<

Category: Global Summit Guide

  • Mont Blanc Via the Goûter Route: Full 2026 Expedition Breakdown

    Mont Blanc Via the Goûter Route: Full 2026 Expedition Breakdown

    Mont Blanc Via the Goûter Route: Full 2026 Expedition Breakdown | Global Summit Guide
    Cluster 03 · Technical & Expert · Updated April 2026

    Mont Blanc Via the Goûter Route: Full 2026 Expedition Breakdown

    The complete Goûter Route breakdown — hut booking system, Grand Couloir crossing, day-by-day itinerary, summit-day timeline, gear, costs, and the operational details climbers actually need to succeed on Europe’s highest peak in 2026.

    4,810 m
    Summit
    elevation
    PD+
    IFAS
    grade
    2–3
    Days on
    route
    60–70%
    Summit
    success rate
    Global Summit Guide A guide in Cluster 03 · Technical & Expert View master hub →

    The Goûter Route is Mont Blanc’s classic ascent — used by roughly 80% of summit climbers and the first serious alpine objective for many careers. It is graded PD+ — technically moderate — but punishes the underprepared through altitude, exposure, and the Grand Couloir, a stone-fall-prone gully that remains the route’s defining hazard. This guide breaks down the actual 2026 expedition — approach options, hut system, day-by-day timeline, summit-day strategy, gear, and the operational details that separate successful climbs from expensive retreats.

    How this guide was built

    Operational details reflect 2026 hut booking systems, transportation schedules, and guide service pricing. Route grading follows the International French Adjectival System (IFAS). Hazard assessments draw from the Office de Haute-Montagne (Chamonix), Compagnie des Guides de Chamonix records, and Pelotons de Gendarmerie de Haute Montagne (PGHM) rescue statistics. Cost estimates reflect 2026 pricing verified with active Chamonix-based operators. Reviewed by IFMGA-certified guides operating the Goûter Route regularly. Fact-check date: April 19, 2026.

    What Is the Goûter Route on Mont Blanc?

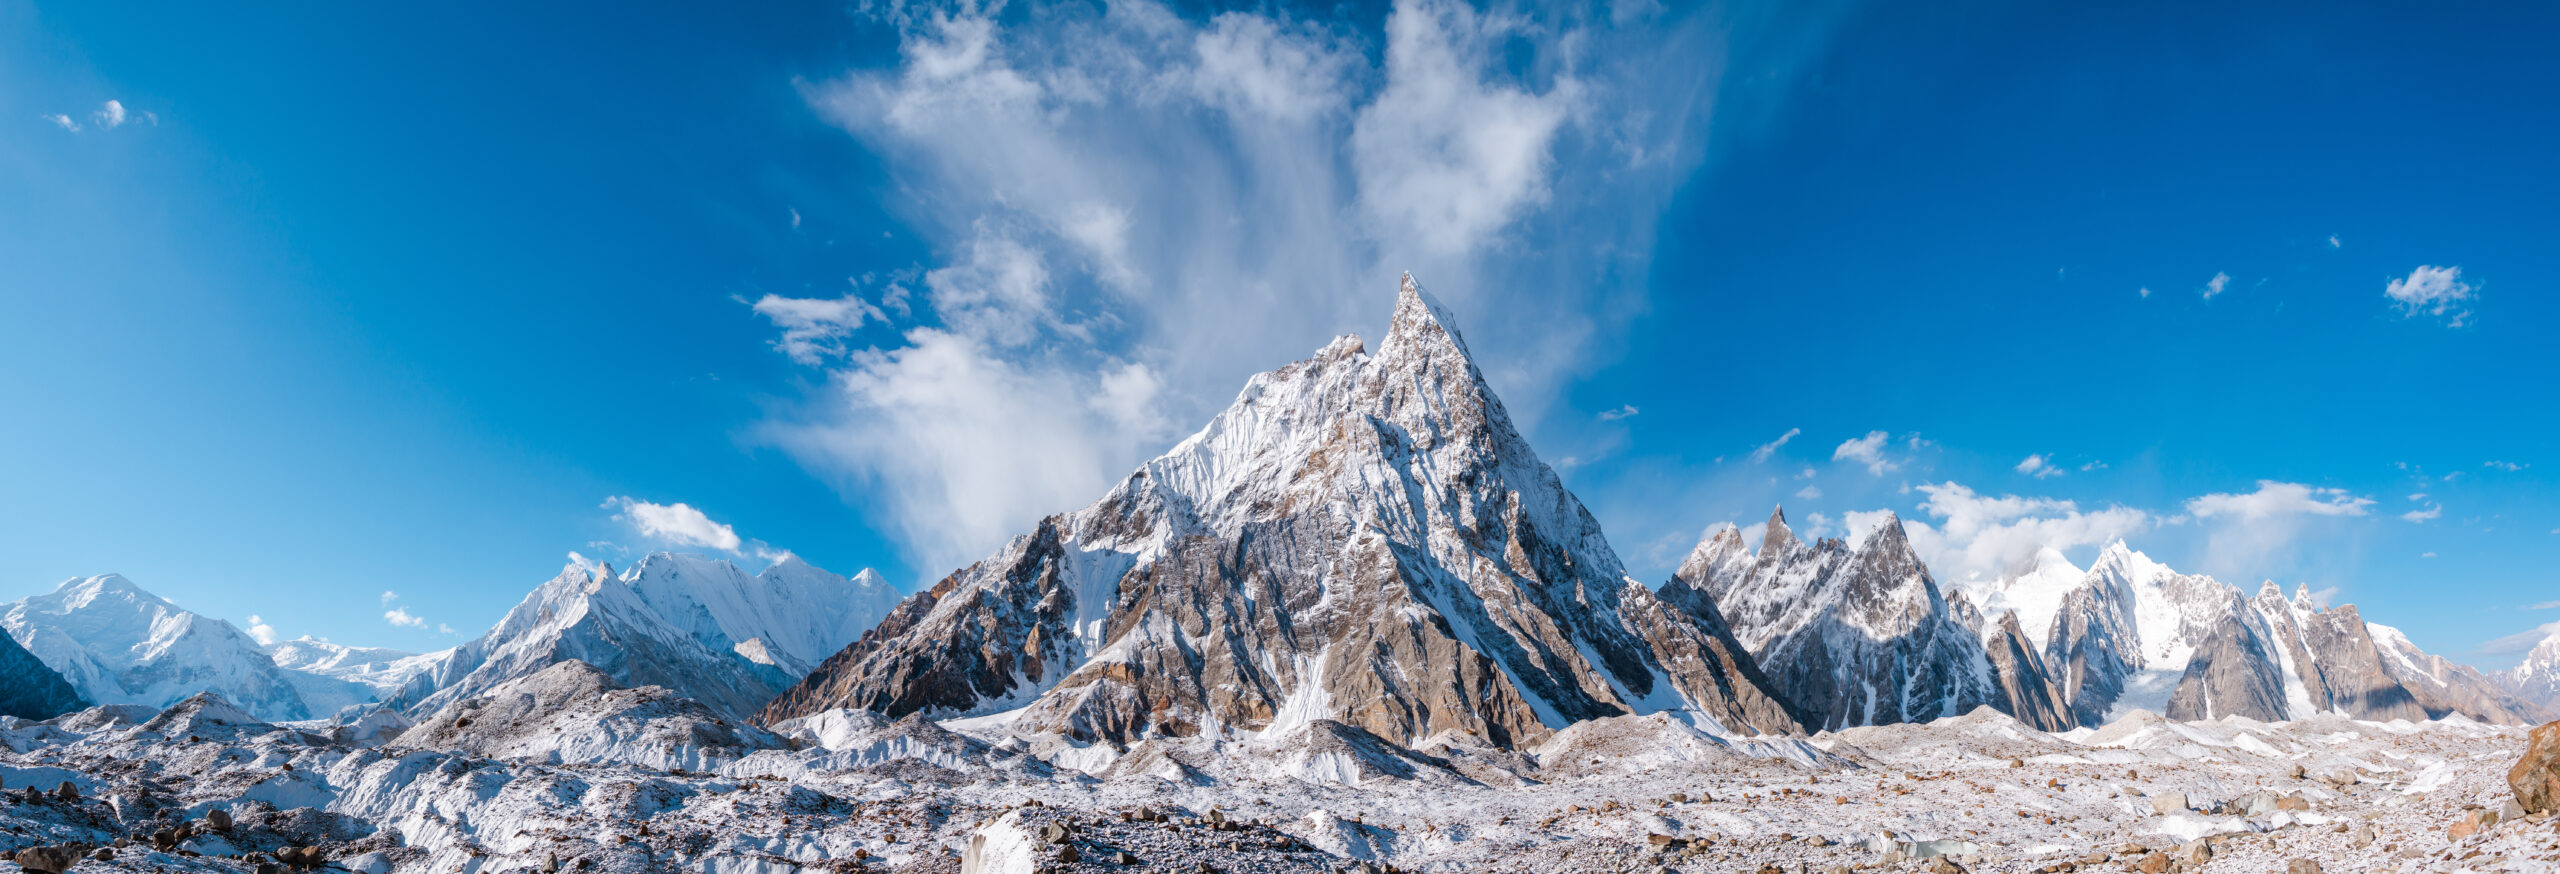
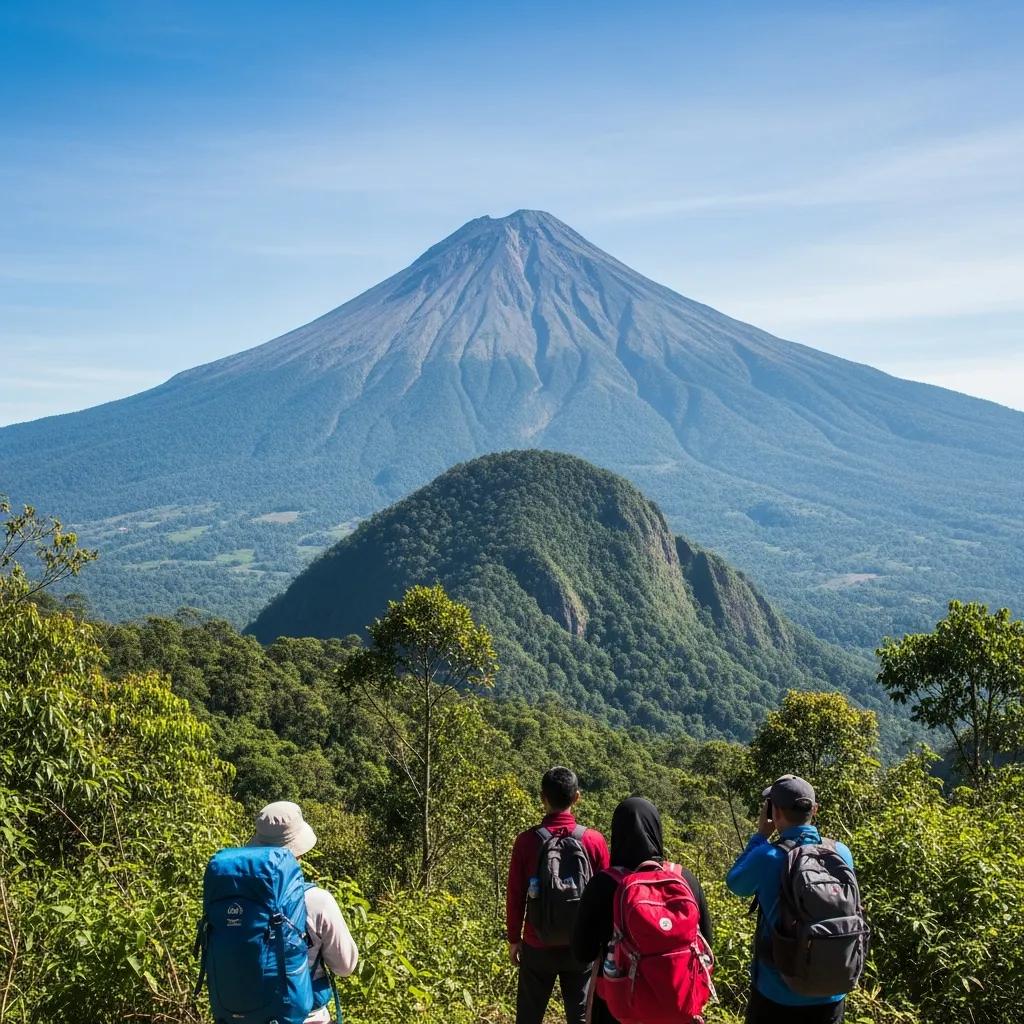
    The Goûter Route — officially “La Voie Royale” (the Royal Way) — is Mont Blanc’s standard ascent via the northwest flank. It combines mechanical lift access (Tramway du Mont Blanc), staffed mountain huts (Tête Rousse at 3,167 m, Goûter Refuge at 3,835 m), and a final summit push via the Dôme du Goûter and Bosses Ridge to the 4,810 m summit.

    The route’s popularity comes from three factors: (1) Mechanical lift access eliminates the approach trek that other routes require. (2) Staffed huts with half-board service make logistics manageable. (3) Moderate technical grade makes the route achievable for first-time 4,000 m climbers with proper preparation.

    The route’s challenges come from three different factors: (1) The Grand Couloir — a stone-fall-prone gully crossed between Tête Rousse and the Goûter Refuge. (2) Extended exposure on the Dôme du Goûter and Bosses Ridge. (3) Altitude — 4,810 m defeats climbers who haven’t properly acclimatized during approach.

    Who this route is for

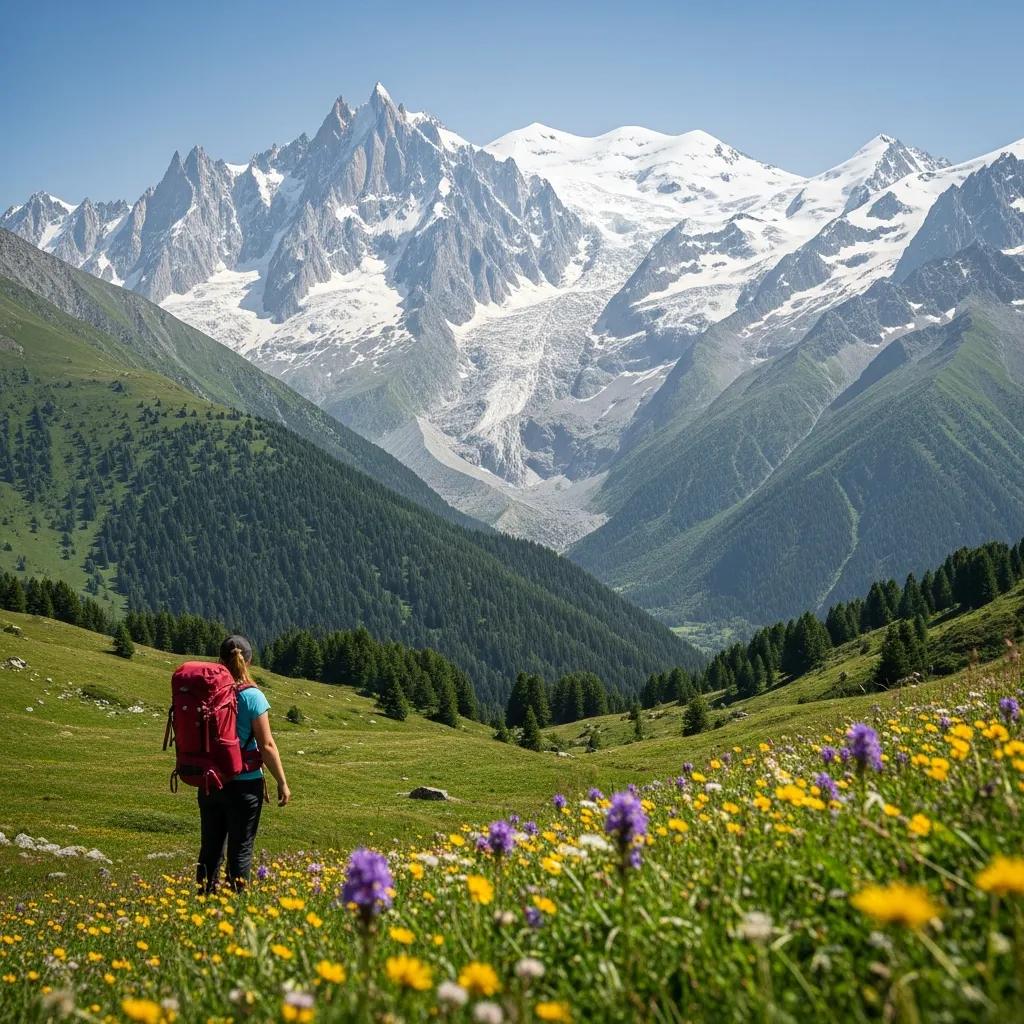
    The Goûter Route suits intermediate climbers with prior alpine experience at grade PD or above, good fitness, and basic glacier travel skills. First-time 4,000 m climbers typically succeed here with guided support; independent climbers should have at least 5-10 prior alpine ascents in the AD range before attempting independently. The route is not appropriate as a first mountaineering experience — consider Mont Blanc du Tacul, Dôme des Écrins, or Allalinhorn as preparation climbs first.


    Approach Options: Getting to Nid d’Aigle

    All Goûter Route approaches converge at Nid d’Aigle station (2,372 m) — the upper terminus of the Tramway du Mont Blanc where climbing begins. Three approach options exist, each with different cost/time tradeoffs.

    Standard · Recommended

    Tramway du Mont Blanc

    €37 round trip

    Rack railway from Saint-Gervais or Le Fayet to Nid d’Aigle. Runs mid-June through mid-September. Takes ~70 minutes each way. Reservations essential in peak season. The standard approach for 95% of Goûter climbers.

    Alternative

    Bellevue Cable Car + Tram

    €45 combined

    Cable car from Les Houches to Bellevue (1,801 m), then catch the Tramway du Mont Blanc. Useful if staying in Les Houches; adds travel complexity without clear advantage for most climbers.

    Budget / Training

    Walk from Les Houches

    Free

    Full foot approach — approximately 1,500 m elevation gain over 5-6 hours to Nid d’Aigle. Provides better acclimatization but exhausts climbers before the real climbing starts. Rarely recommended except for strict budget climbs or training purposes.


    The Goûter Route Hut System: Book Early or Lose Your Trip

    The Goûter Route’s hut booking system is the single operational detail that sinks unprepared climbers. Both refuges on the route require advance reservations, and peak-season slots book out months in advance. Arriving without a booking means turning around.

    Tête Rousse Hut (3,167 m)

    The lower refuge, staffed June through late September. Approximately 70 beds with half-board (dinner + breakfast). Most guided programs use Tête Rousse on Day 1 before moving to Goûter on Day 2. Booking via Club Alpin Français or directly via refugeteterousse.com. Cost ~€75 per night including half-board.

    Goûter Refuge (3,835 m)

    The high camp — the modern refuge opened in 2013 replacing the historic smaller hut. Approximately 120 beds with half-board service. Summit-day starts originate here. Booking essential through refugedugouter.com or Club Alpin Français. Cost ~€75–€90 per night including half-board. Peak season (July-August) typically books out 3-6 months in advance.

    The booking reality

    Refuge bookings for the Goûter season open January-February of the same year, and July/August weekends fill within hours. If you’re planning a July trip, book no later than March. Guided expeditions include refuge bookings; independent climbers must secure their own. Do not plan to climb without confirmed bookings — the refuges turn away walk-ins, the gendarmerie can stop climbers without reservations, and Chamonix guides will refuse unsafe ad-hoc plans.


    The Expedition Day-by-Day: Standard 3-Day Itinerary

    The standard Goûter Route expedition runs 3 days for most climbers. The 2-day variant (Chamonix → Goûter Refuge in one push → summit next day) is possible for fit acclimatized climbers; the 4-day variant adds an acclimatization day at Tête Rousse. Here’s what actually happens each day.

    01
    Day One · Approach

    Chamonix to Tête Rousse

    Nid d’Aigle (2,372 m) → Tête Rousse Hut (3,167 m)
    Elevation gain~800 m
    Distance~4 km
    Duration3–5 hours
    TerrainTrail + scramble

    Morning: Breakfast in Chamonix (2-3 hour window). Catch the Tramway du Mont Blanc from Saint-Gervais or Le Fayet to Nid d’Aigle — the train ride climbs spectacularly through forest to arrive at the 2,372 m trailhead around 10:00–11:00 AM depending on departure time.

    Ascent to Tête Rousse: From Nid d’Aigle, the trail climbs steadily via the Refuge de la Tête Rousse path through increasingly sparse terrain. The route is well-marked but gains serious elevation — pacing matters. Expect 3-5 hours to the hut depending on fitness and pack weight. The upper sections include some rocky scrambling and a short fixed-rope section.

    Afternoon at Tête Rousse: Arrive early afternoon. Check in, claim your bed, hydrate, eat lunch. Rest time allows altitude adaptation at 3,167 m. Many climbers do an afternoon walk up toward the Grand Couloir crossing area for reconnaissance and additional altitude exposure. Dinner at 18:00–19:00; lights out around 21:00 for an early start next day.

    02
    Day Two · Traverse + Summit Push

    Tête Rousse to Goûter Refuge

    Tête Rousse (3,167 m) → Grand Couloir → Goûter Refuge (3,835 m)
    Elevation gain~700 m
    Distance~2.5 km
    Duration3–4 hours
    Key hazardGrand Couloir

    Pre-dawn start: Breakfast at Tête Rousse typically 05:00–06:00, leave by 06:30. The goal is to cross the Grand Couloir before 07:30 — stone-fall activity increases significantly as the sun hits the route.

    The Grand Couloir crossing: From Tête Rousse, the trail climbs to the base of the couloir — a 30-meter-wide stone-fall-prone gully that climbers must cross. Listen for stone fall sounds from above — any active debris means wait. When clear, move quickly across in pairs or small groups. A fixed cable provides hand protection but offers no shielding from falling stones. Cross efficiently; don’t linger.

    The Aiguille du Goûter ridge: Past the couloir, the route climbs the Aiguille du Goûter via a mixed scramble with fixed ropes in steeper sections. Sustained Class 3 scrambling with moderate exposure. Progress is slower than the couloir crossing but conditions are generally stable.

    Arriving at Goûter Refuge: Typically arrive 10:00–11:00 AM. The refuge at 3,835 m is the base for summit day. Check in, hydrate aggressively, eat a meaningful lunch, rest through the afternoon. Dinner at 18:00; summit-day wake-up is typically 01:00–02:00 AM. Sleep can be difficult at altitude — many climbers describe fragmented rest.

    03
    Day Three · Summit Day + Descent

    Goûter Refuge to Summit to Chamonix

    Goûter Refuge → Dôme du Goûter → Vallot Hut → Bosses Ridge → Mont Blanc summit (4,810 m) → reverse descent
    Summit elevation4,810 m
    Summit day gain~975 m
    Total duration12–16 hrs
    Summit push4–6 hrs up

    Wake-up at 01:00–02:00 AM. Light breakfast at the refuge (coffee, bread, cheese). Headlamp start typically between 02:00–03:00 AM in peak season when the route is crowded; earlier if weather windows are marginal.

    The summit ascent: From Goûter Refuge, the route climbs snow slopes to the Dôme du Goûter (4,304 m) — typically 1.5-2 hours. Past the Dôme, the route descends slightly to the historic Vallot Hut (4,362 m) — a bivouac refuge offering emergency shelter but not regular accommodation. From Vallot, the Bosses Ridge (Arête des Bosses) — a narrow, exposed snow ridge — climbs the final 500 m to the summit. The ridge is straightforward but exposed; a slip on either side would be serious.

    Summit arrival 06:00–09:00 AM depending on start time and pace. The summit is a rounded snow dome with 360-degree views of the Alps. Spend 15-30 minutes for photos and navigation preparation — do not linger longer, weather can shift rapidly even in peak season.

    Descent: Reverse the route — Bosses Ridge, Vallot, Dôme du Goûter, Goûter Refuge. Collect gear, have a meal if possible. From Goûter, descend the route to Tête Rousse and cross the Grand Couloir in reverse — this time in the afternoon warming period when stone-fall risk is highest, making this the most dangerous descent moment. Continue to Nid d’Aigle and catch the Tramway back to Saint-Gervais/Chamonix. Total round-trip summit day: 12–16 hours.


    The Summit-Day Timeline: Hour by Hour

    Here’s the typical summit-day clock for a Goûter Refuge start targeting a morning summit. Adjust ±1 hour based on operator preferences, fitness, and weather windows.

    01:30Wake-up at Goûter Refuge. Light breakfast — coffee, bread, cheese.
    02:30Departure from Goûter Refuge. Headlamp start up snow slopes toward Dôme du Goûter.
    04:00Arriving at Dôme du Goûter (4,304 m). Brief rest, water, pace check.
    04:30Descending to Vallot Hut (4,362 m). Emergency shelter — no services available.
    05:30Starting the Bosses Ridge — exposed snow ridge with moderate steepness.
    06:30Summit arrival at Mont Blanc (4,810 m). Photos, navigation check. Stay 15-30 minutes maximum.
    07:00Begin descent. Down Bosses Ridge carefully — descending is where falls happen.
    08:30Back at Vallot Hut; continuing descent over Dôme du Goûter.
    09:30Arriving back at Goûter Refuge. Gear collection, meal, rest break.
    10:30Descent from Goûter toward Grand Couloir crossing — second crossing of the trip.
    12:00Tête Rousse Hut — break, water. Continuing descent.
    14:30Nid d’Aigle station. Catch Tramway du Mont Blanc back to Saint-Gervais/Le Fayet.
    16:30Back in Chamonix. Celebration dinner, hotel rest.

    Key Hazards on the Goûter Route: What Actually Kills Climbers

    Despite its moderate PD+ technical grade, Mont Blanc’s Goûter Route has a significant absolute death toll — estimated 100+ deaths per year across all Mont Blanc routes due to sheer traffic volume. Most fatalities occur through these specific hazards, not technical climbing difficulty.

    Primary hazard · Variable timing

    Grand Couloir Stone Fall

    The single deadliest feature on the route. The 30-meter-wide gully between Tête Rousse and the Goûter Refuge produces constant natural stone fall, especially during warm conditions. Cross before 07:30 going up and before 15:00 coming down. Listen for audible debris above; if active, wait. The couloir has killed 100+ climbers over decades.

    Major hazard · Summer afternoons

    Thunderstorm Development

    Alpine thunderstorms develop rapidly in July-August afternoons, typically 14:00–18:00. Climbers on the summit ridge or Dôme du Goûter during storm development face lightning, hail, wind, and whiteout. Summit before 09:00 and descend through critical exposure before afternoon windows close.

    Common cause · Altitude

    Altitude Illness (AMS/HAPE)

    The rapid altitude gain from Chamonix (1,035 m) to 4,810 m over 2-3 days defeats underprepared climbers. AMS symptoms turn back approximately 15% of attempts. HAPE and HACE are rarer but lethal. Proper acclimatization via pre-trip altitude exposure or an extra day at Tête Rousse reduces risk significantly.

    Significant · Exposure sections

    Falls on Bosses Ridge

    The narrow summit ridge has exposure on both sides and has killed climbers who slipped during descent fatigue. More falls happen descending than ascending. Rope protection (short-rope technique by guides) and focused movement during descent reduce but don’t eliminate this risk.

    Critical · All seasons

    Weather Windows Closing

    Rapid weather deterioration has trapped climbers between Goûter Refuge and summit in whiteout conditions. Monitor forecasts obsessively before and during the climb — Michael Fagin (West Coast Weather) or Chris Tomer provide paid services; Mountain-Forecast.com and Meteoblue are free alternatives. See our Mountain Weather guide.

    Preventable · Preparation

    Inadequate Gear/Fitness

    Climbers attempting Mont Blanc underequipped or undertrained face cascading failures — cold injury, exhaustion, navigation errors. Proper gear is non-negotiable; see the gear section below. Proper training means at least 6 months of structured physical preparation with altitude-specific elements.


    Essential Gear for the Goûter Route

    Gear for Mont Blanc isn’t unique — it’s standard 4,000 m European alpine kit. Rental shops in Chamonix offer complete packages for €200-€400/week, which is often more economical than buying gear you won’t use frequently. Quality is non-negotiable on boots, outer shells, and ice axe/crampons.

    Technical Gear

    • Crampons — steel, 12-point, compatible with your boots
    • Ice axe — straight-shaft technical or general mountaineering
    • Harness — alpine-style with padded leg loops
    • Helmet — essential for Grand Couloir
    • 2 locking carabiners minimum
    • Prusik cord (120 cm cordelette)
    • 2 double-length slings for anchors

    Boots & Footwear

    • Mountaineering boots — B2 or B3 rated, crampon-compatible
    • Warm socks — wool/synthetic, 2-3 pairs
    • Gaiters — Gore-Tex full-coverage
    • Rental from Chamonix shops €100-150/week for boots alone

    Clothing System

    • Base layers — wool or synthetic, top and bottom
    • Insulating mid-layer — fleece or light down
    • Soft shell jacket — wind protection
    • Hard shell jacket + pants — Gore-Tex waterproof/breathable
    • Insulated down jacket — summit-day warmth layer

    Hands, Head, Eyes

    • Lightweight gloves for active climbing
    • Insulated gloves for summit day
    • Spare gloves — always carry
    • Warm hat + sun hat
    • Balaclava — summit-day wind protection
    • Glacier goggles — Category 4 UV protection
    • Sunscreen SPF 50+ and SPF lip balm

    Pack & Navigation

    • Backpack — 40-50L alpine, streamlined
    • Headlamp + spare batteries
    • Water bottle or hydration (freeze-resistant)
    • Map + GPS device with route loaded
    • Altimeter (watch or dedicated device)

    Emergency & Misc

    • Basic first aid kit — personal meds, blister care
    • Emergency bivy — lightweight shelter
    • High-energy snacks — 2,500+ calories per day
    • Emergency contact info — PGHM rescue 112

    See our Mountain Climbing Gear List for complete gear framework including specific product recommendations and quality tier guidance.


    Goûter Route vs Other Mont Blanc Routes: Comparison

    The Goûter isn’t the only way up Mont Blanc. Here’s how it compares to the other common routes for context.

    RouteGradeTypical DaysKey CharacterRecommended For
    Goûter (Voie Royale)PD+2–3Standard, accessible, hut-supportedMost climbers; first Mont Blanc ascent
    Cosmiques (Trois Monts)AD2Aiguille du Midi cable car start, more technicalClimbers seeking technical challenge
    Grands MuletsPD3Historic route, technical glacierSkiers and traditionalists
    Italian Normal (Gonella)PD+3Italian side, less crowdedAvoiding French crowds
    Brenva Spur (Italian)D2–3Technical Italian sideAdvanced climbers seeking harder route

    For complete route-by-route analysis of Mont Blanc options see our Mont Blanc Climbing Guide, which covers all five major routes with detailed comparison.


    Mont Blanc Goûter Route FAQ: Your Common Questions Answered

    What is the Goûter Route on Mont Blanc?

    The Goûter Route is the standard and most popular ascent of Mont Blanc (4,810 m), used by approximately 80% of summit climbers. The route starts from Les Houches or Bellevue in the Chamonix Valley, climbs via the Tramway du Mont Blanc to Nid d’Aigle station at 2,372 m, ascends past the Tête Rousse Hut at 3,167 m, crosses the infamous Grand Couloir (a stone-fall-prone gully), climbs to the Goûter Refuge at 3,835 m, then continues via the Dôme du Goûter and Bosses Ridge to the summit. The route is graded PD+ (Peu Difficile) on the IFAS scale — one of the easier 4,000 m alpine peaks technically, but demanding due to altitude, exposure, and the Grand Couloir stone-fall hazard. Typical expeditions take 2–3 days and cost $1,200–$5,500 depending on self-guided or guided, plus international travel. The route’s huts require advance booking — often months in advance for peak season.

    How dangerous is the Grand Couloir on Mont Blanc?

    The Grand Couloir is the single most dangerous section of Mont Blanc’s Goûter Route. The couloir is a narrow gully between the Tête Rousse Hut and the Goûter Refuge where natural stone fall is constant during warm conditions. Historical estimates suggest the couloir has killed 100+ climbers over the decades, though exact figures vary. Primary factors: (1) Constant natural stone fall, especially during afternoon warming. (2) Climbers crossing must dash through the gully quickly. (3) Limited protection — fixed ropes exist but offer minimal shielding from falling debris. (4) Peak risk occurs mid-morning through afternoon as sun warms the rock above. Safety strategy: cross before 7 AM ideally, never cross alone, listen for stone-fall sounds above, and if conditions are bad, turn around. Some seasons have seen the route closed entirely due to extreme stone-fall activity. The Grand Couloir is why Mont Blanc’s Goûter Route remains more dangerous than its technical grade suggests.

    Do I need to book the Goûter refuge in advance?

    Yes, booking the Goûter Refuge (3,835 m) in advance is essential — often months before your climbing dates. The refuge has approximately 120 beds and is booked through Club Alpin Français or directly via refugedugouter.com. Peak season (July-August) books out months ahead; shoulder season (June, September) is more flexible. Costs are approximately €75–€90 per night including half-board dinner and breakfast. The Tête Rousse Hut (3,167 m) at the lower level also requires advance booking and serves as alternative high camp. Independent climbers must have confirmed refuge reservations to legally attempt the route — the refuges enforce reservations strictly. Guided expedition operators typically handle refuge bookings for clients. If the Goûter Refuge is fully booked, alternatives include the Tête Rousse Hut (more basic, sets up longer summit day) or attempting the Cosmiques Route from the Aiguille du Midi instead. Never plan to arrive at the refuge without a booking — climbers who do are turned away or sent back to Nid d’Aigle for descent.

    How long does it take to climb Mont Blanc via Goûter?

    The standard Mont Blanc Goûter Route expedition takes 2–3 days for most climbers. Day 1: Arrive Chamonix, take Tramway du Mont Blanc to Nid d’Aigle (2,372 m), hike to Tête Rousse Hut (3,167 m) — approximately 4-6 hours. Day 2: Early morning cross Grand Couloir, climb to Goûter Refuge (3,835 m) — approximately 3-4 hours. Sleep at Goûter Refuge. Day 3: Summit day from Goûter Refuge, typically starting 1-3 AM to summit at 4,810 m by 6-9 AM, descend back to Goûter Refuge, then all the way back to Nid d’Aigle and Chamonix — total 12-16 hours of climbing. Faster programs compress this to 2 days by combining Day 1 and Day 2 (Chamonix to Goûter Refuge in one push, 8-11 hours). Slower programs extend to 4 days with an extra acclimatization day. Summit-day timing is critical — early start avoids afternoon thunderstorm development and afternoon warming that destabilizes the Grand Couloir. Complete trips including arrival, acclimatization day, climb, and weather contingency are typically 5-7 days in Chamonix.

    What gear do I need for Mont Blanc Goûter Route?

    Essential gear for Mont Blanc’s Goûter Route includes: (1) Technical gear: crampons (compatible with mountaineering boots), ice axe, harness, helmet, 2 locking carabiners, prusik cord, slings. (2) Clothing system: base layers (wool/synthetic), insulating mid-layer, hard shell jacket and pants, insulated down jacket for summit day, waterproof/breathable shells. (3) Footwear: mountaineering boots (B2 or B3 rated) broken in properly — rental available in Chamonix for €100-150/week. (4) Head/hand/foot: warm hat, sun hat, balaclava, glacier goggles (category 4), sunscreen (SPF 50+), lip balm, lightweight gloves + insulated gloves + spare pair, warm socks and spare pair. (5) Backpack: 40-50L alpine pack. (6) Other: headlamp + spare batteries, water bottle or hydration (avoid freezing), snacks, sunscreen, basic first aid, emergency bivy. Total gear investment is €1,500–€3,000 if buying new; rental from Chamonix shops costs €200–€400 per week for complete sets. Quality boots and rain gear are non-negotiable; other items can be rented.

    Should I climb Mont Blanc guided or independent?

    Guided or independent depends on experience, budget, and risk tolerance. Guided climbing costs $1,800–$5,500 for 2-3 day programs with 1:1 or 1:2 guide ratios through Compagnie des Guides de Chamonix, IFMGA-certified guides, and international operators like Alpine Ascents. Advantages: safety infrastructure, route knowledge, Grand Couloir timing expertise, refuge bookings handled, rescue capability. Independent climbing costs $600–$1,500 for refuge fees, transport, and permits (technically no climbing permit required, but refuge booking is essential). Advantages: lower cost, flexibility, personal climbing experience. Prerequisites for independent climbing: prior alpine experience at grade PD+ or harder, glacier travel competency, crevasse rescue skills, navigation capability in degraded visibility, ability to assess Grand Couloir conditions. Most first-time 4,000 m climbers should go guided for safety; experienced alpinists often do Mont Blanc independently as it’s within the PD+ grade they’re comfortable on. See our companion Mont Blanc Climbing Guide for broader route comparison.

    What is the best time to climb Mont Blanc?

    The best time to climb Mont Blanc is mid-June through mid-September, with peak conditions in July and early August. Monthly breakdown: (1) June: Earlier season, more snow on route, fewer crowds, but less stable weather. Some years snow blocks the Grand Couloir crossing until late June. (2) July: Peak season, most reliable weather windows, crowded refuges requiring early booking. (3) August: Still peak season but increasing afternoon thunderstorm activity by mid-month. (4) September: Late season, cooler, quieter, but less stable weather as autumn approaches. The Grand Couloir is safest in cool, stable conditions — hot summer days produce maximum stone-fall activity. Winter and early spring (November-April) climbing is technically possible but drastically harder due to extreme cold, storms, shorter days, and closed refuges. A typical Mont Blanc trip plans 5-7 days in Chamonix to allow weather contingency — summit days shift by days as weather dictates, and climbers who fix exact dates often fail due to inflexibility.

    What is the success rate of climbing Mont Blanc?

    Mont Blanc’s Goûter Route has an approximate summit success rate of 60–70% for climbers who reach the mountain and attempt the summit push. Success depends heavily on: (1) Weather — approximately 30% of expeditions fail due to weather alone, as the route requires stable conditions for the Grand Couloir crossing and summit-day push. (2) Physical condition — altitude illness (AMS) turns back approximately 15% of attempts, most climbers underestimate the 4,810 m demands. (3) Preparation — climbers who arrive underprepared physically fail at higher rates. (4) Season — July-August has higher summit rates than June or September due to more stable weather. Historically, Mont Blanc sees 20,000-25,000 summit attempts annually across all routes (Goûter, Trois Monts, Italian side), with approximately 12,000-15,000 successful summits. Annual fatalities average 100+ across all routes, though this reflects sheer traffic volume rather than per-attempt fatality rate (under 1%). For guided expeditions with experienced operators, success rates rise to 75-85% when weather cooperates.


    Authoritative Sources & Further Reading

    Content reflects current 2026 operational details and authoritative alpine climbing sources:

    • Compagnie des Guides de Chamonix — chamonix-guides.com — The oldest guide service in the world, primary guided Mont Blanc provider
    • Office de Haute-Montagne (OHM) — ohm-chamonix.com — Official Chamonix mountain information office
    • Pelotons de Gendarmerie de Haute Montagne (PGHM) — French mountain rescue service, Mont Blanc rescue statistics
    • Club Alpin Français — clubalpin.com — Refuge booking system
    • Refuge du Goûter — refugedugouter.com — Direct refuge booking
    • Refuge de la Tête Rousse — refugeteterousse.com — Direct refuge booking
    • IFMGA (UIAGM) — ifmga.info — International mountain guide certification standards
    • Tramway du Mont Blanc — compagniedumontblanc.com — Railway schedules and reservations
    • Reference texts: Mont Blanc: 5 Routes to the Summit (Boulange), Alpine 4000m Peaks by the Classic Routes (Collomb), Freedom of the Hills (The Mountaineers)
    • Weather services: Meteoblue, Mountain-Forecast.com, Michael Fagin West Coast Weather, Chris Tomer Weather Solutions
    Published: February 15, 2026
    Last updated: April 19, 2026
    Next review: July 2026
    Part of the Global Summit Guide

    Back to the Master Hub

    This guide is one of 71 across 12 thematic clusters on Global Summit Guide. The master hub organizes every guide by experience tier, specific peak, skill area, and region.

    View the Hub →
  • Hardest Mountains to Climb: 10 Deadliest Peaks Ranked (2026)The 10 Hardest Mountains to Climb in the World

    Hardest Mountains to Climb: 10 Deadliest Peaks Ranked (2026)The 10 Hardest Mountains to Climb in the World

    The 10 Hardest Mountains to Climb in the World (2026 Ranked) | Global Summit Guide
    Cluster 03 · Technical & Expert · Updated April 2026

    The 10 Hardest Mountains to Climb in the World

    Ten specific peaks ranked by the unforgiving combination of fatality rate, sustained technical difficulty, objective hazard, and historic significance. Not the 10 highest, not the 10 most famous — the 10 hardest. Updated with current fatality statistics and 2026 expedition context.

    28%
    Annapurna
    fatality rate
    20%
    K2 historical
    fatality rate
    <30
    The Ogre
    total summits
    500+
    Matterhorn
    total deaths
    Global Summit Guide A guide in Cluster 03 · Technical & Expert View master hub →

    “Hardest mountain” depends entirely on which metric matters. Most fatal per attempt? Annapurna. Most technically demanding? K2 or The Ogre. Highest absolute death toll? Mont Blanc, via sheer traffic. This list ranks ten peaks that genuinely belong in the conversation, with detailed profiles explaining what makes each one lethal — and why the cocktail of altitude, weather, terrain, and commitment produces the world’s most consequential climbing objectives.

    How this ranking was built

    Rankings weigh four factors: (1) Historical fatality rate per summit attempt from the Himalayan Database and peer-reviewed climbing statistics. (2) Sustained technical difficulty from IFAS alpine grading and route documentation. (3) Objective hazards (serac falls, avalanche paths, storm exposure) documented in climbing literature. (4) Commitment and rescue feasibility based on geographic remoteness. Statistics current through December 2024. Includes peaks where alpine-style ascent remains the gold standard rather than commercial guided climbing. Fact-check date: April 19, 2026.

    The 10 Hardest Mountains at a Glance

    Scanning reference before the detailed profiles below. The 10 peaks span three continents and three decades of first-ascent history, but share the characteristic that they’ve defined the outer edge of what climbing is.

    #PeakCountryHeightFatality RateFirst Ascent
    1Annapurna INepal8,091 m~28%1950
    2K2Pakistan/China8,611 m~20%1954
    3Nanga ParbatPakistan8,126 m~22%1953
    4KangchenjungaNepal/India8,586 m~15%1955
    5Baintha Brakk (The Ogre)Pakistan7,285 m~3%*1977
    6Jannu (Kumbhakarna)Nepal7,711 m~5%1962
    7Dhaulagiri INepal8,167 m~13%1960
    8Eiger (North Face)Switzerland3,967 m~3%**1938
    9Cerro TorreArgentina3,128 m~4%**1974
    10Denali (Cassin Ridge)Alaska, USA6,190 m~2%1961

    * The Ogre’s fatality rate reflects extremely limited total attempts. ** Eiger and Cerro Torre rates reflect route-specific data rather than mountain-wide statistics.


    Annapurna I: The Deadliest 8,000er

    01
    Deadliest fatality rate

    Annapurna I

    Nepal · Himalaya
    8,091 m26,545 ft

    Annapurna I holds the highest fatality rate of any 8,000 m peak — approximately one death for every 3–4 successful summits. Maurice Herzog’s 1950 first ascent was groundbreaking as the first 8,000 m peak ever climbed, but the descent left Herzog with amputated fingers and toes from frostbite. The mountain has punished nearly every expedition since.

    Annapurna’s danger is objective hazard rather than technical difficulty. Hanging glaciers and fluted snow faces produce constant serac fall and avalanches along the standard routes. The South Face, first climbed by Chris Bonington’s 1970 expedition, features an 8,000-foot wall with some of the most sustained avalanche exposure in mountaineering. No skill or preparation can eliminate this hazard — climbers who summit Annapurna often describe luck as much as technique.

    Modern commercial climbs concentrate on the North Face (standard route) with marginally improved safety. But the peak’s fundamental avalanche character cannot be mitigated. Most 14-peak completers leave Annapurna for later in their project, approaching it with maximum preparation and extremely selective weather windows.

    Fatality rate~28%
    Total deaths70+
    First ascent1950 (Herzog)
    Primary hazardAvalanche

    K2: The Savage Mountain

    02
    Most technically demanding 8,000er

    K2

    Pakistan / China · Karakoram
    8,611 m28,251 ft

    K2 is the world’s second-highest peak and widely considered the hardest 8,000er to climb. Its historical fatality rate is approximately 20% — for every 5 climbers who reached the summit, 1 died on the mountain. Despite modern commercial climbing and improved logistics, K2 retains this fundamentally different character from Everest.

    The Bottleneck — a narrow couloir at 8,300–8,400 m — is the defining hazard. Climbers passing through spend 2–4 hours directly beneath an enormous hanging serac that has collapsed multiple times. The 2008 disaster killed 11 climbers in a single summit push when the serac collapsed and cut fixed ropes, stranding people above. No preparation or gear eliminates this hazard; climbers minimize exposure through speed and pre-dawn timing.

    K2 also lacks the infrastructure that makes Everest survivable. Pakistani operators don’t match Nepal’s Sherpa ecosystem; no helicopter rescue is possible above Camp 2. Summit ridges are sustained and technical rather than “up the slope.” Through 2024, approximately 700+ climbers have summited versus 90+ deaths on the mountain. Modern expeditions run $35,000–$55,000 and see ~50% summit rates when weather permits.

    Fatality rate~20%
    Total deaths90+
    First ascent1954 (Italian)
    Primary hazardSerac fall

    Nanga Parbat: The Killer Mountain

    03
    Western Himalaya’s most feared peak

    Nanga Parbat

    Pakistan · Western Himalaya
    8,126 m26,660 ft

    Nanga Parbat earned its nickname “The Killer Mountain” (Nanga Parbat = “Naked Mountain” in Urdu; the climbing nickname came from its brutal early ascent history) through over 80 deaths before its 1953 first ascent by Hermann Buhl — who made the summit solo after being abandoned by his team, a legendary effort in alpine history.

    The peak’s danger comes from its 3,000-meter vertical relief in a single face — the Rupal Face is the largest mountain wall on Earth. Weather systems move rapidly across the peak’s isolated position in the Western Himalaya. Avalanches have killed dozens of climbers across multiple expeditions. The 2013 Diamir Face attack by Pakistani militants killed 11 climbers at Base Camp, adding a political hazard to the peak’s natural dangers.

    Modern climbs run via the Diamir Face (Schell Route, Kinshofer Route) and the Rupal Face for elite alpinists. Reinhold Messner’s 1978 solo ascent via the Diamir Face set the standard for alpine-style 8,000 m climbing. Nanga Parbat’s fatality rate of ~22% reflects both its technical character and its reputation — only experienced 8,000 m climbers typically attempt it.

    Fatality rate~22%
    Total deaths85+
    First ascent1953 (Buhl)
    Primary hazardWeather / face

    Kangchenjunga: The Third-Highest and Third-Hardest

    04
    Sacred peak with sustained technical difficulty

    Kangchenjunga

    Nepal / India · Eastern Himalaya
    8,586 m28,169 ft

    Kangchenjunga is the world’s third-highest mountain and among the world’s hardest to climb — with a fatality rate around 15% and summit numbers far lower than the more-climbed 8,000ers. The 1955 British first-ascent team left the last few meters to the summit unclimbed out of respect for the peak’s sacred status in Sikkim and Nepal. Most modern climbers maintain this tradition.

    Technical difficulty includes: sustained steep mixed terrain above 7,500 m, unpredictable weather, multiple avalanche-prone sections, and an extremely long summit day from high camp. The peak’s remote location on the Nepal/India border creates logistical challenges compared to the Khumbu region peaks. Commercial operators offer Kangchenjunga but in much smaller numbers than Everest or Lhotse.

    Kangchenjunga sees fewer than 15–20 summits in a typical year, compared to 400+ on Everest. The 2023–2024 season saw increased traffic as climbers progressed through 14-peak projects, but the mountain remains categorically more serious than Everest-tier peaks.

    Fatality rate~15%
    Total deaths55+
    First ascent1955 (British)
    Primary hazardAltitude + mixed

    Baintha Brakk (The Ogre): The Most Technical Alpine 7,000er

    05
    The purest test of alpine skill

    Baintha Brakk (The Ogre)

    Pakistan · Karakoram
    7,285 m23,900 ft

    The Ogre is the purest alpine test piece on this list. Through 2024, it has been summited fewer than 30 times since Doug Scott and Chris Bonington’s legendary 1977 first ascent — a climb that became mountaineering legend when Scott broke both legs on the descent and crawled out over 8 days. Many climbers consider The Ogre’s difficulty comparable to the 8,000 m peaks despite its lower altitude.

    What makes it hard: sustained technical rock climbing (5.10+) at altitude, committing approach through complex glacier terrain, extreme weather exposure, and no commercial infrastructure. The summit tower features granite rock climbing that would be difficult at any altitude; at 7,000+ m with alpine conditions, it becomes one of the world’s hardest climbs. Most attempts end in retreat without summit.

    The Ogre exemplifies what separates technical alpine climbing from commercial mountaineering. No amount of money or support gets you up this peak — you need expert rock climbing skills, alpine experience, storm tolerance, and the partnership of equally capable climbers. It is the opposite of the Everest model, and deliberately so.

    Total summits<30
    First ascent1977 (Scott/Bonington)
    Technical gradeED2 / 5.10+
    Primary hazardTechnical rock

    Jannu (Kumbhakarna): The Alpine Fortress

    06
    Nepal’s most technical 7,000er

    Jannu (Kumbhakarna)

    Nepal · Eastern Himalaya
    7,711 m25,299 ft

    Jannu is the most technical major peak in Nepal. Its dramatic North Face — 3,000 meters of near-vertical rock, ice, and mixed terrain — is considered one of the world’s great unfinished alpine objectives. The 1962 first ascent via the Southeast Face by a French expedition was already committing; modern attempts on the North Face have defined elite alpinism for decades.

    The North Face features sustained overhanging mixed terrain above 7,000 m, pushing what humans can physically do at altitude. The Russian team’s 2004 ascent of the North Face was considered one of the most difficult high-altitude climbs ever completed. Most attempts fail; many don’t even reach the base of the critical difficulties before retreating.

    Even Jannu’s standard route (Southeast Face) is graded TD+ and requires expert skills. Commercial operators don’t offer guided Jannu expeditions. The peak remains a test piece for climbers who have graduated beyond the 8,000ers and are looking for pure technical commitment.

    Fatality rate~5%
    Total summits~50
    First ascent1962 (French)
    Primary hazardTechnical mixed

    Dhaulagiri I: The White Mountain

    07
    Deceptively dangerous 8,000er

    Dhaulagiri I

    Nepal · Himalaya
    8,167 m26,795 ft

    Dhaulagiri appears on commercial 8,000 m programs but has a ~13% fatality rate that places it firmly in the “hardest” conversation. The name means “White Mountain” in Sanskrit. The 1960 Swiss-led first ascent followed seven previous expedition failures, signaling the peak’s character from the start.

    Key dangers include: extreme avalanche hazard across multiple route options, severe weather variability, long summit days from high camps, and a reputation for hidden crevasses on the glaciated approach. The standard Northeast Ridge avoids the worst of these but still produces fatalities most seasons.

    Dhaulagiri is often undersold by commercial operators as “similar to Manaslu” — it isn’t. The peak’s fatality rate exceeds most 8,000ers, and climbers progressing through 14-peak projects should approach Dhaulagiri with the seriousness they’d give K2 or Annapurna, not the treatment they’d give Cho Oyu or Shishapangma.

    Fatality rate~13%
    Total deaths75+
    First ascent1960 (Swiss)
    Primary hazardAvalanche / weather

    The Eiger North Face: The Storied Alpine Wall

    08
    The most famous alpine face

    Eiger — North Face (Nordwand)

    Switzerland · Bernese Alps
    3,967 m13,020 ft

    The Eiger North Face is alpine climbing’s most storied wall — 1,800 meters of vertical rock and ice in the Bernese Alps of Switzerland. Despite being nowhere near the tallest peak on this list, the North Face combines sustained technical difficulty, rockfall hazard, storm exposure, and history that places it firmly among the world’s hardest objectives.

    Its story began with tragic 1930s attempts — including the 1936 Kurz-Rainer party that featured in the film “North Face” — before the 1938 first ascent by the Heckmair team. Through 2024, over 60 climbers have died on the face. Named passages (Difficult Crack, Hinterstoisser Traverse, Swallow’s Nest, Flat Iron, Ramp, Traverse of the Gods, White Spider, Exit Cracks) entered climbing vocabulary globally.

    The Heckmair Route grades D+ / 5.9 / WI 4 / 60° snow — sustained rather than extreme technical difficulty, but with relentless objective hazard. Stone fall from above threatens climbers throughout. Weather can turn the face lethal in hours. Speed ascents under 3 hours exist; multi-day climbs still occur. The face is alpine climbing’s most iconic objective for reason.

    Total deaths60+
    First ascent1938 (Heckmair)
    GradeD+ / 5.9 / WI 4
    Primary hazardStone fall / storms

    Cerro Torre: Patagonia’s Impossible Peak

    09
    The controversial alpine spire

    Cerro Torre

    Argentina · Patagonia
    3,128 m10,262 ft

    Cerro Torre is Patagonia’s defining climbing objective and one of the most controversial peaks in climbing history. Cesare Maestri’s disputed 1959 ascent claim (later widely rejected) and the 1974 first ascent of the Compressor Route by Italian climbers using bolts and a gas-powered compressor remain central debates in mountaineering ethics. The 2012 “de-bolting” by Jason Kruk and Hayden Kennedy rekindled the controversy.

    What makes the peak hard: extreme weather with single-digit summit windows per month, vertical rock with sustained technical climbing, ice mushroom summit formations that disappear and reform seasonally, and a committing approach through El Chaltén’s windstorm territory. Unlike the 8,000ers where altitude drives difficulty, Cerro Torre’s difficulty is pure technical climbing plus weather discipline.

    Modern ascents run via the Compressor Route (modified after the 2012 de-bolting) and the Ragni Route on the West Face. Both demand elite alpine climbing skills and extraordinary patience for weather. Fitz Roy and Cerro Torre together represent Patagonia’s twin crown — the world’s highest-concentration technical alpine objectives outside the Alps.

    Total summits~150
    First ascent1974 (Italian)
    GradeED+ / sustained
    Primary hazardWeather windows

    Denali (Cassin Ridge): North America’s Cold Committing Classic

    10
    The Alaskan test piece

    Denali — Cassin Ridge

    Alaska, USA · Alaska Range
    6,190 m20,310 ft

    The Cassin Ridge on Denali is North America’s most storied technical alpine route. While Denali’s West Buttress standard route is graded AD+ and sees 1,000+ attempts per year, the Cassin is ED1 — a 10,000-foot rising face of rock, ice, and mixed climbing with relentless exposure and cold. Riccardo Cassin’s 1961 first ascent established it as a landmark in big-peak alpine climbing.

    What makes it hard: extreme cold (climbs happen at -30°C or colder), sustained mixed terrain, significant objective hazard from falling ice and rock, extreme commitment (retreat is difficult on most sections), and the full altitude experience of 20,000+ feet. Most Cassin attempts take 10–14 days with minimal escape options.

    For North American climbers, the Cassin Ridge represents the next step beyond the West Buttress — a training ground for climbers preparing for the Himalaya or Patagonia. See our Denali Climbing Guide for the full route landscape including West Buttress standard.

    Fatality rate~2%
    Total Denali deaths125+
    Cassin first ascent1961 (Cassin)
    Primary hazardCold + commitment

    What Is the Deadliest Mountain in the World, Really?

    The “deadliest mountain” question has three valid answers depending on metric:

    By fatality rate per summit attempt

    Annapurna I wins at ~28% — your highest probability of dying in a single climbing attempt. K2 follows at ~20%, then Nanga Parbat at ~22%. These three peaks represent the apex of altitude-plus-hazard that the sport produces.

    By absolute number of deaths

    Mont Blanc wins by absolute fatalities. Estimates suggest 100+ deaths per year on Mont Blanc (all routes combined) due to sheer traffic volume — tens of thousands of climbers annually. Total historical deaths exceed 6,000+. The Matterhorn has killed 500+ since 1865. These peaks are technically far less demanding than the 8,000ers, but high traffic + underpreparation produces high body counts.

    By unexpected deaths at low altitude

    Mount Washington in New Hampshire (1,917 m) has killed 160+ people — proving that altitude isn’t the only killer. Extreme wind, rapid weather changes, and traffic from underprepared hikers combine to produce unexpected fatalities. Mount Fuji has killed thousands over its climbing history. These are “hardest” in a different sense — not because climbing them is technically challenging but because their conditions defeat climbers who underestimated them.

    The honest answer

    For experienced climbers asking “what’s the hardest peak I could attempt?” the answer is K2, Annapurna, or Nanga Parbat — all combining extreme altitude, sustained technical difficulty, and objective hazards no preparation eliminates. For general interest readers asking “what mountain kills the most people?” the answer is Mont Blanc by traffic volume. Both questions are valid; they’re just measuring different things. Anyone attempting the 10 peaks on this list needs serious multi-year preparation — see our Top 50 Technical Objectives anchor for the broader progression context.


    Hardest Mountains FAQ: Your Common Questions Answered

    What is the hardest mountain in the world to climb?

    K2 (8,611 m) is widely considered the hardest major mountain in the world to climb, combining extreme altitude, sustained technical difficulty, and a historical fatality rate of approximately 20% among summiters. However, Annapurna I (8,091 m) has the highest fatality rate of all 8,000 m peaks at approximately 28%, making it statistically deadlier. Nanga Parbat (8,126 m), called “The Killer Mountain,” has a fatality rate around 22%. If the question is “most technically demanding single ascent,” K2 generally wins. If the question is “highest probability of death per summit attempt,” Annapurna leads. For pure technical difficulty at non-extreme altitude, Baintha Brakk (The Ogre) at 7,285 m in Pakistan has been climbed only a handful of times since its first ascent in 1977 and rivals the 8,000 m peaks for sheer technical demand.

    What is the deadliest mountain in the world?

    By fatality rate per summit attempt, Annapurna I (8,091 m) is the deadliest major mountain, with approximately 28% of climbers who attempt it dying on the mountain — historically one death for every 3–4 successful summits. K2 (8,611 m) follows at approximately 20% fatality rate. By absolute fatality numbers, Mont Blanc in the Alps has the most deaths annually due to its high traffic volume (estimated 100+ deaths per year) despite being technically moderate. The Matterhorn has killed over 500 climbers since its 1865 first ascent. Mount Washington in New Hampshire has killed over 160 people despite being only 1,917 m, primarily due to extreme weather. Deadliness depends heavily on which metric applies: per-attempt rate (Annapurna wins), absolute numbers (Mont Blanc), or specific conditions (Mount Washington for weather deaths at low altitude).

    Why is K2 considered harder than Everest?

    K2 is considered harder than Everest for several reasons: (1) K2’s Bottleneck couloir above 8,300 m features an active serac hazard that has killed dozens of climbers — Everest has no equivalent. (2) K2’s summit ridges are narrower and more technical than Everest’s, with sustained difficulty rather than Everest’s “up the slope” character. (3) Pakistan lacks Nepal’s commercial Sherpa infrastructure, making K2 expeditions more dependent on climber self-sufficiency. (4) K2 has no helicopter rescue capability above Camp 2 — Everest rescues above Camp 2 are now possible in some conditions. (5) K2’s weather is statistically worse, with shorter and less predictable summit windows. (6) Historical fatality rate on K2 (20%) versus Everest (1.3% modern rate) reflects all these differences. Everest is hard because of its altitude; K2 is hard because of its altitude plus sustained technical climbing plus objective hazards.

    What is the Bottleneck on K2?

    The Bottleneck is a narrow, steep couloir on K2’s summit route between approximately 8,300 m and 8,400 m, located directly beneath an enormous hanging serac. Climbers passing through the Bottleneck are exposed to falling ice from the serac for typically 2–4 hours during summit pushes. The 2008 K2 disaster that killed 11 climbers in a single summit push was caused partly by the Bottleneck’s serac collapsing and cutting fixed ropes, stranding climbers above. The Bottleneck represents one of the most consequential objective hazards in 8,000 m climbing — no skill, preparation, or gear eliminates the serac fall risk. Climbers minimize exposure by moving through quickly during summit pushes and timing their passage to cooler pre-dawn hours when serac activity is lower. The Bottleneck is the single most dangerous section of the most dangerous 8,000 m peak.

    How many people have died on Annapurna?

    Through 2024, approximately 70–75 climbers have died on Annapurna I (8,091 m) against approximately 250–300 successful summits, giving a fatality rate of approximately 28% — the highest of all 14 eight-thousanders. Annapurna’s deaths come primarily from avalanches on the approach and summit push, with the South Face being particularly lethal due to hanging seracs and avalanche-prone flute systems. The 1970 Chris Bonington expedition made the first ascent of the South Face but lost a climber. Modern commercial climbs have improved safety marginally but cannot eliminate the fundamental avalanche hazard. Annapurna is among the few 8,000 m peaks where the commercial route (North Face) has improved safety while alternate routes (South Face, East Ridge) remain in the historical fatality range. The peak is typically attempted later in climbers’ 14-peak progressions for this reason.

    Has anyone climbed The Ogre in Pakistan?

    Yes, but only rarely. Baintha Brakk (The Ogre) at 7,285 m in Pakistan’s Karakoram was first climbed in 1977 by Doug Scott and Chris Bonington — a climb that became legendary when Scott broke both legs on the descent and crawled out over 8 days. The Ogre has been successfully summited fewer than 30 times through 2024, making it one of the most rarely-climbed named 7,000 m peaks. Key difficulties include: sustained technical rock climbing on the summit tower (5.10+ at altitude), extreme weather and storm exposure, a committing approach through technical terrain, and no commercial climbing infrastructure. The Ogre is often cited as the ultimate test piece for elite alpinists because its difficulty rivals the 8,000 m peaks while requiring small-team alpine-style climbing rather than expedition siege tactics. Most modern attempts end in retreat without summit.

    What is the hardest mountain in the Alps?

    The Eiger’s North Face (Nordwand) at 3,967 m is widely considered the hardest commonly-climbed alpine objective in Europe. Its 1,800-meter wall combines technical rock climbing (5.9 at altitude), steep water ice (WI 4), mixed terrain, and severe storm exposure. Over 60 climbers have died on the face since the 1938 first ascent. Harder routes exist in the Alps — the Grandes Jorasses Walker Spur at ED1, the North Face of Les Droites, and various modern test pieces — but the Eiger North Face combines difficulty, storied history, and accessibility in a way no other Alpine face matches. The Matterhorn’s Hörnli Ridge is the standard Alps commercial route at grade AD and has killed approximately 500 climbers primarily through falls and weather. For pure technical difficulty at accessible altitude, Cerro Torre’s Compressor Route in Patagonia and Mount Huntington’s Harvard Route in Alaska surpass Eiger-grade objectives but require remote expedition logistics.

    Why is Mount Washington so deadly?

    Mount Washington (1,917 m) in New Hampshire has killed over 160 people despite being a low-altitude peak, making it one of the world’s deadliest mountains by low-altitude standards. Key factors: (1) Extreme wind — Mount Washington held the world’s highest measured wind speed (372 km/h / 231 mph) for decades and still routinely exceeds 160 km/h. (2) Rapid weather changes where sunny valley weather becomes storm conditions on the summit within hours. (3) Sub-arctic winter temperatures combined with 100+ km/h winds create some of the worst wind chill conditions on Earth. (4) High traffic volume — Mount Washington sees over 250,000 visitors per year, many underprepared. (5) Easy access via auto road and cog railway creates a false sense of safety. Mount Washington fatalities typically involve underprepared hikers caught in sudden weather deterioration — hypothermia, exhaustion, and cliff falls during storm retreats. The peak illustrates how absolute fatality numbers correlate with traffic more than technical difficulty.


    Authoritative Sources & Further Reading

    Statistics reflect primary climbing databases and peer-reviewed sources through December 2024:

    • The Himalayan Database (HDB) — himalayandatabase.com — Primary source for all Himalaya/Karakoram statistics
    • American Alpine Club / American Alpine Journal — americanalpineclub.org — Annual accident reports and historical climb documentation
    • Alan Arnette — alanarnette.com — Annual 8,000 m peak coverage and statistics
    • Pakistan Alpine Club — Karakoram records and expedition documentation
    • Nepal Mountaineering Association (NMA) — Nepal climbing records
    • Mount Washington Observatory — mountwashington.org — Weather statistics and fatality analysis
    • Swiss Alpine Club (SAC) — Eiger and Bernese Alps records
    • Alpine Club of Canada — North American alpine statistics
    • Reference texts: K2: Life and Death on the World’s Most Dangerous Mountain (Viesturs), The Ogre: Biography of a Mountain and the Dramatic Story of the First Ascent (Bonington), Freedom of the Hills (The Mountaineers), Annapurna: First Conquest of an 8,000-Meter Peak (Herzog)
    • Documentary sources: “North Face” (2008 film), “Meru” (2015 film), “K2: Touching the Sky” (2015 film)
    Published: February 15, 2026
    Last updated: April 19, 2026
    Next review: July 2026
    Part of the Global Summit Guide

    Back to the Master Hub

    This guide is one of 71 across 12 thematic clusters on Global Summit Guide. The master hub organizes every guide by experience tier, specific peak, skill area, and region.

    View the Hub →

    Updated 2026 Death Rates and Difficulty Rankings

    The “hardest mountain to climb” question has multiple valid answers depending on how difficulty is measured. Below is updated 2026 data on the most rigorous measures — death rate (deaths per summit), technical difficulty, and average summit success rate. The data combines records from the Himalayan Database, the American Alpine Club, the Pakistan Alpine Club, and the major national alpine clubs.

    Death Rates of the 14 Eight-Thousanders (Updated 2026)

    MountainElevationCountryDeath RateTotal Deaths
    Annapurna I8,091 mNepal~32%~70+
    K28,611 mPakistan / China~23-25%~96+
    Nanga Parbat8,126 mPakistan~21%~85+
    Kangchenjunga8,586 mNepal / India~15%~55+
    Dhaulagiri I8,167 mNepal~13%~80+
    Manaslu8,163 mNepal~10-12%~85+
    Makalu8,485 mNepal / Tibet~9%~35+
    Gasherbrum I (Hidden Peak)8,080 mPakistan / China~8%~30+
    Lhotse8,516 mNepal / Tibet~3%~30+
    Mount Everest8,849 mNepal / Tibet~1-1.5%~330+
    Cho Oyu8,201 mNepal / Tibet~1.4%~50+
    Broad Peak8,051 mPakistan / China~5%~30+
    Gasherbrum II8,035 mPakistan / China~2-3%~25+
    Shishapangma8,027 mTibet~5-6%~30+

    Why Annapurna I is the deadliest 8,000m peak. Annapurna I’s 32% historical death rate makes it the most lethal of the 14 eight-thousanders despite being only the 10th-highest at 8,091m. Three factors combine to produce this rate: (1) Massive avalanche-prone slopes on all standard routes — the north face, south face, and northwest ridge are all swept by avalanches with substantial frequency; (2) Weather unpredictability — Annapurna’s geographic position creates rapidly developing storms that have caught climbing teams at altitude; (3) Lower commercial attention — far fewer expeditions attempt Annapurna than Everest or Manaslu, meaning less developed rescue infrastructure and shorter weather windows for attempts. Recent decades (2010-2025) have seen the death rate decline as expedition logistics have improved, but Annapurna remains the most dangerous of the eight-thousanders per attempt.

    Technical Difficulty Rankings (Beyond Death Rate)

    Death rate is one measure of difficulty, but not the only one. Many of the world’s hardest mountains have low death rates because they’re so technical that only elite climbers attempt them — meaning fewer total deaths despite extreme difficulty per attempt. Below are the most technically demanding mountains in the world by consensus among professional alpinists:

    MountainElevationRegionWhy Technically Hard
    K28,611 mKarakoramSustained steep terrain; Bottleneck couloir at 8,200m; no commercial support
    Cerro Torre3,128 mPatagoniaVertical granite walls; rime ice mushroom summit; extreme weather
    Latok I7,145 mKarakoramNorth ridge unrepeated since first ascent; sustained mixed climbing
    The Mazeno Ridge (Nanga Parbat)8,126 mPakistan14 km ridge traverse; longest 8,000m ridge route; technical crux below summit
    Mount Logan5,959 mYukon, CanadaMost massive mountain in North America; extreme cold; sustained ascent
    Gasherbrum IV7,925 mKarakoramShining Wall is one of the hardest big-wall climbs in the world
    Jannu (Kumbhakarna)7,710 mNepalNorth Face is among the most coveted technical objectives in alpinism
    Meru Central (Shark’s Fin)6,310 mIndiaSustained vertical mixed climbing; subject of “Meru” film (2015)
    The Eiger Nordwand3,967 mAlps, Switzerland1,800m face; 60+ deaths; iconic mixed climbing terrain
    Fitz Roy (Cerro Chaltén)3,405 mPatagoniaGranite Towers of Patagonia; weather-dependent windows

    The Bottleneck on K2: Why a Couloir at 8,200m Has Killed So Many

    The Bottleneck on K2’s Abruzzi Spur is the single deadliest feature in 8,000m mountaineering. Located at approximately 8,200 meters on the standard route, the Bottleneck is a 50-degree couloir directly beneath a massive serac (an unstable ice cliff) that has produced multiple fatal ice collapses including the catastrophic 2008 K2 disaster which killed 11 climbers in 24 hours.

    The 2008 K2 disaster. On 1 August 2008, a serac collapse in the Bottleneck killed 11 climbers across multiple expeditions. The collapse occurred late in the summit day when descending climbers were below the serac. Climbers who had passed earlier or had not yet reached the Bottleneck on ascent survived; those caught in the wrong window did not. The disaster reshaped how serious K2 expeditions plan timing and revealed the unpredictable nature of objective hazard at extreme altitude. Subsequent K2 seasons have seen additional Bottleneck-related fatalities, though commercial expedition support and fixed-rope improvements have reduced overall K2 death rates from historical highs.

    Why Some “Easy” Mountains Are Actually Dangerous

    Several mountains commonly described as “easy” are statistically more dangerous than their reputations suggest. The disconnect comes from how difficulty is measured: technical difficulty versus objective hazard versus underestimation by climbers.

    Underestimated Killers

    MountainElevationReputationWhy It’s Actually Dangerous
    Mount Hood (Oregon, USA)3,429 m“Beginner volcano”Cascade weather; crevasse hazard on standard route; ~130 deaths since 1880
    Ben Nevis (UK)1,345 m“Tourist Path”Scottish weather; sea-level start; summit plateau disorientation; ~5-10 deaths/year
    Mont Blanc (France/Italy)4,808 m“Walk-up”Goûter Couloir rockfall; 100+ deaths/year average; commercial volume amplifies casualties
    Mount Washington (USA)1,917 m“Drive-up”Some of the worst weather in continental USA; ~160+ deaths since records
    Mount Rainier (USA)4,392 m“Manageable for novices”Crevasse hazard; rapid weather change; ~400+ deaths since 1890
    Kilimanjaro (Tanzania)5,895 m“Tourist trek”Altitude sickness; ~10 deaths/year; ~30% turn back without summit

    The “Mont Blanc problem.” Mont Blanc averages 100+ deaths per year — substantially more than K2, Annapurna, or Everest in absolute numbers. The reason is volume: approximately 20,000 climbers attempt Mont Blanc annually compared to 100-300 attempts on K2. Mont Blanc’s death rate per attempt is well below 1%, but the massive participation produces high absolute casualty numbers. The Goûter Couloir — a narrow rock gully that climbers must cross under threat of constant rockfall — is the single deadliest feature, claiming the majority of fatalities. The 2024 Mont Blanc season saw substantial improvements in safety protocols including time-restricted Goûter Couloir crossings and mandatory hut bookings, but the mountain remains the deadliest in absolute terms simply due to climbing volume.

    Frequently Asked Questions

    Which mountain has the highest death rate?

    Annapurna I in Nepal has historically held the highest death rate among the 14 eight-thousanders at approximately 32% (death-to-summit ratio). For 8,000m peaks, this is the deadliest. For technical climbing below 8,000m, Cerro Torre in Patagonia and the Eiger Nordwand have death rates that some sources estimate at 15-20% for serious climbing attempts.

    What is the most dangerous mountain to climb in the world?

    The most dangerous mountain depends on how danger is measured. By death-rate percentage: Annapurna I at 32%. By technical difficulty: K2 by consensus among professional alpinists. By absolute deaths: Mount Everest (330+) and Mont Blanc (100+/year). By underestimation: Ben Nevis and Mount Washington have substantial death tolls for “easy” mountains.

    Why is K2 considered harder than Everest?

    K2 requires sustained technical climbing from base to summit, while Everest’s South Col route has substantial easier sections. The Bottleneck at 8,200m is a serac-threatened couloir that has produced multiple disasters including the 2008 catastrophe (11 deaths). K2 has dramatically less commercial-scale support than Everest, requiring more self-sufficient climbing. The death rate on K2 (~23-25%) is approximately 15-20x higher than Everest (~1-1.5%).

    What is the deadliest mountain by total deaths?

    Mount Everest has the highest total recorded deaths at approximately 330+ fatalities since 1922. However, this reflects massive participation (10,000+ summits) rather than relative danger per attempt. Mont Blanc averages 100+ deaths per year, accumulating substantially higher annual death tolls than 8,000m peaks. Nanga Parbat at 8,126m has approximately 85+ total deaths and was historically called “killer mountain” before commercial expeditions normalized the term.

    Has anyone climbed all 14 eight-thousanders?

    As of 2024, approximately 50+ climbers have summited all 14 eight-thousanders. Reinhold Messner was the first (completed 1986). Nirmal Purja completed all 14 in 6 months in 2019 (the “Project Possible”), setting a speed record that fundamentally changed expectations for the project. Recent completionists have used substantial supplemental oxygen and commercial support; only a small minority have completed the 14 without supplemental oxygen — a substantially more demanding achievement.

    Continue Reading — Mountain Profiles for the Hardest Peaks

  • The Greatest Alps Mountains Compared: Mont Blanc, Matterhorn, Eiger & More

    The Greatest Alps Mountains Compared: Mont Blanc, Matterhorn, Eiger & More

    The Greatest Alps Mountains Compared: Mont Blanc, Matterhorn, Eiger & More (2026) | Global Summit Guide
    Anchor Guide · Cluster 10 · Updated April 2026

    The Greatest Alps Mountains Compared: Mont Blanc, Matterhorn, Eiger & More

    The definitive regional comparison of the European Alps’ greatest peaks — Mont Blanc, Matterhorn, Eiger, Grandes Jorasses, Monte Rosa, Dom, and the Dolomite giants. Heights, grades, costs, seasons, and what makes each peak iconic for climbers choosing Alpine destinations.

    4,810 m
    Mont Blanc
    highest Alp
    82
    Official Alps
    4,000 m peaks
    6
    Major Alpine
    regions
    PD–ED2
    Grade range
    covered
    Global Summit Guide A guide in Cluster 10 · Regional Guides View master hub →

    The Alps are mountaineering’s cradle and capital. For over 150 years, the world’s climbing culture has centered on these peaks — the Matterhorn’s 1865 first ascent, the Eiger’s 1938 Nordwand breakthrough, the accessible 4,000 m concentration that made alpine climbing a measurable sport. This guide compares the greatest Alps mountains across France, Switzerland, Italy, and Austria, organized by major massif, with the context climbers need to choose where to focus — whether for a first 4,000 m summit or a lifetime project climbing all 82 official 4,000ers.

    How this guide was built

    The 82 official Alps 4,000-meter peaks follow the UIAA (International Climbing and Mountaineering Federation) standardized list. Route grades use the International French Adjectival System (IFAS). Summit statistics and historical data draw from the Swiss Alpine Club (SAC), Club Alpin Français (CAF), Alpenverein (Austrian Alpine Club), and the American Alpine Journal. Cost estimates reflect 2026 operator pricing from IFMGA-certified guide services. Reviewed by Chamonix and Zermatt-based IFMGA guides. Fact-check date: April 19, 2026.

    The Six Great Regions of the European Alps

    The Alps span roughly 1,200 kilometers across eight countries, but the great climbing peaks concentrate in six distinct regions. Each has its own character — not just different peaks, but different climbing culture, accommodation style, guide traditions, and seasonal patterns.

    France · Italy

    Mont Blanc Massif

    Mont Blanc · Grandes Jorasses · Aiguille du Dru · Aiguille du Midi

    The cradle of modern alpinism. Centered on Chamonix, France, spanning into Italy (Courmayeur) and briefly Switzerland. Home to Mont Blanc, the highest peak in the Alps, plus the Aiguilles de Chamonix needle group and the Grandes Jorasses north face.

    4,000ers28
    Base townChamonix
    CharacterIconic
    Switzerland · Italy

    Valais Alps (Pennine)

    Matterhorn · Monte Rosa · Dom · Weisshorn · Zinalrothorn

    The densest concentration of 4,000 m peaks in the world. Centered on Zermatt (Switzerland) and Saas-Fee, with Italian access via Breuil-Cervinia. Features the Matterhorn and Monte Rosa massif along with more 4,000ers than any other sub-range.

    4,000ers38
    Base townZermatt
    CharacterConcentrated
    Switzerland

    Bernese Oberland

    Eiger · Jungfrau · Mönch · Finsteraarhorn · Aletschhorn

    Home to the Eiger’s legendary north face and some of the Alps’ largest glaciers. Centered on Grindelwald and Interlaken (Switzerland). Dominated by the Eiger-Mönch-Jungfrau trilogy visible from the valley and the vast Aletsch glacier system.

    4,000ers9
    Base townGrindelwald
    CharacterDramatic
    Italy

    Dolomites

    Tre Cime di Lavaredo · Marmolada · Civetta · Sass Pordoi

    The Alps’ most distinctive rock climbing region. Vertical limestone towers and walls rather than glaciated peaks. Centered on Cortina d’Ampezzo and Val Gardena in Italy. Home to via ferratas, WWI climbing history, and the Tre Cime.

    4,000ers0
    Base townCortina
    CharacterVertical rock
    Austria

    Austrian Alps & Tyrol

    Grossglockner · Wildspitze · Grossvenediger · Hohe Tauern

    The Alps’ best value region with excellent infrastructure at lower cost than Swiss or French destinations. Centered on Innsbruck, Kals am Großglockner, and Lienz. Features Austria’s highest peak Grossglockner (3,798 m) and extensive 3,000 m peak climbing.

    4,000ers0
    Base townInnsbruck
    CharacterBest value
    Switzerland · Italy

    Bernina Range

    Piz Bernina · Piz Palü · Piz Roseg · Biancograt

    The eastern Alps’ 4,000 m outpost on the Swiss-Italian border. Centered on St. Moritz (Switzerland) and Pontresina. Features Piz Bernina, the easternmost 4,000 m peak in the Alps, and the famous Biancograt snow ridge.

    4,000ers1
    Base townPontresina
    CharacterClassic

    The Four Most Iconic Alps Peaks

    Among the Alps’ 82 official 4,000 m peaks and hundreds of significant lower mountains, four stand above the rest in cultural, historical, and climbing importance. These are the peaks that define what the Alps mean to mountaineering.

    01
    The highest · The most climbed

    Mont Blanc

    France / Italy · Mont Blanc Massif
    4,810 m15,781 ft

    Mont Blanc is the Alps’ highest peak and the most-climbed major mountain in the world — over 300,000 summits since Jacques Balmat and Michel-Gabriel Paccard’s 1786 first ascent. Approximately 20,000-25,000 summit attempts occur annually across its five major routes (Goûter, Cosmiques, Grands Mulets, Italian Normal, Brenva).

    The standard Goûter Route is graded PD+ with primarily glacier travel and snow terrain. Technical difficulty is moderate, but the altitude, weather exposure, and the Grand Couloir stone-fall hazard make Mont Blanc more serious than its grade suggests. About 100+ climbers die annually across all routes — driven by traffic volume rather than per-attempt rate (under 1%).

    Mont Blanc attracts both first-time 4,000 m climbers using guided programs and elite alpinists attempting harder routes like the Brenva Spur. The town of Chamonix hosts the Compagnie des Guides de Chamonix — the world’s oldest guide service — and functions as the global capital of mountaineering.

    Grade (standard)PD+
    First ascent1786
    Annual attempts~22,000
    Success rate60–70%
    02
    The most recognizable · The most photographed

    Matterhorn

    Switzerland / Italy · Valais Alps
    4,478 m14,691 ft

    The Matterhorn’s near-perfect pyramidal shape makes it the most recognizable mountain on Earth. Its 1865 first ascent by Edward Whymper ended in tragedy — four of the seven climbers died on descent — an event that marked the end of the “Golden Age of Alpinism” and made the mountain a global icon.

    The standard Hörnli Ridge is graded AD (Assez Difficile) with sustained class 3-4 scrambling, 5.5 climbing moves, and significant exposure. Approximately 500 climbers have died on the Matterhorn since 1865, primarily from falls and weather-caused accidents. Annual fatalities still run 10-15.

    Unlike Mont Blanc, the Matterhorn requires genuine rock climbing confidence and route-finding. The Italian Ridge (Lion Ridge) from Breuil-Cervinia offers an alternative with different character. Fixed ropes assist on key sections, but climbers unable to confidently scramble on moderate rock at altitude should not attempt the peak.

    Grade (Hörnli)AD / 5.5
    First ascent1865
    Total deaths500+
    Success rate50–60%
    03
    The most storied wall · The north face

    Eiger

    Switzerland · Bernese Oberland
    3,967 m13,020 ft

    The Eiger’s 1,800-meter north face — the Nordwand — is the most storied wall in alpine climbing. Though the peak is only 3,967 m (not a 4,000er), its sheer vertical relief and notoriously difficult face put it in a different league. The face killed eight climbers in the 1935-1937 attempts before Heinrich Harrer, Fritz Kasparek, Anderl Heckmair, and Ludwig Vörg made the 1938 first ascent.

    Named passages — the Difficult Crack, Hinterstoisser Traverse, Flat Iron, Ramp, Traverse of the Gods, White Spider, Exit Cracks — entered alpine vocabulary globally. Over 60 climbers have died on the face. The Heckmair Route grades D+ / 5.9 / WI 4 / 60° snow — sustained rather than extreme difficulty, with relentless objective hazard.

    The Eiger also offers easier alternatives: the Mittellegi Ridge (D grade) and South Ridge provide non-face climbing options. The 2008 film “North Face” dramatized the 1936 tragic attempt. See our 10 Hardest Mountains for expanded Eiger coverage.

    Grade (north face)ED2
    First ascent1858 (peak) / 1938 (NF)
    North face deaths60+
    Wall height1,800 m
    04
    The Walker Spur · Elite alpine climbing

    Grandes Jorasses

    France / Italy · Mont Blanc Massif
    4,208 m13,806 ft

    The Grandes Jorasses’ north face — particularly the Walker Spur — represents the apex of classical alpine climbing. Riccardo Cassin’s 1938 first ascent of the Walker Spur, coming the same year as the Eiger Nordwand, established the peak as a second major European test piece.

    The Walker Spur grades ED1 with 1,200 meters of sustained mixed climbing — rock to 5.10, ice to WI 4+, and sustained exposure. The Grandes Jorasses separates elite alpinists from accomplished climbers. Modern speed ascents exist, but most climbers take 2-3 days on the spur. Other north face routes (Croz Spur, Colton-MacIntyre) are harder still.

    The Grandes Jorasses’ standard route (south side) via the Rochefort Ridge is a moderate AD-rated alpine climb. The peak has six named summits along a 1-kilometer ridge. Approach from Courmayeur (Italy) or Chamonix (France) via the Leschaux Glacier. Walker and Whymper are the highest of the six summits.

    Grade (Walker Spur)ED1
    First ascent (Walker)1938 (Cassin)
    Wall height1,200 m
    Commitment2–3 days

    Full Alps Peak Comparison at a Glance

    The 12 most-attempted Alps peaks in one comparison table. Use for quick reference when choosing destinations or planning progressions.

    PeakHeightCountryStandard RouteGradeGuided Cost
    Mont Blanc4,810 mFrance / ItalyGoûter RoutePD+$1,800–$5,500
    Monte Rosa (Dufourspitze)4,634 mSwitzerland / ItalyNormal RoutePD+$1,500–$3,500
    Dom4,545 mSwitzerlandNormal RoutePD+$1,800–$3,800
    Liskamm4,527 mSwitzerland / ItalyWest RidgeAD$2,200–$4,500
    Weisshorn4,506 mSwitzerlandEast RidgeAD+$2,500–$4,500
    Matterhorn4,478 mSwitzerland / ItalyHörnli RidgeAD$1,800–$4,500
    Grandes Jorasses4,208 mFrance / ItalyWalker SpurED1$5,000–$10,000
    Jungfrau4,158 mSwitzerlandSE RidgeAD+$2,000–$4,000
    Breithorn4,164 mSwitzerland / ItalyWest RidgePD$700–$1,500
    Gran Paradiso4,061 mItalyNormal RoutePD$1,000–$2,200
    Eiger (peak)3,967 mSwitzerlandMittellegi RidgeD$3,500–$6,500
    Eiger (North Face)3,967 mSwitzerlandHeckmair RouteED2$5,000–$15,000

    For detailed specs across 20+ Alpine peaks see our Alpine Peak Quick Reference Cards.


    When to Climb in the Alps: Season Guide

    Alpine climbing season is driven by weather stability, hut operations, snow conditions, and glacier state. Mid-June through mid-September is the primary window, with important variations by specific region and peak.

    Early Summer

    Jun 15 – Jul 15
    Opening Season

    More snow, fewer crowds, less stable weather. Some routes still blocked. Hut openings begin mid-June.

    Peak Season

    Jul 15 – Aug 20
    Prime Window

    Most reliable weather, most accessible conditions. Huts crowded — book months ahead. Classic climbing window.

    Late Summer

    Aug 20 – Sep 15
    Good Season

    Cooler, quieter, more afternoon storm activity. Good climbing into early September. Huts close mid-month.

    Winter

    Dec – Apr
    Specialized

    Winter mountaineering and ski touring only. Huts closed, routes become ice/mixed climbs. Not for beginners.

    Regional season variations

    • Mont Blanc Massif: June 15 – September 15 primary. Peak July-August. Grand Couloir can be blocked by snow until late June some years.
    • Valais Alps (Zermatt): July 1 – September 15. Matterhorn particularly weather-sensitive — storms close the peak for days.
    • Bernese Oberland (Eiger area): July – mid-September. Eiger North Face requires specifically cold, stable conditions.
    • Dolomites: June – October (rock climbing season, not glaciated). Longest season of any Alps region.
    • Austrian Alps: June 15 – September 30. Lower altitudes extend season both directions.
    • Bernina: July – early September. Short prime window due to altitude.

    Alpine Climbing Culture: Why the Alps Matter

    Understanding the Alps requires understanding their cultural weight in climbing. The sport of mountaineering was essentially invented here.

    The Golden Age of Alpinism (1854–1865)

    Most major Alps peaks received their first ascents during this 11-year period. Alfred Wills climbed the Wetterhorn in 1854, typically marking the start. Edward Whymper’s Matterhorn ascent in 1865, with its tragic descent, marked the end. The climbers were primarily British alpinists with Swiss and French guides. The Alpine Club (London, 1857) was the world’s first climbing organization.

    The hut system and Alpine clubs

    The Alps’ extensive hut network — approximately 700+ staffed refuges across all countries — is unique in world mountaineering. The Swiss Alpine Club (SAC), Club Alpin Français (CAF), Alpenverein (Austrian Alpine Club), and Club Alpino Italiano (CAI) maintain these huts, which enable multi-day Alpine climbing without tents or heavy loads. Hut reciprocity agreements allow members of any national alpine club to use any hut at member rates. The hut system made alpine climbing accessible to ordinary people, not just wealthy expeditions.

    The IFMGA and Alpine guiding

    The Compagnie des Guides de Chamonix (1821) was the world’s first professional guide association. The modern IFMGA (International Federation of Mountain Guides Associations) originated in the Alps, and most IFMGA-certified guides worldwide trace their certification lineage to French, Swiss, Italian, or Austrian guide training programs. The Alps remain the training ground for professional mountain guides globally.

    Classic literature and film

    Alpine climbing has produced more literature than any other mountaineering region. Key works: Scrambles Amongst the Alps (Whymper, 1871), The White Spider (Harrer, 1959), The Shining Mountain (Tasker/Boardman, 1978). Films: The Eiger Sanction (1975), Touching the Void (2003, set in the Andes but alpine-style), North Face (2008), Free Solo (2018, not Alps but alpine style). The Alps gave birth to the climbing-as-literature tradition.


    Greatest Alps Mountains FAQ: Your Common Questions Answered

    What is the highest mountain in the Alps?

    Mont Blanc (4,810 m / 15,781 ft) is the highest mountain in the Alps and the highest peak in Western Europe. Located on the border between France and Italy with Switzerland nearby, Mont Blanc sees approximately 20,000-25,000 summit attempts per year across all routes. The second-highest Alps peak is Monte Rosa (Dufourspitze, 4,634 m) on the Swiss-Italian border, followed by Dom (4,545 m) and Liskamm (4,527 m). There are approximately 82 officially recognized 4,000-meter peaks in the Alps using the UIAA’s standardized list, concentrated primarily in the Mont Blanc Massif, the Valais Alps (Swiss), and the Bernese Oberland. The Matterhorn (4,478 m) is famous but actually ranks 12th by elevation. Mont Blanc has been climbed by over 300,000 people historically since Jacques Balmat and Michel-Gabriel Paccard’s 1786 first ascent, making it the most-climbed major Alpine peak.

    Which is harder: Mont Blanc or the Matterhorn?

    The Matterhorn is technically harder than Mont Blanc, despite being 332 meters lower. Mont Blanc’s standard Goûter Route is graded PD+ (Peu Difficile) — moderate alpine climbing with primarily glacier and snow terrain, plus the Grand Couloir stone-fall hazard. The Matterhorn’s standard Hörnli Ridge is graded AD (Assez Difficile) — sustained class 3-4 rock scrambling with 5.5 climbing moves, significant exposure, and no glacier section. The Matterhorn demands confident rock climbing and route-finding skills Mont Blanc doesn’t require. Summit success rates reflect this: Mont Blanc sees 60-70% success with guided climbers; Matterhorn sees 50-60%. Mont Blanc’s altitude (4,810 m) is the primary challenge; Matterhorn’s technical rock is its defining difficulty. For first-time 4,000 m climbers, Mont Blanc is typically the progression choice; experienced climbers often find Matterhorn more engaging.

    What are the four classic Alps north faces?

    The four classic Alps north faces — the “great north faces” of European alpinism — are: (1) Eiger North Face (1,800 m wall in Switzerland, IFAS ED2, first climbed 1938 by Heckmair team). (2) Matterhorn North Face (1,200 m wall, IFAS TD, first climbed 1931 by the Schmid brothers). (3) Grandes Jorasses North Face (Walker Spur, 1,200 m, IFAS ED1, first climbed 1938 by Cassin). (4) Mont Blanc North Face variants including the Brenva Face (varied grades up to ED). These four faces represent the apex of classical alpine climbing and have defined European alpinism since the 1930s. Climbing all four (“The Four Great Alps North Faces”) is a serious alpinist’s career objective requiring 10+ years of dedicated technical climbing. Beyond the classical four, modern routes like the north face of Les Droites, Piz Badile, and Dru have joined the great-face pantheon.

    Which Alps country is best for mountaineering?

    Switzerland offers the most concentrated mountaineering infrastructure with the largest number of 4,000-meter peaks (48 of the 82 in the Alps), excellent Swiss Alpine Club hut network, comprehensive guide services, and extensive mechanical lift access (trains, cable cars). The Valais Alps around Zermatt and Saas-Fee concentrate more 4,000ers than anywhere else in the world. France’s Chamonix region offers the most iconic access with Mont Blanc, Aiguille du Midi cable car, and dense guide culture — the Compagnie des Guides de Chamonix is the world’s oldest guide service. Italy’s Aosta Valley offers quieter climbing with access to Mont Blanc south side, Gran Paradiso (4,061 m), and Monte Rosa. Austria’s Tyrol concentrates 3,000-meter peaks with excellent value and fewer crowds. For most first-time Alpine climbers, the Chamonix-Zermatt axis offers the best balance of iconic peaks, infrastructure, and guide quality.

    When is the best time to climb in the Alps?

    The best time to climb in the Alps is mid-June through mid-September, with peak conditions in July and early August. Monthly breakdown: (1) June: Earlier season, more snow on routes, fewer crowds but less stable weather. Some routes inaccessible due to snow cover. (2) July: Peak season, most reliable weather windows, crowded huts require advance booking. (3) August: Still peak season but increasing afternoon thunderstorm activity by mid-month. Paris-August holiday concentrates French climbers. (4) September: Late season, cooler, quieter, less stable weather, some huts close mid-month. (5) Winter (Dec-Mar): Winter mountaineering and ski touring are specialized pursuits — most classical routes become ice climbs or require winter-specific skills. Bernese Oberland peaks like Eiger are particularly season-sensitive due to the stone-fall and weather patterns. Always check hut opening dates before planning — most open late June and close mid-September.

    How expensive is climbing in the Alps?

    Alpine climbing costs depend heavily on guided vs independent approach. Guided climbing ranges: (1) Mont Blanc guided 2-3 day program: $1,800-$5,500 with 1:1 or 1:2 guide ratios. (2) Matterhorn guided: $1,800-$4,500 (highly weather-dependent). (3) Multi-peak Alpine weeks (4-6 peaks): $2,500-$6,000. (4) IFMGA certified guide day rate: €450-€650 per day for 1:1. Independent climbing saves substantially but requires competent partners: (1) Hut fees €70-€90 per night half-board. (2) Mechanical lift passes €30-€80 per ride. (3) Total self-guided Mont Blanc: €600-€1,500 including transport, huts, permits. Gear rental in Chamonix, Zermatt, or Grindelwald: €150-€400 per week for complete alpine kit. International airfare to Geneva or Zurich adds $800-$1,500 from North America. Plan a 7-10 day Alpine trip at $3,000-$8,000 total including flights for a guided single-peak expedition, or $1,500-$3,500 independent.

    What are the most beautiful Alps peaks?

    The most beautiful Alps peaks — as judged by climbers, photographers, and visitors — include: (1) The Matterhorn (4,478 m) for its near-perfect pyramidal shape visible from Zermatt and across the Valais. (2) Mont Blanc (4,810 m) for its dominant presence in the Chamonix Valley and glacier-draped flanks. (3) Eiger (3,967 m) for its dramatic 1,800 m north wall rising directly from the Grindelwald valley. (4) Les Drus (3,754 m) for its sheer granite needles above the Chamonix Valley. (5) Tre Cime di Lavaredo (2,999 m) in the Dolomites for its three iconic rock towers. (6) Marmolada (3,343 m) for its dramatic south face and glacier. (7) Piz Badile (3,308 m) for its granite walls above the Val Bregaglia. (8) Cervino (Italian Matterhorn) for its Italian-side character. Beauty is subjective, but these peaks consistently appear in climbing literature, photography collections, and regional tourism campaigns as the Alps’ most photogenic mountains.

    Which Alps peaks are accessible without technical climbing skills?

    Several Alps peaks are accessible to fit hikers without technical climbing skills, though most 4,000-meter peaks require at least basic mountaineering. Accessible to trained hikers with proper gear: (1) Breithorn (4,164 m) via the Klein Matterhorn cable car — often called the easiest 4,000er in the Alps, PD grade, no technical rock. (2) Gran Paradiso (4,061 m) Italy — PD, glacier walk and easy ridge. (3) Allalinhorn (4,027 m) via Mittelallalin cable car — PD, gentle glacier. (4) Weissmies (4,017 m) normal route — PD. (5) Mönch (4,107 m) via Jungfraujoch — PD+. Not requiring mountaineering but still serious: (1) Zugspitze (2,962 m) Germany — cable car to summit, plus challenging hiking routes. (2) Hohtürli Pass (2,778 m) multi-day trek. (3) Tour du Mont Blanc (180 km trek). Always use a certified guide for first 4,000 m experience — “easy” alpine peaks still involve glacier crevasse hazards, altitude, and weather that can defeat hikers without proper support.


    Authoritative Sources & Further Reading

    Content reflects primary sources from European alpine clubs and verified 2026 operator pricing:

    • UIAA (International Climbing and Mountaineering Federation) — uiaa.org — 4,000 m peaks list and grading standards
    • Swiss Alpine Club (SAC) — sac-cas.ch — Swiss hut network and climbing records
    • Club Alpin Français (CAF) — ffcam.fr — French Alps documentation
    • Österreichischer Alpenverein (ÖAV) — alpenverein.at — Austrian alpine club
    • Club Alpino Italiano (CAI) — cai.it — Italian alpine club
    • Compagnie des Guides de Chamonix — chamonix-guides.com — World’s oldest guide service
    • Zermatt Alpin Center — alpincenter-zermatt.ch — Matterhorn and Valais guides
    • Office de Haute-Montagne (OHM) Chamonix — ohm-chamonix.com — Official mountain conditions
    • IFMGA (UIAGM) — ifmga.info — International mountain guide certification
    • Reference texts: Alpine 4000m Peaks by the Classic Routes (Collomb), Scrambles Amongst the Alps (Whymper), The White Spider (Harrer), Alpine Climbing: Techniques to Take You Higher (Houston & Cosley), Freedom of the Hills (The Mountaineers)
    Published: February 15, 2026
    Last updated: April 19, 2026
    Next review: July 2026
    Part of the Global Summit Guide

    Back to the Master Hub

    This guide is one of 71 across 12 thematic clusters on Global Summit Guide. The master hub organizes every guide by experience tier, specific peak, skill area, and region.

    View the Hub →

    The 25 Highest Mountains in the Alps: Complete Ranking

    The Alps contain approximately 82 official 4,000m peaks per the UIAA (Union Internationale des Associations d’Alpinisme) list. All major Alpine peaks are concentrated in the western Alps — the Mont Blanc Massif and Pennine Alps host the majority, with the Bernese Alps containing the easternmost 4,000m peaks. Below is the complete ranked list of the 25 highest mountains in the Alps.

    RankMountainElevationCountryRange
    1Mont Blanc4,808 m / 15,774 ftFrance / ItalyMont Blanc Massif
    2Dufourspitze (Monte Rosa)4,634 m / 15,203 ftSwitzerland / ItalyPennine Alps
    3Nordend (Monte Rosa)4,609 m / 15,121 ftSwitzerlandPennine Alps
    4Zumsteinspitze (Monte Rosa)4,563 m / 14,970 ftSwitzerland / ItalyPennine Alps
    5Signalkuppe / Punta Gnifetti4,554 m / 14,941 ftSwitzerland / ItalyPennine Alps
    6Dom4,545 m / 14,911 ftSwitzerlandPennine Alps (highest entirely in Switzerland)
    7Liskamm East4,532 m / 14,852 ftSwitzerland / ItalyPennine Alps
    8Weisshorn4,506 m / 14,783 ftSwitzerlandPennine Alps
    9Täschhorn4,491 m / 14,734 ftSwitzerlandPennine Alps
    10Matterhorn4,478 m / 14,692 ftSwitzerland / ItalyPennine Alps
    11Mont Maudit4,465 m / 14,649 ftFrance / ItalyMont Blanc Massif
    12Dent Blanche4,357 m / 14,295 ftSwitzerlandPennine Alps
    13Nadelhorn4,327 m / 14,196 ftSwitzerlandPennine Alps
    14Grand Combin4,314 m / 14,154 ftSwitzerlandPennine Alps (SW)
    15Lenzspitze4,294 m / 14,088 ftSwitzerlandPennine Alps
    16Finsteraarhorn4,274 m / 14,022 ftSwitzerlandBernese Alps (highest)
    17Mont Blanc du Tacul4,248 m / 13,937 ftFranceMont Blanc Massif
    18Stecknadelhorn4,241 m / 13,914 ftSwitzerlandPennine Alps
    19Castor4,228 m / 13,871 ftSwitzerland / ItalyPennine Alps
    20Hohberghorn4,219 m / 13,842 ftSwitzerlandPennine Alps
    21Grandes Jorasses (Pointe Walker)4,208 m / 13,806 ftFrance / ItalyMont Blanc Massif
    22Aletschhorn4,194 m / 13,760 ftSwitzerlandBernese Alps
    23Jungfrau4,158 m / 13,642 ftSwitzerlandBernese Alps
    24Bishorn4,153 m / 13,625 ftSwitzerlandPennine Alps
    25Mönch4,107 m / 13,474 ftSwitzerlandBernese Alps

    Why all the highest Alpine peaks are in Switzerland and France. The 25 highest peaks in the Alps are concentrated in three subranges: the Mont Blanc Massif (on the France-Italy border), the Pennine Alps (Switzerland-Italy border, including the Monte Rosa massif), and the Bernese Alps (Switzerland). All three are in the western Alps — there are zero 4,000m peaks east of the Bernese Oberland, meaning Austria, Germany, eastern Switzerland, and Slovenia have no 4,000m peaks. The geological reason: the western Alps experienced more intense uplift during the Alpine orogeny, producing higher peaks; the eastern Alps were less elevated and have been more eroded. The cultural consequence is that serious 4,000m mountaineering is concentrated in Chamonix (France), Zermatt (Switzerland), and Grindelwald (Switzerland) — making these three towns the spiritual centers of Alpine climbing despite Italy and Austria having larger total Alpine territory.

    The Alps’ Iconic Six: Comparing the Most Famous Peaks

    Six Alpine peaks dominate international recognition: Mont Blanc, the Matterhorn, the Eiger, Jungfrau, the Grossglockner, and the Zugspitze. Each represents a different facet of Alpine mountaineering and tourism. Below is the comprehensive comparison.

    FeatureMont BlancMatterhornEigerJungfrauGrossglocknerZugspitze
    Elevation4,808 m4,478 m3,967 m4,158 m3,798 m2,962 m
    CountryFR/ITCH/ITCHCHATDE/AT
    First Ascent178618651858 (Mittellegi)181118001820
    Annual Climbers~20,000~3,500~3,000 (Mittellegi)~500-1,000 (summit)~5,000~2.5M (cable car)
    Standard Route GradePD (Goûter)AD/D (Hörnli)AD (Mittellegi)D (south ridge)AD (Stüdl)F (cable car)
    Key FeatureHighest peakIconic shapeNordwand (1,800m)Bernese trioAustria’s highestCable car icon
    Death Toll100+/year~500 total60+ (North Face)~25 total~5-10/yearVery low
    Standard Duration2-3 days2 days2 days (Mittellegi)2-3 days2 daysDay trip
    Approx. Cost$1,500-$3,000$1,500-$3,500$1,500-$3,000$2,000-$4,000$1,000-$2,000$80-$150

    Where Climbers Should Start: Alpine Peak Progression

    Alpine mountaineering has a natural progression from accessible “first 4,000m” peaks through technical objectives. Most climbers follow this approximate sequence to build experience.

    StageRecommended PeakElevationSkills Developed
    1. Cable car accessAiguille du Midi (Chamonix)3,842 m (cable car)Altitude experience; cable car logistics
    2. First 4,000m (easy)Breithorn (West Summit)4,164 mBasic glacier travel + crampons
    3. First substantive 4,000mAllalinhorn (Saas-Fee)4,027 mRoped glacier; basic snow climbing
    4. The “Lady’s Weisshorn”Bishorn4,153 mLonger glacier; substantial fitness test
    5. Iconic standard routeMont Blanc (Goûter Route)4,808 mExtended altitude; weather window planning
    6. Technical introductionCastor + Pollux4,228m / 4,092mRope team; basic scrambling
    7. The iconic objectiveMatterhorn (Hörnli Ridge)4,478 mClass 4 scrambling; fixed ropes; exposure
    8. Advanced rockAiguille Verte4,122 mSubstantial technical rock
    9. The Eiger introductionEiger Mittellegi Ridge3,967 mSustained alpine ridge; multi-day exposure
    10. Elite objectivesEiger Nordwand / Walker Spur / Matterhorn NorthVariousThree Great North Faces — elite alpinism

    The Alps as the birthplace of modern mountaineering. Modern mountaineering as a sport was invented in the Alps. The first major Alpine ascent — Mont Blanc on 8 August 1786 by Chamonix doctor Michel-Gabriel Paccard and crystal hunter Jacques Balmat — is widely considered the founding event of mountaineering as a recreational pursuit rather than a scientific, commercial, or military activity. Three subsequent developments cemented the Alpine tradition: (1) The “Golden Age of Alpinism” (1854-1865) when most major Alpine peaks were first climbed, primarily by British clients with Swiss/French guides; (2) Edward Whymper’s 1865 Matterhorn first ascent (with 4 deaths on descent) — the event that ended the Golden Age but established mountaineering in popular consciousness; (3) The founding of the Alpine Club (London, 1857), the Swiss Alpine Club (1863), and subsequent national alpine clubs that institutionalized mountaineering. The Compagnie des Guides de Chamonix, founded 1821, remains the world’s oldest mountain guide service. The substantial hut system (1,500+ staffed huts across the Alps maintained by SAC, CAS, DAV, OeAV, CAI) is unmatched globally in density. Modern IFMGA mountain guide certification — the international standard — originated in the Alps. For climbers, the Alps remain not just a great range but the spiritual and practical center of mountaineering.

    The Alps by Country: National Highest Points

    CountryHighest Alpine PeakElevationNotable
    FranceMont Blanc (with Italy)4,808 mHighest in Western Europe
    ItalyMont Blanc (with France)4,808 mHighest in Italy entirely is Gran Paradiso (4,061m)
    SwitzerlandDufourspitze (with Italy)4,634 mHighest entirely in Switzerland: Dom (4,545m)
    AustriaGrossglockner3,798 mAustria’s only 3,700m+ peak
    GermanyZugspitze2,962 mBorder with Austria; cable car access
    SloveniaMount Triglav2,864 mNational symbol; on Slovenian flag
    LiechtensteinVorder Grauspitz2,599 mSmallest Alpine country by area
    MonacoMont Agel1,148 mTechnically not in the Alps proper; near Alps foothills

    The Alps’ Most Iconic Faces and Routes

    RouteMountainGradeSignificance
    Eiger Nordwand (1938)EigerED21,800m; “Mordwand”; most legendary face in Alps
    Matterhorn North Face (1931)MatterhornTD+/ED1First of Three Great North Faces climbed
    Grandes Jorasses Walker Spur (1938)Grandes JorassesTD+/ED1Third of Three Great North Faces
    Mont Blanc Goûter RouteMont BlancPDStandard Mont Blanc route; most-climbed 4,000er
    Matterhorn Hörnli RidgeMatterhornAD/DWhymper’s 1865 route; standard Matterhorn climb
    Three Monts RouteMont BlancADAlternative Mont Blanc via Mont Blanc du Tacul + Mont Maudit
    Eiger Mittellegi RidgeEigerAD+Standard non-Nordwand Eiger route
    Innominata RidgeMont BlancD+/TDClassic Mont Blanc technical ridge
    Dufourspitze East RidgeMonte RosaADStandard Dufourspitze route
    Weisshorn East Ridge (Schalligrat)WeisshornDClassic Pennine Alps ridge

    Frequently Asked Questions

    What are the highest mountains in the Alps?

    The 10 highest mountains in the Alps: (1) Mont Blanc 4,808m (France/Italy), (2) Dufourspitze 4,634m (Switzerland/Italy, Monte Rosa massif), (3) Nordend 4,609m (Monte Rosa), (4) Zumsteinspitze 4,563m (Monte Rosa), (5) Signalkuppe 4,554m (Monte Rosa), (6) Dom 4,545m (Switzerland — highest entirely in Switzerland), (7) Liskamm East 4,532m, (8) Weisshorn 4,506m, (9) Täschhorn 4,491m, (10) Matterhorn 4,478m. All 10 highest peaks are concentrated in the western Alps — the Mont Blanc Massif and Pennine Alps. The Alps contain approximately 82 official 4,000m peaks per the UIAA list.

    What is the most famous mountain in the Alps?

    The Matterhorn (4,478m, Switzerland/Italy) is widely considered the most famous Alpine mountain and one of the most recognizable mountains in the world. The pyramid-shaped silhouette has become a universal visual symbol for “mountain” — featured on Toblerone chocolate packaging, the Paramount Pictures logo, and countless other commercial uses. First climbed by Edward Whymper’s expedition on 14 July 1865, the Matterhorn became the focus of mountaineering’s transition from Victorian pursuit to modern adventure sport. Mont Blanc (4,808m) is the highest and arguably equally famous historically — the founding mountain of modern mountaineering (1786 first ascent). The Eiger is famous specifically for its 1,800m North Face.

    Which Alps mountain is the hardest to climb?

    The hardest standard-route Alpine 4,000m peaks: (1) The Eiger Nordwand — 1,800m face, ED2 grade, 60+ deaths; (2) Grandes Jorasses Walker Spur — 1,200m face, TD+/ED1; (3) Matterhorn North Face — 1,200m face. Among standard routes: the Matterhorn Hörnli Ridge is class 3/4 with substantial exposure; Mont Blanc’s Goûter Route is non-technical but has substantial objective hazard in the Goûter Couloir; the Eiger’s Mittellegi Ridge is class 3 scrambling. Beyond the 4,000ers, Mount Schreckhorn (4,078m) and Aiguille Verte (4,122m) are demanding technical 4,000m objectives. The Dolomites contain some of the world’s hardest technical climbing but represent different objectives than alpine mountaineering.

    How many 4,000m peaks are in the Alps?

    The Alps contain approximately 82 official 4,000m peaks per the UIAA list. The exact count varies (sources cite 82, 128, or other numbers depending on whether minor sub-summits are included), but 82 is the most widely accepted standard. The 4,000ers are concentrated in three subranges: Mont Blanc Massif (France/Italy), Pennine Alps (Switzerland/Italy), and Bernese Alps (Switzerland). There are zero 4,000m peaks east of the Bernese Oberland — Austria, Germany, eastern Switzerland, and Slovenia have no 4,000m peaks. Approximately 200-300 climbers have completed all 82 4,000ers as of 2024 — a relatively small number reflecting the substantial technical demands of the harder peaks.

    What is the easiest 4,000m peak in the Alps?

    The Breithorn (4,164m, Switzerland/Italy) is generally considered the easiest 4,000m Alpine peak and the standard “first 4,000er” for new climbers. The Klein Matterhorn cable car from Zermatt brings climbers to 3,883m, leaving only ~280m of vertical gain. The standard route involves basic glacier travel, crampon technique, and altitude management. Time from cable car to summit: 2-3 hours. Other accessible 4,000m peaks: Allalinhorn (4,027m, Saas-Fee cable car approach), Bishorn (4,153m, “the lady’s Weisshorn”), Pollux (4,092m), Castor (4,228m). Even “easy” Alpine 4,000ers require glacier travel competence, altitude acclimatization, and weather window selection — not casual hikes.

    When is the best time to climb Alps mountains?

    The standard Alpine climbing season is July through August — warmest temperatures (summit 0 to -10°C), driest conditions, longest weather windows. June and September are shoulder months with fewer crowds; substantial snow may remain through June and return in September. Late August-September has most exposed glaciers with substantial crevasse hazard on standard routes. April-May suits ski mountaineering (Haute Route). December-March is serious winter alpinism on the Great North Faces. Cable car tourism operates year-round. For first-time visitors, weekday mid-July through mid-August offers the best combination of weather, conditions, and manageable crowds.

    Continue Reading — Alpine Mountain Guides

  • Best Mountains Near Salt Lake City to Hike & Climb

    Best Mountains Near Salt Lake City to Hike & Climb

    Best Mountains Near Salt Lake City: Wasatch Hiking Guide 2026 | Global Summit Guide
    Cluster 11 · Japan & Local · Updated April 2026

    Best Mountains Near Salt Lake City: The Complete Wasatch Hiking Guide

    The definitive guide to mountains near Salt Lake City — organized by the five canyons that cut into the Wasatch Range. From 1-hour Ensign Peak to the 14-hour Lone Peak expedition, every mountain you can reach from Salt Lake City, with access routes, difficulty tiers, and what makes each canyon distinctive.

    5
    Main Wasatch
    canyons
    30+
    Mountains
    accessible
    15–90 min
    Drive from
    downtown
    4,000–12,000 ft
    Elevation
    range
    Global Summit Guide A guide in Cluster 11 · Japan & Local View master hub →

    Salt Lake City sits at the base of one of North America’s most accessible mountain ranges — the Wasatch rises 7,000 feet above the valley floor, with summit trailheads reachable from downtown in 15-90 minutes. Five major canyons cut into the range, each offering a different character of mountain hiking: Parleys, Mill Creek, Big Cottonwood, Little Cottonwood, and American Fork. Understanding these canyons is the key to understanding Wasatch hiking — each defines a geography of trailheads, peak difficulty, and canyon personality. This guide walks through every canyon, the signature mountains you can reach from each, and how to match your experience level to the right peak.

    How this guide was built

    Mountain data verified against Uinta-Wasatch-Cache National Forest trail management records, US Geological Survey topographic databases, and Utah County Visitors Bureau documentation. Drive times reflect Google Maps 2026 averages from downtown Salt Lake City (Temple Square) during non-rush hours. Trailhead fee information confirmed from Salt Lake County Parks & Recreation and SLC Public Utilities (watershed regulations). Wildlife data draws from Utah Division of Wildlife Resources and Wasatch Mountain Club observations. Reviewed by Utah hiking community members and local guides. Fact-check date: April 19, 2026.

    The Wasatch Front: Your Home Range

    The Wasatch Range stretches approximately 160 miles from the Utah-Idaho border south through central Utah. The “Wasatch Front” specifically refers to the western face of the range bordering the Salt Lake Valley, Provo/Orem Utah Valley, and Ogden Weber Valley.

    Key Wasatch Front facts

    • Salt Lake City elevation: 4,226 ft (downtown). Even low-elevation trails require substantial elevation gain from valley.
    • Highest peaks visible from SLC: Lone Peak (11,253 ft), Twin Peaks (11,330 ft), Mount Timpanogos (11,752 ft, south), Mount Nebo (11,928 ft, far south)
    • Access corridor: Five canyons cutting into the range, each with different personality and regulations
    • Weather pattern: Summer afternoon thunderstorms (critical safety factor), snow November through May on higher peaks
    • Wildlife: Mountain lions, black bears, moose, mule deer, elk, Rocky Mountain goats (on Timpanogos specifically)
    • Protection status: Much of the range is protected wilderness including Mount Olympus Wilderness, Twin Peaks Wilderness, Lone Peak Wilderness, Mount Timpanogos Wilderness
    • Watershed rules: Little Cottonwood and Parleys canyons have no-dog restrictions (drinking water protection)

    The Five Canyons: Your Access to the Range

    Understanding the canyons is understanding Wasatch hiking. Each canyon has distinct character, regulations, and defining peaks.

    01
    Northernmost · I-80 Access

    Parleys Canyon

    Watershed canyon · Lower peaks · No dogs
    15 min
    From downtown

    Parleys Canyon carries I-80 east out of Salt Lake City toward Park City. As a watershed canyon, it has strict dog restrictions (no dogs permitted) and fewer trailhead options than the other canyons. Peaks accessed tend to be lower elevation but provide sweeping valley views. Best for quick after-work hikes rather than major summit pursuits.

    Key Peaks Accessed

    • Mount Wire — 7,143 ft · Red Butte area
    • Red Butte / Living Room — City views
    • Ensign Peak — 5,417 ft · Historic 1-mile hike
    • Little Mountain — 7,241 ft · Connects Parleys to Emigration
    02
    Most Popular · Dog-Friendly

    Mill Creek Canyon

    $5 fee · Dog-friendly alternating days · Moderate peaks
    20 min
    From downtown

    Mill Creek Canyon is Salt Lake City’s most popular hiking canyon — central location, reasonable fee, dog-friendly regulations (odd days dogs off-leash, even days leashed), and excellent moderate-to-strenuous peaks. The $5 canyon fee applies to vehicles. Runs east from the Brighton/Rainbow Trail entrance.

    Trail character: forested lower sections, moderate grades, peaks in the 8,000-10,300 ft range. Best canyon for first-time SLC hikers building toward bigger peaks. Church Fork, Desolation, and Alexander Basin are popular trailheads.

    Key Peaks Accessed

    • Grandeur Peak — 8,299 ft · SLC classic
    • Mount Aire — 8,621 ft · Accessible moderate
    • Mount Raymond — 10,241 ft · Strenuous
    • Gobblers Knob — 10,246 ft · Pairs with Raymond
    • Thaynes Peak — Moderate peak
    • Pioneer Peak — Sparse use
    03
    Ski Resorts · Varied Terrain

    Big Cottonwood Canyon

    No fee · Solitude/Brighton ski · Mid-elevation peaks
    30 min
    From downtown

    Big Cottonwood Canyon is wider and longer than Mill Creek, stretching east to Solitude and Brighton ski resorts. No canyon fee. Offers excellent moderate and strenuous peaks including several 11,000+ foot summits. Popular for both Salt Lake and Utah County hikers due to central Wasatch location.

    Trail character: Starts from lower Big Cottonwood (Donut Falls area), progresses through mid-canyon access to Lake Blanche and Twin Peaks, extends up to Brighton basin with summit-region hikes to Sunset Peak, Clayton Peak, and ski resort peaks.

    Key Peaks Accessed

    • Twin Peaks (South) — 11,330 ft · SLC County highest
    • Dromedary Peak — 11,107 ft · Technical
    • Lake Blanche basin peaks — Moderate
    • Sunset Peak — 10,648 ft · Brighton
    • Clayton Peak — 10,721 ft · Brighton
    • Mount Raymond — 10,241 ft · Via Butler Fork
    04
    Highest Peaks · Most Demanding

    Little Cottonwood Canyon

    No fee · Alta/Snowbird · No dogs · Advanced hiking
    35 min
    From downtown

    Little Cottonwood is the premier Wasatch canyon for serious hiking. Home to Alta and Snowbird ski resorts, it accesses the range’s highest peaks including Lone Peak, Pfeifferhorn, and the Twin Peaks area. Strict watershed regulations apply — no dogs permitted anywhere in the canyon. Terrain is more dramatic than other canyons with glacial cirques, exposed ridges, and class 3 scrambling opportunities.

    This canyon separates weekend hikers from serious mountain enthusiasts. Every peak here is a commitment requiring strong fitness, early starts, and weather awareness.

    Key Peaks Accessed

    • Pfeifferhorn — 11,326 ft · Class 3 scramble
    • Lone Peak — 11,253 ft · 15 mi RT epic
    • Sunrise Peak — 11,275 ft · Sunrise viewpoint
    • White Baldy — 11,321 ft · Ridge scramble
    • Red Baldy — 11,171 ft · Ridge connect
    • American Fork Twin Peaks — 11,433 ft · Complex
    05
    Southernmost · Utah County

    American Fork Canyon

    $10 fee · Timpanogos access · Alpine Loop
    45 min
    From downtown

    American Fork Canyon sits at Salt Lake County’s southern border, officially in Utah County but within 45 minutes of downtown SLC and therefore commonly accessed by Salt Lake hikers. Gateway to Mount Timpanogos and the Alpine Loop Scenic Byway (SR-92) connecting to Provo Canyon. $10 canyon fee (or America the Beautiful pass). Timpanogos Cave National Monument at canyon’s lower entrance.

    See our complete Timpanogos challenge guide for the canyon’s most famous peak.

    Key Peaks Accessed

    • Mount Timpanogos — 11,752 ft · Wasatch #2
    • Box Elder Peak — 11,101 ft · Alpine Loop
    • American Fork Twin Peaks — 11,433 ft · West
    • Devil’s Castle — 10,920 ft · Alta/AFork
    • Mill Canyon Peak — 10,357 ft · Moderate
    • Mount Baldy (Alta) — 11,068 ft · Ski area

    Matching Peaks to Your Experience: Four Difficulty Tiers

    Salt Lake City’s mountains span the full range from evening strolls to multi-hour expeditions. Work through the tiers systematically rather than jumping to the hardest peaks as your first mountain hikes.

    Tier 1 · Easy

    Under 6 Miles

    500–1,500 ft gain · 1–3 hours

    Examples: Ensign Peak, Living Room Trail, Ferguson Canyon, lower Mill Creek trails. Best for: Beginners, families, evening hikes.

    Tier 2 · Moderate

    6–8 Miles

    1,500–3,000 ft gain · 3–6 hours

    Examples: Mount Wire, Grandeur Peak, Mount Aire, Desolation Trail. Best for: Regular weekend hikers.

    Tier 3 · Strenuous

    7–10 Miles

    3,000–5,000 ft gain · 6–10 hours

    Examples: Mount Olympus, Gobblers Knob, Mount Raymond, Sunset Peak. Best for: Experienced hikers.

    Tier 4 · Expert

    10+ Miles

    4,000+ ft gain · 10–15 hours

    Examples: Lone Peak, Pfeifferhorn, Timpanogos, Twin Peaks. Best for: Advanced mountain hikers with proven endurance.


    Signature SLC Peaks: Quick Reference

    The most iconic mountains you can reach from Salt Lake City, with essential at-a-glance details:

    Tier 1 — Quick Peaks (under 3 hours)

    Ensign Peak

    5,417 ft · 1 mi RT · 400 ft gain

    Historic first-view peak. Pioneer significance. Family-friendly. Stunning valley views at sunset.

    Living Room Trail

    ~6,200 ft · 2.5 mi RT · 1,000 ft gain

    Iconic SLC short hike. Stone ‘living room’ arrangement at top. Year-round accessible.

    Mount Wire

    7,143 ft · 6 mi RT · 1,800 ft gain

    Red Butte area. Sweeping valley views. Good beginner mountain progression.

    Tier 2 — Moderate Peaks (4-6 hours)

    Grandeur Peak

    8,299 ft · 6 mi RT · 2,500 ft gain

    Classic SLC moderate peak. Multiple approach routes. Mill Creek Canyon access.

    Mount Aire

    8,621 ft · 7 mi RT · 2,000 ft gain

    Mill Creek Canyon. Accessible summit with meadow approach. Dog-friendly on odd days.

    Sunset Peak

    10,648 ft · 5 mi RT · 1,600 ft gain

    Brighton ski area access. Higher elevation but shorter distance. Wildflower meadows.

    Tier 3 — Strenuous Peaks (6-10 hours)

    Mount Olympus

    9,026 ft · 7 mi RT · 4,200 ft gain

    SLC’s iconic peak. Final scramble to summit. Visible from entire valley. Demanding grade.

    Mount Raymond

    10,241 ft · 11 mi RT · 3,600 ft gain

    Often paired with Gobblers Knob. Mill Creek or Butler Fork approach. Good second-tier challenge.

    Gobblers Knob

    10,246 ft · 11 mi RT · 3,500 ft gain

    Pairs with Raymond on loop hike. Distinctive exposed summit. Central Wasatch views.

    Tier 4 — Expert Peaks (10-15 hours)

    Lone Peak

    11,253 ft · 15 mi RT · 5,700 ft gain

    SLC’s ultimate peak challenge. Jacob’s Ladder or Draper approach. 11-14 hours. Commit.

    Pfeifferhorn

    11,326 ft · 10 mi RT · 4,500 ft gain

    Iconic class 3 scramble ridge. Red Pine Lake approach. Advanced mountaineering skills.

    Twin Peaks (South)

    11,330 ft · 13 mi RT · 5,500 ft gain

    Highest peak in SLC County. Little Cottonwood approach. Full-day commitment.


    When to Hike the Wasatch

    MonthLower peaks (under 8,000 ft)Mid peaks (8,000–10,000 ft)High peaks (10,000+ ft)
    AprilAccessible, muddySnow patches, microspikesMountaineering conditions
    MayGood conditionsLate snow meltingStill winter conditions
    JuneExcellentGood, scattered snowLate-June accessible
    JulyHot, start earlyPrime seasonPrime season
    AugustHot, thunderstormsPrime seasonPrime season
    SeptemberExcellentExcellentOptimal conditions
    OctoberFall colors, coolFall colorsFirst snow likely late-Oct
    NovemberCold, snow possibleWinter conditions beginningClosed for winter
    December-MarchSnowshoeingTechnical conditionsMountaineering only
    Afternoon thunderstorms are the #1 summer hazard

    Utah’s summer weather pattern creates afternoon convection storms producing dangerous lightning above treeline. The critical rule for summer hiking: summit before 11:00 AM and descend below treeline by noon on thunderstorm-prone days. Start hiking at 4:00-6:00 AM in July-August. Check radar before departing. If storms develop, descend immediately regardless of summit proximity. Lightning fatalities occur in the Wasatch annually — this is not a theoretical risk. Check NOAA Salt Lake forecasts and Mountain-Forecast.com for peak-specific predictions.


    Trailhead & Logistics Tips

    • Start early: 4:00-7:00 AM depending on peak and season. Beats heat, thunderstorms, and crowds simultaneously.
    • Weekday advantages: Most popular SLC trailheads (Mount Olympus, Grandeur, Lake Blanche) fill by 7-8 AM on summer Saturdays. Weekday hikes avoid most parking issues.
    • Canyon fees: Mill Creek $5, American Fork $10, Little Cottonwood and Big Cottonwood no fee. America the Beautiful pass covers most federal sites but not Mill Creek.
    • Dog restrictions: Little Cottonwood and Parleys — no dogs anywhere (watershed). Mill Creek — odd days off-leash, even days leashed. Big Cottonwood — dogs permitted on trails. American Fork — dogs on leash.
    • Water: Most Wasatch streams are watershed-protected — not for drinking. Carry 2-4 liters depending on peak distance.
    • Cell coverage: Spotty on most peaks. Don’t rely on phone for navigation or emergencies. Download offline maps (AllTrails, Gaia GPS).
    • Parking at popular trailheads: Mount Olympus, Grandeur (Church Fork), and Lake Blanche trailheads fill early on weekends. Arrive by 6-7 AM or choose less popular alternatives.
    • Altitude: Coming from sea level? Arrive 1-2 days early. Even Salt Lake Valley’s 4,500 ft helps with 10,000+ ft peak attempts.
    • Snow conditions: Check Utah Avalanche Center (utahavalanchecenter.org) for winter/early spring conditions. Avalanche terrain is real on Cottonwood and American Fork peaks.
    • Wildlife awareness: Moose are the most commonly aggressive wildlife — more injuries than bears/lions. Give them 100+ feet minimum.

    Salt Lake City Mountains FAQ: Your Common Questions Answered

    What is the best mountain to hike near Salt Lake City?

    The best mountain to hike near Salt Lake City depends on your experience level, but Mount Olympus (9,026 ft) is the most iconic SLC-proximate peak — visible from Salt Lake Valley, accessible from the east bench in 15 minutes, and achievable in a single long day. Top recommendations by category: (1) Iconic SLC peak: Mount Olympus via Olympus Trail — 7 miles RT, 4,200 ft gain, 6-8 hours. Final 0.3-mile scramble to summit. (2) Best moderate peak: Grandeur Peak — 6 miles RT, 2,500 ft gain, 4-5 hours. Accessible from multiple trailheads. (3) Best beginner-friendly: Mount Wire via Red Butte — 6 miles RT, 1,800 ft gain, 3-4 hours. Sweeping SLC views. (4) Best advanced peak: Lone Peak (11,253 ft) — 15 miles RT, 5,700 ft gain, 11-14 hours. Significant commitment. (5) Best ridge scramble: Pfeifferhorn (11,326 ft) — 10 miles RT, 4,500 ft gain, class 3 scrambling. (6) Best summit view: Mount Timpanogos (11,752 ft) — 14 miles RT but technically in Utah County, 1 hour south of SLC. (7) Best short quick hike: Ensign Peak — 1 mile RT, 400 ft gain, 1 hour. Historic first view of Salt Lake Valley. (8) Best dog-friendly: Millcreek Canyon peaks (Mount Aire, Grandeur from Millcreek) — leash laws enforced. Most SLC hikers eventually work through multiple peaks rather than focusing on one.

    How do you access Salt Lake City mountains by canyon?

    Salt Lake City’s mountains are accessed through five main canyons cutting into the Wasatch Range, each offering different peaks and character. The five canyons in order from north to south: (1) Parleys Canyon (I-80 east) — Access to Mt. Wire, Red Butte, northern Wasatch peaks. Easy freeway access, generally lower elevation peaks. Upper Parleys has some hiking but limited peak summit options. (2) Mill Creek Canyon (SR-190) — Access to Grandeur Peak, Mount Aire, Mount Raymond, Gobblers Knob, Church Fork. $5 canyon fee, dog-friendly (odd days dogs off-leash, even days leash required), multiple trailheads within 30 minutes of downtown SLC. The most popular canyon for Salt Lake hikers seeking moderate peaks. (3) Big Cottonwood Canyon (SR-190) — Access to Brighton, Solitude, Lake Blanche, Twin Peaks, Dromedary Peak, Sunset Peak. No fee, wider and longer than Mill Creek, extends to Brighton and Solitude ski areas. Popular for longer and higher peaks. (4) Little Cottonwood Canyon (SR-210) — Access to Snowbird, Alta, White Pine, Red Pine, Maybird Gulch, Pfeifferhorn, Lone Peak area. No fee but watercraft/dog restrictions (watershed), most challenging canyon for hikers, home to highest SLC-accessible peaks. (5) American Fork Canyon (SR-92) — Access to Mt. Timpanogos, Timpanogos Cave, Alpine Loop peaks. $10 fee, located at Salt Lake County’s southern border, technically Utah County. Most SLC hikers access multiple canyons over time, matching canyon character to their hike preferences.

    How hard is Mount Olympus in Salt Lake City?

    Mount Olympus is a strenuous day hike — one of Salt Lake City’s most physically demanding popular peaks. Difficulty details: (1) Distance: 7 miles round trip via the main Olympus Trail. (2) Elevation gain: Approximately 4,200 feet — one of SLC’s steepest grade-per-mile hikes. (3) Summit: 9,026 feet elevation. (4) Duration: 6-8 hours typical for average hikers; 4-5 hours for fit experienced hikers; 8-10 hours possible for slower pace. (5) Terrain: Switchback trail for most of climb, then scramble to summit over loose rock. Final 0.3 miles requires class 2-3 scrambling. (6) Exposure: Some class 3 scrambling near summit with moderate exposure. Not recommended for acrophobic hikers. (7) Starting point: Olympus Trailhead at approximately 5,000 feet on Wasatch Boulevard (east bench of SLC). Why Olympus is demanding: (8) Steep grade throughout — relentless uphill on ascent. (9) Mostly exposed to sun (minimal shade) — hot in summer. (10) Water sources very limited — carry 3-4 liters. (11) Summit scramble intimidates some hikers. (12) Descent on loose rock is knee-punishing. Preparation recommendations: (13) Multiple prior hikes of 5+ miles with 2,000+ ft gain before attempting. (14) Trekking poles essential. (15) Start before dawn in summer to avoid heat. (16) Bring food for 8+ hours. Success rate: approximately 70% of hikers reach the summit. Main turn-around reasons: fatigue on ascent, discomfort with summit scramble, afternoon thunderstorms, time pressure. The view from Olympus summit of the entire Salt Lake Valley is considered one of Utah’s most rewarding.

    What is the highest peak near Salt Lake City?

    The highest peak in the immediate Salt Lake City vicinity (Salt Lake County) is Mount Nebo South Peak at 11,928 feet — though technically in Juab County, it’s considered part of the southern Wasatch accessible from SLC in about 90 minutes. Highest peaks by geographic proximity: (1) Mount Nebo (11,928 ft) — Highest Wasatch peak, southern Wasatch, 90 minutes south of SLC via I-15. Technically in Juab County but grouped with SLC-area mountains. (2) Mount Timpanogos (11,752 ft) — Second-highest Wasatch, 60 minutes south in Utah County, iconic from SLC perspective. (3) Box Elder Peak (11,101 ft) — Southern Wasatch on Alpine Loop. (4) American Fork Twin Peaks (11,433 ft — west peak) — Technical scramble peak accessible from Little Cottonwood or American Fork canyons. (5) Dromedary Peak (11,107 ft) — Little Cottonwood Canyon. (6) Twin Peaks (11,330 ft) — Little Cottonwood. (7) Pfeifferhorn (11,326 ft) — Little Cottonwood, iconic class 3 scramble. (8) Lone Peak (11,253 ft) — Little Cottonwood or Alpine access, significant commitment. (9) Bighorn Peak (11,051 ft) — Little Cottonwood. Highest peaks entirely within Salt Lake County: (10) The Twin Peaks (11,330 ft) — South Twin is highest in SLC County proper. (11) Sunrise Peak (11,275 ft) — Little Cottonwood. Urban proximity note: (12) Grandeur Peak (8,299 ft) is often cited as the ‘closest’ SLC mountain — accessible from Mill Creek Canyon in 30 minutes from downtown, though much lower than the Cottonwood peaks. Salt Lake City sits at 4,226 ft elevation, so even lower peaks involve substantial elevation gain.

    When is the best time to hike near Salt Lake City?

    The best time to hike mountains near Salt Lake City is June through October, with the sweet spot being mid-July through mid-September. Seasonal guide: (1) April-May: Lower foothill trails accessible, but higher peaks have snow and unstable avalanche conditions. Mount Wire, Ensign Peak, lower Mill Creek Canyon trails viable. Don’t attempt Olympus, Grandeur summit, or Cottonwood peaks. (2) June: Snow melts off most peaks, wildflowers begin. Mount Olympus typically doable by mid-June. Higher Cottonwood peaks still have snow patches. Mosquitos active in wet areas. (3) July-August: Peak hiking season. All SLC peaks accessible. Afternoon thunderstorms frequent — start before sunrise. Hottest temperatures; hydration critical. Wildflowers at peak. (4) September: Optimal month for most hikers. Cooler mornings, less thunderstorm activity, still 12+ daylight hours. Early autumn color begins. (5) October: Fall color spectacular, crisp air, fewer crowds. Shorter days require earlier starts. First snowfall possible late October on higher peaks. (6) November-March: Winter/snow conditions. Many trailheads inaccessible due to canyon road conditions. Snowshoeing or technical mountaineering required for most peaks. Avalanche terrain on most Cottonwood peaks. Daily timing considerations: (7) Summer starts: 4:00-6:00 AM to beat heat and thunderstorms. (8) Fall starts: 6:00-7:00 AM adequate for shorter peaks. (9) Sunrise summits: Popular on Grandeur, Ensign, Mt. Wire — 1-2 hour start before sunrise. (10) Weekday advantage: Dramatically fewer crowds on popular peaks. Weekends on Mount Olympus or Grandeur can feel congested. Check conditions: (11) Wasatch Mountain Club trail reports. (12) Utah Avalanche Center for winter conditions. (13) National Weather Service Salt Lake forecast pages.

    Can beginners hike mountains near Salt Lake City?

    Yes, beginners have excellent options for mountain hiking near Salt Lake City — the Wasatch Range offers a progression from 1-mile easy hikes to 15+ mile demanding summits. Beginner-appropriate SLC peaks: (1) Ensign Peak — 1 mile RT, 400 ft gain, 1 hour. Historic peak with views of entire Salt Lake Valley. Excellent first-mountain hike. (2) Mount Wire — 6 miles RT, 1,800 ft gain, 3-4 hours. Sweeping city views, well-maintained trail. Perfect progression from Ensign Peak. (3) Grandeur Peak via Church Fork — 6 miles RT, 2,500 ft gain, 4-5 hours. Accessible from Mill Creek Canyon with multiple options for shorter variations. (4) Living Room Trail — 2.5 miles RT, 1,000 ft gain. Less summit-focused but classic SLC hike ending at stone ‘living room’ arrangement. (5) Desolation Trail to Mount Aire — 7 miles RT, 2,000 ft gain. Mill Creek Canyon. Moderate with achievable summit. (6) Lower Little Cottonwood peaks like Alpine Overlook. Beginner progression strategy: (7) Start with 1-3 mile hikes with 500-1,000 ft gain like Ensign Peak. (8) Progress to 4-6 mile hikes with 1,500-2,500 ft gain like Mount Wire or Grandeur. (9) Build up to 7-8 mile peaks with 3,000-4,000 ft gain like Mount Olympus. (10) Save 11,000+ ft peaks (Pfeifferhorn, Lone Peak, Timpanogos) for after 6+ months of regular hiking. Beginner safety tips: (11) Always hike with companion on first attempts. (12) Start early, turn around by set time regardless of summit proximity. (13) Carry water, food, layers even for ‘easy’ hikes. (14) Check weather before departing. (15) Tell someone your plan. (16) Cell phone coverage spotty on many trails. See our mountaineering for beginners guide for building skills progressively.

    What are the 7 Salt Lake City Peaks Challenge?

    The Salt Lake City Seven Peaks Challenge is an informal local hiking challenge where participants complete seven iconic Salt Lake City-area peaks, typically in a single summer season. The peaks most commonly included: (1) Mount Olympus (9,026 ft) — The iconic east bench peak. (2) Grandeur Peak (8,299 ft) — Mill Creek Canyon moderate peak. (3) Mount Wire (7,143 ft) — Accessible Red Butte peak. (4) Mount Aire (8,621 ft) — Mill Creek Canyon moderate peak. (5) Gobblers Knob (10,246 ft) — Mill Creek/Big Cottonwood peak. (6) Mount Raymond (10,241 ft) — Mill Creek/Big Cottonwood peak. (7) Sunrise Peak (11,275 ft) — Little Cottonwood Canyon peak. Alternative lists include: (8) Ensign Peak for historical significance. (9) Twin Peaks (11,330 ft) for highest SLC County peak. (10) Mount Timpanogos for bucket-list Wasatch peak. (11) Lone Peak (11,253 ft) for ultimate SLC challenge. How the challenge works: (12) Not officially organized — informal community tradition. (13) Typically completed between May and October in a single season. (14) Participants track via social media, personal journals, Strava. (15) No permits or registrations — just hike and summit. (16) Some variations allow completion over multiple years. Completion considerations: (17) Total approximate mileage across all 7 peaks: 45-55 miles. (18) Total approximate elevation gain: 20,000-25,000 feet. (19) Time commitment: approximately 10-15 hiking days spread across a season. (20) Skill requirements: growth through the sequence from easier (Mount Wire) to harder (Sunrise Peak). The Seven Peaks challenge provides excellent structure for hikers working through SLC’s mountain offerings systematically rather than randomly. Many local hiking clubs (Wasatch Mountain Club, Utah Mountain Adventures) support members pursuing the challenge.

    Are there mountain lions or bears in the Wasatch mountains?

    Yes, the Wasatch mountains host mountain lions, black bears, and moose, though hiker encounters are relatively rare. Wildlife you might encounter: (1) Mountain lions (cougars) — Present throughout the Wasatch Range. Rarely seen by hikers as they avoid human presence. Utah has approximately 2,000-2,500 lions statewide. Attacks on hikers extremely rare (single-digit fatalities across Utah’s history). (2) Black bears — Present in most SLC-area canyons. American Fork Canyon, Big Cottonwood, upper Mill Creek have documented bear activity. Population approximately 3,000-4,000 in Utah. Bear encounters increase in fall as bears forage before hibernation. (3) Moose — Common in wet meadow areas and riparian zones. Mill Creek Canyon, American Fork Canyon frequent moose habitat. Dangerous if approached — keep 100+ feet minimum. More aggressive than bears in defensive situations. (4) Mule deer — Common, not dangerous. (5) Elk — Present but less common than deer. (6) Coyotes — Throughout the range, rarely aggressive. (7) Rattlesnakes — Lower elevation trails (below 7,000 ft) in summer. Great Basin rattlesnake common. Safety guidelines: (8) Make noise while hiking — reduces surprise encounters. (9) Hike with companion when possible. (10) Keep dogs leashed (both for their safety and wildlife safety). (11) Give moose extra space — they’re responsible for more injuries than bears/lions in Utah. (12) Carry bear spray if solo-hiking remote trails. (13) If you encounter a mountain lion: make yourself large, maintain eye contact, don’t run, fight back if attacked. (14) If you encounter a bear: back away slowly, don’t run, speak calmly, use bear spray if necessary. (15) Report aggressive wildlife to Utah Division of Wildlife Resources. The overwhelming majority of hikers complete decades of Wasatch hiking without any dangerous wildlife encounter. Awareness and prevention are more important than fear.


    Authoritative Sources & Further Reading

    Content reflects authoritative Utah and national forest sources:

    • Uinta-Wasatch-Cache National Forest — fs.usda.gov — Official management
    • Salt Lake County Parks & Recreation — slco.org/parks — Canyon fees and regulations
    • Salt Lake City Public Utilities — slc.gov/utilities — Watershed canyon regulations
    • Utah Avalanche Center — utahavalanchecenter.org — Winter backcountry conditions
    • Utah Division of Wildlife Resources — wildlife.utah.gov — Wildlife safety
    • Wasatch Mountain Club — wasatchmountainclub.org — Community trip reports
    • US Geological Survey — usgs.gov — Topographic data and peak elevations
    • Reference texts: Hiking Utah’s Wasatch Range, Mountains of the Wasatch (Mike Cronin), AllTrails Wasatch collection
    Published: April 5, 2026
    Last updated: April 19, 2026
    Next review: July 2026
    Part of the Global Summit Guide

    Back to the Master Hub

    This guide is one of 71 across 12 thematic clusters on Global Summit Guide. The master hub organizes every guide by experience tier, specific peak, skill area, and region.

    View the Hub →
  • Timpanogos Hiking Co. 2026 Challenge: Your Complete Guide to Every Peak and Destination

    Timpanogos Hiking Co. 2026 Challenge: Your Complete Guide to Every Peak and Destination

    Timpanogos Hiking Co. 2026 Challenge: GOAT Peaks & Escape the Noise Guide | Global Summit Guide
    Home Mountains Utah Challenges Timpanogos Hiking Co. 2026 Challenge
    Utah County · 2026 Challenge · Free Badges

    Timpanogos Hiking Co. 2026 Challenge: Your Complete Guide to Every Peak and Destination

    Provo’s beloved summit badge program is back for its fourth year — bigger than ever, with 7 challenging GOAT peaks, 8 Escape the Noise destinations, a bonus “Give Back” badge, and free shirts for the first 300 finishers. Here’s everything you need to complete the 2026 Timpanogos Hiking Challenge.

    🏆 15 Badges Total available in 2026
    ⛰️ 7 GOAT Peaks + 8 destinations
    🆓 All badges free — pick up in Provo
    📍 252 N. University Ave., Provo, UT

    What Is the Timpanogos Hiking Challenge?

    Year 4
    2026 Challenge Edition
    What started with a single mountain and a hand-sewn badge in 2023 has grown into the most beloved community hiking tradition in Utah Valley, now featuring 15 badges across two distinct challenges.
    1930s
    Badge Tradition Revived
    The original Timp Badges were awarded to anyone summiting Mount Timpanogos from 1930 to 1971. Timpanogos Hiking Co. founder Joseph Vogel resurrected that tradition in 2023 after discovering it in local history archives.
    Free Shirt
    First 300 Finishers
    For the first time in 2026, the first 300 people to complete either the GOAT or Escape the Noise challenge receive a free shirt, donated by SLC Activewear.
    Mental Health
    The Mission Behind the Badges
    The challenge was built specifically to get people outdoors for physical and mental wellness. Vogel’s mantra — “escape the noise” — is a direct response to the mental health crisis driven by screen saturation and digital stress.

    Timpanogos Hiking Co., based in downtown Provo at 252 N. University Ave., is more than an outdoor gear shop — it’s the hub of a rapidly growing community hiking movement centered on mental wellness, mountain culture, and the kind of analog challenge that screens simply can’t replicate. Founder Joseph Vogel left a tenured professorship in Massachusetts to launch the brand in 2022, drawing on his personal experience using the Wasatch Mountains as a tool for navigating some of the hardest years of his life. That backstory is woven into everything the challenge represents.

    The badge program launched in 2023 with a single peak — Mount Timpanogos — and a reissued Timp Badge honoring a tradition that had been dormant for over fifty years. The response was immediate and overwhelming. By 2024, the program had expanded to a Ten Peak Challenge spanning northern Utah. By 2025, the format shifted to include both summit peaks and destination hikes, making the challenge accessible to more people. The 2026 edition builds further on that, with 15 total badges organized into two distinct tracks: the GOAT Challenge for serious peak-baggers and the Escape the Noise Challenge for those who want scenic destinations without the extreme elevation gain.

    How to Earn Your Free Badge

    The process is the same for every peak and destination: reach the summit or location, take a photo with you in it, tag @timpanogoshiking on social media, and walk into the store at 252 N. University Ave. in Provo to pick up your free hand-embroidered badge. Badges are available while supplies last starting late February each year. There is no registration, no fee, and no deadline — just summit, post, and show up.

    How to Earn a Badge — Step by Step

    1
    Reach the Summit
    Hike to the top of the peak or reach the designated destination. No partial credit.
    2
    Post & Tag
    Take a photo with you in it and post it on social media tagging @timpanogoshiking.
    3
    Pick Up in Store
    Visit 252 N. University Ave., Provo. Show your post and collect your free hand-embroidered badge.
    1

    2026 GOAT Challenge: All 7 Peaks at a Glance

    The GOAT Challenge targets seven of Utah’s most prominent and demanding summits. They range from the steep Provo foothills to the highest point in the Wasatch Range. The list deliberately mixes canyon types, counties, and terrain characters so that completing the full challenge means genuinely exploring a broad cross-section of northern Utah’s mountain landscape.

    # Peak Elevation Difficulty Location County
    1Kyhv Peak7,679 ftModerateProvo foothillsUtah
    2Sunset Peak10,648 ftModerate–HardBig Cottonwood CanyonSalt Lake
    3Mount Raymond10,241 ftModerateMillcreek CanyonSalt Lake
    4Frary Peak6,596 ftModerateAntelope IslandDavis
    5Deseret Peak11,031 ftModerate–HardStansbury MountainsTooele
    6Mount Nebo11,933 ftHardSouth Wasatch / NephiJuab
    7Mount Timpanogos11,753 ftHardAmerican Fork CanyonUtah
    2

    The GOAT Challenge: Peak-by-Peak Guide

    1. Kyhv Peak — 7,679 ft

    1Kyhv Peak (formerly Squaw Peak)
    ModerateProvo Foothills
    7,679 ft
    Summit
    ~2,900 ft
    Gain
    ~7.4 mi
    Round Trip
    4,600 ft
    Trailhead Elev.

    Kyhv Peak — officially renamed from Squaw Peak in 2022 as part of a federal initiative to remove offensive geographic names — rises directly above Provo and offers a commanding view of the entire Utah Valley, with Mount Timpanogos to the north and Utah Lake spread across the valley floor below. The trailhead sits just above the Provo Temple in the foothills of Rock Canyon, making it one of the most conveniently accessed peaks on the entire GOAT list. The trail steepens noticeably after the first mile, rewarding those who push through with a quiet, crowd-light summit that most Provo residents have never visited despite it sitting on their doorstep.

    🗺 View Trail on AllTrails

    2. Sunset Peak — 10,648 ft

    2Sunset Peak
    Moderate–HardBig Cottonwood Canyon
    10,648 ft
    Summit
    ~2,300 ft
    Gain
    ~6.2 mi
    Round Trip
    8,300 ft
    Trailhead Elev.

    Sunset Peak sits above the Brighton Ski Resort area at the top of Big Cottonwood Canyon and offers a remarkably efficient path to an above-10,000-foot summit. The high starting elevation keeps the gain manageable even though the views from the top rival peaks twice as tall. The route climbs through beautiful subalpine terrain past Dog Lake and up a broad ridge to the summit, which anchors the ridge connecting several prominent Big Cottonwood peaks. It is also a natural connector to Catherine Pass and Lake Mary, making Sunset Peak an easy launchpad for a longer ridge day if energy allows.

    🗺 View Trail on AllTrails

    3. Mount Raymond — 10,241 ft

    3Mount Raymond
    ModerateMillcreek Canyon
    10,241 ft
    Summit
    ~2,500 ft
    Gain
    7.2 mi
    Round Trip
    7,750 ft
    Trailhead Elev.

    Mount Raymond is the highest summit accessible from Millcreek Canyon and one of the more satisfying moderate summits in northern Utah. The Butler Fork approach winds through dense aspen and fir forest before opening onto the upper ridge with sweeping views of the Salt Lake Valley and beyond. It features on both this challenge and our Top 10 Peaks in Salt Lake County guide, which is a testament to its quality — Raymond delivers a genuine 10,000-foot summit experience with more straightforward logistics than any comparable objective in the adjacent canyons. Strong hikers can extend the day by continuing the ridge to Gobbler’s Knob.

    🗺 View Trail on AllTrails

    4. Frary Peak — 6,596 ft

    4Frary Peak — Antelope Island
    ModerateUnique: Great Salt Lake
    6,596 ft
    Summit
    ~2,100 ft
    Gain
    ~7.0 mi
    Round Trip
    4,500 ft
    Trailhead Elev.

    Frary Peak is the most distinctive summit on the GOAT list — not because of its elevation, which is the lowest of the seven, but because of its setting. As the highest point on Antelope Island in the middle of the Great Salt Lake, Frary delivers one of the genuinely unusual summit experiences in Utah: all-direction views over a vast inland sea, bison roaming the slopes below, and a summit ridge that feels genuinely remote despite being minutes from the Salt Lake metro. The trail involves some exposed scrambling near the top and is fully above treeline for much of its length, making it a windier and more committing objective than its modest elevation suggests.

    • Antelope Island State Park entrance fee applies — approximately $15 per vehicle
    • Bison are present on the island — maintain distance at all times
    • No shade above the parking area — sun and wind exposure is significant
    • The summit scramble is exposed; poles stowed for the final section
    🗺 View Trail on AllTrails

    5. Deseret Peak — 11,031 ft

    5Deseret Peak
    Moderate–HardStansbury Mountains
    11,031 ft
    Summit
    ~3,300 ft
    Gain
    ~9.0 mi
    Round Trip
    7,700 ft
    Trailhead Elev.

    Deseret Peak is the highest summit in the Stansbury Mountains of Tooele County and one of the most remote and rewarding peaks on the entire GOAT list. While it lies west of the main Wasatch Front rather than in the central Wasatch, its isolation means dramatically less foot traffic and a summit that still feels genuinely earned. The approach follows the Stansbury Loop through a high alpine basin before a steeper push to the summit ridge. Views from the top extend to the Great Salt Lake in one direction and deep into the Nevada desert in the other — a panorama available from almost no other peak this close to Salt Lake City.

    • Requires a longer drive than the Wasatch peaks — plan 45–60 minutes from Salt Lake City to the trailhead
    • Far less crowded than any Cottonwood Canyon equivalent
    • Snow can persist on the upper north-facing slopes into June most years
    🗺 View Trail on AllTrails
    Mount Timpanogos summit rising above Utah Valley — the crown jewel of the Wasatch Range and the heart of the Timpanogos Hiking Co. challenge
    Mount Timpanogos — at 11,753 ft, Timp is the centerpiece of the entire badge tradition and the defining summit of Utah Valley. Timpooneke Trail on AllTrails →

    6. Mount Nebo — 11,933 ft

    6Mount Nebo — Tallest Wasatch Peak
    HardSouth Wasatch · Juab County
    11,933 ft
    Summit
    ~5,400 ft
    Gain
    ~12.0 mi
    Round Trip
    6,500 ft
    Trailhead Elev.

    Mount Nebo is the tallest peak in the entire Wasatch Range at 11,933 feet and one of the most demanding day hikes in Utah. Sitting at the range’s southern terminus above the town of Nephi, Nebo is geographically isolated from the central Wasatch cluster — which makes it feel like a genuine expedition rather than a weekend hike. The North Peak approach is the standard route, gaining over 5,000 feet through rugged terrain to a narrow, wind-battered summit ridge. The summit — technically a multi-topped massif — has views extending from the Utah Valley all the way to the Uintas on clear days. Nebo demands respect: it is a full, hard mountain day by any measure and should not be attempted without a proper early start.

    • Full summit day: plan for 8–10 hours round trip for most parties
    • The southern terminus of the Wasatch makes weather patterns slightly different than northern peaks — check forecasts specific to Juab County
    • Late season access: the trailhead road typically opens in late June; verify before planning
    • Snow on the upper ridge can persist well into July in heavy snow years
    🗺 View Trail on AllTrails

    7. Mount Timpanogos — 11,753 ft

    7Mount Timpanogos — The Crown Jewel
    HardThe Badge Origin Peak
    11,753 ft
    Summit
    ~4,900 ft
    Gain (Timpooneke)
    ~16 mi
    Round Trip
    6,900 ft
    Trailhead Elev.

    Mount Timpanogos is the soul of the entire challenge — the peak this tradition was born on, the mountain that looms over Utah Valley, and the reason Joseph Vogel named his company what he did. Approaching 11,800 feet, Timp is the second-highest peak in the Wasatch Range and one of the most beautiful and demanding day hikes in the American West. The two main routes — Timpooneke from the American Fork Canyon side, and Aspen Grove from the Provo Canyon side — are both long, sustained, and breathtaking. The summit plateau is marked by a historic stone shelter, and on clear days the views stretch from the Great Salt Lake to the Uinta Range to the mountains of central Utah far to the south.

    This is the peak the badge tradition was designed around, and completing the GOAT Challenge culminates here for good reason. Timp takes planning, fitness, and an early start. Both trailheads require timed-entry permits on weekends and holidays, bookable through Recreation.gov. Arrive before 6 AM if possible — parking is limited and the mountain draws thousands of visitors on summer weekends.

    • Timed-entry permits required on weekends and holidays — book on Recreation.gov
    • $10 trailhead fee applies at both Timpooneke and Aspen Grove
    • Start by 5–6 AM for summit safety and parking; strong storms develop by early afternoon in July–August
    • Mountain goats are commonly spotted near Emerald Lake and the upper ridge — give them distance
    🗺 Timpooneke Trail on AllTrails   🗺 Aspen Grove Trail on AllTrails
    3

    The Escape the Noise Challenge: 8 Destinations

    The Escape the Noise Challenge was introduced to make the badge program accessible to hikers who want a rewarding outdoor experience without the extreme elevation demands of the GOAT peaks. These eight destinations span waterfalls, alpine lakes, iconic valley overlooks, and landmark trails — ranging from a short urban foothills scramble to a stunning Little Cottonwood Canyon glacial lake. Any of them can be done as a half-day adventure, and all are appropriate for families and newer hikers.

    2026 Escape the Noise: Full Destinations List

    Timpanogos Cave · Lake Blanche · Battle Creek Falls · The Y · The Living Room · Adam’s Canyon · Cecret Lake · Primrose Overlook

    1Timpanogos Cave National Monument

    A guided cave tour inside one of Utah’s most impressive cavern systems in American Fork Canyon. The approach hike climbs steeply to the cave entrance through dramatic canyon walls — the hike alone is worth the trip, and the cave interior is genuinely stunning. Timed entry required through Recreation.gov; cave tours sell out weeks in advance in summer.

    Book Cave Tour (NPS) ↗
    2Lake Blanche — Big Cottonwood Canyon

    One of the most photographed alpine lakes in Utah, Lake Blanche sits in a dramatic quartzite cirque below Sundial Peak in Big Cottonwood Canyon. The 2,700-foot gain from the trailhead is no casual walk, but the lake itself — deep blue, ringed by towering walls — is a genuine destination. Canyon day-use fee applies.

    View Trail on AllTrails ↗
    3Battle Creek Falls — Pleasant Grove

    A short, family-friendly trail in Pleasant Grove that climbs to a seasonal waterfall in the foothills directly above Utah Valley. One of the most accessible Wasatch hikes for young children or those new to trail hiking. The falls are at their best in May and June from snowmelt.

    View Trail on AllTrails ↗
    4The Y — Provo / BYU

    The iconic rock “Y” above Brigham Young University is perhaps Provo’s most recognizable hike — a steep, switchbacked 1,000-foot climb with commanding views of the entire Utah Valley. Fast, accessible, and historically connected to the original Timp Badge tradition. This also served as the bonus badge destination in the 2024 challenge.

    View Trail on AllTrails ↗
    5The Living Room — Salt Lake City Foothills

    A classic SLC urban hike that climbs through the Red Butte area to a collection of large stone slabs arranged like furniture — hence the name. Short, accessible, and gives one of the best city-and-valley views available without driving into a canyon. A perfect warm-up hike or quick-after-work objective for Salt Lake City residents.

    View Trail on AllTrails ↗
    6Adam’s Canyon — Layton / Davis County

    A scenic canyon trail in northern Davis County that leads to a 40-foot waterfall deep in a narrow sandstone gorge. The canyon feels wild and remote despite being minutes from Layton and Ogden. The trail involves some boulder scrambling near the falls — waterproof footwear recommended in spring.

    View Trail on AllTrails ↗
    7Cecret Lake — Little Cottonwood Canyon

    A short but spectacular trail in the Albion Basin above Alta Ski Resort that reaches a pristine alpine lake surrounded by the highest peaks in Salt Lake County. The Albion Basin wildflower meadows in July and August are among the finest in Utah. Canyon fee and potential timed-entry restrictions apply — check current access before visiting.

    View Trail on AllTrails ↗
    8Primrose Overlook — Provo Canyon

    A beautiful viewpoint hike in Provo Canyon above the Bridal Veil Falls area that delivers sweeping views of the canyon, Deer Creek Reservoir, and the surrounding Wasatch peaks. Less traveled than many comparable Wasatch destinations, making it a quiet and rewarding half-day objective from Utah County.

    View Trail on AllTrails ↗
    Mount Nebo — at 11,933 ft the tallest peak in the Wasatch Range, viewed from the south — a defining objective in the 2026 GOAT Challenge
    Mount Nebo — the southernmost and tallest peak in the Wasatch Range, and one of the most committing full-day objectives in the GOAT Challenge. Mount Nebo Trail on AllTrails →
    4

    Planning Your 2026 Challenge Attempt

    Build a Smart Completion Order

    If you’re attempting to complete the full GOAT Challenge, sequence matters. Start with Kyhv Peak and Mount Raymond — both are moderate in difficulty and will begin calibrating your fitness and canyon logistics for the harder objectives ahead. Sunset Peak and Frary Peak make excellent mid-season milestones. Save Mount Nebo and Mount Timpanogos for late summer when you’re trail-fit and familiar with early alpine starts. Deseret Peak can be slotted in as a change-of-pace objective when you want solitude and a different landscape.

    Thunderstorms: The Universal Rule

    Every GOAT peak above 9,000 feet is exposed to serious afternoon lightning risk from mid-July through early September. The rule is non-negotiable: plan your ascent to have you descending below treeline by noon. For long objectives like Mount Nebo and Mount Timpanogos, this requires pre-dawn starts. Check the National Weather Service forecast the evening before and again on the morning of your climb.

    Permits and Fees to Know Before You Go

    Several 2026 challenge locations have fee and permit requirements that require advance planning. Mount Timpanogos has timed-entry permits for both trailheads on weekends and holidays — these must be reserved through Recreation.gov and frequently sell out days in advance. Big and Little Cottonwood Canyons both have per-vehicle day-use fees. Antelope Island requires a state park entrance fee. Timpanogos Cave requires separate cave tour tickets, also through Recreation.gov. Plan your logistics before arrival, especially for weekend attempts in summer.

    The “Give Back” Badge

    In addition to the 15 main badges, a bonus “Give Back” badge is available exclusively at Pando Refitters, located directly across the street from Timpanogos Hiking Co. at 252 N. University Ave. in Provo. Make a $20 donation to one of the non-profits working to preserve Utah’s wild spaces, and you’ll receive this exclusive badge. It’s a tangible way to contribute to the trails and mountains you’re spending your summer on.

    Tools to Sharpen Your Planning

    Fitness Assessment Checklist

    Before committing to Mount Nebo or Timpanogos, use this tool to gauge your current fitness against the demands of a 5,000+ foot gain day at altitude. Identifying gaps early saves summit days.

    Open Checklist →
    ⛰️

    Peak Comparison Tool

    Wondering how GOAT Challenge peaks like Mount Nebo and Timpanogos compare to other prominent objectives in Utah, Colorado, or the Cascades? Use this tool to benchmark them by elevation, difficulty, and technical demands.

    Open Tool →
    📅

    Acclimatization Schedule Builder

    Visiting Utah from a lower-elevation home base and planning to tackle multiple GOAT peaks in a single trip? The Acclimatization Builder helps you sequence days to peak at your best on your hardest objectives.

    Open Builder →

    More Utah Peak Challenges on Global Summit Guide

    The Timpanogos Hiking Co. Challenge is one of several Utah-specific peak-bagging programs worth knowing about. Here are the related challenges and guides on this site:

    Peak Bagging
    Wasatch Range Peak Guide
    Full guide to the Wasatch Range’s most prominent summits — history, difficulty, seasons, and route overviews for the range’s defining peaks.
    Read Guide →
    Utah Challenges
    Utah 13ers
    Utah’s peaks above 13,000 feet — a small but elite list anchored by Kings Peak, the state’s highest summit and a GOAT Challenge veteran peak.
    Explore Utah 13ers →
    Regional Challenge
    Six-Pack of Peaks Challenge
    The self-guided Utah Six-Pack of Peaks challenge features six iconic Utah summits including Mount Nebo and Timpanogos — an excellent complement to the GOAT badge program.
    Learn More →
    US Challenge
    50 State High Points
    Kings Peak — featured in the original Timpanogos Ten Peak Challenge — is Utah’s state high point. It’s one of the more challenging state summits in the contiguous US.
    Explore Highpoints →
    Salt Lake County
    Top 10 Peaks in Salt Lake County
    Several 2026 GOAT peaks — Mount Raymond, Sunset Peak, and Frary Peak — overlap with our guide to Salt Lake County’s best summer climbs. Get full route detail here.
    Read Salt Lake Guide →
    Peak Bagging
    All Utah Peak Challenges
    Browse the full directory of Utah peak-bagging challenges and summit lists on Global Summit Guide — from county highpoints to Wasatch 11ers and beyond.
    View All Challenges →
    Disclaimer: This guide is for informational and planning purposes only. Always verify current trail conditions, permit requirements, and trailhead access with the Uinta-Wasatch-Cache National Forest and relevant land managers before your hike. Badge availability, challenge rules, and program details are set by Timpanogos Hiking Co. — visit timpanogoshiking.com for the most current official information.

  • 10 Best Peaks to Climb in Salt Lake County This Summer

    10 Best Peaks to Climb in Salt Lake County This Summer

    10 Best Peaks to Climb in Salt Lake County: Complete 2026 Ranking | Global Summit Guide
    Cluster 11 · Japan & Local · Updated April 2026

    10 Best Peaks to Climb in Salt Lake County This Summer

    The definitive 2026 ranked list of Salt Lake County’s ten finest summits — from the accessible Grandeur Peak to the iconic Pfeifferhorn scramble and Twin Peaks, the county’s highest point. Each peak earns its rank through a combination of scenic reward, technical interest, and the distinctive hiking experience it offers in the central Wasatch.

    10
    Ranked
    peaks
    8,299–11,330 ft
    Elevation
    range
    5–14 hrs
    Duration
    range
    Jun–Oct
    Hiking
    season
    Global Summit Guide A guide in Cluster 11 · Japan & Local View master hub →

    Salt Lake County contains some of North America’s most accessible mountain peaks — trailheads 20-35 minutes from downtown, 30+ distinct summits, and elevation gains of 5,000+ feet available on the same day as office work. This ranked list covers ten peaks that deserve your attention, ordered by overall hiking experience quality. The ranking weighs scenic reward, technical interest, accessibility, iconic status, and fitness challenge — not just elevation. Serious hikers might re-rank these, and that’s part of the fun. Work through this list over a summer and you’ll have experienced the full range of what the central Wasatch offers.

    How we ranked these peaks

    Ranking weighs five factors equally: scenic reward (summit views and trail aesthetics), technical interest (scrambling variety and route-finding), accessibility (drive time from SLC and trailhead logistics), iconic status (local reputation and hiking community recognition), and fitness challenge balance (reasonable commitment for reward). Elevation data from US Geological Survey topographic database. Trail statistics confirmed against Uinta-Wasatch-Cache National Forest management records. Reviewed by Wasatch hiking guides and Wasatch Mountain Club members. Geographic boundaries follow Salt Lake County limits — see our Utah County peak guide for peaks in the neighboring southern Wasatch. Fact-check date: April 19, 2026.

    Before the List: How to Use This Ranking

    This ranking is designed as a progressive journey, not a difficulty scale. Peak #10 (Grandeur) is ranked lower because it’s the easiest entry point — but that doesn’t mean it’s less worthwhile. Peak #1 (Twin Peaks South) is the ultimate Salt Lake County achievement for most hikers, but it requires experience developed through peaks 4-9 first.

    How to work through the list

    • First-time SLC hikers: Start at #10 (Grandeur Peak). Build progressively.
    • Experienced hikers new to SLC: Jump in at #7-8 (Sunset, Raymond) to match your fitness level.
    • Salt Lake veterans: Work on peaks you haven’t done, especially the higher-ranked ones.
    • Seven Peaks Challenge participants: Mix and match — many SLC Seven Peaks overlap with this list.
    • Fitness progression: Never jump more than 3-4 rank spots without appropriate training. Pfeifferhorn (#2) as your first serious hike is a common dangerous mistake.

    Each peak profile includes ranked position, elevation, difficulty tier, stats, and why it earned its rank. Complete them systematically and you’ll develop the full skill set the Wasatch demands.


    The Ranking: Counting Down from 10 to 1

    Rank
    10
    of 10
    Moderate

    Grandeur Peak

    Mill Creek Canyon · SLC classic · Most accessible moderate peak
    8,299 ft
    Elevation

    Grandeur earns #10 by being the perfect first-mountain peak for Salt Lake hikers — challenging enough to feel like a real accomplishment, accessible enough to do before work. Multiple approaches from Mill Creek Canyon offer flexibility. The Church Fork approach is most popular; West Ridge offers a longer, more scenic option.

    Why we love it: the summit delivers panoramic views of Salt Lake Valley and the central Wasatch. Grandeur is many local hikers’ first big peak — the natural entry point to the ranked list. It’s lower-ranked only because the experience feels familiar to experienced hikers; for newcomers, it’s essential.

    Distance6 mi RT
    Elev gain2,500 ft
    Duration4-5 hrs
    AccessMill Creek
    $5 canyon fee Dog-friendly odd days Year-round (microspikes winter)
    Rank
    9
    of 10
    Moderate

    Mount Aire

    Mill Creek Canyon · Meadow approach · Excellent intermediate peak
    8,621 ft
    Elevation

    Mount Aire takes #9 for being the natural progression from Grandeur — slightly higher, slightly longer, with a more varied approach. The Elbow Fork trailhead in Mill Creek Canyon leads up through forest and meadows to a definitive summit with outstanding central Wasatch views.

    What distinguishes Aire: the meadow sections in the middle of the climb feel like true alpine terrain rather than Wasatch foothills. Wildflower display in July-August is excellent. The summit itself is a grassy dome rather than a rocky peak, offering easy summit lounging. Perfect second mountain peak for progressing hikers.

    Distance7 mi RT
    Elev gain2,000 ft
    Duration4-5 hrs
    AccessMill Creek
    $5 canyon fee Wildflowers July-Aug Accessible mid-June to Oct
    Rank
    8
    of 10
    Moderate

    Sunset Peak

    Brighton basin · 10K+ ft at moderate distance · Wildflowers
    10,648 ft
    Elevation

    Sunset Peak ranks #8 for being the easiest path to a 10,000+ foot summit in Salt Lake County. Starting from Brighton at 8,755 ft eliminates most of the elevation gain other high peaks demand. Wildflower meadows throughout the approach, three alpine lakes (Lake Catherine, Lake Martha, Lake Mary) on the traverse, gentle ridge walking to the summit.

    The magic: you stand on a 10,648-foot summit with panoramic views of Park City, Brighton basin, and the central Wasatch after only 2.5 miles of moderate hiking. Sunset Peak delivers high-altitude reward for intermediate effort. Perfect introduction to the sensation of real altitude hiking without the commitment of peaks 1-7.

    Distance5 mi RT
    Elev gain1,600 ft
    Duration3-4 hrs
    AccessBrighton
    No fee Easiest 10K+ peak July-Sept season
    Rank
    7
    of 10
    Strenuous

    Mount Raymond

    Butler Fork · Classic ridge peak · Often paired with Gobblers
    10,241 ft
    Elevation

    Mount Raymond earns #7 by offering genuine Wasatch ridge hiking without the commitment of expert-tier peaks. The Butler Fork approach from Big Cottonwood Canyon winds through forest to a high ridge, then traverses along increasingly dramatic exposures to Raymond’s defined summit. Classic central Wasatch hiking.

    Why it ranks strong: the ridge walk between forest and summit delivers one of SLC’s best mountaineering-like experiences without technical scrambling. Many hikers combine Raymond with neighboring Gobblers Knob (#6) on a single loop, creating a full-day adventure that captures the Wasatch’s intermediate personality. This pair represents the transition from moderate to serious hiking in our ranking.

    Distance11 mi RT
    Elev gain3,600 ft
    Duration7-9 hrs
    AccessBig Cottonwood
    No fee Pair with Gobblers July-Oct season
    Rank
    6
    of 10
    Strenuous

    Gobblers Knob

    Mill Creek or Big Cottonwood · Iconic exposed summit
    10,246 ft
    Elevation

    Gobblers Knob ranks #6 for offering a more dramatic summit experience than its near-twin Mount Raymond. Only 5 feet taller but considerably more exposed — Gobblers has a narrower, more distinctive summit with prominent views in all directions. Approach via Mill Creek (Alexander Basin) or Big Cottonwood (Butler Fork).

    What distinguishes Gobblers: the final summit approach involves real exposure and a sense of mountaineering commitment. The peak’s name (“Gobblers”) supposedly refers to turkeys, though local lore varies. Either way, standing on the knob with Mount Raymond’s pyramid visible across the valley delivers a classic Wasatch moment. Pair this with Raymond for a comprehensive double-summit day.

    Distance11 mi RT
    Elev gain3,500 ft
    Duration7-9 hrs
    AccessMill Creek or BCC
    Exposed summit Pair with Raymond July-Oct season
    Rank
    5
    of 10
    Expert

    Dromedary Peak

    Big Cottonwood · Technical scramble · Central SLC County
    11,107 ft
    Elevation

    Dromedary crosses the threshold into expert territory as our #5 pick. This genuinely technical peak in Broads Fork (Big Cottonwood) requires class 3 scrambling, route-finding skills, and sustained commitment. The camel-hump summit profile (hence the name) creates the distinctive dromedary shape visible from across the valley.

    Why it earns rank #5: Dromedary delivers the first taste of real mountaineering on our ranked list — the approach through Broads Fork, the technical summit scramble, the sense of route-finding through talus fields. Unlike Pfeifferhorn’s exposed knife edge, Dromedary’s scrambling is more compact but technically demanding. Essential preparation peak before attempting #1-3.

    Distance12 mi RT
    Elev gain5,000 ft
    Duration9-12 hrs
    AccessBig Cottonwood
    Class 3 scramble Route-finding required July-Sept season
    Rank
    4
    of 10
    Strenuous

    Mount Olympus

    East bench · SLC’s iconic peak · Most popular major summit
    9,026 ft
    Elevation

    Mount Olympus ranks #4 despite its modest 9,026 ft elevation because it’s the most iconic peak in Salt Lake County — visible from virtually every part of the valley, accessible from the east bench in 15 minutes, and achievable on a long day. The Olympus Trail delivers a relentless 4,200 ft grade to the summit scramble.

    What pushes Olympus to #4 (not lower): the scramble to the summit is the first real technical challenge most SLC hikers encounter. Class 2-3 moves with moderate exposure, summit views sweeping from Great Salt Lake to the Uintas, and the satisfaction of topping out on the mountain you’ve looked at from the valley for years. The local rite of passage peak. Lower-ranked only because the difficulty-to-elevation ratio feels heavy.

    Distance7 mi RT
    Elev gain4,200 ft
    Duration6-8 hrs
    AccessWasatch Blvd
    No fee Summit scramble June-Oct season
    Rank
    3
    of 10
    Expert

    Sunrise Peak

    Little Cottonwood · Dawn perfection · Less-crowded gem
    11,275 ft
    Elevation

    Sunrise Peak earns #3 for being the connoisseur’s Little Cottonwood peak — less-trafficked than Pfeifferhorn or Twin Peaks, equally spectacular, and named for optimal sunrise viewing angles. The White Pine Lake approach winds through classic alpine terrain to a summit that aligns dramatically with dawn light across the valley.

    Why #3: Sunrise Peak delivers nearly all the reward of the top two peaks with slightly less commitment. Strong hikers who’ve completed Dromedary and Olympus are ready for Sunrise as their first 11,000+ foot scramble. Plan a pre-dawn start for sunrise at the summit — watching the sun emerge over the Uintas while Lone Peak and Twin Peaks catch first light is one of Utah’s finest mountain experiences. The hiking community’s quiet favorite.

    Distance12 mi RT
    Elev gain5,000 ft
    Duration9-12 hrs
    AccessLittle Cottonwood
    No dogs (watershed) Sunrise viewing gem July-Sept only
    Rank
    2
    of 10
    Expert

    Pfeifferhorn

    Little Cottonwood · Class 3 scramble · SLC County icon
    11,326 ft
    Elevation

    Pfeifferhorn ranks #2 as the most iconic scramble peak in Salt Lake County — the hike that serious SLC hikers dream about, train for, and remember forever. The Red Pine Lake approach, the knife-edge summit ridge, the exposed final scramble combine for one of Utah’s most memorable mountain experiences.

    Why #2 and not #1: Pfeifferhorn is 4 feet shorter than Twin Peaks South — an utterly trivial technical difference, but relevant for the “highest peak in SLC County” ranking. Experientially, many hikers rank Pfeifferhorn #1 for its sustained class 3 scrambling and dramatic summit. The ridge traverse demands composure with significant exposure on both sides. Do not attempt Pfeifferhorn as your first SLC scramble — complete Dromedary, Olympus scramble, and ideally Sunrise first. The Red Pine Lake basin views and summit panorama reward the commitment.

    Distance10 mi RT
    Elev gain4,500 ft
    Duration10-13 hrs
    AccessLittle Cottonwood
    Sustained class 3 Significant exposure July-Sept only
    Rank
    1
    of 10
    Expert

    Twin Peaks (South)

    Twin Peaks Wilderness · SLC County’s highest · The ultimate
    11,330 ft
    Elevation

    Twin Peaks South ranks #1 as the highest peak entirely within Salt Lake County and one of the most committing hikes in the central Wasatch. The Deaf Smith Canyon or Broads Fork approach climbs through increasingly dramatic terrain to a summit that represents the county’s true high point.

    Why it earns #1: Twin Peaks South combines elevation supremacy, sustained difficulty, and route-finding challenge in the ultimate SLC County package. 5,500 ft of gain across 13 miles with class 2-3 scrambling through talus and ridge terrain. The summit view encompasses the entire Wasatch panorama, Great Salt Lake to the west, Uintas east, and Park City range north. Most hikers complete Twin Peaks only after years of Wasatch experience — this is the graduation peak. The achievement carries significant local prestige among Utah hiking community. Serious preparation essential: complete the lower-ranked peaks first, choose weather wisely, plan for 12+ hours, start before dawn.

    Distance13 mi RT
    Elev gain5,500 ft
    Duration11-14 hrs
    AccessLittle Cottonwood
    SLC County high point Class 2-3 sustained Aug-Sept optimal

    Honorable Mentions: Peaks That Nearly Made the List

    Several Salt Lake County peaks deserve recognition even though they didn’t earn a top-10 slot. These are excellent additions for hikers working through the list who want variety beyond the ranking:

    Mount Wire

    7,143 ft · 6 mi RT

    Excellent beginner mountain. Lower rank only because it’s more of a foothill than a true peak. Great for first-time SLC hikers.

    White Baldy

    11,321 ft · 12 mi RT

    Near-equal to top peaks but less iconic. Class 2-3 ridge from Red Pine Lake basin. Often combined with Red Baldy.

    Red Baldy

    11,171 ft · 11 mi RT

    Ridge traverse peak near White Baldy. Moderately technical, less trafficked than primary peaks.

    Ensign Peak

    5,417 ft · 1 mi RT

    Historical significance (first Pioneer view of Salt Lake Valley). Too short for list ranking but essential SLC hiking experience.

    Clayton Peak

    10,721 ft · 5 mi RT

    Brighton basin peak accessible from ski area. Similar experience to Sunset Peak but slightly higher.

    Lone Peak

    11,253 ft · 15 mi RT

    Spans SLC/Utah county boundary. Ultimate ultra challenge. See Utah County peaks.


    Top 10 Quick Comparison

    RankPeakElevationDistanceDifficultyDuration
    1Twin Peaks (South)11,330 ft13 miExpert11-14 hrs
    2Pfeifferhorn11,326 ft10 miExpert10-13 hrs
    3Sunrise Peak11,275 ft12 miExpert9-12 hrs
    4Mount Olympus9,026 ft7 miStrenuous6-8 hrs
    5Dromedary Peak11,107 ft12 miExpert9-12 hrs
    6Gobblers Knob10,246 ft11 miStrenuous7-9 hrs
    7Mount Raymond10,241 ft11 miStrenuous7-9 hrs
    8Sunset Peak10,648 ft5 miModerate3-4 hrs
    9Mount Aire8,621 ft7 miModerate4-5 hrs
    10Grandeur Peak8,299 ft6 miModerate4-5 hrs
    Don’t skip ranks

    The ranking represents a progression of skill and commitment. Starting with Pfeifferhorn (#2) as your first SLC peak is a common dangerous mistake — the exposure, altitude, and sustained class 3 scrambling requires foundations built on lower-ranked peaks. Recommended progression: complete at least 3-4 peaks in tiers moderate/strenuous (#6-10) before attempting any expert-tier peak (#1-3, 5). Pfeifferhorn and Twin Peaks South require multiple prior Wasatch experiences. See our mountaineering for beginners guide for skill progression fundamentals.


    Salt Lake County Peaks FAQ: Your Common Questions Answered

    What is the highest peak in Salt Lake County?

    The highest peak entirely within Salt Lake County is Twin Peaks (South), at 11,330 feet (3,453 meters). Located in the Twin Peaks Wilderness above Little Cottonwood Canyon, it’s a challenging class 2-3 scramble peak requiring significant fitness and commitment. Key details about Twin Peaks (South): (1) Elevation: 11,330 feet. (2) Location: Twin Peaks Wilderness, accessible from Little Cottonwood Canyon (Deaf Smith Canyon or Broads Fork approaches). (3) Distance: Approximately 13 miles round trip via most routes. (4) Elevation gain: Approximately 5,500 feet. (5) Duration: 10-14 hours typical. (6) Technical rating: Class 2-3 scrambling required, no roped climbing. (7) Difficulty: Expert-level due to length, elevation gain, and exposure. Other high peaks in or accessible from SLC County: (8) Pfeifferhorn (11,326 ft) — Class 3 scramble peak. (9) Sunrise Peak (11,275 ft) — Little Cottonwood accessed. (10) Lone Peak (11,253 ft) — Spans Salt Lake and Utah counties, often attributed to SLC. (11) American Fork Twin Peaks (11,433 ft) — Technically on SLC/Utah county border. (12) White Baldy (11,321 ft) — Little Cottonwood ridge peak. (13) Dromedary Peak (11,107 ft) — Little Cottonwood, notably technical. The southern Wasatch has higher peaks (Mount Nebo 11,928 ft, Mount Timpanogos 11,752 ft) but these sit in Juab and Utah counties respectively, not Salt Lake County. Twin Peaks (South) holds the SLC County elevation crown by a narrow margin over Pfeifferhorn.

    What are the top 10 best peaks in Salt Lake County?

    The top 10 best peaks in Salt Lake County, ranked by overall hiking experience combining accessibility, scenic reward, difficulty variety, and iconic status: (1) Twin Peaks (South) — 11,330 ft. Highest peak in SLC County, challenging scramble, ultimate bragging rights. (2) Pfeifferhorn — 11,326 ft. Iconic class 3 scramble, dramatic narrow summit, elite Wasatch achievement. (3) Sunrise Peak — 11,275 ft. Little Cottonwood gem, spectacular sunrise views, less crowded alternative to Twin Peaks. (4) Mount Olympus — 9,026 ft. SLC’s iconic east bench peak, short scramble summit, most popular major peak. (5) Dromedary Peak — 11,107 ft. Technical scramble, central SLC County, dramatic ridge route. (6) Gobblers Knob — 10,246 ft. Classic Mill Creek peak, often paired with Raymond. (7) Mount Raymond — 10,241 ft. Butler Fork access, excellent ridge hike with loop options. (8) Sunset Peak — 10,648 ft. Brighton basin peak, wildflower meadows, achievable high peak. (9) Mount Aire — 8,621 ft. Mill Creek accessible summit, solid mid-tier challenge. (10) Grandeur Peak — 8,299 ft. Beloved SLC classic, multiple approach options, excellent starter mountain. This ranking weighs: scenic reward, technical interest, access convenience, iconic status, and fitness challenge balance. Individual rankings vary — serious hikers might rank Pfeifferhorn or Sunrise above Twin Peaks for experience quality over pure elevation.

    How do Salt Lake County peaks rank by difficulty?

    Salt Lake County peaks span from easy 1-hour hikes to 14-hour expert scrambles. Difficulty ranking from easiest to hardest: Beginner-friendly: (1) Ensign Peak (5,417 ft) — 1 mile RT, 400 ft gain, 1 hour. (2) Living Room (6,200 ft) — 2.5 miles RT, 1,000 ft gain, 2 hours. (3) Mount Wire (7,143 ft) — 6 miles RT, 1,800 ft gain, 3-4 hours. Moderate: (4) Grandeur Peak (8,299 ft) — 6 miles RT, 2,500 ft gain, 4-5 hours. (5) Mount Aire (8,621 ft) — 7 miles RT, 2,000 ft gain, 4-5 hours. (6) Sunset Peak (10,648 ft) — 5 miles RT, 1,600 ft gain, 3-4 hours. Strenuous: (7) Mount Olympus (9,026 ft) — 7 miles RT, 4,200 ft gain, 6-8 hours. (8) Mount Raymond (10,241 ft) — 11 miles RT, 3,600 ft gain, 7-9 hours. (9) Gobblers Knob (10,246 ft) — 11 miles RT, 3,500 ft gain, 7-9 hours. Expert: (10) Dromedary Peak (11,107 ft) — 12 miles RT, 5,000 ft gain, class 3 scrambling, 9-12 hours. (11) Sunrise Peak (11,275 ft) — 12 miles RT, 5,000 ft gain, 9-12 hours. (12) Pfeifferhorn (11,326 ft) — 10 miles RT, 4,500 ft gain, class 3 exposed scramble, 10-13 hours. (13) Twin Peaks South (11,330 ft) — 13 miles RT, 5,500 ft gain, 11-14 hours. (14) Lone Peak (11,253 ft, straddles counties) — 15 miles RT, 5,700 ft gain, 11-14 hours. Key difficulty factors: distance, elevation gain, technical scrambling, altitude effects, route-finding complexity. Start with lower tiers and progress upward as your fitness and experience grow.

    Is Pfeifferhorn harder than Mount Olympus?

    Yes, Pfeifferhorn is significantly harder than Mount Olympus — a notable step up in commitment, technical scrambling, and exposure. Side-by-side comparison: Mount Olympus: (1) Elevation 9,026 ft. (2) Distance 7 miles RT. (3) Gain 4,200 ft. (4) Duration 6-8 hours. (5) Technical: Class 2-3 scramble on final 0.3 miles. (6) Exposure: Moderate near summit. (7) Route-finding: Well-marked trail, summit scramble obvious. Pfeifferhorn: (1) Elevation 11,326 ft (2,300 ft higher). (2) Distance 10 miles RT. (3) Gain 4,500 ft. (4) Duration 10-13 hours. (5) Technical: Sustained class 3 scrambling along exposed ridgeline for final 0.5 miles. (6) Exposure: Significant exposure on narrow ridge sections with dropoffs on both sides. (7) Route-finding: Red Pine Lake approach, then off-trail ridge scramble to summit. Why Pfeifferhorn is much harder: (8) Altitude effects — The 2,300 ft elevation difference creates meaningful thin-air conditions on Pfeifferhorn. (9) Sustained exposure — Olympus scramble is brief (0.3 miles); Pfeifferhorn exposure extends nearly 0.5 miles along the summit ridge. (10) Route-finding challenge — Pfeifferhorn requires following sometimes-faint boot paths across talus fields. (11) Time commitment — Pfeifferhorn is typically 10-13 hours vs. 6-8 for Olympus. (12) Mental challenge — Pfeifferhorn’s ‘knife edge’ sections near summit require composure with significant fall potential. Recommended progression: Complete Mount Olympus first to gauge your comfort with summit scrambling and exposure. If Olympus feels comfortable, you’re ready to train toward Pfeifferhorn. If Olympus scramble felt concerning, do not attempt Pfeifferhorn — the exposure is dramatically greater.

    Which Salt Lake County peak has the best views?

    Multiple Salt Lake County peaks offer extraordinary views — ‘best’ depends on which direction and which landmarks you prioritize. Top view-awarded peaks: (1) Mount Olympus (9,026 ft) — The iconic valley view. Summit directly overlooks Salt Lake Valley with the entire Salt Lake City spread below, Great Salt Lake visible west, Oquirrh Mountains across the valley. Closest major peak to downtown SLC creates dramatic urban-nature juxtaposition. Best sunset peak. (2) Pfeifferhorn (11,326 ft) — Wasatch high-country panorama. 360-degree views of Little Cottonwood Canyon, Snowbird basin, Alta basin, and entire central Wasatch ridge. Red Pine Lake visible directly below. Advanced peak earns dramatic reward. (3) Twin Peaks South (11,330 ft) — Eastern Wasatch views. Highest peak entirely in SLC County, views include Park City mountain range east, central Wasatch north and south. (4) Grandeur Peak (8,299 ft) — Mill Creek Canyon and valley views. Best balance of accessibility and scenic reward. Sunrise and sunset spectacular. (5) Sunrise Peak (11,275 ft) — Dawn photography perfection. Named for its optimal sunrise viewing — Lone Peak, Twin Peaks, and valley sunrise align dramatically. (6) Mount Wire (7,143 ft) — Urban panorama. Direct city views with Wasatch Front context. Best for understanding SLC geography. (7) Lone Peak (11,253 ft) — Commanding central Wasatch view. Remote-feeling summit despite urban proximity. Great Salt Lake visible in distance. Photography recommendations: Bring telephoto for distant landmarks, wide angle for summit panorama, sunrise timing for best light on west-facing views, sunset timing for east-facing views. Most hikers discover their favorite view-peak after hiking 4-5 SLC peaks.

    Are Salt Lake County peaks safe to hike?

    Salt Lake County peaks are generally safe for prepared hikers but contain real mountain hazards that cause injuries and fatalities annually. Primary safety considerations: (1) Afternoon thunderstorms — The #1 summer hazard. Lightning above treeline kills hikers in the Wasatch most years. Summit before 11 AM, descend below treeline by noon in summer. (2) Loose rock and scree — Class 3 peaks (Pfeifferhorn, Twin Peaks, Dromedary) have sections of loose rock causing falls. Descents particularly hazardous. (3) Exposure — Several peaks have sections with significant fall potential. Pfeifferhorn’s ridge scramble and Twin Peaks saddle are notable. (4) Altitude effects — Peaks above 10,000 ft cause breathing difficulty for sea-level visitors. Headaches, nausea, fatigue possible. Descend if symptoms worsen. (5) Weather changes — Wasatch weather shifts rapidly. Hot valley mornings can become stormy summit afternoons. (6) Navigation on scramble routes — Off-trail sections of Pfeifferhorn, Twin Peaks require route-finding skills. (7) Wildlife — Mountain lions, black bears, moose all present. Moose most commonly aggressive. (8) Remoteness — Cell coverage spotty; rescue takes hours if needed. Annual SLC hiking incident patterns: (9) 20-30 search and rescue operations annually in Salt Lake County mountains. (10) 2-5 hiking fatalities most years, typically from falls, lightning, or cardiac events. (11) Most incidents involve inadequately prepared hikers rather than experienced ones. Safety recommendations: (12) Never hike alone on technical peaks. (13) File trip plan with someone before departure. (14) Carry Garmin inReach or PLB for emergency communication beyond cell coverage. (15) Match peak choice to actual skill level, not aspiration. (16) Turn around if conditions deteriorate — summit will remain for return attempt. (17) Read trip reports from recent hikers for current conditions. Prepared hikers complete thousands of Wasatch peaks safely annually; unprepared hikers create most of the incidents.

    Can I hike Salt Lake County peaks year-round?

    Most Salt Lake County peaks are seasonal — summer-only for general hikers, while winter requires mountaineering skills for any attempt. Seasonal guidelines by peak category: Year-round accessible (with proper gear): (1) Ensign Peak — Accessible in all seasons with appropriate footwear. Snow/ice conditions in winter. (2) Mount Wire — Lower elevation, year-round hiking viable. (3) Living Room Trail — Snow-covered in winter but hikeable. Spring-fall only (mid-April to October): (4) Grandeur Peak — Generally accessible April-November. Microspikes helpful in shoulder seasons. (5) Mount Aire — Similar to Grandeur. (6) Mount Olympus — Mid-June through early October. Snow summit scramble extremely dangerous. Summer-only (mid-June to September): (7) Gobblers Knob — Snow lingers until mid-June. (8) Mount Raymond — Similar timing. (9) Sunset Peak — Mid-June through October. (10) Sunrise Peak — Mid-June through early October. (11) Dromedary Peak — July through September. (12) Twin Peaks — July through September. (13) Pfeifferhorn — Late June through September. Typically not hiked outside season. Winter conditions specifics: (14) November-April: Most high peaks require mountaineering skills, avalanche awareness, winter camping abilities. (15) Avalanche terrain: Most Cottonwood Canyon peaks cross avalanche-prone slopes. Check Utah Avalanche Center forecast. (16) Cold weather: Summit temperatures regularly below 0°F. (17) Canyon road closures: Little Cottonwood sometimes closed for avalanche control. Winter/spring warnings: (18) The ‘shoulder seasons’ (April-May and late October-November) are deceptively dangerous — spring avalanche conditions peak as snowpack melts, early winter storms arrive suddenly. (19) Summer hiking of Pfeifferhorn, Twin Peaks, Dromedary is hazardous — they become technical mountaineering peaks. Check utahavalanchecenter.org before any winter/spring higher-elevation hikes.

    What should I know before hiking Salt Lake County peaks?

    Before hiking Salt Lake County peaks, several practical factors significantly affect your experience and safety. Essential pre-hike knowledge: (1) Canyon fees vary — Mill Creek Canyon $5, American Fork Canyon $10, Big Cottonwood and Little Cottonwood no fee. No hiking permits required. (2) Dog regulations by canyon — Little Cottonwood NO dogs (watershed), Parleys NO dogs (watershed), Mill Creek dogs on alternating days, Big Cottonwood dogs permitted, American Fork dogs on leash. (3) Water restrictions — Little Cottonwood and Parleys stream water is drinking supply — don’t touch or contaminate. (4) Start times — 4:00-6:00 AM during summer to beat heat and afternoon thunderstorms. (5) Parking reality — Popular trailheads (Mount Olympus, Grandeur Church Fork, Lake Blanche) fill by 7-8 AM summer Saturdays. (6) Altitude considerations — SLC Valley is 4,226 ft; peaks climb to 11,330 ft. Sea-level visitors should arrive 1-2 days early. (7) Thunderstorm awareness — Lightning fatalities occur annually. Summit by 11 AM in summer. Logistics specifics: (8) Phone coverage — Spotty throughout mountains. Download offline maps from AllTrails or Gaia GPS before hiking. (9) Parking theft — Trailhead break-ins occur. Leave no valuables visible in vehicles. (10) Water sources — Most streams are watershed-protected. Carry 2-4 liters per person. (11) Sun protection — UV intense at altitude. Full sunscreen, UV 400 sunglasses, hat required. (12) Temperature range — Summit can be 30°F cooler than trailhead. Always carry warm layer even in July. (13) Bear-aware etiquette — Store food properly if camping. Make noise on trail. (14) Moose awareness — More aggressive than bears; keep 100+ feet minimum distance. Training recommendations: (15) Progressive buildup from Tier 1 through Tier 4 peaks over months. (16) Don’t skip tiers — Pfeifferhorn as first SLC peak is a common dangerous mistake. (17) Train with weighted pack for 2+ months before attempting expert-tier peaks. (18) Learn basic wilderness navigation before technical peaks. (19) See our mountaineering for beginners guide for skill progression. Most important pre-hike preparation: research current conditions via recent trail reports, check weather 24 hours ahead, tell someone your plan, turn around early if conditions deteriorate.


    Authoritative Sources & Further Reading

    Content reflects authoritative Utah and national forest sources:

    • Uinta-Wasatch-Cache National Forest — fs.usda.gov — Official trail management
    • US Geological Survey — usgs.gov — Topographic data and peak elevations
    • Twin Peaks Wilderness — Congressional designation 1984
    • Mount Olympus Wilderness — Congressional designation 1984
    • Utah Division of Wildlife Resources — wildlife.utah.gov — Wildlife safety
    • Utah Avalanche Center — utahavalanchecenter.org — Winter conditions
    • Wasatch Mountain Club — wasatchmountainclub.org — Community trip reports
    • Reference texts: Hiking Utah’s Wasatch, Wasatch Tours series, AllTrails Wasatch collection
    Published: April 4, 2026
    Last updated: April 19, 2026
    Next review: July 2026
    Part of the Global Summit Guide

    Back to the Master Hub

    This guide is one of 71 across 12 thematic clusters on Global Summit Guide. The master hub organizes every guide by experience tier, specific peak, skill area, and region.

    View the Hub →
  • How to Train for Kilimanjaro: A 12-Week Fitness Plan for Beginners

    How to Train for Kilimanjaro: A 12-Week Fitness Plan for Beginners

    How to Train for Kilimanjaro: 12-Week Plan for Beginners (2026) | Global Summit Guide
    Cluster 06 · Kilimanjaro · Updated April 2026

    How to Train for Kilimanjaro: 12-Week Plan for Beginners

    The complete periodized training program — four phases, weekly schedules, key exercises, readiness benchmarks. From Week 1 base building through Week 12 taper, the exact plan that prepares moderately fit adults for Africa’s highest peak.

    12
    Weeks of
    training
    4
    Periodized
    phases
    20–25 lb
    Peak pack
    weight
    5–6 hrs
    Peak weekly
    training
    Global Summit Guide A guide in Cluster 06 · Kilimanjaro View master hub →

    Kilimanjaro is a fitness test disguised as a trek. 5-8 hours of hiking daily for 7-9 consecutive days, a 10-14 hour summit day with 1,255m of elevation gain in darkness, and a punishing 2,730m descent all at altitudes where your body runs on 50-70% of sea-level oxygen. The good news: you don’t need to be elite. You need to be specifically prepared. This 12-week periodized plan transforms moderately active adults into Kilimanjaro-capable climbers using four distinct training phases — base building, capacity building, peak-specific work, and taper. No gym membership required, no exotic equipment — just consistent weekly training that builds the exact fitness the mountain demands.

    How this plan was built

    Training principles follow established periodization models from Uphill Athlete, Training for the New Alpinism (Steve House & Scott Johnston), and mountain-specific coaching standards. Weekly structures reviewed by AMGA-certified guides and NSCA certified strength coaches with mountaineering specialty. Progression matches physiological adaptation timelines — cardiovascular (6-8 weeks), muscular endurance (8-12 weeks), neuromuscular patterns (10-12 weeks). Assumes starting point of recreationally active (able to hike 4-5 miles without distress). Sedentary beginners should complete 6-8 weeks of baseline conditioning before starting this plan. Fact-check date: April 19, 2026.

    The Four Phases of Training

    The 12-week plan follows classic periodization: start with volume to build capacity, add intensity to sharpen fitness, taper to arrive fresh. Each phase has distinct goals and workout structures.

    12-Week Kilimanjaro Training Timeline

    Periodized phases from base building through mountain-ready taper
    Phase 1 · BaseWeeks 1–4
    Phase 2 · BuildWeeks 5–8
    Phase 3 · PeakWeeks 9–11
    TaperW12
    Aerobic foundation
    Capacity + intensity
    Mountain-specific
    Recovery

    This is not a random workout collection — it’s a physiological sequence. Base building develops the aerobic system and connective tissue. Build phase adds volume and introduces intensity. Peak phase delivers Kilimanjaro-specific demands (long hikes with heavy pack). Taper reduces fatigue while maintaining fitness. Each phase prepares you for the next.


    Phase 1: Base Building (Weeks 1–4)

    01
    Phase 1 of 4 · Weeks 1-4

    Base Building

    Establish aerobic fitness and movement patterns

    The base phase is about consistency, not intensity. You’re building aerobic capacity, strengthening connective tissues, and establishing the habit of regular training. Zone 2 cardio (conversational pace — you can speak full sentences) dominates these weeks. Hiking begins modestly with 10-12 lb pack weight.

    Common mistake: doing too much too soon. Your cardiovascular system adapts within 2-3 weeks, but tendons and ligaments take 6-8 weeks. Ramp up gradually or risk injury that derails the entire plan. Skip a workout rather than push through pain.

    Typical Week 3 Schedule

    Mon
    Rest or 20 min easy walk
    Tue
    Zone 2 cardio — 45 min easy run/bike/swim
    Wed
    Strength — full body, 45 min (see exercises below)
    Thu
    Zone 2 cardio — 45 min
    Fri
    Rest or yoga/mobility
    Sat
    Long hike — 3-4 hours with 10-12 lb pack
    Sun
    Easy 30 min walk + mobility work

    Phase 1 goals by Week 4

    • Complete 45-minute Zone 2 cardio without distress
    • Hike 4 hours with 12 lb pack on varied terrain
    • Finish strength workout with 3 full sets of each exercise
    • Consistent 4-5 training days per week
    • No nagging injuries — tendons/muscles feeling stronger

    If struggling with these goals by Week 4, extend base phase by 2-4 additional weeks. There’s no prize for compressed training. Rushing into build phase with inadequate base leads to injury or plateaued progress.


    Phase 2: Capacity Building (Weeks 5–8)

    02
    Phase 2 of 4 · Weeks 5-8

    Capacity Building

    Add volume, introduce intensity, extend long days

    Build phase increases both volume and intensity. Cardio duration extends to 60-75 minutes. Strength sessions get heavier. Most critically, long hikes extend to 4-6 hours with 15-18 lb packs — approaching actual Kilimanjaro daypack weight. This is where your mountain-specific fitness starts developing.

    New addition in this phase: hill repeats. One weekly cardio session becomes 30-45 minutes of 2-3 minute uphill efforts with easy descents. Builds the specific power for sustained climbing. Also introduces back-to-back weekend days — Saturday long hike, Sunday moderate hike. Simulates Kilimanjaro’s consecutive-days demand.

    Typical Week 7 Schedule

    Mon
    Rest or active recovery walk
    Tue
    Zone 2 cardio — 60 min
    Wed
    Strength A — lower body focus, 60 min
    Thu
    Hill repeats — 45 min (warmup, 6x 2-min hills, cooldown)
    Fri
    Strength B — upper body + core, 45 min
    Sat
    Long hike — 5-6 hours with 15-18 lb pack
    Sun
    Recovery hike — 2 hours easy with 10 lb pack

    Phase 2 goals by Week 8

    • Complete 6-hour hike with 18 lb pack on 2,000 ft elevation gain
    • Complete back-to-back weekend hikes without excessive soreness
    • 60-minute Zone 2 cardio feels manageable
    • Strength reps have progressed with added weight or reps
    • Hill repeats completed without form breakdown

    Phase 3: Mountain-Specific Peak (Weeks 9–11)

    03
    Phase 3 of 4 · Weeks 9-11

    Peak Phase

    Simulate Kilimanjaro demands — the readiness test

    Peak phase is deliberate over-preparation. Pack weights reach 20-25 lb (above Kilimanjaro’s 15-18 lb reality). Long hikes extend to 7-8 hours. You add stair climber sessions with pack to build sustained elevation-gain fitness. This is where benchmarks are tested.

    Training feels demanding — expect fatigue, minor soreness, and the occasional urge to skip workouts. Push through while listening to injury signals. If something hurts sharply, back off. If it’s just fatigue, continue. The distinction matters. This phase also introduces pole pole pace training — deliberately slow hikes that build the mental and physical discipline of patient climbing.

    Typical Week 10 Schedule

    Mon
    Rest or mobility
    Tue
    Stair climber with 20 lb pack — 45 min at steady pace
    Wed
    Strength A — heavier loads, lower reps
    Thu
    Zone 2 cardio — 75 min
    Fri
    Strength B + core work, 45 min
    Sat
    Benchmark hike — 7-8 hours, 22 lb pack, 3,500 ft gain
    Sun
    Recovery hike — 3 hours moderate, 15 lb pack

    Key Phase 3 benchmarks

    1
    Benchmark 1

    Back-to-Back Day Test

    Complete two consecutive days of 10-mile hikes with 2,000 ft elevation gain each day, carrying 20 lb pack. Day 2 should feel demanding but completable. Tests overnight recovery — the exact demand of Kilimanjaro’s consecutive climbing days.

    2
    Benchmark 2

    Summit Day Simulation

    Complete one 15-18 mile hike with 3,500-4,000 ft elevation gain in 8-10 hours, carrying 22 lb pack. Approximates Kilimanjaro summit day (1,255m up + 2,730m down). Finishing exhausted but capable indicates readiness.

    3
    Benchmark 3

    Pole Pole Pace Test

    Complete 2 hours of deliberately slow pace hiking without speeding up, getting bored, or losing focus. Tests the mental discipline of patient summit-day pace. See our How Long to Climb Kilimanjaro guide for why pace matters so much.

    Passing all three benchmarks by Week 11 confirms readiness. Failing any benchmark signals need for additional training — consider delaying your Kilimanjaro climb rather than attempting undertrained.


    Phase 4: Taper (Week 12)

    04
    Phase 4 of 4 · Week 12

    Taper Week

    Maintain fitness, eliminate fatigue, arrive fresh

    Taper is counter-intuitive. After 11 weeks of progressive overload, your instinct may be to keep pushing. Resist this — training fatigue is still present and will degrade summit performance. Volume drops by 40-50%, intensity drops slightly, pack weight returns to moderate.

    Taper week eliminates accumulated fatigue while maintaining cardiovascular and muscular fitness. You arrive at Kilimanjaro fresh, not worn down. Additional benefit: this week coincides with travel preparation, gear organization, mental readiness. Reduced training load creates space for planning.

    Week 12 Schedule (final week before climb)

    Mon
    Rest or gentle 20 min walk
    Tue
    Zone 2 cardio — 30 min (reduced from 60-75)
    Wed
    Strength maintenance — lighter loads, 30 min
    Thu
    Easy cardio — 30 min at conversational pace
    Fri
    Complete rest — gear packing
    Sat
    Short hike — 2 hours with 12 lb pack (moderate)
    Sun
    Travel day or complete rest

    Key taper principles: (1) Reduce volume, maintain some intensity. (2) No new stimuli — stick to familiar workouts. (3) Prioritize sleep (8-9 hours nightly). (4) Focus on nutrition quality. (5) Avoid alcohol for 5-7 days pre-climb. (6) Stay hydrated. (7) Mental rehearsal of summit day and climbing routine. Arrive in Moshi with fresh legs and strong fitness — your body will thank you on summit night.


    The Essential Kilimanjaro Exercises

    These exercises form the core of the strength and cardio work throughout all four phases. Progression happens through added weight, reps, or duration rather than changing exercises.

    Strength · Single-Leg

    Bulgarian Split Squats

    3 sets × 10-12 reps per leg

    Back foot elevated on bench, front leg loaded. Builds unilateral leg strength for steep uphill stepping. Add dumbbells as you progress.

    Strength · Climbing-Specific

    Step-Ups with Pack

    3 sets × 15-20 per leg

    Step onto 18-inch box or bench wearing training pack. Directly simulates sustained uphill stepping — the primary Kilimanjaro movement pattern.

    Strength · Descent Prep

    Reverse Lunges

    3 sets × 12-15 per leg

    Step backward into lunge, controlled descent. Targets eccentric quad strength — critical for Kilimanjaro’s 2,730m descent where most knee injuries occur.

    Strength · Upper Back

    Bent-Over Rows

    3 sets × 10-12 reps

    Barbell or dumbbell rows for pack-carrying back strength. Prevents shoulder and upper-back fatigue on long mountain days.

    Strength · Core

    Plank Variations

    3 sets × 60 seconds

    Standard, side, and weighted planks. Builds core stability on uneven terrain. Essential for trekking pole efficiency and injury prevention.

    Strength · Calves

    Weighted Calf Raises

    3 sets × 20-25 reps

    Standing calf raises with dumbbells or pack. Often overlooked but essential — calves fatigue first on long descents and cause calf strains on scree.

    Cardio · Aerobic Base

    Zone 2 Running/Cycling

    45-75 min, 2-3x weekly

    Conversational pace — you should be able to speak full sentences. Builds aerobic foundation. Run, cycle, or swim. Mix modes to reduce injury risk.

    Cardio · Intensity

    Hill Repeats

    4-8 × 2 min, 1x weekly

    Find a hill taking 2 minutes of hard effort. Climb hard, recover on descent. Builds sustained climbing power for summit night’s 5-6 hour ascent.

    Specific · Mountain Prep

    Stair Climber with Pack

    30-45 min, 1-2x weekly

    Stair mill or stadium stairs wearing 15-20 lb pack. Most specific Kilimanjaro training short of actual mountain hiking. Builds sustained elevation-gain endurance.

    Specific · Most Important

    Long Weekend Hikes

    3-8 hours, 1x weekly

    The single most important Kilimanjaro workout. Build from 3 hours with 10 lb pack (Week 1) to 8 hours with 22 lb pack (Week 11). Actual hiking on varied terrain preferred.


    Pack Weight Progression

    PhaseWeeksPack WeightLong Hike DurationElevation Gain Target
    BaseWeeks 1-410-12 lb3-4 hours1,000-1,500 ft
    BuildWeeks 5-815-18 lb5-6 hours2,000-2,500 ft
    PeakWeeks 9-1120-25 lb7-8 hours3,500-4,000 ft
    TaperWeek 1210-15 lb2 hours1,000 ft
    Kilimanjaro actualOn mountain15-18 lb daypack5-8 hrs typical; 10-14 summitVaries daily

    The logic: train heavier than your actual climb. Your Kilimanjaro daypack will feel light compared to Week 10-11 training weight. This builds confidence and physical reserves for unexpected demands on the mountain. See our Mountain Climbing Gear List for exactly what your Kilimanjaro daypack should contain.


    Training Mistakes That Derail Kilimanjaro Prep

    • Too much too soon: Starting Week 1 with Week 6 volume. Leads to injury in Weeks 3-5, disrupting the entire plan.
    • Only cardio: Running marathons doesn’t prepare you for sustained hiking with a pack. Strength and specific hiking matter equally.
    • Only gym work: Cannot replicate the complex demands of real hiking on uneven terrain. Get outside at least weekly.
    • Skipping long hikes: The single most important workout. No amount of gym work replaces 6-hour hikes with pack.
    • New boots close to trip: Boots need 50+ miles to break in. Start in Week 1-2 minimum, ideally earlier.
    • Overtraining peak phase: Some people push through fatigue signals, arrive at Kilimanjaro worn down, and fail on summit day.
    • Skipping taper: “I feel fine, I’ll keep training.” No — taper is essential physiological recovery. Trust the plan.
    • Ignoring nutrition: Training demands 500+ additional calories. Undereating causes muscle loss and poor recovery.
    • Insufficient sleep: 7-9 hours nightly is required for training adaptation. Less sleep = slower progress + injury risk.
    • Neglecting hiking pace: Fast hikers must practice deliberate slow pace. Summit day requires pole pole discipline.
    When to delay your climb

    If by Week 10 you cannot complete Benchmark 1 (back-to-back 10-mile hikes with 20 lb pack), consider postponing Kilimanjaro by 3-6 months to complete adequate training. The mountain will still be there. Attempting Kilimanjaro undertrained means: (1) Much higher failure probability (dropping to 50-60% on ideal routes). (2) Injury risk on descent. (3) Slow, miserable experience that doesn’t match expectations. (4) Wasted $3,500-$10,000 if you don’t summit. A rescheduled climb at peak fitness is worth far more than a rushed attempt. Don’t confuse enthusiasm with readiness.


    Kilimanjaro Training FAQ: Your Common Questions Answered

    How long should I train for Kilimanjaro?

    A minimum of 12 weeks of structured training is recommended for Kilimanjaro. This timeline reflects the physiological reality that endurance and strength adaptations require consistent progressive loading over months. Training timeline breakdown by current fitness level: (1) Sedentary starting point: 16-24 weeks recommended — build base fitness first, then follow the 12-week Kilimanjaro-specific plan. (2) Recreationally active (hiking, gym): 12-16 weeks — follow standard 12-week plan with extra base weeks if needed. (3) Endurance athletes (runners, cyclists): 10-12 weeks — existing fitness transfers well but add specific hiking/weighted pack work. (4) Former climbers returning after break: 8-12 weeks — muscle memory speeds adaptation. Why 12 weeks works: cardiovascular fitness adapts over 6-8 weeks, muscular endurance develops 8-12 weeks, neuromuscular patterns for hiking with weighted pack need 10-12 weeks practice. The plan structure: 4 weeks base building (establishing aerobic fitness), 4 weeks building volume and intensity, 3 weeks peak training with mountain-specific work, 1 week taper before climb. Starting earlier than 12 weeks is fine — maintain higher volume but avoid peaking too early. Starting later than 12 weeks risks inadequate preparation; consider delaying Kilimanjaro by 3-6 months if needed.

    How fit do you need to be to climb Kilimanjaro?

    You need moderate fitness to climb Kilimanjaro — comparable to being able to complete a half-marathon or hike 10 miles with elevation gain. Specific fitness benchmarks: (1) Cardiovascular: able to sustain moderate aerobic effort (Zone 2-3) for 4+ hours continuously. (2) Muscular endurance: capable of hiking 8+ hours per day on consecutive days. (3) Strength: carry 15-20 lb daypack comfortably all day; leg strength for sustained uphill hiking. (4) Flexibility: basic mobility for uneven terrain and occasional scrambling (Barranco Wall). Kilimanjaro is NOT extreme fitness required — you don’t need to be an elite athlete. What you DO need: (1) Consistency in training (12+ weeks of regular work). (2) Specificity (actual hiking, not just gym cardio). (3) Mental preparation for sustained exertion. (4) Weight management (excess weight makes altitude harder). Concrete fitness tests: Can you hike 10 miles with 2,000 ft elevation gain in 5-6 hours? Can you do this on back-to-back days without injury? Can you climb stairs for 30 minutes with a 20 lb pack? If yes to all three, you have adequate fitness for Kilimanjaro. If not, prioritize training before booking. Success rate is more determined by route duration (acclimatization) than fitness level — but inadequate fitness compounds altitude challenges and raises failure risk significantly.

    What type of training is best for Kilimanjaro?

    The best training for Kilimanjaro combines four key modalities: hiking with weighted pack (50% of training), cardiovascular endurance (30%), strength training (15%), and flexibility/recovery (5%). Training breakdown: (1) Hiking with weighted pack — The most transferable training. Build to 3-4 hour hikes with 15-20 lb pack on varied terrain. Simulates Kilimanjaro’s sustained exertion demands better than any other workout. Ideally outdoors on actual trails. (2) Cardiovascular endurance — Zone 2 (conversational pace) running, cycling, or swimming 3-4 times weekly. Builds aerobic base, improves mitochondrial function, enhances recovery. Target 30-60 minutes per session. (3) Strength training — 2 sessions weekly focused on single-leg exercises (lunges, step-ups), back (rows, pull-ups for pack carrying), core (planks, dead-bugs for stability on uneven terrain), and calves (for descents). Not bodybuilding — functional strength for multi-day endurance. (4) Flexibility/mobility — 10-15 minutes daily stretching, especially hip flexors, hamstrings, calves. Reduces injury risk on uneven Kilimanjaro terrain. Less effective training: (5) Pure bodybuilding — adds weight without endurance benefits. (6) CrossFit-style — too intense for altitude, doesn’t build specific endurance. (7) Only treadmill — lacks terrain variability and outdoor conditions. (8) Only cycling — doesn’t develop hiking-specific muscle patterns. Mix modalities but prioritize weighted pack hiking as your single most important training activity.

    Do I need to train at altitude for Kilimanjaro?

    No, you do not need to train at altitude for Kilimanjaro — but any altitude exposure in the months before helps. Why altitude training isn’t required: (1) Sea-level training improves cardiovascular fitness and muscular endurance, which transfer directly to altitude performance. (2) Altitude tolerance is primarily genetic and reveals itself during the acclimatization process on the mountain itself. (3) Sleeping at 3,000+ meters for weeks before climbing would help but is impractical for most people. (4) Acclimatization must happen on Kilimanjaro regardless of prior altitude exposure — your body resets after returning to sea level. Strategies that do help: (1) Multi-day hiking with weighted pack — simulates mountain demands even at sea level. (2) Stair climbing with pack — builds leg endurance for sustained ascent. (3) Any altitude hiking 2-4 weeks before Kilimanjaro — Colorado 14ers, Alps, high-altitude races — provides some residual red blood cell elevation. (4) Hypoxic tents or altitude masks — limited effectiveness, expensive, primarily psychological. (5) Mount Meru pre-Kilimanjaro — climbing this 4,566m peak immediately before Kilimanjaro provides the best real acclimatization boost. Bottom line: train at sea level with appropriate volume and specificity. If you live at altitude or have access to mountains, use them for additional hiking practice — but the plan below works equally well for flatlanders.

    How much weight should I carry when training?

    Build training pack weight gradually from 10 lb in Week 1 to 20-25 lb by Week 10. Progression guidelines: (1) Weeks 1-4 (Base): 10-15 lb pack on training hikes. Builds neuromuscular patterns without overloading. (2) Weeks 5-8 (Build): 15-20 lb pack. Approaches Kilimanjaro daypack weight. (3) Weeks 9-11 (Peak): 20-25 lb pack on long training hikes. Deliberately over-training above Kilimanjaro’s 15-18 lb real daypack weight. (4) Week 12 (Taper): 10-15 lb pack for shorter maintenance hikes. Actual Kilimanjaro daypack weight: 15-18 lb typical (water, snacks, layers, camera, sunscreen). Porters carry main gear up to 15 kg (33 lb) limit. Training with heavier pack than real climb means actual summit day feels lighter. What to carry in training pack: Water bottles (flexible weight adjustment), rice or sand bags, actual hiking gear, books, anything distributing weight evenly. Avoid single heavy items in one pocket — simulate Kilimanjaro distribution. Pack fit matters: Use the same pack you’ll take to Kilimanjaro during late-phase training (Weeks 8-12). Breaking in both pack and your shoulders/hips prevents chafing and hot spots on the mountain. Rental packs in Moshi work but training with your own pack is ideal. Safety: Never carry heavy pack with poor form or while injured. Pack weight should challenge but never cause pain. Build gradually and reduce if knee/back issues appear.

    What are the key training benchmarks before Kilimanjaro?

    Three critical training benchmarks indicate readiness for Kilimanjaro, ideally completed by Week 10 of a 12-week plan. Benchmark 1 — Back-to-back hiking: Complete two consecutive days of 10-mile hikes with 2,000 ft elevation gain each day, carrying 20 lb pack. This tests your ability to recover overnight and return to demanding work the next day — exactly what Kilimanjaro demands. If you complete Day 1 but can’t continue Day 2, you need more endurance base. Benchmark 2 — Single long hike: Complete one 15-18 mile hike with 3,500-4,000 ft elevation gain carrying 20-25 lb pack in 8-10 hours. This approximates the physical demand of Kilimanjaro summit day. If you finish this feeling exhausted but capable, you’re ready. If you finish injured or couldn’t complete, add 4 weeks of additional training before Kilimanjaro. Benchmark 3 — Pace discipline: Complete a 2-hour hike at deliberately slow ‘pole pole’ pace without getting bored or speeding up. This mental training is as important as physical — summit day requires 5-6 hours of slow, deliberate pace. Fit climbers often fail this test psychologically. Additional indicators: (1) Can you complete stair climber workout with 20 lb pack for 45 minutes? (2) Can you do 5 single-leg squats on each side with 20 lb in hand? (3) Have you slept on a camping pad for 3+ consecutive nights comfortably? (4) Does your boot feel broken in and blister-free over 15+ miles? If yes to all, you’re prepared. Failing any benchmark is a signal to extend training, not rush the mountain.

    What exercises should I do for Kilimanjaro?

    The most effective Kilimanjaro-specific exercises target single-leg strength, core stability, and sustained cardiovascular endurance. Essential strength exercises: (1) Single-leg squats (pistol squat progressions) — builds the specific strength needed for steep uphill single-leg loading. 3 sets of 8-12 per leg. (2) Bulgarian split squats — unilateral leg strength with stability. 3 sets of 10-12 per leg. (3) Step-ups with weighted pack — simulates stair climbing with pack. 3 sets of 15-20 per leg. (4) Reverse lunges — descent-specific training; Kilimanjaro descent is 2,730m and causes most injuries. 3 sets of 12-15 per leg. (5) Bent-over rows — builds back strength for carrying pack all day. 3 sets of 10-12. (6) Planks (various) — core stability on uneven terrain. 2-3 sets of 60 seconds each. (7) Dead bugs — rotational core stability. 3 sets of 8-10 per side. (8) Calf raises — frequently overlooked but essential for scree descents. 3 sets of 20-25. Cardio workouts: (1) Zone 2 running/cycling for 45-60 minutes 2-3x weekly. (2) Stair climber with pack 20-30 minutes 1-2x weekly. (3) Hill repeats (4-8x 2-minute hill climbs) 1x weekly. (4) Long weekend hikes (3-6 hours with pack) 1x weekly — the most important workout. Equipment needed: hiking boots (break in over months), day pack you’ll actually use, water bottles, dumbbells or gym access, trekking poles for later training. Nothing exotic required — this is entirely accessible training that transforms any moderately fit person into a Kilimanjaro-capable climber.

    Can I climb Kilimanjaro without training?

    Climbing Kilimanjaro without training is technically possible but significantly reduces your summit chances and increases injury and altitude sickness risk. Why training matters: (1) Physical endurance — Kilimanjaro demands 5-8 hours of hiking daily for 7-9 consecutive days. Untrained bodies break down with injury, blisters, exhaustion. (2) Altitude compounds fatigue — normal hiking fatigue becomes dangerous at altitude. Well-trained body maintains reserve capacity; untrained body runs on empty. (3) Summit day reality — 10-14 hour summit day with 1,255m elevation gain requires baseline endurance most sedentary people don’t possess. (4) Descent injury risk — 2,730m descent on summit day is where most injuries occur; untrained knees and quads fail under load. (5) AMS risk increases — exhausted bodies acclimatize worse. Success rates by training preparation: (a) 12+ weeks structured training: Success rate reaches route potential (85-95% on proper duration routes). (b) 4-8 weeks training: Success rate drops 10-20 percentage points. (c) Minimal training: Success rate drops 25-40 percentage points even on 8-day routes. (d) No training: Often fail before reaching high camp due to cumulative fatigue. What the untrained can do: If you must attempt Kilimanjaro without adequate training time, minimize risk by: (1) Choose 9-day Northern Circuit for maximum acclimatization. (2) Climb during optimal season. (3) Hire top-tier operator. (4) Build fitness as much as possible in available weeks. (5) Accept higher risk of failure or injury. Better approach: delay Kilimanjaro 3-6 months to properly train. The mountain will still be there; you’ll significantly increase enjoyment and success probability.


    Authoritative Sources & Further Reading

    Training methodology reflects established periodization and mountaineering standards:

    • Training for the New Alpinism (Steve House & Scott Johnston) — Foundational mountain training text
    • Uphill Athlete — uphillathlete.com — Periodization and mountain-specific training resources
    • AMGA (American Mountain Guides Association) — amga.com — Guide training standards
    • NSCA (National Strength and Conditioning Association) — nsca.com — Strength training research
    • ACSM (American College of Sports Medicine) — acsm.org — Training guidelines for endurance
    • Research on altitude performance and training from Journal of Applied Physiology, High Altitude Medicine & Biology
    • Coaching insights: Steve House training principles, Alison Levine mental preparation, Mark Twight training philosophy
    • Reference texts: The Mountain (Ed Viesturs), Extreme Alpinism (Mark Twight), Mountaineering: Freedom of the Hills (Mountaineers Books)
    Published: March 30, 2026
    Last updated: April 19, 2026
    Next review: July 2026
    Part of the Global Summit Guide

    Back to the Master Hub

    This guide is one of 71 across 12 thematic clusters on Global Summit Guide. The master hub organizes every guide by experience tier, specific peak, skill area, and region.

    View the Hub →
  • How Much Does It Cost to Climb Kilimanjaro in 2026

    How Much Does It Cost to Climb Kilimanjaro in 2026

    How Much Does It Cost to Climb Kilimanjaro in 2026? Complete Price Breakdown | Global Summit Guide
    Cluster 06 · Kilimanjaro · Updated April 2026

    How Much Does It Cost to Climb Kilimanjaro in 2026?

    The complete 2026 cost breakdown — park fee math, operator tier economics, hidden costs most packages don’t include, tipping frameworks, and real total budgets from $3,500 to $10,000+. Honest pricing from the actual economics of the mountain.

    $1,500–$7,500
    Climb package
    range
    ~$1,015
    Park fees
    7-day climb
    $250–$400
    Standard
    total tips
    $3,500+
    Total trip
    from US
    Global Summit Guide A guide in Cluster 06 · Kilimanjaro View master hub →

    Kilimanjaro climb packages range from $1,500 to $7,500 — a 5x price spread for what’s sold as the same mountain. That range isn’t arbitrary. It reflects real differences in porter welfare, guide training, equipment quality, safety systems, and success rates. The $1,500 climb and the $5,500 climb are not the same product. This deep-dive breaks down exactly where your money goes, what costs most packages leave out, how to budget realistically for Kilimanjaro from North America, and how to save money without making the trade-offs that compromise safety or exploit the ~10,000 Tanzanians who work on the mountain.

    How this guide was built

    Park fee figures reflect the 2026 TANAPA tariff schedule as published by Tanzania National Parks Authority. Operator cost analysis draws from KPAP (Kilimanjaro Porters Assistance Project) compliance data and interviews with 15+ operators across all three price tiers. Tip benchmarks follow Kilimanjaro industry-standard guidelines published by KPAP and established operators. All costs in US dollars. Fact-check date: April 19, 2026.

    Where Your Money Goes: The Cost Stack

    When you pay $5,500 for a mid-range 8-day Lemosho climb from North America, only about 55% goes to the operator package. The rest flows to airlines, the Tanzanian government (visa + VAT), hotels, your tipping budget, insurance, and gear. Understanding this distribution matters because compressing operator costs doesn’t save much overall — but it does directly impact safety and porter welfare.

    Typical $5,500 mid-range Kilimanjaro budget breakdown

    From North America · 8-day Lemosho · Mid-range operator
    $3,000
    Climb
    $1,600
    Flights
    $350
    Tips
    $250
    Gear
    $300
    Other
    Climb package (54%) — park fees, guides, porters, food, tents
    International flights (29%) — JRO round-trip from US/Canada
    Mountain crew tips (6%) — guides, assistants, cook, porters
    Gear rental/purchase (5%) — boots, layers, sleep system
    Visa, hotels, insurance (6%) — pre/post climb logistics

    The important observation: saving $1,000 on operator cost typically means porter exploitation or safety compromise, while saving $1,000 on flights, gear rental, or trip extensions costs nothing in mountain safety or ethics. Optimize the non-climb costs aggressively and pay fair price for the mountain itself.


    2026 Park Fees: Line-by-Line Breakdown

    Park fees are identical across all operators — set by TANAPA (Tanzania National Parks) and paid to the Tanzanian government. Understanding them helps you spot operators under-quoting to win your booking. The 2026 fee schedule uses rates published January 2026 and applies through the current climbing seasons.

    FeeRate (2026)PerWhy Charged
    Conservation fee$70Person · DayPark access and conservation funding
    Camping fee$50Person · NightMaintained campsites (tented routes)
    Hut fee (Marangu)$60Person · NightHut accommodation (Marangu only)
    Rescue fee$20Person · One-timeKINAPA emergency rescue operations
    Guide/porter entry~$2Crew · DayCrew park entry (3-5 crew per climber)
    VAT18%Added to all feesTanzanian value-added tax
    Crater camp (optional)$100Person · NightSpecial product for Crater Camp itinerary

    Real fee calculation: 7-day Lemosho climb

    Using 2026 rates for one international adult climber:

    ComponentCalculationSubtotal
    Conservation fee$70 × 7 days$490
    Camping fee$50 × 6 nights$300
    Rescue fee$20 × 1 climber$20
    Crew entry fees~$2 × 4 crew × 7 days$56
    Pre-VAT subtotalBase park fees$866
    VAT 18%$866 × 0.18$156
    Total park feesPer climber, 7-day Lemosho$1,022

    Park fees by route and duration

    Route & DurationNightsTotal with VATNotes
    Marangu 5-day4 huts~$795Lower success rate, not recommended
    Machame 6-day5 camps~$880Compressed itinerary
    Machame 7-day6 camps~$1,022Standard recommended version
    Lemosho 7-day6 camps~$1,022Good success rate
    Lemosho 8-day7 camps~$1,150Gold standard for success
    Rongai 7-day6 camps~$1,022Quieter alternative
    Northern Circuit 9-day8 camps~$1,280Highest success rate
    Crater Camp add-on+1 night+$235$100 special + $50 camping + VAT
    Red flag: operators under $1,500 total

    If park fees alone cost ~$1,000+ and an operator is offering a complete package at $1,500, only $500 remains for guide wages, porter wages, food for 7 days, tents, fuel, transport, operator overhead, and profit margin. The math doesn’t work ethically. Something is being sacrificed — typically porter welfare (paying $3/day instead of $15/day), safety equipment (skipping oxygen or pulse oximeters), or guide training. Avoid any operator quoting under $1,800-$2,000 for a complete 7-day climb. The savings aren’t worth the cost to the porters or to your safety.


    Why Operators Price So Differently: The Economic Reality

    Kilimanjaro operator prices span $1,500 to $7,500 because operators deliver fundamentally different products. Understanding what drives the cost difference helps you evaluate value honestly.

    What budget operators cut to reach $1,500-$2,500

    Budget operators achieve their low prices by reducing costs in specific categories:

    • Porter wages: $3-$5 per day instead of $10-$20. Saves ~$70-$105 per porter per 7-day climb × 3 porters per climber = $210-$315 savings.
    • Porter gear: No provided cold-weather gear. Porters work in inadequate clothing at altitude.
    • Food quality: Lower calorie meals, less variety, fewer fresh ingredients. Budget: ~$80 food cost per climber vs mid-range ~$180.
    • Guide training: Locally-trained guides without Wilderness First Responder certification. Saves ~$2,000 per guide in certification costs.
    • Safety equipment: Minimal first aid kits, no oxygen, no pulse oximeters. Saves ~$3,000-$5,000 per trip in equipment amortization.
    • Guide-to-climber ratio: 1:8 or 1:10 instead of safer 1:3-1:4. Each additional guide saves ~$700-$1,000 per climb.
    • Tent and sleep gear: Older or cheaper tents. Saves ~$200-$400 per climb in equipment.
    • Compressed itinerary: Pushing 6-day routes even when 7-day strongly recommended. Saves park fees and food costs.

    What mid-range operators deliver for $2,500-$4,500

    The $2,500-$4,500 tier is the sweet spot for safety, ethics, and value:

    • KPAP partnership: Verified ethical porter treatment with fair wages and proper gear
    • Experienced guides: 5+ years guiding Kilimanjaro, Wilderness First Responder certified
    • Safety monitoring: Pulse oximeters twice daily, supplemental oxygen on standby, comprehensive first aid
    • Quality food: 4,000+ calorie meals, fresh ingredients, variety, accommodation for dietary needs
    • Modern tents: 4-season tents rated for Kilimanjaro conditions
    • 1:3-1:4 ratios: Appropriate guide coverage for safety
    • Proper schedules: 7-8 day routes with adequate acclimatization
    • International accountability: Established brand reputation, insurance, communication systems

    What premium operators add for $4,500-$7,500

    Premium tier provides additional features primarily for comfort and marginal safety improvements:

    • IFMGA-certified guides: International Federation of Mountain Guides certification — highest qualification
    • Helicopter evacuation access: Pre-arranged medical helicopter coordination
    • Private toilets: Portable toilet tents at every camp (highly valued by many climbers)
    • Gourmet meals: Professional chef preparations, dining tents, quality tableware
    • High-end equipment: Latest tents, gear, sleep systems
    • Detailed medical monitoring: Individual health assessments, personalized altitude management
    • Hotel and transfer inclusion: Premium hotels, private transfers, welcome packages
    • Smaller group sizes: 4-8 climbers typical vs 10-16 at mid-range tier
    The value sweet spot: $2,800-$3,800

    For most climbers, operators in the $2,800-$3,800 range deliver 90% of the premium experience at 50% of the premium cost. KPAP partnership, experienced guides, proper safety systems, and quality food — all present at mid-range. The jump from mid-range to premium is primarily for comfort features (private toilets, gourmet food, smaller groups), not for substantially improved summit success or safety. Mid-range operators achieve 85-90% success rates vs premium 90-97%. See our Kilimanjaro Climbing Guide anchor for the full tier framework.


    The Kilimanjaro Tipping Framework: How Much, to Whom

    Tipping on Kilimanjaro is not optional — it’s essential income for the mountain crew and a core part of the expedition economics. Standard total tips range $250-$400 per climber, distributed among 3-5 crew members supporting each climber.

    Standard 7-day climb tip structure (per climber)

    Head Guide1 per group
    $20-$25 per climber per day
    $140-$175
    Assistant Guide1-2 per group
    $12-$18 per climber per day
    $84-$126
    Cook1 per group
    $10-$15 per climber per day
    $70-$105
    Porters3-4 per climber
    $8-$10 per porter per climber per day
    $170-$280
    Total per climber
    7-day standard climb
    $250-$400

    How to deliver tips properly

    1. Pool and distribute: Most groups pool tips and distribute by category — the head guide doesn’t keep all tips privately.
    2. Final evening delivery: Tips are delivered at the final meal/evening, after everyone is down safely.
    3. Envelopes by category: Prepare separate envelopes labeled “Head Guide,” “Assistant Guide,” “Cook,” “Porters.” The head guide distributes porter tips equally among individual porters.
    4. Public presentation: Tips are typically presented publicly with a brief thank-you speech and applause. Embrace the ceremony.
    5. Currency: USD preferred (new bills, no tears or marks). Tanzanian shillings acceptable. Euro less common but accepted.
    6. Confirm crew count before climb: Ask operator for exact crew manifest so you can plan tip amounts. Typical is 3-5 crew per climber.

    Group tipping adjustments

    If climbing in groups, tip pools adjust:

    • Solo climber: Standard 3-4 porters × 7 days × $8-10 = $170-$280 for porters alone.
    • Group of 2: 5-7 porters × 7 days × $8-10 split between 2 climbers = $125-$175 per climber for porters.
    • Group of 4+: Economies of scale. Porter tip per climber decreases because fewer porters per climber are needed.

    Your operator should provide a specific tip recommendation based on your actual group size and crew count. If the recommendation is significantly below the standard ranges above, the operator may be under-tipping crew — ask questions.

    Watch for “all-inclusive” tip pressure

    Some budget operators advertise “all-inclusive” pricing then pressure climbers for large additional tips on the mountain, using guilt or social pressure. This is a budget operator tactic — the initial low price excluded tip expectations that reputable operators communicate upfront. Reputable mid-range operators send a tipping guideline document before your trip with specific amounts for each crew role, so you can budget accurately and deliver tips with confidence rather than being shaken down at altitude.


    The Hidden Costs: What’s NOT in the Package

    Most Kilimanjaro packages include the climb itself but exclude substantial additional costs. Budget for these separately:

    Cost CategoryTypical RangeNotes & Savings Opportunities
    International flights$1,200–$2,200From North America to JRO. Book 3-6 months ahead saves $200-$500
    Tanzania visa$100Single-entry e-visa at immigration.go.tz. Some nationalities pay $50
    Yellow fever vaccine$150–$300Required only if arriving from certain countries. Check current rules
    Travel insurance$100–$300Must cover high-altitude trekking and evacuation. Essential
    Tips$250–$400See tipping framework above. Budget precisely
    Pre/post climb hotels$150–$4002-3 nights typical. Budget hotels $30-$60/night; resorts $150+
    Gear rental (alternative)$150–$300Full kit rental in Moshi vs $800-$2,000 to buy
    Diamox & medications$20–$50Prescription altitude medication, personal meds
    Airport transfers$30–$100Often included in operator package. Confirm
    Meals in Moshi/Arusha$50–$150Pre/post climb restaurant meals, snacks
    Souvenirs$50–$200Optional but most climbers spend something
    Safari extension (optional)$1,500–$4,000Serengeti/Ngorongoro 3-5 day add-on. Skip to save
    Kilimanjaro-specific gear$500–$2,000If buying everything new. Alternative: rent in Moshi
    Total additions (typical)$2,300–$5,000Beyond the climb package cost

    These additions are why Kilimanjaro trip totals from North America realistically run $4,000-$10,000+ even with mid-range climb packages. See our broader Mountain Climbing Costs framework for how this compares to other mountaineering destinations.


    Three Real Budget Scenarios: Lean, Balanced, Luxe

    Here’s what three realistic Kilimanjaro trip budgets actually look like from North America, based on actual 2026 pricing. Each scenario assumes a 7-8 day climb with a reputable operator and zero safety compromises.

    Lean Traveler

    Lean Budget

    $4,200All-in from US
    • Mid-range 7-day Machame$2,700
    • Economy flights booked early$1,300
    • Rental gear in Moshi$180
    • Tips (solo-climber rate)$320
    • Budget hotel 2 nights$70
    • Visa, insurance, meds$230
    • Meals, misc$100
    • No safari extension
    Most Climbers

    Balanced Budget

    $6,800All-in from US
    • KPAP 8-day Lemosho$3,500
    • Economy flights$1,600
    • Mix rent/buy gear$450
    • Tips (solo-climber rate)$350
    • 3-star hotel 3 nights$300
    • Visa, insurance, meds$280
    • Meals, misc$220
    • Optional day safari+$100
    Premium Experience

    Luxe Budget

    $11,500All-in from US
    • Premium 8-day Lemosho$5,500
    • Business class flights$3,200
    • New gear investment$1,200
    • Tips (generous)$500
    • Luxury hotels 4 nights$800
    • Visa, insurance (comp.)$500
    • Meals, misc$300
    • 4-day safari add-on

    For any budget, the critical rule: never compromise on operator quality to save money. Optimize flights, gear rental, hotel tier, and trip extensions instead. The $800-$1,500 you might “save” with a budget operator comes at the cost of porter exploitation and reduced safety.


    Operator Red Flags & Green Flags

    Red Flag

    Package under $1,800

    Mathematically impossible to cover park fees + ethical wages + quality operations. Something is being cut — always porter welfare or safety. Avoid.

    Green Flag

    KPAP Partner certification

    Verified commitment to fair porter treatment. Check the KPAP partner list at kiliporters.org. Certification requires ongoing compliance audits.

    Red Flag

    Only 5-day or 6-day options

    Reputable operators discourage compressed schedules. If only 5-6 day options offered, operator prioritizes turnover over summit success. Budget operator tactic.

    Green Flag

    Detailed tip guidance upfront

    Pre-trip document specifying tip amounts by role. Shows transparent expectations and respect for crew income. No surprise pressure on the mountain.

    Red Flag

    Vague safety systems

    Can’t specify pulse oximeter monitoring, oxygen availability, first aid qualifications, or evacuation procedures. Reputable operators answer these immediately.

    Green Flag

    Published guide ratios 1:3-1:4

    Maintains appropriate guide-to-climber ratios. Safety scales with coverage. Operators with 1:6+ ratios are cutting safety staff to reduce costs.

    Red Flag

    Pressure tactics at booking

    “Limited spots,” “today only,” aggressive upsells, reluctance to answer specific questions. Reputable operators let you decide at your pace.

    Green Flag

    Verifiable track record

    TripAdvisor reviews, KPAP listings, established years in operation, clear business registration. Cross-reference multiple sources beyond operator’s own website.


    Kilimanjaro Cost FAQ: Your Common Questions Answered

    How much does it really cost to climb Kilimanjaro in 2026?

    The total cost to climb Kilimanjaro from North America in 2026 typically ranges from $3,500 to $10,000+ per person when including everything. Climb package costs alone range $1,500-$7,500 based on operator tier: Budget $1,500-$2,500 (often unsafe), Mid-range $2,500-$4,500 (recommended sweet spot), Premium $4,500-$7,500 (luxury features). Additional costs beyond the climb package: International flights $1,200-$2,200, Tanzania visa $100 (single-entry e-visa), hotel nights pre/post climb $150-$400, tips for mountain crew $250-$400, gear purchase or rental $150-$800, travel insurance $100-$300, optional safari add-on $1,500-$4,000. Realistic total budget scenarios: (1) Budget North America traveler: $3,500-$5,000 using mid-range operator with modest extras. (2) Mid-range North America traveler: $5,500-$7,500 with good operator, some gear purchases, tips included. (3) Premium North America traveler: $8,000-$12,000 with top operator, all gear new, luxury hotels, safari extension. Never choose operators under $1,500 — cost savings come from cut corners on safety, porter welfare, or guide training.

    What are the 2026 Kilimanjaro park fees?

    2026 Kilimanjaro park fees are set by TANAPA (Tanzania National Parks) and are identical across all operators. Fee structure: (1) Conservation fee: $70 per person per day — every climber pays for every day in the park. (2) Camping fee: $50 per person per night — for tented routes (Machame, Lemosho, Rongai, Northern Circuit, Umbwe). (3) Hut fee: $60 per person per night — only for Marangu route using huts. (4) Rescue fee: $20 per person one-time — funds KINAPA rescue operations. (5) Support team fees: ~$2 per crew member per day. (6) VAT: 18% added to all fees. Example calculation for standard 7-day Lemosho climb (6 nights): Conservation fee $70×7 = $490, Camping $50×6 = $300, Rescue $20, Crew fees ~$50, Subtotal $860, Plus 18% VAT = ~$155, Total park fees ~$1,015 per climber. For 8-day Lemosho: ~$1,150. For 9-day Northern Circuit: ~$1,280. Park fees represent approximately 25-40% of total climb cost. Operators offering packages under $1,500 cannot cover these mandatory fees plus other essential costs — red flag.

    How much should I tip my Kilimanjaro guides and porters?

    Standard Kilimanjaro tips total $250-$400 per climber for the entire climb — distributed among the 3-5 crew supporting each climber. Recommended tipping structure: (1) Head guide: $20-$25 per climber per day (typical $140-$175 for 7-day climb). (2) Assistant guide: $12-$18 per climber per day ($84-$126 for 7 days). (3) Cook: $10-$15 per climber per day ($70-$105 for 7 days). (4) Porters: $8-$10 per porter per climber per day. With typical 3-4 porters per climber, this totals $170-$280 per climber for all porters combined. Total for standard climber: $250-$400 distributed. Tips are typically delivered on the final evening in envelopes by category — not individually. Pool tips, divide by category, and present publicly at the final meal. Currencies accepted: USD preferred (US dollars in good condition), Tanzanian shillings acceptable. Bring new bills — torn or heavily marked USD won’t be accepted. This is not optional — Kilimanjaro crew depend on tips as essential income. Budget operators sometimes promise ‘all inclusive’ pricing then pressure climbers for large tips on the mountain; reputable operators clearly communicate tip expectations upfront.

    Why do Kilimanjaro operators vary so much in price?

    Kilimanjaro operators vary from $1,500 to $7,500 for essentially the same climb because they differ dramatically in safety systems, porter welfare, guide quality, equipment, and operational standards. Cost-driving factors: (1) Porter treatment — KPAP-partnered operators pay porters $10-$20 per day with proper gear and weight limits. Budget operators pay $3-$5 per day with inadequate gear, violating international guidelines. This difference alone adds $300-$500 per climber. (2) Guide quality — Certified Wilderness First Responder guides with 5+ years experience cost more than lightly-trained local guides. Safety monitoring with pulse oximeters twice daily requires qualified personnel. (3) Food and water — Operators providing 4,000+ calorie meals with hot food at high camps spend more. Budget operators may serve repetitive inadequate meals. (4) Oxygen and safety equipment — Supplemental oxygen, pulse oximeters, comprehensive first aid kits, satellite communication cost thousands to deploy per climb. (5) Tent and gear quality — Premium tents rated to -20°C last years and keep climbers safe. Budget tents fail in Kilimanjaro conditions. (6) Overhead and sales costs — International operators have marketing and office costs that local budget operators skip. The $1,000+ cost difference between budget and mid-range tiers directly improves safety outcomes and supports ethical tourism.

    What is KPAP and why does it matter?

    KPAP (Kilimanjaro Porters Assistance Project) is a non-profit organization advocating for fair treatment of Kilimanjaro’s approximately 10,000 porters. KPAP was founded in 2003 in response to reports of porters dying from exposure due to inadequate gear and food on the mountain. KPAP’s work includes: (1) Partner Program — Operators meeting ethical standards receive KPAP partnership certification. Look for the KPAP logo when comparing operators. (2) Standards enforced: proper daily wages ($10-$20+ per day), maximum 15-20 kg load weights, provided shelter and hot food, cold-weather gear appropriate for altitude, fair working hours, health insurance. (3) Training programs for porters including altitude safety, English, first aid. (4) Gear loan program — KPAP lends winter clothing and boots to porters working with budget operators. (5) Reports on partner operator performance. Why it matters for climbers: Choosing a KPAP-partnered operator directly supports the 10,000+ Tanzanians working annually as mountain crew. The extra $200-$500 cost difference between budget and KPAP-certified operators funds fair wages, proper gear, and ethical treatment. It also correlates with higher summit success rates because properly treated and equipped crews deliver better client experiences. KPAP partner list is publicly available at kiliporters.org.

    Can I climb Kilimanjaro for under $2,000?

    Climbing Kilimanjaro for under $2,000 is technically possible but involves significant compromises and safety risks. The minimum cost structure: Park fees alone cost $1,000+ for a 7-day climb. An operator package under $1,500 means only $500 available for guide wages, porter wages, food, tents, fuel, transport, operator overhead, and profit. Something is being sacrificed. Common sacrifices in sub-$2,000 operators: (1) Porter exploitation — payments of $3-$5 per day instead of $10-$20, no proper gear, overweight loads. (2) Inadequate safety — few or no pulse oximeters, minimal first aid, no supplemental oxygen, untrained guides. (3) Poor food and low calories — rice and beans repeatedly, inadequate for 4,000+ calorie daily needs at altitude. (4) Compressed itineraries — 5-6 day routes with low success rates but lower park fees. (5) Rushed guide-to-client ratios — 1 guide for 8-10 climbers instead of safer 1:3 ratio. Alternative budget strategies that work: (1) Choose mid-range KPAP-partnered operator $2,500-$3,500. (2) Select shoulder seasons (June or November) for 10-15% lower operator prices. (3) Rent gear in Moshi for $150-$250 instead of buying. (4) Share flights with climbing partner to reduce costs. (5) Skip safari add-on ($1,500-$4,000 savings). (6) Stay in budget hotels pre/post climb. These strategies can reduce total trip to $4,000-$5,000 while maintaining safety and ethics.

    What extra costs are not included in Kilimanjaro packages?

    Kilimanjaro climb packages typically exclude several substantial additional costs. Items NOT included in most package prices: (1) International flights — $1,200-$2,200 from North America, $800-$1,400 from Europe, $600-$1,200 from Asia/Australia. Book 3-6 months ahead for best rates. (2) Tanzania visa — $100 for single-entry US visa (required), $50 for other nationalities. E-visa recommended at immigration.go.tz. (3) Hotel nights before/after climb — $150-$400 typically for 2-3 nights in Moshi or Arusha (most operators include 1 night, additional extras). (4) Tips for mountain crew — $250-$400 total distributed among guides and porters. (5) Travel insurance — $100-$300 for climb-specific coverage (essential). (6) Gear purchase or rental — $150-$300 for rental kit in Moshi or $500-$2,000 for full gear purchase. (7) Vaccinations — Yellow fever required from certain countries ($150-$300), typhoid and hepatitis recommended. (8) Diamox and personal medications — $20-$50. (9) Souvenirs and Moshi meals — $50-$200. (10) Safari extension (optional) — $1,500-$4,000 for Serengeti/Ngorongoro add-on. Items typically INCLUDED in package prices: park fees, guide wages, porter wages, food on mountain, tents, transport to/from trailhead, emergency evacuation access, first aid.

    How can I save money on Kilimanjaro without sacrificing safety?

    You can save significant money on Kilimanjaro while maintaining safety and ethical standards. Smart savings strategies: (1) Choose mid-range KPAP-partnered operator — $2,500-$3,500 operators deliver 85-90% of premium operator quality at 50% of the cost. Avoid going below $2,500. (2) Travel in shoulder seasons — June or November climbs cost 10-15% less than peak season (July-August, January-February) with similar weather. (3) Book group climbs — Scheduled group departures are 20-30% cheaper than private climbs. (4) Rent gear in Moshi — Full kit rental for $150-$250 vs $800-$2,000 to buy. Quality rental gear meets mountain standards. (5) Book flights 3-6 months ahead — Saves $200-$500 per ticket. (6) Use points/miles — Kilimanjaro International (JRO) or Nairobi (NBO) routing via major airline hubs. (7) Share costs with travel companion — Reduces per-person guide costs, shared hotels, group flights. (8) Skip safari extension — $1,500-$4,000 saved if not your primary goal. Visit Ngorongoro as day trip ($300-$500) instead. (9) Stay in budget hotels — $30-$60/night guest houses vs $150+/night resorts. (10) Bring essential gear from home — Boots, base layers, rain gear easy to pack. Rent only heavy items (sleeping bag, down jacket). Combined approach achieves $4,000-$5,000 total North America budget with zero safety compromises. NEVER save money by choosing operators under $1,500 or routes shorter than 7 days.


    Authoritative Sources & Further Reading

    Content reflects current 2026 pricing data from authoritative sources:

    • TANAPA (Tanzania National Parks) — tanzaniaparks.go.tz — Official 2026 tariff schedule
    • KINAPA (Kilimanjaro National Park Authority) — Park regulations and permit requirements
    • KPAP (Kilimanjaro Porters Assistance Project) — kiliporters.org — Partner operator list and porter welfare standards
    • International Porter Protection Group (IPPG) — ippg.net — Ethical porter treatment guidelines
    • Tanzania Immigration Services — immigration.go.tz — Visa fees and e-visa application
    • Operator pricing data from: Altezza Travel, Climbing Kilimanjaro, Mount Kilimanjaro Climb, African Scenic Safaris, Mountain Madness, Alpine Ascents International, REI Adventures, Tusker Trail
    • Reference texts: Kilimanjaro: The Trekking Guide (Henry Stedman), Mount Kilimanjaro: Africa’s Roof (various) — expedition planning reference
    • Industry reporting: Responsible Tourism Partnership reports on Tanzania porter welfare
    Published: March 29, 2026
    Last updated: April 19, 2026
    Next review: July 2026
    Part of the Global Summit Guide

    Back to the Master Hub

    This guide is one of 71 across 12 thematic clusters on Global Summit Guide. The master hub organizes every guide by experience tier, specific peak, skill area, and region.

    View the Hub →
  • Australian & Oceania Peaks: A Complete Summit Guide

    Australian & Oceania Peaks: A Complete Summit Guide

    Australian & Oceania Peaks: A Complete Summit Guide (2026) | Global Summit Guide
    Cluster 10 · Regional Guides · Updated April 2026

    Australian & Oceania Peaks: A Complete Summit Guide

    From Kosciuszko’s easy walk-up to Carstensz Pyramid’s technical summit ridge, Oceania’s peaks span the full climbing spectrum. The complete regional guide covering Australia, New Zealand, Papua New Guinea, and Indonesia — plus the Seven Summits debate that has divided climbers for decades.

    4,884 m
    Carstensz
    highest peak
    2,228 m
    Kosciuszko
    Australia high
    3,724 m
    Aoraki
    NZ highest
    4
    Major
    countries
    Global Summit Guide A guide in Cluster 10 · Regional Guides View master hub →

    Oceania is mountaineering’s most geographically ambiguous continent. Depending on how you define the region, the highest peak is either Mount Kosciuszko (2,228 m — an easy walk-up in Australia) or Carstensz Pyramid (4,884 m — a serious technical climb in Indonesian Papua). This definitional question has fueled decades of Seven Summits debate and made Oceania the most contested continent in mountaineering. Beyond the Seven Summits argument, the region offers New Zealand’s Aoraki/Mount Cook, Papua New Guinea’s wild peaks, the Australian Alps, and Pacific volcanoes — a remarkably diverse mountain landscape often overlooked in favor of more famous ranges.

    How this guide was built

    Peak elevations reflect verified survey data from the respective national mapping authorities: Geoscience Australia, Land Information New Zealand (LINZ), Indonesian Geospatial Information Agency, and Papua New Guinea Office of the Valuer General. Climbing grades use the International French Adjectival System (IFAS). Cost estimates reflect 2026 operator pricing from established commercial providers. Seven Summits debate discussion draws from Adventure Stats records and American Alpine Journal commentary. Fact-check date: April 19, 2026.

    The Seven Summits Oceania Debate: Kosciuszko vs Carstensz

    The single most-debated question in Seven Summits mountaineering: which peak counts as Oceania’s Seven Summit? Two competing lists have coexisted for decades, and serious climbers typically complete both to settle the argument.

    Bass List · The Easy One

    Mount Kosciuszko

    2,228 m · Australia
    • Established 1985 by Dick Bass (first Seven Summits completer)
    • Uses mainland Australia as Oceania’s representative
    • Essentially a walk-up peak — 1-day summit from Thredbo
    • No technical climbing required in summer
    • Accessible to any fit hiker
    • Called “light Seven Summits” by purists
    • Total cost: $200–$500 including flights within Australia
    vs
    Messner List · The Serious One

    Carstensz Pyramid

    4,884 m · Indonesia
    • Established by Reinhold Messner as more appropriate challenge
    • Uses the Australian continental plate (includes New Guinea)
    • Technical 5.9-5.10 rock climbing on summit ridge
    • 4-7 day jungle approach in Papua, Indonesia
    • 10-14 day total expedition from arrival
    • Political complexity with Indonesian permits
    • Total cost: $18,000–$28,000 guided expedition

    Why the debate exists

    The debate comes down to how you define Oceania as a continent:

    • Political definition: Oceania = Australia + Pacific islands. Under this definition, Kosciuszko (Australia’s highest) is the obvious Seven Summit.
    • Continental plate definition: Oceania = Australian continental plate including New Guinea. Under this definition, Carstensz Pyramid (the plate’s highest) is the Seven Summit.
    • Mountaineering “seriousness” argument: Seven Summits should challenge climbers; Kosciuszko’s ease undermines the achievement, so Carstensz is the meaningful objective.
    What serious climbers do

    Most climbers completing the Seven Summits today do both Kosciuszko and Carstensz Pyramid to satisfy both lists — often called the “Eight Summits” approach. Kosciuszko takes a day as a cheap add-on to any Australia trip; Carstensz requires a dedicated expedition. Completing only the Messner List (Carstensz) is accepted by the Alpine Club and considered the more credible achievement. See our Seven Summits Guide for the complete seven-peak progression including how Oceania fits into a multi-year project.


    Oceania’s Major Climbing Countries

    Four countries dominate Oceanic mountain climbing — each with distinct peak character, access logistics, and climbing culture.

    🇦🇺 Australia

    Australia

    Easy access · Walk-up peaks · Seven Summits (Bass)

    Mainland Australia’s highest peak is Mount Kosciuszko (2,228 m) in the Australian Alps. No technical climbing required. Tasmania adds Mount Ossa (1,617 m). Country offers hiking and bushwalking traditions rather than alpine climbing.

    Highest peakKosciuszko
    SeasonDec–Feb
    🇳🇿 New Zealand

    New Zealand

    Southern Alps · Real mountaineering · Glaciers

    South Island’s Aoraki/Mount Cook (3,724 m) leads the Southern Alps — genuine alpine climbing with glaciers, ice, and technical routes. North Island adds Mount Taranaki (2,518 m) and Mount Ruapehu (2,797 m). World-class guide services.

    Highest peakAoraki
    SeasonNov–Mar
    🇮🇩 Indonesia (Papua)

    Indonesia (Papua)

    Carstensz Pyramid · Seven Summits (Messner) · Technical

    Indonesian Papua hosts Carstensz Pyramid (Puncak Jaya, 4,884 m) — Oceania’s highest peak under continental definition. Technical rock climbing, equatorial glaciers, one of the world’s most remote Seven Summits. Requires extensive logistical coordination.

    Highest peakCarstensz
    SeasonJul–Dec
    🇵🇬 Papua New Guinea

    Papua New Guinea

    Mount Wilhelm · Wild peaks · Cultural richness

    PNG hosts Mount Wilhelm (4,509 m), the country’s highest peak — a serious multi-day trek. Mount Giluwe (4,367 m) is a volcanic alternative. PNG’s mountains see far fewer climbers than Carstensz but offer extraordinary remote experiences.

    Highest peakMt Wilhelm
    SeasonMay–Sep

    Mount Kosciuszko: The Seven Summit Walk-Up

    01
    Australia’s highest · Bass List Seven Summit

    Mount Kosciuszko

    Kosciuszko National Park · NSW, Australia
    2,228 m7,310 ft

    Mount Kosciuszko is the highest peak on mainland Australia, named by Polish explorer Paul Edmund Strzelecki in 1840 after Tadeusz Kościuszko, the Polish-Lithuanian military commander. The peak sits in the Australian Alps of southeastern New South Wales, approximately 500 km south of Sydney in Kosciuszko National Park.

    For Seven Summits climbers using the Bass List, Kosciuszko is the continent’s representative — the easiest of the seven by a wide margin, completable in a single day by any fit hiker. The Main Range Track from Thredbo uses the Kosciuszko Express chairlift to reach 1,930 m, followed by a 6.5 km walk on maintained trail to the summit. Round trip is approximately 13 km with 400 m elevation gain, typically 4-6 hours.

    Alternative routes include the Summit Walk from Charlotte Pass (9 km one-way, more scenic) and the longer Main Range walking track. Kosciuszko National Park charges AU$29 vehicle entry per day. Best season is December-March; winter brings snow and skiing rather than hiking. The town of Thredbo offers full tourism infrastructure.

    GradeWalk (summer)
    Typical duration4–6 hrs
    Total cost$200–$500
    Base townThredbo

    Carstensz Pyramid: Oceania’s Technical Summit

    02
    Puncak Jaya · Messner List Seven Summit

    Carstensz Pyramid

    Papua Province · Indonesia (New Guinea)
    4,884 m16,024 ft

    Carstensz Pyramid — known officially as Puncak Jaya in Indonesian — is the highest peak in Oceania under continental plate definition. Located in Indonesian Papua on the western half of New Guinea, the peak combines serious technical rock climbing with extreme logistical complexity.

    The standard route climbs the peak’s north face via sustained rock climbing. The summit ridge requires 5.9-5.10 technical rock, tyrolean traverses, and exposed scrambling. The peak has equatorial glaciers — the only tropical glaciers outside Africa’s Mount Kilimanjaro and the Andes — though these are rapidly shrinking due to climate change. Summit day is typically 10-14 hours on technical terrain.

    The greater challenge is getting there. The jungle approach takes 4-7 days through remote Papua terrain, flown into Timika from Bali or Jakarta. Indonesian permits require advance coordination, and security considerations around the Grasberg mine sometimes affect access. Guided expeditions cost $18,000-$28,000 and take 10-14 days total. Success rates approximate 60-70%.

    Alternative helicopter access (bypassing the jungle trek) reduces expedition time to 6-8 days but costs significantly more. The peak sees approximately 80-150 successful summits per year, making it one of the least-summited Seven Summits along with Vinson Massif in Antarctica.

    GradeD+ / 5.9-5.10
    Expedition time10–14 days
    Total cost$18K–$28K
    Success rate60–70%

    Aoraki/Mount Cook: New Zealand’s Alpine Test

    03
    New Zealand’s highest · Southern Alps

    Aoraki / Mount Cook

    Southern Alps · South Island, New Zealand
    3,724 m12,218 ft

    Aoraki/Mount Cook is New Zealand’s highest peak and the Southern Hemisphere’s benchmark alpine climb. The name combines Māori (“Aoraki” — “cloud piercer”) with the English name honoring Captain James Cook. New Zealand officially uses the dual designation.

    First climbed in 1894 by Tom Fyfe, George Graham, and Jack Clarke, Aoraki has defined New Zealand mountaineering for 130 years. A major rockfall event in December 1991 reduced the mountain’s height by 10 meters — one of the few major peaks whose elevation has been verifiably altered by geological event in modern times.

    The standard Linda Glacier route grades AD+ with sustained snow and ice climbing over 2-3 days. Climbing requires navigating crevasses, steep ice faces, and summit ridge exposure. Aoraki has killed approximately 240+ climbers since record-keeping began, making it proportionally one of the most dangerous Southern Hemisphere peaks.

    Commercial climbing costs NZ$4,000-$8,000 for guided 3-5 day programs through Aspiring Guides, Alpine Guides Aoraki, and Adventure Consultants. Access via Aoraki/Mount Cook Village on the South Island, 300 km from Christchurch. Primary climbing season November through March (Southern Hemisphere summer). Weather notoriously unpredictable — plan 10-14 day trips to allow summit attempts.

    GradeAD+
    Standard routeLinda Glacier
    Total costNZ$4–8K
    SeasonNov–Mar

    Other Major Oceania Peaks

    Beyond the three headline peaks, Oceania offers many worthwhile climbing objectives. Here’s the broader landscape for climbers planning regional projects.

    PeakCountryHeightCharacterGradeSeason
    Carstensz PyramidIndonesia4,884 mTechnical rock, Seven SummitD+Jul–Dec
    Mount WilhelmPapua New Guinea4,509 mPNG’s highest, trekking peakPDMay–Sep
    Mount GiluwePapua New Guinea4,367 mVolcanic, second PNG highestPDMay–Sep
    Aoraki/Mount CookNew Zealand3,724 mNZ’s highest, technical alpineAD+Nov–Mar
    Mount TasmanNew Zealand3,497 mTechnical NZ alpineAD+Nov–Mar
    Mount Taranaki (Egmont)New Zealand2,518 mNear-perfect cone volcanoPDNov–Apr
    Mount RuapehuNew Zealand2,797 mActive volcano, accessiblePDOct–Apr
    Mount KosciuszkoAustralia2,228 mWalk-up Seven Summit (Bass)FDec–Mar
    Mount TownsendAustralia2,209 mAustralia’s #2, near KosciuszkoFDec–Mar
    Mount BogongAustralia1,986 mVictoria’s highestFNov–Apr
    Mount OssaTasmania, AU1,617 mTasmania’s highest, wildernessFDec–Mar
    Mount YasurVanuatu361 mActive volcano, tourist accessFJun–Oct

    New Zealand beyond Aoraki

    New Zealand’s Southern Alps contain 23 peaks over 3,000 m, making the region richer in alpine climbing than its relatively small size suggests. Major climbing objectives beyond Aoraki include Mount Tasman (3,497 m, technically harder than Aoraki), Malte Brun (3,199 m), Mount Sefton (3,151 m), and the Darran Mountains in Fiordland. The New Zealand Alpine Club maintains 24 huts across the Southern Alps.

    Australian Alps

    The Australian Alps extend from the Australian Capital Territory through New South Wales into Victoria. Major peaks beyond Kosciuszko include Mount Townsend (2,209 m), Mount Twynam (2,196 m), Mount Bogong (1,986 m, Victoria’s highest), and Mount Feathertop (1,922 m). The range hosts Australia’s primary ski resorts (Thredbo, Perisher, Mount Hotham, Falls Creek).


    When to Climb Oceania Peaks: Southern Hemisphere Timing

    Oceania’s climbing calendar is fundamentally different from Northern Hemisphere destinations — December through March is peak season for most peaks rather than June-August. Equatorial peaks (Carstensz, PNG) have different patterns based on rainfall rather than temperature.

    Country-specific seasons

    • Australia (Kosciuszko): December-March optimal. Winter (June-September) transforms the peak into a ski mountaineering objective.
    • New Zealand (Aoraki, Southern Alps): November through March is the Southern Hemisphere summer climbing season. December-February is peak conditions.
    • Indonesia (Carstensz): July through December is driest — Papua has year-round rainfall but these months offer the best windows.
    • Papua New Guinea (Mount Wilhelm): May-September dry season.
    • Pacific volcanoes (Vanuatu, Fiji): June-October dry season, avoiding cyclone season November-April.

    Flipping the climbing calendar

    Serious climbers often use Oceania’s seasonal inversion to extend their annual climbing window. North American climbers might spend June-August on Denali, then November-March on Aoraki and Carstensz. Seven Summits projects often schedule Oceania attempts in January-February when the Alps and Himalaya are in off-season. This creates year-round training and climbing potential for dedicated alpinists.


    Oceania Peaks FAQ: Your Common Questions Answered

    What is the highest mountain in Oceania?

    The highest mountain in Oceania depends on how Oceania is defined. By continental definition including the Australian continental plate and New Guinea, the highest peak is Puncak Jaya (Carstensz Pyramid) at 4,884 meters (16,024 feet) in Papua, Indonesia — the western half of New Guinea. By political Australian continent (mainland + Tasmania), the highest is Mount Kosciuszko at 2,228 meters (7,310 feet). The Seven Summits debate centers on this distinction: the Messner List uses Carstensz Pyramid as Oceania’s Seven Summit; the Bass List uses Kosciuszko. In Papua New Guinea, Mount Wilhelm (4,509 m) is the highest peak. Across New Zealand, Aoraki/Mount Cook is the highest at 3,724 m. The entire Oceanic continental region, including Melanesian, Micronesian, and Polynesian island peaks, contains fewer 4,000 m peaks than any other Seven Summits continent.

    Kosciuszko vs Carstensz: which is the Seven Summit?

    Kosciuszko vs Carstensz Pyramid is mountaineering’s most-debated Seven Summits question. Two lists have coexisted for decades: (1) The Bass List (Dick Bass, 1985) uses Mount Kosciuszko (2,228 m, Australia) as Oceania’s Seven Summit. (2) The Messner List (Reinhold Messner) uses Carstensz Pyramid / Puncak Jaya (4,884 m, Indonesia) as the Seven Summit. The Messner List is considered the more “serious” mountaineering challenge because Carstensz requires technical rock climbing (5.10 difficulty), remote jungle approach, and serious altitude. Kosciuszko is essentially a walk-up peak that most fit hikers can complete in a day. For serious Seven Summits climbers, completing the Messner List (including Carstensz) is the recognized achievement. The Bass List with Kosciuszko is sometimes called “light Seven Summits.” Many completer climbers do both to satisfy both lists. The debate reflects different definitions of the Oceania continent — some view New Guinea as part of Oceania, others include only mainland Australia.

    How hard is it to climb Carstensz Pyramid?

    Carstensz Pyramid (4,884 m, Indonesia) is a serious technical climbing objective — graded D+ (Difficile) on the IFAS scale with sustained 5.9-5.10 rock climbing on the summit ridge. The challenges include: (1) Technical rock climbing on the final 300 m summit ridge, including tyrolean traverses and exposed scrambling. (2) Equatorial jungle approach requiring 4-7 days of trekking through remote Papua terrain. (3) Extreme humidity and rainfall — one of the wettest regions on Earth. (4) Political complexity — Indonesia requires special permits and Papua region entry coordination. (5) Logistical difficulty — flights to Timika are unreliable, and the full expedition takes 10-14 days. Guided expeditions cost $18,000-$28,000 including all logistics and permits. Success rates approximate 60-70% in favorable conditions. Carstensz is notably harder than Kosciuszko but requires different preparation than high-altitude 8,000ers — more technical rock climbing than altitude endurance.

    What is the highest mountain in New Zealand?

    Aoraki/Mount Cook is the highest mountain in New Zealand at 3,724 m (12,218 ft) — part of the Southern Alps on the South Island. The mountain has dual naming: “Aoraki” is the Māori name meaning “cloud piercer,” while “Mount Cook” is the English name honoring Captain James Cook. New Zealand officially uses the combined “Aoraki/Mount Cook” designation. The mountain was climbed first in 1894 by Tom Fyfe, George Graham, and Jack Clarke. The standard Linda Glacier route is graded AD+ with sustained snow and ice climbing over 2-3 days. Aoraki has killed approximately 240+ climbers since record-keeping began, making it proportionally one of the most dangerous peaks in the Southern Hemisphere. A major rockfall event in December 1991 reduced the mountain’s height by 10 meters. Current commercial climbing costs NZ$4,000-$8,000 for guided 3-5 day programs. Access is via Aoraki/Mount Cook Village with flights from Christchurch or scenic drives through Canterbury.

    When is the best time to climb Oceania peaks?

    Best times vary significantly across Oceania due to Southern Hemisphere seasonality and equatorial locations: (1) Mount Kosciuszko (Australia): December-February is the classic summer hiking season; snow climbing December-March; other times possible but more challenging weather. (2) Carstensz Pyramid (Indonesia): Late July through early December offers drier conditions — Papua has year-round rainfall but these months are least wet. (3) Aoraki/Mount Cook (New Zealand): November through early March is the Southern Hemisphere summer climbing season; peak conditions December-February. (4) Australian Alps peaks (Victoria, NSW): December-February for summer hiking; winter peaks July-September for ski mountaineering. (5) Mount Taranaki (New Zealand North Island): November-April for standard climbing. (6) Papua New Guinea peaks (Mount Wilhelm): May-September dry season. (7) Pacific volcanoes (Fiji, Vanuatu): June-October dry season avoiding cyclone season November-April. Southern Hemisphere seasonality reverses the traditional alpine climbing calendar — Oceania’s best climbing window is typically December-February when most other destinations are in winter.

    How do you climb Mount Kosciuszko?

    Mount Kosciuszko (2,228 m) is the easiest of the Seven Summits — essentially a summer hike rather than a climb. Three main routes: (1) Main Range Track from Thredbo: Take the Kosciuszko Express chairlift from Thredbo Village to 1,930 m, then walk 6.5 km one-way along a well-maintained track. Total 13 km round trip, 400 m elevation gain, typically 4-6 hours. Popular and accessible. (2) Summit Walk from Charlotte Pass: 9 km one-way walk, 18 km round trip, 500 m elevation gain. More scenic with fewer crowds. (3) Mount Kosciuszko Summit Ride: Some operators offer cycle access via maintained fire roads. Kosciuszko National Park entry fee is AU$29 per vehicle per day. Best season is December-March for snow-free conditions. No guide required, no special permits. Thredbo Village is approximately 500 km south of Sydney, 6 hours drive. For Seven Summits collectors using the Bass List, Kosciuszko is the quickest Seven Summit — most climbers complete summit and descent in a single day.

    What peaks are in the Australian Alps?

    The Australian Alps are a mountain range spanning the Australian Capital Territory, New South Wales, and Victoria. Major peaks include: (1) Mount Kosciuszko (2,228 m, NSW) — Australia’s highest mainland peak. (2) Mount Townsend (2,209 m, NSW) — Australia’s second-highest at the time of first measurement (originally thought to be highest). (3) Mount Twynam (2,196 m, NSW) — third-highest. (4) Mount Bogong (1,986 m, Victoria) — Victoria’s highest peak. (5) Mount Feathertop (1,922 m, Victoria). (6) Mount Hotham (1,862 m, Victoria) — major ski resort. (7) Mount Jagungal (2,061 m, NSW). (8) The Main Range including Mount Carruthers and Mount Lee. The Alps extend roughly 500 km from the ACT through southern NSW into Victoria. Home to Kosciuszko National Park, Alpine National Park, and Namadgi National Park. The range includes Australia’s main ski resorts (Thredbo, Perisher, Mount Hotham, Falls Creek) operating primarily June-September. Summer hiking season December-March offers wildflower displays and accessible peaks for day walks and multi-day treks.

    Can you climb peaks in Papua New Guinea?

    Yes, peaks in Papua New Guinea are climbable though involve significant logistical complexity. Mount Wilhelm (4,509 m) is PNG’s highest peak and a genuine climbing objective — primarily a strenuous multi-day trek rather than technical climbing, typically 3-5 days from the town of Kundiawa. Other major PNG peaks include Mount Giluwe (4,367 m, a volcanic peak), Mount Hagen (3,778 m), and Mount Victoria (4,072 m in the Owen Stanley Range). Key considerations for PNG climbing: (1) Political stability varies by region — consult current travel advisories. (2) Infrastructure is limited outside main towns. (3) Local communities control land access — working with licensed operators is essential. (4) Malaria is present in lowland approaches. (5) Best climbing season is May-September dry season. (6) Costs are higher than expected due to logistical complexity — Mount Wilhelm climbs run $3,000-$6,000 guided. Operators like PNG Trekking Adventures and No Roads Expeditions specialize in PNG mountain expeditions. Experienced climbers find PNG peaks offer some of the most remote and culturally distinctive mountain experiences in the world.


    Authoritative Sources & Further Reading

    Content reflects verified national mapping data and authoritative mountaineering sources:

    • Geoscience Australia — ga.gov.au — Australian peak elevations and surveys
    • Land Information New Zealand (LINZ) — linz.govt.nz — NZ mountain data
    • Indonesian Geospatial Information Agency (BIG) — Papua region mapping
    • New Zealand Alpine Club — alpineclub.org.nz — Southern Alps hut network and climbing records
    • Department of Conservation New Zealand — doc.govt.nz — National park regulations
    • NSW National Parks and Wildlife Service — environment.nsw.gov.au — Kosciuszko National Park
    • Adventure Stats — 7summits.com — Seven Summits records and list documentation
    • American Alpine Journal — Seven Summits debate and climbing history
    • Operator websites: Alpine Guides Aoraki, Adventure Consultants, Aspiring Guides, Alpine Ascents International, Mountain Trip, PNG Trekking Adventures, No Roads Expeditions
    • Reference texts: Seven Summits (Dick Bass, Frank Wells), Meetings with the Seven Summits (Messner), Aoraki/Mount Cook: A Guide (Gilbert van Reenen), Australian Alpine Climbing (various)
    Published: February 15, 2026
    Last updated: April 19, 2026
    Next review: July 2026
    Part of the Global Summit Guide

    Back to the Master Hub

    This guide is one of 71 across 12 thematic clusters on Global Summit Guide. The master hub organizes every guide by experience tier, specific peak, skill area, and region.

    View the Hub →
  • Sacred Mountains of the World: A Guide to Pilgrimage Peaks

    Sacred Mountains of the World: A Guide to Pilgrimage Peaks

    Sacred Mountains of the World: A Guide to Pilgrimage Peaks (2026) | Global Summit Guide
    Cluster 10 · Regional Guides · Updated April 2026

    Sacred Mountains of the World: A Guide to Pilgrimage Peaks

    From Mount Kailash’s unclimbed sanctity to Fuji’s pilgrimage traditions, the world’s most sacred mountains carry thousands of years of religious meaning. A guide to pilgrimage peaks across cultures, climbing restrictions, and the respectful etiquette that separates thoughtful travelers from extractive tourists.

    10+
    Sacred peaks
    profiled
    4
    Religions at
    Mount Kailash
    50K+
    Annual Kailash
    pilgrims
    Never
    Kailash &
    Machapuchare climbed
    Global Summit Guide A guide in Cluster 10 · Regional Guides View master hub →

    Mountains have been sacred to every major world religion. Cultures separated by oceans and millennia have independently concluded that high peaks are where the divine meets the human — Kailash in Tibet, Fuji in Japan, Olympus in Greece, Sinai in Egypt, Uluru in Australia. For climbers and travelers, these peaks represent something categorically different from mere climbing objectives. Some are forbidden from summit attempts entirely. Others welcome pilgrims but demand specific protocols. Understanding sacred mountain traditions transforms a visit from tourism into cultural engagement — and protects these places for the generations who will continue revering them long after current climbers are forgotten.

    How this guide was built

    Content reflects primary religious texts and traditions where applicable, scholarly works on mountain religiosity, and direct consultation with cultural and religious studies scholars. Pilgrim numbers and access regulations reflect current 2026 government information where verifiable. Because sacred traditions are matters of living belief, this guide aims for respectful accuracy rather than religious commentary. Fact-check date: April 19, 2026.

    Why Mountains Become Sacred

    The pattern is striking: across unrelated religions and cultures worldwide, mountains consistently carry sacred meaning. Religious scholars identify several recurring reasons:

    • Axis mundi — The cosmic center connecting earth and heaven. Mountains often function as ladders, pillars, or bridges between worlds in religious cosmology.
    • Divine dwelling — Gods live on mountains. Olympus for the Greek pantheon, Shiva on Kailash and Meru, Fuji as a Shinto kami.
    • Revelation sites — Humans encounter the divine on mountains. Moses receives the Ten Commandments on Sinai, Muhammad receives revelation on Mount Hira, Buddha achieves enlightenment at Bodh Gaya (technically a tree but mountain-adjacent).
    • Cosmological pillars — Mountains hold up the sky or separate earth from heaven in many cosmologies.
    • Source of life-giving water — Rivers sacred to cultures often originate in sacred mountains: the Ganges from Himalayan glaciers, the Nile from Ethiopian highlands.
    • Ancestral homes — Indigenous cultures often locate ancestors and origin stories in specific mountains.

    The sacred mountain concept is so universal that it functions as near-proof of cultural parallel evolution — or perhaps of something inherent to the human response to high places.


    Mount Kailash: The World’s Most Sacred Mountain

    01
    The Unclimbed Axis Mundi

    Mount Kailash

    Ngari Prefecture · Tibet Autonomous Region, China
    6,638 m21,778 ft
    Hinduism Buddhism Jainism Bon

    Mount Kailash is the most sacred mountain on Earth by the measure of religious reach — four separate religions consider it cosmically central. In Hindu tradition, Kailash is the dwelling of Shiva and Parvati, source of the four great rivers of Asia (Ganges, Indus, Sutlej, Brahmaputra). In Tibetan Buddhism, it is the home of Demchog and Dorje Phagmo, tantric deities. In Jainism, Rishabhanatha — the first tirthankara — achieved moksha here. In the indigenous Tibetan Bon religion, Kailash is the seat of spiritual power.

    The mountain has never been climbed. Chinese authorities have denied all climbing permits, citing religious significance. Reinhold Messner famously declined an offered permit in 1985, stating he would not desecrate the peak. As of 2026, Kailash remains perhaps the most prominent unclimbed significant mountain in the world.

    What climbers can experience is the 52-kilometer kora — the circumambulation pilgrimage around the base. One kora is believed to cleanse the sins of a lifetime; 108 lead to enlightenment. Pilgrims travel clockwise (Hindus and Buddhists) or counterclockwise (Jains and Bonpos). The route crosses the 5,630 m Dolma La pass and takes 3 days for fit travelers — or 3-4 weeks for devoted Tibetan pilgrims performing full-length prostrations.

    Climbing statusForbidden
    Pilgrimage52-km kora (3 days)
    Annual pilgrims40,000–50,000

    Other Major Sacred Peaks

    02
    Japan’s sacred summit

    Mount Fuji

    Honshu · Japan
    3,776 m12,389 ft
    Shinto Buddhism Shugendo

    Mount Fuji is Japan’s most sacred peak and a living pilgrimage mountain. Designated a UNESCO World Heritage Site in 2013 specifically as a “sacred place and source of artistic inspiration,” Fuji combines Shinto, Buddhist, and Shugendo (mountain ascetic) traditions across 1,400 years of documented religious use.

    Unlike Kailash, Fuji welcomes pilgrims. The peak has active shrines at the summit and along climbing routes, particularly the Asama Shrine system and summit shrines. Traditional pilgrims (fujikō) climbed the mountain as religious practice — the tradition continues in modern form, with approximately 200,000-300,000 climbers annually during the official July-September season.

    Respectful climbing protocols include: climbing only in official season, not removing stones or items, following designated trails, and treating shrines with appropriate reverence. For a complete climbing guide see our Mount Fuji Climbing Guide.

    Climbing statusWelcomed
    Climbing seasonJul 1 – Sep 10
    Annual climbers200,000–300,000
    03
    Home of the Greek gods

    Mount Olympus

    Thessaly · Greece
    2,917 m9,570 ft
    Ancient Greek Mythological

    Mount Olympus was the home of the twelve Olympian gods in ancient Greek religion — Zeus, Hera, Poseidon, Apollo, Athena, and the rest of the pantheon. The mountain’s religious significance predates written Greek history and shaped Western mythology, art, and literature for 3,000 years.

    While classical Greek religion is no longer practiced, Olympus retains cultural significance as one of the foundational sacred mountains of Western tradition. The peak is climbed freely today by approximately 10,000 climbers annually, primarily via the E4 trail system from Litochoro. The summit complex includes Mytikas (the highest point, 2,917 m), Skolio (2,911 m), and Stefani (2,909 m, “The Throne of Zeus”).

    Ancient Greek religion practiced offerings and sacrifices at the base rather than summit attempts. Modern climbers who approach Olympus with cultural awareness engage with a different kind of sacredness — one that connects them to the foundations of Western civilization.

    Climbing statusOpen
    GradeHiking/Scramble
    Best seasonJun–Oct
    04
    Where Moses received the Ten Commandments

    Mount Sinai (Jebel Musa)

    Sinai Peninsula · Egypt
    2,285 m7,497 ft
    Judaism Christianity Islam

    Mount Sinai is sacred to all three major Abrahamic religions — Judaism, Christianity, and Islam — as the traditional location where Moses received the Ten Commandments from God. The mountain, called Jebel Musa (“Mountain of Moses”) in Arabic, has been a pilgrimage site for over 1,500 years.

    At the base sits Saint Catherine’s Monastery, built 548-565 CE — the world’s oldest continuously operating Christian monastery and a UNESCO World Heritage Site. The monastery houses thousands of early Christian manuscripts and icons. Its location is protected under a charter attributed to Muhammad himself, which has preserved the site through centuries of political change.

    Pilgrims climb the mountain via two traditional routes: the Camel Path (a gentler Bedouin-developed route) and the Steps of Penitence (3,750 ancient stone steps). Most climb at night to reach the summit for sunrise — a tradition combining the practical (avoiding heat) with the spiritual (experiencing dawn as symbolic revelation). The climb takes 2-3 hours up, 1-2 hours down.

    Climbing statusPilgrimage welcome
    Typical timingNight ascent
    Base siteSt Catherine’s Monastery
    05
    Nepal’s unclimbed sacred peak

    Machapuchare

    Annapurna Region · Nepal
    6,993 m22,943 ft
    Hinduism

    Machapuchare — “Fish Tail” in Nepali for its distinctive double-summit appearance — is sacred to Lord Shiva and forbidden to climbing. Despite being one of Nepal’s most photographed mountains (visible from Pokhara and the Annapurna Base Camp trek), the peak has never been summited.

    In 1957, a British expedition led by Wilfred Noyce reached within 50 meters of the summit but turned back out of respect for their Nepalese hosts’ religious beliefs. No climbing permits have been issued since. Machapuchare represents Nepal’s most explicit declaration that some peaks remain inviolable regardless of climbing demand — neighboring Annapurna peaks see regular expeditions, but Machapuchare is specifically protected.

    The peak is visible from the Annapurna Sanctuary trek and Annapurna Base Camp. Trekkers can photograph it, approach its base, and experience its presence without violating sacred boundaries.

    Climbing statusForbidden
    Trek accessABC trek visible
    Closest approachAnnapurna Base Camp
    06
    Australia’s most sacred site

    Uluru (Ayers Rock)

    Northern Territory · Australia
    863 m2,831 ft
    Anangu Aboriginal (Tjukurpa)

    Uluru is sacred to the Anangu Aboriginal people, the traditional owners of the land, with religious significance rooted in Tjukurpa (the Aboriginal spiritual worldview). Specific features of the 348-meter sandstone monolith relate to ancestral beings and sacred events in the Anangu creation narrative.

    Climbing Uluru was permanently prohibited on October 26, 2019, after decades of Anangu advocacy. The ban ended an era of problematic tourism where approximately 16% of visitors climbed against the traditional owners’ wishes despite clear signage. The 2019 closure represented one of the most successful modern cases of sacred site protection through legal restriction.

    Respectful visits now include: the 10.6 km Base Walk around Uluru, the Cultural Centre showing Anangu traditions, sunrise and sunset viewing platforms, and Aboriginal-guided tours sharing traditional stories (with appropriate boundaries on sacred information). The nearby Kata Tjuta (the Olgas) is a related sacred site with walking trails still accessible.

    Climbing statusBanned 2019
    Base walk10.6 km
    Cultural CentreAnangu education
    07
    Bali’s spiritual center

    Mount Agung

    Bali · Indonesia
    3,031 m9,944 ft
    Balinese Hinduism

    Mount Agung is Bali’s most sacred mountain in Balinese Hinduism, considered the dwelling of the gods and an earthly manifestation of Mount Meru — the mythological center of the Hindu universe. Besakih Temple, Bali’s “Mother Temple,” sits at Agung’s base and serves as the island’s most important Hindu site.

    Climbing is permitted but requires religious protocols. Climbers should: (1) Not climb during major religious ceremonies at Besakih. (2) Hire licensed local guides who understand religious protocols. (3) Wear appropriate dress including sarong requirements at Besakih. (4) Respect temple offerings encountered on the route.

    The peak is an active volcano that erupted significantly in 2017-2019, requiring climbing closures during active periods. Standard routes climb from Pasar Agung (southwest, 3-6 hours) or Besakih (north, 4-7 hours). Climbers start before dawn to reach summit for sunrise.

    Climbing statusRestricted
    Volcanic statusActive
    Base templeBesakih

    More Sacred Mountains Worldwide

    Beyond the major examples, dozens of mountains carry profound sacred significance in specific traditions. Here are additional peaks worth knowing.

    PeakLocationHeightSacred TraditionAccess
    Adam’s Peak (Sri Pada)Sri Lanka2,243 mBuddhism, Hinduism, Christianity, IslamPilgrimage
    Mount MeruTanzania4,566 mMaasai spiritual significanceClimbing
    Mount KenyaKenya5,199 mKikuyu (home of Ngai)Climbing
    DenaliAlaska, USA6,190 mAthabaskan “The High One”Climbing
    Mount ShastaCalifornia, USA4,322 mMultiple indigenous traditionsRestricted areas
    Mount TaishanShandong, China1,545 mTaoism, Chinese folk religionPilgrimage
    Mount EmeiSichuan, China3,099 mChinese BuddhismPilgrimage
    Mount AraratTurkey5,137 mAbrahamic (Noah’s Ark)Permit required
    Mount DamavandIran5,610 mPersian mythology, ZoroastrianismClimbing
    Mount EtnaSicily, Italy3,329 mAncient Greek/Roman mythologyClimbing
    Mount HieiKyoto, Japan848 mTendai BuddhismPilgrimage
    HuangshanAnhui, China1,864 mTaoism, artistic traditionPilgrimage

    Sacred Mountain Etiquette: How to Visit Respectfully

    Whether climbing a sacred peak where access is welcomed or visiting the base of one where the summit is forbidden, respectful protocols transform visitors from tourists into cultural participants. Here are the essential rules.

    01

    Research before visiting

    Understand which religion(s) consider the mountain sacred and what practices they observe. A 30-minute read transforms your experience from ignorant to informed.

    02

    Respect climbing restrictions absolutely

    Some peaks (Kailash, Machapuchare, Uluru) are completely off-limits. Respect this without negotiation or “exception” thinking. The prohibition is the tradition.

    03

    Dress modestly

    Especially at religious sites on approach or at the base. Covered shoulders, knees, and appropriate local dress codes show cultural awareness. Sarongs and scarves are useful.

    04

    Don’t remove anything

    Rocks, soil, plants, or religious items are sacred and should remain. “Taking home a small memento” from a sacred site is cultural violation regardless of intent.

    05

    Follow designated trails

    Creating shortcuts through sacred areas causes environmental damage and disrespects specific pilgrimage routes. Stay on marked paths.

    06

    Ask permission before photography

    Some traditions prohibit photographing pilgrims or religious ceremonies. Ask first. Many will say yes; the respect of asking matters regardless.

    07

    Support local communities

    Use local guides, eat at local establishments, purchase legitimate souvenirs. Sacred sites often sit in communities whose livelihood depends on respectful tourism.

    08

    Be quiet near religious sites

    Temples, shrines, and active ceremonies deserve quiet respect. Voice volume reflects attitude. Many travelers are oblivious to how loud they are in sacred spaces.

    09

    Learn respectful greetings

    Basic hellos, thank-yous, and respect phrases in local languages — even crude pronunciations — communicate effort and respect. Learn three phrases minimum before arrival.

    10

    Avoid festival days if uninvited

    Some mountains have religious festival days when tourist access is discouraged or the site is reserved for traditional practitioners. Check calendars before planning.

    The deeper principle

    Sacred mountain visiting at its best is cultural exchange, not extraction. Travelers who approach these places with curiosity, humility, and genuine interest in the traditions receive something profound in return — a connection to how human beings have understood mountains, the divine, and their place in the cosmos for thousands of years. Rush through on a checklist, and you see rock. Engage carefully, and you encounter one of humanity’s deepest responses to the natural world.


    Sacred Mountains FAQ: Your Common Questions Answered

    What is the most sacred mountain in the world?

    Mount Kailash (6,638 m) in Tibet is widely considered the most sacred mountain in the world because it holds supreme religious significance in four separate religions: Hinduism (home of Lord Shiva and Parvati), Buddhism (home of Demchog), Jainism (where Rishabhanatha achieved liberation), and the indigenous Tibetan Bon religion. Approximately 40,000-50,000 pilgrims perform the 52-kilometer kora (circumambulation) around Kailash annually — Hindus and Buddhists clockwise, Bonpos and Jains counterclockwise. The mountain has never been climbed out of religious respect; all climbing permits have been denied. Kailash is considered the axis mundi — the cosmic center — in multiple religious cosmologies. Other highly sacred mountains include Mount Fuji (Shinto/Buddhist, Japan), Mount Sinai (Abrahamic religions), Mount Olympus (Greek mythology), Uluru (Aboriginal Australian), and Machapuchare (Nepal, unclimbed out of respect to Shiva).

    Why can’t Mount Kailash be climbed?

    Mount Kailash (6,638 m) remains unclimbed as of 2026 due to its extraordinary religious significance across four religions. Chinese authorities, who govern Tibet, have consistently denied climbing permits out of respect for Hindu, Buddhist, Jain, and Bon religious traditions that consider the peak the dwelling place of deities. Key reasons: (1) Hindus believe Kailash is Lord Shiva’s home — climbing is considered blasphemous desecration. (2) Tibetan Buddhists view it as the manifestation of the tantric deity Demchog. (3) Jains believe their first tirthankara Rishabhanatha achieved moksha on the mountain. (4) Bonpos consider it the seat of spiritual power. Spanish climber Reinhold Messner famously declined an offered permit in 1985, stating he would not climb the peak out of respect. Unofficial ascents may have occurred but are not publicly documented. Unlike most major peaks where religious concerns are accommodated around climbing, Kailash remains completely off-limits — the world’s most prominent unclimbed significant peak.

    Is climbing Mount Fuji considered disrespectful?

    Climbing Mount Fuji (3,776 m) is not considered disrespectful — it is in fact part of the peak’s sacred tradition. Fuji has been a pilgrimage site for centuries, with Shinto and Buddhist pilgrims (fujikō) ascending the mountain as religious practice since the 7th century. The official climbing season is July-early September, when approximately 200,000-300,000 people summit annually. However, respectful climbing is expected: (1) Climb only during official season — off-season climbing risks accidents and disrespects safety traditions. (2) Do not touch or damage the torii gates, shrines, or stone markers. (3) Do not remove stones, rocks, or items from the mountain. (4) Follow the designated trails — creating new paths disturbs sacred landscape. (5) Be considerate at summit shrines. (6) Approximately 20 shrines and Shinto sites sit along the climbing routes. The Fuji experience combines physical challenge with cultural pilgrimage — climbers who approach it with respect rather than as mere tourist activity honor 1,400 years of religious tradition.

    What is the Kailash kora pilgrimage?

    The Kailash kora is a 52-kilometer pilgrimage circumambulation around Mount Kailash in Tibet, considered one of the world’s most spiritually significant religious journeys. Pilgrims believe one kora completion cleanses the sins of one lifetime; 108 koras lead to enlightenment. Traditional completion takes 3 days, though some devout Tibetan pilgrims perform prostrations (lying down every step) making the journey in 3-4 weeks. Direction varies by religion: Hindus and Buddhists travel clockwise; Jains and Bonpos travel counterclockwise. The route crosses the 5,630 m Dolma La pass (the pilgrimage’s highest point), the Siwa Tsal “sky burial” site (symbolic death/rebirth), and features three monasteries along the way. Most Western pilgrims fly to Kathmandu, drive to Tibet via Lhasa, and trek from Darchen at 4,620 m. Permits require Tibet travel permits plus Kailash region permits — only arranged through authorized Tibetan operators. Costs $2,500-$5,000 for 12-15 day expeditions. The altitude and pilgrimage nature make this challenging even for fit travelers.

    Why is Machapuchare never climbed?

    Machapuchare (6,993 m) in Nepal remains unclimbed out of religious respect for Hindu beliefs that the peak is sacred to Lord Shiva. Nepal officially closes the peak to climbing, making it one of the world’s most prominent peaks that has never been summited. The name means “Fish Tail” in Nepali, referring to the mountain’s distinctive double-summit appearance from certain angles. In 1957, a British expedition led by Wilfred Noyce reached within 50 meters of the summit but chose to turn back out of respect for their Nepalese hosts’ religious beliefs — no ascents have been permitted since. The peak is visible from Pokhara and the Annapurna Base Camp trek, making it one of Nepal’s most photographed mountains. Nepal’s approach to Machapuchare demonstrates that peaks can maintain sacred status even amid major commercial climbing — unlike most major mountains, no permit system has ever been established. The peak’s sanctity contrasts with neighboring Annapurna peaks (climbed) and reflects specific religious traditions rather than blanket policy.

    Can you climb Uluru in Australia?

    No, climbing Uluru was permanently prohibited on October 26, 2019, after decades of advocacy by the Anangu Aboriginal people who are the traditional owners of the sacred site. The ban ended an era of problematic tourism where hundreds of thousands climbed the 348-meter sandstone monolith against the Anangu’s wishes. Uluru holds deep significance in Tjukurpa, the Aboriginal worldview and spiritual tradition — specific features of the rock relate to ancestral beings and sacred events. The climbing ban reflects respect for the traditional owners and implements a long-standing request from the Anangu community. Alternatives for visitors: (1) Walk around the base via the 10.6 km Base Walk. (2) Visit the Cultural Centre to learn about Anangu traditions. (3) Attend sunrise and sunset viewings. (4) Take Aboriginal-guided tours sharing traditional stories. (5) Visit Kata Tjuta (the Olgas) nearby — a related sacred site with walking trails available. Uluru represents one of the most successful modern examples of sacred site protection through regulation.

    What religion considers Mount Sinai sacred?

    Mount Sinai (Jebel Musa, 2,285 m in Egypt) is considered sacred across the three major Abrahamic religions — Judaism, Christianity, and Islam — due to its traditional identification as the location where Moses received the Ten Commandments from God. The mountain’s sacred status includes: (1) Judaism: The mountain (called Har Sinai) is where the Torah was revealed, forming the foundational covenant. (2) Christianity: Traditional site of God’s revelation to Moses, venerated since early Christian centuries. Saint Catherine’s Monastery at the base (built 548-565 CE) is the world’s oldest continuously operating Christian monastery. (3) Islam: Known as Jebel Musa (“Mountain of Moses”), revered as site of Moses’s conversations with Allah. Some scholars dispute whether Jebel Musa is the actual biblical Mount Sinai — alternative candidates include Jebel al-Lawz in Saudi Arabia and several other Sinai Peninsula peaks. Regardless of scholarly debate, Jebel Musa has been the traditional Mount Sinai for over 1,500 years. Pilgrims climb the peak via two routes: the Camel Path (gentler) and the Steps of Penitence (3,750 ancient steps). Most climb at night to reach summit for sunrise.

    How do I respectfully visit sacred mountains?

    Respectful visits to sacred mountains require cultural awareness and adherence to specific protocols: (1) Research before visiting — understand which religion(s) consider the mountain sacred and what practices they observe. (2) Follow all climbing restrictions — some peaks (Kailash, Machapuchare, Uluru) are completely off-limits; respect this absolutely. (3) Dress modestly — especially at religious sites on approach or at the base. (4) Don’t remove anything — rocks, soil, plants, or religious items are sacred and should remain. (5) Don’t leave trash or graffiti — environmental and spiritual damage matters equally. (6) Follow designated trails — don’t create shortcuts through sacred areas. (7) Be quiet near religious sites and ceremonies. (8) Ask permission before photographing pilgrims or religious ceremonies — some prohibit photography entirely. (9) Support local communities — use local guides, eat at local establishments, purchase legitimate souvenirs. (10) Learn basic greetings and respectful phrases in local languages. (11) Avoid certain days — some mountains have religious festival days when tourist access is discouraged. (12) Understand that climbing itself may be the disrespect — some peaks should be visited but not summited. Respectful visiting enriches rather than exploits these profound cultural landscapes.


    Authoritative Sources & Further Reading

    Content reflects primary religious traditions, scholarly works, and verified current regulations:

    • UNESCO World Heritage Centre — whc.unesco.org — Mount Fuji, St Catherine’s Monastery, Uluru-Kata Tjuta documentation
    • Encyclopedia Britannica: Sacred Mountains — Scholarly entries on religious mountain traditions
    • Parks Australia — Uluru-Kata Tjuta National Park — parksaustralia.gov.au — Anangu traditional owner information
    • Nepal Mountaineering Association (NMA) — Machapuchare restriction policy
    • Saint Catherine’s Monastery — sinaimonastery.com — Historical documentation
    • Mount Kailash Tourism Department (Chinese) — Kailash kora regulations
    • Reference texts: Sacred Mountains of the World (Edwin Bernbaum), The Travels of Marco Polo (historical accounts), Mountains and the Sacred (academic essay collection), The Sacred and the Profane (Mircea Eliade)
    • Religious texts cited: Hindu Puranas on Kailash, Buddhist sutras on sacred mountains, Hebrew Bible (Exodus on Sinai), Quran on Moses and Sinai
    • Indigenous cultural sources: Anangu Uluru-Kata Tjuta Management Plan, various Aboriginal traditional owner materials, Berber cultural documentation
    • Academic journals: Journal of the American Academy of Religion, Mountain Research and Development, Religions
    Published: February 15, 2026
    Last updated: April 19, 2026
    Next review: July 2026
    Part of the Global Summit Guide

    Back to the Master Hub

    This guide is one of 71 across 12 thematic clusters on Global Summit Guide. The master hub organizes every guide by experience tier, specific peak, skill area, and region.

    View the Hub →
Language »