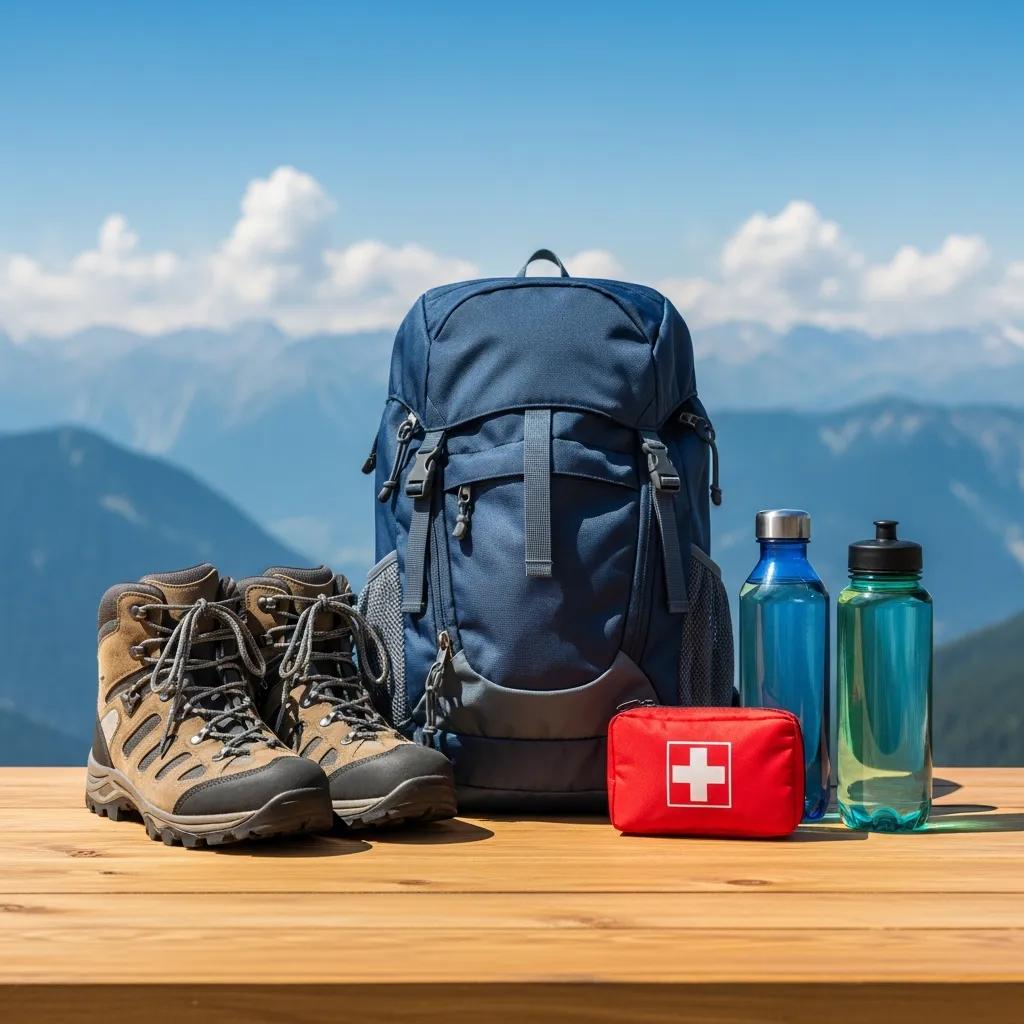
Nepal’s Technical Peaks Complete Guide 2026 — The 12 Himalayan Climbing Objectives Between Trekking Peaks and 8,000ers
The middle tier of Himalayan climbing — Nepal’s technical peaks between 5,800 and 7,200 meters that teach actual Himalayan alpinism without the $75K+ cost or extreme consequence of 8,000er work. Generally, this collection covers Ama Dablam, Baruntse, Pumori, Cholatse, Thamserku, Island Peak, Mera Peak, and the peaks that define Himalayan climbing progression for serious but not elite climbers. Specifically, this guide profiles 12 technical peaks with verified 2026 NMA permit fees following the September 2025 regulatory update, IFAS difficulty grades, summit rate data from the Himalayan Database, and detailed operator pricing across Nepal-based and Western providers. Notably, this is the tier that produces the next generation of serious Himalayan climbers — the curriculum between trekking introduction and elite 8,000er expedition work.
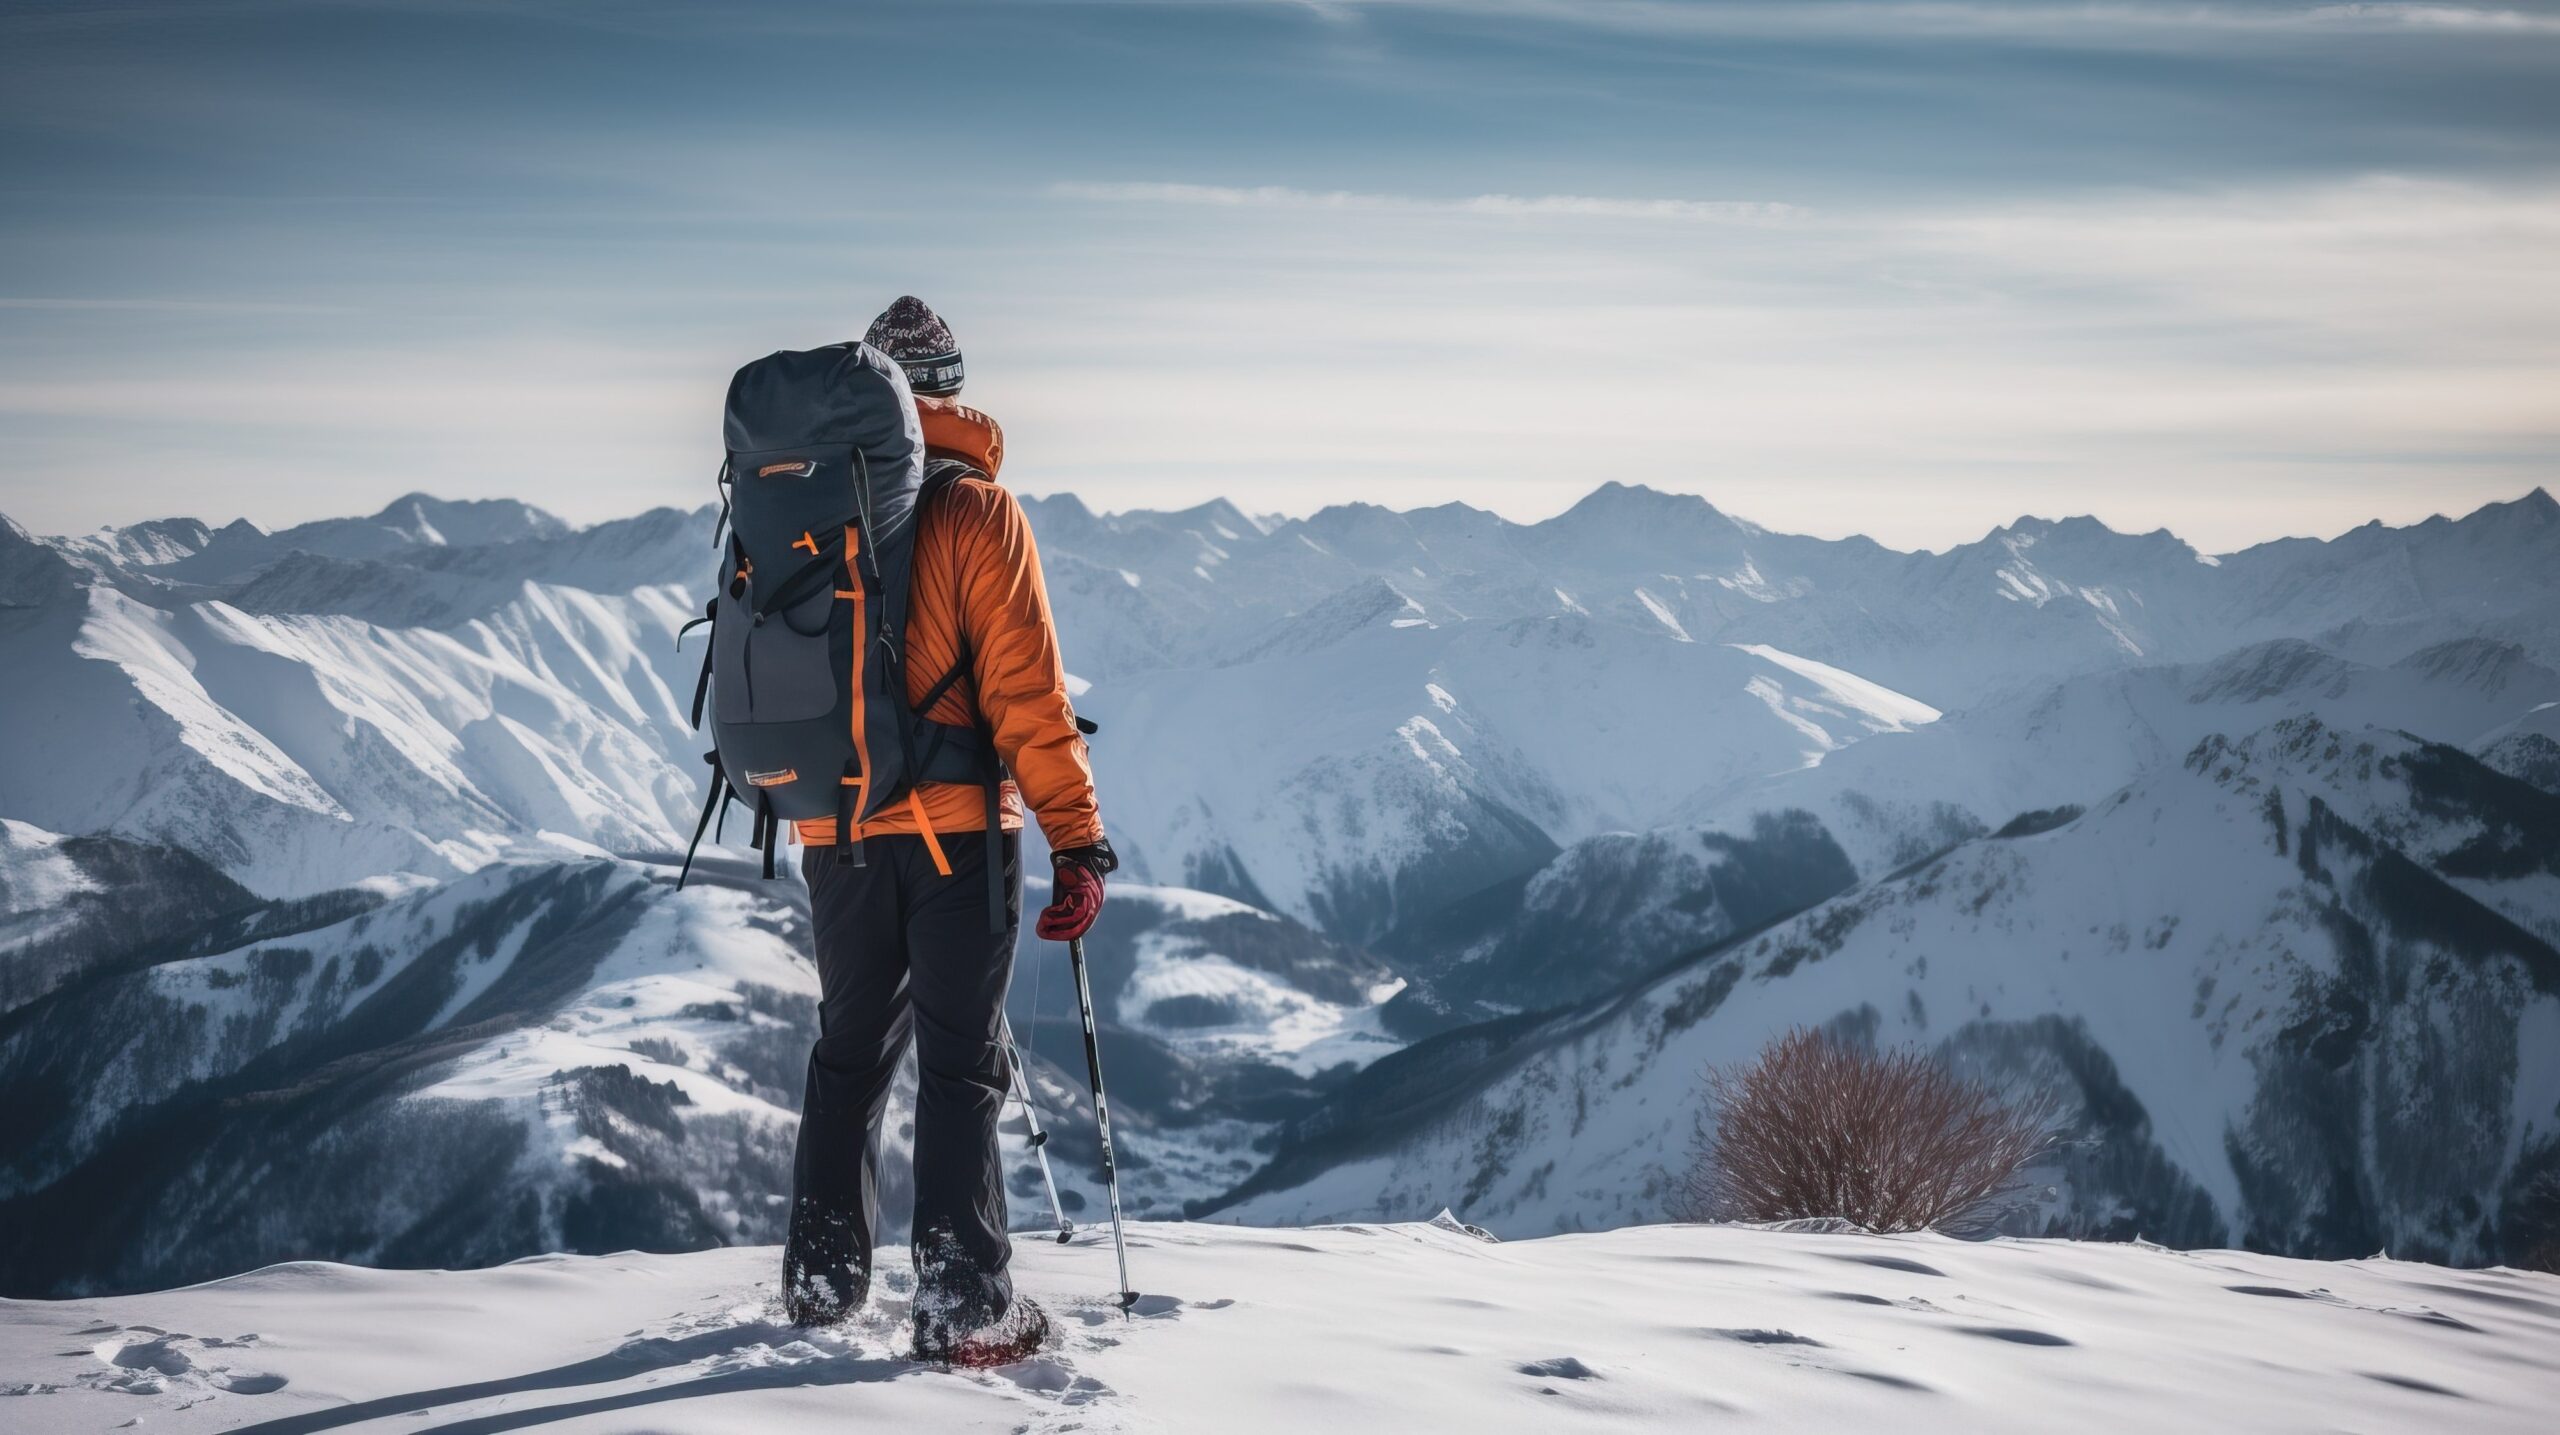
Nepal’s mountains divide into three coherent tiers — trekking peaks for mountaineering introduction, 8,000-meter expedition peaks for elite high-altitude climbing, and the technical middle tier covered in this guide. Generally, the collection of peaks between 5,800 m and 7,200 m forms Nepal’s real alpinism curriculum. Specifically, Ama Dablam, Baruntse, Pumori, Cholatse, Thamserku, Island Peak, Mera Peak, and their siblings teach the actual skills of Himalayan climbing including fixed rope ascending, mixed terrain movement, extended altitude endurance, and expedition logistics. Notably, this tier delivers serious Himalayan climbing experience without the $75K+ cost or extreme consequence of 8,000er work — making it the natural progression for climbers building toward elite objectives.
This guide answers what climbers need to know about Nepal’s technical peaks. Which peak suits your current experience level? What separates Ama Dablam from Island Peak in actual climbing demands? How do permit costs compare across NMA trekking peaks versus Ministry of Tourism expedition peaks? Notably, we’ll cover concrete details: the three-tier Nepal peak structure with regulatory implications, complete 12-peak comparison table with IFAS grades and current costs, flagship Ama Dablam deep-dive, gateway peaks (Island Peak and Mera Peak) decision framework, serious technical peaks (Baruntse, Pumori, Cholatse), lesser-known peaks (Kyajo Ri, Chulu West, Himlung Himal), NMA permit costs and 2025 regulatory changes, and seasonal planning across all four climbing windows.
Nepal’s Three-Tier Peak Structure
Understanding Nepal’s three-tier peak structure determines permit requirements, cost, guide requirements, and where each peak sits in climber progression. Generally, the structure follows Nepal’s regulatory framework distinguishing trekking peaks (under 6,500 m, NMA permits), technical peaks (mixed authority, 5,800-7,200 m), and expedition peaks (above 6,999 m, Ministry of Tourism). Specifically, climbers should understand which tier their target peak falls into before planning permits or operator engagement.
NMA Trekking Peaks
33 peaks · Under 6,500 m · Group A & B
Licensed by the Nepal Mountaineering Association. Examples include Island Peak (6,189 m), Mera Peak (6,476 m), Lobuche East (6,119 m), Kwangde, Pokalde, Naya Kanga, and others. Permits $250-$400. Most introductory climbs grade PD to AD. Guided climbs cost $1,500-$3,500.
Technical Peaks
The middle tier · 5,800-7,200 m
Examples include Ama Dablam (6,812 m), Baruntse (7,129 m), Pumori (7,161 m), Cholatse (6,440 m), Thamserku, Kyajo Ri, Chulu West, Himlung Himal. NMA or Ministry of Tourism permits depending on peak. Expedition-style climbs cost $6,500-$20,000.
8,000er Expedition Peaks
8 peaks · Above 8,000 m
The 8 Nepalese 8,000ers include Everest, Kanchenjunga, Lhotse, Makalu, Cho Oyu, Dhaulagiri, Manaslu, and Annapurna. Ministry of Tourism permits cost $3,000-$15,000. Full expedition logistics run $35,000-$230,000+ for guided 2026 climbs.
The critical distinction. Trekking peaks serve as acclimatization and introduction. 8,000ers demand specialized expedition capability. The technical middle tier is where Nepal teaches climbers to become real Himalayan alpinists — climbing fixed-rope routes with guide support, developing multi-week expedition endurance, and operating in the 6,000-7,000 m range that forms the majority of interesting peaks worldwide. Notably, skipping this tier is the most common mistake in Himalayan progression. Climbers who jump directly from trekking peaks to 8,000ers commonly fail because of inadequate technical climbing skills and expedition management experience.
Complete 12-Peak Comparison Table
The complete Nepal Technical Peaks list appears below — organized by IFAS grade from easiest (F) through hardest (D+). Generally, climbers should reference this table when selecting their next Nepal climbing objective. Specifically, the table shows elevation, IFAS difficulty grade, permit type, 2026 cost range, expedition duration, and current summit rate where available. Notably, this comparison table is the core decision tool for matching peak to climber experience — the audit gap the previous version missed.
| # | Peak | Elevation | Grade | Permit | 2026 Cost | Duration | Summit Rate |
|---|---|---|---|---|---|---|---|
| 1 | Mera Peak | 6,476 m | F/PD | NMA | $1,800-$3,200 | 18-22 days | ~85% |
| 2 | Lobuche East | 6,119 m | PD | NMA | $1,500-$2,800 | 14-18 days | ~80% |
| 3 | Chulu West | 6,419 m | PD+ | NMA | $2,200-$4,000 | 20-24 days | ~75% |
| 4 | Island Peak (Imja Tse) | 6,189 m | PD+ | NMA | $1,800-$3,500 | 16-20 days | ~75% |
| 5 | Himlung Himal | 7,126 m | PD+ | MoT | $6,500-$11,000 | 28-32 days | ~70% |
| 6 | Kyajo Ri | 6,186 m | AD | NMA | $2,500-$4,500 | 18-22 days | ~65% |
| 7 | Thamserku | 6,623 m | AD+ | MoT | $5,500-$9,000 | 22-26 days | ~55% |
| 8 | Baruntse | 7,129 m | AD+ | MoT | $7,500-$15,000 | 25-28 days | ~60% |
| 9 | Cholatse | 6,440 m | D | MoT | $6,000-$10,000 | 20-24 days | ~50% |
| 10 | Ama Dablam | 6,812 m | D / 5.7 | MoT | $6,500-$15,000 | 25-30 days | ~70% |
| 11 | Pumori | 7,161 m | D+ | MoT | $9,000-$16,000 | 25-30 days | ~40% |
| 12 | Burke Khang (emerging) | 6,942 m | TD | MoT | $8,000-$14,000 | 26-30 days | varies |
Reading the Grade Column
The IFAS (International French Adjectival System) grading scale provides standard alpine difficulty ratings used across European and Nepal climbing. Generally, climbers should match their experience to the appropriate grade level rather than jumping ahead. Specifically, the IFAS grades map to:
| IFAS Grade | Translation | Technical Demand |
|---|---|---|
| F | Facile (Easy) | Glacier walking, basic snow slopes. No technical climbing. |
| PD | Peu Difficile (Slightly Difficult) | Moderate slopes, basic glacier travel skills, occasional steep sections. |
| PD+ | Peu Difficile Plus | Sustained moderate climbing with short steep sections requiring fixed rope. |
| AD | Assez Difficile (Fairly Difficult) | Sustained 45-55° slopes, technical sections, real climbing skills required. |
| AD+ | Assez Difficile Plus | Sustained 50-60° slopes, mixed terrain, exposure on key sections. |
| D | Difficile (Difficult) | Sustained steep climbing 55-65°, technical rock, significant exposure. |
| D+ | Difficile Plus | Very sustained difficult climbing with technical mixed sections. |
| TD | Très Difficile (Very Difficult) | Continuously technical climbing, multi-pitch rock and ice. |
The Decision Framework — Which Peak Should You Climb?
Selecting the right Nepal technical peak depends on three factors: current climbing experience, altitude exposure history, and budget commitment. Generally, climbers should match their first Nepal technical peak to actual current capabilities rather than aspirational goals. Specifically, the recommended progression framework follows a clear logic:
| Climber Profile | Recommended Peak | Reasoning |
|---|---|---|
| First 6,000m experience, no technical background | Mera Peak (6,476 m) | Highest trekking peak; F/PD grade; mostly glacier walking; excellent acclimatization profile |
| First 6,000m, prior trekking experience | Lobuche East (6,119 m) | Easy combination with EBC trek; PD grade; manageable technical sections |
| Want technical practice before Ama Dablam | Island Peak (6,189 m) | PD+ with real ice headwall; fixed rope and jumar practice; standard technical introduction |
| Annapurna region preferred over Khumbu | Chulu West (6,419 m) | Combines with Annapurna Circuit; PD+ grade; less crowded than Khumbu peaks |
| Want first 7,000m before Ama Dablam | Himlung Himal (7,126 m) | PD+ grade at 7,000m altitude; moderate technical demands; 8,000er preparation |
| Strong 6,000m experience, ready for technical climb | Ama Dablam (6,812 m) | D grade with 5.7 rock; the definitive Nepal technical peak; iconic objective |
| Have done Ama Dablam, want more technical | Cholatse (6,440 m) or Kyajo Ri (6,186 m) | Similar technical demands without Ama Dablam crowds; “connoisseur’s peaks” |
| Building toward 8,000er expeditions | Baruntse (7,129 m) | AD+ at 7,000m; full expedition logistics; demonstrates 7,000m capability |
| Elite technical objective | Pumori (7,161 m) | D+ with sustained steep mixed terrain; higher avalanche risk; demands prior 7,000m experience |
The “Three Peaks” combination strategy. Generally, a popular 4-week progression combines Mera Peak + Island Peak + Lobuche East in a single expedition. First, Mera Peak provides acclimatization through gradual altitude gain. Then Island Peak adds technical practice with the steep ice headwall. Finally, Lobuche East provides additional altitude experience. Specifically, the combined “Three Peaks” itinerary costs $3,500-$5,500 guided over 25-30 days. Notably, many climbers do this as their entry into serious Nepal climbing before moving on to Ama Dablam or Himlung Himal. The combination delivers maximum experience per trip cost.
The Two Most Common Progression Paths
Most serious Nepal climbing progression follows one of two paths. Generally, climbers choose between technical-focused and altitude-focused progression depending on their ultimate objective. Specifically, the two standard paths produce different skill development:
| Path | Sequence | Total Time | Building Toward |
|---|---|---|---|
| Technical Path | Mera → Island Peak → Ama Dablam → Cholatse/Pumori | 4-6 years | Elite technical 6,000-7,000m peaks worldwide |
| Altitude Path | Mera → Island Peak → Himlung Himal → Baruntse → 8,000er | 5-8 years | Everest, Cho Oyu, Manaslu, other 8,000ers |
| Combined Path | Mera → Ama Dablam → Baruntse → 8,000er | 5-7 years | Maximum versatility for advanced climbing |
| Fast Track (compressed) | Three Peaks (Mera/Island/Lobuche) → Ama Dablam → Baruntse | 3-4 years | Climbers with prior international mountaineering |
Flagship Peak — Ama Dablam
Ama Dablam — The Definitive Nepal Technical Peak
Ama Dablam (“Mother’s Necklace” in Sherpa) is the most iconic peak in the Khumbu region and the definitive technical objective in Nepal outside the 8,000ers. Generally, the distinctive pyramid shape dominates the approach to Everest Base Camp, making it one of the most photographed peaks in the world. Specifically, the Southwest Ridge standard route is graded D (Difficile) requiring technical rock climbing on the Yellow Tower up to 5.7, sustained fixed-rope climbing, and extended exposure on narrow ridges above 6,000 m. Notably, the peak is typically attempted as the culmination of a Nepal technical peak progression — climbers often complete Island Peak or Lobuche East first for 6,000 m experience.
Ama Dablam Route Structure
Base camp sits at 4,600 m with two higher camps used during summit pushes. Generally, the climbing structure progresses through several distinct stages. First, Camp 1 establishes at 5,700 m below the main ridge. Then Camp 2 sits at 6,000 m on the ridge proper. Also Camp 3 (used by some operators) at 6,300 m provides a final acclimatization point. Specifically, summit day from Camp 2 takes 10-14 hours through the famous Yellow Tower rock section, the Grey Tower mixed climbing, the Mushroom Ridge snow traverse, and the final summit cone.
2026 Cost Breakdown
| Cost Component | 2026 Range | Notes |
|---|---|---|
| MoT permit (spring/autumn) | $400 | Plus $2,000 refundable garbage deposit |
| MoT permit (winter/summer) | $200 | Climbing not advised winter |
| Sagarmatha NP entry | $30 | Required for Khumbu access |
| Khumbu Pasang Lhamu Rural Municipality | $17 | Local government fee |
| Liaison Officer fee | ~$3,000 / team | Required for expedition peaks |
| Sherpa support and guide fees | $2,500-$4,000 | Includes climbing Sherpa |
| Base camp logistics | $1,200-$2,000 | Porterage, base camp setup |
| Food, tents, fixed rope | $800-$1,500 | Expedition consumables |
| Nepali operator total | $6,500-$9,000 | Asian Trekking, 8K Expeditions, Nepal Alpine |
| Mid-tier operator total | $9,000-$12,000 | Seven Summit Treks, Imagine Nepal |
| Western operator total | $12,000-$15,000 | Alpine Ascents International, Mountain Professionals |
| International flight to Kathmandu | $1,200-$2,500 | Plus pre/post Kathmandu lodging |
| Insurance (high-altitude rescue) | $200-$500 | Required for permit application |
Ama Dablam Operator Selection
Climbers selecting an Ama Dablam operator should evaluate several factors. Generally, Nepali operators (Nepal Alpine Expeditions, 8K Expeditions, Asian Trekking) provide lowest cost with strong local expertise. Specifically, mid-tier operators (Seven Summit Treks, Imagine Nepal) offer balance of cost and Western communication standards. Notably, Western operators (Alpine Ascents International, Mountain Professionals, Adventure Consultants) provide highest cost with extensive pre-trip support and English-speaking guides. Generally, climbers should match operator choice to their experience level — first-time Himalayan climbers benefit from Western operator support while experienced climbers can save considerably with Nepali operators.
Summit Statistics
Ama Dablam summit rate is approximately 70% in favorable weather, with fatality rate around 2%. Generally, the favorable summit rate reflects the well-established fixed-rope route plus experienced guide infrastructure. Specifically, summit failures typically result from weather windows, AMS at high camps, or technical inability rather than route conditions. Notably, expedition duration is 25-30 days from Kathmandu arrival to Kathmandu departure — making it one of the more time-committing objectives relative to altitude.
Gateway Technical Peaks — Island Peak and Mera Peak
The two most-climbed gateway peaks in Nepal serve different progression purposes. Generally, Island Peak provides technical practice while Mera Peak provides altitude experience. Specifically, most serious climbers eventually climb both. Notably, the two peaks combine well in single 4-week expeditions with proper sequencing.
Island Peak (Imja Tse) — Technical Practice + Everest Views
Island Peak gets its English name from its island-like appearance rising from the Imja Valley. Generally, the standard route is graded PD+ with a steep headwall ice section requiring fixed rope and jumar, plus a summit ridge traverse on snow and ice. Specifically, this makes Island Peak the preferred introductory 6,000 m peak for climbers who want to practice technical skills before bigger objectives. Notably, the peak is commonly combined with the Everest Base Camp trek — adding 3-4 days for the summit attempt after reaching EBC. Approach via Chhukhung, high camp at 5,600 m, summit day 8-12 hours. Guided climbs cost $1,800-$3,500 including permit, guide, gear, and porters. Fatality rate approximately 1%.
Mera Peak — Highest Altitude, Forgiving Terrain
Mera Peak is Nepal’s highest-altitude trekking peak — taller than Island Peak but technically easier, rated F/PD. Generally, the climb is primarily glacier travel with gentle snow slopes, culminating in a short steep section (30-40°) just below the summit. Specifically, the approach through the Hinku Valley avoids the Everest trekking route’s crowds. Notably, the peak is the preferred first 6,000 m experience for climbers without prior technical climbing background — its forgiving terrain lets climbers focus on altitude adaptation without managing complex technical moves. Summit views from 6,476 m include five 8,000ers (Everest, Lhotse, Makalu, Cho Oyu, Kanchenjunga). Guided climbs cost $1,800-$3,200.
Serious Technical Peaks — Baruntse, Pumori, and Cholatse
The graduate-level technical peaks in Nepal demand prior 6,000 m experience, strong technical skills, and serious expedition commitment. Generally, these peaks form the next progression step after Ama Dablam for climbers building toward elite objectives. Specifically, Pumori rivals Ama Dablam for technical demand while Baruntse provides the natural 7,000m stepping stone to 8,000ers.
Baruntse — The 7,000m Training Ground
Baruntse is the natural stepping stone to 8,000 m peaks. Generally, at 7,129 m, Baruntse delivers full expedition-style altitude experience without the extreme costs of 8,000ers. Specifically, the Southeast Ridge standard route is graded AD+ with sustained snow and ice to 60°, several technical sections, and a committing summit day. Notably, Baruntse is popular with climbers preparing for Everest or other 8,000ers as proof of 7,000 m capability. Expedition duration 25-28 days, operator costs $7,500-$15,000. The approach through the Hongu Valley is remote and spectacular, distinct from the Khumbu traffic patterns.
Pumori — The Everest-View Technical Peak
Pumori sits directly across from Everest Base Camp and is known for its technical Southeast Ridge. Generally, the standard route is graded D+ with sustained steep ice and mixed terrain. Specifically, the peak’s fatality rate around 4% is notably higher than Ama Dablam because of avalanche hazard on the standard routes. Notably, Pumori is less commonly attempted than Ama Dablam but considered more technical. Pumori requires major prior technical experience — not an appropriate first Nepal peak. Most climbers attempt it after Ama Dablam or a 7,000 m peak elsewhere. Expedition cost $9,000-$16,000, duration 25-30 days.
Cholatse — The Khumbu’s Hidden Technical Gem
Cholatse is a connoisseur’s peak — less famous than Ama Dablam but equally technical in its own way. Generally, the Southwest Ridge is graded D with sustained mixed climbing and exposed ridge traverses. Specifically, the peak sees far fewer ascents than Ama Dablam but offers similar technical challenge. Notably, Cholatse suits climbers who want Ama Dablam-level technical difficulty without the crowds. Expedition cost $6,000-$10,000, duration 20-24 days. Best climbed in October-November.
Lesser-Known but Excellent — Kyajo Ri, Chulu West, Himlung
Beyond the famous peaks, Nepal offers remarkable technical objectives that see far fewer climbers. Generally, these peaks reward climbers who want real Himalayan experience without tourist-route congestion. Specifically, three lesser-known peaks deserve attention from intermediate climbers.
Kyajo Ri — Technical Peak Near Namche
Kyajo Ri is a newer NMA trekking peak that opened in 2003. Generally, the peak combines technical rock and mixed climbing in a less-visited valley. Specifically, the standard Southwest Face route is graded AD with genuine rock climbing sections. Notably, Kyajo Ri provides a strong alternative to the crowded Island Peak and Mera Peak circuit for climbers wanting Khumbu region access without tourist density.
Chulu West — Annapurna Region Trekking Peak
Chulu West combines excellent altitude experience with access from the Annapurna Circuit trek. Generally, the peak is graded PD+ with moderate snow slopes and a short technical section near the summit. Specifically, Chulu West is a strong choice for Annapurna-region climbers wanting to combine trekking and climbing in a single expedition. Notably, the Annapurna region access provides cultural and scenic variety distinct from the Khumbu-focused alternatives.
Himlung Himal — 7,000m Peak with Moderate Difficulty
Himlung is increasingly popular as a 7,000 m objective with moderate technical demands. Generally, the peak is graded PD+ with mostly snow and ice slopes. Specifically, Himlung provides excellent 8,000er preparation without the extreme commitment of Baruntse or more technical 7,000ers. Notably, the remote location near the Tibet border adds cultural appeal — climbers experience Tibetan-influenced villages during the approach. Himlung represents the best “first 7,000m peak” option for climbers building altitude experience with lower technical demands.
NMA Permits and 2026 Logistics
Nepal’s permit system distinguishes trekking peaks (NMA) from expedition peaks (Ministry of Tourism). Generally, understanding the permit structure affects cost, timeline, and what operators can legally offer. Specifically, the September 2025 regulatory update introduced several mandatory requirements that affect 2026 climbing planning.
Permit Costs by Peak Type and Season
| Peak / Type | Spring (Mar-May) | Autumn (Sep-Nov) | Winter/Summer | Authority |
|---|---|---|---|---|
| Group A NMA (Ama Dablam, Baruntse, Pumori) | $400-$500 | $400-$500 | $200-$250 | MoT |
| Group B NMA (Island, Mera, Lobuche) | $250-$400 | $250-$400 | $125-$200 | NMA |
| 8,000m peaks (Everest) | $15,000 | $7,500 | $3,750 | MoT |
| Other 8,000ers (Cho Oyu, Manaslu) | $1,800 | $900 | $450 | MoT |
What the September 2025 Regulatory Update Changed
Several major changes from the September 2025 update affect technical peak climbers. Generally, the changes reinforce existing safety requirements while adding new tracking and environmental standards. Specifically, the key changes include several mandatory provisions:
- Mandatory guide requirements reinforced — no solo or unsupported climbing on permitted peaks. Independent climbing is not legally permitted on technical peaks.
- Insurance requirements verified at permit application — high-altitude rescue coverage now required. Coverage minimums increased.
- GPS tracking required on some expedition peaks — 8,000 m+ mandatory, technical 7,000ers encouraged. Affects Ama Dablam, Baruntse, Pumori, Himlung.
- Biodegradable waste management required on all peaks — operators must provide waste collection systems. Refundable garbage deposits enforced.
- Climber-to-guide ratios codified — most technical peaks require 1:1 to 2:1 climber-to-guide. Ama Dablam typically requires 1:1 or 2:1 depending on experience.
- Insurance coverage minimums raised — high-altitude guide insurance raised from NPR 1.5 million to NPR 2 million (~$15,000 USD coverage minimum).
Ama Dablam specific 2026 requirements. Generally, the Ama Dablam permit application now requires several documents at submission. First, certified climbing resume showing 6,000m experience. Then a medical certificate. Also a Liaison Officer fee deposit (~$3,000 per team). Plus proof of high-altitude rescue insurance. Finally, a $2,000 refundable garbage deposit. Notably, climbers should begin permit applications 2-3 months before climbing dates because of processing time and document verification requirements. Late applications during peak season frequently face delays.
Seasonal Planning — When to Climb
Nepal’s seasons strongly determine climbing feasibility on technical peaks. Generally, post-monsoon October-November is the prime season for most peaks. Specifically, pre-monsoon April-May is the secondary window. Notably, winter and summer climbing requires specialized planning for most peaks.
| Season | Months | Conditions | Best For |
|---|---|---|---|
| Post-Monsoon (Primary) | October-November | Clear, cold, stable weather; minimal precipitation; longer daylight than winter | Ama Dablam, Baruntse, Pumori, Cholatse, all technical peaks |
| Pre-Monsoon (Secondary) | April-May | Warmer temperatures; more afternoon storms; higher avalanche risk | Most peaks but less stable than autumn; preferred for some 7,000m peaks |
| Winter (Specialized) | December-February | Extreme cold but stable weather; short days limit summit windows | Only experienced cold-weather climbers; Island Peak and Mera Peak possible |
| Monsoon (Avoid) | June-September | Constant precipitation; high avalanche hazard; poor visibility | Not suitable for most technical peaks |
Why October-November is the prime season. Generally, the post-monsoon window produces optimal climbing conditions for several reasons. First, the monsoon precipitation has ended creating clear weather patterns. Then daytime temperatures are cold but not extreme. Also avalanche risk decreases as snowpack stabilizes. Plus visibility is exceptional with cleared mountain views. Finally, daylight remains sufficient for summit pushes through mid-November. Notably, the window narrows rapidly after mid-November as winter conditions arrive — climbers should plan summit attempts in the first three weeks of October through mid-November for maximum weather safety.
Frequently Asked Questions About Nepal’s Technical Peaks
What are Nepal’s technical climbing peaks?
Nepal’s technical climbing peaks are mountains between trekking peaks (under 6,500 m) and the 8,000-meter expedition peaks. These peaks form the middle tier where climbers learn actual Himalayan alpinism — fixed rope ascending, mixed terrain movement, extended altitude endurance. The 12 technical peaks include Ama Dablam (6,812 m), Baruntse (7,129 m), Pumori (7,161 m), Cholatse (6,440 m), Thamserku (6,623 m), Island Peak (6,189 m), Mera Peak (6,476 m), Lobuche East (6,119 m), Kyajo Ri (6,186 m), Chulu West (6,419 m), and Himlung Himal (7,126 m). These peaks require real climbing skills but not the expedition logistics or extreme cost of 8,000ers. NMA-classified peaks cost $250-$400 in permit fees while Ministry of Tourism expedition peaks like Ama Dablam cost $400-$500.
How hard is Ama Dablam to climb?
Ama Dablam (6,812 m) is graded D (Difficile) on the IFAS scale and is considered one of Nepal’s most technical peaks for its size. The standard Southwest Ridge route requires technical rock climbing on the Yellow Tower up to 5.7, sustained fixed-rope ascending on steep snow and ice, extended exposure on narrow ridge sections above 6,000 m, and acclimatization to 6,800 m over typically 3-4 weeks. Ama Dablam has approximately 2% fatality rate — safer than most 8,000ers but considerably more dangerous than trekking peaks. The peak is typically attempted after climbers complete Island Peak or Mera Peak. Guided expeditions cost $6,500-$15,000 with operators like Asian Trekking, Nepal Alpine Expeditions, and Alpine Ascents International. The November-December season is preferred for stable weather.
What is the difference between Mera Peak and Island Peak?
Mera Peak (6,476 m) and Island Peak (6,189 m) are Nepal’s most popular NMA trekking peaks but serve different purposes. Mera Peak is taller but technically easier — rated F/PD (Facile to Peu Difficile) with mostly glacier travel and one short ice face near the summit. Mera Peak is the better choice for first 6,000 m experience as introduction to altitude climbing. Island Peak is shorter but more technical — rated PD+ with a steep ice section requiring fixed rope and jumar, plus a summit ridge traverse. Island Peak is the better choice for climbers wanting to practice technical skills before Ama Dablam. Both peaks cost similar ($250-$400 NMA permit plus $1,500-$3,500 for guided climb). Many expeditions combine them — Mera first for acclimatization and altitude, Island Peak second for technical practice.
How much does it cost to climb Ama Dablam?
A guided Ama Dablam expedition in 2026 costs $6,500-$15,000 depending on operator, group size, and included services. Typical cost breakdown includes Nepal Ministry of Tourism permit $400 (spring/autumn) or $200 (winter/summer), Sagarmatha National Park entry $30, Khumbu Pasang Lhamu Rural Municipality fee $17, Liaison Officer fees (~$3,000 per team), guide fees and Sherpa support $2,500-$4,000, base camp and porterage logistics $1,200-$2,000, food, tents, fixed rope, and optional oxygen $800-$1,500. Budget Nepali operators run at the lower end ($6,500-$9,000); Western operators like Alpine Ascents run $12,000-$15,000 for more services. Plus international flight to Kathmandu $1,200-$2,500. Plus travel insurance with high-altitude rescue coverage $200-$500. Total trip cost including flights and pre/post trek is typically $8,000-$18,000.
When is the best time to climb Nepal’s technical peaks?
The two best seasons for climbing Nepal’s technical peaks are post-monsoon (October-November) and pre-monsoon (April-May). Post-monsoon October-November is preferred for most technical peaks including Ama Dablam, Pumori, and Baruntse — clear, cold, stable weather with minimal precipitation and longer daylight than winter. Pre-monsoon April-May also works for most peaks but brings warmer temperatures, more afternoon storm activity, and avalanche hazard from winter snowpack warming. Winter climbing (December-February) is possible on lower peaks but brings extreme cold and shorter days. Monsoon season (June-September) is unsuitable for most technical peaks because of constant precipitation, avalanche hazard, and poor visibility. Plan 3-4 weeks for most technical peak expeditions including approach trek, acclimatization, summit push, and weather contingency.
Do I need a guide for Nepal trekking peaks?
Yes, Nepal requires all climbers on NMA-permitted trekking peaks and Ministry of Tourism expedition peaks to use registered guides. The September 2025 regulatory update reinforced existing rules requiring licensed sirdar/guide and appropriate Sherpa support for all climbing activities above trekking peak status. Independent climbing is not legally permitted on these peaks. Climber-to-guide ratios vary by peak. NMA trekking peaks like Island Peak and Mera Peak typically have 4:1 or 2:1 climber-to-guide ratios. Expedition peaks like Ama Dablam and Baruntse use 1:1 or 2:1 depending on experience. Highly technical routes or winter climbs typically require 1:1 ratios. The guide requirement adds $1,500-$4,000 to expedition cost but provides essential local knowledge, rescue capability, and regulatory compliance. Attempting to climb without proper permits risks permit seizure, fines, and future restrictions on return visits.
What is the NMA permit for Nepal climbing peaks?
The Nepal Mountaineering Association (NMA) permit system regulates climbing on designated trekking peaks in Nepal. NMA categorizes peaks into Group A (27 peaks above 6,500 m requiring Ministry of Tourism permits) and Group B (peaks under 6,500 m requiring NMA permits). NMA trekking peak permits cost $250-$400 depending on peak and season, with spring (March-May) being the highest fee. Permit application requires several documents. First, a certified climbing resume showing relevant experience. Then a medical certificate. Also a licensed Nepali guide and climbing crew. Plus proof of travel insurance including high-altitude rescue coverage. Finally, a $2,000+ refundable security deposit in some cases. Applications are submitted through registered trekking agencies in Kathmandu. Processing time is 2-7 days for most peaks. Permit revenue supports Nepal’s mountaineering infrastructure and conservation programs.
Which Nepal peak is best for first 6000m climb?
Mera Peak (6,476 m) is widely considered the best first 6,000 m peak for climbers progressing beyond trekking. Several factors support this recommendation. First, it’s technically moderate — mostly glacier travel and gentle snow slopes with one short ice section near the summit. Then it has an excellent acclimatization profile — the approach takes 10-12 days of steady altitude gain before summit push. Also it delivers full Himalayan experience — base camp and high camp structure, guide-led teams, fixed rope where needed. Plus strong commercial infrastructure — many operators run Mera Peak expeditions year-round. Finally, it’s affordable — total trip cost $1,800-$3,500 including permits and guides. Island Peak (6,189 m) is the alternative with more technical demands — better for climbers with prior mountaineering experience. Lobuche East (6,119 m) combines nicely with the Everest Base Camp trek for climbers wanting to add a peak to a trekking trip. Avoid Ama Dablam as a first 6,000 m peak.
What changed in Nepal’s September 2025 permit update?
Several major changes from the September 2025 update affect technical peak climbers. The changes reinforce existing safety requirements while adding new tracking and environmental standards. Key changes include mandatory guide requirements reinforced — no solo or unsupported climbing on permitted peaks. Insurance requirements verified at permit application — high-altitude rescue coverage now required. GPS tracking required on some expedition peaks — 8,000 m+ mandatory, technical 7,000ers encouraged. Biodegradable waste management required on all peaks — operators must provide waste collection systems. Climber-to-guide ratios codified — most technical peaks require 1:1 to 2:1 climber-to-guide. Insurance coverage minimums raised — high-altitude guide insurance increased from NPR 1.5 million to NPR 2 million. Nepal also introduced the FastClimb Premium Summit+ permit for Everest at $12,000 surcharge over the standard $15,000 permit cost — allowing wealthy climbers to skip bottlenecks.
How do I choose between Nepali and Western operators?
Climbers selecting between Nepali and Western operators for technical peaks should evaluate several factors. Nepali operators (Nepal Alpine Expeditions, 8K Expeditions, Asian Trekking, Imagine Nepal, Pioneer Adventure) provide lowest cost ($6,500-$9,000 for Ama Dablam) with strong local expertise. They typically include all permits, food, base camp setup, and English-speaking guides. Western operators (Alpine Ascents International, Mountain Professionals, Adventure Consultants, Climbing the Seven Summits) provide highest cost ($12,000-$15,000 for Ama Dablam) with extensive pre-trip support, Western communication standards, comprehensive medical screening, and detailed gear lists. The decision often comes down to climbing experience — first-time Himalayan climbers benefit from Western operator support and communication. Experienced climbers can save considerably with Nepali operators. Mid-tier operators (Seven Summit Treks, 8K Expeditions) offer balance between cost and Western communication standards at $9,000-$12,000 for Ama Dablam.
Nepal Technical Peaks Related Resources
Sources & Further Reading
- Nepal Mountaineering Association (NMA) — nepalmountaineering.org — Official trekking peak permits and regulations
- Nepal Ministry of Tourism, Culture & Civil Aviation — tourism.gov.np — Expedition peak permits and September 2025 regulations
- The Himalayan Database — himalayandatabase.com — Comprehensive summit statistics and fatality data for all Nepal peaks
- Trekking Agencies’ Association of Nepal (TAAN) — taan.org.np — Operator licensing and standards
- Alan Arnette — alanarnette.com — Current season coverage and statistics for Himalayan climbing
- Climbing.com — Coverage of Nepal’s 2026 Summit+ permit tier announcement
- Operator websites consulted: Asian Trekking, 8K Expeditions, Seven Summit Treks, Nepal Alpine Expeditions, Imagine Nepal, Pioneer Adventure, Alpine Ascents International, Mountain Professionals, Adventure Consultants, Climbing the Seven Summits
- Reference texts: Trekking Peaks of Nepal (O’Connor), Nepal: A Trekker’s Guide (McGuinness), Freedom of the Hills (The Mountaineers)
- Climbing association records from the Nepal Mountaineering Association Alpine Club and international climbing federations
- Access Nepal Tour and Hop Nepal — Verified 2026 Ama Dablam permit cost data
- The Everest Holiday and Green Valley Nepal Treks — Verified 2026 NMA permit fee structures
- Summit Climb — Operator-side Ama Dablam permit and Liaison Officer fee information
Last updated: May 25, 2026. Next scheduled update: November 2026 (verify autumn 2026 season completion data, current permit fee structure, and any additional regulatory changes).
Start Your Nepal Technical Peak Progression
Nepal’s technical peaks form the curriculum that produces real Himalayan climbers. Generally, climbers should start with Mera Peak or Island Peak for first 6,000 m experience, then progress through Ama Dablam as the definitive technical objective before considering 7,000 m peaks like Baruntse or Himlung Himal. Notably, the September 2025 regulatory update reinforces guide requirements and insurance verification — climbers should plan permit applications 2-3 months ahead and verify all requirements before committing to operator contracts.
See the 14 Eight-Thousanders →