
Peak Profile Template: Standardized Guide Format for Climbs
A peak profile template gives climbers a consistent way to record a climb and plan future trips. This guide explains why standard formats matter for safety, clarity, and expedition planning. It covers what a peak profile is, the main benefits, required data fields, and practical steps to build route templates. You’ll also find guidance on adding safety details and gear recommendations so profiles are useful in the field. The guidance that follows is written for climbers, trip leaders, guidebook authors and club administrators who need repeatable, printable and digital forms for pre-trip planning, briefings and trip debriefs.
What is a Peak Profile Template and Why is it Essential for Mountain Summit Guides?
A peak profile template is a standard form for recording a mountain climb’s key facts: route options, terrain, and safety measures. That structure ensures climbers can access the information they need to make decisions, assess risk, and prepare appropriately. Clear, concise profiles support both new and experienced climbers in choosing routes and planning logistics. In practice they are used as a pre-trip briefing document, a checklist for gear and communications, and a post-trip record that preserves lessons learned for future teams.
Defining Peak Profile Templates in Mountaineering Documentation
Peak profile templates collect the essential data points for a climb and present them consistently. Typical sections list the mountain’s name, elevation, location, and detailed route descriptions. Standardizing these fields makes it easy to compare peaks and share reliable information within the climbing community. A good template will also include metadata such as author, last updated date, version number and a short note field for contributors to record changes or conditions encountered.
Key Benefits of Using Standardized Guide Formats for Climbs
Standardized guide formats reduce uncertainty and speed decision-making before and during a climb. They improve safety, streamline planning, and make information easier to use in the field. The benefits shown below reflect those practical improvements.
- Consistency and Clarity: Standardized formats ensure that all necessary information is presented uniformly, making it easier for climbers to understand and utilize the data.
- Comprehensive Trip Planning: By providing a complete overview of a climb, these templates facilitate better preparation and risk assessment.
- Safety and Gear Management: Standardized profiles help climbers identify essential gear and safety protocols, reducing the likelihood of accidents during climbs.
For teams and individuals implementing templates, Information Hub offers practical resources and step‑by‑step guidance to build profiles that meet climbers’ needs. In real-world use, a template speeds briefings and reduces last-minute omissions: for example, a concise page listing approach times, permit needs and critical contacts makes it faster to check readiness before leaving base camp.
Which Essential Data Fields Should a Standardized Peak Profile Include?

A complete peak profile lists the core data points you need to plan and execute a climb. Typical entries include the mountain name, elevation, location, route descriptions, and safety notes. Beyond these basics, useful templates also capture logistics and legal requirements so teams can prepare efficiently.
- Mountain Name: The official name of the mountain being climbed.
- Elevation: The height of the mountain, which is crucial for assessing difficulty.
- Location: Geographic details that help climbers find the mountain.
These foundational attributes form the basis of any peak profile template, providing essential context for climbers.
Mountain Name, Elevation, and Location: Foundational Attributes
The mountain name identifies the objective; elevation indicates likely physical demand and altitude effects. Location details — coordinates, access points and parking or approach routes — are necessary for navigation and logistics. Together they give a clear starting point for planning. Additional practical fields to include are nearest town or access airstrip, typical approach time, difficulty grading system used, and permit or fee information when relevant.
Climbing Routes, Difficulty Levels, and Safety Notes: Core Climb Information
Profiles should list available routes, their difficulty ratings, and concise safety notes. Include objective hazards, typical weather patterns, altitude sickness risks, and recommended emergency procedures so climbers can match routes to their skills and prepare mitigation steps. Good route descriptions are structured: an approach summary, key waypoints and time estimates, technical pitches or obstacles, recommended gear for each section, and descent options.
Proper preparedness, including matching skillsets to route difficulty, is key to reducing the risks of high‑altitude mountaineering.
Mountaineering Preparedness & Risk Guidance
At high altitude, lack of skills, experience and preparedness increases the risk of accidents, injuries and death. The study recommended collecting and adapting readiness strategies used by expert high‑altitude climbers into a guidance document for adventure tourists.
Preparedness and Peak Performance for Mountaineering Tourists, 2023
How to Create a Comprehensive Climbing Route Template for Accurate Peak Documentation?
Build a climbing route template with a clear scope, consistent fields, and useful visuals so the file is accurate and usable in planning and on the mountain. Choose a file format that fits your workflow — a shared spreadsheet, a formatted document, or a simple database — and define required fields so contributors supply consistent information.
- Identify Key Elements: Determine the essential information that needs to be documented, such as route descriptions, difficulty ratings, and safety protocols.
- Use a Standardized Format: Adopt a consistent layout that allows for easy comparison between different routes.
- Incorporate Visual Aids: Utilize maps and elevation profiles to enhance understanding and navigation.
Follow these steps to produce templates that teams can rely on before and during expeditions. Also define responsibilities: who is authorized to update a profile, how changes are tracked, and where archive versions are stored for accountability.
Step-by-Step Guide to Documenting Climbing Routes Effectively
Use a repeatable workflow when documenting routes:
- Gather Information: Collect data on the route, including descriptions, difficulty levels, and safety notes.
- Organize Data: Use a standardized template to present the information clearly.
- Review and Update: Regularly review and update the template based on new experiences and feedback from other climbers.
That systematic approach helps keep route records accurate and practically useful. When possible, capture the person who supplied each field and the date of the observation so later readers can judge the currency of a report.
Integrating GPS Data and Elevation Profiles for Route Accuracy
Add GPS tracks and elevation profiles to improve precision. GPS points fix key features and access routes; elevation charts show steep sections and total ascent. Together these elements make physical demands and navigation clearer for planning and pacing. Include commonly used export formats (for example GPX or KML), waypoint names, and timestamps so tracks can be replayed and validated by others using mapping apps or handheld GPS units.
What Safety and Gear Information Should be Integrated into Peak Profiles?
Every peak profile should include a focused safety section and a gear list tailored to the route’s conditions and hazards. Make lists modular so teams can adapt the base kit to seasonal or route-specific needs without losing sight of minimum safety items.
- Essential Gear Lists: A comprehensive list of gear required for the climb, tailored to the specific conditions and challenges of the route.
- Safety Protocols: Guidelines for managing risks, including weather considerations and emergency procedures.
- Recommended Practices: Best practices for climbing, such as hydration strategies and acclimatization tips.
Including Safety Protocols and Risk Mitigation Strategies in Summit Guides
Outline clear safety protocols that address weather, signs and management of altitude sickness, and emergency response steps. Specify when to turn back and list contact or evacuation options so teams can make informed, timely decisions. Include standard check-in times, expected radio or phone windows, and a simple escalation ladder that lists local rescue contacts and the steps to call for assistance. Keep instructions concise and action-oriented so they can be referenced quickly in pressure situations.
Adventure carries inherent risks; robust safety standards and disciplined risk management reduce those risks.
Mountain Safety Standards & Risk Management
Adventure is linked to risk of injuries and fatalities; this study examined safety concerns, risk management and standards of practice for preparing and handling emergencies in the East African afro‑alpine regions of Mt. Kenya, the Rwenzori Mountains and Mt. Kilimanjaro.
Standards of practice, risk assessment, and safety concerns in outdoor adventure programmes in the afro‑alpine mountains of east
Africa, LJ Wachira, 2022
Recommended Gear Lists and Product Specifications for Climbers
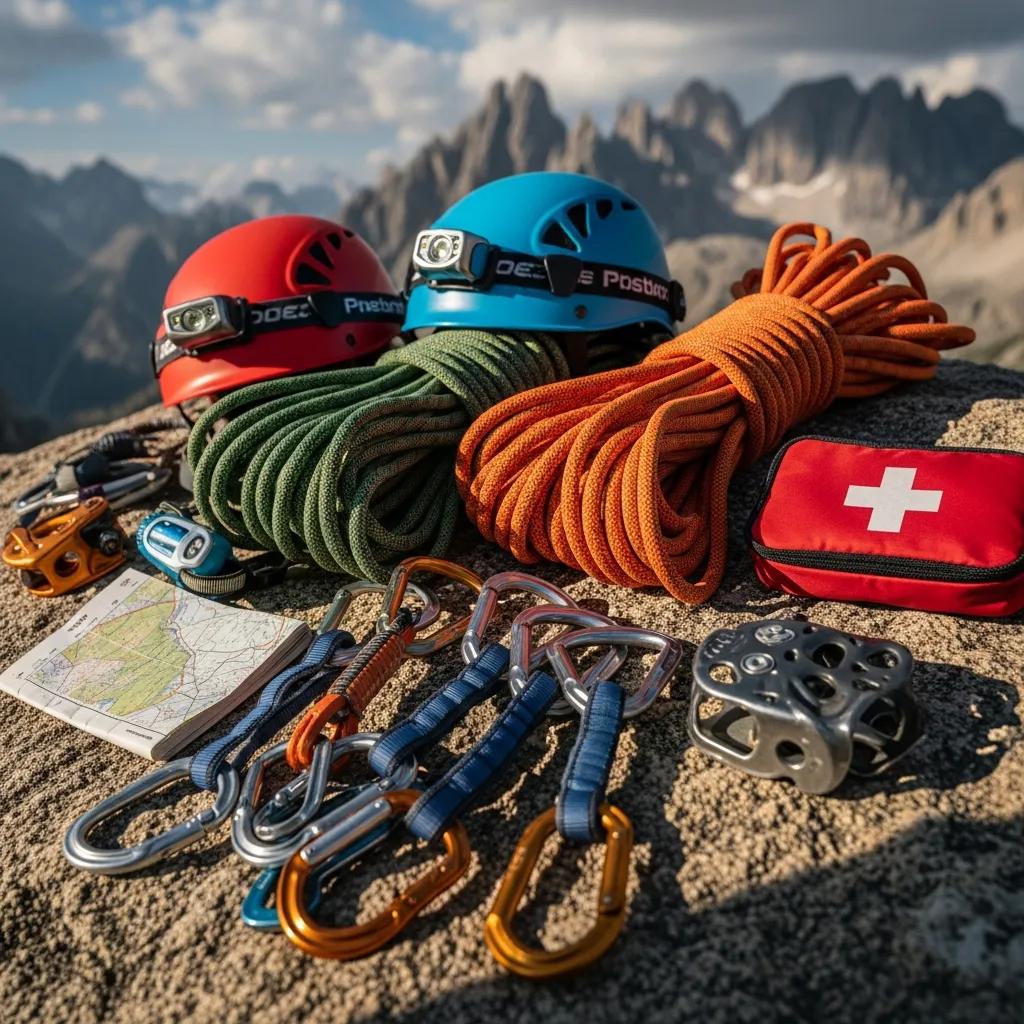
Produce a gear list that matches route conditions. Include technical climbing equipment (ropes, harnesses, carabiners), clothing layers for expected weather, and safety items (helmet, first‑aid kit, navigation tools). Where useful, add brief product specs or performance criteria to guide purchasing decisions. Organize gear by category — technical hardware, clothing and footwear, overnight kit, navigation and communication, and emergency supplies — to make packing and checking faster before a climb.
How Can Trip Planning Templates Enhance Summit Expedition Preparation?
Trip planning templates organise logistics so teams don’t miss critical items. They turn planning into checkable tasks for gear, food, timing and communications. Well-structured templates reduce cognitive load during planning, freeing leaders to focus on route-specific decisions and contingency planning.
Careful expedition planning is essential; small oversights can compromise an entire climb.
Essential Mountaineering Expedition Planning
Planning an expedition, especially a major climb such as Mount McKinley, requires detailed attention to food, equipment and personnel — and to administrative items like applications and reservations, which can determine success or failure.
Expedition Planning., 1977
- Comprehensive Checklists: Include checklists for gear, food, and safety equipment to ensure nothing is overlooked.
- Timeline Planning: Establish a timeline for the expedition, including travel, acclimatization, and climbing days.
- Coordination with Team Members: Facilitate communication and coordination among team members to ensure everyone is on the same page.
Using trip templates reduces the chance of missed steps and helps teams coordinate timelines, supplies and emergency plans. Add an alternate-itinerary section for common failure points (late arrival, bad weather, injury) so leaders can execute a fallback plan without rebuilding logistics under stress.
Using Peak Profiles to Develop Effective Summit Expedition Checklists
Reference the peak profile to build a checklist tailored to that climb’s specific risks and equipment needs. That ensures you pack appropriate gear and plan acclimatisation and contingency steps. Consider including a short “mandatory items” line that all team members must sign off on during the pre-departure check.
Linking Peak Profiles with Trip Planning Tools for Seamless Coordination
Connect peak profiles with your planning tools so team members can access route details, timelines and gear lists in one place. This reduces errors and improves communication before and during the expedition. Where possible, integrate profiles with shared calendars, cloud folders for key documents (permits, maps) and a single communication channel for day-of status updates.
What Are Best Practices for Documenting and Standardizing Mountaineering Profiles?
Follow consistent formatting, use structured data where possible, and keep profiles current with recent statistics or route changes. These steps improve readability, searchability and reliability. A consistent template reduces friction for contributors and makes automated checks or exports easier when building a digital route library.
- Consistent Formatting: Use a uniform format for all profiles to enhance readability and usability.
- Structured Data Markup: Implement structured data to improve searchability and accessibility of information.
- Incorporating Recent Climbing Statistics and Industry Updates: Regularly update profiles with the latest data to ensure relevance and accuracy.
When documenting, keep a visible change log and a contributor field so readers can see who added or verified information. Test templates in a low-risk setting (local crag or short approach) to ensure fields are understandable and practical before applying them to major expeditions.
Adopting Consistent Formatting and Structured Data Markup
Use a standard layout and clear field labels. If you publish profiles online, add structured data markup to help others find accurate, machine‑readable information. Consistent labels (for example “approach time”, “technical crux”, “bivy options”) make cross-peak comparisons and automated sorting easier for teams and researchers.
Incorporating Recent Climbing Statistics and Industry Updates
Update profiles with recent route reports, incident statistics and regulatory changes so planning decisions reflect current conditions and best practices. Encourage trip leaders to append short condition notes after each use so the living document reflects real experience rather than a static description.
How to Utilize Visual Aids Like Route Maps and Elevation Charts in Peak Profiles?
Use maps, elevation charts and annotated photos to show route lines, key landmarks and steep or exposed sections. Visual aids reduce ambiguity and improve navigation and pacing decisions. A well-annotated image can quickly communicate the appearance of the crux and the safest places to bivi or escape a route.
- Route Maps: Detailed maps that outline the climbing route, including key landmarks and potential hazards.
- Elevation Charts: Graphical representations of the climb’s elevation changes, allowing climbers to assess the physical demands of the route.
- Annotated Images: Images that highlight specific features of the climb, such as difficult sections or scenic viewpoints.
When paired with concise text, these visuals give a practical picture of the climb’s terrain and demands. Add scale bars, north arrows and contour interval notes where relevant so readers understand distances and gradient at a glance.
What Are Common User Questions About Peak Profile Templates and Summit Guides?
Climbers commonly ask what to include in a profile, how to keep formats consistent, and which documentation practices work best for routes and safety. Addressing these common concerns in a template’s help text or an introductory section reduces repeated questions and improves the quality of contributions.
- What information should be included in a peak profile?
- How can I ensure my peak profile is standardized?
- What are the best practices for documenting climbing routes?
Answering these questions helps climbers understand how to compile useful, standardised profiles they can rely on in planning and during climbs.
How to Document a Mountain Climb Using a Peak Profile Template?
Document a climb in three steps: collect accurate data, fill the standardized template, and review the entry after the trip to capture lessons learned. Keeping notes on conditions, decision points and unexpected issues helps other teams anticipate the same challenges more effectively.
- Collect Data: Gather all relevant information about the climb, including route details and safety protocols.
- Fill Out the Template: Use the standardized format to document the information clearly and concisely.
- Review and Revise: Regularly review the documented profile to ensure accuracy and relevance.
Follow these steps to maintain a reliable record that benefits future planning and team briefings. Where possible, include photos with captions and short file names that link back to the profile fields for quick verification.
What Safety Information is Critical in Summit Expedition Guides?
Include weather patterns, altitude sickness guidance, and clear emergency protocols. Those elements directly affect decision points and contingency planning on the mountain. Make the safety section actionable with bullet-pointed steps that are easy to scan in an emergency.
- Weather Patterns: Understanding local weather conditions and how they can impact climbing safety.
- Altitude Sickness Awareness: Information on recognizing and managing altitude sickness symptoms.
- Emergency Protocols: Clear guidelines for responding to emergencies during climbs.
Integrating these safety items into profiles improves preparedness and reduces avoidable risk during expeditions. Encourage teams to rehearse emergency workflows and confirm communication devices before committing to high exposure segments.
Frequently Asked Questions
What are the best tools for creating peak profile templates?
Use tools that match your needs: Google Docs or Microsoft Word for quick, shareable templates; Climb Pro or Mountain Project for route mapping and gear lists; and Canva for visual layouts. Choose the tool that fits your workflow and the level of detail you need. For collaborative editing, cloud documents and version-controlled spreadsheets make it easy to track changes and roll back if necessary.
How often should peak profiles be updated?
Update profiles after each expedition to capture new route notes and lessons. Also review them annually or whenever significant changes occur, such as new access rules, route changes or notable incidents. If a route is used regularly, add a short seasonal summary so readers can see how conditions evolve through the year.
Can peak profiles be shared with other climbers?
Yes. Sharing profiles helps the community learn and improves collective safety. Publish profiles on community sites or in team folders, but check accuracy before sharing to avoid passing on outdated information. When sharing, mark the profile’s last-verified date and list any known condition caveats.
What role do visual aids play in peak profiles?
Visuals clarify route lines, highlight hazards and show elevation change. They help you assess technical sections and energy requirements, making planning more reliable than text alone. Use high-contrast annotations and short captions to make images usable even on small mobile screens or printed copies.
How can I ensure my peak profile is accessible to others?
Save profiles in common formats (PDF, DOCX) and upload them to community platforms. Use clear file names, section headings and structured data where possible to improve discoverability. Also provide a short printable summary page for team leaders who prefer paper briefings.
What are the common mistakes to avoid when creating peak profiles?
Avoid omitting safety details or gear lists, using inconsistent formats, and failing to update profiles. Also solicit feedback from other climbers; regular review and revision are essential to keep profiles useful. Standardize terminology (for example, use the same grading scale across profiles) to reduce confusion when comparing routes.
Conclusion
Using a peak profile template improves expedition planning by giving you a clear, repeatable way to record routes, risks and gear needs. Standardised profiles raise safety and clarity, and sharing them builds community knowledge. Adopt a template, keep it current, and use it to prepare practical checklists before your next climb.
Start small: implement a single template for your next few trips, collect feedback from participants, and iterate. Over time a maintained, well-structured profile library becomes an essential part of safe, efficient climbing operations and helps teams learn from each ascent without repeating avoidable mistakes.