Global Summit Guide logo featuring mountain imagery, symbolizing hiking and mountaineering resources for trip planning and safety.

Category: Expedition Updates

  • Mount Jefferson Expedition Update 2026: Oregon’s Hardest Volcano

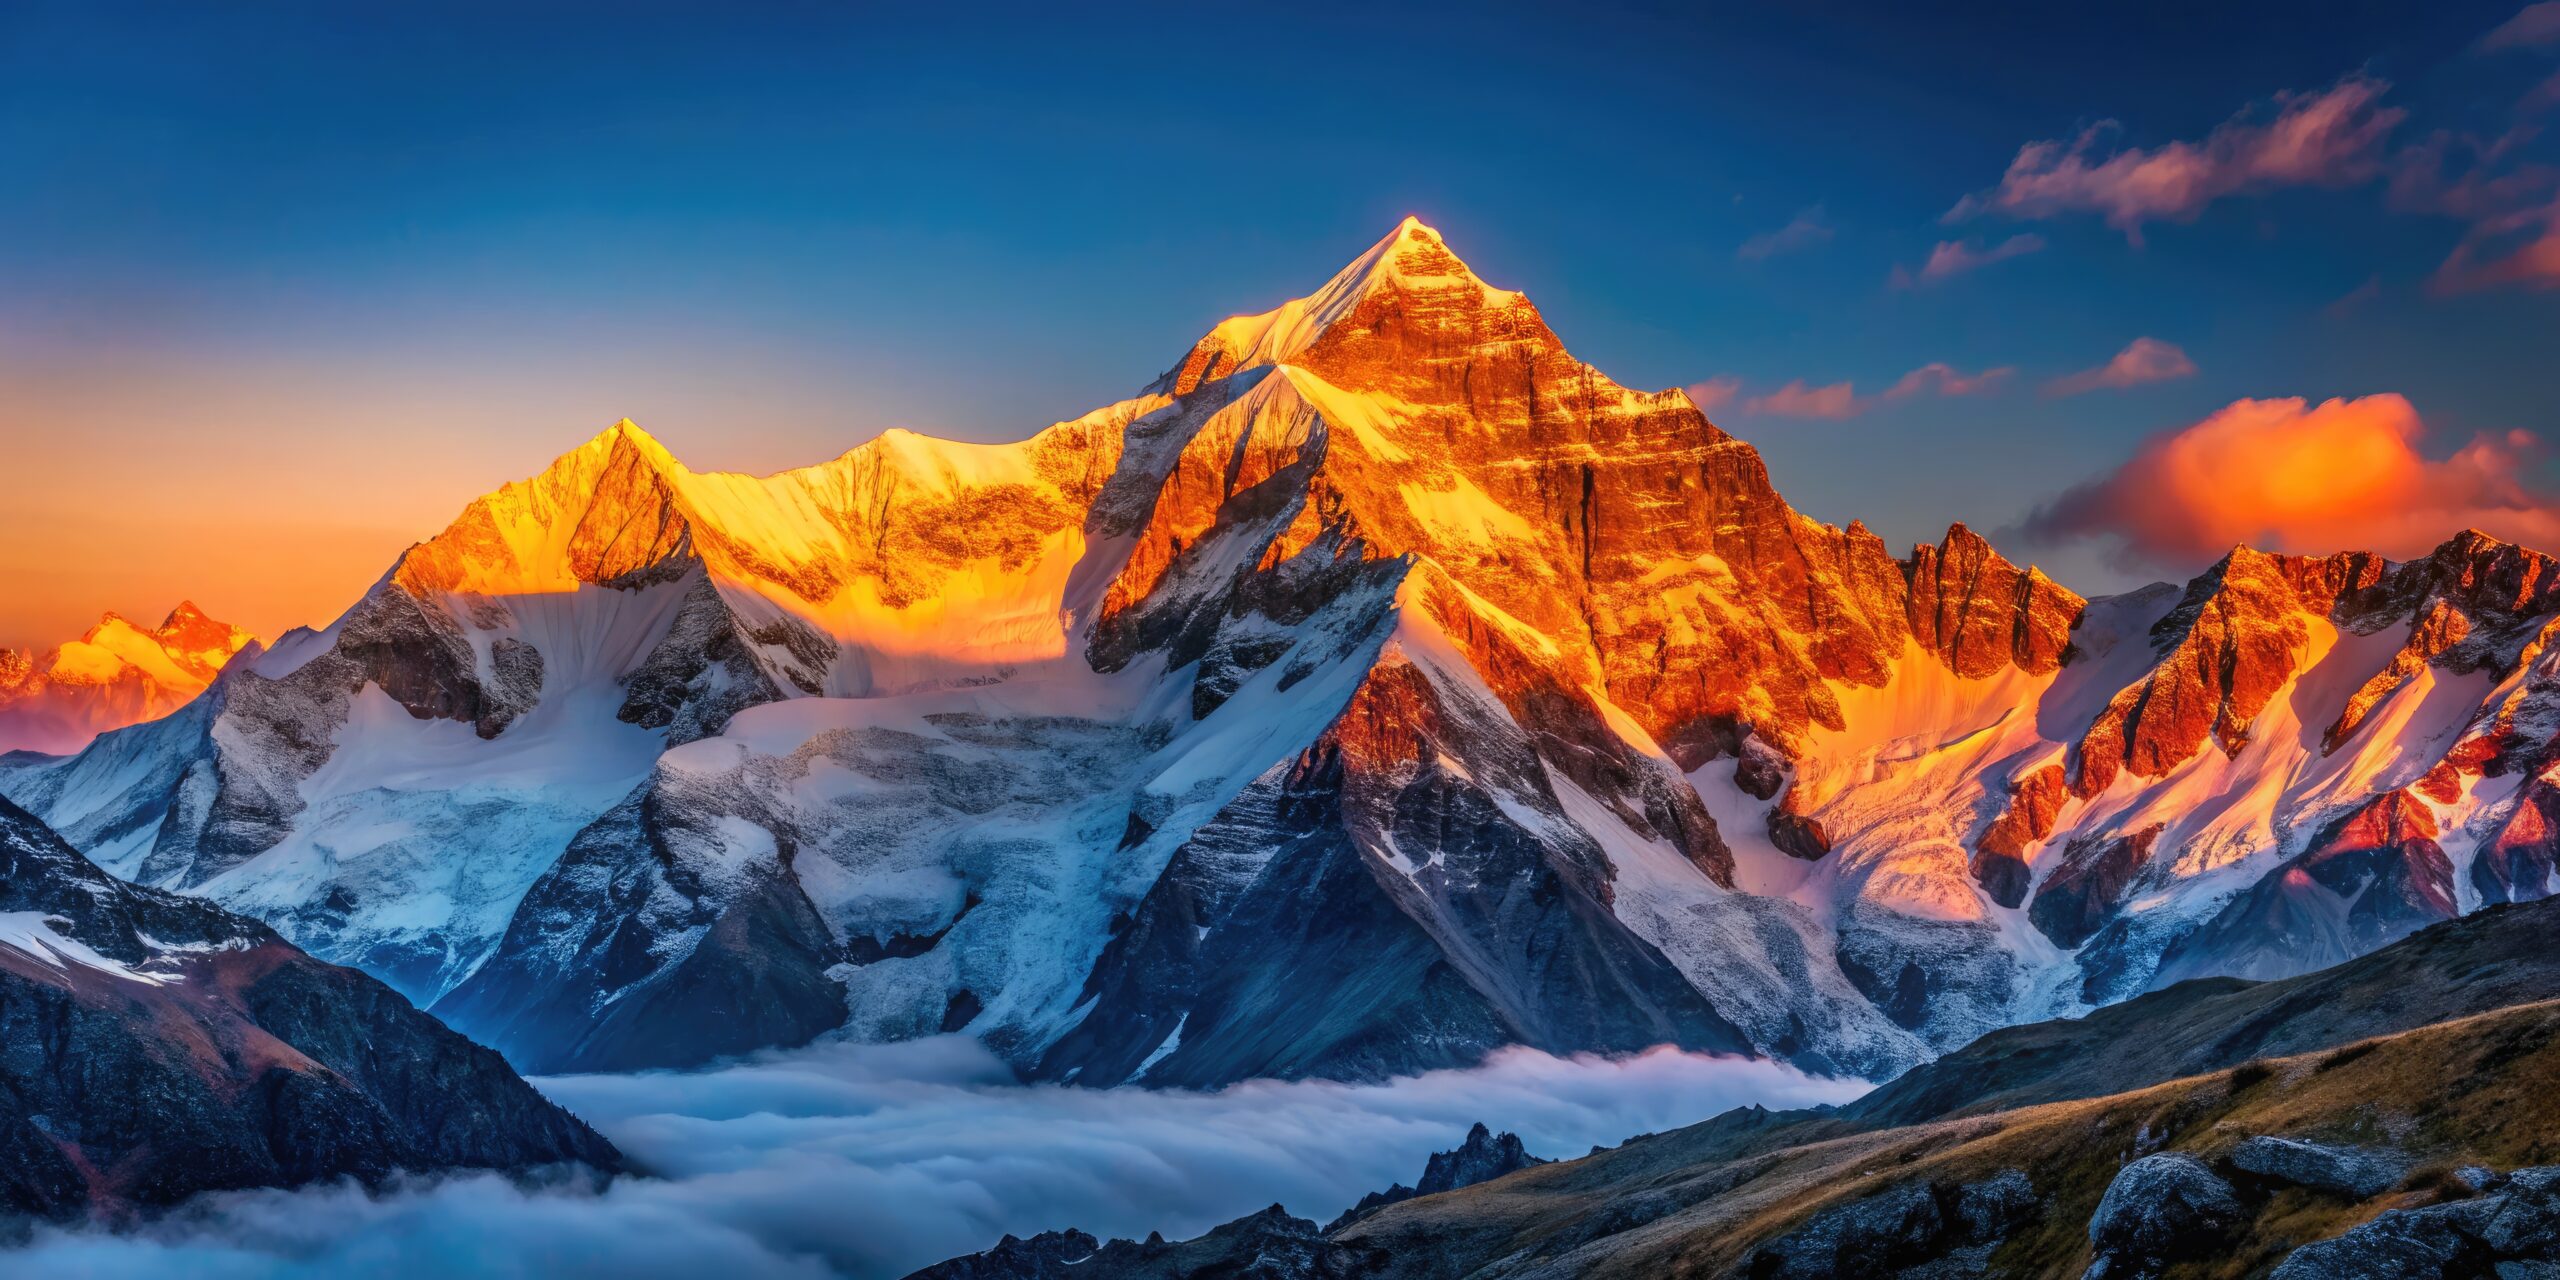
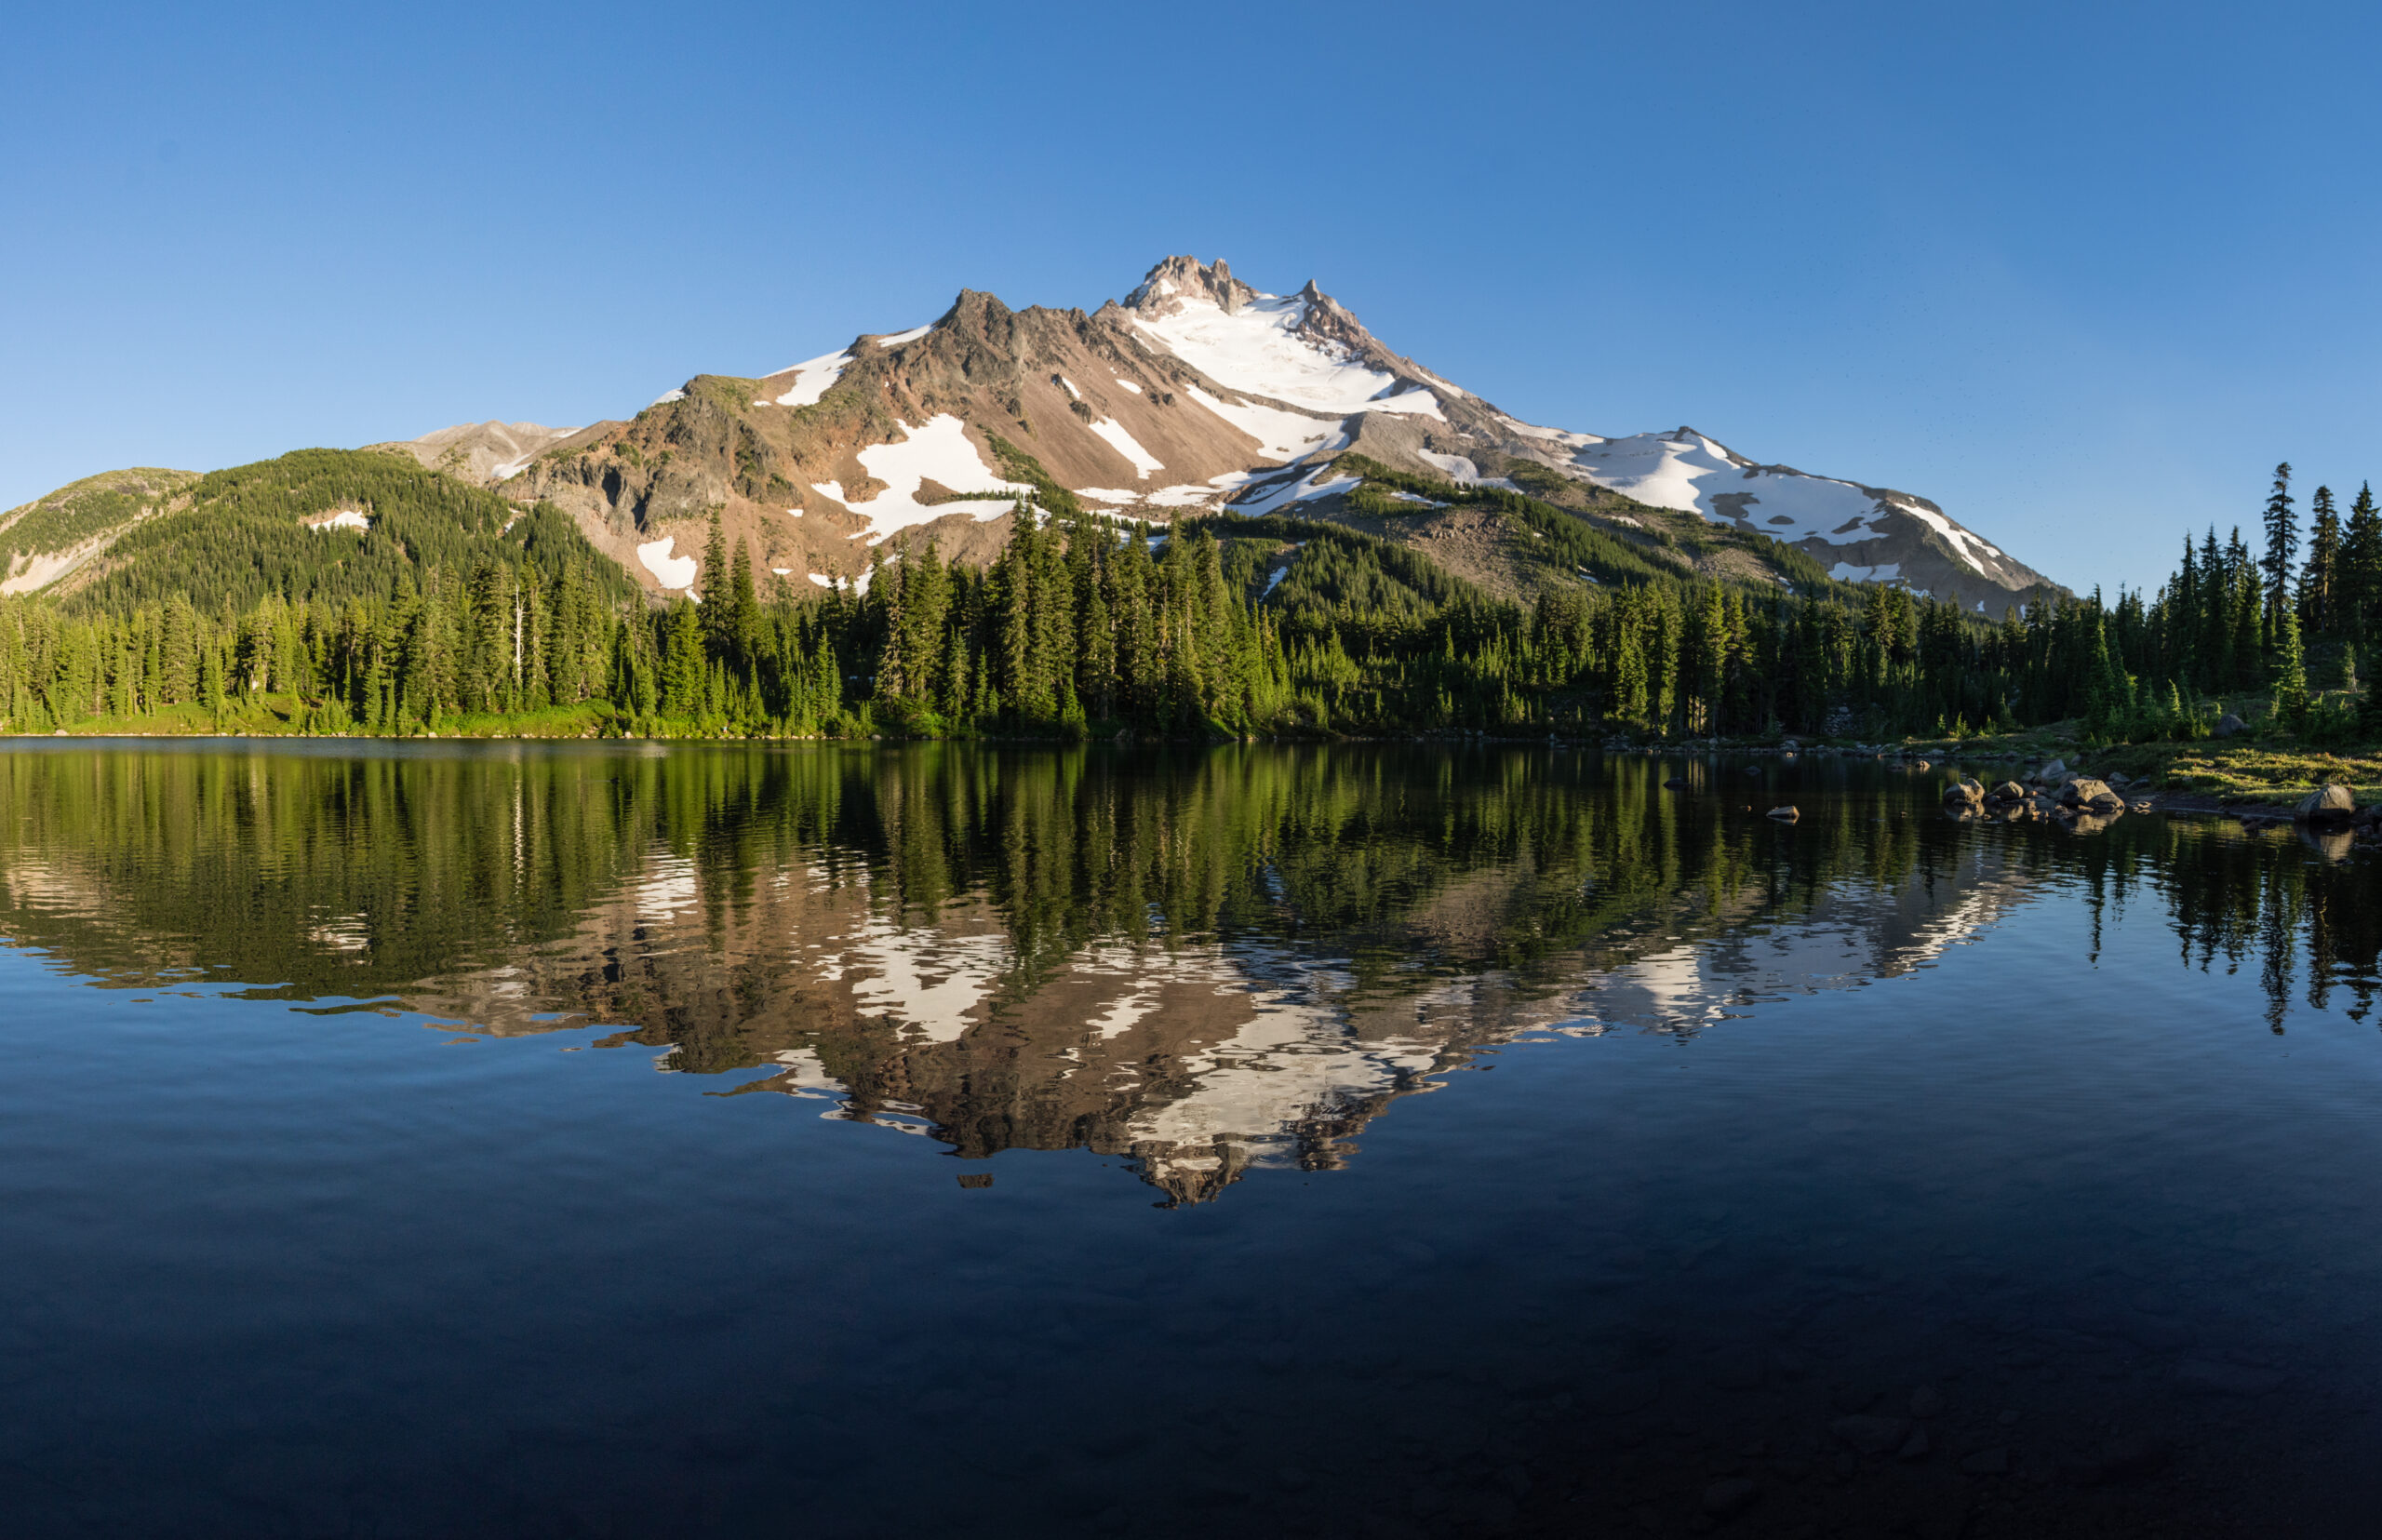
    Mount Jefferson, Oregon's second-highest peak, a glaciated stratovolcano in the Cascades
    10,497 ft (3,199 m) · Oregon Cascades · Mount Jefferson Wilderness

    Mount Jefferson: Oregon’s second-highest, and its hardest volcano to top out

    Jefferson is Oregon’s second-highest peak, but where Mount Hood draws the crowds, Jefferson keeps its solitude and its difficulty. A remote, glaciated, decaying stratovolcano, its summit is a loose Class 4 to 5 rock pinnacle above the Red Saddle that stops many climbers cold. This update covers the routes, the permits, the hazards, and an honest readiness view. Heights in feet (metres).

    Research-based updateSafety and medical reviewReviewed each Cascade seasonOur team has not climbed Jefferson

    Updated 27 July 2026 · Compiled by Travis Ludlow · Safety review by Dawson Ludlow · Medical review by Taylor Ludlow, RN

    10,497 ftSummit (3,199 m)
    2ndHighest in Oregon
    Class 4-5Summit pinnacle
    Red SaddleWhere many stop
    Jul-SepSeason
    PermitCentral Cascades

    Single-mountain expedition update, compiled from Forest Service and permit information, guide-service and climber route descriptions, and published records. Our team has not climbed Mount Jefferson; the only first-hand summit anyone on our team claims is Kilimanjaro. This is a planning briefing for experienced Cascade climbers, not a how-to and not a substitute for training or a guide.

    Lower than Hood, and much harder to climb.

    Jefferson is Oregon’s second-highest peak, and widely called its hardest major volcano. Unlike Hood’s popular standard route, Jefferson stacks a long wilderness approach, glacier and steep-snow travel, and a loose, exposed summit pinnacle into one committing climb. Many strong climbers reach the Red Saddle and go no higher. It is not a first Cascade volcano, and it is often called the peak that proves you are ready for Rainier.

    • Oregon’s second-highest peak, after Hood.
    • The hardest of Oregon’s major volcanoes.
    • Summit is a loose Class 4 to 5 pinnacle.
    • Long, remote, permit-controlled wilderness climb.
    • A serious step toward Rainier and beyond.
    The mountain

    What Jefferson involves

    A long, remote, glaciated climb with a loose and exposed summit, the most committing volcano in Oregon.

    Mount Jefferson rises to 10,497 ft in the central Oregon Cascades, a deeply eroded stratovolcano inside the Mount Jefferson Wilderness, about 60 miles east of Salem. It is Oregon’s second-highest peak, and by wide agreement its hardest major volcano to climb. Where Mount Hood has a short, popular standard route, Jefferson demands a long wilderness approach of many miles, glacier and steep-snow travel, and a summit that is a genuine rock climb.

    That summit is the point. Every route gains the Red Saddle, at about 9,900 ft, and then climbs a loose, exposed pinnacle of Class 4 to 5 volcanic rock, or an exposed steep-snow traverse early in the season, to reach the true top. Rockfall on that friable rock is the defining hazard. It is a superb, committing objective for experienced climbers, and not a first Cascade volcano. For the full route, permits, and cost, see our Mount Jefferson climb guide.

    The crux

    The Red Saddle, and the summit pinnacle

    Jefferson’s difficulty is concentrated in its last few hundred feet, and that is where the mountain turns many climbers back.

    The long approach and the upper snow and scree bring a climber to the Red Saddle, a notch of red volcanic soil at about 9,900 ft, directly below the summit block. It is a natural stopping point, and an honest one: from here the summit is a loose, exposed pinnacle, and reaching it is a different order of commitment from the walk that got you here. Many capable parties call the Red Saddle their high point and turn around, which is a respectable choice.

    Above it, the final 400 to 600 ft varies sharply with the season. Later in summer, the block is a scramble up dangerously loose Class 4 to 5 volcanic rock, where rockfall, including rock knocked loose by ropes, is the main danger, and many climbers unrope to move safely. Earlier in the season, the same ground is an exposed steep-snow traverse with severe runout below. Either way, the pinnacle is the climb, and icy or out-of-condition rock is a clear reason to descend.

    The Red Saddle is a real summit choice

    Turning around at the Red Saddle is common and not a failure. If the pinnacle is iced, badly loose, or beyond your team’s comfort on exposed rock, the saddle is a fine high point, and the smart one.

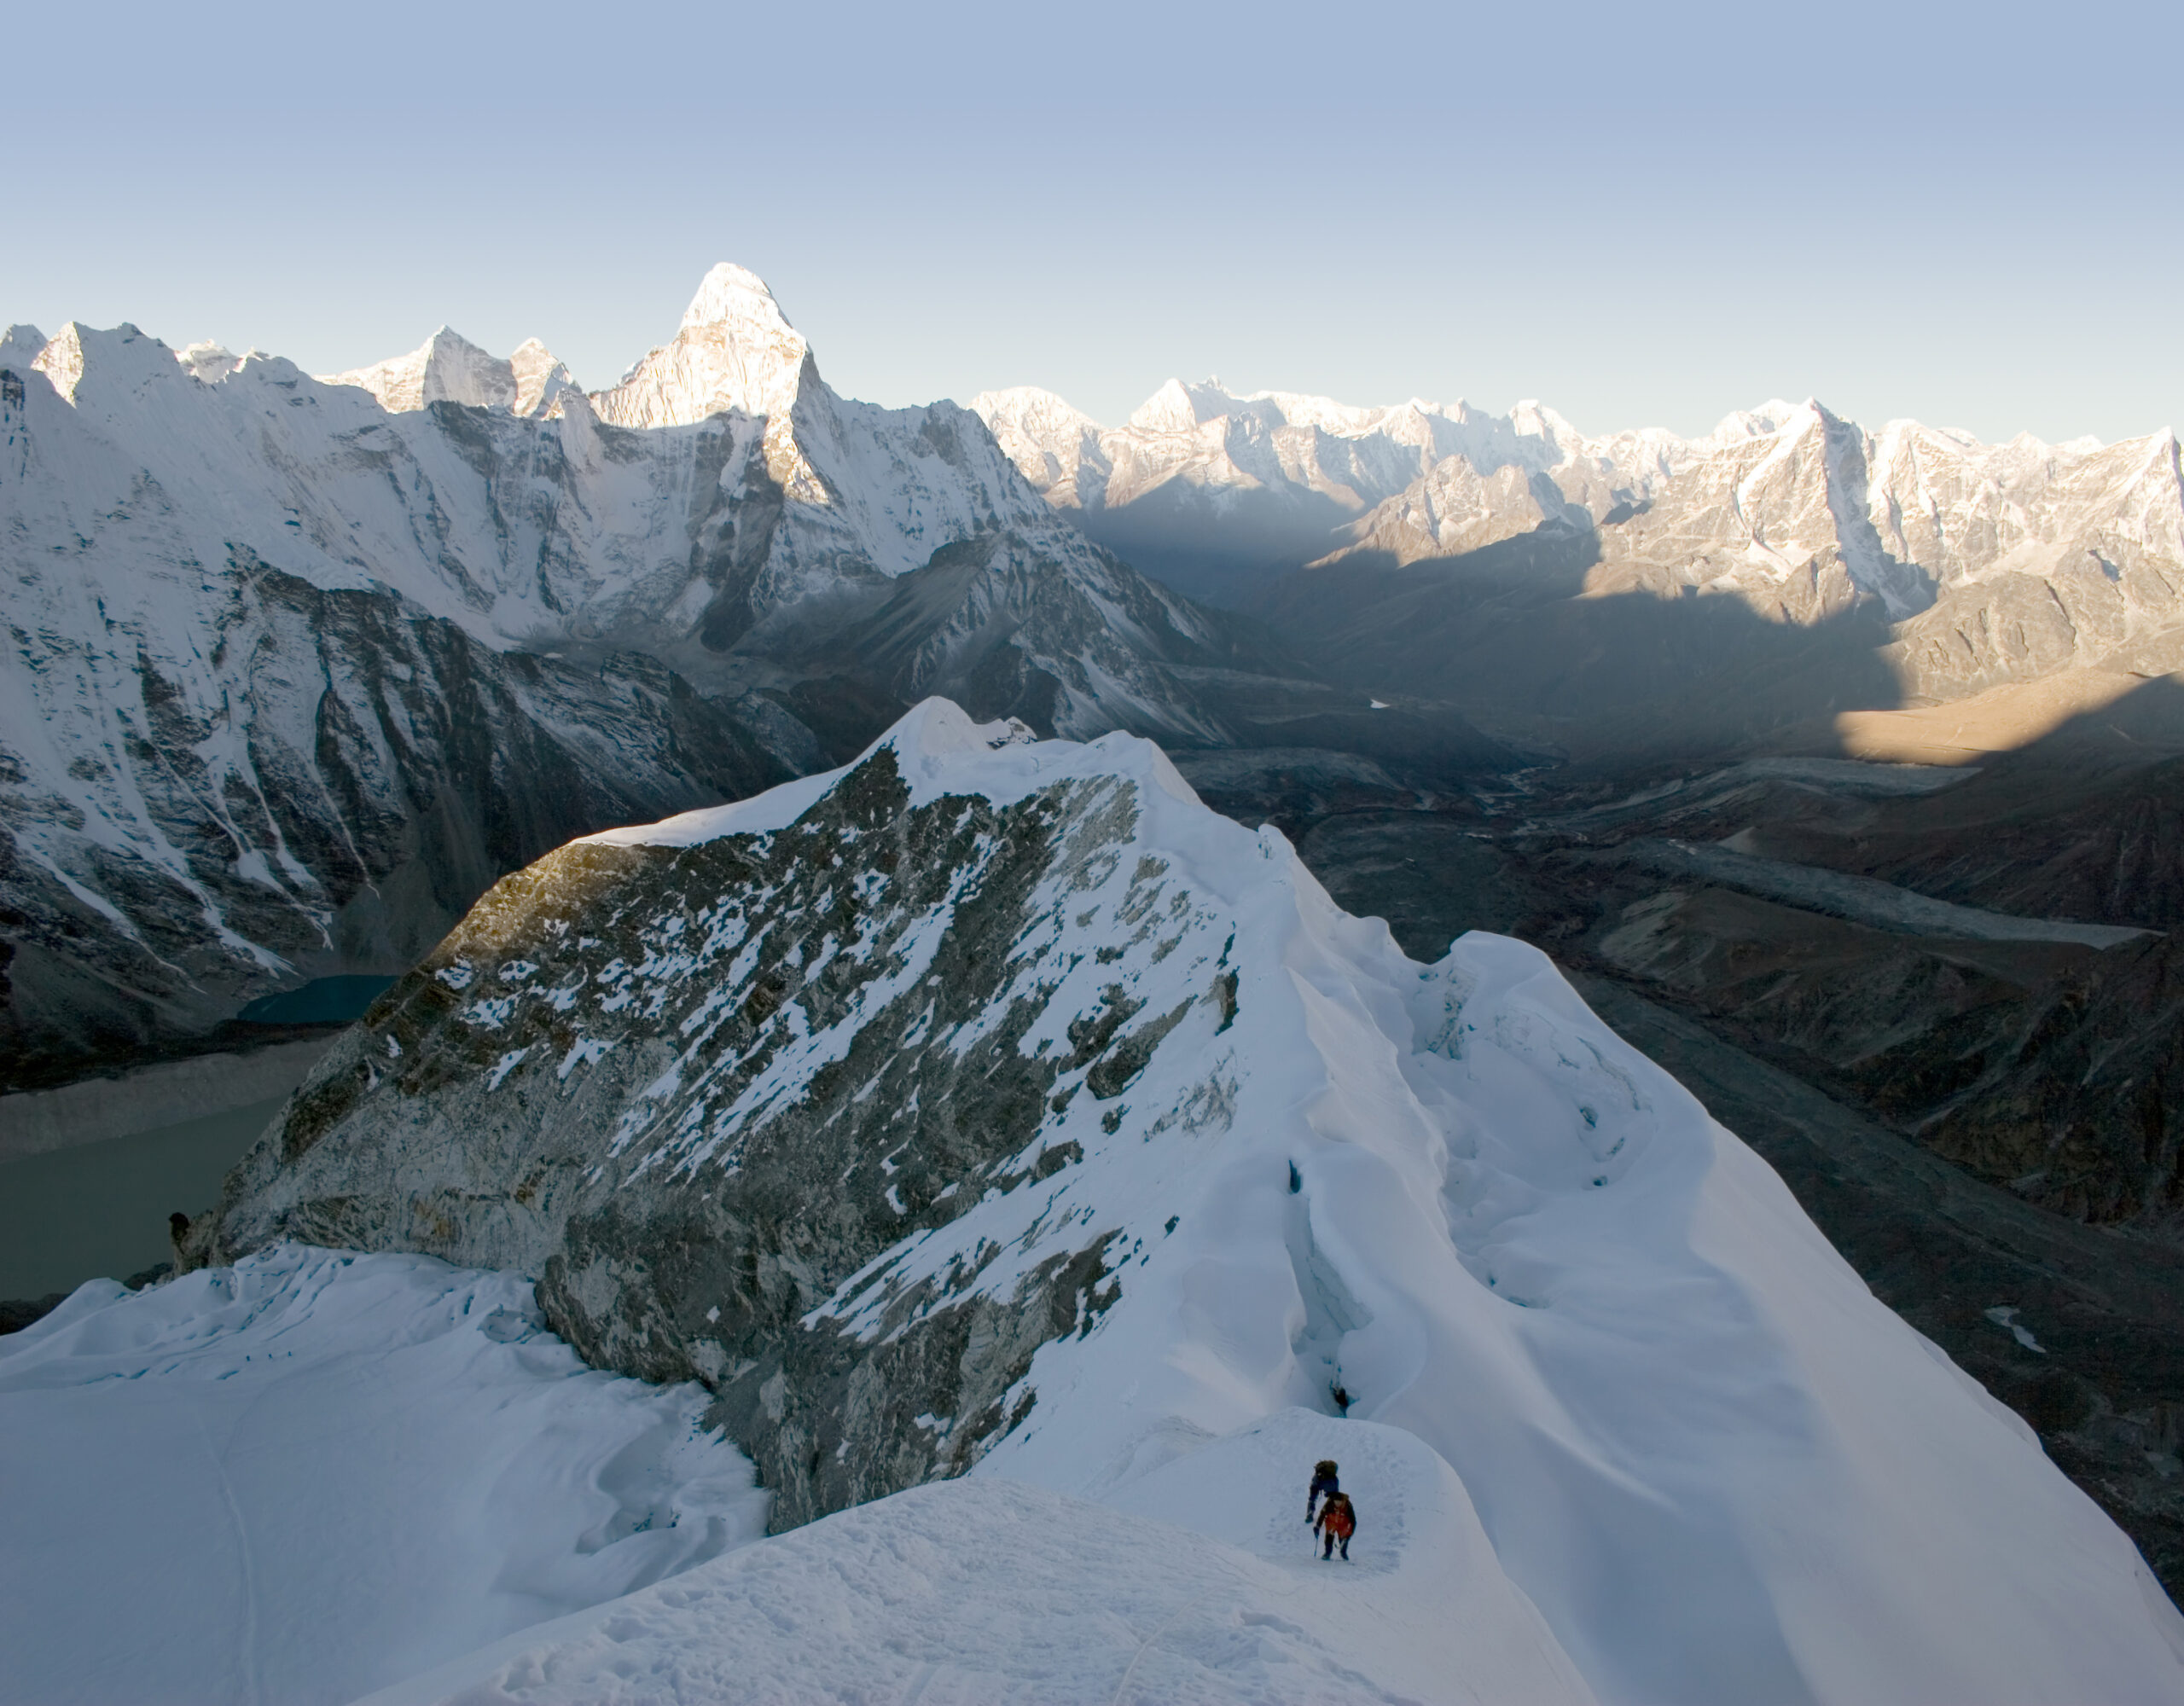
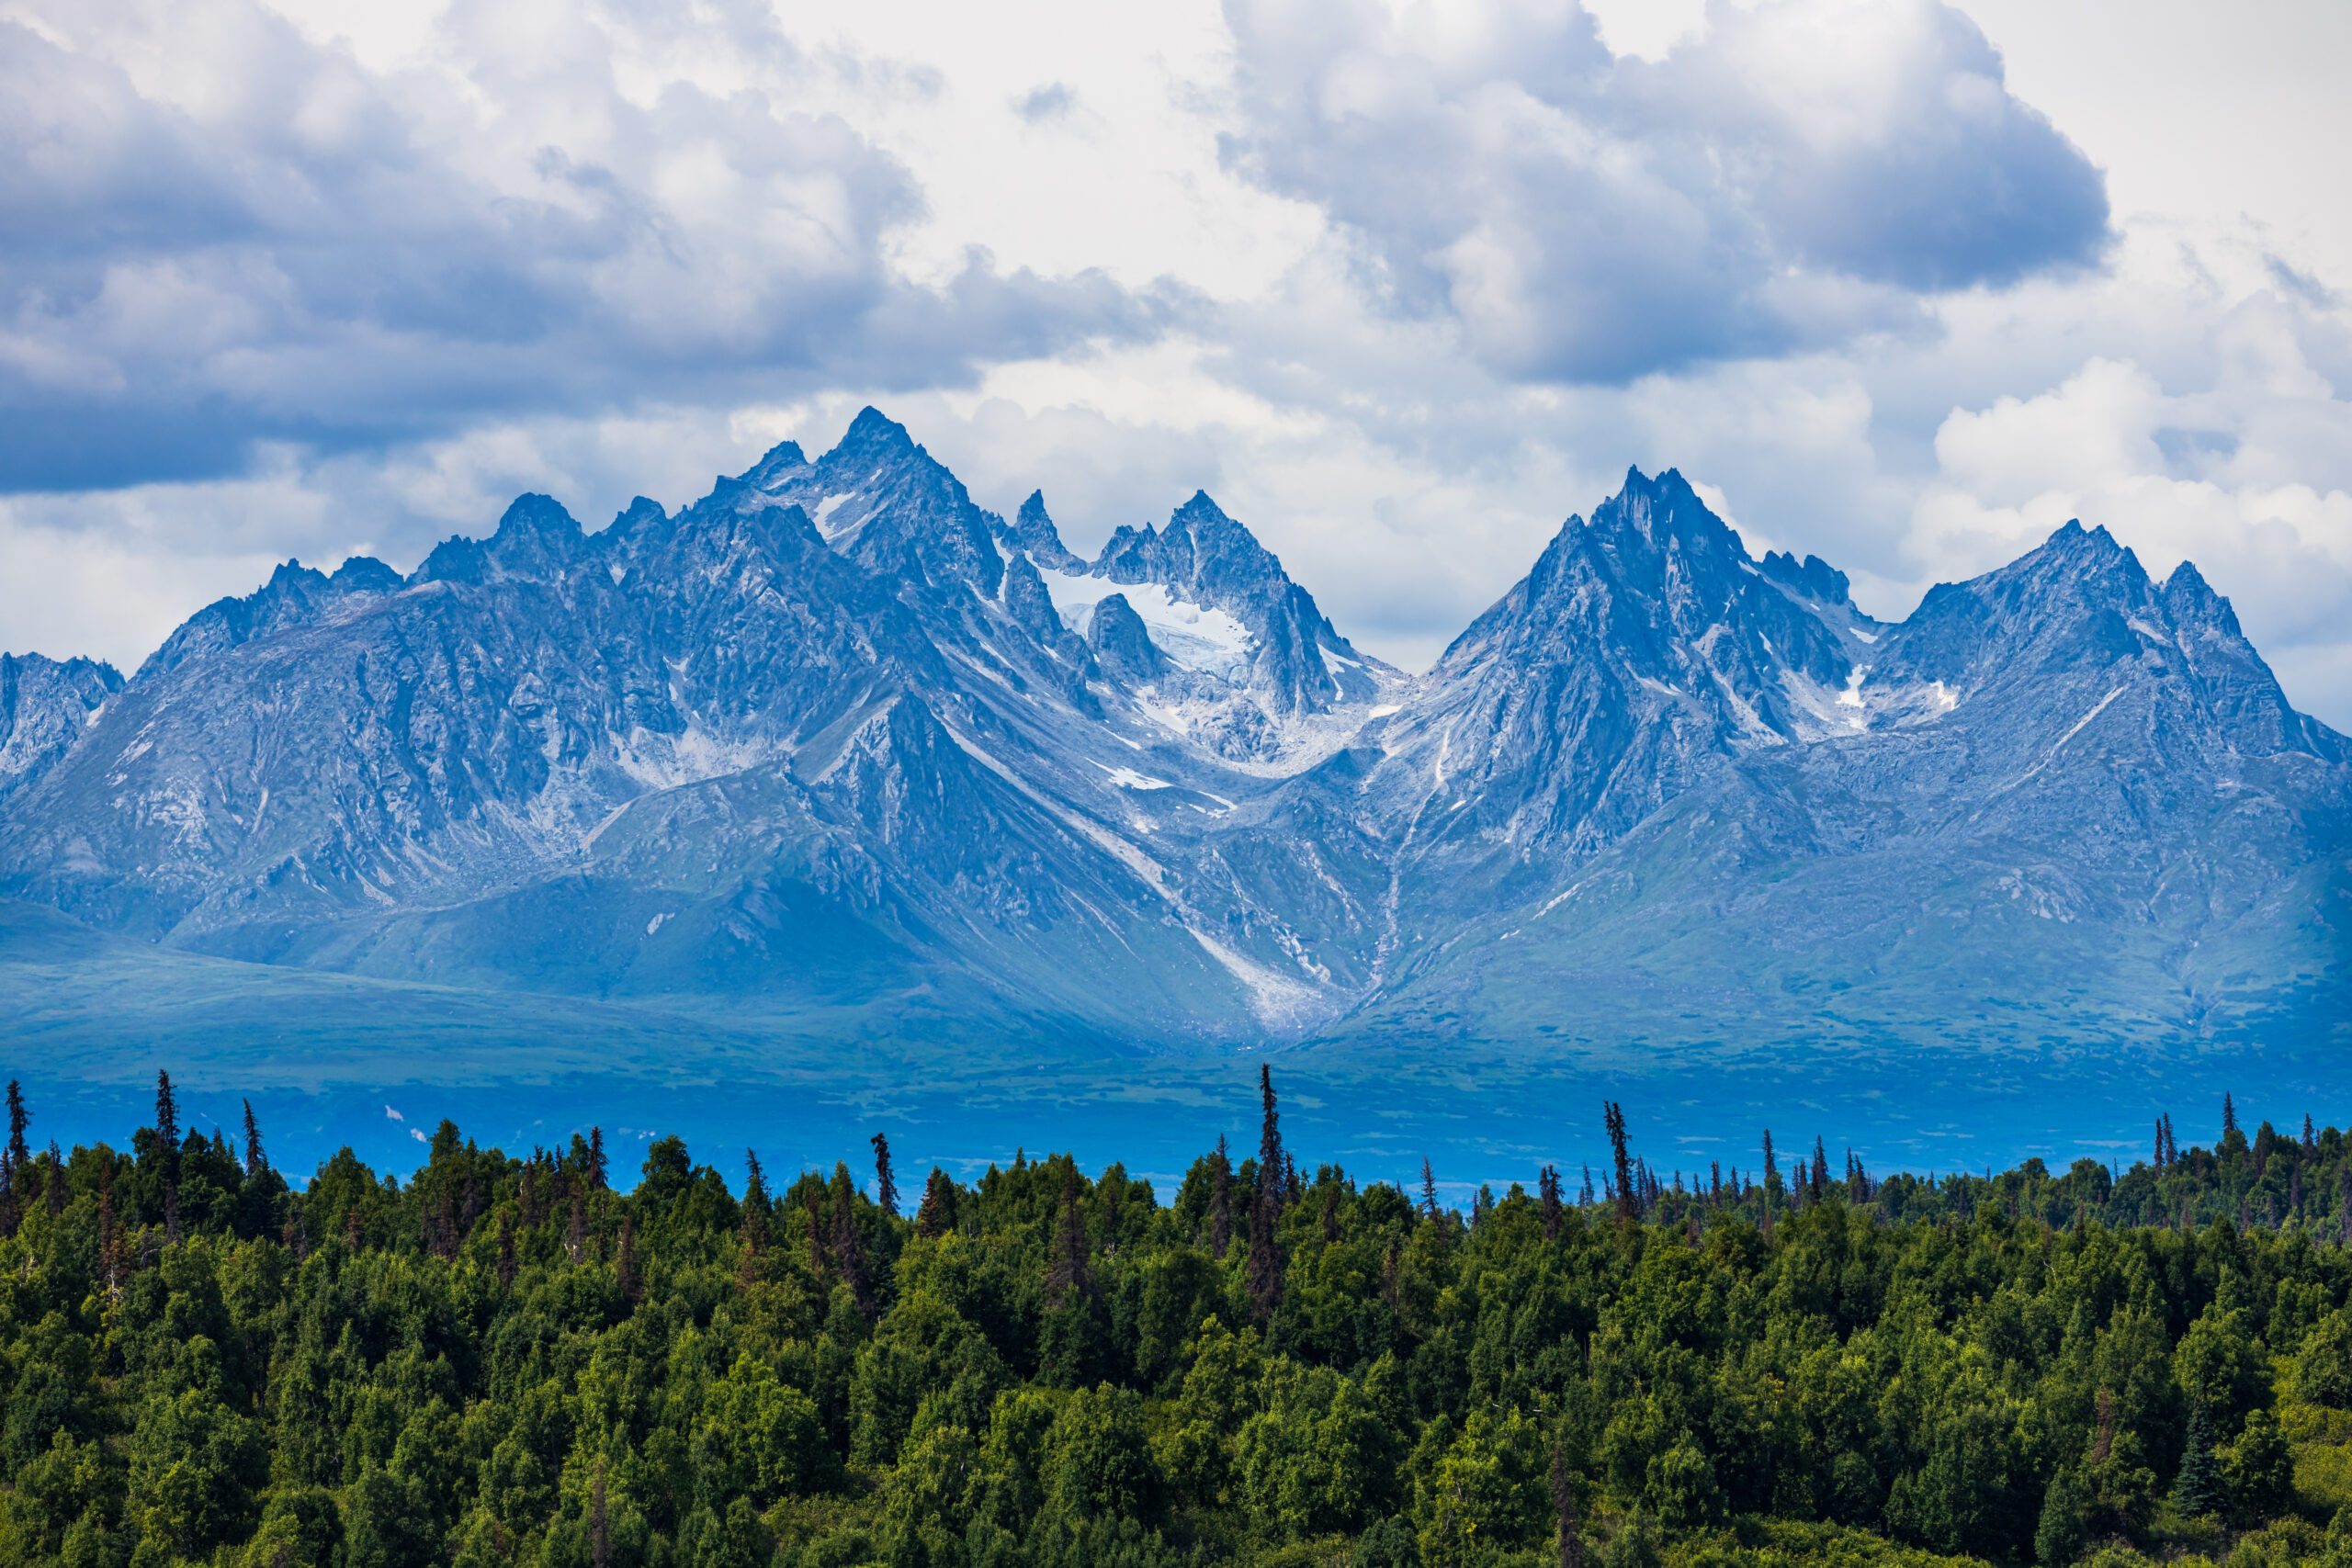
    The rocky, glaciated summit block of Mount Jefferson

    A decaying volcano with a vertical sting

    Jefferson has not erupted in the age of memory, but its summit is still being taken apart, one loose block at a time. The friable rock that makes the pinnacle so hazardous is the same erosion that gives the mountain its sharp, sculpted profile. It is beautiful from the wilderness below, and serious the moment you commit to its final tower.

    Honest self-assessment

    Are you ready for Jefferson?

    Jefferson asks for three things together: glacier and snow skill, nerve on loose rock, and the fitness for a long approach. These are the prerequisites.

    Glacier and snow

    Rope, Axe, Crampons

    The approach crosses glaciers and steep snow. Roped travel, crevasse rescue, and ice-axe arrest are prerequisites.

    Evidence: prior glaciated climbs.
    Loose-rock nerve

    The Summit Pinnacle

    The crux is friable Class 4 to 5 rock with real exposure. You must move calmly and precisely on bad rock.

    Evidence: prior loose alpine rock.
    Long approach fitness

    Miles With A Pack

    Jefferson is a wilderness climb of 13 to 22 miles and thousands of feet of gain, often over two to three days.

    Evidence: prior long approaches under load.
    Turnaround judgment

    Stop At The Saddle

    Many strong climbers top out at the Red Saddle. Knowing when the pinnacle is out of condition is a skill.

    Evidence: willingness to turn back.
    RequirementBaselineWhy it matters
    Glacier competenceRoped travel and crevasse rescueThe standard routes cross live glaciers and steep snow.
    Loose rockCalm on friable Class 4-5The summit pinnacle is decaying volcanic rock.
    FitnessStrong for a long wilderness approach13 to 22 miles with 6,000 to 8,000 ft of gain.
    Rockfall disciplineHelmet, spacing, often unroped highRope-induced rockfall is a real danger on the pinnacle.
    PermitsCentral Cascades Wilderness PermitRequired Jun 15 to Oct 15; quotas apply.
    JudgmentWilling to stop at the Red SaddleAn out-of-condition pinnacle is a turnaround.

    Build the foundation with glacier travel basics and crevasse rescue basics, and study the snow and rockfall hazard in avalanche awareness for climbers. Coming from Mount Hood is good preparation.

    The routes

    The ridges, and the glaciers

    Two families of route, from the south ridges and the northern glaciers, all finishing on the same summit pinnacle.

    The standard lines

    South and Southwest Ridges

    The usual routes, from the Pamelia Lake and Whitewater trailheads, gaining the south ridge to the Red Saddle. They involve a long approach, steep snow or loose scree, and finish on the summit pinnacle. This is the most reasonable way up a mountain with no easy route.

    • Long wilderness approach
    • Steep snow or loose scree to the Red Saddle
    • Finish on the Class 4-5 summit pinnacle
    • 13 to 22 miles; usually 2 to 3 days
    Best fit: experienced climbers with glacier and rock skills.
    The glacier routes

    Whitewater and Jefferson Park Glaciers

    From the north, the Whitewater and Jefferson Park Glacier routes add genuine glacier travel, grade III with Class 5 rock, and are usually climbed from camps in Jefferson Park. They are best earlier in the season, when snow reduces rockfall, and they still finish on the same loose pinnacle.

    • Genuine glacier travel from the north
    • Grade III with Class 5 rock
    • Best earlier season, less rockfall
    • Same summit-pinnacle crux
    Best fit: climbers wanting a glaciated line.
    FactorSouth / Southwest RidgeWhitewater / Jefferson Park Glacier
    ApproachPamelia Lake, Shale Lake campsWhitewater, Jefferson Park camps
    CharacterLong ridge, snow and screeGenuine glacier travel, grade III
    Best seasonSummer, year-round on the ridgeEarlier season, less rockfall
    CruxThe summit pinnacleThe summit pinnacle
    Who it suitsMost experienced partiesClimbers wanting a glaciated line

    The Mount Jefferson climb guide covers the camps, permits, and gear in full.

    Route profile

    From the trailhead to the pinnacle

    An overview of a standard South Ridge ascent, from the wilderness trailhead to the summit block and back.

    Gateway

    Salem / Portland / Bend

    The Oregon cities and forest roads leading to the trailheads.

    Trailhead

    Pamelia Lake or Whitewater

    South and Southwest ridges, or the northern glacier routes.

    Wilderness approach

    Miles Of Trail

    A long forest and PCT approach into the Mount Jefferson Wilderness.

    High camp

    Shale Lake / Jefferson Park

    Common camps near 5,800 to 5,900 ft below the upper mountain.

    The upper mountain

    Snow And Scree

    Steep snow or loose volcanic sand gains the south ridge.

    Red Saddle ~9,900 ft

    The Decision Point

    The notch below the summit block, where many parties stop.

    Summit pinnacle ~10,497 ft

    The Loose Crux

    400 to 600 ft of exposed snow or friable Class 4 to 5 rock.

    Descent

    Reverse With Care

    Down the pinnacle and the long approach, rockfall-aware.

    The pinnacle decides the day

    Everything below the Red Saddle is a long, strenuous approach; everything above it is the real climb. Arrive at the saddle with time, energy, and a clear head, assess the block honestly, and treat the last few hundred feet as the serious pitch they are.

    How a trip runs

    A Jefferson climb timeline

    Jefferson is usually a two to three-day climb, dominated by a long wilderness approach and a committing summit day.

    1

    Secure permits and travel

    Book the Central Cascades permit, get a Northwest Forest Pass, and drive to the trailhead.

    2

    Hike the wilderness approach

    Trek miles of forest and PCT trail into the Mount Jefferson Wilderness.

    3

    Camp below the mountain

    Set a high camp near Shale Lake or in Jefferson Park.

    4

    Alpine start up the ridge

    Leave early and climb snow and scree toward the Red Saddle.

    5

    Gain the Red Saddle

    Reach the notch below the summit block and assess the pinnacle’s condition.

    6

    Climb the summit pinnacle

    Take the exposed snow or loose Class 4 to 5 rock to the true summit.

    7

    Descend to camp

    Reverse the pinnacle and upper mountain carefully, wary of rockfall.

    8

    Pack out

    Hike the long approach back to the trailhead.

    Money and rules

    Cost, permits and access

    Jefferson is inexpensive to climb but tightly permitted, and access can be shaped by quotas and by wildfire.

    ComponentFigureNote
    Guided climbTwo to three daysA committing wilderness climb; few operators run it.
    Central Cascades permitJun 15 to Oct 15Overnight and Whitewater day use, via Recreation.gov; quotas apply.
    Northwest Forest PassTo parkRequired at the trailheads to leave a vehicle.
    Personal gearGlacier and rock kitCrampons, axe, harness, helmet, and rock protection.
    SkillsGlacier, snow, loose rockThe three skill sets Jefferson demands together.

    Plan the permit and check for fire

    A Central Cascades Wilderness Permit is required from 15 June to 15 October, booked on Recreation.gov, with daily quotas on popular zones like Pamelia Lake, plus a Northwest Forest Pass to park. Book early, and check current conditions: wildfire in recent years has closed trails and trailheads around the mountain. Confirm the details with the Forest Service before you go.

    Choosing a team

    Choosing a Jefferson guide

    Few operators guide Jefferson, and its loose summit rewards real experience on the peak. These are the questions to ask.

    Jefferson experience

    Not Just Hood

    Ask how often the guide has climbed Jefferson and its pinnacle.

    Condition report

    Pinnacle And Snow

    The state of the summit block and the traverse for your dates.

    Ratio on the crux

    Tight On The Pinnacle

    Loose, exposed rock calls for a low guide-to-client ratio.

    Permits

    Handled In Advance

    A good operator secures the Central Cascades permits and quotas.

    Rockfall plan

    Helmets And Spacing

    How the team manages rope-induced and natural rockfall.

    Turnaround

    Clear At The Saddle

    A serious guide will stop at the Red Saddle when needed.

    How to choose an expedition operator covers the vetting, and the operator directory is a place to start.

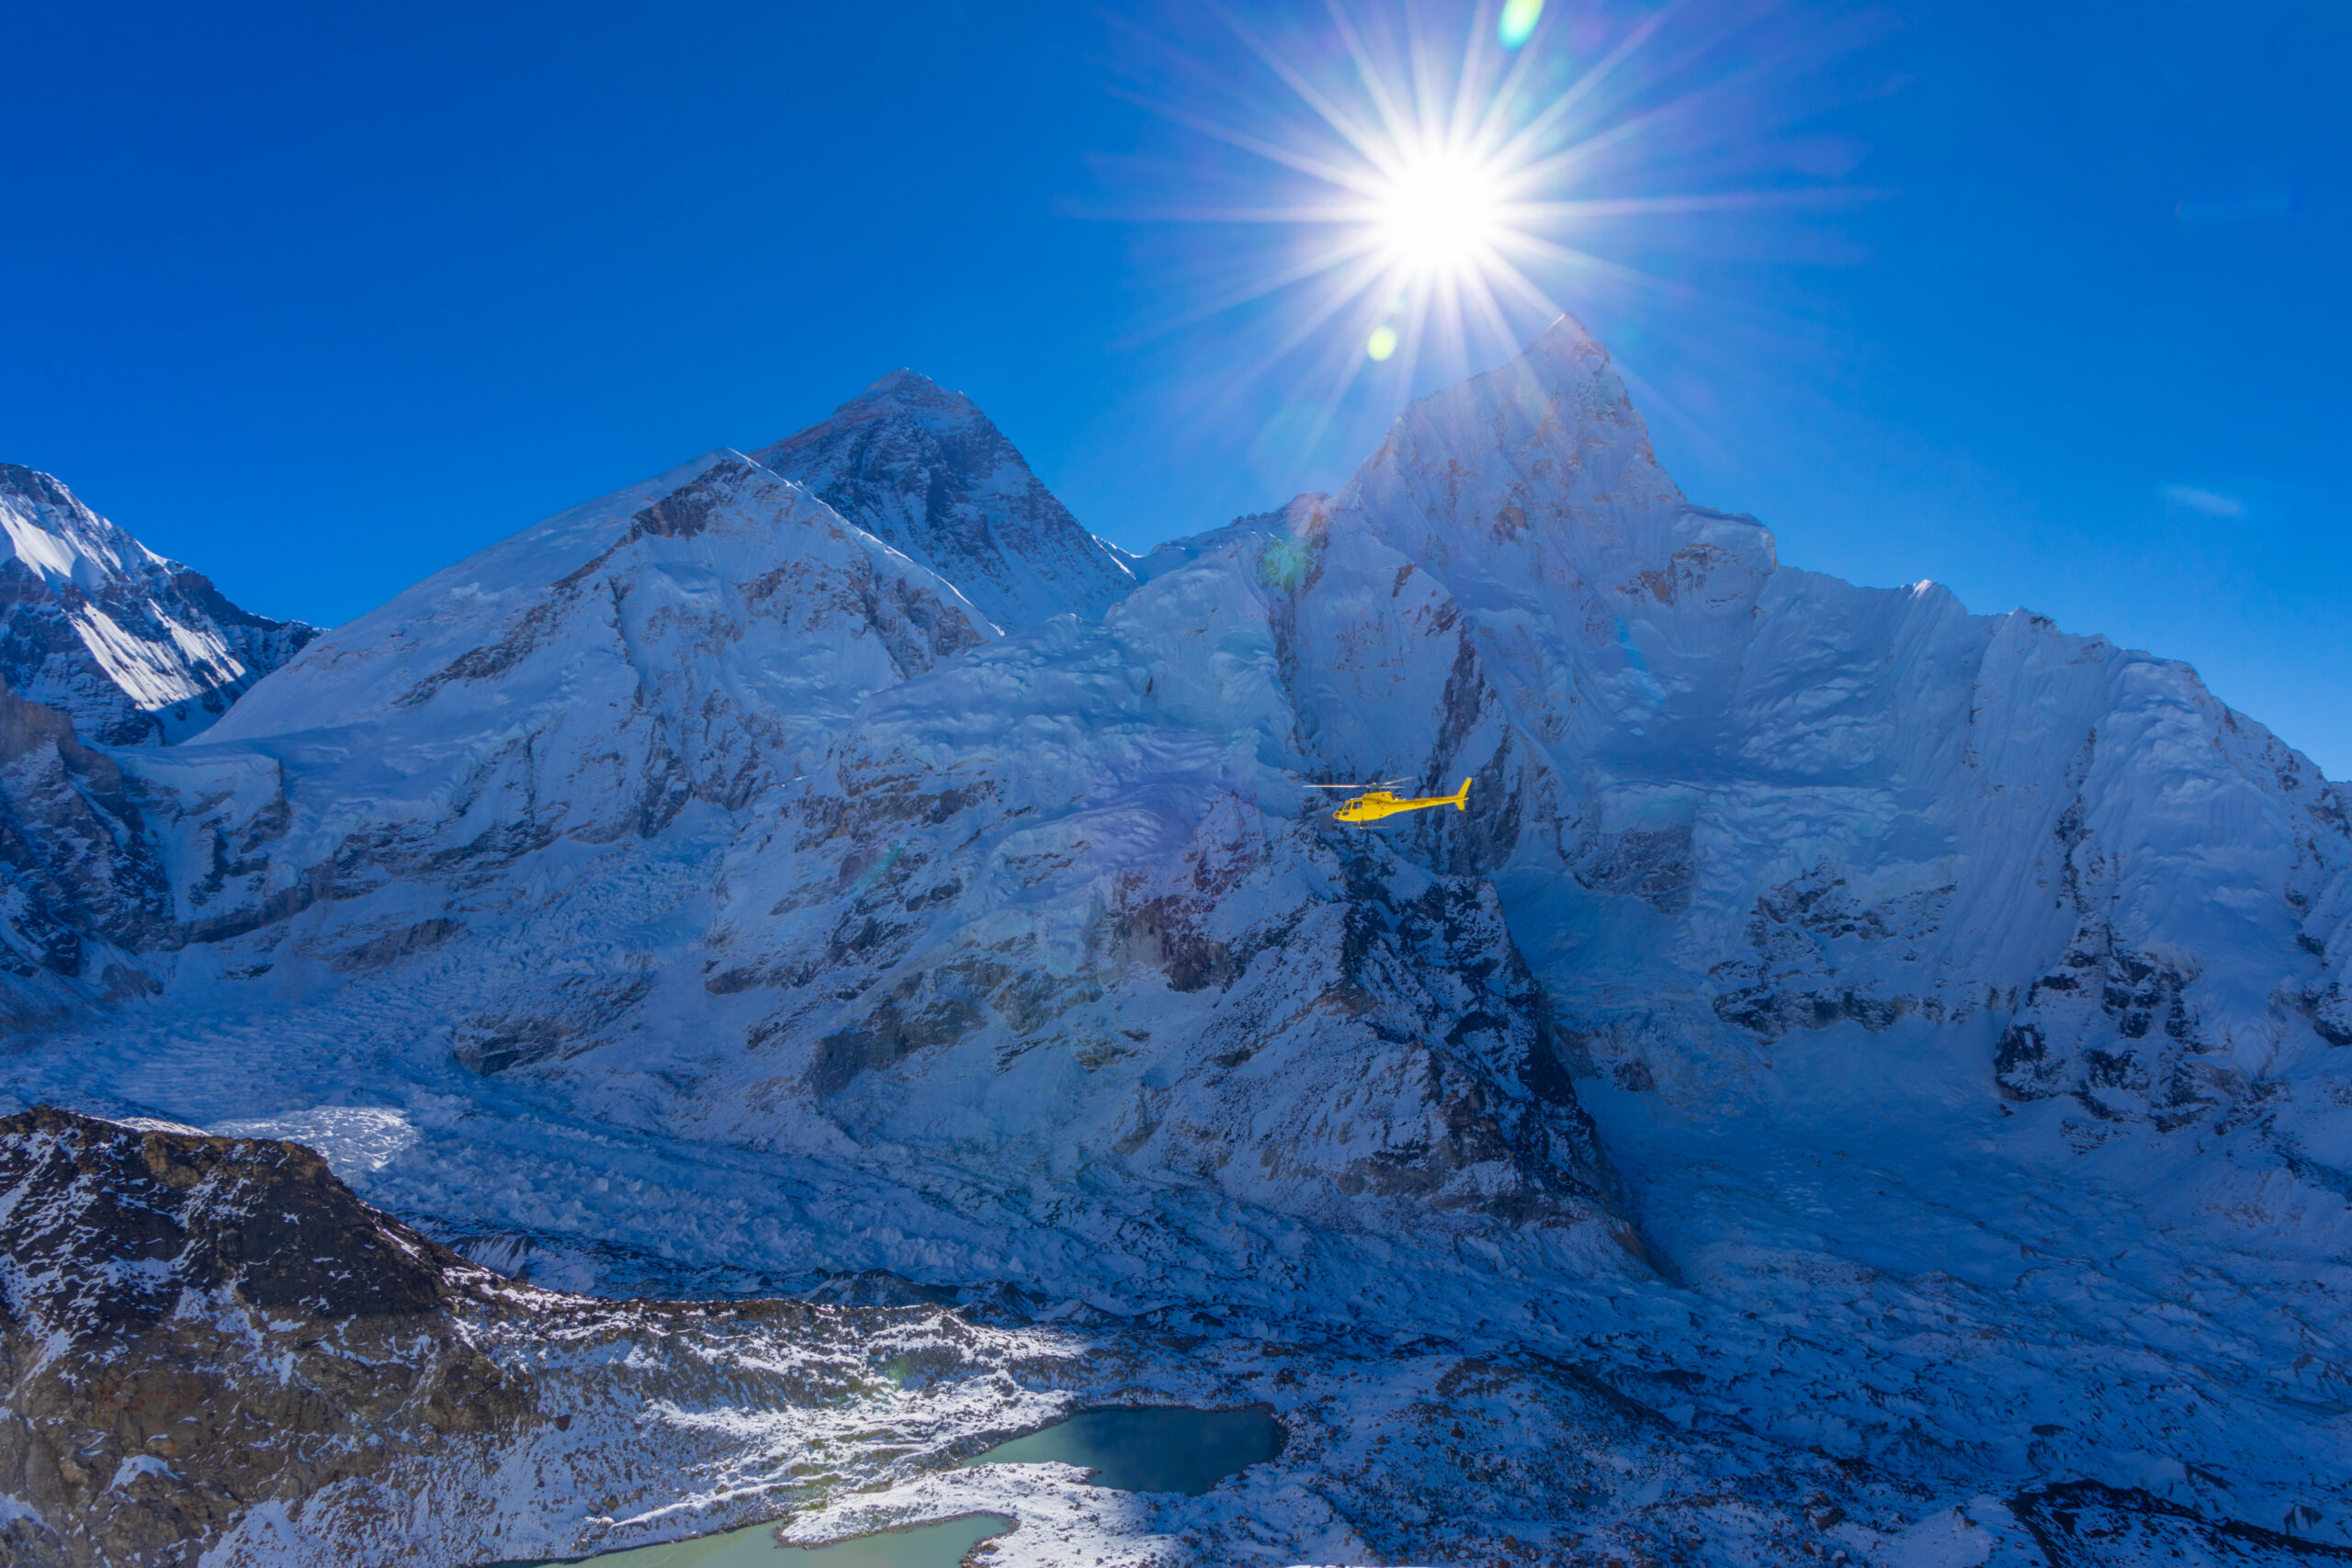
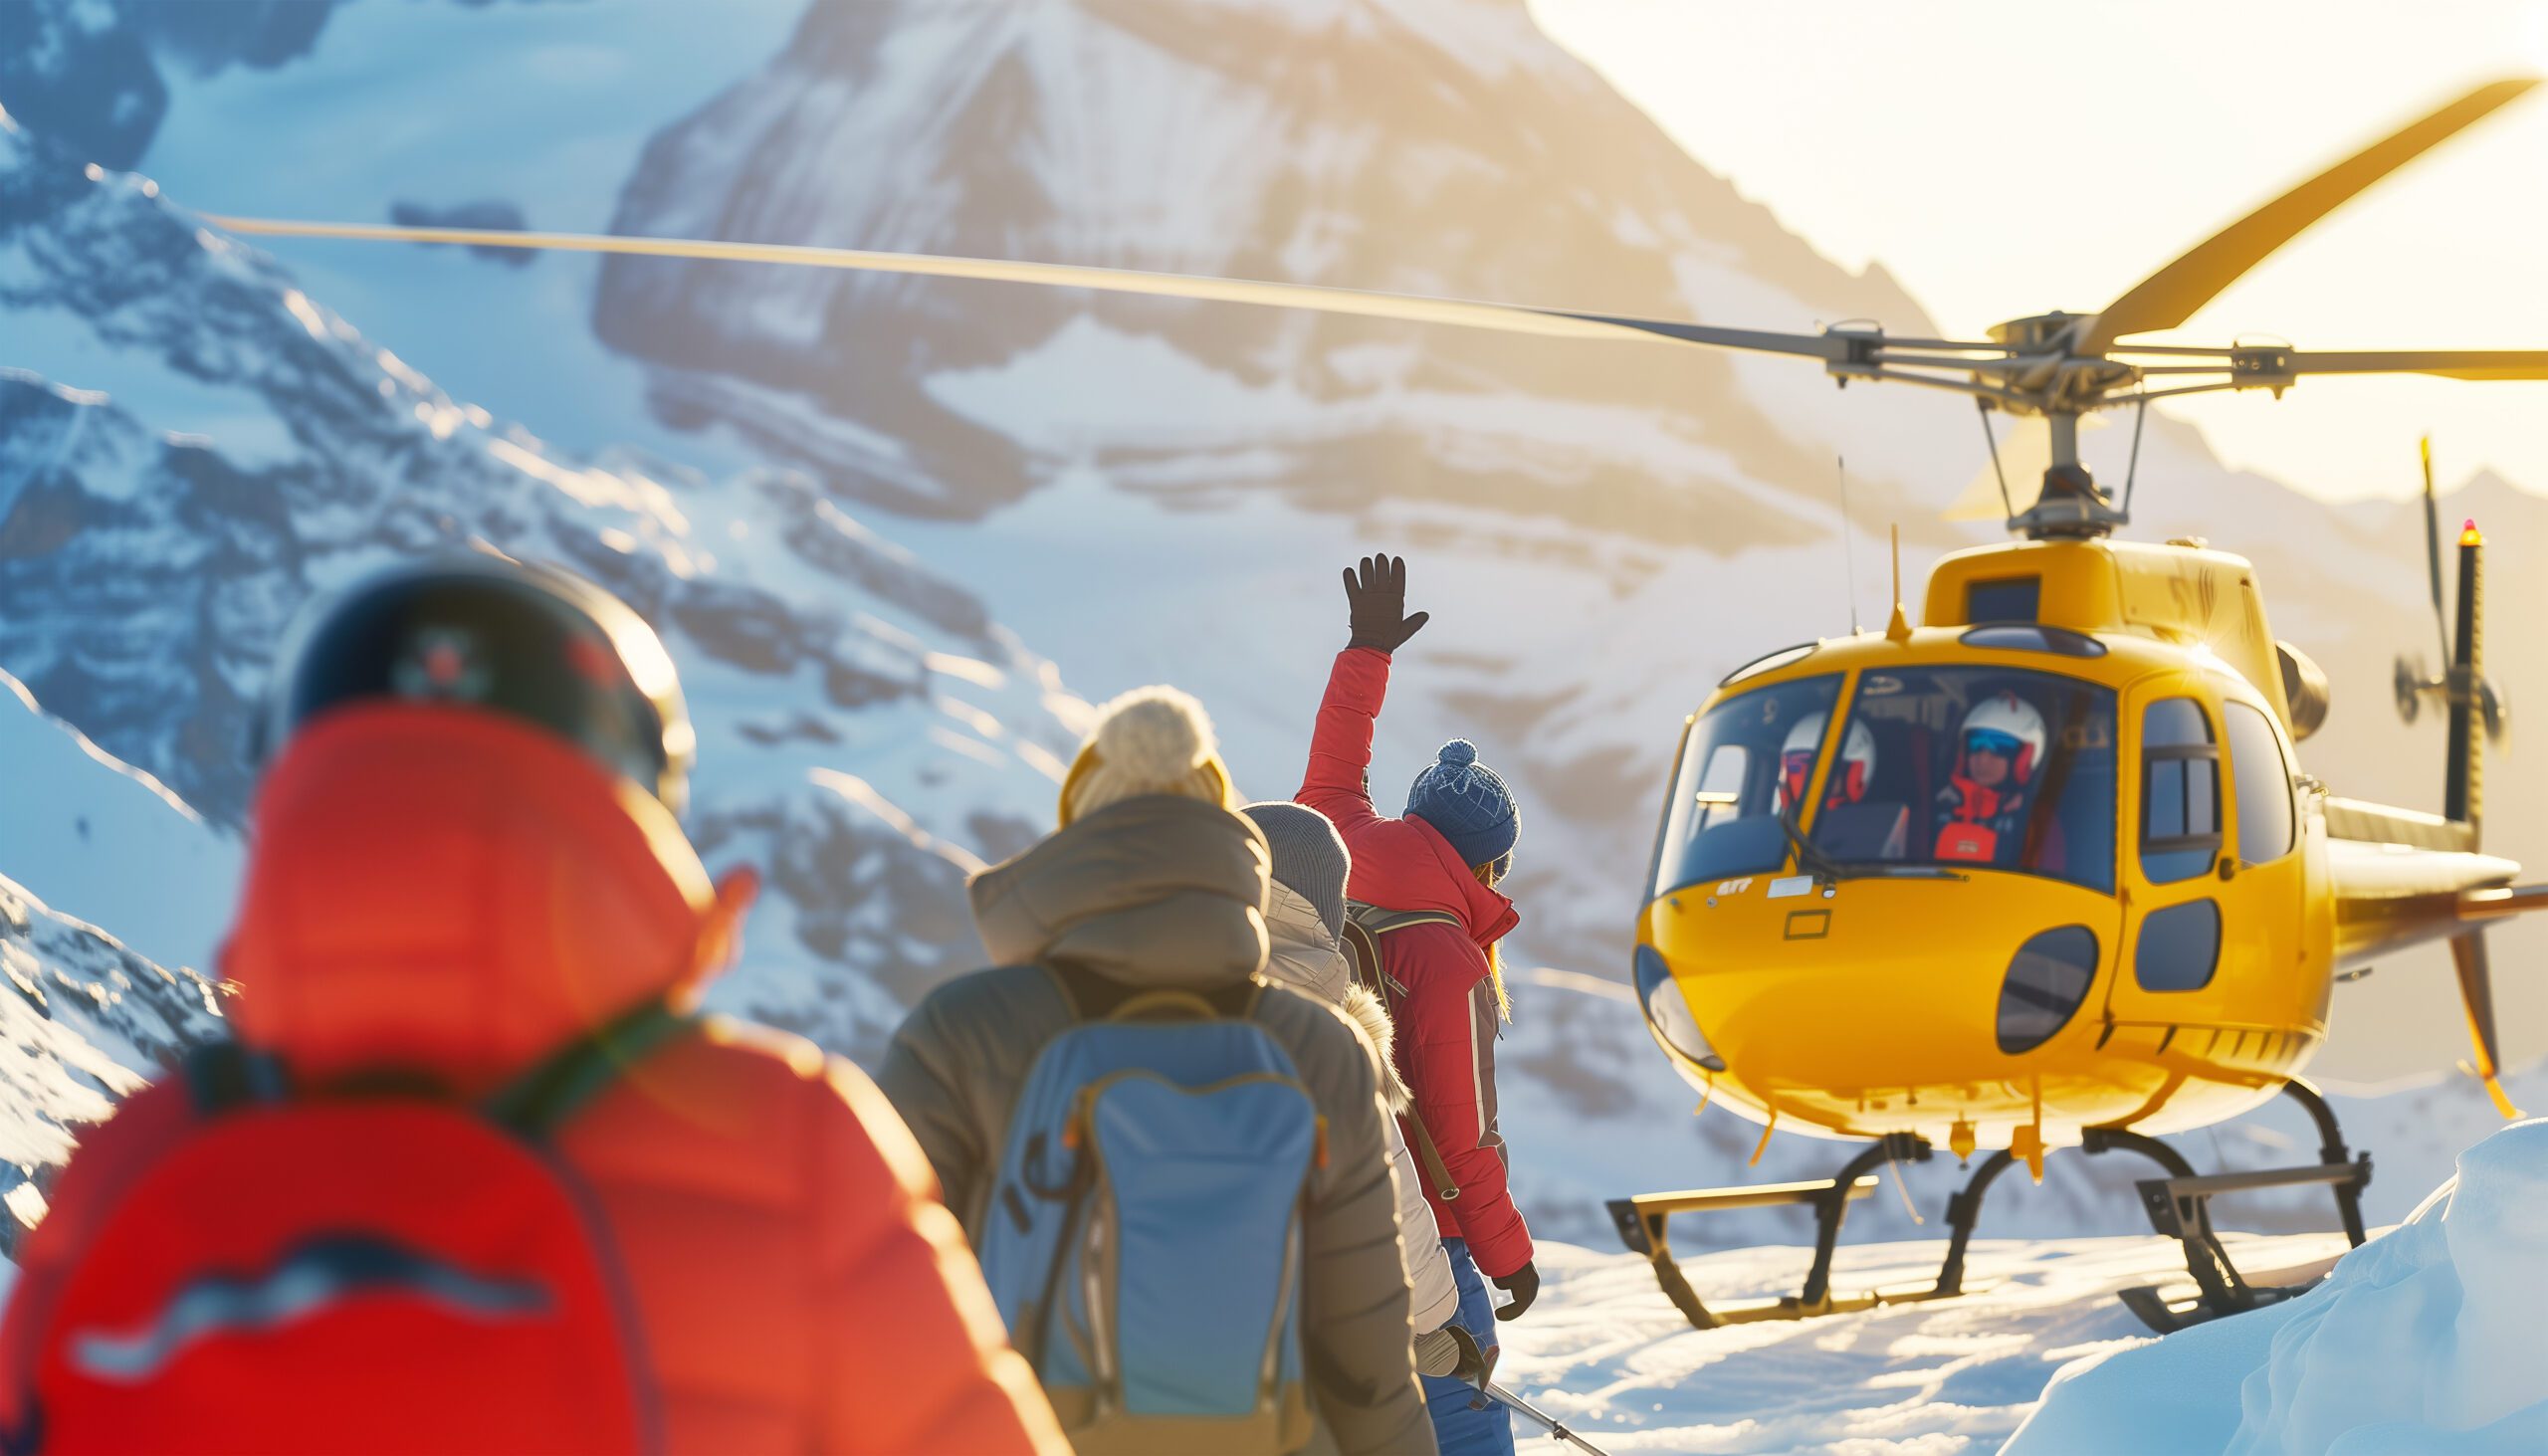
    A rescue helicopter over a remote mountain, a reminder that help is far away

    Remote, loose, and a long way from the road

    Jefferson’s wilderness setting is part of its appeal and part of its risk. An accident on the loose summit pinnacle, miles from the trailhead, is a serious situation, and rescue is neither quick nor guaranteed. Move deliberately, protect against rockfall, and keep enough in reserve for the long walk out.

    The hazards

    Difficulty and hazard, honestly

    Jefferson’s difficulty is not its height. It is the loose summit rock, the exposed snow, the remoteness, and the weather.

    HazardWhat it isHow to treat it
    Loose summit rockThe defining hazardFriable Class 4-5; rockfall, including rope-induced.
    The exposed traverseEarly-season snowSteep snow with severe runout below the pinnacle.
    Remote approachA wilderness climbLong miles from the trailhead; help is far away.
    Fast weather and fireCascade conditionsStorms move fast; wildfire can close access.
    Timing

    Season and weather

    Summer is the season, but the state of the summit block, rock or snow, matters more than the month.

    July

    Season Opens

    Snow lingers on the pinnacle; the exposed traverse in play.

    Aug-Sep

    Prime, Rock

    The summit block clears to loose rock; the classic window.

    Late season

    Looser

    Drier and looser rock, with more rockfall risk.

    Spring

    Snow Climb

    Steep-snow ascents, with less rockfall but real avalanche care.

    Any time

    Check The Block

    The summit block’s state matters more than the month.

    Live wind and weather for Mount Jefferson. Source: Windy.com. For how to read a mountain forecast, see our weather guide.
    Mount Jefferson, in the central Oregon Cascades, within the Mount Jefferson Wilderness. Map: OpenStreetMap contributors.
    History

    A short history of Jefferson

    From a Lewis and Clark naming to an 1888 first ascent and a reputation as Oregon’s hardest volcano.

    Mount Jefferson was named in 1806 by the Lewis and Clark expedition, for President Thomas Jefferson, who had sent them west; the peoples of the region knew it long before by their own names. Its first recorded ascent came in 1888, by E. C. Cross and Ray L. Farmer, who reached the loose summit pinnacle that still defines the climb.

    In the years since, Jefferson has kept a quiet, formidable reputation. It lacks Hood’s crowds and Rainier’s fame, but among Cascade climbers it is respected as the hardest of Oregon’s major volcanoes, a remote peak whose difficulty is concentrated in a few hundred feet of decaying rock. For many, standing on that pinnacle is the moment they know they are ready for bigger glaciated mountains.

    Questions

    Mount Jefferson FAQ

    The questions climbers ask most about the difficulty, the summit pinnacle, the permits, and the season.

    How high is Mount Jefferson, and where is it?

    Mount Jefferson is 10,497 ft (3,199 m), Oregon’s second-highest peak after Mount Hood. It is a deeply eroded stratovolcano in the central Oregon Cascades, inside the Mount Jefferson Wilderness, about 60 miles east of Salem and 90 miles southeast of Portland. It has had no eruptions in recorded geological recent history and now carries four named glaciers.

    Is Jefferson really harder than Mount Hood?

    Yes. Though it is lower than Hood, Jefferson is widely regarded as the hardest of Oregon’s major volcanoes to summit. Where Hood has a popular, guided standard route, Jefferson stacks a long wilderness approach, glacier travel, and a loose, exposed summit pinnacle into a far more committing climb. It is not a first Cascade volcano.

    What is the Red Saddle, and the summit pinnacle?

    The Red Saddle, at about 9,900 ft, is the notch of red volcanic soil just below the summit block, and the point where many climbers stop. Above it, the final 400 to 600 ft is the crux: either an exposed steep-snow traverse with severe runout early in the season, or a scramble up dangerously loose Class 4 to 5 volcanic rock once the snow melts. The true summit is that pinnacle.

    What is the standard route?

    The usual lines are the South and Southwest Ridges, reached from the Pamelia Lake or Whitewater trailheads, with the Whitewater Glacier and Jefferson Park Glacier routes from the north. All of them gain the Red Saddle and finish on the summit pinnacle. Expect a 13 to 22 mile round trip with 6,000 to 8,000 ft of gain, usually done over two to three days.

    Why is the rock so dangerous?

    Jefferson is a decaying volcano, and its upper rock is friable and loose. Rockfall, including rock knocked down by ropes and by other climbers, is the defining hazard on the summit pinnacle, and many parties choose to unrope there to avoid rope-induced rockfall. A helmet, careful movement, and spacing are essential, and icy rock is a reason to turn around.

    Do I need a permit?

    Yes. A Central Cascades Wilderness Permit is required from 15 June to 15 October, booked through Recreation.gov, for overnight trips and for day use at the Whitewater trailhead, and popular zones like Pamelia Lake have strict daily quotas. You also need a Northwest Forest Pass to park. Confirm the current rules and quotas before you plan, and note that wildfire can affect trail access.

    When is the best time to climb?

    Roughly July to September. Later summer clears the summit block to rock, at the cost of looser conditions and rockfall; earlier season keeps snow on the upper mountain, which can make the final traverse a steep, exposed snow climb instead. Each has trade-offs, and the state of the summit block is the key thing to check for your dates.

    What experience do you need?

    Glacier travel and crevasse rescue, competence and a cool head on steep snow and loose exposed rock, and the fitness for a long wilderness approach with a heavy pack. Jefferson rewards climbers who already have peaks like Hood, Adams, or St. Helens behind them, and it is often described as the climb that proves you are ready for Rainier.

    Transparency

    How we built this update

    What this page is based on, who reviewed it, and what we do not claim to know.

    Sources

    • Forest Service and Recreation.gov information for permits and access.
    • Guide-service and climber route descriptions for the ridges and glaciers.
    • Published records for the summit pinnacle, grades, and 1888 first ascent.
    • USGS material on the mountain’s geology and glaciers.
    • Our own Mount Jefferson climb guide for the detailed route and cost.

    Review and standards

    Compiled by Travis Ludlow and reviewed for safety by Dawson Ludlow, our Climbing and Mountaineering Lead (Wilderness First Aid), whose highest first-hand summit is Kilimanjaro. Health and medical points were reviewed by Taylor Ludlow, RN. We do not fabricate summit experience, quotes, or credentials, and we say plainly when we are reporting rather than recounting.

    What we do not claim to know

    Conditions on Jefferson change through the season and year, and no web page can replace current reports and a guide’s judgment. In particular:

    • The summit block’s state, rock or snow or ice, varies through the season.
    • Permit quotas and rules change; confirm current details on Recreation.gov.
    • Wildfire can close trails and trailheads with little notice.
    • Our team has not climbed Jefferson, so we report records and route descriptions, not personal experience.
    Global Summit Guide research team

    Global Summit Guide research

    We compile mountain updates from land-manager and permit information, route descriptions, and published records, review them for safety and medical accuracy, and refresh them each season. We are transparent about what we have and have not climbed, and Jefferson is a research-based briefing, not a personal account.

    About our team and standards ->
    Plan your Oregon Cascades climb

    Earn the pinnacle. Respect the Red Saddle.

    Start with the full route and permits in our Mount Jefferson climb guide, warm up on Mount Hood, build the skills with our glacier travel guide, and weigh yourself against our fitness standards. Trips stage through Portland, Salem, and Bend, so for flights and lodging, browse travel on Expedia.

    Disclosure: the Expedia link above is a sponsored affiliate link, and we may earn a commission at no extra cost to you. It is the only affiliate link on this page; our route, permit, and safety guidance is independent.

    Was this helpful?

    Yes
    No
    Thanks for your feedback!
  • Mount Shuksan Expedition Update 2026: The Sulphide Glacier, the Summit Pyramid

    Mount Shuksan, a glaciated non-volcanic horn in the North Cascades of Washington
    9,131 ft (2,783 m) · North Cascades · Washington

    Mount Shuksan: the most photographed peak that climbs like a mountain

    Shuksan is one of the most photographed mountains in the world, its reflection in Picture Lake a Cascades icon. Behind the postcard is a serious alpine climb: a non-volcanic, heavily glaciated horn beside the volcano Baker, where every route finishes with a rock climb up the summit pyramid. This update covers the Sulphide Glacier, the classics, permits, and an honest readiness view. Heights in feet (metres).

    Research-based updateSafety and medical reviewReviewed each Cascade seasonOur team has not climbed Shuksan

    Updated 27 July 2026 · Compiled by Travis Ludlow · Safety review by Dawson Ludlow · Medical review by Taylor Ludlow, RN

    9,131 ftSummit (2,783 m)
    Non-volcanicGlaciated rock horn
    Summit pyramidEvery route’s finish
    SulphideStandard glacier route
    Jul-SepSeason
    N. Cascades NPWilderness permit

    Single-mountain expedition update, compiled from National Park Service information, guide-service route descriptions, and published climbing records. Our team has not climbed Mount Shuksan; the only first-hand summit anyone on our team claims is Kilimanjaro. This is a planning briefing for climbers with alpine skills, not a how-to and not a substitute for training or a guide.

    A postcard from the outside, an alpine climb up close.

    Shuksan is admired by millions from the roadside at Picture Lake, and climbed by far fewer. It is not a volcano like its neighbour Baker but a glacier-carved rock horn, and its every route ends with a rock climb up the summit pyramid. Even the moderate Sulphide Glacier demands glacier travel, crevasse rescue, and exposed Class 3 to 4 rock. It is a superb step up from a volcano walk-up toward real alpine climbing.

    • One of the most photographed peaks on Earth.
    • Non-volcanic, glaciated rock horn beside Baker.
    • Every route finishes on the summit pyramid.
    • Standard route: the Sulphide Glacier.
    • Glacier plus rock skills required, not a hike.
    The mountain

    What Shuksan involves

    An accessible but genuine alpine climb: a glacier, a rock pyramid, and Cascade weather, all in a short, committing package.

    Mount Shuksan rises to 9,131 ft in the North Cascades of Washington, a heavily glaciated, non-volcanic peak within North Cascades National Park, beside the volcano Mount Baker. Where Baker is a rounded ice-clad volcano, Shuksan is a craggy horn of rock, wrapped in glaciers and topped by a distinct rock pyramid. That structure is what makes it so photogenic, and what makes it a real climb rather than a walk.

    The standard Sulphide Glacier route begins with a forest approach to a high camp, then an alpine start across the glacier to the base of the summit pyramid, where climbers swap crampons for a Class 3 to 4 rock scramble to the top. It is very achievable for competent alpine climbers, and a fine objective for those building skills, but it asks for glacier travel, crevasse rescue, and comfort on exposed rock. Build those first with glacier travel basics and crevasse rescue basics.

    Postcard and climb

    The postcard, and the pyramid

    The same features that make Shuksan the most photographed peak in the Cascades are what make it a serious summit.

    Shuksan’s fame is built on one view: its reflection in Picture Lake, off the Mount Baker Highway, a scene printed on countless calendars and postcards. The steep glaciers dropping off its north side, the layered rock, and the sharp summit give it a drama that few peaks match, and draw photographers in every season. Most who admire it never set foot above the meadows.

    Those who climb it meet a different mountain. Whatever route reaches the base of the summit pyramid, the top itself is a rock tower, roughly 500 to 600 ft of Class 3 to 4 climbing, or steep snow in early season. It is the crux of every ascent, exposed and committing, and if the rock is glazed with ice, the right decision is to turn around below it. The postcard and the pyramid are the same mountain, seen from two very different places.

    Icy rock is a turnaround

    The summit pyramid is unavoidable, and it is dangerous when iced. If conditions coat the rock, a strong team accepts a high point below the summit rather than forcing it. The mountain will still be photogenic next season.

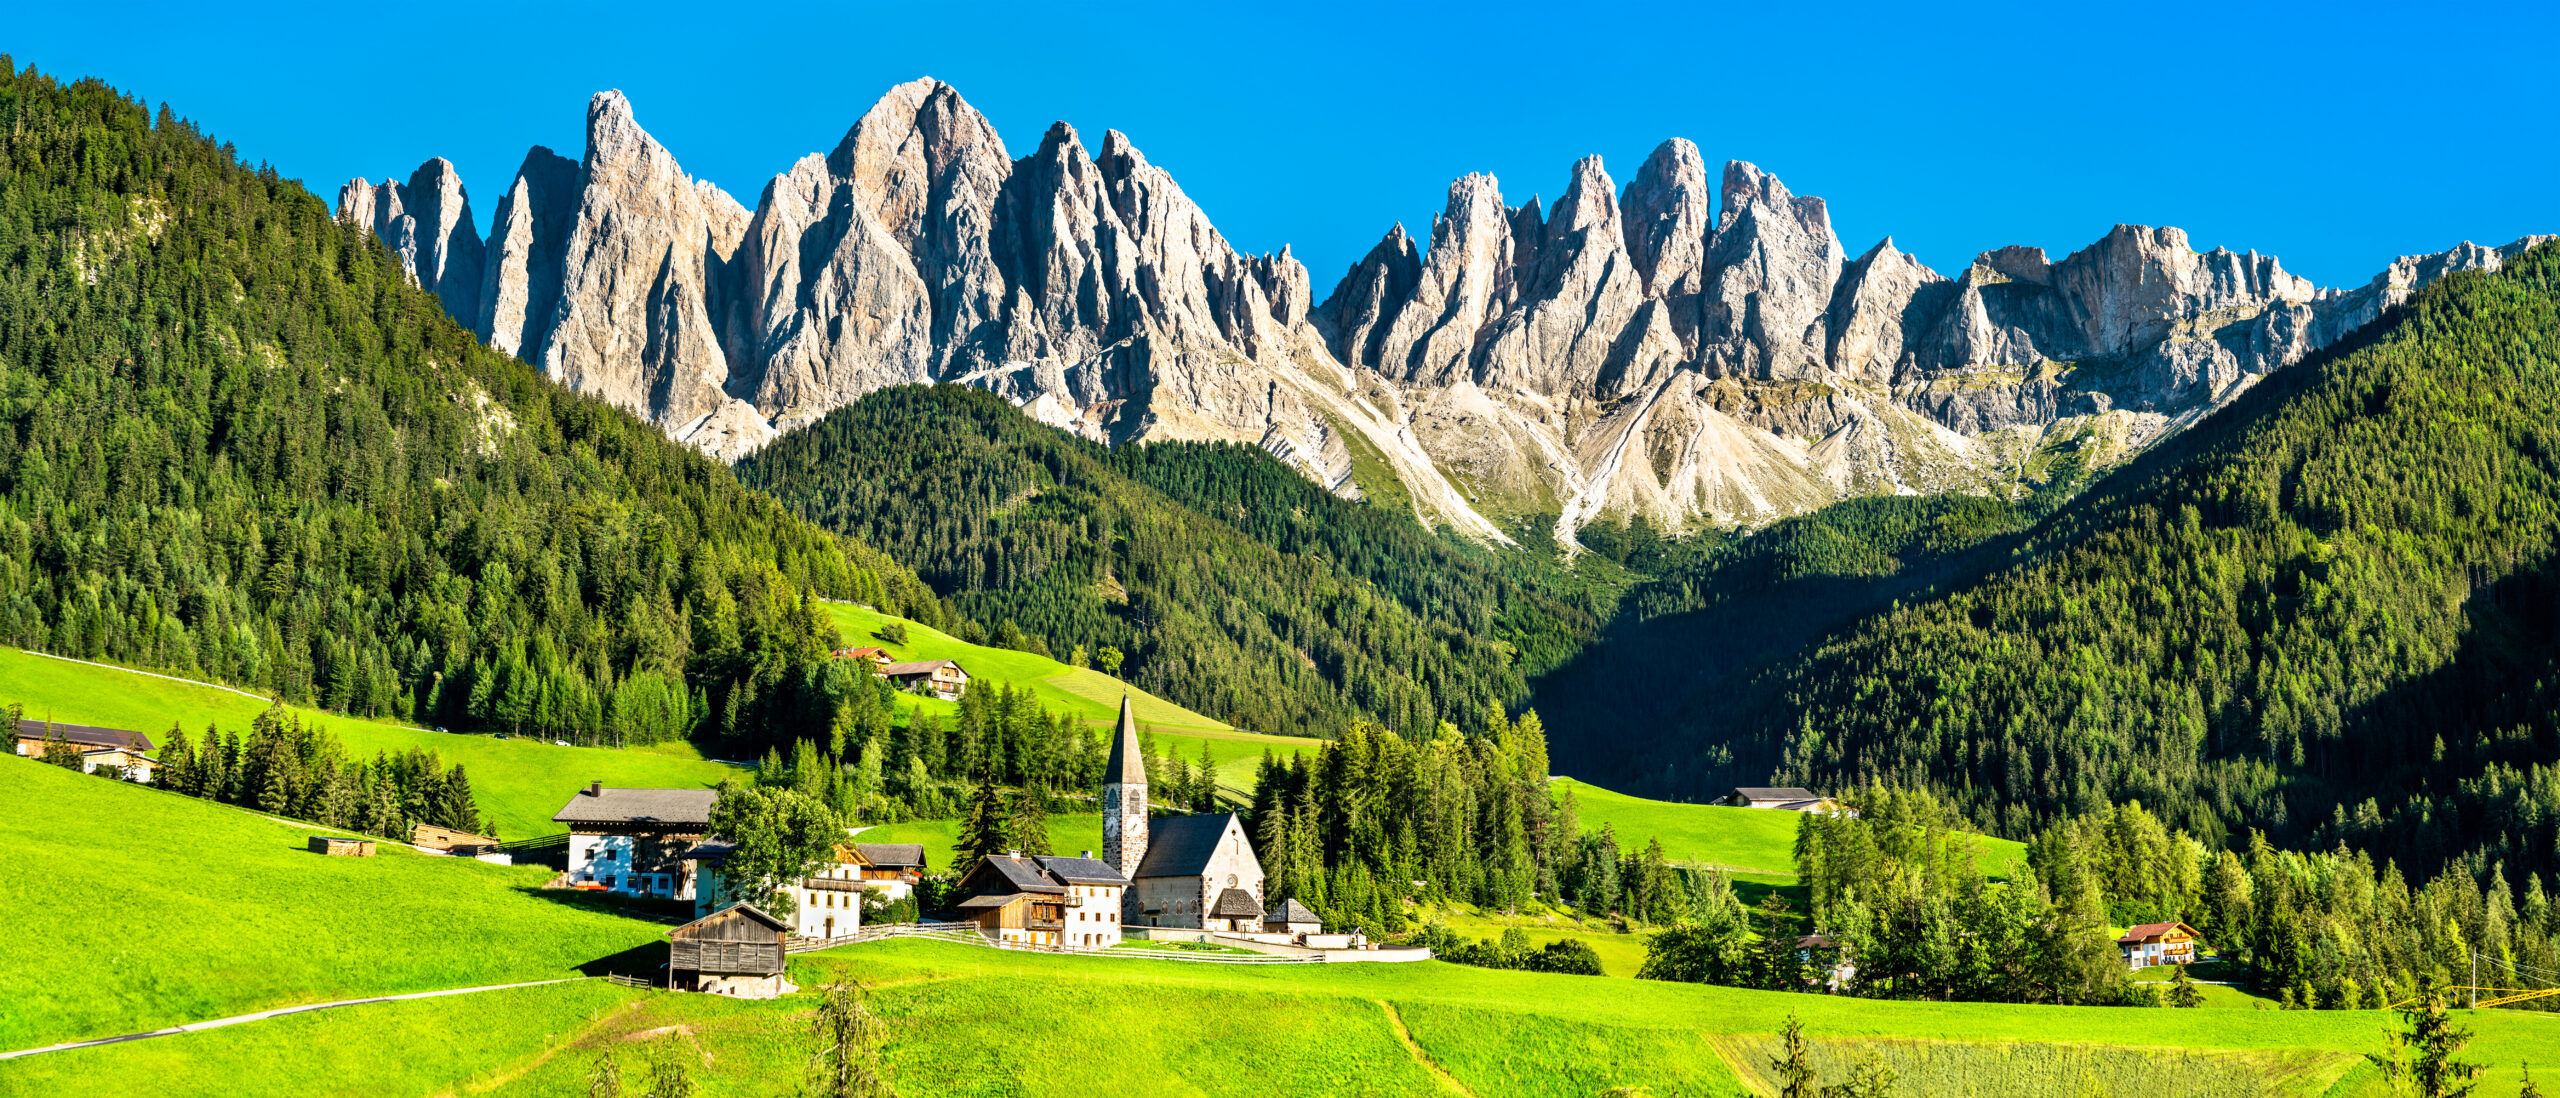
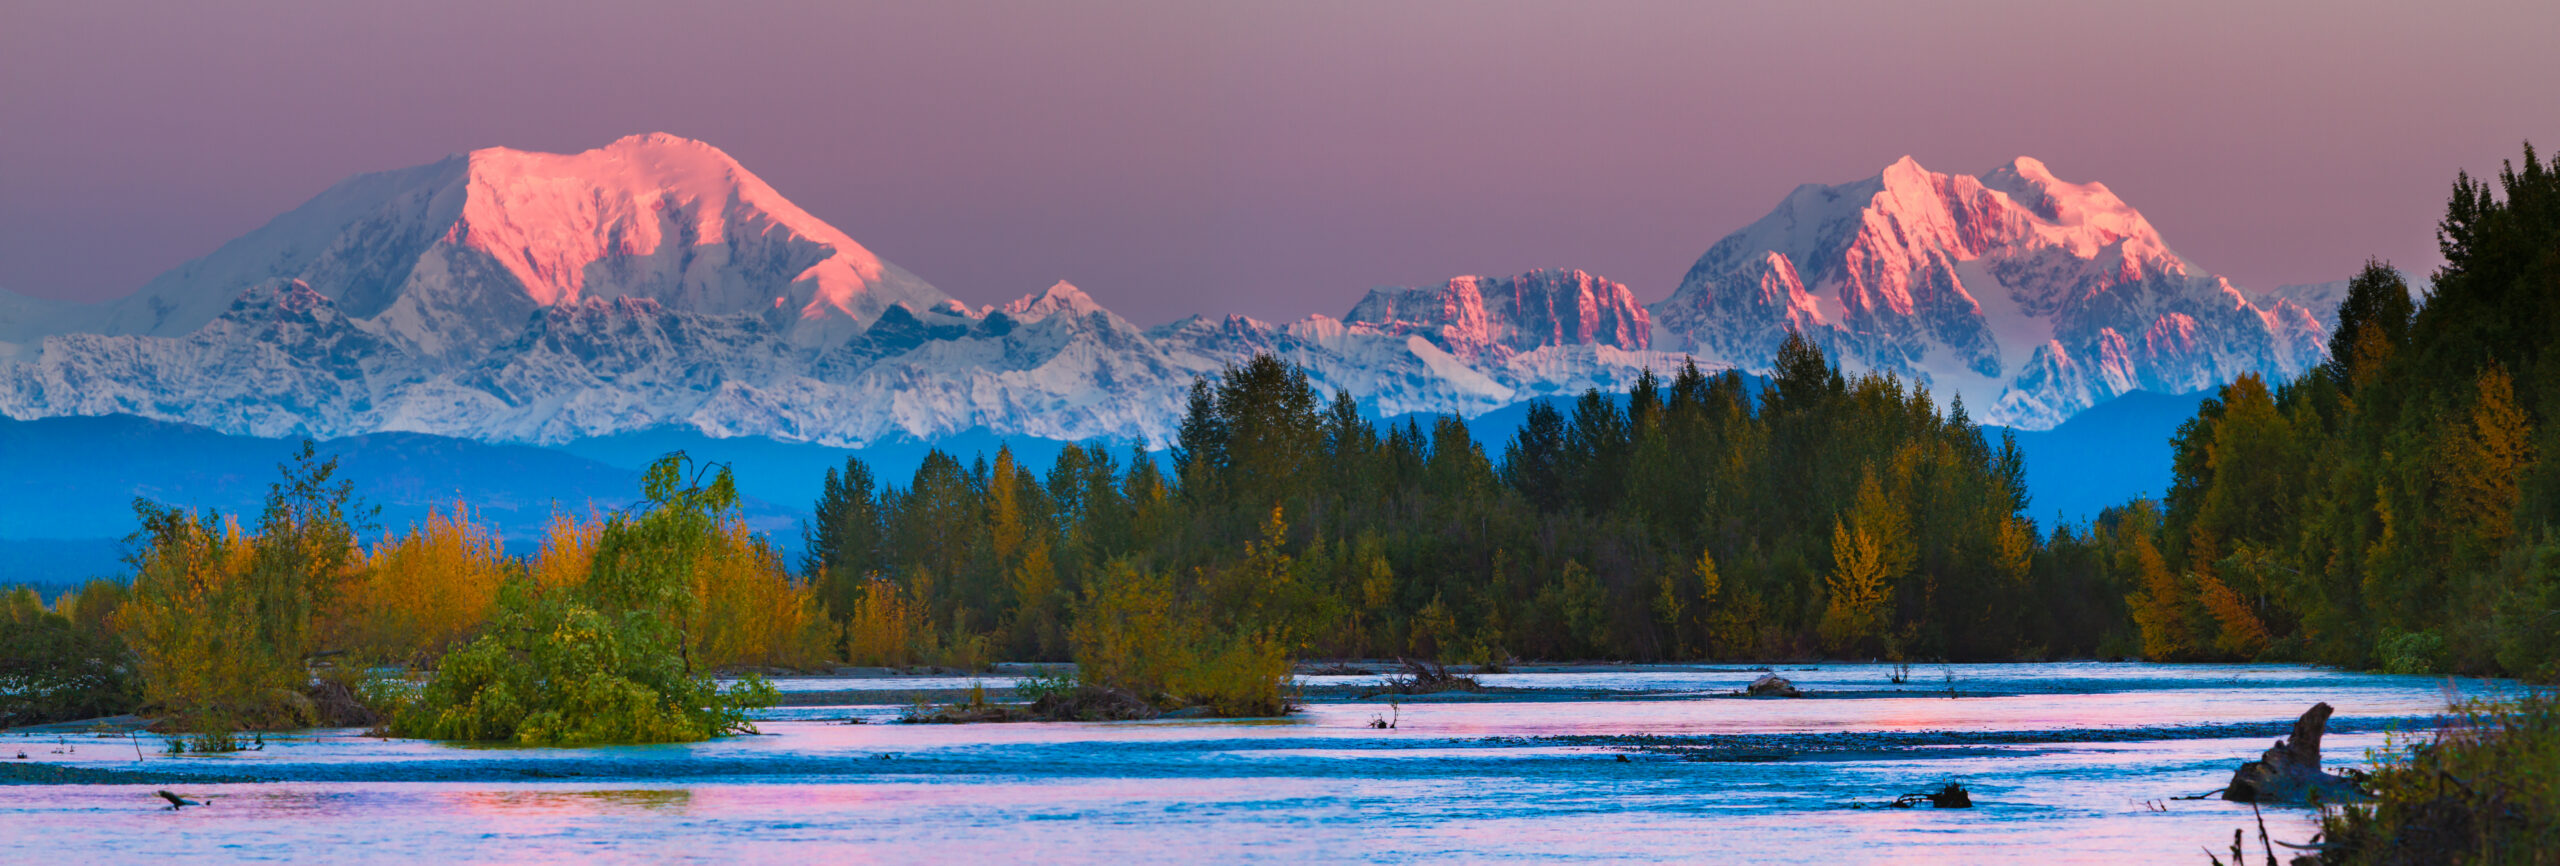
    A wide panorama of Mount Shuksan and the North Cascades

    The most photographed peak in the Cascades

    From Picture Lake to Artist Point, Shuksan anchors some of the most famous views in the Pacific Northwest. Its cascading glaciers and layered rock are a photographer’s gift, and a climber’s challenge. The same relief that fills the frame is the relief you climb to reach its rocky summit.

    Honest self-assessment

    Are you ready for Shuksan?

    Shuksan rewards climbers who bring two skill sets, glacier and rock, and the judgment to read the weather. These are the prerequisites.

    Glacier skills

    Rope, Axe, Crampons

    Even the standard route crosses a real glacier. Roped travel and crevasse rescue are prerequisites, not extras.

    Evidence: prior glaciated climbs.
    Alpine rock

    The Summit Pyramid

    Every route tops out on 500 to 600 ft of exposed Class 3 to 4 rock. You must be comfortable moving on it.

    Evidence: prior exposed alpine rock.
    Weather judgment

    Cascade Conditions

    North Cascades weather turns fast. Reading it, and knowing when the pyramid is too icy, is a safety skill.

    Evidence: sound calls in changeable weather.
    Turnaround discipline

    Ice Means Stop

    If the summit rock is coated in ice, the safe answer is to descend. Ego is the real hazard here.

    Evidence: willingness to turn back.
    RequirementBaselineWhy it matters
    Glacier competenceRoped travel and crevasse rescueThe Sulphide and other routes cross live glaciers.
    Alpine rockComfortable on Class 3-4 exposureThe summit pyramid is unavoidable on every route.
    FitnessStrong for a long approach and summit dayA forest approach plus a big summit day, back to back.
    Weather senseAble to read fast Cascade changesConditions and the pyramid’s state shift quickly.
    PermitsNorth Cascades wilderness permitOvernight trips need a park permit; access is limited.
    JudgmentWilling to turn aroundIcy summit rock is a clear stop signal.

    If you are coming from a volcano like Mount Baker, Shuksan is a natural next step that adds real rock to your glacier skills.

    The routes

    The Sulphide, and the classics

    One moderate standard route, and two celebrated harder lines. All of them finish on the same summit pyramid.

    The standard route

    Sulphide Glacier

    The most popular and moderate line, from the south, and the route of the 1906 first ascent. It crosses the Sulphide Glacier to the base of the summit pyramid, then climbs a Class 3 to 4 gully to the top. It is an excellent introduction to North Cascades alpine climbing, but it is still a glacier climb with a real rock finish.

    • Moderate glacier travel from the south
    • Class 3-4 summit-pyramid gully
    • The 1906 first-ascent line
    • A fine step up to alpine climbing
    Best fit: competent glacier climbers building alpine rock.
    The classics

    Fisher Chimneys and the North Face

    The Fisher Chimneys, from the north, is a celebrated North Cascades classic, demanding rock, steep snow, and route-finding through the chimneys, Winnie’s Slide, and Hell’s Highway before the pyramid. The North Face is a serious ice and alpine climb. Both are steps beyond the Sulphide in commitment and skill.

    • Fisher Chimneys: a North Cascades classic
    • Rock, steep snow, and route-finding
    • North Face: a serious ice line
    • For experienced alpine climbers
    Best fit: experienced alpinists seeking a classic line.
    FactorSulphide GlacierFisher Chimneys / North Face
    SideSouthNorth
    CharacterModerate glacier plus rock finishRock, steep snow, ice, route-finding
    Grade feelAn intro to Cascade alpineA North Cascades classic and beyond
    SummitThe pyramid gullyThe pyramid, via a harder approach
    Who it suitsCompetent glacier climbersExperienced alpinists

    For the volcano beside it, see our Mount Baker update; for the range’s giant, our Mount Rainier update.

    Route profile

    The Sulphide Glacier, step by step

    An overview of the standard route, from the trailhead to the summit pyramid and back.

    Gateway

    Bellingham / Seattle

    The cities and the Mount Baker Highway that lead to the trailheads.

    Trailhead

    Shannon Ridge or Lake Ann

    Sulphide Glacier from the south; Fisher Chimneys from the north.

    Forest approach

    Old-growth And Meadows

    A several-mile hike through forest and alpine meadow to camp.

    High camp

    Glacier’s Edge

    Camp near the toe of the glacier, below the upper route.

    The glacier

    Sulphide Crossing

    An alpine start and a roped crossing of the glacier at dawn.

    Base of the pyramid

    Crampons Off

    The glacier ends at the foot of the summit pyramid.

    Summit pyramid ~9,131 ft

    The Rock Finish

    500 to 600 ft of Class 3 to 4 rock, or steep snow early season.

    Descent

    Down The Route

    Reverse the pyramid and the glacier back to camp and out.

    The pyramid is the point

    The glacier gets you to the base; the summit pyramid gets you to the top. Save energy and time for that final rock, check its condition before committing, and treat it as the real climb it is.

    How a trip runs

    A Shuksan climb timeline

    Shuksan is usually a two to three-day climb: a forest approach, a night at high camp, and a big summit day on glacier and rock.

    1

    Travel to the trailhead

    Drive from Seattle or Bellingham to the Sulphide or Fisher Chimneys trailhead.

    2

    Hike in through the forest

    Climb through old-growth forest and alpine meadow to a high camp.

    3

    Review skills at camp

    Refresh glacier travel and rope work, and prepare for an alpine start.

    4

    Alpine start on the glacier

    Leave before dawn and cross the glacier toward the summit pyramid.

    5

    Climb the summit pyramid

    Swap to rock and climb the Class 3 to 4 pyramid to the true summit.

    6

    Descend to camp

    Reverse the pyramid and glacier carefully back to high camp.

    7

    Pack out

    Hike back down through the forest to the trailhead.

    Money and rules

    Cost, permits and access

    Shuksan is an affordable, short guided climb by big-mountain standards, but it does need a park permit and comes with limited peak-season access.

    ComponentFigureNote
    Guided climbTwo to three daysA short guided program, often two to three days on Shuksan.
    Wilderness permitNorth Cascades NPRequired for overnight trips; limited in peak season.
    Trailhead accessNational forest roadsForest-road driving to the Sulphide or Fisher trailheads.
    Personal gearGlacier and rock kitCrampons, axe, harness, helmet, and rock protection as needed.
    SkillsGlacier and rockThe skills to climb a glacier and exposed alpine rock.

    Plan the permit early

    The summit, route, and camps sit within North Cascades National Park, so overnight trips need a wilderness permit, and access to popular North Cascades zones is limited in peak season. Sort this early, and confirm the current rules with the park, because it can be the deciding factor in when, and whether, you climb.

    Choosing a team

    Choosing a Shuksan guide

    Several North Cascades guide services climb Shuksan, often as a skills-and-summit program. These are the questions worth asking.

    Route match

    Sulphide Or Fisher

    Which route suits your skills, from moderate glacier to classic chimneys.

    Ratio on rock

    Tighter On The Pyramid

    The summit rock calls for a low guide-to-client ratio.

    Conditions

    Pyramid State

    Ask about the current state of the summit rock and glacier.

    Permits

    Handled In Advance

    A good operator sorts the North Cascades permits and access.

    Skills taught

    Learn As You Climb

    Many programs teach glacier and rock skills along the way.

    Weather plan

    Flexible Dates

    Cascade weather means a plan that can move or wait.

    How to choose an expedition operator covers the vetting, and the operator directory is a place to start.

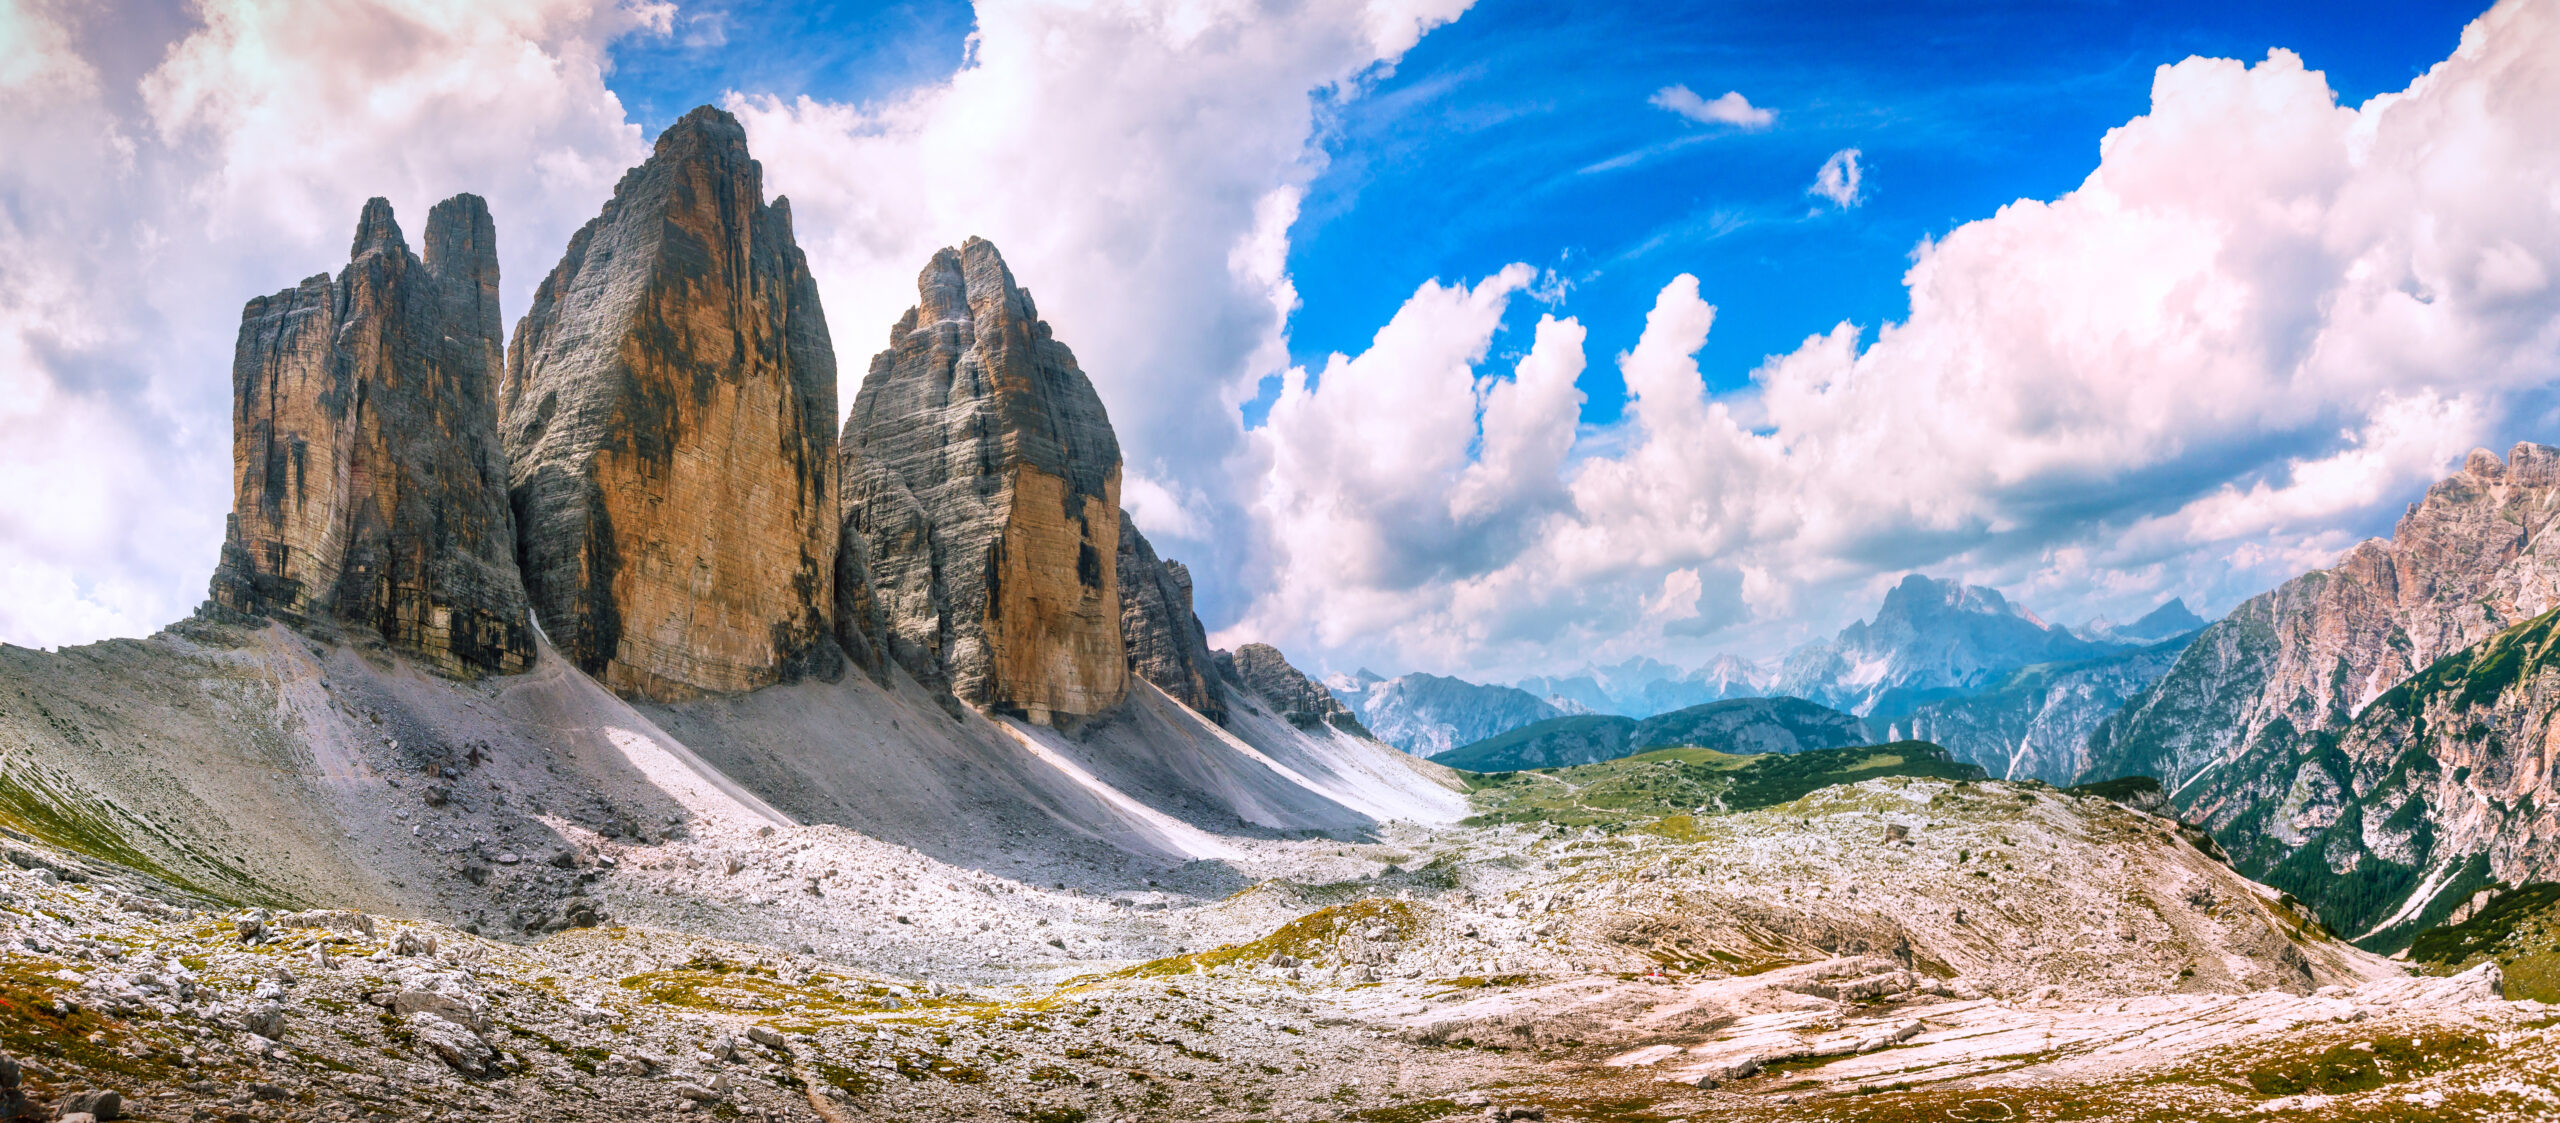
    Mount Shuksan's glaciers and rocky summit pyramid

    Glacier below, rock above

    Shuksan asks for two mountaineers in one: the glacier traveller who crosses the Sulphide roped and watchful, and the rock climber who takes the sharp end on the summit pyramid. That combination, in a compact and beautiful package, is exactly why it is such a rewarding step in a climber’s progression.

    The hazards

    Difficulty and hazard, honestly

    Shuksan is accessible, but not casual. Its hazards are the glacier, the rock pyramid, and the speed of Cascade weather.

    HazardWhat it isHow to treat it
    The summit pyramidExposed alpine rockUnavoidable Class 3-4; icy rock is a turnaround.
    CrevassesLive glaciersThe Sulphide and other glaciers require roped travel.
    Fast weatherCascade changeabilityStorms and cloud arrive quickly; the pyramid can ice up.
    Route-findingEspecially Fisher ChimneysComplex terrain rewards navigation and experience.
    Timing

    Season and weather

    Summer is the season for the rock summit pyramid; early season means steep snow, and Cascade weather decides the rest.

    July-Aug

    Prime

    The summit pyramid is workable rock; the classic window.

    September

    Good

    Often stable and quiet, into early autumn.

    Early season

    Steep Snow

    The pyramid holds steep snow rather than clean rock.

    Winter

    Ice And Alpine

    The North Face and ice lines, for experts only.

    Any time

    Weather Rules

    Cascade conditions decide far more than the calendar.

    Live wind and weather for Mount Shuksan. Source: Windy.com. For how to read a mountain forecast, see our weather guide.
    Mount Shuksan, in the North Cascades of Washington, beside Mount Baker. Map: OpenStreetMap contributors.
    History

    A short history of Shuksan

    From a 1906 first ascent to a place on the world’s most photographed lists.

    Mount Shuksan was first climbed, by the accepted record, on 7 September 1906 by Asahel Curtis and W. Montelius Price, by the Sulphide Glacier, though an earlier ascent in 1897 has been claimed. Several of the mountain’s glaciers carry the names of those early climbers. The name Shuksan itself comes from a Lummi word meaning high peak, and the mountain has been a landmark to the peoples of the North Cascades far longer than it has been climbed.

    In the modern era, Shuksan became one of the most photographed mountains anywhere, its image tied to the Mount Baker area and the view across Picture Lake. For climbers it has stayed a beloved objective, valued precisely because it pairs an approachable glacier with a genuine rock summit, a mountain that looks like a poster and climbs like the real thing.

    Questions

    Mount Shuksan FAQ

    The questions climbers ask most about the difficulty, the summit pyramid, the permits, and the season.

    How high is Mount Shuksan, and where is it?

    Mount Shuksan is 9,131 ft (2,783 m), in the North Cascades of Washington, within North Cascades National Park and beside the Mount Baker scenic area. It is one of the highest peaks in the state, though not the tallest, and sits about 11 miles from the Canadian border. Its name comes from a Lummi word meaning high peak.

    Is Shuksan a volcano like Mount Baker?

    No, and that is part of what makes it distinctive. Its neighbour Mount Baker is a stratovolcano, but Shuksan is a non-volcanic peak, a glacially carved horn of metamorphic rock draped in glaciers. That structure gives it steep rock faces and cascading icefall glaciers, and the craggy, layered look that makes it so photogenic.

    Why is Shuksan so famous in photos?

    It is often called one of the most photographed mountains in the world. Its reflection in Picture Lake, in the Heather Meadows area off the Mount Baker Highway, is a Pacific Northwest icon, and the peak’s dramatic relief and glaciers draw photographers year-round. The postcard, though, hides a serious climb.

    Is Shuksan a hike or a real climb?

    A real climb. Even the standard Sulphide Glacier route requires glacier travel, crevasse-rescue skill, and a Class 3 to 4 rock scramble up the summit pyramid, and every other route is harder. It is not a walk-up, and it is a common step up for climbers moving from a volcano like Baker toward technical alpine terrain.

    What is the summit pyramid?

    The summit pyramid is the final rock tower that tops every route on Shuksan, roughly 500 to 600 ft of climbing on alpine rock, or steep snow in early season. On the standard route it is climbed by a Class 3 to 4 gully; if it is coated in ice, the safe choice is to turn around. Reaching the true summit means climbing this pyramid, whatever route you took to its base.

    What are the main routes?

    The Sulphide Glacier, from the south, is the standard and most popular line, a moderate glacier climb finishing on the summit-pyramid gully, and the route of the 1906 first ascent. The Fisher Chimneys, from the north, is a celebrated North Cascades classic that demands rock, steep snow, and route-finding skill. The North Face is a serious ice and alpine objective for experienced climbers.

    When is the season, and do I need a permit?

    The main climbing season is roughly July to September, when the summit pyramid is workable rock; early season means steep snow instead. Because the summit, route, and camps lie within North Cascades National Park, a wilderness permit is required for overnight trips, and access to popular North Cascades zones is limited in peak season. Confirm current permit rules with the park before you go.

    What experience do you need?

    Solid glacier travel and crevasse-rescue skills, comfort on exposed Class 3 to 4 alpine rock, and the judgment to read fast-changing Cascade weather. Shuksan is very achievable for competent alpine climbers and a superb objective for those building technical skills, but it is more than a fit hiker should take on unroped or unpracticed.

    Transparency

    How we built this update

    What this page is based on, who reviewed it, and what we do not claim to know.

    Sources

    • National Park Service information for North Cascades access and permits.
    • Guide-service route descriptions for the Sulphide Glacier and Fisher Chimneys.
    • Published climbing records for the routes, grades, and 1906 first ascent.
    • Glacier and geography references for the mountain’s non-volcanic structure.
    • Our own glacier travel and crevasse rescue guides for the core skills.

    Review and standards

    Compiled by Travis Ludlow and reviewed for safety by Dawson Ludlow, our Climbing and Mountaineering Lead (Wilderness First Aid), whose highest first-hand summit is Kilimanjaro. Health and medical points were reviewed by Taylor Ludlow, RN. We do not fabricate summit experience, quotes, or credentials, and we say plainly when we are reporting rather than recounting.

    What we do not claim to know

    Conditions on Shuksan change through the season, and no web page can replace current route reports and a guide’s judgment. In particular:

    • The summit pyramid’s state, rock or snow or ice, varies week to week.
    • Permit rules and North Cascades access limits change; confirm with the park.
    • Glacier conditions shift with the season and the year.
    • Our team has not climbed Shuksan, so we report records and route descriptions, not personal experience.
    Global Summit Guide research team

    Global Summit Guide research

    We compile mountain updates from park information, guide route descriptions, and published records, review them for safety and medical accuracy, and refresh them each season. We are transparent about what we have and have not climbed, and Shuksan is a research-based briefing, not a personal account.

    About our team and standards ->
    Plan your North Cascades climb

    Come for the postcard. Respect the pyramid.

    Build the foundation with our glacier travel and crevasse rescue guides, pair Shuksan with the volcano next door in our Mount Baker update, and weigh yourself against our fitness standards. Trips stage through Bellingham and Seattle, so for flights and lodging, browse travel on Expedia.

    Disclosure: the Expedia link above is a sponsored affiliate link, and we may earn a commission at no extra cost to you. It is the only affiliate link on this page; our route, permit, and safety guidance is independent.

    Was this helpful?

    Yes
    No
    Thanks for your feedback!
  • Mount Foraker Expedition Update 2026: Sultana, Denali’s Wife & the Sultana Ridge

    Mount Foraker, Sultana, rising above the Kahiltna Glacier in the Alaska Range
    17,400 ft (5,304 m) · Alaska Range · Denali National Park

    Mount Foraker: Sultana, Denali’s Wife, and the range’s overshadowed giant

    Foraker is the second-highest peak in the Alaska Range and the third-highest in the United States, yet it stands in Denali’s shadow and is climbed by very few. Its Dena’ina name, Sultana, means the woman; it is Denali’s Wife. This update covers the committing Sultana Ridge, the permit rules that do apply here, and an honest readiness view. Heights in feet (metres).

    Research-based updateSafety and medical reviewReviewed each Alaska Range seasonOur team has not climbed Foraker

    Updated 27 July 2026 · Compiled by Travis Ludlow · Safety review by Dawson Ludlow · Medical review by Taylor Ludlow, RN

    17,400 ftSummit (5,304 m)
    2ndIn the Alaska Range
    3rdHighest in the US
    Sultana RidgeStandard (AK Grade 3)
    May-JunSeason
    KahiltnaBase glacier

    Single-mountain expedition update, compiled from National Park Service registration rules, operator route information, and published alpine records. Our team has not climbed Mount Foraker; the only first-hand summit anyone on our team claims is Kilimanjaro. This is a planning briefing for experienced expedition climbers, not a how-to and not a substitute for training or a guide.

    The range’s second giant, in the shadow of the first.

    Foraker is the second-highest peak in the Alaska Range and third-highest in the US, but almost everyone drawn to the Kahiltna goes for Denali instead. Its standard route, the Sultana Ridge, is a long, corniced, committing climb with no easy way up, staged from the same glacier as Denali but with none of the crowds or support. It is a serious, quiet mountaineer’s peak.

    • Second-highest in the Alaska Range; third in the US.
    • Sultana, the woman; Denali’s Wife.
    • Standard route: the corniced Sultana Ridge.
    • The Denali permit rules do apply here.
    • Rarely climbed; fully self-supported.
    The mountain

    What Foraker involves

    A committing, self-supported alpine expedition on a big, quiet peak, staged from Denali’s own glacier.

    Mount Foraker rises to 17,400 ft about 14 miles southwest of Denali, above the Kahiltna Glacier, the second-highest peak in the Alaska Range and the third-highest in the United States. Climbers reach it the same way they reach Denali, by ski-plane from Talkeetna onto the Kahiltna, but there the similarity ends. Foraker has no trade route, no fixed lines, and no crowd: its standard line, the Sultana Ridge, is a long, corniced, committing climb around Alaska Grade 3.

    Because it is overshadowed by its taller neighbour, Foraker sees only a handful of parties a year, and fewer summits. That quiet is part of its appeal and part of its seriousness: a team is truly on its own, negotiating miles of corniced ridge and long weather holds without support. For the full route, registration, and cost detail, see our Mount Foraker climb guide.

    Sultana

    Denali’s Wife, and the family of three

    The Dena’ina names for these peaks tell a family story, and Foraker is its quiet, powerful centre.

    In Dena’ina, Denali is the high one, the great parent of the range. Foraker is Sultana, the woman, also called Menlale, Denali’s Wife. Mount Hunter is Begguya, Denali’s Child. The three stand together above the Kahiltna Glacier, a family of peaks, and Foraker is the second-tallest of them, a giant in its own right that happens to live beside a larger one. We cover the others in our Denali and Hunter updates.

    The English name came in 1899, when the mountain was named for an Ohio senator, Joseph Foraker, who never saw it. Among the ancient names of the range it is the newcomer, and many climbers prefer Sultana, which fits a peak so closely bound to its towering partner.

    Mount Foraker and the Alaska Range under a broad glaciated sky

    Second-highest, and almost alone

    For the second-tallest peak in the Alaska Range, Foraker is strikingly empty. The crowds and the infrastructure gather on Denali, next door, while Sultana keeps its long corniced ridges and its silence. That is exactly why experienced expedition climbers seek it out, and exactly why it demands so much of them.

    Honest self-assessment

    Are you ready for Foraker?

    Foraker is not a first big mountain. It rewards fully self-reliant expedition teams. These are the prerequisites.

    Glacier and alpine skill

    Rope, Ice, Cornice

    You must be fluent on crevassed glaciers and steep, corniced snow and ice. This is a real alpine climb, not a walk-up.

    Evidence: prior glaciated alpine routes.
    Expedition self-support

    No Trade-Route Help

    Foraker has no fixed lines, ranger camps, or crowds. Your team hauls, camps, and solves everything itself.

    Evidence: prior self-supported expeditions.
    Cornice judgment

    Read The Ridge

    The Sultana Ridge is long and heavily corniced. Knowing where it is safe to move is a survival skill.

    Evidence: sound calls on corniced terrain.
    Storm endurance

    Wait It Out

    Alaska Range weather forces long holds. You need the supplies and patience to sit safely for days.

    Evidence: prior storm-bound expeditions.
    RequirementBaselineWhy it matters
    Alpine competenceFluent on glaciers and corniced ridgesThe route is long, exposed, and objectively hazardous.
    Expedition experiencePrior self-supported big-range tripsNo infrastructure exists; the team provides everything.
    Cornice judgmentComfortable on heavily corniced groundThe Sultana Ridge crest is long and exposed.
    Fitness and haulingStrong for a committing multi-day climbThe approach and ridge demand endurance under load.
    Storm readinessSupplies and craft for long holdsWeather holds of days are normal in the range.
    Turnaround disciplineWilling to retreatReversing the ridge is as serious as the ascent.

    Build the foundation with glacier travel basics and crevasse rescue basics, and study the ridge hazard in avalanche awareness for climbers.

    The routes

    The Sultana Ridge, and the harder lines

    One committing standard route, and a set of serious technical lines for expert teams.

    The standard line

    Sultana Ridge – the Southeast Ridge

    The usual route on Foraker, reached from the Kahiltna Glacier. It is a long, corniced ridge climbed over several days, around Alaska Grade 3, committing and exposed, with real objective hazard. It is the most reasonable way up a mountain that has no easy route.

    • Long, heavily corniced ridge
    • Around Alaska Grade 3; committing
    • Reached from the Kahiltna Glacier
    • Multi-day, with real exposure
    Best fit: experienced, self-supported expedition teams.
    The harder lines

    Northeast and Talkeetna Ridges

    Beyond the Sultana Ridge, Foraker holds harder, less-travelled lines, including the northeast and Talkeetna ridges and steeper faces. These are serious technical objectives for expert alpinists, climbed rarely, and well beyond the standard route in difficulty and commitment.

    • Steeper, harder ridge and face lines
    • Rarely climbed; expert objectives
    • More technical than the Sultana Ridge
    • For strong, self-reliant teams
    Best fit: expert alpinists seeking a hard line.
    FactorSultana RidgeHarder lines
    GradeAround Alaska Grade 3Alaska Grade 4 and above
    CharacterLong, corniced ridgeSteep ridges and faces
    TrafficThe standard, but rarely climbedVery rare; expert only
    Main hazardCornices, avalanche, weatherTechnical difficulty plus objective hazard
    Who it suitsSelf-supported expedition teamsExpert alpinists

    The Mount Foraker climb guide covers the Sultana Ridge camps, registration, and gear in full.

    Route profile

    The Sultana Ridge, section by section

    An overview of the standard route, from the Kahiltna to the south summit and back. For the full detail, see the climb guide.

    Fly-in

    Kahiltna Base ~7,200 ft

    The ski-plane base camp shared with Denali and Hunter traffic.

    The approach

    Onto Foraker

    Leave the Denali flow and cross toward Foraker’s own slopes.

    Lower ridge

    Gaining The Sultana

    Climb onto the southeast, Sultana, ridge and its lower camps.

    The corniced crest

    Long And Exposed

    Miles of corniced ridge, the defining character of the route.

    High camp

    Below The Summit

    A committing high camp for the final push to the top.

    South summit ~17,400 ft

    The True Top

    The higher of Foraker’s summits, the objective of the climb.

    North summit

    The Lower Top

    A secondary summit along the mountain’s crest.

    Descent

    Reverse The Ridge

    The long corniced ridge must be reversed; descent stays serious.

    The cornices are the crux

    Foraker’s difficulty is less about a single hard pitch and more about miles of long, corniced ridge at altitude. Judgment about where to move on that crest, and the patience to wait for the right conditions, matter more than raw technical grade.

    How a trip runs

    A Foraker expedition timeline

    A Foraker attempt runs several weeks, most of it acclimatization, ridge climbing, and waiting out Alaska Range weather.

    1

    Talkeetna, register and fly

    Complete the 60-day registration and fee, sort gear, and charter the ski-plane.

    2

    Fly to the Kahiltna Glacier

    Land at the base camp near 7,200 ft and establish the expedition base.

    3

    Acclimatize and prepare

    Skills, load carries, and acclimatization before committing to the ridge.

    4

    Gain the Sultana Ridge

    Cross toward Foraker and climb onto the southeast ridge.

    5

    Climb the corniced crest

    Work along the long, exposed, corniced ridge over several days.

    6

    Summit push

    Take a settled window to reach the south summit and turn around promptly.

    7

    Descend the ridge

    Reverse the committing ridge carefully back toward the glacier.

    8

    Fly out

    Return to base camp and wait for the ski-plane window to Talkeetna.

    Money and rules

    Cost and the permit

    Foraker is guided rarely and costs like a serious Alaska expedition, and unlike Hunter, the Denali permit rules apply.

    ComponentFigureNote
    Guided expedition~$10,000-$15,000+Committing and multi-week; few operators guide Foraker.
    Registration and feeApplies, like DenaliThe 60-day pre-registration and mountaineering fee are required.
    Ski-plane charterTalkeetna to the KahiltnaThe bush flight onto the glacier, weather permitting.
    Personal gearFull expedition kitTechnical alpine and expedition gear for weeks of self-support.
    InsuranceRemote-evacuation coverRescue is distant and weather-bound; verify remote cover.

    The Denali rules apply to Foraker

    Unlike neighbouring Mount Hunter, Foraker is covered by the same National Park Service requirements as Denali: climbers must register at least 60 days in advance and pay the special mountaineering fee through the Talkeetna ranger station. Confirm the current requirements and fees with Denali National Park before you plan.

    Choosing a team

    Choosing a Foraker guide

    Few operators guide Foraker, so the right questions matter. Look for genuine experience on this peak, not just Denali.

    Foraker experience

    Not Just Denali

    Ask how many times the guide has climbed Foraker itself.

    Ratio

    Tight On The Ridge

    A close guide-to-client ratio matters on corniced, exposed ground.

    Self-sufficiency

    Built For No Support

    Confirm the plan assumes full self-support, not trade-route help.

    Weather buffer

    Days For Holds

    Ask how the itinerary absorbs long Alaska Range storm holds.

    Screening

    Right Experience

    A serious operator checks your expedition record before accepting you.

    Rescue reality

    Remote And Slow

    Understand that outside help is distant and never assured.

    How to choose an expedition operator covers the vetting in full, and the operator directory is a place to start.

    A helicopter over a glaciated range, a reminder that rescue is remote

    Quiet means alone

    Foraker’s emptiness is its character and its risk. With almost no other teams on the mountain and no trade-route infrastructure, a party in trouble cannot count on neighbours or a quick rescue. Self-sufficiency, from crevasse fall to multi-day storm, is the price of the solitude.

    The hazards

    Difficulty and rarity

    Foraker is hard for reasons that do not fit a single grade: length, cornices, weather, and the absence of any support.

    FactorWhat it isHow to treat it
    Few ascentsA small, expert fieldThe second-highest range peak, yet rarely climbed.
    Long corniced ridgeThe defining hazardMiles of exposed, cornice-laden crest to negotiate.
    Avalanche and stormsAlaska Range weatherLoaded slopes and long storms shape every attempt.
    No infrastructureSelf-support throughoutNo fixed lines, camps, or crowds to fall back on.
    Timing

    Season and weather

    Foraker is a spring climb, on the same calendar as Denali, and always at the mercy of Alaska Range weather.

    Early May

    Cold, Early

    Colder, more stable snow, and very few teams.

    Mid May-Jun

    Prime

    The core of the Alaska Range climbing window.

    Late June

    Warmer

    Warmer and more hazardous as the snowpack changes.

    Weather

    The Deciding Factor

    Storms and flight delays control every trip.

    Winter

    Extreme

    Rare, elite ascents only, in brutal cold.

    Live wind and weather for Mount Foraker. Source: Windy.com. For how to read a mountain forecast, see our weather guide.
    Mount Foraker, about 14 miles southwest of Denali, above the Kahiltna Glacier. Map: OpenStreetMap contributors.
    History

    A short history of Foraker

    From a 1934 first ascent to a peak that remains quiet by choice of the crowds next door.

    Mount Foraker was first climbed in 1934 by Charles Houston, T. Graham Brown, and Chychele Waterston, a committing early Alaska Range ascent at a time when the range was barely explored. The mountain took its English name in 1899, after the Ohio senator Joseph Foraker, though its Dena’ina name, Sultana, is far older.

    In the decades since, Foraker has remained one of the quietest big peaks in North America, precisely because it stands beside Denali. Its long routes, serious commitment, and lack of a easy line keep the numbers low, and it endures as a prize for experienced expedition mountaineers who want a giant to themselves.

    Questions

    Mount Foraker FAQ

    The questions climbers ask most about the difficulty, the name, the permit, and the season.

    How high is Mount Foraker, and where is it?

    Mount Foraker is 17,400 ft (5,304 m), the second-highest peak in the Alaska Range after Denali, and the third-highest mountain in the United States after Denali and Mount Saint Elias. It stands in Denali National Park, about 14 miles southwest of Denali, rising above the Kahiltna Glacier. Its Dena’ina name is Sultana, the woman, and it is widely known as Denali’s Wife.

    Why is Foraker called Denali’s Wife?

    Because of the local naming. In Dena’ina, Denali is the high one, the parent of the range; Foraker is Sultana, the woman, or Menlale, Denali’s Wife; and Mount Hunter is Begguya, Denali’s Child. The three form a family of peaks above the Kahiltna. The English name Foraker, given in 1899 after an Ohio senator, is the newcomer among them.

    Is Foraker harder than Denali?

    In the way that matters to a climber, yes. Denali is higher and far busier, with a trade route, fixed infrastructure in season, and ranger presence. Foraker has none of that: its routes are long, corniced, and committing, it is climbed by very few, and a party is on its own. It is not as technical as Mount Hunter’s hardest lines, but it is a serious, remote expedition that stands in Denali’s shadow.

    What is the standard route?

    The Sultana Ridge, the southeast ridge, is the usual line, reached from the Kahiltna Glacier. It is a long, corniced ridge climb, around Alaska Grade 3, committing and multi-day, with real exposure and objective hazard. Other lines, such as the northeast or Talkeetna Ridge, are harder still. None of Foraker’s routes is a straightforward climb.

    Do the Denali permit rules apply to Foraker?

    Yes. Unlike nearby Mount Hunter, Foraker is covered by the same National Park Service rules as Denali: climbers must register at least 60 days in advance and pay the special mountaineering fee, through the Talkeetna ranger station. Confirm the current requirements and fees with Denali National Park before you plan, as they are updated over time.

    How do you get there, and when do people climb?

    Access is the same as Denali: fly to Talkeetna, then take a ski-equipped bush plane onto the Kahiltna Glacier, and climb from there. The season is the Alaska Range spring, roughly May and June. Because Foraker is lower and quieter than Denali, it sees a tiny fraction of the traffic, and weather holds and self-sufficiency shape every trip.

    How often is Foraker climbed?

    Rarely, especially for the second-highest peak in the range. Most climbers drawn to the Kahiltna go for Denali, and Foraker’s length, commitment, and lack of a easy route keep its numbers low. In a typical season only a small number of parties attempt it, and fewer succeed. It is a peak for experienced expedition mountaineers, not a first big climb.

    What experience do you need?

    Solid glacier and technical alpine skills, prior expedition experience with self-support and storm camps, sound judgment on long corniced ridges, and the fitness for a committing multi-day climb at altitude. Foraker rewards teams that are fully self-reliant, because there is no trade-route infrastructure and no crowd to follow.

    Transparency

    How we built this update

    What this page is based on, who reviewed it, and what we do not claim to know.

    Sources

    • National Park Service, Denali National Park registration and mountaineering-fee rules.
    • Operator and guide-service route information for the Sultana Ridge.
    • Published alpine records for the 1934 first ascent and later routes.
    • Alaska Range guidebooks for grade, character, and hazard.
    • Our own Mount Foraker climb guide for the detailed route and cost.

    Review and standards

    Compiled by Travis Ludlow and reviewed for safety by Dawson Ludlow, our Climbing and Mountaineering Lead (Wilderness First Aid), whose highest first-hand summit is Kilimanjaro. Health and medical points were reviewed by Taylor Ludlow, RN. We do not fabricate summit experience, quotes, or credentials, and we say plainly when we are reporting rather than recounting.

    What we do not claim to know

    Conditions on Foraker change from year to year, and no web page can replace current route reports and a guide’s judgment. In particular:

    • Ridge conditions and cornice hazard vary by season; recent reports matter most.
    • Registration rules and fees change; confirm the current requirements with Denali National Park.
    • Guided pricing and availability shift with operators and dates.
    • Our team has not climbed Foraker, so we report official rules and records, not personal experience.
    Global Summit Guide research team

    Global Summit Guide research

    We compile mountain updates from official rules and published records, review them for safety and medical accuracy, and refresh them each season. We are transparent about what we have and have not climbed, and Foraker is a research-based briefing, not a personal account.

    About our team and standards ->
    Plan your Alaska Range season

    A giant to yourself, if you are ready for it.

    Start with the full route in our Mount Foraker climb guide, weigh yourself against our fitness standards, and read the family in the Denali and Hunter updates. Expeditions stage through Anchorage and Talkeetna, so for flights and lodging, browse travel on Expedia.

    Disclosure: the Expedia link above is a sponsored affiliate link, and we may earn a commission at no extra cost to you. It is the only affiliate link on this page; our route, permit, and safety guidance is independent.

    Was this helpful?

    Yes
    No
    Thanks for your feedback!
  • Mount Saint Elias Expedition Update 2026: North America’s Sea-to-Summit Giant

    Mount Saint Elias rising in glaciated relief above the Gulf of Alaska coast
    18,008 ft (5,489 m) · Alaska-Yukon border · Saint Elias Mountains

    Mount Saint Elias: from the sea to 18,000 feet, and one of the hardest peaks in North America

    The second-highest mountain in both the United States and Canada rises almost straight from the ocean at Icy Bay, one of the greatest vertical reliefs on Earth. Storm-hammered by the Gulf of Alaska, hugely glaciated, and climbed only about fifty times since 1897, it is a lower peak than Denali but, for many teams, a more committing one. Heights in feet (metres).

    Research-based updateSafety and medical reviewReviewed each Alaska seasonOur team has not climbed Saint Elias

    Updated 27 July 2026 · Compiled by Travis Ludlow · Safety review by Dawson Ludlow · Medical review by Taylor Ludlow, RN

    18,008 ftSummit (5,489 m)
    2ndHighest in US and Canada
    ~10 miFrom sea to summit
    ~50Total ascents since 1897
    May-JunSeason
    1897First ascent – Abruzzi

    Single-mountain expedition update, compiled from National Park Service and published mountaineering records, expedition reports, and route accounts. Our team has not climbed Mount Saint Elias; the only first-hand summit anyone on our team claims is Kilimanjaro. This is a planning briefing for experienced expedition climbers, not a how-to and not a substitute for training or current route research.

    Lower than Denali, and for many teams more committing.

    Mount Saint Elias is the second-highest peak in both the US and Canada, on the border in the Saint Elias Mountains. Its fame is its vertical relief: the summit stands only about 10 miles from the sea, so the mountain rises nearly its full 18,008 ft from tidewater. Add the worst coastal storms of any major North American peak, no infrastructure, and only about fifty ascents since 1897, and you have one of the continent’s hardest objectives.

    • Second-highest in the US and in Canada.
    • Rises ~18,000 ft from the sea in ~10 miles.
    • Gulf of Alaska storms dominate every attempt.
    • First climbed 1897; second ascent not until 1946.
    • Around fifty ascents in total; no fixed infrastructure.
    The mountain

    What Saint Elias involves

    A remote, self-supported expedition on a huge coastal peak, where the weather, not the grade, usually decides the outcome.

    Mount Saint Elias stands 18,008 ft on the Alaska-Yukon border, the second-highest peak in both countries, in the heavily glaciated Saint Elias Mountains. It carries a Tlingit name, Yas’eit’aa Shaa, the mountain behind Icy Bay, and it was among the first parts of Alaska sighted by Europeans, named after Vitus Bering saw it in 1741. What sets it apart is not height but relief: the summit rises nearly its full height from tidewater only about 10 miles away.

    That position, hard against the Gulf of Alaska, makes it one of the stormiest major peaks in North America. There are no fixed ropes, established camps, or ranger presence. A team flies onto a glacier, hauls its own loads for miles, climbs steep snow, ice, and mixed ground, and plans to sit out long storms on both the ascent and the descent. Denali is higher, but Saint Elias has more route complexity, far less support, and stronger coastal weather. For the full route and expedition detail, see our Mount Saint Elias climb guide.

    What makes it hard

    The sea-to-summit rise, and the weather

    The same thing that makes Saint Elias spectacular, its wall of relief above the ocean, is what makes it so dangerous.

    Saint Elias is often called the highest peak in the world standing so close to the sea. Its summit is only about 10 miles from tidewater at Icy Bay, so the mountain presents nearly 18,000 ft of vertical relief in a very short horizontal distance, a rise comparable to Denali or to Himalayan giants. That relief is why the mountain is the subject of a documentary about an attempt at the planet’s longest ski descent, from high on the peak toward the Gulf of Alaska.

    It is also why the climbing is so serious. Rising straight out of the ocean puts Saint Elias directly under the Aleutian Low storm systems that sweep in off the Gulf of Alaska, bringing prolonged storms, extreme snowfall, and hurricane-force winds. That snowfall loads slopes heavily and feeds active icefall, and the storms can pin a team for days at a time. The forecast, more than the technical grade, is what usually decides a Saint Elias attempt.

    Plan around the weather, not the calendar

    Every realistic Saint Elias plan builds in long weather holds and flexible flight windows. Teams that schedule tightly, or treat a fair forecast as a promise, are the ones the mountain turns back, or worse.

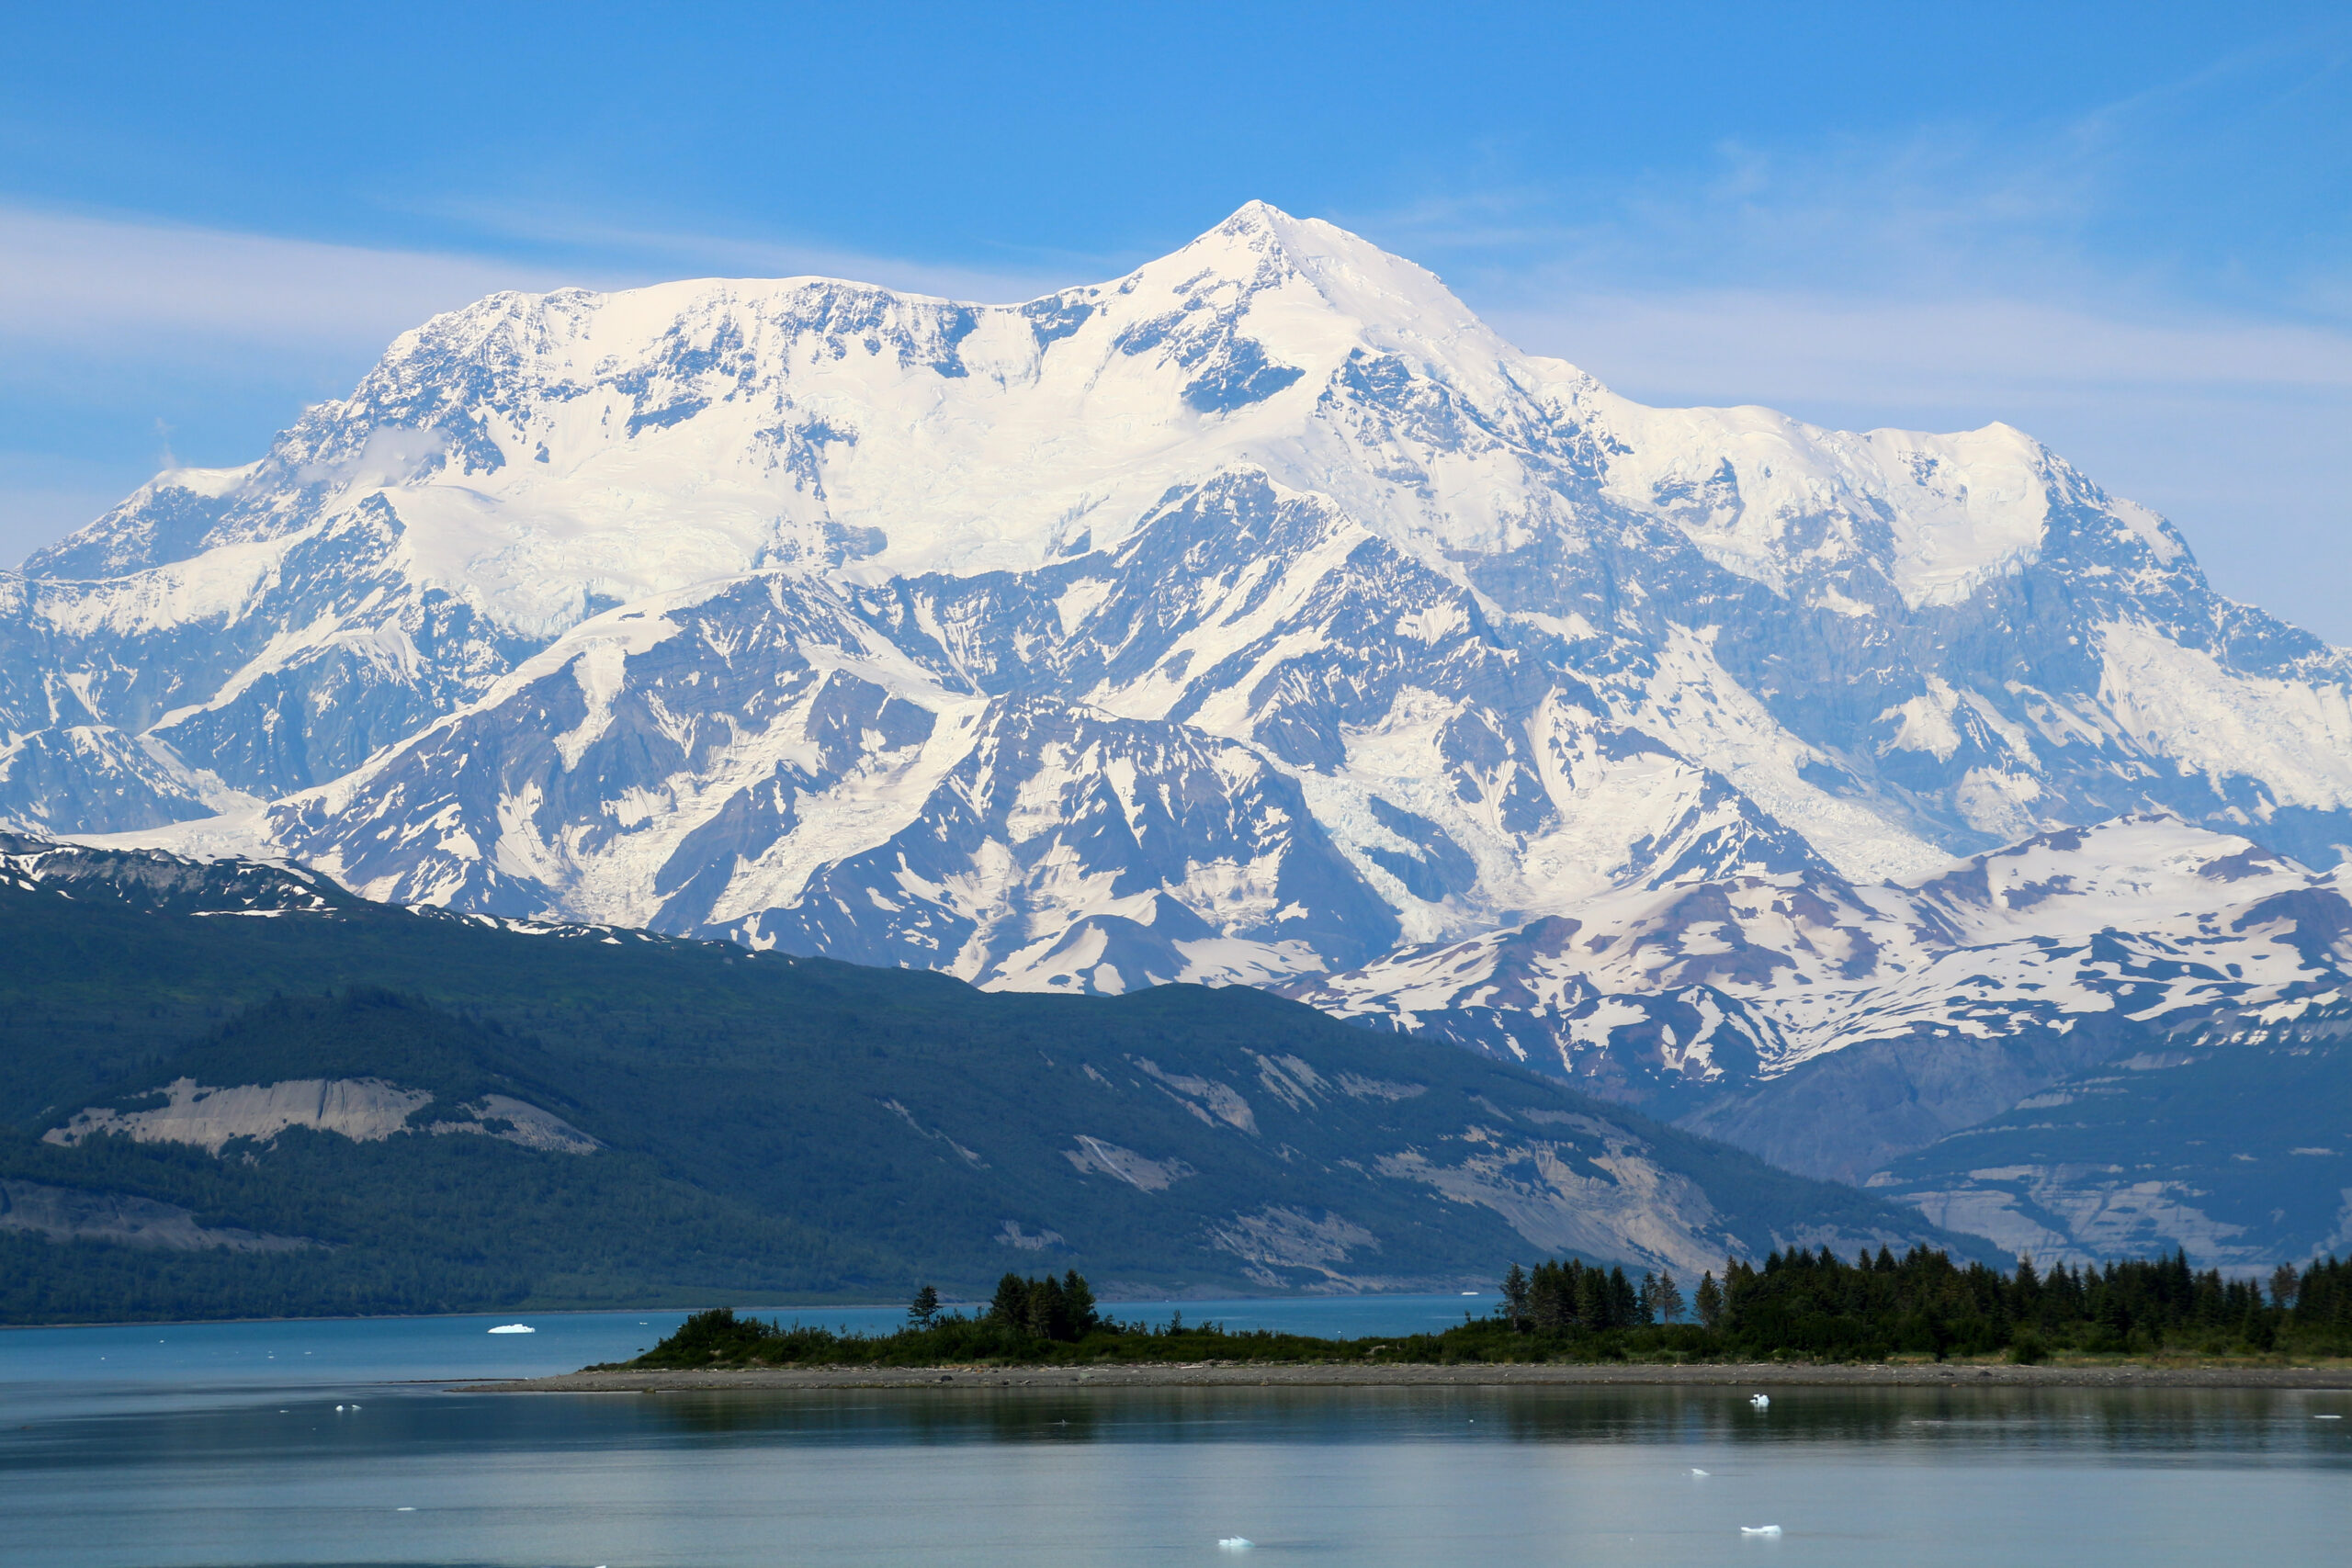
    Mount Saint Elias rising from the coastal glaciers toward its summit

    Eighteen thousand feet, straight from the sea

    Few mountains on Earth rise so far, so fast, from the ocean. From the tidewater of Icy Bay to the summit is barely ten miles horizontally and nearly the mountain’s full height vertically. It is a wall of ice and storm that has been climbed only about fifty times, and skied, in part, by a daring few.

    Honest self-assessment

    Are you ready for Saint Elias?

    This is an expert, self-supported expedition, not a guided trade-route peak. These are the prerequisites, not aspirations.

    Expedition skill

    Self-Sufficient, No Support

    There are no fixed ropes, camps, or rangers. Your team hauls, camps, navigates, and rescues itself on a huge, complex mountain.

    Evidence: prior self-supported expeditions.
    Technical ability

    Steep Snow, Ice, Mixed

    The routes combine expedition hauling with steep snow, ice, and mixed ground. This is well beyond a glacier walk-up.

    Evidence: prior technical alpine routes.
    Storm tolerance

    Wait Out The Weather

    Gulf of Alaska storms bring long holds. You need the supplies, patience, and camp craft to sit safely for days.

    Evidence: prior long storm-bound expeditions.
    Hazard judgment

    Icefall And Avalanche

    Coastal snowfall loads slopes heavily and feeds active icefall. Reading and timing that hazard is a survival skill.

    Evidence: sound decisions on loaded snow.
    RequirementBaselineWhy it matters
    Expedition experiencePrior self-supported big-range tripsNo infrastructure exists; the team provides everything.
    Technical gradeSteep snow, ice, and mixed competenceRoutes are complex and variable, not a set line.
    Storm readinessSupplies and craft for long holdsWeather holds of many days are normal here.
    Hazard judgmentFluent on icefall and avalanche terrainCoastal snow loads and active ice are the main killers.
    Fitness and haulingStrong for heavy loads over distanceThe approach and route demand endurance under weight.
    Flight logisticsBuffer days for bush flightsWeather delays flights in and out at both ends.

    Build the foundation with glacier travel basics and crevasse rescue basics, and study the coastal hazard in avalanche awareness for climbers.

    The routes

    The Harvard Route and the Abruzzi Ridge

    No maintained trade route exists. The choice is between a serious modern line and a storied but hazardous historic one.

    The modern route

    Southwest Ridge – the Harvard Route

    The principal modern Alaska-side line, first climbed by the 1946 Harvard Mountaineering Club party and named in their honor. It is a serious, variable expedition route from the coastal glaciers, combining long hauling with steep snow, ice, and mixed ground, and no fixed infrastructure of any kind.

    • The main modern Alaska-side line
    • Long glaciated approach from the coast
    • Steep snow, ice, and mixed ground
    • No fixed ropes, camps, or ranger support
    Best fit: experienced self-supported expedition teams.
    The historic line

    Abruzzi Ridge (Yukon side)

    The 1897 first-ascent route by the Duke of the Abruzzi, dropping to the Yukon side, and one of the 50 Classic Climbs of North America. It is rarely climbed today because glacial change has made its icefall and avalanche hazard severe. A storied line, but not a safe default.

    • The 1897 first-ascent route
    • One of the 50 Classic Climbs
    • Rarely climbed now: severe icefall
    • Historic significance, high objective hazard
    Best fit: history-minded expert teams, hazard permitting.
    FactorSouthwest Ridge (Harvard)Abruzzi Ridge (1897)
    SideAlaska, from the coastYukon, north side
    RoleThe principal modern routeThe historic first-ascent line
    First climbed1946, Harvard Mountaineering Club1897, Duke of the Abruzzi
    StatusSerious, variable, currentRarely climbed; severe icefall
    Who it suitsSelf-supported expedition teamsHistory-minded experts, hazard permitting

    The Mount Saint Elias climb guide covers both route systems and the logistics in full.

    Logistics and profile

    From the coast to the summit

    An overview of a Saint Elias expedition, from the coastal staging town to the border summit. For the full detail, see the climb guide.

    Coastal staging

    Yakutat

    The small Gulf-of-Alaska town where most Alaska-side trips fly from.

    Fly-in

    Ski-plane to the glacier

    A bush flight lands the team on a glacier such as the Tyndall.

    Base Camp

    On The Ice

    Near sea level to low elevation, the start of a long glaciated approach.

    The approach

    Miles Of Glacier

    Expedition hauling across crevassed glaciers toward the route.

    Ridge camps

    Southwest Ridge

    A series of exposed camps up the principal Alaska-side line.

    Storm holds

    Wait For Weather

    Days pinned in camp are a normal, planned part of the climb.

    Summit ~18,008 ft

    The Second-Highest

    Steep, exposed ground leads to the US-Canada border summit.

    Descent

    Reverse Everything

    The full route and glacier must be reversed, storms and all.

    The approach is half the climb

    Long, crevassed glacier travel from near sea level, with heavy hauling and full self-support, is a defining part of Saint Elias. The team must be as ready for the miles of glacier and the storm holds as for the steep ground high on the ridge.

    How a trip runs

    A Saint Elias expedition timeline

    There is no fixed itinerary. A realistic plan allows several weeks, most of it approach, hauling, and waiting out weather.

    1

    Reach Yakutat or the Yukon side

    Travel to the coastal staging town and stage food, fuel, and the flight.

    2

    Fly onto the glacier

    A weather-dependent ski-plane lands the team on the ice at low elevation.

    3

    Establish base and haul in

    Set base camp and begin the long, crevassed glacier approach to the route.

    4

    Work up the ridge

    Climb the Southwest Ridge in stages, carrying and stocking exposed camps.

    5

    Sit out storms

    Build in and take the weather holds that Gulf of Alaska systems force.

    6

    Summit push

    Take a rare settled window to climb the steep upper mountain to the top.

    7

    Descend the route

    Reverse the ridge and glacier, still exposed to weather and hazard.

    8

    Fly out

    Return to the glacier strip and wait for the flight window back to Yakutat.

    Money and access

    Cost and access

    Saint Elias is rarely a packaged trip. Most teams build their own logistics around a bush pilot and a long weather buffer.

    ComponentFigureNote
    Private expeditionSelf-organized or bespokeRarely a set commercial trip; teams build their own logistics.
    Bush flightsSki-plane charterGlacier landings from Yakutat or the Yukon side, weather permitting.
    Park contextWrangell-St. Elias / KluaneClimbing within the US and Canadian protected-area system.
    Personal gearFull expedition kitTechnical alpine and expedition gear for weeks of self-support.
    InsuranceRemote-evacuation coverRescue is distant and weather-bound; verify remote cover.

    Yakutat, the coastal gateway

    Most Alaska-side attempts stage through the small Gulf-of-Alaska town of Yakutat, where a ski-equipped bush pilot flies the team onto a glacier. The pilot and the weather together set the whole schedule, so a reliable flight operator and buffer days matter as much as the climbing plan.

    Planning the expedition

    Planning a Saint Elias expedition

    This is a peer expedition, not a guided queue. The questions are about logistics, weather, and partners, not a brochure.

    Current conditions

    This Season’s Route

    Base any plan on recent route reports, not the historic line.

    Weather buffer

    Days For Holds

    Build a schedule that survives long storm and flight delays.

    Team, not clients

    Expedition Peers

    This is a peer expedition or bespoke trip, not a guided queue.

    Flight operator

    Reliable Bush Pilot

    Your glacier pilot and their weather judgment are critical.

    Hazard plan

    Icefall Timing

    How the team routes around and times icefall and loaded slopes.

    Rescue reality

    Remote And Slow

    Understand that outside help is distant and never assured.

    For the rare guided or bespoke option, how to choose an expedition operator still applies, and the operator directory is a starting point.

    A rescue helicopter against a stormy northern sky

    A very long way from help

    On a mountain climbed only about fifty times, in some of the worst weather in North America, rescue is a distant and uncertain thing. Bad weather grounds aircraft for days, and the nearest help is far away. A Saint Elias team must be built to solve its own problems, from a crevasse fall to a multi-day storm, without counting on anyone else.

    The hazards

    Difficulty and rarity

    Saint Elias is hard for reasons that do not show up in a single grade: relief, weather, remoteness, and the absence of any support.

    FactorWhat it isHow to treat it
    Coastal stormsThe main enemyGulf of Alaska systems bring holds, snow, and hurricane winds.
    Vertical reliefImmense, complex groundNearly 18,000 ft from the sea means long, committing terrain.
    Icefall and avalancheHeavy snow loadingCoastal snowfall feeds active ice and loads slopes.
    Rarity~50 ascents, no infrastructureLittle recent beta; the team is on its own throughout.
    Timing

    Season and weather

    Spring is the window, but on this coast the weather is difficult in every month, and it rules the climb.

    Late April

    Cold, Early

    Colder and more stable snow, but deep winter conditions linger.

    May-June

    The Window

    The workable spring season, such as it is on this coast.

    Summer

    Warm, Unstable

    Warmer, wetter, and more hazardous as snow rots and ice moves.

    Weather

    The Deciding Factor

    Storms, not the calendar, control every attempt here.

    Flights

    Delay-Prone

    Bush flights in and out hinge entirely on the weather.

    Live wind and weather for Mount Saint Elias. Source: Windy.com. For how to read a mountain forecast, see our weather guide.
    Mount Saint Elias, on the Alaska-Yukon border above Icy Bay and the Gulf of Alaska. Map: OpenStreetMap contributors.
    History

    A short history of Mount Saint Elias

    From a royal Italian first ascent to a nearly fifty-year gap before the second, and a legendary ski descent.

    Mount Saint Elias was first climbed on 31 July 1897 by an Italian expedition led by Prince Luigi Amedeo, Duke of the Abruzzi, who would later reconnoiter the standard route on K2, the Abruzzi Spur that still bears his name. His party, which included the great mountain photographer Vittorio Sella, started from tidewater and worked for weeks up the glaciers to the summit by the Yukon-side ridge. It was a landmark of early Alaskan mountaineering.

    Then the mountain was left alone. The second ascent did not come until 1946, nearly half a century later, when a Harvard Mountaineering Club party climbed the Southwest Ridge from the coast, the line still known as the Harvard Route. The first winter ascent waited until 1996. In total the peak has been climbed only around fifty times. In the modern era it became a magnet for extreme skiing, and the subject of a documentary about an attempt to ski its immense relief from high on the mountain down toward the sea.

    Questions

    Mount Saint Elias FAQ

    The questions climbers ask most about the difficulty, the weather, the routes, and the rarity.

    How high is Mount Saint Elias, and where is it?

    Mount Saint Elias is 18,008 ft (5,489 m), the second-highest mountain in both the United States and Canada, behind Denali and Mount Logan. Its summit sits directly on the Alaska-Yukon border, in the Saint Elias Mountains, within the Wrangell-St. Elias and Kluane protected-area system. Its Tlingit name is Yas’eit’aa Shaa, the mountain behind Icy Bay.

    What makes Mount Saint Elias special?

    Its vertical relief. The summit stands only about 10 miles from tidewater at Icy Bay, so the mountain rises nearly its full 18,008 ft almost straight from the sea, one of the greatest base-to-summit rises on Earth, comparable to Denali or Himalayan peaks. That relief, and its position in the path of Gulf of Alaska storms, are what make it so dramatic and so hard.

    Is Saint Elias harder than Denali?

    It is lower, but for many teams more committing. Denali is higher and brings greater altitude, but Saint Elias has more technical route complexity, far less infrastructure, and much stronger coastal-storm influence. There are no fixed ropes, established camps, or ranger presence, and prolonged storms can pin a team on the ascent or the descent. Lower does not mean easier here.

    How often is Mount Saint Elias climbed?

    Rarely. It was first climbed in 1897, and the second ascent did not come until 1946, nearly half a century later. In total it has been summited only on the order of fifty times. Severe weather, a remote and complex approach, and the absence of any commercial infrastructure keep the traffic to a trickle of experienced expedition teams.

    What is the weather like?

    Among the most severe of any major peak in North America. Its position beside the Gulf of Alaska places it directly under Aleutian Low storm systems, which bring prolonged storms, extreme snowfall, and hurricane-force winds. Long weather holds are a normal part of any attempt, and the forecast, not the climbing grade, is usually what decides success.

    What are the routes?

    There is no easy or maintained route. The Southwest Ridge, sometimes called the Harvard Route after the 1946 second-ascent party, is the principal modern Alaska-side line, a serious and variable expedition route. The historic Abruzzi Ridge on the Yukon side, the 1897 first-ascent line and one of the 50 Classic Climbs of North America, is rarely climbed now because of icefall and avalanche danger. All routes combine expedition hauling with steep snow, ice, and mixed ground.

    How do you get there, and when do people climb?

    Access is by ski-equipped bush flight, usually from the coastal town of Yakutat onto a glacier such as the Tyndall, or from the Yukon side. The climbing season is the spring, roughly May and June, when conditions are most workable, though Saint Elias weather is difficult in any month. Expect to build in extra days for storms and flight delays at both ends.

    Is there a famous ski descent?

    Yes. Mount Saint Elias is the subject of a documentary about an attempt at the planet’s longest ski descent, skiing from high on the peak toward the Gulf of Alaska, nearly 18,000 ft of vertical to the sea. The team summited on their second attempt and skied to about 13,000 ft. The mountain’s relief makes it a legendary, and extremely dangerous, objective for extreme skiing.

    What experience do you need?

    This is an expert, self-sufficient expedition, not a guided trade-route peak. It demands strong glacier and technical mountaineering skills, expedition experience with hauling and storm camps, sound avalanche and icefall judgment, and the patience to sit out long weather holds. It is a mountain for experienced alpine teams researching current route reports, not a first big peak.

    Transparency

    How we built this update

    What this page is based on, who reviewed it, and what we do not claim to know.

    Sources

    • National Park Service records and the preserved 1897 first-ascent history.
    • Published mountaineering records for the 1946 second ascent and 1996 winter ascent.
    • Expedition reports and route accounts for the Southwest and Abruzzi ridges.
    • Weather and geography references for the Gulf of Alaska storm setting.
    • Our own Mount Saint Elias climb guide for the detailed route and logistics.

    Review and standards

    Compiled by Travis Ludlow and reviewed for safety by Dawson Ludlow, our Climbing and Mountaineering Lead (Wilderness First Aid), whose highest first-hand summit is Kilimanjaro. Health and medical points were reviewed by Taylor Ludlow, RN. We do not fabricate summit experience, quotes, or credentials, and we say plainly when we are reporting rather than recounting.

    What we do not claim to know

    Saint Elias is a remote, rarely climbed, and changing peak, and no web page can replace current route reports and a team’s own judgment. In particular:

    • Route conditions and glacier hazard change; recent reports matter more than any fixed description.
    • Ascent totals are approximate, drawn from published records over many decades.
    • There is no set commercial itinerary; logistics vary by team, pilot, and season.
    • Our team has not climbed Saint Elias, so we report records and accounts, not personal experience.
    Global Summit Guide research team

    Global Summit Guide research

    We compile mountain updates from park and historical records, expedition reports, and route accounts, review them for safety and medical accuracy, and refresh them each season. We are transparent about what we have and have not climbed, and Saint Elias is a research-based briefing, not a personal account.

    About our team and standards ->
    Plan a northern expedition

    Respect the weather. Build the expedition.

    Start with the full route in our Mount Saint Elias climb guide, weigh yourself against our fitness standards, and read the neighbours in the Mount Logan and Denali pages. Trips stage through Anchorage and Yakutat, so for flights and lodging, browse travel on Expedia.

    Disclosure: the Expedia link above is a sponsored affiliate link, and we may earn a commission at no extra cost to you. It is the only affiliate link on this page; our route, weather, and safety guidance is independent.

    Was this helpful?

    Yes
    No
    Thanks for your feedback!
  • Middle Teton + South Teton in One Day: 15.2-Mile Double Summit

    Dawson looking toward the Teton skyline after climbing Middle Teton and South Teton
    Field report · August 9, 2026 · Grand Teton National Park

    Middle Teton + South Teton in One Day: Dawson’s 15.2-Mile Double Summit

    Two major Teton summits, 15.20 miles, 7 hours 22 minutes and 7,546 feet of recorded elevation gain. Dawson’s Middle Teton–South Teton day was fast, steep and far harder than the mileage alone suggests.

    First-hand photosStrava activity screenshotTwo summitsTrip report, not route instruction

    Climbed August 9, 2026 · Field report prepared the same day · Global Summit Guide

    15.20 miRecorded distance
    7h 22mRecorded time
    7,546 ftStrava elevation gain
    ~7,800 ftDawson’s vertical estimate
    2Teton summits
    Field report: Dawson · Edited for Global Summit Guide
    Middle Teton 12,804 ft · South Teton 12,514 ft
    First-hand authority: this post documents Dawson’s actual August 9, 2026 outing using his photographs and Strava activity screenshot. It is intentionally different from a formal route guide. Route conditions, snow, loose rock, weather and exact line choice can change quickly in the Tetons.
    The short version

    This was a huge alpine day disguised as a 15-mile outing.

    Fifteen miles sounds manageable until more than 7,500 feet of vertical gain, two 12,000-foot summits, steep rock, route-finding and the long descent are stacked into the same day. The striking part of Dawson’s outing is not simply that he reached Middle Teton and South Teton—it is that he linked both peaks in 7 hours 22 minutes.

    • Middle Teton: first summit of the day.
    • South Teton: second summit.
    • Strava: 15.20 miles / 7:22 / 7,546 ft gain.
    • Effort: roughly 7,800 vertical feet by Dawson’s estimate.
    • Takeaway: endurance, mountain efficiency and descent strength mattered as much as raw uphill fitness.
    Two summits before the descent was over

    Dawson’s Middle Teton + South Teton Day

    The photos tell the story almost as clearly as the GPS numbers: dry high-country rock, huge relief, open sky and the central Teton skyline filling the background.

    Dawson headed into the Tetons on August 9 with an ambitious plan: climb Middle Teton, continue to South Teton and bring the entire day back to the trailhead in one push.

    By the time the activity stopped, the Strava screenshot showed 15.20 miles, 7 hours 22 minutes and 7,546 feet of elevation gain. Dawson described the effort as roughly 7,800 vertical feet. Either way, it was a major mountain day.

    The two summits sit in the heart of the Teton skyline. Grand Teton National Park lists Middle Teton at 12,804 feet, while the park’s backcountry map lists South Teton at 12,514 feet. Their proximity makes a two-peak day look obvious on a map. In practice, adding a second summit means adding another climb after the legs have already absorbed thousands of feet of ascent.

    Middle Teton first

    Middle Teton is one of the most popular climbing peaks in the range. NPS notes that it is often reached by the Southwest Couloir, although this field report does not claim or teach Dawson’s exact line. What matters from the day is that the first summit did not represent the finish—it represented the midpoint of the major climbing effort.

    Then South Teton

    Once Middle Teton was complete, Dawson continued to South Teton rather than descending directly. That decision changes the character of the outing. The second summit asks for another block of uphill work when fueling, hydration, footwork and concentration are already becoming more important.

    The descent still counts

    Big mountain days are often judged by the summit. The actual performance includes getting down efficiently. After two high summits, thousands of feet of descent remain. Tired legs on boulders and steep trail can turn a successful climb into a slow finish, so the 7:22 total time says as much about descent efficiency as it does climbing speed.

    Distance understates the effort

    What 15.20 Miles and 7,546 Feet Really Mean

    The ratio of vertical gain to mileage is what makes the day stand out.

    MetricDawson’s activityWhy it matters
    Distance15.20 milesLong enough to demand real endurance, but the vertical makes the mileage much harder than a normal trail day.
    Recorded time7 hours 22 minutesA very efficient pace for a two-summit Teton day with more than 7,500 feet of gain.
    Recorded gain7,546 feetNearly a vertical mile and a half of climbing accumulated in one outing.
    Field estimateAbout 7,800 vertical feetA useful round-number description; the Strava screenshot remains the exact recorded figure.
    SummitsMiddle Teton + South TetonThe second summit adds meaningful ascent after the first major objective is already complete.

    Why the 7:22 time is impressive

    This was not 15 flat trail miles. The day combined sustained uphill travel, high elevation, rock and boulder movement, two separate summit pushes and a long descent. The pace reflects fitness, but also efficient transitions, route decisions, fueling and the ability to keep moving after the first summit.

    Photos from August 9

    High in the Central Tetons

    These are the original images supplied from Dawson’s day and are packaged with this post in web-optimized form.

    Dawson and climbing partner above the Teton valleys on a clear summer day
    A second summit changes the day

    The hardest miles usually come after the goal already feels close.

    Linking Middle Teton and South Teton means choosing to climb again instead of simply beginning the descent. That is where endurance becomes mountain efficiency.

    What made the day hard

    More Than a Long Hike

    Dawson called it a great, hard trip. The numbers support that description, but the real difficulty comes from how the components stack together.

    1. Vertical density

    More than 7,500 feet of gain across 15.2 miles creates a very different workload than a rolling trail of the same distance. Every mile is carrying a large share of vertical work.

    2. Two summit pushes

    The body never gets the psychological simplicity of “summit and descend.” After Middle Teton, another high point remains. That means another commitment to climbing while fatigue is already accumulating.

    3. Teton terrain

    Grand Teton National Park describes the Garnet Canyon approach as strenuous and notes boulder fields that require boulder hopping and wayfinding. Higher on the mountains, route choice and surface conditions matter even more. This is why a fast GPS time should never be read as evidence that the outing is easy.

    4. High-elevation decision making

    Middle Teton reaches 12,804 feet and South Teton 12,514 feet. The elevations are below the great expedition ranges but high enough that weather exposure, altitude, hydration and pacing can compound the physical effort.

    5. The descent

    After two summits, the legs still have to absorb thousands of feet downward. Good mountain fitness is not just about climbing speed; it is the ability to keep precise footwork and steady concentration on the way home.

    Two neighboring peaks, one big day

    Middle Teton and South Teton in Context

    This field report intentionally stops short of being a turn-by-turn climbing guide.

    PeakElevationPlanning contextGSG role
    Middle Teton12,804 ftNPS identifies it as one of the range’s popular climbing peaks and notes the Southwest Couloir as a common route. Conditions can change substantially with snow, rock and weather.Dedicated GSG mountain pillar is planned; this post does not replace it.
    South Teton12,514 ftShares the central Teton approach environment and can be combined with Middle Teton by strong parties, depending on route, conditions and experience.This post documents Dawson’s double summit rather than attempting full route ownership.
    Grand Teton13,775 ftA separate, more technical objective on its standard climbing routes.Existing full GSG parent guide.

    Do not copy Dawson’s time as a planning target.

    This is one person’s fast field result, not a recommended schedule. NPS advises climbers to use current route information and conditions. Stronger or slower teams, lingering snow, route-finding errors, thunderstorms or loose rock can change the day dramatically.

    What this day teaches

    Four Lessons From a Fast Double Summit

    The useful part of a field report is not copying the athlete—it is understanding what made the day work.

    Lesson 01

    Vertical beats mileage

    When evaluating a mountain day, look at gain per mile and terrain—not distance alone.

    Lesson 02

    Efficiency compounds

    Small savings in transitions, navigation, fueling and pacing add up across seven-plus hours.

    Lesson 03

    Save legs for descent

    A second summit is only successful when the team still has enough strength and attention to descend well.

    Lesson 04

    Conditions own the plan

    A dry August photo should never be treated as permanent route beta. Check NPS conditions for the day you climb.

    Trip-report questions

    Middle + South Teton FAQ

    Direct answers based on the supplied activity record and official park context.

    Can Middle Teton and South Teton be climbed in one day?

    Yes, strong and experienced mountain athletes sometimes combine the two in a single long day, but the effort is substantial. Dawson’s August 9, 2026 activity recorded 15.20 miles, 7 hours 22 minutes and 7,546 feet of gain.

    How much elevation gain did Dawson record?

    The Strava screenshot records 7,546 feet of elevation gain. Dawson described the day as roughly 7,800 vertical feet, which is a reasonable round-number description of the effort.

    How long did the double summit take?

    The Strava activity screenshot shows 7 hours 22 minutes for the 15.20-mile day.

    How high is Middle Teton?

    Grand Teton National Park identifies Middle Teton at 12,804 feet. It is one of the most popular climbing objectives in the Teton Range.

    How high is South Teton?

    The National Park Service backcountry map lists South Teton at 12,514 feet.

    Is this a route guide for Middle Teton or South Teton?

    No. This is a field report documenting one strong double-summit day. Use current National Park Service climbing information, backcountry conditions and detailed route resources before attempting either mountain.

    What is the main lesson from this trip?

    The distance alone understates the day. Stacking more than 7,500 feet of gain with two high Teton summits, boulder travel, route finding and a long descent makes this a serious endurance and mountain-efficiency test.

    Sources and boundaries

    What This Post Is Based On

    First-hand evidence is separated from general planning information.

    • First-hand source: Dawson’s August 9, 2026 photographs supplied to Global Summit Guide.
    • Activity source: supplied Strava story showing 15.20 mi, 7h 22m and 7,546 ft elevation gain.
    • Middle Teton elevation: Grand Teton National Park identifies Middle Teton at 12,804 ft.
    • South Teton elevation: NPS backcountry mapping lists South Teton at 12,514 ft.
    • Access context: Lupine Meadows / Garnet Canyon is the primary climbing approach corridor for the central Tetons.
    • Current conditions: always check Grand Teton backcountry and trail conditions before attempting a similar objective.

    Boundary: the supplied activity did not include a permanent public GPX or a written route-by-route account, so this post does not invent Dawson’s exact couloir, traverse line or turn-by-turn route.

    A real mountain day, not a theoretical one

    15.2 Miles. Two Teton Summits. More Than 7,500 Feet Up.

    Dawson’s day is exactly the kind of field experience Global Summit Guide can use to connect research with what mountain effort actually feels like.

    Was this helpful?

    Yes
    No
    Thanks for your feedback!
  • Huascaran Expedition Update 2026: Peru’s Highest Peak, the La Garganta Route & the 1970 Disaster

    Nevado Huascaran, Peru's highest mountain, rising in glaciated splendour above the Cordillera Blanca
    6,768 m (22,205 ft) · Cordillera Blanca · Peru

    Huascaran: the roof of the tropics, and the mountain that buried a city

    Nevado Huascaran is the highest peak in Peru and the highest point in the Earth’s tropics, the crown of the Cordillera Blanca. It is a serious glacier climb by the La Garganta route, not a trekking peak, and it carries one of the deadliest disasters in mountain history. This update covers the route, the 1970 avalanche, the fast-retreating glacier, and an honest readiness view. Heights in metres (feet).

    Research-based updateSafety and medical reviewReviewed each Andes seasonOur team has not climbed Huascaran

    Updated 27 July 2026 · Compiled by Travis Ludlow · Safety review by Dawson Ludlow · Medical review by Taylor Ludlow, RN

    6,768 mSummit – Sur (22,205 ft)
    HighestIn Peru and the tropics
    PD+/AD-La Garganta grade
    ~18,000Died in the 1970 avalanche
    Jun-AugPrime season
    HuarazGateway

    Single-mountain expedition update, compiled from park authority and USGS records, operator route and pricing information, and published mountaineering history. Our team has not climbed Huascaran; the only first-hand summit anyone on our team claims is Kilimanjaro. This is a planning briefing for experienced climbers, not a how-to and not a substitute for training or a guide.

    Peru’s highest peak, and a serious glacier climb.

    Huascaran is the roof of Peru and of the Earth’s tropics, the crown of the Cordillera Blanca. Its normal route, La Garganta, is a glaciated climb of crevasses, seracs, and icefall rated around PD-plus to AD-minus – popular, but not a trek. Its summit is among the farthest points on Earth’s surface from the planet’s center, a quirk of the equatorial bulge. And its history holds one of the deadliest avalanche disasters ever recorded.

    • Standard route: La Garganta, from Musho.
    • Grade: PD-plus to AD-minus, conditions-dependent.
    • Highest in Peru and the Earth’s tropics.
    • 1970: an avalanche off the peak buried Yungay.
    • Now: a fast-retreating glacier reshaping the route.
    The mountain

    What Huascaran involves

    A popular but serious glaciated climb, high and cold, on a mountain whose ice is changing fast.

    Nevado Huascaran stands 6,768 m above the Cordillera Blanca in Peru’s Ancash region, the highest mountain in the country and the highest point in the Earth’s tropics. It has two summits, the higher Sur and the lower Norte, separated by a col called La Garganta, the Throat. After Aconcagua, it draws more climbers than any other of South America’s very highest peaks, thanks to a reasonable approach and a normal route that is straightforward by the standards of a 6,768 m glaciated giant.

    Straightforward, though, is relative. The La Garganta route is a real glacier climb, rated around PD-plus to AD-minus, with large crevasses, seracs, an active icefall below the col, and short ice sections up to about 60 degrees. Nights above the col fall below -25 C, and morning cloud can bring white-outs near the top. Most climbers acclimatize first on smaller Cordillera Blanca peaks. For the full route, camps, park fee, and cost, see our Huascaran climb guide.

    The mountain’s shadow

    The 1970 disaster, and the retreating glacier

    Huascaran’s beauty is inseparable from its danger, both to the climbers on it and the valleys below.

    On 31 May 1970, the Ancash earthquake shook a vast mass of rock, ice, and debris off Huascaran’s north peak. It swept down about 14.5 km and buried the town of Yungay and part of Ranrahirca. On the order of 18,000 people died, and only a few hundred in Yungay survived, by running uphill to a cemetery. It is one of the deadliest avalanche disasters ever recorded, and it remains a defining part of the mountain’s story, memorialized at the buried town’s site.

    That collapse was triggered by a major earthquake, which is rare. The everyday hazard now is different: the Cordillera Blanca is losing its glaciers quickly. On Huascaran, the icefall below La Garganta has grown more active over the years, crevasses open and shift, and the classic col camp has been struck by icefall in the past. For a climber, the practical lesson is that the route is not a fixed thing. It changes year to year, and a guide who knows this season’s glacier is worth more than any historical description.

    The route is not fixed

    Do not plan Huascaran from an old topo. Ask your operator about the current state of the icefall and crevasses, because the retreating glacier reshapes the La Garganta route and its hazards from one season to the next.

    The glaciated flanks of Huascaran above the Cordillera Blanca valleys

    The mountain that buried a city

    Above the green valleys of Ancash, Huascaran’s ice has twice fallen catastrophically on the towns below, in 1962 and again, far worse, in 1970. The beauty and the danger are the same mountain. Every climber on the La Garganta route moves through the living, shifting ice that makes this range as hazardous as it is magnificent.

    Honest self-assessment

    Are you ready for Huascaran?

    It is a reasonable step up for climbers with glacier experience, but it is not a first mountain. These are the prerequisites.

    Glacier skills

    Rope, Axe, Crampons

    You must be fluent on a glaciated peak: crampon technique, roped travel, and crevasse rescue are prerequisites, not skills to learn here.

    Evidence: prior glaciated summits.
    Altitude and fitness

    Acclimatized For 6,768 m

    This is a high, cold peak. Arrive properly acclimatized, usually on smaller Cordillera Blanca peaks first, and strong for long summit days.

    Evidence: prior time above 5,000 m.
    Hazard judgment

    Read The Ice

    Seracs, icefall, and shifting crevasses are the real risks. Timing and route choice through them is a survival skill.

    Evidence: sound decisions on live glaciers.
    Current-glacier guiding

    Know This Year’s Route

    The glacier changes fast. A guide who knows the current ice, not the old topo, matters more here than on a stable route.

    Evidence: a guide climbing it this season.
    RequirementBaselineWhy it matters
    Glacier competenceFluent crampon, rope, and rescue skillsThe route is crevassed, seraced, and steep in places.
    Altitude recordAcclimatized, prior time above 5,000 mAt 6,768 m the thin air punishes the underprepared.
    FitnessStrong for long glacier summit daysSummit day is long, cold, and cumulative after the approach.
    Hazard judgmentComfortable reading icefall and seracsObjective hazard, not technical grade, is the main danger.
    Acclimatization planWarm-up peaks built into the tripPisco, Ishinca or similar prepare the body before Huascaran.
    GuidingA guide who knows the current glacierRoute and hazard change year to year with the retreating ice.

    Build the skills first with glacier travel basics and crevasse rescue basics, and prepare your body with the acclimatization guide.

    The routes

    La Garganta, and the hard lines

    One popular normal route, and a set of serious technical faces for expert alpinists.

    The normal route

    La Garganta

    The standard route and the reason Huascaran is popular. Climbed from Musho in the west, through base camp, moraine and glacier camps, an active icefall, and the La Garganta col to the Sur summit. Rated PD-plus to AD-minus depending on conditions, with short ice to about 60 degrees.

    • Glaciated: crevasses, seracs, icefall
    • Short ice sections up to ~60 degrees
    • La Garganta col high camp near 6,000 m
    • Changing every year with the retreating glacier
    Best fit: acclimatized climbers with solid glacier skills.
    The hard lines

    West Face, Spanish and Paragot Routes

    Beyond the normal route, Huascaran holds serious technical lines. The West Face and Ridge (D-plus), the Northeast Spanish Route (TD-plus to ED), and the Paragot route on the Norte face (ED1) are objectives for expert alpinists, far above the La Garganta trade route.

    • West Face and Ridge, around D+
    • Spanish Route on the northeast ridge
    • Paragot and other Norte-face ED lines
    • Expert technical objectives, rarely guided
    Best fit: expert alpinists seeking a hard line.
    FactorLa Garganta (normal)The technical faces
    GradePD-plus to AD-minusD-plus to ED
    CharacterGlacier, icefall, short steep iceSustained technical rock and ice
    TrafficPopular; the standard routeRare; expert objectives
    Main hazardIcefall, seracs, crevassesTechnical difficulty plus objective hazard
    Who it suitsAcclimatized glacier climbersExpert alpinists

    The Huascaran climb guide covers the La Garganta camps, park fee, and gear in full.

    Route profile

    The La Garganta route, camp by camp

    An overview of the normal route, from Musho to the Sur summit. For the full detail, see the climb guide.

    Trailhead

    Musho ~3,000 m

    The western village where the approach and the pack animals begin.

    Base Camp ~4,300 m

    The Approach

    A few hours’ hike up to base camp below the moraine.

    Moraine Camp ~4,850 m

    Below The Ice

    Up glacially polished slabs to the camp at the glacier’s edge.

    Camp 1 ~5,400 m

    On The Glacier

    Onto the ice itself, roped, through the lower crevasse fields.

    The icefall

    Below La Garganta

    An active, changing icefall guards the way to the col; the crux hazard.

    La Garganta / Camp 2 ~6,000 m

    The Throat

    The broad col between the summits and the high camp for the summit push.

    Summit ~6,768 m

    Huascaran Sur

    Steep ice sections near 60 degrees lead to Peru’s highest point.

    Descent

    Reverse The Glacier

    Retrace the crevasses and icefall; the descent is where care matters most.

    The icefall is the crux

    On a route of moderate grade, the active icefall below La Garganta is the single place that decides safety. It is where seracs and shifting crevasses concentrate, and where timing and a guide’s current knowledge matter most.

    How a trip runs

    A Huascaran expedition timeline

    A responsible program runs about 14 to 21 days, including the acclimatization peaks, with five to seven days on Huascaran itself.

    1

    Lima to Huaraz

    Travel to the Cordillera Blanca hub of Huaraz and organize the expedition.

    2

    Acclimatization peaks

    Climb smaller peaks such as Pisco or Ishinca to prepare the body for altitude.

    3

    Drive to Musho and hike in

    Transfer to Musho and hike up to Huascaran base camp near 4,300 m.

    4

    Move to moraine and glacier camps

    Climb the slabs to the moraine camp and onto the glacier at Camp 1.

    5

    Cross the icefall to La Garganta

    Negotiate the active icefall and crevasses up to the col and high camp near 6,000 m.

    6

    Summit push

    Start in the small hours, climb steep ice to the Sur summit, and turn quickly.

    7

    Descend the glacier

    Reverse the route through the ice back to base camp.

    8

    Exit to Huaraz

    Hike out to Musho and return to Huaraz and Lima.

    Money and access

    Cost and access

    Huascaran is one of the great affordable high-altitude climbs, guided from Huaraz, with the acclimatization peaks built into a proper program.

    ComponentFigureNote
    Guided expeditionAndes-pricedFar cheaper than the Himalaya; set by group size and guide ratio.
    National park feeHuascaran National ParkA park entry and climbing fee applies in the Cordillera Blanca.
    Acclimatization peaksPart of the programBudget for the warm-up peaks that make Huascaran realistic.
    InsuranceHigh-altitude cover requiredRescue and evacuation cover for a remote glaciated peak.
    Duration14 to 21 days completeFive to seven days on the mountain, plus acclimatization.

    Huaraz, the Andes hub

    Trips stage through Lima and the mountain town of Huaraz, the heart of the Cordillera Blanca. From there, acclimatization peaks like Pisco and Ishinca sit close by, which is what makes a Huascaran program realistic rather than a gamble on arriving fit.

    Choosing a team

    Choosing a Huascaran guide

    On a fast-changing glacier, current knowledge is the most valuable thing a guide brings. These are the questions to ask.

    Current glacier

    This Season’s Route

    Ask when the guide last climbed it and how the icefall is this year.

    Ratio

    Tight On The Ice

    A close guide-to-client ratio matters on crevassed, seraced ground.

    Acclimatization

    Warm-Up Built In

    A good program acclimatizes you on smaller peaks first.

    Hazard timing

    Through The Icefall

    How the team times and manages the exposed icefall below the col.

    Rescue

    Remote And Slow

    Understand the evacuation reality high on a Cordillera Blanca peak.

    Screening

    Right Skills First

    A serious operator checks your glacier record before accepting you.

    How to choose an expedition operator covers the vetting in full, and the operator directory is a place to start.

    A rescue helicopter against a high, cold sky

    High, cold, and a long way from help

    Above the col the air is thin, the nights fall below -25 C, and rescue from a Cordillera Blanca peak is slow and weather-bound. The objective hazards – icefall, seracs, avalanche – do not care how popular the route is. Move well, time the icefall, and set a turnaround you will actually honor.

    The hazards

    Difficulty and hazard, honestly

    Huascaran’s grade is moderate, but its danger is not. The risk here is objective hazard on a live, retreating glacier.

    HazardWhat it isHow to treat it
    Icefall and seracsThe defining hazardObjective danger, not grade, is what kills on Huascaran.
    CrevassesConstantly changingThe route shifts; night travel through it is a known problem.
    AvalancheEarly season and post-stormFour climbers died at ~6,400 m in a 2002 avalanche, among others.
    Cold and white-out-25 C and morning cloudStorms and cloud can strike even in settled weather.
    Timing

    Season and weather

    Huascaran is a dry-season climb, in the Peruvian winter, when the weather is most settled but never guaranteed.

    May

    Season Opens

    Early dry season; more snow, higher avalanche risk on fresh loading.

    Jun-Aug

    Prime

    The heart of the Peruvian dry-season window, most settled.

    September

    Season Closes

    Late dry season, still climbable as conditions allow.

    Cold

    -25 C At Night

    Thin, cold air above the col makes every task an effort.

    Cloud

    White-Out Risk

    Morning cloud around the peak can cause white-outs near the top.

    Live wind and weather for Huascaran. Source: Windy.com. For how to read a mountain forecast, see our weather guide.
    Huascaran, in the Cordillera Blanca of the Ancash region, Peru. Map: OpenStreetMap contributors.
    History

    A short history of Huascaran

    From an American suffragette on the north peak to the German-Austrian first ascent of the summit.

    The lower north summit, Huascaran Norte, was first climbed in 1908 by the American alpinist and suffragette Annie Smith Peck, with Swiss guides, a landmark early ascent in the Andes. The higher Huascaran Sur, the true summit at 6,768 m, was first climbed on 20 July 1932 by a German-Austrian expedition led by Philipp Borchers, a team that also produced an accurate and long-valued map of the Cordillera Blanca.

    In the decades since, Huascaran has become one of the most sought-after high peaks in South America, second only to Aconcagua in traffic among the continent’s giants. Its story, though, is marked as much by catastrophe as by ascent: the avalanches of 1962 and 1970 that fell on the valleys below, and the slow, ongoing retreat of its glaciers, which is rewriting the mountain a climber meets today.

    Questions

    Huascaran FAQ

    The questions climbers ask most about the difficulty, the danger, the season, and the cost.

    How high is Huascaran, and where is it?

    Huascaran Sur is 6,768 m (22,205 ft), the highest mountain in Peru and the highest point in the Earth’s tropics. It stands in the Cordillera Blanca, in the Ancash region, and is the crown of that range. It has two summits, the higher Sur and the lower Norte at about 6,654 m, separated by a col called La Garganta, the Throat.

    Is Huascaran a technical climb or a trekking peak?

    It is a serious glaciated climb, not a trek. The normal La Garganta route is rated around PD-plus to AD-minus, with large crevasses, seracs, icefall, and short ice sections up to about 60 degrees. It is popular, and the second-busiest of South America’s very highest peaks after Aconcagua, but it demands real glacier skills, acclimatization, and respect for objective hazard.

    What happened in 1970?

    On 31 May 1970, the Ancash earthquake shook loose a massive rock, ice, and debris avalanche from Huascaran’s north peak. It traveled about 14.5 km and buried the town of Yungay and part of Ranrahirca, killing on the order of 18,000 people; only a few hundred in Yungay survived by running to a cemetery hill. It remains one of the deadliest avalanche disasters in recorded history, and it is inseparable from the mountain’s story.

    Is the mountain still dangerous to the valley?

    The 1970 collapse was triggered by a major earthquake, which is rare, but the Cordillera Blanca sits above populated valleys and its glaciers are retreating. That retreat is changing the mountains and, in the wider range, has created and threatened glacial lakes. For climbers, the relevant point is that the ice is less stable and less predictable than it once was.

    How does glacial retreat affect the climb?

    The Cordillera Blanca is losing ice quickly, and Huascaran is changing with it. The icefall on the approach to La Garganta has grown more active over the years, crevasses open and shift, and the classic camp at La Garganta has been hit by icefall in the past. The practical effect is that the route varies year to year, and a guide who knows the current glacier matters more than the historical topo.

    What is the standard route and how long does it take?

    The normal route is La Garganta, climbed from the village of Musho to the west, through base camp, a moraine camp, and glacier camps to the col between the summits, then up to the Sur summit. The mountain phase runs about five to seven days, but a responsible complete program with acclimatization usually takes 14 to 21 days. Most climbers acclimatize first on smaller Cordillera Blanca peaks such as Pisco or Ishinca.

    When is the climbing season?

    The dry season, roughly June to August, is the prime window, within a broader May to September season. This is the Peruvian winter, when the weather is most settled, though storms, cold nights below -25 C, and morning cloud that causes white-outs are all still possible.

    What experience do you need?

    Solid glacier mountaineering skills, competence with crampons, ice axe, roped travel and crevasse rescue, good high-altitude fitness, and proper acclimatization. Huascaran is a reasonable step up for climbers with prior glaciated peaks under their belt, but it is not a first mountain, and its altitude and objective hazard are unforgiving of gaps.

    How much does it cost, and where do trips start?

    Huascaran is far cheaper than the Himalaya or a Seven Summits peak, guided from the Andes hub of Huaraz, with a national park fee and a Musho approach. Costs depend on group size, guide ratio, and how much acclimatization support is included. Trips stage through Lima and Huaraz, and a complete program budgets for the acclimatization peaks as well as Huascaran itself.

    Transparency

    How we built this update

    What this page is based on, who reviewed it, and what we do not claim to know.

    Sources

    • USGS and park authority records for the 1970 avalanche and the mountain.
    • Operator route, itinerary, and pricing information for the La Garganta route.
    • Published mountaineering records for the 1908 and 1932 first ascents.
    • Cordillera Blanca glacier-retreat reporting and route-condition accounts.
    • Our own Huascaran climb guide for the detailed route and cost.

    Review and standards

    Compiled by Travis Ludlow and reviewed for safety by Dawson Ludlow, our Climbing and Mountaineering Lead (Wilderness First Aid), whose highest first-hand summit is Kilimanjaro. Health and medical points were reviewed by Taylor Ludlow, RN. We do not fabricate summit experience, quotes, or credentials, and we say plainly when we are reporting rather than recounting.

    What we do not claim to know

    Huascaran is a changing glaciated peak, and no web page can replace a current route report and a guide’s judgment. In particular:

    • The glacier and icefall change season to season; conditions must be checked for the year you climb.
    • Historical casualty figures for 1970 vary by source; we cite widely reported USGS-based numbers.
    • Grades shift with conditions; PD-plus to AD-minus is a fair-weather guide, not a guarantee.
    • Our team has not climbed Huascaran, so we report records and operator data, not personal experience.
    Global Summit Guide research team

    Global Summit Guide research

    We compile mountain updates from park and scientific records, operator data, and published history, review them for safety and medical accuracy, and refresh them each season. We are transparent about what we have and have not climbed, and Huascaran is a research-based briefing, not a personal account.

    About our team and standards ->
    Plan your Cordillera Blanca season

    Respect the ice. Build the plan.

    Start with the full route in our Huascaran climb guide, weigh yourself against our fitness standards, and build a program around the acclimatization peaks in the Andes collection. Trips stage through Lima and Huaraz, so for flights and lodging, browse travel on Expedia.

    Disclosure: the Expedia link above is a sponsored affiliate link, and we may earn a commission at no extra cost to you. It is the only affiliate link on this page; our route, hazard, and safety guidance is independent.

    Was this helpful?

    Yes
    No
    Thanks for your feedback!
  • Cho Oyu Expedition Update 2026: The Easiest 8000er – When Tibet Is Open

    Cho Oyu, the Turquoise Goddess, rising in gentle snow slopes on the Nepal-Tibet border
    8,188 m (26,864 ft) · Nepal-Tibet border · Sixth-highest on Earth

    Cho Oyu: the easiest 8000er, when Tibet is open

    The Turquoise Goddess is the most accessible and safest of the fourteen 8,000-metre peaks, and the classic first 8000er by the gentle Northwest Ridge from Tibet. But its whole appeal rests on Chinese access, which has closed for most recent seasons. This update covers the route, the access problem, the emerging Nepal side, and an honest readiness view. Heights in metres (feet).

    Research-based updateSafety and medical reviewReviewed each Himalayan seasonOur team has not climbed Cho Oyu

    Updated 27 July 2026 · Compiled by Travis Ludlow · Safety review by Dawson Ludlow · Medical review by Taylor Ludlow, RN

    8,188 mSummit (26,864 ft)
    6thHighest on Earth
    ~1.3%Fatality – lowest 8000er
    NW RidgeStandard route (Tibet)
    Apr-May / Sep-OctSeasons
    1954First ascent, no oxygen

    Single-mountain expedition update, compiled from China Tibet Mountaineering Association access reporting, operator route and pricing information, and published expedition records. Our team has not climbed Cho Oyu; the only first-hand summit anyone on our team claims is Kilimanjaro. This is a planning briefing for experienced climbers, not a how-to and not a substitute for training or a guide.

    The most forgiving 8000er – if you can get to it.

    Cho Oyu earns its reputation: a drive-to base camp, gentle snow slopes, one fixed-roped serac band, the lowest fatality rate of the 8000ers, and the highest success rates in open seasons. It is the classic first 8,000-metre peak and a common step toward Everest. The catch is access. It is climbed almost entirely from Tibet, and China has closed that side to foreign teams for most seasons since the pandemic.

    • Standard route: Northwest Ridge, from Tibet.
    • Safest 8000er: fatality around 1.3 percent.
    • Success: 50 to 90 percent in open seasons.
    • The catch: Tibet access, closed most recent springs.
    • First climbed 1954, without supplemental oxygen.
    The mountain

    What Cho Oyu involves

    The gentlest 8,000-metre climb there is, staged from a road-head, with a single technical obstacle and one large caveat.

    Cho Oyu, the Turquoise Goddess, is the sixth-highest mountain on Earth at 8,188 m, standing on the Nepal-Tibet border about 20 km west of Everest. Its normal route, the Northwest Ridge from the Tibetan side, is the most accessible way up any 8000er: a vehicle reaches Chinese base camp near 4,900 m, advanced base sits at about 5,650 m, and above that the climb is mostly gentle snow near 30 degrees. The one real obstacle is a fixed-roped serac and ice-cliff band near 6,600 m.

    That gentleness, and the lowest fatality rate of the fourteen 8000ers, make Cho Oyu the classic first 8,000-metre peak and a common rehearsal for Everest. But the word easy is relative. This is still a death-zone climb of 30 to 40 days, in temperatures of -15 to -30 C, where the gentle slopes hide real objective danger and people still die. And the whole proposition depends on Chinese access to Tibet, which is where the current story lies. For the full route, permit, and cost detail, see our Cho Oyu climb guide.

    The current story

    The Tibet access problem

    Cho Oyu’s reputation as the easy 8000er assumes you can reach the easy side. Lately, often, you cannot.

    Almost every commercial Cho Oyu ascent uses the Northwest Ridge from Tibet, which means a permit from the China Tibet Mountaineering Association. Since the pandemic, China has kept the Tibetan side closed to foreign commercial expeditions for most seasons, with occasional exceptions such as spring 2023. Spring 2025 was formally closed, along with neighbouring Shishapangma. Autumn has more often opened than spring, but the decision is made by Chinese authorities and can change from one season to the next.

    The closures have two practical effects. First, climbers pursuing the fourteen 8000ers, or a first 8000er, increasingly pivot to Manaslu in Nepal as the accessible alternative. Second, Nepali teams have worked since 2022 to open a commercial route on the Nepal side of Cho Oyu, and a few expeditions have fixed ropes and summited that way. That Nepal-side line is far harder than the Tibetan trade route and is not yet an established commercial option. The single most important planning question for Cho Oyu is therefore not when, but whether: confirm current access with your operator before committing.

    Verify access first

    Do not book flights or gear around Cho Oyu until an operator confirms Tibet access for your specific season. Build in a backup objective, and understand the cost consequences if China closes the peak late.

    A helicopter above a high Himalayan glacier, a reminder that rescue is remote

    Gentle is not the same as safe

    Cho Oyu is the safest 8000er by the numbers, but the numbers still record deaths. A serac band that has killed climbers, heavy snow loading after storms, and the simple arithmetic of the death zone all remain. The easy reputation is exactly what makes it easy to push too far.

    Honest self-assessment

    Are you ready for Cho Oyu?

    It is the most forgiving 8000er, not a beginner’s mountain. These are the prerequisites operators expect.

    Altitude record

    Proven Above 6,000 m

    Operators expect prior high-altitude experience. Cho Oyu is a first 8000er, not a first big mountain, and the death zone is unforgiving of gaps.

    Evidence: a solid 6,000 m-plus record.
    Fixed-rope skill

    Up And Down, Alone

    You must move confidently up and down fixed ropes and manage yourself between camps. The route is roped, but no one climbs it for you.

    Evidence: efficient ascender and rappel work.
    Self-sufficiency

    Care For Yourself High

    Eat, drink, manage oxygen, and solve small problems at 7,000 m and above. Guides cannot do everything for a hypoxic client.

    Evidence: prior self-reliance at altitude.
    Access realism

    Plan For Closures

    The single biggest variable is whether Tibet is open. Build flexibility, and a backup objective, into the plan from the start.

    Evidence: a plan that survives a closure.
    RequirementBaselineWhy it matters
    Altitude experiencePrior success above 6,000 mThe death zone punishes anyone who has not tested it lower first.
    Fixed-rope competenceFluent ascender and rappel workThe route is fixed but demands reliable movement while hypoxic.
    Self-careIndependent between campsGuides support, but cannot perform every task for a hypoxic client.
    FitnessStrong for a 30 to 40 day tripThe expedition is long, cold, and cumulative even on gentle ground.
    Access flexibilityA plan that survives a closureTibet access can vanish for a season; a backup protects the trip.
    Turnaround disciplineWilling to descendAn easy reputation makes it easy to push too far in bad conditions.

    If you are building toward this as a first 8000er, our what to climb before Everest progression puts Cho Oyu in context, and the acclimatization guide prepares your body for the death zone.

    The two sides

    The Tibetan trade route and the Nepal side

    One mountain, two very different climbs, separated by a border and a wide gap in difficulty.

    The trade route

    Northwest Ridge – from Tibet

    The normal route and the reason for Cho Oyu’s reputation. A drive-to base camp, an advanced base at 5,650 m, and mostly gentle snow slopes near 30 degrees, with one fixed-roped serac band near 6,600 m as the only technical obstacle. It depends entirely on Chinese access to the Tibetan side.

    • Gentle snow, around 30 degrees
    • One fixed-roped serac and ice-cliff band
    • Drive-to base camp on the Tibetan side
    • Needs Tibet open; closed most recent springs
    Best fit: a first 8000er for experienced high-altitude climbers.
    The hard alternative

    The Nepal Side

    A very different mountain. The Nepal side is technical, rarely climbed, and success is uncommon. Because Tibet keeps closing, Nepali teams have worked since 2022 to fix a commercial route from Nepal, and a few have summited that way, but it remains an expert undertaking rather than a trade route.

    • Technical and rarely climbed
    • An emerging, not established, commercial line
    • Fixed and summited by a few recent teams
    • An expert objective, not the easy 8000er
    Best fit: expert alpinists, or when Tibet is closed.
    FactorNorthwest Ridge (Tibet)The Nepal side
    CharacterGentle snow, one serac bandTechnical and sustained
    AccessDrive-to base camp; needs China openFrom Nepal; no Chinese permit needed
    DifficultyThe easiest 8000erAn expert undertaking
    StatusClosed most recent springsEmerging, not established
    Who it suitsA first 8000er, when openExpert alpinists, or when Tibet is shut

    The Cho Oyu climb guide covers the Northwest Ridge camps, permit, and gear in full.

    Route profile

    The Northwest Ridge, camp by camp

    An overview of the Tibetan trade route, from the road-head to the broad summit plateau. For the full detail, see the climb guide.

    Drive-in

    Chinese Base Camp ~4,900 m

    Reached by vehicle on the Tibetan side, a rare luxury among 8000ers.

    The real start

    Advanced Base Camp ~5,650 m

    A short walk up the moraine; the working base for the climb.

    Camp 1 ~6,400 m

    Onto The Mountain

    Above ABC the route gains the lower slopes toward the serac band.

    The one crux

    Serac Band ~6,600 m

    A fixed-roped ice cliff, the only technical obstacle on the normal route.

    Camp 2 ~7,100 m

    Gentle Snow

    Broad, moderate slopes near 30 degrees lead higher up the ridge.

    Camp 3 ~7,450 m

    Last Camp

    The high camp for the summit push in cold, thin air.

    Summit plateau

    The Broad Top

    A wide summit plateau, deceptively flat, marks the true summit at 8,188 m.

    Descent

    Reverse The Ropes

    Retrace the fixed lines; most incidents happen tired, on the way down.

    The one obstacle

    On a route this gentle, the serac and ice-cliff band near 6,600 m is the single place that demands real care. It is fixed with ropes, but timing and exposure through it are what a good team manages closely.

    How a trip runs

    A Cho Oyu expedition timeline

    A commercial Cho Oyu expedition runs about 30 to 40 days, most of it acclimatization and waiting rather than climbing.

    1

    Kathmandu and permits

    Gather in Kathmandu, complete Tibet visa and Chinese permit formalities, and check gear.

    2

    Cross into Tibet

    Travel to the Tibetan plateau and the drive-to Chinese base camp near 4,900 m.

    3

    Establish ABC

    Move up the moraine to Advanced Base Camp at about 5,650 m, the real start.

    4

    Acclimatization rotations

    Climb to Camps 1 and 2, sleep high, and descend to recover across several rounds.

    5

    Cross the serac band

    Pass the fixed-roped ice cliff near 6,600 m, the route’s one real obstacle.

    6

    Wait for a window

    Rest at base and watch the forecast for a settled summit period.

    7

    Summit push

    Move through the high camps and up the gentle plateau to the summit, then descend.

    8

    Exit to Kathmandu

    Clear the mountain and return across Tibet to Kathmandu.

    Money

    Cost and operators

    Cho Oyu is the affordable 8000er, and the most operator-rich after Everest, but tier choice matters more here than route choice.

    ComponentFigureNote
    Operator fee~$20,000-$45,000Premium Western to budget Nepali; the tier affects success rate.
    All-in trip cost~$35,000-$65,000Adds travel, insurance, gear, and tips; still far below Everest.
    Chinese permit and logisticsIncluded by operatorThe CTMA permit and Tibet logistics are handled by the operator.
    InsuranceOften $90,000+ cover requiredHigh-altitude rescue and evacuation cover is mandatory.
    DurationAbout 30 to 40 daysA full expedition, long even on relatively gentle terrain.

    Compare the field, tier by tier, in our Cho Oyu operators comparison, and see how the numbers are built in summit success rates.

    Choosing a team

    Choosing a Cho Oyu operator

    On Cho Oyu the operator tier affects success more than the route does. These are the questions that separate them.

    Access status

    Tibet, Confirmed

    The first question: is the operator confident of Tibet access for your season?

    Backup plan

    If It Closes

    Ask what happens, and what it costs, if China closes the peak late.

    Sherpa ratio

    Support Up High

    Clarify the climbing-Sherpa ratio and oxygen plan for the summit push.

    Success definition

    How They Count

    Ask which seasons and clients are in their quoted success rate.

    Serac management

    The One Hazard

    How the team manages timing and exposure through the serac band.

    Screening

    Right Experience

    A serious operator checks your altitude record before accepting you.

    How to choose an expedition operator covers the vetting in full, and the Cho Oyu operators comparison ranks the field.

    A rescue helicopter against a cold high-altitude sky

    The safest 8000er is still an 8000er

    A low fatality rate is a statistic, not a guarantee. Above 7,000 m the margins are thin, rescue is slow and weather-bound, and the descent, tired and hypoxic, is when most incidents happen. Treat Cho Oyu with the respect any death-zone peak demands.

    The numbers

    Safety and success, honestly

    Cho Oyu’s figures are the friendliest of the 8000ers, but only when you read what is inside them.

    StatisticWhat it measuresHow to use it
    ~1.3% fatalityLowest of the 8000ersThe safest 8000er, but not a safe mountain.
    50-90% success (open)In good seasonsAmong the highest 8000er success rates when Tibet is open.
    ~35% headlineIncludes closed seasonsLong-run figures fold in the permit closures; read the denominator.
    The serac bandThe recurring killerGentle slopes, but the ice cliff and post-storm snow are real hazards.

    Our summit success rates analysis explains why the headline rate is lower than what open-season operators report.

    Timing

    Season and conditions

    Cho Oyu has two seasons, but access matters more than the calendar in deciding when you can actually go.

    Spring (Apr-May)

    One Window

    Climbed when open, though Tibet has often stayed shut in recent springs.

    Autumn (Sep-Oct)

    The Classic Season

    The traditional Cho Oyu season, and more often open in recent years.

    Access

    The Real Variable

    Whether Tibet is open matters more than the month you choose.

    Cold

    -15 to -30 C

    Thin, cold air makes even routine tasks a serious effort up high.

    Storms

    Snow Loading

    Heavy precipitation raises avalanche risk on the accumulation slopes.

    Live wind and weather for Cho Oyu. Source: Windy.com. For how to read a mountain forecast, see our weather guide.
    Cho Oyu, on the Nepal-Tibet border about 20 km west of Everest. Map: OpenStreetMap contributors.
    History

    A short history of Cho Oyu

    From a lightweight 1954 first ascent to the most-climbed 8000er after Everest.

    Cho Oyu was first climbed on 19 October 1954 by Herbert Tichy, Sepp Joechler, and Pasang Dawa Lama, on a small, lightweight Austrian expedition and without supplemental oxygen. It was one of the earliest 8,000-metre summits, and unusual for its style at a time when the great peaks were being climbed by large siege expeditions. That lightweight ascent set the tone for a mountain that would become known for accessibility rather than extremity.

    Since then Cho Oyu has become the most-climbed 8000er after Everest, with thousands of ascents, most by the Tibetan Northwest Ridge in autumn. Its role as the standard first 8000er is well established, which is why the recent Chinese access closures matter so much: they have disrupted the single most common on-ramp to 8,000-metre climbing, and pushed both climbers and Nepali operators to look for alternatives.

    Questions

    Cho Oyu FAQ

    The questions climbers ask most about the difficulty, the access, the cost, and the season.

    How high is Cho Oyu, and where is it?

    Cho Oyu is 8,188 m (26,864 ft), the sixth-highest mountain on Earth. It sits on the Nepal-Tibet border about 20 km west of Everest, in the Mahalangur Himalaya. Its Tibetan name, Cho Oyu, is usually translated as Turquoise Goddess. Almost all commercial ascents climb the Northwest Ridge from the Tibetan side.

    Why is Cho Oyu called the easiest 8000er?

    Because its normal route asks less of a climber than any other 8,000-metre peak. The Northwest Ridge from Tibet is a mostly gentle snow climb of around 30 degrees, with a drive-to base camp and only one serious obstacle, a fixed-roped serac and ice-cliff band near 6,600 m. It has the lowest fatality rate of the fourteen 8000ers, around 1.3 to 1.4 percent, and the highest success rate. It is the classic first 8000er and a common step toward Everest. Easiest, though, is relative: it is still a death-zone peak.

    Is Cho Oyu open right now?

    That is the central question, and it changes. Cho Oyu is climbed almost entirely from Tibet, and China has kept the Tibetan side closed to foreign commercial expeditions for most seasons since the pandemic, with occasional exceptions such as spring 2023. Spring 2025 was formally closed. Autumn seasons have sometimes opened. Because access is set by the China Tibet Mountaineering Association and can change season to season, verify the current status with an operator before you plan around it.

    Can you climb Cho Oyu from Nepal?

    Yes, but it is a very different and much harder climb. The Nepal side is technical and rarely done, and success is uncommon. Because Tibet access keeps closing, Nepali teams have worked since 2022 to establish a viable commercial route from the Nepal side, and a few expeditions have fixed ropes and summited that way. For now, though, the Nepal side is an expert undertaking, not the accessible trade route that made Cho Oyu famous.

    What is the success rate on Cho Oyu?

    In open seasons with strong operators, summit rates commonly run 50 to 90 percent, among the highest of any 8000er. Headline long-run figures are lower, near 35 percent, because they fold in seasons disrupted or closed by Chinese permit decisions. Operator tier matters: premium teams report higher rates than budget ones. See our summit success rates analysis for how these numbers are built.

    How much does a Cho Oyu expedition cost?

    Operator fees in 2026 commonly run about $20,000 to $45,000, with all-in trip costs often $35,000 to $65,000 once travel, insurance, gear, and tips are included. It is far cheaper than Everest, which is part of its appeal as a first 8000er. Costs include the Chinese permit and Tibet logistics handled by the operator. A trip runs about 30 to 40 days.

    When is the season?

    Both spring (April to May) and autumn (September to October) are climbed, and autumn has long been the classic Cho Oyu season. Access, though, is the bigger variable than the calendar: in recent years the Tibetan side has more often opened in autumn than spring, but this is set by Chinese authorities and must be checked for the year you intend to climb.

    Do you need supplemental oxygen or prior experience?

    Cho Oyu is often climbed with supplemental oxygen on the commercial route, though a fit, experienced minority climb it without. It was first climbed in 1954 without oxygen. Either way, it is not a first big mountain: operators expect prior experience above 6,000 m, competence moving up and down fixed ropes, and the self-sufficiency to look after yourself between camps in the death zone.

    Is Cho Oyu actually safe?

    It is the safest of the 8000ers by fatality rate, but safe is the wrong word for any 8,000-metre peak. Its gentle slopes hide real objective danger: a serac zone that has killed climbers, and heavy snow accumulation that raises avalanche risk after storms. People die on Cho Oyu. Treat it as the most forgiving 8000er, not a guaranteed one.

    Transparency

    How we built this update

    What this page is based on, who reviewed it, and what we do not claim to know.

    Sources

    • China Tibet Mountaineering Association access decisions and current-season reporting.
    • Operator route, itinerary, and 2026 pricing information for the Northwest Ridge.
    • Published expedition records for the 1954 first ascent and Nepal-side attempts.
    • Fatality and success-rate datasets for the fourteen 8000ers.
    • Our own Cho Oyu climb guide and operators comparison for the detail.

    Review and standards

    Compiled by Travis Ludlow and reviewed for safety by Dawson Ludlow, our Climbing and Mountaineering Lead (Wilderness First Aid), whose highest first-hand summit is Kilimanjaro. Health and medical points were reviewed by Taylor Ludlow, RN. We do not fabricate summit experience, quotes, or credentials, and we say plainly when we are reporting rather than recounting.

    What we do not claim to know

    Access and conditions on Cho Oyu change, and no web page can replace a current operator confirmation and forecast. In particular:

    • Tibet access is set season by season by Chinese authorities; confirm it before planning.
    • The Nepal-side route is developing; its status and difficulty may change year to year.
    • Success and fatality figures vary by source, season, and how open seasons are counted.
    • Our team has not climbed Cho Oyu, so we report official access, records, and operator data, not personal experience.
    Global Summit Guide research team

    Global Summit Guide research

    We compile mountain updates from official access decisions, operator data, and published records, review them for safety and medical accuracy, and refresh them each season. We are transparent about what we have and have not climbed, and Cho Oyu is a research-based briefing, not a personal account.

    About our team and standards ->
    Plan your first 8000er

    Confirm access first. Then build the plan.

    Start with the full route in our Cho Oyu climb guide, compare teams in the operators comparison, and weigh the alternative in the Manaslu guide in case Tibet stays shut. Expeditions gather in Kathmandu, so for flights and lodging there, browse travel on Expedia.

    Disclosure: the Expedia link above is a sponsored affiliate link, and we may earn a commission at no extra cost to you. It is the only affiliate link on this page; our route, access, and safety guidance is independent.

    Was this helpful?

    Yes
    No
    Thanks for your feedback!
  • The Eiger Expedition Update 2026: The North Face, the West Flank & the Mordwand

    The Eiger and its North Face rising above Grindelwald in the Bernese Alps
    3,967 m (13,015 ft) · Bernese Oberland · Switzerland

    The Eiger: the Nordwand, and the most storied wall in the Alps

    At 3,967 m the Eiger is not a tall peak by Alpine standards. Its fame is its North Face, the Eigerwand, the Mordwand, the most storied wall in mountaineering. This expedition update covers the 1938 Heckmair route, the far-less-technical West Flank, the death toll and speed records, and an honest readiness view. Heights in metres (feet).

    Research-based updateSafety and medical reviewReviewed each Alpine seasonOur team has not climbed the Eiger

    Updated 27 July 2026 · Compiled by Travis Ludlow · Safety review by Dawson Ludlow · Medical review by Taylor Ludlow, RN

    3,967 mSummit (13,015 ft)
    1,800 mNorth Face height
    1938First ascent of the face
    64+Deaths on the Nordwand
    ED2Heckmair route grade
    GrindelwaldGateway

    Single-mountain expedition update, compiled from published alpine records, guide and operator route information, and mountaineering history. Our team has not climbed the Eiger; the only first-hand summit anyone on our team claims is Kilimanjaro. This is a planning briefing for experienced alpinists, not a how-to and not a substitute for training or a guide.

    Famous for its face, not its height.

    At 3,967 m the Eiger is dwarfed by the Alps’ 4,000-metre giants, but the North Face, the Eigerwand and Mordwand, is the most storied wall in mountaineering. The 1938 Heckmair route is a serious, conditions-dependent ED2 climb of 1,800 m. The West Flank is the far-less-technical normal route to the summit. Most climbers who stand on top never touch the face.

    • The face: the 1938 Heckmair route, ED2.
    • The normal route: the West Flank.
    • One of the three great north faces of the Alps.
    • A conditions game: climbed frozen to limit rockfall.
    • Solo speed record: 2:22:50, Ueli Steck, 2015.
    The mountain

    What the Eiger involves

    One mountain, two utterly different climbs: an elite wall that made history, and a serious normal route to the same summit.

    The Eiger rises above Grindelwald in the Bernese Oberland, one of a famous trio with the Moench and the Jungfrau. Its summit is 3,967 m, modest for the Alps, but its North Face is anything but. The Eigerwand is a 1,800-metre wall of rock, snow and ice that killed a string of climbers through the 1930s, watched by spectators and the press from the valley, until Anderl Heckmair’s four-man team finally climbed it in 1938. The wall earned a grim nickname, the Mordwand, the murder wall.

    Two very different routes matter to a planner. The North Face, by the 1938 Heckmair line, is an ED2 mixed climb and one of the three great north faces of the Alps, an objective for elite alpinists, almost always with a guide. The West Flank is the normal route, a serious but far-less-technical snow and scramble line that most climbers use to reach the summit, and to descend. Knowing which mountain you intend to climb is the first honest question. For the full route detail, see our Eiger climb guide.

    Honest self-assessment

    Are you ready for the Eiger?

    The answer depends entirely on the route. The North Face is elite terrain; the West Flank is a real climb in its own right.

    Technical ability

    Elite Mixed Ground

    The North Face is an ED2 mixed climb on rock, snow and ice, with sections near 80 degrees. It is far beyond a first serious alpine route.

    Evidence: prior hard mixed alpine faces.
    Speed and efficiency

    Fast, Or Exposed

    The wall rewards speed. Slow parties get caught by afternoon rockfall or a storm high on the face, with no easy escape.

    Evidence: efficient movement over long days.
    Conditions judgment

    Read the Wall

    The face is climbed frozen to limit rockfall. Reading conditions and turning back is a core skill, not a footnote.

    Evidence: sound go and no-go calls.
    Right route, right skills

    Know Your Objective

    The West Flank and the North Face are different mountains. Match the route to your real record, and hire a guide.

    Evidence: an honest self-assessment.
    RequirementBaselineWhy it matters
    North Face gradeED2, sustained mixed to ~80 degreesWell beyond a first alpine face; elite terrain.
    SpeedFast movement over 1,800 m of wallSlow parties meet rockfall, storms and forced bivouacs.
    Conditions judgmentComfortable calling off in poor conditionsThe face is a rockfall and weather game, not a date on a calendar.
    West Flank fitnessSolid alpine fitness and glacier skillsEven the normal route is a real mountaineering climb.
    GuidingA guide who knows the wallRoute-finding on the Nordwand is intricate and consequential.
    Retreat skillAble to reverse or escape mid-faceRescue is limited high on the wall; self-reliance is essential.

    Two mountains, one summit

    The single most useful thing a planner can do is separate the North Face from the West Flank. They share a summit and nothing else. Booking the wall when your record fits the normal route is how ambition outruns skill on the Eiger.

    The North Face of the Eiger, the Nordwand, in cold conditions

    The Nordwand rewards cold, and punishes delay

    The face is climbed frozen, because warmth turns its loose rock into a firing range. Parties start in the dark to pass the ice fields before the sun, and a slow day or a changing forecast can trap a team high on the wall. On the Eiger, conditions and speed are not details. They are the climb.

    The two climbs

    The face and the normal route

    An elite wall and a serious summit route share the mountain. Choose honestly.

    The face

    North Face – the 1938 Heckmair Route

    The classic and most-climbed line up the North Face, first climbed over three days in 1938 by Heckmair, Harrer, Voerg, and Kasparek. It is a 1,800-metre ED2 mixed climb through a sequence of famous features, and one of the three great north faces of the Alps.

    • ED2, sustained mixed to around 80 degrees
    • 1,800 m of rock, snow and ice
    • Named features: the Hinterstoisser, the ice fields, the White Spider
    • Climbed frozen to limit rockfall; elite objective
    Best fit: elite alpinists, almost always with a guide.
    The normal route

    West Flank and Mittellegi Ridge

    The West Flank is the normal route to the summit and the standard descent, a serious but far-less-technical snow and scramble line. The Mittellegi Ridge, from the east, is a classic exposed ridge with a famous hut. These are how most climbers reach the top.

    • West Flank: the standard ascent and descent
    • Mittellegi: a classic, exposed east ridge
    • Real alpine routes, but not the North Face
    • A guide is standard for most climbers
    Best fit: competent alpinists seeking the summit, not the wall.
    FactorNorth Face (Heckmair)West Flank (normal)
    Character1,800 m ED2 mixed wallSnow and scramble to the summit
    DifficultyElite; sustained to ~80 degreesSerious, but far less technical
    Main hazardRockfall, storms, exposureStandard alpine hazards
    First ascent1938: Heckmair, Harrer, Voerg, KasparekThe historic normal route and descent
    Who it suitsElite alpinists, with a guideCompetent alpinists seeking the summit
    RoleThe famous objectiveHow most climbers reach the top
    Route profile

    The North Face, feature by feature

    The Heckmair route climbs a sequence of named features, each a landmark in mountaineering history. An overview, not a topo.

    The base

    Eigergletscher

    Reached by the Jungfrau Railway; many parties bivvy near here the night before.

    The key unlock

    Hinterstoisser Traverse

    The rising traverse that unlocks the lower face, named for the 1936 tragedy.

    The ice

    First, Second and Third Ice Fields

    Long ice slopes that set the pace and expose climbers to what falls from above.

    The grim marker

    Death Bivouac

    A ledge named for an early tragedy, a landmark on the upper wall.

    The line up

    The Ramp

    A weakness that leads climbers up through the steep central wall.

    The exposure

    Traverse of the Gods

    An exposed traverse leading toward the wall’s most famous feature.

    The crux feature

    The White Spider

    The Weisse Spinne, an ice field of radiating gullies near the top of the face.

    The finish

    Exit Cracks to the summit

    Mixed cracks lead to the summit ice field and the top at 3,967 m.

    A wall written into the language

    The Hinterstoisser Traverse, the White Spider, the Death Bivouac, the Traverse of the Gods: the Eiger’s features are named for tragedy and triumph, and they read like a history of alpinism. Heinrich Harrer’s book The White Spider took its title from one of them.

    How a climb runs

    A North Face timeline

    A fast, competent party climbs the wall in a long single push of roughly 10 to 20 hours, weather and conditions permitting.

    1

    Grindelwald and the forecast

    Base in Grindelwald, watch the conditions, and wait for a cold, settled window.

    2

    Train to Eigergletscher

    Ride the Jungfrau Railway to the foot of the wall and bivouac nearby, not at the station.

    3

    Very early start

    Begin in the dark to climb the lower face and ice fields before the day warms.

    4

    The Hinterstoisser and ice fields

    Cross the key traverse and climb the long ice fields that set the rhythm of the day.

    5

    The Ramp and the Gods

    Work up the Ramp and the exposed Traverse of the Gods toward the White Spider.

    6

    The White Spider and Exit Cracks

    Climb the famous ice field and the mixed cracks to the summit slopes.

    7

    Summit, then descend the West Flank

    Top out at 3,967 m and descend the far-less-technical West Flank, the normal route.

    8

    Back to the valley

    Return by the West Flank and the railway to Grindelwald.

    Money and access

    Cost and access

    The Eiger is unusually accessible for a great wall: a railway reaches its foot. The barrier is skill, not logistics.

    ComponentFigureNote
    Guided North FacePremium, privateAn elite, high-ratio objective; a serious personal commitment with a top guide.
    Guided West Flank / MittellegiMore accessibleThe usual guided way to the summit, at standard Alpine guiding rates.
    Train accessJungfrau Railway faresThe railway reaches Eigergletscher and Kleine Scheidegg at the foot of the wall.
    Personal gearFull alpine kitTechnical mixed rack, boots and clothing for a cold, committing wall.
    InsurancePolicy-dependentVerify activity, altitude, evacuation and repatriation cover.

    A railway to the foot of the wall

    The Jungfrau Railway tunnels through the Eiger and stops at Eigergletscher and Kleine Scheidegg, at the base of the face. That access made the Eiger a public spectacle in the 1930s, and it still lets climbers reach the start quickly and retreat to the valley fast when the weather turns.

    Choosing a guide

    Choosing an Eiger guide

    For the North Face especially, the guide is the single most important decision. The right questions reveal who truly knows the wall.

    Eiger experience

    Knows This Wall

    Ask how many times the guide has climbed the North Face, not just the Alps.

    Honest route match

    Right Line For You

    A good guide steers you to the West Flank if the face is beyond your record.

    Ratio

    One To One On The Face

    The North Face needs a tight ratio; be wary of anything else.

    Conditions

    Waits For The Window

    The best guides wait for cold, settled conditions rather than force a date.

    Escape plan

    Retreat And Rescue

    Ask how they handle a mid-face storm, a slow day, or an injury.

    Screening

    Willing To Say No

    A serious guide assesses you honestly before agreeing to the face.

    How to choose an expedition operator covers the vetting in full, and the operator directory is a place to start.

    A mountain rescue helicopter against a cold alpine sky

    Rescue is possible, but never a plan

    The Alps are well served by rescue, and a helicopter can reach parts of the Eiger fast. But high on the North Face, in storm or cloud, no aircraft can help, and a team must be able to reverse the wall or wait it out. Plan to rescue yourself, and treat outside help as the exception.

    Danger and the record

    The toll, and the speed

    The North Face is both a graveyard and a stage: the deadliest of the classic walls, and the arena for the sport’s fastest ascents.

    FactWhat it measuresHow to use it
    64+ deaths since 1935The North Face tollAmong the deadliest classic climbs in the Alps; treat it as elite.
    RockfallThe defining hazardWhy the wall is climbed frozen; warmth loosens the face.
    Sudden stormsThe historic killerWeather can trap a party high with no easy way down.
    Steck 2:22:50The solo speed recordWorld-class alpinists move in hours; most parties need many more.
    Timing

    Season and conditions

    The face wants cold; the ridges want summer. In every season the deciding factor is settled weather, not the date.

    Late winter

    Prime For The Face

    Cold and frozen, with the least rockfall on the North Face.

    Early spring

    Still Good

    Often the best mix of frozen rock and manageable daylight.

    Summer

    West Flank Season

    Warmer, more rockfall on the face; the normal route and ridges come in.

    Conditions

    The Real Calendar

    Settled cold weather matters more than the month.

    Storms

    The Deciding Risk

    A forecast change can turn the wall lethal within hours.

    Live wind and weather for the Eiger. Source: Windy.com. For how to read a mountain forecast, see our weather guide.
    The Eiger, above Grindelwald in the Bernese Oberland, with the Moench and Jungfrau nearby. Map: OpenStreetMap contributors.
    Context

    The three great north faces of the Alps

    The Eiger belongs to a trio that defined a generation of alpinism.

    In the 1930s, three unclimbed north faces stood as the great problems of the Alps: the Eiger, the Matterhorn, and the Grandes Jorasses. The Matterhorn north face fell in 1931 and the Grandes Jorasses in the mid-1930s, leaving the Eiger as the last and most feared. When Heckmair’s team climbed it in 1938, the trilogy was complete, and the idea of the three great north faces entered mountaineering language. We cover its companion in our Matterhorn update.

    The three faces still draw the world’s best alpinists, and the same names recur across them: Ueli Steck and Dani Arnold each set speed records on more than one. To place the Eiger among the classic peaks of the range, see our Mont Blanc update and the wider Alps cluster below.

    History

    A short history of the North Face

    From the tragedies of the 1930s to the first ascent and the modern era of records.

    The North Face drew climbers, and killed them, through the 1930s. The 1936 attempt ended in disaster: all four climbers of two roped parties died, among them Toni Kurz, whose slow death within reach of rescuers became one of the sport’s most haunting stories, and Andreas Hinterstoisser, whose name marks the key traverse low on the wall. The face was cast as a suicide mission by a press that could watch it from the valley.

    On 24 July 1938, after three days on the wall, Anderl Heckmair, Heinrich Harrer, Ludwig Voerg, and Fritz Kasparek reached the summit and completed the first ascent. Harrer’s later book, The White Spider, made the climb famous. In 1992 Catherine Destivelle made the first solo ascent by a woman. The modern era belongs to speed: Ueli Steck soloed the Heckmair route in 2 hours 22 minutes 50 seconds in 2015, on a wall that once took days, though the face remains deadly for anyone who mistakes those feats for the ordinary climb.

    Questions

    The Eiger FAQ

    The questions climbers ask most about the face, the normal route, the danger, and the season.

    How high is the Eiger, and where is it?

    The Eiger is 3,967 m (13,015 ft), in the Bernese Oberland of Switzerland, southwest of Grindelwald. It forms a famous trio with its neighbours the Moench and the Jungfrau. By Alpine standards it is not tall: the range’s 4,000-metre giants are all higher. The Eiger’s fame comes from its north wall, not its altitude.

    Why is the Eiger so famous?

    Because of its North Face, the Eigerwand, a 1,800-metre wall that is the most storied and feared in mountaineering. Through the 1930s a string of climbers died trying to force it, watched by spectators and the press from the valley at Kleine Scheidegg, until a four-man team finally climbed it in 1938. It is one of the three great north faces of the Alps, alongside the Matterhorn and the Grandes Jorasses.

    What does Mordwand mean?

    Mordwand means murder wall in German, a grim play on Nordwand, the north wall. The nickname stuck during the deadly attempts of the 1930s, when the media cast the face as a suicide mission. At least 64 climbers have died on the North Face since 1935. The name endures, though modern climbers approach the wall with far better equipment, forecasting, and technique.

    Who made the first ascent of the North Face?

    On 24 July 1938, after a three-day climb, Anderl Heckmair, Heinrich Harrer, Ludwig Voerg, and Fritz Kasparek reached the summit by the North Face. Two roped parties, one Austrian and one German, joined forces on the wall. Their line, the Heckmair route, remains the classic and most-climbed way up the face. Heinrich Harrer later wrote a famous account of the wall, The White Spider.

    What is the difference between the West Flank and the North Face?

    They are two very different climbs on the same mountain. The West Flank is the normal route, a serious but far less technical snow and scramble line that is also the standard descent, and the way most climbers reach the summit. The North Face is the Heckmair route, an elite ED2 alpine climb of 1,800 m. Most people who stand on the Eiger’s summit never touch the face.

    How dangerous is the Eiger North Face?

    It is one of the most dangerous classic climbs in the Alps. At least 64 climbers have died on it since 1935, from rockfall, ice fall, avalanches, and sudden storms that can trap a party high on the wall. Rockfall is the defining hazard, which is why the face is usually climbed in cold, frozen conditions. It should be attempted only by very experienced alpinists, ideally with a guide who knows the wall.

    What is the speed record on the North Face?

    The standing solo record on the Heckmair route is 2 hours 22 minutes 50 seconds, set by the Swiss alpinist Ueli Steck on 16 November 2015, on a wall that took its first-ascent team three days. Dani Arnold soloed it in 2 hours 28 minutes in 2011. These are extraordinary feats by the world’s leading alpinists; a typical fast, competent party takes something more like 10 to 20 hours.

    When is the Eiger climbed?

    The North Face is usually climbed in cold conditions, often late winter and early spring, when the wall is frozen and rockfall is reduced; summer ascents face more loose rock. The West Flank and the Mittellegi Ridge are summer objectives. In every season the Eiger is a conditions game, and settled cold weather matters more than the calendar.

    What experience do you need for the Eiger?

    It depends entirely on the route. The North Face demands elite mixed-climbing skill, speed, and conditions judgment, well beyond a first serious alpine climb, and even strong alpinists hire a guide. The West Flank and the Mittellegi Ridge are real mountaineering routes that still require solid alpine skills, fitness, and a guide for most climbers. None of the routes is a walk-up.

    Transparency

    How we built this update

    What this page is based on, who reviewed it, and what we do not claim to know.

    Sources

    • Published alpine records for the 1938 first ascent, the death toll, and the speed records.
    • Guide and operator route information for the North Face, West Flank, and Mittellegi Ridge.
    • Mountaineering history, including Heinrich Harrer’s account of the wall.
    • Guidebook grades and conditions guidance for the Bernese Oberland.
    • Our own Eiger climb guide for the detailed route and cost.

    Review and standards

    Compiled by Travis Ludlow and reviewed for safety by Dawson Ludlow, our Climbing and Mountaineering Lead (Wilderness First Aid), whose highest first-hand summit is Kilimanjaro. Health and medical points were reviewed by Taylor Ludlow, RN. We do not fabricate summit experience, quotes, or credentials, and we say plainly when we are reporting rather than recounting.

    What we do not claim to know

    The Eiger is a conditions climb, and no web page can substitute for a current forecast, a route report, and a guide’s judgment. In particular:

    • Conditions on the North Face change quickly; rockfall and storm risk vary by the day.
    • Death-toll and record figures come from published sources and are updated over time.
    • Guided pricing and availability shift with guides, dates, and conditions.
    • Our team has not climbed the Eiger, so we report published records, not personal experience.
    Global Summit Guide research team

    Global Summit Guide research

    We compile mountain updates from published records and current route and conditions information, review them for safety and medical accuracy, and refresh them each season. We are transparent about what we have and have not climbed, and the Eiger is a research-based briefing, not a personal account.

    About our team and standards ->
    Plan your Alpine season

    The Eiger rewards the prepared, and only them.

    Start with the full route in our Eiger climb guide, weigh yourself against our fitness standards, and read the companion faces in the Matterhorn and Mont Blanc updates. Trips base in Grindelwald and Interlaken, so for lodging and travel there, browse travel on Expedia.

    Disclosure: the Expedia link above is a sponsored affiliate link, and we may earn a commission at no extra cost to you. It is the only affiliate link on this page; our route, conditions, and safety guidance is independent.

    Was this helpful?

    Yes
    No
    Thanks for your feedback!
  • Mount Hunter (Begguya) Expedition Update 2026: The Hardest 14er in North America

    Mount Hunter, Begguya, rising steep and corniced above the Kahiltna Glacier in the Alaska Range
    14,573 ft (4,442 m) · Alaska Range · Denali National Park

    Mount Hunter: Denali’s Child, and the hardest of the three

    Begguya is the smallest of the Alaska Range’s big three, and the hardest. This expedition update covers why it is the most technical 14,000-foot climb in North America, the West Ridge and the Moonflower Buttress, the permit distinction from Denali and Foraker, and an honest readiness view. Heights in feet (metres).

    Research-based updateSafety and medical reviewReviewed each Alaska Range seasonOur team has not climbed Hunter

    Updated 27 July 2026 · Compiled by Travis Ludlow · Safety review by Dawson Ludlow · Medical review by Taylor Ludlow, RN

    14,573 ftSummit – north (4,442 m)
    3rdIn the Alaska Range
    Under 40%Summit success
    West RidgeStandard route (AK Grade 4)
    Apr-JunSeason
    KahiltnaBase glacier

    Single-mountain expedition update, compiled from National Park Service registration rules, operator route information, and published alpine records. Our team has not climbed Mount Hunter; the only first-hand summit anyone on our team claims is Kilimanjaro. This is a planning briefing for experienced alpinists, not a how-to and not a substitute for training or a guide.

    The technical test of the range, not the tallest.

    Hunter is lower than Denali and Foraker, yet it is widely called the most difficult 14,000-foot climb in North America. The standard West Ridge is a long, corniced, Alaska Grade 4 climb; the north face’s Moonflower Buttress is a world-class mixed testpiece. Fewer than 40 percent of attempts on the peak succeed. It stages from the same Kahiltna Glacier as Denali, but it asks for technical skill the West Buttress never does.

    • Standard route: the West Ridge, Alaska Grade 4.
    • Signature hard route: the Moonflower Buttress.
    • Success: under 40 percent of attempts.
    • Permit: the Denali and Foraker special fee does not apply.
    • Name: Begguya, Denali’s Child, in Dena’ina.
    The mountain

    What climbing Hunter involves

    A technical alpine climb staged from a familiar glacier, but with none of the trade-route support that makes its taller neighbour approachable.

    Mount Hunter rises about 8 miles south of Denali, towering some 7,000 feet above the Kahiltna Glacier, the longest in the Alaska Range at 44 miles. Climbers fly in by ski-plane from Talkeetna to the same glacier base camp used for Denali and Foraker, and from there the resemblance ends. Where Denali’s West Buttress is a walk-up by alpine standards, Hunter’s standard West Ridge is a sustained, corniced Alaska Grade 4 climbed on snow and ice throughout, with a mixed step low down and huge cornices high on the crest.

    The peak has two summits, a north top at 14,573 ft, which is the true and higher one, and a south top at 13,966 ft, joined by a long corniced ridge. Because Hunter is lower than its neighbours, the upper mountain is not as brutally cold as Denali’s high camps, but that is scant comfort: the difficulty here is technical and sustained, not a matter of altitude. Fewer than 40 percent of the small number who attempt it each year reach the top. For the full route detail, camps, and gear, see our Mount Hunter climb guide.

    Honest self-assessment

    Are you ready for Hunter?

    Hunter is not a peak to grow into. Read these as prerequisites, and if any is a stretch, build toward it on smaller objectives first.

    Technical ability

    Steep Ice and Mixed

    You must be fluent on steep alpine ice and mixed ground, not only glacier walking. The West Ridge is Alaska Grade 4; the Moonflower is far above that.

    Evidence: prior AI3-plus and mixed routes.
    Alaska Range record

    Cold, Storms, Self-Rescue

    Prior Alaska Range or comparable big-range experience: crevassed glaciers, storm days pinned at camp, and self-sufficiency far from any help.

    Evidence: prior expeditions in a big range.
    Cornice judgment

    Read the Ridge

    The West Ridge traverses enormous cornices with huge exposure. Knowing where it is safe to walk is a survival skill, not a detail.

    Evidence: sound decisions on corniced terrain.
    Self-sufficiency

    No Trade-Route Support

    Unlike Denali’s West Buttress, Hunter has no fixed lines, ranger camps, or crowds to follow. Your team solves every problem itself.

    Evidence: an independent expedition record.
    RequirementBaselineWhy it matters
    Technical gradeFluent to Alaska Grade 4 (AI3, ~5.8)The route is sustained steep snow, ice and mixed, not a walk.
    Alaska Range recordPrior range or comparable big-alpine experienceWeather, glaciers and remoteness punish the underprepared.
    Cornice judgmentComfortable on heavily corniced ridgesThe West Ridge crest is exposed and cornice-laden.
    Self-sufficiencyFull independent expedition capabilityNo trade-route infrastructure or crowds to follow.
    Fitness and loadStrong for 12 to 14 days under loadThe approach and ridge demand endurance with weight.
    Turnaround disciplineWilling to retreat from technical groundReversing the ridge is as serious as climbing it.

    The self-selection trap

    Hunter’s low success rate is not softened by an inexperienced crowd dragging the average down. The field is small and expert, and it still turns back more often than not. If strong alpinists fail here regularly, an honest look at your own record matters more than ambition.

    A helicopter over a glaciated range, a reminder that rescue is limited and slow

    Rescue is limited, and self-rescue is the plan

    Deep in the Alaska Range, help is distant and weather-dependent. Bush planes fly only when conditions allow, and a rescue can be days away. On Hunter your team is the first and often the only responder, which is why self-sufficiency is a prerequisite, not a virtue.

    The two routes

    The West Ridge and the Moonflower

    Two very different climbs share the mountain: a serious guided ridge, and one of the continent’s hardest mixed walls.

    Standard route

    West Ridge

    The standard and original line, first climbed in 1954 by Fred Beckey, Heinrich Harrer, and Henry Meybohm. It is a long ridge on snow and ice throughout, with a mixed step low down at the rabbit ears and enormous cornices high on the crest.

    • Alaska Grade 4 (AI3, around 5.8 rock)
    • Sustained snow, ice and one mixed step
    • Huge, exposed cornice traverses
    • One of the 50 Classic Climbs; 12 to 14 days guided
    Best fit: strong alpinists ready for a sustained Grade 4.
    North face testpiece

    Moonflower Buttress

    A route on the north face, first climbed by Bibler and Klewin in 1983, and one of the hardest mixed climbs in North America. It is far above the West Ridge in difficulty and is a personal objective for elite alpinists, not a guided trip.

    • Sustained vertical ice, mixed and rock
    • Among the hardest mixed lines on the continent
    • The nearby Mini Moonflower is used as training
    • An elite testpiece, rarely guided
    Best fit: elite technical alpinists only.
    FactorWest RidgeMoonflower Buttress
    AspectSouth-west and west ridgeNorth face
    GradeAlaska Grade 4 (AI3, ~5.8)Among the hardest mixed climbs in North America
    StyleLong ridge, snow and ice, one mixed stepSustained vertical ice, mixed and rock
    First ascent1954: Beckey, Harrer, Meybohm1983: Bibler and Klewin
    Who it suitsStrong alpinists ready for Grade 4Elite technical alpinists only
    Guided?Occasionally, 12 to 14 daysRarely; a personal objective
    Route profile

    The West Ridge, section by section

    An overview of the standard line, from the glacier to the north summit and back. For the full detail, see the climb guide.

    Fly-in

    Kahiltna Base ~7,200 ft

    Ski-plane base camp, shared with Denali and Foraker traffic.

    Approach

    Toe of the West Ridge

    Gain the ridge from the glacier; the Northwest Basin variation is shorter but harder.

    Mixed step

    The Rabbit Ears

    A rock feature low on the ridge with a mixed climbing step.

    The crux character

    The Corniced Crest

    Enormous cornices; teams stay off the crest, usually to the south.

    Between the tops

    The Plateau

    A broad glacier plateau links the terrain toward the summits.

    Main summit

    North Summit 14,573 ft

    The true, higher summit and the objective of the climb.

    Lower top

    South Summit 13,966 ft

    Joined to the north by a long corniced ridge.

    Descent

    Reverse the Ridge

    The corniced ridge must be down-climbed; the descent stays committing.

    The Northwest Basin variation

    In stable snow, many parties gain the ridge by the Northwest Basin, which is shorter and more direct than the toe of the ridge, but also harder. The choice depends on conditions, and it is one your guide or team makes on the ground.

    How a trip runs

    A Hunter expedition timeline

    A guided West Ridge attempt runs about 12 to 14 days on the mountain, weather permitting, plus travel and contingency.

    1

    Talkeetna, briefing and flight

    Ranger check-in, gear and food sorting, weather, and the ski-plane charter to the Kahiltna.

    2

    Fly to the Kahiltna Glacier

    Land near 7,200 ft, build base camp, and wait out weather if the planes cannot fly.

    3

    Acclimatize and prepare

    Shorter climbs, skills, and load carries; the lower summit means less extreme cold than Denali.

    4

    Gain the West Ridge

    Climb from the glacier onto the ridge, or take the steeper Northwest Basin variation.

    5

    Climb the corniced ridge

    Sustained snow and ice, the mixed step at the rabbit ears, and the long cornice traverses.

    6

    Summit push to the north top

    Move over the plateau to the true north summit and turn around without lingering.

    7

    Descend the ridge

    Reverse the technical ground carefully; the descent remains the serious half of the climb.

    8

    Fly out

    Return to base camp and wait for the ski-plane window back to Talkeetna.

    Money and rules

    Cost and the permit distinction

    Hunter costs less than Denali to guide and skips the special mountaineering fee, but the barrier here was never the paperwork.

    ComponentFigureNote
    Guided West Ridge~$10,000-$15,000+12 to 14 days; far fewer operators than Denali.
    Ski-plane charterIncluded or ~$700-$900Talkeetna to the Kahiltna Glacier, weather permitting.
    Park registrationNo special feeThe Denali and Foraker mountaineering fee does not apply to Hunter.
    Personal gear$5,000-$10,000+Technical alpine kit and a serious ice and mixed rack.
    InsurancePolicy-dependentVerify activity, altitude, evacuation and repatriation cover.

    The Denali and Foraker fee does not apply

    The National Park Service requires climbers on Denali and Foraker to register at least 60 days in advance and pay a special mountaineering fee. Those rules apply to those two peaks only. Hunter climbers register as backcountry climbers flying into the range and fly with an authorized air-taxi concessionaire, but they skip the 60-day pre-registration and the fee. Confirm the current requirements with Denali National Park before you plan.

    Choosing a team

    Choosing a Hunter operator

    Only a handful of operators guide Hunter, and the right questions separate a serious team from an optimistic brochure.

    Hunter experience

    Specific to This Peak

    Ask how many times the guide has climbed Hunter itself, not just the range.

    Honest route match

    Grade Matched to You

    A good operator matches the West Ridge to your real record, or turns you away.

    Team ratio

    Small Rope Teams

    Technical terrain needs tight ratios and strong rope-team management.

    Flight contingency

    Bush-Plane Delays

    Ask how weather delays to and from the glacier are handled and costed.

    Screening

    Willing to Say No

    The best sign is an operator who screens hard and declines the underqualified.

    Rescue reality

    Limited, Self-First

    Understand that rescue is limited and self-rescue is the expectation.

    How to choose an expedition operator covers the vetting in full, and the operator directory is a place to start the search.

    A mountain rescue helicopter against a cold sky, symbolizing weather-bound evacuation

    Weather runs the whole trip

    From the flight in to the summit window and the flight out, Alaska Range weather decides everything. Teams routinely wait days for a break, and a plan that does not build in patience is a plan to fail. Read the sky, and set your turnaround before you leave camp.

    The numbers

    Difficulty and success, read honestly

    Use the statistics as a mirror, not a dare. They describe an elite objective with a stubbornly low success rate.

    StatisticWhat it measuresHow to use it
    Under 40% successShare of attempts reaching the topThe hardest 14er in North America; treat it as elite.
    Few annual attemptsA small, self-selected fieldMost climbers here are experienced alpinists.
    Alaska Grade 4The West Ridge technical gradeSustained, not a single crux; the whole ridge tests you.
    Two summitsNorth (main) and SouthThe higher north summit is the true objective.
    Timing

    Season and weather

    Hunter is a spring and early-summer climb, on the same calendar as Denali and Foraker, and always at the mercy of the sky.

    Early April

    Season Opens

    Cold, more stable snow, and fewer teams on the glacier.

    Late April-May

    Prime

    The core of the Alaska Range climbing window.

    June

    Late Season

    Warmer, with more objective hazard as the snow thaws.

    Weather

    The Deciding Factor

    Storms and bush-plane delays shape every single trip.

    Winter

    Extreme

    Rare, elite ascents only, in brutal cold and dark.

    Live wind and weather for Mount Hunter. Source: Windy.com. For how to read a mountain forecast, see our weather guide.
    Mount Hunter (Begguya), about 8 miles south of Denali, above the Kahiltna Glacier. Map: OpenStreetMap contributors.
    Begguya

    Denali’s Child, and the family of three

    The Dena’ina names for these peaks tell a family story, and Hunter is the youngest and fiercest of them.

    In Dena’ina, Denali is the high one, the great parent of the range. Foraker is Sultana, often rendered as Denali’s Wife. Hunter is Begguya, Denali’s Child. The three stand together above the Kahiltna, and the naming captures something true about them: the child is the smallest, but it is also the most difficult to climb, steeper and more technical than either elder. We cover its neighbours in our Denali and Foraker updates.

    The English name is an accident of history. It was transferred from a nearby peak that an early climber named after a relative who helped fund his travels, and it stuck to this mountain by mistake. Begguya is the older name, and the more fitting one for a peak so bound up with its towering parent.

    History

    A short history of climbing Hunter

    From a corniced first ascent to a north-face testpiece, Hunter’s story is one of technical ambition.

    The West Ridge was first climbed in 1954 by Fred Beckey, Heinrich Harrer, and Henry Meybohm, following a corniced line proposed a year earlier by the great range surveyor Bradford Washburn. It remains the standard route and a coveted objective, listed among the 50 Classic Climbs of North America. Even today, gaining the higher north summit is hard by any route and turns back most who try.

    In 1983, Mugs Stump’s era of hard alpine climbing found its Hunter landmark when Todd Bibler and Doug Klewin climbed the north face’s Moonflower Buttress, a route that became one of the most respected mixed climbs on the continent. The peak has since drawn elite alpinists to its steep faces, while the West Ridge continues to test strong mountaineers as the mountain’s classic line.

    Questions

    Mount Hunter FAQ

    The questions climbers ask most about the difficulty, the name, the permit, and the season.

    Why is Mount Hunter called the hardest 14er in North America?

    Because difficulty is about terrain, not height. Hunter is the third-highest peak in the Alaska Range, lower than Denali and Foraker, but its routes are steeper and more technical than either. The standard West Ridge is a long, corniced, Alaska Grade 4 climb of sustained snow and ice with a mixed step, and fewer than 40 percent of attempts on the peak succeed. Alpinists widely regard it as the most difficult 14,000-foot climb on the continent.

    What does Begguya mean?

    Begguya is the Dena’ina name for the mountain and means Denali’s Child. It fits a family of three: Denali, the high one, the parent of the range; Foraker, called Sultana or Denali’s Wife; and Hunter, Begguya, the child. The English name Hunter came from a historical mix-up, transferred from a nearby peak that an early climber named after a relative, so Begguya is the older and truer name.

    How hard is the West Ridge?

    The West Ridge is rated Alaska Grade 4, with crux difficulties around 5.8 on rock and AI3 on ice, but the grade understates it because the challenge is sustained rather than a single crux. It is a long corniced ridge climbed on snow and ice throughout, with a mixed step low down at a rock feature known as the rabbit ears, and huge cornices higher up where teams stay off the crest. Guided ascents run about 12 to 14 days, and it is one of the 50 Classic Climbs of North America.

    What is the Moonflower Buttress?

    The Moonflower Buttress is a route on Hunter’s north face, first climbed by Bibler and Klewin in 1983, and it is one of the hardest mixed climbs in North America. It is far more difficult than the West Ridge, a sustained wall of vertical ice, mixed ground, and rock that draws elite alpinists as a personal testpiece rather than a guided objective. A shorter nearby route, the Mini Moonflower, is used as training.

    Do you need a permit, or the Denali and Foraker fee?

    You do not pay the special Denali and Foraker mountaineering fee on Hunter. The National Park Service requires climbers on Denali and Foraker to register at least 60 days in advance and pay that fee, but those rules apply only to those two peaks. Hunter climbers register as backcountry climbers flying into the range, fly with an authorized air-taxi concessionaire, and follow park rules, but they skip the 60-day pre-registration and the special fee. Confirm the current requirements with Denali National Park before you plan around them.

    What is the success rate on Mount Hunter?

    Fewer than 40 percent of attempts on Mount Hunter reach the summit, and only a small number of climbers attempt it in a given year. The field is self-selected and experienced, which makes the low success rate all the more telling: even strong alpinists turn back often. Treat the number as confirmation that this is an elite objective, not a peak to grow into.

    When is the climbing season?

    April to June, the Alaska Range spring and early-summer window, the same season as Denali and Foraker. Because Hunter is lower, the upper mountain is not as brutally cold as Denali’s high camps, but the weather is still fierce and unpredictable, and bush-plane flights to and from the glacier depend entirely on it. Late April through May is the core of the season.

    What experience do you need for Mount Hunter?

    Fluency on steep alpine ice and mixed ground to at least Alaska Grade 4, prior experience in the Alaska Range or a comparable big-alpine setting, sound judgment on heavily corniced ridges, and full self-sufficiency. Unlike Denali’s West Buttress, Hunter has no fixed lines, ranger camps, or crowds to follow, so your team must solve everything itself. It is not a first big mountain.

    How high is Mount Hunter and where is it?

    Mount Hunter is 14,573 ft (4,442 m) at its north summit, the main top, with a lower south summit at 13,966 ft (4,257 m) joined to it by a long corniced ridge. It stands in the Alaska Range in Denali National Park and Preserve, about 8 miles south of Denali, rising some 7,000 feet above the 44-mile Kahiltna Glacier, the longest glacier in the range.

    Transparency

    How we built this update

    What this page is based on, who reviewed it, and what we do not claim to know.

    Sources

    • National Park Service, Denali National Park backcountry climbing registration and mountaineering fee rules.
    • Operator and guide-service route information for the West Ridge and the Northwest Basin variation.
    • Published alpine records for the first ascent and the Moonflower Buttress.
    • Alaska Mountaineering School and range guidebooks for grade, success rate, and character.
    • Our own Mount Hunter climb guide for the detailed route and cost.

    Review and standards

    Compiled by Travis Ludlow and reviewed for safety by Dawson Ludlow, our Climbing and Mountaineering Lead (Wilderness First Aid), whose highest first-hand summit is Kilimanjaro. Health and medical points were reviewed by Taylor Ludlow, RN. We do not fabricate summit experience, quotes, or credentials, and we say plainly when we are reporting rather than recounting.

    What we do not claim to know

    Conditions on Hunter change from year to year and within a season, and no web page can substitute for current route reports and a guide’s judgment. In particular:

    • Success rates and attempt numbers are approximate and vary by source and year.
    • Park registration rules and fees change; confirm the current requirements with Denali National Park.
    • Guided pricing shifts with operators, dates, and fuel; treat figures as a planning range.
    • Our team has not climbed Mount Hunter, so we report official rules and published records, not personal experience.
    Global Summit Guide research team

    Global Summit Guide research

    We compile mountain updates from official rules and published expedition records, review them for safety and medical accuracy, and refresh them each season. We are transparent about what we have and have not climbed, and Mount Hunter is a research-based briefing, not a personal account.

    About our team and standards ->
    Plan your Alaska Range season

    Hunter rewards the prepared, and only them.

    Start with the full route in our Mount Hunter climb guide, weigh yourself against our fitness standards, and read the neighbours in the Denali and Foraker updates. Expeditions stage through Anchorage and Talkeetna, so for flights and lodging there, browse travel on Expedia.

    Disclosure: the Expedia link above is a sponsored affiliate link, and we may earn a commission at no extra cost to you. It is the only affiliate link on this page; our route, permit, and safety guidance is independent.

    Was this helpful?

    Yes
    No
    Thanks for your feedback!
  • Mount Hood Expedition Update 2026: The Most-Underestimated Climb, Permit & Route Timing

    Mount Hood, the glaciated Cascade stratovolcano and highest peak in Oregon, above Timberline
    Mount Hood is 11,249 ft (3,429 m), Oregon’s highest peak. One of the most-climbed glaciated volcanoes in North America, and one of the most underestimated.
    Expedition Updates · Cascades

    Mount Hood expedition update

    One of the most-climbed glaciated peaks on the continent, and one of the most underestimated. This page tracks the new year-round permit, the South Side hazards, why it is a spring climb with a midnight start, and a go or no-go checklist. A single-mountain page in our Expedition Updates directory. Heights in feet (metres).

    Current status Spring climb 11,249 ft (3,429 m)

    An accessible mountain is not the same as an easy one.

    Mount Hood is Oregon’s highest peak and one of the most-climbed glaciated volcanoes in North America, an hour from Portland with a lodge at 6,000 feet. That accessibility is exactly why it is so underestimated: it is a real technical snow climb, with steep icy chutes, a crevasse below the summit, toxic fumaroles, rockfall, and fast weather, and it has a serious accident record.

    Two current-state points matter most. A climbing permit is now required year-round above 9,500 feet, and Hood is a spring climb with a near-midnight start, not a summer stroll. For the full route detail, see our Mount Hood climb guide.

    11,249 ft

    Summit (3,429 m)

    Oregon’s highest; a glaciated Cascade volcano.

    May to Jun

    Prime season

    A spring climb, not a summer one.

    Permit

    Above 9,500 ft

    New year-round; $20 for 3 days or $50 a year.

    Mount Hood is a potentially active stratovolcano with eleven named glaciers, about 50 miles east-southeast of Portland, monitored by the USGS. Its standard South Side route from Timberline Lodge is short and non-technical by alpine standards, which draws thousands of climbers a year, from first-timers to those training for bigger peaks. This page owns the current picture, the permit, the timing, and the honest hazards. For the full South Side route, the Pearly Gates and Old Chute variations, gear, and guide companies, see our Mount Hood climb guide.

    Season and status

    A spring snow climb, best before summer melts it out.

    Mount Hood is climbed year-round, but the prime window is roughly May to early July, with early May to late June the best for solid snow and ice. It is a spring mountain: by mid-summer the snow melts back, rockfall picks up, and the summit chutes can turn to bare ice or loose rock. The mountain is open and busy through the season, with the main current change being the year-round climbing permit now required above 9,500 feet. Whatever the month, conditions on the upper mountain shift from year to year, so current information matters more than any fixed description.

    Most-climbed, most-underestimated

    The gap between how it looks and what it is.

    Few big mountains are as easy to reach as Mount Hood. A paved road runs to Timberline Lodge at 6,000 feet, the standard route is under three miles to the summit, and the peak sits an hour from a major city, so it draws thousands of climbers a year and a reputation as a walk-up. The reputation is misleading. Above the Hogsback the route steepens into snow and ice chutes of 35 to 45 degrees with serious exposure, past a crevasse and active fumaroles, and the weather can turn from clear to whiteout in an hour. Hood has a long accident and fatality record, and most of it comes down to climbers treating an accessible mountain as an easy one.

    The mindset that keeps you safe: approach Hood as a real mountaineering objective that happens to be convenient, not a hike that happens to be tall. Carry and know how to use an ice axe, crampons, and a helmet, travel with experienced partners or a guide, and be as willing to turn around here as you would be on a remote peak.

    The new year-round permit

    The current-state change many climbers have missed.

    Mount Hood used to be a free self-registration. It is not anymore. A Mount Hood Climbing Permit is now required year-round for all travel above 9,500 feet, bought on Recreation.gov, and on the South Side route the three-day permit doubles as the required wilderness permit. There is also a new free uphill travel pass for moving within the Timberline ski area. It is a small cost, but an easy one to overlook, and rangers do check.

    Mount Hood permits and passes, 2026. Confirm current requirements on Recreation.gov before you go.
    ItemCostNotes
    Climbing Permit, 3-day$20Required above 9,500 ft, year-round, via Recreation.gov; on the South Side it also serves as the wilderness permit.
    Climbing Permit, annual$50Annual holders complete the wilderness permit requirement separately.
    Timberline uphill travel passFreeNew for the 2025/2026 winter season, for travel within the ski area.
    ParkingSno-Park or NW Forest PassSeasonal, for the Timberline Lodge lot.

    The South Side hazards

    Three things the upper mountain will test you on.

    âš  The fumaroles, the Bergschrund, and the chutes

    The Devil’s Kitchen fumaroles, on the upper mountain, vent toxic, oxygen-depleting gas, and climbers have fallen into them; move through quickly and do not linger or breathe the fumes. The Bergschrund, a large crevasse below the summit headwall, must be crossed, and its snow bridges weaken and collapse as the day warms. Above it, the Pearly Gates and Old Chute finishes are steep snow or ice at 35 to 45 degrees, exposed to rock and ice fall from the buttresses above.

    The choice between the two chutes is made on the mountain from the day’s conditions, and either can be bare ice in a lean year. Wear a helmet, move fast through the fall zones, keep spacing so you do not endanger climbers below, and watch for the summit cornice on the far side. Our climb guide covers the variations in detail. This page is educational and is not a substitute for training.

    Timing and the alpine start

    Why you leave the lodge near midnight.

    The single most important tactic on Mount Hood is the early start, closer to midnight than to dawn. The mountain grows more dangerous as it warms: the sun loosens rock in the chutes above the Hogsback, softens the snow, and weakens the snow bridges over the Bergschrund. A midnight or 1am departure lets a party climb and descend the hazardous upper sections while everything is still frozen, and the standard advice is to be clear of the rockfall zones by around 10am. Climbing late, or lingering on the summit into a warm afternoon, is how people get hurt.

    Difficulty and the Cascades progression

    A fine first glaciated peak, with a warning attached.

    Mount Hood is often a climber’s first glaciated summit, and it is a good one for it: short, accessible, and a real introduction to steep snow, crampon work, and glacier hazards. But it belongs in the same conversation as Mount Baker and Mount Rainier, not below them, because its hazards are real and its accident record is long. Many climbers use it alongside Mount Baker to build glacier skills before the bigger commitment of Mount Rainier. Test your base against our fitness standards, and brush up on glacier travel and avalanche awareness before you go.

    Weather and timing

    A mountain that makes its own fast weather.

    Mount Hood builds cloud and storm quickly, and whiteouts on the featureless upper snowfields have led climbers astray on descent, a factor in some of its worst accidents. A settled, clear forecast and a hard turnaround time matter as much as fitness. The live map below shows current conditions; rely on a mountain forecast and current route reports for the summit-day call.

    Live wind and weather for Mount Hood. Source: Windy.com. For how to read a mountain forecast, see our weather guide.
    Mount Hood, about 50 miles east-southeast of Portland, climbed from Timberline Lodge. Map: OpenStreetMap contributors.

    Go or no-go checklist

    Work through these before you go.

    Before you go

    • Buy the climbing permit – it is required year-round above 9,500 ft; get it on Recreation.gov before you leave.
    • Time it for spring – May to June is prime; summer melts the route out and raises rockfall.
    • Start near midnight – be off the rockfall zones and across the Bergschrund by mid-morning.
    • Carry axe, crampons, and helmet – all are effectively mandatory on the upper mountain.
    • Avoid the fumaroles – do not linger in or breathe the Devil’s Kitchen gases.
    • Respect the weather – whiteouts on descent have killed here; set a hard turnaround time.

    Mount Hood update FAQ

    The questions climbers ask most about the permit, the hazards, and the timing.

    Do you need a permit to climb Mount Hood?

    Yes, and the rule is recent. A Mount Hood Climbing Permit is now required year-round for all travel above 9,500 feet, costing $20 for three days or $50 for an annual pass, bought on Recreation.gov. On the South Side route the three-day permit also serves as the required wilderness permit, while annual holders complete the wilderness permit separately. There is also a new free uphill travel pass for the Timberline ski area. Confirm the current rules before you go, as they have changed from the old free self-registration.

    How hard is it to climb Mount Hood?

    It is a technical snow climb, not a hike. The standard South Side route gains about 5,000 feet from Timberline Lodge and finishes with steep snow or ice chutes of 35 to 45 degrees with serious exposure, on top of glacier hazards, volcanic fumaroles, and rockfall. An ice axe, crampons, and a helmet are mandatory. It suits climbers with basic mountaineering skills and is often a first glaciated peak, but its accessibility leads many people to underestimate it.

    Why is Mount Hood dangerous if it is so popular?

    Because accessibility and difficulty are not the same thing. Hood is one of the most-climbed glaciated volcanoes in North America, an hour from Portland with a lodge at 6,000 feet, so many people arrive treating it as an easy day. The upper mountain, though, has real hazards, the Bergschrund, the fumaroles, steep icy chutes, rockfall, and fast-moving weather, and it carries a serious accident and fatality record. The danger on Hood is underestimating it.

    What are the main hazards on the South Side route?

    Three stand out. The Devil’s Kitchen fumaroles emit toxic, oxygen-depleting gas, and climbers have fallen into them. The Bergschrund is a large crevasse below the summit headwall whose snow bridges collapse as the day warms. And the Pearly Gates and Old Chute finishes are steep snow or ice with rock and ice fall from above. The choice between the two chutes is made on the mountain according to the day’s conditions.

    When is the best time to climb Mount Hood?

    Roughly May to early July, with early May to late June the prime window for solid snow and ice. It is a spring climb, not a summer one. By mid-summer the route melts out, rockfall increases, and the chutes can turn to bare ice or rock. Whatever the date, start extremely early, closer to midnight than dawn, to be off the rockfall zones by around 10am while the mountain is still frozen.

    Why do you start so early on Mount Hood?

    Because the mountain grows more dangerous as the day warms. The sun loosens rock in the chutes above the Hogsback, softens the snow underfoot, and weakens the snow bridges over the Bergschrund. A midnight or 1am start lets a party climb and descend the hazardous upper sections while everything is still frozen and stable, which is why the standard advice is to be clear of the rockfall zones by mid-morning.

    Pearly Gates or Old Chute, which finish should I take?

    Both are steep snow or ice at 35 to 45 degrees, and the choice is made on the day from conditions rather than in advance. The Pearly Gates is the most direct line but can be a wall of ice, or congested with other climbers; the Old Chute is the common alternative when the Gates are in poor shape. Either way you must navigate around the Bergschrund. Our Mount Hood climb guide covers the route and the variations in full.

    How high is Mount Hood and where is it?

    Mount Hood is 11,249 feet (3,429 m), the highest mountain in Oregon, a glaciated and potentially active Cascade stratovolcano about 50 miles east-southeast of Portland. It has eleven named glaciers and perennial snowfields, and it is monitored by the USGS as a potentially active volcano, with the Devil’s Kitchen fumaroles a visible reminder of the heat still beneath it.

    📋 How this update is built

    This page is compiled by Travis Ludlow, Founder and Head of Research at Global Summit Guide, from US Forest Service and Recreation.gov permit rules, Mazamas and Mountaineers route information, and USGS volcano monitoring, with sources named below. It was reviewed for safety by Dawson Ludlow, our Climbing and Mountaineering Lead (Wilderness First Aid), whose highest first-hand summit is Kilimanjaro.

    Our team has not climbed Mount Hood, so we report official rules and route information rather than personal experience, and we review this page for the spring climbing season. Permit rules and route conditions change from year to year, so confirm the current requirements on Recreation.gov and check recent route reports before you go.

    Planning a Mount Hood climb?

    Start with our Mount Hood climb guide for the full route and gear, build glacier skills alongside our Mount Baker and Mount Rainier updates, and choose a team in the operator directory. Most climbers stage through Portland, so for flights and lodging, browse travel on Expedia.

    Disclosure: the Expedia link above is a sponsored affiliate link. We may earn a commission at no extra cost to you.

    Was this helpful?

    Yes
    No
    Thanks for your feedback!
Language »