<

Category: Trekking & Trekking Peaks

Nepal trekking peaks, 6,000m class, trek-to-summit progressions

  • Himalaya Trekking Peaks: Choosing Objectives & Routes

    Himalaya Trekking Peaks: Choosing Objectives & Routes

    Himalaya Trekking Peaks: How to Choose Objectives and Plan Routes for Safe and Successful Expeditions

    By Travis Ludlow, Global Summit Guide

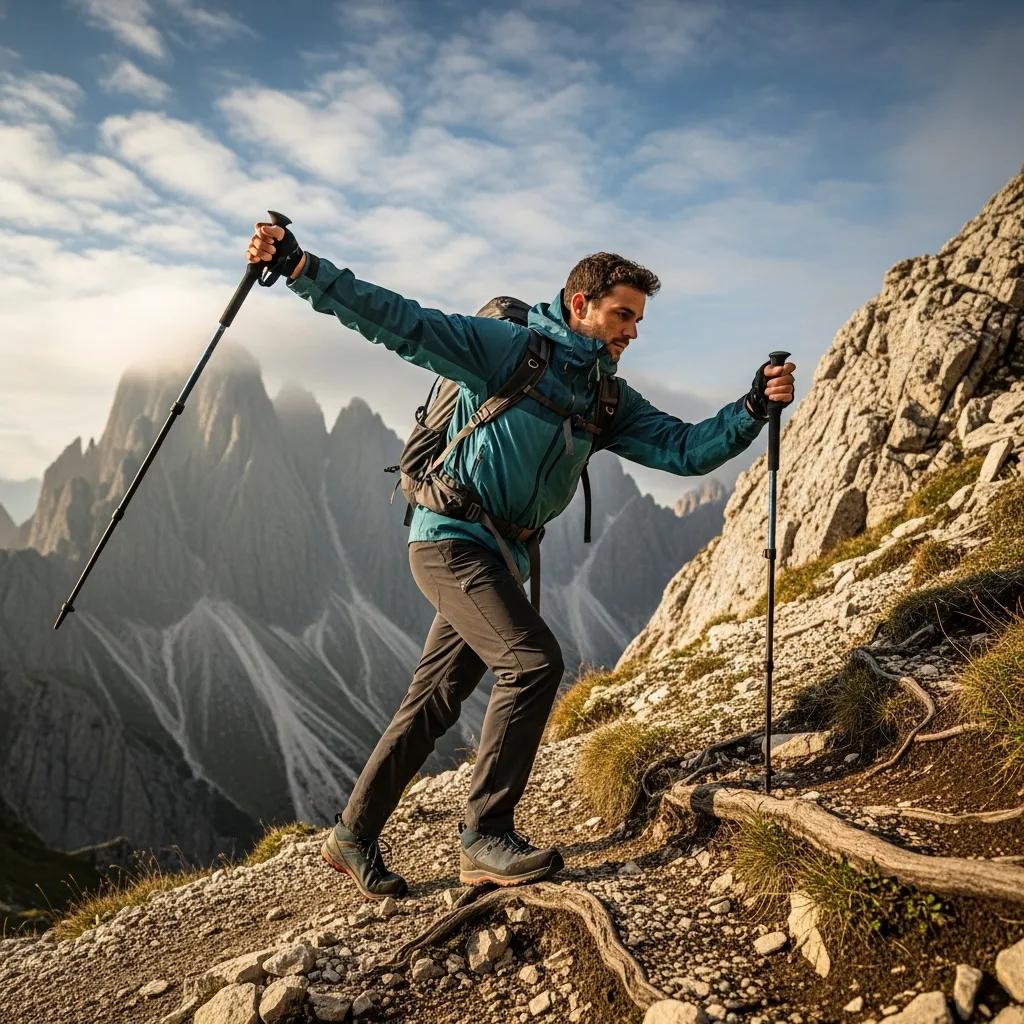
    Trekking in the Himalayas is a high-value experience with complex logistics and real safety demands. This guide breaks the planning process into clear, practical steps: choosing peaks by skill level, preparing physically and with gear, obtaining permits, and selecting qualified operators. Follow the checklists and decision points here to reduce risk and improve outcomes on your expedition.

    Use this guide as a framework rather than a prescriptive itinerary. Each route varies by season, local regulation and current trail condition; adapt the general steps to your chosen valley and consult local authorities or experienced guides to confirm specifics before travel. Emphasise conservative decision-making at every stage—when in doubt, choose a safer option.

    Which Are the Best Trekking Peaks in the Himalayas for Different Skill Levels?

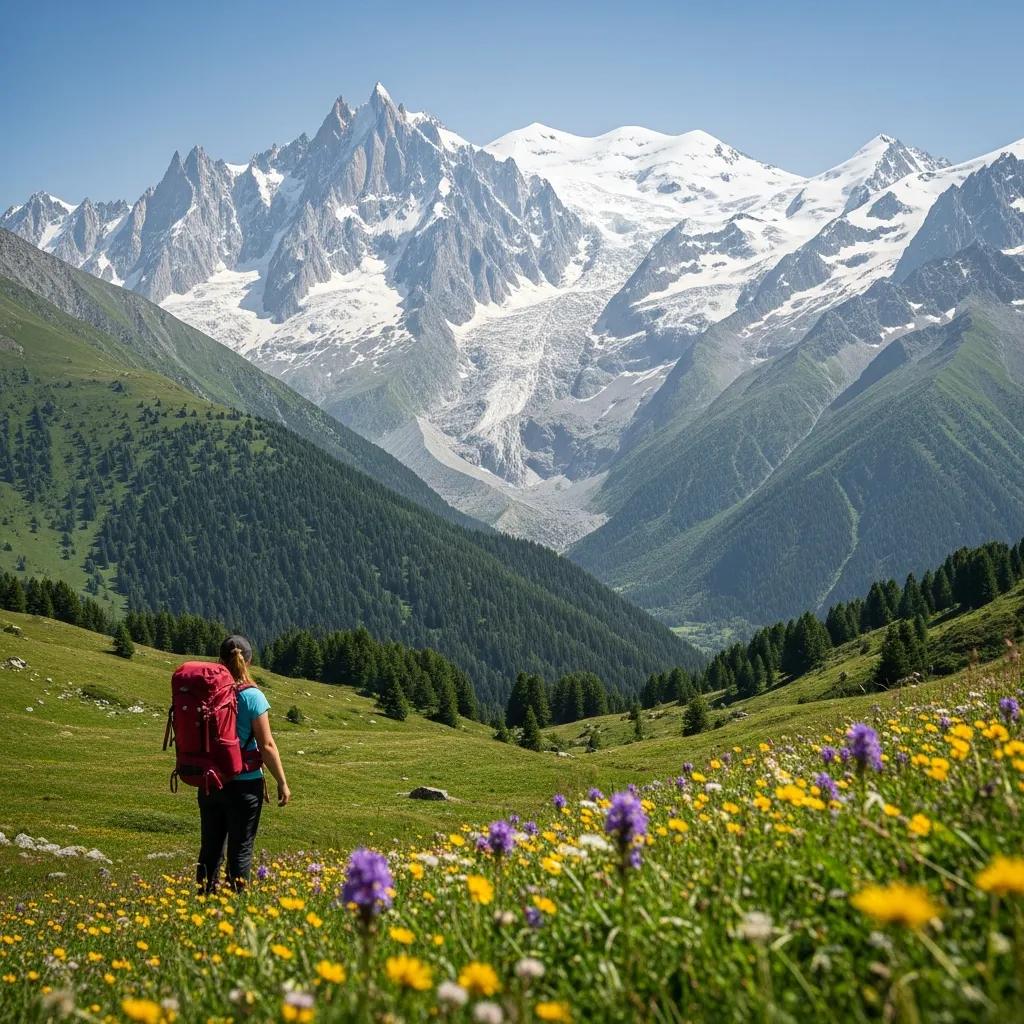
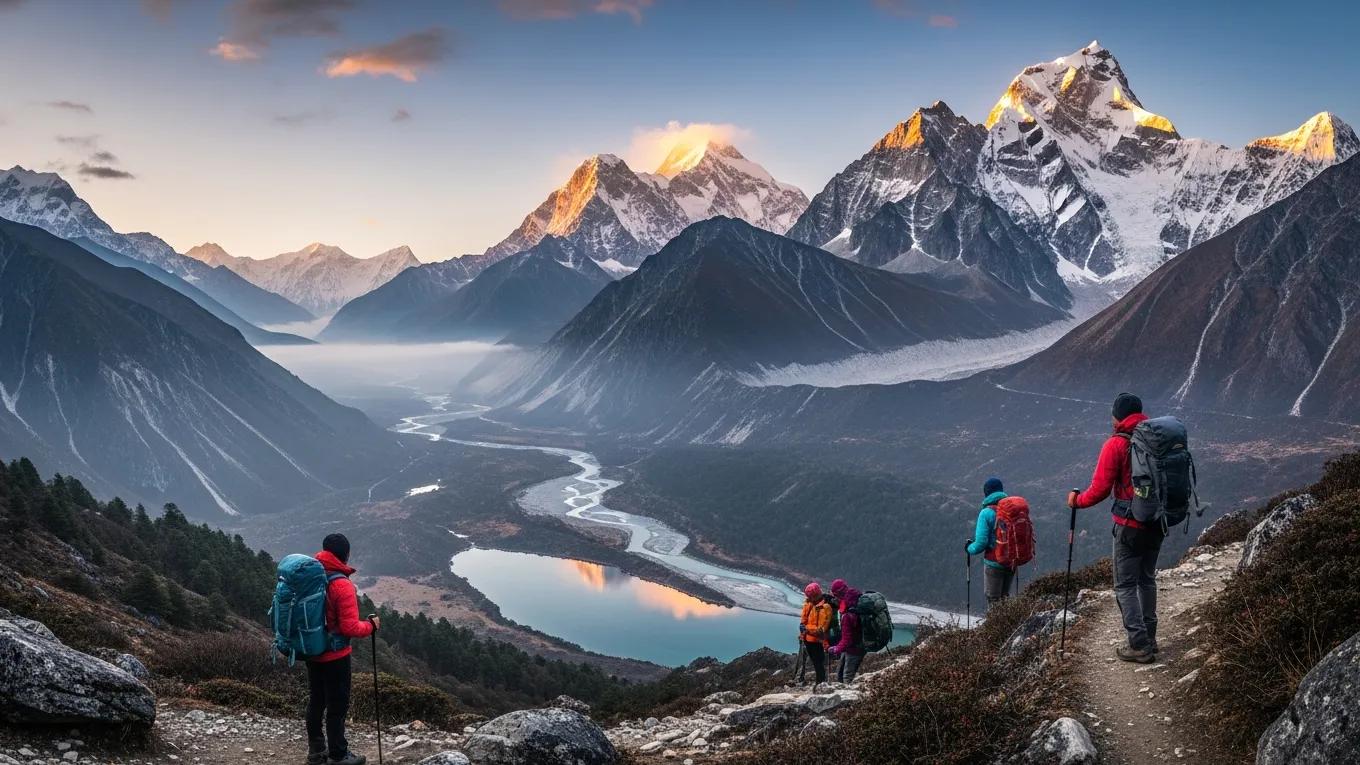
    The Himalayas include routes suitable for beginners through to advanced trekkers. Match each route’s difficulty and time commitment to your fitness, experience, and available days before you commit.

    PeakDifficultyDuration
    Everest Base Camp TrekModerate12-14 days
    Annapurna CircuitModerate to Challenging12-19 days
    Langtang Valley TrekModerate7-10 days

    Beginners often choose Everest Base Camp for a manageable ascent with strong support infrastructure. The Annapurna Circuit suits intermediate trekkers who can handle longer days and varied terrain. The Langtang Valley Trek is described here as a higher-demand option for experienced trekkers; verify route specifics and altitude when planning.

    When selecting between these and other routes, consider secondary factors such as daily elevation gain, the availability of accommodation (tea houses versus camping), and the ease of emergency evacuation. For example, routes with regular villages tend to provide more rapid access to help than long, isolated approaches.

    How to Compare Himalaya Trekking Routes: Key Factors and Route Selection Guide

    Compare routes using a consistent set of factors: terrain type, technical difficulty, total duration, and available support. Use these to rank options against your skills and time.

    • Terrain : Assess the type of terrain you will encounter, including steep ascents, rocky paths, and river crossings.
    • Difficulty : Evaluate your physical fitness and experience level to choose a route that matches your capabilities.
    • Duration : Consider how much time you can dedicate to the trek, as some routes require more days than others.
    • Support Services : Check for the availability of guides, porters, and accommodation along the route.

    Use a simple decision matrix: list routes, score them against the factors above, and pick the route with the best overall fit for safety and success.

    A practical scoring approach is to assign 1–5 values for each factor and add them to generate a total score. Weight the categories to reflect your priorities—for example, give safety and support a higher weight if you have limited altitude experience. Document the assumptions you make so you can revisit choices if conditions or your fitness change.

    What Are the Essential Preparation Steps for a Himalaya Trek?

    Trekking gear setup for Himalaya preparation, emphasizing readiness and adventure

    Preparation reduces risk. Focus on improving fitness, choosing appropriate kit, and having emergency plans before you reach high altitude.

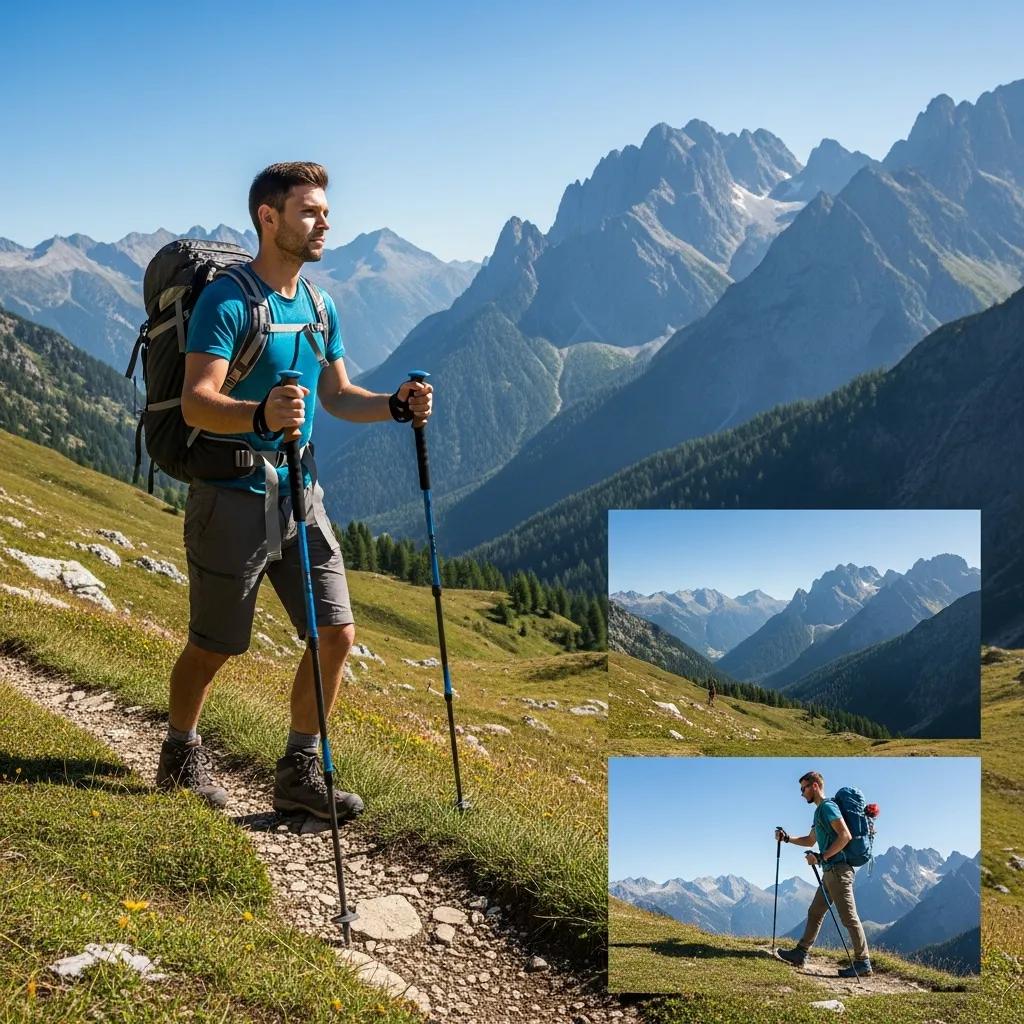
    • Physical Training : Engage in a fitness regimen that includes cardiovascular exercises, strength training, and hiking practice to build endurance.
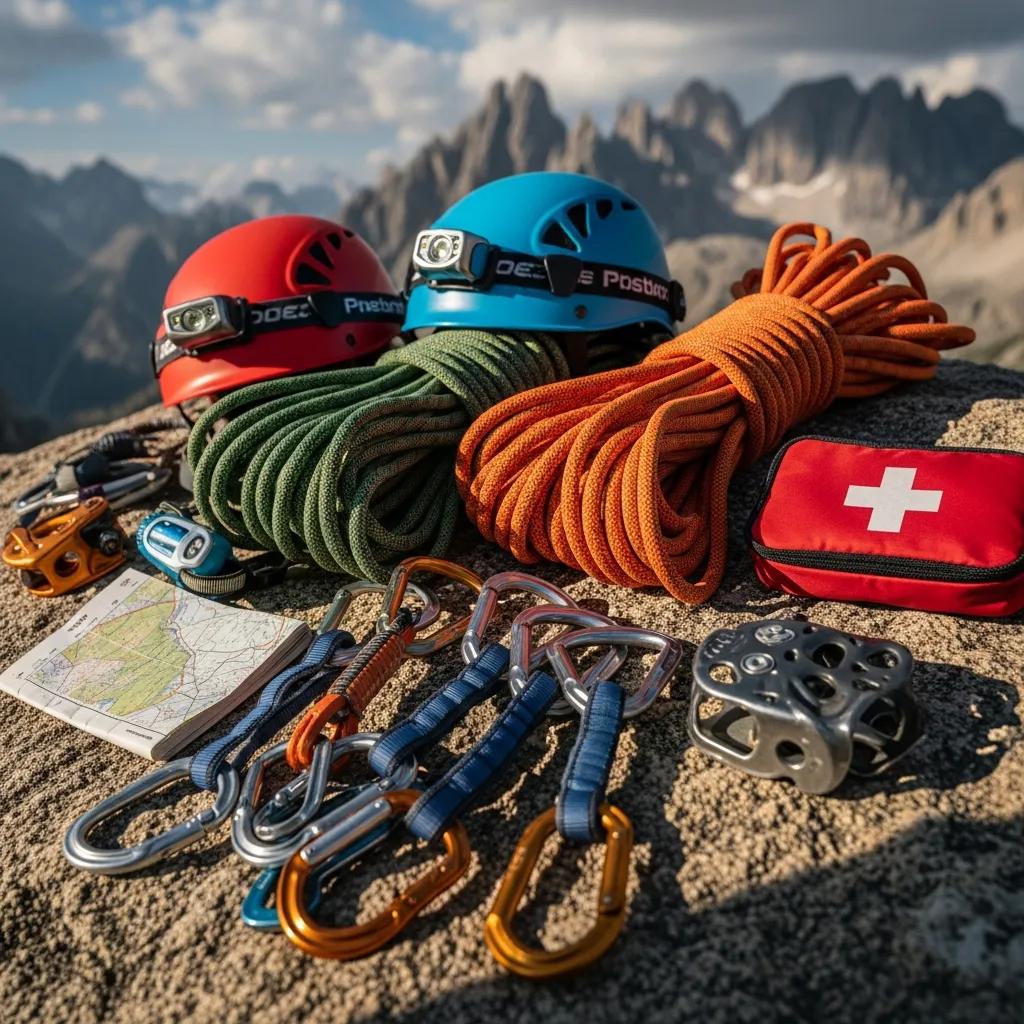
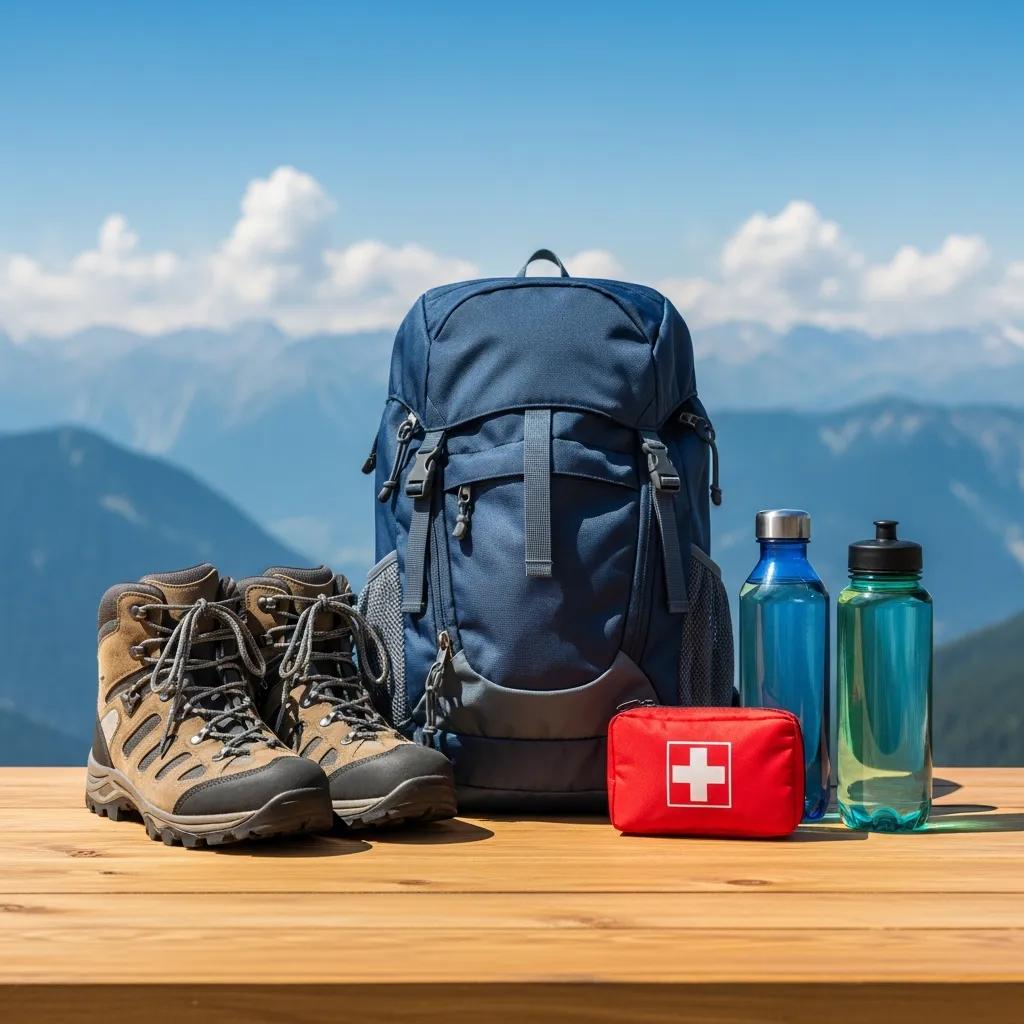
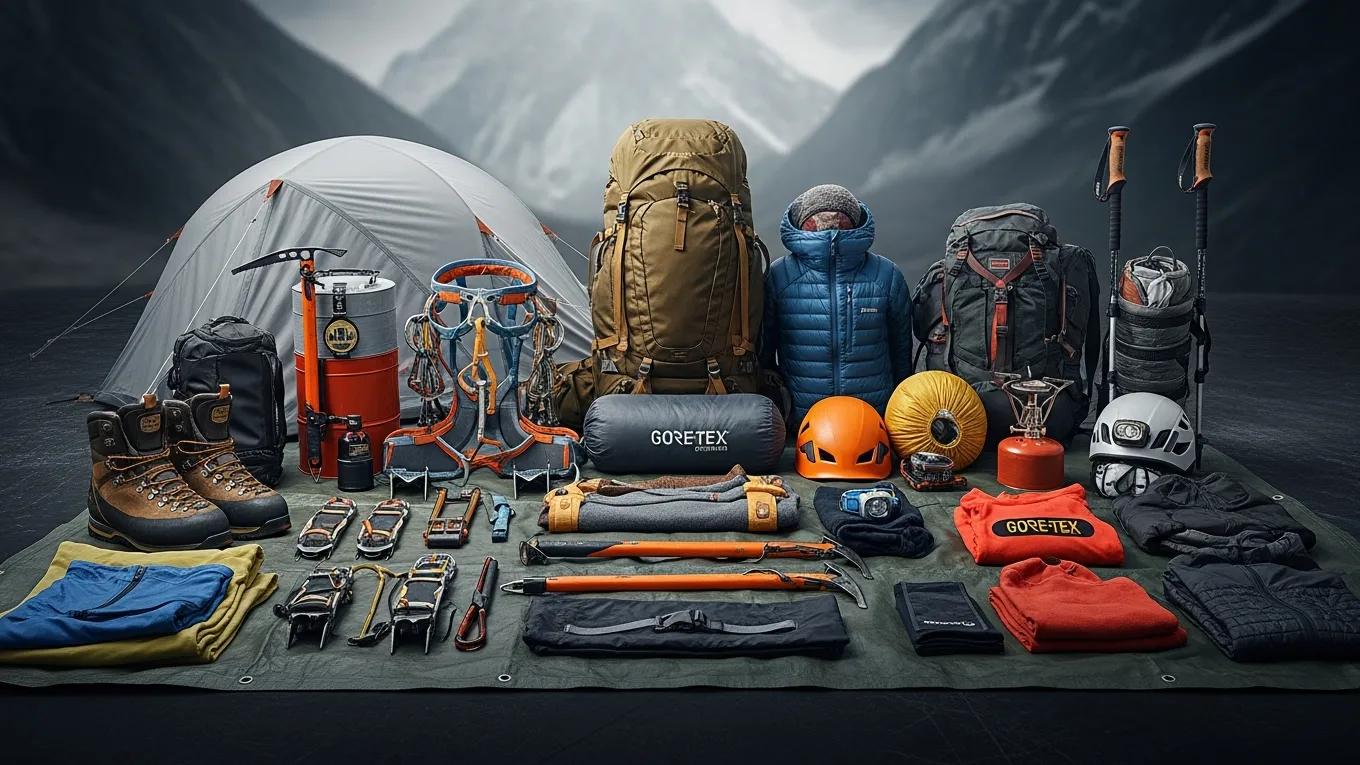
    • Gear Selection : Invest in high-quality trekking gear, including boots, clothing, and equipment suitable for varying weather conditions.
    • Emergency Preparedness : Familiarize yourself with first aid procedures and carry a well-stocked first aid kit.

    Build a training plan with progressive hikes, test all gear on multi-day walks, and prepare an emergency kit and evacuation plan tailored to your route.

    Practical training suggestions: include at least one long hike per week that simulates the load and duration you expect on trek days, gradually increase pack weight and elevation gain, and include interval cardio sessions to improve recovery on steep sections. If possible, train on terrain similar to the route—rocky trails and stair climbs are better preparation than treadmill-only workouts.

    Gear checklist refinements: break system components into categories—footwear and socks, layered clothing for temperature control, sleep system, navigation and communication tools (map, compass, satellite or local SIM options), and a compact repair kit. Pack items you can share with a partner (e.g., stove fuel, some repair tools) if you are travelling in a small group.

    What Permits and Regulations Must You Know for Himalaya Trekking?

    Most Himalayan treks require permits and adherence to local regulations that protect both trekkers and the environment. Confirm requirements early.

    • Types of Permits : Common permits include the TIMS (Trekkers’ Information Management System) card and national park entry permits.
    • Application Process : Permits can typically be obtained through trekking agencies or local authorities, often requiring identification and a fee.
    • Compliance Guidelines : Adhere to local regulations regarding waste disposal, wildlife protection, and cultural respect to minimize your impact on the environment.

    Check permit lists for your exact route, allow time for applications, and budget permit fees into your trip costs to avoid last-minute issues.

    Beyond permits, consider the environmental and ethical impacts of travel: respect local communities, follow waste-management rules, and choose operators who apply minimum-impact practices.

    Administrative tips: keep digital and paper copies of all permits and identification, register your planned itinerary with local authorities where possible, and confirm whether permits must be shown at checkpoints along the route. In some regions permit offices have set opening times and blackout dates—plan accordingly.

    Himalayan Adventure Tourism: Types, Impacts & Ethical Codes

    This paper summarises types of adventure tourism in the Himalayas and traces the development of mountaineering and trekking. It lists environmental impacts such as trail erosion, rubbish on routes, and declining water quality, and describes management responses like codes of conduct and minimum-impact measures.

    Adventure tourism in the Himalayas, T Stott, 2019

    How to Choose Reliable Trekking Operators and Guided Expedition Services?

    A competent operator reduces operational risk. Vet providers against clear safety, experience, and transparency criteria before booking.

    • Reputation and Experience : Research the operator’s history, client reviews, and safety records to gauge their reliability.
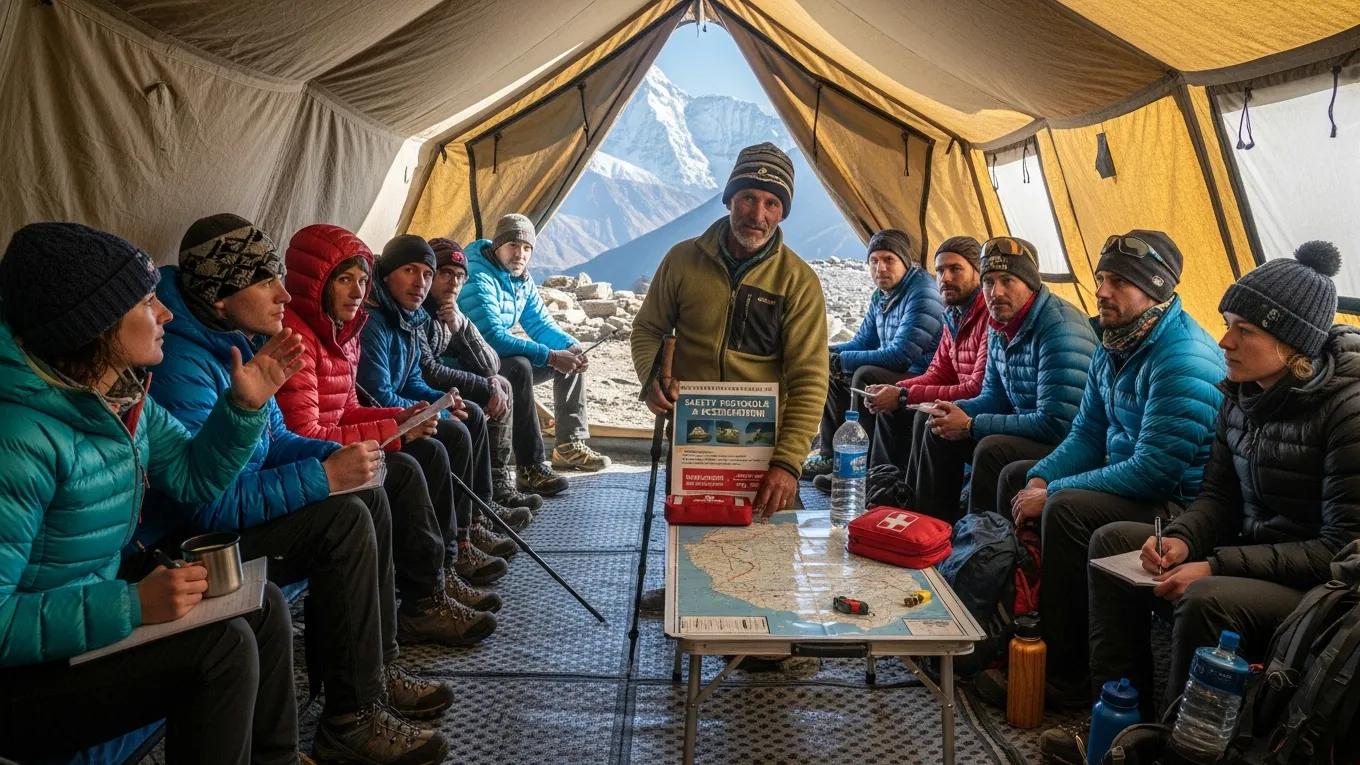
    • Safety Protocols : Ensure the operator follows established safety protocols, including emergency response plans and first aid training for guides.
    • Transparency in Pricing : Look for operators who provide clear pricing structures without hidden fees.

    Check references, ask for sample itineraries and emergency plans, and confirm guide qualifications before you commit to an operator.

    Proper management—training for guides, clear permit systems, and community engagement—supports both safety and the long-term sustainability of trekking operations.

    Suggested vetting checklist: request written emergency and evacuation procedures, verify guide licences or training certificates, ask about recent incidents and how they were handled, confirm insurance coverage for staff and clients, and request references from recent clients who completed similar routes. Red flags include evasive answers about past incidents, unclear insurance, and poor record-keeping.

    Himalayan Trekking Management: Training, Permits & Protection

    The study highlights the need for mountain awareness through adequate training and guiding. It recommends supporting local livelihoods so tourism augments existing options while minimising negative impacts. It also stresses effective protection through management regimes and gives worldwide examples of mountain tourism management, including permit and cost data for the ‘seven summits’.

    Mountaineering and trekking tourism management: A global perspective, C Cater, 2019

    What Services Do Himalaya Trekking Operators Typically Offer?

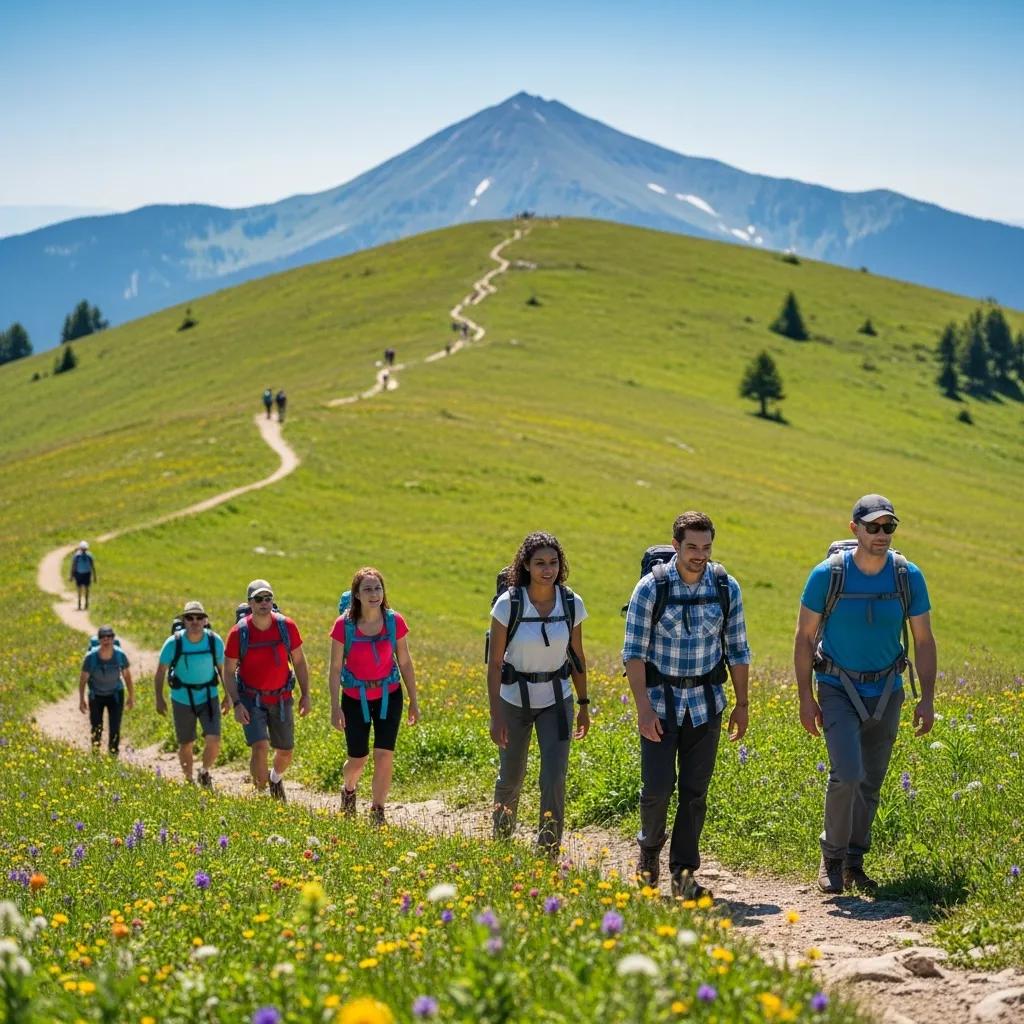
    Operators provide logistical support that reduces planning burden: guides, porters, accommodation booking, and emergency procedures tailored to the route.

    • Guide-to-Client Ratios : Operators typically maintain a low guide-to-client ratio to ensure personalized attention and safety.
    • Logistics Management : Comprehensive planning and management of transportation, accommodation, and meals throughout the trek.
    • Safety and Rescue Planning : Operators should have established protocols for emergency situations, including evacuation plans.

    Confirm what services are included, who is responsible for evacuation, and how additional costs are handled to avoid surprises in the field.

    Typical package variations: full-service packages cover transfers, permits, guides, porters, accommodation and meals; semi-supported options might provide guides and key logistics while clients carry their own daypack; independent bookings allow more flexibility but require you to manage permits and emergency contacts. Match the package to your experience and tolerance for logistical responsibility.

    How to Evaluate Operator Safety Records and Customer Reviews?

    Operator safety records and client feedback reveal operational standards. Use them to verify claims and spot patterns that matter for your safety.

    • Investigating Operator History : Research the operator’s track record regarding safety incidents and their response to emergencies.
    • Checking Certifications : Verify that the operator holds necessary certifications and licenses from relevant authorities.
    • Client Feedback Analysis : Read reviews from previous clients to gain insights into their experiences and the operator’s reliability.

    Cross-check reviews with accident reports, ask operators for safety references, and favour providers with transparent incident-reporting and training policies.

    How to read reviews: look for recurring comments—consistent praise for guides and logistics is positive; multiple mentions of delayed evacuations or poor communication are warning signs. Contact recent reviewers when possible to clarify context and outcomes. Balance one-off negative reviews against the overall trend.

    What Are the Latest Safety Protocols and Acclimatization Guidelines for Himalaya Treks?

    Trekkers in a safety briefing, emphasizing safety protocols and acclimatization in the Himalayas

    Recent best practice focuses on routine health checks, clear emergency response plans, and planned acclimatization days built into itineraries.

    • Health Checks and Guidelines : Regular health assessments should be conducted to monitor trekkers’ well-being, especially at high altitudes.
    • Emergency Preparedness : Operators should have clear emergency procedures in place, including access to medical facilities and evacuation plans.
    • Acclimatization Strategies : Gradual ascent and proper hydration are essential to prevent altitude sickness, with recommended acclimatization days factored into the itinerary.

    Build acclimatisation days into your plan, monitor symptoms daily, and confirm the operator’s evacuation and medical links before departure.

    Sample acclimatisation approach: limit daily sleeping elevation gains where possible, include a rest day after two to three days of ascent, and use active rest (short, moderate walks) on acclimatisation days rather than total bed rest. Explicitly plan for an earlier descent if symptoms appear rather than pushing to a fixed summit day. mountaineering

    How to Recognize and Prevent Altitude Sickness During Your Trek?

    Altitude sickness is common above 2,500–3,000 m. Early recognition and conservative decisions are the most effective prevention strategies.

    • Symptoms to Watch For : Common symptoms include headaches, nausea, dizziness, and fatigue.
    • Preventive Measures : Ascend gradually, stay hydrated, and consider medications to mitigate symptoms.
    • Recommended Acclimatization Strategies : Incorporate rest days into your itinerary to allow your body to adjust to higher altitudes.

    Stop ascent if symptoms appear, descend when symptoms worsen, and follow established guidelines for HAPE/HACE recognition and evacuation.

    Recent studies detail risk factors for altitude illness and reinforce that preventative planning—rate of ascent, acclimatisation, and prophylactic measures—reduces incidence.

    Practical measures in the field: keep a written symptom log for each member of the party, use simple checklists for daily health checks (sleep quality, headache presence, nausea, balance), and ensure a nominated leader has clear authority to change plans for medical reasons. If using medications suggested by a medical professional, combine these with conservative pacing rather than relying on drugs alone.

    High Altitude Sickness Risks for Himalayan Trekkers

    High-elevation travel carries measurable health risks, including acute mountain sickness and more severe conditions. This case-control study from Mustang district assessed factors such as ascent rate, medical history, and prophylactic medicine use using structured questionnaires and standard assessment tools. Data were analysed statistically to identify associated risk factors, with ethical approval and participant consent obtained.

    Risk factors associated with high altitude sickness among travelers: A case control study in Himalaya district of Nepal, L Wagle, 2025

    How to Use Peak Comparison Tables and Interactive Maps for Trek Planning?

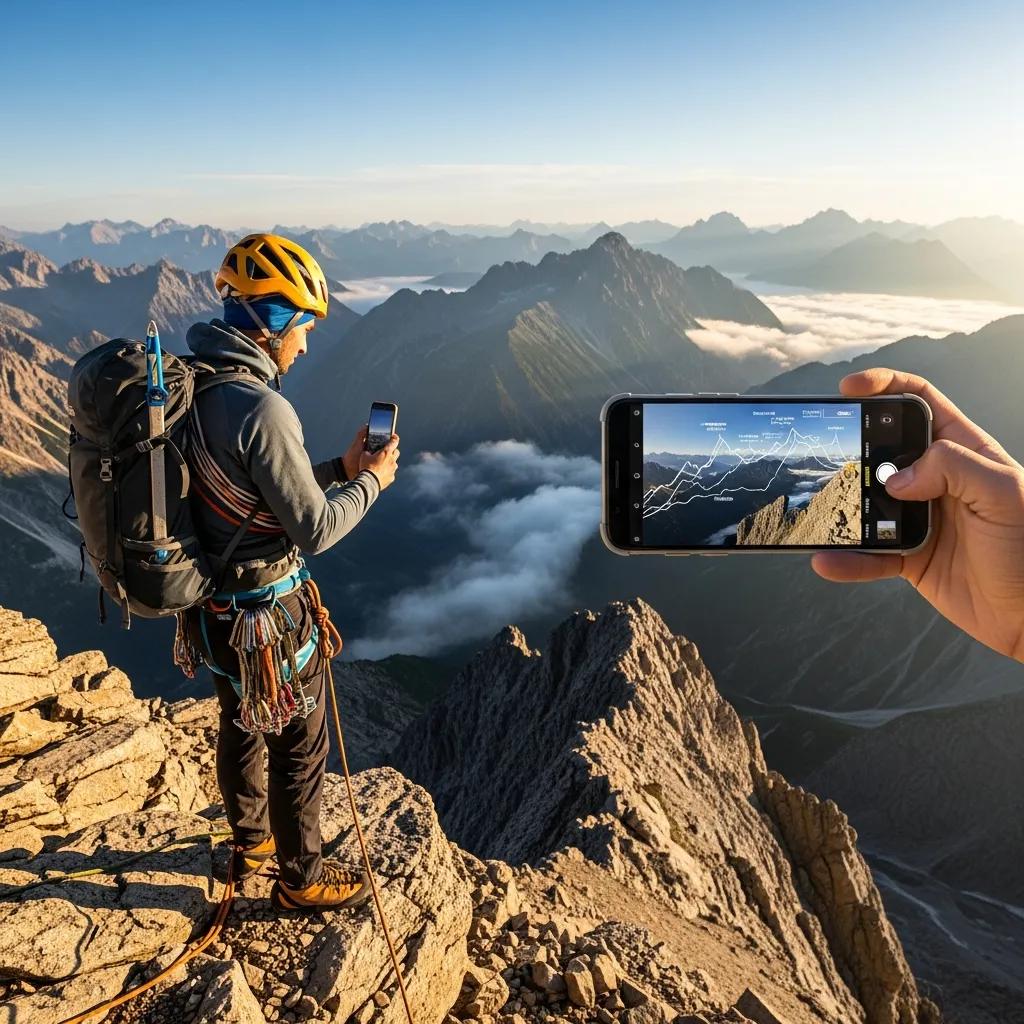
    Peak tables and interactive maps streamline route choices. Use them to compare objective data and to update plans when conditions change.

    • Benefits of Interactive Maps : These tools provide real-time updates on trail conditions, weather, and route options, helping you make informed decisions.
    • Using Peak Comparison Tables : Tables can help you compare different trekking peaks based on difficulty, duration, and required permits, streamlining your planning process.
    • Real-Time Updates for Planning : Access to current information allows you to adjust your plans based on changing conditions or personal preferences.

    Combine a static comparison table for initial planning with live-map checks in the lead-up to departure to confirm trail status, weather, and logistics.

    Practical tool guidance: use reputable mapping sources for elevation profiles and waypoints, cross-check weather forecasts for both the route and lower access points, and set up alerts for major changes. If using mobile mapping apps, download offline map tiles and waypoints so you can navigate without continuous connectivity.

    What Are Emerging Trends and Statistics in Himalaya Trekking for 2025-2026?

    Recent data show shifts in permit volumes, safety practices, and regulatory frameworks that affect route access and operator requirements.

    • Permit Numbers and Popularity Changes : Recent data indicates a steady increase in trekking permits issued, reflecting growing interest in Himalayan adventures.
    • New Safety Measures : Operators are adopting enhanced safety protocols, including improved communication systems and emergency response training.
    • Regulatory Impacts on Trekking : Changes in regulations are influencing trekking routes and permit requirements, necessitating awareness among trekkers.

    Track official permit statistics and operator advisories for your intended season so you can anticipate access changes and safety expectations.

    How to adapt: build contingency time into itineraries, retain flexible flight and accommodation bookings where possible, and choose operators with clear change and refund policies. If a preferred route becomes restricted, identify alternative valleys with similar characteristics and discuss transfer options with your operator early.

    Frequently Asked Questions

    What should I pack for a trek in the Himalayas?

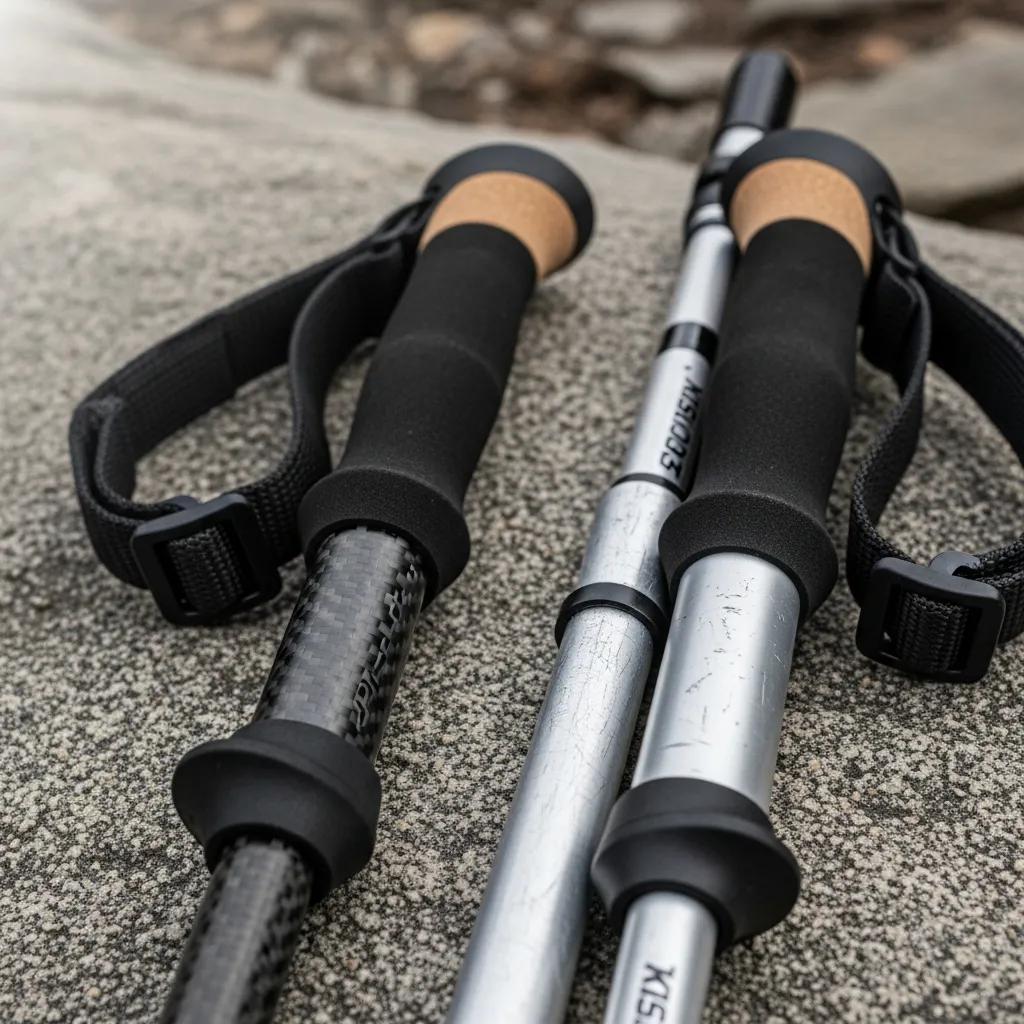
    Pack to cover variable weather and long days. Essentials: sturdy trekking boots, layered clothing, waterproof jacket, warm sleeping bag, first aid kit, hydration system, energy snacks, trekking poles, and a reliable backpack. Add sun protection (sunglasses, sunscreen) and a headlamp. Test pack weight on training hikes.

    Suggested organization: keep daily essentials in an accessible daypack (water, snacks, raincover, warm layer, basic first aid, map), store spare layers and heavier items in the main bag carried by a porter if available, and separate essential documents (permits, identification, emergency contacts) in a waterproof pouch worn on your person.

    How can I ensure my safety while trekking in the Himalayas?

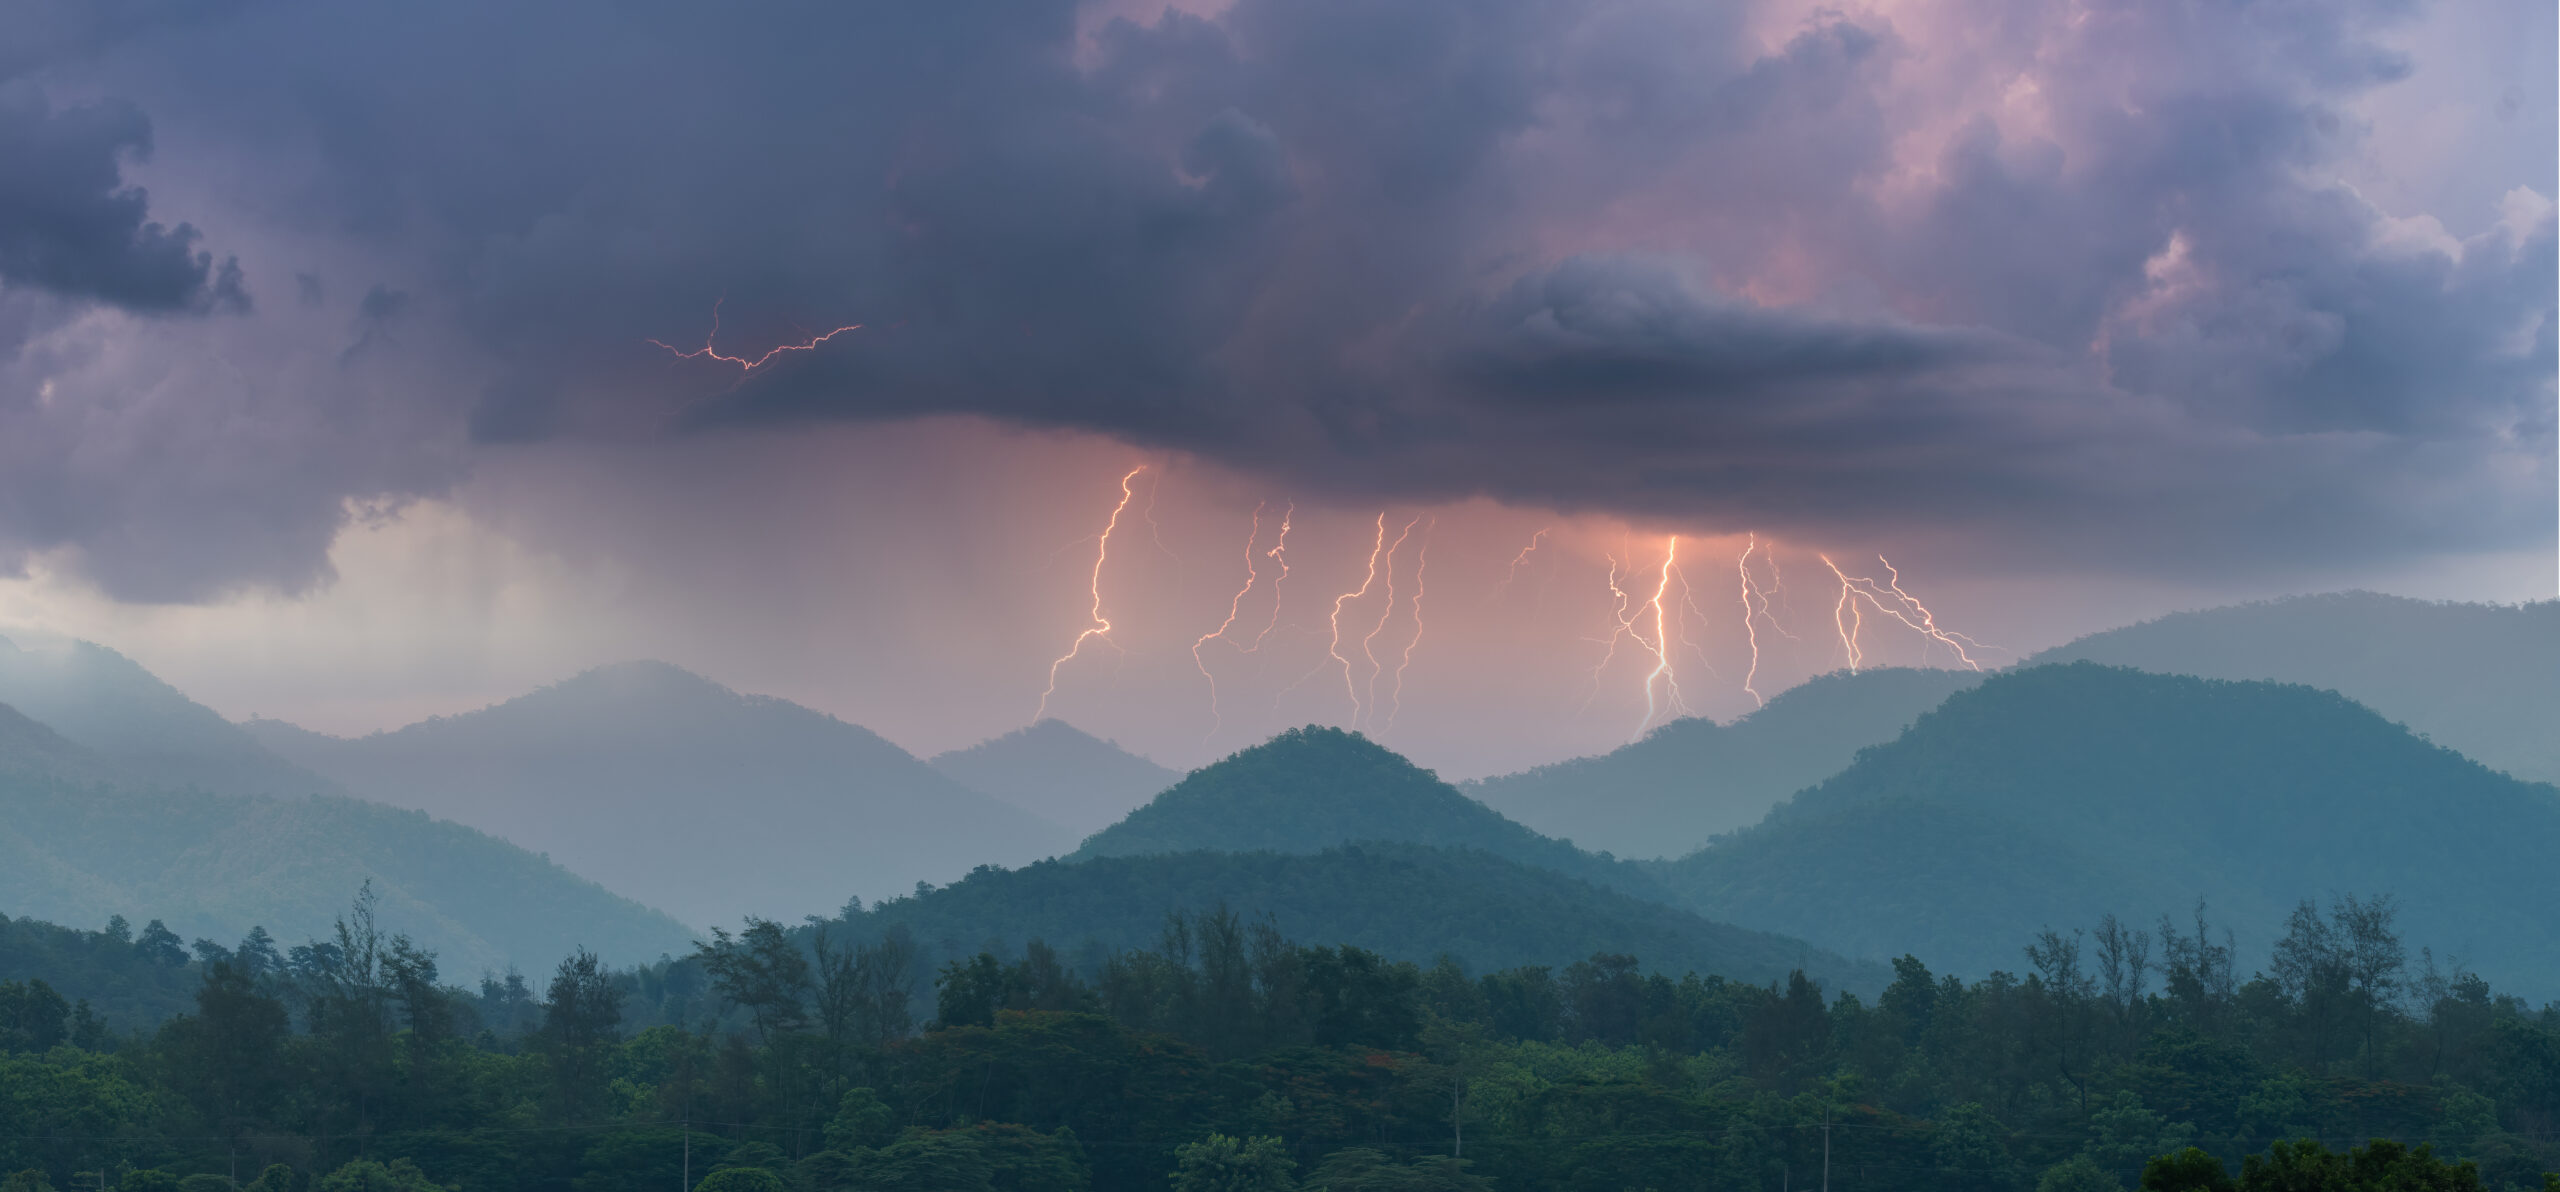
    Reduce risk by trekking with trained guides or a competent group, monitoring health for altitude symptoms, and following a clear emergency plan. Carry a stocked first aid kit, check weather forecasts, and keep communication lines open with your operator. Make conservative decisions when conditions or health are uncertain.

    Additional safety steps: brief the whole team on daily objectives and escape routes, agree on a turnaround time for summit days, maintain regular check-ins with your operator or base contact, and carry a compact set of emergency supplies (thermal blanket, whistle, repair tape). Know the location of the nearest medical facility and evacuation options for the route you choose.

    What is the best time of year to trek in the Himalayas?

    Optimal seasons are late spring (March–May) and autumn (September–November) when weather is generally stable and visibility is good. Spring offers blooms; autumn gives clearer mountain views. Winter treks are possible but require specialist gear and experience.

    Seasonal planning: consider monsoon patterns and local microclimates—valleys on different sides of major ranges may have substantially different conditions in the same month. For high passes, plan buffer days either side of expected crossing dates to allow for weather delays.

    How do I choose the right trekking peak for my skill level?

    Assess fitness, prior high-altitude experience, and tolerance for long days. Beginners often start with routes like Everest Base Camp; intermediate trekkers can choose the Annapurna Circuit; advanced trekkers should select more demanding routes such as the Langtang Valley Trek as described here. Confirm route details and acclimatisation needs with a guide.

    Ask yourself practical questions: Can you comfortably hike eight hours on uneven terrain? Have you slept above 3,000 m before? Are you comfortable navigating minor technical sections? Honest answers to these will help place you in the appropriate category.

    What are the environmental impacts of trekking in the Himalayas?

    Trekking can cause trail erosion, waste problems, and disturbance to wildlife. Reduce impact by following Leave No Trace principles: stay on designated trails, pack out rubbish, and use eco-conscious operators. Support local conservation and community-led initiatives when possible.

    When choosing services, prefer operators that pay fair wages to local staff, follow proper waste disposal procedures, and contribute to community projects. Small changes—using refillable water bladders, carrying reusable cutlery, and minimising single-use plastics—collectively reduce the burden on remote settlements.

    What are the common health risks associated with high-altitude trekking?

    Primary risks include altitude sickness (headache, nausea, fatigue), dehydration, hypothermia, and falls. Minimise risk by ascending slowly, staying hydrated, and carrying appropriate medications. Recognise signs of HAPE (pulmonary oedema) and HACE (cerebral oedema); these require immediate descent and medical care.

    Health preparation: consult a travel or high-altitude medical professional if you have chronic conditions, get vaccinations recommended for the region, and carry copies of prescriptions. Ensure any team members with known conditions have clear management plans that are shared with the group leader.

    Conclusion

    A safe Himalayan trek requires clear planning: choose routes that match your skills, prepare physically and with appropriate gear, secure permits, and work with reputable operators. Prioritise acclimatisation and emergency planning. Use the checklists and decision steps in this guide to make measurable choices that improve safety and trip success.

    Final checklist before departure: confirm permits and copies, verify guide and operator credentials, review the daily itinerary and evacuation plan with the whole group, test communication equipment, and ensure everyone understands basic altitude-sickness recognition and who to contact in an emergency. With planning and conservative decision-making you increase the likelihood of a safe and rewarding Himalayan experience.

  • The Greatest Alps Mountains Compared: Mont Blanc, Matterhorn, Eiger & More

    The Greatest Alps Mountains Compared: Mont Blanc, Matterhorn, Eiger & More

    The Greatest Alps Mountains Compared: Mont Blanc, Matterhorn, Eiger & More (2026) | Global Summit Guide
    Anchor Guide · Cluster 10 · Updated April 2026

    The Greatest Alps Mountains Compared: Mont Blanc, Matterhorn, Eiger & More

    The definitive regional comparison of the European Alps’ greatest peaks — Mont Blanc, Matterhorn, Eiger, Grandes Jorasses, Monte Rosa, Dom, and the Dolomite giants. Heights, grades, costs, seasons, and what makes each peak iconic for climbers choosing Alpine destinations.

    4,810 m
    Mont Blanc
    highest Alp
    82
    Official Alps
    4,000 m peaks
    6
    Major Alpine
    regions
    PD–ED2
    Grade range
    covered
    Global Summit Guide A guide in Cluster 10 · Regional Guides View master hub →

    The Alps are mountaineering’s cradle and capital. For over 150 years, the world’s climbing culture has centered on these peaks — the Matterhorn’s 1865 first ascent, the Eiger’s 1938 Nordwand breakthrough, the accessible 4,000 m concentration that made alpine climbing a measurable sport. This guide compares the greatest Alps mountains across France, Switzerland, Italy, and Austria, organized by major massif, with the context climbers need to choose where to focus — whether for a first 4,000 m summit or a lifetime project climbing all 82 official 4,000ers.

    How this guide was built

    The 82 official Alps 4,000-meter peaks follow the UIAA (International Climbing and Mountaineering Federation) standardized list. Route grades use the International French Adjectival System (IFAS). Summit statistics and historical data draw from the Swiss Alpine Club (SAC), Club Alpin Français (CAF), Alpenverein (Austrian Alpine Club), and the American Alpine Journal. Cost estimates reflect 2026 operator pricing from IFMGA-certified guide services. Reviewed by Chamonix and Zermatt-based IFMGA guides. Fact-check date: April 19, 2026.

    The Six Great Regions of the European Alps

    The Alps span roughly 1,200 kilometers across eight countries, but the great climbing peaks concentrate in six distinct regions. Each has its own character — not just different peaks, but different climbing culture, accommodation style, guide traditions, and seasonal patterns.

    France · Italy

    Mont Blanc Massif

    Mont Blanc · Grandes Jorasses · Aiguille du Dru · Aiguille du Midi

    The cradle of modern alpinism. Centered on Chamonix, France, spanning into Italy (Courmayeur) and briefly Switzerland. Home to Mont Blanc, the highest peak in the Alps, plus the Aiguilles de Chamonix needle group and the Grandes Jorasses north face.

    4,000ers28
    Base townChamonix
    CharacterIconic
    Switzerland · Italy

    Valais Alps (Pennine)

    Matterhorn · Monte Rosa · Dom · Weisshorn · Zinalrothorn

    The densest concentration of 4,000 m peaks in the world. Centered on Zermatt (Switzerland) and Saas-Fee, with Italian access via Breuil-Cervinia. Features the Matterhorn and Monte Rosa massif along with more 4,000ers than any other sub-range.

    4,000ers38
    Base townZermatt
    CharacterConcentrated
    Switzerland

    Bernese Oberland

    Eiger · Jungfrau · Mönch · Finsteraarhorn · Aletschhorn

    Home to the Eiger’s legendary north face and some of the Alps’ largest glaciers. Centered on Grindelwald and Interlaken (Switzerland). Dominated by the Eiger-Mönch-Jungfrau trilogy visible from the valley and the vast Aletsch glacier system.

    4,000ers9
    Base townGrindelwald
    CharacterDramatic
    Italy

    Dolomites

    Tre Cime di Lavaredo · Marmolada · Civetta · Sass Pordoi

    The Alps’ most distinctive rock climbing region. Vertical limestone towers and walls rather than glaciated peaks. Centered on Cortina d’Ampezzo and Val Gardena in Italy. Home to via ferratas, WWI climbing history, and the Tre Cime.

    4,000ers0
    Base townCortina
    CharacterVertical rock
    Austria

    Austrian Alps & Tyrol

    Grossglockner · Wildspitze · Grossvenediger · Hohe Tauern

    The Alps’ best value region with excellent infrastructure at lower cost than Swiss or French destinations. Centered on Innsbruck, Kals am Großglockner, and Lienz. Features Austria’s highest peak Grossglockner (3,798 m) and extensive 3,000 m peak climbing.

    4,000ers0
    Base townInnsbruck
    CharacterBest value
    Switzerland · Italy

    Bernina Range

    Piz Bernina · Piz Palü · Piz Roseg · Biancograt

    The eastern Alps’ 4,000 m outpost on the Swiss-Italian border. Centered on St. Moritz (Switzerland) and Pontresina. Features Piz Bernina, the easternmost 4,000 m peak in the Alps, and the famous Biancograt snow ridge.

    4,000ers1
    Base townPontresina
    CharacterClassic

    The Four Most Iconic Alps Peaks

    Among the Alps’ 82 official 4,000 m peaks and hundreds of significant lower mountains, four stand above the rest in cultural, historical, and climbing importance. These are the peaks that define what the Alps mean to mountaineering.

    01
    The highest · The most climbed

    Mont Blanc

    France / Italy · Mont Blanc Massif
    4,810 m15,781 ft

    Mont Blanc is the Alps’ highest peak and the most-climbed major mountain in the world — over 300,000 summits since Jacques Balmat and Michel-Gabriel Paccard’s 1786 first ascent. Approximately 20,000-25,000 summit attempts occur annually across its five major routes (Goûter, Cosmiques, Grands Mulets, Italian Normal, Brenva).

    The standard Goûter Route is graded PD+ with primarily glacier travel and snow terrain. Technical difficulty is moderate, but the altitude, weather exposure, and the Grand Couloir stone-fall hazard make Mont Blanc more serious than its grade suggests. About 100+ climbers die annually across all routes — driven by traffic volume rather than per-attempt rate (under 1%).

    Mont Blanc attracts both first-time 4,000 m climbers using guided programs and elite alpinists attempting harder routes like the Brenva Spur. The town of Chamonix hosts the Compagnie des Guides de Chamonix — the world’s oldest guide service — and functions as the global capital of mountaineering.

    Grade (standard)PD+
    First ascent1786
    Annual attempts~22,000
    Success rate60–70%
    02
    The most recognizable · The most photographed

    Matterhorn

    Switzerland / Italy · Valais Alps
    4,478 m14,691 ft

    The Matterhorn’s near-perfect pyramidal shape makes it the most recognizable mountain on Earth. Its 1865 first ascent by Edward Whymper ended in tragedy — four of the seven climbers died on descent — an event that marked the end of the “Golden Age of Alpinism” and made the mountain a global icon.

    The standard Hörnli Ridge is graded AD (Assez Difficile) with sustained class 3-4 scrambling, 5.5 climbing moves, and significant exposure. Approximately 500 climbers have died on the Matterhorn since 1865, primarily from falls and weather-caused accidents. Annual fatalities still run 10-15.

    Unlike Mont Blanc, the Matterhorn requires genuine rock climbing confidence and route-finding. The Italian Ridge (Lion Ridge) from Breuil-Cervinia offers an alternative with different character. Fixed ropes assist on key sections, but climbers unable to confidently scramble on moderate rock at altitude should not attempt the peak.

    Grade (Hörnli)AD / 5.5
    First ascent1865
    Total deaths500+
    Success rate50–60%
    03
    The most storied wall · The north face

    Eiger

    Switzerland · Bernese Oberland
    3,967 m13,020 ft

    The Eiger’s 1,800-meter north face — the Nordwand — is the most storied wall in alpine climbing. Though the peak is only 3,967 m (not a 4,000er), its sheer vertical relief and notoriously difficult face put it in a different league. The face killed eight climbers in the 1935-1937 attempts before Heinrich Harrer, Fritz Kasparek, Anderl Heckmair, and Ludwig Vörg made the 1938 first ascent.

    Named passages — the Difficult Crack, Hinterstoisser Traverse, Flat Iron, Ramp, Traverse of the Gods, White Spider, Exit Cracks — entered alpine vocabulary globally. Over 60 climbers have died on the face. The Heckmair Route grades D+ / 5.9 / WI 4 / 60° snow — sustained rather than extreme difficulty, with relentless objective hazard.

    The Eiger also offers easier alternatives: the Mittellegi Ridge (D grade) and South Ridge provide non-face climbing options. The 2008 film “North Face” dramatized the 1936 tragic attempt. See our 10 Hardest Mountains for expanded Eiger coverage.

    Grade (north face)ED2
    First ascent1858 (peak) / 1938 (NF)
    North face deaths60+
    Wall height1,800 m
    04
    The Walker Spur · Elite alpine climbing

    Grandes Jorasses

    France / Italy · Mont Blanc Massif
    4,208 m13,806 ft

    The Grandes Jorasses’ north face — particularly the Walker Spur — represents the apex of classical alpine climbing. Riccardo Cassin’s 1938 first ascent of the Walker Spur, coming the same year as the Eiger Nordwand, established the peak as a second major European test piece.

    The Walker Spur grades ED1 with 1,200 meters of sustained mixed climbing — rock to 5.10, ice to WI 4+, and sustained exposure. The Grandes Jorasses separates elite alpinists from accomplished climbers. Modern speed ascents exist, but most climbers take 2-3 days on the spur. Other north face routes (Croz Spur, Colton-MacIntyre) are harder still.

    The Grandes Jorasses’ standard route (south side) via the Rochefort Ridge is a moderate AD-rated alpine climb. The peak has six named summits along a 1-kilometer ridge. Approach from Courmayeur (Italy) or Chamonix (France) via the Leschaux Glacier. Walker and Whymper are the highest of the six summits.

    Grade (Walker Spur)ED1
    First ascent (Walker)1938 (Cassin)
    Wall height1,200 m
    Commitment2–3 days

    Full Alps Peak Comparison at a Glance

    The 12 most-attempted Alps peaks in one comparison table. Use for quick reference when choosing destinations or planning progressions.

    PeakHeightCountryStandard RouteGradeGuided Cost
    Mont Blanc4,810 mFrance / ItalyGoûter RoutePD+$1,800–$5,500
    Monte Rosa (Dufourspitze)4,634 mSwitzerland / ItalyNormal RoutePD+$1,500–$3,500
    Dom4,545 mSwitzerlandNormal RoutePD+$1,800–$3,800
    Liskamm4,527 mSwitzerland / ItalyWest RidgeAD$2,200–$4,500
    Weisshorn4,506 mSwitzerlandEast RidgeAD+$2,500–$4,500
    Matterhorn4,478 mSwitzerland / ItalyHörnli RidgeAD$1,800–$4,500
    Grandes Jorasses4,208 mFrance / ItalyWalker SpurED1$5,000–$10,000
    Jungfrau4,158 mSwitzerlandSE RidgeAD+$2,000–$4,000
    Breithorn4,164 mSwitzerland / ItalyWest RidgePD$700–$1,500
    Gran Paradiso4,061 mItalyNormal RoutePD$1,000–$2,200
    Eiger (peak)3,967 mSwitzerlandMittellegi RidgeD$3,500–$6,500
    Eiger (North Face)3,967 mSwitzerlandHeckmair RouteED2$5,000–$15,000

    For detailed specs across 20+ Alpine peaks see our Alpine Peak Quick Reference Cards.


    When to Climb in the Alps: Season Guide

    Alpine climbing season is driven by weather stability, hut operations, snow conditions, and glacier state. Mid-June through mid-September is the primary window, with important variations by specific region and peak.

    Early Summer

    Jun 15 – Jul 15
    Opening Season

    More snow, fewer crowds, less stable weather. Some routes still blocked. Hut openings begin mid-June.

    Peak Season

    Jul 15 – Aug 20
    Prime Window

    Most reliable weather, most accessible conditions. Huts crowded — book months ahead. Classic climbing window.

    Late Summer

    Aug 20 – Sep 15
    Good Season

    Cooler, quieter, more afternoon storm activity. Good climbing into early September. Huts close mid-month.

    Winter

    Dec – Apr
    Specialized

    Winter mountaineering and ski touring only. Huts closed, routes become ice/mixed climbs. Not for beginners.

    Regional season variations

    • Mont Blanc Massif: June 15 – September 15 primary. Peak July-August. Grand Couloir can be blocked by snow until late June some years.
    • Valais Alps (Zermatt): July 1 – September 15. Matterhorn particularly weather-sensitive — storms close the peak for days.
    • Bernese Oberland (Eiger area): July – mid-September. Eiger North Face requires specifically cold, stable conditions.
    • Dolomites: June – October (rock climbing season, not glaciated). Longest season of any Alps region.
    • Austrian Alps: June 15 – September 30. Lower altitudes extend season both directions.
    • Bernina: July – early September. Short prime window due to altitude.

    Alpine Climbing Culture: Why the Alps Matter

    Understanding the Alps requires understanding their cultural weight in climbing. The sport of mountaineering was essentially invented here.

    The Golden Age of Alpinism (1854–1865)

    Most major Alps peaks received their first ascents during this 11-year period. Alfred Wills climbed the Wetterhorn in 1854, typically marking the start. Edward Whymper’s Matterhorn ascent in 1865, with its tragic descent, marked the end. The climbers were primarily British alpinists with Swiss and French guides. The Alpine Club (London, 1857) was the world’s first climbing organization.

    The hut system and Alpine clubs

    The Alps’ extensive hut network — approximately 700+ staffed refuges across all countries — is unique in world mountaineering. The Swiss Alpine Club (SAC), Club Alpin Français (CAF), Alpenverein (Austrian Alpine Club), and Club Alpino Italiano (CAI) maintain these huts, which enable multi-day Alpine climbing without tents or heavy loads. Hut reciprocity agreements allow members of any national alpine club to use any hut at member rates. The hut system made alpine climbing accessible to ordinary people, not just wealthy expeditions.

    The IFMGA and Alpine guiding

    The Compagnie des Guides de Chamonix (1821) was the world’s first professional guide association. The modern IFMGA (International Federation of Mountain Guides Associations) originated in the Alps, and most IFMGA-certified guides worldwide trace their certification lineage to French, Swiss, Italian, or Austrian guide training programs. The Alps remain the training ground for professional mountain guides globally.

    Classic literature and film

    Alpine climbing has produced more literature than any other mountaineering region. Key works: Scrambles Amongst the Alps (Whymper, 1871), The White Spider (Harrer, 1959), The Shining Mountain (Tasker/Boardman, 1978). Films: The Eiger Sanction (1975), Touching the Void (2003, set in the Andes but alpine-style), North Face (2008), Free Solo (2018, not Alps but alpine style). The Alps gave birth to the climbing-as-literature tradition.


    Greatest Alps Mountains FAQ: Your Common Questions Answered

    What is the highest mountain in the Alps?

    Mont Blanc (4,810 m / 15,781 ft) is the highest mountain in the Alps and the highest peak in Western Europe. Located on the border between France and Italy with Switzerland nearby, Mont Blanc sees approximately 20,000-25,000 summit attempts per year across all routes. The second-highest Alps peak is Monte Rosa (Dufourspitze, 4,634 m) on the Swiss-Italian border, followed by Dom (4,545 m) and Liskamm (4,527 m). There are approximately 82 officially recognized 4,000-meter peaks in the Alps using the UIAA’s standardized list, concentrated primarily in the Mont Blanc Massif, the Valais Alps (Swiss), and the Bernese Oberland. The Matterhorn (4,478 m) is famous but actually ranks 12th by elevation. Mont Blanc has been climbed by over 300,000 people historically since Jacques Balmat and Michel-Gabriel Paccard’s 1786 first ascent, making it the most-climbed major Alpine peak.

    Which is harder: Mont Blanc or the Matterhorn?

    The Matterhorn is technically harder than Mont Blanc, despite being 332 meters lower. Mont Blanc’s standard Goûter Route is graded PD+ (Peu Difficile) — moderate alpine climbing with primarily glacier and snow terrain, plus the Grand Couloir stone-fall hazard. The Matterhorn’s standard Hörnli Ridge is graded AD (Assez Difficile) — sustained class 3-4 rock scrambling with 5.5 climbing moves, significant exposure, and no glacier section. The Matterhorn demands confident rock climbing and route-finding skills Mont Blanc doesn’t require. Summit success rates reflect this: Mont Blanc sees 60-70% success with guided climbers; Matterhorn sees 50-60%. Mont Blanc’s altitude (4,810 m) is the primary challenge; Matterhorn’s technical rock is its defining difficulty. For first-time 4,000 m climbers, Mont Blanc is typically the progression choice; experienced climbers often find Matterhorn more engaging.

    What are the four classic Alps north faces?

    The four classic Alps north faces — the “great north faces” of European alpinism — are: (1) Eiger North Face (1,800 m wall in Switzerland, IFAS ED2, first climbed 1938 by Heckmair team). (2) Matterhorn North Face (1,200 m wall, IFAS TD, first climbed 1931 by the Schmid brothers). (3) Grandes Jorasses North Face (Walker Spur, 1,200 m, IFAS ED1, first climbed 1938 by Cassin). (4) Mont Blanc North Face variants including the Brenva Face (varied grades up to ED). These four faces represent the apex of classical alpine climbing and have defined European alpinism since the 1930s. Climbing all four (“The Four Great Alps North Faces”) is a serious alpinist’s career objective requiring 10+ years of dedicated technical climbing. Beyond the classical four, modern routes like the north face of Les Droites, Piz Badile, and Dru have joined the great-face pantheon.

    Which Alps country is best for mountaineering?

    Switzerland offers the most concentrated mountaineering infrastructure with the largest number of 4,000-meter peaks (48 of the 82 in the Alps), excellent Swiss Alpine Club hut network, comprehensive guide services, and extensive mechanical lift access (trains, cable cars). The Valais Alps around Zermatt and Saas-Fee concentrate more 4,000ers than anywhere else in the world. France’s Chamonix region offers the most iconic access with Mont Blanc, Aiguille du Midi cable car, and dense guide culture — the Compagnie des Guides de Chamonix is the world’s oldest guide service. Italy’s Aosta Valley offers quieter climbing with access to Mont Blanc south side, Gran Paradiso (4,061 m), and Monte Rosa. Austria’s Tyrol concentrates 3,000-meter peaks with excellent value and fewer crowds. For most first-time Alpine climbers, the Chamonix-Zermatt axis offers the best balance of iconic peaks, infrastructure, and guide quality.

    When is the best time to climb in the Alps?

    The best time to climb in the Alps is mid-June through mid-September, with peak conditions in July and early August. Monthly breakdown: (1) June: Earlier season, more snow on routes, fewer crowds but less stable weather. Some routes inaccessible due to snow cover. (2) July: Peak season, most reliable weather windows, crowded huts require advance booking. (3) August: Still peak season but increasing afternoon thunderstorm activity by mid-month. Paris-August holiday concentrates French climbers. (4) September: Late season, cooler, quieter, less stable weather, some huts close mid-month. (5) Winter (Dec-Mar): Winter mountaineering and ski touring are specialized pursuits — most classical routes become ice climbs or require winter-specific skills. Bernese Oberland peaks like Eiger are particularly season-sensitive due to the stone-fall and weather patterns. Always check hut opening dates before planning — most open late June and close mid-September.

    How expensive is climbing in the Alps?

    Alpine climbing costs depend heavily on guided vs independent approach. Guided climbing ranges: (1) Mont Blanc guided 2-3 day program: $1,800-$5,500 with 1:1 or 1:2 guide ratios. (2) Matterhorn guided: $1,800-$4,500 (highly weather-dependent). (3) Multi-peak Alpine weeks (4-6 peaks): $2,500-$6,000. (4) IFMGA certified guide day rate: €450-€650 per day for 1:1. Independent climbing saves substantially but requires competent partners: (1) Hut fees €70-€90 per night half-board. (2) Mechanical lift passes €30-€80 per ride. (3) Total self-guided Mont Blanc: €600-€1,500 including transport, huts, permits. Gear rental in Chamonix, Zermatt, or Grindelwald: €150-€400 per week for complete alpine kit. International airfare to Geneva or Zurich adds $800-$1,500 from North America. Plan a 7-10 day Alpine trip at $3,000-$8,000 total including flights for a guided single-peak expedition, or $1,500-$3,500 independent.

    What are the most beautiful Alps peaks?

    The most beautiful Alps peaks — as judged by climbers, photographers, and visitors — include: (1) The Matterhorn (4,478 m) for its near-perfect pyramidal shape visible from Zermatt and across the Valais. (2) Mont Blanc (4,810 m) for its dominant presence in the Chamonix Valley and glacier-draped flanks. (3) Eiger (3,967 m) for its dramatic 1,800 m north wall rising directly from the Grindelwald valley. (4) Les Drus (3,754 m) for its sheer granite needles above the Chamonix Valley. (5) Tre Cime di Lavaredo (2,999 m) in the Dolomites for its three iconic rock towers. (6) Marmolada (3,343 m) for its dramatic south face and glacier. (7) Piz Badile (3,308 m) for its granite walls above the Val Bregaglia. (8) Cervino (Italian Matterhorn) for its Italian-side character. Beauty is subjective, but these peaks consistently appear in climbing literature, photography collections, and regional tourism campaigns as the Alps’ most photogenic mountains.

    Which Alps peaks are accessible without technical climbing skills?

    Several Alps peaks are accessible to fit hikers without technical climbing skills, though most 4,000-meter peaks require at least basic mountaineering. Accessible to trained hikers with proper gear: (1) Breithorn (4,164 m) via the Klein Matterhorn cable car — often called the easiest 4,000er in the Alps, PD grade, no technical rock. (2) Gran Paradiso (4,061 m) Italy — PD, glacier walk and easy ridge. (3) Allalinhorn (4,027 m) via Mittelallalin cable car — PD, gentle glacier. (4) Weissmies (4,017 m) normal route — PD. (5) Mönch (4,107 m) via Jungfraujoch — PD+. Not requiring mountaineering but still serious: (1) Zugspitze (2,962 m) Germany — cable car to summit, plus challenging hiking routes. (2) Hohtürli Pass (2,778 m) multi-day trek. (3) Tour du Mont Blanc (180 km trek). Always use a certified guide for first 4,000 m experience — “easy” alpine peaks still involve glacier crevasse hazards, altitude, and weather that can defeat hikers without proper support.


    Authoritative Sources & Further Reading

    Content reflects primary sources from European alpine clubs and verified 2026 operator pricing:

    • UIAA (International Climbing and Mountaineering Federation) — uiaa.org — 4,000 m peaks list and grading standards
    • Swiss Alpine Club (SAC) — sac-cas.ch — Swiss hut network and climbing records
    • Club Alpin Français (CAF) — ffcam.fr — French Alps documentation
    • Österreichischer Alpenverein (ÖAV) — alpenverein.at — Austrian alpine club
    • Club Alpino Italiano (CAI) — cai.it — Italian alpine club
    • Compagnie des Guides de Chamonix — chamonix-guides.com — World’s oldest guide service
    • Zermatt Alpin Center — alpincenter-zermatt.ch — Matterhorn and Valais guides
    • Office de Haute-Montagne (OHM) Chamonix — ohm-chamonix.com — Official mountain conditions
    • IFMGA (UIAGM) — ifmga.info — International mountain guide certification
    • Reference texts: Alpine 4000m Peaks by the Classic Routes (Collomb), Scrambles Amongst the Alps (Whymper), The White Spider (Harrer), Alpine Climbing: Techniques to Take You Higher (Houston & Cosley), Freedom of the Hills (The Mountaineers)
    Published: February 15, 2026
    Last updated: April 19, 2026
    Next review: July 2026
    Part of the Global Summit Guide

    Back to the Master Hub

    This guide is one of 71 across 12 thematic clusters on Global Summit Guide. The master hub organizes every guide by experience tier, specific peak, skill area, and region.

    View the Hub →

    The 25 Highest Mountains in the Alps: Complete Ranking

    The Alps contain approximately 82 official 4,000m peaks per the UIAA (Union Internationale des Associations d’Alpinisme) list. All major Alpine peaks are concentrated in the western Alps — the Mont Blanc Massif and Pennine Alps host the majority, with the Bernese Alps containing the easternmost 4,000m peaks. Below is the complete ranked list of the 25 highest mountains in the Alps.

    RankMountainElevationCountryRange
    1Mont Blanc4,808 m / 15,774 ftFrance / ItalyMont Blanc Massif
    2Dufourspitze (Monte Rosa)4,634 m / 15,203 ftSwitzerland / ItalyPennine Alps
    3Nordend (Monte Rosa)4,609 m / 15,121 ftSwitzerlandPennine Alps
    4Zumsteinspitze (Monte Rosa)4,563 m / 14,970 ftSwitzerland / ItalyPennine Alps
    5Signalkuppe / Punta Gnifetti4,554 m / 14,941 ftSwitzerland / ItalyPennine Alps
    6Dom4,545 m / 14,911 ftSwitzerlandPennine Alps (highest entirely in Switzerland)
    7Liskamm East4,532 m / 14,852 ftSwitzerland / ItalyPennine Alps
    8Weisshorn4,506 m / 14,783 ftSwitzerlandPennine Alps
    9Täschhorn4,491 m / 14,734 ftSwitzerlandPennine Alps
    10Matterhorn4,478 m / 14,692 ftSwitzerland / ItalyPennine Alps
    11Mont Maudit4,465 m / 14,649 ftFrance / ItalyMont Blanc Massif
    12Dent Blanche4,357 m / 14,295 ftSwitzerlandPennine Alps
    13Nadelhorn4,327 m / 14,196 ftSwitzerlandPennine Alps
    14Grand Combin4,314 m / 14,154 ftSwitzerlandPennine Alps (SW)
    15Lenzspitze4,294 m / 14,088 ftSwitzerlandPennine Alps
    16Finsteraarhorn4,274 m / 14,022 ftSwitzerlandBernese Alps (highest)
    17Mont Blanc du Tacul4,248 m / 13,937 ftFranceMont Blanc Massif
    18Stecknadelhorn4,241 m / 13,914 ftSwitzerlandPennine Alps
    19Castor4,228 m / 13,871 ftSwitzerland / ItalyPennine Alps
    20Hohberghorn4,219 m / 13,842 ftSwitzerlandPennine Alps
    21Grandes Jorasses (Pointe Walker)4,208 m / 13,806 ftFrance / ItalyMont Blanc Massif
    22Aletschhorn4,194 m / 13,760 ftSwitzerlandBernese Alps
    23Jungfrau4,158 m / 13,642 ftSwitzerlandBernese Alps
    24Bishorn4,153 m / 13,625 ftSwitzerlandPennine Alps
    25Mönch4,107 m / 13,474 ftSwitzerlandBernese Alps

    Why all the highest Alpine peaks are in Switzerland and France. The 25 highest peaks in the Alps are concentrated in three subranges: the Mont Blanc Massif (on the France-Italy border), the Pennine Alps (Switzerland-Italy border, including the Monte Rosa massif), and the Bernese Alps (Switzerland). All three are in the western Alps — there are zero 4,000m peaks east of the Bernese Oberland, meaning Austria, Germany, eastern Switzerland, and Slovenia have no 4,000m peaks. The geological reason: the western Alps experienced more intense uplift during the Alpine orogeny, producing higher peaks; the eastern Alps were less elevated and have been more eroded. The cultural consequence is that serious 4,000m mountaineering is concentrated in Chamonix (France), Zermatt (Switzerland), and Grindelwald (Switzerland) — making these three towns the spiritual centers of Alpine climbing despite Italy and Austria having larger total Alpine territory.

    The Alps’ Iconic Six: Comparing the Most Famous Peaks

    Six Alpine peaks dominate international recognition: Mont Blanc, the Matterhorn, the Eiger, Jungfrau, the Grossglockner, and the Zugspitze. Each represents a different facet of Alpine mountaineering and tourism. Below is the comprehensive comparison.

    FeatureMont BlancMatterhornEigerJungfrauGrossglocknerZugspitze
    Elevation4,808 m4,478 m3,967 m4,158 m3,798 m2,962 m
    CountryFR/ITCH/ITCHCHATDE/AT
    First Ascent178618651858 (Mittellegi)181118001820
    Annual Climbers~20,000~3,500~3,000 (Mittellegi)~500-1,000 (summit)~5,000~2.5M (cable car)
    Standard Route GradePD (Goûter)AD/D (Hörnli)AD (Mittellegi)D (south ridge)AD (Stüdl)F (cable car)
    Key FeatureHighest peakIconic shapeNordwand (1,800m)Bernese trioAustria’s highestCable car icon
    Death Toll100+/year~500 total60+ (North Face)~25 total~5-10/yearVery low
    Standard Duration2-3 days2 days2 days (Mittellegi)2-3 days2 daysDay trip
    Approx. Cost$1,500-$3,000$1,500-$3,500$1,500-$3,000$2,000-$4,000$1,000-$2,000$80-$150

    Where Climbers Should Start: Alpine Peak Progression

    Alpine mountaineering has a natural progression from accessible “first 4,000m” peaks through technical objectives. Most climbers follow this approximate sequence to build experience.

    StageRecommended PeakElevationSkills Developed
    1. Cable car accessAiguille du Midi (Chamonix)3,842 m (cable car)Altitude experience; cable car logistics
    2. First 4,000m (easy)Breithorn (West Summit)4,164 mBasic glacier travel + crampons
    3. First substantive 4,000mAllalinhorn (Saas-Fee)4,027 mRoped glacier; basic snow climbing
    4. The “Lady’s Weisshorn”Bishorn4,153 mLonger glacier; substantial fitness test
    5. Iconic standard routeMont Blanc (Goûter Route)4,808 mExtended altitude; weather window planning
    6. Technical introductionCastor + Pollux4,228m / 4,092mRope team; basic scrambling
    7. The iconic objectiveMatterhorn (Hörnli Ridge)4,478 mClass 4 scrambling; fixed ropes; exposure
    8. Advanced rockAiguille Verte4,122 mSubstantial technical rock
    9. The Eiger introductionEiger Mittellegi Ridge3,967 mSustained alpine ridge; multi-day exposure
    10. Elite objectivesEiger Nordwand / Walker Spur / Matterhorn NorthVariousThree Great North Faces — elite alpinism

    The Alps as the birthplace of modern mountaineering. Modern mountaineering as a sport was invented in the Alps. The first major Alpine ascent — Mont Blanc on 8 August 1786 by Chamonix doctor Michel-Gabriel Paccard and crystal hunter Jacques Balmat — is widely considered the founding event of mountaineering as a recreational pursuit rather than a scientific, commercial, or military activity. Three subsequent developments cemented the Alpine tradition: (1) The “Golden Age of Alpinism” (1854-1865) when most major Alpine peaks were first climbed, primarily by British clients with Swiss/French guides; (2) Edward Whymper’s 1865 Matterhorn first ascent (with 4 deaths on descent) — the event that ended the Golden Age but established mountaineering in popular consciousness; (3) The founding of the Alpine Club (London, 1857), the Swiss Alpine Club (1863), and subsequent national alpine clubs that institutionalized mountaineering. The Compagnie des Guides de Chamonix, founded 1821, remains the world’s oldest mountain guide service. The substantial hut system (1,500+ staffed huts across the Alps maintained by SAC, CAS, DAV, OeAV, CAI) is unmatched globally in density. Modern IFMGA mountain guide certification — the international standard — originated in the Alps. For climbers, the Alps remain not just a great range but the spiritual and practical center of mountaineering.

    The Alps by Country: National Highest Points

    CountryHighest Alpine PeakElevationNotable
    FranceMont Blanc (with Italy)4,808 mHighest in Western Europe
    ItalyMont Blanc (with France)4,808 mHighest in Italy entirely is Gran Paradiso (4,061m)
    SwitzerlandDufourspitze (with Italy)4,634 mHighest entirely in Switzerland: Dom (4,545m)
    AustriaGrossglockner3,798 mAustria’s only 3,700m+ peak
    GermanyZugspitze2,962 mBorder with Austria; cable car access
    SloveniaMount Triglav2,864 mNational symbol; on Slovenian flag
    LiechtensteinVorder Grauspitz2,599 mSmallest Alpine country by area
    MonacoMont Agel1,148 mTechnically not in the Alps proper; near Alps foothills

    The Alps’ Most Iconic Faces and Routes

    RouteMountainGradeSignificance
    Eiger Nordwand (1938)EigerED21,800m; “Mordwand”; most legendary face in Alps
    Matterhorn North Face (1931)MatterhornTD+/ED1First of Three Great North Faces climbed
    Grandes Jorasses Walker Spur (1938)Grandes JorassesTD+/ED1Third of Three Great North Faces
    Mont Blanc Goûter RouteMont BlancPDStandard Mont Blanc route; most-climbed 4,000er
    Matterhorn Hörnli RidgeMatterhornAD/DWhymper’s 1865 route; standard Matterhorn climb
    Three Monts RouteMont BlancADAlternative Mont Blanc via Mont Blanc du Tacul + Mont Maudit
    Eiger Mittellegi RidgeEigerAD+Standard non-Nordwand Eiger route
    Innominata RidgeMont BlancD+/TDClassic Mont Blanc technical ridge
    Dufourspitze East RidgeMonte RosaADStandard Dufourspitze route
    Weisshorn East Ridge (Schalligrat)WeisshornDClassic Pennine Alps ridge

    Frequently Asked Questions

    What are the highest mountains in the Alps?

    The 10 highest mountains in the Alps: (1) Mont Blanc 4,808m (France/Italy), (2) Dufourspitze 4,634m (Switzerland/Italy, Monte Rosa massif), (3) Nordend 4,609m (Monte Rosa), (4) Zumsteinspitze 4,563m (Monte Rosa), (5) Signalkuppe 4,554m (Monte Rosa), (6) Dom 4,545m (Switzerland — highest entirely in Switzerland), (7) Liskamm East 4,532m, (8) Weisshorn 4,506m, (9) Täschhorn 4,491m, (10) Matterhorn 4,478m. All 10 highest peaks are concentrated in the western Alps — the Mont Blanc Massif and Pennine Alps. The Alps contain approximately 82 official 4,000m peaks per the UIAA list.

    What is the most famous mountain in the Alps?

    The Matterhorn (4,478m, Switzerland/Italy) is widely considered the most famous Alpine mountain and one of the most recognizable mountains in the world. The pyramid-shaped silhouette has become a universal visual symbol for “mountain” — featured on Toblerone chocolate packaging, the Paramount Pictures logo, and countless other commercial uses. First climbed by Edward Whymper’s expedition on 14 July 1865, the Matterhorn became the focus of mountaineering’s transition from Victorian pursuit to modern adventure sport. Mont Blanc (4,808m) is the highest and arguably equally famous historically — the founding mountain of modern mountaineering (1786 first ascent). The Eiger is famous specifically for its 1,800m North Face.

    Which Alps mountain is the hardest to climb?

    The hardest standard-route Alpine 4,000m peaks: (1) The Eiger Nordwand — 1,800m face, ED2 grade, 60+ deaths; (2) Grandes Jorasses Walker Spur — 1,200m face, TD+/ED1; (3) Matterhorn North Face — 1,200m face. Among standard routes: the Matterhorn Hörnli Ridge is class 3/4 with substantial exposure; Mont Blanc’s Goûter Route is non-technical but has substantial objective hazard in the Goûter Couloir; the Eiger’s Mittellegi Ridge is class 3 scrambling. Beyond the 4,000ers, Mount Schreckhorn (4,078m) and Aiguille Verte (4,122m) are demanding technical 4,000m objectives. The Dolomites contain some of the world’s hardest technical climbing but represent different objectives than alpine mountaineering.

    How many 4,000m peaks are in the Alps?

    The Alps contain approximately 82 official 4,000m peaks per the UIAA list. The exact count varies (sources cite 82, 128, or other numbers depending on whether minor sub-summits are included), but 82 is the most widely accepted standard. The 4,000ers are concentrated in three subranges: Mont Blanc Massif (France/Italy), Pennine Alps (Switzerland/Italy), and Bernese Alps (Switzerland). There are zero 4,000m peaks east of the Bernese Oberland — Austria, Germany, eastern Switzerland, and Slovenia have no 4,000m peaks. Approximately 200-300 climbers have completed all 82 4,000ers as of 2024 — a relatively small number reflecting the substantial technical demands of the harder peaks.

    What is the easiest 4,000m peak in the Alps?

    The Breithorn (4,164m, Switzerland/Italy) is generally considered the easiest 4,000m Alpine peak and the standard “first 4,000er” for new climbers. The Klein Matterhorn cable car from Zermatt brings climbers to 3,883m, leaving only ~280m of vertical gain. The standard route involves basic glacier travel, crampon technique, and altitude management. Time from cable car to summit: 2-3 hours. Other accessible 4,000m peaks: Allalinhorn (4,027m, Saas-Fee cable car approach), Bishorn (4,153m, “the lady’s Weisshorn”), Pollux (4,092m), Castor (4,228m). Even “easy” Alpine 4,000ers require glacier travel competence, altitude acclimatization, and weather window selection — not casual hikes.

    When is the best time to climb Alps mountains?

    The standard Alpine climbing season is July through August — warmest temperatures (summit 0 to -10°C), driest conditions, longest weather windows. June and September are shoulder months with fewer crowds; substantial snow may remain through June and return in September. Late August-September has most exposed glaciers with substantial crevasse hazard on standard routes. April-May suits ski mountaineering (Haute Route). December-March is serious winter alpinism on the Great North Faces. Cable car tourism operates year-round. For first-time visitors, weekday mid-July through mid-August offers the best combination of weather, conditions, and manageable crowds.

    Continue Reading — Alpine Mountain Guides

  • Peak Profile Template: Standardized Guide Format for Climbs

    Peak Profile Template: Standardized Guide Format for Climbs

    Peak Profile Template: Standardized Guide Format for Climbs

    A peak profile template gives climbers a consistent way to record a climb and plan future trips. This guide explains why standard formats matter for safety, clarity, and expedition planning. It covers what a peak profile is, the main benefits, required data fields, and practical steps to build route templates. You’ll also find guidance on adding safety details and gear recommendations so profiles are useful in the field. The guidance that follows is written for climbers, trip leaders, guidebook authors and club administrators who need repeatable, printable and digital forms for pre-trip planning, briefings and trip debriefs.

    What is a Peak Profile Template and Why is it Essential for Mountain Summit Guides?

    A peak profile template is a standard form for recording a mountain climb’s key facts: route options, terrain, and safety measures. That structure ensures climbers can access the information they need to make decisions, assess risk, and prepare appropriately. Clear, concise profiles support both new and experienced climbers in choosing routes and planning logistics. In practice they are used as a pre-trip briefing document, a checklist for gear and communications, and a post-trip record that preserves lessons learned for future teams.

    Defining Peak Profile Templates in Mountaineering Documentation

    Peak profile templates collect the essential data points for a climb and present them consistently. Typical sections list the mountain’s name, elevation, location, and detailed route descriptions. Standardizing these fields makes it easy to compare peaks and share reliable information within the climbing community. A good template will also include metadata such as author, last updated date, version number and a short note field for contributors to record changes or conditions encountered.

    Key Benefits of Using Standardized Guide Formats for Climbs

    Standardized guide formats reduce uncertainty and speed decision-making before and during a climb. They improve safety, streamline planning, and make information easier to use in the field. The benefits shown below reflect those practical improvements.

    • Consistency and Clarity: Standardized formats ensure that all necessary information is presented uniformly, making it easier for climbers to understand and utilize the data.
    • Comprehensive Trip Planning: By providing a complete overview of a climb, these templates facilitate better preparation and risk assessment.
    • Safety and Gear Management: Standardized profiles help climbers identify essential gear and safety protocols, reducing the likelihood of accidents during climbs.

    For teams and individuals implementing templates, Information Hub offers practical resources and step‑by‑step guidance to build profiles that meet climbers’ needs. In real-world use, a template speeds briefings and reduces last-minute omissions: for example, a concise page listing approach times, permit needs and critical contacts makes it faster to check readiness before leaving base camp.

    Which Essential Data Fields Should a Standardized Peak Profile Include?

    Well-organized peak profile template with climbing gear in an outdoor setting

    A complete peak profile lists the core data points you need to plan and execute a climb. Typical entries include the mountain name, elevation, location, route descriptions, and safety notes. Beyond these basics, useful templates also capture logistics and legal requirements so teams can prepare efficiently.

    • Mountain Name: The official name of the mountain being climbed.
    • Elevation: The height of the mountain, which is crucial for assessing difficulty.
    • Location: Geographic details that help climbers find the mountain.

    These foundational attributes form the basis of any peak profile template, providing essential context for climbers.

    Mountain Name, Elevation, and Location: Foundational Attributes

    The mountain name identifies the objective; elevation indicates likely physical demand and altitude effects. Location details — coordinates, access points and parking or approach routes — are necessary for navigation and logistics. Together they give a clear starting point for planning. Additional practical fields to include are nearest town or access airstrip, typical approach time, difficulty grading system used, and permit or fee information when relevant.

    Climbing Routes, Difficulty Levels, and Safety Notes: Core Climb Information

    Profiles should list available routes, their difficulty ratings, and concise safety notes. Include objective hazards, typical weather patterns, altitude sickness risks, and recommended emergency procedures so climbers can match routes to their skills and prepare mitigation steps. Good route descriptions are structured: an approach summary, key waypoints and time estimates, technical pitches or obstacles, recommended gear for each section, and descent options.

    Proper preparedness, including matching skillsets to route difficulty, is key to reducing the risks of high‑altitude mountaineering.

    Mountaineering Preparedness & Risk Guidance

    At high altitude, lack of skills, experience and preparedness increases the risk of accidents, injuries and death. The study recommended collecting and adapting readiness strategies used by expert high‑altitude climbers into a guidance document for adventure tourists.

    Preparedness and Peak Performance for Mountaineering Tourists, 2023

    How to Create a Comprehensive Climbing Route Template for Accurate Peak Documentation?

    Build a climbing route template with a clear scope, consistent fields, and useful visuals so the file is accurate and usable in planning and on the mountain. Choose a file format that fits your workflow — a shared spreadsheet, a formatted document, or a simple database — and define required fields so contributors supply consistent information.

    • Identify Key Elements: Determine the essential information that needs to be documented, such as route descriptions, difficulty ratings, and safety protocols.
    • Use a Standardized Format: Adopt a consistent layout that allows for easy comparison between different routes.
    • Incorporate Visual Aids: Utilize maps and elevation profiles to enhance understanding and navigation.

    Follow these steps to produce templates that teams can rely on before and during expeditions. Also define responsibilities: who is authorized to update a profile, how changes are tracked, and where archive versions are stored for accountability.

    Step-by-Step Guide to Documenting Climbing Routes Effectively

    Use a repeatable workflow when documenting routes:

    • Gather Information: Collect data on the route, including descriptions, difficulty levels, and safety notes.
    • Organize Data: Use a standardized template to present the information clearly.
    • Review and Update: Regularly review and update the template based on new experiences and feedback from other climbers.

    That systematic approach helps keep route records accurate and practically useful. When possible, capture the person who supplied each field and the date of the observation so later readers can judge the currency of a report.

    Integrating GPS Data and Elevation Profiles for Route Accuracy

    Add GPS tracks and elevation profiles to improve precision. GPS points fix key features and access routes; elevation charts show steep sections and total ascent. Together these elements make physical demands and navigation clearer for planning and pacing. Include commonly used export formats (for example GPX or KML), waypoint names, and timestamps so tracks can be replayed and validated by others using mapping apps or handheld GPS units.

    What Safety and Gear Information Should be Integrated into Peak Profiles?

    Essential climbing gear including helmets and ropes on a rocky surface in a mountain environment

    Every peak profile should include a focused safety section and a gear list tailored to the route’s conditions and hazards. Make lists modular so teams can adapt the base kit to seasonal or route-specific needs without losing sight of minimum safety items.

    • Essential Gear Lists: A comprehensive list of gear required for the climb, tailored to the specific conditions and challenges of the route.
    • Safety Protocols: Guidelines for managing risks, including weather considerations and emergency procedures.
    • Recommended Practices: Best practices for climbing, such as hydration strategies and acclimatization tips.

    Including Safety Protocols and Risk Mitigation Strategies in Summit Guides

    Outline clear safety protocols that address weather, signs and management of altitude sickness, and emergency response steps. Specify when to turn back and list contact or evacuation options so teams can make informed, timely decisions. Include standard check-in times, expected radio or phone windows, and a simple escalation ladder that lists local rescue contacts and the steps to call for assistance. Keep instructions concise and action-oriented so they can be referenced quickly in pressure situations.

    Adventure carries inherent risks; robust safety standards and disciplined risk management reduce those risks.

    Mountain Safety Standards & Risk Management

    Adventure is linked to risk of injuries and fatalities; this study examined safety concerns, risk management and standards of practice for preparing and handling emergencies in the East African afro‑alpine regions of Mt. Kenya, the Rwenzori Mountains and Mt. Kilimanjaro.

    Standards of practice, risk assessment, and safety concerns in outdoor adventure programmes in the afro‑alpine mountains of east

    Africa, LJ Wachira, 2022

    Recommended Gear Lists and Product Specifications for Climbers

    Produce a gear list that matches route conditions. Include technical climbing equipment (ropes, harnesses, carabiners), clothing layers for expected weather, and safety items (helmet, first‑aid kit, navigation tools). Where useful, add brief product specs or performance criteria to guide purchasing decisions. Organize gear by category — technical hardware, clothing and footwear, overnight kit, navigation and communication, and emergency supplies — to make packing and checking faster before a climb.

    How Can Trip Planning Templates Enhance Summit Expedition Preparation?

    Trip planning templates organise logistics so teams don’t miss critical items. They turn planning into checkable tasks for gear, food, timing and communications. Well-structured templates reduce cognitive load during planning, freeing leaders to focus on route-specific decisions and contingency planning.

    Careful expedition planning is essential; small oversights can compromise an entire climb.

    Essential Mountaineering Expedition Planning

    Planning an expedition, especially a major climb such as Mount McKinley, requires detailed attention to food, equipment and personnel — and to administrative items like applications and reservations, which can determine success or failure.

    Expedition Planning., 1977
    • Comprehensive Checklists: Include checklists for gear, food, and safety equipment to ensure nothing is overlooked.
    • Timeline Planning: Establish a timeline for the expedition, including travel, acclimatization, and climbing days.
    • Coordination with Team Members: Facilitate communication and coordination among team members to ensure everyone is on the same page.

    Using trip templates reduces the chance of missed steps and helps teams coordinate timelines, supplies and emergency plans. Add an alternate-itinerary section for common failure points (late arrival, bad weather, injury) so leaders can execute a fallback plan without rebuilding logistics under stress.

    Using Peak Profiles to Develop Effective Summit Expedition Checklists

    Reference the peak profile to build a checklist tailored to that climb’s specific risks and equipment needs. That ensures you pack appropriate gear and plan acclimatisation and contingency steps. Consider including a short “mandatory items” line that all team members must sign off on during the pre-departure check.

    Linking Peak Profiles with Trip Planning Tools for Seamless Coordination

    Connect peak profiles with your planning tools so team members can access route details, timelines and gear lists in one place. This reduces errors and improves communication before and during the expedition. Where possible, integrate profiles with shared calendars, cloud folders for key documents (permits, maps) and a single communication channel for day-of status updates.

    What Are Best Practices for Documenting and Standardizing Mountaineering Profiles?

    Follow consistent formatting, use structured data where possible, and keep profiles current with recent statistics or route changes. These steps improve readability, searchability and reliability. A consistent template reduces friction for contributors and makes automated checks or exports easier when building a digital route library.

    • Consistent Formatting: Use a uniform format for all profiles to enhance readability and usability.
    • Structured Data Markup: Implement structured data to improve searchability and accessibility of information.
    • Incorporating Recent Climbing Statistics and Industry Updates: Regularly update profiles with the latest data to ensure relevance and accuracy.

    When documenting, keep a visible change log and a contributor field so readers can see who added or verified information. Test templates in a low-risk setting (local crag or short approach) to ensure fields are understandable and practical before applying them to major expeditions.

    Adopting Consistent Formatting and Structured Data Markup

    Use a standard layout and clear field labels. If you publish profiles online, add structured data markup to help others find accurate, machine‑readable information. Consistent labels (for example “approach time”, “technical crux”, “bivy options”) make cross-peak comparisons and automated sorting easier for teams and researchers.

    Incorporating Recent Climbing Statistics and Industry Updates

    Update profiles with recent route reports, incident statistics and regulatory changes so planning decisions reflect current conditions and best practices. Encourage trip leaders to append short condition notes after each use so the living document reflects real experience rather than a static description.

    How to Utilize Visual Aids Like Route Maps and Elevation Charts in Peak Profiles?

    Use maps, elevation charts and annotated photos to show route lines, key landmarks and steep or exposed sections. Visual aids reduce ambiguity and improve navigation and pacing decisions. A well-annotated image can quickly communicate the appearance of the crux and the safest places to bivi or escape a route.

    • Route Maps: Detailed maps that outline the climbing route, including key landmarks and potential hazards.
    • Elevation Charts: Graphical representations of the climb’s elevation changes, allowing climbers to assess the physical demands of the route.
    • Annotated Images: Images that highlight specific features of the climb, such as difficult sections or scenic viewpoints.

    When paired with concise text, these visuals give a practical picture of the climb’s terrain and demands. Add scale bars, north arrows and contour interval notes where relevant so readers understand distances and gradient at a glance.

    What Are Common User Questions About Peak Profile Templates and Summit Guides?

    Climbers commonly ask what to include in a profile, how to keep formats consistent, and which documentation practices work best for routes and safety. Addressing these common concerns in a template’s help text or an introductory section reduces repeated questions and improves the quality of contributions.

    • What information should be included in a peak profile?
    • How can I ensure my peak profile is standardized?
    • What are the best practices for documenting climbing routes?

    Answering these questions helps climbers understand how to compile useful, standardised profiles they can rely on in planning and during climbs.

    How to Document a Mountain Climb Using a Peak Profile Template?

    Document a climb in three steps: collect accurate data, fill the standardized template, and review the entry after the trip to capture lessons learned. Keeping notes on conditions, decision points and unexpected issues helps other teams anticipate the same challenges more effectively.

    • Collect Data: Gather all relevant information about the climb, including route details and safety protocols.
    • Fill Out the Template: Use the standardized format to document the information clearly and concisely.
    • Review and Revise: Regularly review the documented profile to ensure accuracy and relevance.

    Follow these steps to maintain a reliable record that benefits future planning and team briefings. Where possible, include photos with captions and short file names that link back to the profile fields for quick verification.

    What Safety Information is Critical in Summit Expedition Guides?

    Include weather patterns, altitude sickness guidance, and clear emergency protocols. Those elements directly affect decision points and contingency planning on the mountain. Make the safety section actionable with bullet-pointed steps that are easy to scan in an emergency.

    • Weather Patterns: Understanding local weather conditions and how they can impact climbing safety.
    • Altitude Sickness Awareness: Information on recognizing and managing altitude sickness symptoms.
    • Emergency Protocols: Clear guidelines for responding to emergencies during climbs.

    Integrating these safety items into profiles improves preparedness and reduces avoidable risk during expeditions. Encourage teams to rehearse emergency workflows and confirm communication devices before committing to high exposure segments.

    Frequently Asked Questions

    What are the best tools for creating peak profile templates?

    Use tools that match your needs: Google Docs or Microsoft Word for quick, shareable templates; Climb Pro or Mountain Project for route mapping and gear lists; and Canva for visual layouts. Choose the tool that fits your workflow and the level of detail you need. For collaborative editing, cloud documents and version-controlled spreadsheets make it easy to track changes and roll back if necessary.

    How often should peak profiles be updated?

    Update profiles after each expedition to capture new route notes and lessons. Also review them annually or whenever significant changes occur, such as new access rules, route changes or notable incidents. If a route is used regularly, add a short seasonal summary so readers can see how conditions evolve through the year.

    Can peak profiles be shared with other climbers?

    Yes. Sharing profiles helps the community learn and improves collective safety. Publish profiles on community sites or in team folders, but check accuracy before sharing to avoid passing on outdated information. When sharing, mark the profile’s last-verified date and list any known condition caveats.

    What role do visual aids play in peak profiles?

    Visuals clarify route lines, highlight hazards and show elevation change. They help you assess technical sections and energy requirements, making planning more reliable than text alone. Use high-contrast annotations and short captions to make images usable even on small mobile screens or printed copies.

    How can I ensure my peak profile is accessible to others?

    Save profiles in common formats (PDF, DOCX) and upload them to community platforms. Use clear file names, section headings and structured data where possible to improve discoverability. Also provide a short printable summary page for team leaders who prefer paper briefings.

    What are the common mistakes to avoid when creating peak profiles?

    Avoid omitting safety details or gear lists, using inconsistent formats, and failing to update profiles. Also solicit feedback from other climbers; regular review and revision are essential to keep profiles useful. Standardize terminology (for example, use the same grading scale across profiles) to reduce confusion when comparing routes.

    Conclusion

    Using a peak profile template improves expedition planning by giving you a clear, repeatable way to record routes, risks and gear needs. Standardised profiles raise safety and clarity, and sharing them builds community knowledge. Adopt a template, keep it current, and use it to prepare practical checklists before your next climb.

    Start small: implement a single template for your next few trips, collect feedback from participants, and iterate. Over time a maintained, well-structured profile library becomes an essential part of safe, efficient climbing operations and helps teams learn from each ascent without repeating avoidable mistakes.

  • Top 50 Non-Technical Peaks to Hike and Trek

    Top 50 Non-Technical Peaks to Hike and Trek

    Top 50 Non-Technical Peaks to Hike and Trek: Comprehensive Guide for Beginner and Accessible Mountain Summits

    Hiking connects you with nature and builds fitness. For beginners, picking the right trail affects safety and enjoyment. This guide lists the top 50 non-technical peaks suited to novice trekkers and explains what makes them accessible. If you feel unsure where to start, use these clear, practical recommendations on route features, preparation, trip planning and safety to make informed choices.

    Throughout this guide you will find practical advice that focuses on accessible mountain summits, route selection, and step-by-step preparation. The aim is to give you tools that reduce uncertainty and increase the chance of a safe, enjoyable first climb.

    What Are Non-Technical Peaks and Why Are They Ideal for Beginner Hikers?

    Non-technical peaks are summits you can reach without ropes, technical climbing skills or specialised equipment. Trails usually have clear signage, gentle slopes and limited exposure to steep drops. They let you gain experience and confidence while reducing objective risk. Many non-technical summits also deliver rewarding views and a real sense of achievement without complex procedures or gear.

    For beginners, these routes are ideal because they emphasise walking and route-finding rather than climbing technique. Routes commonly include maintained footpaths, switchbacks to manage steepness, and regular natural or constructed rest points. They are also more likely to have nearby emergency access and reliable information from park services or user reports.

    Defining Non-Technical Mountain Climbs: Characteristics and Difficulty Levels

    These climbs follow straightforward routes and exclude sections that require rock climbing or steep scrambles. They are commonly rated easy to moderate. Key variables that change difficulty are trail surface, total elevation gain and prevailing weather. Assessing those factors helps you match a route to your fitness and skills before you go.

    Typical non-technical trail features include packed earth paths, gravel or compacted scree, wooden steps or boardwalks in wet sections, and clear junction markers. Difficulty is often driven by sustained steep sections, loose surface material that reduces traction, and route exposure where a fall could be dangerous despite the absence of technical climbing moves.

    When evaluating a potential summit, look for recent trip reports, official trail descriptions and simple metrics such as total ascent and average slope. If a route lists exposed scrambles or requires hands-on climbing, it is likely beyond a non-technical classification for most beginners.

    Objective Mountain Trail Categorization for Hikers

    Trail categorisation remains a core resource for hikers when selecting and preparing for routes. Simpler, descriptive national or regional classifications are most useful for the majority of users, but many systems still rely on subjective expert judgement. Research combining empirical studies and literature shows two clear points: available geographical data and GIS-based methods can make trail categorisation more objective, and better categorisation supports safer hiking decisions.

    Reconsidering the basics of mountain trail categorisation: Case study in Slovenia, M Krevs, 2023

    Benefits of Choosing Easy Alpine Hikes for New Hikers

    Serene alpine landscape with hikers enjoying an easy trail

    Easy alpine hikes offer clear benefits for beginners. They improve cardiovascular fitness and leg strength through steady effort. Time outdoors reduces stress and improves mood. Finally, accessible routes let you enjoy scenery and build experience without the technical demands of mountaineering, making further progression safer and more likely.

    Beyond the physical gains, accessible summits provide practical learning opportunities: navigation skills, pace management, group communication and basic emergency response can all be practised on lower-risk routes. These routes also offer repeatability — you can rehearse a path multiple times to learn how your body responds to sustained ascent, varying footing and changing weather.

    Choosing easy alpine hikes as initial goals increases the chance of positive experiences that build confidence. Positive early experiences are important: they reduce anxiety about the outdoors, help develop good habits, and make it easier to take on progressively longer or slightly more technical routes when you are ready.

    Which Are the Top 50 Easiest Mountain Summits Worldwide?

    The following list highlights some of the top 50 easiest mountain summits around the globe, perfect for beginner hikers:

    • Mount Monadnock, New Hampshire, USA: A popular hiking destination known for its panoramic views and well-maintained trails.
    • Mount Tammany, New Jersey, USA: Offers a moderate hike with rewarding vistas of the Delaware Water Gap.
    • Mount Fuji, Japan: An iconic peak that provides a straightforward climbing experience during the climbing season.
    • Ben Nevis, Scotland: The highest mountain in the UK, featuring a well-marked path to the summit.
    • Table Mountain, South Africa: Accessible via a cable car or a moderate hike, offering breathtaking views of Cape Town.

    These examples share easy access, established paths and notable scenery—qualities that make them suitable first summits for new hikers. The list above provides representative options across regions and trail types; many other non-technical summits exist locally and regionally. For a complete ranked list and detailed route descriptions, consult official park sites or curated resources such as the Information Hub linked earlier.

    Geographic Distribution of Accessible Mountain Treks

    Accessible treks exist on every continent and offer different landscape types. In North America look to the Rockies and the Appalachians for non-technical options. In Europe, the Alps and Pyrenees contain many beginner-friendly routes. Asia offers accessible sections of the Himalayas and established trails in Japan. Knowing regional options helps you plan trips close to home or choose destinations that match your travel plans.

    Consider local climate and season when choosing a region. A trail that is accessible in summer may be snow-covered or icy in shoulder seasons. Similarly, some regions have brief windows of ideal weather and clearer trail maintenance schedules. Local visitor centres, ranger stations and community hiking groups are often excellent sources of up-to-date information on accessibility.

    Comparing Difficulty and Route Types Among Top Hiking Trails

    Compare routes by surface type, signage, elevation profile and average duration. Non-technical peaks tend to have defined paths, though some sections may be uneven or steadily steep. Prioritise trails with clear wayfinding and gradual ascent if you are new to hiking. Read recent trail reports and user reviews for practical details like muddy sections or seasonal closures.

    Useful comparison points include: whether a path is singletrack or wide, the degree of exposure on ridge sections, trail maintenance frequency, and proximity to emergency services or access roads. When planning, create a simple matrix for each hike listing these variables and rate each route against what matters most to you — distance, ascent, scenery, or ease of access.

    How to Plan Your Trip for Non-Technical Mountain Climbs?

    Trip planning follows a simple sequence: research the route (length, elevation, hazards), prepare an equipment checklist, and verify access and weather. Pack appropriate footwear, layered clothing and basic safety gear. Check trail conditions and closures on official sites before you leave. For additional planning resources and practical tips, consult best mountains to climb.

    Plan a realistic timeline for the day, including breaks and extra time for slow sections or poor weather. Leave a buffer for unexpected delays. If the route involves remote access, ensure somebody not on the hike knows your approximate start time, route and expected return. Consider transportation logistics for trailheads that require permits or timed entry.

    When assessing hazards, think seasonally: snow patches, high river crossings, or heat exposure can change a comfortable route into a demanding one. If you are uncertain, choose a shorter or nearer route so you can gain experience without overcommitting.

    Essential Permits, Timing, and Weather Considerations for Safe Treks

    Confirm permit requirements early; many popular areas limit visitors to protect trails. Choose season and time of day to reduce weather risk and crowding. Always check a local forecast within 24 hours of your start, and plan contingencies for sudden weather changes common in mountains.

    Some areas require timed entries, parking reservations, or explicit camping permits. Permits are often used to manage trail erosion, protect wildlife, or limit crowding on fragile summits. If a permit is required, obtain it well in advance and keep evidence of the permit with you during the hike.

    Time of day matters for both safety and experience. Starting early often means cooler temperatures, better light for navigation, and less crowding. Midday storms are common in many mountain regions during warmer months, so aim to be below tree line or near sheltered terrain before typical afternoon weather shifts.

    Using Interactive Maps and GPS Tools for Navigation on Easy Trails

    Use interactive maps and GPS to confirm route choices and track progress. These tools show distance, elevation and current position. Download offline maps for areas with poor reception. Regularly compare digital navigation with visible trail markers to avoid mistakes.

    Practical navigation tips include plotting waypoints at key junctions, shelter areas and known water sources. Keep a small paper map or a downloaded track as a backup, and learn basic compass skills so you can orient the map to the landscape. Be wary of blindly following a device route; occasionally verify that the mapped trail matches the real-world trail and signage.

    Most apps allow you to measure total ascent and expected time estimates. Use those features conservatively: allow extra time for rest, terrain difficulty, and group pace. If you are new to a route, consider transferring a GPX file to your device beforehand and learning how to follow it in offline mode.

    What Gear and Safety Equipment Are Recommended for Beginner-Friendly Mountain Summits?

    Essential hiking gear for beginners including boots, backpack, and safety equipment

    Prepare essential gear that matches the route and expected conditions. Core items should cover support, carrying capacity, first aid and basic nutrition.

    • Hiking Boots: Proper footwear provides support and traction on various terrains.
    • Backpack: A comfortable backpack allows hikers to carry necessary supplies without strain.
    • First Aid Kit: A basic first aid kit is essential for addressing minor injuries or emergencies.
    • Water and Snacks: Staying hydrated and energized is vital for maintaining stamina during hikes.

    Carrying these essentials reduces common risks and lets you focus on navigation and scenery. In addition, consider items that address comfort and minor repairs: a lightweight rain layer, sun protection (hat and sunscreen), a headlamp with spare batteries, a small repair kit for pack straps or footwear, and a multi-tool. A whistle and emergency blanket are compact items that increase preparedness without significant weight.

    Boots should fit well with a small amount of toe room to accommodate descent and downhill braking. Break in footwear on shorter walks before relying on them for longer or steeper summits. Backpacks should distribute weight evenly; pack heavier items close to your back and near shoulder height for balance.

    Checklist of Essential Hiking Gear for Non-Technical Peaks

    Use a short checklist before departure to avoid omissions. Include items that address weather, navigation, health and hydration.

    • Hiking Boots: Ensure they are broken in and provide adequate support.
    • Weather-Appropriate Clothing: Dress in layers to adapt to changing conditions.
    • Navigation Tools: Bring a map, compass, or GPS device for navigation.
    • First Aid Kit: Include band-aids, antiseptic wipes, and any personal medications.
    • Hydration System: Carry enough water for the duration of the hike.

    A short, consistent checklist helps you prepare thoroughly and reduces on-trail surprises. Review and adjust your checklist based on seasonality: add an insulated layer for cooler months, insect protection for warm damp seasons, or sun protection for exposed ridgelines. If you plan to be out after dark, carry a headlamp and confirm battery charge before leaving.

    Safety Tips and Risk Mitigation Strategies for Easy Mountain Climbs

    Even on non-technical routes, treat safety as your primary objective. Prepare for common hazards and plan decisions ahead of time.

    • Stay on Marked Trails: Following designated paths reduces the risk of getting lost and minimizes environmental impact.
    • Inform Someone of Your Plans: Always let a friend or family member know your hiking itinerary and expected return time.
    • Be Aware of Your Limits: Know your physical capabilities and choose hikes that match your fitness level.
    • Monitor Weather Conditions: Keep an eye on changing weather patterns and be prepared to turn back if conditions worsen.

    Apply these measures to lower risk: plan turn-back points, monitor pace and keep emergency contacts readily available. A simple risk-management routine is to set a planned turnaround time and stick to it regardless of how close you are to the summit. If weather or fatigue change your risk profile, treat your turnaround plan as mandatory rather than optional.

    For groups, assign a leader and a sweep (the last person) so the group remains cohesive. Communicate signals for stopping, regrouping, and emergency response before you start. Carrying a basic communication device or a charged phone is useful, but do not rely on coverage in remote areas.

    Which Hiking Tips and Best Practices Enhance Your Experience on Non-Technical Peaks?

    Small habits improve comfort and safety on every hike. Plan your day, manage effort and respect the environment.

    • Start Early: Begin your hike early in the day to avoid crowds and enjoy cooler temperatures.
    • Pace Yourself: Take breaks as needed to rest and hydrate, especially on longer hikes.
    • Engage with Nature: Take time to appreciate the surroundings, observe wildlife, and enjoy the scenery.
    • Practice Leave No Trace Principles: Respect the environment by packing out all trash and minimizing your impact on the trail.

    These practices make hikes safer, more enjoyable and sustainable for others. Simple pacing strategies include alternating periods of steady walking with short rest stops and increasing your cadence on steeper sections while maintaining a comfortable breathing rhythm. Use rest stops to check footwear comfort and adjust layers to avoid sweating excessively, which can cool quickly on descents.

    Physical Preparation and Conditioning for Accessible Mountain Treks

    Build fitness with a mix of cardiovascular work and strength training. Walks, jogging, cycling or swimming improve stamina. Add leg and core strength sessions to support uneven terrain. Gradually increase distance and elevation on practice hikes so your body adapts.

    A progressive conditioning plan helps reduce injury risk: start with regular low-intensity aerobic sessions, add hill repeats or stair training to mimic ascent, and include strength exercises for hips, quads and core. Include mobility and balance work to reduce tripping risk on uneven ground. Rest and recovery are critical; allow days for muscles to adapt between harder sessions.

    Practice hikes should include similar terrain and pack weight to your planned summit attempt. This trains your body to handle both the distance and the demands of carrying a loaded backpack, and helps you refine food, hydration and clothing choices before a longer or more remote hike.

    Environmental Responsibility and Sustainable Hiking Practices

    Follow Leave No Trace: stay on trails, pack out waste and avoid disturbing wildlife or plants. Use established campsites and minimise new impacts. These steps preserve trail quality and habitats for future hikers.

    In addition to basic trail etiquette, consider trail-season sensitivity: some high-use areas close seasonally to protect breeding fauna or fragile alpine vegetation. Respect signs and temporary closures. When camping, keep fires to established rings where permitted and avoid introducing non-native materials to the site.

    What Are Common Questions About Non-Technical Peaks and Beginner Hiking?

    New hikers often ask practical questions about gear, route choice and encounters on the trail. Clear answers reduce uncertainty and improve safety.

    • What should I wear for a hike?: Dress in layers and choose moisture-wicking fabrics to stay comfortable.
    • How do I choose the right trail?: Research trails based on difficulty, distance, and personal fitness levels.
    • What if I encounter wildlife?: Remain calm, keep your distance, and do not feed or approach wild animals.

    Giving straightforward, actionable answers prepares novices and reduces avoidable risks on the trail. When deciding clothing layers, start with a moisture-managing base layer, add an insulating mid layer if temperatures suggest, and carry a lightweight waterproof outer layer if there is a chance of rain or wind. Test your full kit on a short walk before committing to a longer summit attempt.

    How to Choose the Right Non-Technical Peak for Your Skill Level?

    Match route metrics to your fitness and goals. Check trail length, total ascent and terrain type. Read recent trip reports and local guidance. Start with shorter routes that have clear wayfinding and build up as your experience increases.

    Further research highlights systematic approaches that can aid beginners in selecting the most suitable mountain based on various criteria.

    When possible, choose a route that allows an easy exit or bailout point if conditions change. Pick climbs that are frequently used and well-documented when you are gaining your first summit experiences — they generally offer clearer signage, better-maintained paths, and more people who can provide up-to-date trail information.

    Beginner Mountain Selection & Terrain Difficulty Guide

    Selecting a mountain for a first climb can be difficult. The Simple Additive Weighting (SAW) method helps by letting users weight criteria and compare options directly, speeding and clarifying the decision process. The study identifies campsite quality, mountain height, natural resources, scenic value and terrain difficulty as primary factors to consider when choosing a mountain.

    Mountain Selection for Beginner Climbers: a Simple Additive Weighting (SAW)

    Method, L Wikarsa, 2024

    What Are the Most Popular Non-Technical Mountains for First-Time Hikers?

    Several accessible mountains are popular with first-time hikers because they combine clear routes with strong scenery. Examples include:

    • Mount Rainier, Washington, USA: Offers various trails with breathtaking scenery and well-maintained paths.
    • Mount Hood, Oregon, USA: Features beginner-friendly routes with picturesque landscapes.
    • Pikes Peak, Colorado, USA: Accessible via a scenic highway or hiking trail, providing stunning vistas.

    These peaks provide a range of route options that let novices enjoy high-quality scenery without technical climbing demands. If you are travelling to a popular summit, expect varying levels of crowding and plan accordingly: use public transport options where available, arrive early to reduce parking stress, and check local guidance on busy periods.

    Frequently Asked Questions

    What should I consider when hiking with children on non-technical peaks?

    Choose short, gentle routes with regular rest spots. Fit children with proper footwear and layered clothing. Pack extra snacks, water and basic first-aid items. Make the hike engaging with simple nature facts and allow extra time. Watch for fatigue and be ready to turn back if a child is uncomfortable.

    How can I improve my hiking endurance before tackling non-technical peaks?

    Combine cardio sessions (walking, jogging, cycling or swimming) with leg and core strength work. Progressively increase distance and elevation on practice hikes. Train consistently and include rest days. Gradual load increase reduces injury risk and builds reliable stamina.

    What are the best practices for maintaining trail etiquette while hiking?

    Yield to uphill hikers and step aside on narrow sections. Keep noise low and avoid disturbing wildlife. Carry out all rubbish and stay on the established path to prevent erosion. Respecting others and the environment preserves trail quality for everyone.

    What are the signs of altitude sickness, and how can I prevent it?

    Altitude sickness often shows as headache, nausea, dizziness and unusual fatigue above about 8,000 feet. Prevent it by ascending slowly, staying well hydrated and avoiding alcohol and heavy exertion during initial exposure. If symptoms appear, descend to a lower elevation promptly.

    How do I choose the right hiking partner for non-technical climbs?

    Pick someone with a similar fitness level and a compatible pace. Discuss goals, turnaround times and emergency plans before you start. Good communication and shared expectations improve safety and enjoyment on the trail.

    What should I do if I get lost while hiking?

    Stop and stay calm. Retrace your steps to the last known point if safe. Use a map or GPS to locate yourself. If you remain uncertain, stay put to avoid further disorientation and signal for help with a whistle or mirror. Always tell someone your plan before you leave so they can alert authorities if needed.

    What are the environmental impacts of hiking, and how can I minimize them?

    Hiking can cause soil erosion, disturb wildlife and leave litter. Minimise impact by staying on trails, packing out all waste, not picking plants and using established campsites. Learn about local rules and practice responsible behaviour to help preserve natural areas.

    Conclusion

    Non-technical peaks give beginners a safe, practical way to build skills, fitness and confidence while enjoying nature. Use route research, a concise gear checklist and the safety practices outlined here to plan each hike. With deliberate preparation and measured progression, you can expand your experience and safely enjoy more challenging routes over time.

    Start small, learn the basics, and progressively take on slightly longer or more exposed routes as your skill and confidence grow. When in doubt, choose the easier option and repeat it — repetition builds competence and makes more ambitious climbs accessible over time.

  • Mountain Weather: How to Read Forecasts and Stay Safe

    Mountain Weather: How to Read Forecasts and Stay Safe

    Mountain Weather: How to Read Forecasts and Stay Safe (2026 Guide) | Global Summit Guide
    Cluster 12 · Planning, Safety & Weather · Updated April 2026

    Mountain Weather: How to Read Forecasts and Stay Safe

    The single most important non-fitness skill in mountaineering — reading forecasts accurately, recognizing warning signs, and making safe summit-day decisions. This is the guide climbers consistently wish they’d read before their first expedition.

    5
    Forecast
    elements
    40 km/h
    Everest
    summit threshold
    24–72h
    Most reliable
    forecast range
    85–90%
    24-hour forecast
    accuracy
    Global Summit Guide A guide in Cluster 12 · Planning, Safety & Weather View master hub →

    Fitness gets you to base camp; weather judgment gets you to the summit and back. Most climbing fatalities at altitude involve weather decisions made with incomplete information or incorrect interpretation — not catastrophic terrain errors or sudden illness. This guide covers the weather skills every serious climber needs: reading forecasts accurately, recognizing warning signs, and making summit-day go/no-go decisions that keep you climbing for years rather than ending a promising career on one bad call.

    How this weather guide was built

    Content reflects standard meteorological practice as applied to mountaineering by professional expedition forecasters including Michael Fagin (West Coast Weather) and Chris Tomer (Tomer Weather Solutions), alongside published guidance from the American Alpine Club, the Wilderness Medical Society, and the American Mountain Guides Association (AMGA). Forecast source reviews reflect 2026 app capabilities and expedition-service pricing. Fact-check date: April 19, 2026.

    How to Read a Mountain Weather Forecast: The 5 Elements

    A mountain weather forecast contains far more information than a city forecast, and the elements matter in a specific order. Reading them correctly separates climbers who use forecasts effectively from climbers who glance at summaries and miss what’s coming.

    01
    Pressure Trend
    Rising = stable. Falling = incoming system. Watch 3-hour changes.
    02
    Wind at Summit
    500 mb or 300 mb winds. Summit-level, not base.
    03
    Temperature + Wind Chill
    At your camp elevation, with wind chill calculated.
    04
    Precipitation
    Type, amount, freezing level. Snow above vs rain below.
    05
    Confidence Interval
    How certain the forecast is. Check model agreement.

    Why pressure matters most

    Pressure is the leading indicator — it changes before clouds form, before winds rise, before precipitation arrives. A rapidly falling barometer (3 millibars or more drop in 3 hours) predicts incoming weather 12–24 hours before visual signs appear. Every expedition should carry a barometric altimeter or a satellite device with pressure tracking (Garmin inReach, Suunto altimeter watches). Watch the trend, not just the current reading.

    The altitude problem with wind speeds

    Surface winds are nearly irrelevant for summit decisions. What matters is wind at your actual climbing elevation. Professional forecasts provide winds at pressure levels: 850 mb (~1,500 m), 700 mb (~3,000 m), 500 mb (~5,500 m), and 300 mb (~9,000 m). For Everest, check 500 mb for Camp 2 and Camp 3, and 300 mb for summit day. Apps like Mountain-Forecast.com automatically provide summit-elevation wind — this is the single most important number on the page.


    Best Weather Apps and Forecast Sources for Mountaineers

    Weather source selection matters — free apps cover basic monitoring, but professional expedition services deliver the summit-window confidence that justifies $90K expedition investments. Use both.

    Tier 1 · Free Tools

    Mountain-Forecast.com

    Free · Web + mobile
    Best for

    Daily monitoring of most major peaks worldwide. Provides summit-elevation forecasts, 6-day outlooks, and separate forecasts for different elevations on the same peak. The default free tool used by most self-guided climbers and many commercial operators for routine monitoring.

    Tier 1 · Free Tools

    Windy.com

    Free · Premium $20/year
    Best for

    Wind pattern visualization and multi-model comparison. Lets you switch between ECMWF, GFS, and ICON models to identify forecast agreement. Premium tier unlocks higher-resolution data and extended forecast ranges.

    Tier 1 · Free Tools

    Meteoblue

    Free · Premium available
    Best for

    Strong European coverage and multi-model consensus forecasting. Particularly valuable for Alps climbing where local terrain effects are significant. Meteoblue Expedition service offers custom summit forecasts for major peaks.

    Tier 2 · Professional

    West Coast Weather (Michael Fagin)

    $200–$1,500 per expedition
    Best for

    Summit-window decisions on major expeditions. Daily expert-interpreted briefings, satellite-delivered to base camp, with confidence intervals and specific summit-day go/no-go recommendations. Used by Alpine Ascents, IMG, and Madison Mountaineering.

    Tier 2 · Professional

    Tomer Weather Solutions (Chris Tomer)

    $200–$1,500 per expedition
    Best for

    Alternative to West Coast Weather with strong reputation on Everest and 8,000 m peaks. Multi-model consensus forecasting with explicit confidence intervals. Many operators subscribe to both services for independent confirmation on summit decisions.

    Tier 2 · Professional

    Garmin inReach Weather

    $15–$65/month subscription
    Best for

    Satellite-delivered forecasts beyond cell coverage. Essential for any expedition operating above base camp where internet access fails. Request forecasts from anywhere on the mountain, including emergency condition updates.

    For any climb above 5,000 m, combine daily free-app monitoring during expedition prep with professional expedition forecasting during summit-window decisions. The $500 invested in professional forecasting on a $90K Everest expedition is well spent.


    Warning Signs of Bad Mountain Weather You Can See

    Forecast data is powerful but limited — visual weather signs add real-time information that apps can’t deliver. These signs have saved countless lives when climbers recognized them and turned around despite forecasts that hadn’t yet updated.

    Lenticular Clouds
    Lead time: 12–24 hours

    Lens-shaped clouds forming over or downwind of peaks. Indicate strong winds aloft (often 80+ km/h) even when surface conditions feel calm. Classic warning that a weather system is approaching or has already established jet-stream winds over the summit. Never start a summit push when lenticulars are forming.

    Halo Around Sun or Moon
    Lead time: 12–36 hours

    Bright ring caused by cirrus clouds at high altitude, typically the leading edge of an approaching warm front. Often appears 24+ hours before deteriorating conditions reach the surface. Particularly valuable at night when other signs are harder to observe.

    Rapidly Falling Barometer
    Lead time: 6–24 hours

    A pressure drop of 3 millibars or more in 3 hours predicts incoming weather. The faster and steeper the drop, the more intense the system. Barometric altimeters make this trivially observable — check your watch regularly during summit window periods.

    Humidity & Temperature Rising Together
    Lead time: 6–12 hours

    Counterintuitive but important — a warm front approach brings moisture and rising temperatures before precipitation. If it’s unexpectedly warm and humid at high elevation, weather is deteriorating, not improving. Most climbers misread this as a “nice day” signal.

    Anvil-Shaped Cumulonimbus
    Immediate hazard

    Thunderstorm cells with flat tops and towering bodies. Signal immediate severe weather including lightning, hail, extreme winds. Common on afternoon climbs in summer alpine conditions. Descend immediately and aggressively — don’t wait to see where the cell goes.

    Sudden Wind Direction Shift
    Lead time: 1–4 hours

    Wind that suddenly shifts direction, particularly from west to south/southwest in North America, signals a frontal passage. Often accompanied by temperature change and increased gusts. Expect deteriorating conditions within hours.

    Unusual Calm Before Wind
    Lead time: Minutes to hours

    A strange, abrupt calm in normally breezy conditions — the “calm before the storm” effect. Can precede violent downslope winds, severe thunderstorms, or sudden front arrivals. Rare but extremely dangerous when it occurs.

    Snow Plumes From Summit Ridges
    Current conditions

    Visible snow plumes streaming off summit ridges indicate wind speeds typically 40+ km/h at elevation even if base camp is calm. Good proxy for summit-level wind when forecast data is unavailable. Plume length correlates roughly with wind speed.


    What Wind Speed Is Too Dangerous for Climbing?

    Wind speed thresholds are context-dependent, but general guidelines hold across most mountaineering. These thresholds assume summit-elevation winds, not base camp winds — check your forecast carefully for which elevation the number represents.

    < 30 km/h
    Safe
    Ideal climbing conditions
    30–50 km/h
    Moderate
    Manageable with experience
    50–70 km/h
    Challenging
    Exposed terrain dangerous
    70–90 km/h
    Dangerous
    Most teams abort summits
    > 90 km/h
    Fatal Risk
    Evacuate to lower camps

    Everest’s 40 km/h threshold

    On Everest, professional expedition forecasters typically recommend under 40 km/h at summit for summit-day attempts. The South Col to summit traverse is highly exposed, and the combination of -30°C temperatures with even moderate winds produces severe wind chill that defeats most layering systems. Most commercial operators won’t send climbers to the summit when forecasts predict over 45 km/h sustained. The 2019 “summit queue” deaths occurred partly because teams rushed marginal windows rather than waiting for better conditions.

    Wind chill amplifies the danger

    Temperature and wind interact multiplicatively, not additively. At -30 °C, adding 40 km/h wind produces an effective temperature around -45 °C. At 60 km/h wind, the same temperature feels like -52 °C. Most expedition-grade clothing systems start failing above 50 km/h sustained wind — the gear manages either extreme cold OR high wind, not both simultaneously for extended periods.


    Understanding Weather Windows and Summit Timing

    A weather window is a period of forecasted clear conditions long enough to safely execute your climb. Finding them, evaluating their reliability, and committing at the right moment is the defining expedition skill.

    Summit windows by region

    Each major climbing region has a predictable summit-window pattern driven by jet stream behavior, monsoon patterns, and seasonal transitions.

    Region / PeakPrimary windowSecondary windowDefining factor
    Everest & Himalayan 8,000ersMay 15–23Late Sept–OctJet stream lift + pre/post monsoon
    AconcaguaDec 15–Feb 15NoneSouthern Hemisphere summer
    DenaliMay 15–Jul 5NonePost-winter, pre-rain season
    KilimanjaroJan–Feb, Jun–OctN/A — monthly windowsDry seasons between rains
    Mont Blanc / MatterhornJun 15–Sep 15NoneAlpine summer conditions
    Cascades / RockiesJul 1–Sep 10NoneStable summer high pressure
    Antarctica (Vinson)Nov 15–Jan 31NonePolar summer logistics window
    Patagonia (Fitz Roy)Nov 15–Mar 15NoneBrief summer weather breaks

    Window length requirements

    Different climbs need different window durations. An alpine day route might need 8–12 hours of clear weather. Rainier’s summit push needs 18–24 hours. Aconcagua’s typical summit day needs 14–18 hours. Everest’s summit push from Camp 4 back to Camp 2 needs 36–48 hours of low winds and no precipitation. Always check whether the forecast window is long enough for your objective before committing.

    Early-morning summit strategy

    Most summits happen in early morning — typically 2 AM to 8 AM with summit reached by 6–11 AM. Three reasons: (1) Afternoon thunderstorm development is the most common weather hazard in summer alpine climbing. (2) Wind intensification through the day due to solar heating creates late-morning wind buildup. (3) Snow conditions deteriorate with sun exposure — harder to climb, higher avalanche risk, softer cornices. Summit-day starts of 10 PM to 2 AM are standard for expedition-style climbs.

    The “false window” trap

    Expeditions consistently get fooled by false windows — apparent weather breaks that don’t actually materialize or close early. Signs of false windows: short duration (under 36 hours), low forecast confidence, models disagreeing, or the window appearing only in one forecast source. Wait for windows confirmed by multiple sources with high confidence ratings. The climbers who died in 2019’s Everest queue were partly victims of a false window that teams committed to before waiting for better confirmed conditions.


    Summit-Day Go/No-Go Decisions: A Framework

    The decision to attempt or abort a summit is typically made 12–24 hours before the summit push. A disciplined framework replaces gut decisions that tend to fail under the pressure of sunk-cost thinking.

    01

    Check forecast data 24–48 hours ahead

    Review your primary forecast source plus at least one independent source. For expedition climbs, your professional forecaster’s briefing. For independent climbs, cross-reference Mountain-Forecast, Windy, and Meteoblue. Disagreement between sources is itself a signal — lower confidence forecasts require more conservative decisions.

    02

    Apply explicit thresholds

    Write down your thresholds before the summit day. Don’t negotiate them during the push. Typical thresholds: summit winds under X km/h, no precipitation forecast, confidence above 70%, storm timing at least Y hours after expected descent. If any threshold is violated, default to abort.

    03

    Observe current conditions at your camp

    Visual signs override forecasts when they conflict. If you see lenticular clouds, falling pressure, or unusual wind patterns — these trump what the app says. Apps have the past and predicted future; your eyes have the present, which is usually more accurate than the forecast at that moment.

    04

    Assess team readiness honestly

    Weather is one factor; team condition is another. Even perfect weather doesn’t save a climber with HAPE symptoms, frostbitten fingers, or severe exhaustion. Aborting for weather is routine; aborting for health is the right call even more often. Integrate both into the decision.

    05

    Set a turnaround time — and honor it

    Every summit push needs an absolute turnaround time regardless of progress. Typical turnaround: 11 AM on alpine climbs, 1–2 PM on big mountains. Climbers who missed the summit by an hour but returned alive made the right decision. Climbers who continued past turnaround to summit and died didn’t. The mountain will be there next year.

    06

    Accept that patience beats ambition

    The hardest decision in mountaineering is waiting. Sitting at Camp 4 for another day while weather clears tests every climber. But summit-window discipline is what separates long climbing careers from short, spectacular, tragic ones. Budget for patience in every expedition — the financial cost of waiting is always less than the cost of disasters.


    When Is the Best Time to Summit a Mountain?

    Summit timing works at two scales: seasonal timing (which month or year), and daily timing (what hour of the specific day). Both matter.

    Seasonal summit timing

    As shown in the regional windows table above, each major peak has its own seasonal summit calendar driven by hemisphere position, monsoon patterns, and jet stream behavior. Plan expeditions 12–18 months ahead to align with these windows — trying to climb Aconcagua in July (Southern Hemisphere winter) or Everest in August (peak monsoon) doesn’t work regardless of individual fitness or determination.

    Daily summit timing

    Within any summit day, start between 10 PM and 2 AM with the goal of summiting by 6–11 AM and being below the summit by noon. This pattern optimizes for: afternoon thunderstorm avoidance (peaks form in afternoon heat), wind minimization (winds typically build through the day), snow condition management (stable overnight snow softens rapidly with sun), and turnaround-time discipline (forces early decisions before sunk-cost bias accumulates).

    Multi-day summit windows

    Big-peak summit windows on Everest, Aconcagua, Denali, and Vinson typically involve multi-day staged pushes rather than single-day attempts. Climbers move up through camps over 3–5 days with summit day being the final push from the highest camp. Weather decisions apply to each camp move, not just the final summit day — aborting at Camp 2 is always preferable to aborting at Camp 4 because descent is far less dangerous.


    Mountain Weather FAQ: Your Common Questions Answered

    How do you read a mountain weather forecast?

    Reading a mountain weather forecast requires looking at five critical elements in order: (1) Pressure trends — rising pressure generally signals stable weather, falling pressure signals incoming systems. (2) Wind speed at summit elevation, not just base level — most mountain forecasts provide wind speeds at 500 mb (around 5,500 m) or 300 mb (around 9,000 m). (3) Temperature at altitude including wind chill calculation. (4) Precipitation type and amount, with attention to freezing levels. (5) Storm timing including the confidence interval of the forecast. Professional climbing weather services like Michael Fagin’s West Coast Weather or Chris Tomer provide these elements in expedition-formatted briefings. For self-service forecasting, Mountain-Forecast.com, Windy.com, and Meteoblue are the most reliable free tools.

    What is the best weather app for mountaineering?

    The best weather apps for mountaineering in 2026 are: (1) Mountain-Forecast.com — free, covers most major peaks worldwide with summit-elevation forecasts and 6-day outlooks. (2) Windy.com — free with premium tier, excellent wind and pressure visualization, multiple weather model comparison. (3) Meteoblue — strong European coverage, multi-model consensus forecasts, premium expedition packages. (4) inReach Weather — satellite-delivered forecasts for expeditions beyond cell coverage. (5) Professional services like West Coast Weather (Michael Fagin) or Tomer Weather Solutions (Chris Tomer) for major expeditions — $200–$1,500 per expedition for expert-interpreted daily briefings. For serious expeditions, combine a free app for daily monitoring with a professional service for summit-window decisions.

    What are the warning signs of bad mountain weather?

    Key warning signs of approaching bad mountain weather include: (1) Rapidly falling barometric pressure — a drop of 3 mb or more in 3 hours indicates an incoming storm. (2) Lenticular clouds (lens-shaped clouds over peaks) — signal high winds aloft and often precede storm systems by 12–24 hours. (3) Halo around the sun or moon — caused by high cirrus clouds, often the first sign of an approaching warm front. (4) Sudden wind shifts, especially from west to south or southwest in North America. (5) Increasing humidity and warmer temperatures at altitude (counterintuitive but a warm front signal). (6) Anvil-shaped cumulonimbus clouds — immediate thunderstorm hazard. (7) Sudden silence or unusual calm before wind — can precede severe systems. Combined with forecast data, these visual signs add critical real-time information that apps miss.

    What is a weather window for climbing?

    A weather window is a period of forecasted clear, stable conditions long enough to complete a specific climb or summit push. On large expeditions like Everest, a typical summit window requires 36–48 hours of low winds (under 40 km/h at summit) and no precipitation. On shorter alpine routes, a weather window might be 8–12 hours. Weather windows are identified by monitoring multi-day forecasts and watching for patterns where jet stream winds lift off the summit. Everest’s spring summit window typically falls May 15–23 when the jet stream briefly moves north before monsoon arrival. False windows — apparent breaks that don’t actually materialize — are common, which is why professional expedition forecasters build confidence intervals into their predictions.

    How accurate are mountain weather forecasts?

    Mountain weather forecast accuracy degrades significantly with forecast distance and elevation. At 24 hours, forecasts from quality services (Mountain-Forecast, Meteoblue, professional forecasters) are approximately 85–90% accurate for general conditions and 70–80% accurate for specific timing. At 3–5 days, accuracy drops to 60–70%. Beyond 7 days, mountain forecasts become increasingly unreliable. Forecast accuracy is worse in complex terrain where local effects dominate — summit-specific forecasts for peaks like Denali or the Eiger are harder than large-valley forecasts. This is why professional expeditions use multi-model consensus forecasting (comparing ECMWF, GFS, and ICON model outputs) and why summit-window decisions are typically made on 48–72 hour forecasts rather than longer-range predictions.

    What wind speed is too dangerous for climbing?

    Wind speed safety thresholds depend on terrain exposure, altitude, and climber experience. General guidelines: (1) Under 30 km/h (19 mph) at summit — ideal conditions, most climbers can proceed safely. (2) 30–50 km/h (19–31 mph) — challenging but manageable with full expedition gear and experienced climbers. (3) 50–70 km/h (31–43 mph) — dangerous on exposed ridges, standing upright becomes difficult, frostbite risk elevated. (4) 70–90 km/h (43–56 mph) — extremely dangerous, most commercial expeditions abort summit attempts. (5) Above 90 km/h — fatal risk, cannot safely move above 7,000 m, evacuate to lower camps. On Everest specifically, 40 km/h at summit is the common upper threshold for go/no-go decisions. Wind chill compounds the danger — -30°C with 40 km/h wind feels like -45°C.

    When is the best time to summit a mountain based on weather?

    The best summit timing varies by region and altitude. Major peak windows: (1) Everest and Himalayan 8,000ers — mid-to-late May (pre-monsoon) or late September–October (post-monsoon). (2) Aconcagua — December to February (Southern Hemisphere summer). (3) Denali — May to early July. (4) Kilimanjaro — January–February and June–October (dry seasons). (5) European Alps (Mont Blanc, Matterhorn) — mid-June to mid-September. (6) Cascades and Rockies — July to early September. Within a season, most summits happen in the early morning (2–8 AM) to avoid afternoon thunderstorm development, wind-intensification, and deteriorating snow conditions. Summit-day starts typically begin 10 PM to 2 AM with the goal of summiting by 8–11 AM and being below the summit by noon.

    How far in advance can you predict mountain weather?

    Reliable mountain weather prediction extends approximately 3–5 days for specific events and 7–10 days for general pattern identification. Beyond 10 days, forecasts become educational rather than actionable. For climbing decisions: (1) Summit-day decisions are made on 24–48 hour forecasts with the highest confidence. (2) Expedition start-date decisions are made on 5–7 day pattern forecasts. (3) Season selection is based on climatological averages and long-range pattern indicators but not specific predictions. Modern ensemble forecasting (running multiple model scenarios) helps identify forecast confidence — when all ensemble members agree, the prediction is more reliable; when they diverge significantly, weather is less predictable. Professional expedition forecasters provide both the prediction and its confidence interval.


    Authoritative Sources & Further Reading

    Weather forecasting content reflects standard meteorological practice as applied to mountaineering by recognized experts and organizations:

    • Michael Fagin — West Coast Weather (westcoastweather.com) — Professional expedition weather forecasting, Everest summit-window analysis
    • Chris Tomer — Tomer Weather Solutions — Professional mountain weather forecasting, multi-model consensus analysis
    • American Mountain Guides Association (AMGA) — Guide certification standards including weather competency requirements
    • American Alpine Club / American Alpine Journal — Accident reports with weather-incident analysis
    • Wilderness Medical Society — Practice guidelines for weather-related wilderness emergencies
    • European Centre for Medium-Range Weather Forecasts (ECMWF) — Primary global forecasting model used in expedition forecasting
    • NOAA / National Weather Service — US mountain-region forecasting standards
    • Reference texts: Mountain Weather (Dunlop), Mountain Weather and Climate (Barry), Freedom of the Hills (The Mountaineers)
    • Apps and services: Mountain-Forecast.com, Windy.com, Meteoblue, Garmin inReach Weather
    Published: February 15, 2026
    Last updated: April 19, 2026
    Next review: July 2026
    Part of the Global Summit Guide

    Back to the Master Hub

    This guide is one of 71 across 12 thematic clusters on Global Summit Guide. The master hub organizes every guide by experience tier, specific peak, skill area, and region.

    View the Hub →
  • Tour du Mont Blanc: Complete Trekker’s Guide

    Tour du Mont Blanc: Complete Trekker’s Guide

    Tour du Mont Blanc: Complete Trekker’s Guide (2026) | Global Summit Guide
    Cluster 04 · Non-Technical Treks · Updated April 2026

    Tour du Mont Blanc: Complete Trekker’s Guide

    The definitive 2026 guide to Europe’s classic alpine trek — 170 km circumnavigating the Mont Blanc massif through France, Italy, and Switzerland. Day-by-day itinerary, refuge system, costs, gear, and everything you need to plan the continent’s premier long-distance hike. Three countries, ten high passes, and Mont Blanc’s 4,810 m summit as constant companion.

    170 km
    Circuit
    distance
    10–11
    Trek
    days
    3
    Countries
    crossed
    ~10,000 m
    Cumulative
    gain
    Global Summit Guide A guide in Cluster 04 · Non-Technical Treks View master hub →

    The Tour du Mont Blanc (TMB) is Europe’s definitive long-distance trek — a 170 km circumnavigation of the Mont Blanc massif that crosses through France, Italy, and Switzerland over 10-11 days of hiking. Unlike Nepal’s teahouse treks or Pakistan’s camping expeditions, the TMB uses a distinctive European mountain refuge system: traditional huts offering dormitory beds, communal meals, and the unique social atmosphere that has defined Alpine trekking for over a century. With Mont Blanc’s 15,774 ft summit as the constant reference point, trekkers ascend and descend ten significant passes, pass through three distinct mountain cultures, and experience landscapes ranging from forested valleys to rocky high passes to glacier-carved amphitheaters. This guide covers everything for planning your TMB: day-by-day itinerary with country transitions, refuge booking, costs, season, gear, and how the TMB compares to other iconic treks.

    How this guide was built

    Route and distance data verified against Compagnie des Guides de Chamonix (founded 1821, oldest mountain guide organization in world) records and the Federation Française de la Randonnée Pédestre (GR TMB classification). Refuge information and costs confirmed directly with refuges.info aggregator system and individual hut operators (2026 rates). Daily stage planning cross-referenced with Kev Reynolds’ Tour of Mont Blanc Cicerone Guide (the authoritative English-language reference). Current climbing conditions and trail updates provided by Compagnie des Guides de Chamonix and Italian Alpine Club Courmayeur chapter. Reviewed by practicing IFMGA mountain guides with 2025 TMB season experience. Fact-check date: April 19, 2026.

    TMB Overview: The Classic European Circuit

    The Tour du Mont Blanc follows a circular route around the Mont Blanc massif — the 4,810 m (15,774 ft) peak that is the highest mountain in the Alps and a legendary symbol of European mountaineering. Most trekkers start and finish in Les Houches, France (just outside Chamonix), travel counter-clockwise through Italy and Switzerland before returning to France, but clockwise is equally valid.

    Key TMB facts

    • Total distance: 170 km (105 miles)
    • Cumulative elevation gain: ~10,000 m (33,000 ft)
    • Maximum altitude: 2,665 m (8,743 ft) at Fenêtre d’Arpette (alternative)
    • Standard maximum: 2,537 m (8,323 ft) at Grand Col Ferret
    • Duration: 10-11 days typical (7 days minimum, 14+ days comfortable)
    • Standard start/end: Les Houches, France (just outside Chamonix)
    • Countries crossed: France, Italy, Switzerland (back to France)
    • Accommodation: Mountain refuges and valley hotels
    • Season: Mid-June through mid-September
    • Annual trekkers: ~25,000-30,000 (full circuit)
    • Technical rating: Non-technical hiking with cable-assisted sections
    • Guide requirement: None — self-guided is standard
    Three countries, three mountain cultures

    The TMB’s unique character comes from passing through three distinct Alpine cultures in a single trek. France offers Savoyard cuisine, Chamonix’s mountaineering heritage, and the refinement of French Alps infrastructure. Italy delivers Aosta Valley hospitality, exceptional food (fresh pasta, Fontina cheese, polenta), and Courmayeur’s Italian-Alpine charm. Switzerland brings precision (Swiss trails are famously well-marked), Valais Alps character, and Swiss refuge cuisine. The culinary journey alone is worth the trek — few multi-day hikes offer this depth of cultural and gastronomic variety.


    The Six Great Landmarks

    01

    Col de la Seigne

    2,516 m border pass between France and Italy. Dramatic entry to Italy’s Aosta Valley. Classic panoramic view back toward Mont Blanc. One of TMB’s signature moments — stepping from French trails to Italian terrain with the full Mont Blanc massif as backdrop.

    02

    Courmayeur

    Italy’s premier Mont Blanc resort town at 1,224 m. Rest day opportunity — traditional Italian mountain cuisine, narrow cobbled streets, access to Skyway Monte Bianco cable car for Mont Blanc views. Halfway point of standard itinerary.

    03

    Rifugio Bonatti

    Legendary Italian refuge at 2,025 m named for climber Walter Bonatti. Often cited as TMB’s finest refuge — modern facilities, stunning views of Grandes Jorasses north face. Book 9-12 months in advance. Dinner here is an Alpine highlight.

    04

    Grand Col Ferret

    2,537 m Italy-Switzerland border pass. High point of standard TMB route. Cross from Italian Val Ferret to Swiss Val Ferret. Tibetan-style prayer flags sometimes seen here. Stunning panorama of Swiss Alps to north.

    05

    Fenêtre d’Arpette

    Optional 2,665 m high-alternative pass in Switzerland — TMB’s highest point. Dramatic narrow gap between peaks. Spectacular Trient Glacier views. Weather-dependent alternative to easier Alp Bovine route. For fit trekkers only.

    06

    Refuge du Lac Blanc

    Iconic French refuge at 2,352 m above Chamonix Valley. Overlooks a turquoise alpine lake with Mont Blanc massif reflected on calm days. Classic sunrise/sunset photography. Approached via chains and ladders for added adventure on final days.


    Day-by-Day Itinerary: The Classic 11-Day Circuit

    The standard TMB counter-clockwise route from Les Houches. Color-coded by country:

    01
    FRDay 1 · 7-8 Hours · 15 km

    Les Houches to Les Contamines

    Trek begins ascending Col de Voza (1,653 m). Pass beneath Bionnassay Glacier with views of Mont Blanc and Aiguille du Midi. Descend to Les Contamines village. Cable car option available to skip initial climb.

    1,164 m
    Les Contamines
    02
    FRDay 2 · 8-9 Hours · 17 km

    Les Contamines to Les Chapieux

    Long challenging day. Climb past Refuge de la Balme (1,706 m) to Col du Bonhomme (2,329 m) then Col de la Croix du Bonhomme (2,479 m). Refuge du Col de la Croix du Bonhomme excellent lunch stop. Descend to Les Chapieux valley.

    2,479 m
    Col max
    03
    ITDay 3 · 7-8 Hours · 15 km

    Les Chapieux to Rifugio Elisabetta

    CROSS INTO ITALY. Climb via Ville des Glaciers to Col de la Seigne (2,516 m) — classic French-Italian border pass. Descend into Italy’s Vallon de la Lée Blanche. Rifugio Elisabetta at foot of Miage Glacier with dramatic views.

    2,195 m
    Rif. Elisabetta
    04
    ITDay 4 · 6-7 Hours · 20 km

    Rifugio Elisabetta to Courmayeur

    Descend through Val Veny to Courmayeur. Stunning views of Mont Blanc’s south face. Option to extend via Rifugio Maison Vieille for higher route. Courmayeur hotel rest, Italian dinner, optional Skyway Monte Bianco day.

    1,224 m
    Courmayeur
    05
    ITDay 5 · 5-6 Hours · 12 km

    Courmayeur to Rifugio Bonatti

    Stunning Italian balcony day. Climb from Courmayeur to Rifugio Bertone (1,989 m). Traverse high above Val Ferret on balcony trail with Grandes Jorasses north face visible. Arrive Rifugio Bonatti — trek’s most celebrated refuge.

    2,025 m
    Rif. Bonatti
    06
    CHDay 6 · 7-8 Hours · 17 km

    Rifugio Bonatti to La Fouly

    CROSS INTO SWITZERLAND. Climb to Grand Col Ferret (2,537 m) — trek’s highest standard point. Dramatic Italy-Switzerland border pass. Descend into Swiss Val Ferret to village of La Fouly. First Swiss Franc transactions.

    2,537 m
    Grand Col Ferret
    07
    CHDay 7 · 5-6 Hours · 14 km

    La Fouly to Champex-Lac

    Gentler day through Swiss Val Ferret. Pass through villages of Prayon, Issert. Gradual climb to Champex-Lac — alpine village with boating lake. Swiss mountain culture at its most polished. Rest opportunity.

    1,466 m
    Champex-Lac
    08
    CHDay 8 · 7-9 Hours · 16 km

    Champex-Lac to Trient (via Fenêtre d’Arpette or Alp Bovine)

    Choice day. High alternative via Fenêtre d’Arpette (2,665 m — TMB’s highest point) with Trient Glacier views. Standard route via Alp Bovine (2,049 m) easier and lower. Descend to Trient village.

    2,665 m
    Arpette high
    09
    FRDay 9 · 5-6 Hours · 13 km

    Trient to Tré-le-Champ

    CROSS BACK INTO FRANCE. Climb to Col de Balme (2,191 m) — France-Switzerland border. Panoramic view of Chamonix valley and Mont Blanc massif reveals final approach. Descend to Tré-le-Champ.

    2,191 m
    Col de Balme
    10
    FRDay 10 · 4-5 Hours · 8 km

    Tré-le-Champ to Refuge du Lac Blanc

    Short but dramatic day. Chains and ladders section between Tré-le-Champ and Le Lavancher. Climb to Refuge du Lac Blanc (2,352 m) — iconic turquoise lake with Mont Blanc massif reflection. Sunset and sunrise photography legendary here.

    2,352 m
    Lac Blanc
    11
    FRDay 11 · 6-7 Hours · 15 km

    Refuge du Lac Blanc to Les Houches

    Final day. Traverse via La Flégère (option to use lift). Descend through Chamonix valley forests to Les Houches. Circuit complete. Traditional celebration in Chamonix — fondue, beer, and satisfaction of 170 km accomplished.

    1,007 m
    Les Houches
    Clockwise vs counter-clockwise?

    The TMB can be hiked in either direction. Counter-clockwise (described above) is more common and has the advantage of generally having Mont Blanc behind you as you walk — meaning you don’t see the main peak as often but the approach reveals stays fresh. Clockwise puts Mont Blanc constantly in your field of view — more photogenic but the peak can feel repetitive. Both directions cover the same trails. Practical tip: counter-clockwise aligns better with most commercial operators’ itineraries, so refuges may have slightly more availability for clockwise if you can navigate reservations yourself.


    The Refuge System: How TMB Accommodation Works

    The TMB’s refuge system is central to the experience. Unlike Nepal teahouses or Pakistan camping, European refuges are operated by Alpine Club chapters (CAF in France, CAI in Italy, SAC in Switzerland) or private operators, and they function as coordinated infrastructure throughout the circuit.

    Refuge essentials

    • Sleeping: Primarily dormitories with 8-40 bunks. Some refuges offer 2-4 person private rooms at higher cost.
    • Half-board standard: Most bookings include dinner and breakfast.
    • Dinner: Hearty mountain cuisine — soup, main course, dessert at communal tables.
    • Breakfast: Bread, cheese, charcuterie, coffee or tea.
    • Water: Potable water usually available. Showers sometimes require payment.
    • Electricity: Limited — some refuges have minimal charging, others have none.
    • Sleeping bag liner: Required (sometimes rentable). Refuges provide blankets.

    Booking process

    • Peak season (July-August): Book 6-9 months in advance.
    • Popular refuges (Rifugio Bonatti, Refuge du Lac Blanc): Book 9-12 months ahead.
    • Shoulder season (June, September): 3-6 months typically adequate.
    • Booking systems: Individual refuge websites, refuges.info aggregator, or guide tour packages.
    • Deposits: 30-50% typically required at booking.
    • Cancellation: Strict policies — 30 days minimum for full refund typically.

    Key refuges to know

    • Refuge de la Croix du Bonhomme (France, 2,443 m): Day 2 end — traditional French refuge.
    • Rifugio Elisabetta (Italy, 2,195 m): Day 3 end — Italian CAI refuge, glacier views.
    • Rifugio Bonatti (Italy, 2,025 m): Day 5 end — most celebrated TMB refuge, named for legendary climber Walter Bonatti.
    • Cabane du Trient (Switzerland, 3,170 m): Optional side trip — Swiss SAC refuge for acclimatization.
    • Refuge du Lac Blanc (France, 2,352 m): Day 10 end — iconic sunrise view.
    Refuge etiquette matters

    European refuges operate with specific customs that international trekkers should understand. Quiet hours typically 10 PM to 7 AM — strictly observed. Boots removed at entrance and replaced with refuge slippers provided. Communal dining is the norm — you’ll sit with strangers and share meals. Sleeping bag liners required (some refuges provide for purchase/rental). Cash is preferred at some refuges; card acceptance varies. Tips welcome but not expected. Respecting these customs makes the refuge experience a highlight rather than a friction point — and international trekkers who engage with fellow hikers often find the refuge social aspect as memorable as the trails themselves.


    Logistics: Getting There and Practical Tips

    Getting to Chamonix

    • Nearest airports: Geneva (GVA) 90 km / 1 hour 15 min drive. Lyon (LYS) 220 km / 2.5 hours.
    • From Geneva: Shuttle bus (€25-€50), private transfer (€150-€250), train + bus (€30-€50).
    • From Paris: TGV train to St-Gervais then bus to Chamonix (~6 hours total).
    • From UK: Eurostar to Paris then TGV, or direct flights to Geneva.
    • Starting point Les Houches: 5 km from Chamonix, reachable by local bus or short taxi.

    Currency and payments

    • Euros: Accepted in France, Italy, and increasingly in Switzerland.
    • Swiss Francs: Official currency in Swiss sections, better exchange rates than Euros in Switzerland.
    • Cards: Widely accepted at lowland hotels, variable at mountain refuges.
    • Cash for refuges: Bring €200-€400 cash for unexpected refuge charges.

    Language considerations

    • French: Dominant in French sections. Basic French phrases appreciated.
    • Italian: Dominant in Courmayeur region. English often available.
    • German/French: Swiss sections depending on region. French dominates on TMB.
    • English: Widely spoken at refuges and hotels. Guides typically multilingual.

    TMB vs Other Iconic Treks

    FeatureTour du Mont BlancEBC TrekK2 Base Camp
    Duration10-11 days12-14 days18-21 days
    Distance170 km130 km137 km
    Max altitude2,665 m5,550 m5,000 m
    Cost$2,000-$5,000$1,200-$3,500$3,500-$6,000
    InfrastructureRefugesTeahousesCamping only
    Countries3 (FR/IT/CH)1 (Nepal)1 (Pakistan)
    Altitude riskMinimalSignificantModerate
    TechnicalNon-technicalNon-technicalNon-technical (glacier)
    Self-guided~60-70% of trekkersNot allowed (2023+)Not practical
    Annual trekkers~25,000-30,000~40,000-50,000~1,500
    Best forEuropean alpine experienceIconic HimalayaWilderness expedition

    Tour du Mont Blanc FAQ: Your Common Questions Answered

    How long is the Tour du Mont Blanc trek?

    The Tour du Mont Blanc (TMB) is approximately 170 km (105 miles) with approximately 10,000 meters (33,000 feet) of cumulative elevation gain — typically completed in 10-11 days of hiking. Standard itinerary: Day 1 Les Houches to Les Contamines — 15 km, 7-8 hours. Day 2 Les Contamines to Les Chapieux via Col du Bonhomme — 17 km, 8-9 hours. Day 3 Les Chapieux to Rifugio Elisabetta via Col de la Seigne crossing into Italy — 15 km, 7-8 hours. Day 4 Rifugio Elisabetta to Courmayeur — 20 km, 6-7 hours. Day 5 Courmayeur to Rifugio Bonatti — 12 km, 5-6 hours. Day 6 Rifugio Bonatti to La Fouly via Grand Col Ferret crossing into Switzerland — 17 km, 7-8 hours. Day 7 La Fouly to Champex-Lac — 14 km, 5-6 hours. Day 8 Champex-Lac to Trient via Fenêtre d’Arpette OR Alp Bovine route — 16 km, 7-9 hours. Day 9 Trient to Tré-le-Champ via Col de Balme crossing back into France — 13 km, 5-6 hours. Day 10 Tré-le-Champ to Refuge du Lac Blanc — 8 km, 4-5 hours. Day 11 Refuge du Lac Blanc to Les Houches — 15 km, 6-7 hours. Shorter variations 7-9 days possible using lifts, skipping Lac Blanc, taking buses. Longer variations 14-17 days add rest days. The TMB is designed flexibly — most trekkers complete it in 10-11 days.

    How much does the Tour du Mont Blanc cost?

    The Tour du Mont Blanc costs $1,500-$3,500 for a self-guided trek or $2,500-$5,000 for a guided tour. Accommodation: refuge dormitory half-board €60-€95/night (~$65-$105), private room half-board €90-€150 per person (~$100-$165), hotel in towns €100-€250/night. Total accommodation 10-11 nights €700-€1,500 ($770-$1,650). Food beyond half-board: lunches on trail €15-€25/day, snacks at refuges €5-€15/day, restaurant meals €25-€50/meal. Total food beyond half-board €300-€600. Transportation: international flight to Geneva or Lyon $500-$1,500, airport transfer €25-€50 shuttle or €200 private, bus/train transfers during trek €50-€150. Self-guided costs: budget $1,500-$2,200 with dorm refuges, mid-range $2,200-$3,000 with mix of dorms and private rooms. Guided tour packages: guided tours (luggage transfer, pre-booked refuges) $2,500-$5,000, premium guided $4,000-$6,500, major services Salamander, Tracks and Trails, Exodus Travels, REI Adventures. Extras: gear if buying $500-$1,500, travel insurance $100-$300, trekking poles/apps $50-$150. Average total: self-guided $2,000-$3,500, guided $3,500-$5,500, premium $5,500-$7,000. Cost-saving tips: book refuges 6-9 months ahead via refuges.info, choose dorm over private, pack lunches from breakfast, shoulder season slightly lower. More expensive than Nepal due to Europe’s cost of living but excellent value for infrastructure quality. See our complete mountain climbing costs guide.

    When is the best time to hike the Tour du Mont Blanc?

    The best time to hike the TMB is mid-June through mid-September, with peak season July and August. October-May refuges closed, snow on high passes, not suitable for typical TMB hiking. Mid-June trek season opens, some snow may remain on passes, cooler temperatures, fewer crowds, wildflowers beginning. Late June-early July excellent conditions, longest daylight, peak wildflowers. Mid July-August PEAK season, all refuges open and busy, best weather typically, advance reservations essential 6-9 months ahead. Late August continued excellent conditions, fewer crowds, wildflowers fading. Early-mid September shoulder season, cooler temperatures, possible early snowfall, fewer crowds, last reliable trek window. Mid-late September season ending, refuges closing. Why mid-June through mid-September: all refuges operating, passes clear of snow (Col du Bonhomme and Grand Col Ferret can hold snow), long daylight 15-17 hours, moderate temperatures 50-75°F daytime, relatively stable weather (afternoon thunderstorms common but windows exist). Daily conditions peak season: Chamonix day 65-80°F July-August, high passes 30-55°F with wind, overnight in refuges 40-55°F, precipitation 10-15 rainy days per month usually afternoon storms. Reservation considerations: popular refuges book 9-12 months ahead, less popular 3-6 months ahead. Choice between peak July-August (maximum infrastructure, reliable weather) vs. mid-June or early September (fewer crowds, cooler).

    How hard is the Tour du Mont Blanc?

    The TMB is moderately strenuous — not technically difficult but physically demanding due to 170 km distance, ~10,000 m cumulative elevation gain, and 10-11 consecutive days of hiking. Difficulty factors: total distance 170 km, cumulative elevation 10,000 m, maximum altitude 2,665 m, typical daily hiking 5-9 hours, daily elevation 500-1,500 m gain and loss, non-technical hiking with cable-assisted sections, mix of alpine trails/forest paths/rocky sections/glacial moraine, multiple 2,000+ m passes including Col du Bonhomme, Col de la Seigne, Grand Col Ferret, Col de Balme. Physical challenges: cumulative fatigue (10-11 consecutive days), elevation gain (some days exceed 1,500 m), descent stress (knees take abuse), weather variability (afternoon thunderstorms), backpack weight 8-12 kg when using refuges, altitude effects minimal (highest 2,665 m, no serious AMS). Comparative difficulty: easier than EBC (lower altitude, better infrastructure), harder than single-day hikes (multi-day cumulative), similar to Kilimanjaro in duration but different character, easier than K2 Base Camp, more accessible than multi-week Nepal treks. Main challenges: endurance (10-11 days of 5-9 hour hiking), pass crossings (Col du Bonhomme and Fenêtre d’Arpette particularly challenging), descents (steep downhills hard on knees), weather windows, reservation management. Success rate 85-90% of fit trekkers complete. Preparation: 3-6 months cardio training, weighted pack hikes, broken-in hiking boots, knee/leg strengthening, back-to-back long hiking days practice. Treat as serious multi-day endurance adventure.

    Do you need a guide for the Tour du Mont Blanc?

    No, the TMB can be comfortably hiked independently by experienced hikers — guides are not required or legally mandated. Approximately 60-70% of trekkers do TMB self-guided. Self-guided considerations: trail well-marked with distinctive red-and-white markings (French) and red-and-blue markings (Swiss), refuge system mature and used to international trekkers, multilingual staff at most refuges, navigation straightforward with guidebook or mapping app, most refuges book online. What self-guided requires: pre-booking accommodations 6-9 months ahead for peak season, guidebook or digital maps (Cicerone TMB guidebook standard), navigation skills, ability to handle altitude/weather/terrain decisions independently, language comfort or translation tools. When to consider guided tours: first multi-day European trek experience, prefer having logistics handled, want cultural interpretation, group travel preferences, safety preferences for emergency response. Guided tour services: Salamander Adventures, Tracks and Trails, Exodus Travels, REI Adventures, Mac’s Adventure. What guided provides: all refuge reservations pre-booked, luggage transfer between refuges, professional TMB guides, group meals and social, emergency support, cultural commentary. Baggage transfer services: even self-guided trekkers can use baggage transfer €15-€25 per bag per transfer (Sherpa Van, Rucksack Readers, Mont Blanc Treks). Cost comparison: self-guided $1,500-$3,000, self-guided with luggage transfer $2,000-$3,500, guided tours $2,500-$5,000, premium guided $4,000-$6,500. Most trekkers successfully complete TMB self-guided with pre-booked refuges. Guided tours add convenience and social component at meaningful additional cost.

    How do refuges work on the Tour du Mont Blanc?

    The TMB’s refuge system provides mountain hut accommodation — dormitory beds, half-board (dinner and breakfast), and social atmosphere unique to European alpine trekking. How refuges work: Accommodation type mountain huts operated by Alpine Club affiliated organizations or private operators. Sleeping primarily dormitories with 8-40 bunks per room, some private rooms at higher cost. Half-board standard including dinner and breakfast. Meals hearty mountain cuisine (soup, main course, dessert), breakfast bread/cheese/charcuterie/coffee. Potable water usually available, showers sometimes require payment. Limited electricity. Reservations: book 6-9 months in advance for peak season, popular refuges (Rifugio Bonatti, Refuge du Lac Blanc) 9-12 months ahead, systems include individual refuge websites, refuges.info aggregator, or guide tour booking. Cancellation policies strict — typically 30 days minimum for refund. Deposit required at booking 30-50% of stay. Cost per night (2026): dormitory bed half-board €60-€95 (~$65-$105), private room half-board €90-€150 per person (~$100-$165). Payment cash preferred at some, cards accepted at most. Daily routines: 7:00-8:00 AM breakfast, 8:00-8:30 AM depart, 3:00-5:00 PM arrive next refuge, 6:30-7:30 PM communal dinner, 9:00-10:00 PM lights out. Etiquette: quiet hours 10 PM-7 AM, leave boots at entrance, wear refuge slippers, respect communal spaces, pack out personal trash, sleeping bag liner required, tips welcome but not expected. Key TMB refuges by country France (Refuge du Lac Blanc), Italy (Rifugio Elisabetta, Rifugio Bonatti), Switzerland (Hôtel de la Forclaz). The refuge experience is a highlight of TMB.

    What gear do I need for the Tour du Mont Blanc?

    The TMB requires standard alpine trekking gear — lighter than high-altitude expedition treks but sturdy enough for variable weather and 10-11 days of hiking. Complete checklist: Footwear: broken-in hiking boots with ankle support and waterproofing, gaiters for snow sections, 4-5 pairs merino wool socks, liner socks, approach shoes/sandals for refuge. Clothing layering: 2-3 base layer tops, 2 pairs hiking pants, fleece mid-layer, insulated puffy jacket, waterproof/windproof shell jacket, rain pants (essential), hiking shirts, sun hat and warm beanie, lightweight and warmer gloves, buff/neck gaiter. Backpack: 30-40 liter daypack (refuge use means no camping gear), rain cover, dry bags, packing cubes. Hydration: 2-3 L water bottles, purification tablets, electrolytes. Accessories: trekking poles (highly recommended for descents), headlamp, category 2-3 sunglasses, SPF 30-50 sunscreen and lip balm, first aid kit with blister treatments, basic medications. Refuge-specific: sleeping bag LINER (required — refuges provide blankets), quick-dry towel and biodegradable soap, earplugs (dormitory noise), eye mask. Navigation: map or mapping app (Swisstopo, IGN France, AllTrails offline), guidebook (Cicerone ‘Tour of Mont Blanc’ standard), phone with TMB tracking app, emergency whistle. Documents: passport (multi-country), Euros and Swiss Francs, credit cards, insurance documents. Not needed: camping gear (refuges throughout), expedition-weight insulation (too warm), crampons (unless early season), technical climbing gear. Pack weight target 8-12 kg (18-27 lbs). Gear rental available in Chamonix and Courmayeur. See our complete mountain gear list.

    Tour du Mont Blanc vs Everest Base Camp trek — which is better?

    The choice depends on preferences — TMB offers European alpine character with better infrastructure while EBC delivers iconic high-altitude Himalayan experience. Comparison: Duration TMB 10-11 days, EBC 12-14 days. Cost TMB $2,000-$5,000, EBC $1,200-$3,500. Maximum altitude TMB 2,665 m (8,743 ft), EBC 5,550 m (18,209 ft). Infrastructure TMB refuges with beds and meals, EBC teahouses with dormitories. Access TMB Chamonix (Geneva airport), EBC Kathmandu + Lukla flight. Countries TMB France/Italy/Switzerland, EBC Nepal. Altitude challenge TMB minimal, EBC significant AMS risk. Why choose TMB: lower altitude (no serious AMS concerns), better infrastructure (European standards), shorter total commitment, three countries in one trek, cultural variety (Alpine mountain cultures), predictable refuges and meals, good for first international trek, family-friendly. Why choose EBC: iconic status (world’s highest mountain), genuine high-altitude experience, Sherpa cultural immersion, lower cost, adventure/expedition feel, greater scenic drama (mountains above 8,000 m), Kala Patthar sunrise experience. Who should do TMB first: first multi-day European trek, sensitive to altitude, shorter time available, family with teenagers, prefer infrastructure comfort, want three-country experience. Who should do EBC first: want bucket-list iconic experience, experienced with altitude, lower budget, interested in expedition-style, prefer Asian/Nepalese culture. Realistic: TMB is ‘greatest hits of European Alps’ with comfort, EBC is ‘iconic Himalayan experience’ with challenges. Both deserve respect — TMB is not easier in absolute terms (170 km vs 130 km), just more accessible infrastructure. Many trekkers do both. See our EBC Trek guide.


    Authoritative Sources & Further Reading

    Content reflects authoritative European Alpine trekking sources:

    • Compagnie des Guides de Chamonix — chamonix-guides.com — Founded 1821, oldest mountain guide organization
    • Federation Française de la Randonnée Pédestre — ffrandonnee.fr — Official GR trail classification
    • Kev Reynolds, Tour of Mont Blanc: Complete Two-Way Trekking Guide (Cicerone) — Authoritative English-language reference
    • refuges.info — Refuge aggregator booking system
    • Club Alpin Français (CAF) — French refuge management
    • Club Alpino Italiano (CAI) — Italian refuge management
    • Schweizer Alpen-Club (SAC) — Swiss Alpine Club
    • Alpine Club of Pakistan and American Alpine Club — Historical and comparative trekking data
    • Guide services: Salamander Adventures, Tracks and Trails, Exodus Travels, REI Adventures, Mac’s Adventure, Mont Blanc Treks
    Published: March 13, 2026
    Last updated: April 19, 2026
    Next review: July 2026
    Part of the Global Summit Guide

    Back to the Master Hub

    This guide is one of 71 across 12 thematic clusters on Global Summit Guide. The master hub organizes every guide by experience tier, specific peak, skill area, and region.

    View the Hub →

  • Best Trekking Poles for Mountain Hiking: Complete Guide 2026

    Best Trekking Poles for Mountain Hiking: Complete Guide 2026

    Best Trekking Poles for Mountain Hiking: Complete Guide 2026

    Trekking poles are essential tools for mountain hikers, providing stability, support, and safety on challenging terrains. This comprehensive guide will explore the best trekking poles available in 2025, detailing their features, benefits, and how to choose the right ones for your hiking adventures. Many hikers struggle with balance and joint strain, especially on steep or uneven trails. The right trekking poles can alleviate these issues, enhancing your overall hiking experience. In this article, we will cover the types of trekking poles, their core features, comparisons between materials, and tips for maintenance and usage techniques.

    Indeed, research supports the notion that trekking poles are effective in preventing muscle injury during strenuous mountain activities.

    Prevent Muscle Injury with Trekking Poles on Mountain Hikes

    Temporary muscle damage precipitated by downhill walking affects muscle function and potentially exposes muscle to further musculoskeletal injury. We hypothesized that the use of trekking poles would help maintain muscle function and reduce indices of muscle damage after a day’s mountain trekking.

    Trekking poles reduce exercise-induced muscle injury during mountain walking, G Howatson, 2011

    What Are Trekking Poles and Why Are They Essential for Mountain Hiking?

    Trekking poles are lightweight, adjustable sticks used by hikers to provide additional support and stability while navigating various terrains. They work by distributing weight more evenly across the body, reducing strain on joints and improving balance. The essential benefit of using trekking poles is their ability to enhance stability, especially on steep or uneven ground, making them invaluable for mountain hiking. This guide will delve into the different types of trekking poles and their specific advantages for hikers.

    Defining Trekking Poles: Types and Core Features

    Trekking poles come in various types, each designed to cater to different hiking needs. The primary types include:

    1. Carbon Fiber Trekking Poles: Known for their lightweight and durability, these poles are ideal for long-distance hikes where every ounce counts.
    2. Aluminum Trekking Poles: These poles are heavier but offer greater durability and resistance to bending, making them suitable for rugged terrains.
    3. Adjustable Trekking Poles: These poles can be lengthened or shortened, allowing for customization based on the user’s height and the terrain.

    Each type features core components such as grips, baskets, and tips, which contribute to their overall functionality and user experience.

    How Trekking Poles Enhance Stability and Safety on Mountain Trails

    Trekking poles significantly enhance stability on mountain trails by providing additional points of contact with the ground. This increased contact helps distribute weight more evenly, reducing the risk of falls and injuries. Moreover, they assist in maintaining balance on uneven surfaces, allowing hikers to navigate tricky sections with confidence. The use of trekking poles can also alleviate joint strain by shifting some of the load from the legs to the arms, making long hikes more comfortable and less taxing on the body.

    Studies further confirm that using trekking poles, especially during uphill backpacking, can significantly reduce muscle activity and enhance overall comfort.

    Uphill Backpacking: Trekking Poles Reduce Muscle Activity & Boost Comfort

    The results showed that although imposing no metabolic consequence, pole use elicited a longer stride length (1.27 vs 1.19 m), kinematics that were more similar to those of unloaded walking, and reduced activity in several lower extremity muscles. Although pole use evoked a greater heart rate (113.5 vs 107 bpm), subjects were backpacking more comfortably as indicated by their ratings of perceived exertion (10.8 vs 11.6).

    Muscular and metabolic costs of uphill backpacking: are hiking poles beneficial?, CA KNIGHT, 2000

    Which Types of Trekking Poles Are Best for Mountain Hiking in 2026?

    When selecting trekking poles for mountain hiking in 2025, consider the following options based on user reviews and expert recommendations:

    1. Black Diamond Trail Pro Shock: Known for its shock-absorbing features, this pole is perfect for those seeking comfort on long hikes.
    2. LEKI Micro Vario Ti: This adjustable pole is praised for its lightweight design and durability, making it a favorite among serious hikers.
    3. MSR DynaLock Ascent: Ideal for steep terrains, this pole offers excellent stability and is built to withstand harsh conditions.

    These poles have been highlighted for their performance, user satisfaction, and value for money.

    Comparing Carbon Fiber and Aluminum Poles: Weight, Durability, and Cost

    Close-up comparison of carbon fiber and aluminum trekking poles, highlighting material differences and features

    When choosing between carbon fiber and aluminum trekking poles, it’s essential to consider their respective advantages and disadvantages. The following table summarizes the key differences:

    MaterialWeightDurabilityCost
    Carbon FiberLightweightModerateHigher
    AluminumHeavierHighLower

    Carbon fiber poles are favored for their lightweight nature, making them ideal for long hikes. However, they can be more expensive and less durable than aluminum poles, which are heavier but offer greater strength and resistance to bending. Understanding these differences can help hikers make informed decisions based on their specific needs and budget.

    Adjustable vs. Fixed-Length Poles: Choosing Based on Terrain and User Needs

    Choosing between adjustable and fixed-length trekking poles depends on the terrain and personal preferences. Adjustable poles are versatile, allowing users to modify the length based on the incline or their height. This feature is particularly beneficial for hikers who traverse varied terrains. Conversely, fixed-length poles are often lighter and more robust, making them suitable for specific hiking conditions where stability is paramount. Evaluating the pros and cons of each type can guide hikers in selecting the best option for their adventures.

    How to Choose Lightweight Trekking Poles Without Compromising Strength?

    Selecting lightweight trekking poles without sacrificing strength involves considering the materials and construction methods used. Look for poles made from high-quality carbon fiber or aluminum alloys that provide a balance between weight and durability. Additionally, consider the pole’s locking mechanism; twist locks tend to be lighter, while lever locks offer more security. It’s crucial to test the poles for comfort and stability before making a purchase, ensuring they meet your hiking needs without adding unnecessary weight.

    Evaluating Pole Weight and Material for Long-Distance Mountain Hiking

    For long-distance mountain hiking, the weight and material of trekking poles play a critical role in overall performance. Lightweight poles reduce fatigue over extended periods, allowing hikers to maintain energy levels. Carbon fiber poles are often preferred for their minimal weight, but aluminum poles can provide the necessary durability for rugged trails. Hikers should also consider the pole’s grip and shock absorption features, as these elements contribute to comfort during long treks.

    Incorporating Shock Absorption Features for Enhanced Comfort

    Shock absorption features in trekking poles can significantly enhance comfort during hikes. These features work by reducing the impact on joints when descending steep trails, minimizing fatigue and discomfort. Look for poles with built-in shock-absorbing mechanisms, such as springs or flexible shafts, which can provide a smoother hiking experience. Incorporating these features into your trekking pole selection can lead to a more enjoyable and less strenuous hiking adventure.

    Scientific investigations have specifically demonstrated the effectiveness of trekking poles in mitigating muscle and cartilage damage during downhill walking.

    Trekking Poles Reduce Downhill Muscle & Cartilage Damage

    This study investigated the effect of the use of trekking poles on muscle and cartilage damage and fatigue during downhill walking in obese women. Subjects performed downhill walking without a trekking pole (NP) and with a trekking pole (TP) at 50% heart rate reserve for 30 minutes on a treadmill.

    Trekking poles reduce downhill walking-induced muscle and cartilage damage in obese women, 2016

    What Are the Best Usage Techniques for Trekking Poles on Mountain Terrain?

    Hiker demonstrating proper usage techniques for trekking poles on a mountain trail, emphasizing stability and balance

    To maximize the benefits of trekking poles, it’s essential to use them correctly. Here are some effective techniques:

    1. Adjust the Length: Ensure the poles are adjusted to the correct height for your body, typically at a 90-degree angle when holding the grips.
    2. Plant the Poles Ahead: Use the poles to probe the ground ahead of you, providing stability and balance before stepping.
    3. Use a Natural Rhythm: Coordinate your pole planting with your steps to maintain a natural rhythm, enhancing your overall balance and efficiency.

    These techniques can help hikers utilize their trekking poles effectively, improving their stability and safety on mountain trails.

    How to Maintain and Care for Your Trekking Poles to Ensure Longevity?

    Proper maintenance of trekking poles is crucial for ensuring their longevity and performance. Here are some essential care tips:

    1. Clean Regularly: After each hike, wipe down the poles to remove dirt and moisture, preventing corrosion and wear.
    2. Inspect for Damage: Regularly check for any signs of wear or damage, particularly at the joints and tips, to ensure they remain safe to use.
    3. Store Properly: When not in use, store the poles in a cool, dry place to prevent material degradation.

    By following these maintenance tips, hikers can extend the life of their trekking poles and ensure they are always ready for the next adventure.

    Which Trekking Poles Are Recommended for Specific Mountain Conditions and Peaks?

    Selecting the right trekking poles for specific mountain conditions is vital for safety and performance. Here are some recommendations based on various conditions:

    1. For Snowy Conditions: Look for poles with wider baskets to prevent sinking into the snow, such as the Black Diamond Expedition 3.
    2. For Rocky Terrain: Choose durable aluminum poles like the MSR DynaLock Ascent, which can withstand impacts.
    3. For Steep Climbs: Lightweight carbon fiber poles, such as the LEKI Micro Vario Ti, are ideal for maintaining energy on steep ascents.

    These recommendations can help hikers choose the best trekking poles tailored to their specific hiking conditions and challenges.

    What Safety Benefits Do Trekking Poles Provide During Mountain Hiking?

    Trekking poles offer several safety benefits that enhance the hiking experience. They help reduce the risk of falls by providing additional points of contact with the ground, improving balance on uneven surfaces. Furthermore, they can alleviate joint stress by redistributing weight, making descents less taxing on the knees. In emergency situations, trekking poles can also serve as makeshift splints or support devices, adding an extra layer of safety for hikers navigating challenging terrains.

    For more detailed information on planning your next adventure, visit this resource.

    Before embarking on any mountain hike, it’s crucial to prioritize gear and safety. Proper equipment and knowledge can significantly reduce risks and ensure a safer experience.

    If you have any questions or need further assistance, feel free to contact us. We’re here to help you prepare for your next mountain adventure.

    To discover incredible mountain destinations and expert guidance, explore our mountains section. Find the perfect peak for your next challenge.

    For comprehensive resources and expert advice on mountain hiking, check out Global Summit Guide. Your ultimate resource for mountain adventures.

    Conclusion

    Utilizing trekking poles can significantly enhance your mountain hiking experience by providing stability, reducing joint strain, and preventing injuries. With the right selection of poles tailored to your specific needs, you can navigate challenging terrains with confidence and comfort. Explore our curated collection of trekking poles to find the perfect fit for your next adventure. Start your journey towards safer and more enjoyable hikes today!

Language »