
Last updated June 3, 2026
Beginner Gear Guide: What You Actually Need (and What to Skip)
The honest version — no brand deals, no upselling. Just the five things you genuinely can’t go without, three budget tiers from $230 to $1,400, and a clear list of what to leave on the shelf until year two. Walk into any outdoor retailer and a first-timer can easily spend $1,500 on gear they don’t need for five years. This guide gives you the third path: exactly what you need, organized by what it does, priced honestly.
Beginner climbing gear divides into five non-negotiable categories (footwear, three-layer clothing system, navigation, hydration, and safety basics) plus a 20-28 liter daypack as the container — totaling $230-$290 at the entry tier or $490-$590 at the comfortable tier, with no technical mountaineering equipment required for any beginner Class 1-2 summer summit. Generally, the five non-negotiable categories cover everything a beginner needs: footwear (trail runners or low-cut hiking boots — not technical mountaineering boots), layering (base layer of merino wool or synthetic but never cotton, mid layer of fleece or light down, shell layer of wind/rain jacket), navigation (phone GPS with offline-downloaded route plus paper map backup), hydration (minimum 2 liters water capacity carried before leaving trailhead), and safety basics (headlamp, first aid kit, emergency whistle, space blanket). Specifically, three honest budget tiers cover beginner needs: Under $300 entry kit gets you up the mountain safely, $300-$600 sweet spot adds comfort and capability for a full season, and $600+ multi-year kit handles light snow travel and overnight objectives. Notably, six items are sold to beginners regularly but should be absolutely skipped for the first season — ice axe, crampons, climbing harness and rope, 4-season mountaineering tent, technical mountaineering boots (B3 category), and avalanche beacon/probe/shovel — because they create false confidence on terrain that doesn’t require them while adding weight without function.
Key Takeaways
- 5 non-negotiable gear categories: Footwear, 3-layer clothing system, navigation, hydration, safety basics. Plus a 20-28L daypack.
- Trail runners are often better than hiking boots for dry Class 1-2 summer peaks — lighter, more agile, faster drying, easier on feet during long descents.
- Cotton is forbidden for any layer. Base layers must be merino wool or synthetic. Cotton holds moisture, gets cold, stays cold.
- 3 budget tiers cover all needs: Under $300 entry kit ($230-$290), $300-$600 sweet spot ($490-$590), $600+ multi-year kit ($900-$1,400).
- Higher budgets buy comfort, not safety. The entry tier kit is genuinely complete — nothing critical is missing at the lower price point.
- 6 items to absolutely skip: Ice axe, crampons, climbing harness/rope, 4-season tent, B3 mountaineering boots, avalanche beacon/probe/shovel.
- Buy footwear and daypack, rent expensive specialty items. Trekking poles, crampons, ice axes are best rented first to confirm fit and use frequency.
- Pack hip belt must sit on hips, not waist — transfers 70% of load to legs and off shoulders. Most common pack fit mistake.
- Wear new footwear on 3+ training walks before summit day. Blisters from new footwear are the single most common beginner complaint and 100% preventable.
The Beginner Gear Trap — And How to Avoid It
Two failure modes send first-timers home before the summit. Generally, neither is about fitness. Specifically, both are about gear decisions made before the trailhead. Notably, the outdoor industry wants you to believe that the right gear unlocks the mountain — but the truth is more nuanced: under-buying creates real safety problems, and over-buying wastes money on equipment you don’t need for five years.
The $1,200 First Hike
Titanium cookset, four-season tent, GPS watch, technical mountaineering boots — purchased for a Class 1 summit that needed trail runners and a water bottle. Money spent that earns nothing in performance or safety on a beginner peak, and creates pack weight that slows you down.
Find Hotels, Flights & Trips for the World’s Best Hiking Destinations
The Global Summit Guide Travel Shop on Expedia — curated for outdoor adventurers, mountaineers, and serious hikers. Patagonia to the Alps. Nepal to the Rockies. Curated lodging for every region we cover.
Explore Travel Shop on Expedia →The $60 Disaster Kit
Cotton t-shirt, running shoes, single 500ml bottle, no headlamp or first aid. Fine for a 2-mile park walk. A genuine problem when weather changes at elevation or the descent runs past dark. Skipping the safety basics creates real consequences.
The solution isn’t splitting the difference between these two extremes — it’s understanding which items are truly non-negotiable for any mountain objective, and which are genuinely optional until your objectives demand them. That’s what this guide is structured around.

The 5 Non-Negotiables: Every Beginner Must Have These
Five categories. No exceptions. Generally, every item below earns its place because its absence creates a real safety risk or causes the kind of discomfort that ends trips early and puts people off the sport.
Footwear: Trail Runners vs Hiking Boots
This is the most debated gear decision for beginners and the answer is simpler than the industry wants you to think. For dry, Class 1-2 trails in summer: trail runners are fine, and often better. Lighter, more agile, faster drying, and your feet will thank you on long descents. For wet conditions, loose rocky terrain, or any route with ankle-twisting potential: low-cut hiking boots or trail runners with a stiffer midsole. High-cut mountaineering boots are for technical terrain only — leave them for year two.
- Trail runners ($80-$160): Hoka Speedgoat, Salomon Speedcross, Brooks Cascadia — excellent for most beginner Class 1 peaks
- Hiking boots ($120-$220): Merrell Moab, Keen Targhee, Salomon X Ultra — better for wet or rocky terrain and beginners who want ankle support
- Critical: Whatever you choose, wear them on 3+ training walks before summit day. Blisters from new footwear are the single most common beginner complaint and 100% preventable
- Decision rule: Trail runners for most Class 1 summer peaks · Hiking boots for wet, rocky, or ankle-risk terrain
Layering: The 3-Layer System in Plain English
The three-layer system isn’t a premium upgrade — it’s the basic operating framework for staying comfortable and safe when mountain temperatures shift. Generally, on a summer summit you might start in 60°F warmth and arrive at the top in 40°F wind. Specifically, without layers you’re either too hot on the way up or dangerously cold at the summit. Notably, cotton is forbidden — this is the one rule where there’s no flexibility.
Moves Sweat Away
Merino wool or synthetic. Never cotton — cotton holds moisture, gets cold, and stays cold. This is the one item where the “no cotton” rule is absolute.
Picks: Smartwool Classic ($65), REI Merino ($55), any Patagonia/Arc’teryx/Columbia synthetic tee
Traps Body Heat
Fleece or light down jacket. This is what you pull on at the summit or when you stop moving. Lives in the top of your pack, not on your body during the climb.
Picks: Patagonia R1 fleece ($150), REI 100-weight fleece ($40-$65), lightweight down hoody
Blocks Wind & Rain
Lightweight wind/rain jacket. Doesn’t need to be Gore-Tex at beginner level — a DWR-treated nylon shell handles summer mountain conditions well. Your emergency layer.
Picks: Marmot Precip ($150), REI Co-op Flash ($99), Columbia Watertight ($70)
Navigation: Phone GPS + Offline Map + Paper Backup
For Class 1-2 beginner peaks, your phone running AllTrails Pro or Gaia GPS with an offline-downloaded map is genuinely sufficient. Generally, download the map before you leave home — cell coverage on mountain trails is unreliable. Specifically, a paper map as backup costs nothing to print and weighs nothing meaningful.
- Download offline the night before — not at the trailhead where you may have no signal
- Carry a portable battery pack (10,000 mAh, ~$20) — GPS drains battery twice as fast as normal use
- A dedicated GPS device ($250-$400) is unnecessary for marked trail objectives in year one — phone navigation is genuinely sufficient
- Paper map backup costs $0-$3 — print before leaving home. Weighs nothing, never runs out of battery
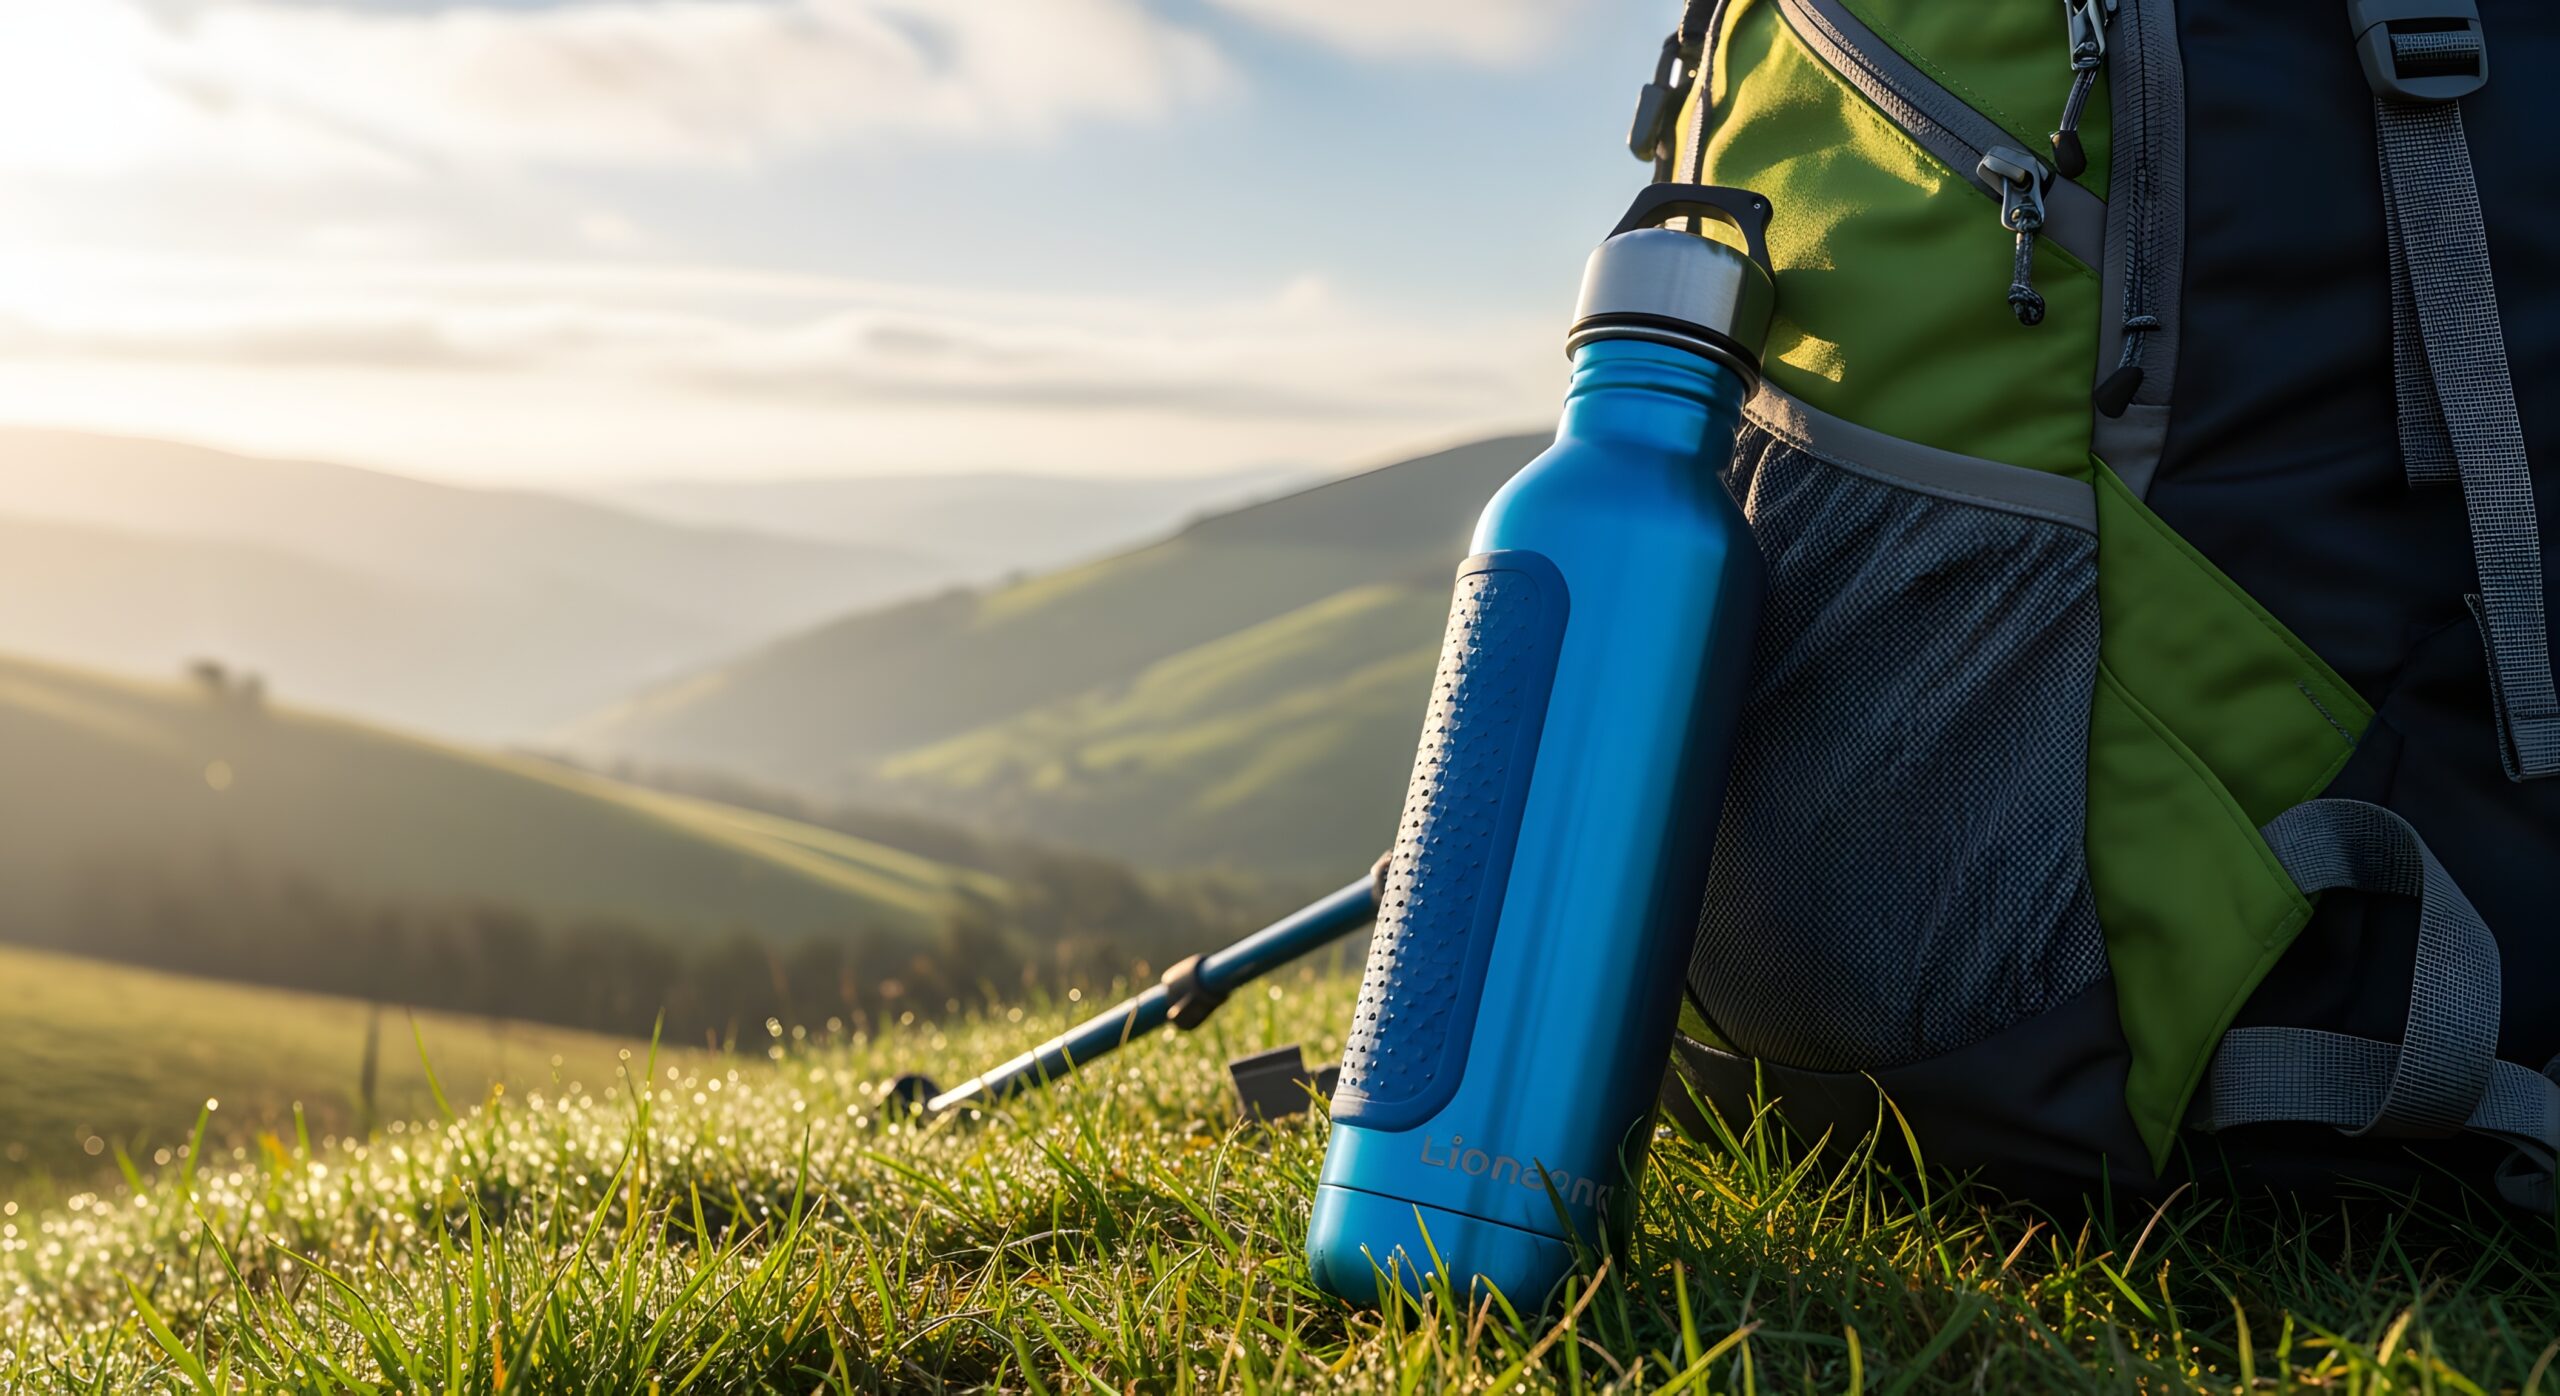
Hydration: Minimum 2 Liters Capacity
The minimum for any beginner summit is 2 liters of water, carried, before you leave the trailhead. Generally, on hot days or longer objectives, carry 3 liters. Specifically, dehydration is the most common cause of headaches, dizziness, and premature turnarounds on beginner peaks — and it’s entirely preventable. Notably, drink 500ml per hour of hiking as a solid starting rule, adjusted for heat.
- Two 1L Nalgene bottles ($12 each) — bulletproof and zero-faff, no tubes to clean or valves to break
- Hydration reservoirs (CamelBak, Osprey) — comfortable but require more maintenance and hide how much you’ve drunk
- Water treatment (Sawyer filter, $35) — lets you refill from streams, useful for longer objectives but not required for most beginner peaks
- Drink schedule: 500ml per hour of hiking is a solid starting rule, adjusted for heat and exertion
Safety Basics: First Aid, Headlamp, Whistle
Three items that together weigh under 400g and cost under $50. Generally, skipping them is the clearest signal of a first-timer who hasn’t thought through what happens when something goes slightly wrong. Specifically, none of these items earns its place on luck or rare emergencies — they earn it on the routine moments when small problems prevent bigger ones.
- Headlamp ($25-$45): Black Diamond Spot or Petzl Actik — 200+ lumens minimum. Descents run long; trails look completely different in the dark. Never hike without one even on a “day hike”
- First aid kit ($18-$35): Adventure Medical Kits Ultralight/Watertight 0.5 covers all realistic beginner scenarios — blisters, cuts, sprains, headache. Know what’s in it before you go
- Emergency whistle ($5-$8): Fox 40 or equivalent. Three blasts = universal distress signal. Audible over a kilometer in most conditions. Attach to pack strap so it’s always accessible
- Emergency blanket ($4): A mylar space blanket weighs 50g and can prevent hypothermia if you’re stuck out overnight. There is no reason not to carry one
Don’t forget the pack itself. A 20-28L daypack is the container for everything above. You don’t need a 65L expedition pack — it’ll be empty, flop around, and create back pain. Osprey Talon 22, REI Flash 22, or similar ($80-$130) are well-fitting, trail-tested options that won’t overwhelm a beginner’s frame. Make sure the hip belt actually sits on your hips, not your waist — this transfers 70% of the load to your legs and off your shoulders. This is the most common pack fit mistake for beginners.
Gear by Budget: Three Honest Tiers
Every tier below covers a complete beginner kit — nothing critical is missing at any level. Generally, higher budgets buy more comfort, durability, and performance in marginal conditions. Specifically, they don’t buy safety that the lower tier lacks. Notably, the most common mistake is over-investing in Tier 3 gear before completing a single Tier 1 summit — wait until you know what specific gear failures matter to you before upgrading.
Gets You Up the Mountain
A genuinely complete kit. Nothing critical is missing. Will get you up any beginner Class 1-2 peak safely and comfortably in summer conditions.
What to Prioritize
- Trail runners or mid hiking boot — $80-$130 · biggest single investment at this tier
- Synthetic base layer — $30-$45 · REI or Decathlon house brand
- Wind/light rain jacket — $50-$70 · Columbia Watertight or similar
- 20-25L daypack — $40-$65 · REI Flash 22 or equivalent
Safety + Hydration Essentials
- 2× 1L Nalgene water bottles — $24 total · simple and reliable
- Headlamp — $25 · Black Diamond Spot 350
- First aid kit + whistle + space blanket — $30 combined · Adventure Medical Kits 0.5
- Printed paper map + AllTrails offline — $0-$3 · free app tier is sufficient
Comfortable, Capable Setup
The recommended tier for most committed beginners. Comfortable across a full season, handles light weather changes, and covers most beginner objectives through end of year two.
Meaningful Upgrades from Tier 1
- Quality mid hiking boot or Hoka trail runner — $130-$180 · significant comfort gain on long days
- Merino wool base layer — $65-$90 · Smartwool or Icebreaker · more comfortable, odor-resistant
- Fleece mid layer + waterproof shell — $80 fleece + $130 shell · handles variable mountain weather well
- Osprey Talon 22 or Stratos 24 — $110-$140 · well-fitted, ventilated back panel, integrated rain cover
Additional Items at This Tier
- Trekking poles (collapsible) — $50-$90 · dramatically reduces knee stress on descent
- 3L hydration reservoir — $30-$50 · CamelBak or Osprey · carry more water comfortably
- Sun hat, gloves, wool beanie — $40 combined · summit temperatures surprise first-timers
- Gaia GPS Pro subscription — $40/year · offline topographic maps for all US peaks
All-Weather, Multi-Year Capable
For committed climbers planning multiple seasons. Handles everything through end of beginner and into intermediate tier — including light snow travel, variable weather, and overnight-capable objectives.
Premium Performance Upgrades
- Leather or B1 hiking boot — $180-$260 · La Sportiva, Scarpa, or Lowa · lasts 5-8 seasons with care
- Gore-Tex hardshell jacket — $250-$400 · Arc’teryx Beta, Patagonia Torrentshell 3L · handles real storms
- Down mid layer (800-fill+) — $150-$220 · Patagonia Down Sweater · compresses small, warm fast
- Osprey Stratos 36 / Ariel 35 — $180-$220 · right-sized for overnight capable summit days
Extras That Earn Their Place
- Carbon fiber trekking poles — $130-$180 · Black Diamond Carbon Distance · ultralight, foldable
- Garmin inReach Mini 2 (satellite communicator) — $350 + $15/mo plan · two-way messaging anywhere, emergency SOS
- Sun protection: glacier glasses + SPF50 base — $30-$80 · more critical above treeline and on snow
- Lightweight bivy or emergency tent — $50-$90 · SOL Escape Bivvy · under 250g, serious emergency shelter
What to Absolutely Skip for Your First Season
The items below are sold to beginners regularly. Generally, some are sold specifically by well-meaning gear shop staff who don’t know your target peak. Specifically, all of them are unnecessary for Class 1-2 beginner objectives, and some will actively work against you if you’re not trained to use them. Notably, carrying these items without the training to use them properly creates false confidence — which is more dangerous than not having them at all.
⛔ Ice Axe
Required for steep snow travel and self-arrest on technical terrain. Not required on any Class 1-2 summer peak. Carrying one without knowing how to use it is more dangerous than not having one — creates false confidence on terrain that doesn’t require it.
⛔ Crampons
Essential for glacier travel and steep ice. Unnecessary on clear summer trails. If your route has a snow section in early season warranting traction, microspikes ($35-$50) are the right tool — not crampons. Crampons need compatible boots to function safely.
⛔ Climbing Harness & Rope
If your Class 1-2 route requires a harness and rope, it is not a beginner route. A harness carried without the skills and partner systems to use it correctly is dead weight at best, a false safety signal at worst.
⛔ 4-Season Mountaineering Tent
Heavy, expensive, and built for winter expedition use. If your first summit involves an overnight, a 3-season backpacking tent ($100-$250) is completely appropriate for summer mountain conditions.
⛔ Technical Mountaineering Boots (B3)
Designed for crampon compatibility and extreme cold. Stiff, heavy, and blister-inducing without the specific terrain to justify them. B1 hiking boots or trail runners are the appropriate footwear for beginner summer peaks.
⛔ Avalanche Beacon, Probe & Shovel
Critical for off-piste winter travel. Completely unnecessary for summer beginner peaks. Carrying avalanche gear without the training to interpret a beacon signal or probe efficiently creates a false sense of preparedness without actual capability.
The exception to every “skip” rule. If your specific route requires any of the above items — crampons for a persistent snow section, microspikes for an icy approach — then they’re not optional. The skip list applies to gear purchased generically because “it might be useful.” Always check current trip reports for your specific peak and date before finalizing your kit. A peak that’s a Class 1 summer walk in August may be a Class 3+ technical climb in May or October.
Rent vs Buy: A Quick Decision Guide
Renting before you buy makes sense for any item that’s expensive, body-specific, or rarely used. Generally, it makes less sense for items that are hygiene-sensitive, need to be broken in, or are so inexpensive that the rental cost approaches the purchase price. Specifically, the matrix below covers the 8 most common beginner gear decisions.
| Item | Decision | Reason |
|---|---|---|
| Hiking boots / trail runners | BUY | Must be broken in before summit day. Blisters from unfamiliar rentals are the #1 beginner trip-ruiner. The one item to own from day one. |
| Trekking poles | RENT FIRST | REI rents poles for ~$12/day. Try them on one summit before committing $80-$180 to a pair you may not prefer. |
| Daypack (20-28L) | BUY | Fit is critical and personal. A pack that doesn’t sit right will ruin your day regardless of quality. Inexpensive to buy; worth owning early. |
| Rain jacket / shell | EITHER | Rent a basic shell for year one to confirm you need the upgrade before spending $200+ on a Gore-Tex model. |
| Crampons (if route requires) | RENT FIRST | Highly route-specific. REI and most mountain towns offer crampon rentals. Buy after confirming you’ll use them more than 2-3 times per season. |
| Headlamp | BUY | $25-$35 to own. Safety-critical. No reason to rent something this affordable and essential. |
| Ice axe (if route requires) | RENT FIRST | Expensive and technique-dependent. If you need one, rent from a local mountaineering shop, take a basic ice axe course, and evaluate buying after year one. |
| First aid kit | BUY | $18-$35 and permanently yours. Can’t be rented. Non-negotiable safety item that lives in your pack for years. |
For a deeper dive into rent vs buy decisions — including rental costs by item, where to rent near major US mountain hubs, and a season-by-season decision framework — see our dedicated Renting vs Buying Gear guide (Guide 10).
The 8 Common Gear Mistakes Beginners Make
Avoid These Common Beginner Gear Mistakes
- Buying $1,500 of gear before your first hike. The single most common beginner regret. Beginners over-invest in equipment designed for objectives years beyond their current skill level — then discover after one summit that they don’t actually enjoy the sport, or that the gear they bought doesn’t fit their actual needs. Start with the entry tier ($230-$290), complete 2-3 summits, then upgrade based on actual gear failures you experience.
- Wearing brand-new footwear on summit day. Blisters from unfamiliar footwear are the most common beginner complaint and 100% preventable. Wear new boots or trail runners on at least 3 training walks before summit day — including one walk of 4+ hours with full pack load. Discover footwear issues in training, not on the mountain.
- Choosing cotton anywhere in the layering system. Cotton holds moisture, gets cold, stays cold — and stops insulating completely when wet. The “no cotton” rule applies to base layer (must be merino wool or synthetic), but also to t-shirts, socks, underwear, and any other clothing item. Cotton is the most common reason beginners get dangerously cold on summer peaks.
- Skipping the headlamp because it’s “just a day hike.” Mountain days routinely run long — descent fatigue, weather delays, route-finding errors, slower-than-expected pace. Beginners get caught in the dark on planned day hikes regularly. Headlamp is non-negotiable safety equipment regardless of trip duration.
- Buying a 65L expedition pack for day trips. Oversized packs are empty, flop around, create back pain, and signal inexperience to other climbers. A 20-28L daypack is the right size for any Class 1-2 day objective. Save bigger packs for actual overnight trips after you’ve completed several day summits.
- Treating the hip belt as decorative. A properly-adjusted hip belt sits on the hip bones (iliac crest) and transfers 70% of pack weight to your legs. Beginners commonly wear the belt too low (on the waist), defeating its purpose. Test pack fit while loaded — the belt should bear most of the weight, not your shoulders.
- Carrying technical gear without training. Ice axe, crampons, climbing harness, avalanche beacon — these items require specific training to use safely and effectively. Carrying them without training creates false confidence on terrain that doesn’t require them while adding weight without function. Skip them for year one regardless of online recommendations.
- Skipping water filtration confidence about water sources. Beginners who plan to refill from streams without water treatment (Sawyer Squeeze or similar, $35) put themselves at risk for waterborne illness. Either carry your full water requirement (2-3L) from the trailhead, or carry a filter — never count on “clear-looking” streams being safe.
What We Don’t Know
Honest limitations of any beginner gear guide
Specific brands and models change every season. The footwear, jackets, and packs recommended in this guide reflect 2026 availability and current model versions — but outdoor brands routinely update product lines, discontinue specific models, and adjust pricing. Use brand recommendations as starting points for research rather than definitive product names.
Individual fit varies dramatically. A Hoka Speedgoat that fits one climber perfectly may cause blisters on another with different foot shape. Smartwool merino that one climber loves may itch unbearably on another’s skin. The right gear for you depends on your body, your sweat patterns, your foot shape, and your sensitivities — not on the guide’s recommendations alone. Try gear before committing when possible.
Regional climate differences affect gear choices. Pacific Northwest gear needs differ from Southwest desert gear needs from Northeast above-treeline gear needs from Midwest low-elevation gear needs. The base recommendations in this guide work nationally but may need adjustment for specific regional climates and seasons.
Used gear markets change the calculation. REI Used Gear, Geartrade.com, Facebook Marketplace, local consignment shops, and outdoor retailer return sales offer significant savings on quality gear — sometimes 50-70% off retail for nearly-new items. The budget tier numbers in this guide assume new gear retail pricing; used markets can shift Tier 2 quality into Tier 1 budget for committed shoppers.
Seasonal availability affects pricing. Outdoor gear pricing follows predictable seasonal patterns — winter gear is cheapest in spring (March-May), summer gear is cheapest in fall (September-November). Beginners shopping in shoulder seasons typically save 20-40% on the same items they’d pay full retail for during peak season. Plan gear purchases around these cycles when possible.
Gear technology is genuinely improving. Trail runner cushioning, breathable rain shell membranes, and lightweight insulation technologies have all advanced significantly in the past decade. Climbers buying gear in 2026 generally get more capability per dollar than climbers buying the same nominal items five years ago — but this also means model recommendations get outdated faster.
Beginner Gear Guide FAQ
What gear do I need for my first mountain climb?
Five non-negotiable gear categories cover every beginner Class 1-2 summit: (1) Footwear — trail runners ($80-$160) for dry summer peaks or low-cut hiking boots ($120-$220) for wet/rocky terrain; (2) Three-layer clothing system — base layer (merino wool or synthetic, never cotton), mid layer (fleece or light down), and shell layer (wind/rain jacket); (3) Navigation — phone GPS with offline-downloaded route plus backup paper map and portable battery pack; (4) Hydration — minimum 2 liters water capacity carried before leaving the trailhead; (5) Safety basics — headlamp, first aid kit, emergency whistle, and space blanket plus a 20-28 liter daypack to carry it all. A complete beginner kit costs $230-$290 at the entry tier or $490-$590 at the comfortable tier. Beginners do NOT need technical gear like ice axe, crampons, climbing harness, rope, 4-season tent, or avalanche equipment for Class 1-2 summer summits.
Trail runners or hiking boots for beginners?
It depends on your specific route conditions. For dry Class 1-2 trails in summer conditions, trail runners are fine and often better than hiking boots — lighter, more agile, faster drying, and easier on your feet during long descents. Recommended trail runners include Hoka Speedgoat, Salomon Speedcross, and Brooks Cascadia ($80-$160). For wet conditions, loose rocky terrain, or any route with ankle-twisting potential, choose low-cut hiking boots or trail runners with a stiffer midsole — Merrell Moab, Keen Targhee, or Salomon X Ultra ($120-$220). High-cut mountaineering boots are for technical terrain only — leave them for year two. Whatever you choose, wear them on 3+ training walks before summit day. Blisters from new footwear are the single most common beginner complaint and the easiest preventable problem to solve.
How much should I spend on beginner climbing gear?
Three honest budget tiers cover beginner Class 1-2 summit objectives. The Under $300 entry kit ($230-$290 total) gets you up any beginner peak safely and comfortably in summer conditions — this kit is complete with nothing critical missing. The $300-$600 sweet spot tier ($490-$590 total) is recommended for most committed beginners — significant upgrades to footwear, base layer, mid/shell layer combination, daypack quality, trekking poles, and 3L hydration. The $600+ multi-year tier ($900-$1,400 total) handles everything through end of beginner and into intermediate level including light snow travel and overnight objectives. Higher budgets buy more comfort, durability, and performance in marginal conditions — they don’t buy safety the lower tier lacks. Beginners over-buying $1,500+ kits before discovering whether they enjoy the sport is the single most common gear regret in mountain climbing.
Do I need an ice axe for my first mountain?
No. An ice axe is required for steep snow travel and self-arrest on technical mountaineering terrain — neither of which is appropriate for any beginner Class 1-2 summer peak. Carrying an ice axe without knowing how to use it is more dangerous than not having one — it creates false confidence on terrain that doesn’t require it and adds weight without function. If your specific route has a snow section in early season that warrants traction, microspikes ($35-$50) are the appropriate tool — not crampons or ice axe. Microspikes attach to any boot or trail runner and provide grip on packed snow and ice without requiring technical training. Save ice axe purchase and training for year two or three when you transition to technical mountaineering objectives — most American mountaineering courses include ice axe instruction.
Should I rent or buy hiking gear as a beginner?
Eight-item rent versus buy decision guide for beginner gear: BUY items that require break-in (hiking boots/trail runners — must be worn on 3+ training walks before summit day to prevent blisters), are fit-personal (daypack — must sit right or ruins your day regardless of quality), or are inexpensive safety essentials (headlamp $25-$35, first aid kit $18-$35). RENT FIRST items that are expensive, body-specific, or rarely used (trekking poles $50-$180, route-specific crampons, ice axe). EITHER approach works for rain jacket/shell — rent basic shell for year one to confirm you need the upgrade before spending $200+ on Gore-Tex. REI rents trekking poles for approximately $12/day, crampons and ice axes from mountain town specialty shops. Renting before buying makes sense for any item that’s expensive, body-specific, or rarely used — and less sense for items that are hygiene-sensitive, need to be broken in, or are so inexpensive that rental cost approaches purchase price.
What gear can I skip for beginner mountain climbing?
Eight items sold to beginners regularly that are unnecessary for Class 1-2 summer peaks: (1) Ice axe (required for steep snow self-arrest only), (2) Crampons (essential for glacier travel and steep ice — microspikes are the right tool for early-season snow patches), (3) Climbing harness and rope (if your Class 1-2 route requires them, it isn’t a beginner route), (4) 4-season mountaineering tent (heavy, expensive, built for winter expedition use), (5) Technical mountaineering boots in B3 category (designed for crampon compatibility and extreme cold — stiff, heavy, blister-inducing without specific terrain to justify them), (6) Avalanche beacon, probe, and shovel (critical for off-piste winter travel only — carrying without training creates false sense of preparedness). The exception to every skip rule is route-specific gear requirements — always check current trip reports for your peak and date before finalizing your kit. The skip list applies to gear purchased generically because “it might be useful” rather than items needed for specific route conditions.
Sources and Methodology
Numbered Source References
This beginner gear guide synthesizes data from outdoor industry retailers, climbing education organizations, gear testing publications, and beginner climbing community resources.
- REI Co-op gear standards. REI — outdoor retailer providing gear category breakdowns, rental programs, and seasonal pricing patterns referenced throughout this guide.
- American Alpine Club (AAC). AAC — climbing organization providing accident reporting (Accidents in North American Climbing) that informs the safety basics recommendations.
- The Mountaineers (Pacific Northwest). The Mountaineers — established climbing education organization whose Mountaineering: The Freedom of the Hills text remains the standard reference for layering systems and gear progression.
- Outside Magazine gear testing. Outside Online and Outside Magazine annual gear guides provide independent product reviews referenced for current model recommendations across footwear, layering, and pack categories.
- Backpacker Magazine. Long-running publication with detailed gear testing methodology used to verify model recommendations and beginner-appropriate equipment selections.
- Wirecutter (New York Times). Wirecutter — consumer review publication with rigorous testing methodology used as cross-reference for beginner gear value recommendations.
- Internal Global Summit Guide research. Cross-referenced with our Beginner Climbing Guide hub, Mountaineering Gear Hub, High Altitude Layering Guide, and Renting vs Buying Gear (Guide 10).
Methodology note. Quarterly review cycle — next review September 2026 (post-summer climbing season). Specific brand and model recommendations verified current as of June 2026; outdoor product lines change frequently, so use brand recommendations as starting points for current research rather than definitive product names.
What’s Next?
The Right Gear for Your First Summit Is the Gear That Matches Today’s Route — Not Tomorrow’s Aspirations
Generally, start with the entry tier kit ($230-$290), complete 2-3 successful summits, then upgrade based on actual gear failures you experience. Specifically, skip the ice axe, crampons, harness, 4-season tent, and avalanche gear for year one regardless of online recommendations. Notably, beginners who buy for the mountain they’re climbing now (not the mountain they might climb in three years) consistently have better first-summit experiences and lower gear regret.
Compare All 3 Budget Tiers Rent vs Buy Deep Dive →Was this helpful?
Global Summit Guide is an independent mountaineering resource founded in 2026. The team combines first-hand trekking and climbing experience with in-depth research and professional health and nutrition review to help climbers choose objectives, prepare properly, and stay safe.
Health, altitude, and nutrition content is reviewed by Taylor Ludlow (Registered Nurse) and Brigg Hoopes (Nutritionist).
What We Don't Know Yet
Mountain information changes quickly. This box explains the limits of what this page can responsibly promise.
- Weather, snowpack, avalanche risk, road access, and route conditions can change quickly and may be different on your climbing dates.
- Route conditions, trailhead access, crevasse exposure, stream crossings, and rescue access may vary from published planning guidance.
- Total trip cost can change with flights, lodging, guide pricing, permits, gear rentals, transportation, and exchange rates.
- Gear requirements can change by season, route variation, weather window, personal cold tolerance, and guide-service requirements.
Verify current conditions with official land managers, guide services, local forecasts, and current route reports before booking or climbing.
Mountaineering, rock and ice climbing, glacier travel, and high-altitude activity are inherently dangerous and can result in serious injury or death. The information on Global Summit Guide is provided for general informational and educational purposes only and is not a substitute for professional instruction, qualified guiding, proper equipment, or your own judgment and experience.
Route conditions, weather, snowpack, permits, regulations, and hazards change constantly and may differ from what is described here. Details may be incomplete, out of date, or contain errors. Always verify current information with local authorities, certified guides, and official sources before making any decision in the mountains.
Nothing on this site is medical, legal, or financial advice. Our fitness, acclimatization, altitude, and nutrition content is general in nature; consult a qualified physician before beginning any strenuous exercise program or exposing yourself to high altitude.
You are solely responsible for your own safety and decisions. To the fullest extent permitted by law, Global Summit Guide and its team accept no liability for any loss, injury, damage, or expense arising from use of, or reliance on, this information. By using this site you acknowledge these risks and accept these terms.
Some links on this site may be affiliate links. If you buy through them we may earn a small commission at no extra cost to you; this never affects our recommendations.
Global Summit Guide recommendation path
Next Best Mountain to Research
Use these recommendations to continue the right planning path instead of stopping on one page.
Use current permit, weather, route, and operator information before booking or climbing.