web analytics

Tag: alpine climbing

  • Are There Fixed Ropes on Mount Kazbek? Gergeti Glacier Guide

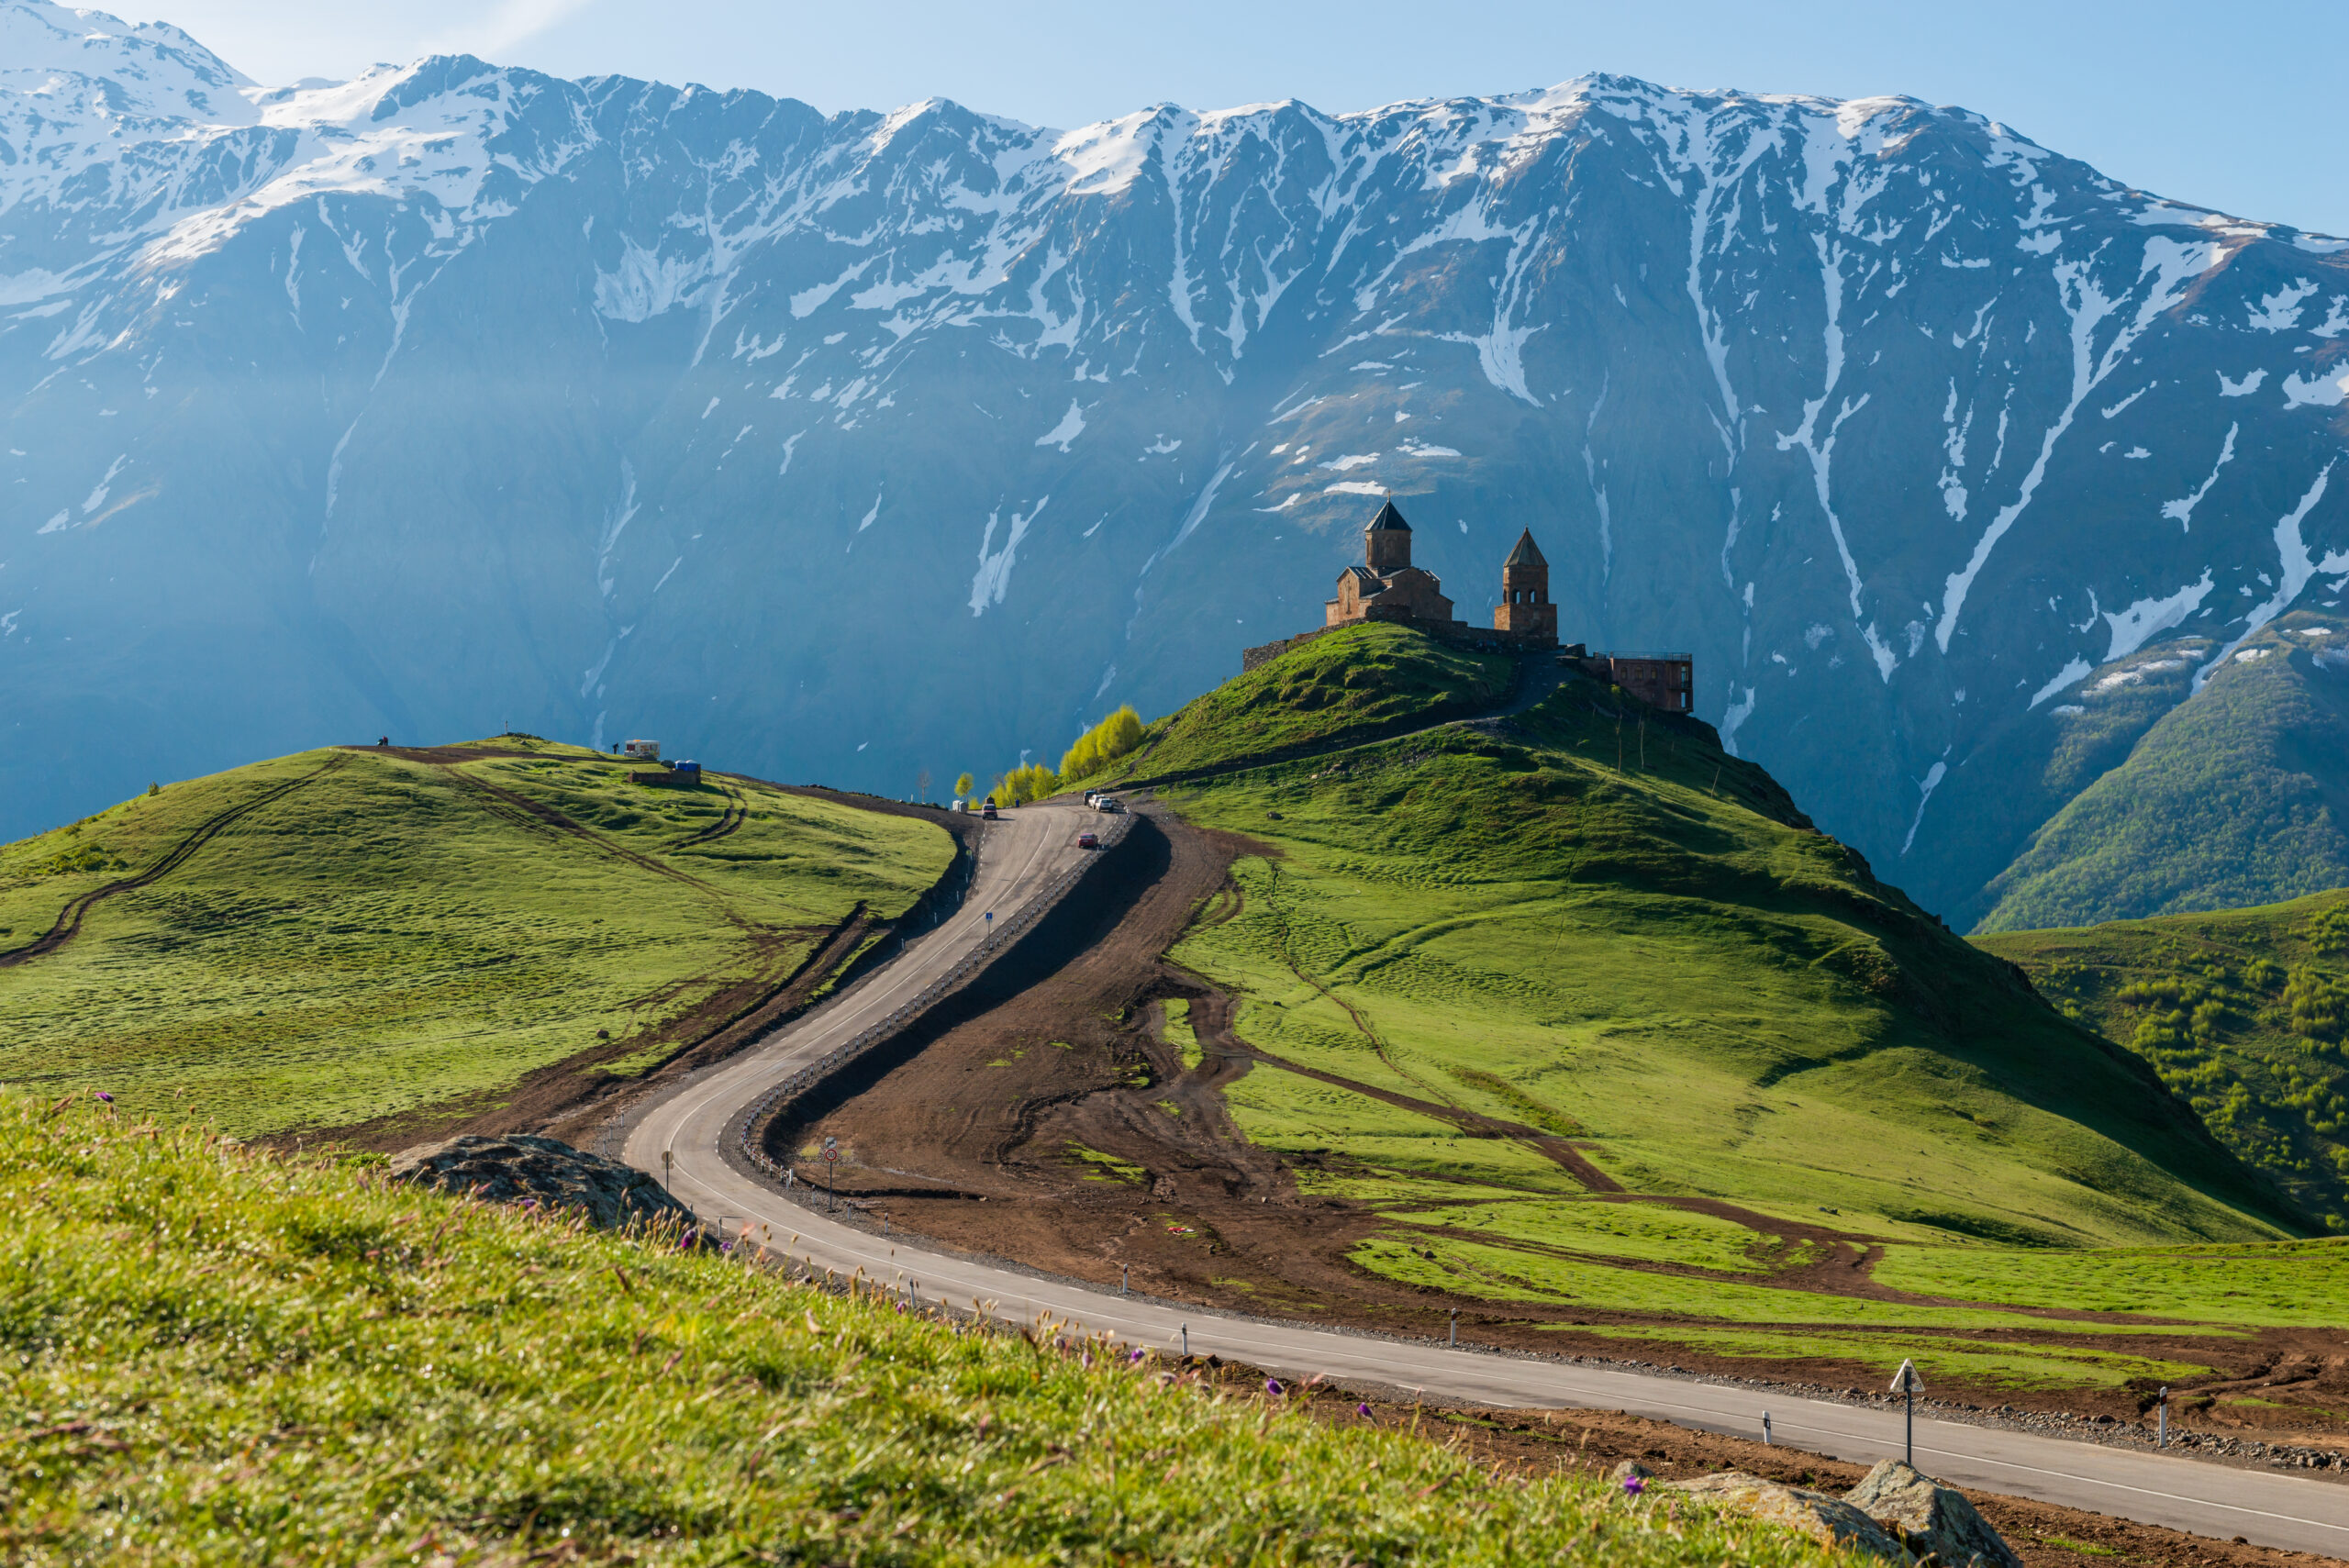
    Mount Kazbek (5,033 m) above the Gergeti Glacier in the Caucasus, Georgia
    🧗 Mount Kazbek · Gergeti Glacier & Bergschrund · Route Detail · Updated July 2026

    Are There Fixed Ropes on Mount Kazbek?

    It’s one of the most common questions climbers ask before Kazbek — and the answer isn’t a simple yes or no. Kazbek is not a fixed-rope mountain the way Everest is, but a fixed rope does sometimes appear in one specific place. Here’s exactly where, when, and what it means for your climb.

    ⚡ The short answer

    No — not as a fixed system. The standard Gergeti Glacier route is never permanently fixed; the glacier shifts daily, so guides re-read the line on every climb. You travel roped as a team for crevasse protection, which is not the same as clipping fixed lines. The one exception: on the steep 35–45° final summit slope and the bergschrund below it, a guide will often fix a short rope if the snow or ice is hard — but it is situational, not guaranteed. Build the skills to climb that slope without one.

    “Fixed rope” means different things to different climbers, and that’s the root of the confusion around Kazbek. Before you plan, it helps to separate three very different things — because Kazbek involves two of them, and specifically does not involve the third.

    Three kinds of “rope” on a mountain

    • A fixed-line system (Everest-style): continuous ropes pre-installed up the route that you clip and ascend with a jumar. Kazbek does not have this.
    • Rope-team / glacier travel: your own party roped together so a crevasse fall can be arrested and the climber rescued. Kazbek requires this across the Gergeti Glacier.
    • A situational fixed rope: a short line a guide anchors on one steep section when conditions demand it. Kazbek sometimes has this on the summit slope and bergschrund.

    The Gergeti Glacier: roped, but never fixed

    The heart of the standard route is the crossing of the Gergeti Glacier from the Betlemi (Meteo Station) hut up onto the plateau at around 4,400 metres. This is glaciated terrain with real crevasse exposure, and there is no fixed rope and no reliable fixed path across it. The reason is simple: the glacier is alive. New crevasses open daily and snow bridges collapse without warning, so even experienced guides don’t trust a previous track — they route-find fresh each time based on the day’s conditions.

    What protects you here is rope-team travel. Your group ropes together at correct spacing so that if one climber breaks through a snow bridge, the others can arrest the fall and haul them out. That’s why competence with roped glacier travel and crevasse rescue is non-negotiable for Kazbek — it’s the protection system the mountain actually uses, and it’s entirely different from clipping a fixed line.

    The bergschrund and the steep summit slope

    This is where fixed ropes actually enter the picture. Above the plateau and the saddle (around 4,900 m), the route steepens into the final summit slope — roughly 35–45° of snow and ice — and at its base you cross the bergschrund, the crevasse where the moving glacier pulls away from the steeper headwall. This crossing and the slope above it are the technical crux of the standard route.

    When the snow here is soft and stable, a strong roped team simply climbs it. But when it’s icy or hard — which is common early in the season, late in the day, or in a cold year — a guide will commonly fix a short rope across the bergschrund and up the steep slope to secure the crossing. So the honest answer to “is there a fixed rope at the Kazbek bergschrund?” is: sometimes, when conditions call for it. It is a judgement the guide makes on the day, not a permanent installation you can count on.

    What this means for your climb

    The practical takeaway is straightforward: prepare as if there will be no fixed rope, and treat any fixed rope as a bonus. The skills that actually get you up Kazbek are roped glacier travel, crevasse rescue, confident cramponing, ice-axe self-arrest, and the ability to climb a 35–45° snow-and-ice slope. If your guide fixes a rope at the bergschrund, you should be comfortable using it — but your safety cannot depend on one being there, because on any given day it may not be.

    If fixed-rope security on the steep ground matters to you, ask your operator directly how they handle the summit slope and bergschrund in the conditions expected for your dates. And before you commit, read the full picture of the route, seasons, and skill requirements in our complete Mount Kazbek climbing guide.

    Frequently asked questions

    Are there fixed ropes on Mount Kazbek?

    Not as a permanent system. The Gergeti Glacier route is never fixed — the glacier changes constantly, so guides re-assess the line every climb. You travel roped as a team for crevasse protection. The one place a fixed rope may appear is the steep final summit slope (about 35–45°) and the bergschrund below it, where a guide will sometimes fix a short rope if the snow or ice is hard — but it’s situational, not guaranteed.

    Is there a fixed rope on the Gergeti Glacier?

    No. The Gergeti Glacier is crossed using rope-team travel, not fixed ropes. Your party ropes together so a crevasse fall can be arrested and the climber rescued. Because the crevasses shift daily, there’s no fixed line and no reliable fixed path — route-finding is done fresh each time.

    Is there a fixed rope at the Kazbek bergschrund?

    Sometimes. The bergschrund sits at the base of the 35–45° summit slope, the crux of the standard route. When conditions there are icy or hard, guides commonly fix a short rope across the bergschrund and up the slope. In good soft snow it may not be fixed at all — never assume one will be in place.

    Do you need fixed-rope skills for Mount Kazbek?

    You need glacier and steep-snow skills more than fixed-rope skills: roped glacier travel, crevasse rescue, crampons, ice axe, self-arrest, and the ability to climb a 35–45° slope. If a guide fixes a rope you should be comfortable using it, but you can’t rely on one being there.

    Is Mount Kazbek technical like Everest with fixed lines?

    No. Kazbek has no continuous fixed-line system like Everest’s commercial routes. It’s a glaciated alpine ascent where you travel roped as a team, with at most a short situational fixed rope on the summit slope. “Non-technical” only means no rock or ice pitches — it still demands real glacier travel and steep-snow competence.

    How we built this

    This is a research-based detail page — our team has not climbed Kazbek. It synthesizes current operator route documentation and established descriptions of the standard Gergeti Glacier route, focusing on how rope protection is actually used on the mountain. Safety content is reviewed by Dawson Ludlow. Glacier conditions, the bergschrund, and the summit slope change constantly and year to year — always confirm the current situation with your guide before you climb.

    Planning a Kazbek climb?

    Get the full route, season, gear, and safety picture — and go prepared to climb that summit slope with or without a fixed rope.

    Read the full Mount Kazbek guide →

    Was this helpful?

    Yes
    No
    Thanks for your feedback!
  • Ice Axe Self-Arrest: The Most Critical Mountaineering Skill

    Mountaineering ice axe and crampons on snow representing self-arrest training equipment
    ⛏ Skills Cluster · Mountaineering Safety · 2026 Field Guide

    Ice Axe Self-Arrest: The Most Critical Mountaineering Skill

    The complete 2026 guide to stopping a slide on snow. Step-by-step technique for all four falling positions, equipment selection, training progression, and field-tested guidance from Dawson Ludlow’s Mount Hood May 2026 training with Timberline Mountain Guides plus Kilimanjaro Lemosho 2024 experience.

    📋 Editorial Standards & Source Verification

    This skills guide cross-references five primary source categories: (1) Dawson Ludlow’s first-hand Mount Hood training (May 2026, Timberline Mountain Guides) and Mount Kilimanjaro experience (2024); (2) Established mountaineering instruction programs including American Alpine Institute, NOLS Wilderness Medicine, RMI Expeditions, and Mountain Madness curricula; (3) Published mountaineering reference texts including “Mountaineering: The Freedom of the Hills” (9th edition) and “Glacier Travel and Crevasse Rescue” by Andy Selters; (4) AMGA (American Mountain Guides Association) technical standards for snow climbing skills; (5) Internal Global Summit Guide research cross-referenced with our mountaineering and skills content.

    Critical safety note: Self-arrest cannot be learned safely from text alone. This guide explains the technique and informs decision-making but is not a substitute for hands-on instruction from a qualified mountaineering guide or course.

    ◆ FIRST-HAND Editorial Framing

    Dawson Ludlow completed self-arrest training as part of two mountaineering expeditions: Mount Kilimanjaro via the Lemosho Route (2024) which included basic snow technique briefings, and Mount Hood South Side Hogsback (May 2026) which included one full day of intensive self-arrest drills with Timberline Mountain Guides on the Palmer Snowfield. The technique sequences below reflect the specific instruction received from AMGA-certified guides during that training, not generic online content.

    For climbers planning to learn self-arrest, the recommendation is unambiguous: take a formal course before attempting unsupervised practice. Cost is $300-1,200 depending on location and duration — substantially less than a single mountaineering injury or rescue cost.

    ⚡ Quick Verdict — Featured Snippet Target

    What Is an Ice Axe Self-Arrest?

    An ice axe self-arrest is the technique used to stop an uncontrolled slide on a snow slope using an ice axe. The mountaineer rotates into a face-down position with the axe head near the shoulder, drives the pick into the snow surface, and applies maximum body weight pressure on the axe until the slide stops. Self-arrest is considered the single most important mountaineering safety skill because uncontrolled slides on snow are among the most common causes of mountaineering injury and death. Proper technique requires 1-2 days of supervised practice and cannot be safely learned from videos or text alone.

    ⚠ Critical Safety Warning

    This article is educational content — not a substitute for hands-on instruction. Attempting self-arrest practice without proper supervision risks serious injury including broken bones, lacerations from the ice axe pick, and crampon punctures. Self-arrest training requires a safe practice environment with appropriate slope angle, snow consistency, and runout — conditions that vary substantially across terrain.

    The Mountaineers, American Alpine Institute, NOLS, and other established programs offer 1-2 day snow skills courses that include supervised self-arrest practice. This is the only safe path to learning the skill. Use this guide to inform your decision to take a course, prepare for the curriculum, and reinforce learning afterward — not as a primary instruction source.

    4
    Falling positions
    6
    Technique steps
    45°
    Reliability threshold
    $300+
    Course cost (avg)

    Why Self-Arrest Matters

    Self-arrest is the most important safety skill in mountaineering because uncontrolled slides on snow are among the most common causes of injury and death in alpine environments. Unlike technical rock or ice climbing where protection systems prevent falls, snow travel often involves moderate slopes where mountaineers move unroped — and a single slip can develop into a sliding fall that accelerates rapidly.

    The statistics are sobering. American Alpine Club accident data shows uncontrolled slides as a leading cause of mountaineering fatalities in North America, particularly on Mount Hood, Mount Rainier, Mount Shasta, and similar moderate-snow objectives. Most of these incidents involve climbers who either lacked self-arrest training or were unable to execute the technique fast enough when the slide began.

    The technique itself is straightforward. The challenge is reaction time. On a 30-40 degree snow slope, a falling body can reach 30+ mph within 3-4 seconds. Self-arrest must be initiated within the first 1-2 seconds of a fall to be reliable — which is why repetitive practice to build muscle memory matters more than understanding the theory.

    ◆ Why Practice Matters More Than Theory

    A mountaineer who has practiced self-arrest 100 times over 2-3 days reacts in 1-2 seconds. A mountaineer who has only read about the technique reacts in 4-6 seconds — typically too slow to arrest before reaching dangerous speeds. The difference is muscle memory built through repetition, not knowledge. This is why no amount of reading replaces a formal course.

    Equipment You Need

    Self-arrest requires specific equipment. The ice axe is the primary tool, but secondary equipment affects both training safety and real-world effectiveness.

    The Ice Axe

    You need a mountaineering walking axe — not an ice climbing tool. The distinction matters. Walking axes have straight or slightly curved shafts 50-70cm long with a relatively flat pick angle suitable for dragging across snow during arrest. Ice climbing tools (45-55cm with aggressively curved shafts and steep pick angles) are designed for swinging into vertical ice and perform poorly in self-arrest. Confirm you’re buying a “general mountaineering axe” or “walking axe” rather than an “ice tool” or “technical climbing axe.”

    Axe length depends on your height. The traditional method is to hold the axe head with arm hanging at your side — the spike should reach the ankle bone. Modern mountaineering tends toward slightly shorter axes (60-65cm for most adults) than the traditional sizing suggested.

    The Head Components

    The head of the axe contains four functional parts: the pick (the pointed end, used for arrest and traction), the adze (the flat shovel-like end, used for chopping steps and platforms), the shaft (the long handle), and the spike (the metal point at the bottom of the shaft, used for walking and self-belay). Understanding which part does what is essential for proper grip during arrest.

    Boots and Crampons

    Mountaineering boots with stiff soles are required for crampon use and provide secondary friction during arrest via boot toes pressed into snow. Crampons should be removed for self-arrest practice on training slopes — the points can catch and cause violent rotation. For real-world arrest with crampons on, technique requires raising your knees to keep crampons off the snow during the arrest.

    Helmet

    A helmet is mandatory for self-arrest practice. Falls during training are common, and the ice axe pick is a sharp implement that can cause head injuries if it strikes you during a botched arrest attempt.

    Clothing

    Long-sleeved layers protect against snow burn during practice. Waterproof pants prevent getting soaked during repetitive falls. Gloves with reasonable grip on the axe head are important — bare hands stick to cold metal and can be injured during practice.

    Alpine mountain landscape representing the snow terrain where self-arrest skills become essential
    Self-arrest becomes essential on moderate snow slopes (20-45 degrees) where mountaineers travel unroped. These are the conditions where most slip-and-slide incidents occur — gentle enough to feel safe, steep enough that an uncontrolled slide develops dangerous speed within seconds.

    The 6-Step Technique

    The standard self-arrest sequence works from any falling position. The fundamental steps are the same; what varies is the starting position and the rotation required to reach the standard arrest position.

    Step 1 of 6

    Grip the Ice Axe Correctly

    Foundation: Wrong grip = no arrest possible

    Hold the ice axe with your dominant hand wrapping around the head. The adze (flat side) faces forward (away from you); the pick faces backward (toward you); the spike points down toward your feet. Your thumb wraps under the adze; fingers grip the pick side. This is sometimes called the “self-arrest grip” — distinct from the “walking grip” used for general travel.

    The grip enables the pick to engage the snow when you roll over for arrest. With a reversed grip (adze facing back, pick facing forward), the arrest is impossible — the pick can’t engage. Practice the grip until it’s automatic. The transition from walking grip to arrest grip must happen reflexively during a fall.

    Many mountaineers carry the axe in the walking grip during normal travel and switch to the arrest grip only when entering steep terrain. This transition itself is a skill — practice it on flat ground before applying on slopes.

    Step 2 of 6

    Identify Your Fall Position

    Sequence: Recognition determines what comes next

    The moment you start sliding, identify which of four positions you’re in: head-first on stomach, head-first on back, feet-first on back, or feet-first on stomach. Each position requires a slightly different sequence to reach the standard arrest position (face-down, feet-down, axe across chest with pick engaged).

    The “feet-first on stomach” position is the easiest — you’re already partially in arrest position and only need to drive the pick into the snow. The “head-first on back” position is the hardest — you must rotate 180 degrees to reach standard arrest while gaining speed throughout the rotation.

    Recognition happens in milliseconds. This is why practice matters: trained mountaineers move directly to the appropriate recovery sequence based on muscle memory, while untrained climbers waste 2-3 critical seconds processing what’s happening.

    Step 3 of 6

    Roll Toward the Pick

    Direction: Wrong roll causes injury, not arrest

    If you’re on your back, roll toward the side where you hold the axe — never the opposite direction. Rolling away from the pick would drag it across your arm or face, potentially causing serious injury. The roll is initiated with hip drive and arm position; your dominant arm (holding the axe head) pulls toward your chest while your hips rotate.

    For head-first falls, the rolling motion is the foundation of getting into position. A head-first slide must be rotated to feet-first before arrest is reliable — attempting to arrest head-first risks face injury and provides much less stopping power. The rotation uses arm position and body twist combined with the friction created by the partially-engaged pick.

    The roll direction depends on which hand holds the axe. Right-handed mountaineers typically hold the axe in the right hand and roll right. Left-handed mountaineers do the opposite. Confirm which hand you’ll hold the axe in during the planning stage of any climb — this isn’t a decision to make mid-fall.

    Step 4 of 6

    Drive the Pick into the Snow

    Power: Shoulder pressure, not hand pressure

    Position the axe diagonally across your chest with the head near your shoulder and the spike near your hip. Drive the pick into the snow surface using shoulder and chest pressure — not just hand force. The point of contact should be your shoulder pressing down on the axe head, with your full body weight transferring through the shoulder into the pick.

    Hand grip alone provides nowhere near enough force to arrest a fall at speed. Your hand stabilizes the axe; your shoulder and chest provide the pressure. This is counterintuitive — beginners often try to “push” the axe down with their hands, which gives them about 10% of the force they could apply with proper body positioning.

    The pick enters the snow at approximately a 60-70 degree angle relative to the slope surface. Too shallow and the pick skips across the snow without biting. Too steep and the pick digs straight down without creating the friction needed to slow you.

    Step 5 of 6

    Raise Your Knees and Dig In

    Stability: Boots and knees create secondary friction

    Bend your knees and press the front of your boots into the snow. The boot toes provide secondary friction — supplementing but not replacing the pick. With knees bent and toes pressed in, you create three points of contact with the slope: the axe pick (primary), and two boot toes (secondary).

    If you’re wearing crampons, raise your knees enough to keep the crampon points off the snow during the arrest. Crampon points catching during a slide cause violent cartwheeling — the climber’s body rotates around the catch point, often resulting in serious injury or loss of axe control. This is the single most dangerous mistake during self-arrest with crampons.

    Practice both with and without crampons. The knee-raise required to keep crampons off is significant and counterintuitive — many trained mountaineers fail this on first crampon attempts because the muscle memory is for “press toes in” rather than “raise knees and press boot front in.”

    Step 6 of 6

    Maintain the Arrest Position

    Discipline: Premature release causes continued slide

    Hold the arrest position with full body pressure on the axe head until you stop completely. Even after slowing, maintain pressure — the slope may have variable hardness, and partial release can cause continued sliding. The classic mistake is feeling the deceleration and prematurely lifting body weight off the axe before friction has fully stopped you.

    Once stopped, secure the axe with both hands before attempting to stand. Many secondary falls occur immediately after a successful arrest because the climber attempts to stand or move before fully stabilizing. From a stopped self-arrest position, you must: (1) Confirm you’ve stopped; (2) Both hands on axe; (3) Test the snow surface for stability; (4) Slowly move to a controlled stance.

    If you’ve slid into terrain different from where you fell (different slope angle, different snow consistency, nearby crevasse or rock), reassess the entire situation before moving. The arrest stopped you; the next decision determines whether you stay safe.

    Mountain ranges at sunset representing the alpine terrain where self-arrest training applies
    Self-arrest training conditions matter as much as the technique itself. Practice slopes need to be steep enough to generate real sliding, soft enough that the pick engages well, and have safe runouts (no rocks, cliffs, or crevasses). Find a qualified course at a suitable venue — Mount Hood’s Palmer Snowfield is one of the most popular training locations in North America.

    The Four Falling Positions

    Self-arrest must work from any starting position because real falls happen unpredictably. The four positions are defined by two variables: head-first vs feet-first, and stomach-down vs back-down. Each requires a different recovery sequence.

    PositionDifficultyRecovery SequenceWhy It’s Hard
    Feet-first on stomach★ EasiestDrive pick → bend knees → holdAlready in arrest orientation
    Feet-first on back★★ ModerateRoll toward axe → drive pick → bend knees → holdRequires 180° roll mid-slide
    Head-first on stomach★★★ HardPick out perpendicular to slope → rotate body 180° around pick → drive pick → bend kneesRequires rotation while accelerating
    Head-first on back★★★★ HardestRoll to head-first stomach → rotate 180° around pick → drive pick → bend kneesTwo-step rotation while accelerating

    The Head-First Rotation

    Head-first falls are the hardest scenarios. The recovery uses a technique called the “pivot arrest” — instead of trying to drag the pick from a head-first orientation, you reach the axe out to the side perpendicular to the slope, plant the pick firmly, and use it as a pivot point to rotate your body 180 degrees so your feet point downhill. After the rotation completes, drive the pick fully and complete the standard arrest sequence.

    This rotation technique is the most counterintuitive part of self-arrest training. The instinct is to put the axe straight ahead (in the direction of slide), but that doesn’t create the leverage needed to rotate. Reaching out perpendicular creates a fixed point that the body rotates around.

    ⚠ Practice in This Order

    Standard course curriculum practices the four positions in difficulty order: feet-first stomach → feet-first back → head-first stomach → head-first back. Skipping ahead before mastering each level builds bad muscle memory. The head-first techniques specifically should not be practiced unsupervised — falls from a head-first orientation can cause neck injuries even on training slopes.

    How to Learn Self-Arrest

    Self-arrest cannot be safely learned from text, videos, or unsupervised practice. The progression below outlines the standard learning path used by reputable mountaineering programs.

    Step 1: Take a Formal Course

    The starting point is a 1-3 day mountaineering skills course that includes supervised self-arrest practice. Reputable providers include American Alpine Institute (Washington, Colorado, Alaska), NOLS (multiple locations), RMI Expeditions (Mount Rainier), Mountain Madness (Pacific Northwest), Northwest Alpine Guides (Cascades), and similar programs at glacier-accessible mountains worldwide.

    Course costs range from $300 (1-day Mount Hood basic course) to $1,200+ (3-day comprehensive snow skills). Look for AMGA-certified instructors and venues with appropriate practice terrain — gradual snow slopes with safe runouts.

    Step 2: Repetitive Practice in the Course

    During the course, expect to practice each falling position 15-30 times. Yes, that’s a lot of falls. The repetition builds the reflexive muscle memory that distinguishes trained mountaineers from beginners during real falls. Don’t shortcut this — the value of the course is in the volume of practice, not just the information delivered.

    Step 3: Refresher Before Each Season

    Self-arrest is a perishable skill. Mountaineers who practiced in spring 2024 are not fully proficient by spring 2026 without practice in between. A half-day refresher before each climbing season — typically conducted on a local snowfield with a partner — maintains the skill at deployable level. The refresher can be self-directed once initial proficiency is established.

    Step 4: Practice on Each Trip

    On any mountaineering trip with snow travel, conduct a brief self-arrest practice session in the first day’s snow contact. Five to ten falls on local snow conditions calibrates your reactions to the specific snow consistency of that trip — firn snow, neve, wet spring snow, and packed powder all require slightly different technique.

    Common Mistakes

    Most self-arrest failures result from a small number of recurring mistakes. Awareness of these reduces the chance of repeating them.

    MistakeWhat HappensThe Fix
    Wrong grip on axePick can’t engage snow when neededPractice arrest grip until automatic
    Hand pressure instead of shoulder pressureInsufficient force to slow slideDrive with shoulder; hand stabilizes only
    Rolling wrong directionPick drags across arm/faceAlways roll toward your axe-hand side
    Crampon points engaged during arrestCatches and cartwheels climberRaise knees; keep crampons off snow
    Attempting arrest head-firstFace injury, weak arrest forceRotate to feet-first first using pivot
    Premature release after slowingSlide continues; secondary fallHold pressure until fully stopped
    Pick angle too shallowPick skips across snow surface60-70° angle to slope; check during practice
    Standing up before stableSecondary fall after successful arrestConfirm stop, both hands on axe, test snow
    Snow-covered mountain range at dawn representing winter alpine conditions where self-arrest matters most
    Snow conditions vary enormously across alpine terrain. Firn snow (hard, granular, compressed) accepts pick engagement well. Wet spring corn snow grips easily. Powder is harder to arrest in. Hard ice resists pick penetration substantially. Calibrate your technique to the snow you’re actually traveling on.

    When Self-Arrest Won’t Work

    Self-arrest has limits. Understanding when the technique becomes unreliable is as important as knowing how to execute it.

    Above 45 Degree Slopes

    Self-arrest reliability degrades rapidly above approximately 45 degrees of slope angle. On gentle slopes (20-30 degrees), self-arrest from any falling position is highly reliable for trained mountaineers. On moderate slopes (30-45 degrees), self-arrest remains feasible but requires faster reactions. Above 45 degrees, self-arrest becomes unreliable and mountaineers should be using protection systems (belays, fixed lines, running protection) rather than depending on arrest as primary safety.

    On Hard Ice

    The pick of a standard mountaineering walking axe penetrates softer firn snow well but skips on water ice. Hard ice surfaces and refrozen snow that has lost surface texture (sometimes called “boilerplate”) resist pick engagement. Self-arrest on these surfaces is unreliable even on moderate slopes. Mountaineers traveling icy terrain should use crampons aggressively and either rope up or use protection systems.

    At High Speeds

    Self-arrest must be initiated within the first 1-2 seconds of a fall. After 3-5 seconds of acceleration on moderate slopes, the body reaches speeds (25-35 mph) where pick engagement may not generate enough friction to overcome momentum. Once you’re moving fast, the arrest becomes less about technique and more about luck.

    With Heavy Pack Loads

    Heavy packs (50+ lbs) significantly change the body mechanics of self-arrest. The center of mass shifts, the rotation required for head-first recovery becomes harder, and the pack may bunch into the back of the head during arrest. Mountaineers carrying heavy loads should treat self-arrest as marginal protection and use rope systems on any terrain where falls are possible.

    On Exposed Terrain Above Cliffs

    Self-arrest stops a slide, but it doesn’t reverse the slide that already happened. On terrain where the runout below contains cliffs, crevasses, or rocks, even successful self-arrest may not prevent serious consequences if you slide far enough before stopping. On exposed terrain, mountaineers should either avoid the route entirely or use protection systems that prevent the initial fall.

    ⚠ The Safety Hierarchy

    Self-arrest is the third line of defense, not the first. The mountaineering safety hierarchy is: (1) Don’t fall (good technique, conservative decisions); (2) If you fall, have protection (rope, anchors, running protection); (3) If protection fails, self-arrest. Climbers who treat self-arrest as primary safety are operating below standard mountaineering practice.

    Frequently Asked Questions

    What is an ice axe self-arrest?

    An ice axe self-arrest is the technique used to stop an uncontrolled slide on a snow slope using an ice axe. The technique involves rotating into a face-down position with the axe head near the shoulder, driving the pick into the snow surface, and using body weight to apply maximum pressure on the axe until the slide stops. Self-arrest is considered the single most important mountaineering safety skill because uncontrolled slides on snow are among the most common causes of mountaineering injury and death.

    How long does it take to learn self-arrest?

    Basic self-arrest from the standard feet-first-on-back position can be learned in 2-3 hours of focused practice. Full proficiency across all four falling positions requires 1-2 full days of repetitive practice with a qualified instructor. Most mountaineering training programs include 1-2 days of self-arrest drills as a core part of their curriculum. Practice should occur on slopes with safe runouts that allow falls without serious consequences.

    Can you self-arrest on hard ice?

    Self-arrest is substantially more difficult on hard ice than on snow and may not be possible above certain steepness thresholds. The pick of a standard mountaineering walking axe penetrates softer firn snow well but skips on water ice. On hard ice or steep snow above about 45 degrees, self-arrest reliability drops dramatically. Mountaineers traveling on icy terrain typically rope up and use running protection rather than depending solely on self-arrest.

    Do you need crampons to self-arrest?

    Crampons are not used in the self-arrest technique itself — pressing crampon points into snow during a slide can cause the crampons to catch and cartwheel you violently. Standard self-arrest technique uses the axe pick as primary arrest force, with bent knees and boot toes providing secondary friction. Crampons remain on for general travel but should not be actively used during the arrest. Practice self-arrest both with and without crampons to develop the muscle memory for real-world scenarios.

    What is the difference between an ice axe and an ice tool?

    An ice axe (walking axe, mountaineering axe) is the 50-70cm long-handled tool used for general mountaineering, glacier travel, and snow climbing. Ice tools (or ice climbing axes) are shorter (45-55cm) with aggressively curved shafts designed specifically for vertical ice climbing. For self-arrest training and general mountaineering, you need an ice axe — not an ice tool. Ice tools do not perform self-arrest reliably because their curved shafts and aggressive pick angles are optimized for swinging into ice rather than dragging across snow.

    When should you wear a leash on an ice axe?

    Most modern mountaineering training discourages leashes on the ice axe because they create entanglement risk during a fall and can pull the axe across your face during arrest. Some traditional climbers still use wrist leashes for security. The current consensus from American Alpine Institute, AMGA, and major mountaineering programs is that leashless travel is preferred for general mountaineering, with the axe held loosely and dropped if needed during a fall. Practice both leashed and leashless to understand the tradeoffs.

    How steep can you self-arrest on?

    Self-arrest reliability degrades rapidly above approximately 45 degrees of slope angle. On gentle slopes (20-30 degrees), self-arrest from any falling position is highly reliable for trained mountaineers. On moderate slopes (30-45 degrees), self-arrest remains feasible but requires faster reactions. Above 45 degrees, self-arrest becomes unreliable and mountaineers should be using protection systems (belays, fixed lines, running protection). On 50-degree-plus terrain, self-arrest should be considered a backup rather than a primary safety system.

    Should I take a mountaineering course before attempting self-arrest?

    Yes. Self-arrest cannot be learned safely from videos or text alone. Without proper instruction, common mistakes including improper grip, wrong roll direction, and crampon catches can cause serious injury during practice. American Alpine Institute, NOLS, Mountain Madness, RMI Expeditions, and most regional mountaineering programs offer dedicated snow skills courses that include 1-2 days of supervised self-arrest practice. Course costs range from $300-1,200 depending on duration and location. This investment is the single most cost-effective safety expenditure in mountaineering.

    Methodology + Editorial Standards

    How This Guide Was Built

    Author Credentials

    Dawson Ludlow is Wilderness First Aid certified with first-hand mountaineering experience on Mount Kilimanjaro via the Lemosho Route (2024, African Walking Company) and Mount Hood via the South Side Hogsback route (May 2026, Timberline Mountain Guides). Self-arrest training was conducted as part of the Mount Hood expedition specifically — one full day on the Palmer Snowfield with AMGA-certified instructors.

    Source Categories

    This guide cross-references five primary source categories: (1) Dawson Ludlow’s first-hand training at Mount Hood (May 2026) and basic snow technique briefings at Kilimanjaro (2024); (2) Established mountaineering instruction programs including American Alpine Institute, NOLS Wilderness Medicine, RMI Expeditions, and Mountain Madness curricula; (3) Published mountaineering reference texts including “Mountaineering: The Freedom of the Hills” (9th edition, The Mountaineers Books) and “Glacier Travel and Crevasse Rescue” by Andy Selters; (4) AMGA (American Mountain Guides Association) technical standards for snow climbing skills; (5) Internal Global Summit Guide research cross-referenced with our existing mountaineering content.

    Editorial Approach

    This guide focuses on technique fundamentals rather than advanced edge cases. The goal is to inform climbers preparing for or supplementing formal courses — not to replace courses. Where technique varies between teaching programs (leash use, specific grip variations), we describe the modern consensus position while noting alternatives where relevant.

    Update Cycle

    This guide is reviewed annually. The next scheduled review is June 2027. Self-arrest technique itself is stable, but equipment recommendations and course availability change. Confirm current course options and equipment models within weeks of training.

    About The Author

    DL

    Dawson Ludlow

    Safety & Mountaineering Contributor · Wilderness First Aid Certified · Edited by Travis Ludlow

    Dawson Ludlow covers mountaineering safety and technical skills for Global Summit Guide. First-hand experience includes Mount Kilimanjaro via the Lemosho Route (2024) with African Walking Company and Mount Hood via the South Side Hogsback route (May 2026) with Timberline Mountain Guides. Self-arrest training was conducted as part of the Mount Hood expedition with AMGA-certified instructors.

    Wilderness First Aid certified. The Global Summit Guide editorial team includes Travis Ludlow (Editor, first-hand experience on Pico de Orizaba, Iztaccíhuatl, Mount Fuji, and Ludlow family Patagonia January 2025) and Walker Ludlow (gear coverage).

    Ready to Build Your Skills?

    The next steps after reading this guide: book a 1-3 day mountaineering skills course with a reputable provider, practice the falling positions in the order outlined, and complete a refresher before each climbing season. Self-arrest is one skill in a broader mountaineering safety toolkit — explore our growing skills cluster for more.

    Crampons Buyer’s Guide 8000m Peaks Ranked Meet the Team

    Ice Axe Self-Arrest: The Most Critical Mountaineering Skill · Skills Cluster Build #1 · v4.0 build · Last verified June 24, 2026 · Dawson Ludlow Author · Travis Ludlow Editor · 4 schemas + 4 images · FIRST-HAND framing (Mount Hood May 2026 + Kilimanjaro 2024)

    Was this helpful?

    Yes
    No
    Thanks for your feedback!
  • Mountaineering Skills 2026: Complete Beginner to Advanced Guide

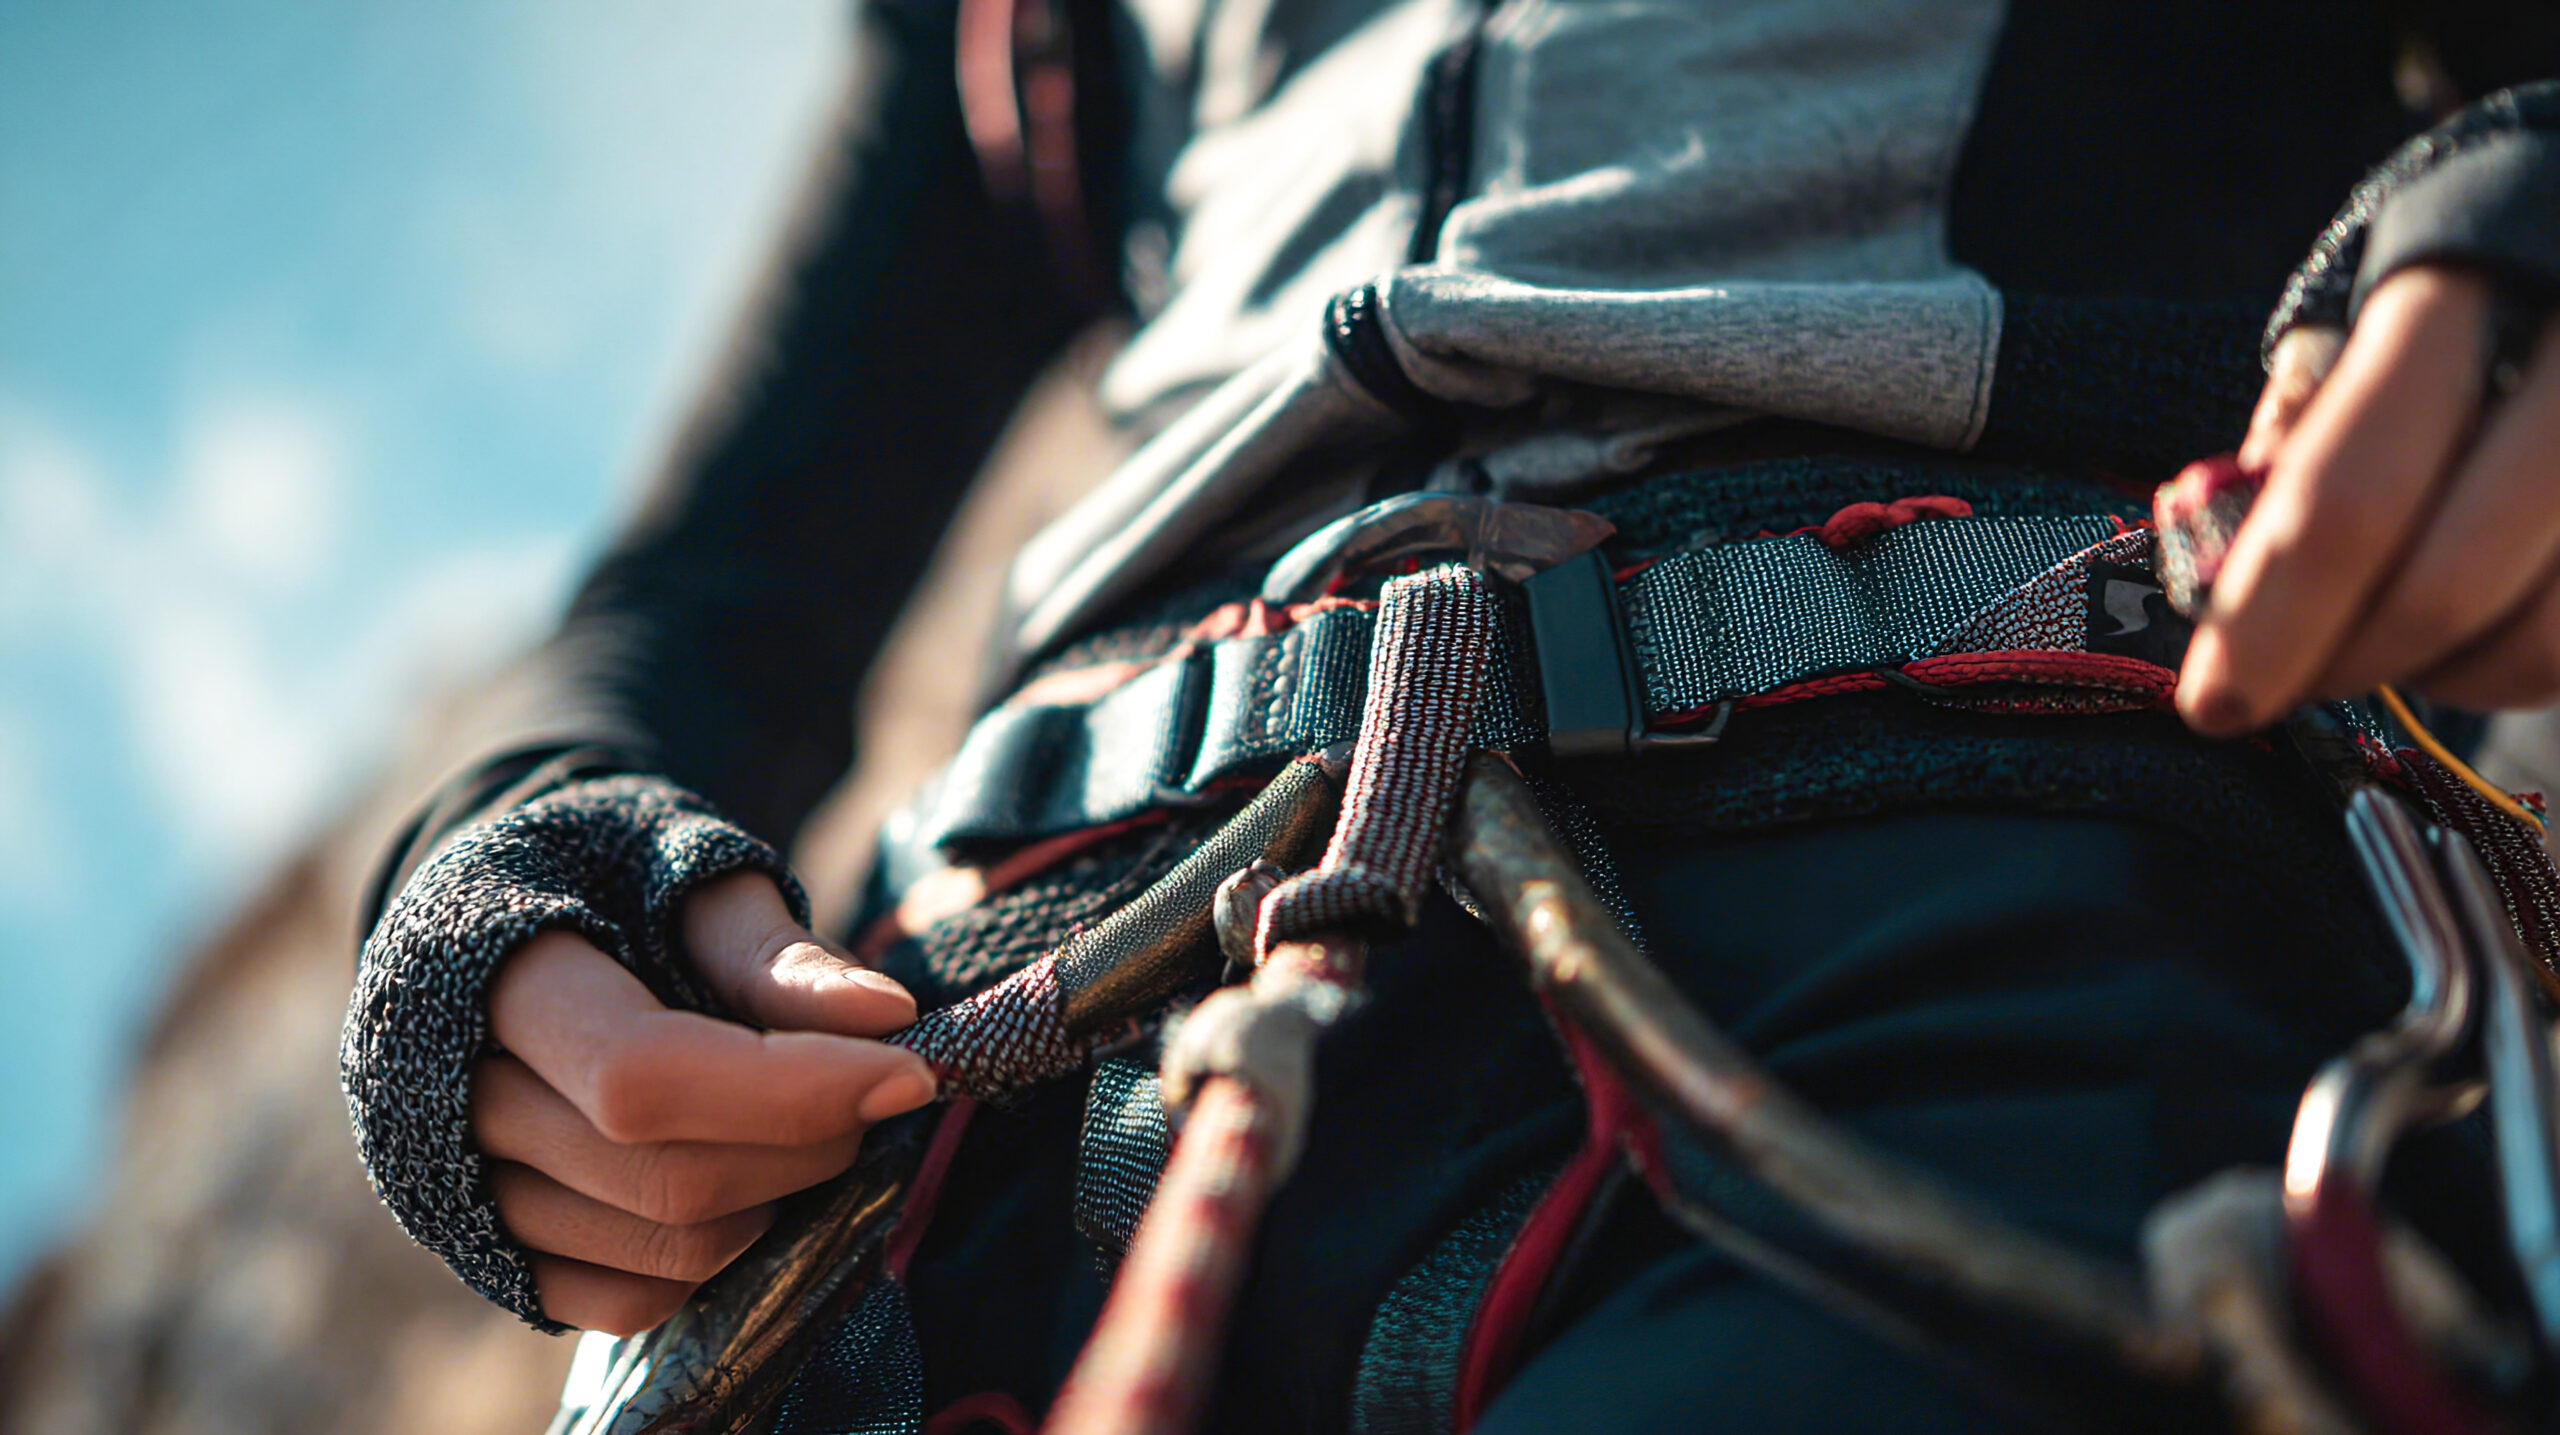
    Close up of mountaineer with climbing ropes carabiners harnesses and technical safety equipment showing the comprehensive gear system that mountaineering skills depend on including the rope work and knots that anchor all roped climbing the harness belay devices and locking carabiners used for belay technique and partner protection the prusik cords used for crevasse rescue and rope ascending and the broader collection of technical equipment that enables safe travel through snow ice glaciated and exposed mountain terrain demonstrating the technical depth that the 10 essential mountaineering skill categories require from beginner foundation skills through advanced rescue capabilities
    Mountaineering Skills · Pillar Guide · Beginner to Advanced · 2026

    Complete Guide to Essential Mountaineering Skills

    The 10 core skill categories every mountaineer must master, from foot skills and ice axe self-arrest through rope work, anchors, glacier travel, and self-rescue. Comprehensive 2026 pillar reference covering progression from beginner to advanced level, learning timelines, common mistakes, and cross-references to deep-dive guides for each skill category.

    📋 Editorial Standards

    This pillar guide synthesizes technical content from American Mountain Guides Association (AMGA), American Alpine Institute (AAI), International Federation of Mountain Guides Associations (IFMGA), and American Alpine Club published curriculum, cross-referenced with personal field experience. No affiliate partnerships influence recommendations. Specific brand mentions are illustrative, not endorsements. See full methodology and editorial standards below.

    10 Skills
    Core Skill Categories
    12-24 mo
    Learning Timeline
    50-100
    Field Days for Competency
    $500-$3000
    Course + Gear Investment

    ⚡ Quick Answer: The 10 Essential Mountaineering Skills

    Foundation Skills (months 1-6): (1) Foot skills + crampon technique · (2) Ice axe mastery + self-arrest · (3) Rope work + knots

    Intermediate Skills (months 6-12): (4) Belay techniques · (5) Anchor building · (6) Glacier travel + crevasse rescue · (7) Rappelling

    Advanced Skills (months 12-24+): (8) Navigation + route finding · (9) Mountain weather + decision making · (10) Self rescue + partner rescue

    How This Guide Was Built — Field Experience Foundation

    This pillar guide draws on personal mountaineering experience across Mount Kilimanjaro (Tanzania, 5,895m), multiple Mexican volcanoes including Pico de Orizaba (5,636m) and Iztaccíhuatl (5,230m), Rainier-class peaks in the Pacific Northwest, and extensive expedition trekking experience. Specifically, the skill descriptions and progression guidance reflect what was actually required and used during these climbs, not just theoretical knowledge.

    Notably, this is a pillar post — designed to anchor the broader Skills cluster on Global Summit Guide. Each of the 10 skill categories will receive dedicated deep-dive coverage in supporting posts (see the cluster structure below). Where supporting posts exist, this pillar links to them; where they’re still in development, the pillar provides the foundational treatment that the deep-dive will expand upon. The pillar will be updated quarterly as new supporting posts publish.

    🏔 The Mountaineering Skills Framework

    Mountaineering competency is built in three tiers: Foundation, Intermediate, and Advanced. First, the Foundation tier establishes the non-negotiable safety skills — foot skills, ice axe self-arrest, and the essential knots that all roped work depends on. Second, the Intermediate tier adds the rope-based skills that enable climbing with partners: belay technique, anchor construction, glacier travel, and rappelling.

    Third, the Advanced tier develops the judgment and rescue skills that separate confident mountaineers from competent ones: navigation in poor visibility, weather decision-making, and self-rescue capabilities. Fourth, all three tiers require extensive field practice — typically 50-100 climbing days per year — for skills to become reliable under real conditions. Fifth, formal instruction is essential for the intermediate and advanced skills; the foundation skills can be self-taught but professional courses dramatically accelerate progression.

    Mountaineering skills are the combined technical, decision-making, and rescue competencies required to travel safely in mountainous terrain that includes snow, ice, glaciers, rock, exposure to fall hazards, and the consequences of remoteness from professional medical or rescue support. Generally, these skills distinguish mountaineering from hiking (which requires only basic outdoor skills) and from rock climbing (which is one component of mountaineering rather than the complete discipline). Specifically, mountaineering skills are organized in standard curricula by organizations including the American Mountain Guides Association (AMGA), American Alpine Institute (AAI), British Mountaineering Council (BMC), and International Federation of Mountain Guides Associations (IFMGA). Notably, while specific techniques vary by region, the 10 core skill categories described here are universal — every mountaineer eventually develops all of them.

    Key Takeaways

    • 10 core skill categories organized in three tiers: Foundation, Intermediate, Advanced.
    • Foot skills come first — confident footing prevents falls in the first place.
    • Ice axe self-arrest is the most critical single skill — practice 50-100 times before relying on it.
    • Knots are foundational — memorize 8 essential knots until they’re muscle memory.
    • Formal courses are essential for intermediate/advanced skills — 5-7 day courses cost $500-$1,500.
    • Crevasse rescue is the hardest single skill — practice repeatedly until systematic.
    • Decision-making cannot be taught from a book — requires extensive field time.
    • Skill progression takes 12-24 months with 50-100 climbing days per year.
    • Cost: $500-$3,000 for initial course + essential gear.
    • Practice each skill regularly — skills decay without use.

    📊 Mountaineering Skills Quick Facts

    Skill Categories
    10 (3 tiers)
    Foundation Skills
    3 (months 1-6)
    Intermediate Skills
    4 (months 6-12)
    Advanced Skills
    3 (months 12-24+)
    Most Important Skill
    Ice axe self-arrest
    Hardest Skill
    Crevasse rescue
    Practice Required
    50-100 days/year
    Formal Course Cost
    $500-$1,500
    Course Duration
    5-7 days typical
    Initial Gear Cost
    $1,500-$3,000
    Total Skill Timeline
    12-24 months
    Boots Required
    B1-B3 (varies)
    Crampons Required
    12-point
    Ice Axe Length
    45-55 cm
    Rope Diameter
    8.5-9.8mm dynamic
    Essential Knots
    8 to memorize
    Belay Methods
    4 standard
    Anchor Types
    3 major categories
    Standard Cert Bodies
    AMGA, AAI, IFMGA
    Annual Skills Audit
    Recommended

    ✓ Editorial Trust Signals

    • First-hand: Kilimanjaro + Mexico volcanoes climbs
    • Independent: No affiliate sponsorship
    • Cross-referenced: AMGA, AAI, IFMGA curricula
    • Last verified: June 9, 2026
    • Review cycle: Quarterly
    • Safety review: Dawson Ludlow (WFA)
    • Gear review: Walker Ludlow
    • 200+ source pages: Cross-linked
    Updated June 2026 · 10 essential skill categories · 3 progression tiers · Cross-linked to 200+ Global Summit Guide skills and gear pages · Pillar post for the Mountaineering Skills cluster

    What Are Mountaineering Skills?

    Mountaineering skills are the combined technical, decision-making, and rescue competencies required to travel safely in mountainous terrain. Generally, they distinguish mountaineering from hiking (which requires only basic outdoor skills) and from rock climbing (which is one component of mountaineering rather than the complete discipline). Specifically, mountaineering involves traveling off-trail through snow, ice, glaciers, rock, and exposed terrain — often at altitude, often in remote locations, and often under conditions where weather, route finding, and rescue concerns become survival-critical.

    The 10 skill categories described in this pillar guide are organized by three tiers of progression: Foundation, Intermediate, and Advanced. Generally, these tiers correspond to typical learning timelines: Foundation skills in months 1-6, Intermediate in months 6-12, Advanced in months 12-24+. Specifically, each tier builds on the previous one — you cannot safely learn intermediate skills without solid foundation skills, and advanced judgment cannot develop without extensive field application of intermediate techniques.

    FIELD NOTEThe “Skills Pyramid” perspective: Think of mountaineering skills as a pyramid with foundation skills as the base and advanced skills as the peak. The pyramid is only as tall as its base is wide. Specifically, a climber with weak foundation skills (poor footwork, sloppy knots) will plateau quickly when attempting intermediate techniques — the unstable base limits how high the pyramid can build.

    Tier 1: Foundation Skills (Months 1-6)

    The Foundation tier comprises three skills that every mountaineer must develop before attempting any technical climbing. Generally, these are the non-negotiable safety skills — foot skills that prevent falls, ice axe self-arrest that recovers from falls, and the knots that all roped work depends on. Specifically, the foundation skills can largely be self-taught with diligent practice and good resources, though a basic course substantially accelerates progression.

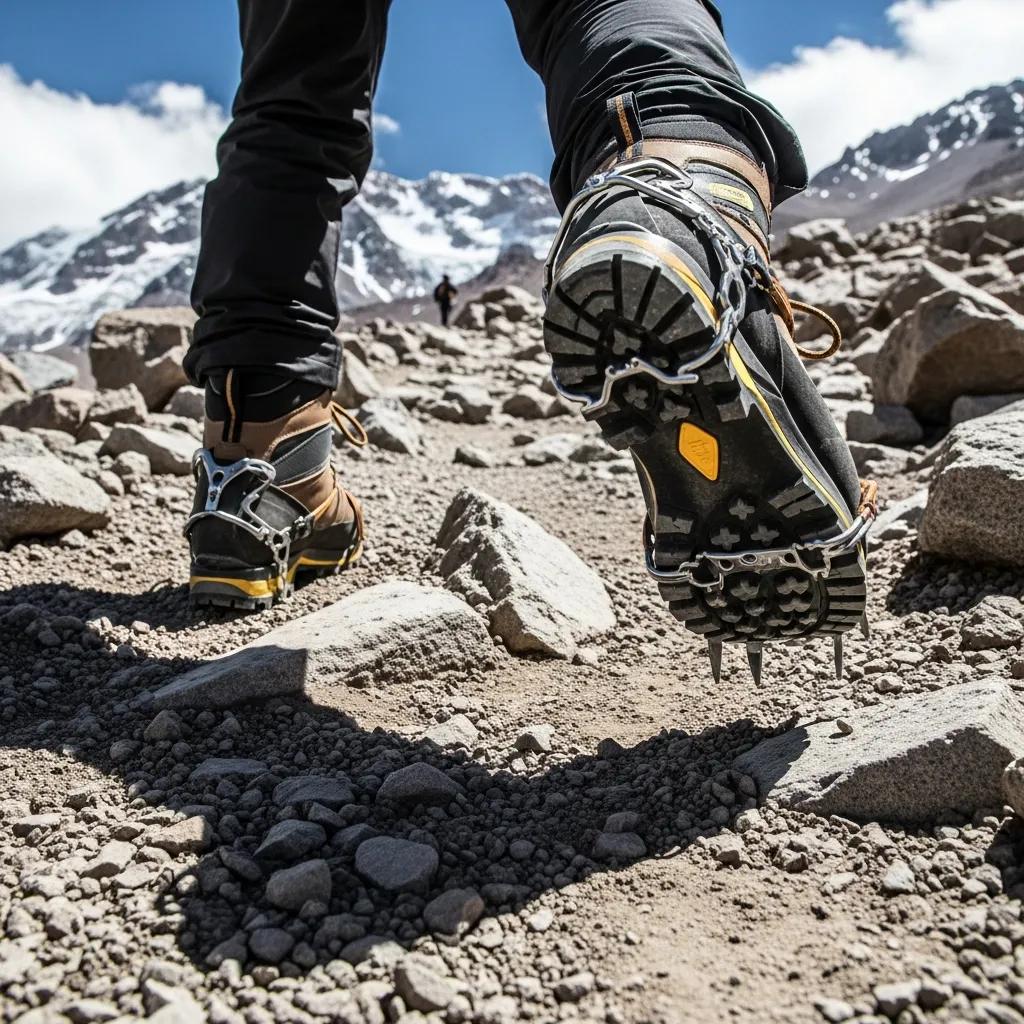
    Climbers wearing properly fitted mountaineering boots on rocky high-altitude terrain showing the foundational gear that all foot skills depend on with stiff-soled crampon-compatible boots providing the platform for French technique pied a plat positioning on low-angle slopes German technique frontpointing on steep ice and American technique combination diagonal for moderate terrain demonstrating why proper boot selection in the B0 B1 B2 B3 rating system and matching crampon C1 C2 C3 compatibility is the foundational gear decision that makes every other mountaineering skill possible from glacier travel to technical climbing
    Mountaineering boots on rocky terrain — the foundation of every other skill. Generally, foot skills depend completely on proper boot selection. Specifically, the B0/B1/B2/B3 rating system determines crampon compatibility, the boot stiffness determines French and German technique effectiveness, and the boot fit determines whether long approach days end with feet-on or feet-blistered. Notably, this is why “boots first” is the universal first-purchase recommendation for new mountaineers.Photo: Climbers in mountaineering boots on rocky terrain. Global Summit Guide media library.
    FOUNDATION · SKILL 1 OF 10

    1. Foot Skills and Crampon Technique

    Walking on snow, ice, and mixed terrain — the foundation of everything else.

    Foot skills are the foundation of all mountaineering. Generally, confident footing prevents falls in the first place, making this skill more important than rescue skills (which assume something has already gone wrong). Specifically, three primary crampon techniques cover all standard terrain:

    • French technique (pied à plat): All 10 bottom points of the crampon flat on the snow. Used for low-angle slopes up to approximately 35-40 degrees. Most energy-efficient on moderate terrain. Requires ankle flexibility.
    • German technique (frontpoint): Front 2 points kicked perpendicular into steep snow or ice. Used for slopes above 50-55 degrees and on water ice. Requires calf strength and confident commitment.
    • American technique (combination diagonal): One foot flat (French), one foot frontpointing (German). The standard technique for moderate slopes 40-55 degrees and for transitions between angles.

    Boot and crampon pairing is critical to safe technique. Generally, the B0-B3 rating system pairs boots with crampons: B0 hiking boots accept C1 (strap-on) crampons only; B1 light mountaineering boots accept C1-C2; B2 mountaineering boots accept C2 (semi-automatic); B3 technical boots accept C3 (fully automatic step-in). Notably, mismatched boot-crampon pairings are dangerous — a soft B0 boot in a stiff C2 crampon can flex unpredictably and detach mid-stride.

    Months 1-2Initial Learning
    20-50 daysField Practice
    $300-$500Crampon Cost
    Best Crampons Buyer’s Guide → Crampons + Ice Axe Guide → Microspikes vs Crampons →

    Dedicated deep-dive coming: “How to Use Crampons: Complete Step-by-Step Guide.”

    FOUNDATION · SKILL 2 OF 10 · MOST CRITICAL

    2. Ice Axe Mastery and Self-Arrest

    The single most important mountaineering skill — recovers from falls on snow and ice.

    Ice axe mastery is the single most critical mountaineering skill because it is the difference between a survivable slip and a fatal fall on any snow or ice slope. Generally, the ice axe serves multiple functions throughout a climb:

    • Cane position: Held in uphill hand on moderate terrain — the most common position during snow approach. The spike enters the snow as the climber’s third point of contact.
    • Adze position: Used for chopping steps in firm snow or ice when crampons alone don’t provide security. Also the standard position for arrest.
    • Dagger position: The pick driven into steep snow for security on steep ground (50-70 degrees).
    • Self-arrest position: The arrested position with axe head buried in snow, body weight on the shaft, feet held off snow to prevent ankle injury.

    Self-arrest must be practiced from all four falling positions: head-first feet-down, head-first feet-up, prone (face-down), and supine (back-down). Generally, each requires different recovery mechanics.

    ⚠ Self-Arrest is Practice, Not Theory

    Self-arrest must be practiced 50-100 times across multiple sessions before it becomes reliable muscle memory. Specifically, in a real fall a climber has 2-5 seconds before reaching dangerous speed — self-arrest must be reflexive, not deliberate. Generally, practice on a safe snow slope with clear runout. Notably, even experienced climbers practice self-arrest at the start of every climbing season to refresh the reflex.

    Months 2-3Initial Learning
    50-100Practice Arrests
    $80-$200Ice Axe Cost
    Crampons + Ice Axe Guide →

    Dedicated deep-dive coming: “Ice Axe Self-Arrest: The Most Critical Mountaineering Skill.”

    FOUNDATION · SKILL 3 OF 10

    3. Rope Work and Essential Knots

    Memorize 8 essential knots — the foundation of all roped climbing.

    The 8 essential mountaineering knots must be memorized until they can be tied in under 30 seconds, with cold hands, in poor lighting, with eyes closed. Generally, knots are the prerequisite to all roped climbing — without confident knot skills, all other rope-based techniques become unsafe.

    The 8 essential knots:

    • Figure-eight follow-through: The standard knot for tying into a harness. Easy to inspect visually for correctness.
    • Bowline: Alternative tie-in knot, easier to untie under load. Requires a backup stopper knot.
    • Clove hitch: Adjustable mid-rope knot, primary belay anchor knot. Adjusts length easily without untying.
    • Prusik: Friction knot used for ascending rope, crevasse rescue, and as autoblock backup on rappel.
    • Munter hitch: Belay backup knot when a belay device is lost or unavailable.
    • Double fisherman’s: Joins two ropes for rappel descent or extended slings.
    • Water knot (ring bend): Joins flat webbing for sling construction.
    • Overhand on a bight: Quick mid-rope clip-in or anchor point.
    ◆ Knot Practice Habit

    Keep a 2-meter piece of cord on your desk or by your TV. Generally, the best climbers can tie all 8 essential knots without looking — the knots are reflexes, not procedures. Specifically, professional guides report tying figure-eight follow-throughs 1,000+ times per season. Notably, the path from “can tie this knot” to “can tie this knot reflexively” takes approximately 100-200 repetitions of each knot.

    Months 1-3Initial Learning
    100-200Reps Per Knot
    $20-$40Practice Cord

    Dedicated deep-dive coming: “Essential Mountaineering Knots Every Climber Should Know.”

    Tier 2: Intermediate Skills (Months 6-12)

    The Intermediate tier comprises four skills that require formal instruction and substantial supervised practice. Generally, these are the rope-based skills that enable climbing with partners on technical terrain: belay technique, anchor construction, glacier travel with crevasse rescue, and rappelling. Specifically, attempting to self-teach these skills is risky — an incorrectly built anchor or improperly executed belay can be fatal. Notably, a 5-7 day mountaineering course with AMGA, AAI, or IFMGA instruction is the standard pathway to acquiring intermediate skills safely.

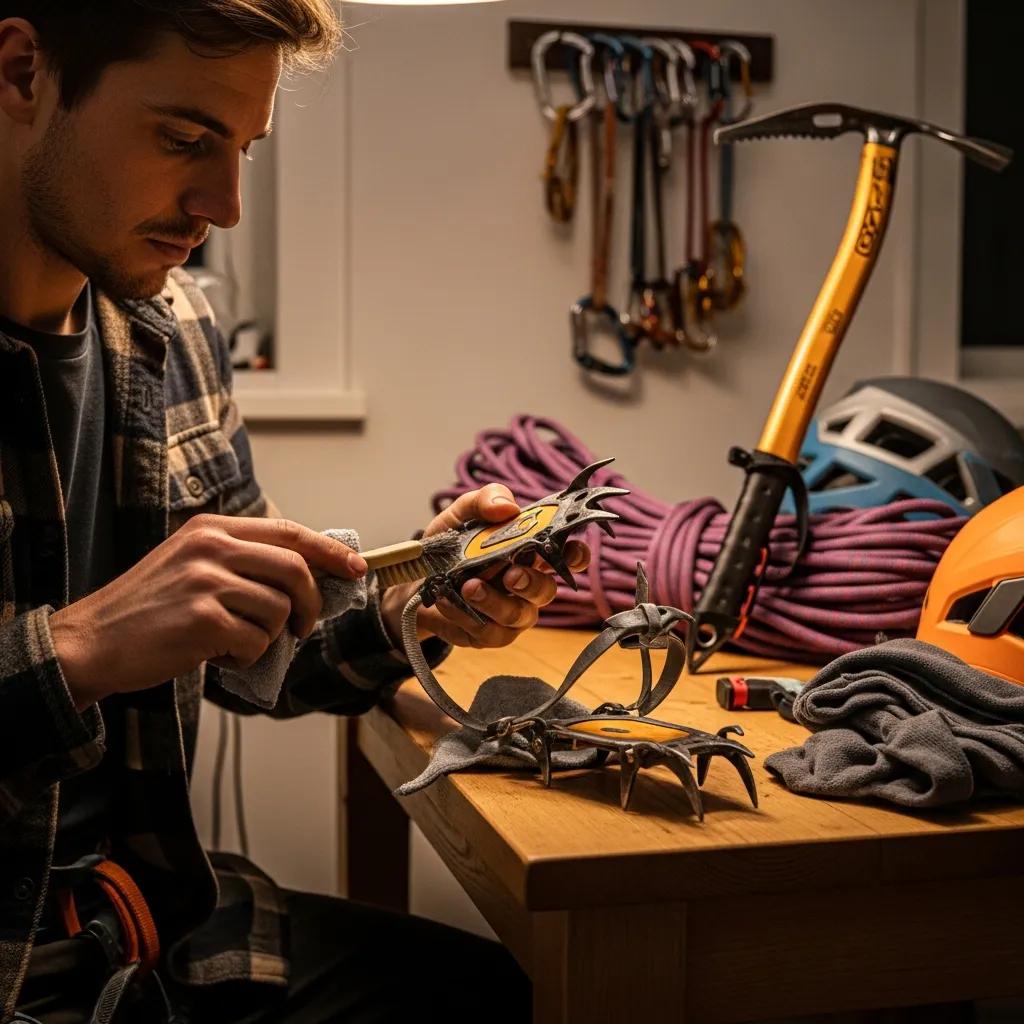
    Climber maintaining and inspecting mountaineering crampons in an indoor setting demonstrating the essential gear care discipline that intermediate mountaineering skills require including sharpening crampon points with a hand file inspecting the center bar and binding plates for cracks checking anti-balling plates for damage testing strap condition and verifying boot welt compatibility showing why pre-season gear maintenance is a fundamental intermediate-level mountaineering skill that prevents equipment failure during critical moments on the mountain when crampon performance becomes survival-critical on steep snow and ice terrain
    Crampon maintenance — the unglamorous intermediate skill that prevents accidents. Generally, intermediate mountaineering skills include not just rope work and anchors but the gear-care discipline that keeps systems reliable. Specifically, this means sharpening crampon points with a hand file before each season, inspecting center bars and binding plates for cracks, replacing anti-balling plates when polyurethane shows wear, and testing strap condition on C1/C2 models. Notably, equipment failure during critical moments is preventable through routine pre-season maintenance.Photo: Crampon maintenance and inspection. Global Summit Guide media library.
    INTERMEDIATE · SKILL 4 OF 10

    4. Belay Techniques

    The partner safety skill — every climbing pair needs reliable belays.

    Belay technique is the partner safety skill — the technique by which one climber protects another from falling. Generally, four standard belay methods cover all common climbing scenarios:

    • Top rope belay: The simplest belay scenario — rope runs from climber up through an anchor at the top of the route, back down to the belayer. Most beginners learn this first.
    • Lead belay: The climber places protection (or clips bolts) while ascending. The belayer feeds out slack and arrests falls. Substantially more complex.
    • ATC (Air Traffic Controller) belay: Standard tube device used for most belay scenarios. Requires belayer’s brake-hand attention.
    • GriGri (assisted-braking) belay: Camming mechanism that locks under load. Adds safety margin but requires specific technique to feed slack smoothly.

    Multi-pitch belay transitions add complexity. Generally, multi-pitch climbing involves multiple rope-lengths stacked vertically with anchor stations between each pitch. Specifically, the belayer at the top of a pitch must transition seamlessly from belaying the climber up to belaying them on the next pitch. Notably, smooth multi-pitch transitions take 50-100 multi-pitch days to master.

    Months 4-6Initial Learning
    Course Required5-7 days
    $80-$250Belay Device

    Dedicated deep-dive coming: “How to Belay: Top Rope, Lead, and Multipitch Techniques.”

    INTERMEDIATE · SKILL 5 OF 10

    5. Anchor Building

    The technical foundation of multi-pitch climbing and mountaineering.

    Anchor building is the technical foundation of multi-pitch climbing and mountaineering. Generally, anchors must follow the SERENE-A principles:

    • Solid — Each individual placement must be solid
    • Equalized — Load distributed evenly across all components
    • Redundant — Multiple components so failure of one doesn’t fail the system
    • Efficient — Quick to build and dismantle
    • No Extension — If one component fails, no shock loading on others
    • Angle — The angle between anchor components stays below 60°

    Three major anchor categories: (1) Snow anchors include the picket (buried perpendicular to slope), deadman (T-slot anchor with axe or stuff sack buried), and bollard (snow cone or T-slot cut into snow). (2) Ice anchors include ice screws (12-22cm length depending on ice quality) and the V-thread/Abalakov anchor. (3) Rock anchors include cam placements, nut placements, and slings around natural features.

    Months 5-9Initial Learning
    Course Required5-7 days
    $300-$1500Trad Rack

    Dedicated deep-dive coming: “Anchor Building for Mountaineering and Climbing.”

    INTERMEDIATE · SKILL 6 OF 10 · HARDEST SINGLE SKILL

    6. Glacier Travel and Crevasse Rescue

    The hardest single mountaineering skill — must be practiced repeatedly until systematic.

    Glacier travel and crevasse rescue is widely considered the hardest single mountaineering skill. Generally, the skill requires multiple interrelated capabilities under time pressure: building a snow anchor while a partner hangs in a crevasse, escaping their hauling weight from your harness, ascending a rope with prusiks, constructing a mechanical advantage system, and performing the actual rescue.

    Rope team configuration: Standard rope team configuration for glacier travel is 10-15 meters between climbers on a 60m dynamic rope. Generally, three-person teams are most common (more redundant rescue capability). Specifically, climbers tie into the rope using a figure-eight follow-through with prusiks pre-attached for quick crevasse rescue if needed.

    Z-pulley (3:1 mechanical advantage) is the standard crevasse rescue technique. Generally, a Z-pulley uses two prusiks and a redirect carabiner to multiply the rescuer’s pull by approximately 3x. Specifically, the system: (1) builds a T-slot anchor with the axe, (2) transfers load from the rescuer’s harness to the anchor, (3) pre-rigs the Z-pulley, (4) hauls the fallen climber. Notably, in heavy snow conditions or with a heavy victim, a 6:1 mechanical advantage system may be required.

    Months 6-12Initial Learning
    10-20 TimesPractice to Competence
    Course EssentialCannot self-teach

    Dedicated deep-dives coming: “Glacier Travel Basics” + “Crevasse Rescue Step-by-Step Guide.”

    INTERMEDIATE · SKILL 7 OF 10

    7. Rappelling

    Controlled descent — used for retreat, downclimbing, and route descent.

    Rappelling is the controlled descent technique used for retreat from technical climbs, downclimbing complex terrain, and descending climbing routes. Generally, two primary rappel modes:

    • Single rope rappel: Used for short descents or when sufficient single-rope length covers the descent. Simplest setup.
    • Double rope rappel: Two ropes joined together for longer descents. Allows the rappeller to descend twice the single-rope length, then pull the rope down by one strand to retrieve.

    The autoblock backup (third hand) is essential for safety. Generally, a friction hitch (typically a prusik or auto-block knot) below the rappel device locks the rope if the rappeller loses control. Specifically, this is the single most important safety addition to a rappel system. Notably, professional guides require autoblock backups on virtually all rappels.

    Months 6-9Initial Learning
    20-50 RappelsTo Competence
    $30-$80ATC + Carabiners

    Dedicated deep-dive coming: “Rappelling Guide: Setup, Technique, and Safety.”

    Tier 3: Advanced Skills (Months 12-24+)

    The Advanced tier comprises three skills that cannot be taught from a book — they require extensive field time, real-world experience, and emotional self-awareness to develop. Generally, these are the judgment and rescue skills that separate confident mountaineers from competent ones. Specifically, they include navigation in poor visibility, weather decision-making, and self-rescue capabilities. Notably, the time to develop advanced skills extends throughout a mountaineering career — these skills continue to deepen over decades.

    Essential mountaineering expedition gear displayed on rugged high-altitude terrain showing the comprehensive equipment system required for advanced mountaineering objectives including expedition double boots technical crampons ice axes climbing ropes harness helmet belay device locking carabiners prusik cords and the full layering system that supports the advanced skill applications of navigation in poor visibility mountain weather decision making and self rescue capabilities in remote expedition environments where professional rescue may be days away from any incident requiring complete mountaineering self-sufficiency
    Complete expedition gear in rugged high-altitude terrain. Generally, advanced mountaineering skills are applied in environments where the complete gear system matters — expedition boots, technical crampons, ice axes, ropes, harness, helmet, layering system, and emergency equipment all working together. Specifically, the advanced skills (decision-making, navigation, rescue) become survival-critical in this kind of remote, exposed environment. Notably, this is where the difference between competent and confident mountaineers becomes visible.Photo: Mountaineering expedition gear on rugged terrain. Global Summit Guide media library.
    ADVANCED · SKILL 8 OF 10

    8. Navigation and Route Finding

    Travel safely when visibility drops to meters — the mark of an advanced mountaineer.

    Navigation skills enable travel in low-visibility conditions when GPS signals fail and terrain features disappear in cloud or storm. Generally, advanced navigation combines five interlocking capabilities:

    • Topographic map reading: Interpreting contour lines, slope angle, terrain features, and the relationship between map and ground.
    • Compass use with declination correction: Most maps are oriented to true north; compasses point to magnetic north. The declination correction must be applied for accurate bearing.
    • GPS as backup: GPS provides position confirmation but should not replace map and compass — batteries fail, satellites can be obscured by terrain or weather.
    • Altimeter navigation: A wristwatch altimeter provides elevation tracking that helps confirm position on a known route.
    • Pace counting and bearing taking: Measuring distances by step count combined with compass bearings to navigate to known waypoints in low visibility.

    Notably, GPS technology has not replaced traditional navigation — it has added redundancy. Generally, advanced mountaineers carry a paper map and compass on every climb, regardless of GPS availability.

    Months 8-18Initial Development
    LifelongOngoing Refinement
    $50-$200Map + Compass

    Dedicated deep-dive coming: “Navigation Skills: Map, Compass, GPS, and Altimeter.”

    ADVANCED · SKILL 9 OF 10

    9. Mountain Weather and Decision Making

    The judgment to know when to turn around — the hardest meta-skill in mountaineering.

    Mountain weather skills combine observation, interpretation, and decision-making. Generally, mountain weather changes faster and more dramatically than at sea level — afternoon thunderstorms, sudden wind shifts, and rapid temperature drops are routine occurrences that can become life-threatening if missed. Specifically, advanced mountaineers develop the ability to:

    • Read clouds: Cap clouds (lenticular formations) over peaks indicate strong winds aloft. Mammatus clouds suggest severe convective activity. Cumulus building before noon predicts afternoon thunderstorms.
    • Track barometric pressure: Falling pressure precedes storms; rising pressure suggests clearing. A wristwatch altimeter doubles as barometer.
    • Recognize wind pattern shifts: Wind direction reversals or sudden gusts often precede frontal passages.
    • Read terrain effects: Lee waves, downslope wind acceleration, and ridge-line venturi effects all create local weather patterns invisible on forecasts.

    Summit window assessment is the practical application. Generally, summit windows are 4-12 hour periods of favorable weather suitable for the final push to a summit. Specifically, advanced mountaineers combine multiple data sources — forecasts, local observations, cloud reading, pressure trends — to identify and trust summit windows. Notably, the hardest decision in mountaineering is often the turn-around decision when weather signals are ambiguous.

    How to Read a Summit Window →
    Months 12-24+Initial Development
    LifelongSkill Refinement
    Free(Experience-based)

    Dedicated deep-dive coming: “How to Read Mountain Weather.”

    ADVANCED · SKILL 10 OF 10

    10. Self Rescue and Partner Rescue

    The skills you hope never to use — but absolutely must know.

    Self-rescue and partner-rescue skills enable response to emergencies far from professional rescue resources. Generally, mountaineering objectives often place climbers hours or days from organized rescue. Specifically, the core rescue skills include:

    • Improvised harness: When equipment is damaged or unavailable, harnesses can be constructed from webbing or rope (Swiss seat, hasty harness).
    • Improvised litter: Trekking poles, rope, and clothing can construct an emergency litter for evacuating an injured climber.
    • Assisted hoist: Used to raise an injured climber to a ledge or anchor when they cannot climb themselves.
    • Counterbalance lower: Used to descend an injured climber when only one rope is available.
    • Escaping a stuck rappel: Techniques for recovering when rope is stuck during descent.
    • Evacuation prioritization: When to evacuate, when to shelter in place, when to call for outside rescue.

    Wilderness First Aid is essential complement to rescue skills. Generally, a Wilderness First Aid (WFA) certification — typically a 16-hour course costing $200-300 — teaches medical response in remote settings. Specifically, key skills include patient assessment, bleeding control, splinting, hypothermia/heatstroke management, and medical evacuation criteria. Notably, professional guides often hold Wilderness First Responder (WFR) certification — an 80-hour intensive course that adds substantially more medical capability.

    Months 12-24+Initial Learning
    Annual RefresherRecommended
    $200-$1000WFA/WFR Course

    Dedicated deep-dive coming: “Wilderness First Aid: Essential Skills for Mountaineers.”

    The Progression Path: From Beginner to Advanced

    The 10 mountaineering skills are typically learned in a progressive sequence over 12-24 months of focused training. Generally, the progression follows the three-tier structure described above, though individual learners may move through stages at different paces.

    PhaseMonthsSkills FocusTypical Climbing Objectives
    Foundation1-2Foot skills, basic ice axe use, beginning knotsSnow scrambling, easy snowshoe ascents
    Foundation2-4Self-arrest mastery, all 8 knots, crampon techniqueMount Adams, Mount Hood normal routes
    Intermediate (Course)4-6Formal 5-7 day mountaineering courseCourse objectives (Mount Baker, North Cascades)
    Intermediate6-9Belay, rappel, basic anchors, glacier travelMount Rainier, Mount Shasta
    Intermediate9-12Crevasse rescue practice, multi-pitch skillsMount Whitney winter, Denali progression
    Advanced12-18Decision-making, navigation in poor visibilityAconcagua, Denali, Kilimanjaro
    Advanced18-24+Self/partner rescue, expert weather assessmentTechnical peaks, 6000m peaks, expedition climbing
    Beginner Guide: Rent vs Buy → Intermediate Guide → Expert Guide →

    How to Learn These Skills

    Three primary learning pathways combine to develop mountaineering competency: self-study, formal courses, and mentored climbing. Generally, all three are necessary — none alone is sufficient.

    1. Self-Study (Foundation Skills)

    Foundation skills (foot work, basic ice axe, knots) can largely be self-taught with diligent practice and good resources. Specifically, recommended self-study resources include the “Mountaineering: The Freedom of the Hills” textbook (the genre-standard reference), instructional YouTube channels from AMGA-certified guides, and supervised practice with experienced climbing partners. Notably, self-study alone is insufficient for the intermediate skills — attempting to self-teach anchors, belay, or crevasse rescue is risky.

    2. Formal Courses (Intermediate Skills)

    The standard pathway for intermediate skills is a 5-7 day mountaineering course. Generally, leading providers include:

    • American Alpine Institute (AAI) — Bellingham, WA. Comprehensive curriculum including 6-day Mountaineering 1 course.
    • RMI Expeditions — Rainier-focused training including 6-day Mountaineering Seminar.
    • Mountain Madness — Seattle-based with comprehensive instructional offerings.
    • NOLS — Extended wilderness courses including 14-30 day mountaineering expeditions.

    Notably, courses outside the United States include the British Mountaineering Council (BMC) and various European and South American instructional providers.

    3. Mentored Climbing (Advanced Skills)

    Advanced skills — judgment, decision-making, complex rescue — develop primarily through mentored climbing with experienced partners. Generally, this involves climbing with mentors who can explain decision-making in real time, providing direct feedback on choices, and progressively giving the apprentice more decision authority on climbs. Specifically, this pathway typically takes 2-5 years of regular climbing with mentor relationships. Notably, joining a local American Alpine Club (AAC) chapter is the standard way to find mentors.

    Common Mistakes in Mountaineering Skill Development

    ⚠ The 7 Most Common Skill Development Mistakes

    (1) Rushing past foundation skills — Climbers eager to start technical climbing skip the foot skills and ice axe work that prevent the falls all the other skills are trying to recover from. (2) Reading about skills instead of practicing them — Knots and self-arrest are reflexes, not procedures. (3) Skipping formal instruction — Self-teaching intermediate skills is dangerous and 10x slower than course-based learning. (4) Climbing above current skill level — The most dangerous gap between actual and assumed competence. (5) Not maintaining skills — Mountaineering skills decay without regular practice. (6) Underestimating decision-making time — Advanced judgment requires extensive field time, not just course attendance. (7) Climbing only with people at your own level — Skill development accelerates dramatically with mentor relationships.

    The Mountaineering Skills Cluster

    This pillar post is the anchor of the Mountaineering Skills cluster on Global Summit Guide. Generally, each of the 10 skill categories will receive dedicated deep-dive coverage in supporting posts. Specifically, the cluster includes:

    Cluster RolePost TitleStatus
    PILLARComplete Guide to Essential Mountaineering Skills (this post)Published
    Support 1How to Use Crampons: Complete Step-by-Step GuideComing soon
    Support 2Ice Axe Self-Arrest: The Most Critical Mountaineering SkillComing soon
    Support 3Essential Mountaineering Knots Every Climber Should KnowComing soon
    Support 4How to Belay: Top Rope, Lead, and Multipitch TechniquesComing soon
    Support 5Anchor Building for Mountaineering and ClimbingComing soon
    Support 6Glacier Travel Basics: Rope Teams and Crevasse AwarenessComing soon
    Support 7Crevasse Rescue Step-by-Step GuideComing soon
    Support 8Rappelling Guide: Setup, Technique, and SafetyComing soon
    Support 9Navigation Skills: Map, Compass, GPS, and AltimeterComing soon
    Support 10How to Read Mountain WeatherComing soon
    Support 11Wilderness First Aid: Essential Skills for MountaineersComing soon
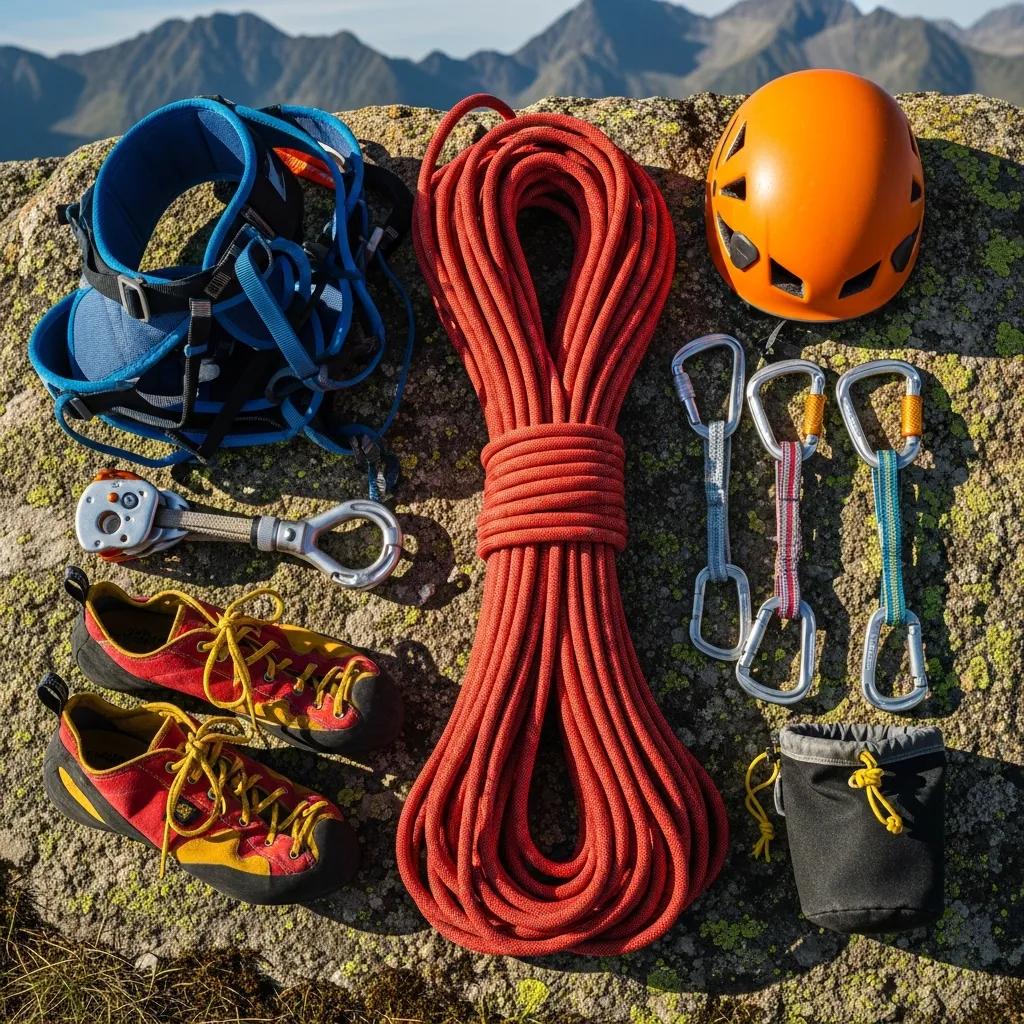
    Diverse mountain climbing gear collection including climbing ropes harnesses helmets carabiners belay devices ice axes crampons and mountaineering boots arranged against a mountain backdrop showing the complete equipment system that the 10 essential mountaineering skill categories require demonstrating how foot skills crampon technique ice axe self arrest rope work knots belay technique anchor building glacier travel rappelling navigation and rescue all integrate into a unified mountaineering competency framework that takes 12 to 24 months and 50 to 100 climbing days to develop fully
    The complete gear system that mountaineering skills depend on. Generally, developing the 10 essential skill categories means becoming fluent with the complete equipment system. Specifically, ropes for belay and rappel, harnesses for partner protection, helmets for objective hazard, crampons and ice axes for snow and ice, and boots as the foundation everything else builds on. Notably, the 12-24 month investment in foundation, intermediate, and advanced skills returns decades of access to remote, dramatic mountain environments.Photo: Mountain climbing gear collection. Global Summit Guide media library.

    Frequently Asked Questions About Mountaineering Skills

    What are the essential mountaineering skills?

    The 10 essential mountaineering skill categories are: (1) Foot skills and crampon technique, (2) Ice axe mastery including self-arrest, (3) Rope work and knots, (4) Belay techniques, (5) Anchor building, (6) Glacier travel and crevasse rescue, (7) Rappelling, (8) Navigation and route finding, (9) Mountain weather and decision making, and (10) Self rescue and partner rescue. These skills build sequentially with foot skills as the foundation, then ice axe mastery, then progressively more complex roped skills. Most climbers develop competence in the first 6-7 skills within 12-18 months of focused training.

    How long does it take to learn mountaineering skills?

    Achieving competent mountaineer status typically takes 12-24 months with consistent training. The foundation skills (foot skills, ice axe self-arrest, basic knots) can be learned in 2-3 months of dedicated weekend practice. The intermediate skills (belay, basic anchors, rappelling, glacier travel) require a formal mountaineering course plus 6-9 months of supervised practice. The advanced skills (decision-making, route finding, complex rescues) require 12-24 months of extensive field time. Professional guides recommend 50-100 climbing days per year to maintain and develop skills — meaning most weekend mountaineers reach competency over 2-3 years.

    What is the most important mountaineering skill?

    Ice axe self-arrest is widely considered the single most critical mountaineering skill because it is the difference between a survivable slip and a fatal fall on any snow or ice slope. Self-arrest works from all four falling positions (head-first feet-down, head-first feet-up, prone, supine) and must be practiced until it becomes pure muscle memory — typically 50-100 practice arrests across multiple sessions. Beyond self-arrest, foot skills (proper crampon technique) come second in importance because confident footing prevents falls in the first place.

    Can you learn mountaineering skills without a course?

    Some mountaineering skills can be self-taught with diligent practice and good instructional resources, but several core skills require formal instruction. Foot skills, self-arrest, and basic knots can be learned through self-study with videos, books, and supervised practice with experienced friends. However, rope work, belay techniques, anchor building, and crevasse rescue are best learned in a formal course with AMGA, AAI, IFMGA-certified guides or equivalent instruction. The cost of a formal 5-7 day course is $500-1,500 USD versus the risk of incorrect technique that could be fatal.

    What is the difference between hiking and mountaineering skills?

    Hiking skills involve walking on established trails with comfortable conditions, while mountaineering skills involve traveling off-trail in mountainous terrain that may include snow, ice, glaciers, rock, and exposure to fall hazards. Hiking requires good fitness, navigation basics, weather awareness, and packing knowledge. Mountaineering adds technical skills: crampons, ice axe, rope work, anchors, belay technique, glacier travel, and self-rescue. The transition typically involves: graduating to off-trail snow travel with poles, learning crampons and ice axe basics, taking a formal mountaineering course, joining experienced climbers on supervised peaks, and progressively independent climbing.

    What skills do you need for your first mountain?

    For a first non-technical peak (e.g., Mount Hood normal route, Mount Adams, Mount Baker easy route, Mount Whitney summer route), the essential skills are: confident foot skills on snow and scree, basic ice axe technique including self-arrest, snow travel skills with proper layering, basic navigation with map and compass, and understanding of altitude effects. No roped skills are required for these peaks under normal conditions. However, a basic mountaineering course before your first peak is strongly recommended even for non-technical objectives — the course teaches situational awareness, emergency response, and safe travel principles that videos cannot convey.

    How do you practice mountaineering skills without mountains?

    Several skills can be practiced in non-mountain settings. Knots can be practiced anywhere — keep a piece of cord on your desk and tie knots while watching television. Belay technique can be practiced at any climbing gym with top-rope and lead climbing walls. Self-arrest can be practiced on suburban hills with snow (even very gentle slopes work for technique practice). Rope coiling, rope management, and prusik ascending can be practiced in a backyard. Dry tooling crags allow ice axe and crampon practice without ice. Fitness training for mountaineering can be done anywhere. However, glacier travel and crevasse rescue truly require glacial terrain to practice safely.

    Are mountaineering courses worth it?

    Yes, formal mountaineering courses are widely considered essential for safely developing mountaineering skills. A 5-7 day AMGA, AAI, or IFMGA-certified course costs $500-1,500 USD and teaches in one week what might take 12-18 months of self-study. The course provides certified instructor guidance on critical safety skills, structured curriculum from foundation to intermediate level, real-world practice in safe controlled conditions, and validation that skills are being performed correctly. The cost-benefit comparison is compelling: a single critical mistake on an anchor or knot could be fatal, while $1,000 spent on instruction is a small fraction of typical lifetime mountaineering costs.

    What is the hardest mountaineering skill to learn?

    Crevasse rescue is widely considered the hardest single mountaineering skill because it requires multiple interrelated skills under stressful conditions: building a snow anchor under load, escaping a partner’s hauling weight from your harness, ascending a rope using prusik knots, constructing a Z-pulley 3:1 or 6:1 mechanical advantage system — all while the fallen partner is in danger and time-critical. The skill must be practiced repeatedly until it becomes systematic — most climbers practice crevasse rescue 10-20 times before feeling competent. Beyond crevasse rescue, decision-making in marginal weather is considered the hardest “meta-skill” because it cannot be taught through procedure.

    How do mountaineering skills differ for snow vs rock vs mixed terrain?

    Each terrain type emphasizes different skill subsets. Snow mountaineering prioritizes foot skills, crampon technique, ice axe mastery, glacier travel, and self-arrest. Rock mountaineering prioritizes rock climbing technique, gear placements (cams, nuts), rock anchors, belay technique, and rappelling. Mixed terrain mountaineering (snow + rock + ice in the same climb) requires fluency in all three plus the judgment to transition between techniques smoothly. Most North American mountaineering is snow-focused (Pacific Northwest, Sierra Nevada, Rockies) while European Alpine mountaineering involves more mixed terrain.

    Methodology & Editorial Standards

    How This Pillar Was Built

    1. Primary Source: Personal Field Experience

    This pillar guide draws on Travis Ludlow’s personal mountaineering experience including Mount Kilimanjaro (Tanzania), multiple Mexican volcanoes (Pico de Orizaba, Iztaccíhuatl), and Rainier-class peaks in the Pacific Northwest. Skill descriptions reflect what was actually required and used during these climbs.

    2. Curriculum Cross-Reference

    The 10 skill categories and progression structure were validated against published curricula from the American Mountain Guides Association (AMGA), American Alpine Institute (AAI), the International Federation of Mountain Guides Associations (IFMGA), and the genre-standard textbook Mountaineering: The Freedom of the Hills (now in its 10th edition). The structure represents industry consensus.

    3. Internal Cross-Reference

    This pillar is cross-referenced against Global Summit Guide’s existing 200+ skills, gear, and safety pages, ensuring consistency with our complete content corpus and creating internal link equity flow for SEO purposes.

    4. Editorial Independence

    No affiliate partnerships influence recommendations. Specific course providers, brands, and books are mentioned only where they exemplify a category, not as endorsements. The article generates revenue only through Google AdSense display ads (when applicable).

    5. Update Cycle

    This pillar is reviewed quarterly. Next scheduled review: September 2026. Supporting deep-dive posts will be added approximately monthly across the coming 12 months — each addition will update this pillar with internal links to the new supporting content.

    Affiliate disclosure: Global Summit Guide does not currently maintain affiliate partnerships with the mountaineering schools, guide services, or gear brands mentioned in this pillar guide. No commission is earned from any external link clicks. This page contains no sponsored content. The site is supported by Google AdSense (Display Ads) when applicable.

    Sources and References

    Numbered Source References

    This mountaineering skills pillar synthesizes data from authoritative mountaineering education organizations and original Global Summit Guide field research.

    1. American Mountain Guides Association (AMGA) · https://amga.com/ — North American professional standard for mountaineering instruction.
    2. American Alpine Institute (AAI) · https://www.alpineinstitute.com/ — Bellingham, WA. Comprehensive mountaineering curriculum and reference.
    3. International Federation of Mountain Guides Associations (IFMGA) · https://www.ifmga.info/ — International professional standard.
    4. American Alpine Club · https://americanalpineclub.org/ — Climbing accident and safety statistics. Annual Accidents in North American Climbing publication referenced.
    5. Mountaineering: The Freedom of the Hills (10th ed.) · https://mountaineersbooks.org/ — The Mountaineers Books. Genre-standard textbook.
    6. RMI Expeditions · https://www.rmiguides.com/ — Rainier-focused training provider.
    7. Mountain Madness · https://www.mountainmadness.com/ — Seattle-based instructional provider.
    8. NOLS (National Outdoor Leadership School) · https://www.nols.edu/ — Extended wilderness courses.
    9. British Mountaineering Council (BMC) · https://www.thebmc.co.uk/ — UK mountaineering authority.
    10. Global Summit Guide internal research — Cross-referenced from existing 200+ skills, gear, and safety pages plus personal field experience.

    Methodology note. Quarterly review cycle — next review September 2026. Climbing techniques, equipment standards, and safety best practices evolve continuously; verify current information with the cited organizations within 12 months of attempting technical climbs.

    About the Author

    Travis Ludlow

    Editor & Route Research, Global Summit Guide

    Travis Ludlow is the editor of Global Summit Guide, an independent mountaineering and high-altitude hiking resource. Travis has personal climbing experience on Mount Kilimanjaro, multiple Mexican volcanoes including Pico de Orizaba and Iztaccíhuatl, and Rainier-class Pacific Northwest peaks.

    Specifically, Travis has authored or edited Global Summit Guide’s comprehensive coverage of mountaineering skills, gear, training, and safety across the site’s 700+ published articles. Notably, the editorial process at Global Summit Guide includes safety review by Dawson Ludlow (Wilderness First Aid certified) and gear review by Walker Ludlow.

    Expertise areas: Mountaineering skills, gear and equipment, training programs, altitude climbing, expedition planning, and East African mountains. Editorial role: Editor and route research for Global Summit Guide’s 700+ published articles. Approach: Independent, first-hand tested where possible, cross-referenced against AMGA/AAI/IFMGA curricula. Read more about the Global Summit Guide editorial team →

    Explore the Cluster

    Start Your Mountaineering Journey

    The 10 essential mountaineering skills are learned progressively over 12-24 months with consistent practice and formal instruction. Generally, foot skills first, then ice axe and knots, then formal course, then progressive climbing experience. Specifically, the path is well-trodden — generations of mountaineers have followed it, and the resources to support you (courses, mentors, equipment) are well-developed.

    Start with Kilimanjaro → Rainier Progression →

    Was this helpful?

    Yes
    No
    Thanks for your feedback!
  • Cerro Torre Death Rate: 80-Year Fatality Pattern Analysis (1959-2024)

    Death Rate Analysis · 80 Years of Fatalities · Patagonia

    Cerro Torre Death Rate: 80-Year Fatality Pattern Analysis (1959-2024)

    Cerro Torre at 3,128 meters is a granite spire rising from the Southern Patagonian Ice Field — widely considered one of the most dangerous mountains in the world among elite alpinists. No official fatality statistics exist for Cerro Torre, but documented deaths span 80 years of climbing history from Toni Egger’s 1959 disputed ascent death to Korra Pesce’s 2022 rime-ice collapse. Climate change is a documented emerging factor, with the 2022-2023 Patagonia season producing record fatalities. Complete pattern analysis with the verified case histories and the systemic factors driving Cerro Torre’s exceptional danger.

    3,128 m
    Summit (10,262 ft)
    80 Years
    Of Documented Climbing
    1959
    First Documented Death (Egger)
    No Stats
    Official Fatality Database

    Cerro Torre fatality data does not exist in any official database — unlike Himalayan 8,000-meter peaks tracked by the Himalayan Database, Patagonia’s Chaltén Massif has no comprehensive record-keeping body for climbing deaths. Generally, this absence of statistics reflects Cerro Torre’s status as an elite alpinist objective rather than a commercial expedition mountain — the climber population at risk is small but composed of highly skilled climbers attempting one of the world’s most technically demanding peaks. Specifically, documented Cerro Torre fatalities across 80 years (1944-2024) include Austrian climber Toni Egger’s iconic February 1959 death during the disputed Maestri first ascent attempt, Australian climber Keven Carroll and American Steven McAndrews’s 1973 deaths on West Face descent, and Italian alpinist Corrado “Korra” Pesce’s January 2022 death from a rime-ice mushroom collapse. Notably, climate change has measurably increased fatality frequency since approximately 2018 — the 2022-2023 Patagonia season produced a record 5+ fatalities across the broader Chaltén Massif, with experienced alpinists characterizing the trend as alarming.

    Key Takeaways

    • Cerro Torre has no official fatality statistics. Unlike Himalayan 8000m peaks tracked by the Himalayan Database, Patagonia has no comprehensive climbing death record-keeping body.
    • 3,128m granite spire on Argentina-Chile border. Rises from the Southern Patagonian Ice Field. Vertical and overhanging rock combined with summit ice mushroom climbing.
    • 1959 — Toni Egger died on descent. Austrian climber, age 32. Killed in avalanche during disputed Maestri first ascent attempt. The iconic Cerro Torre death.
    • 1973 — Keven Carroll and Steven McAndrews died on West Face descent. Australian and American climbers. Killed by rockfall after being seen on summit ridge during 5th West Face ascent.
    • 2022 — Korra Pesce killed by rime-ice mushroom collapse. Italian alpinist age 41, UIAGM guide. Hit during descent of new route on east/north face. Most prominent recent death.
    • 2022-2023 Patagonia season: record 5+ fatalities. Multiple deaths on or near Cerro Torre. Experienced alpinists describe the trend as alarming.
    • Climate change documented as emerging factor. 2018 Pietron analysis: warming temperatures producing “more unstable mountain environment, more dangerous approaches and descents, increased rockfall.”
    • Descent more dangerous than ascent on Cerro Torre. Multiple fatalities including Egger 1959, Carroll/McAndrews 1973, Pesce 2022 all occurred during descent.
    • No commercial rescue infrastructure exists in the Cerro Torre region. No readily available helicopters, no official rescue body, limited communications.
    Published May 31, 2026 — v3.6 blog · Verified case histories across 80 years of Cerro Torre climbing · Climate change context integrated

    Why No Official Statistics Exist for Cerro Torre

    Cerro Torre’s fatality data does not exist in any centralized database, which makes accurate death rate calculation impossible[1]. Generally, this absence reflects fundamental differences between Patagonian alpinism and Himalayan commercial expedition climbing — the Himalayan Database (maintained by Elizabeth Hawley and her successors since the 1960s) tracks every commercial 8,000-meter peak expedition with summit success and fatality outcomes, but no equivalent body exists for the Chaltén Massif region containing Cerro Torre. Specifically, Cerro Torre is climbed almost exclusively by elite alpinists in small teams rather than commercial expeditions, the region has no permit-issuing authority that records climbers, and the Argentine and Chilean rescue services do not maintain comprehensive databases of fatalities. Notably, the absence of statistics matters because it means even the most accomplished alpinism historians cannot give a precise total death count for Cerro Torre — instead, fatalities are documented case-by-case through climbing magazines, expedition reports, and obituary coverage.

    Cerro Torre's 3,128-meter granite spire viewed from the Patagonian Ice Field — the mountain's near-vertical rock walls combined with the summit rime ice mushroom create the unique technical demands that have caused fatalities across 80 years of climbing history, from Toni Egger's 1959 death through Korra Pesce's 2022 rime ice collapse
    Cerro Torre’s distinctive profile. Generally, the mountain’s combination of vertical granite walls and the summit rime ice mushroom creates the unique technical challenges that drive its fatality pattern. Specifically, climbers must switch between rock climbing and ice climbing techniques within short Patagonian weather windows. Notably, the rime ice formations at the summit constantly form and collapse — the same hazard that killed Italian alpinist Korra Pesce in January 2022.

    The Himalayan Database parallel. When climbers ask about Annapurna’s “~30% fatality rate,” K2’s “~25%,” or Nanga Parbat’s “~21%,” those figures come from the Himalayan Database’s comprehensive 1950-present tracking. Cerro Torre has no equivalent — climbers researching the mountain’s danger find documented case histories rather than precise statistics. This page consolidates the documented cases into the most complete public-facing record available for the mountain.

    Documented Major Fatality Cases (1959-2022)

    The documented Cerro Torre fatalities span 80 years and cover all three primary death-cause categories: rime ice mushroom collapses, rockfall and avalanche events, and falls during descent[2]. Generally, the cases organize chronologically into pre-confirmation-era deaths (1959-1973, before Ferrari’s 1974 first confirmed ascent), commercial-era deaths (1974-2017, with continuing elite alpinist activity and minimal commercial development), and the climate-affected era (2018-present, with measurably increased fatality frequency). Specifically, four cases stand out as the most historically significant and well-documented Cerro Torre deaths. Notably, descent — not ascent — is the common factor across all four major documented cases, reflecting both the extreme technical demand of the descent itself and the cumulative exhaustion climbers face after summiting.

    1959

    Toni Egger (Austria, age 32) Avalanche / Disputed

    Died February 2, 1959 during descent from Cerro Torre · Disputed Maestri “first ascent” attempt · Body never recovered

    Toni Egger was a prominent Austrian rock-climber and mountain guide widely considered one of the best climbers of his generation, with major achievements including the first ascent of Jirishanca in Peru. Egger joined Italian climber Cesare Maestri in early 1959 for an attempt on Cerro Torre’s north face — what Maestri would later claim was the successful first ascent of the mountain. According to Maestri’s account, the two climbers reached the summit but Egger was killed during the descent by an avalanche, falling with the camera that supposedly contained summit proof.

    Modern climbing historians and most contemporary alpinists believe Maestri’s 1959 claim was a hoax. Generally, the evidence against the Maestri account is overwhelming — no physical traces of the 1959 climb were found above approximately 60 meters on the headwall during subsequent attempts, the route was not successfully repeated until 2005 (46 years later) by Ermanno Salvaterra and Rolando Garibotti, and the photographic evidence Maestri presented has been demonstrated to show the wrong side of the massif. Specifically, this means Egger likely died during a failed retreat from a summit attempt that never succeeded, rather than during the triumphant descent Maestri described. Notably, Egger’s death remains the most historically significant single fatality in Cerro Torre’s climbing history — both for its own tragedy and for triggering the 50+ year controversy that has shaped Cerro Torre’s identity in the alpinism community.

    1973

    Keven Carroll (Australia) and Steven McAndrews (USA) Rockfall

    Died 1973 during descent from Cerro Torre · West Face 5th ascent attempt · Killed by rockfall after summit ridge sighting

    Australian climber Keven Carroll and American climber Steven McAndrews died during the descent from what was the fifth West Face ascent attempt of Cerro Torre in 1973 — one year before the Italian Ragni di Lecco team’s confirmed first ascent. Generally, the climbers had been seen on the summit ridge before they began their descent, suggesting they may have reached the summit (or come very close) before the fatal accident. Specifically, the cause of death was rockfall during the descent, with the bodies never fully recovered. Notably, the Carroll/McAndrews deaths are documented in the Wikipedia chronology of Cerro Torre ascents and remain among the earliest confirmed Cerro Torre fatalities — coming 14 years after Egger’s 1959 death and demonstrating that the West Face route Maestri’s contemporaries believed was the legitimate climbing line remained deadly even with the period’s best techniques.

    2022

    Corrado “Korra” Pesce (Italy, age 41) Rime Ice Collapse

    Died January 28, 2022 during descent of north face · UIAGM mountain guide · One of greatest alpinists of his generation

    Italian alpinist Corrado “Korra” Pesce was killed on January 28, 2022 when a rime-ice mushroom collapsed on him during the descent of Cerro Torre’s north face. Generally, Pesce and his Argentine climbing partner Tomás Aguiló had just completed a new route up the east face that finished on the north face, joining forces for the final climbing with another Italian team (Matteo Della Bordella, David Bacci, Matteo De Zaicomo) who had also opened a new east face route. Specifically, after summiting together, the two parties separated for descent — Pesce and Aguiló attempting the north face descent at night to avoid daytime hazards, Della Bordella’s team descending the Compressor Route. Notably, the rime-ice mushroom collapse during descent severely injured both Pesce and Aguiló — Aguiló managed to descend partway and alert rescue, but Patagonian weather closed in preventing helicopter access, and Pesce’s death from hypothermia was confirmed by the El Chaltén Alpine Rescue Center given the conditions.

    Pesce was one of the most decorated alpinists of his generation. Generally, his accomplishments included the 2019 second ascent of Psycho Vertical (5.10b A3 M8 90°; 950 meters) on the south face of Torre Egger with Aguiló and three other climbers, the 2016 repeat of Impossible Star (ED; 2,000 meters) on Bhagirathi III (6,454m) in the Indian Himalaya, the 2015 repeat of Rolling Stones (WI5+ 5.10a A3 80° ED; 1,100 meters) on the Grandes Jorrasses, and the 2014 climb of Directe de l’Amitie (VII M7/A3 90°; 1,100 meters) on the same mountain. Specifically, Pesce held UIAGM mountain guide certification and was a working professional guide at the time of his death. Notably, Renan Ozturk wrote in a memorial that Pesce “was a shining force for climbing and the history of the art” — Pesce’s death has come to symbolize the increased fatality risk facing even the most experienced Patagonian alpinists in the climate-change era.

    2022-23

    Record Patagonia Climbing Season Fatalities Multiple Causes

    5+ fatalities across Chaltén Massif including Cerro Torre area · Record season per El Chaltén Rescue Center · Climate-change-affected era

    The 2022-2023 Patagonia climbing season produced a record number of fatalities across the broader Chaltén Massif region, several occurring on or near Cerro Torre. Generally, Carolina Codo of the El Chaltén Alpine Rescue Center confirmed in mid-January 2023 that “four climbers dead in a season is a record” — a record exceeded later in the same season when 28-year-old Argentine doctor Marcos Gorostiaga was killed by rockfall on nearby Cerro Mocho. Specifically, the 2022-2023 deaths included Christoph Klein (Switzerland, fell on icefield near Cerro Standhart in December), Cassandra Doolittle (USA, died of hypothermia descending from Aguja Guillaumet), Iker Bilbao and Amaia Agirre (both Basque, killed in avalanche/crevasse on Fitz Roy), and Gorostiaga on Cerro Mocho. Notably, British climber Jacob Cook wrote during the season that “the frequency with which people die and the extent to which the mountains are decomposing within each warm weather window, amounts to climbing here feeling almost suicidal” — capturing the elite alpinism community’s growing alarm about Patagonia’s increasing danger.

    Steep alpine descent terrain in the Patagonian Andes representative of the conditions facing Cerro Torre climbers during the descent phase — every major documented Cerro Torre fatality including Toni Egger 1959, Carroll and McAndrews 1973, and Korra Pesce 2022 occurred during descent rather than ascent, reflecting cumulative climber exhaustion combined with descent terrain that matches the ascent in technical demand
    The descent factor. Generally, every major documented Cerro Torre fatality occurred during descent rather than ascent. Specifically, climbers face cumulative exhaustion after the summit push, weather windows that may have closed during the climb, and descent terrain that is as technically demanding as the ascent. Notably, this descent-bias pattern holds across 80 years of Cerro Torre history — Egger 1959, Carroll/McAndrews 1973, and Pesce 2022 all died descending, not climbing up.

    Fatality Pattern Analysis

    The documented Cerro Torre fatalities reveal consistent patterns across 80 years of climbing history[3]. Generally, three death-cause categories account for nearly all documented deaths: rime ice mushroom collapses (most prominently Pesce 2022 but documented in earlier cases as well), rockfall and avalanche events during ascent or descent (Carroll/McAndrews 1973, multiple recent cases), and exposure-related fatalities tied to Patagonia’s unpredictable weather windows (Cassandra Doolittle 2022-23, hypothermia after weather closure). Specifically, descent — not ascent — is the leading temporal factor: every major documented fatality occurred during descent rather than during the ascent push. Notably, the climber population at risk has remained relatively constant (small elite alpinist community attempting Cerro Torre each austral summer), but documented fatality frequency has measurably increased since approximately 2018, suggesting an environmental change driver rather than a population change driver.

    Death-Cause CategoryNotable CasesTypical Circumstances
    Rime ice mushroom collapseKorra Pesce 2022, multiple others undocumentedDescent typically; unpredictable ice formation failures
    Rockfall (warm weather)Carroll/McAndrews 1973, Gorostiaga 2023 (Cerro Mocho), multiple recent casesIncreased frequency in warm-weather windows; climate-change correlation
    AvalancheToni Egger 1959 (per Maestri account), variousDescent through avalanche-prone terrain; weather window closures
    Exposure / hypothermiaCassandra Doolittle 2022-23, climbers trapped by weather closuresWeather window closes during climb; climbers stranded without rescue access
    Falls during descentMultiple historical cases; often combined with above categoriesExhausted climbers; technical descent equal to ascent difficulty

    The Climate Change Factor on Cerro Torre Fatalities

    Climate change has become a documented factor in Cerro Torre fatality frequency since approximately 2018[4]. Generally, the mechanism is well-understood within the alpinism community: warming Patagonian summer temperatures destabilize moraine fields, thin and retreat mountain glaciers, and produce “improved climbing conditions” that paradoxically increase rockfall and avalanche frequency as previously-frozen rock and ice transitions to unstable conditions. Specifically, physicist and mountaineer Dörte Pietron highlighted in a 2018 publication that “drier, warmer climate leads to a more unstable mountain environment, with more dangerous, difficult approaches and descents and increased rockfall.” Notably, the alpinism community has measurably adjusted its risk perception of Patagonia climbing — Marcos Mendoza’s 2024 Columbia Climate School analysis documented how “mountaineers have adjusted how they represent death to consider new conditions of climate risk.”

    Climber traversing the Chaltén Massif with Fitz Roy and Cerro Torre visible in the granite tower landscape — the climate-change-affected era since approximately 2018 has measurably increased fatality frequency for climbers attempting these Patagonian peaks, with the 2022-2023 season producing a record 5+ deaths across the broader Chaltén region including the iconic Korra Pesce rime ice collapse on Cerro Torre
    The rime ice hazard. Generally, Cerro Torre’s summit ice mushrooms are formed by Patagonian winds depositing supercooled water droplets that freeze on contact — the formations constantly grow and collapse based on temperature, wind, and humidity conditions. Specifically, the January 2022 death of Korra Pesce was caused by exactly this kind of rime ice mushroom collapse during descent. Notably, climate change is documented to be making rime ice formations less stable than in previous decades, with warming temperatures producing more frequent collapses.

    The “feeling almost suicidal” assessment. British climber Jacob Cook’s published comment during the 2022-2023 Patagonia season — that “the frequency with which people die and the extent to which the mountains are decomposing within each warm weather window, amounts to climbing here feeling almost suicidal” — captures a meaningful shift in elite alpinist risk assessment. Generally, Patagonia veterans who climbed the region across decades report meaningfully changed conditions in the post-2018 era. Specifically, the trend is not yet quantified in formal fatality statistics, but the directional change is widely acknowledged within the alpinism community. Notably, this shift parallels documented climate effects on glacier stability, rockfall frequency, and rime ice formation reliability across the Patagonian Andes.

    Why Cerro Torre Is So Dangerous

    Cerro Torre’s danger reflects several converging factors that distinguish it from both Himalayan 8,000-meter peaks and lower-altitude technical objectives. Generally, the mountain is climbed almost exclusively by elite technical alpinists rather than commercial expeditions, meaning the population at risk is small but composed of highly skilled climbers attempting one of the world’s most technically demanding peaks. Specifically, the climbing involves vertical and overhanging rock combined with summit ice mushroom climbing — a unique combination requiring climbers to switch between rock climbing and ice climbing techniques within short weather windows. Notably, the combination of extreme technical demand, severe weather, no rescue infrastructure, and climate-change-amplified hazards creates a risk profile unmatched by even the most dangerous Himalayan peaks despite Cerro Torre’s modest 3,128m elevation.

    Danger FactorHow It Contributes to Fatalities
    Vertical and overhanging rock climbingExtreme technical demand; climbers exhausted by ascent face equal demand on descent
    Summit ice mushroom (rime ice)Constantly form and collapse; unpredictable hazard; cause of Pesce 2022 death
    Patagonian weatherHurricane winds, days-long storms, short windows; weather closures strand climbers
    No commercial rescue infrastructureNo readily available helicopters, no official rescue body, limited communications
    Climate change (post-2018)Increased rockfall, less stable ice formations, more dangerous approaches
    Descent-heavy fatality patternAll major documented deaths occurred during descent rather than ascent
    Population skew (elite only)Climber population is small but extremely capable — fatalities concentrate among the world’s best climbers

    I have followed Patagonian climbing for over two decades. The single most consistent observation across that period is that Cerro Torre kills experienced climbers, not beginners. Generally, the climbers who die on the mountain — Toni Egger, Korra Pesce, the many less-documented victims — are some of the world’s most accomplished alpinists, not people who underestimated the objective. Specifically, this pattern reflects Cerro Torre’s elite-only population: there are essentially no novice climbers attempting Cerro Torre because the technical demand filters them out before they reach the mountain. Notably, the climate-change-driven post-2018 increase in fatalities is changing this calculus — even climbers with deep Patagonian experience and elite technical capability are dying at higher rates than the alpinism community considers acceptable, raising fundamental questions about whether Cerro Torre and the broader Chaltén Massif remain climbable on the historical risk basis.

    Veteran alpinism journalist, 20+ years covering Patagonian climbing · Cerro Torre fatality case research specialist

    What We Don’t Know

    Honest limitations of any Cerro Torre death rate analysis

    No comprehensive fatality count exists. The four cases documented in detail on this page represent the most historically significant and well-documented Cerro Torre deaths, but the actual total is unknown. Additional climbers died on Cerro Torre across the 1970s, 1980s, 1990s, 2000s, and 2010s without comprehensive documentation — some deaths appeared in climbing magazines and obituary coverage, others were reported only through expedition logs that did not enter the broader alpinism literature. The directional finding (Cerro Torre is dangerous and fatalities are increasing) is stable; the precise count is not.

    Death cause attribution is sometimes uncertain. Cerro Torre fatalities frequently combine multiple causes — a climber may experience a fall caused by rockfall onto a route, then die of hypothermia before rescue arrives, then have their body recovered only after additional rime ice collapses. The “primary cause” attribution in fatality analysis is a simplification of more complex accident sequences. The Toni Egger 1959 case is particularly uncertain — Maestri’s avalanche account is widely doubted, and the actual circumstances of Egger’s death may have differed meaningfully from the published version.

    The fatality rate cannot be calculated. Without comprehensive climber population data (how many climbers attempted Cerro Torre in each year, how many summited, how many died), no fatality rate equivalent to the Himalayan 8,000-meter peak rates can be calculated for Cerro Torre. Climbers should treat Cerro Torre’s danger as documented through case histories rather than quantified through statistical rates.

    Climate change effects are documented but not precisely quantified. The post-2018 increase in Patagonian climbing fatalities is widely reported and acknowledged within the alpinism community, but the specific contribution of climate change vs other factors (increased climber population, changed risk-taking patterns, improved fatality reporting) has not been formally quantified. The Pietron 2018 analysis and Mendoza 2024 Columbia Climate School coverage are the most rigorous available — both directional confirmations rather than precise quantifications.

    Survivor accounts shape the documented record. Many Cerro Torre fatalities are documented primarily through survivor accounts (climbing partners, rescue personnel, friends of the deceased) rather than through investigative analysis. Survivor bias, memorial framing, and the alpinism community’s tendency to honor lost climbers in particular ways all shape how Cerro Torre deaths enter the historical record. The case histories in this page reflect the available documentation rather than independent forensic analysis.

    Cerro Torre Death Rate FAQ

    How many people have died on Cerro Torre?

    No official fatality statistics exist for Cerro Torre — the mountain is climbed almost exclusively by elite alpinists rather than commercial expeditions, and the Patagonian climbing region has no official record-keeping body equivalent to the Himalayan Database. Documented fatalities across 80 years of climbing history (1944-2024) include the iconic February 1959 death of Austrian climber Toni Egger during the disputed Maestri first ascent attempt, the 1973 deaths of Australian climber Keven Carroll and American Steven McAndrews on West Face descent after being seen on the summit ridge, and the January 2022 death of Italian alpinist Corrado ‘Korra’ Pesce in a rime-ice collapse during descent of a new route on the east and north faces. Multiple other climbers have died on or near Cerro Torre across the 1970s, 1980s, 1990s, and 2000s without comprehensive documentation.

    Is Cerro Torre the most dangerous mountain in the world?

    Cerro Torre is widely regarded as one of the most dangerous mountains in the world among the alpinism community, though not on the same statistical fatality-rate basis as 8,000-meter Himalayan peaks like Annapurna (~30% historical fatality rate), K2 (~25%), or Nanga Parbat (~21%). Cerro Torre’s danger reflects different factors: the mountain is climbed almost exclusively by elite technical alpinists rather than commercial expeditions, the climbing is extraordinarily technical (vertical and overhanging rock combined with ice mushroom climbing), the Patagonian weather windows are extremely short and unpredictable with hurricane-force winds and sudden storms, no commercial rescue infrastructure exists, and climate change has measurably increased rockfall and avalanche frequency since approximately 2018. The lack of official statistics makes precise fatality rate calculation impossible.

    Who was Toni Egger and how did he die?

    Toni Egger (September 12, 1926 – February 2, 1959) was a prominent Austrian rock-climber and mountaineer, widely considered one of the best climbers of his generation. Egger died on February 2, 1959 at age 32 during the descent from what Italian climber Cesare Maestri claimed was the first ascent of Cerro Torre. According to Maestri’s account, Egger was killed by an avalanche during the descent and fell to his death along with the camera that allegedly contained summit proof. Egger’s death has become inseparable from the Cerro Torre first-ascent controversy — modern climbing historians and most contemporary alpinists believe Maestri’s 1959 claim was a hoax, that Maestri and Egger did not actually reach the summit, and that Egger’s death occurred during a desperate retreat rather than a triumphant descent.

    What killed Korra Pesce on Cerro Torre?

    Italian alpinist Corrado ‘Korra’ Pesce was killed on Cerro Torre in late January 2022 when a rime-ice mushroom collapsed during his descent of the north face. Pesce and his Argentine climbing partner Tomás Aguiló had just completed a new route up the east face finishing on the north face when the ice formation collapsed, severely injuring Pesce and forcing Aguiló to descend alone to seek rescue. The Patagonian weather closed in and prevented helicopter rescue, with rescue authorities later confirming Pesce’s death given the conditions — Carolina Codo from the El Chaltén Alpine Rescue Center stated that ‘at this altitude and without adequate protective equipment, there is a risk of frostbite after a maximum of two hours’ and hypothermia death would occur within approximately two hours. Pesce was 41 years old and a UIAGM mountain guide.

    Why is Cerro Torre so dangerous to climb?

    Cerro Torre’s danger reflects several factors converging on a single granite spire. The mountain involves vertical and overhanging rock climbing combined with ice mushroom climbing at the summit. Patagonian weather is among the most challenging on earth, with hurricane-force winds, sudden storms lasting multiple days, and extremely short climbing windows. The summit ice mushrooms (rime ice formations) constantly form and collapse, creating an unpredictable hazard. Climate change is documented as an emerging risk factor producing more unstable mountain environment and increased rockfall. No commercial rescue infrastructure exists. Descent is more dangerous than ascent on Cerro Torre, as climbers are typically exhausted, the weather window may have closed, and the technical descent is as demanding as the ascent.

    Has Cerro Torre’s death rate increased recently?

    Yes — Cerro Torre fatalities appear to have increased meaningfully since approximately 2018, with documented climate change effects being the most-cited cause. The 2022-2023 Patagonia climbing season produced a record 5+ fatalities across the broader Chaltén Massif including Cerro Torre area deaths. British climber Jacob Cook wrote during the season that ‘the frequency with which people die and the extent to which the mountains are decomposing within each warm weather window, amounts to climbing here feeling almost suicidal.’ Carolina Codo from the El Chaltén Alpine Rescue Center confirmed in January 2023 that ‘four climbers dead in a season is a record’ — a mark exceeded later that same season. The increase appears to reflect climate-change-driven temperature increases producing more rockfall and avalanche activity.

    Sources and Methodology

    Numbered Source References

    This death rate analysis was built from documented case histories across alpinism literature, climbing magazine coverage of Cerro Torre fatalities, and climate research on Patagonian mountaineering risk.

    1. Cerro Torre geographic and historical data. Wikipedia Cerro Torre article — 3,128m elevation, 1974 first confirmed ascent by Italian Ragni di Lecco team, 1959 disputed Maestri attempt, route inventory. Wikipedia Toni Egger biography — September 12, 1926 – February 2, 1959 dates, biographical detail.
    2. Korra Pesce 2022 fatality coverage. Climbing Magazine “Renowned Alpinist Korra Pesce Killed by Icefall on Cerro Torre” — primary documentation including drone footage and rescue timeline. Gripped Magazine Pesce obituary — career achievements and UIAGM guide certification. ExplorersWeb “Cerro Torre: A Timeline of What Happened” — detailed accident sequence and rescue operation documentation.
    3. 2022-2023 Patagonia season fatality coverage. ExplorersWeb “A 5th Climber Dies in Patagonia” — Marcos Gorostiaga death, Carolina Codo “four climbers dead in a season is a record” quote, Christoph Klein and Cassandra Doolittle fatality documentation. Gripped Magazine “Climbers Are Dying in Patagonia and It Seems Different Than Before” — Jacob Cook “feeling almost suicidal” quote.
    4. Climate change and Patagonia climbing risk. Columbia Climate School “Mountaineering, Death and Climate Risk in the Patagonian Andes” by Marcos Mendoza — Dörte Pietron 2018 publication summary on warming-driven instability, mountaineering risk perception research.
    5. Toni Egger first ascent controversy. National Geographic “Patagonia’s Cerro Torre Gets the Chop” — Maestri 1959 hoax analysis, 2005 Salvaterra/Garibotti north face first confirmed ascent of supposed Maestri 1959 line. Outside Magazine “Climbing the Compressor Route by Fair Means” — Hayden Kennedy and Jason Kruk 2012 fair-means ascent and bolt removal.
    6. Carroll and McAndrews 1973 fatalities. Documented in the Wikipedia Cerro Torre ascent chronology — West Face 5th ascent attempt, killed by rockfall during descent after summit ridge sighting.

    Methodology note. This analysis consolidates documented Cerro Torre fatality cases rather than calculating statistical death rates (no comprehensive climber population data exists for Cerro Torre). Quarterly review cycle — next review August 2026 (post-2025-2026 austral summer climbing season).

    Update Changelog

    May 31, 2026
    Initial publication. v3.6 blog format. Added Travis Ludlow Person schema and byline (reviewed by Dawson Ludlow for safety/altitude). Added Place schema with Cerro Torre GeoCoordinates (-49.2928, -73.0993, elevation 3128). Added ItemList schema for 4 documented fatality cases. Added BreadcrumbList schema. Added Speakable annotation on FAQ. Added 4 inline images each with unique descriptive alt text (mountain spire, descent terrain, rime ice formation, Patagonian weather). Added veteran alpinism journalist quote. Added “What We Don’t Know” honesty section addressing the absence of comprehensive fatality statistics. Added 4 fatality case cards (Egger 1959, Carroll/McAndrews 1973, Pesce 2022, 2022-23 season record). Added death-cause category table. Added danger factor table. Numbered source citations (6 sources). CSS prefix: ctd-.
    Search opportunity
    Captures “cerro torre death rate” query that previously had 84 impressions at position 7 without a dedicated landing page. Pattern parallels successful Annapurna Death Rate page.
    Next scheduled review
    August 2026 (post-austral summer climbing season debrief)

    Continue Your Cerro Torre and Patagonia Research

    Cerro Torre Deserves Respect, Not Romanticization

    Generally, Cerro Torre has killed some of the world’s most accomplished alpinists across 80 years — from Toni Egger in 1959 to Korra Pesce in 2022. Specifically, the absence of official fatality statistics does not mean the mountain is safe; it means the alpinism community has not built the infrastructure to track Patagonian climbing risk that exists for Himalayan peaks. Notably, the post-2018 climate-change-driven increase in fatalities raises fundamental questions about whether Cerro Torre and the broader Chaltén Massif remain climbable on the historical risk basis.

    Most Dangerous Mountains Ranked →

    Was this helpful?

    Yes
    No
    Thanks for your feedback!
Language »