
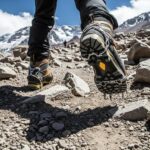
Crampons & ice axes: how to choose mountaineering hardware
Of all the gear a mountaineer carries, crampons and ice axes generate the most confusion and the most wrong purchases. The reason is simple: both pieces live inside rigid compatibility systems that aren’t obvious from a retail shelf. Buy C3 crampons for B1 boots and they won’t stay on. Buy a 70cm axe for technical ice and it swings like a canoe paddle. Buy mono-points for a 7-Summits expedition and you’ll wear through them on moraines halfway up the mountain. This guide decodes the compatibility matrix, the tool-type spectrum, and the specific model choices that actually work for the peaks you’re climbing. It’s part of our comprehensive mountaineering reference covering gear, training, and route planning across every major expedition objective.
How the C1, C2, and C3 crampon rating system works
European mountaineering uses a crampon rating of C1, C2, or C3 that directly mirrors the boot rating of B1, B2, or B3. The rating describes how the crampon attaches to the boot and how much sole flex the crampon tolerates before it fails or falls off. Our mountaineering boots guide covers the boot side of this equation in depth; here we flip the frame and look at what each crampon category does best.
The core rule is the crampon rating must match or be below the boot rating. A B3 boot accepts any crampon — C1, C2, or C3. A B2 boot accepts C1 or C2. A B1 boot accepts only C1. Violating this means either the crampon won’t attach (missing heel or toe welt) or it will flex loose off a flexible boot sole within hours of walking.
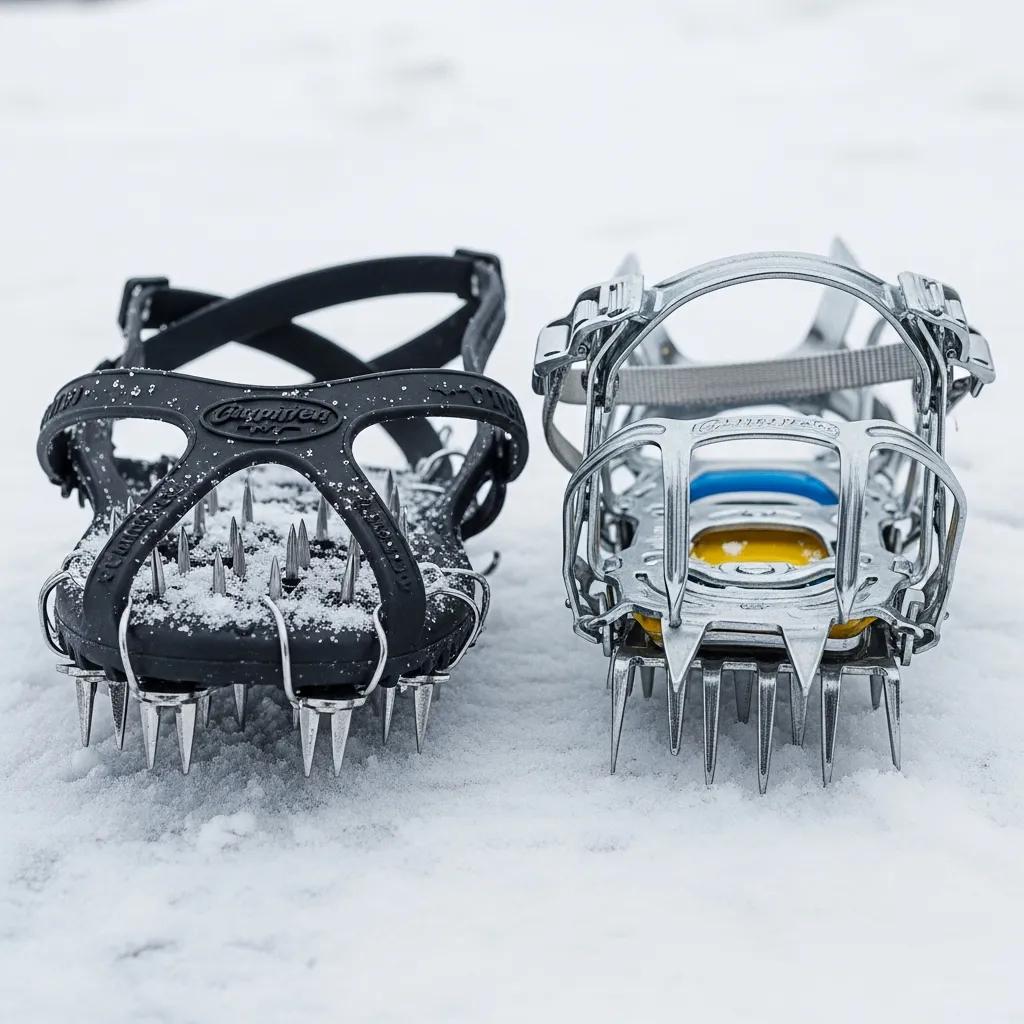
Flexible strap-on crampons
The entry tier. Horizontal front points, flexible center bar that hinges as the sole flexes, universal strap bindings that fit almost any boot — including leather hiking boots with no welt. Suitable for glacier travel on trekking peaks, Kilimanjaro summit day icefields, and anywhere the terrain stays below 30-degree snow slopes.
Semi-rigid hybrid-bind crampons
The universal mountaineering category. Heel clip with toe strap (also called “new-matic” or “hybrid”). Semi-rigid frame with some flex for walking, aggressive enough for moderate ice up to 55-60 degrees. This is the correct choice for Denali, Everest, Aconcagua, Vinson, Elbrus, Kilimanjaro with B2 boots, and every general mountaineering route worldwide.
Rigid step-in technical crampons
The specialist tier. Fully rigid frame with no flex tolerance, step-in binding with toe bail and heel clip requiring a full B3 boot welt. Aggressive front points (often mono-point or interchangeable). Built for waterfall ice, steep alpine ice, and mixed climbing where precision placement matters more than walking comfort. Overkill for walking peaks.
Before you buy, read the sole welt of your boot. A B1 boot has no welts — the sole is smooth rubber front and rear. A B2 boot has a heel welt only. A B3 boot has both a heel welt and a toe welt. The welt is the grooved lip that catches the crampon’s clip or bail. No welt means no attachment.
Mono-point vs dual-point: which front points do you need?
Modern technical crampons offer a choice between mono-point (single center-front tooth) or dual-point (two parallel front teeth) configurations. Many high-end crampons are modular — you can swap between configurations by changing the front-point module. The choice isn’t a question of quality but of terrain match.
Dual-point
- Two parallel front teeth distribute load across a wider platform
- Resists sideways torque and lateral slipping on firm snow
- Less fatiguing on long days of snow walking
- Far more durable on rocky moraines and mixed ground
- Standard configuration on C2 crampons and most C3 alpine tools
Mono-point
- Single central point concentrates all force into one penetrating tooth
- Precise placement in small holds, hooks, and thin ice
- Better rotation for drytooling and figure-four moves on mixed routes
- Lighter weight — less steel hanging off the toe
- Wears faster and is unstable on moderate terrain — not for walking peaks
The practical rule: if the question is “what do I buy for my first 7-Summits peak,” the answer is dual-point. If the question is “what do I buy for weekend waterfall ice at home,” the answer is mono-point or modular. For climbers who do both, modular crampons (Petzl Sarken, Grivel G14) let you switch between configurations in under ten minutes. For a complete overview of how crampons integrate with the rest of your expedition kit, see our complete mountain climbing gear list.
Sizing your ice axe: the length formula that actually works
The traditional ice axe sizing rule — “stand upright, hold the axe head, the spike should just touch the ground” — produces an axe that is genuinely too long for most modern mountaineering applications. That rule was written for nineteenth-century alpinists who used their axes primarily as walking canes on long glacier approaches. Modern axes live in the 50-65cm range because short axes self-arrest better, swing better on moderate ice, and clip to the pack cleanly without catching on rock.
The current consensus for a general mountaineering axe (walking piolet) is to size to the ankle, not the ground. Stand relaxed with the axe head in your hand — the spike should reach the top of your ankle bone or just below your calf. This produces a length somewhere between your hip and knee when the axe hangs at your side, which is correct.
Why shorter axes have won
A longer axe makes self-arrest slower because your hand has to travel further to pull the pick into your chest. A longer axe also forces awkward body position on moderate slopes — you can’t plunge the shaft into firm snow without bending to reach it. Modern mountaineers plunge-shaft as a standard technique on 30-45 degree snow, and a 55-60cm axe plunges in one natural arm motion. Guides on Denali, Rainier, and Mont Blanc have standardized on 55cm for most clients, 60cm for tall climbers only. This short-axe convention is now the standard across our master mountaineering guide recommendations.
Three tool categories: matching the axe to the climb
Ice axes split into three functional categories defined by shaft curvature, pick geometry, and intended angle of use. The pick aggression, head weight, and shaft curve all shift as you move from general mountaineering through technical ice to mixed climbing specialists.
General mountaineering
Technical ice
Mixed / drytool
A straight shaft self-arrests and plunges best. A gently curved shaft provides knuckle clearance on ice. An aggressively curved “pistol-grip” shaft clears overhanging ice and enables hooking moves on mixed terrain. The more curve, the worse the axe performs on moderate walking terrain. Match the curvature to the angles you actually climb.
Leashed vs leashless: what the modern setup looks like
Traditional climbing paired every axe with a wrist leash — a strap from the axe head to your wrist that prevented dropping the tool and provided weight transfer to the wrist during aggressive swinging. Modern technical ice climbing has moved almost entirely leashless because ergonomic pommels and grip rests on the shaft provide the same support without the drawbacks.
The drawbacks were real. Leashes restrict hand switching, entangle during tool swapping, and can actively endanger climbers in falls — a climber whose axe snags a feature during a fall can be held by the leashed wrist at catastrophic force. For steep ice, leashless with trigger-grip pommels is now universal.
For general mountaineering, the story is different:
- Glacier travel: a simple wrist loop or umbilical tether to the harness is still recommended — losing your axe into a crevasse during a self-arrest is a worst-case scenario.
- Moderate snow slopes: most climbers go leashless on easy terrain and clip the axe to the pack when not in hand.
- Steep alpine ice: leashless with pommel/grip rest, with an umbilical to the harness as backup.
- Ridge traverses with exposure: umbilical tether is smart insurance against dropping the tool on airy terrain.
Ice screws and protection: when you actually need them
For the walking-peak 7-Summits climbs — Denali, Everest, Aconcagua, Vinson, Kilimanjaro, Elbrus, Kosciuszko, and Carstensz — ice screws are typically not required. Fixed lines handle steep terrain, and the technical ice that exists (the Lhotse Face on Everest, the Polish Traverse on Aconcagua) is managed by ascenders on pre-placed ropes. For independent alpine ice or glacier rescue practice, screws become essential. Our complete mountaineering guide covers route-specific protection strategy in detail.
Modern ice screws are drastically lighter than the 1990s generation. Aluminum-hangered stainless tubes (Petzl Laser Speed Light, Black Diamond Express) drop weight to around 85-95g per screw. A standard mountaineering rack looks like this:
| Application | Length Mix | Total Count | Typical Weight |
|---|---|---|---|
| Glacier travel + rescue | 2× 13cm, 2× 16cm | 4 screws | ~380g |
| Alpine ice route | 2× 10cm, 4× 13cm, 2× 16cm | 8 screws | ~720g |
| Waterfall ice (single pitch) | 3× 10cm, 5× 13cm, 3× 16cm, 1× 22cm | 12 screws | ~1150g |
| Multi-pitch ice route | 4× 10cm, 6× 13cm, 3× 16cm, 1× 19cm | 14 screws | ~1320g |
Carry a screw-sharpening file on any multi-day trip. Dull screws wind harder, cut less efficiently, and eat into your forearms on steep pitches. A ten-second file pass on the leading edge restores bite.
Anti-balling plates and crampon maintenance essentials
Wet snow is the single most dangerous condition for crampons. In temperatures just below freezing, snow compacts under each step and builds up between the crampon’s teeth into a dense platform that elevates your boot off the ice surface. The crampon stops biting, and you become essentially a person wearing frozen snowshoes on a steep slope. This is called balling up, and it causes more crampon-related slip accidents than any other factor.
Anti-balling plates (ABS plates, anti-snow plates) are polyurethane sheets that fit between the crampon frame and the boot, preventing snow accumulation. Every modern crampon from every reputable manufacturer either includes them or accepts them as an accessory. They are not optional.
Climbing without anti-balling plates in wet snow conditions is a recognized contributing factor in mountaineering accident reports. Before every expedition, inspect the plates for cracks, replace if damaged, and ensure they’re seated flush against the frame. Spare plates weigh almost nothing — bring them.
Pre-season maintenance checklist
- Sharpen points with a hand file — never use a powered grinder, as heat will destroy the steel temper. Maintain the original point geometry.
- Inspect the center bar and binding plates for cracks, especially at the flex hinge on C2 models.
- Replace anti-balling plates if the polyurethane shows any cracking or tearing.
- Check strap condition on C1 and C2 models — UV degradation makes straps brittle after 2-3 seasons.
- Test-fit with your actual boots — boots from different brands have slightly different welt geometries, and a crampon that fits your old boots may not fit new ones.
Peak-specific hardware recommendations
The right pairing of crampons and ice axe depends entirely on what you’re climbing. Here’s the working setup for the major 7-Summits and popular expedition objectives — see our master hub for route-level guides on each peak below:
| Peak / Objective | Crampon | Ice Axe | Notes |
|---|---|---|---|
| Kilimanjaro | Optional C1 | Optional 60cm | Most routes need neither; Western Breach or icefield variations only |
| Aconcagua | C2 (e.g., Petzl Vasak) | 55-60cm general | Polish Traverse requires solid crampon technique |
| Denali | C2 dual-point | 60cm general + optional 2nd tool | Headwall and ridge work may need second tool |
| Vinson | C2 dual-point | 55-60cm general | Standard route is straightforward glacier + slopes |
| Everest (South) | C2 dual-point | 60cm general | Lhotse Face managed by fixed lines and ascenders |
| Elbrus | C1 or C2 | 55-60cm general | Route is snow slopes; C1 often sufficient |
| Mont Blanc | C2 dual-point | 55-60cm general | Bosses Ridge has some exposed steep snow |
| Rainier | C2 dual-point | 55-60cm general | Excellent training peak for Denali setup |
For technical objectives
Routes like the Cassin Ridge on Denali, the Eigerwand, steep alpine routes in Patagonia, or dedicated waterfall ice move into C3 territory with modular front points and two technical tools. Popular choices include Petzl Lynx crampons with Nomic or Ergo axes, or Black Diamond Cyborg crampons with Viper axes. These setups are inappropriate for walking peaks — they’re heavier, more aggressive, and wear out faster on anything but ice.
Continue your gear research
Crampons and ice axes sit in the middle of the expedition gear matrix — the boots below them, the pack around them, and the broader system they fit into all matter. Our complete cluster takes you through each piece:
Every guide, one navigation point
Crampons and ice axes are one part of a 67-guide mountaineering reference covering gear, training, altitude, routes, and peak-specific planning across all 7-Summits and beyond. Our master hub indexes every guide in one place.
Browse the Complete Guide →Frequently asked questions about crampons and ice axes
What’s the difference between C1, C2, and C3 crampons?
C1 crampons are flexible strap-on models for soft B1 boots — suitable for glacier travel and low-angle snow. C2 crampons are semi-rigid hybrid-bind models (heel clip, toe strap) requiring B2 boots — suitable for general mountaineering up to moderate ice. C3 crampons are fully rigid step-in models (heel clip, toe bail) requiring B3 boots — suitable for technical ice and mixed climbing. The rating must match or be below your boot’s B-rating.
Should I choose mono-point or dual-point crampons?
Dual-point crampons offer better stability on moderate terrain, snow slopes, and general mountaineering. Mono-point crampons excel on technical ice and mixed climbing where precision placement matters. For 7-Summits objectives, dual-point is correct. For waterfall ice or alpine mixed, mono-point or modular models win. Most modern technical crampons offer interchangeable front points.
How do I size an ice axe correctly?
For a general mountaineering axe, stand upright with the axe head in your hand — the spike should reach your ankle, not the ground. Height-based guideline: under 5’4″ use 50cm, 5’4″-5’8″ use 55cm, 5’8″-6’0″ use 60cm, over 6’0″ use 65cm. Technical climbing axes run 50cm or shorter regardless of user height. Shorter axes self-arrest faster, plunge better, and swing cleaner on ice.
Do I need leashes on my ice axes in 2026?
Modern climbing has moved largely leashless for technical ice — leashes restrict movement and can trap climbers in falls. For general mountaineering and walking terrain, a simple wrist leash or umbilical tether prevents loss. For steep ice climbing, ergonomic grip rests have replaced leashes. Exception: glacier travel with crevasse risk — a leash prevents losing your axe during a crevasse fall.
What crampons and axes do I need for Denali or Everest?
For Denali, Everest, Aconcagua, Vinson, and similar 7-Summits expeditions, use C2 semi-rigid crampons paired with B2 or B3 double boots — Petzl Vasak or Grivel G12 are benchmark choices. A single 55-60cm general-mountaineering axe is standard; some climbers carry a second technical tool for specific pitches. Anti-balling plates are mandatory. Full technical tools are overkill for these peaks.
Are anti-balling plates really necessary?
Yes. Anti-balling plates prevent wet snow from packing under the crampon and forming dangerous platforms of compressed snow that elevate your boot off the ice. Without them, in warm or wet snow, snow builds up within seconds and you lose all penetration — a primary cause of slip-and-fall accidents on glacier terrain. Every modern crampon includes or accepts them; install them and inspect for cracking before each trip.
How many ice screws should I carry for mountaineering?
For standard 7-Summits routes, ice screws are typically unnecessary — fixed lines handle protection. For alpine ice routes, a team typically carries 6-8 screws total: a mix of 10cm, 13cm, and 16-19cm lengths. For waterfall ice climbing, double that — a full rack is 10-14 screws per leader. Petzl Laser Speed Light and Black Diamond Express are current benchmarks for weight-to-strength ratio.
What are the best crampons for 7-Summits climbing?
The Petzl Vasak (C2, dual-point, versatile) is the benchmark — it handles everything from Kilimanjaro to Everest. The Grivel G12 New-Matic is its closest competitor. Black Diamond Sabretooth offers similar performance with easier adjustment. For climbers wanting modular capability, Petzl Sarken or Grivel G14 convert to mono-point. Avoid full C3 technical tools for walking peaks — they’re heavier and wear faster on mixed rocky terrain.
Related posts:
 Everest Base Camp Trek: Complete Itinerary, and Cost Guide
 K2 Base Camp Trek: Complete Guide for Trekkers
 Top 50 Technical Mountaineering Objectives
 Everest 2026 Season: New Permit Fees, Crowd Limits & What’s Changed
 Seven Summits for Beginners: Which Peak Should You Climb First?
 The 10 Hardest Mountains to Climb in the World
Leave a Reply