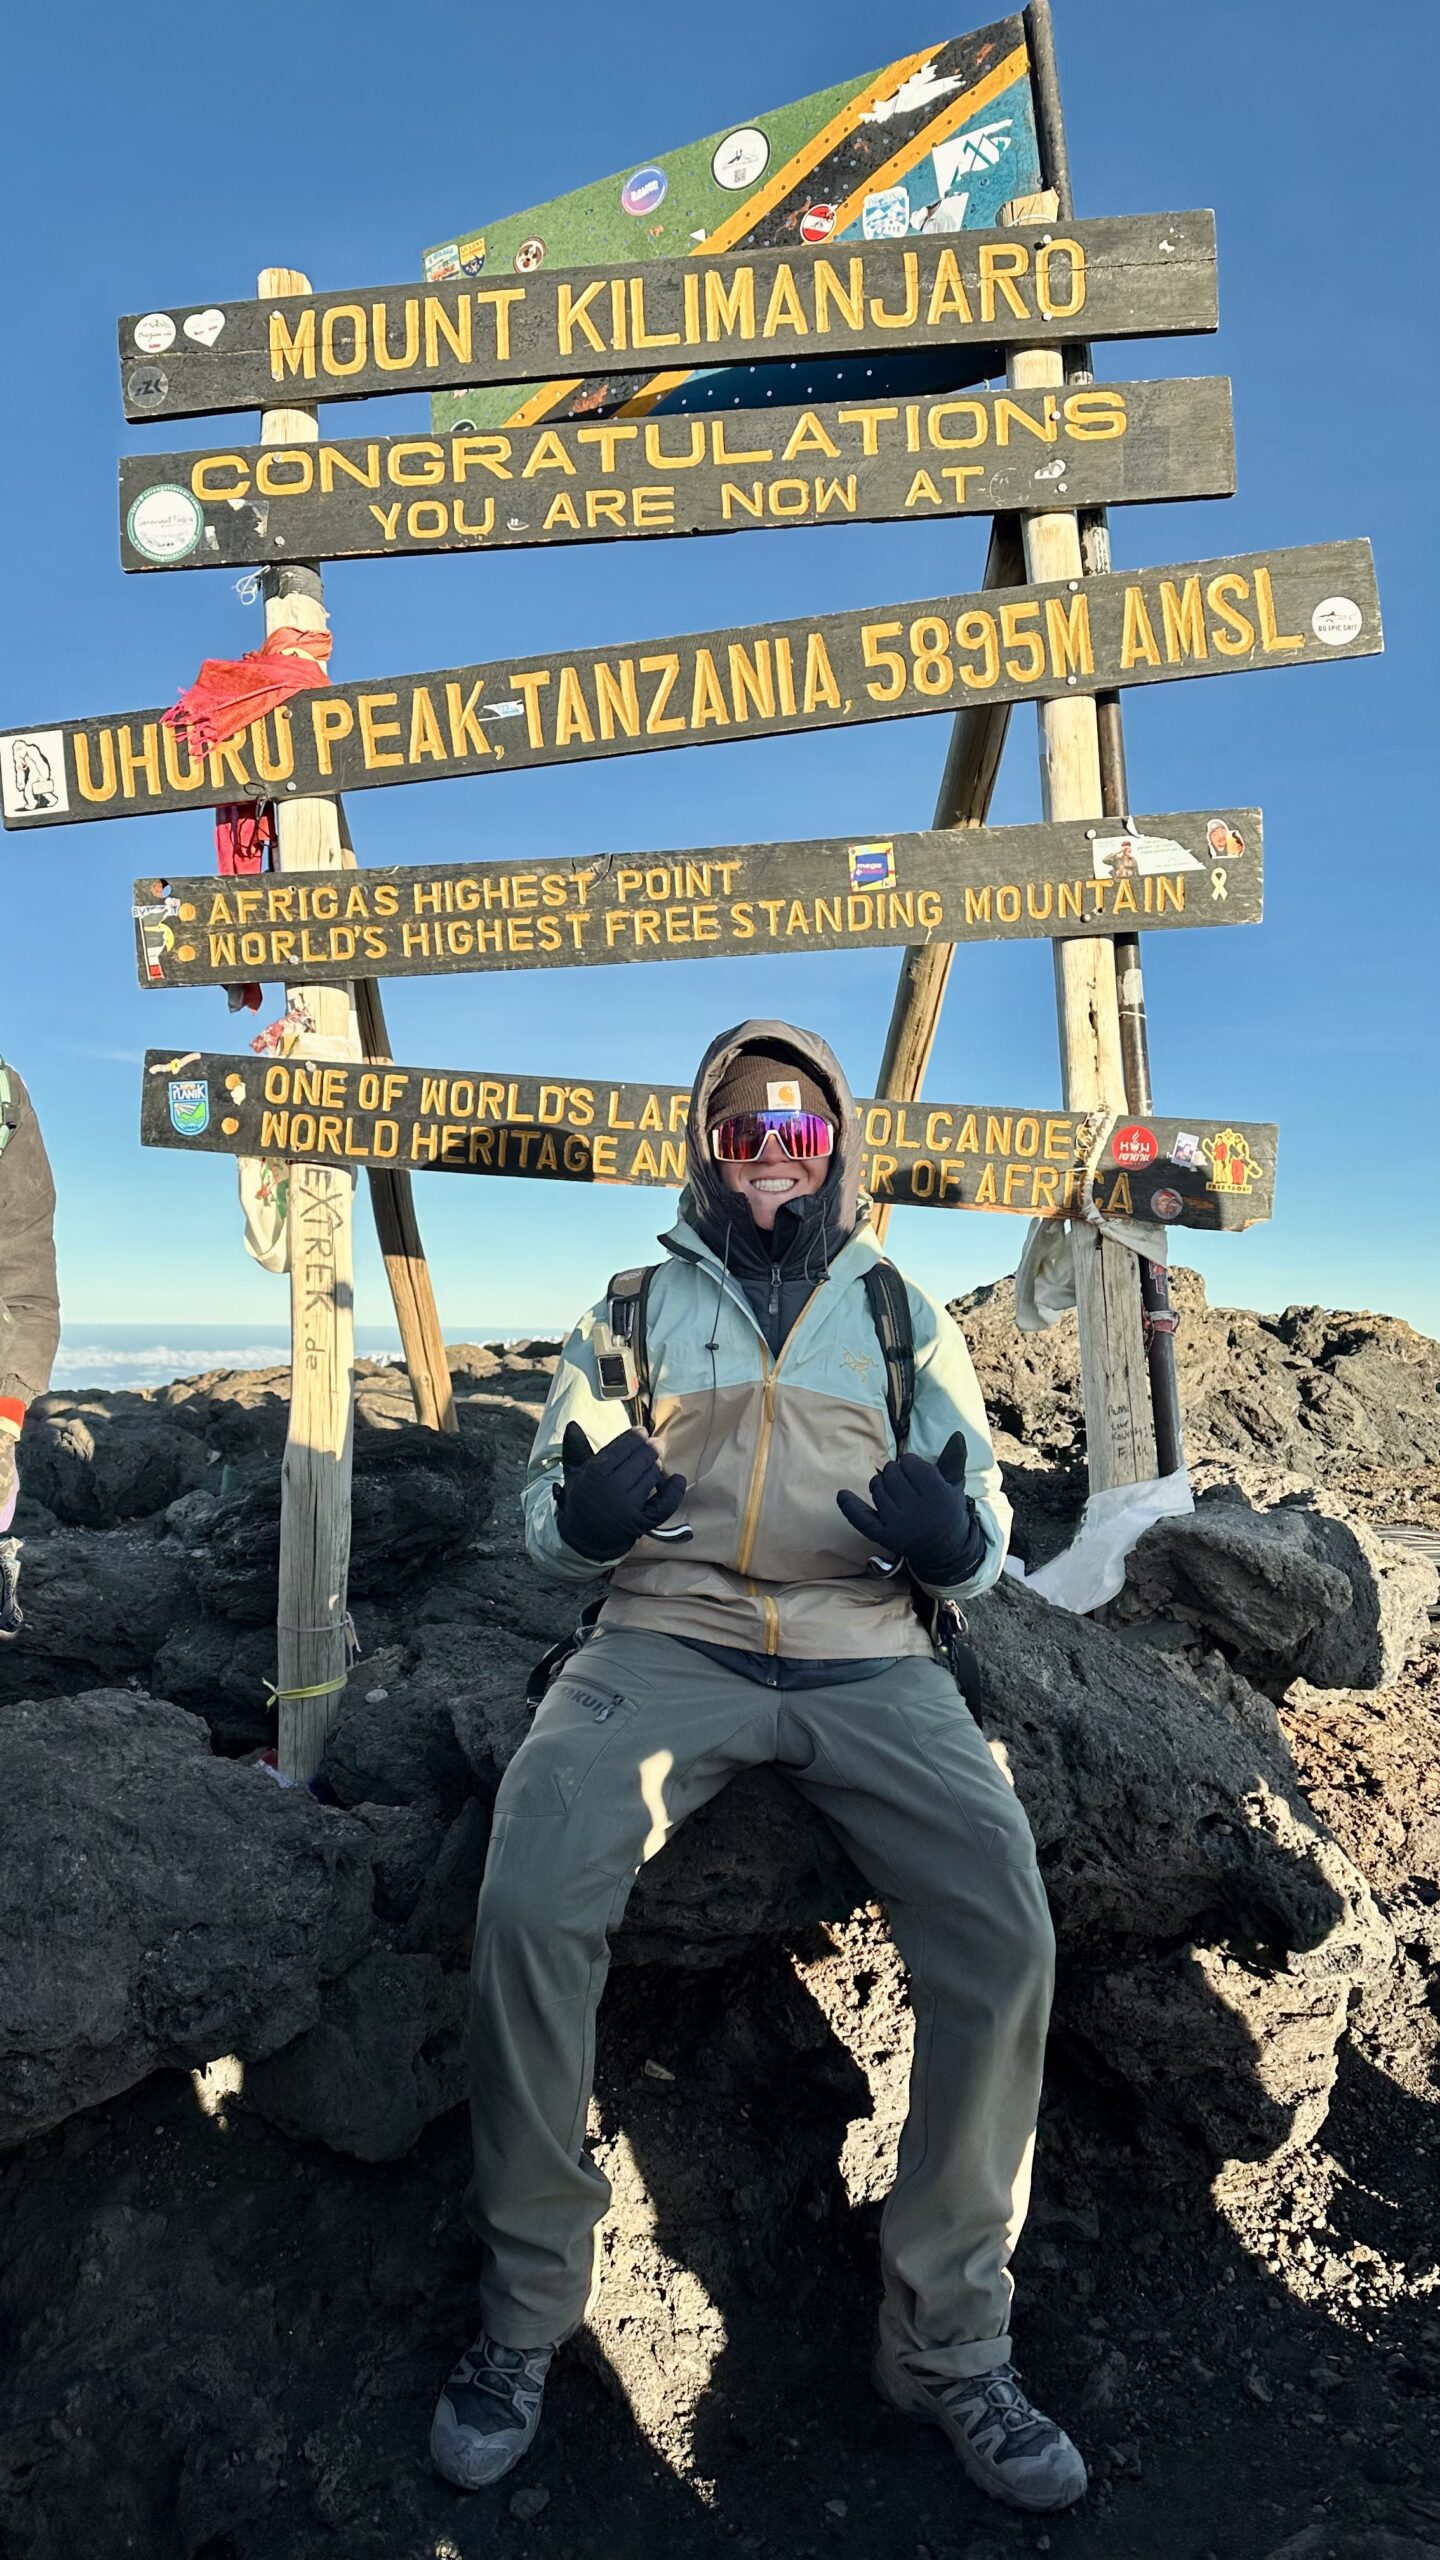
Kilimanjaro, 19,341 ft (5,895 m), via Lemosho. The roof of Africa and the highest point we have reached.
About · Our Field Experience
The real climbs behind our guides
Anyone can write about mountains. We think you deserve to know who is actually doing the climbing. This is our honest first-hand record: two dozen summits and more than forty ascents from Utah’s Wasatch Range to the roof of Africa, climbs in Patagonia and Iceland, and the high-altitude progression we are on right now. Where our guides go beyond what we have personally climbed, we tell you, and we cite our sources.
Updated Jul 27, 2026 · Our experience record · ~9 min read
Every climb on this page is first-hand and real. Elevations are verified against current geographic records. Where we have not personally climbed a peak we cover, we say so, and those guides are clearly research-based. We would rather earn your trust with an honest record than an inflated one.
The honest summary
Deep experience up to 19,000 feet, and honest about the rest.
Our Climbing & Mountaineering Lead, Dawson Ludlow, has summited more than twenty distinct peaks across more than forty ascents, from repeated Wasatch classics to Kilimanjaro (19,341 ft), Mount Whitney (14,505 ft), and the glaciated Mount Hood.
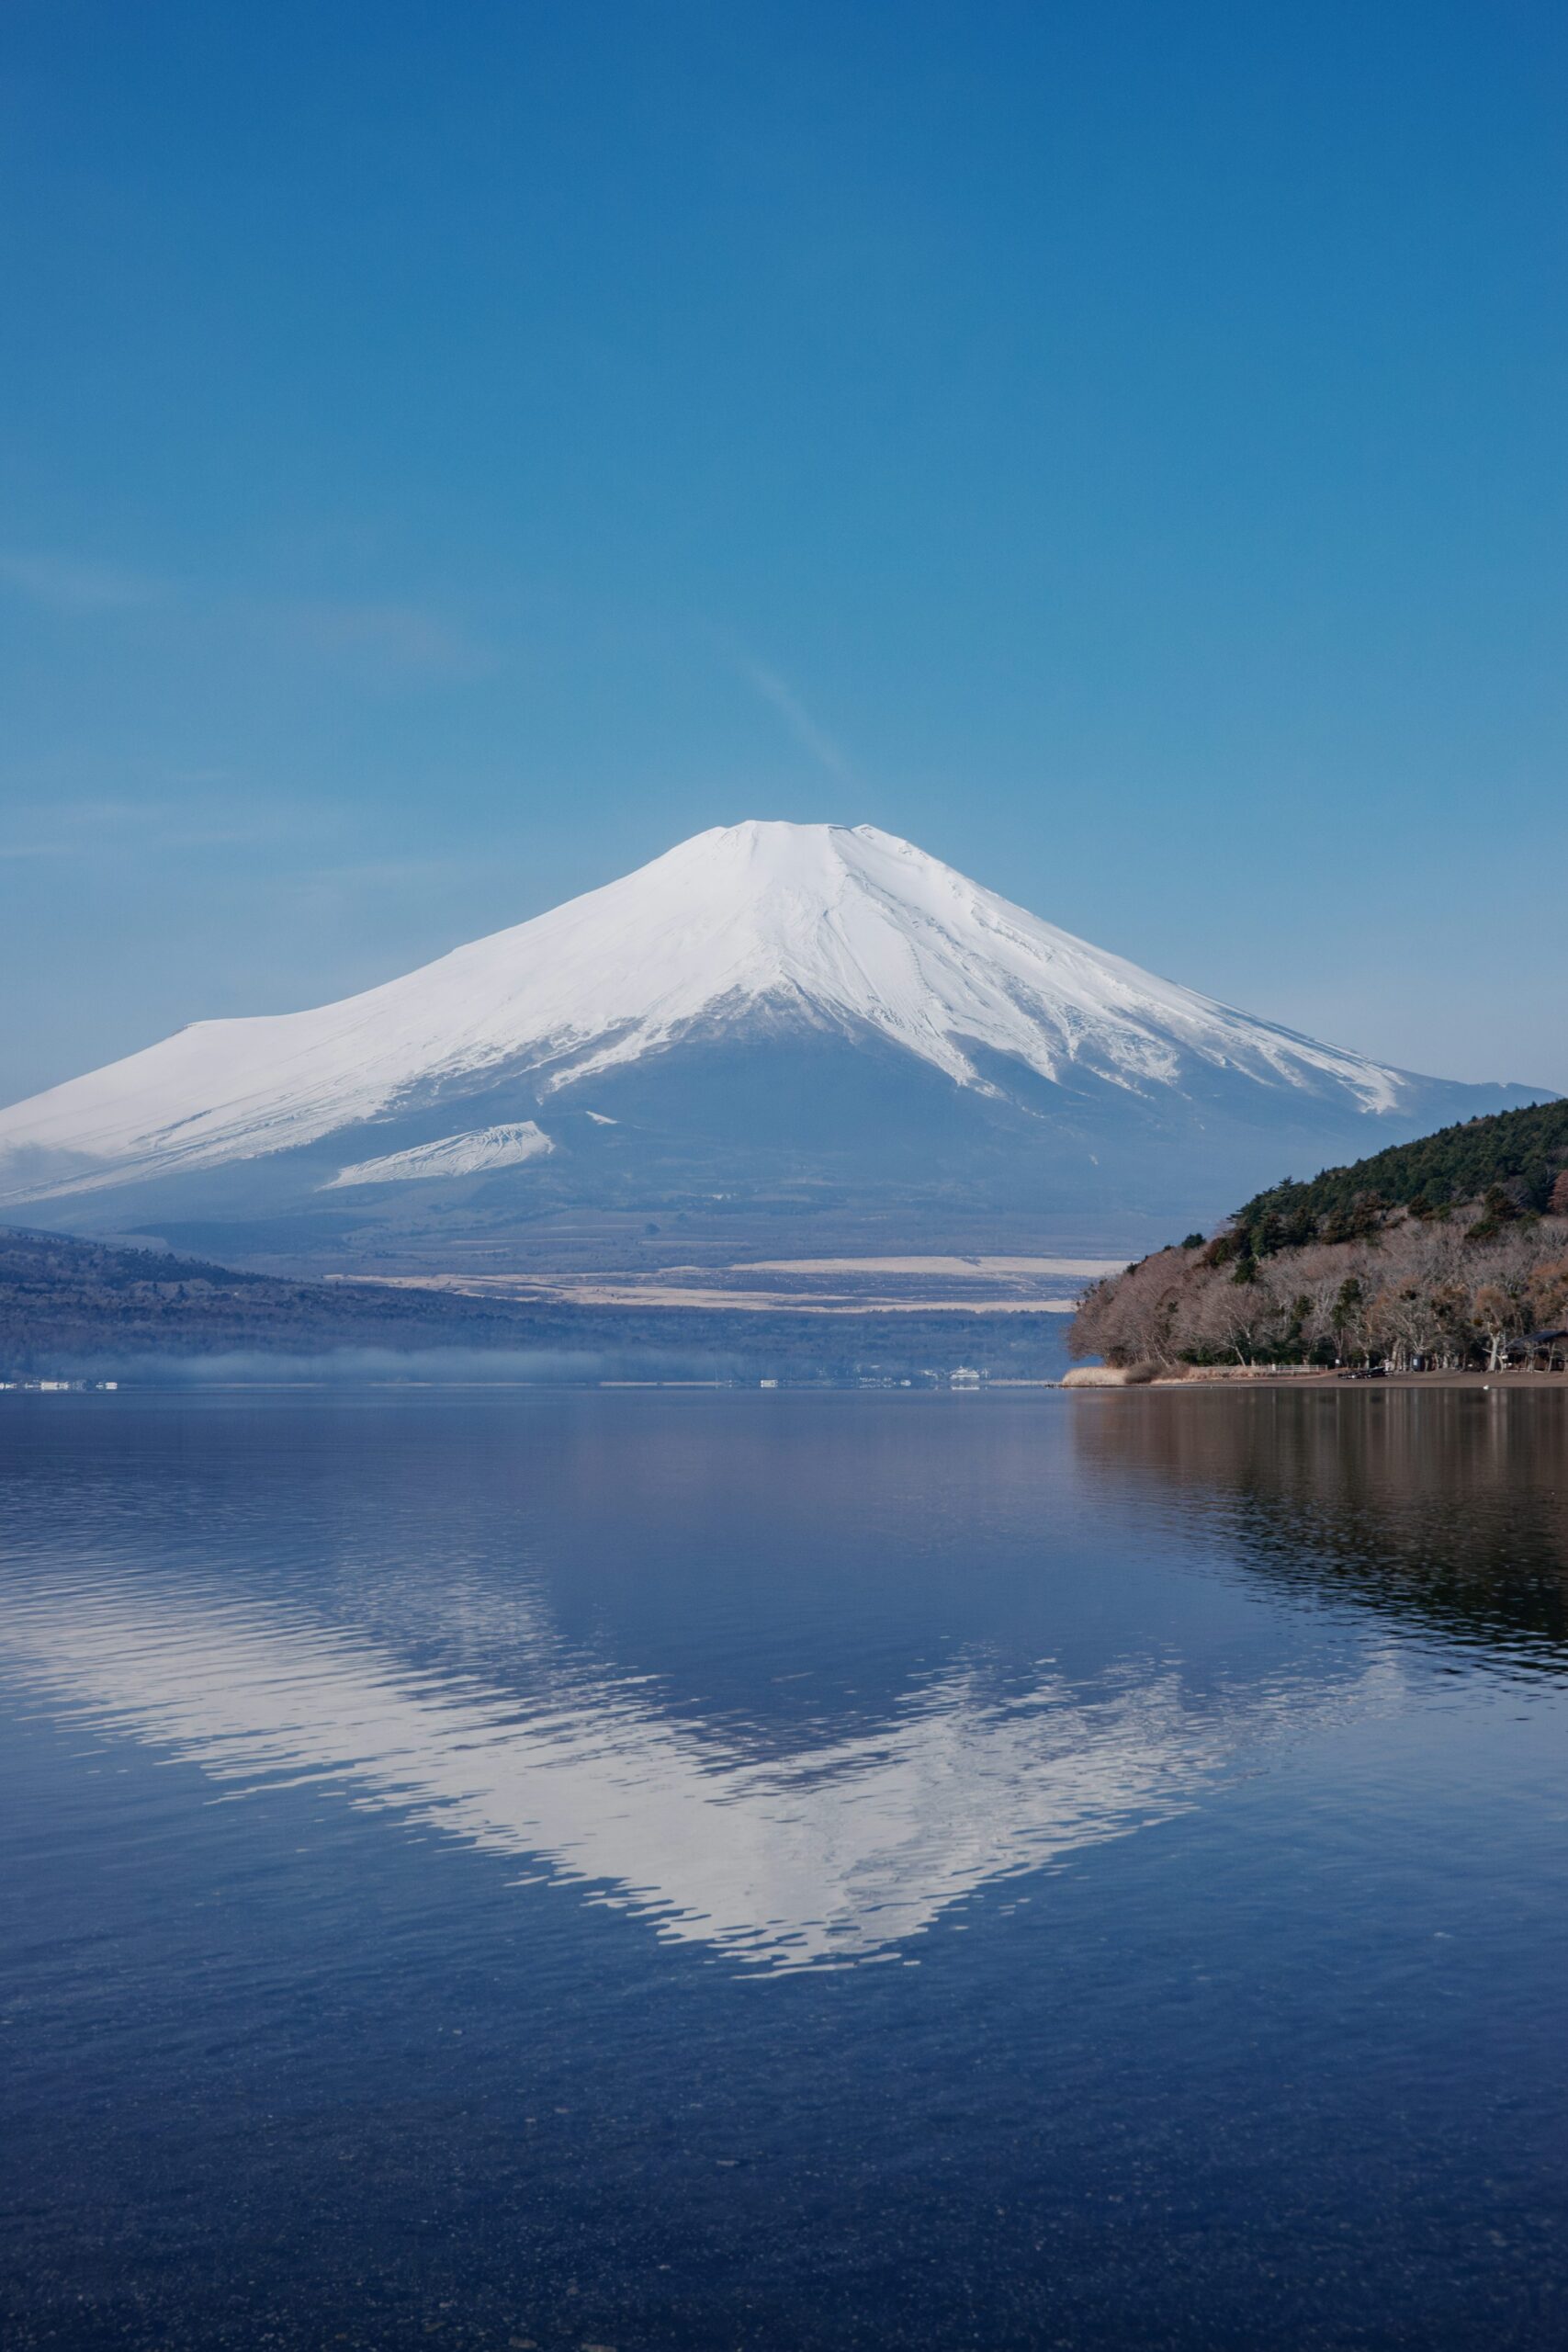
With founder Travis Ludlow he has also climbed Pikes Peak, climbed in Patagonia and Iceland, and stood at the foot of Mount Fuji.
We have not summited Everest or any 8,000-meter peak, and we never pretend otherwise. Next up is a deliberate high-altitude progression: Orizaba, Cotopaxi, and Chimborazo.
The climbs that anchor our altitude and glacier experience, and inform how we write about the bigger peaks.
Kilimanjaro · via the Lemosho route
19,341 ft (5,895 m) · Tanzania · our highest summit
The roof of Africa and the highest point we have reached. A non-technical but serious high-altitude trek that taught us first-hand how altitude, pacing, and multi-day fatigue actually feel above 15,000 feet, lessons that shape our Kilimanjaro and altitude guides.
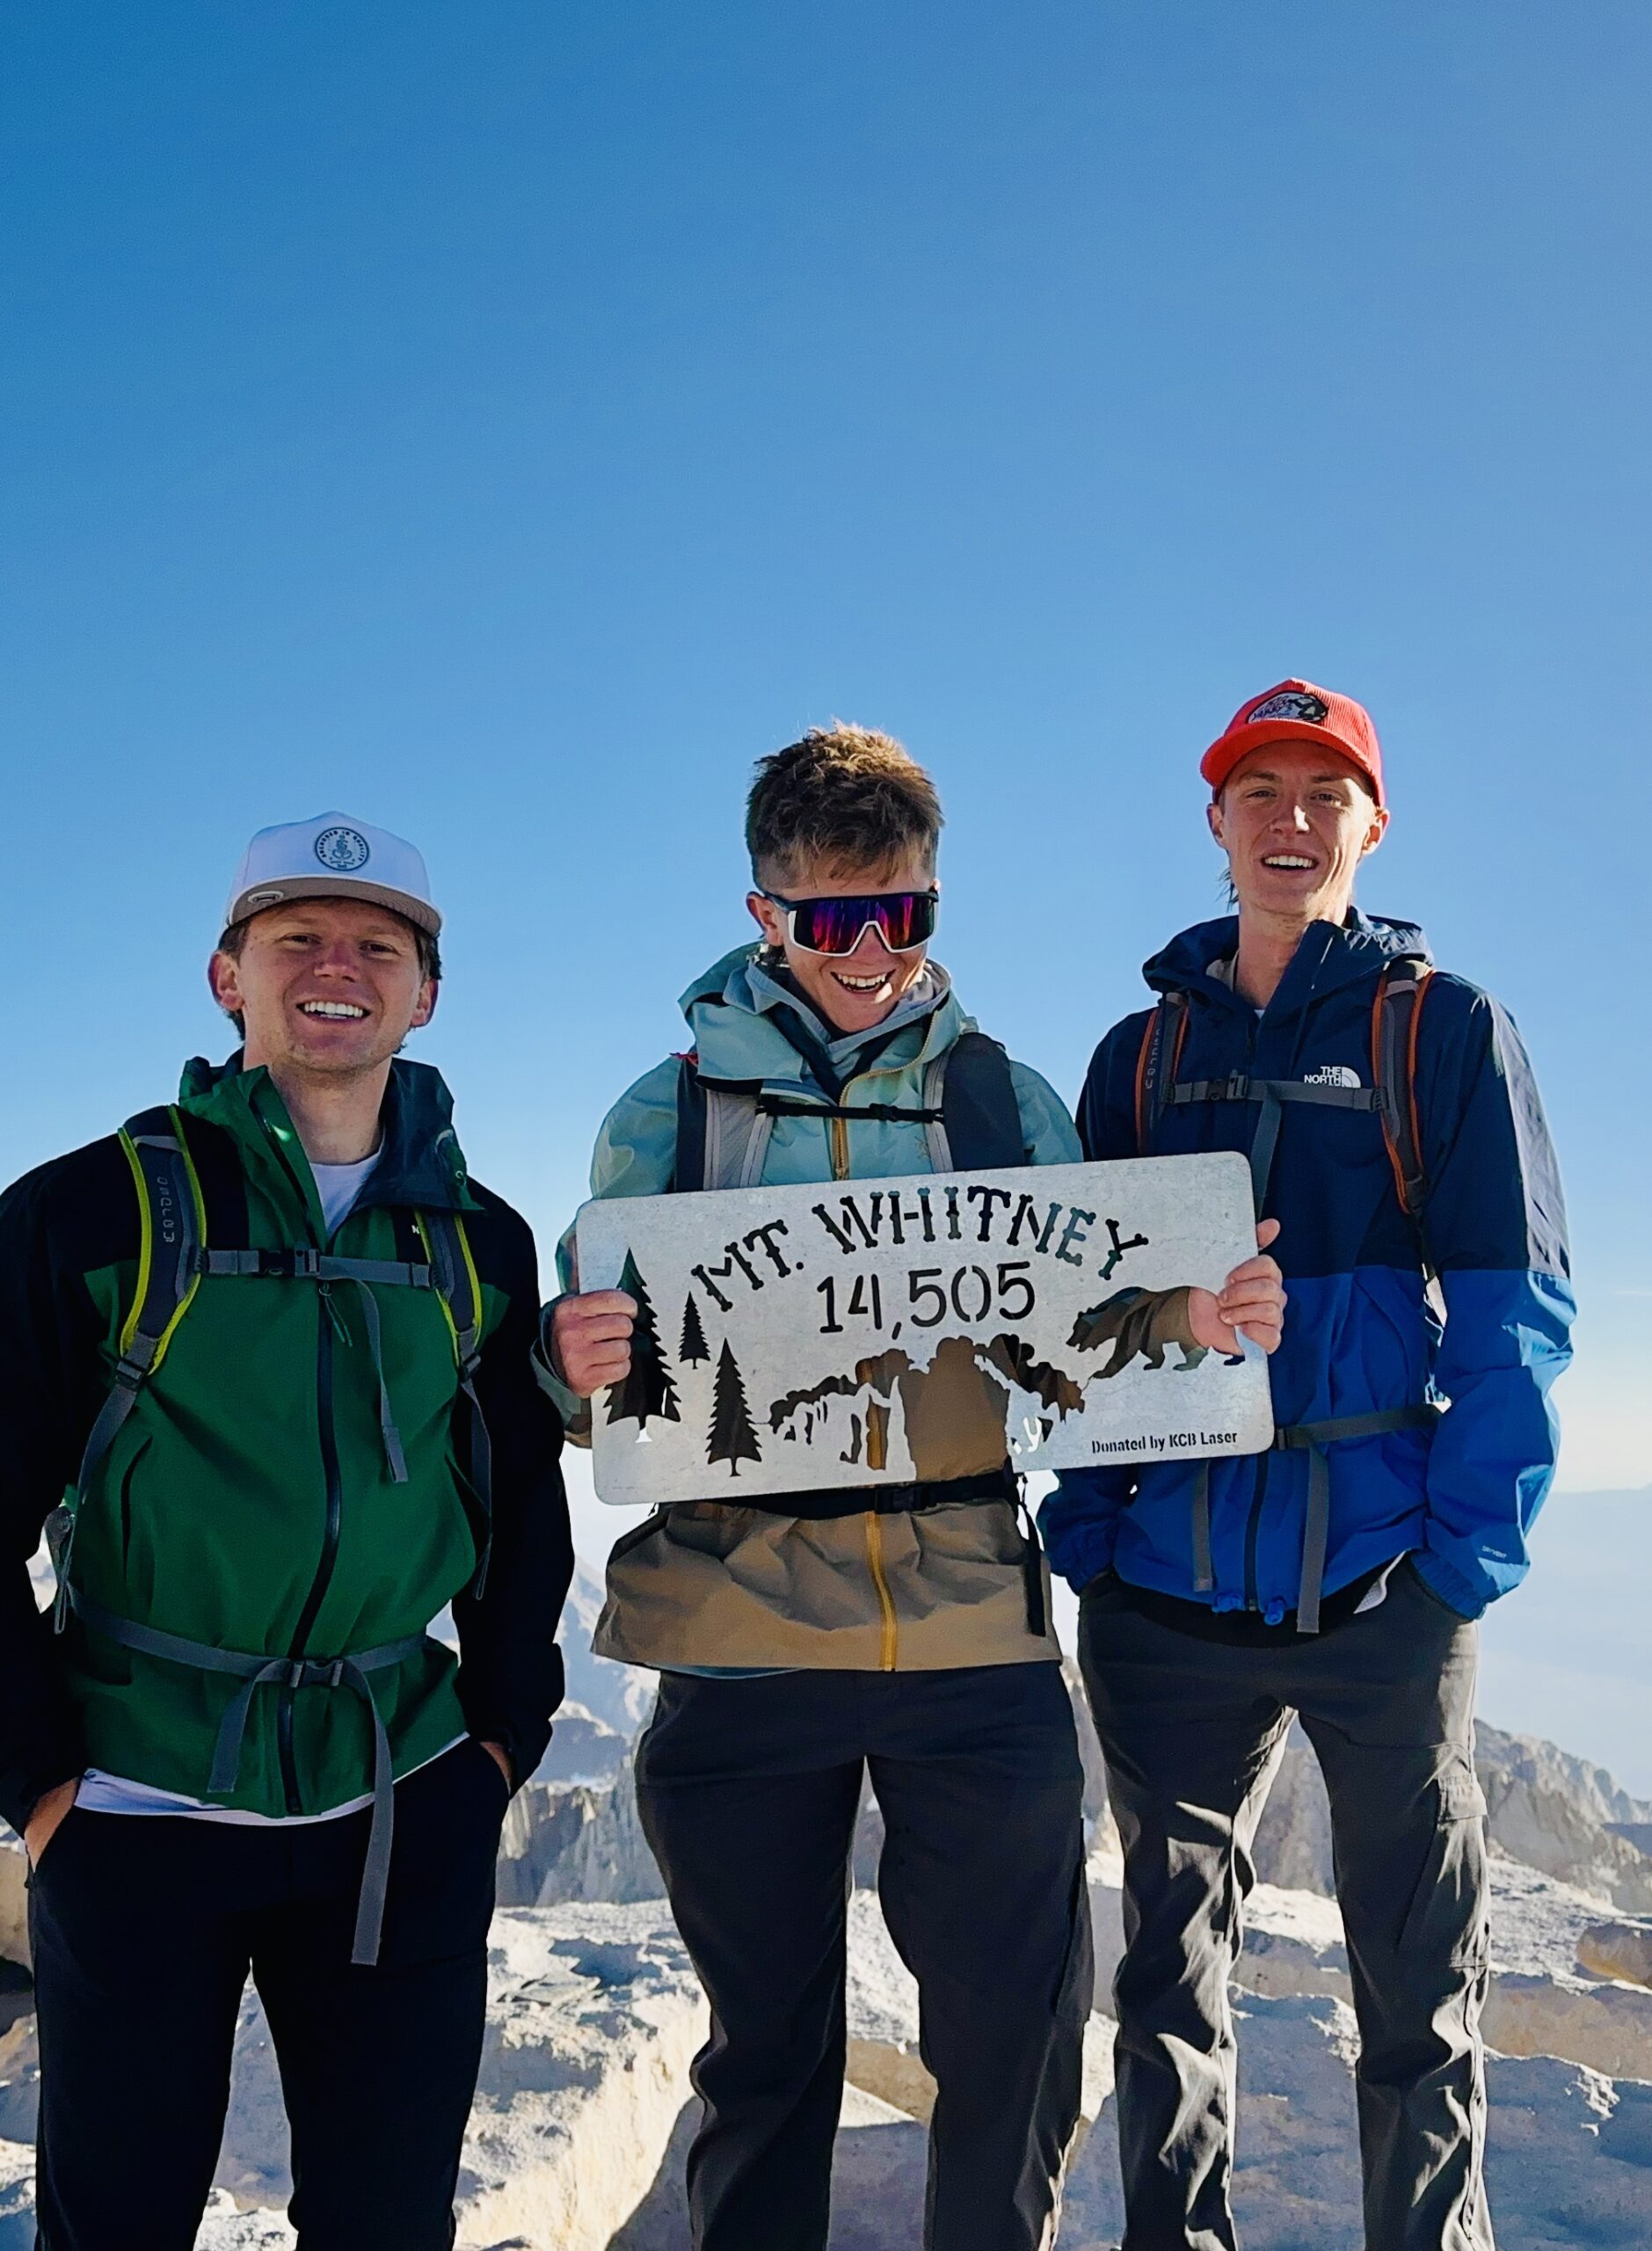
Mount Whitney
14,505 ft (4,421 m) · California · highest in the lower 48
The highest summit in the contiguous United States, a long, demanding day at altitude on the classic route.
Pikes Peak · Travis and Dawson
14,115 ft (4,302 m) · Colorado
A Colorado 14er climbed together, one of several climbs Travis and Dawson have done side by side.
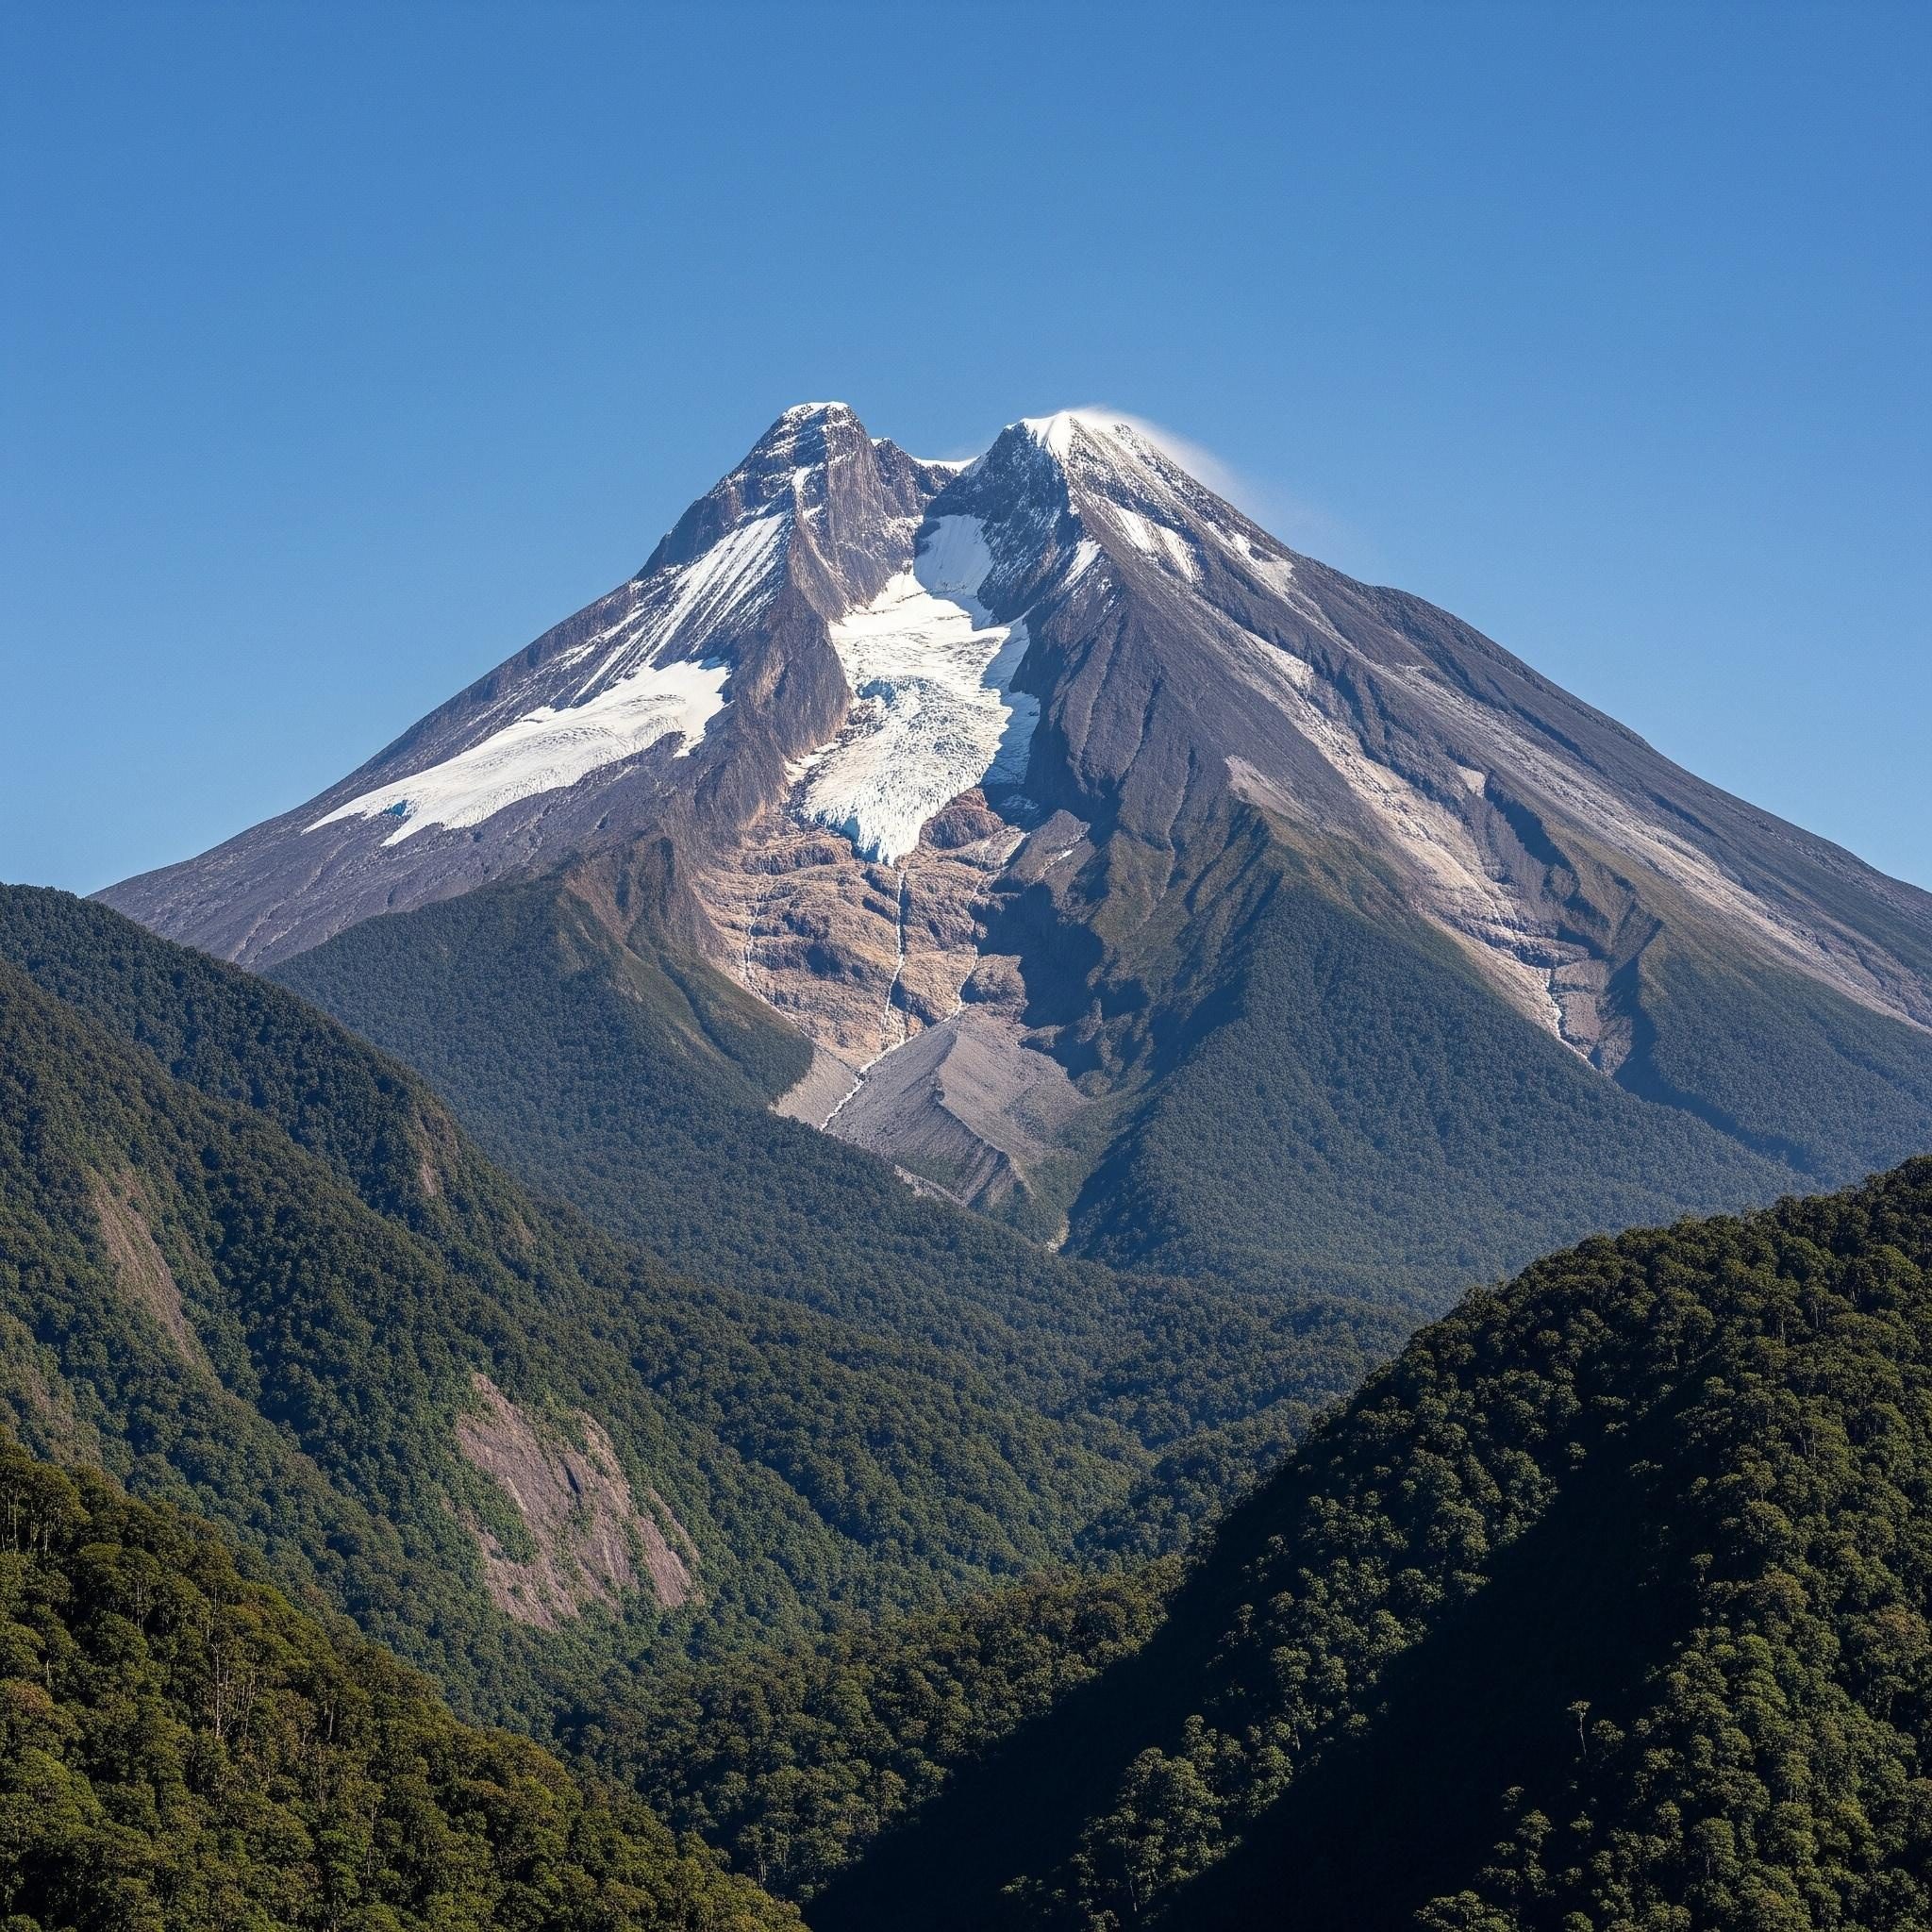
Mount Hood · via Timberline
11,249 ft (3,429 m) · Oregon · glaciated volcano
Our introduction to a glaciated Cascade volcano: crampons, an alpine start, and real snow-and-ice terrain, and a direct stepping stone toward the volcanoes we are climbing next.
The Wasatch record
Utah’s Wasatch Range is our home range and the foundation of everything else. Repeated ascents in every season are where judgment is actually built.
The bulk of our experience is earned close to home, on the peaks of Utah’s Wasatch Range, climbed and re-climbed across seasons and conditions. This is where the unglamorous work of mountaineering happens: learning to read weather, pace a long climb, move on snow, and turn around when a day goes wrong. Highlights include Mount Nebo, the highest peak in the Wasatch, climbed six times; Mount Timpanogos by two different routes including the Everest Ridge; Lone Peak three times via the committing Jacob’s Ladder approach; and Kyhv Peak above Provo four times. These are not exotic objectives, but the accumulated mileage across dozens of ascents is exactly the kind of experience that makes the difference between writing about mountains and knowing them.
Out on the mountain. First-hand time in real terrain, across seasons and conditions, is where the judgment behind our guides is actually built.
The full summit table
Every peak in our first-hand record, with verified elevations and the number of ascents. Grouped by elevation band.
Peak
Route(s)
Elevation
Ascents
High-altitude & signature
Kilimanjaro
Lemosho
19,341 ft (5,895 m)
1
Mount Whitney
Standard route
14,505 ft (4,421 m)
1
Mount Hood
Timberline
11,249 ft (3,429 m)
1
Wasatch & Utah 11,000-ft peaks
Mount Nebo
North Peak Trail
11,928 ft
6
Mount Timpanogos
Timpooneke; Everest Ridge
11,752 ft
3
American Fork Twin Peaks
Standard
11,489 ft
1
Pfeifferhorn
Standard
11,326 ft
2
Lone Peak
Jacob’s Ladder
11,253 ft
3
Mount Superior
Cardiff Pass
11,132 ft
1
Box Elder Peak
Standard
11,101 ft
1
Provo Peak
The Y; Slate Canyon; normal
11,068 ft
3
Wasatch & Utah 10,000-ft peaks
Loafer Mountain
Standard
10,687 ft
1
Santaquin Peak
Loafer Mountain Trail
10,685 ft
1
Sunset Peak
Catherine Pass
10,648 ft
1
Gobblers Knob
Standard
10,246 ft
1
Mount Raymond
Standard
10,241 ft
1
Spanish Fork Peak
Standard
10,193 ft
2
Utah peaks under 10,000 ft
Ben Lomond
Cutler
9,712 ft
1
Notch Peak
Standard
9,655 ft
1
Mount Olympus
Standard
9,026 ft
2
Y Mountain
Standard
~8,568 ft
1
Grandeur Peak
Standard
8,299 ft
1
Kyhv Peak
Rock Canyon
7,865 ft
4
Big Baldy
Standard
Wasatch
2
How to read this table
Twenty-four distinct summits, forty-two total ascents. The repeated climbs matter as much as the list: six trips up Mount Nebo and four up Kyhv Peak represent real, seasonal familiarity, not a one-time tick. Elevations are verified against current records; Big Baldy is listed without a precise figure rather than guess at which of Utah’s several Big Baldys applies.
International climbing
Beyond the summits above, Travis and Dawson have sought out mountain terrain around the world.
Our experience is not confined to North America. Together, Travis and Dawson have climbed in Patagonia, the wild, weather-battered mountains at the southern end of South America, and in Iceland, a landscape of glaciers, volcanoes, and fast-changing conditions. They have also spent time at the base of Mount Fuji in Japan. We are precise about that last one on purpose: we explored Fuji’s lower slopes rather than standing on its summit, and it matters to us to describe experience exactly as it happened. Time in these ranges, on very different rock, ice, and weather than Utah’s, broadens the judgment we bring to writing about mountains everywhere.
What we are climbing next
Our experience is not a finished list. We are on a deliberate progression toward higher, glaciated, high-altitude volcanoes, and we will document it as it happens.
The high-altitude progression, 2026 to 2027
December 2026
Pico de Orizaba
18,491 ft (5,636 m) · Mexico
North America’s highest volcano and our next high-altitude glacier objective, building on Mount Hood.
2027
Cotopaxi
19,347 ft (5,897 m) · Ecuador
A classic glaciated Andean volcano and a step up in sustained altitude and glacier travel.
2027
Chimborazo
20,548 ft (6,263 m) · Ecuador
Ecuador’s highest peak and the farthest point from the center of the Earth, our first objective above 20,000 feet.
These are goals, not achievements, and we will report honestly on how the preparation and the climbs actually go. Follow the same path in our progression plans and expedition training guides.
Our honesty policy
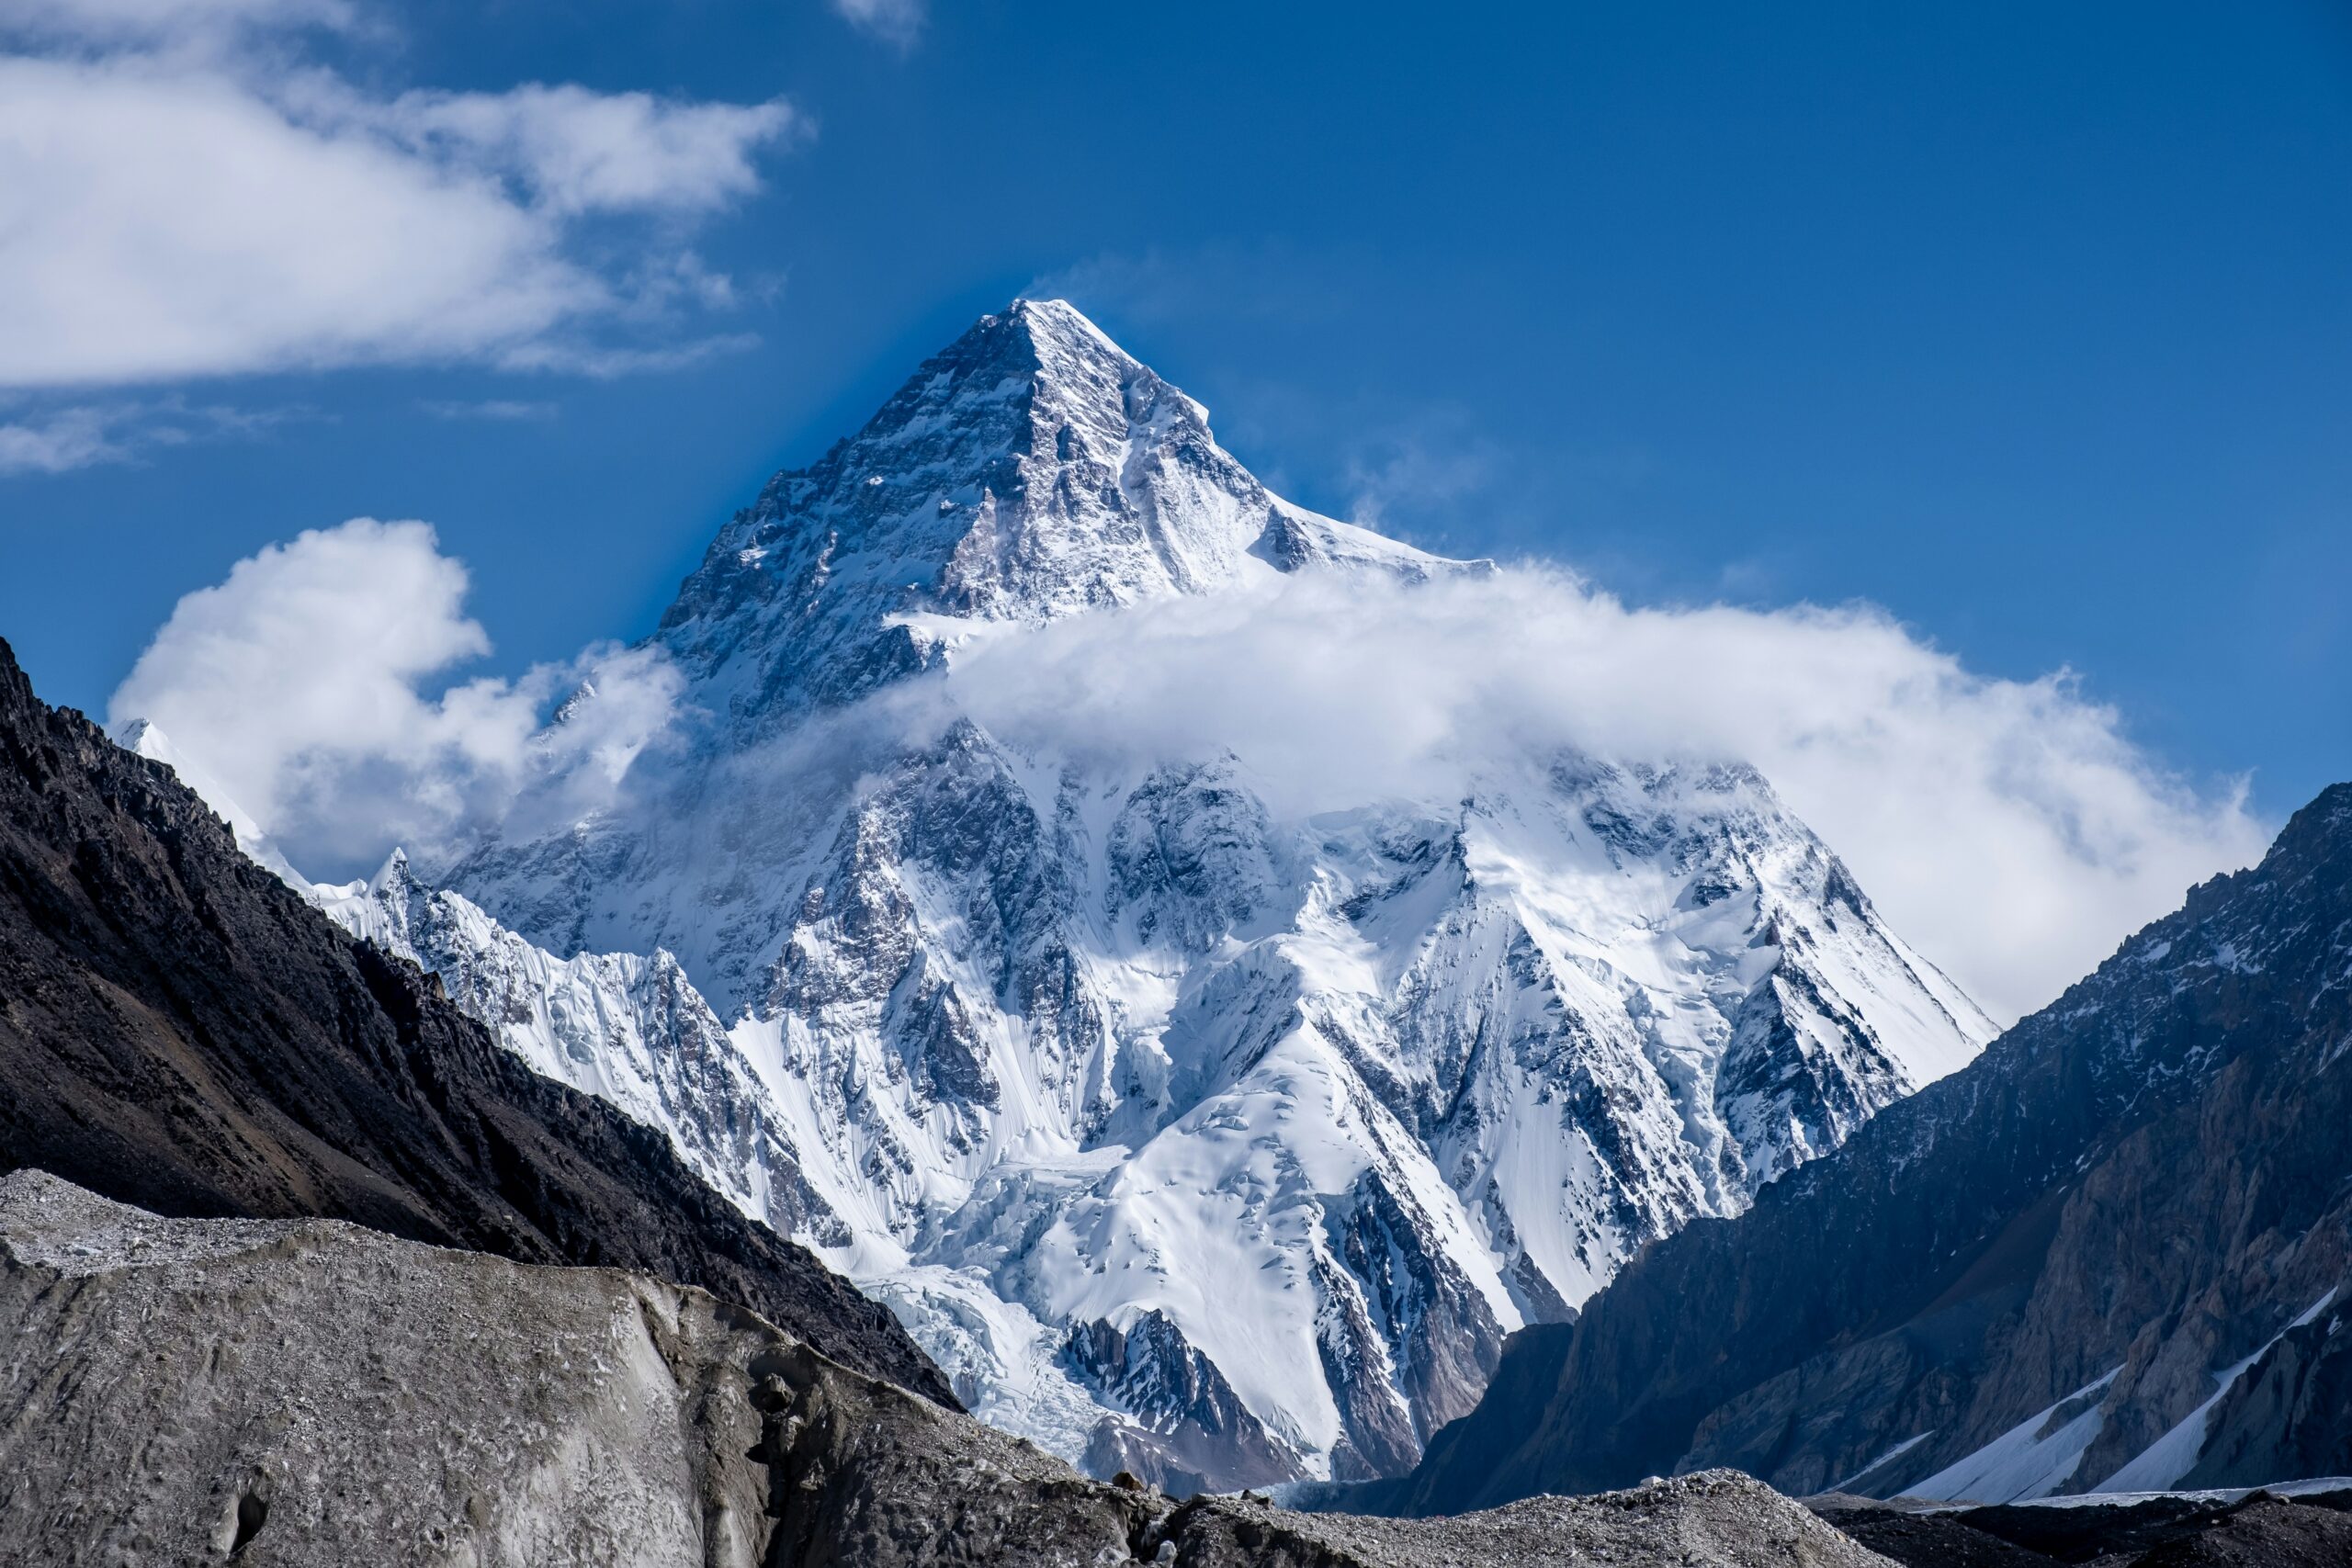
Global Summit Guide covers mountains far higher and more technical than we have personally climbed, including Everest, K2, and the 8,000-meter peaks. We will never blur the line between what we have done and what we have researched. Our first-hand summits top out at Kilimanjaro; everything above that is research-based synthesis drawn from the Himalayan Database, the American Alpine Club, expedition operators, and published accounts, and we cite those sources.
We believe this honesty makes us more useful, not less. It means you can trust that when we describe how something feels, we have felt it, and when we are working from research, we say so. That is the standard we hold every page on this site to.
Experience FAQ
The questions readers ask about who is behind the guides.
Has the team summited Everest or the 8,000-meter peaks?
No, and we say so plainly. Our highest summit is Kilimanjaro at 19,341 feet. Our 8,000-meter guides are research-based syntheses from the Himalayan Database, the American Alpine Club, operators, and published accounts, with sources cited.
What is the team’s highest summit?
Kilimanjaro, 19,341 feet (5,895 m), via Lemosho. Then Mount Whitney (14,505 ft), Pikes Peak (14,115 ft), and Mount Hood (11,249 ft), plus more than twenty Wasatch summits.
How does this experience make your guides more reliable?
First-hand time teaches what no database can: how altitude feels, how fast weather turns, how fatigue erodes judgment on descent. That shapes how we frame difficulty, training, and risk, even for peaks higher than we have climbed, where we are transparent that the work is research-based.
What are you climbing next?
A high-altitude progression: Pico de Orizaba (18,491 ft) in December 2026, then Cotopaxi (19,347 ft) and Chimborazo (20,548 ft) in 2027. Glaciated volcanoes that build directly on Kilimanjaro and Mount Hood.
Who does the climbing?
Primarily Dawson Ludlow, our Climbing & Mountaineering Lead, with founder Travis Ludlow climbing alongside him, including Pikes Peak and climbs in Patagonia and Iceland. Health and altitude content is reviewed by Taylor Ludlow, RN.
About Global Summit Guide
Dawson Ludlow, Climbing & Mountaineering Lead · Travis Ludlow, Founder & Head of Research
Global Summit Guide is an independent mountaineering resource built on a simple principle: earn trust by being honest about what we know first-hand and what we have researched. This page is our experience record, and we keep it current as we climb. Health and altitude content is reviewed by Taylor Ludlow (Registered Nurse), and gear by Walker Ludlow. Read more about the team and mission.
Puncak Jaya · Adobe Stock · Global Summit Guide media library
Carstensz Pyramid · Central Papua · Permit and access report
Puncak Jaya 2026: Permit Realities, Helicopter Access and the Go/No-Go Decision
Carstensz Pyramid is not reliably “open” or “closed” in the way a normal park trail is. In 2026, legal access depends on an Indonesian operating partner, overlapping permissions, a functioning helicopter plan, local security approval and conditions that may change after you pay.
Built from current government travel guidance, Indonesian immigration information, commercial schedules and operator-published logistics. Global Summit Guide has not climbed Puncak Jaya.
Template 5.0 current-status reviewVerified July 18, 2026
Next scheduled review: September 2026 or immediately after a material access change.
2026 status
Top 10 Trekking Routes in Nepal: Safety & Planning Guide
At least one major international operator has published a sold-out October 2026 departure, and Indonesian-supported commercial programs continue to market helicopter access. That means the mountain is not universally closed. It does not mean a climber can independently obtain a ticket, arrive in Timika and proceed to base camp.
The accurate planning phrase is: operator-managed access may operate when permits, security authorization, helicopters and weather align.
Current government warning
Puncak Jaya is in Central Papua. As of July 7, 2026, the U.S. Department of State says “Do Not Travel” to Central Papua and Highland Papua. The United Kingdom also advises against all travel to those provinces. Those warnings are broader than one climbing route and must be considered before booking, especially because consular and emergency assistance may be limited.
4,884 mSummit elevation
Level 4U.S. Central Papua advisory
HelicopterDominant 2026 access
TimikaMain staging city
ConditionalOperational status
This page owns
Permit workflow, current access, security advisories, helicopter logistics, insurance exclusions, booking terms and the go/no-go checklist.
The parent guide owns
Elevation, history, general difficulty, standard summit-day overview and the complete Carstensz Pyramid climb guide.
There is no stable public gate status that guarantees a foreign climber can reach the mountain.
On many mountains, “open” means the national park has published a season and the permit website is accepting reservations. Puncak Jaya works differently. The mountain sits inside a politically sensitive part of Central Papua, close to major mining and security infrastructure. A commercial expedition is viable only when the Indonesian operating partner can coordinate the necessary permissions, transport and local acceptance for that specific team and date.
A scheduled departure is therefore evidence of an operator’s intent—not proof that final permission has already been issued. A client may sign a contract months before the final document package is complete. Security officials can also restrict movement or suspend operations closer to departure.
Scheduled
An operator has advertised dates and is collecting deposits. This is the weakest level of certainty.
Permit processing
Passport details and team documents have been submitted through the Indonesian operating structure.
Operationally confirmed
The operator confirms final permission, aircraft availability, local security acceptance and a current departure plan.
Best wording for your own planning Do not ask only, “Is Carstensz open?” Ask, “Does my named Indonesian operating company have a current legal and operational path for my exact team, date, access method and landing area?”
The 2026 permit reality: a package, not one document
The commercial product is an operator-managed authorization chain rather than a simple climbing permit.
Public operator descriptions commonly refer to overlapping national, security, police, provincial and local authorizations. Some commercial materials name Indonesian intelligence, military, foreign-affairs, tourism, national-police and Papua-level approvals. Global Summit Guide treats those agency lists as operator-described permit frameworks, not as a complete public legal checklist that an individual foreigner should attempt to reproduce.
The practical conclusion is more important than the agency vocabulary: a foreign climber should use an experienced Indonesian operator that accepts written responsibility for the complete access package. Western Seven Summits companies normally depend on Indonesian local partners for this work because the permissions, helicopter coordination and regional relationships cannot be delivered from outside Indonesia.
Layer
What it controls
What to ask the operator
Common failure
Immigration
Legal entry and stay in Indonesia
Which visa category fits the expedition and who advises on it?
Assuming an e-VOA is a mountain-access permit
National expedition approval
Foreign team activity and expedition purpose
Which Indonesian entity files the team and when?
No named responsible legal operator
Security clearance
Movement in a sensitive region
What security approvals are included and when are they final?
Partial documents accepted by a sales agent but rejected locally
Police and local coordination
Checkpoint, local movement and team verification
Who meets the team in Timika and handles verification?
Arriving with copies that cannot be confirmed locally
Provincial or regional permission
Central Papua operational acceptance
Is authorization valid for the exact approach and landing area?
A permit package naming the mountain but not the actual access plan
Aviation and landing logistics
Aircraft, passenger manifest and base-camp movement
Which helicopter provider, luggage limit and contingency arrangement apply?
Permits complete but no flyable aircraft or landing authorization
Do not buy a “permit-only” promise without an operating structure. A collection of PDF approvals has little value if no licensed Indonesian company is responsible for your team, no aircraft is committed and no one can resolve a checkpoint or local authorization problem in real time.
How far in advance should the process begin?
Operator timelines vary. The safest planning assumption is several months, not several weeks. Even when a company markets a shorter nominal processing window, it still needs passport data, photographs, team details, planned dates, access method and internal coordination. Permit timing may also determine when large nonrefundable helicopter or partner payments are released.
Ask when your documents will be submitted, when the operator expects preliminary acceptance, when final confirmation normally arrives and what happens if approval is still pending when your balance is due.
Your Indonesian visa is separate from Carstensz permission
Immigration approval answers “May you enter Indonesia?”—not “May you enter a restricted Central Papua expedition area?”
Indonesia’s Directorate General of Immigration publishes tourist visa and electronic visa-on-arrival options for eligible nationalities. A B1 visitor visa, for example, permits tourism and an initial stay of up to 30 days under its conditions. That can solve the ordinary immigration requirement for many travelers.
It does not replace the mountain-access package. A climber can be lawfully present in Bali, Jakarta or Timika and still lack permission to proceed toward Puncak Jaya. Conversely, an operator cannot fix an incorrect immigration status merely by holding mountain approvals.
Climber responsibility
Valid passport and correct personal information
Appropriate Indonesian visa or entry status
Return or onward travel documentation where required
Compliance with visa conditions
Operator responsibility
Complete expedition and regional permission package
Security and local coordination
Helicopter manifest and operational documents
Current confirmation that the team may proceed
Request one written document checklist Your operator should distinguish documents you personally obtain from documents it obtains on your behalf. Every line should show the responsible party, submission deadline, expected confirmation point and refund consequence if the item is denied.
Puncak Jaya’s position above equatorial forest creates a rare combination of tropical access, high-altitude rock climbing and weather-dependent aviation. Adobe Stock · Global Summit Guide WordPress media library
Helicopter access is the dominant commercial model
For international 2026 programs, Timika-to-base-camp aviation replaces the traditional multi-day overland approach.
Major commercial programs describe charter flights into the Papua highlands followed by helicopter movement to the Yellow Valley base-camp area. One established international operator markets a fly-in, fly-out itinerary and says it uses helicopters because they reduce dependence on local trekking logistics, health exposure and limited emergency options. Indonesian specialists similarly describe helicopter access from Timika as their standard operating model.
The flight itself may be short, but the operational chain is not. Clouds can close the route. Helicopters may be committed elsewhere. Passenger and luggage limits can force multiple rotations. A team may reach base camp while its baggage is delayed—or wait in Timika while mountain weather appears perfectly clear from a forecast model.
Before departure
Confirm the staging city, hotel, internal flight, baggage transfer and exact point where the operator assumes responsibility.
Flight day
Expect last-minute changes based on cloud, visibility, aircraft readiness and security approval.
After the summit
A successful climb does not guarantee an immediate flight out. Keep food, medication and schedule margin for a delayed extraction.
Questions that expose a weak helicopter plan
Is the helicopter included round-trip in the quoted price?
Which company provides the aircraft?
Is the price based on a minimum number of clients?
Who pays if an extra rotation is needed?
What is the personal and group baggage limit?
How many weather days are included?
What accommodation and meals are covered during delays?
What happens if the aircraft cannot reach base camp?
Is a delayed extraction included or billed separately?
Can the operator substitute another aircraft provider?
A helicopter is an access method—not a safety guarantee. Cloud, rain, visibility, aircraft availability and regional security can prevent evacuation. The team still needs communications, medical capability, additional food and a realistic plan for waiting at altitude.
The jungle approach: historically real, operationally different in 2026
Do not choose an itinerary merely because it advertises the “authentic” overland experience.
The traditional Carstensz approach crossed remote Papuan highlands and rainforest through local communities. It became part of the mountain’s identity: mud, rivers, cultural negotiations, porter logistics and many days of travel before the rock climbing began.
That route is no longer the normal choice for mainstream international expeditions. Several operators explicitly say they do not offer it because of political instability, dangerous river crossings, porter complications, checkpoint risk and the near absence of dependable emergency assistance. The United Kingdom’s travel guidance also notes attacks on aircraft, armed clashes and an unpredictable situation in Central and Highland Papua.
This does not prove that no local journey will occur anywhere in the region. It does mean a foreign client should treat any advertised jungle approach as a materially different risk product. The operator should identify the current route, communities, security plan, evacuation method, local permissions and recent successful team history.
Issue
Helicopter program
Traditional overland approach
Typical international use in 2026
Dominant commercial model
Limited and operator-specific
Duration
Short mountain program plus weather buffers
Several additional approach and return days
Main dependency
Flyable weather and aircraft
Security, local relations, rivers, porters and route access
Medical exposure
Rapid move from low elevation to base camp
Tropical illness, foot problems and prolonged remote travel
Evacuation
Still weather-dependent
Extremely limited along remote approach sections
Client suitability
Experienced Seven Summits climbers with rock skills
Only clients accepting substantially higher logistical and security uncertainty
Security advisories are not a footnote
They may affect the decision to travel, insurance validity, employer rules and the ability to obtain help.
The U.S. State Department’s July 7, 2026 advisory places Central Papua and Highland Papua at Level 4: Do Not Travel because of civil unrest. It says conflict is sporadic but persistent, armed groups have kidnapped foreign nationals and the U.S. government has limited ability to provide emergency services. The United Kingdom advises against all travel to the same provinces and describes regular clashes, attacks involving remote aircraft and a situation that can change quickly.
These are official national risk assessments, not a statement that every village or landing zone is experiencing active fighting at every moment. An operator may reasonably judge that a specific helicopter corridor and mountain program can operate. A traveler may also reasonably decide that the government warning exceeds their acceptable risk.
What an operator can manage
Local intelligence and current communication
Security coordination and checkpoint documents
Choice of access corridor
Schedule changes and cancellation
What an operator cannot eliminate
Regional conflict and government restrictions
Kidnapping or unrest risk
Limited consular assistance
Insurance exclusions written by third parties
Mining and security infrastructure near Puncak Jaya shape modern access. The mountain cannot be planned like an isolated public trailhead. Adobe Stock · Global Summit Guide WordPress media library
Insurance: the policy wording matters more than the logo
A standard high-altitude policy may still exclude the exact reason your Carstensz trip fails.
Climbers often focus on the 4,884-meter elevation and helicopter evacuation limit. Those are important, but Carstensz creates additional questions: civil unrest, warlike activity, kidnapping, government closure, political evacuation, travel against official advice and cancellation after a permit denial.
Some insurers will cover medical treatment while excluding trip cancellation caused by civil unrest. Others may exclude all losses in a destination under a Level 4 advisory. A helicopter benefit may cover medical rescue but not the charter cost of returning a healthy climber after weather or security disruption.
Ask the insurer these exact questions
Is Central Papua covered despite current government advice?
Does traveling against a Level 4 advisory void any benefit?
Are civil unrest and political violence excluded?
Is kidnapping included or excluded?
Does cancellation cover government permit denial?
Does interruption cover a regional closure after arrival?
Is nonmedical helicopter extraction covered?
What altitude limit applies to medical evacuation?
Are technical rock climbing and fixed ropes covered?
Is the full prepaid expedition value insurable?
Obtain answers in writing and keep the policy wording—not merely a salesperson’s email. Use the dedicated mountaineering insurance comparison to understand high-altitude exclusions, then verify the Papua-specific issues directly with the insurer.
Protect your payment before permits are final
The largest financial risk may occur before you reach Indonesia.
Carstensz prices reflect helicopter chartering, specialized permissions, local partnerships and small-group operations. These costs can require early nonrefundable commitments. One large international operator currently lists a $26,000 program with a $5,000 nonrefundable deposit and a nonrefundable balance due 120 days before departure.
That structure may be commercially understandable, but the client should know who bears the loss if permits are denied, the province closes, the Indonesian partner cannot operate or the helicopter plan collapses. “Nonrefundable” is especially consequential when the access environment is politically volatile.
Permit denial
Does the operator refund, postpone, issue credit or keep all committed local costs?
Government closure
Is a closure treated as force majeure, operator cancellation or client cancellation?
Helicopter failure
Who pays for additional hotel days, internal flights, replacement aircraft or a second attempt?
Credit is not the same as a refund. A future-expedition credit may expire, require the same operator, exclude new helicopter surcharges or become unusable if access remains unstable. Read the rescheduling language before paying.
The seven-step go/no-go verification process
Use this sequence before committing a nonrefundable balance.
Name the Indonesian operator
Identify the legal Indonesian company responsible for permits, local movement and aviation. A Western brand may be the seller while an Indonesian company is the actual operator.
Demand the permit scope in writing
Ask what authorizations are included, which are pending, who issues them and what exact activity, team, date and landing zone they cover.
Confirm the visa separately
Use official Indonesian immigration guidance. Do not assume that the visa recommended for a normal holiday automatically fits the operator’s expedition structure.
Audit the helicopter plan
Confirm aircraft provider, minimum group size, luggage, included rotations, delay costs, buffer days and extraction obligations.
Read advisories and insurance together
Compare government warnings with the policy exclusions. Obtain written coverage answers for Central Papua, unrest, kidnapping and political cancellation.
Audit cancellation terms
Separate permit denial, government closure, operator failure, client cancellation, weather delay and helicopter cancellation. They may produce different refunds.
Reconfirm 14 days and 72 hours before departure
Request written confirmation that the expedition remains authorized and operational. Continue monitoring official advisories and be prepared to cancel despite sunk costs.
Green-light standard Proceed only when the named Indonesian operator confirms the team’s permissions, the access method is scheduled, the insurance position is understood, the cancellation exposure is acceptable and the traveler independently accepts the official security warning.
Continue the Carstensz planning sequence
This access page is one part of the cluster. Use the exact page that owns your next decision.
Direct answers to the most important 2026 access questions.
Is Puncak Jaya open for climbing in 2026?
Commercial departures are being scheduled, so the mountain is not universally closed. Access remains conditional on the specific team’s permits, local security acceptance, helicopter logistics and current operational decision.
Can a foreign climber obtain the permit independently?
A practical public self-service system does not exist for the complete 2026 access package. Use a qualified Indonesian operating company that accepts responsibility for permits, regional coordination and transport.
Is a tourist e-VOA enough?
No. Immigration status and expedition access are separate. Follow official Indonesian immigration guidance for entry, while the operator manages the mountain and restricted-area approvals.
Is helicopter access mandatory?
It is the dominant international commercial method rather than a universal legal rule. Several established programs use helicopters exclusively because the overland approach carries substantially greater security and evacuation uncertainty.
Can insurance cover travel to Central Papua?
Possibly, but never assume it. Some policies exclude travel against official advice, civil unrest, political evacuation or kidnapping. Obtain written confirmation referencing Central Papua and your technical climbing activity.
How many buffer days should I keep?
Keep several days beyond the operator’s ideal itinerary. Equatorial cloud can delay the flight in or out, and political or document verification can also alter the schedule.
What we can and cannot verify
There is no single public government page that displays the live approval status for every foreign Carstensz team. Commercial permit descriptions come largely from operators and may use different agency names or package structures. This article therefore distinguishes official travel and immigration guidance from operator-reported mountain procedures.
Confidence: High for current U.S./UK travel warnings, immigration separation and published helicopter programs. Medium for the precise agency-by-agency permit chain because public regulatory transparency is limited and operator descriptions differ.
Last checked: July 18, 2026. Next review: September 2026 or immediately after a government advisory or access change.
Plan the Indonesia travel portion separately
Expedition permits and helicopters should remain under the climbing operator. Hotels and ordinary travel before or after the expedition can be compared separately, provided the bookings remain flexible.
Global Summit Guide separates facts that are publicly verifiable from operator claims and estimates. For Carstensz, that distinction is essential: official governments publish travel and immigration rules, while the practical mountain-access chain is usually described by commercial operators.
Do not book Carstensz on the strength of a date and price alone.
The decision is complete only after you understand who holds the permits, how the helicopter is secured, what the government advisory means for you, which losses insurance excludes and what happens to your money if access changes.
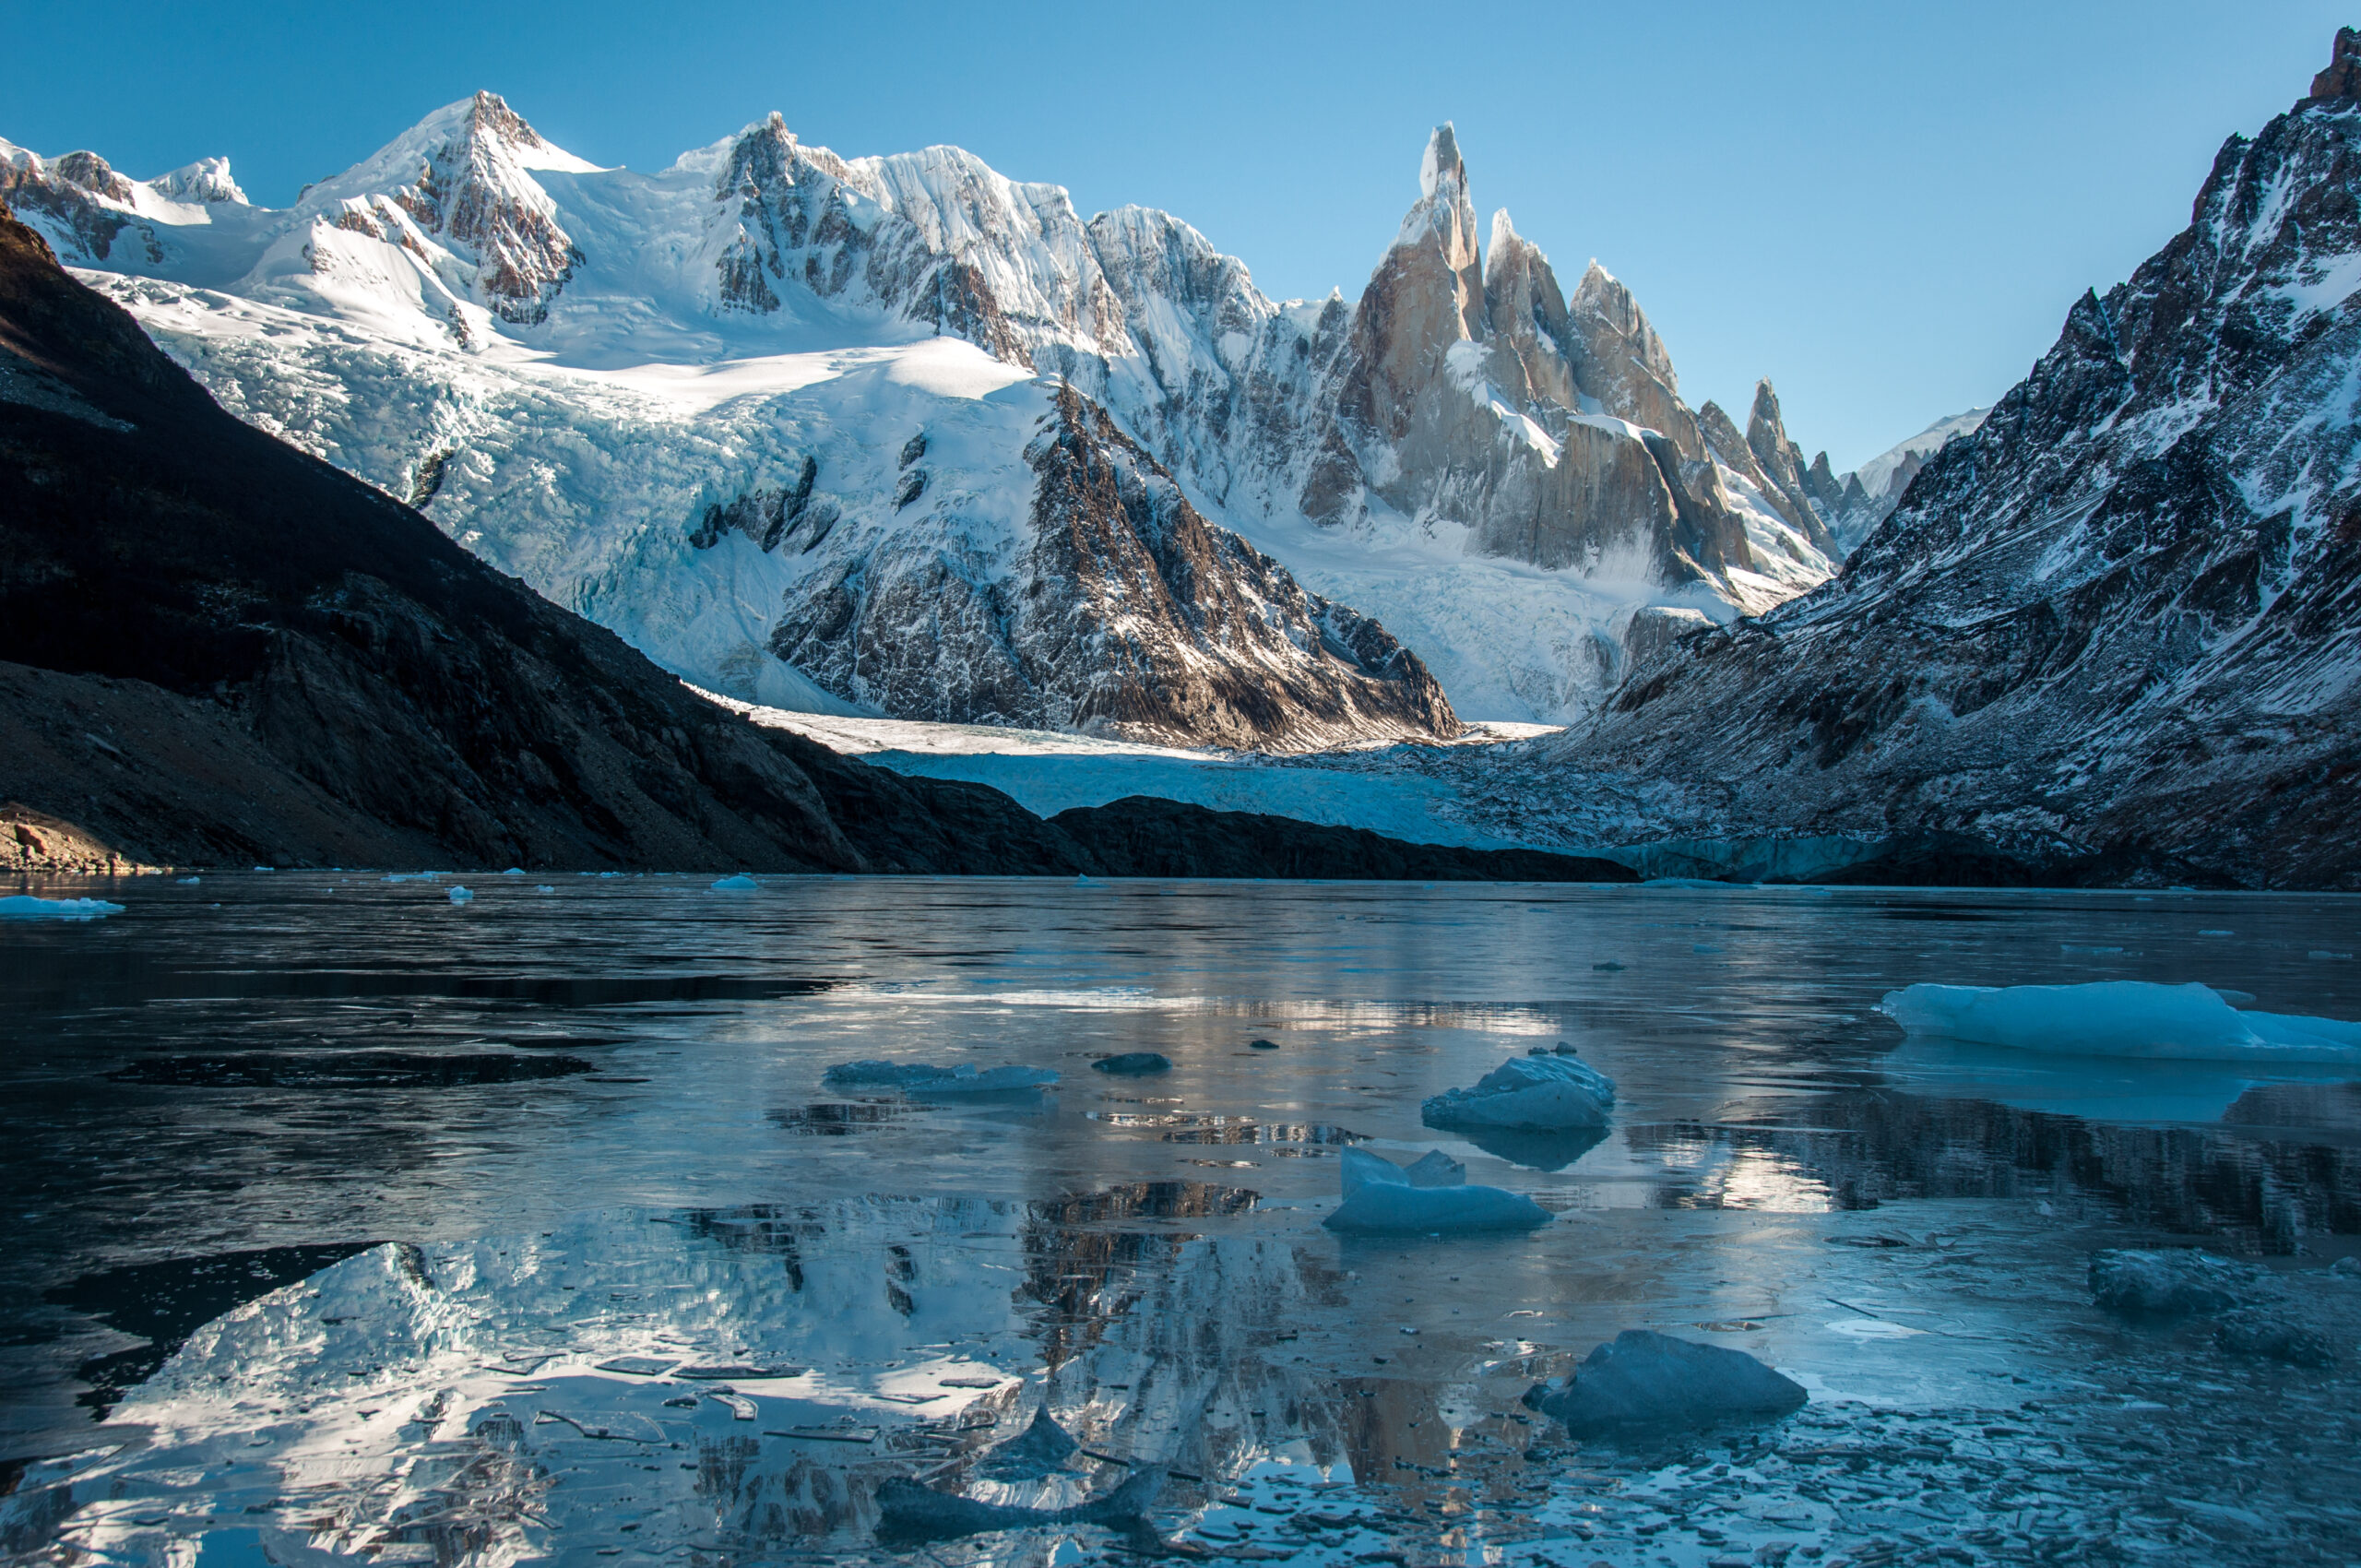
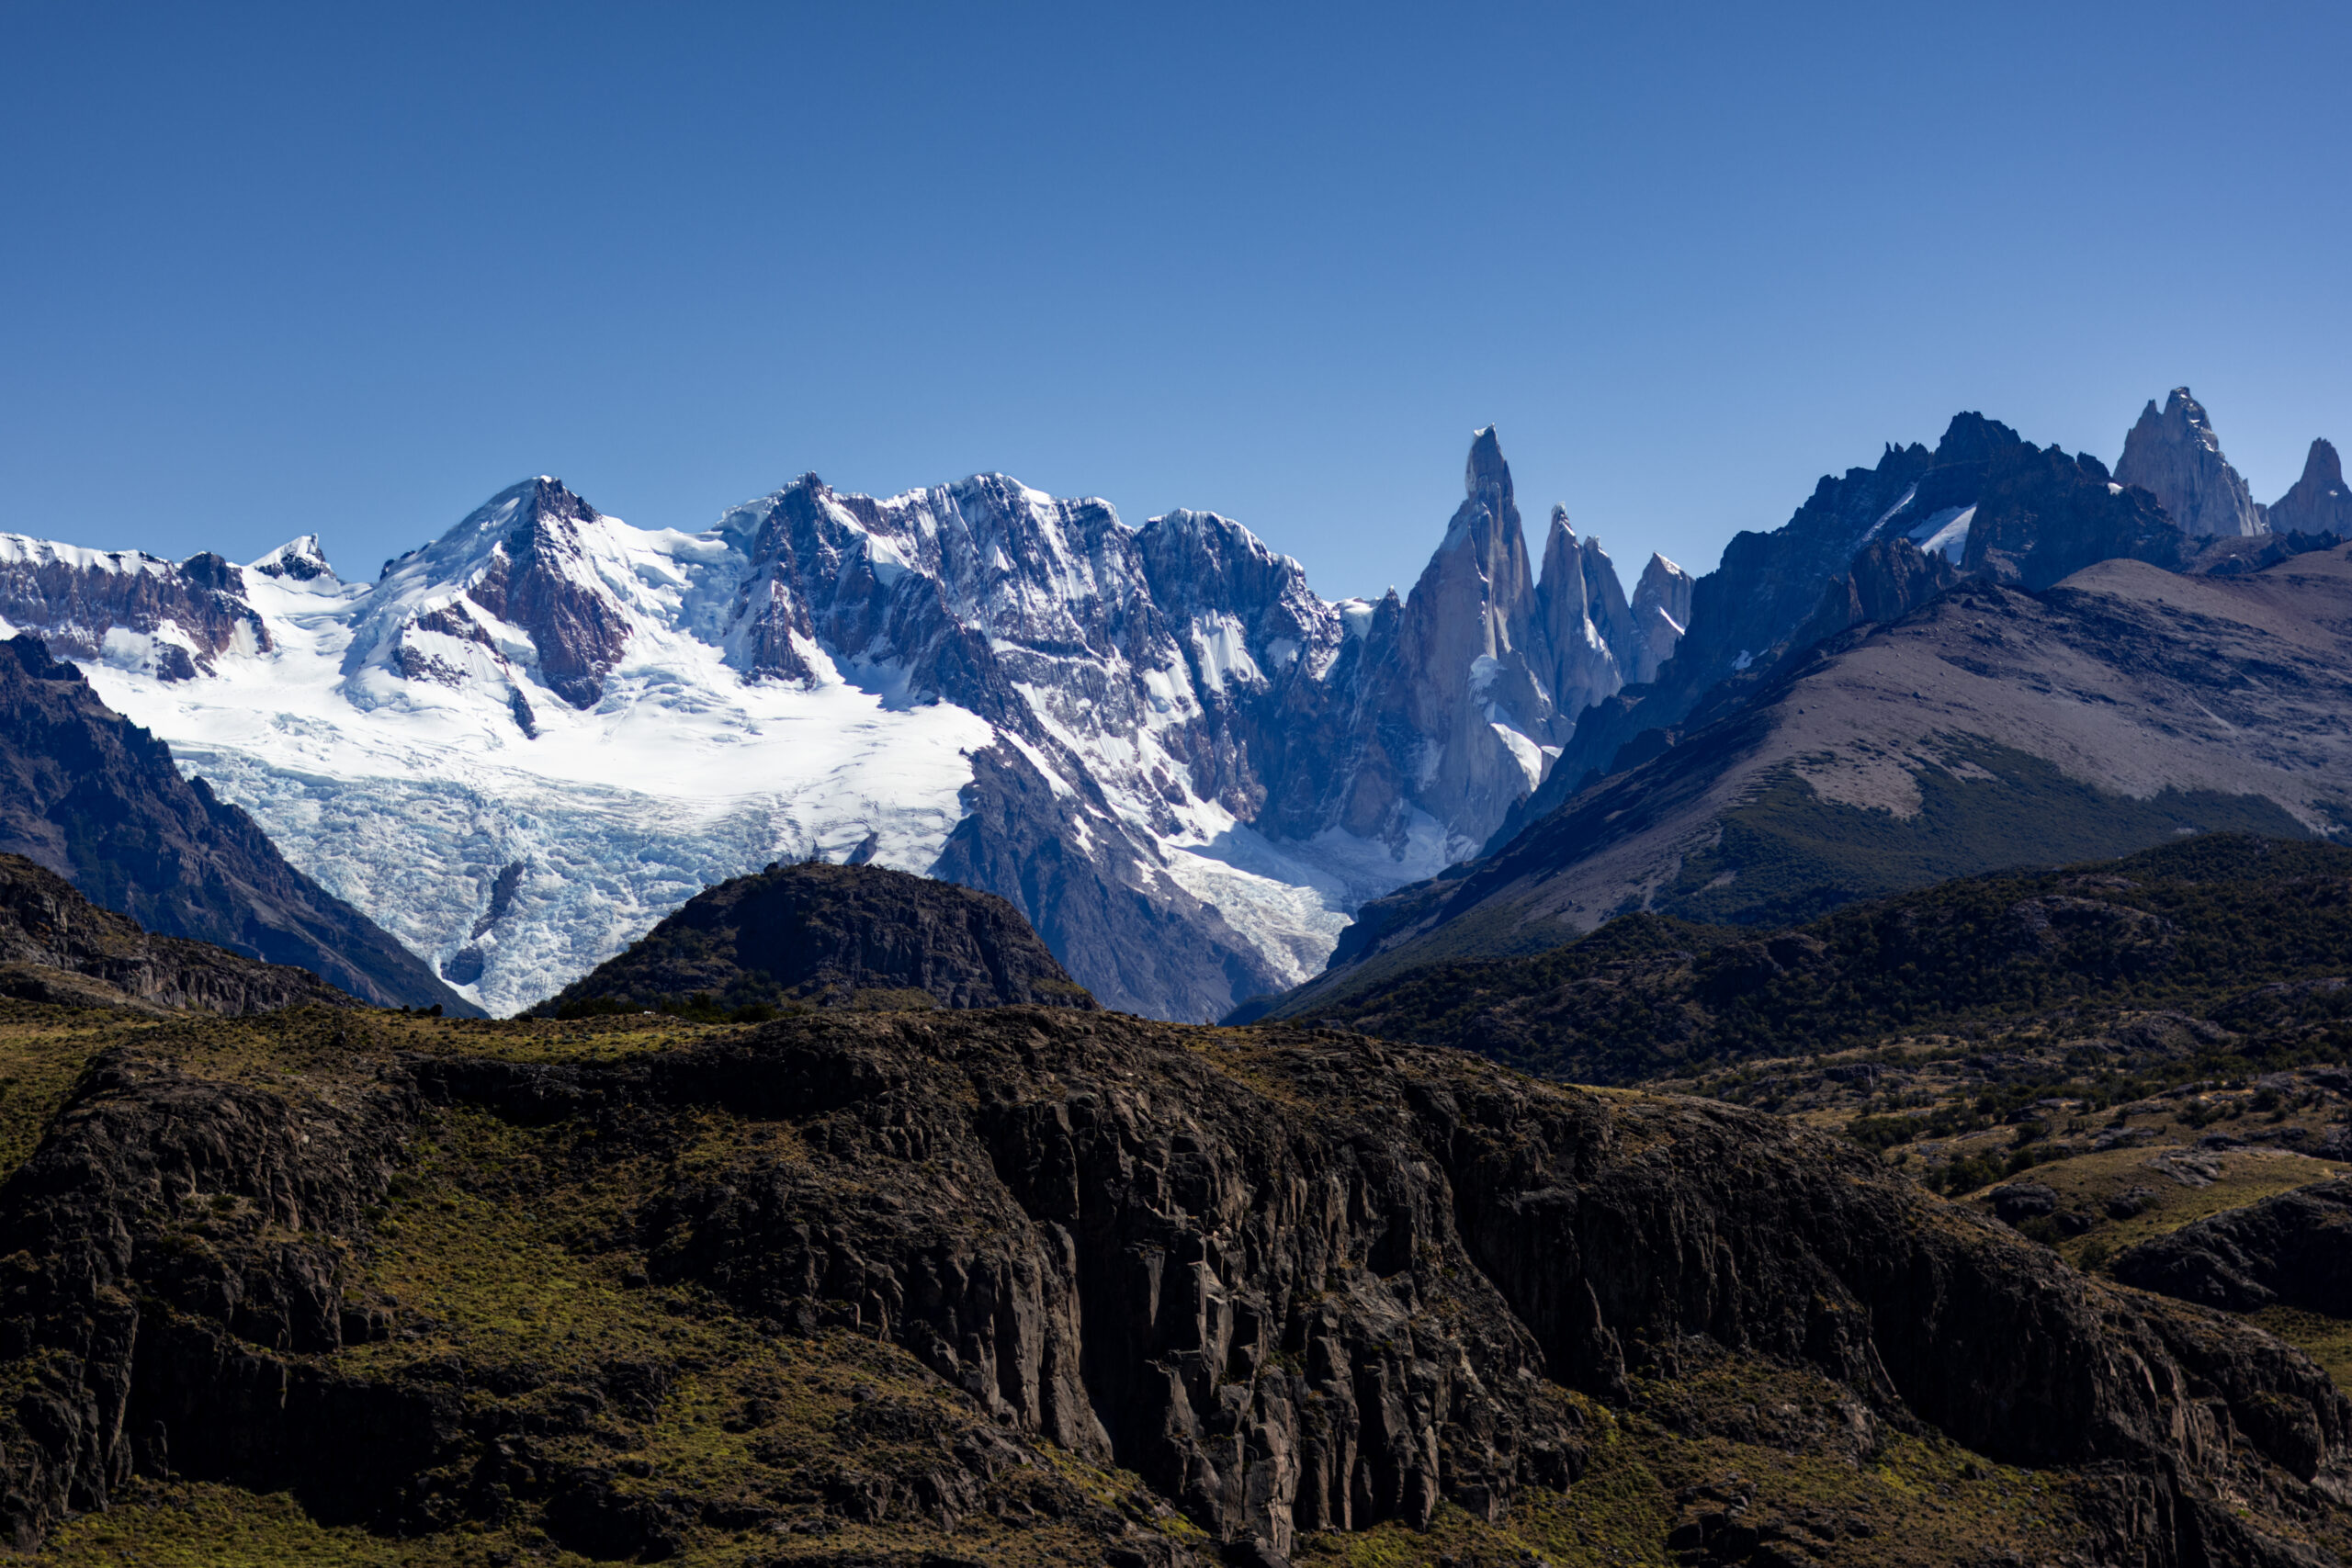
Cerro Torre Death Rate: How Deadly Is Patagonia’s Hardest Spire?
Barely 3,128 metres tall, yet one of the most feared mountains on Earth. Cerro Torre’s danger has nothing to do with altitude and everything to do with vertical granite, rime ice, and the worst weather in the inhabited world. Here’s the real death rate, what it means, and the deaths that built the legend.
By Travis Ludlow · Reviewed by Dawson Ludlow, Safety & Altitude
Published Jul 17, 2026 · Verified Jul 17, 2026 · ~8 min read
Editorial approach – research-based safety data: this page explains relative risk, not to sensationalise tragedy. Figures are drawn from Patagonian climbing records, alpine journals, and accident reporting, cross-checked against our death rates by mountain hub. Cerro Torre sees far fewer attempts than the 8,000ers, so its rate is a directional risk band, not an exact ratio.
The short answer
Around 6% per climber among serious attempts – extreme for a peak under 3,200 m.
Cerro Torre’s estimated fatality rate is roughly 6% per climber among serious attempts – far below the deadliest 8,000ers (Annapurna ~27-32%, K2 ~22-25%), but severe for its modest height. Its danger is technical, not altitudinal: vertical granite, rime ice, and ferocious weather.
The number works differently here than on commercial 8,000ers. Cerro Torre is an elite objective attempted by relatively few, where most attempts are turned back by storms rather than reaching the top – so read it as danger-per-attempt, not a death-to-summit ratio. For where it sits among all peaks, see our most dangerous mountains ranking.
3,128 mSummit (10,262 ft)
~6%Per-climber fatality (serious attempts)
1959First death (Toni Egger)
1974First undisputed ascent
Rime iceThe signature hazard
Fatality Snapshot
As of Jul 17, 2026 · directional risk band · few attempts, elite objective
On the 8,000ers, “death rate” almost always means deaths divided by successful summits. Cerro Torre can’t be measured that cleanly: it’s an elite technical objective climbed by comparatively few people, and on any given expedition most attempts are turned back by weather without reaching the summit. So its estimated ~6% per-climber fatality rate among serious attempts is best read as danger-per-attempt. That’s low next to Annapurna or K2 – but for a peak barely 3,128 m high, it reflects just how unforgiving the climbing is.
Why it’s so dangerous
Everything hard about mountaineering, minus the altitude.
Cerro Torre rises as a near-vertical granite spire straight out of the Southern Patagonian Ice Field, and its danger is a stack of technical hazards rather than thin air:
Hazard
Why it kills
Rime ice
Fragile, feathery ice mushrooms cap the spire; climbers must tunnel through unstable, unprotectable rime
Patagonian weather
Among the fiercest on Earth – violent storms arrive fast, and windows are measured in hours
Vertical granite
Sustained hard rock and mixed climbing where a fall is typically fatal
Rockfall
Warming has increased rockfall on some sections – a factor in recent deaths
No rescue
Remote, committing terrain; if a storm traps you high, there is often no safe retreat and no help
The tiny-window trap. More than almost any mountain, Cerro Torre punishes impatience. Climbers wait days or weeks for a narrow good-weather window, then move fast and commit – and a window that closes early can leave a party high on the spire in a full Patagonian storm. That combination of extreme difficulty and unforgiving weather is exactly what the death rate is measuring.
The signature hazard. The summit mushrooms of Cerro Torre – unstable, feathery rime ice that can’t be reliably protected – are the crux and the reason the mountain resisted an undisputed ascent until 1974. Terrain like this is why a slip here is rarely survivable.
The deaths that defined it
From the disputed first ascent to a modern tragedy.
Cerro Torre’s reputation was forged in controversy and loss. In 1959, Cesare Maestri claimed the first ascent with Austrian climber Toni Egger – but Egger was swept to his death on the descent, taking the only camera and with it the proof. When later expeditions failed to repeat the line and brought further deaths, doubt hardened into one of climbing’s most famous disputes; the first undisputed ascent came only in 1974, by Casimiro Ferrari’s Ragni di Lecco team via the west face. Decades later, in 2022, the accomplished alpinist Korra Pesce was struck by rockfall while descending and died – a reminder that even for the world’s best, the mountain’s margins are razor-thin.
Cerro Torre vs the 8000ers
A different kind of deadly.
Comparing Cerro Torre’s rate to an 8,000er’s is almost comparing two different sports. The great Himalayan and Karakoram killers – Annapurna, K2, Nanga Parbat – are lethal through a mix of extreme altitude and objective hazard on expeditions that many attempt. Cerro Torre is lethal through pure technical difficulty and weather on a peak few can even seriously try. It’s why it appears near the top of every “hardest mountain” list but well down the fatality-rate table.
Deadly through difficulty
Cerro Torre
~6% per attempt · technical climbing + Patagonian weather, not altitude.
Deadly through altitude & hazard
Annapurna / K2
~22-32% death-to-summit · thin air, avalanche, serac on commercial expeditions.
The modern fatality rate is dramatically lower than during the 1959-1980s era. Better equipment, vastly improved forecasting, refined technique, and accumulated route knowledge have all cut the risk for skilled parties who wait for the right window. But the mountain hasn’t changed: the rime, the storms, and the exposure remain, and warming has increased rockfall on some sections. Cerro Torre rewards experience and patience – and still humbles the best climbers alive.
Planning a Patagonia trip? Compare flights and lodging via the Global Summit Guide Expedia travel shop. Disclosure: affiliate link; we may earn a small commission at no extra cost to you, and it never affects our reporting.
Cerro Torre death rate FAQ
The questions people search right after “cerro torre death rate.”
What is Cerro Torre’s death rate?
Roughly 6% per climber among serious attempts – far below Annapurna (~27-32%) or K2 (~22-25%), but extreme for a 3,128 m peak. It’s danger-per-attempt, not death-to-summit, since most attempts are turned back by weather. The modern rate is far lower than the 1959-1980s era.
Why is it so dangerous under 3,200 m?
Its danger is technical and weather-driven, not altitude: vertical granite, fragile rime ice, violent Patagonian storms, rockfall, and no rescue. A fall on this terrain is typically fatal.
How many have died on it?
There’s no official tally as for the 8,000ers, but deaths have accumulated since the first-ascent era. The most famous is Toni Egger (1959); more recently, Korra Pesce died in 2022 from rockfall on the descent.
Is it the deadliest mountain?
No – by rate it’s well below the deadliest 8,000ers, and Mont Blanc has a far higher total toll. It’s among the most feared for difficulty, not for topping the death charts. See most dangerous mountains.
Has it become safer?
Yes – modern gear, forecasting, and technique have cut the rate sharply since the 1980s. But the rime, storms, and exposure are unchanged, so it’s safer, not safe.
How we built this
Patagonian climbing records, alpine journals, and accident reporting for fatality context
First-ascent history (Maestri 1959 dispute; Ferrari / Ragni di Lecco 1974) for the historical record
GSG house estimate of ~6% per-climber fatality among serious attempts, cross-checked against the most-dangerous ranking
Presented as a directional risk band, since Cerro Torre sees far fewer attempts than the 8,000ers
Last updated: July 17, 2026. Next review: January 2027. Research-based safety data, not a record of personal ascents; figures are directional, not exact probabilities.
About the author
Travis Ludlow · Founder & Head of Research · Safety review: Dawson Ludlow
Travis leads research at Global Summit Guide, which maintains a safety-data hub covering fatality patterns across the world’s major peaks. This Cerro Torre page sits within that hub – a single-peak deep dive that points up to the cross-mountain ranking.
Autumn Himalaya 2026 Preview: The Season, Peaks & Permits
As the Karakoram season winds down, the Himalaya’s second act is coming into view. Post-monsoon autumn brings stable skies, quieter mountains, and a very different cast of peaks — Manaslu, Cho Oyu, Dhaulagiri, and the technical jewel Ama Dablam. Here’s what the autumn 2026 season looks like and how to plan for it.
Published Jul 17, 2026 · Last updated: Jul 17, 2026 · ~8 min read
Editorial approach – research-based season preview: compiled from the standard Himalayan season calendar, Nepal Department of Tourism permit structures, and operator reporting. This is a forward-looking preview and will be refreshed as autumn approaches; detailed fee tables live on our mountaineering permits & fees guide.
The season, in brief
Post-monsoon Sept–Nov: Manaslu leads the 8000ers, Ama Dablam owns the technical scene.
Autumn is Nepal’s second major season. The monsoon clears in late September, October delivers the most stable weather, and November turns cold and clear. Manaslu (8,163 m) is the autumn 8,000er of choice — now the season’s most popular expedition and a common Everest warm-up — while Ama Dablam (6,812 m) is the iconic November technical peak.
Cho Oyu and Dhaulagiri round out the 8,000m options. Permits vary sharply by peak and a licensed guide is mandatory in Nepal — the full fee-by-peak detail is in our permits & fees guide.
Sep–NovAutumn season
8,163 mManaslu (lead 8000er)
6,812 mAma Dablam (technical)
OctoberMost stable weather
2ndOf Nepal’s two seasons
Autumn 2026 Season Snapshot
As of Jul 17, 2026 · forward-looking · confirm permits before booking
The autumn season opens as the summer monsoon retreats, usually in late September, and runs through November. October is the sweet spot: the air is washed clean, skies are stable, and the peaks are in good condition. By November the weather stays clear but turns colder with shorter days — perfect for technical peaks like Ama Dablam, tougher for the big 8,000ers as winter approaches. It’s Nepal’s second climbing season, and for several peaks it’s the best one.
The peaks in play
A different cast from the spring Everest circus.
Peak
Height
Autumn role
Manaslu
8,163 m (8th)
The season’s headline 8,000er — most popular autumn expedition, common Everest prep
Cho Oyu
8,188 m (6th)
Traditional autumn 8,000er, mostly from the Tibet side (access can vary year to year)
Dhaulagiri
8,167 m (7th)
Serious, quieter, avalanche-exposed — a step up in commitment
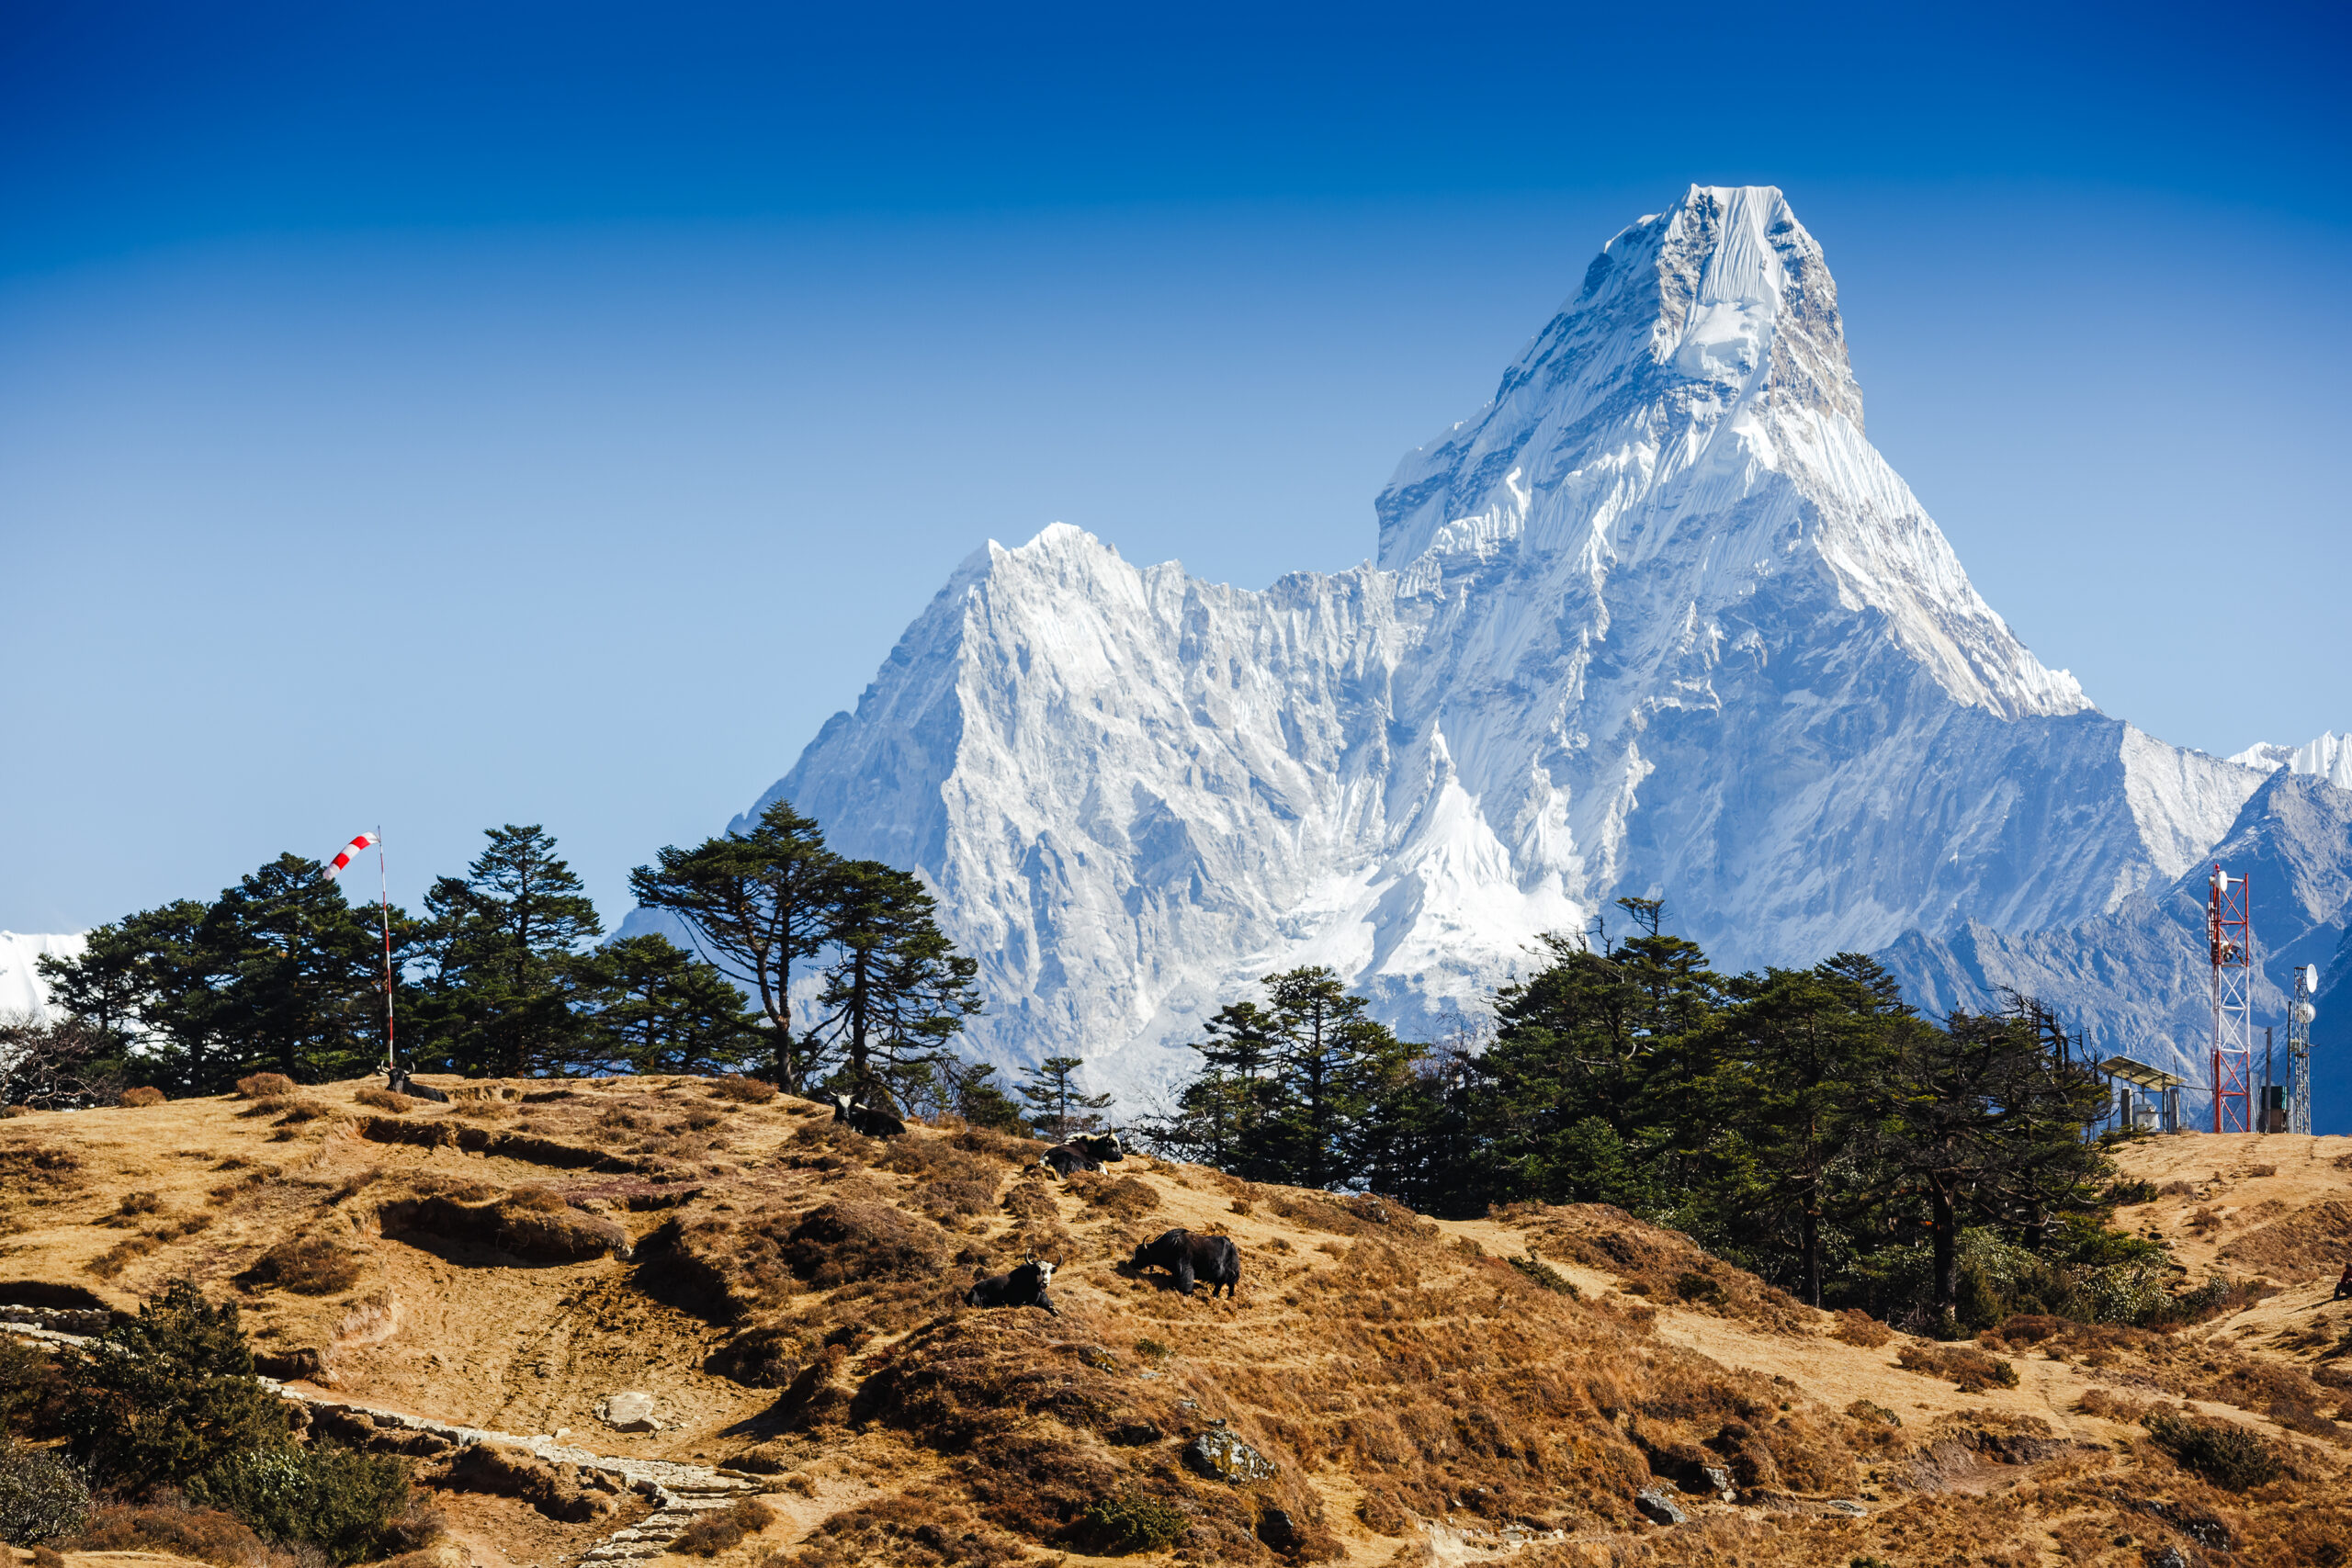
Ama Dablam
6,812 m
The technical jewel — “the Matterhorn of the Himalaya,” prime in November
Autumn Everest and Lhotse attempts do happen but are rare next to the spring season, when most of the commercial machine operates. If spring is about Everest, autumn is about Manaslu and Ama Dablam. See where these peaks rank in our 8,000ers ranked by difficulty and the full 14 eight-thousanders guide.
The autumn 8,000er. Manaslu (8,163 m) has become the most popular autumn expedition peak, widely used as an Everest warm-up. Its accessibility relative to Everest and K2 — and an autumn permit far cheaper than Everest’s — make it the anchor of the post-monsoon season.
Permits & costs
Wildly different by peak — and a guide is mandatory.
Autumn permit and cost planning is peak-specific. As a rough guide, expedition royalties run to roughly Cho Oyu ~$5,500, Manaslu ~$1,800, and Annapurna ~$3,600, with Everest at about $11,000 — all separate from guide, operator, and logistics costs. Since April 2023, Nepal has required a licensed local guide for foreign climbers, and major expedition peaks must be booked through registered operators.
Full fee breakdown lives on the permits page. These are headline figures for orientation only. For the complete, peak-by-peak permit and fee detail — including trekking-peak permits, conservation fees, and the guide rules — see our mountaineering permits & fees guide. Confirm current rates with your operator before booking.
What to watch in 2026
Three storylines heading into the season.
Storyline
Why it matters
Manaslu crowds
As the go-to Everest warm-up, Manaslu draws big autumn numbers — expect fixed-rope traffic and a busy Base Camp
Cho Oyu access
Cho Oyu is climbed mainly from Tibet; China-side access and permit conditions can shift year to year, so confirm early
Ama Dablam volume
November’s technical classic keeps growing in popularity — book huts, permits, and guides well ahead
This is a preview, not a live report. Published mid-July ahead of the season, this page previews what autumn 2026 is shaping up to be. Summit results, conditions, and any permit changes will firm up from September — we’ll refresh as the season opens. Always verify current permits, operator terms, and access with your operator before committing.
Planning your autumn climb
Book early, match the peak to your experience.
Autumn’s popularity means the best operators, guides, and Ama Dablam permits go early — plan several months out. Match the objective honestly to your experience: Manaslu is an accessible-but-serious 8,000er and a logical Everest stepping stone; Ama Dablam is a genuine technical climb despite its lower height; Dhaulagiri is a step up in commitment and objective hazard. Whatever you choose, build the altitude and skills first.
Planning a Nepal trip? Compare flights and lodging via the Global Summit Guide Expedia travel shop. Disclosure: affiliate link; we may earn a small commission at no extra cost to you. Permits and guides are booked directly with registered Nepali operators.
Autumn Himalaya FAQ
The questions people search heading into the autumn season.
When is the autumn Himalaya season?
Roughly September to November, after the monsoon. October brings the most stable weather; November is colder and clearer. It’s Nepal’s second major season and prime time for Manaslu and Ama Dablam.
Which 8000ers are climbed in autumn?
Mainly Manaslu (the headline peak), Cho Oyu, and Dhaulagiri. Autumn Everest attempts are rare compared with spring. See our 8,000ers ranked by difficulty.
Why is Ama Dablam so popular in autumn?
At 6,812 m it offers serious, exposed technical climbing without 8,000m altitude, with November its prime window and stable weather above the Everest trekking route. It’s the season’s iconic technical objective.
How much do autumn permits cost?
By peak: roughly Cho Oyu ~$5,500, Manaslu ~$1,800, Annapurna ~$3,600, Everest ~$11,000 — plus guide and logistics. Full detail in our permits & fees guide.
Is autumn better than spring?
Different. Spring is the main 8,000m and Everest season; autumn is more stable early, quieter, and ideal for Manaslu and Ama Dablam, but colder heading into winter.
How we built this preview
The standard Himalayan season calendar (post-monsoon timing and weather patterns)
Nepal Department of Tourism permit structures and the April 2023 guide requirement
Operator reporting on autumn peak popularity and typical itineraries
Forward-looking preview — to be refreshed with conditions and results from September
Last updated: July 17, 2026. Next update: season open (September 2026). A planning preview, not a live conditions report — verify permits and access with your operator.
About the author
Travis Ludlow · Founder & Head of Research · Research: Walker Ludlow
Travis leads research at Global Summit Guide, tracking the world’s climbing seasons across the year. This autumn preview complements our live Karakoram summer dispatches — as one season closes, it points you toward the next.
Mount Fuji Climbing Season Is Open: 2026 Trail Status & Crowds
Japan’s highest peak is open for the summer — and 2026 brings a stricter, pricier, more organised mountain. Here’s which trails are running right now, the new rules that govern every climber, and exactly how to time your ascent to dodge the crowds.
By Travis Ludlow · Founder & Head of Research · Safety review: Taylor Ludlow, RN
Published July 15, 2026 · Last updated: July 15, 2026 · Reading time 7 minutes
Editorial approach: LIVE SEASON DISPATCH. Compiled from the official Mt. Fuji climbing portal (fujisan-climb.jp), the Yamanashi and Shizuoka prefectural governments, and the FUJI NAVI system, cross-checked against our evergreen Fuji guides. Rules, fees, and gate hours change between and within seasons — always confirm the current status on the official portal before you travel.
Season status · Jul 15, 2026
Mount Fuji is open — all four trails are now running. The Yoshida and Subashiri trails opened July 1; the Fujinomiya and Gotemba trails and the summit crater-rim walk opened July 10. Every route stays open until September 10.
Right now, in mid-July, you’re in a sweet spot: the trails are fully open but the Japanese school-holiday surge (from about July 20) hasn’t hit yet. A weekday climb this week means fewer crowds and better hut availability than almost any other time in the season — if you’ve handled the new fee, reservation, and gate rules below.
This is a live dispatch. Trail status can change with weather or typhoons; confirm the latest on the official Mt. Fuji portal before you go.
📌 This is the season-status update — the deep guides are one click awayThis page covers what’s happening this season. For the full trail-by-trail breakdown, itineraries, and costs, see our Mount Fuji routes guide; and for summit wind, typhoons, and timing, our Mount Fuji weather & best season guide.
All four — but they opened on two different dates.
Fuji has four official trails, each from its own 5th Station, and in 2026 they opened in two waves. All close together on September 10.
Trail
Side · 5th Station
2026 open date
Character
Yoshida
Yamanashi · 2,305 m
July 1
Most popular (~60%), most huts, easiest from Tokyo — and busiest
Subashiri
Shizuoka · 2,000 m
July 1
Forested, quieter; famous “sand run” descent; merges with Yoshida up high
Fujinomiya
Shizuoka · 2,400 m
July 10
Shortest but steepest; shared ascent/descent path
Gotemba
Shizuoka · 1,450 m
July 10
Longest and quietest; for fit, experienced hikers
The new 2026 rules
Fuji is now a gated, fee-paying, reservation-based mountain.
The days of just showing up and walking to the summit are over. The overtourism rules first rolled out in 2024 are now unified across all four trails, and they shape every part of your plan.
Rule
2026 detail
Hiking fee
¥4,000 (~US$27) per person on all four trails — doubled from the original ¥2,000 and now uniform
Gate hours
Gates close 2:00 PM–3:00 AM; no entry in that window unless you hold a mountain-hut reservation
Yoshida cap
4,000 climbers/day (~3,000 advance + ~1,000 same-day); book at fujisan-climb.jp
Shizuoka trails
Pre-register via the FUJI NAVI app + complete a short safety e-learning module for a QR code
Bullet climbing
Effectively banned — the 2 PM gate closure stops the overnight straight-to-summit push
Gear check
Rangers may inspect packs; proper boots, rain gear, and cold-weather clothing are required to pass
Book in the right orderThe trail fee is separate from your mountain-hut booking — and the hut is what lets you pass the 2 PM gate for a sunrise climb. Huts for 2026 opened between April and June and popular 8th-station huts sell out fast, with Obon week already gone. Sequence it: book the hut first, then the trail slot, then the bus.
Beating the crowds
When you climb matters as much as which trail you pick.
Fuji’s crowds are famous — queues form near the summit before dawn on busy days. The season has a clear rhythm, and timing your climb around it is the single biggest lever you control.
Window
Crowds
Verdict
Early–mid July weekdays
Lightest
Best crowd-to-access balance — where we are now. Weather can be less settled.
~July 20 – late Aug
Peak
School holidays; busiest of the season. Book everything far ahead.
Mid-August (Obon)
Maximum
The single busiest week — huts and slots sell out first. Avoid if you can.
Early September
Lighter
Quieter again — but watch the typhoon season ramping up.
The wildcard: weatherFuji’s exposed cone concentrates wind, and late summer overlaps Japan’s typhoon season — a system tracking toward Honshu can close every trail with 24–48 hours’ notice. Summit-rim winds of 40–60+ km/h are common even on clear-looking days. Plan a contingency day, and read summit wind (not valley) forecasts — our Fuji weather & best season guide explains how.
How to plan your climb
The safe, sunrise-friendly template — and where to get the detail.
Fuji (3,776 m) is a strenuous hike, not a technical climb — no ropes or ice axe, just well-marked volcanic gravel. What catches people is altitude (about 30% feel some altitude sickness), cold (near-freezing at the summit before dawn, even in August), and the crowds up high. The standard, safest plan is a two-day climb: up to a 7th- or 8th-station hut on day one, a pre-dawn push on day two to catch goraikō — the sunrise — from the rim.
Goraikō — “the arrival of light.” Watching the sun break over the sea of clouds from Fuji’s crater rim is, for many climbers, the whole point. A mountain-hut reservation is what makes it possible — it’s the only way past the 2 PM gate for a pre-dawn summit push.
Fuji is one of 500+ peaks in our mountain database — compare it and plan your next summit.
Frequently asked questions
Is Mount Fuji open right now?
Yes — the 2026 season is open. Yoshida and Subashiri opened July 1; Fujinomiya, Gotemba, and the crater rim opened July 10. All close September 10. Off-season climbing above the 5th stations is prohibited and dangerous.
How much does it cost in 2026?
A mandatory ¥4,000 (~$27) fee on all four trails, plus transport (~¥3,900 round-trip shuttle) and a hut stay (~¥10,000–17,600). Budget roughly ¥20,000–40,000 total. Full costs are in our routes guide.
Do I need a reservation?
Effectively yes. Yoshida is capped at 4,000/day (book at fujisan-climb.jp); the three Shizuoka trails need FUJI NAVI pre-registration plus a safety e-learning QR code. A hut booking is separate and essential for a sunrise climb.
When are the crowds worst?
The school holidays, ~July 20 to end of August, with mid-August Obon the busiest. Weekdays in early July or early September are the quietest. Mid-July weekdays — right now — are a sweet spot.
Can I do a one-day bullet climb?
No — the 2 PM–3 AM gate closure (unless you hold a hut reservation) effectively bans it. A two-day climb with a hut stay is the recommended, safer plan.
How hard is it?
A strenuous hike, not technical — no ropes or scrambling. The challenges are altitude (~30% feel it), cold (near-freezing summit at dawn), and wind (40–60+ km/h at the rim). A steady two-day pace manages all three.
How we track this
This dispatch is compiled from the official Mt. Fuji climbing portal (fujisan-climb.jp), the Yamanashi and Shizuoka prefectural governments, and the FUJI NAVI registration system, cross-checked against our evergreen Fuji guides. Open dates, fees, and gate rules are stated as published for 2026 and can change with weather or policy.
This is an educational planning aid, not the official source — always confirm the current trail status, reservations, and any closures on the official portal before you travel.
Travis Ludlow
Founder & Head of Research, Global Summit Guide
Travis leads research at Global Summit Guide, where the team tracks climbing seasons worldwide and maintains guides to more than 500 peaks, with safety content reviewed by Taylor Ludlow, RN. This Fuji dispatch is a live season update; for the full trail and weather detail, it points you to our evergreen Fuji guides.
The season’s open and the crowds haven’t peaked. Sort your fee, reservation, and hut, pick your trail, and stand above the clouds for the sunrise of a lifetime.
Karakoram Weather Window Explained: How Teams Time a Summit Push
On the 8,000ers of Pakistan, the whole season comes down to a handful of days. Here’s what opens that window, why it’s so short and unreliable, and how expedition teams read the sky to time a summit push on K2 and its neighbours.
Published July 15, 2026 · Last verified: July 15, 2026 · Reading time 8 minutes
Editorial approach: EXPLAINER. Compiled from meteorological analysis of Karakoram summer weather, expedition-forecasting practice, and historical summit records, with a current-season note. The mechanics here are evergreen; the live conditions below and in our season trackers change daily.
🌦️ The window, in brief
Every Karakoram 8,000m season hinges on one thing: a short, unreliable weather window in late July. Two giant weather systems — the retreating monsoon and the migrating jet stream — briefly align to drop the wind and precipitation over the peaks. Statistically, nearly all K2 summits fall between about July 20 and August 10, and the true window is often just a few days inside that.
Right now, in mid-July 2026, teams across K2, Broad Peak, and the Gasherbrums are doing exactly what this article describes: acclimatizing, pre-positioning, and watching the forecast. Follow the live picture in our K2 2026 tracker and Broad Peak & Gasherbrum dispatch.
The Karakoram sits further north and deeper inland than the Himalaya, which makes its climate more continental and more violent. For most of the year, the peaks are scoured by jet-stream winds — hurricane-force gusts that make the upper mountain unclimbable and drive off-season summit temperatures toward −60 °C. The season is defined by the brief period when those winds lift.
Two systems govern it. First, the South Asian monsoon: through June and July, warm, moist air drives north, bringing rain low and heavy snow high. Then, near the end of July, the polar jet stream migrates north and the monsoon slides north with it toward the Tibetan highlands, while the subtropical jet shifts well south of the Karakoram. For a short spell, the peaks are left in relative calm — lower wind, less precipitation, and “manageable” cold around −20 °C on the summit. That truce is the window.
When it opens
The last two weeks of July, give or take.
The best Karakoram climbing weather is typically the last two weeks of July, sometimes starting as early as mid-July and running into early August. It’s not a new discovery — the Italians made the first ascent of K2 on July 31, 1954, squarely inside it, and the pattern has held ever since. Statistically, nearly every K2 summit in history has landed between roughly July 20 and August 10.
Early–mid July
Monsoon still active — snow high, rain low. Teams trek in, acclimatize, and fix the lower route.
~July 20 onward
Jet stream lifts, monsoon retreats. The prime window opens — a few stable days at a time.
Into early August
Window can persist, but warming raises rockfall and instability. Later is riskier.
Why it’s short & unreliable
Two systems have to line up — and often don’t.
Because the window depends on two large systems briefly aligning, it’s fragile. If the monsoon lingers or the jet stream dips back, the window slams shut. The numbers are sobering: between 1986 and 2016, 39% of years — 12 of 30 — produced no K2 summits at all because the weather never cooperated in the back half of July. A whole season of effort can end without a single summit.
Why forecasts fail hereThe Karakoram is a forecaster’s nightmare: remote, high, and crowded with giant peaks that spin up local wind tunnels and microclimates — including the notorious localized “K2 cloud” that can trap climbers in the high camps. Global models struggle at this altitude and resolution, so forecasts several days out are frequently wrong. Teams buy specialist high-altitude forecasts and still treat any window as provisional until it actually arrives.
The trail-breaking problem. A window in the sky isn’t enough — someone still has to open the route. After heavy monsoon snow, rope-fixers must break trail through deep snow above the high camps before anyone can push to the top, which can eat the first day or two of a precious window.
How teams time a push
Acclimatize early, wait, then move fast.
The choreography is remarkably consistent across the Karakoram’s big peaks:
1 · Acclimatize
Complete rotations to the high camps early in the season, sleeping progressively higher to adapt — done before the window, not during it.
2 · Pre-position & watch
Return to Base Camp, rest, and monitor multi-model forecasts, waiting for a stable multi-day window to appear.
3 · Fix the route
Rope-fixers break trail and fix lines through the upper mountain — the deep-snow section above the high camps is the crux of opening the route.
4 · The push
When the window and the fixed route align, teams move fast to the high camps and launch a night-time summit bid, aiming to top out in the morning and descend before it closes.
Who the window punishes mostAs on Everest, the climbers with the least margin are those going without supplemental oxygen. They benefit from fixed ropes and a broken trail, but they must move fast and avoid the traffic jams that form when everyone launches into the same narrow window — lingering high and cold without oxygen is how no-O2 attempts turn dangerous. It’s one reason the compressed, single-window nature of the Karakoram season carries real risk. See where these peaks rank in our 8,000ers ranked by difficulty.
Live Karakoram conditions
The window, in real time — watch it build or break.
Here’s the concept in action. The 7-day outlook below is modelled data for the K2 region — a general indicator, not a summit-day forecast (teams pay for specialist high-altitude models before committing). Watch for a run of calm, dry days: that’s the shape of a window forming.
K2 region (~Base Camp, Karakoram)
Loading live data…
Fetching the latest forecast…
Live forecast unavailable right now — fitting for a region this remote. Watch for a run of calm, dry days in the back half of July: that’s the shape of a summit window.
A general indicator only. This is modelled data near Base Camp altitude; the 8,000m summits are colder and far windier. The window is defined at the summit, not the valley — which is exactly why teams pay for specialist high-altitude forecasts.
Reading the window yourself
What experienced climbers actually watch.
You don’t need to be a meteorologist, but you do need to know what matters. On the 8,000ers, the two variables that define a window are summit-altitude wind (ideally dropping below ~30–40 km/h) and precipitation (none, ideally, with settled snow). Temperature matters less than wind — it’s the wind that kills. Climbers cross-reference several models rather than trusting one, and treat a forecast more than three or four days out as a rough guide, not a promise.
Roughly the last two weeks of July into early August — statistically nearly all K2 summits fall between about July 20 and August 10, opened by the monsoon retreating and the jet stream migrating north.
Why is the window so short?
It depends on two big systems briefly aligning. When the monsoon slides north and the jet stream lifts off the peaks, wind and precipitation drop; when either shifts back, the window closes — often after just a few days.
Why are forecasts unreliable?
The Karakoram is remote, high, and full of giant peaks that create local wind tunnels and microclimates like the “K2 cloud.” Global models struggle at this resolution, so multi-day forecasts are often wrong. See mountain weather for climbers.
How do climbers time a push?
Acclimatize early, then wait at Base Camp for a stable multi-day window with the route fixed high, then move fast to the high camps for a night-time summit bid — topping out in the morning and descending before it closes.
How cold is it in the window?
Around −20 °C on the summit — harsh but survivable — versus about −60 °C off-season, when jet-stream winds make the peak unclimbable.
About this explainer
The mechanics here — the monsoon and jet-stream interaction, the late-July window, and the historical summit statistics — are drawn from meteorological analysis of Karakoram summer weather and long-run summit records, and are evergreen. The current-season notes and the live widget reflect conditions as they change; for the day-to-day picture, follow our season trackers.
This is an educational overview, not operational guidance. Real summit-push decisions rely on specialist high-altitude forecasts and experienced judgment on the ground.
Travis Ludlow
Founder & Head of Research, Global Summit Guide
Travis leads research at Global Summit Guide, where the team tracks the world’s major climbing seasons and maintains guides to more than 500 peaks. This explainer sits alongside our live Karakoram dispatches — the theory here, the day-to-day reality there.
Antarctic history · Ellsworth Mountains · Polar exploration
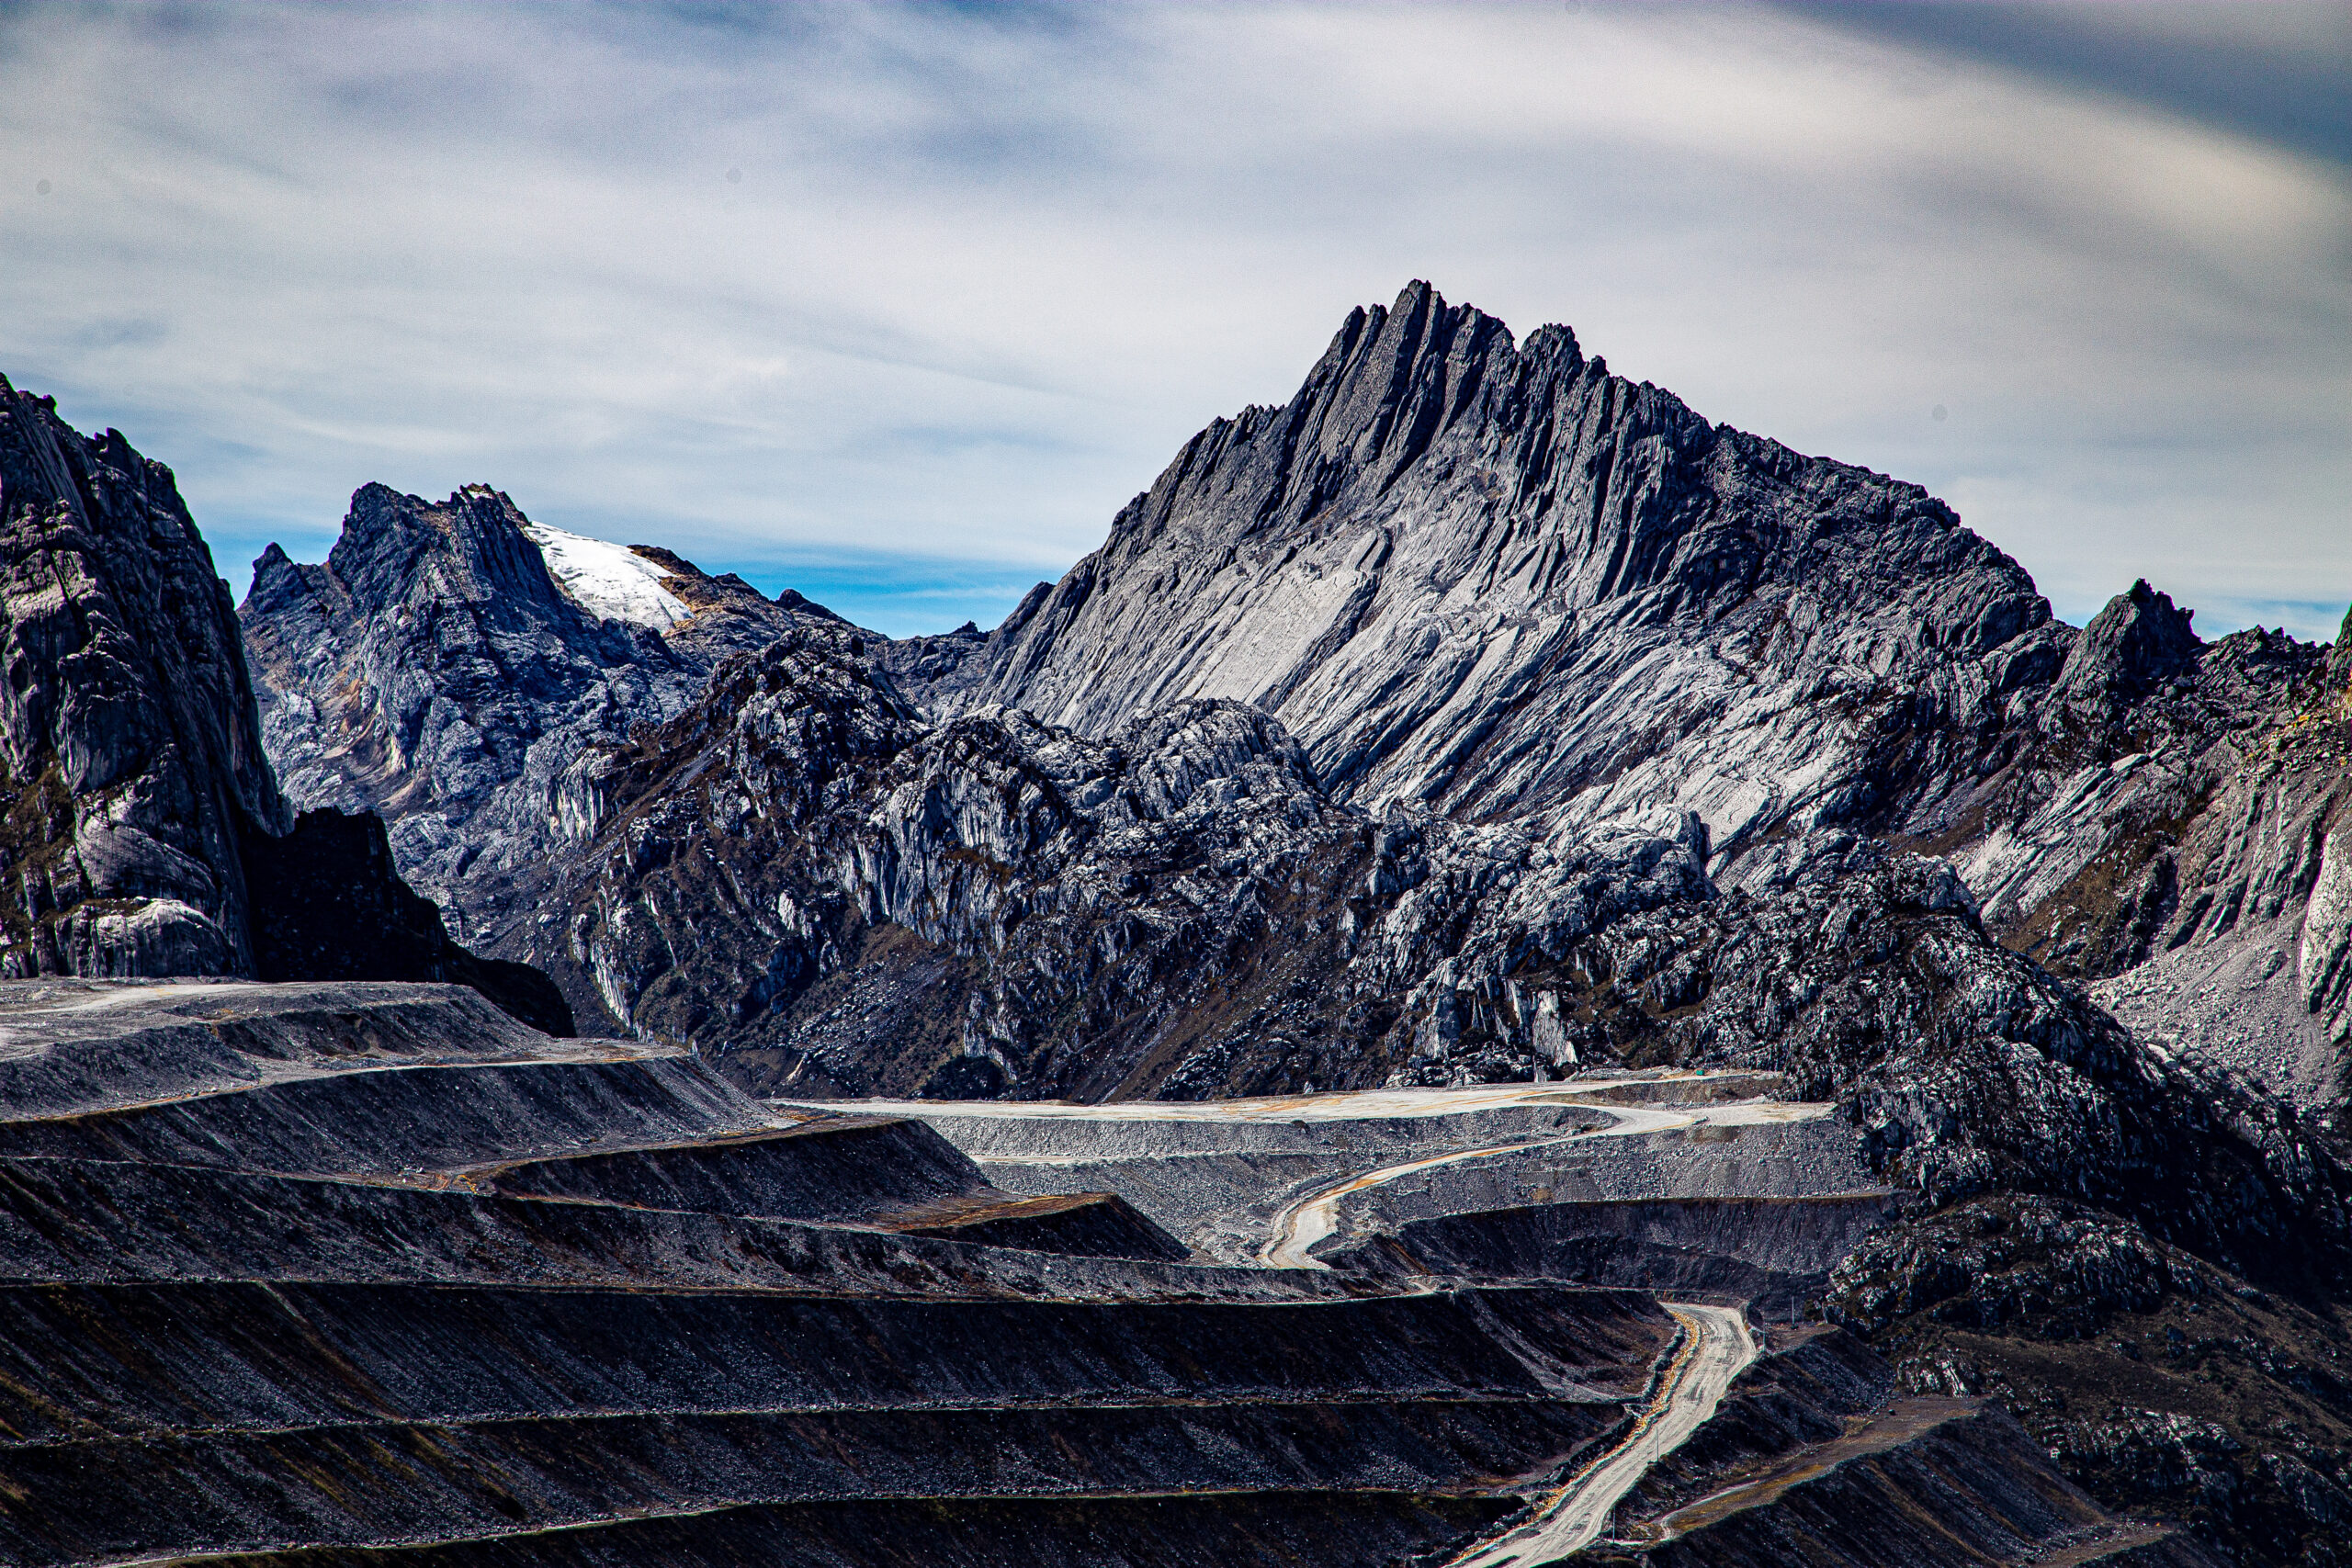
The History of the Sentinel Range: Antarctic Exploration and the First Ascent of Mount Vinson
For most of recorded history, one of Earth’s greatest mountain ranges was absent from every map. The Sentinel Range entered human knowledge first as a distant line of peaks beneath an aircraft wing—and only three decades later as the setting for one of twentieth-century mountaineering’s most unusual first ascents.
Published July 14, 2026 · Historical verification: July 14, 2026
Editorial scope: This is a history and geography post—not a second Mount Vinson climbing guide. Discovery dates, early surveys, mapping milestones, naming history, and first-ascent details were checked against USGS research, the American Alpine Club, Antarctic place-name records, and established expedition histories.
The short history
The Sentinel Range was discovered from the air, understood from the ground, and opened by a ten-person expedition.
Lincoln Ellsworth saw and named the northern Sentinel Range on November 23, 1935 during a trans-Antarctic flight in the Polar Star. He did not appear to see the highest southern peaks. Those were identified through the International Geophysical Year era of aerial reconnaissance, oversnow travel, surveying, and photography in 1958–1959.
On December 18, 1966, Pete Schoening, Bill Long, Barry Corbet, and John Evans made the first ascent of Mount Vinson. The remaining six members of Nicholas Clinch’s American Antarctic Mountaineering Expedition followed on December 19 and 20. In a matter of weeks, the same expedition also made first ascents of other major Sentinel Range peaks.
1935Range discovered
1958Vinson identified
1959Aerial mapping
1966Vinson first ascent
4,892 mMount Vinson today
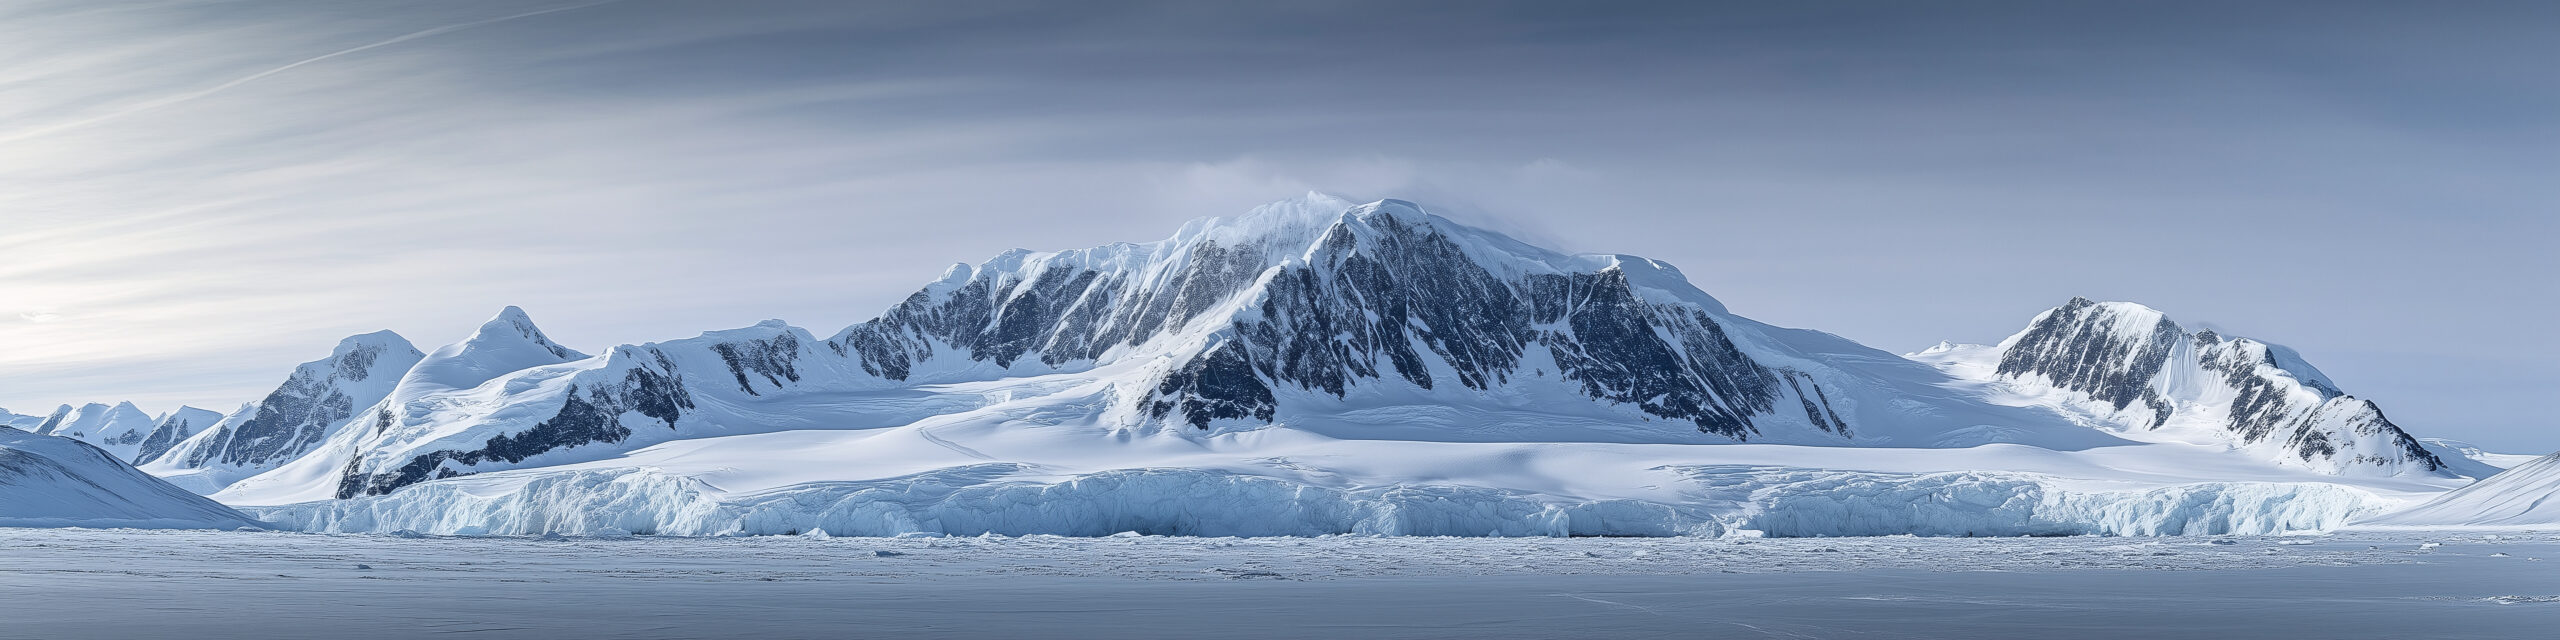
Geographic setting: The Sentinel Range forms the northern half of the Ellsworth Mountains in interior West Antarctica. The Heritage Range lies to the south, separated by the Minnesota Glacier.
The range remained unknown not because it was small, but because Antarctica was vast enough to hide it.
Standing beneath the Sentinel Range, it is hard to accept how recently these mountains entered recorded geography. The Alps had been crossed for trade and war for centuries. Surveyors had calculated the height of Everest in the nineteenth century. Expeditions had penetrated the Andes, Rockies, and Alaska Range. Yet a chain containing Antarctica’s highest mountain remained absent from maps until the 1930s.
The explanation is scale. Antarctica covers roughly 14 million square kilometers, and its interior is sealed behind the Southern Ocean, coastal ice, enormous glaciers, and an ice sheet that erases ordinary landmarks. The Sentinel Range lies in West Antarctica, far from the coastal routes followed by ships and far from the best-known sledging corridors of the Heroic Age.
Reaching the South Pole did not reveal every major feature of the continent. Roald Amundsen and Robert Falcon Scott approached the pole through different mountain gateways hundreds of kilometers from the Ellsworth Mountains. Ernest Shackleton’s proposed transcontinental line also belonged to another geographic problem. The interior was not one white room in which every feature could be seen. It was a continent large enough for entire mountain systems to remain beyond the horizon.
Why the name “Sentinel” fitsEllsworth’s name captured the impression of the peaks standing like guards above the ice. The northern range presents long walls, sharp summits, and isolated massifs rising abruptly from glacier systems. It looks less like a gradual upland than a line of stone sentries.
The airplane changed the map
Antarctic exploration moved from the pace of a dog team to the reach of an aircraft.
Before aviation, explorers learned Antarctica one hard mile at a time. Ships mapped coasts. Sledging parties crossed glaciers and plateaus. Surveyors fixed positions with instruments that depended on clear skies, stable observations, and patient calculation. Every new valley required weeks of travel and the transport of food, fuel, tents, and scientific equipment.
An aircraft did not remove Antarctic risk. Early polar flying introduced new forms of it: engine failure over terrain without landing fields, uncertain fuel calculations, primitive weather information, whiteout, and navigation across a nearly featureless surface. What aviation changed was perspective. From altitude, a crew could identify a mountain front, follow a glacier, photograph several ranges, and cross hundreds of kilometers before a ground party had moved camp.
The Sentinel Range belongs to that transition. It was not approached first by climbers or geologists. It was revealed through a cockpit window.
From blank map to climbing ground. Modern teams move through an environment that was unknown to outside geography until aerial exploration exposed the Ellsworth Mountains in the twentieth century.
Lincoln Ellsworth and the flight of the Polar Star
On November 23, 1935, a line of mountains appeared beneath one of polar aviation’s boldest crossings.
Lincoln Ellsworth
American explorer · polar aviator · geographic pioneer
Ellsworth had already participated in Arctic aviation with Roald Amundsen before turning his attention south. His Antarctic objective was not a sightseeing flight. He wanted to cross a large section of the continent, record new terrain, and prove that aircraft could transform polar geography.
Ellsworth and pilot Herbert Hollick-Kenyon departed Dundee Island near the Antarctic Peninsula in the single-engine Polar Star. Their intended trans-Antarctic flight aimed toward Admiral Richard Byrd’s Little America base on the Ross Ice Shelf. The journey was beset by uncertain weather, difficult navigation, forced landings, and eventually a loss of radio contact that made the outside world fear the men had disappeared.
During the flight on November 23, Ellsworth saw the northern part of the mountain system now called the Ellsworth Mountains. USGS historical research records that he named the Sentinel Range and several visible features, including Mount Lymburner, Polarstar Peak, Mount Ulmer, and Mount Wyatt Earp. The names preserved people and equipment connected to the expedition: his pilot, his aircraft, his wife, and his expedition ship.
The distinction matters: Ellsworth discovered the mountain system, but he apparently did not see its highest southern summits. Vinson Massif lies farther south in the Sentinel Range. The mountain that later became the continent’s highest known point would require another generation of exploration.
A correction to a common oversimplificationIt is often said that Lincoln Ellsworth “discovered Mount Vinson” in 1935. More precisely, he discovered and named the northern Sentinel Range. The Vinson area was identified during later U.S. aerial and ground-survey work in the International Geophysical Year period.
How the Ellsworth Mountains took shape on paper
First came isolated names. The full structure of the range emerged through later survey work.
The Ellsworth Mountains are now understood as two major segments: the Sentinel Range in the north and the Heritage Range in the south. The Minnesota Glacier separates them. That clean geographic description was not available to Ellsworth. From the air, through uncertain weather and limited time, he saw only part of a system whose dimensions, drainage, and highest points were still unknown.
Later cartographers honored Ellsworth by applying his name to the larger mountain system. The choice recognized more than a single sighting. His flight changed the geographic problem. What had been blank space became a range requiring photographs, ground observations, rock samples, elevations, and formal names.
Name
What it identifies
Historical origin
Ellsworth Mountains
The full West Antarctic mountain system
Named for Lincoln Ellsworth and his polar discoveries
Sentinel Range
The northern, higher segment
Named by Ellsworth after his 1935 flight
Heritage Range
The southern segment
Later mapped and named through U.S. Antarctic survey programs
Minnesota Glacier
The glacier separating the two segments
Named in connection with University of Minnesota geological work
Vinson Massif
The broad high massif containing Mount Vinson
Named for U.S. Representative Carl G. Vinson
The International Geophysical Year reaches the Ellsworth Mountains
The next chapter belonged to scientists, surveyors, Navy air crews, and oversnow traverses.
The International Geophysical Year of 1957–1958 brought an unprecedented concentration of scientific effort to Antarctica. Nations established stations, launched traverses, expanded aerial photography, measured ice, recorded weather and seismic activity, and turned enormous areas of uncertain geography into surveyable terrain.
On January 12, 1958, an oversnow traverse led by geophysicist Charles R. Bentley saw the Ellsworth Mountains. The party visited two outlying nunataks, collected rock samples, and established positions for major peaks through ground surveying. The encounter was important because the range was no longer only an aerial impression. Scientists had reached its margins and begun tying the visible peaks to measured ground control.
U.S. Navy aircraft also observed the high massif during this period. Vinson Massif was identified in January 1958, bringing the highest southern section of the Sentinel Range into formal geographic knowledge. Early elevation estimates changed as measurements improved, but the larger conclusion held: the Sentinel Range contained the highest ground in Antarctica.
Why ground control matteredAerial photographs can show shape and relative position, but accurate topographic maps require known points. Surveyors established positions and elevations on the ground so photogrammetrists could convert overlapping images into measurable terrain.
From trimetrogon photography to USGS maps
By the early 1960s, the mountains had moved from scattered observations to usable topographic sheets.
On December 14, 1959, U.S. Navy Squadron VX-6 photographed the Sentinel Range using trimetrogon aerial coverage. The system used three cameras: one pointing downward and two looking obliquely to either side. Together they captured broad terrain strips suited to mapping vast areas where ordinary ground survey networks were sparse.
Combined with subsequent field observations, these photographs produced a series of 1:250,000-scale U.S. Geological Survey maps. The Newcomer Glacier, Nimitz Glacier, and Vinson Massif sheets were published in 1962. Additional photography of the Heritage Range in 1962 supported later Liberty Hills and Union Glacier sheets.
Those maps changed what was possible. A mountain expedition could now discuss actual glaciers and passes rather than a vague white space. Geologists could design traverses. Pilots could relate landing possibilities to named terrain. Peaks could be compared, measured, and approached as part of a connected system.
Nov. 23, 1935
Lincoln Ellsworth discovers the northern Sentinel Range during the trans-Antarctic flight of the Polar Star.
Jan. 12, 1958
Charles Bentley’s IGY traverse sees the Ellsworth Mountains, visits outlying nunataks, collects rock, and establishes survey positions.
Jan. 1958
Vinson Massif is identified by U.S. aerial reconnaissance in the southern Sentinel Range.
Dec. 14, 1959
U.S. Navy VX-6 photographs the Sentinel Range with trimetrogon aerial coverage.
1961–1962
University of Minnesota geological fieldwork traverses much of the western Sentinel Range and parts of the Heritage Range.
1962
USGS topographic sheets are published for the Vinson Massif and neighboring glacier systems.
Dec. 18, 1966
The first four climbers reach Mount Vinson’s summit.
Vinson: from unnamed high ground to Antarctica’s summit
The continent’s highest peak was recognized only after the range itself had been surveyed.
Vinson Massif was named for Carl G. Vinson, the long-serving U.S. representative from Georgia who supported funding for American Antarctic research. The naming followed a common Antarctic pattern: remote geographic features often honored the public officials, scientists, military personnel, pilots, and field workers who made exploration possible.
For decades, “Vinson Massif” served as both the name of the broad mountain body and, informally, its highest point. Modern place-name usage distinguishes Mount Vinson, the 4,892-meter summit, from Vinson Massif, the larger elevated block around it. That distinction helps separate the precise summit from the whole mountain complex.
The elevation also evolved with measurement. Early figures were higher. Better surveying, satellite geodesy, and GPS work eventually established the accepted elevation of 4,892 meters (16,050 feet). The changing number is not evidence that the mountain shrank. It records the history of improving instruments.
A mountain can be “discovered” several timesFirst it is seen. Then it is photographed. Then its position is fixed. Then its height is measured. Then geologists interpret its rock. Then climbers find a route. Vinson passed through each stage within about three decades.
The American Antarctic Mountaineering Expedition of 1966–1967
Ten climbers arrived with Navy support, scientific objectives, and a plan larger than one summit.
By the early 1960s, Mount Vinson had become the obvious unclimbed prize of the continent. Two groups within the American Alpine Club began seeking support for an expedition. The efforts eventually merged, and Nicholas Clinch was selected to lead what became the American Antarctic Mountaineering Expedition, commonly abbreviated AAME.
The expedition was sponsored by the American Alpine Club and the National Geographic Society, with field support from the U.S. Navy and the National Science Foundation’s Antarctic program. That combination was essential. Private climbers could not simply book an aircraft into the Sentinel Range. The team depended on the polar aviation and logistics infrastructure of the U.S. Antarctic program.
The ten members were:
Expedition member
Role in the historical record
Nicholas Clinch
Expedition leader and organizer
Barry Corbet
First-ascent party; later first ascent of Mount Tyree with John Evans
John Evans
First-ascent party; geologist and later Mount Tyree first ascensionist
Eiichi Fukushima
Expedition climber; associated with the first ascent of Mount Shinn
Charles Hollister
Scientist and mountaineer
William “Bill” Long
First-ascent party
Brian Marts
Expedition mountaineer
Peter “Pete” Schoening
First-ascent party; renowned American climber
Samuel Silverstein
Physician and mountaineer
Richard Wahlstrom
Expedition mountaineer
The U.S. Navy transported the party first to McMurdo Station and then across the continent in a ski-equipped LC-130 Hercules. The aircraft delivered the team and its equipment into the Sentinel Range—a striking contrast with Ellsworth’s uncertain 1935 crossing. Aviation had progressed from discovery to sustained field support.
The expedition’s objectives extended beyond planting a flag on the highest summit. The team intended to climb several of the range’s major peaks, collect observations, and demonstrate what organized mountaineering could accomplish in the Antarctic interior.
December 18, 1966: the first ascent of Mount Vinson
The summit was reached not by the expedition leader alone, but by a four-man team moving through the range’s first established climbing campaign.
Pete Schoening, Bill Long, Barry Corbet, and John Evans reached the summit of Mount Vinson on December 18, 1966. The date places the ascent late in mountaineering history compared with the world’s other continental high points. Everest had been climbed in 1953. Denali’s first ascent dated to 1913. Aconcagua had been climbed in 1897. Vinson remained untouched until aircraft and institutional logistics made a serious attempt possible.
The remaining expedition members did not stop below. Three more reached the summit on December 19, and the final three followed on December 20. All ten members stood on Antarctica’s highest mountain.
The collective success says something about the expedition’s design. This was not a rushed dash by a small summit pair while others supported from below. It was a broad mountaineering program whose entire membership reached the primary objective.
The first summit teamPete Schoening, Bill Long, Barry Corbet, and John Evans—December 18, 1966. Nicholas Clinch led the expedition, but the first four summiters should be named individually when recounting the ascent.
The modern route, flight schedule, commercial camp structure, and equipment have changed profoundly. The historical meaning has not. The 1966 climbers proved that a major Antarctic range could support a sustained alpine expedition and that its highest summit was attainable through careful logistics and disciplined fieldwork.
More than Vinson: a season of first ascents
The expedition did not leave after the continental high point. It turned to the harder mountains around it.
The American Antarctic Mountaineering Expedition made first ascents of six of Antarctica’s highest peaks. That broader record is often overshadowed by Vinson’s Seven Summits status. In mountaineering terms, however, the neighboring objectives gave the expedition much of its depth.
Mount Shinn was climbed soon after Vinson. Mount Tyree—the second-highest mountain in Antarctica and a far more technical objective—was first climbed by John Evans and Barry Corbet in January 1967. Other summits added to an extraordinary season in which a team moved through a previously unclimbed high range and solved one route after another.
This is one reason the 1966–1967 expedition deserves to be remembered as more than “the Vinson trip.” It was the opening survey of Sentinel Range mountaineering.
Do not confuse elevation with difficultyMount Vinson became famous because it is the continental high point. Mount Tyree, only about 40 meters lower, is a much more serious technical climb. The first expedition’s move from Vinson to Tyree showed that its ambition extended beyond list completion.
Explore the range’s broader climbing geography in the Antarctic peaks collection, which includes Mount Tyree, Mount Shinn, Mount Gardner, Mount Epperly, and other objectives beyond Vinson.
What exploration revealed beneath the ice
The Sentinel Range was not only a climbing discovery. Its rocks preserved a record of vanished seas, moving continents, and ancient life.
Early geological teams found that the Ellsworth Mountains contain thick sequences of sedimentary and metamorphosed sedimentary rock. In the Vinson area, resistant quartz-rich sandstone and related rocks form steep ridges and summit crests. Fossils—including trilobites and younger Paleozoic material in the wider range—help geologists reconstruct environments that existed long before Antarctica became an ice-covered continent.
The range also carries evidence relevant to continental drift. The orientation and history of the Ellsworth Mountains have been studied as part of West Antarctica’s complicated tectonic development. Rocks now locked in polar ice formed under conditions radically different from the modern climate and were displaced as the southern continents assembled and separated.
For a climber, the landscape looks permanent: dark walls, blue ice, wind-carved snow. For a geologist, it is evidence of motion over hundreds of millions of years.
The mountain is younger as a human idea than as a landformVinson entered maps in the twentieth century, but its rocks preserve a history hundreds of millions of years old. “Discovery” marks the beginning of outside documentation, not the beginning of the mountain.
From state-supported exploration to modern expeditions
The infrastructure changed. The continent’s control over every journey did not.
After 1966, ascents remained rare because access was the dominant obstacle. The second ascent did not occur until years later. There was no regular commercial air bridge, no established Union Glacier camp, and no predictable schedule for private climbing teams.
The development of private Antarctic logistics in the 1980s changed that pattern. Aircraft, blue-ice runway operations, ski-plane transfers, field communications, environmental systems, and established base camps allowed guided expeditions to reach Vinson on a regular seasonal basis. The mountain became the Antarctic member of the Seven Summits circuit.
That modern access should not blur the historical sequence. Today’s climber stands on layers of work:
Discovery
Ellsworth’s aircraft reveals the northern range.
Survey
IGY traverses and Navy aircraft establish positions and collect photographs.
Mapping
USGS sheets turn photographs and ground control into usable topography.
Field science
Geologists traverse the range and interpret its rocks.
Mountaineering
The AAME makes the first ascents of Vinson and neighboring peaks.
Commercial access
Private polar aviation opens a regular seasonal path for modern climbers.
The complete modern planning process belongs in the canonical Mount Vinson climbing guide. That page covers flights, the Branscomb Shoulder route, camps, skills, weather, gear, cost, and safety. This post stops where that planning guide begins.
Why the Sentinel Range still matters
The history is not finished simply because the highest peak has a boot track.
The Sentinel Range remains important in three distinct ways.
It records the transformation of polar exploration
The range was discovered by an aircraft, mapped through military and scientific aviation, reached by oversnow traverses, and climbed with state-supported logistics. Its history compresses the twentieth-century evolution of Antarctic fieldwork into one place.
It is a geological archive
The exposed rock above the ice provides rare windows into West Antarctica’s deep history. Fossils, sedimentary layers, folds, and structural relationships help scientists reconstruct ancient environments and continental movement.
It remains a serious alpine range
Vinson is now a standardized guided objective, but the Sentinel Range is not “solved.” Peaks such as Tyree, Gardner, and Epperly retain technical seriousness, sparse visitation, and expedition-level consequences. Beyond the best-known lines, the range still holds the scale and remoteness that first defined it.
A range larger than one summit. Mount Vinson is the headline, but the Sentinel Range contains a dense concentration of Antarctica’s highest and most technically demanding peaks.
Frequently asked questions
Direct answers to the historical questions most often confused in short mountain summaries.
Who discovered the Sentinel Range?
Lincoln Ellsworth discovered the northern Sentinel Range on November 23, 1935, during his trans-Antarctic flight in the Polar Star. He named the range and several visible peaks.
Did Lincoln Ellsworth discover Mount Vinson?
Not in the precise sense. Ellsworth saw the northern Sentinel Range but apparently did not see the highest southern massifs. Vinson was identified through U.S. aerial and survey work during the International Geophysical Year era in 1958.
When was the Sentinel Range first visited on the ground?
An IGY oversnow traverse led by Charles R. Bentley reached outlying features of the Ellsworth Mountains in January 1958, collected rock samples, and established survey positions. Later geological teams worked extensively in the range.
Who made the first ascent of Mount Vinson?
Pete Schoening, Bill Long, Barry Corbet, and John Evans reached the summit on December 18, 1966. They were members of the ten-person American Antarctic Mountaineering Expedition led by Nicholas Clinch. Every expedition member summited by December 20.
Why is the mountain named Vinson?
Vinson Massif was named for U.S. Representative Carl G. Vinson of Georgia, who supported funding for American Antarctic research and exploration.
Why are the Ellsworth Mountains divided into two ranges?
The Sentinel Range forms the northern and higher segment, while the Heritage Range lies to the south. The Minnesota Glacier separates the two.
Was Vinson the only mountain climbed by the 1966 expedition?
No. The expedition made first ascents of six major Antarctic peaks, including Mount Vinson. Its members also opened important routes on neighboring mountains such as Mount Shinn and Mount Tyree.
Why was Mount Vinson climbed so late?
Access, not lack of climbing ability, was the central barrier. The mountain is deep in the Antarctic interior. A serious attempt required accurate maps, long-range ski aircraft, polar logistics, communications, and institutional support.
The chronology was checked against the USGS paper Craddock Massif and Vinson Massif Remeasured, which summarizes the discovery of the Ellsworth Mountains, the 1958 traverse, 1959 aerial photography, subsequent mapping, and early scientific work. The 1966 expedition roster and six-peak first-ascent record were checked against the American Alpine Club’s historical exhibit. First-ascent details were cross-checked with Antarctic Logistics & Expeditions and established expedition histories.
Primary and institutional references: U.S. Geological Survey; American Alpine Club; U.S. Antarctic place-name records; Antarctic Logistics & Expeditions; International Association of Antarctica Tour Operators.
Historical names and elevations can change as naming authorities refine definitions and survey technology improves. This article distinguishes Mount Vinson from Vinson Massif and uses the accepted modern elevation of 4,892 meters.
Why we wrote this guide
Mountains are more useful when they are understood as places rather than products. The Sentinel Range cannot be reduced to an expedition price and a summit itinerary. Its story belongs to pilots, surveyors, scientists, mapmakers, military air crews, and climbers who worked in sequence to reveal a range that had been invisible to the outside world. This post preserves that history while the separate Mount Vinson guide handles practical expedition planning.
Travis Ludlow
Founder & Head of Research, Global Summit Guide
Travis develops research-based mountain resources from Nephi, Utah. Global Summit Guide separates history, geography, route planning, equipment, cost, and operator selection into distinct articles so each page can answer one job thoroughly without repeating the same mountain overview.
Ready to move from history to expedition planning?
Follow the Sentinel Range story into the complete Mount Vinson guide, where modern aviation, camps, the standard route, weather, skills, equipment, cost, and safety are covered in detail.
The Killer Mountain opens Pakistan’s 8,000m season, and 2026 delivered the summer’s first summit, a rare 14×8000er completion, and an age record — all on a quiet, hot Diamir side. Here’s how the season played out on the world’s ninth-highest peak.
Published July 11, 2026 · Last updated: July 11, 2026 · Reading time 7 minutes
Editorial approach: LIVE SEASON WRAP. Compiled from expedition dispatches, operator statements (Seven Summit Treks, 8K Expeditions, Imagine Nepal), the Alpine Club of Pakistan, and specialist coverage (ExplorersWeb), cross-checked against the standard Karakoram calendar. Early-season tallies evolve; named summits are those confirmed by operators or reliable reporting as of publication, and we update as the record firms up.
🏔️ How the 2026 season went
Nanga Parbat delivered Pakistan’s first 8,000m summit of the summer. In early July, a seven-member Seven Summit Treks team topped out via the standard Kinshofer route on the Diamir Face after a rope-fixing team opened the line — the season’s opening 8,000er success in Pakistan. The summit party included Tao Hu (China), Antonina Samoilova (Ukraine), Mindaugas Satkauskas (Lithuania), and Pakistan’s Abbas Ali Mehdi, with Nepali guides.
Two milestones stood out. On July 3, Kili Pemba Sherpa (Imagine Nepal) completed all 14 eight-thousanders on the summit, climbing with Wang Zhong of China (his 11th). And as the season closed, Liliya Ianovskaia, 67, became the oldest woman to summit Nanga Parbat, on her 11th 8,000er. It was a quiet, mostly Diamir-side season in warm conditions.
This is a live wrap. Full summiter tallies for 2026 are still being confirmed — we update as they firm up.
📌 The season wrap — the deep guides are one click awayThis page recaps the 2026 season. For the mountain itself — history, difficulty, cost, and the full route picture — see the Nanga Parbat climb guide and the Nanga Parbat route comparison, and see where it ranks among the 14 eight-thousanders.
Nanga Parbat once again opened Pakistan’s 8,000m summer.
As the westernmost 8,000er, Nanga Parbat reliably produces the first summits of Pakistan’s season — and 2026 was no exception. In early July, after a six-strong rope-fixing team from Seven Summit Treks established the line to the top, a seven-member international party summited via the Kinshofer route on the Diamir Face. It was billed as the season’s first successful 8,000m ascent anywhere in Pakistan.
Route
Kinshofer, Diamir (west) Face — the standard commercial line
Team
Seven Summit Treks; rope-fixers plus international clients and Nepali/Pakistani guides
Named summiters
Tao Hu (China), Antonina Samoilova (Ukraine), Mindaugas Satkauskas (Lithuania), Abbas Ali Mehdi (Pakistan), with Nepali guides
Significance
Pakistan’s first 8,000m summit of the 2026 summer season
The milestones: 14×8000 & an age record
Two summits that meant more than a tick on the list.
On July 3, 2026, senior Imagine Nepal guide Kili Pemba Sherpa stood on the summit of Nanga Parbat and completed all fourteen 8,000-metre peaks — one of mountaineering’s rarest achievements. He topped out alongside fellow guide Lakpa Chhiri Sherpa and Chinese climber Wang Zhong, for whom Nanga Parbat was an 11th 8,000er (with Gasherbrum II, Broad Peak, and Shishapangma still to come later in the year).
And as the season wound down, Liliya Ianovskaia, a 67-year-old Canadian-Belarusian climbing with 8K Expeditions, became the oldest woman to summit Nanga Parbat — also her 11th 8,000er. Two very different climbers, two records, on the same Killer Mountain in the same short season.
The Diamir side. Over 95% of Nanga Parbat attempts go up the Kinshofer route on the Diamir (west) Face — the safest practical line, but still a serious technical climb defined by the near-vertical Kinshofer Wall and a long, high-fatality descent.
The character of 2026
Quiet mountain, hot conditions, Diamir-side climbing.
2026 was a lighter-than-usual Nanga Parbat season, part of a generally quieter Pakistan summer across the 8,000ers. Climbers found an uncrowded mountain and worked almost exclusively on the Diamir side via the Kinshofer. The recurring theme was heat: warm temperatures softened the snow and raised rockfall and instability on the lower route — the same pattern seen across the Karakoram this summer — making early, pre-dawn movement and careful timing essential on summit pushes.
Why the record still firms up slowlySeason tallies on the 8,000ers are almost never final on the day the last team descends. Summits are confirmed operator by operator, and early Base Camp reports can be incomplete or corrected. We name only summits confirmed by operators or reliable reporting, and we’ll expand this wrap as the full 2026 list settles.
About the mountain
The ninth-highest on Earth — and one of the hardest.
Nanga Parbat rises to 8,126 m, the ninth-highest mountain in the world and the western anchor of the Himalaya, standing alone beyond the Indus from the Karakoram. First climbed solo and without oxygen by Hermann Buhl in 1953 — after 31 climbers had already died on it — it earned the name “Killer Mountain,” and it’s consistently ranked among the three hardest 8,000ers alongside K2 and Annapurna. Its Diamir Face offers some of the greatest vertical relief on Earth, and its descent is the highest-fatality phase of the climb.
Nanga Parbat closes; K2 and the Gasherbrums are just warming up.
Nanga Parbat’s wrap is the starting gun for the rest of Pakistan’s season. As its teams headed home, the big Karakoram peaks were still building: Broad Peak and the Gasherbrums positioning for their first pushes, and K2 fixing toward its late-July to early-August window. Follow the rest of the summer in our companion dispatches:
Nanga Parbat is one of 500+ peaks in our mountain database — explore the giants and find your next objective.
Frequently asked questions
Who summited Nanga Parbat in 2026?
The season’s first summit came in early July via a seven-member Seven Summit Treks team on the Kinshofer route — including Tao Hu (China), Antonina Samoilova (Ukraine), Mindaugas Satkauskas (Lithuania) and Abbas Ali Mehdi (Pakistan). On July 3, Kili Pemba Sherpa completed all 14 eight-thousanders on the summit; and Liliya Ianovskaia, 67, became the oldest woman to summit as the season closed. Full tallies are still firming up.
What route did they use?
The standard Kinshofer route on the Diamir (west) Face — the line for nearly all commercial climbers. The Rupal and Rakhiot faces remain elite-alpinist terrain. See our route comparison.
When is Nanga Parbat climbed?
In summer, roughly late June through July — earlier than K2. As the westernmost 8,000er, it’s usually the first of Pakistan’s big peaks to see summits each year.
How tall is it and where does it rank?
8,126 m — the ninth-highest mountain and one of the 14 eight-thousanders, with the second-highest prominence of any peak after Everest. See our 8,000ers ranked by difficulty.
Why is it called the Killer Mountain?
31 climbers died on it before its 1953 first ascent, and it has kept one of the highest fatality rates of the 8,000ers — driven by huge vertical relief, the technical Kinshofer Wall, and a dangerous descent. It’s ranked among the three hardest 8,000ers with K2 and Annapurna.
How we compiled this
This wrap draws on operator statements (Seven Summit Treks, 8K Expeditions, Imagine Nepal), the Alpine Club of Pakistan, and specialist mountaineering coverage including ExplorersWeb, cross-checked against the standard Karakoram calendar. We name only summits confirmed by operators or reliable reporting as of publication; early-season tallies are frequently incomplete and are updated as they firm up.
For evergreen detail on the mountain — routes, cost, difficulty, and history — our Nanga Parbat guides are the authoritative reference. This is a news wrap, not a planning guide.
Travis Ludlow
Founder & Head of Research, Global Summit Guide
Travis leads research at Global Summit Guide, where the team tracks the world’s major climbing seasons and maintains guides to more than 500 peaks. This Nanga Parbat wrap is a live season recap; for full route, cost, and difficulty detail, it points you to our dedicated mountain guides.
Nanga Parbat opens the season; K2 closes it. See where the Killer Mountain ranks among the world’s fourteen 8,000ers, then follow the rest of the summer as it unfolds.
Mont Blanc Conditions This Week: Grand Couloir Heat & Rockfall Watch
The Goûter route is open and busy — but mid-summer heat is loading the dice in the Grand Couloir, the most dangerous section of the normal route. Here’s where conditions stand this week, why the heat matters, and exactly what to do about it.
By Travis Ludlow · Founder & Head of Research · Safety review: Taylor Ludlow, RN
Published July 12, 2026 · Last updated: July 12, 2026 · Reading time 8 minutes
Editorial approach: LIVE CONDITIONS WATCH. Compiled from the Chamonix Office de Haute Montagne, the Haute-Savoie prefecture, FFCAM refuge information, and published rockfall research (UIAA / Petzl Foundation / EDYTEM–ISTerre), cross-checked against our evergreen Goûter route conditions guide. This is a dated watch, not the full planning reference — for season dates, refuge booking, and the route breakdown, we link to the pillar throughout. Always verify the current advisory locally before you climb.
Conditions watch · Jul 12, 2026
The Goûter route is in peak season and open — and this is exactly the window when heat drives rockfall. Mid-July sits in the busiest, warmest part of the Mont Blanc season, and warm, dry spells sharply raise the risk in the Grand Couloir, the route’s notorious “corridor of death.” Refuge dismantling work on the old Goûter hut continues through the summer but does not close the route.
The dominant hazard right now isn’t technical difficulty — it’s timing and temperature. Teams are crossing the couloir in the pre-dawn cold and moving fast. On hot days, the risk climbs through the morning and afternoon, and during past heatwaves the prefecture has asked climbers to postpone the ascent entirely.
This is a dated watch. Alpine conditions change day to day — always confirm the latest with the Chamonix Office de Haute Montagne and the Haute-Savoie prefecture before you go. We refresh this page through the season.
📌 This is the this-week watch — the full guide is the pillarThis page covers the current picture. For the complete, evergreen reference — 2026 season dates, refuge reservations, cost, cable status, and the camp-by-camp route — see our Mont Blanc Goûter route conditions guide, with the full itinerary in the Goûter route expedition breakdown.
The highest point in Western Europe, above Chamonix and Saint-Gervais.
Mont Blanc rises to 4,808 m on the France–Italy border, above the Chamonix valley. The standard Goûter route starts from Saint-Gervais / Les Houches, climbs via the Nid d’Aigle, the Tête Rousse hut (3,167 m), across the Grand Couloir at about 3,340 m, up to the Goûter Refuge (3,835 m), then along the Bosses Ridge to the summit. The couloir crossing sits early on summit day — which is why where you sleep the night before decides when you cross it.
Summit: Mont Blanc (4,808 m)Grand Couloir: ~3,340 m crossingBase: Chamonix / Saint-Gervais
Why heat is the story this week
Warm days don’t just make you sweat — they bring the mountain down.
The Grand Couloir is a natural funnel for falling rock, and what holds that rock in place is ice and permafrost. When a warm, dry spell hits — exactly the mid-summer pattern — that frozen glue melts, and the couloir starts shedding stones, sometimes day and night. Research on the couloir found that the majority of rockfall happens through the middle of the day, which is why the entire safety strategy is built around crossing before the rock warms up.
This isn’t theoretical. Hot summers have produced the worst conditions on record: during the 2015 heatwave the Goûter hut was temporarily closed by prefectural order, and in other dry years the authorities have publicly asked climbers to postpone. A hot forecast, in other words, is a direct rockfall signal — and the reason a “conditions this week” check matters more on Mont Blanc than on almost any peak in the Alps.
Timing beats fitness here. The Goûter route is graded PD — not technically hard — but the Grand Couloir turns the ascent into a problem of when, not whether. The strongest climbers on the mountain are the ones across the couloir before first light.
The Grand Couloir, by the numbers
One of the deadliest spots in the Alps — and unavoidable on the normal route.
The couloir’s reputation is earned. French mountain police recorded 347 rescue operations, 102 deaths, and 230 injuries in the Grand Couloir between 1990 and 2017 — a toll that has made “couloir de la mort” a genuine local name, not tabloid hyperbole. A 2020 Petzl Foundation study even examined whether an alternative path could replace the crossing and concluded any alternative would be more dangerous. The couloir is the route.
The hazard
Falling rock funnelled down a ~40 m-wide gully; a single stone can be fatal.
The driver
Heat and drought melt the permafrost binding the rock — warm afternoons are worst.
The defence
Cross before dawn, move fast (2–5 minutes), helmet on, never linger.
The alternative
The Trois Monts route avoids the couloir entirely — more technical, but no couloir.
Mont Blanc’s overall toll is part of why it ranks among the most dangerous mountains in Europe despite its modest grade — context we cover in our death rates by mountain analysis.
What to do this week
If you’re climbing in the next few days, this is the checklist.
None of this replaces a qualified guide or the official advisory, but it’s the discipline that keeps climbers alive in the couloir during the hot months:
1 · Sleep low, cross early
Start from the Tête Rousse hut so you cross the couloir in the pre-dawn cold, ideally before 06:00.
2 · Read the forecast as a rockfall gauge
Hot, dry days = higher risk. If a heatwave is forecast, consider postponing or switching routes.
3 · Check the official advisory
Office de Haute Montagne (Chamonix) and the Haute-Savoie prefecture publish current conditions and any closures.
4 · Consider the Trois Monts
If the Goûter is shedding, the Aiguille du Midi / Cosmiques approach avoids the couloir.
5 · Helmet, crampons, speed
Helmet non-negotiable; crampons required from the Goûter upward all season; cross fast and don’t stop.
On this route, the temperature forecast is a safety forecast.
The 7-day outlook below is modelled data for the Mont Blanc / Chamonix region — a general indicator, not a summit-day forecast. Read it as a rockfall gauge: warm, dry days push the Grand Couloir risk up, cool spells and fresh snow settle it down. For summit-day planning, pair this with a dedicated alpine forecast and the Office de Haute Montagne bulletin.
Mont Blanc / Chamonix region
Loading live data…
Fetching the latest forecast…
Live forecast unavailable right now. As a rule this season: warm, dry days raise Grand Couloir rockfall risk — cross before dawn and check the Office de Haute Montagne bulletin.
Read heat as risk. This is valley-and-massif model data; the freezing level and how hot the rock gets matter as much as the summit temperature. When it’s warm, cross the couloir earlier and be ready to turn back.
Planning to climb this season?
Beyond this week — the full picture for a Mont Blanc attempt.
If Mont Blanc is on your list for this summer, the conditions watch is only the starting point. Get the season logistics and the honest difficulty from the guides below, and see where Mont Blanc sits among Europe’s great peaks:
Mont Blanc is one of 500+ peaks in our mountain database — compare it, and find your next objective.
Frequently asked questions
Is Mont Blanc safe to climb this week?
The Goûter route is open and in peak season, but mid-summer heat drives Grand Couloir rockfall — the route’s biggest hazard. Whether it’s advisable on a given day depends on temperature and the current advisory. Cross before dawn, check the Office de Haute Montagne and prefecture, and be ready to turn back. Full detail in our Goûter conditions guide.
Is the Goûter route open right now?
Yes — the 2026 season runs roughly late May to early October, and mid-July is peak window. Old-hut dismantling work continues through summer but doesn’t close the route. Confirm refuge bookings and any short-notice closures with FFCAM and the prefecture.
What time should I cross the Grand Couloir?
Before dawn — ideally before 06:00, when the rock is coldest and rockfall is lowest. Most rockfall happens through the middle of the day. Starting from Tête Rousse lets you cross in the dark.
Does heat really increase rockfall?
Yes, sharply. Heat and drought melt the permafrost binding the rock above the couloir. Hot summers have produced the worst conditions on record, and in 2015 the Goûter hut was closed during a heatwave.
Can I avoid the couloir?
The Trois Monts route (via the Aiguille du Midi and Cosmiques hut) avoids the Grand Couloir entirely. It’s more technical but sidesteps the rockfall — the usual alternative when the Goûter is in poor shape.
How dangerous is the Grand Couloir?
It’s one of the deadliest spots in the Alps: 347 rescues, 102 deaths, and 230 injuries between 1990 and 2017. The danger is objective — falling rock in a narrow gully — so timing and discipline matter most.
How we compiled this
This watch draws on the Chamonix Office de Haute Montagne, the Haute-Savoie prefecture, FFCAM refuge information, and published rockfall research (UIAA, the Petzl Foundation, and the EDYTEM–ISTerre study), cross-checked against our own Goûter route conditions guide. Conditions are described in general, dated terms rather than as day-specific guarantees.
Alpine conditions change quickly. This page is an educational planning aid, not a substitute for the official advisory — always confirm the current situation with the Office de Haute Montagne and the prefecture, and climb with a qualified guide if you lack alpine experience.
Travis Ludlow
Founder & Head of Research, Global Summit Guide
Travis leads research at Global Summit Guide, where the team tracks conditions on the world’s major peaks and maintains guides to more than 500 mountains, with safety content reviewed by Taylor Ludlow, RN. This is a dated conditions watch; for full route and planning detail, it points you to our evergreen Mont Blanc guides.
The Goûter route rewards good timing more than raw strength. Get the full season picture and the camp-by-camp plan before you go — and cross the couloir before the sun hits the rock.
Broad Peak & Gasherbrum: First Summit Pushes of the Karakoram Season
Before K2 takes the spotlight, its neighbours go first. Three of the Baltoro’s 8,000ers — Broad Peak, Gasherbrum I, and Gasherbrum II — are where the 2026 Karakoram season opens. Here’s who’s on the mountains, where the ropes are, and when the first summits are likely.
Published July 11, 2026 · Last updated: July 11, 2026 · Reading time 8 minutes
Editorial approach: LIVE SEASON DISPATCH. Compiled from expedition dispatches, operator updates, and specialist mountaineering coverage (ExplorersWeb and the operators themselves), cross-checked against the standard Karakoram calendar. This is a news dispatch, not a how-to guide — for routes, cost, and planning on each peak, we link to the full mountain guides throughout.
Where things stand · Jul 11, 2026
The 2026 Karakoram season is opening on Broad Peak and the Gasherbrums — quietly. It’s a lighter summer than usual in Pakistan, but teams are in position. On Broad Peak, rope-fixing had pushed high on the standard route and a first summit push was poised, only to be postponed by strong wind and fresh snow while teams wait for a cleaner window.
On the Gasherbrums, commercial and alpine teams have been establishing at base camp after the long Baltoro trek, with a notable number of climbers going without supplemental oxygen. No confirmed 8,000m summits yet — the first of the season would be expected with the next stable weather window, typically mid-to-late July. Meanwhile the Nanga Parbat season over on the Diamir side has been wrapping up.
This is a live dispatch. Karakoram conditions change by the day; we refresh it as the pushes develop.
📌 This is the live dispatch — the deep guides are one click awayThis page tracks the 2026 season. For routes, difficulty, cost, and planning on each peak, go straight to the full guides: Broad Peak, Gasherbrum I, and Gasherbrum II — and see where all three sit in our 8,000ers ranked by difficulty.
Four of the world’s fourteen 8,000ers, clustered around one glacial junction.
Broad Peak, Gasherbrum I, Gasherbrum II, and K2 all sit within about 20 km of Concordia, the confluence of the Baltoro and Godwin-Austen glaciers — one of the greatest concentrations of high peaks on Earth. Climbers reach them the same way: fly to Skardu, drive to Askole, then trek roughly a week up the Baltoro. Broad Peak’s base camp sits on the Godwin-Austen Glacier near K2’s; the Gasherbrums share a base camp further up the South Gasherbrum Glacier.
Broad Peak: 8,051 mGasherbrum I & II: 8,080 / 8,035 mK2: 8,611 m (nearby)Concordia: Baltoro junction
Broad Peak: first to move
The 12th-highest mountain — and often the season’s opening act.
At 8,051 m, Broad Peak is the 12th-highest mountain in the world, standing about 8 km from K2. First climbed in June 1957 by an Austrian team — Marcus Schmuck, Fritz Wintersteller, Kurt Diemberger, and the legendary Hermann Buhl, who died on nearby Chogolisa days later — it’s long been considered one of the more approachable 8,000ers. That reputation comes with an asterisk: its summit is reached via a long, deceptive ridge with a notorious false summit that repeatedly turns climbers back short of the true top.
In 2026, Broad Peak has been the pace-setter. Rope-fixing pushed high on the standard route, and a first summit push was ready to go before wind and fresh snow forced a postponement. It’s the familiar Karakoram waiting game — everything set, held back by the sky.
Full Broad Peak guideRoutes, camps, cost, permits, and the false-summit trap are covered in depth in our complete Broad Peak climb guide.
The Gasherbrum group. “Gasherbrum” comes from the Balti rgasha brum — “beautiful mountain.” Two of the massif’s peaks are 8,000ers: Gasherbrum I (the Hidden Peak) and Gasherbrum II, both climbed from a shared base camp up the South Gasherbrum Glacier.
The Gasherbrums: I & II
Two 8,000ers, one massif — and very different climbs.
The Gasherbrum massif holds two of the fourteen 8,000ers, and they’re often confused despite being quite different objectives:
Peak
Height / rank
Character
First ascent
Gasherbrum I (Hidden Peak)
8,080 m · 11th
Steeper, more technical; Japanese Couloir from Gasherbrum La
1958 (American)
Gasherbrum II
8,035 m · 13th
One of the most accessible 8,000ers; a common first eight-thousander
1956 (Austrian)
In 2026, the Gasherbrums have drawn both commercial groups and elite alpinists. Teams have been establishing at base camp for standard-route attempts, while small alpine parties eye harder objectives on the massif. As on Broad Peak, the first summits hinge entirely on the next weather window.
Same glacier, same weather, same waiting game as K2.
These peaks don’t just sit next to each other — they run on the same clock. The Karakoram summer offers shorter, less reliable weather windows than Nepal’s Himalaya, so teams across Broad Peak, the Gasherbrums, and K2 all watch the same forecasts and often move within days of one another. Typically the sequence runs Gasherbrum II and Broad Peak first, Gasherbrum I alongside, and K2 last, in its late-July to early-August window.
That’s also why many climbers pair these peaks with bigger goals: Gasherbrum II and Broad Peak are common stepping stones toward K2. You can follow the top of that pyramid in our 2026 K2 season tracker — the companion to this dispatch — and see the season’s other Pakistan giant in our Nanga Parbat guide.
Where they rank
Accessible by 8,000er standards — but never easy.
It’s tempting to file Broad Peak and Gasherbrum II under “easier 8,000ers,” and by standard-route difficulty they are among the more approachable of the fourteen — well below K2, Annapurna, or Nanga Parbat. But “accessible 8,000er” still means extreme altitude, real objective hazard, and Karakoram weather. Gasherbrum I sits a clear notch harder than GII, and Broad Peak’s false summit has ended more attempts than its grade suggests.
We don’t re-rank them here — that’s the pillar’s job. For the full hardest-to-easiest picture, with fatality rates and technical grades:
The forecast is the story — these summits wait on the window.
Every summit push on this page depends on one thing: a stable weather window. The 7-day outlook below is modelled data for the Concordia / Baltoro region — a general indicator, not a summit-day forecast (expedition teams buy specialist high-altitude forecasts before committing). It’s a useful read on whether the next window is building or breaking down.
Karakoram summit region (~Concordia / Baltoro)
Loading live data…
Fetching the latest forecast…
Live forecast unavailable right now — not unusual for a remote high-altitude region. Karakoram summit conditions are driven by the jet stream, and even a fair valley forecast can hide fierce winds up high.
A general indicator only. This is modelled data near glacier/base-camp altitude — the 8,000m summits are colder and far windier. Teams launch only when a multi-day window of light wind lines up with the route being fixed to the top.
Frequently asked questions
Has anyone summited Broad Peak or Gasherbrum in 2026 yet?
Not as of this update (July 11, 2026). Broad Peak was fixed high with a first push poised but weather-delayed; Gasherbrum teams were still establishing at base camp. The season’s first summits usually come mid-to-late July with the first stable window. We refresh this dispatch as pushes develop.
When are these peaks climbed?
In the Karakoram summer only — roughly June through August, with most summits in July and August. Gasherbrum II often sees the season’s first 8,000m summits, followed by Broad Peak and Gasherbrum I, with K2 last.
Which is easiest — Broad Peak, GI or GII?
Gasherbrum II is one of the most accessible 8,000ers and a common first eight-thousander. Broad Peak is approachable but has a deceptive false summit. Gasherbrum I is meaningfully steeper and more technical. See our 8,000ers ranked by difficulty.
How do they relate to K2’s season?
They share the same Baltoro region, weather, and summer window as K2, and many climbers use Broad Peak or GII to build Karakoram experience before K2. First summits here usually precede K2’s late-July window — follow it in our K2 2026 tracker.
Are Broad Peak and GII good first 8000ers?
GII is one of the more common first eight-thousanders, and Broad Peak is often a K2-region acclimatizer. Both are serious expeditions with real hazards, but their moderate grade makes them a genuine step into 8,000m climbing.
How we track this
This dispatch is compiled from expedition dispatches, operator updates, and specialist mountaineering coverage (including ExplorersWeb), cross-checked against the standard Karakoram climbing calendar. Fast-moving details — rope-fixing progress, summit pushes, casualties — are reported cautiously and dated, because early base-camp information is often incomplete and evolves.
Conditions change daily during the season. For the current state of any climb, follow the operators directly; for routes, cost, and planning, our full mountain guides are the authoritative reference.
Travis Ludlow
Founder & Head of Research, Global Summit Guide
Travis leads research at Global Summit Guide, where the team tracks the world’s major climbing seasons and maintains guides to more than 500 peaks. This Karakoram dispatch is updated through the summer; for full route, cost, and difficulty detail, we always point you to the individual mountain guides.
Broad Peak and the Gasherbrums open the summer; K2 closes it. See where these giants rank among the world’s highest, then follow the whole season as it unfolds.