How Much Do Sherpas Get Paid in 2026? What Everest Guides Actually Earn This Season
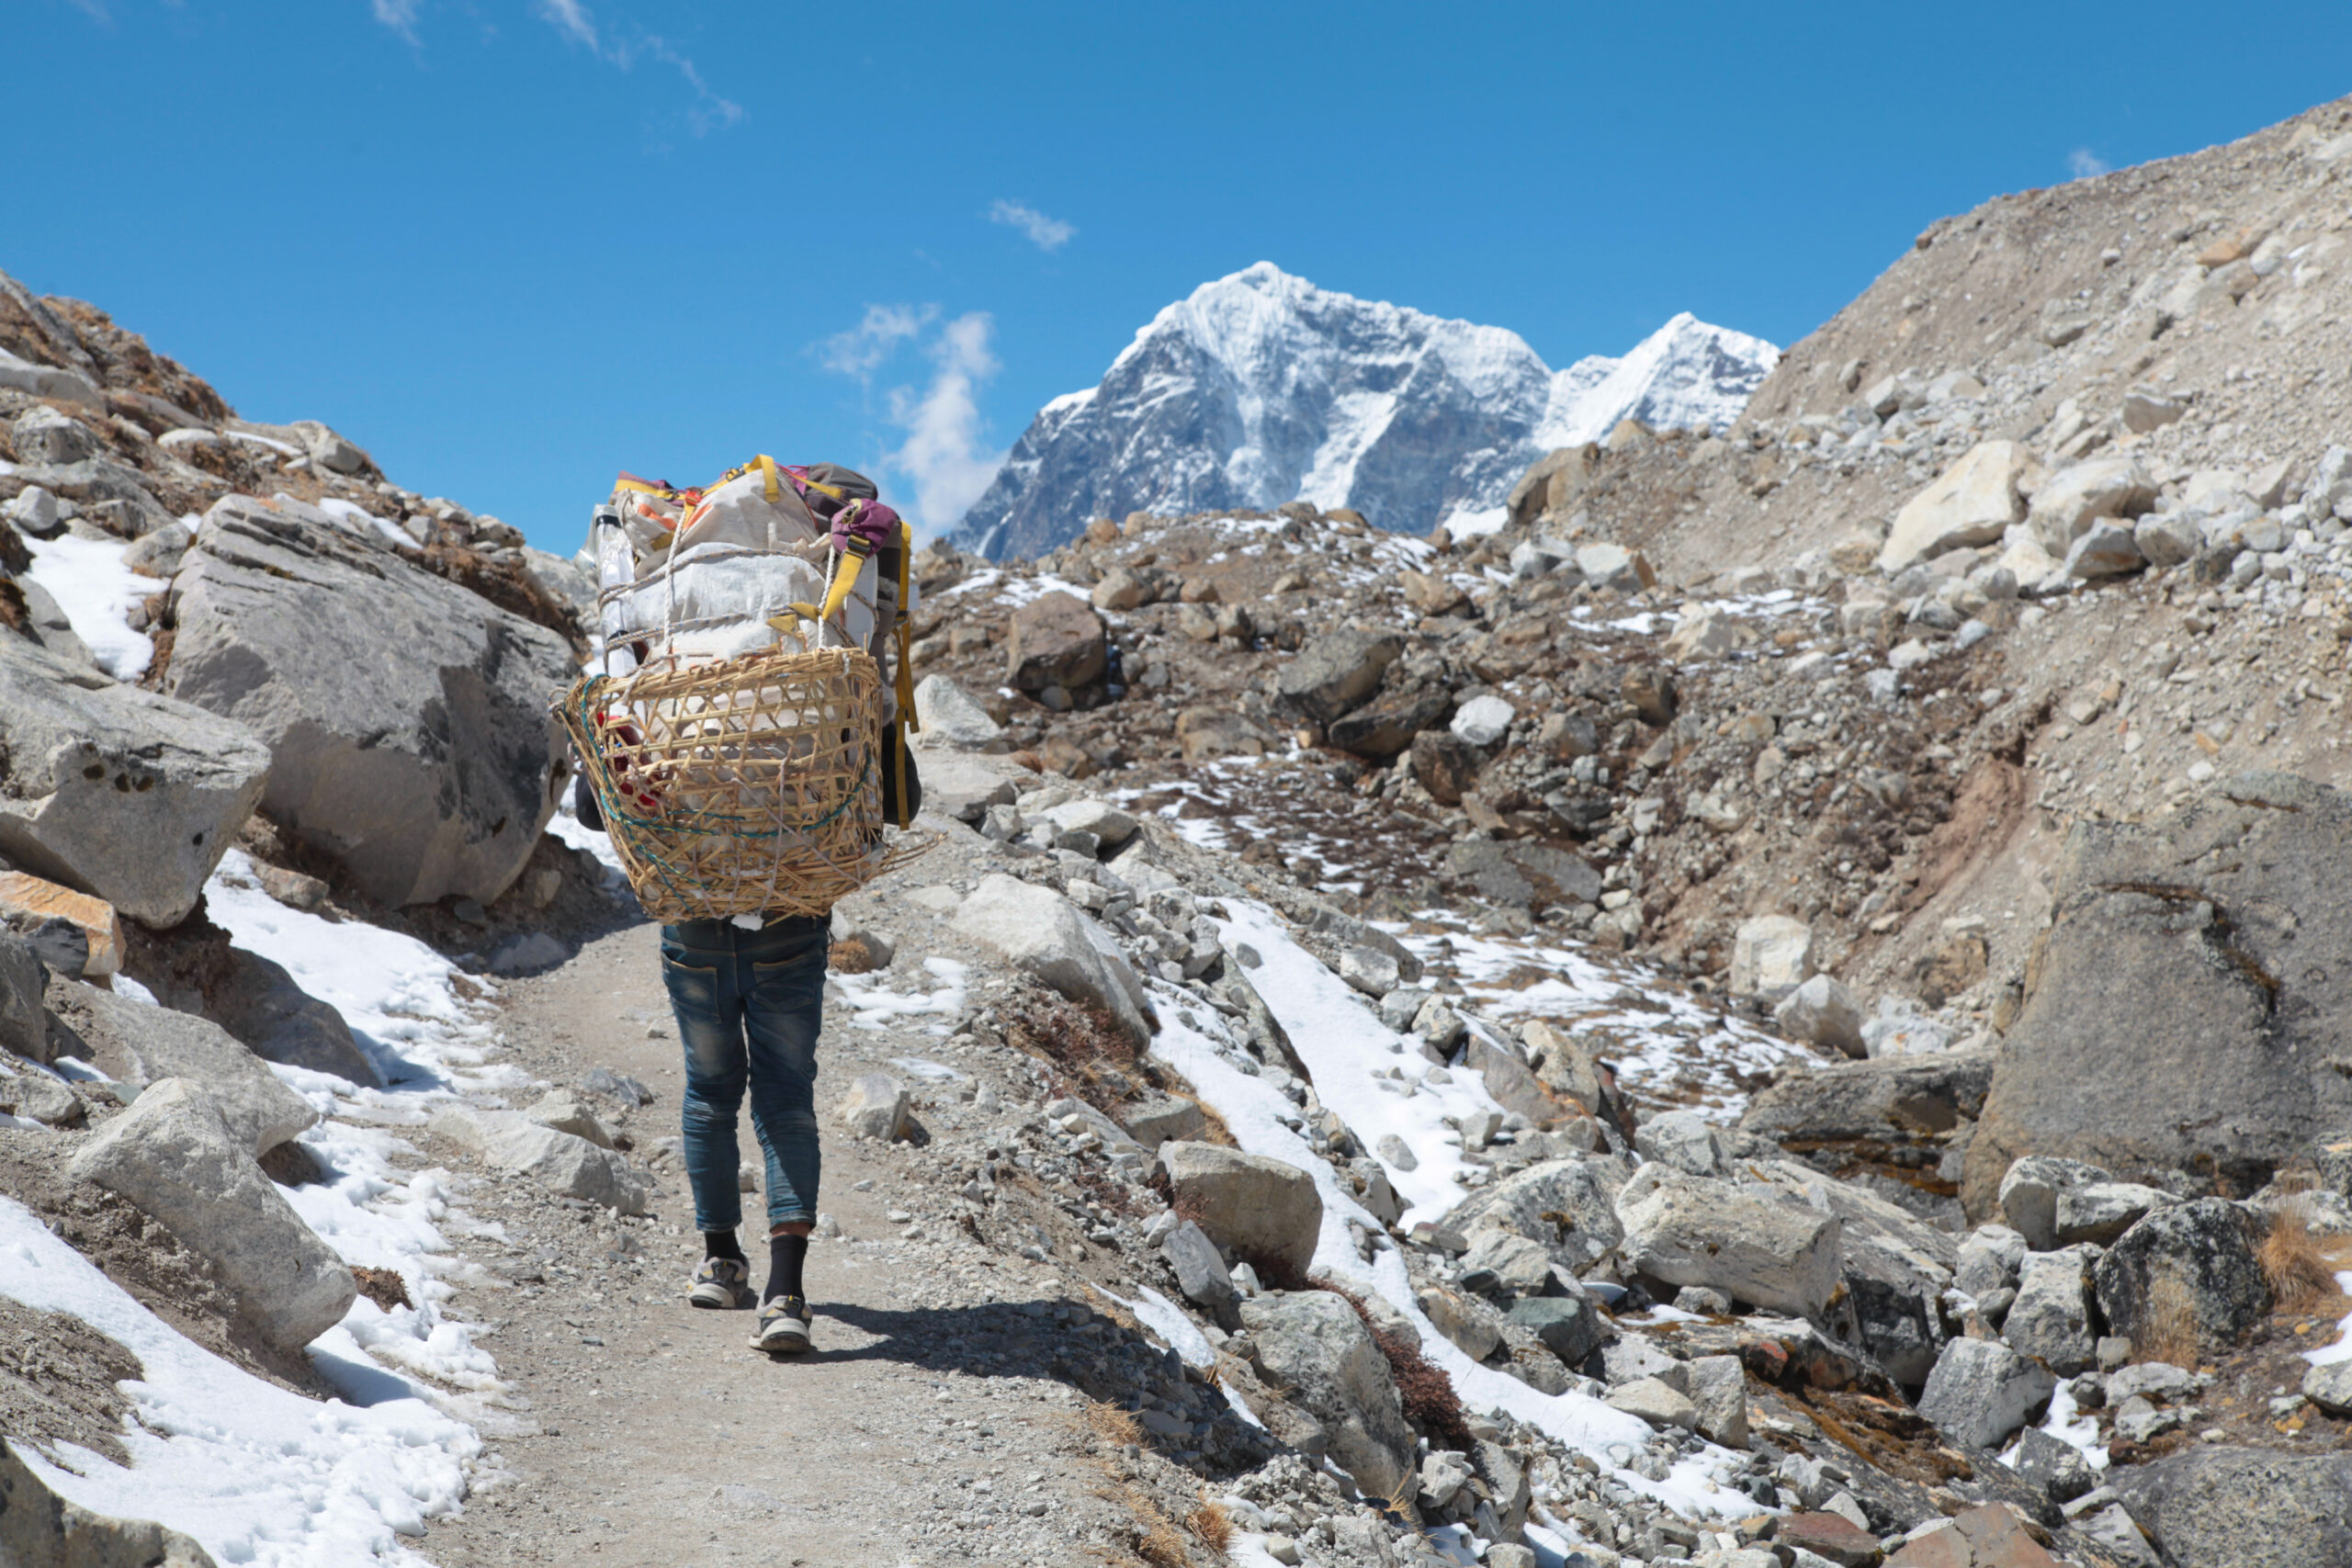
The people who fix the ropes, carry the loads, and cross the Khumbu Icefall dozens of times a season are the engine of every Everest expedition. Here’s what they earn in 2026 — base wages, summit bonuses, tips, and what changed this year — with the full economics linked throughout.
Published July 11, 2026 · Last verified: July 11, 2026 · Reading time 8 minutes
Editorial approach: RESEARCH-BASED & CURRENT-SEASON. Compiled from operator disclosures, Nepal Department of Tourism data, and published Sherpa-community wage benchmarks, cross-checked against our in-depth Sherpa Wage Economy analysis. This is a 2026 snapshot — for the full cash path of an expedition, we link to the pillar throughout.
💰 The 2026 answer, fast
In 2026, a personal climbing Sherpa on Everest earns a base of roughly $2,500–$4,500 for the expedition, plus a summit bonus of about $1,500–$3,500 and a share of client tips. Put together, an experienced Khumbu Sherpa can clear $10,000 or more in a single season, and considerably more across a full year once tips are counted. Base-camp crew and porters earn less; elite rope-fixing sirdars earn the top of the range.
That’s the headline. Where every dollar of a $90,000 expedition actually goes — and why Sherpa labour has grown to 32–38% of the operator fee — is mapped in our Sherpa Wage Economy breakdown.
📌 This is the 2026 snapshot — the pillar is the deep diveThis page answers “what do Sherpas earn this year” and covers what changed in 2026. For the full economics — the ten payment categories, the post-2014 reform, the operator-margin shift, and the year-round income picture — our Sherpa Wage Economy analysis is the definitive reference, and everything below links back to it.
New this season: a higher permit, tighter rules, and a labour share that keeps climbing.
The single biggest recent shift reached the government line, not the Sherpa line: Nepal raised the standard spring Everest permit to $15,000 per foreign climber (up from $11,000), the first increase in roughly a decade. That doesn’t go to Sherpas directly, but it reshapes the total cost climbers budget — the wider picture is in our Everest permits and fees guide.
On the labour side, the 2026 season continues a decade-long trend: Sherpa-related pay has grown to roughly 32–38% of the operator fee, up from about 22% before 2014. Alongside that, Nepal has been tightening the rules around high-altitude workers — moves toward stricter guide-to-climber ratios, mandatory medical certificates for staff, and a push for lead guides to be Nepali nationals. Insurance minimums, raised sharply after the 2014 disaster, now sit at $15,000–$20,000 of mandatory life cover per climbing Sherpa, with many operators voluntarily providing more.
The number that matters when you bookWages and insurance are one of the clearest signals of an ethical operator. Climbing Sherpas should earn several thousand dollars for the season plus bonuses, and carry at least $15,000–$20,000 of life insurance. Our operator comparison walks through exactly how to check an operator’s staffing model, wages, and cover before you pay a deposit.
The 2026 pay snapshot
Representative ranges by role — a summary, not the full methodology.
Pay varies widely by role, experience, summit count, and certification. These are representative 2026 ranges for the Nepal side; the detailed derivation lives on the wage-economy pillar.
Role
Base (per expedition)
Bonuses
Typical 2026 season take
Base-camp crew / porters
$500–$1,000
Minimal
Lower; seasonal support work
High-altitude porter (load carrier)
$1,500–$3,000
Per-load / carry bonuses
Varies with number of carries
Personal climbing Sherpa
$2,500–$4,500
$1,500–$3,500 summit + tips
Several thousand up to ~$10K
Elite / sirdar / rope-fixer (IFMGA, 10+ summits)
Top of range
Highest bonuses + largest tips
$10,000+ in a season
For the most experienced Sherpas, the full-year figure is what really matters. A senior climber working multiple expeditions across the year — Everest in spring, plus other Nepalese peaks — can see tip income alone of $25,000–$40,000, on top of wages and bonuses. That’s high by Nepali standards and is a major reason competition for the best Sherpas has driven base wages up so quickly since 2014.
Paid by the season, not the year. A Sherpa’s earning window is a short, intense sprint — roughly eight to ten weeks in spring to make what has to support a family for twelve months. It’s why summit bonuses and tips matter so much, and why the incentive to push on summit day is so strong.
How the pay is built
Three moving parts: base, bonus, and the tip climbers control.
Sherpa compensation isn’t a single flat rate — it stacks up from three pieces:
Base wage
The guaranteed pay for the expedition. Steady, but the smaller part of a good season.
Bonuses
Summit bonuses (~$1,500–$3,500) plus load or performance bonuses. Conditional — they depend on the season going well.
Tips
The part climbers control directly, paid at the base-camp tipping ceremony. Real income, often several thousand per climber to the team.
Because two of the three pieces are conditional, take-home pay swings hard from year to year. That’s exactly why the “how much do Sherpas make” question has no single answer — and why our pillar maps the full cash path of a representative expedition rather than quoting one figure. If you’re budgeting your own climb, the tipping line is covered in our full Everest cost breakdown.
The most dangerous job on the mountain
High pay for Nepal — low pay for the risk.
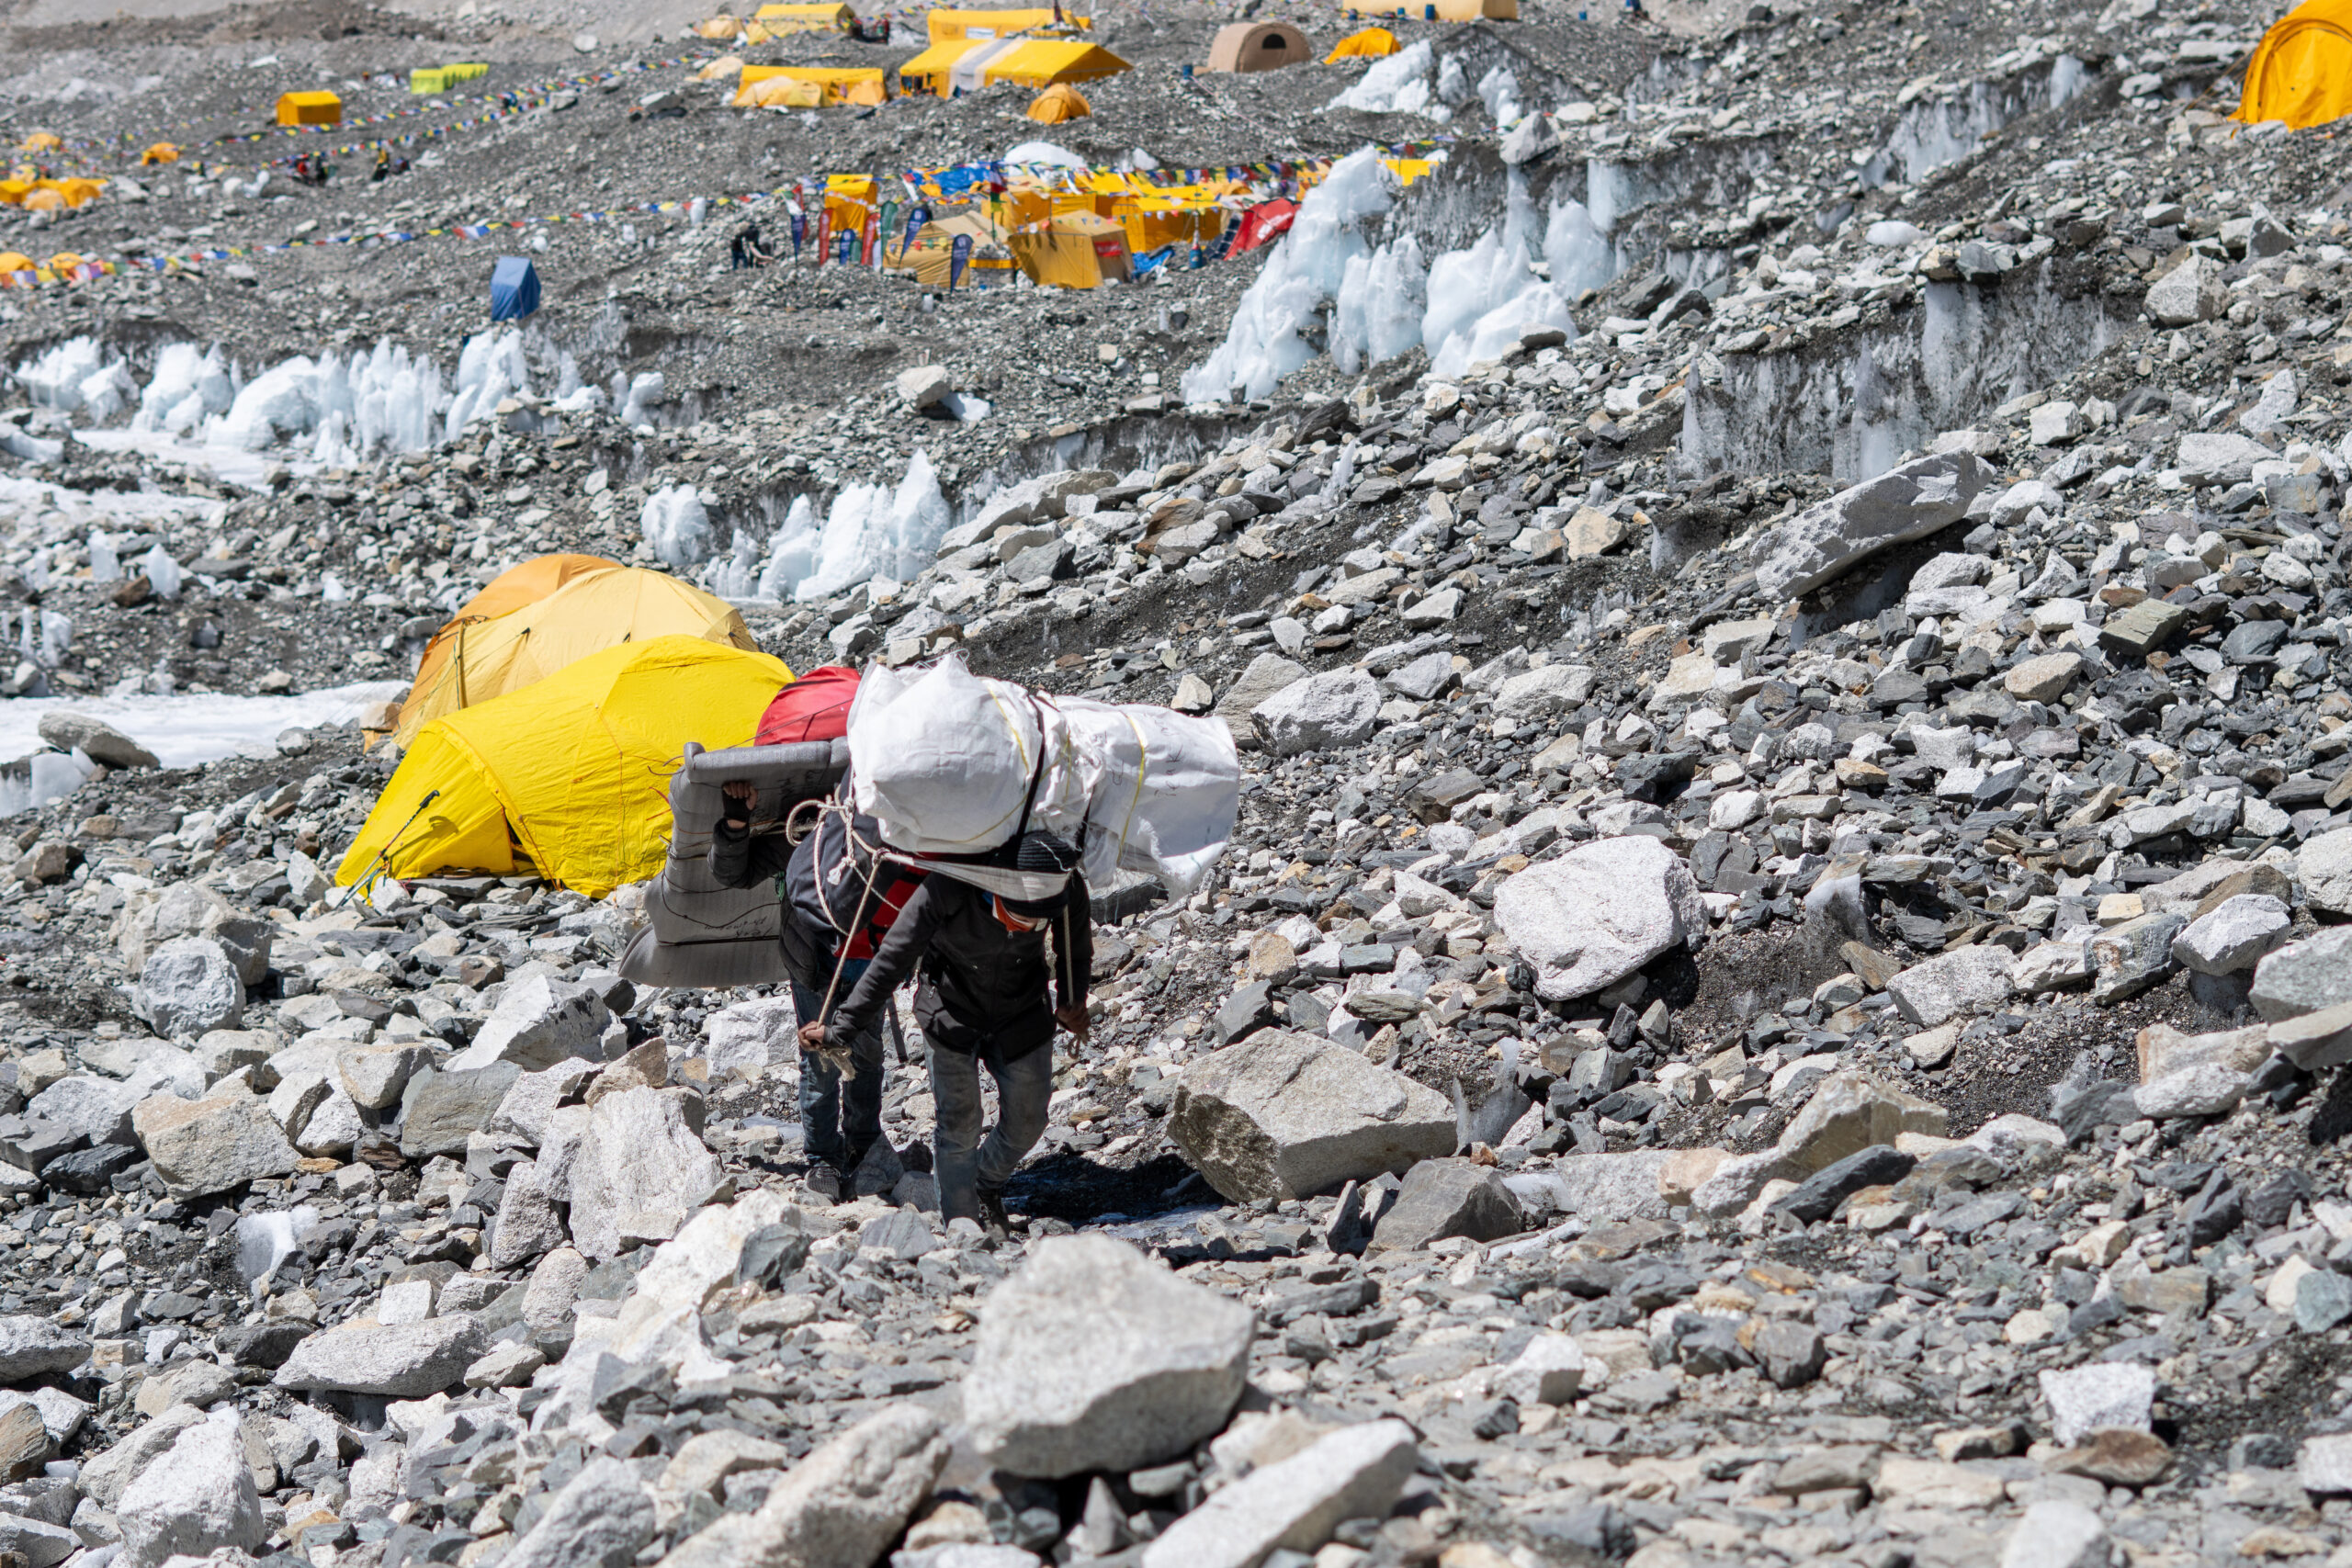
Here’s the context the salary numbers can’t show on their own. While a Western climber crosses the Khumbu Icefall a handful of times, the Sherpas supporting them cross it again and again — fixing ropes, stocking camps, ferrying oxygen. Sherpa climbing is consistently ranked among the most dangerous jobs in the world, and the 2014 Icefall avalanche that killed sixteen Nepali workers is what triggered the wage and insurance reforms still shaping pay today.
So the honest read on 2026 pay is two-sided: it’s genuinely high income by Nepali standards and a pillar of the Khumbu economy, yet low for the risk carried. For the hard numbers behind the risk, see our death rates by mountain analysis and the Everest death map.
The pay gap in one lineAn elite Sherpa might earn around $10,000 in a season. A Western lead guide from a US or European operator can earn $30,000–$50,000 for the same two months — while doing fewer trips through the most dangerous terrain. The gap has narrowed since 2014, but it hasn’t closed.
Sherpa pay beyond Everest
The same labour, different mountains and different rules.
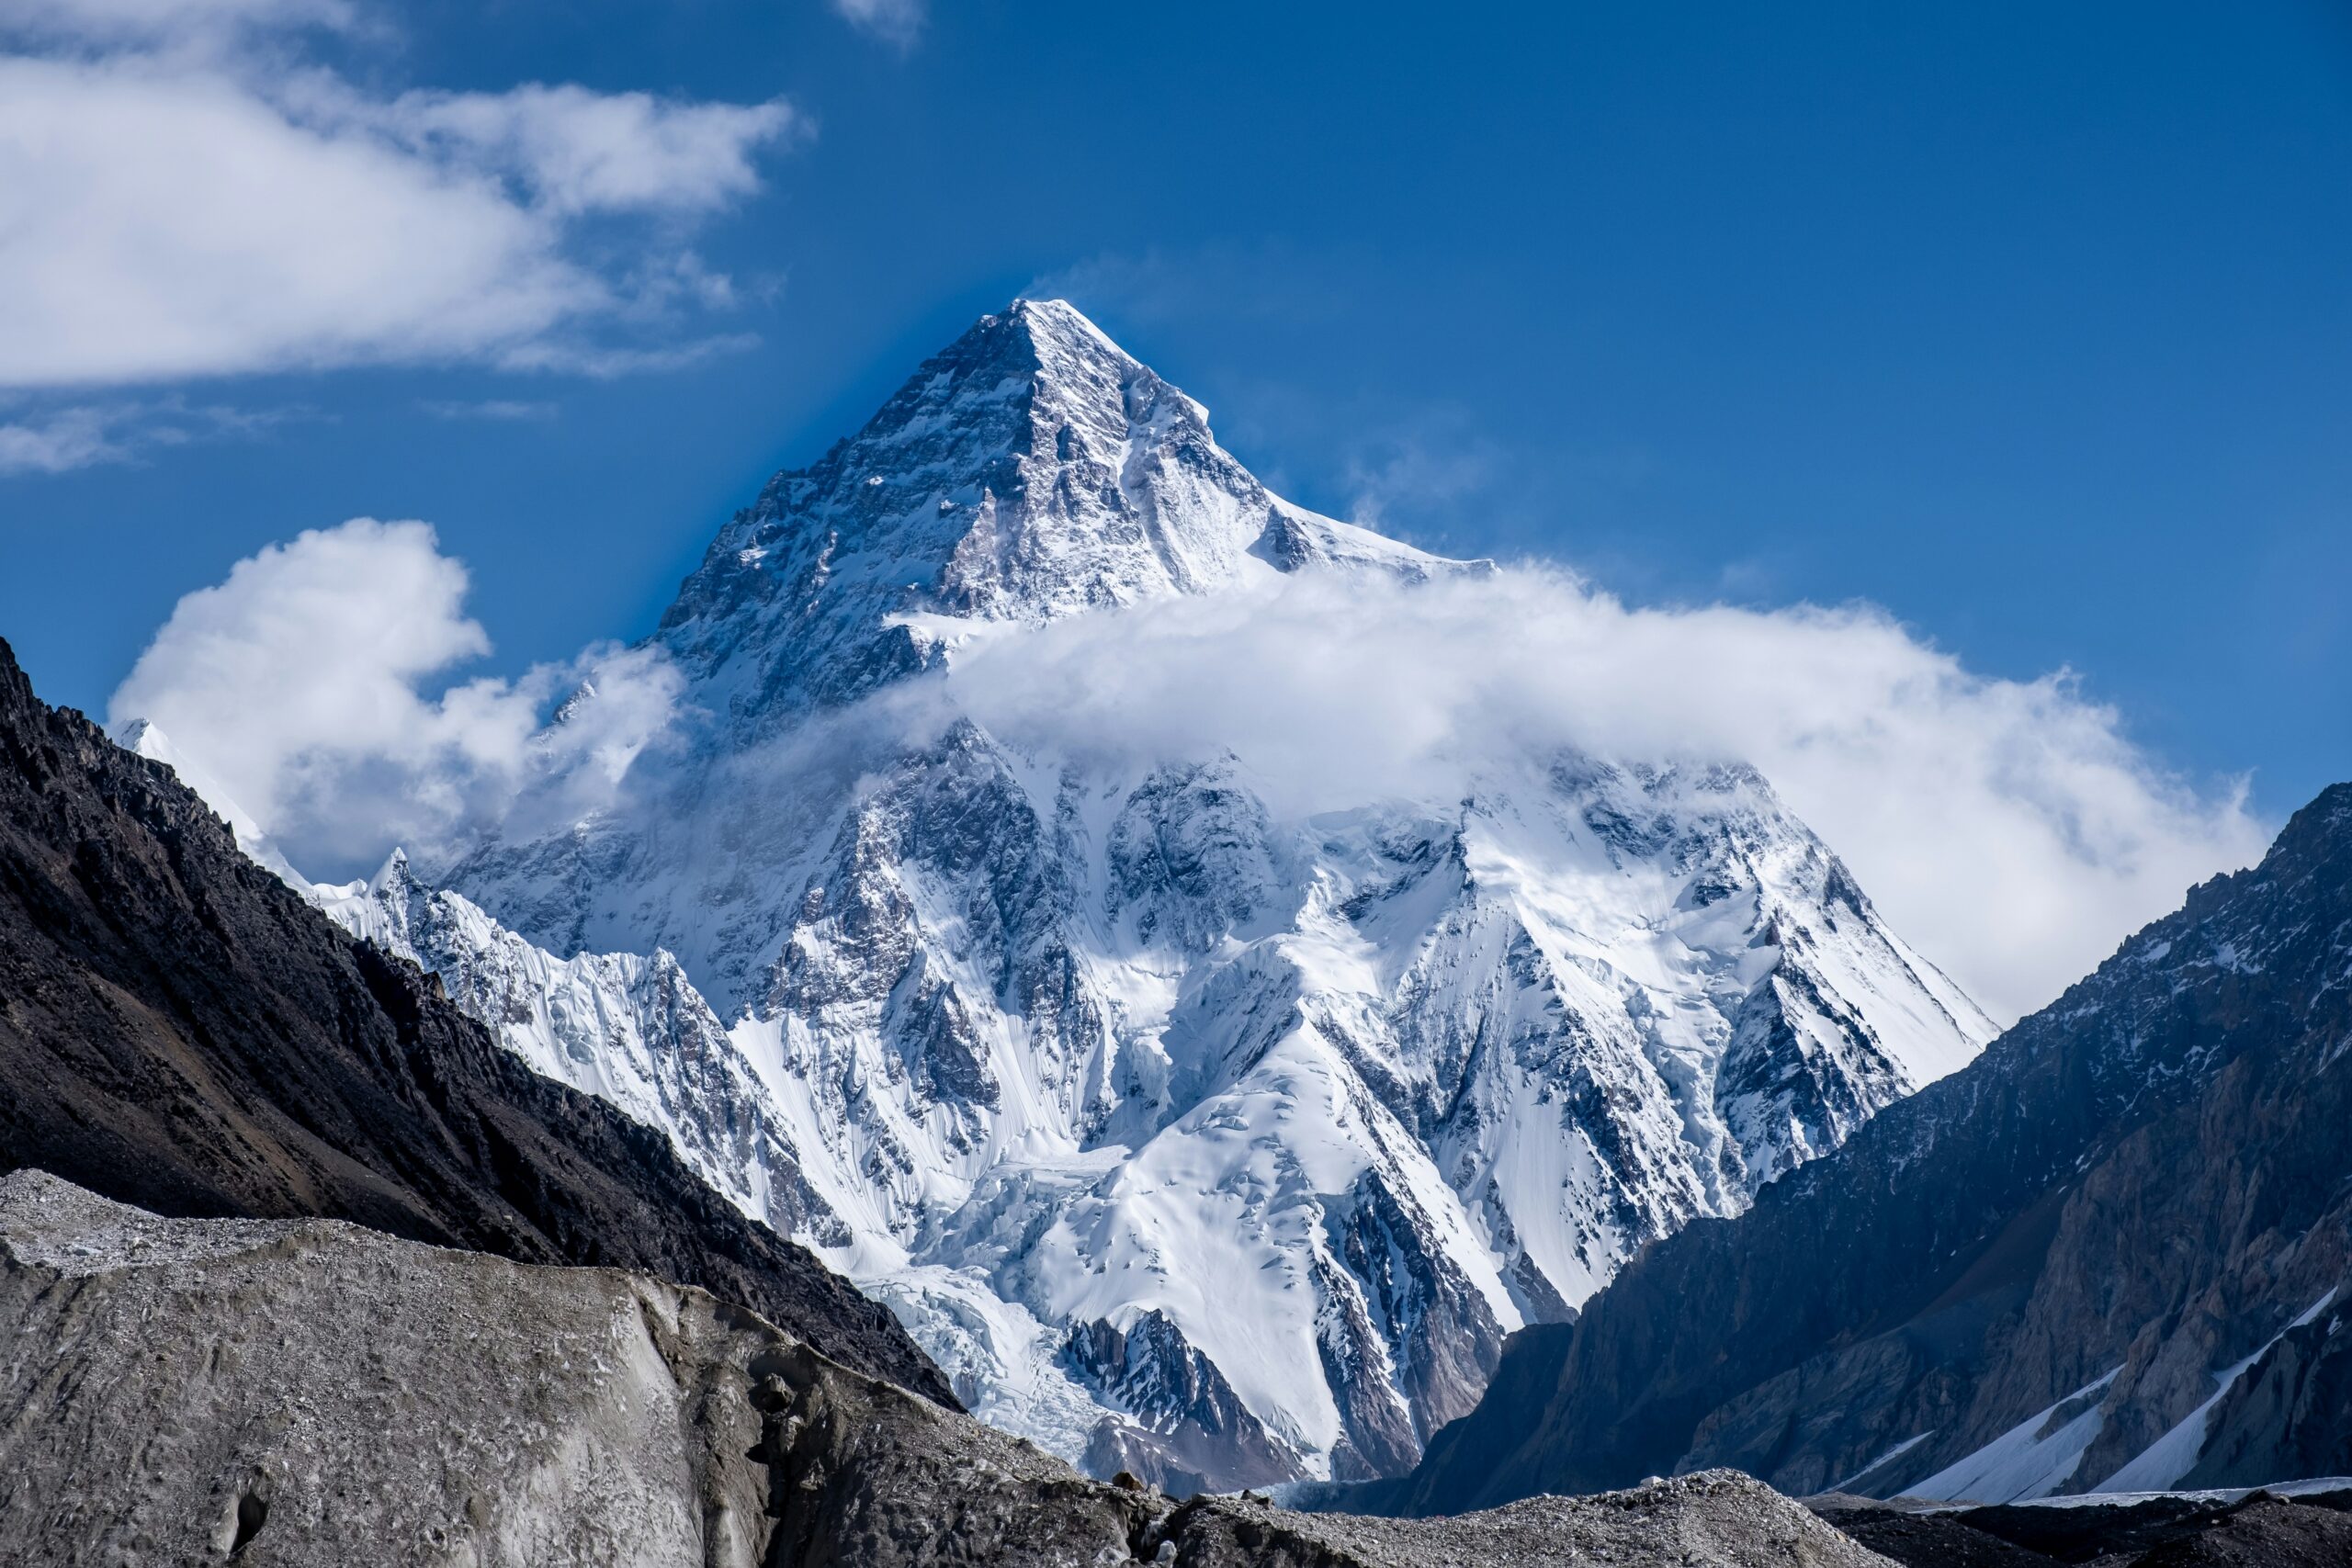
“Sherpa pay” is really shorthand for high-altitude expedition labour, and it looks different from range to range. Right now, during the live Karakoram season, Pakistani high-altitude porters are doing the same brutal work on K2 and Broad Peak — often for less than Nepali Sherpas, and with porter welfare a recurring issue. You can follow that season in our K2 2026 tracker, with the labour and operator detail in the full K2 climb guide.
Elsewhere the frameworks differ: on Kilimanjaro, the Kilimanjaro Porters Assistance Project sets minimum wage and tipping standards; on Denali, the US National Park Service concessionaire system standardises guide wages. The common thread — and the thing worth checking before you book any peak — is how the operator treats its local staff. That’s the fourth of the eight criteria in our operator comparison.
K2, Everest, Denali and the rest are all in our database of 500+ mountains — compare the peaks and the expeditions that run on them.
Frequently asked questions
How much do Sherpas get paid in 2026?
A personal climbing Sherpa on Everest earns roughly $2,500–$4,500 base for the expedition, plus a $1,500–$3,500 summit bonus and a share of tips. An experienced Khumbu Sherpa can clear $10,000+ in a season, and more across a full year. The full breakdown is in our Sherpa Wage Economy analysis.
Base salary vs total season pay — what’s the difference?
Base is the guaranteed wage (~$2,500–$4,500 for a veteran). Total season pay adds bonuses and tips, which can double the take-home. Because bonuses and tips are conditional, actual earnings vary a lot year to year.
How big is the summit bonus in 2026?
Around $1,500–$3,500 when a Sherpa’s client summits, with elite rope-fixers at the higher end. It’s a major part of the total and a strong summit-day incentive.
Do tips really matter?
Yes — tips are real income, not a courtesy, paid at the base-camp tipping ceremony. Across a full year, tip income alone can reach $25,000–$40,000 for a busy senior Sherpa. See how it fits the wider structure in our wage-economy breakdown.
How does it compare to Western guides?
There’s a large gap: ~$10,000 for an elite Sherpa vs $30,000–$50,000 for a Western lead guide in the same season. It has narrowed since 2014 as Sherpa labour grew to 32–38% of the operator fee, but remains substantial.
Is it enough, given the risk?
It’s high pay for Nepal but low for the danger — Sherpa climbing is among the world’s most hazardous jobs. Post-2014 reforms raised wages and insurance ($15,000–$20,000 minimum), but the fair-pay debate continues. See our death rates by mountain for context.
How we compiled this
This 2026 snapshot draws on operator disclosures, Nepal Department of Tourism data, and published Sherpa-community wage benchmarks, cross-checked against our own Sherpa Wage Economy analysis. Figures are representative ranges, not fixed rates — real pay depends on role, experience, operator, summit success, and tips, all of which vary by season.
Permit fees, insurance minimums, and staffing rules change from year to year. For the current requirements, consult the Nepal Department of Tourism and your operator; for the full economics, our pillar is the definitive reference.
Travis Ludlow
Founder & Head of Research, Global Summit Guide
Travis leads research at Global Summit Guide, where the team tracks the economics and logistics of the world’s major expeditions and maintains guides to more than 500 peaks. This is a current-season snapshot of Sherpa pay; for the full cash path of an Everest expedition, it defers to our in-depth Sherpa Wage Economy analysis.
Sherpa pay is one line in a much bigger ledger. See exactly how a $90,000 Everest expedition splits into ten payment categories — and how much reaches the people doing the most dangerous work.
K2 2026 Season Tracker: Who’s at Base Camp and What Happens Next
The world’s second-highest mountain has one short window a year — and it’s opening now. Here’s where the 2026 season stands on the Savage Mountain: who’s at Base Camp, how far the ropes are fixed, and when the summit push is likely to go. Updated through the Karakoram summer.
By Travis Ludlow · Founder & Head of Research · Safety review: Taylor Ludlow, RN
Published July 11, 2026 · Last updated: July 11, 2026 · Reading time 8 minutes
Editorial approach: LIVE SEASON TRACKER. Compiled from expedition dispatches, operator updates, and specialist mountaineering coverage (ExplorersWeb, Alan Arnette, and the operators themselves), cross-checked against the standard Karakoram climbing calendar. This is a news tracker, not a how-to guide — for the full route, gear, cost, and preparation detail, we link to our evergreen K2 guides throughout.
Where things stand · Jul 11, 2026
The 2026 Karakoram season is underway, and it’s a quieter one than recent years. As of early-to-mid July, most teams are established at K2 Base Camp (~5,150 m) after the long trek up the Baltoro Glacier, and have been running acclimatization rotations up the standard Abruzzi Spur.
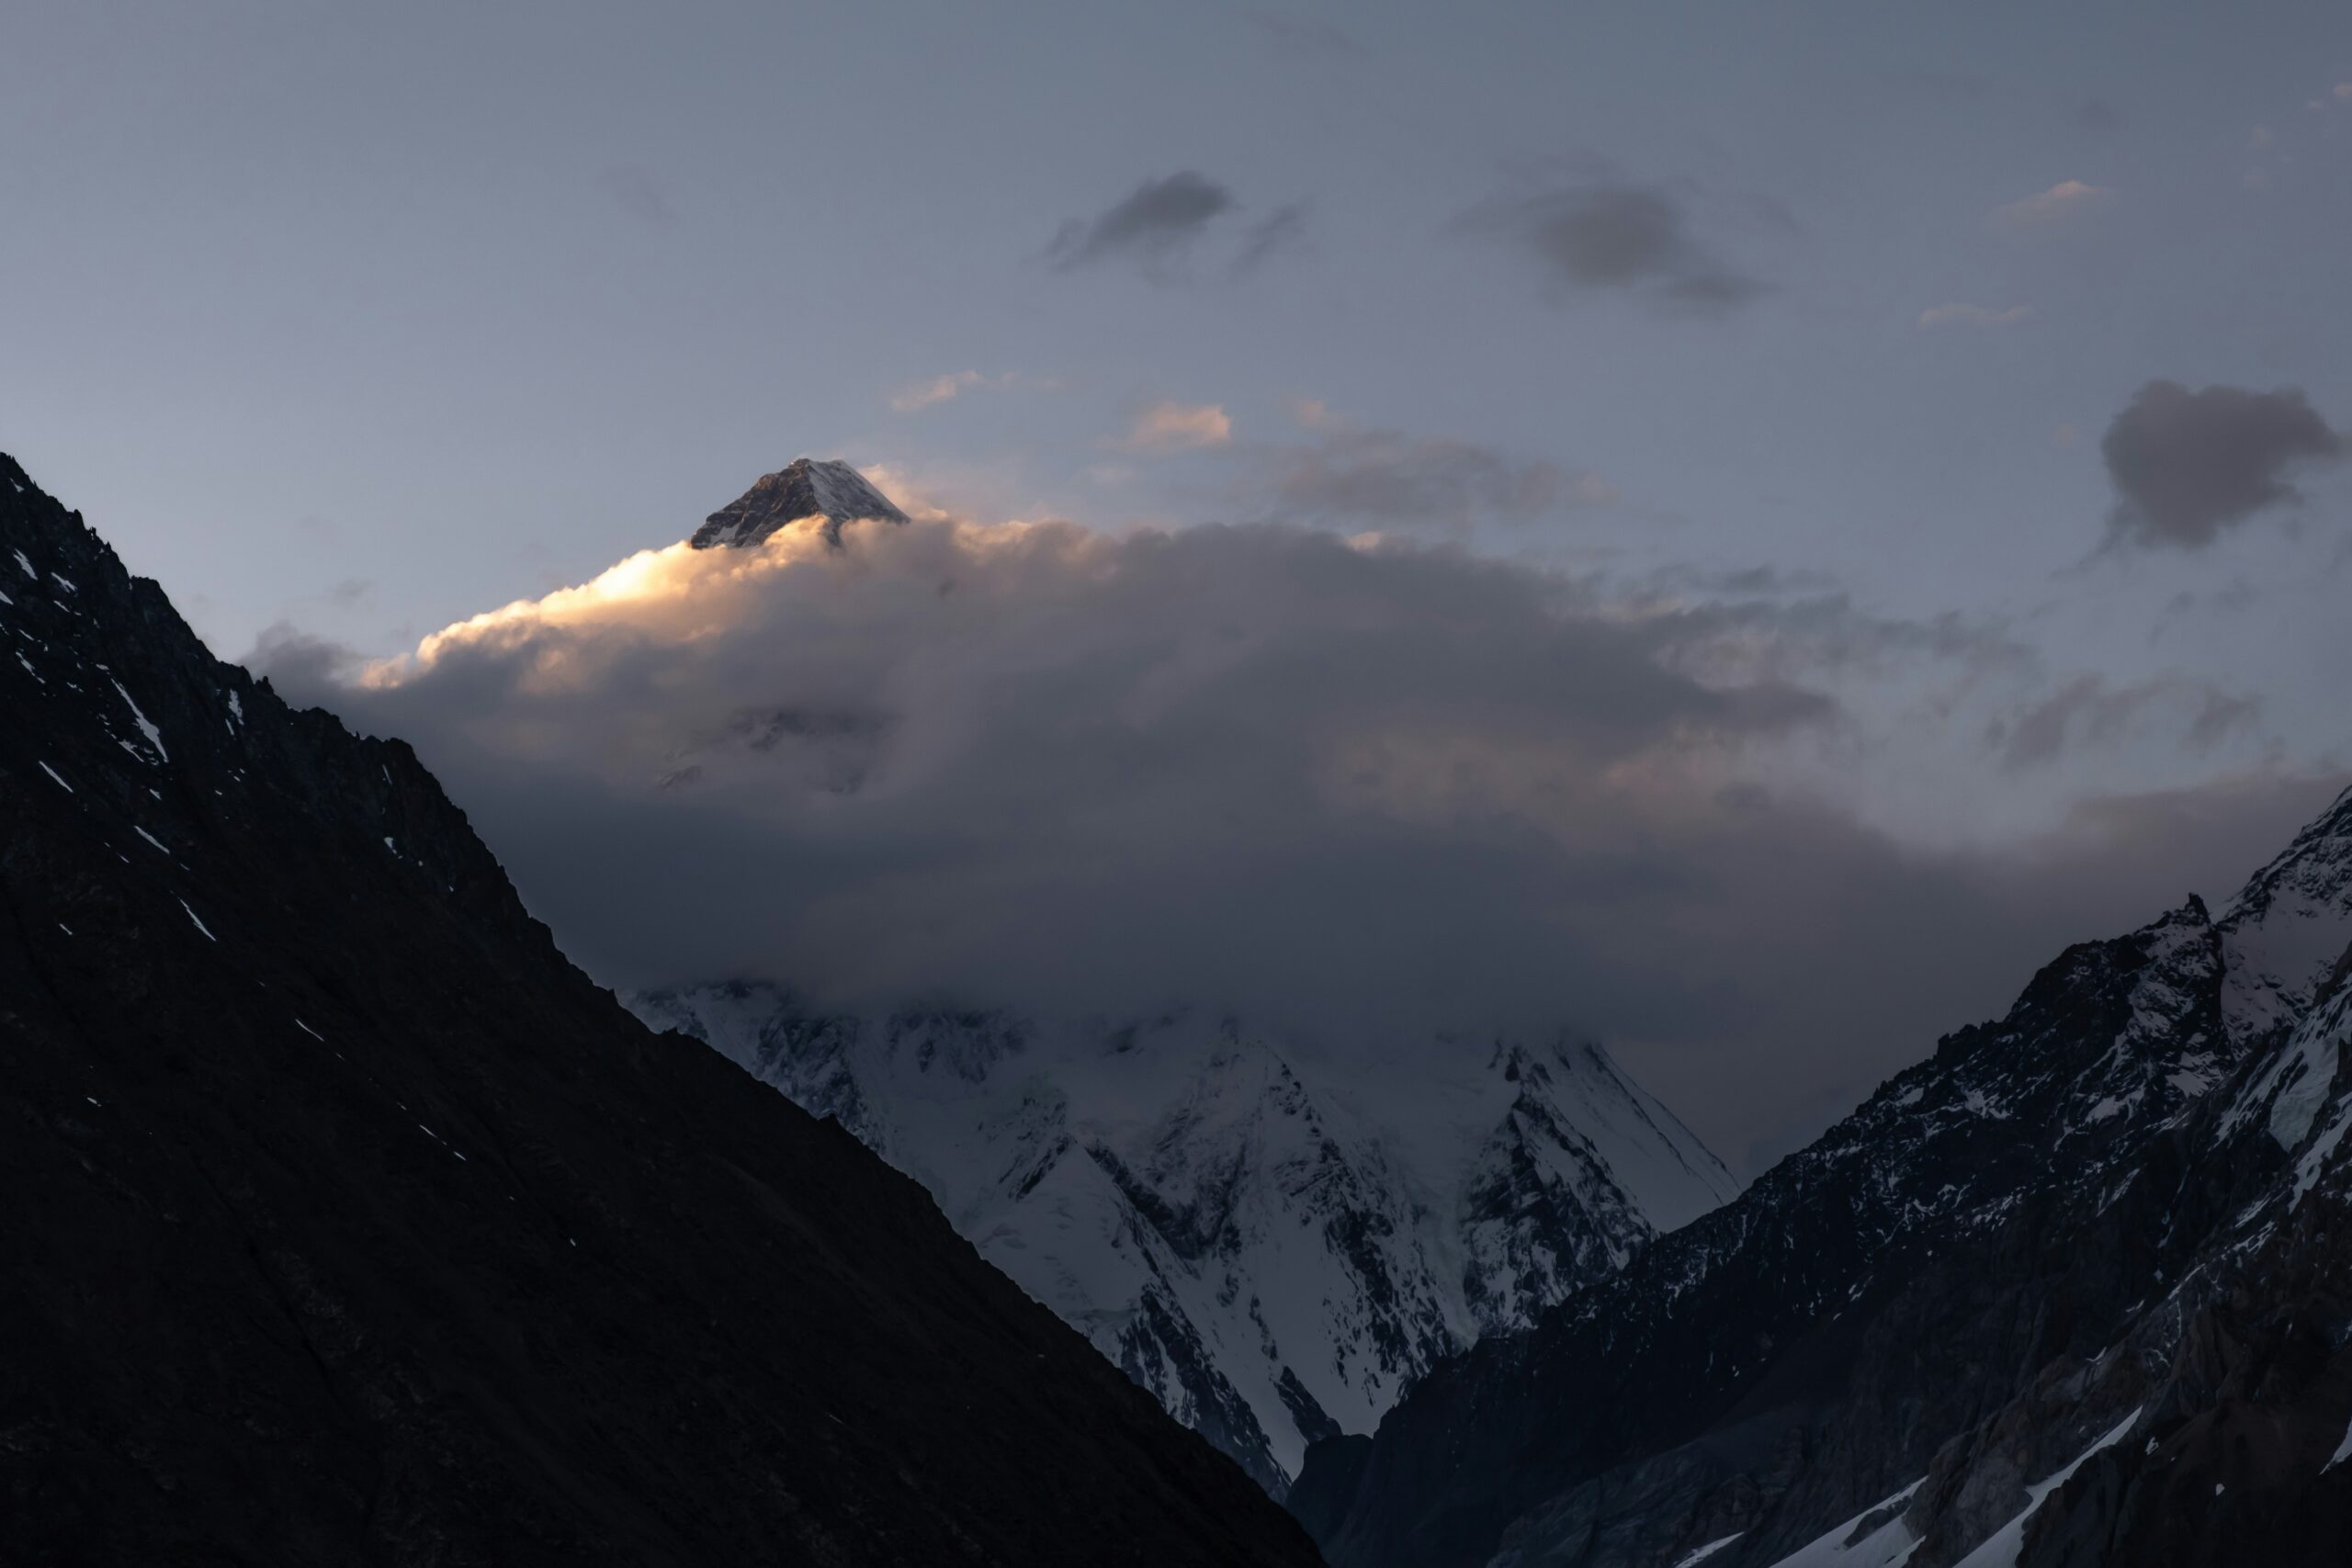
Rope-fixing had reached roughly Camp 2, with progress toward Camp 3 and the upper mountain slowed by spells of rain, snow, and wind. No summits yet — none would be expected this early. The main summit window remains late July to early August, once the route is fixed to the top and the jet stream lifts off the peak.
This is a live tracker. Conditions in the Karakoram change by the day; we refresh it as the summit push develops.
📌 Looking to climb K2 yourself — not just follow the season?This page tracks what’s happening on the mountain right now. For the full how-to — operators, cost, permits, day-by-day itinerary, and preparation — start with our complete K2 climb guide, then dig into the guide to all of K2’s climbing routes and the K2 gear list.
On the China–Pakistan border, deep in the Karakoram — six days’ trek beyond the road.
K2 straddles the border between Pakistan’s Gilgit-Baltistan and China’s Xinjiang, at the head of the Baltoro Glacier in the heart of the Karakoram. Almost all climbing happens from the Pakistan side: teams fly to Skardu, drive to Askole, then trek roughly a week up the Baltoro past Concordia to K2 Base Camp at about 5,150 m. There are no roads, no helicopters for routine access, and no quick way out — part of what makes K2 so committing.
Summit: K2 (8,611 m)Base Camp: ~5,150 m, Godwin-Austen GlacierAccess: Baltoro Glacier trek via Concordia
The 2026 season so far
A lighter crowd, a slow-building route, and a familiar waiting game.
2026 is shaping up as a quieter Karakoram summer than the busy recent years, with a modest number of climbers spread across K2, Broad Peak, and the Gasherbrums. One recurring theme this season: a notable share of climbers are attempting Pakistan’s 8,000ers without supplemental oxygen or personal Sherpa support, which puts extra weight on getting acclimatization and timing exactly right.
On K2 itself, the rhythm has followed the usual script. Teams reached Base Camp, held their puja ceremonies, and began pushing up the Abruzzi in rotations to sleep higher and adapt. As of this update, the fixed ropes had reached around Camp 2, with the harder rock of the Black Pyramid and the route to Camp 3 still ahead — and repeatedly stalled by weather. Meanwhile the nearby peaks set the tone: on Broad Peak, rope-fixing teams have been poised for a first summit push but held back by wind and fresh snow, while the Nanga Parbat season over on the Diamir side has been wrapping up.
Why the wait mattersOn K2 there is effectively one route and one narrow window. When rope-fixing runs late — as it often does — teams get compressed into a single mass summit push instead of staggered days. That raises the odds of crowding at the Bottleneck, the most dangerous point on the mountain. The climbers with the least margin are those going without bottled oxygen, who can’t afford long waits in the cold at 8,000 m+.
What happens next
The season now hinges on one thing: a weather window.
From here, the sequence is almost always the same. The rope-fixing team pushes the line from Camp 2 up through Camp 3 and the upper mountain toward the summit; forecasters watch for the jet stream to lift off the peak; and when a two-to-three-day window appears, teams move fast — Base Camp to the high camps, then a midnight summit push through the Bottleneck at around 8,200 m. Historically the K2 summit day lands somewhere in the last week of July or the first days of August.
Now → mid-window
Fixing & positioning. Ropes extended toward the summit; teams complete final rotations and pre-position at Base Camp, watching the forecast.
The window
Summit push. A 2–3 day weather window triggers the move to high camps and a night-time summit bid via the Bottleneck and the traverse under the serac.
After
Descent & wrap-up. The most dangerous phase — down-climbing tired through the same hazards — followed by the season retrospective.
We’ll update the status block at the top of this page as the push develops. For the mechanics of the climb itself — the camps, the crux sections, and how the standard route is laid out — see our complete guide to K2’s routes.
One window a year. The Karakoram summer — roughly late June through August — is the only realistic time to climb K2, and the true summit window is often just a few days inside it. Everything before that is trekking, acclimatizing, and waiting on the weather.
The route they’re on
The Abruzzi Spur — the standard line, and the one being fixed now.
As in most modern seasons, the action is on the Abruzzi Spur, the ridge on the Pakistan side that has been the standard route since the 1954 first ascent. Commercial teams’ Sherpa staff fix the ropes, usually supported by Pakistani high-altitude climbers, and the season’s other big line — the Cesen (Basque) route — joins the Abruzzi around Camp 3. Beyond these, K2’s harder faces and ridges are the domain of a handful of elite alpinists each year rather than the commercial teams.
We’re deliberately not re-explaining every camp and crux here — that’s covered in depth on the pillar pages. If you want the full picture:
K2’s reputation isn’t hype — and it isn’t the summit that kills.
K2 is steeper, more technical, and more exposed than Everest, with no easy line to the top. The crux Bottleneck sits directly beneath a hanging serac, and the section that has claimed the most lives isn’t the way up — it’s the exhausted, oxygen-depleted descent back through the same terrain, often in deteriorating afternoon weather. Rockfall low on the mountain and avalanche risk higher up round out a genuinely serious picture. It’s why K2’s historical fatality rate sits far above Everest’s, and why experienced guides talk about “red flags stacking up” as a reason to turn around.
The numbers behind the reputationK2 has one of the highest death-to-summit ratios of any 8,000 m peak. For the full comparison against Everest and the rest of the 8,000ers, see our death rates by mountain analysis and where K2 lands in our 8,000ers ranked by difficulty.
Live K2 conditions
Modelled forecast for the K2 region — a read on the window teams are waiting for.
The single biggest variable in any K2 season is the weather at altitude. The 7-day outlook below is modelled data for the K2 region — treat it as a general indicator, not a summit-day forecast (expedition teams pay for specialist high-altitude forecasts before committing to a push). Even in July, high temperatures and jet-stream winds swing conditions from perfect to unclimbable within a day.
K2 region (~Base Camp, Karakoram)
Loading live data…
Fetching the latest forecast…
Live forecast unavailable right now — not unusual for a remote high-altitude region. Summit-altitude conditions on K2 are driven by the jet stream, and even a good valley forecast can mask fierce winds up high.
A general indicator only. This is modelled data near Base Camp altitude — the summit at 8,611 m is a different world, colder and far windier. Teams launch only when a multi-day window of light wind lines up with the route being fixed to the top.
Thinking of climbing it?
K2 is a realistic objective for experienced 8,000 m climbers — with a lot of preparation.
Following the season is one thing; standing on top is another. Commercial operators do run guided K2 expeditions with fixed ropes, oxygen, and Sherpa support, but it remains one of the most serious objectives in guided mountaineering and expects real prior high-altitude experience. If K2 is on your list, our evergreen guides are built to take you from “someday” to a concrete plan:
And if you’re just here to explore the mountains themselves, K2 is one of more than 500 peaks in our mountain database — compare it against the other giants and find your own next objective.
Frequently asked questions
Has anyone summited K2 in 2026 yet?
Not as of this update (July 11, 2026). Ropes on the Abruzzi Spur had reached roughly Camp 2, with the upper mountain still to be fixed. K2 summits almost always come in the late-July to early-August window, so none would be expected this early. We refresh this tracker as the push develops.
When is K2 climbed each year?
Only in the Karakoram summer — roughly late June through August. The true summit window is usually just a few days in late July or early August, when the jet stream lifts off the peak. Everything before that is trekking, acclimatizing, and rope-fixing.
What route are they using?
The standard Abruzzi Spur on the Pakistan side, where the commercial teams fix the ropes. The Cesen (Basque) route is the main alternative and joins the Abruzzi around Camp 3. Full detail in our K2 routes guide.
How many people are climbing K2 in 2026?
2026 is a quieter season than recent years, with a modest number of climbers across K2, Broad Peak, and the Gasherbrums, and an unusually high share going without supplemental oxygen. Exact permit numbers shift through the season.
Why is K2 more dangerous than Everest?
It’s steeper, more technical, and more exposed, with the crux Bottleneck under a hanging serac — and most tragedies happen on the descent, not the summit. Its historical fatality rate is far higher than Everest’s. See our death rates by mountain comparison.
Can I climb K2 as a client?
Yes — guided K2 expeditions exist, with fixed ropes, oxygen, and Sherpa support, but K2 demands prior 8,000 m experience. Our full K2 climb guide covers operators, cost, permits, and preparation.
How we track this
This tracker is compiled from expedition dispatches, operator updates, and specialist mountaineering coverage (including ExplorersWeb and Alan Arnette), cross-checked against the standard Karakoram climbing calendar. Fast-moving details — rope-fixing progress, summit pushes, casualties — are reported cautiously and dated, because early Base Camp information is often incomplete and evolves.
Conditions and status change daily during the season. For the current state of any climb, we recommend following the operators directly; for the how-to detail, our evergreen K2 guides are the authoritative reference.
Travis Ludlow
Founder & Head of Research, Global Summit Guide
Travis leads research at Global Summit Guide, where our team tracks the world’s major climbing seasons and maintains in-depth guides to more than 500 peaks. This K2 tracker is a live season dispatch, updated through the Karakoram summer, with safety notes reviewed by Taylor Ludlow, RN. For the full climbing detail, we always point you to our evergreen guides.
The K2 window opens once a year, and we track it as it happens. When you’re ready to go from watching to planning, our complete K2 guide and the 8,000ers difficulty ranking will get you started.
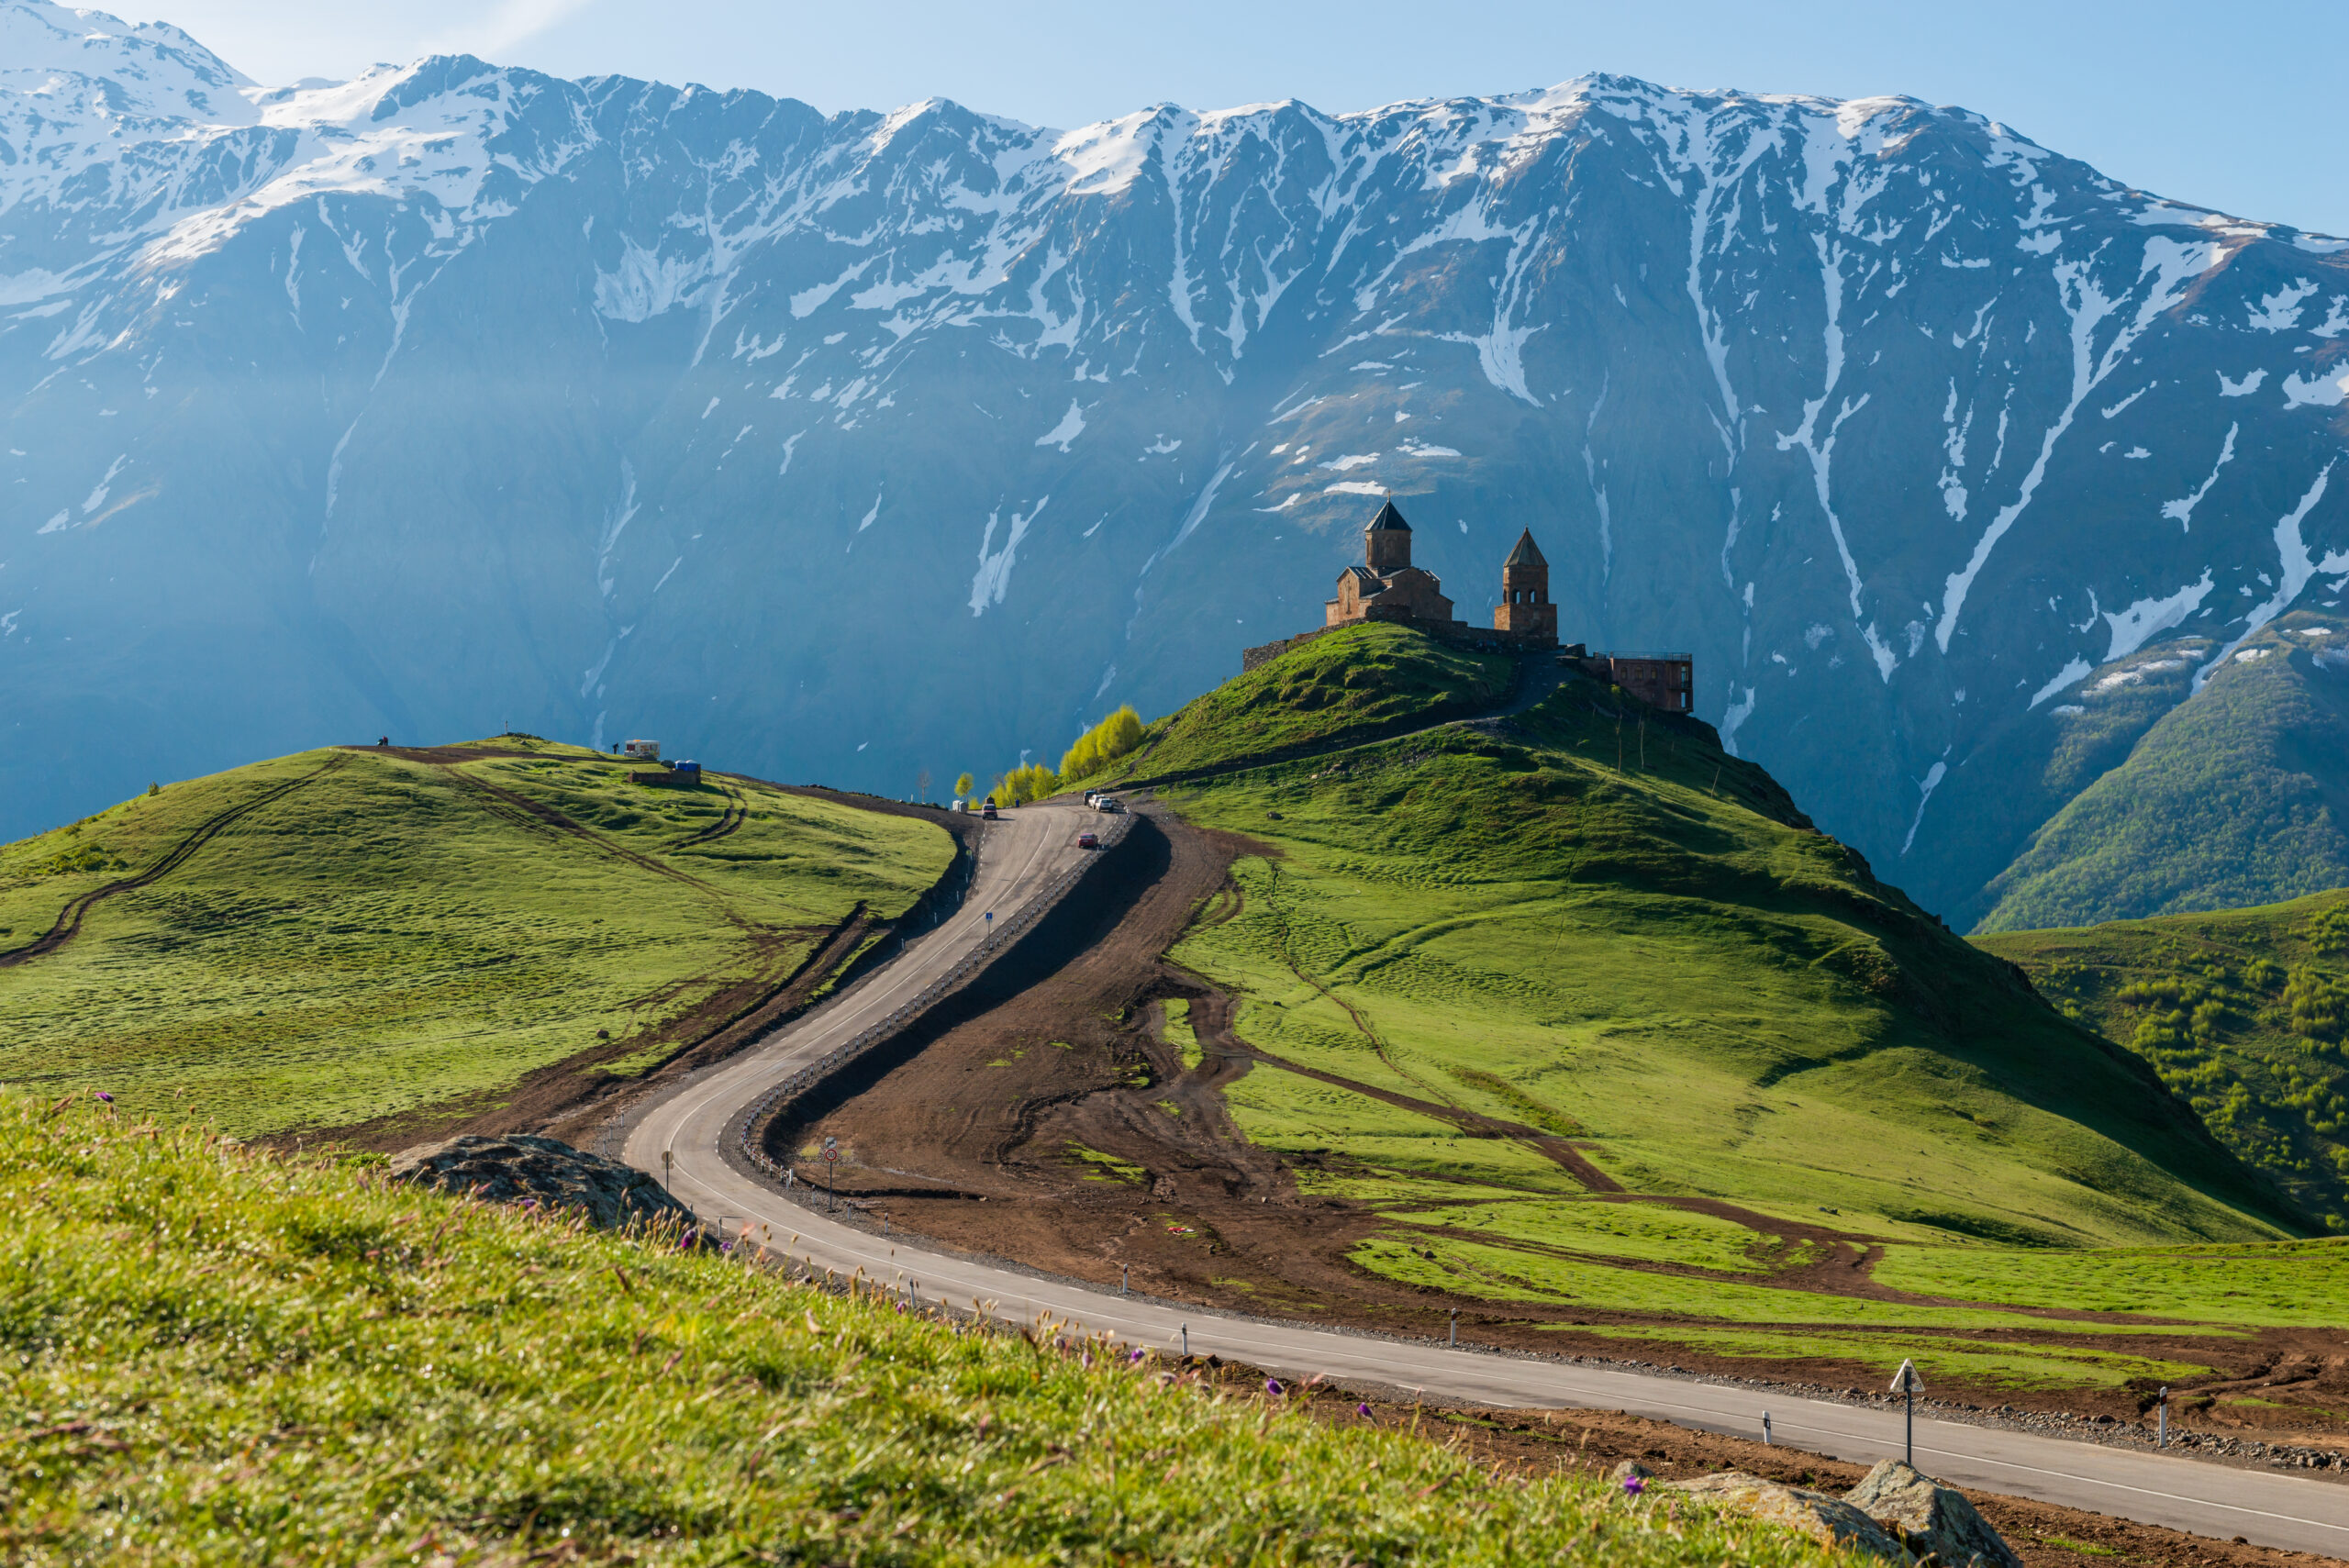
🧗 Mount Kazbek · Gergeti Glacier & Bergschrund · Route Detail · Updated July 2026
Are There Fixed Ropes on Mount Kazbek?
It’s one of the most common questions climbers ask before Kazbek — and the answer isn’t a simple yes or no. Kazbek is not a fixed-rope mountain the way Everest is, but a fixed rope does sometimes appear in one specific place. Here’s exactly where, when, and what it means for your climb.
By Travis Ludlow · Editor, Global Summit Guide · Route research: Walker Ludlow · Safety review: Dawson Ludlow
Published July 5, 2026 · Last verified: July 5, 2026 · Reading time 7 minutes
Editorial approach: RESEARCH-BASED. Our team has not climbed Kazbek. This detail page synthesizes current operator route documentation and established route descriptions for the standard Gergeti Glacier ascent. Safety content is reviewed by Dawson Ludlow. Glacier and route conditions change constantly on Kazbek — always confirm the current situation with your guide or operator.
⚡ The short answer
No — not as a fixed system. The standard Gergeti Glacier route is never permanently fixed; the glacier shifts daily, so guides re-read the line on every climb. You travel roped as a team for crevasse protection, which is not the same as clipping fixed lines. The one exception: on the steep 35–45° final summit slope and the bergschrund below it, a guide will often fix a short rope if the snow or ice is hard — but it is situational, not guaranteed. Build the skills to climb that slope without one.
“Fixed rope” means different things to different climbers, and that’s the root of the confusion around Kazbek. Before you plan, it helps to separate three very different things — because Kazbek involves two of them, and specifically does not involve the third.
Three kinds of “rope” on a mountain
A fixed-line system (Everest-style): continuous ropes pre-installed up the route that you clip and ascend with a jumar. Kazbek does not have this.
Rope-team / glacier travel: your own party roped together so a crevasse fall can be arrested and the climber rescued. Kazbek requires this across the Gergeti Glacier.
A situational fixed rope: a short line a guide anchors on one steep section when conditions demand it. Kazbek sometimes has this on the summit slope and bergschrund.
The Gergeti Glacier: roped, but never fixed
The heart of the standard route is the crossing of the Gergeti Glacier from the Betlemi (Meteo Station) hut up onto the plateau at around 4,400 metres. This is glaciated terrain with real crevasse exposure, and there is no fixed rope and no reliable fixed path across it. The reason is simple: the glacier is alive. New crevasses open daily and snow bridges collapse without warning, so even experienced guides don’t trust a previous track — they route-find fresh each time based on the day’s conditions.
What protects you here is rope-team travel. Your group ropes together at correct spacing so that if one climber breaks through a snow bridge, the others can arrest the fall and haul them out. That’s why competence with roped glacier travel and crevasse rescue is non-negotiable for Kazbek — it’s the protection system the mountain actually uses, and it’s entirely different from clipping a fixed line.
The bergschrund and the steep summit slope
This is where fixed ropes actually enter the picture. Above the plateau and the saddle (around 4,900 m), the route steepens into the final summit slope — roughly 35–45° of snow and ice — and at its base you cross the bergschrund, the crevasse where the moving glacier pulls away from the steeper headwall. This crossing and the slope above it are the technical crux of the standard route.
When the snow here is soft and stable, a strong roped team simply climbs it. But when it’s icy or hard — which is common early in the season, late in the day, or in a cold year — a guide will commonly fix a short rope across the bergschrund and up the steep slope to secure the crossing. So the honest answer to “is there a fixed rope at the Kazbek bergschrund?” is: sometimes, when conditions call for it. It is a judgement the guide makes on the day, not a permanent installation you can count on.
What this means for your climb
The practical takeaway is straightforward: prepare as if there will be no fixed rope, and treat any fixed rope as a bonus. The skills that actually get you up Kazbek are roped glacier travel, crevasse rescue, confident cramponing, ice-axe self-arrest, and the ability to climb a 35–45° snow-and-ice slope. If your guide fixes a rope at the bergschrund, you should be comfortable using it — but your safety cannot depend on one being there, because on any given day it may not be.
If fixed-rope security on the steep ground matters to you, ask your operator directly how they handle the summit slope and bergschrund in the conditions expected for your dates. And before you commit, read the full picture of the route, seasons, and skill requirements in our complete Mount Kazbek climbing guide.
Frequently asked questions
Are there fixed ropes on Mount Kazbek?
Not as a permanent system. The Gergeti Glacier route is never fixed — the glacier changes constantly, so guides re-assess the line every climb. You travel roped as a team for crevasse protection. The one place a fixed rope may appear is the steep final summit slope (about 35–45°) and the bergschrund below it, where a guide will sometimes fix a short rope if the snow or ice is hard — but it’s situational, not guaranteed.
Is there a fixed rope on the Gergeti Glacier?
No. The Gergeti Glacier is crossed using rope-team travel, not fixed ropes. Your party ropes together so a crevasse fall can be arrested and the climber rescued. Because the crevasses shift daily, there’s no fixed line and no reliable fixed path — route-finding is done fresh each time.
Is there a fixed rope at the Kazbek bergschrund?
Sometimes. The bergschrund sits at the base of the 35–45° summit slope, the crux of the standard route. When conditions there are icy or hard, guides commonly fix a short rope across the bergschrund and up the slope. In good soft snow it may not be fixed at all — never assume one will be in place.
Do you need fixed-rope skills for Mount Kazbek?
You need glacier and steep-snow skills more than fixed-rope skills: roped glacier travel, crevasse rescue, crampons, ice axe, self-arrest, and the ability to climb a 35–45° slope. If a guide fixes a rope you should be comfortable using it, but you can’t rely on one being there.
Is Mount Kazbek technical like Everest with fixed lines?
No. Kazbek has no continuous fixed-line system like Everest’s commercial routes. It’s a glaciated alpine ascent where you travel roped as a team, with at most a short situational fixed rope on the summit slope. “Non-technical” only means no rock or ice pitches — it still demands real glacier travel and steep-snow competence.
How we built this
This is a research-based detail page — our team has not climbed Kazbek. It synthesizes current operator route documentation and established descriptions of the standard Gergeti Glacier route, focusing on how rope protection is actually used on the mountain. Safety content is reviewed by Dawson Ludlow. Glacier conditions, the bergschrund, and the summit slope change constantly and year to year — always confirm the current situation with your guide before you climb.
⛰ Difficulty Ratings · The Mountains People Underestimate
5 Mountains That Are Actually Harder Than They Look
The most dangerous mountains aren’t always the ones that look hardest. Some of the deadliest peaks on Earth are famous, photogenic, or sold as “walk-ups” — and that gentle reputation is exactly what gets people into trouble. Here are five mountains climbers routinely underestimate, and the hidden reasons each is tougher than it seems.
Published July 3, 2026 · Last verified: July 3, 2026 · Reading time 11 minutes
Editorial framing: RESEARCH-BASED, with first-hand experience where noted. Our team has stood on the summit of Kilimanjaro and climbed glaciated high-altitude volcanoes; the picks and difficulty notes are drawn from that experience plus summit-success and safety data, cross-referenced with our own mountain difficulty ratings. Figures are approximate and vary by source and season.
⚡ The Thesis
Reputation is not difficulty. A mountain can be famous, beautiful, or technically “easy” and still be lethal — because of altitude, weather, objective hazard, or sheer endurance. The five below all hide a hard mountain behind a gentle face, and underestimating them is the single biggest mistake climbers make on each.
Climbers and hikers tend to judge a mountain by two things: how steep and technical it looks, and how famous it is. Both are misleading. A peak with no ropework can still sit at an altitude where the body fails; a gentle-looking glacier can hide crevasses; a postcard volcano can be raked by rockfall; a “bucket-list” tourist mountain can be brutally cold and crowded. The danger isn’t just the terrain — it’s the gap between what people expect and what the mountain actually delivers.
That gap is where accidents happen. Underestimation leads to the wrong gear, too few acclimatisation days, a forecast ignored, a turnaround time blown. None of the five mountains below is the “hardest” in the world — and that’s the point. They are dangerous precisely because they don’t look it. Read each alongside our mountain difficulty ratings guide, which exists to replace reputation with something measurable.
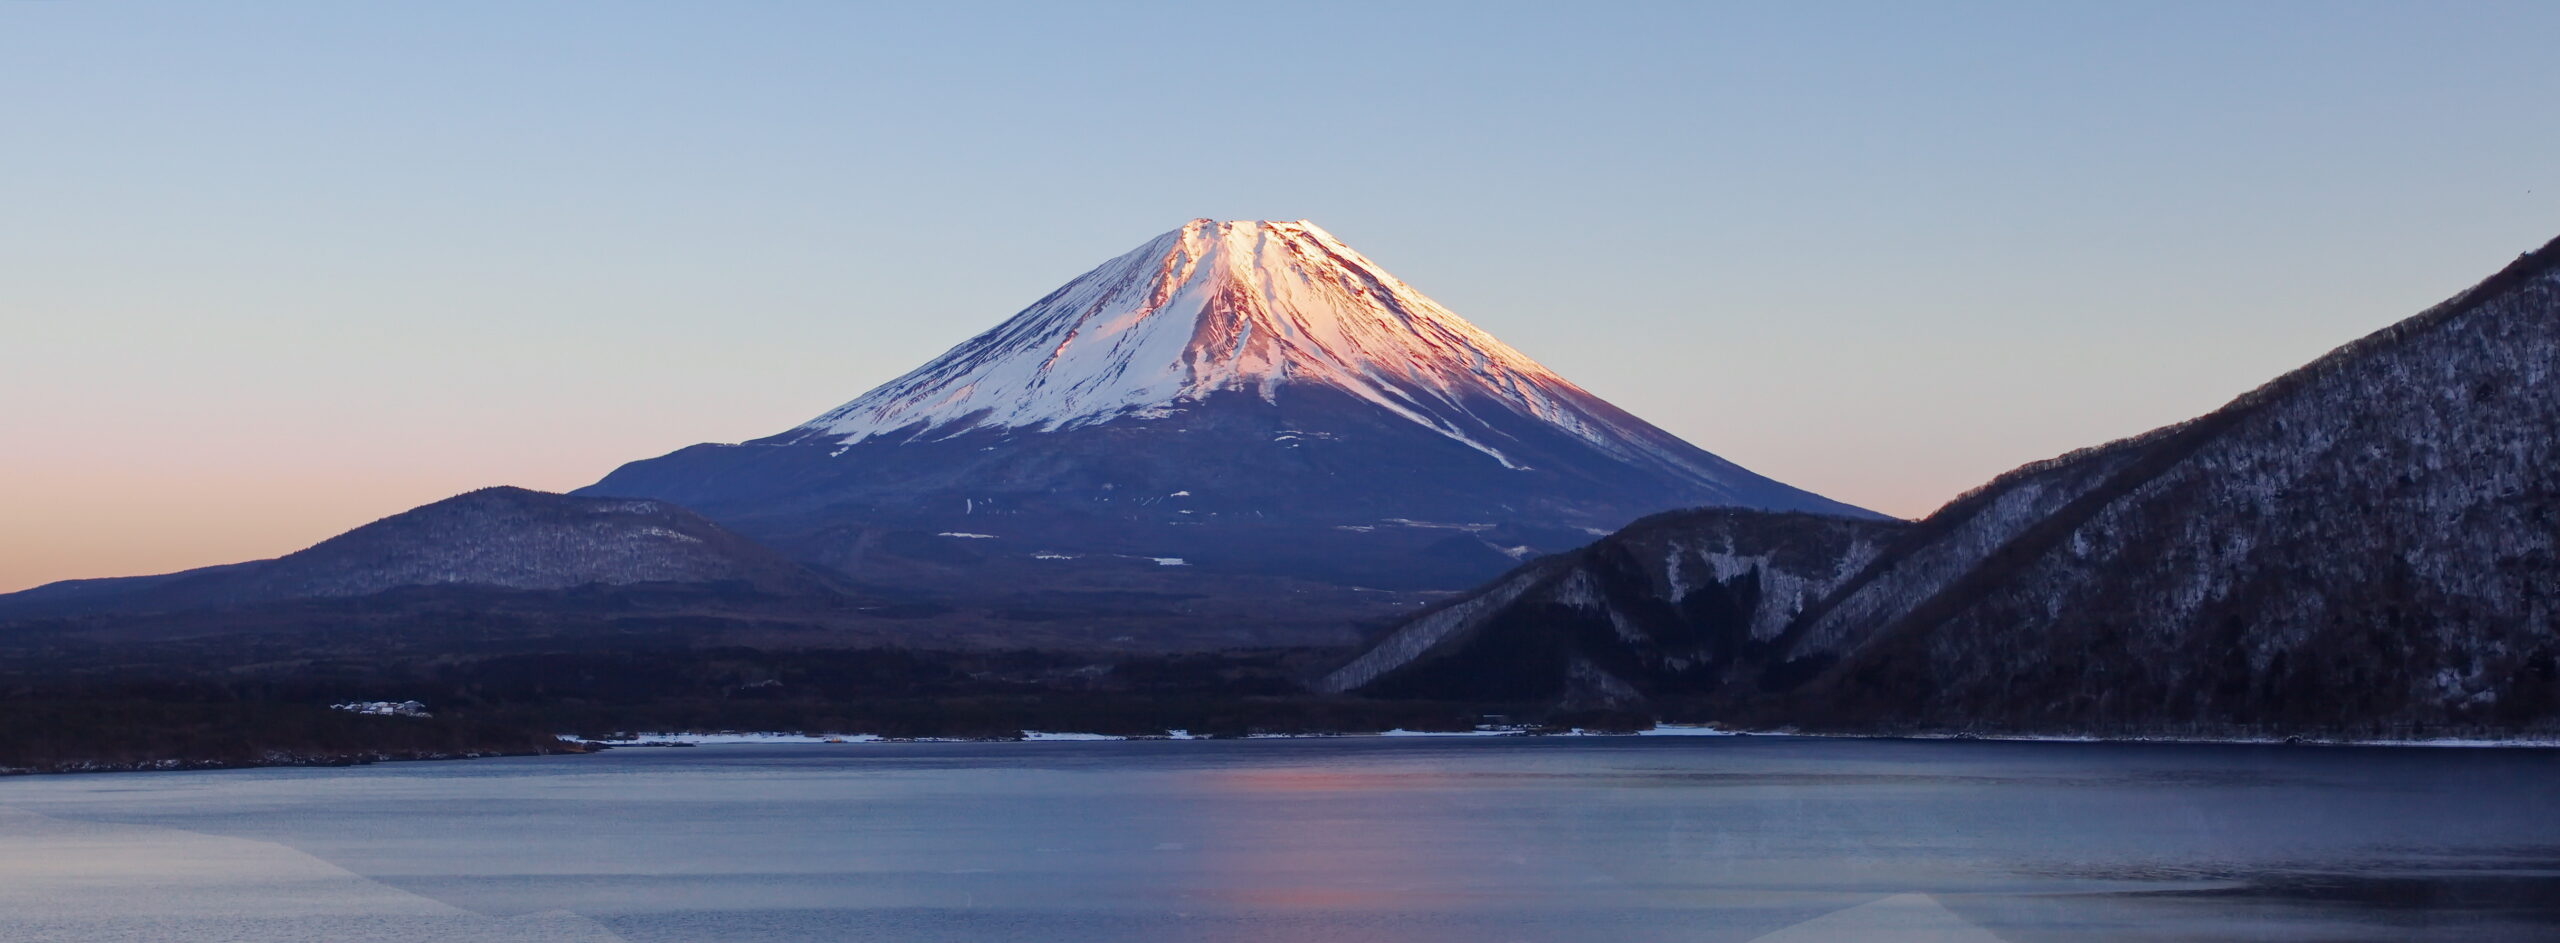
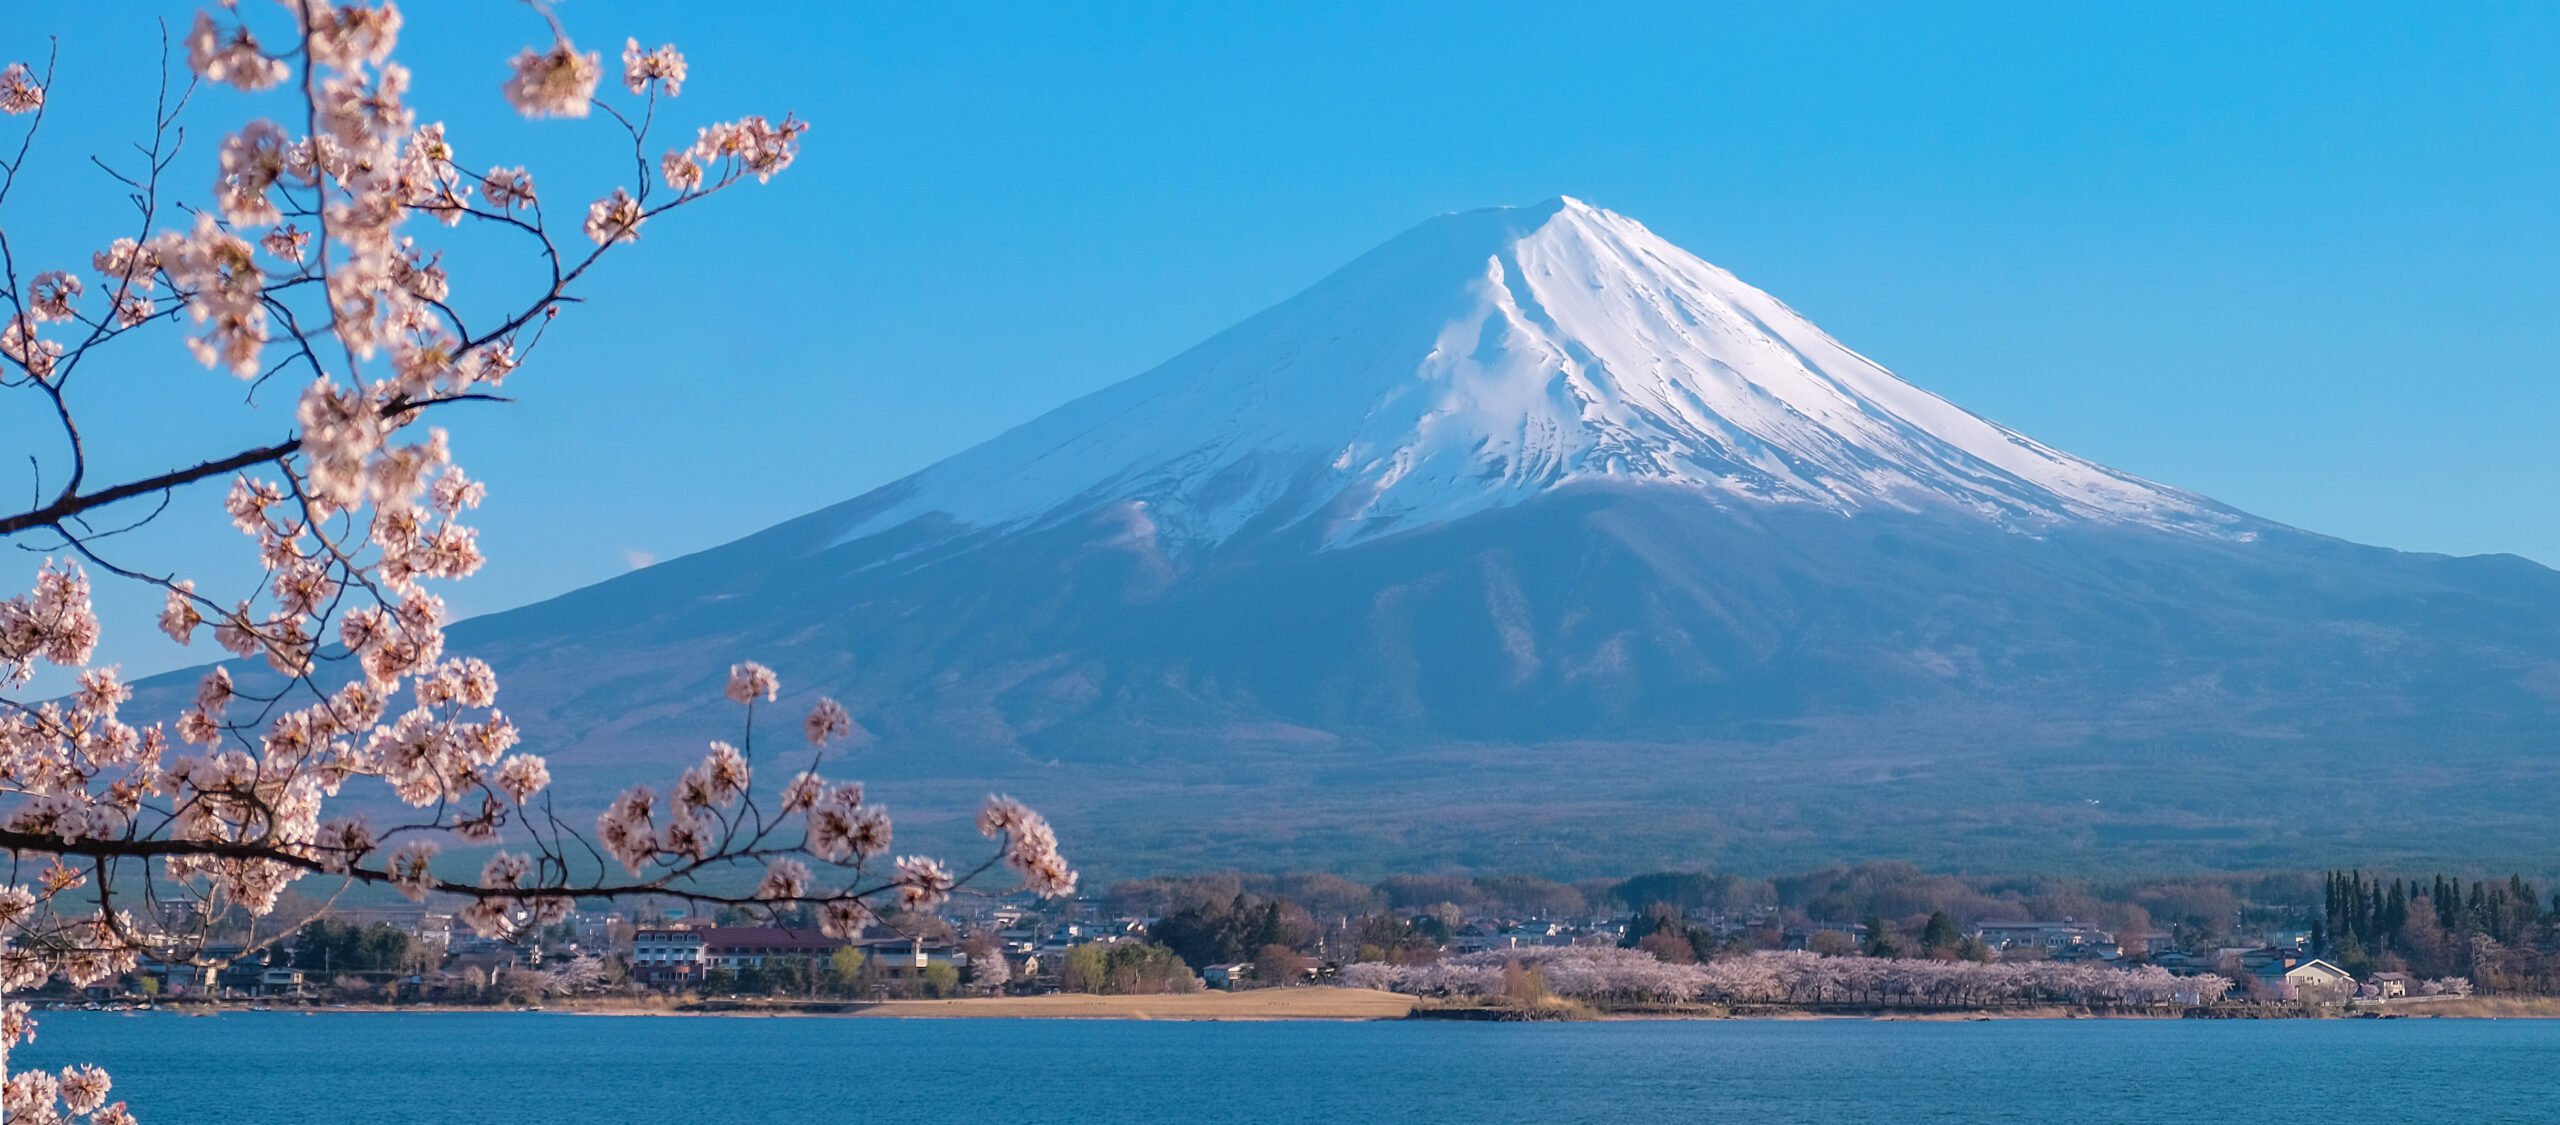
1. Mount Fuji — The Tourist Trap
Mount Fuji, 3,776 m. The world’s most-climbed mountain looks like a gentle bucket-list hike — which is exactly the problem.
The reputation: Japan’s sacred icon, the most-climbed mountain on the planet, and a near-mandatory photo for visitors. Hundreds of thousands walk up it each summer, many with no mountain experience at all — it’s widely treated as a long but casual hike in trainers.
Why it’s actually harder: Fuji is non-technical, but at 3,776 m the altitude is high enough to make a meaningful share of climbers ill, and the summit is genuinely cold — below freezing with wind, even at the height of summer. The classic ascent is done overnight, to catch sunrise from the top, so people climb tired, in the dark, in the cold, on crowded trails where a slow queue can leave you stationary and chilling for hours. Every season brings altitude sickness, hypothermia, and exhaustion cases among the unprepared.
The reality check: the crowds and casualties got serious enough that Japan introduced a climbing fee and daily caps for 2026, along with gate hours to stop reckless overnight “bullet climbing.” Fuji rewards the same respect as any high mountain: warm layers, a head torch, a sensible pace, and ideally a night in a mountain hut to break the altitude gain. Treat it as a hike and it bites; treat it as a small mountain and it’s a wonderful climb. See our Fuji routes guide and best-time-to-climb guide, or the head-to-head in Fuji vs Kilimanjaro.
2. Mount Rainier — The Pretty Volcano
The reputation: a glorious, glaciated cone looming over Seattle — the kind of mountain that looks like a scenic weekend objective for any fit hiker, and draws huge numbers of day visitors to its meadows and viewpoints.
Why it’s actually harder: Rainier is a serious, heavily glaciated mountaineering climb, not a hike. Its standard routes cross crevassed glaciers that demand rope teams, crampons, and ice-axe skills; they’re exposed to rockfall and serac danger; and the weather can swing from sunshine to whiteout in an hour. The altitude (4,392 m) and the sheer vertical gain — over 2,700 m from the usual trailhead — wear climbers down. Tellingly, only around half of those who set out for the summit actually make it.
The reality check: Rainier is so genuinely demanding that it’s a recognised training ground for Denali and Everest — climbers use it to rehearse glacier travel and altitude before the world’s biggest peaks. That should tell you everything: a mountain elite expeditions use as practice is not a casual outing. Compare it honestly in Rainier vs Denali and check the odds in our Rainier summit success rate breakdown.
3. Mont Blanc — The Deadly “Walk-Up”
The reputation: the highest mountain in the Alps, and one routinely marketed as an accessible “walk-up” — a fit hiker’s trophy that can be bagged in a long weekend with a guide. Thousands attempt it every summer.
Why it’s actually harder: the popular Goûter route crosses the notorious Grand Couloir, a gully so frequently swept by rockfall that it has earned the grim nickname the “Couloir of Death.” Beyond it, the climb is a true high-alpine undertaking: glaciated terrain with hidden crevasses, altitude nearing 4,808 m, fast-moving storms that strand climbers, and heavy crowds that slow everything down at exactly the wrong moments. None of this is “technical” in the extreme sense — and yet people die here regularly.
The reality check: Mont Blanc has one of the highest death tolls of any mountain in the Alps, the accumulated price of so many under-prepared parties on an objectively hazardous route. The word “walk-up” does it a dangerous disservice. Anyone heading up should treat it as the serious glaciated climb it is — see our Goûter route conditions and the full expedition breakdown, and weigh it against its sharper neighbour in Mont Blanc vs Matterhorn.
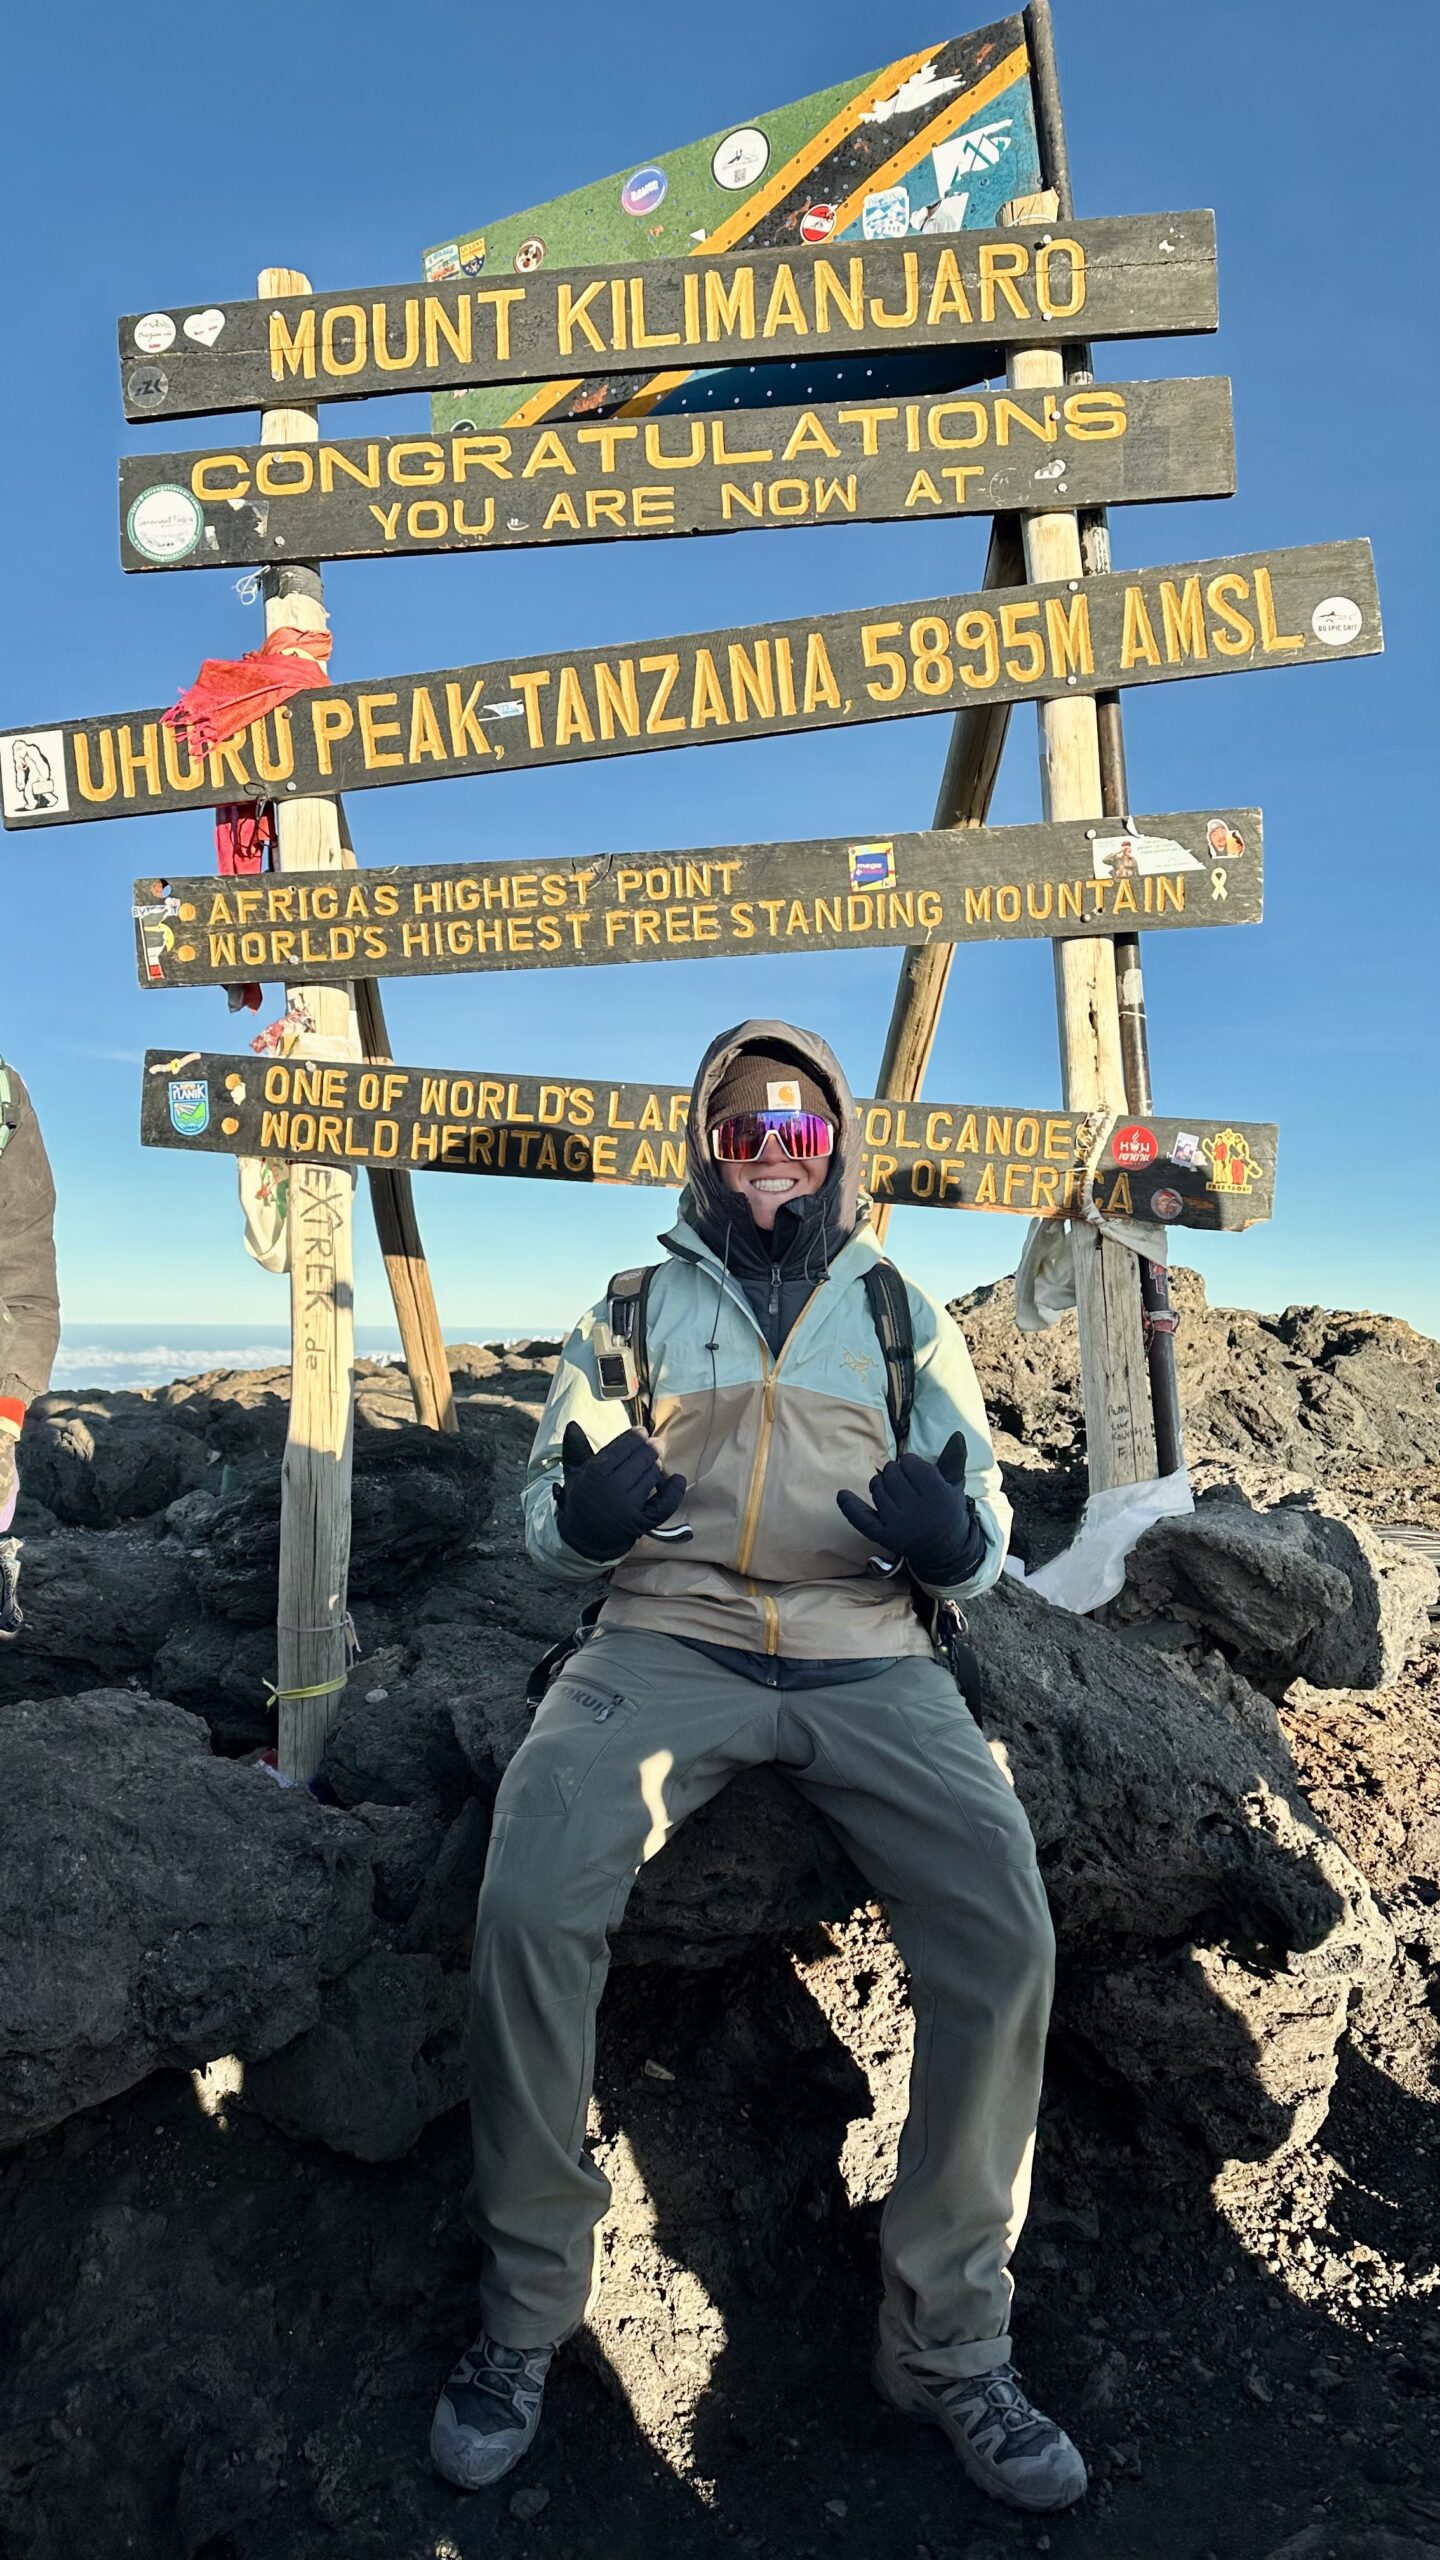
4. Mount Kilimanjaro — The Altitude Trap
Uhuru Peak, 5,895 m — the roof of Africa. No ropes required, but the altitude turns back a large share of those who try.
First-hand: a member of our team has summited Kilimanjaro via the Lemosho route, so the notes here come from the mountain itself, not just the data — and the single biggest factor in summiting was acclimatisation days, not fitness.
The reputation: the highest mountain in Africa and the world’s most famous “walk-up” — the big peak that, the story goes, anyone reasonably fit can climb because it needs no ropes, crampons, or technical skill. That reputation pulls in tens of thousands of trekkers a year.
Why it’s actually harder: the lack of technical difficulty is real — and almost beside the point. At 5,895 m, Kilimanjaro is high enough that altitude is the great equaliser, and it humbles the fit and unfit alike. A large share of climbers never reach the summit, plenty are evacuated with altitude sickness, and people genuinely die here each year from HACE and HAPE — the high-altitude brain and lung emergencies. The cruel twist is that strong, fit people sometimes fare worse, because they push too fast for their bodies to adapt.
The reality check: on Kilimanjaro, the variable that most predicts success isn’t fitness — it’s how many days you take to go up. Rushed five-day itineraries have far lower summit and safety rates than seven- or eight-day routes that build in acclimatisation. The mountain is absolutely climbable by ordinary people; it just demands respect for altitude that its “anyone can do it” billing actively discourages. Start with our Kilimanjaro climbing guide and understand the physiology in acclimatisation explained.
5. Aconcagua — “Non-Technical” ≠ Easy
Aconcagua, 6,961 m — the highest “non-technical” mountain on Earth, and one of the most dangerously underestimated.
The reputation: at 6,961 m, Aconcagua is the highest peak outside the Himalaya and Karakoram, and it’s famous as the highest non-technical mountain in the world — a summit you can reach, by the normal route, without ever roping up. To many that reads as “the easiest way to climb really high,” and the mountain draws crowds of climbers chasing their first big altitude.
Why it’s actually harder: “non-technical” describes the climbing, not the difficulty. Aconcagua is nearly 7,000 m — deep into serious altitude — and it sits in the path of brutal, sustained wind and cold, including the infamous Viento Blanco, a white-out storm that can pin or kill a team. Summit day is enormously long and punishing, and the summit success rate is often only around a third. People die on Aconcagua most years, frequently from altitude illness, cold, or exhaustion brought on by treating a near-7,000 m peak as a walk.
The reality check: Aconcagua may be the most dangerously underestimated mountain on this list, precisely because “non-technical” gets mistaken for “safe.” It demands genuine acclimatisation, real cold-weather kit, and the judgement to turn around in the wind. Get the full picture in our Aconcagua climbing guide, the odds in our success-rate analysis, and the conditions in normal route conditions.
The Common Thread
Line these five up and the pattern is impossible to miss. Three of them — Fuji, Kilimanjaro, Aconcagua — are non-technical, and it’s the altitude that does the damage. Two — Rainier and Mont Blanc — look like scenic outings but are real glaciated climbs with hidden, lethal hazards. In every case, the danger lives in the gap between a gentle reputation and a serious reality.
🟠 The lesson for your own plans
Judge the mountain, not its fame. “Walk-up,” “non-technical,” and “bucket-list” tell you nothing about altitude, weather, or hazard.
Respect altitude above all. On the non-technical giants, acclimatisation days beat fitness every time.
Read the hidden hazards. Rockfall couloirs, crevasses, and storms kill more people on these peaks than hard climbing does.
Use a real difficulty rating. Replace reputation with something measurable before you commit.
That last point is the whole reason difficulty ratings exist. Our Mountain Difficulty Ratings Guide breaks down how the grading systems actually work — technical grade, altitude, hazard, and commitment — so you can size up any peak honestly instead of trusting its reputation. If you take one link from this article, take that one.
How We Picked Them
Our method.
Selection favoured mountains with a wide gap between public reputation and real difficulty – famous “walk-ups” and photogenic peaks that data and experience show to be seriously demanding.
Informed by real search behaviour: these are peaks people actively compare and question (“is X harder than Y,” “non-technical mountain climbs”), confirming the reputation-versus-reality gap is real.
Figures are approximate – summit success rates, fatality counts, and altitudes vary by source, route, and season; treat them as honest ballparks, not precise statistics.
Research-based, with first-hand Kilimanjaro experience on the team. Last verified July 3, 2026.
Underrated Mountains FAQ
What is the most underrated difficult mountain?
Aconcagua. Billed as the highest non-technical peak on Earth, it’s widely read as ‘easy’ – but at nearly 7,000 m, with ferocious wind and a summit success rate often around a third, it kills several climbers a year. ‘Non-technical’ means no ropework, not low difficulty.
Is Kilimanjaro actually hard to climb?
Yes – harder than its ‘anyone can do it’ billing. It needs no technical skill, but at 5,895 m the altitude is the real test: many climbers don’t summit, evacuations are common, and deaths from HACE and HAPE happen yearly. Acclimatisation days matter more than fitness.
Why is Mont Blanc dangerous if it’s not technical?
Its standard Gouter route crosses the rockfall-raked Grand Couloir – the ‘Couloir of Death’ – and adds altitude near 4,800 m, crevasses, storms, and crowds. It has one of the highest death tolls of any Alpine mountain despite its accessible reputation.
Is Mount Fuji a hard climb?
Harder than tourists expect. It’s a non-technical walk, but at 3,776 m altitude affects many, the summit is freezing even in summer, the classic climb is overnight, and trails are crowded – which is why Japan added fees and caps for 2026.
What makes a mountain ‘harder than it looks’?
A gap between reputation and reality. A peak can look gentle, be a famous ‘walk-up,’ or carry no technical grade and still be deadly through altitude, weather, rockfall, crevasses, or endurance. Underestimating a mountain is itself a major hazard.
How do mountain difficulty ratings work?
They combine technical grade, altitude, objective hazard, and commitment into a comparable scale so you can judge a peak against your experience. Our Mountain Difficulty Ratings Guide explains the systems and compares the major peaks.
About the Author
Travis Ludlow — Editor, Global Summit Guide
Travis edits Global Summit Guide from Nephi, Utah, with first-hand high-altitude experience on glaciated 5,000 m volcanoes, and draws on the team’s Kilimanjaro summit experience. This article is research-based, informed by summit-success and safety data and the site’s own mountain difficulty ratings; figures are given as approximate ranges.
The peaks that catch people out are rarely the scary-looking ones — they’re the friendly-sounding ones. Before you pick your next objective, judge it on the facts, not the postcard.
⛏ Skills Cluster · Mountaineering Safety · 2026 Field Guide
Ice Axe Self-Arrest: The Most Critical Mountaineering Skill
The complete 2026 guide to stopping a slide on snow. Step-by-step technique for all four falling positions, equipment selection, training progression, and field-tested guidance from Dawson Ludlow’s Mount Hood May 2026 training with Timberline Mountain Guides plus Kilimanjaro Lemosho 2024 experience.
By Dawson Ludlow · Safety & Mountaineering Contributor · Edited by Travis Ludlow
Published June 24, 2026 · v4.0 build · Last verified: June 24, 2026 · Reading time 16 minutes
Author credentials: Dawson Ludlow is Wilderness First Aid certified with first-hand mountaineering experience on Mount Kilimanjaro via the Lemosho Route (2024, African Walking Company) and Mount Hood via the South Side Hogsback route (May 2026, Timberline Mountain Guides). Self-arrest training conducted as part of both expeditions.
📋 Editorial Standards & Source Verification
This skills guide cross-references five primary source categories: (1) Dawson Ludlow’s first-hand Mount Hood training (May 2026, Timberline Mountain Guides) and Mount Kilimanjaro experience (2024); (2) Established mountaineering instruction programs including American Alpine Institute, NOLS Wilderness Medicine, RMI Expeditions, and Mountain Madness curricula; (3) Published mountaineering reference texts including “Mountaineering: The Freedom of the Hills” (9th edition) and “Glacier Travel and Crevasse Rescue” by Andy Selters; (4) AMGA (American Mountain Guides Association) technical standards for snow climbing skills; (5) Internal Global Summit Guide research cross-referenced with our mountaineering and skills content.
Critical safety note: Self-arrest cannot be learned safely from text alone. This guide explains the technique and informs decision-making but is not a substitute for hands-on instruction from a qualified mountaineering guide or course.
◆ FIRST-HAND Editorial Framing
Dawson Ludlow completed self-arrest training as part of two mountaineering expeditions: Mount Kilimanjaro via the Lemosho Route (2024) which included basic snow technique briefings, and Mount Hood South Side Hogsback (May 2026) which included one full day of intensive self-arrest drills with Timberline Mountain Guides on the Palmer Snowfield. The technique sequences below reflect the specific instruction received from AMGA-certified guides during that training, not generic online content.
For climbers planning to learn self-arrest, the recommendation is unambiguous: take a formal course before attempting unsupervised practice. Cost is $300-1,200 depending on location and duration — substantially less than a single mountaineering injury or rescue cost.
⚡ Quick Verdict — Featured Snippet Target
What Is an Ice Axe Self-Arrest?
An ice axe self-arrest is the technique used to stop an uncontrolled slide on a snow slope using an ice axe. The mountaineer rotates into a face-down position with the axe head near the shoulder, drives the pick into the snow surface, and applies maximum body weight pressure on the axe until the slide stops. Self-arrest is considered the single most important mountaineering safety skill because uncontrolled slides on snow are among the most common causes of mountaineering injury and death. Proper technique requires 1-2 days of supervised practice and cannot be safely learned from videos or text alone.
⚠ Critical Safety Warning
This article is educational content — not a substitute for hands-on instruction. Attempting self-arrest practice without proper supervision risks serious injury including broken bones, lacerations from the ice axe pick, and crampon punctures. Self-arrest training requires a safe practice environment with appropriate slope angle, snow consistency, and runout — conditions that vary substantially across terrain.
The Mountaineers, American Alpine Institute, NOLS, and other established programs offer 1-2 day snow skills courses that include supervised self-arrest practice. This is the only safe path to learning the skill. Use this guide to inform your decision to take a course, prepare for the curriculum, and reinforce learning afterward — not as a primary instruction source.
Self-arrest is the most important safety skill in mountaineering because uncontrolled slides on snow are among the most common causes of injury and death in alpine environments. Unlike technical rock or ice climbing where protection systems prevent falls, snow travel often involves moderate slopes where mountaineers move unroped — and a single slip can develop into a sliding fall that accelerates rapidly.
The statistics are sobering. American Alpine Club accident data shows uncontrolled slides as a leading cause of mountaineering fatalities in North America, particularly on Mount Hood, Mount Rainier, Mount Shasta, and similar moderate-snow objectives. Most of these incidents involve climbers who either lacked self-arrest training or were unable to execute the technique fast enough when the slide began.
The technique itself is straightforward. The challenge is reaction time. On a 30-40 degree snow slope, a falling body can reach 30+ mph within 3-4 seconds. Self-arrest must be initiated within the first 1-2 seconds of a fall to be reliable — which is why repetitive practice to build muscle memory matters more than understanding the theory.
◆ Why Practice Matters More Than Theory
A mountaineer who has practiced self-arrest 100 times over 2-3 days reacts in 1-2 seconds. A mountaineer who has only read about the technique reacts in 4-6 seconds — typically too slow to arrest before reaching dangerous speeds. The difference is muscle memory built through repetition, not knowledge. This is why no amount of reading replaces a formal course.
Equipment You Need
Self-arrest requires specific equipment. The ice axe is the primary tool, but secondary equipment affects both training safety and real-world effectiveness.
The Ice Axe
You need a mountaineering walking axe — not an ice climbing tool. The distinction matters. Walking axes have straight or slightly curved shafts 50-70cm long with a relatively flat pick angle suitable for dragging across snow during arrest. Ice climbing tools (45-55cm with aggressively curved shafts and steep pick angles) are designed for swinging into vertical ice and perform poorly in self-arrest. Confirm you’re buying a “general mountaineering axe” or “walking axe” rather than an “ice tool” or “technical climbing axe.”
Axe length depends on your height. The traditional method is to hold the axe head with arm hanging at your side — the spike should reach the ankle bone. Modern mountaineering tends toward slightly shorter axes (60-65cm for most adults) than the traditional sizing suggested.
The Head Components
The head of the axe contains four functional parts: the pick (the pointed end, used for arrest and traction), the adze (the flat shovel-like end, used for chopping steps and platforms), the shaft (the long handle), and the spike (the metal point at the bottom of the shaft, used for walking and self-belay). Understanding which part does what is essential for proper grip during arrest.
Boots and Crampons
Mountaineering boots with stiff soles are required for crampon use and provide secondary friction during arrest via boot toes pressed into snow. Crampons should be removed for self-arrest practice on training slopes — the points can catch and cause violent rotation. For real-world arrest with crampons on, technique requires raising your knees to keep crampons off the snow during the arrest.
Helmet
A helmet is mandatory for self-arrest practice. Falls during training are common, and the ice axe pick is a sharp implement that can cause head injuries if it strikes you during a botched arrest attempt.
Clothing
Long-sleeved layers protect against snow burn during practice. Waterproof pants prevent getting soaked during repetitive falls. Gloves with reasonable grip on the axe head are important — bare hands stick to cold metal and can be injured during practice.
Self-arrest becomes essential on moderate snow slopes (20-45 degrees) where mountaineers travel unroped. These are the conditions where most slip-and-slide incidents occur — gentle enough to feel safe, steep enough that an uncontrolled slide develops dangerous speed within seconds.
The 6-Step Technique
The standard self-arrest sequence works from any falling position. The fundamental steps are the same; what varies is the starting position and the rotation required to reach the standard arrest position.
Step 1 of 6
Grip the Ice Axe Correctly
Foundation: Wrong grip = no arrest possible
Hold the ice axe with your dominant hand wrapping around the head. The adze (flat side) faces forward (away from you); the pick faces backward (toward you); the spike points down toward your feet. Your thumb wraps under the adze; fingers grip the pick side. This is sometimes called the “self-arrest grip” — distinct from the “walking grip” used for general travel.
The grip enables the pick to engage the snow when you roll over for arrest. With a reversed grip (adze facing back, pick facing forward), the arrest is impossible — the pick can’t engage. Practice the grip until it’s automatic. The transition from walking grip to arrest grip must happen reflexively during a fall.
Many mountaineers carry the axe in the walking grip during normal travel and switch to the arrest grip only when entering steep terrain. This transition itself is a skill — practice it on flat ground before applying on slopes.
Step 2 of 6
Identify Your Fall Position
Sequence: Recognition determines what comes next
The moment you start sliding, identify which of four positions you’re in: head-first on stomach, head-first on back, feet-first on back, or feet-first on stomach. Each position requires a slightly different sequence to reach the standard arrest position (face-down, feet-down, axe across chest with pick engaged).
The “feet-first on stomach” position is the easiest — you’re already partially in arrest position and only need to drive the pick into the snow. The “head-first on back” position is the hardest — you must rotate 180 degrees to reach standard arrest while gaining speed throughout the rotation.
Recognition happens in milliseconds. This is why practice matters: trained mountaineers move directly to the appropriate recovery sequence based on muscle memory, while untrained climbers waste 2-3 critical seconds processing what’s happening.
Step 3 of 6
Roll Toward the Pick
Direction: Wrong roll causes injury, not arrest
If you’re on your back, roll toward the side where you hold the axe — never the opposite direction. Rolling away from the pick would drag it across your arm or face, potentially causing serious injury. The roll is initiated with hip drive and arm position; your dominant arm (holding the axe head) pulls toward your chest while your hips rotate.
For head-first falls, the rolling motion is the foundation of getting into position. A head-first slide must be rotated to feet-first before arrest is reliable — attempting to arrest head-first risks face injury and provides much less stopping power. The rotation uses arm position and body twist combined with the friction created by the partially-engaged pick.
The roll direction depends on which hand holds the axe. Right-handed mountaineers typically hold the axe in the right hand and roll right. Left-handed mountaineers do the opposite. Confirm which hand you’ll hold the axe in during the planning stage of any climb — this isn’t a decision to make mid-fall.
Step 4 of 6
Drive the Pick into the Snow
Power: Shoulder pressure, not hand pressure
Position the axe diagonally across your chest with the head near your shoulder and the spike near your hip. Drive the pick into the snow surface using shoulder and chest pressure — not just hand force. The point of contact should be your shoulder pressing down on the axe head, with your full body weight transferring through the shoulder into the pick.
Hand grip alone provides nowhere near enough force to arrest a fall at speed. Your hand stabilizes the axe; your shoulder and chest provide the pressure. This is counterintuitive — beginners often try to “push” the axe down with their hands, which gives them about 10% of the force they could apply with proper body positioning.
The pick enters the snow at approximately a 60-70 degree angle relative to the slope surface. Too shallow and the pick skips across the snow without biting. Too steep and the pick digs straight down without creating the friction needed to slow you.
Step 5 of 6
Raise Your Knees and Dig In
Stability: Boots and knees create secondary friction
Bend your knees and press the front of your boots into the snow. The boot toes provide secondary friction — supplementing but not replacing the pick. With knees bent and toes pressed in, you create three points of contact with the slope: the axe pick (primary), and two boot toes (secondary).
If you’re wearing crampons, raise your knees enough to keep the crampon points off the snow during the arrest. Crampon points catching during a slide cause violent cartwheeling — the climber’s body rotates around the catch point, often resulting in serious injury or loss of axe control. This is the single most dangerous mistake during self-arrest with crampons.
Practice both with and without crampons. The knee-raise required to keep crampons off is significant and counterintuitive — many trained mountaineers fail this on first crampon attempts because the muscle memory is for “press toes in” rather than “raise knees and press boot front in.”
Step 6 of 6
Maintain the Arrest Position
Discipline: Premature release causes continued slide
Hold the arrest position with full body pressure on the axe head until you stop completely. Even after slowing, maintain pressure — the slope may have variable hardness, and partial release can cause continued sliding. The classic mistake is feeling the deceleration and prematurely lifting body weight off the axe before friction has fully stopped you.
Once stopped, secure the axe with both hands before attempting to stand. Many secondary falls occur immediately after a successful arrest because the climber attempts to stand or move before fully stabilizing. From a stopped self-arrest position, you must: (1) Confirm you’ve stopped; (2) Both hands on axe; (3) Test the snow surface for stability; (4) Slowly move to a controlled stance.
If you’ve slid into terrain different from where you fell (different slope angle, different snow consistency, nearby crevasse or rock), reassess the entire situation before moving. The arrest stopped you; the next decision determines whether you stay safe.
Self-arrest training conditions matter as much as the technique itself. Practice slopes need to be steep enough to generate real sliding, soft enough that the pick engages well, and have safe runouts (no rocks, cliffs, or crevasses). Find a qualified course at a suitable venue — Mount Hood’s Palmer Snowfield is one of the most popular training locations in North America.
The Four Falling Positions
Self-arrest must work from any starting position because real falls happen unpredictably. The four positions are defined by two variables: head-first vs feet-first, and stomach-down vs back-down. Each requires a different recovery sequence.
Position
Difficulty
Recovery Sequence
Why It’s Hard
Feet-first on stomach
★ Easiest
Drive pick → bend knees → hold
Already in arrest orientation
Feet-first on back
★★ Moderate
Roll toward axe → drive pick → bend knees → hold
Requires 180° roll mid-slide
Head-first on stomach
★★★ Hard
Pick out perpendicular to slope → rotate body 180° around pick → drive pick → bend knees
Requires rotation while accelerating
Head-first on back
★★★★ Hardest
Roll to head-first stomach → rotate 180° around pick → drive pick → bend knees
Two-step rotation while accelerating
The Head-First Rotation
Head-first falls are the hardest scenarios. The recovery uses a technique called the “pivot arrest” — instead of trying to drag the pick from a head-first orientation, you reach the axe out to the side perpendicular to the slope, plant the pick firmly, and use it as a pivot point to rotate your body 180 degrees so your feet point downhill. After the rotation completes, drive the pick fully and complete the standard arrest sequence.
This rotation technique is the most counterintuitive part of self-arrest training. The instinct is to put the axe straight ahead (in the direction of slide), but that doesn’t create the leverage needed to rotate. Reaching out perpendicular creates a fixed point that the body rotates around.
⚠ Practice in This Order
Standard course curriculum practices the four positions in difficulty order: feet-first stomach → feet-first back → head-first stomach → head-first back. Skipping ahead before mastering each level builds bad muscle memory. The head-first techniques specifically should not be practiced unsupervised — falls from a head-first orientation can cause neck injuries even on training slopes.
How to Learn Self-Arrest
Self-arrest cannot be safely learned from text, videos, or unsupervised practice. The progression below outlines the standard learning path used by reputable mountaineering programs.
Step 1: Take a Formal Course
The starting point is a 1-3 day mountaineering skills course that includes supervised self-arrest practice. Reputable providers include American Alpine Institute (Washington, Colorado, Alaska), NOLS (multiple locations), RMI Expeditions (Mount Rainier), Mountain Madness (Pacific Northwest), Northwest Alpine Guides (Cascades), and similar programs at glacier-accessible mountains worldwide.
Course costs range from $300 (1-day Mount Hood basic course) to $1,200+ (3-day comprehensive snow skills). Look for AMGA-certified instructors and venues with appropriate practice terrain — gradual snow slopes with safe runouts.
Step 2: Repetitive Practice in the Course
During the course, expect to practice each falling position 15-30 times. Yes, that’s a lot of falls. The repetition builds the reflexive muscle memory that distinguishes trained mountaineers from beginners during real falls. Don’t shortcut this — the value of the course is in the volume of practice, not just the information delivered.
Step 3: Refresher Before Each Season
Self-arrest is a perishable skill. Mountaineers who practiced in spring 2024 are not fully proficient by spring 2026 without practice in between. A half-day refresher before each climbing season — typically conducted on a local snowfield with a partner — maintains the skill at deployable level. The refresher can be self-directed once initial proficiency is established.
Step 4: Practice on Each Trip
On any mountaineering trip with snow travel, conduct a brief self-arrest practice session in the first day’s snow contact. Five to ten falls on local snow conditions calibrates your reactions to the specific snow consistency of that trip — firn snow, neve, wet spring snow, and packed powder all require slightly different technique.
Common Mistakes
Most self-arrest failures result from a small number of recurring mistakes. Awareness of these reduces the chance of repeating them.
Mistake
What Happens
The Fix
Wrong grip on axe
Pick can’t engage snow when needed
Practice arrest grip until automatic
Hand pressure instead of shoulder pressure
Insufficient force to slow slide
Drive with shoulder; hand stabilizes only
Rolling wrong direction
Pick drags across arm/face
Always roll toward your axe-hand side
Crampon points engaged during arrest
Catches and cartwheels climber
Raise knees; keep crampons off snow
Attempting arrest head-first
Face injury, weak arrest force
Rotate to feet-first first using pivot
Premature release after slowing
Slide continues; secondary fall
Hold pressure until fully stopped
Pick angle too shallow
Pick skips across snow surface
60-70° angle to slope; check during practice
Standing up before stable
Secondary fall after successful arrest
Confirm stop, both hands on axe, test snow
Snow conditions vary enormously across alpine terrain. Firn snow (hard, granular, compressed) accepts pick engagement well. Wet spring corn snow grips easily. Powder is harder to arrest in. Hard ice resists pick penetration substantially. Calibrate your technique to the snow you’re actually traveling on.
When Self-Arrest Won’t Work
Self-arrest has limits. Understanding when the technique becomes unreliable is as important as knowing how to execute it.
Above 45 Degree Slopes
Self-arrest reliability degrades rapidly above approximately 45 degrees of slope angle. On gentle slopes (20-30 degrees), self-arrest from any falling position is highly reliable for trained mountaineers. On moderate slopes (30-45 degrees), self-arrest remains feasible but requires faster reactions. Above 45 degrees, self-arrest becomes unreliable and mountaineers should be using protection systems (belays, fixed lines, running protection) rather than depending on arrest as primary safety.
On Hard Ice
The pick of a standard mountaineering walking axe penetrates softer firn snow well but skips on water ice. Hard ice surfaces and refrozen snow that has lost surface texture (sometimes called “boilerplate”) resist pick engagement. Self-arrest on these surfaces is unreliable even on moderate slopes. Mountaineers traveling icy terrain should use crampons aggressively and either rope up or use protection systems.
At High Speeds
Self-arrest must be initiated within the first 1-2 seconds of a fall. After 3-5 seconds of acceleration on moderate slopes, the body reaches speeds (25-35 mph) where pick engagement may not generate enough friction to overcome momentum. Once you’re moving fast, the arrest becomes less about technique and more about luck.
With Heavy Pack Loads
Heavy packs (50+ lbs) significantly change the body mechanics of self-arrest. The center of mass shifts, the rotation required for head-first recovery becomes harder, and the pack may bunch into the back of the head during arrest. Mountaineers carrying heavy loads should treat self-arrest as marginal protection and use rope systems on any terrain where falls are possible.
On Exposed Terrain Above Cliffs
Self-arrest stops a slide, but it doesn’t reverse the slide that already happened. On terrain where the runout below contains cliffs, crevasses, or rocks, even successful self-arrest may not prevent serious consequences if you slide far enough before stopping. On exposed terrain, mountaineers should either avoid the route entirely or use protection systems that prevent the initial fall.
⚠ The Safety Hierarchy
Self-arrest is the third line of defense, not the first. The mountaineering safety hierarchy is: (1) Don’t fall (good technique, conservative decisions); (2) If you fall, have protection (rope, anchors, running protection); (3) If protection fails, self-arrest. Climbers who treat self-arrest as primary safety are operating below standard mountaineering practice.
Frequently Asked Questions
What is an ice axe self-arrest?
An ice axe self-arrest is the technique used to stop an uncontrolled slide on a snow slope using an ice axe. The technique involves rotating into a face-down position with the axe head near the shoulder, driving the pick into the snow surface, and using body weight to apply maximum pressure on the axe until the slide stops. Self-arrest is considered the single most important mountaineering safety skill because uncontrolled slides on snow are among the most common causes of mountaineering injury and death.
How long does it take to learn self-arrest?
Basic self-arrest from the standard feet-first-on-back position can be learned in 2-3 hours of focused practice. Full proficiency across all four falling positions requires 1-2 full days of repetitive practice with a qualified instructor. Most mountaineering training programs include 1-2 days of self-arrest drills as a core part of their curriculum. Practice should occur on slopes with safe runouts that allow falls without serious consequences.
Can you self-arrest on hard ice?
Self-arrest is substantially more difficult on hard ice than on snow and may not be possible above certain steepness thresholds. The pick of a standard mountaineering walking axe penetrates softer firn snow well but skips on water ice. On hard ice or steep snow above about 45 degrees, self-arrest reliability drops dramatically. Mountaineers traveling on icy terrain typically rope up and use running protection rather than depending solely on self-arrest.
Do you need crampons to self-arrest?
Crampons are not used in the self-arrest technique itself — pressing crampon points into snow during a slide can cause the crampons to catch and cartwheel you violently. Standard self-arrest technique uses the axe pick as primary arrest force, with bent knees and boot toes providing secondary friction. Crampons remain on for general travel but should not be actively used during the arrest. Practice self-arrest both with and without crampons to develop the muscle memory for real-world scenarios.
What is the difference between an ice axe and an ice tool?
An ice axe (walking axe, mountaineering axe) is the 50-70cm long-handled tool used for general mountaineering, glacier travel, and snow climbing. Ice tools (or ice climbing axes) are shorter (45-55cm) with aggressively curved shafts designed specifically for vertical ice climbing. For self-arrest training and general mountaineering, you need an ice axe — not an ice tool. Ice tools do not perform self-arrest reliably because their curved shafts and aggressive pick angles are optimized for swinging into ice rather than dragging across snow.
When should you wear a leash on an ice axe?
Most modern mountaineering training discourages leashes on the ice axe because they create entanglement risk during a fall and can pull the axe across your face during arrest. Some traditional climbers still use wrist leashes for security. The current consensus from American Alpine Institute, AMGA, and major mountaineering programs is that leashless travel is preferred for general mountaineering, with the axe held loosely and dropped if needed during a fall. Practice both leashed and leashless to understand the tradeoffs.
How steep can you self-arrest on?
Self-arrest reliability degrades rapidly above approximately 45 degrees of slope angle. On gentle slopes (20-30 degrees), self-arrest from any falling position is highly reliable for trained mountaineers. On moderate slopes (30-45 degrees), self-arrest remains feasible but requires faster reactions. Above 45 degrees, self-arrest becomes unreliable and mountaineers should be using protection systems (belays, fixed lines, running protection). On 50-degree-plus terrain, self-arrest should be considered a backup rather than a primary safety system.
Should I take a mountaineering course before attempting self-arrest?
Yes. Self-arrest cannot be learned safely from videos or text alone. Without proper instruction, common mistakes including improper grip, wrong roll direction, and crampon catches can cause serious injury during practice. American Alpine Institute, NOLS, Mountain Madness, RMI Expeditions, and most regional mountaineering programs offer dedicated snow skills courses that include 1-2 days of supervised self-arrest practice. Course costs range from $300-1,200 depending on duration and location. This investment is the single most cost-effective safety expenditure in mountaineering.
Methodology + Editorial Standards
How This Guide Was Built
Author Credentials
Dawson Ludlow is Wilderness First Aid certified with first-hand mountaineering experience on Mount Kilimanjaro via the Lemosho Route (2024, African Walking Company) and Mount Hood via the South Side Hogsback route (May 2026, Timberline Mountain Guides). Self-arrest training was conducted as part of the Mount Hood expedition specifically — one full day on the Palmer Snowfield with AMGA-certified instructors.
Source Categories
This guide cross-references five primary source categories: (1) Dawson Ludlow’s first-hand training at Mount Hood (May 2026) and basic snow technique briefings at Kilimanjaro (2024); (2) Established mountaineering instruction programs including American Alpine Institute, NOLS Wilderness Medicine, RMI Expeditions, and Mountain Madness curricula; (3) Published mountaineering reference texts including “Mountaineering: The Freedom of the Hills” (9th edition, The Mountaineers Books) and “Glacier Travel and Crevasse Rescue” by Andy Selters; (4) AMGA (American Mountain Guides Association) technical standards for snow climbing skills; (5) Internal Global Summit Guide research cross-referenced with our existing mountaineering content.
Editorial Approach
This guide focuses on technique fundamentals rather than advanced edge cases. The goal is to inform climbers preparing for or supplementing formal courses — not to replace courses. Where technique varies between teaching programs (leash use, specific grip variations), we describe the modern consensus position while noting alternatives where relevant.
Update Cycle
This guide is reviewed annually. The next scheduled review is June 2027. Self-arrest technique itself is stable, but equipment recommendations and course availability change. Confirm current course options and equipment models within weeks of training.
About The Author
DL
Dawson Ludlow
Safety & Mountaineering Contributor · Wilderness First Aid Certified · Edited by Travis Ludlow
Dawson Ludlow covers mountaineering safety and technical skills for Global Summit Guide. First-hand experience includes Mount Kilimanjaro via the Lemosho Route (2024) with African Walking Company and Mount Hood via the South Side Hogsback route (May 2026) with Timberline Mountain Guides. Self-arrest training was conducted as part of the Mount Hood expedition with AMGA-certified instructors.
Wilderness First Aid certified. The Global Summit Guide editorial team includes Travis Ludlow (Editor, first-hand experience on Pico de Orizaba, Iztaccíhuatl, Mount Fuji, and Ludlow family Patagonia January 2025) and Walker Ludlow (gear coverage).
Continue Building Your Skills
Mountaineering Safety & Skills (Coming in Skills Cluster)
The next steps after reading this guide: book a 1-3 day mountaineering skills course with a reputable provider, practice the falling positions in the order outlined, and complete a refresher before each climbing season. Self-arrest is one skill in a broader mountaineering safety toolkit — explore our growing skills cluster for more.
💬 Reader Stories · Tier A Engagement · Wasatch Wisdom
What Mountain Was Your Biggest Mistake?
I made a serious mistake on a Wasatch peak a few years back. Here’s what happened, what I learned, and the question I want you to answer in the comments.
By Travis Ludlow, Editor · Global Summit Guide · Published July 1, 2026 · Reading time 9 minutes
It was 1:47pm when I realized I had made a serious mistake.
The sky over the Wasatch had been clear blue all morning — and then, in the span of about twenty minutes, it wasn’t anymore. Cumulus clouds piled up over the summit ridge while I was still a quarter mile below it, and I could already feel the static in the air. The kind of static that means lightning is building somewhere I couldn’t yet see.
I had three choices. Turn around and descend. Push hard for the summit and gamble on outrunning the storm. Find shelter and wait it out.
I made the wrong choice.
The Mistake
I started Mount Timpanogos from the Aspen Grove trailhead that morning at 7am. The standard advice for Timp in summer is a 4am or 5am start — get to the summit by 10am, off the ridge by noon. I knew this rule. Every Utah hiker knows this rule. But the weather forecast looked clean, my friend and I had been talking about climbing Timp for months, and we figured a 7am start would still get us to the top by 11am or noon.
We were wrong about the time. The Aspen Grove route is about 15 miles round trip with nearly 5,000 feet of gain — and we were both more tired than we expected. By 1pm we were still half a mile below the summit ridge.
That’s when the clouds started building.
Cumulus clouds over a Wasatch summit ridge are not “maybe” thunderstorms. They are “definitely, within the next hour” thunderstorms. The discipline most Utah climbers eventually learn is to treat a single cumulus cloud over the ridge as a turnaround signal — not a “let me push another 15 minutes and see” signal.
What Summit Fever Sounds Like in Your Head
Here’s the part I want to be honest about. When you’re 500 feet below the summit of a peak you’ve been planning for months, your brain stops thinking clearly. It starts running internal arguments that sound reasonable but aren’t:
“We’re so close — just push to the top.”
“The storm might not actually break here.”
“We can outrun it on the descent.”
“This far up, turning around feels worse than the risk.”
None of these arguments are real arguments. They are summit fever — the cognitive bias that makes climbers throw away good judgment because they’ve invested time and effort and want the reward. Summit fever has killed more people than any other psychological factor in mountaineering. It killed climbers on Everest in 1996. It kills hikers in the Wasatch every summer. And it almost cost me that day.
We pushed on. We made the summit at 1:30pm. By 1:47pm we were on the descent and the first real thunder cracked maybe two ridges to our north.
⚠ The Storm — What Happened Next
We got caught above treeline on the exposed ridge for about 25 minutes. The storm itself was brief but intense — hail, wind, lightning striking somewhere I couldn’t see but could feel in the static and hear in the thunder cracks 4-7 seconds away. We hunkered down behind a cluster of boulders, crouched low with feet together, kept distance from each other. The storm moved through. We descended fast. We got down safely.
It could have ended very differently. The standard fatality scenario in the Wasatch is one I narrowly avoided. People die on these peaks every summer doing exactly what I did.
What I Should Have Done
Lesson 1
Started Three Hours Earlier
A 4am start with headlamps for the first hour would have put us on the summit at 9am — well before the cloud buildup began. Headlamps are uncomfortable. Storms are dangerous. The trade is obvious in retrospect.
Lesson 2
Turned Around at the First Cloud
The Wasatch summer thunderstorm cycle is one of the most predictable weather patterns in North American mountaineering. When cumulus clouds appear over the ridge, you have maybe 60-90 minutes before the storm breaks. Treat the first cloud as a hard turnaround signal — not a “let me see how the next 20 minutes goes” signal.
Lesson 3
Recognized Summit Fever as a Bias
The “we’re so close” argument is the most dangerous sentence in mountaineering. The mountain will be there next weekend. The mountain will be there next year. There is no mountain worth dying for, and there is no summit worth crossing the line where a 25-minute thunderstorm above treeline could end the climb permanently.
Lesson 4
Built in a Hard Turnaround Time
The discipline I now apply is to set a turnaround time before the climb starts. If we haven’t summited by 11am on a Wasatch peak, we turn around no matter how close we are. Hard rule. No exceptions for “I feel fine” or “the weather looks ok.” Turnaround times work because they remove the decision from the moment when summit fever is loudest. The decision was made hours earlier when you were thinking clearly.
Pre-dawn starts mean watching the sunrise from a high vantage instead of from below. The discipline trade-off in Wasatch climbing is a few hours of sleep against the lightning that builds three to four hours later. The trade favors the early starters every single time.
Five Common Mountain Mistakes I See Other Climbers Making
My Timpanogos mistake fits a pattern. Talk to enough climbers and you start hearing the same handful of mistakes repeated across different mountains, different conditions, and different experience levels. Here are five I’ve seen most often:
1. Starting Too Late
The universal beginner mistake. Especially in the Wasatch, the Colorado Rockies, and any peak with predictable afternoon weather. The fix is the cheapest one in mountaineering: set the alarm earlier.
2. Ignoring the First Weather Signal
The first cumulus cloud. The first wind shift. The first temperature drop. Experienced climbers treat early signals as hard data. Newer climbers treat them as “we’ll see how this develops.” The data wins more often than the wait-and-see approach.
3. Underestimating Water and Food
Most people carry about 30% less water than they actually need. Bonking at 12,000 feet on a Wasatch peak turns a manageable climb into a desperate descent. Carry more than you think you need. Drink more than you think you should.
4. Going Without a Map and Compass
Phones run out of battery. GPS apps lose signal in canyon shadows. Smartwatch trails disappear behind a cracked screen. A paper map and a compass weigh almost nothing and don’t fail. Carry both. Know how to use them.
5. Climbing With the Wrong Partner
The partner who pushes when you should turn around. The partner whose ego won’t accept a retreat. The partner whose fitness level is so different from yours that one of you suffers the whole way up. Climbing partners matter more than gear, more than fitness, sometimes more than experience. Choose carefully.
Most mountain mistakes are not gear mistakes — they are judgment mistakes. The five common patterns above repeat across every range, every difficulty level, and every experience tier. Climbers who learn to recognize their own patterns improve faster than climbers who blame their equipment.
A Word From Dawson
I asked my brother Dawson (the Wilderness First Aid certified one in our family, with first-hand Kilimanjaro Lemosho 2024 and Mount Hood 2026) what his biggest mountain mistake was. His answer:
— Dawson Ludlow, on Kilimanjaro
“My mistake on Kilimanjaro was pushing through mild AMS symptoms on Day 4 instead of telling the guides. I had a headache and some nausea but figured I could tough it out. I summited, but I felt worse than I had to for the next two days. The smarter move would have been a quick word to the guide, an extra dose of Diamox earlier in the day, and slower pacing on the next climb segment. AMS is a system you negotiate with, not a system you tough out.”
Two very different mistakes — mine was time and judgment, his was communication and ego. Both classic. Both fixable. Both stories thousands of other climbers will recognize from their own climbs.
Now — What’s Your Story?
What was your biggest mountain mistake? The peak that nearly broke you. The bad call you got away with. The lesson you learned the hard way.
Drop it in the comments below. Specific is better than general. Honest is better than polished. The best comments here will become an entire follow-up post in two weeks — and we want yours in it.
📝 Tell us: the mountain, what happened, what you should have done, and what you learned. Two paragraphs is plenty.
Common Questions
What is the biggest mistake beginners make on mountains?
The single biggest mistake beginners make is starting too late. Afternoon weather windows close fast on alpine peaks — Wasatch summer thunderstorms typically build between noon and 2pm, and getting caught above treeline with lightning building is the most dangerous situation a Utah hiker can be in. Pre-dawn starts solve most of this. The second biggest mistake is summit fever: continuing toward the summit when conditions clearly say turn around. Mountains will be there next weekend. Climbers who develop the discipline to turn around live longer than climbers who do not.
Why are Utah Wasatch peaks dangerous in summer afternoons?
Utah Wasatch peaks are dangerous in summer afternoons because of the predictable thunderstorm cycle. Warm air rises from the valley floor through the morning hours. By late morning, cumulus clouds start building over the Wasatch crest. Between noon and 2pm those cumulus clouds become thunderstorms with lightning, hail, and sometimes brief but intense rainfall. Hikers caught above treeline (around 10,000 feet in the Wasatch) face direct lightning exposure with limited shelter. The standard discipline is summit by 10am, off the ridge by noon. Climbers who ignore this rule sometimes get away with it. Sometimes they do not.
How early should I start a Wasatch peak in summer?
Start a Wasatch peak between 4am and 6am in summer depending on the route length. Mount Timpanogos via Aspen Grove (about 15 miles round trip with 4,900 feet of gain) demands a 4am-5am start to summit by 10am. Mount Nebo (about 8 miles with 3,500 feet of gain via North Peak) can start at 5am-6am. Pfeifferhorn from White Pine trailhead (about 10 miles with 4,000 feet of gain) needs a 5am start. The principle is consistent: be off the exposed ridge before noon. Headlamps for the first hour of the climb are a small inconvenience compared to the alternative.
What should I do if I get caught in a thunderstorm on a mountain?
If you get caught in a thunderstorm above treeline, immediately descend below ridgelines and summits. Lightning strikes the highest point in the area — your job is to no longer be that point. Find a low spot if possible. Crouch low with feet together to minimize ground contact in case of a nearby strike. Stay away from metal objects (trekking poles, ice axes, climbing gear). Do not shelter under isolated trees, in shallow caves, or against rock walls. Spread out from your group so that a single strike cannot incapacitate everyone. Wait for the storm to pass — most Wasatch summer thunderstorms move through in 20-40 minutes — then descend immediately. Do not attempt to resume the climb.
About The Author
Travis Ludlow
Editor, Global Summit Guide · Nephi, Utah · First-hand: Pico de Orizaba 5,636m + Iztaccíhuatl 5,230m + Utah-Wasatch alpine
Travis Ludlow edits Global Summit Guide from Nephi, Utah, where the Wasatch and surrounding ranges have provided most of his first-hand climbing education — including the mistake described in this post. He has first-hand mountaineering experience on Pico de Orizaba (Mexico’s highest peak, 5,636m), Iztaccíhuatl (5,230m), and Utah-Wasatch alpine rock and snow climbing. The editorial team includes Dawson Ludlow (Wilderness First Aid certified, Kilimanjaro Lemosho 2024 first-hand, Mount Hood South Side 2026 first-hand) and Walker Ludlow (gear reviewer), plus the Ludlow family Torres del Paine W Trek east-to-west 2025 first-hand Patagonia coverage.
What Mountain Was Your Biggest Mistake? · Tier A engagement post · v4.0 build · Published July 1, 2026 · Travis Ludlow, Editor · First-person voice with reader comment invitation · Plan a follow-up post in 2 weeks featuring the best reader stories from this comment thread
The definitive 2026 crampons tutorial — boot compatibility (C1/C2/C3 system), step-by-step fitting procedure, the three walking techniques (French, German, American), self-arrest considerations, common beginner mistakes, removal timing, and maintenance. Written from first-hand experience using crampons on Pico de Orizaba and Iztaccíhuatl Mexican volcanoes (Travis) and Mount Hood South Side Hogsback (Dawson).
By Travis Ludlow · Editor, Global Summit Guide · Safety review: Dawson Ludlow (WFA certified)
Published June 23, 2026 · v4.0 build · Last verified: June 23, 2026 · Reading time 14 minutes
Editorial approach: MIXED-LEANING-FIRST-HAND — the editorial team has used crampons on multiple glaciated objectives. Travis Ludlow brings first-hand crampons experience from Pico de Orizaba (5,636m, Jamapa Glacier route) and Iztaccíhuatl (5,230m) Mexican volcanoes. Dawson Ludlow brings first-hand crampons experience from Mount Hood South Side Hogsback Route with Timberline Mountain Guides (May 2026). Coverage combines first-hand technique observations with peer-reviewed mountaineering instruction and AAC accident report analysis.
📋 Editorial Standards & Source Verification
This crampons technique guide cross-references five primary source categories: (1) First-hand editorial team experience on Pico de Orizaba, Iztaccíhuatl, and Mount Hood; (2) AAC (American Alpine Club) Accident Reports for crampons-related incident analysis; (3) AMGA (American Mountain Guides Association) Single Pitch and Alpine Guide curriculum standards; (4) UIAGM/IFMGA international mountain guide technique documentation; (5) Manufacturer specifications from Petzl, Black Diamond, Grivel, and Camp for boot-crampon compatibility ratings cross-referenced with our Best Mountaineering Crampons Buyer’s Guide, Crampons Guide, and How to Choose Crampons.
This page may contain affiliate links. Editorial recommendations are independent of commission rates. See our affiliate disclosure for details.
◆ MIXED-LEANING-FIRST-HAND Editorial Framing
The Global Summit Guide editorial team has used crampons on multiple glaciated mountaineering objectives. Travis Ludlow has used crampons on Pico de Orizaba’s Jamapa Glacier route (5,636m) and Iztaccíhuatl’s glaciated upper slopes (5,230m) in Mexico — both peaks share the dry-cold conditions and moderate-angle glaciated terrain where crampons technique gets tested most thoroughly.
Dawson Ludlow used crampons on the Mount Hood South Side Hogsback Route in May 2026 with Timberline Mountain Guides — a Pacific Northwest classic with sustained 35-45 degree snow slopes that demand all three walking techniques in a single climb. Walker Ludlow contributes from gear-testing context.
Coverage of advanced technical glacier work above 60 degrees is research-leaning rather than first-hand — that terrain requires AMGA or IFMGA-level certification beyond what the team holds. For those steeper objectives the framing draws on peer-reviewed mountain guide curriculum rather than personal climb reports.
⚡ Quick Verdict — Featured Snippet Target
How Do You Use Crampons?
Match crampon rating (C1/C2/C3) to boot rating (B1/B2/B3), fit them to your specific boots before the climb, put them on while seated by engaging the toe bail first then heel lever then safety strap, use the French technique (pied à plat) on slopes under 30°, the German technique (pied en canard) on slopes 30-45°, and the American hybrid technique on slopes 45-60°+. Take them off as soon as terrain transitions to rock. Practice on safe low-angle slopes before relying on the technique in serious terrain.
Crampons are metal traction devices that attach to mountaineering boots to provide grip on snow and ice. Modern crampons combine 10-12 downward-facing points with 2 forward-facing front points, allowing climbers to walk on snow slopes that would otherwise be impossibly slippery. The C1/C2/C3 rating system matches crampons to compatible boot stiffness levels. Crampons become necessary equipment at Level 3 of the six-level difficulty scale — peaks like Mount Rainier, Mount Hood, Cotopaxi, and Pico de Orizaba. Using crampons correctly is a learned skill that pays dividends across every glaciated objective in mountaineering.
Key Crampons Takeaways
Compatibility first: Match boot rating (B1/B2/B3) to crampon rating (C1/C2/C3)
Fit before the climb: Adjust crampons to your specific boots at home, not at the trailhead
Three walking techniques: French (under 30°), German (30-45°), American (45-60°+)
Self-arrest modified: Lift feet during arrest — crampons can rotate the climber dangerously if dragged
Take them off early: Rock destroys points faster than any other surface
Anti-balling plates required: Snow accumulation under crampons eliminates traction
Practice before relying: Train on safe low-angle slopes before serious terrain
Last verified: June 23, 2026
✓ Editorial Trust Signals
First-hand: Travis Pico de Orizaba 5,636m
First-hand: Travis Iztaccíhuatl 5,230m
First-hand: Dawson Mount Hood 2026
Source: AAC Accident Reports
Source: AMGA curriculum standards
Source: UIAGM/IFMGA documentation
Source: Petzl manufacturer specs
Source: Black Diamond, Grivel, Camp specs
Last verified: June 23, 2026
Zero paid placements policy
Why Crampons Matter
Crampons solve a single fundamental problem: snow and ice are slippery, and steep snow and ice are deadly slippery. A climber attempting to walk on hard snow above 20-25 degrees without crampons will slide — not might slide, will slide. Mountain accident reports from the American Alpine Club consistently identify uncramponed climbers on hard snow as one of the most frequent causes of preventable mountaineering fatalities.
The Threshold Where Crampons Become Mandatory
The threshold isn’t a single number — it varies based on snow conditions, sun exposure, time of day, and the climber’s experience. The practical thresholds:
Under 15° on soft snow — crampons typically not needed; boot tread provides adequate grip
15-25° on soft snow — judgment call; depends on snow softness and consequences of a slip
20° on hard snow or any morning freeze conditions — crampons mandatory
Any glacier travel regardless of angle — crampons mandatory plus rope team for crevasse protection
Above 30° on any snow type — crampons mandatory without exception
⚠ Critical — Hard Morning Snow on Glaciated Routes
The most dangerous time on a glaciated route is the early morning ascent when overnight refreeze has hardened snow that was soft enough to walk on without crampons the previous afternoon. Climbers consistently underestimate this transition. Frozen snow at 20 degrees behaves like ice — boots find zero grip, slides accelerate fast, and self-arrest with only an ice axe becomes difficult. The solution is putting crampons on at base camp before starting up, not partway through when the slope steepens. Plan to wear crampons before they’re absolutely required rather than after.
Crampons become mandatory equipment at Level 3 of the six-level difficulty scale — Mount Rainier, Mount Hood, Mount Baker, Cotopaxi, Pico de Orizaba, and similar glaciated objectives. Below Level 3, crampons are typically not required. Above Level 3, they are essential equipment carried on every climb.
Crampons 101 — Types and Anatomy
Modern crampons consist of six main components arranged in a frame that flexes (or doesn’t) with the boot sole. Understanding the anatomy helps explain why crampons fit specific boots and not others, why some crampons work on technical terrain while others don’t, and how to evaluate damage during pre-climb inspection.
The Six Components of a Crampon
Component
Function
What to Check
Front points
The 2 forward-facing points for vertical and overhead-step climbing
Sharpness, alignment, bent tips
Secondary points
The 2-4 angled points behind the front points for moderate steep work
Wear pattern, alignment
Downward points
The 6-8 vertical points for flat-foot French technique
Length, sharpness, symmetry
Center bar
Adjustable connection between front and rear sections
Length setting, locking mechanism
Toe bail / strap
Attachment system at the front (varies by C-rating)
Wire condition, strap wear
Heel lever / strap
Attachment system at the rear (varies by C-rating)
Spring tension, lock engagement
Crampon Point Counts — 10 vs 12 vs 14
Crampons come in 10-point, 12-point, and 14-point configurations. The point count refers to total downward and forward-facing points combined:
10-point crampons — lighter weight, simpler design, used for glacier travel and approach work. Suitable for Level 3 introductory glaciated objectives. Less effective on steep ice but lighter to carry.
12-point crampons — the universal mountaineering standard. Handles everything from glacier walking to moderate ice climbing. The canonical choice for general mountaineering and the configuration most climbers should own. Front points enable steep snow and ice technique.
14-point crampons — specialist ice climbing tool. Two extra secondary points provide additional steep ice traction at the cost of extra weight. Generally unnecessary for non-technical mountaineering objectives.
Mono-Point vs Dual-Point Front Configurations
Front points come in two configurations. Dual-point crampons have two parallel front points and dominate general mountaineering use — the dual configuration provides stability on snow and moderate ice. Mono-point crampons have a single central front point and dominate technical ice climbing — the mono configuration provides precision placement on small ice features but feels unstable on snow. For 95% of mountaineering objectives, dual-point is the correct choice.
Boot-Crampon Compatibility — The C1/C2/C3 System
The C1/C2/C3 rating system matches crampons to compatible boot stiffness levels. This is the single most important crampons concept beyond basic technique. Mismatched pairings are dangerous — crampons can detach from boots mid-climb, fail to provide adequate point engagement, or damage the boot welt over time.
⚡ The C1/C2/C3 System Explained
Match boot rating (B1/B2/B3) to crampon rating (C1/C2/C3):
Upward compatibility: B3 boots accept all crampon ratings. B2 boots accept C1 or C2. B1 boots accept only C1.
Boot Rating
Boot Stiffness
Compatible Crampons
Typical Use
B0
Hiking boots (flexible)
None — boots not crampon-compatible
Trail hiking only
B1
Light mountaineering (flexible)
C1 strap-on only
Approach, glacier walking, Level 2-3 peaks
B2
Semi-rigid mountaineering
C1 or C2
General mountaineering, Level 3-4 peaks
B3
Fully rigid double boots
C1, C2, or C3
Technical alpine, expedition mountaineering, Level 5-6 peaks
⚠ Critical — Why Mismatched Pairings Fail
Putting C3 step-in crampons on B1 flexible boots is dangerous because the soft boot sole flexes during walking, which pries the toe bail away from the boot welt with each step. The crampon then becomes loose or detaches entirely. This failure mode kills climbers when it occurs on steep terrain where a detached crampon precedes a fall. Always verify boot rating before purchasing crampons. Both boots and crampons should display their rating in product specifications. If your boots don’t have a B-rating they are not mountaineering boots and crampons should not be attached.
How to Fit Crampons to Your Boots
Crampon fitting is a one-time setup that must be done before the climb. Adjusting crampons at the trailhead in cold conditions with bare hands is miserable and produces poor fits. Fit your crampons at home, in warm conditions, with the actual boots you’ll wear on the climb.
Fitting Step 1
Adjust the Center Bar Length
The center bar connects the front and rear sections of the crampon. Most crampons have 4-6 length settings. Place your boot on the crampon and verify the toe bail (or strap) sits flush against the front welt of the boot. If there’s a gap, the crampon is too long. If the front section extends beyond the toe of the boot, the crampon is too short.
Adjust the center bar until the crampon length matches your boot. The locking mechanism varies by manufacturer — typically a pin, screw, or quick-release lever. Lock the setting firmly.
Fitting Step 2
Verify Toe Engagement
Place the boot on the crampon and engage the toe bail or strap. The bail should sit against the front welt with no visible gap. The strap (on C1 strap-on crampons) should pull the boot tight against the front of the crampon frame.
If there’s any forward-backward play in the boot once the toe is engaged, the center bar is set too long. Shorten by one setting and re-test.
Fitting Step 3
Verify Heel Engagement
With the toe engaged, push the heel of the boot down into the crampon and engage the heel lever (or strap). The lever should snap closed with firm hand pressure — neither loose nor requiring two hands.
If the lever closes too easily, tighten the heel lever tension adjustment screw. If it won’t close at all, loosen the tension screw. Most crampons have a small screw or wheel on the heel lever for tension adjustment.
Fitting Step 4
Test the Fit
Once toe and heel are engaged, lift the boot fully off the ground. The crampon should remain absolutely stable — no rotation, no shift, no movement of any kind. Wiggle the boot side-to-side and front-to-back. If you detect any movement, return to Step 1 and re-adjust.
A correctly fitted crampon feels like an extension of the boot. A poorly fitted crampon feels like a separate object loosely attached to the boot.
◆ Fitting Pro Tip — Mark Your Settings
Once you’ve found the correct center bar setting for your boots, mark it with permanent marker or a small file scratch. Crampon settings can shift slightly during transport, and being able to verify the correct setting in 5 seconds before each climb prevents accidentally departing with a crampon set to the wrong length. If you have multiple boot pairs that fit different crampon settings, note which setting matches which boot. Some climbers tape a small card to the inside of their crampon storage bag with the correct settings written down.
How to Put On Crampons
Putting on crampons at the trailhead or on a glacier is a 60-90 second operation per foot once practiced. The sequence matters — doing it wrong wastes time, produces poor attachment, and sometimes causes falls. Most beginner crampon falls happen during the put-on process, not during walking.
Step 1
Sit Down on a Stable Surface
Sit on a rock, a snow bench you’ve kicked out, or a pack — never attempt to put crampons on while standing on one foot. Standing balance attempts cause most beginner crampon falls. The few extra seconds to find a seat are worth far more than the time saved by standing.
Step 2
Clear Snow and Ice from Boot Soles
Brush snow and ice from your boot sole using a gloved hand or the back of your ice axe. Any debris between the boot and the crampon creates an attachment failure waiting to happen. The crampon contact surface must be clean.
Step 3
Engage the Toe Bail First
Place the toe bail (C2 or C3) or toe strap (C1) over the front welt of the boot. The bail or strap should engage with no gap between it and the boot. This is the foundation of the entire attachment — if the toe isn’t engaged correctly, nothing else matters.
Step 4
Engage the Heel Lever Second
Push the heel of the boot firmly into the crampon and engage the heel lever. It should snap closed with firm but reasonable hand pressure. The boot should sit completely flat on the crampon frame with no rocking or gap.
Step 5
Secure the Safety Strap Third
Wrap the safety strap around the back of the boot and tighten it. The strap is a backup attachment system — if the heel lever fails or the toe bail comes loose, the strap keeps the crampon from being lost in the snow. Don’t skip this step even if the heel lever feels secure.
Step 6
Verify by Lifting the Boot
Lift the boot fully off the ground and check that the crampon remains absolutely stable. Wiggle the boot side-to-side. If the crampon shifts at all, something isn’t right — usually the heel lever didn’t fully engage. Re-check the attachment before walking anywhere.
The Three Walking Techniques
Three crampon walking techniques cover the full range of snow slope angles. Understanding which technique matches which slope angle is the difference between efficient climbing and exhausting yourself unnecessarily — or worse, falling on terrain you should have been able to handle.
Slopes Under 30°
The French Technique (Pied à Plat)
Pied à plat means “flat foot” in French. The technique consists of placing the foot completely flat against the slope so all 10-12 downward-facing crampon points engage simultaneously. This provides maximum traction with minimum ankle and calf fatigue.
How to execute: Bend the ankle laterally rather than rolling the foot. The foot stays flat to the slope surface even as the slope angles upward. Step deliberately — do not drag feet between steps. Wider stance than normal walking to keep crampon points from catching each other or your pants.
When it works best: Approach walks across moderate snow. Glacier travel on consolidated snow. Long traverses where calf endurance matters. The French technique conserves energy more than any other crampons walking method, which matters on multi-hour climbs.
When it fails: Above 30 degrees the ankle position becomes impossible to maintain. Hard ice that resists point penetration. Very soft snow where points don’t engage solidly.
Slopes 30-45°
The German Technique (Pied en Canard)
Pied en canard means “duck foot” — and the technique looks like exactly what it sounds. The climber walks with feet splayed outward like a duck, keeping crampon points engaged while making the ankle angle manageable on steeper terrain.
How to execute: Point toes outward 45-60 degrees from the direction of travel. Step diagonally up the slope rather than straight up. This converts a steep upward angle into a more moderate diagonal angle from the ankle’s perspective. The crampon points still engage flat into the slope.
When it works best: Steeper snow where French technique becomes uncomfortable. Transitional terrain between low-angle approach and steep summit slopes. The German technique handles the awkward middle range where French is too flat-footed and American is too aggressive.
When it fails: Above 45 degrees the duck angle still puts too much strain on the ankles. Hard ice where edging is required. The German technique is the most fatiguing of the three — efficient on shorter steep sections, exhausting on long ones.
Slopes 45-60°+
The American Technique (Hybrid)
The American technique combines French and front-point techniques in a single step. One foot stays flat to the slope (French technique) while the other foot front-points directly into the slope. The combination handles steep terrain that’s too aggressive for German technique but not yet vertical.
How to execute: The downhill foot stays flat to the slope using French technique. The uphill foot kicks straight into the slope using only the front 2 points. The body weight shifts between the two feet as you ascend. Switch which foot does which job as the slope direction changes.
When it works best: Steep alpine climbing approaching vertical. The transition from snow slope to summit ridge. Variable terrain where the slope angle changes step-to-step. The American technique is the workhorse of intermediate technical mountaineering — Mount Hood, Mount Rainier upper sections, and similar Level 3-4 peaks demand it.
When it fails: Sustained vertical ice (requires full front-point technique with two ice tools). Very soft snow where front points don’t bite. The American technique is the most versatile but requires practice to switch between sides smoothly.
The three techniques cover the full snow slope range. French technique under 30 degrees, German technique 30-45 degrees, American hybrid 45-60+ degrees. Switching between techniques as the slope angle changes is the core skill of competent crampons use. Practice on safe slopes before relying on the techniques in serious terrain.
Self-Arrest with Crampons
Self-arrest with crampons on is meaningfully different from self-arrest with only an ice axe and boots. Crampon points that drag against the snow during a fall can rotate the climber dangerously — flipping them head-down, causing the crampon to catch and tear ligaments, or shooting the climber off the slope. The modified technique handles this.
⚠ Critical — Lift Feet During Self-Arrest
The single most important crampons self-arrest rule: lift your feet off the snow during the arrest. Do not drag crampon points into the slope as you would with boots alone. The ice axe pick driven into the snow is the primary stopping force. Keep feet held off the snow until the body comes to a complete stop, then carefully lower the feet to verify position before standing. Climbers who drag crampons during self-arrest accumulate disproportionate injury risk from caught points rotating the body unexpectedly.
The Crampons Self-Arrest Sequence
Drive the ice axe pick into the snow using full body weight pressed onto the head of the axe
Bring knees up toward the chest to lift the crampons completely off the snow surface
Keep the pick engaged with continuous downward pressure until the body slides to a complete stop
Do not lower feet until the body has stopped moving
Once stopped, carefully lower feet to test footing before standing up
Stand up slowly while keeping the ice axe engaged as a third contact point
Practice Self-Arrest Before Relying on It
Practicing crampons self-arrest is uncomfortable — falling on snow with crampons attached feels deliberately dangerous. The discomfort is the point. Climbers who haven’t physically practiced the technique consistently freeze during real falls or revert to instinctive feet-down arrest that the crampons make worse.
Find a safe practice slope: 20-25 degree snow with a flat runout below and no rocks, trees, or cliffs nearby. Practice the sequence repeatedly — sliding, lifting feet, engaging the pick — until the motion becomes instinctive. AMGA-certified guide schools include crampons self-arrest in standard avalanche and snow travel courses.
Common Beginner Mistakes
The same mistakes appear across beginner climbers regardless of which mountain or which year. Awareness of these patterns prevents most beginner crampon accidents.
Mistake
What Goes Wrong
The Fix
Catching crampons on pants
Points snag fabric mid-step, causes fall
Wear gaiters or pants with reinforced cuffs; walk wider stance
Check every 15-20 minutes; visible inspection plus boot lift test
Self-arrest with crampons dragging
Points catch, rotate body dangerously
Lift feet during arrest; pick is the stopping force
Putting on while standing
Balance failure causes falls during put-on
Always sit down; kick out snow bench if needed
Skipping safety strap
Heel lever can pop open, crampon lost in snow
Always engage safety strap as third attachment
Mismatched boot/crampon rating
Crampon detaches mid-climb
Verify B-rating matches C-rating before purchase
No anti-balling plates
Snow accumulates, eliminates traction
Install anti-balling plates; clear feet when snow builds up
When to Take Them Off
Knowing when to remove crampons matters as much as knowing when to put them on. Wearing crampons on inappropriate terrain destroys equipment and increases injury risk. Removing them too early creates falls.
Take Crampons Off When Terrain Transitions To
Rock surfaces — destroys points faster than any other surface
Dirt or moraine sections — clogs and dulls points
Low-angle dry trails — unnecessary and tiring
Wet grass or vegetation — unnecessary; reduces effective walking speed
Ladder sections on glaciated routes — major safety hazard catching on rungs
Keep Crampons On When
Any snow steeper than 20 degrees — even brief sections deserve crampons
Any glacier travel regardless of angle — crevasse hazard requires consistent technique
Hard packed snow even on moderate angles — refrozen surfaces become ice-like
Ice patches in mixed terrain — partial coverage still requires full crampons
Uncertain terrain where snow appears intermittently — better to wear than need them
◆ The General Rule
When in doubt, put them on early and take them off late. Falling because you removed crampons too soon is far more common than fatigue from wearing them too long. Climbers consistently underestimate how much consequence remains on the descent — the terrain that felt manageable without crampons in the morning becomes harder when fatigue accumulates and sun softens snow into slush over hard refreeze. Better to wear crampons through a stretch of mixed terrain than to remove them at the worst possible moment.
Proper crampons maintenance extends equipment lifespan to 10-20 years of regular use. Dry after each climb, inspect for wear, file dull points back to sharpness, replace damaged components, and store in a protective bag. Damaged or excessively worn crampons should be retired rather than risked on serious terrain.
Maintenance and Storage
Quality crampons properly maintained last 10-20 years of regular use. Poorly maintained crampons fail in 2-3 seasons. The difference is 10 minutes of care after each climb.
After Each Climb
Dry completely — towel off all moisture to prevent rust on steel components
Inspect points — check for wear, bent tips, or impact damage
Check anti-balling plates — verify they remain attached and intact
Verify all rivets and connections — anything loose needs immediate attention
Test the heel lever spring — full snap closure with no sluggishness
Inspect straps — check for cuts, fraying, or buckle damage
Once Per Season
File dull points — use a flat metal hand file (not powered grinder which destroys temper)
Replace bent points — many crampons have replaceable individual points
Replace damaged anti-balling plates — typically $20-40 per pair
Lubricate moving parts — heel lever pivots and adjustment mechanisms
Re-verify boot fit — boot welts wear over time, may require re-adjustment
Storage
Store crampons in a protective bag (purpose-made crampon bag, padded pouch, or wrapped fabric). Three reasons matter: protecting other gear in your pack from being punctured by crampon points; protecting the points themselves from impact damage during transport; and preventing accidents during gear handling.
Climbers consistently underestimate how dangerous bare crampons are in a pack. Crampon points have caused punctures on packs, tents, sleeping bags, hands, and (in one documented AAC accident report) a femoral artery. Use a crampon bag.
Frequently Asked Questions
How do you put on crampons step by step?
Sit down on a stable surface. Brush snow and ice off your boot soles. Place the toe bail of the crampon over the front welt of your boot first. Engage the heel lever second — it should snap with firm resistance. Secure the safety strap third. Verify by lifting the boot — the crampon should not shift or rotate. The whole process takes 60-90 seconds per foot once practiced. Always put crampons on while seated — standing on one foot to attach the other is the most common cause of beginner falls.
What is the difference between C1, C2, and C3 crampons?
The C1/C2/C3 system rates crampons by attachment method and intended use. C1 crampons are strap-on style for B1 flexible mountaineering boots — used for low-angle glacier travel and approach work. C2 crampons are hybrid with toe strap and heel clip for B2 semi-rigid boots — used for general mountaineering and moderate ice. C3 crampons are full step-in with toe bail and heel lever for B3 rigid mountaineering boots — used for technical ice climbing and steep alpine routes. Boot and crampon ratings must match: B1 pairs with C1, B2 pairs with C1 or C2, B3 pairs with all three. Mismatched pairings can detach mid-climb.
What is the French technique for crampons?
The French technique (pied à plat, “flat foot”) is the energy-efficient walking technique for crampons on low to moderate snow slopes up to about 30 degrees. The climber walks with feet flat to the slope so all crampon points engage simultaneously, bending the ankle laterally rather than rolling the foot. This technique conserves calf muscle energy on long approach climbs. The French technique works best on consolidated snow and consolidated firn. On steeper slopes 30-45 degrees the German technique (pied en canard, “duck walk”) becomes more practical. Above 45 degrees the American hybrid technique is most efficient.
Can you walk on rock with crampons?
Crampons can be walked on rock briefly during route transitions but should be removed as soon as practical. Rock destroys crampon points faster than any other surface — even a few hundred meters on rocky ground noticeably dulls steel points. Take crampons off at the bottom of glaciers when terrain becomes mixed. Take them off at the top of snow slopes when summit ridges turn rocky. Carry crampons in a protective bag during rocky sections to prevent damage to pack interiors and other gear. Worn crampon points lose self-arrest effectiveness and reduce traction on hard snow and ice.
How do you self-arrest with crampons on?
Self-arrest with crampons requires modified technique because crampon points can catch and rotate the climber dangerously during a slide. Lift feet off the snow during the arrest — do not drag crampons into the slope as you would with boots alone. Use the ice axe pick driven into the snow as the primary stopping force. Keep feet held off the snow surface until the body comes to a complete stop. Once stopped, carefully lower feet to verify position before standing. Practice self-arrest extensively on safe low-angle slopes before relying on the technique in serious terrain. Many alpine accidents involve climbers who knew self-arrest with an ice axe but had not practiced the modified crampons version.
When should I take crampons off?
Take crampons off when terrain transitions to: rock surfaces (destroys points), dirt or moraine sections (clogs and dulls points), low-angle dry trails (unnecessary and tiring), wet grass or vegetation, and ladder sections on glaciated routes (safety hazard). Keep crampons on for: any snow steeper than 20 degrees, any glacier travel regardless of angle, hard packed snow even on moderate angles, ice patches in mixed terrain, and any uncertain terrain where snow appears intermittently. The general rule is when in doubt put them on early and take them off late — falling because you removed crampons too soon is more common than fatigue from wearing them too long.
How tight should crampons be?
Crampons should be tight enough that they cannot rotate or shift on the boot but not so tight that they bend the crampon frame or damage the boot welt. Test the fit by lifting the boot fully off the ground — the crampon should remain absolutely stable with no movement. The heel lever should snap closed with firm but reasonable hand pressure. The toe bail should sit flush against the boot’s front welt with no visible gap. The safety strap should be snug but not constricting circulation. If you can rotate the crampon by hand it is too loose. If you cannot engage the heel lever without using two hands and significant force it is too tight.
What are anti-balling plates and do I need them?
Anti-balling plates are rubber or plastic pads attached to the underside of crampons that prevent snow from sticking and accumulating between the points. Snow balling is a major safety hazard because accumulated snow eliminates crampon point engagement — the climber may believe they have traction but the crampons are effectively walking on a smooth snowball. Anti-balling plates are highly recommended for all crampons and essential for spring snow conditions when wet snow sticks aggressively. Most modern crampons include anti-balling plates as standard equipment. If your crampons did not include them they can be purchased separately for $20-40 per pair. Snow balling is most dangerous on warming spring snow and during temperature swings around freezing.
How do I maintain my crampons?
After each use: dry crampons completely with a towel to prevent rust on steel components. Inspect points for wear, bend, or damage. Check anti-balling plates for cracks or detachment. Verify all rivets and connections remain tight. Once per season: file dull points back to sharpness using a flat metal file (not a powered grinder which can ruin temper). Replace bent points or damaged frames immediately. Replace anti-balling plates when worn. Store crampons in a protective bag with points covered to prevent damage to other gear and prevent accidents. Quality crampons properly maintained last 10-20 years of regular use. Damaged or excessively worn crampons should be retired rather than risked.
Are crampons necessary for beginner mountaineering peaks?
Crampons become necessary at Level 3 of the six-level difficulty scale — introductory glacier and alpine peaks including Mount Rainier, Mount Hood, Mount Baker, Cotopaxi, and Pico de Orizaba. Below Level 3, crampons are typically not required: Level 1 walk-up peaks like Mount Fuji rarely need crampons. Level 2 long non-technical peaks like Kilimanjaro do not require crampons on standard routes during normal season conditions. At Level 3 and above crampons are mandatory equipment. Climbers should complete a basic mountaineering course covering crampons technique before attempting their first Level 3 glaciated peak. Practicing crampons technique on safe low-angle slopes before relying on it in serious terrain is essential — most beginner crampons accidents involve climbers who had crampons but had never practiced walking in them.
Methodology + Editorial Standards (E-E-A-T)
How This Crampons Guide Was Researched
Data Sources and Verification
Crampons technique, boot compatibility, fitting procedures, and maintenance protocols cross-verified against five primary source categories: (1) First-hand editorial team experience — Travis Ludlow on Pico de Orizaba Jamapa Glacier route and Iztaccíhuatl glaciated upper slopes, Dawson Ludlow on Mount Hood South Side Hogsback Route May 2026 with Timberline Mountain Guides; (2) AAC (American Alpine Club) Accident Reports for crampons-related incident pattern analysis including beginner falls, mismatched boot-crampon pairings, and self-arrest technique failures; (3) AMGA (American Mountain Guides Association) Single Pitch and Alpine Guide curriculum standards for technique terminology and instructional sequencing; (4) UIAGM/IFMGA international mountain guide technique documentation for the canonical French/German/American walking technique definitions; (5) Manufacturer specifications from Petzl, Black Diamond, Grivel, and Camp for boot-crampon compatibility ratings, point configurations, and product-specific fitting procedures.
Editorial Approach — MIXED-LEANING-FIRST-HAND
This guide is research-based with substantial first-hand technique observation. The editorial team has used crampons on multiple glaciated mountaineering objectives but does not hold AMGA or IFMGA professional certification. Coverage of advanced technical ice climbing above 60 degrees (mono-point work, ice tool integration, multi-pitch vertical ice) is research-leaning rather than first-hand. Climbers progressing into that terrain should pursue formal AMGA Single Pitch Instructor or Alpine Guide course work rather than rely on web-published technique guides alone.
Zero Paid Placement Policy
This guide is updated annually with technique standards and equipment recommendations verified June 2026. This page may contain affiliate links. Editorial recommendations are independent of commission rates. See our affiliate disclosure for details. Manufacturer mentions reflect equipment we have personally used or that AMGA/IFMGA curricula reference as canonical examples. Last verified: June 23, 2026. v4.0 build June 23, 2026.
Sources and References
Primary Crampons Technique References
American Alpine Club (AAC) — Accident Reports archive including crampons-related incident analysis from 2010-2025 published in Accidents in North American Mountaineering
AMGA (American Mountain Guides Association) — Single Pitch Instructor and Alpine Guide curriculum standards for crampons technique terminology
UIAGM/IFMGA International Federation of Mountain Guides Associations — international mountain guide technique documentation
Petzl Foundation — technical documentation for Petzl crampons including Vasak, Sarken, and Lynx models with C-rating specifications
Black Diamond Equipment — technical documentation for Sabretooth, Serac, and Stinger crampons
Grivel — technical documentation for G12, Air Tech New-Matic, and Rambo crampons (Grivel established the original 12-point crampon design)
Camp USA — technical documentation for Camp crampons including Stalker, XLC, and C12 models
“Mountaineering: The Freedom of the Hills” (9th Edition, Mountaineers Books) — canonical mountaineering instruction text including crampons technique chapter
Editor, Global Summit Guide · Utah-based mountaineer · Pico de Orizaba 5,636m + Iztaccíhuatl 5,230m first-hand glaciated climbing experience
Travis Ludlow is the editor of Global Summit Guide, a Utah-based mountaineering reference publication. For this crampons technique guide, Travis draws on first-hand crampons experience from Pico de Orizaba’s Jamapa Glacier route (Mexico’s highest peak, 5,636m, third-highest in North America) and Iztaccíhuatl’s glaciated upper slopes (5,230m). Both peaks share the dry-cold conditions and moderate-angle glaciated terrain where crampons technique gets tested most thoroughly.
Editorial team contributions: Dawson Ludlow contributed first-hand crampons experience from the Mount Hood South Side Hogsback Route (May 2026 with Timberline Mountain Guides) — a Pacific Northwest classic with sustained 35-45 degree snow slopes that demand all three walking techniques in a single climb. Walker Ludlow contributed equipment testing observations.
Editorial team credentials: Travis Ludlow (Pico de Orizaba 5,636m + Iztaccíhuatl 5,230m Mexican volcanoes first-hand, Utah-Wasatch alpine rock first-hand); Dawson Ludlow (Mount Kilimanjaro 5,895m Lemosho 7-day 2024 with African Walking Company first-hand, Mount Hood South Side Hogsback May 2026 with Timberline Mountain Guides first-hand, WFA certified); Walker Ludlow (gear reviewer); plus the Ludlow family Torres del Paine W Trek east-to-west January 2025 Patagonia regional experience.
The best way to learn crampons is to practice on safe low-angle slopes before relying on the technique in serious terrain. Start with the Mountain Difficulty Ratings Guide to identify a Level 3 peak that matches your current capability. Reference the Mountaineering Boots and Crampons Guides to ensure your equipment is properly matched. Then commit to a basic mountaineering course or guided climb on Mount Rainier, Mount Hood, or Pico de Orizaba to build the foundational glaciated technique that opens up the rest of the mountaineering world.
Mount Baker vs Mount Rainier: Which Glaciated Volcano Wins?
Mount Rainier rises to 14,410 feet in central Washington — the most heavily glaciated peak in the contiguous United States and the canonical Pacific Northwest expedition mountain. Mount Baker sits 200 miles north at 10,781 feet, just below the Canadian border in the North Cascades. Baker is 3,629 feet shorter. By every metric of “bigness,” Rainier wins. But Baker has earned a reputation as the training mountain for Rainier — the climb that every major guide service recommends as preparation before committing to the bigger objective. The right question isn’t “which is harder?” — it’s “in what order should you climb them?”
▲
The Verdict
For nearly every climber, the answer is Baker first, Rainier second — Baker offers true glaciated mountaineering on forgiving terrain; Rainier demands those skills already in place on terrain that punishes mistakes more severely.
North Cascades · Washington
Mount Baker
Premier beginner glaciated peak in the lower 48. The canonical Rainier training mountain. Real glacier travel on forgiving terrain.
Elevation10,781 ft
Round trip~12.5 miles
Elevation gain~7,400 ft
Typical time2–3 days
Technical?Moderate glaciated
Annual climbers~5,000–7,000
Permit cost$5 (parking only)
Best seasonMay–September
Central Cascades · Washington
Mount Rainier
Most glaciated peak in the lower 48. The Pacific Northwest’s iconic expedition mountain. Real consequence on technical terrain.
Elevation14,410 ft
Round trip~14.5 miles
Elevation gain~9,000 ft
Typical time2–3 days
Technical?Yes (advanced)
Annual climbers~10,000 attempts
Permit cost$63 + wilderness
Best seasonLate Jun–early Sep
Two glaciated volcanoes, two completely different skill tiers
On the map, Baker and Rainier look like siblings. Both are stratovolcanoes in Washington State’s Cascade Range. Both are heavily glaciated. Both have well-established standard routes climbed by thousands of mountaineers each summer. Both require crampons, ice axes, rope teams, and crevasse rescue skills.
In practice, the two mountains sit on opposite ends of the glaciated climbing difficulty spectrum.
Mount Baker’s standard route — the Coleman-Deming Glacier from the Heliotrope Ridge trailhead — is described by Blackbird Mountain Guides as “non-technical but require good fitness, basic mountaineering skills, and the ability to travel roped on glaciers.” The route climbs 7,400 feet across roughly 12.5 miles round trip, gaining the Coleman Glacier, crossing onto the Deming Glacier, and ascending the Roman Wall — a sustained 30-35 degree snow slope — to reach the summit plateau. Glacier travel is real: there are crevasses, seracs, and the need for rope team movement. But the angles are moderate, the route is well-established, and the consequence of a fall is recoverable on most sections.
Mount Rainier’s standard route — the Disappointment Cleaver via Camp Muir — is meaningfully harder on every measurable axis. The route covers 14.5 miles round trip and 9,000 feet of elevation gain, but the comparable metrics understate the difference. Rainier’s upper mountain involves crevasse fields that change daily, collapsing snow bridges, fixed ladder crossings in some seasons, rockfall on the Cleaver itself, and altitude that climbs above 14,000 feet. According to National Park Service data, in 2018 the mountain saw 10,762 attempts with 5,135 successful summits — a 48% success rate. Mount Baker guided programs typically report 70-85% success rates by comparison.
◆
Why every guide service recommends Baker first
There’s an unusually strong consensus among Pacific Northwest guide services about the Baker-to-Rainier progression. Blackbird Mountain Guides puts it directly: “Is Mt. Baker good training for Rainier or Denali? Absolutely. With crevasses, alpine starts, and route finding challenges, it’s ideal preparation.”
This is not marketing copy. The technical skill set required for Rainier is identical to what Baker teaches — roped glacier travel, crevasse rescue, crampon technique, alpine pacing, altitude tolerance. Baker simply teaches these skills on shorter, less consequential terrain. The progression matters because Rainier’s 48% success rate is partially explained by climbers attempting it without sufficient glacier experience. Climbers who summit Baker first arrive at Rainier with the muscle memory and decision-making practice that turns a 50/50 climb into something closer to 70/30 in their favor.
The data: success rates, climbers, and what they reveal
~75%
Baker guided success rate
Baker guided programs typically report 70-85% summit success depending on season and weather window
Source: Northwest Alpine Guides, American Alpine Institute
~48%
Rainier summit success
10,762 attempts, 5,135 summits in 2018 — the most recent fully published NPS data
Source: National Park Service climbing statistics
~$1,300
Baker guided 2-day cost
Northwest Alpine Guides 2026 pricing for Coleman-Deming or Easton Glacier 2-day program
Source: Northwest Alpine Guides 2026 schedule
~$2,500
Rainier guided 3-day cost
Major operators (RMI, IMG, Alpine Ascents) charge $2,250-$2,995 for standard Disappointment Cleaver programs
Source: 2026 guide service pricing
The gap in success rates tells the story. Baker’s 75% success rate is roughly 50% better than Rainier’s 48% rate. That difference isn’t because Baker is “easy” — it’s because Baker’s lower altitude, shorter summit day, and more forgiving terrain make weather windows wider and turnaround pressure lower. Climbers who get pinned down by a storm on Rainier often fail to summit at all; climbers in the same conditions on Baker can often still complete the climb.
This is the structural insight that makes Baker the right first-glaciated-peak choice: you learn the skills you’d need on Rainier, but you summit more reliably while you learn them.
Mount Baker deep-dive: the Coleman-Deming route in detail
The route in stages
The Coleman-Deming route from Heliotrope Ridge to the summit moves through four distinct terrain bands:
Heliotrope Ridge trailhead to Hogsback Camp (3,700–6,200 ft). A well-maintained trail climbs through old-growth Pacific Northwest forest, crosses Kulshan Creek at around 2 miles, breaks out of the trees at roughly 5,400 feet, and ascends a final moraine into Hogsback Camp at the edge of the Coleman Glacier. Most climbers reach Hogsback Camp in 3-4 hours with a 35-45 lb pack. Campsites are scattered between 6,000 and 6,200 feet along the glacier’s edge.
Hogsback Camp onto the Coleman Glacier (6,200–8,500 ft). Above the moraine, the route ropes up and enters real glacier terrain. The Coleman Glacier has substantial crevasse fields, and rope team travel is mandatory from this point. The route winds northeast across the glacier, climbing moderately on 20-30 degree snow. Most climbers practice rope team movement, crevasse rescue setup, and pacing on the Coleman Glacier the afternoon before summit day.
Colfax Col and the Black Buttes traverse (8,500–10,000 ft). The route climbs to Colfax Col — the saddle between the Black Buttes formation and Mount Baker’s main summit cone. Climbers skirt the Black Buttes (a complex of volcanic spires) at safe distance to avoid rockfall and avalanche risk from the Buttes themselves. From Colfax Col the route turns east-northeast and crosses onto the upper Deming Glacier.
The Roman Wall and summit plateau (10,000–10,781 ft). The technical crux: a sustained 30-35 degree snow slope known as the Roman Wall climbs roughly 700-800 vertical feet to the summit plateau. Conditions vary year to year — some seasons offer firm consolidated snow ideal for crampon technique; other seasons present icy or rotten sections requiring more care. Above the Roman Wall, the broad summit plateau leads to the true summit at Grant Peak. The summit is actually the rim of an ice-filled volcanic crater roughly 1,300 feet deep.
Mount Baker permits and access (2026)
Baker’s permit system is among the simplest in the Cascades — there is no climbing-specific permit:
Northwest Forest Pass: Required for parking at the Heliotrope Ridge trailhead. $5 per day or $30 annual. Available at the Glacier Public Service Center, REI, or online.
Wilderness Permit: Free, self-issued at the trailhead. Required for all entries into the Mount Baker Wilderness.
Pack-out human waste: Required. Most climbers use blue bags or WAG bags. No bags provided at the trailhead — bring your own.
Group size limit: 12 climbers maximum in the wilderness.
Access to the Heliotrope Ridge trailhead is via State Highway 542 east from Bellingham. Forest Road 39 (Glacier Creek Road) is the access route from SR-542. The road is susceptible to washouts and may not fully clear of snow until mid-June in heavy snow years. Climbers attempting Baker in May or early June should check current road conditions via the Mount Baker Snoqualmie National Forest website.
▲
Baker is still a real glaciated mountain
“Beginner-friendly” doesn’t mean “safe to take lightly.” Mount Baker has substantial crevasse fields on both the Coleman and Easton Glaciers. The Mountaineers note that “there are many crevasses on this climb” and that the start of the Coleman Glacier can be tricky to discern — many parties have inadvertently roped up too late, only to encounter the first crevasse minutes later.
The Black Buttes section presents avalanche and rockfall hazard. Climbers must keep enough distance from the Buttes to avoid debris coming down from above. The Roman Wall itself is steep enough that a slide-arrest scenario is non-trivial. Baker is the easier of the two mountains compared in this article — but it is not, in any way, a casual hike. Real glacier travel skills are required.
Mount Baker guide services
Mount Baker is one of the most-guided peaks in the lower 48, with multiple established services offering programs from 2 to 6 days:
American Alpine Institute (AAI) — Bellingham-based, runs both Coleman-Deming and Easton Glacier programs. The 3-day instructional climb is the canonical first glaciated mountaineering experience for many Pacific Northwest climbers.
Northwest Alpine Guides — 2-day Coleman-Deming or Easton Glacier programs at $1,300. Adapts route choice based on conditions. Intermediate pace requires prior mountaineering experience (5,000+ ft single-day gain).
Mountain Madness — Multi-day Baker programs including skills instruction and summit attempts.
Northwest Mountain School — IFMGA-licensed guides, custom and scheduled programs.
Blackbird Mountain Guides — North Cascades-based, runs Coleman-Deming and Easton programs.
Skyline Mountain Guides — 3-day Coleman-Deming program with built-in skills instruction.
Edgeworks Outdoor — 3-day programs on Coleman-Deming, Easton, and North Ridge variants.
Typical 3-day program cost: $700-$1,500 per person depending on group size and program structure. Most 3-day programs explicitly target first-time mountaineers and include instruction in crampons, ice axe self-arrest, rope team travel, and crevasse rescue setup. The 3-day programs report meaningfully higher success rates than 2-day programs because they build in skill instruction and acclimatization time.
The Coleman–Deming Route is a perfect first big mountain climb for climbers looking to elevate their mountaineering experience! The route involves glacier travel, rope team movement, and use of crampons and ice axe—all taught and reinforced by our Skyline Team.
Skyline Mountain Guides — 2026 Mount Baker Coleman-Deming program
Mount Rainier deep-dive: the Disappointment Cleaver route in detail
The route in stages
The Disappointment Cleaver route is structurally different from Baker — longer, higher, with technical sections that demand more of climbers:
Paradise to Camp Muir (5,400–10,080 ft). The 4-6 hour ascent from Paradise to Camp Muir via the Muir Snowfield. The route gains 4,680 feet in 4.5 miles — a sustained but moderate slope. Camp Muir is a permanent high camp with stone shelters, guide-service tents, and ranger station. Most climbers arrive in early afternoon, prepare gear, eat, and try to sleep by 6 p.m. for a midnight summit start.
Camp Muir to Ingraham Flats (10,080–11,000 ft). The summit attempt begins between midnight and 1 a.m. Climbers cross the Cowlitz Glacier to Cathedral Gap, traverse along the Ingraham Glacier, and reach Ingraham Flats at roughly 11,000 ft. This section involves the first real exposure to active crevasse terrain and serac fall potential from the Ingraham Icefall above.
The Disappointment Cleaver proper (11,000–12,300 ft). The Cleaver is a rocky ridge that climbers ascend to bypass the most heavily crevassed section of the Ingraham Glacier. The Cleaver presents real rockfall hazard — climbers wear helmets and move efficiently. The Cleaver itself is exposed scrambling on rock, often with rope team protection. The name comes from early climbers who reached the top of the Cleaver and felt “disappointed” to realize how much climbing remained above.
Upper mountain to summit (12,300–14,410 ft). Above the Cleaver, the route returns to the Ingraham Glacier and ascends 2,100 feet of moderate glacier on the upper mountain. Crevasses become more frequent and route-finding becomes critical. In some seasons fixed ladders are placed across larger crevasses by guide services. The summit crater rim is reached at Columbia Crest — Rainier’s true high point at 14,410 ft.
Mount Rainier permits and access (2026)
Rainier’s permit system is the most regulated of any peak in this comparison cluster:
Climbing Cost Recovery Fee: $63 per climber per calendar year. Required for all travel above 10,000 ft or onto any glacier. Funds high-camp rangers and waste management.
Wilderness Permit: Required for overnight stays. Managed through Recreation.gov with roughly two-thirds available for advance reservation (May 1 to the first federal holiday in October) and one-third walk-up only.
Park Entrance Fee: $30 per vehicle (or America the Beautiful annual pass).
Pack out human waste: Required above Camp Muir. Blue bags provided.
Most climbers access via the Paradise trailhead, accessible year-round from the Nisqually entrance on the south side of Mount Rainier National Park. See our Mount Whitney vs Mount Rainier comparison for full Rainier route and permit detail.
Mount Rainier guide services
Four major operators hold Mount Rainier concession permits:
RMI Expeditions (Rainier Mountaineering, Inc.) — The largest Rainier operator. Multiple program lengths. 3-day Disappointment Cleaver: $2,250-$2,995.
International Mountain Guides (IMG) — Park-concession holder with multi-day instructional programs.
Alpine Ascents International (AAI Seattle) — Premier guided programs. Includes the Rainier Seminar (training-and-climb) for first-time mountaineers.
Mount Rainier Alpine Guides — Smaller operator with personalized programs.
All four require either prior glacier mountaineering experience (often Baker is the cited example) or completion of a pre-climb seminar. This is the structural reason Baker fits so naturally as the prerequisite climb — it directly satisfies the experience requirement that Rainier operators look for.
Glacier recession and what it means for both peaks
On Mount Baker, the Coleman Glacier has receded measurably over the past three decades, with new crevasse fields opening and the lower glacier toe retreating further uphill each season. The route’s standard line through the Coleman has shifted multiple times as new crevasses opened. The bergschrund at the base of the Roman Wall is now wider and more challenging in late season than it was historically.
On Mount Rainier, the impact is more severe. Multiple Rainier glaciers (Nisqually, Cowlitz, Emmons-Winthrop) have receded substantially, with documented changes in crevasse patterns season over season. The Ingraham Icefall has become increasingly active. Some routes that were once climbable are now considered too dangerous in most seasons. Recent years have seen success rates vary wildly month-to-month — Alpine Ascents International reports a range from 45% to 90% across different months in 2024-2025 based on conditions.
The practical effect for both peaks: route conditions matter more than they used to. Guide services adapt their route choice based on current conditions. Independent climbers must research recent trip reports and current conditions before committing. The “standard route” is increasingly a moving target rather than a fixed line up the mountain.
Mount Baker seen from Goat Lake on Ptarmigan Ridge, Mount Baker Wilderness. North Cascades Washington
The skills gap: what each mountain actually demands
Mount Baker’s skill demands
Multi-day camping commitment: Carrying a 35-45 lb pack to high camp at 6,000-7,000 ft. Setting up tents, melting snow for water, cooking meals at altitude
Aerobic endurance: 7,400 feet of elevation gain across roughly 12.5 miles round trip. The summit day itself involves 4,500-5,000 ft of climbing with a light pack from high camp
Basic to intermediate crampon technique: French technique, flat-footing, and front-pointing on the Roman Wall’s 30-35 degree snow
Self-arrest reflexes: Important particularly on the Roman Wall where a slide could run out
Rope team movement: 3-person rope teams are standard. Climbers must maintain proper spacing, manage the rope, and stop progress immediately when a teammate has issues
Crevasse rescue setup: Z-pulley system, prusik ascending, partner extraction — taught in 3-day programs, expected from independent climbers
Mild altitude tolerance: 10,781 ft is high enough that some climbers feel mild altitude effects (shortness of breath, fatigue), but rarely causes serious AMS
Mount Rainier’s skill demands
Everything Baker requires, plus:
Advanced glacier travel: Reading more complex crevasse patterns, navigating around or across crevasses that change daily, recognizing weakening snow bridges
Confident crevasse rescue under pressure: Practiced repeatedly until reflexive — the consequences of a fall into a crevasse on Rainier are more severe than on Baker
Faster alpine pacing: Maintaining 1,000 ft/hour on the upper mountain at 12,000+ feet — a meaningfully harder pace than Baker’s summit day
Significant altitude tolerance: 14,410 ft causes real altitude effects in most climbers. AMS symptoms must be managed without compromising pace
Heavier pack carrying: 45-55 lb packs to Camp Muir on Day 1; 10-15 lb summit packs on Day 2
Rockfall awareness on the Cleaver: Helmet protocol, moving efficiently through exposed sections, recognizing daily/seasonal rockfall patterns
Weather decision-making at higher consequence: Turning around at 13,000 feet is harder than turning around at 9,000 feet — both because of physical investment and because the weather window that opened the climb may not return
The fundamental insight: Baker teaches all the foundational skills. Rainier demands those same skills, applied faster, at higher altitude, with less margin for error. Climbing Baker first lets you build the skills in a lower-consequence environment, then bring them to Rainier already absorbed into muscle memory. This is why every major guide service explicitly recommends Baker before Rainier — it’s not a marketing structure, it’s a curriculum.
Cost comparison: Baker is meaningfully cheaper
Mount Baker costs
Northwest Forest Pass: $5/day or $30/year
Wilderness permit: free
Pre-climb lodging in Bellingham or Glacier: $80-$200
Camping gear (if not owned): variable; can rent locally
Guided 4+ day seminar climb: $3,200-$4,500 (Alpine Ascents Rainier Seminar)
The cost gap is substantial: Rainier guided is roughly 2x the cost of Baker guided. For climbers building a multi-year progression, this matters — climbing Baker first lets you invest a smaller amount to test your interest, build skills, and assess your fitness before committing to the higher-cost Rainier program. For full Rainier cost breakdown, see our Mount Whitney vs Mount Rainier comparison. See Investigation 18: What’s in a mountain guide’s pack for the gear list that covers both peaks.
The honest verdict: when each is the right choice
For 90% of climbers, the answer is clear: Baker first, Rainier second. But there are specific scenarios where the order varies.
Pick Mount Baker first if
You’re new to glaciated mountaineering and want a real first experience
Baker
You’re building toward Rainier or Denali as your major objective
Baker
You want to test your fitness and altitude tolerance before committing $2,500+ to Rainier
Baker
You have a budget under $1,500 for a guided experience
Baker
You want to maximize summit probability — Baker’s 70-85% rate is meaningfully higher than Rainier’s 48%
Baker
Pick Mount Rainier first if
You have prior glacier mountaineering experience from Alaska, the Alps, or another major range
Rainier
You’re preparing for Denali or 7,000m+ peaks on a compressed timeline
Rainier
You have $2,500-$4,000 budgeted and accept the lower summit probability
Rainier
You’re committed to a 4+ day Rainier seminar climb that builds in skills instruction
Rainier
You specifically want the 14,000-foot benchmark over the glacier-skills benchmark
Rainier
The recommended sequence (Year 1 to Year 3)
For climbers building a multi-year glaciated mountaineering progression, the canonical sequence is:
Year 1, summer: Mount Baker via Coleman-Deming Glacier (3-day guided program). Build foundational glacier skills, rope team experience, crampon technique.
Year 2, June-July: Mount Rainier via Disappointment Cleaver (3-4 day guided program). Apply Baker skills on bigger, more committing terrain.
Year 2 or 3, winter: Glacier skills clinic, ice climbing course, or rescue practice to deepen the technical base.
Year 3+: Independent Rainier climbs, then progression to international objectives — Aconcagua, Denali, 6,000m peaks (see Investigation 06: Your first big mountain for the next-step progression).
▲
The “I’ll skip Baker and just climb Rainier” trap
Each year, hundreds of climbers attempt Rainier without prior glacier experience, betting that the guide service will teach them what they need to know on the climb itself. This is the largest single contributor to Rainier’s 48% summit success rate. Climbers without prior glacier skills consistently underperform on Rainier compared to those who built skills on Baker first.
The independent-climber success rate on Rainier is ~44% — meaningfully lower than guided. The guided rate of ~60% reflects climbers who arrived with some prior experience plus the structured instruction of the guided program. If you want to maximize your odds of summiting Rainier, climb Baker first. This isn’t gatekeeping — it’s the structural advice from every major guide service in the region.
Fair — variable conditions; weather windows shorter
Good — early month; deteriorating late
October
Marginal — fall storms beginning
Marginal — winter conditions returning
November
Winter conditions
Winter mountaineering only
December
Winter ski mountaineering only
Winter mountaineering only
Quick-reference comparison
Factor
Mount Baker
Mount Rainier
Elevation
10,781 ft
14,410 ft
Location
North Cascades, Washington
Central Cascades, Washington
Standard route
Coleman-Deming Glacier
Disappointment Cleaver
Route grade
Beginner-intermediate glaciated
Intermediate-advanced glaciated
Round trip distance
~12.5 miles
~14.5 miles
Elevation gain
~7,400 ft
~9,000 ft
Days required
2-3 days
2-4 days
Technical demands
Glacier travel, rope team, basic crampon/axe
Advanced glacier travel, complex crevasse rescue, fast pacing at altitude
Annual climbers
~5,000-7,000
~10,000 attempts
Summit success rate
~70-85% (guided)
~48% overall
Permit cost
$5 parking (no climbing fee)
$63 climbing fee + wilderness
Cost (unguided)
$150-$400 per person
$300-$600 per person plus gear
Cost (guided)
$700-$1,500 (3-day)
$2,250-$2,995 (3-day)
Best season
June-July
Late June-early September
Best for
First glaciated climb / Rainier prep
Intermediate-advanced glaciated objective
Frequently Asked Questions
Is Mount Baker harder than Mount Rainier?
No. Mount Rainier is meaningfully harder than Mount Baker. Rainier is 3,629 feet taller, has more crevasses, more objective hazard, longer summit-day distance, and demands more advanced glacier travel skills.
Baker is widely considered the premier Rainier training peak precisely because it offers real glaciated mountaineering on more forgiving terrain. Most major guide services explicitly recommend climbing Baker before Rainier.
Should I climb Baker before Rainier?
Yes, in almost all cases. Baker is the canonical Rainier preparation climb. It teaches the same fundamental skills — rope team travel, crevasse rescue, crampon and ice axe technique, altitude exposure, glacier reading — on shorter, less consequential terrain.
The Mount Baker Coleman-Deming route is rated as a beginner-friendly glacier climb; Rainier’s Disappointment Cleaver is intermediate-to-advanced. Building Baker into your progression substantially increases Rainier success rates.
How much does it cost to climb Mount Baker vs Mount Rainier?
Baker unguided: $5 Northwest Forest Pass for parking, plus food, gas, and lodging. Total under $400 typically.
Baker guided: $700-$1,500 for a 2-3 day program with American Alpine Institute, Northwest Alpine Guides, Mountain Madness, or others.
Rainier unguided: $63 NPS climbing fee plus wilderness permit. Total under $600 plus gear.
Rainier guided: $2,250-$2,995 for a 3-day program with RMI, IMG, or Alpine Ascents.
Rainier guided is roughly 2x the cost of Baker guided.
How long does each climb take?
Mount Baker: 2-3 days for most climbers via the Coleman-Deming route, with high camp at 6,000-7,000 feet. The 2-day program is intermediate-pace and requires prior mountaineering experience. The 3-day program builds in skills instruction.
Mount Rainier: 2-3 days minimum on the Disappointment Cleaver route, with high camp at Camp Muir (10,080 ft). Many programs run 4 days to include skills instruction and weather contingency.
Is Mount Baker a beginner-friendly climb?
Yes, when guided. Mount Baker’s Coleman-Deming and Easton Glacier routes are widely considered the most beginner-friendly true glaciated climbs in the lower 48.
Major guide services run multi-day programs for first-time mountaineers with built-in instruction in glacier travel, crevasse rescue, and rope team movement. Mount Baker is genuinely accessible to fit beginners with no prior mountaineering experience, provided they go guided.
What is Mount Baker’s success rate?
Mount Baker guided programs typically report 70-85% summit success rates, varying by season and weather window. This is meaningfully higher than Mount Rainier’s 48% historical average.
The higher Baker success rate reflects both lower technical demands and shorter overall commitment — bad weather windows close out Rainier climbs more often than they shut down Baker attempts.
When is the best time to climb Mount Baker?
May through September, with peak conditions typically in June and July. Earlier in the season the routes are fully snow-covered with stable crevasse bridges. By late summer, crevasses become more exposed and route-finding gets more complex.
The road to the Heliotrope Ridge trailhead may not fully open until mid-June in heavy snow years. Most guided programs run June through August.
What gear do I need for both climbs?
The technical gear list is nearly identical: mountaineering boots, crampons, ice axe, climbing harness, helmet, rope (provided by guide services), prusiks and rescue gear, glacier glasses, multi-layer clothing system.
For both peaks: tent, 0-20°F sleeping bag, sleeping pad, stove and fuel, food for 2-3 days, and a 60-70L pack. Mount Rainier additionally requires more cold-weather layering due to higher altitude and longer summit day exposure.
Most guide services rent the technical gear (crampons, ice axe, harness, helmet) for both peaks at similar prices. See Investigation 18: What’s in a mountain guide’s pack for the detailed gear list both guides carry.
Kings Peak via Henrys Fork: Our 3-Day Backpack to Utah’s Highest Summit | Global Summit Guide
Trip Reports / Utah
Kings Peak via Henrys Fork: our 3-day backpack to Utah’s highest summit
Written byGlobal Summit Guide Editorial Team
ClimbedAugust 2023 · Summited Day 2
Reading time14 minutes
13,528 ft
Utah high point
29 mi
Round trip
3 days
Standard itinerary
~4,100 ft
Total elevation gain
★Part of the HubThis Kings Peak trip report sits inside our master mountaineering reference covering routes, training, gear, and trip guides for every major peak and high-point objective.Visit the Hub →
If you live in Utah and you are serious about mountains, Kings Peak is the rite of passage. At 13,528 feet it is the state high point, it is non-technical, and the Henrys Fork approach is the cleanest route in. We had done bigger peaks (Aconcagua, Kilimanjaro) but had somehow never climbed our own state’s high point until late August 2023. Three days, 29 miles, one boulder field that lasts an hour and a half, and a summit ridge with views all the way into Wyoming. This is the unedited trip report. What worked, what we underestimated, and what we would do differently next time we drove the 3 hours up from Salt Lake. The full peak-by-peak progression framework that this trip slots into lives in our master mountaineering hub.
The route at a glance
Kings Peak sits at the eastern edge of the Uinta Mountains in the High Uintas Wilderness of northeastern Utah. The Uintas are the only east-west running major mountain range in the lower 48, a strange geographic detail that becomes obvious once you are standing on Anderson Pass looking down into both Painter Basin (south) and Henrys Fork Basin (north). The mountain is approached from three sides: Henrys Fork from the north (the most popular), Yellowstone Creek from the south (longer, less traveled), and the Uinta River drainage from the southeast (rarely used). Henrys Fork is the standard route because it is the shortest at 29 miles round trip and the trailhead at 9,400 feet starts you within reach of a single backpacking day to Dollar Lake.
The trailhead is in Wyoming, which surprises first-time visitors. You drive 3 hours from Salt Lake City east on I-80 across the state line, exit at Lyman, drop south through Mountain View on Wyoming 410, and then follow the dirt Forest Road 17 for the final 15 miles to the Henrys Fork Trailhead in the Ashley National Forest. No fees, no permits, just a self-registration kiosk at the trailhead. From there, the trail follows Henrys Fork creek upstream through forest and meadow for 8 miles to Dollar Lake at roughly 10,800 feet, then continues another 4 miles climbing through Gunsight Pass into Painter Basin and up to Anderson Pass at 12,800 feet. From Anderson Pass, the summit ridge runs 1.5 miles of class 2 boulder hopping to the 13,528-foot summit.
Phase 1: the drive and the trailhead (Day 0)
Day 0
Salt Lake City to Henrys Fork Trailhead
3 hours driving, 9,400 ft trailhead
FridayTrailhead camp
We left Salt Lake at 2 PM on Friday and rolled into the Henrys Fork Trailhead campground around 5:30 PM. The drive is straightforward until the last 15 miles, which run on dirt Forest Road 17 from Mountain View, Wyoming. The road is passable by any car in dry conditions but becomes hard work after rain. There is no cell signal from Mountain View onward, so download offline maps before you leave.
The trailhead has a small campground with vault toilets and primitive sites scattered along the access road. Cost is around $10 per night per site. We grabbed a spot, set up the tent, and ate a quick dinner at the truck. The mosquitoes were thick at the trailhead in late August (this was a wet year), and we burned through more bug spray in 30 minutes at the trailhead than we did the entire rest of the trip above tree line. Recommendation: pack permethrin-treated layers if you are going during peak mosquito season, which in the Uintas is roughly mid-July through mid-August.
Phase 2: backpacking in to Dollar Lake (Day 1)
Day 1
Henrys Fork Trailhead to Dollar Lake
8 miles, 1,400 ft gain
Saturday5-6 hours backpacking
We started hiking at 8 AM. The first 3 miles climb gently through lodgepole pine forest along Henrys Fork creek, gaining about 600 feet to Elkhorn Crossing. The trail crosses the creek twice in the first 4 miles. In late August the water level was low enough to rock-hop both crossings without changing footwear. In early summer (June and early July), expect to wade or use stepping logs that are often submerged. The trail is well-maintained, well-marked, and easy to follow.
Past Elkhorn Crossing the forest opens into the broad Henrys Fork meadows. This is the visual payoff of the approach: the upper Uinta basin stretching south, the cathedral walls of Henrys Fork Peak on the right (the rounded high mountain that frames the basin), and Kings Peak itself visible far to the south as a dark, blocky summit. Dollar Lake sits at about 8 miles in, roughly 10,800 feet, on a small bench just east of the main trail. Most people camp here. Some push 1 to 2 miles further to Henrys Fork Lake at 10,900 feet for a shorter summit-day approach. We chose Dollar Lake for the views. The backpacking kit that makes a trip like this work is detailed in our expedition pack guide, our layering systems article, our trekking poles guide, and the broader gear context in our crampons and ice axes guide for the snow conditions that linger early season.
Dollar Lake, ~3 PM Saturday afternoon
We had been climbing for six hours, complaining the whole time about pack weight. Then we crested the small ridge above the lake, and Kings Peak was sitting right there at the south end of the basin, perfectly framed between the ridgelines. Suddenly nobody was complaining anymore.
Camp setup at Dollar Lake means following standard High Uintas Wilderness regulations: camp at least 200 feet from water, no campfires above 10,800 feet (Dollar Lake is right at that line, so practically no fires), and pack out all waste including used toilet paper. The mosquito situation was much better than at the trailhead. The afternoon thunderstorms missed us, but we could see lightning on the ridges to the east starting around 4 PM. We ate dinner early, did our gear prep for summit day, and were asleep by 9 PM.
Phase 3: summit day (Day 2)
Day 2
Dollar Lake to Kings Peak summit and return
14 miles, 2,700 ft gain
Sunday~10 hours total
We left camp at 5:00 AM in headlamp light. The summit day timing is the single most important decision of the trip: be off the exposed summit ridge before 1:00 PM, when the standard Uinta afternoon thunderstorms start firing. We aimed for a 10 AM summit, which gave us 3 hours of buffer to be back below Anderson Pass before the lightning risk built up. Some groups push for a 9 AM summit. Either works. A noon summit attempt is asking for trouble.
The trail from Dollar Lake climbs gradually through Henrys Fork Basin for the first 2 miles to Henrys Fork Lake (10,900 feet). From there it steepens toward Gunsight Pass at 11,888 feet. The view from Gunsight Pass is one of the highlights of the whole trip: looking south into Painter Basin and the upper Uinta drainage with Kings Peak rising at the southwest corner. The boulder field on the summit ridge is visible from here, which is sobering. From Gunsight Pass, the trail drops 300 feet into the basin then climbs steadily for the next 1.5 miles to Anderson Pass at 12,800 feet.
Anderson Pass is where the trail ends and the route begins. The summit ridge runs 1.5 miles roughly west to the Kings Peak summit, all of it class 2 boulder hopping over car-sized blocks of quartzite. There is no exposure (the ridge is wide and the drops on either side are gentle), but the cumulative fatigue is significant. We averaged about 0.7 miles per hour on the boulder section. Trekking poles helped on the easier parts and were a nuisance on the larger blocks. Most experienced hikers stow them after the first 10 minutes of bouldering.
Kings Peak summit, 10:15 AM
The summit register is bolted to a USGS marker on a flat slab at the high point. We signed our names, took the obligatory summit photographs, and looked east. The view stretches all the way into Wyoming, out to the Wind River Range, with the entire eastern Uinta basin spread out below. The most striking thing is how flat the surrounding terrain is once you are this high: Kings Peak is meaningfully taller than anything around it for fifty miles in any direction.
We spent 25 minutes on the summit, ate a quick lunch, and started the descent at 10:45 AM. The boulder hop on the way down was actually harder than the way up: tired legs, less concentration, more weight on the knees with each step. Two of our group rolled ankles within the first 20 minutes. We slowed the pace, took breaks every 15 minutes, and reached Anderson Pass at 12:15 PM. Lightning was visible on the high ridges to the east as we descended, which validated the early-start strategy. We rolled back into camp at Dollar Lake at 3:30 PM, exhausted but with the summit secured. The altitude physiology that makes a 13,528 foot summit meaningful even for Utah-acclimated hikers is detailed in our altitude acclimatization explainer, with the symptoms framework in our altitude sickness guide and the broader peak progression context in our conquer-peaks mountaineering hub.
Phase 4: packing out (Day 3)
Day 3
Dollar Lake to Henrys Fork Trailhead
8 miles, mostly downhill
Monday4-5 hours backpacking
The pack out is the easiest day of the trip. We broke camp at 7:30 AM, hiked the 8 miles back to the trailhead by noon, and were sitting in a diner in Mountain View by 1:30 PM eating something that involved bacon. The 3-hour drive back to Salt Lake got us home by 5:30 PM, exactly 72 hours after we had left on Friday.
The descent through Henrys Fork basin in the morning light is beautiful in a different way than the inbound trip. The angle of light hits the wildflower meadows from the east instead of overhead, and the entire basin glows for the first hour after sunrise. The mosquitoes at the trailhead were just as aggressive on the way out as they had been on Friday, which was a fitting reminder of where we had been.
What it actually cost us
Per-person spending for the 3-day Kings Peak trip
Total: roughly $150 to $250 per person for 3 days. Kings Peak is one of the cheapest meaningful peak experiences in the American West, mostly because the trailhead is free, the wilderness is free, and the distance from Salt Lake (3 hours) keeps fuel costs low. The biggest variable is gear: if you already own backpacking equipment, the trip is essentially food, fuel, and the trailhead campground. Solo hikers spend more (no shared fuel or food), groups of 4 to 6 share most costs.
Line item
Per person
What it covered
Gas (Salt Lake to Henrys Fork, round trip)
~$35
~360 miles total, shared 4 ways
Trailhead campground (1 night)
$3
$10 site shared 4 ways
Permits and park fees
$0
None required
Food (3 days backpacking)
$45
Mix of dehydrated meals and snacks
Fuel (canister) and shared cooking
$8
Half canister per person
Diner stop on the way home
$25
Real food in Mountain View
Bug spray and odds and ends
$10
Permethrin spray, batteries
ALL-IN PER PERSON
~$126
3-day trip total
Add gear if you do not already own it: a 3-season backpacking tent ($200-$500), a 60-70L pack ($200-$350), a 20-degree sleeping bag ($150-$350), a sleeping pad ($80-$150), a stove and pot system ($60-$120), and trekking poles ($60-$150). A complete kit from scratch runs $750-$1,600. Most Utah backpackers build this kit incrementally over a few seasons. The full backpacking and climbing kit framework lives in our expedition gear list, with the specialized items broken out in our boots guide and our sleeping bags article.
What we would do differently
Six honest takeaways from our trip that we wish someone had told us:
Camp closer to Anderson Pass if you can. We camped at Dollar Lake (8 miles in, 10,800 feet). Several groups we passed had pushed another 2 to 3 miles to camps at Henrys Fork Lake or even higher in the basin. The summit day from Henrys Fork Lake is roughly 2 hours shorter round trip, which means a 7 AM start gets you the same 10 AM summit window with less pre-dawn hiking. Trade-off is a heavier first day and a slightly less scenic camp.
Treat the mosquitoes seriously. Permethrin-treat your hiking pants and long-sleeve shirts before you leave. DEET works in the moment but wears off. A bug net hat saves the morning and evening hours at camp. We did not do enough on this and paid for it.
Start summit day at 5 AM, not 6. An extra hour of buffer before the 1 PM thunderstorm window is the difference between a relaxed summit and a frantic descent. Headlamps are a small investment for a much bigger margin of safety.
Watch your knees on the boulder descent. The summit ridge boulder field is harder on the descent than the ascent. We had two ankle rolls within 20 minutes. Take breaks, slow down, and consider knee braces if you have any history of knee issues.
Bring more water than you think. The trail crosses Henrys Fork creek several times and there is water at Dollar Lake and Henrys Fork Lake. From Anderson Pass to the summit there is no water, and the round-trip from camp to summit and back is 6 to 8 hours. We each carried 3 liters and that was barely enough on a hot August day.
Check trail conditions before going. Snow lingers on the north-facing slopes into early July, and the Gunsight Pass area can hold snow even later in cool years. Check the High Uintas Wilderness reports on the Ashley National Forest website before you commit to dates. The mountain weather framework that helps with this decision is in our mountain weather guide.
The thunderstorm risk that locals take seriously
The standard Uinta afternoon thunderstorm pattern is predictable and dangerous. Through July and August, daytime heating in the basins drives convective storms that build over the high ridges starting around 1 PM and peak between 3 PM and 6 PM. Kings Peak sits at the highest point for fifty miles in any direction, which means it attracts lightning preferentially when the storms come through. Hikers have died on the summit ridge from electrical strikes within the past two decades, and the local search-and-rescue teams in Daggett and Summit counties know the pattern well. The protocol is simple: be off the summit by 1 PM. Anyone you meet on the trail going up after 11 AM is taking unnecessary risk.
The good news is that thunderstorm risk is forecastable. The National Weather Service Salt Lake City office issues thunderstorm probability forecasts for the High Uintas zone, and the percentages are usually accurate within plus or minus 20 percent. A day with 40% afternoon thunderstorm probability means most groups have a clean weather window before 1 PM. A day with 70% probability means many groups end up in storms by mid-afternoon. We did not climb on a 70% day. If you are flexible on dates, watching the forecast for a low-thunderstorm-probability window is the highest-impact preparation decision you can make. The cold-weather and storm-safety context that applies above tree line is in our frostbite prevention article and the broader high-altitude framework in our high-altitude training program.
Kings Peak in the broader peak-bagging context
Kings Peak is the second-easiest state high point west of the Mississippi (after Black Mesa in Oklahoma at 4,975 feet). The 50 US state high points are a peak-bagging objective that draws thousands of completers each year, with Kings Peak typically attempted as one of the western Rocky Mountain group. The harder state high points (Denali in Alaska at 20,310 feet, Granite Peak in Montana at 12,799 feet with technical climbing, Gannett Peak in Wyoming at 13,809 feet) require expedition-level commitment. Kings Peak is the gateway state high point that introduces hikers to multi-day backpacking at meaningful elevation without requiring technical climbing skills. The bigger 50-state high point progression and the global 7-Summits framework that often parallels it lives in our Seven Summits guide and our master mountaineering hub.
For Utah climbers, Kings Peak is also the entry point into the High Uintas Wilderness as a backpacking destination beyond a single peak. The Uintas hold dozens of peaks above 12,000 feet, hundreds of alpine lakes, and roughly 1,000 miles of trail. Kings Peak is the most-climbed peak in the range but represents a small fraction of what the wilderness offers. Hikers who complete Kings Peak and want more typically progress to Gilbert Peak, Mount Lovenia, Mount Emmons, or the Painter Basin and West Fork Whiterocks loop. The Uintas reward repeat visits and are the most underrated multi-day wilderness in the lower 48.
After Kings Peak: where to go next
Kings Peak is a great stepping stone if your bigger ambition is high-altitude expedition climbing. The skills it builds (multi-day pack carrying, camping above 10,000 feet, navigating exposed terrain above tree line, managing thunderstorm risk) are foundational for objectives like Mount Whitney (14,505 feet) and the broader Sierra high country. From Whitney the natural progression is Aconcagua, the South American 7-Summits peak we have covered in detail in our Aconcagua trip report and Aconcagua routes guide. The decision framework for picking the next mountain after Kings Peak depends on whether you want to stay in the western US (Whitney, then Rainier or Hood) or skip directly to international objectives (Kilimanjaro or Aconcagua). The framework for that decision is in our Kilimanjaro vs Aconcagua first-7-summit framework.
The bottom line on Kings Peak
Kings Peak is the right first multi-day peak experience for Utah hikers who want to step up from day-hiking. The trail is straightforward, the elevation is real but manageable, the cost is minimal, and the payoff (standing on the highest point in Utah with the entire eastern half of the state spread out below) is genuinely meaningful. The two structural risks (afternoon thunderstorms and the boulder field) are well-understood and avoidable with reasonable planning. Pick a low-thunderstorm-probability window in late July or August, start your summit day at 5 AM, treat your bug spray seriously, and you will likely have a great trip. The cross-region peak progression context that places Kings Peak alongside other mountain objectives lives in our master mountaineering hub, with the broader trekking and expedition framework in our mountaineering for beginners guide.
★ Master Resource
Plan your next mountain trip
Routes, training timelines, gear lists, cost frameworks, and trip reports from every major peak and high-point objective we cover.
Kings Peak via Henrys Fork is moderate for fit backpackers and challenging for casual hikers. The route is 29 miles round trip with roughly 4,100 feet of total elevation gain across 3 days. The trail is non-technical (no ropes, no exposure beyond class 2 boulder hopping on the summit ridge), but the distance, altitude (summit at 13,528 feet), and weather exposure above tree line make it a real undertaking. Most people complete it as a 3-day trip with one night each at Dollar Lake or nearby.
How long does it take to hike Kings Peak?
The standard itinerary is 3 days: Day 1 backpack 8 miles in to Dollar Lake, Day 2 summit (12 to 14 miles round trip including the summit ridge), Day 3 pack 8 miles out. Strong hikers can complete it as a 2-day trip with one night at Dollar Lake or higher. The single-day push (29 miles in one day) is done by experienced peak baggers but is not recommended for first-timers due to elevation exposure and storm risk above tree line.
When is the best time to climb Kings Peak?
Late July through mid September is the standard window. Snow lingers on north-facing slopes and at the higher passes into early July. After mid September, the weather becomes unpredictable and the first snow storms typically hit by late September. Peak conditions are usually the first three weeks of August: trail snow-free, mosquitoes diminishing, and afternoon thunderstorm risk still present but more predictable. Avoid August weekends if you want solitude.
Where is the Henrys Fork Trailhead and how do you get there?
The Henrys Fork Trailhead is at 9,400 feet in the Ashley National Forest, accessed via Mountain View, Wyoming (despite climbing Utah’s high point). Drive from Salt Lake City takes 3 to 3.5 hours: I-80 east into Wyoming, exit at Lyman, drive south on Wyoming 410 to Mountain View, then continue on Forest Road 17 to the trailhead. The last 15 miles of dirt road is passable by 2WD in dry conditions but becomes difficult after rain. No fees, no permits required for the trailhead.
How dangerous are the afternoon thunderstorms on Kings Peak?
Significant. The exposed summit ridge above Anderson Pass is the highest terrain for many miles in any direction and attracts lightning strikes during the afternoon thunderstorm pattern that hits the Uintas almost daily in summer. Standard protocol is to be off the summit by 1:00 PM, which means starting the summit push from Dollar Lake by 5:00 AM or earlier. Hikers caught above tree line during electrical storms have died on Kings Peak. The risk is real and locally well-known.
What is the boulder field on the summit ridge like?
The summit ridge from Anderson Pass to Kings Peak is roughly 1.5 miles of class 2 boulder hopping. The boulders are car-sized in places and require continuous attention to foot placement. No exposure (the ridge is wide), no climbing skill required, but the cumulative fatigue of two solid hours of boulder hopping after a long approach is what wears most hikers down. Trekking poles are mixed: useful for balance but a pain to manage on the larger blocks. Most experienced hikers stow them on the boulder section.
Do you need any permits for Kings Peak?
No permits required. Henrys Fork Trailhead is on Ashley National Forest land with no fees, no quota system, and no advance registration. Standard wilderness regulations apply: groups limited to 14 people, camp at least 200 feet from water, no campfires above 10,800 feet in the High Uintas Wilderness, and pack out all waste. The free trailhead self-registration at the kiosk is for trail counts and search-and-rescue purposes.
Patagonia in 10 Days: Torres del Paine, Perito Moreno, and Mount Fitz Roy | Global Summit Guide
Trip Reports / Patagonia
Patagonia in 10 days: Torres del Paine, Perito Moreno, and Mount Fitz Roy
Written byGlobal Summit Guide Editorial Team
TraveledMarch 28 – April 6, 2025
Reading time16 minutes
10 days
Total trip length
2 countries
Chile + Argentina
4 parks
National parks visited
~$2.8K
Per person all-in
★Part of the HubThis Patagonia trip report sits inside our master mountaineering reference covering routes, training, gear, and travel guides for every major peak and region.Visit the Hub →
We had been talking about Patagonia for years before we actually booked it. The reality of getting there from Salt Lake City is what keeps most people away: it takes nearly 24 hours of flying to land in Punta Arenas, and the trip needs to be at least 8 days to justify the travel. We carved out 10 days at the end of March 2025, picked up Taylor and Helena in Santiago on Day 3, and ran the Chilean and Argentine highlights back to back: Torres del Paine for two days, Perito Moreno glacier, then Mount Fitz Roy from El Chaltén. This is the unedited trip report. What we actually paid, what we wish we had done differently, and the moment at Laguna de los Tres that none of us will forget. The broader expedition context for South American climbing lives in our master mountaineering hub, with the Andes climbing arc in our Aconcagua routes guide.
The route at a glance
Patagonia is two countries: Chilean Patagonia (Torres del Paine, Puerto Natales, Punta Arenas) and Argentine Patagonia (El Calafate, Perito Moreno, El Chaltén, Mount Fitz Roy). The standard 10-day trip works one country at a time, crossing the border at Cancha Carrera between Days 5 and 6. We flew into Santiago, transferred south to Punta Arenas the same day Taylor and Helena landed (Day 3), drove 2.5 hours to Puerto Natales, spent 2 full days in Torres del Paine, drove 3.5 hours across the Argentine border to El Calafate on Day 6, ran Perito Moreno on Day 7, drove 3 hours to El Chaltén for Day 8, then reversed back to Punta Arenas and Santiago for the return. Total ground covered: roughly 1,400 km of driving, two international border crossings, and four national parks.
If you only have a week, pick one country. The Chile-only version (Torres del Paine focus) is roughly 7 days and skips El Calafate and Fitz Roy. The Argentina-only version (Perito Moreno plus El Chaltén) is also 7 days and skips Torres del Paine. Doing both in under 10 days is possible but feels rushed. Ten days was the right amount of time for our group, with one buffer day for weather or fatigue.
Phase 1: getting there (Days 1-3)
Day 1
Salt Lake City to Santiago, Chile
Direct LATAM flight, 11 hours
Friday11:35 AM departure
The LATAM nonstop from Salt Lake to Santiago is the cleanest US-Patagonia routing if you live in the Mountain West. It is an 11-hour overnight flight that lands at 6:40 AM the next morning, putting you on the ground with most of Day 2 still ahead. We left SLC on Friday, March 28 at 11:35 AM and landed in Santiago at 6:40 AM Saturday morning. We had pre-booked the Holiday Inn Santiago Airport for an early check-in so we could clean up and grab a few hours of horizontal sleep before exploring.
Day 2
Recovery day in Santiago
Santiago, Chile
SaturdayBuffer day
We took the Day 2 buffer instead of trying to push straight to Patagonia. After the overnight flight, the smart play is to use the half-day to walk around Santiago (Plaza de Armas, Cerro San Cristóbal, the Bellavista neighborhood) and reset your sleep cycle before heading south. The Holiday Inn Santiago Airport made airport return easy the next morning. We slept early to be ready for the Day 3 departure to Punta Arenas.
Day 3
Santiago to Puerto Natales
LATAM SCL-PUQ, then 2.5h drive
Sunday12:40 PM departure
Taylor and Helena landed in Santiago at 8 AM after their overnight flight from Salt Lake. We met at the gate, grabbed lunch at the airport, and flew LATAM to Punta Arenas (PUQ) departing at 12:40 PM. The flight is a one-stop, just under 5 hours total. Punta Arenas is the southernmost city of Chile and the gateway to Torres del Paine. We picked up the rental VW at the airport (booked through Expedia for the week), grabbed dinner at La Forastera Burgers in Puerto Natales (closes at 9:30 PM), stopped at the local grocery store for breakfast and lunch supplies, and checked into our Airbnb in Puerto Natales.
The 2.5-hour drive from Punta Arenas to Puerto Natales runs through open Patagonian steppe. Guanacos grazing along the road, the occasional rhea, and very little traffic. The terrain feels like Wyoming high plains turned up to a different scale. We arrived in Puerto Natales just before sunset and the light over Lago Sofía was the first proper “we are in Patagonia” moment of the trip.
Phase 2: Torres del Paine (Days 4-5)
Day 4
Base Torres Hike: the three towers
Torres del Paine NP, ~20 km, 800m gain
Monday8 hours total
This was the hike we had come for. The Base Torres trail starts at the Hotel Las Torres parking area (1.5-hour drive from our Airbnb in Puerto Natales, including the park entry on the 3-day pass we had bought online). The hike is roughly 20 km round trip with 800 meters of elevation gain. The first two-thirds is moderate climbing through Patagonian beech forest along the Ascencio river. The final hour is a steep rock and boulder scramble up to the lake at the base of the towers. The payoff is one of the most photographed views on the planet, and it earns its reputation.
We started at 7:30 AM, hit the lake around 11:30 AM, spent 90 minutes at the towers, and were back at the car by 4 PM. The wind on the final scramble was strong enough that we hunched against the gusts on the way up. The towers themselves emerged from morning cloud cover at the exact moment we crested the final ridge, which felt cinematic in a way we did not deserve. The three granite spires (Torre Norte, Torre Central, Torre Sur) rising vertically out of the lake do not photograph the way they feel in person. The scale is the part that surprises everyone.
The Base Torres viewpoint, around 11:30 AM
We had been climbing for four hours, mostly looking at our feet on the final scramble. Then the trees opened, the wind hit us square, and the three towers were just there. Right there. No filter, no edit, no zoom. The kind of view that makes you sit down on a rock for ten minutes before you can talk about anything else.
The descent was harder than the ascent on the knees. We were grateful for poles. Back in Puerto Natales by 6 PM, we ate at a restaurant on Avenida Manuel Bulnes and were asleep by 9. The full Torres del Paine route framework and the broader peak-by-peak hiking arc lives in our mountaineering for beginners guide, our expedition gear list, and the multi-day trek preparation framework in our EBC and trekking training plan. The cross-region mountain travel context lives in our master mountaineering hub.
Day 5
Grey Glacier boat excursion
Lago Grey, Torres del Paine NP
Tuesday2h drive each way
The Grey Glacier boat tour through Fiordos del Sur was the right Day 5 choice. It is a 2-hour drive from Puerto Natales to the boat dock at Lago Grey, then a 3-hour boat journey across Lago Grey to the glacier face. The boat costs about 100 to 110 USD per person and you book online ahead of time. We saw icebergs floating in the lake on the inbound leg, watched the boat thread between bergs the size of houses, and reached the 30-meter ice wall at the glacier face about 90 minutes in. The crew handed out whiskey on the rocks (literal glacier ice in the glass) and we stood on deck in the cold wind for the better part of an hour just watching.
The drive back to Puerto Natales runs through the heart of the park. We stopped at the Mirador Salto Grande for the waterfall view, drove past Lago Pehoé and Lago Nordenskjöld, and hit the Mirador Condor overlook for a panoramic view of the Paine Massif at sunset. The Paine Horns, the dark sedimentary spires that the park is famous for beyond the Towers, are unreal in late-afternoon light. By the time we got back to Puerto Natales for dinner, we had spent nearly 12 hours seeing the park from a different angle than Day 4, and it felt complete.
Phase 3: crossing into Argentina (Days 6-8)
Day 6
Puerto Natales to El Calafate
3.5-hour drive, Cancha Carrera border
WednesdayBorder crossing
The drive from Puerto Natales to El Calafate runs through the Cancha Carrera-Cerro Castillo border crossing between Chile and Argentina. Plan for 60 to 90 minutes at the border on top of the driving time. The actual paperwork is straightforward for US citizens (no visa for either country, just stamps in and out), but the queues can be slow and the two countries each have separate posts on either side of the dirt road. We left Puerto Natales at 8 AM, cleared both borders by 11 AM, and rolled into El Calafate around 1 PM.
El Calafate is a tourist town built around Perito Moreno tourism. The main street, Avenida del Libertador, has restaurants, gear shops, and tour offices. We checked into our El Calafate Airbnb, explored the main strip, ate dinner at one of the parrilla restaurants, and called it an early night to be ready for the Perito Moreno full-day on Day 7.
Day 7
Perito Moreno Glacier full day
Los Glaciares NP, 1.5h drive each way
Thursday~10 hours
Perito Moreno is the headline attraction of Argentine Patagonia and it earned the billing. The glacier is one of the only major glaciers in the world that is still advancing rather than retreating, and the calving events (where house-sized chunks break off the 70-meter ice face) happen every 30 to 60 minutes during daytime. We drove from El Calafate at 8 AM, reached the park entrance gates around 9:30, and spent the next 5 hours on the boardwalk system that gives you multi-angle viewing of the glacier face.
The Nautical Safari boat tour (around 90 USD per person, also booked through the official site) takes you within 200 meters of the south face of the glacier. The boat journey is about 1 hour. We stood on the deck the entire time, listened to the ice crack like artillery, and watched a piece the size of a small apartment building fall into the water in front of us. The wave it made traveled across the entire channel and rocked the boat noticeably ten seconds later. We were back at our Airbnb in El Calafate by 7 PM.
From the boardwalk above the south face
The cracking sound is what surprises you. Not a chunk falling, just the ice itself flexing under its own weight. Like a building working in a thunderstorm. You stand there long enough, you start to hear the glacier as a living, breathing thing rather than a postcard image.
Day 8
Laguna de los Tres at Mount Fitz Roy
El Chaltén, 25 km, 800m gain
Friday8-9 hours
The 3-hour drive from El Calafate to El Chaltén runs along Ruta 40 with the Southern Patagonian Ice Field on the horizon for the last hour. El Chaltén is a small mountain town at the trailhead for Mount Fitz Roy and Cerro Torre. We arrived at 9 AM, parked at the southern trailhead, and started the Laguna de los Tres hike at 9:30. The trail runs 12 km one-way through forest, then opens onto an exposed Patagonian valley, and finishes with the most brutal final climb of the entire trip: roughly 400 meters of vertical gain in the last 1.5 kilometers, on loose rock and scree, almost straight up to the lake at the base of Fitz Roy.
The view at the top is the reason we came. Mount Fitz Roy is one of the most dramatic mountain spires on Earth, a vertical granite tooth rising 1,500 meters above the Laguna de los Tres lake. The three peaks (Aguja Saint Exupery, Fitz Roy itself, and Aguja Poincenot) form a continuous ridge that looks impossible to scale. On a clear day the reflection in the lake doubles the drama. We had two hours of clear weather before clouds rolled in, which was enough.
Laguna de los Tres, ~1:30 PM
Dawson opened his mission call at the lake. We had carried the envelope all the way up from El Chaltén, sealed and folded in his pack, waiting for the moment. With Fitz Roy reflected in the water behind him and our group standing around in the wind, he read the assignment out loud. The kind of moment that makes a place mean something for the rest of your life.
The descent took us four hours. We were back at the car by 6 PM, drove the 3 hours back to El Calafate, and rolled into the Airbnb around 9:30 PM. Easily the longest single day of the trip but the highest-payoff hike of the ten days. The full peak-by-peak hiking framework that prepares climbers for days like this is detailed in our high-altitude training program, with the cold-weather kit context in our layering systems guide.
Phase 4: the return (Days 9-10)
Day 9
El Calafate to Punta Arenas to Santiago
5-6h drive plus evening flight
SaturdayTravel day
We left El Calafate at 8 AM, drove back through the Cancha Carrera border (90 minutes total this direction), reached Puerto Natales for lunch, and drove the final 2.5 hours to Punta Arenas to drop the rental car. The 5:10 PM LATAM flight from Punta Arenas to Santiago lands at 8:35 PM. From Santiago, we caught the 11:05 PM LATAM flight back to Salt Lake City. A long travel day, but the only one of the trip where every hour was transit rather than experience.
Day 10
Landing in Salt Lake City
SCL to SLC, 1 PM arrival
SundayTrip complete
The LATAM flight from Santiago arrived in Salt Lake City at 1 PM on Sunday. Total trip time door to door: 10 days. We were home before dinner with photographs we still look at every week, a rental car in our driveway that needed unloading, and a sense that we had done Patagonia about as efficiently as a 10-day itinerary allows.
What it actually cost us
Our per-person all-in spending, March 28 – April 6, 2025
Total: roughly $2,800 to $3,200 per person for 10 days. The breakdown below is what we actually paid for our group of family and friends, with a shared rental car and shared Airbnbs distributing the lodging cost. Solo travelers should expect to pay 30-40% more on lodging and transport. Couples land in the same per-person range as our group of 5.
Line item
Per person
What it covered
International airfare (LATAM SLC-SCL)
$1,483
Round trip, direct nonstop
Domestic flight (Santiago-Punta Arenas)
$297
LATAM, one stop, ~5 hours
Airbnb lodging (shared, 7 nights)
$361
Puerto Natales + El Calafate
Rental car (VW, shared 5 ways, 6 days)
$166
Punta Arenas pickup and return
Torres del Paine 3-day pass
$50
pasesparques.cl online
Grey Glacier boat tour
$105
Fiordos del Sur 3-hour boat
Perito Moreno Nautical Safari
$90
Boat tour to glacier face
Los Glaciares NP entry (2 days)
$40
El Chaltén + Perito Moreno
Food, snacks, dinners (10 days)
~$350
Mix of groceries and restaurants
Hotel night in Santiago + transit incidentals
~$90
Holiday Inn airport
ALL-IN PER PERSON
~$3,030
10-day trip total
The two biggest cost levers are international airfare (40-50% of the total) and group size (the rental car and lodging savings from sharing 5 ways were significant). If you can find shoulder-season airfare under $1,200, or if you travel as a group of 4-6, your per-person all-in can drop to $2,500. Going solo or paying peak summer airfare can push it past $4,000. The broader expedition cost reference framework lives in our mountain climbing costs guide, and the comparable South American expedition cost in our Aconcagua cost breakdown.
What we would do differently
Five honest takeaways from our trip that we wish someone had told us before we booked:
Start the Base Torres hike earlier. We started at 7:30 AM and that was good. Hikers who start at 9 AM hit the final scramble in the heat of the day and run out of time for photographs. The towers light up best in the morning. Aim for a 7 AM start at the trailhead.
Build in a weather buffer day. We were lucky. The weather held for both Torres del Paine and Fitz Roy days. The standard pattern is roughly 60% of days have good visibility on the Towers and 40-50% on Fitz Roy. If we had hit two consecutive cloudy days, our highlights would have been cancelled. Future trips, we would build in one extra day in each location as weather buffer.
Pack for wind, not just for cold. Patagonia is windy in a way that surprises Mountain West hikers. Wind chill on the Base Torres scramble was meaningfully colder than the temperature alone suggested. Bring a windproof shell layer even if the forecast looks mild.
Do not skip the Grey Glacier boat. A surprising number of trip reports skip this in favor of more hiking. It is genuinely one of the highlights of the trip. The boat tour gives you a perspective on the Patagonian Ice Field that you cannot get from any trail.
Stay in El Chaltén overnight for Fitz Roy. We day-tripped from El Calafate and it worked, but driving 3 hours each way on Day 8 with the Laguna de los Tres climb in the middle was punishing. If we had built one more night into the itinerary and stayed in El Chaltén, we could have done the hike fresher and had time for a second hike (Laguna Capri or Cerro Torre viewpoint).
Weather and what we actually packed
Late March is the beginning of Southern Hemisphere autumn in Patagonia. Daytime highs in Torres del Paine and El Chaltén ran 8 to 14°C (mid 40s to high 50s Fahrenheit). Nights dropped to 0 to 4°C in the parks, slightly warmer in the towns. The wind was constant, especially on Day 4 at the Base Torres viewpoint and on Day 8 above tree line near Laguna de los Tres. Rain showed up exactly twice on our 10 days and never enough to cancel anything.
What we packed and used heavily: lightweight wool base layers (top and bottom), a midweight fleece, a windproof shell jacket, water-resistant hiking pants, gloves and a warm hat for the Base Torres scramble, leather hiking boots that were already broken in (not the lightweight trail runners some people recommend; the rocks and roots punish thin soles), trekking poles for the descents, a 35L day pack, a 1L water bottle plus 1L collapsible refill, sun glasses and high-SPF sunscreen (UV is intense even in autumn), and a phone with offline maps from Maps.me downloaded for the Torres del Paine and Los Glaciares park areas. The full gear breakdown that applies to trips like this is in our expedition gear list, our mountaineering boots guide, and our trekking poles guide.
Patagonia in the broader South American climbing arc
Patagonia is not Aconcagua. The two regions get conflated by climbers planning their first South American trip, and they should not be. Patagonia is a hiking, glacier, and photography destination with technical climbing reserved for the world’s best mountaineers (Fitz Roy, Cerro Torre, Torres del Paine main faces are not commercial peaks). Aconcagua is a high-altitude expedition climb on a non-technical route. A 10-day Patagonia trip is the right introduction to South American mountain travel for hikers and photographers. Aconcagua is the introduction to South American high-altitude expedition climbing for mountaineers. Many climbers do both across multiple trips. Our team’s Aconcagua experience is in our Aconcagua summit trip report, with the route framework in our Aconcagua routes guide and the cost breakdown in our Aconcagua expedition cost breakdown.
The decision logic for picking between a Patagonia trip and an Andes expedition like Aconcagua is essentially: how much altitude exposure, technical mountaineering, and commitment are you ready for? Patagonia is the lower commitment with photography-grade payoff. Aconcagua is the higher commitment with 7-Summits resume payoff. Both are worthwhile. The bigger 7-Summits framework that puts both in context lives in our Seven Summits guide, our Kilimanjaro vs Aconcagua first-7-summit framework, and the entry-point trekking option in our Kilimanjaro climbing guide. The cross-peak peak progression reference lives in our conquer-peaks mountaineering hub.
The bottom line on a 10-day Patagonia trip
If you have the budget and you have 10 days, do Patagonia. It is the most photogenic mountain region we have visited, the autumn shoulder season is the ideal time to go, and the logistics work cleanly from the Mountain West with the LATAM direct routing. Plan for at least one weather buffer day, start hikes early, do not skip the Grey Glacier boat tour, and consider staying overnight in El Chaltén for the Fitz Roy day. The full peak-by-peak travel framework that places this trip alongside other major mountain travel destinations lives in our master mountaineering hub, with the broader expedition planning context across the global mountain ranges in our mountaineering for beginners guide.
★ Master Resource
Plan your next mountain trip
Routes, training timelines, gear lists, cost frameworks, and trip reports from every major mountain region we cover.
Ten days is the minimum to see both the Chilean and Argentine highlights without rushing. Our trip covered Santiago arrival, Torres del Paine for two full days (Base Towers hike plus the Grey Glacier boat), El Calafate and Perito Moreno, and El Chaltén for the Mount Fitz Roy area. If you have less time, pick one country. If you have 14 days, add the W Trek in Torres del Paine and one extra Fitz Roy area hike.
What is the best month to visit Patagonia?
We went in late March and early April (Southern Hemisphere autumn) and the weather was outstanding. Crowds were noticeably lighter than peak summer (December to February), trails were still fully open, and autumn colors on the Patagonian shrub were vivid red and orange. December to February is the most stable weather window but draws the largest crowds. Late March through mid-April is the sweet spot for fewer people with still-stable weather.
How much does a 10-day Patagonia trip cost per person?
Our group spent approximately 2,800 to 3,200 USD per person all-in for 10 days. The breakdown: international airfare from Salt Lake City around 1,483, domestic flights Santiago to Punta Arenas around 297, lodging across Airbnbs roughly 361, shared car rental around 166 per person, park passes and boat tours around 250, and food across 10 days around 350. Solo travelers spend more (no shared lodging or car), couples land in the same per-person range as groups.
Do you need a car to see Patagonia?
Yes for the way we did it, no if you book guided tours. We rented a VW in Punta Arenas and used it for the Torres del Paine days and the cross-border transit to El Calafate. Without a car, you can use Buses Fernandez between Puerto Natales and El Calafate (about 5 to 6 hours), and book Torres del Paine day tours from Puerto Natales. The car gives flexibility on hike start times and saves on tour booking costs.
What is the Base Torres hike actually like?
The Base Torres hike is an 8-hour out and back to the three iconic granite towers and their reflective lake. About 20 km round trip with roughly 800 meters of elevation gain. The final climb to the lake is a steep, rocky scramble that takes 1 to 1.5 hours. Most hikers underestimate the descent (especially knees) and run out of time if they leave the trailhead after 9 AM. We started at 7:30 AM and were back at the car by 4 PM.
Is the Perito Moreno Glacier worth the day trip?
Yes. Perito Moreno is one of the few glaciers in the world that is still advancing rather than retreating, and the calving events (where house-sized chunks of ice break off the face) happen visibly every 30 to 60 minutes during daytime. The walkways give you 3 to 4 hours of multi-angle viewing time. The nautical safari boat tour adds another perspective at close range for about 90 USD per person. Plan a full day from El Calafate.
Which Fitz Roy hike should you do: Laguna de los Tres or Laguna Capri?
Laguna de los Tres if you have the day and the fitness (8 to 9 hours, 25 km round trip, brutal final climb in the last hour). Laguna Capri if you want the views with less commitment (about 4 hours total, easier terrain, still excellent Fitz Roy panorama). We did Laguna de los Tres and it was worth every step, but the final climb is genuinely hard and most hikers do not warn you adequately about it.