

Expedition pack selection: how to choose a mountaineering pack
Your expedition pack is the single most consequential gear fit on the mountain. A pack that’s too small forces you to strap bulk externally where it catches wind and snags on fixed lines. A pack that’s too long pulls you backward on steep ground. A pack that’s fit to the wrong torso length loads your shoulders instead of your hips, accelerates fatigue, and causes the nerve compression injuries that send climbers home early. This guide covers how to measure for the right pack, which frame type to buy, how to size volume to the expedition, and the model-by-model recommendations that actually work on 7-Summits peaks. It’s part of our comprehensive mountaineering reference.
Torso length: the measurement that matters most
Pack size is not about your height. A tall climber with a short torso and long legs needs a medium pack. A shorter climber with a long torso and short legs needs a large pack. The metric that matters is the distance along your spine from the C7 vertebra (the prominent bump at the base of your neck when you tilt your head forward) to the imaginary line across the top of your iliac crest (hip bones). This is your torso length, and it dictates which pack size fits you regardless of height.
Find your C7 vertebra
Tilt your head forward. Run a finger down your neck to the base — the most prominent bony bump is the C7 vertebra. Mark this with a finger or washable pen. This is your top measurement anchor.
Locate your iliac crest
Place your hands on your hips with thumbs pointing backward along the top of the pelvis. Draw an imaginary horizontal line across your back between your thumbs. This is your bottom measurement anchor.
Measure along the spine
Have a partner run a soft tape measure along the curve of your spine from C7 down to the iliac-crest line. Stand naturally upright during the measurement. Record the measurement in inches — this is your torso length.
Most quality packs offer 1-4 inches of torso adjustment via a sliding or velcro-backed harness. An adjustable pack gives you flexibility but adds weight; a size-specific pack (fixed S/M/L) is lighter and often fits more precisely. For expedition use, getting the fit exactly right matters more than saving a few ounces — lean toward adjustable harnesses for your first expedition pack.
Three frame types: internal, external, frameless
Modern expedition packs use internal frames — the external frame era ended in the 1990s for technical use. But there’s still a three-way split worth understanding because the choice affects carry capacity and technical performance in meaningful ways.
Internal frame
Modern standardAluminum stays, HDPE (high-density polyethylene) framesheet, or tensioned mesh suspension integrated inside the pack body. Keeps the load close to your center of gravity for balance on uneven terrain and allows full arm movement for technical sections.
External frame
Legacy / specialtyTraditional aluminum tubular frame with pack body lashed to the outside. Good ventilation and can carry awkward loads (hunter’s meat, rescue equipment). Rare in modern mountaineering because the high center of gravity unbalances climbers on technical terrain.
Frameless
Specialty alpineNo frame structure at all. The pack’s contents and internal compression provide structure. Extremely lightweight but comfort degrades rapidly above 30-35 pound loads. Specialty category for alpine summit-day packs and fastpacking.
Volume tiers: matching capacity to expedition
Pack volume measured in liters maps directly to expedition duration, gear weight, and whether you’ll be carrying personal loads or sharing group gear. Six tiers cover everything from a summit push to a month on Denali. The same tier structure shows up across our complete mountain climbing gear list and through every peak-specific guide on the master mountaineering hub.
The two-pack expedition strategy
On any 7-Summits peak beyond Kilimanjaro and Elbrus, the standard setup is two packs, not one. Your main expedition pack (75-90L) handles the base-camp-to-high-camp haul — loaded with 50-70 pounds of food, group gear, sleeping system, and personal equipment. Your summit-day pack (30-40L) stays inside or strapped to the big pack on the ascent, and comes out for the summit push when you’re moving fast with minimal gear.
Why two packs instead of one? Three reasons:
- Different loads need different architectures. A pack optimized for 70 lbs has heavy padding, robust hip belt, and multiple compression systems. A pack optimized for 20 lbs on summit day is stripped, lightweight, and moves with your body on technical ground. Using one pack for both roles compromises both.
- Summit pack weight. A 40L summit pack weighs about half of a half-empty 80L expedition pack — 2.5 vs 5+ lbs. On summit day at altitude, every pound saved is proportionally enormous.
- Redundancy. If you tear your main pack on the approach, you still have a functional climbing pack. Two smaller failure points instead of one catastrophic one.
The exception is Kilimanjaro, where porters carry expedition gear and you only carry a 25-35L daypack with snacks, water, camera, and a shell layer. For Elbrus, Mont Blanc, and short alpine objectives with hut-based lodging, one pack in the 40-55L range covers both roles adequately.
Five checkpoints for perfect pack fit
Pack fitting is a repeatable five-point process that any outdoor shop staff can walk you through. Do this with the pack loaded to expedition weight — 20-30 pounds minimum — because an empty pack sits on your body completely differently than a loaded one. This fitting protocol is the same one we reference throughout our master mountaineering guide.
Hip belt placement
The padded portion of the hip belt sits directly over your iliac crest (top of the hip bone), not on your belly or your thighs. Clip the belt first and tighten until 80% of the pack’s weight transfers to your hips. You should feel the pack sitting on your skeleton, not your muscles.
Shoulder strap contact
Shoulder straps should make contact along your full shoulder blade, not just at the tops of your shoulders. Gaps between strap and shoulder indicate the torso is too long; straps cutting into armpits indicate torso too short. Straps carry about 15% of load — not the majority.
Load lifter angle
Load-lifter straps run from the top of the shoulder strap to the top of the pack body. Properly adjusted, they form a 45-degree angle (between 30° and 60° is acceptable). This angle pulls the top of the pack toward your body without lifting the shoulder straps off your shoulders.
Sternum strap tension
The sternum strap clips the shoulder straps together across your chest. Position it roughly two inches below your collarbone, and tension just enough to keep the shoulder straps from sliding off your shoulders outward. Over-tightening restricts breathing at altitude.
Stabilizer straps
The stabilizer straps on the hip belt pull the bottom of the pack body toward your body. Tension these last, after all other straps are set. They eliminate pack sway on uneven terrain — a key detail for long descents and technical movement.
When everything is properly adjusted, you should be able to shrug your shoulders freely without lifting or shifting the hip belt. If shrugging moves the whole pack, you’re carrying too much weight on your shoulders — loosen the shoulder straps and re-tension the load lifters until the hips carry the primary load.
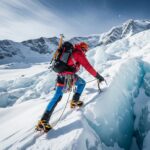
Weight distribution: the three-zone rule
How you load the pack matters as much as how the pack fits. The expedition packing formula is a three-zone distribution that places the center of gravity between your shoulder blades at spine level — the natural balance point for carrying significant weight on varied terrain.
- Bottom zone (lightest items): sleeping bag, puffy layers, tent footprint, any soft bulky gear you don’t need during the day.
- Middle zone against back (heaviest items): food, stove, fuel, water, tent body. This is where most of the weight should concentrate, pressed against the back panel.
- Top zone (medium weight, quick-access): rain shell, first aid, navigation, snacks. Items you’ll reach for during the day live in the lid or top compartment.
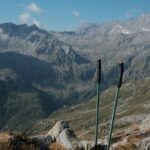
External pockets and hip belt pockets handle snacks, sunscreen, lip balm, camera, and anything else you want to access without opening the main compartment. Ice axe attachment loops, crampon pouches (if included), and side compression straps hold sharp gear externally without risking puncture to pack contents. This layout integrates tightly with the tools covered in our crampons and ice axes guide, the trekking poles guide, and the sleeping bags guide covering pad R-value integration for cold-weather camping.
Model recommendations: what to actually buy
Mystery Ranch Crewcab or Marshall 80
The heavy-haul benchmark. Three-zip access, robust framesheet, overbuilt hip belt that carries 70+ lbs without complaint. Used by Alaska guides and military for good reason. Heavier than competitors (~6.5 lbs) but unmatched for serious expedition loads.
Osprey Aether Plus 85
The most-used expedition pack in North American mountaineering. Adjustable AirScape torso, removable top lid that converts to daypack, excellent hip belt padding, and Osprey’s lifetime warranty. A complete expedition solution at two-thirds the price of Mystery Ranch.
Gregory Baltoro 85
Gregory’s Response A3 suspension auto-adjusts to your spine angle as you move. Multiple hip belt sizes (sold separately), industry-leading ventilation, and stellar organization. Slightly less tough than Mystery Ranch but more comfortable on long approaches.
Black Diamond Mission 75
Built for technical objectives where movement matters. Streamlined profile, removable components (lid, framesheet, hip belt padding) for weight tuning, and excellent ice tool attachment. The choice for alpine routes on Denali, Alaska, and advanced Himalayan objectives.
Black Diamond Speed 30 or 40
The classic summit-day pack. Sliding framesheet (removable for ultra-light missions), dual ice tool carry, helmet pocket, rope strap. Proven on 7-Summits summit pushes for decades. The Speed 40 adds volume for colder objectives; Speed 30 is perfect for lighter summit days.
Arc’teryx Alpha SK 32
Frameless alpine climbing pack with AC² fabric (ultra-durable and weatherproof). No bells, minimal compression, purpose-built for steep technical ground. Moves with you on mixed climbing and ice. The fastest-moving pack in its category, but uncomfortable above 30 lbs.
Hyperlite Mountain Gear Ice Pack 40
Dyneema Composite Fabric construction — fully waterproof, extremely lightweight, and nearly indestructible. Minimalist alpine design with dual tool loops and removable framesheet. The choice when weight and weather resistance matter more than organizational features.
Osprey Mutant 38 or 52
The Swiss Army knife of mountaineering packs. Mutant 38 excels as a summit pack; Mutant 52 covers alpine overnights. Fixed framesheet, dual tool attachment, removable lid, and stripped hip belt. A single pack that handles both summit day and shorter alpine objectives.
Peak-specific pack combinations
Different peaks demand different pack setups. Here’s the working configuration for each major 7-Summits objective:
| Peak / Expedition | Main Pack | Summit Pack | Notes |
|---|---|---|---|
| Kilimanjaro | 25-35L daypack | Same (single pack) | Porters carry expedition gear; climber carries day essentials only |
| Elbrus | 40-55L | Same (hut-based) | Single pack works; hut lodging eliminates big-load hauling |
| Aconcagua | 75-85L | 30-40L | Mule support to Plaza de Mulas; two-pack strategy above Base Camp |
| Denali | 80-90L + sled | 30-40L | Sled below 11,000′; pack-only above; summit pack essential above 14,200′ camp |
| Vinson | 75-85L + sled | 30-40L | Similar setup to Denali; sled for lower glacier approach |
| Everest | 85-100L | 35-45L | Porters/yaks to EBC; climbers carry technical loads above; summit pack above Camp 2 |
| Mont Blanc | 40-55L | Same (single pack) | Hut-based expedition; single pack sufficient |
Durability and longevity considerations
Expedition packs are significant investments — a quality 85L pack costs $350-750 and should last 10-15+ years with reasonable care. A few practices extend pack life dramatically:
- Never sit on a loaded pack with the framesheet supporting your weight — it warps over time and destroys load transfer. Use a sit pad or empty rock bag.
- Rinse salt after expeditions to salty peaks (Aconcagua, coastal range). Salt crystallizes on hardware and abrades fabric over years.
- Store packs hanging or loosely stuffed — never compressed flat for months. Foam padding takes permanent compression set.
- Replace hip belt padding when it compresses to half its original thickness. Most manufacturers sell replacement padding for $30-50.
- Repair small tears immediately with seam grip or pack-specific repair tape. A 1cm tear becomes a 15cm tear in one hard pull.
Complete the gear cluster
Your expedition pack is the final piece of a seven-part gear system. Each part integrates with the others — boots with crampons, poles with pack attachment points, sleeping bag with pad R-value, layers with pack volume requirements. Our complete Gear & Equipment cluster covers every piece:
Every guide, one navigation point
Pack selection is the final piece of a 67-guide mountaineering reference covering gear, training, altitude, routes, and peak-specific planning across all 7-Summits and beyond. Our master hub indexes every guide in one place.
Browse the Complete Guide →Frequently asked questions about expedition packs
How do I measure my torso length for a pack?
Tilt your head forward to find the prominent C7 vertebra at the base of your neck — this is your top measurement point. Place your hands on your hips with thumbs pointing backward along your iliac crest — draw an imaginary line between your thumbs. Your torso length is the distance between C7 and that iliac crest line, measured along the curve of your spine. Under 16″ is small, 16-18″ is medium, 18-20″ is large, over 20″ is extra large.
What pack size do I need for expedition mountaineering?
For expedition mountaineering on peaks like Denali, Everest, Aconcagua, or Vinson, plan on 70-90 liters for your main pack. For shorter multi-day objectives (Rainier, Elbrus, Kilimanjaro), 55-65 liters usually suffices. Summit day uses a smaller 30-40 liter climbing pack. The common expedition strategy is two packs: a 75-90L hauler plus a 30-40L summit pack that stows inside or on top of the larger pack.
Internal, external, or frameless pack — which is best for mountaineering?
Internal frame packs dominate modern mountaineering — they keep the load close to your center of gravity and work well with technical movements. External frame packs are essentially extinct for technical use. Frameless packs strip the frame for lightweight summit days but compromise carry comfort over 30 lbs. For expedition loads, internal frame is the answer; for summit packs, frameless or minimal-frame is standard.
How do I fit a pack correctly?
Load the pack with 20-30 pounds before fitting. Clip the hip belt first with the padded portion centered over your iliac crest. Tighten so 80% of the weight rides on your hips. Pull shoulder straps snug but not tight. Tension the load-lifter straps at a 45-degree angle. Clip and adjust the sternum strap. When properly fit, you should be able to shrug shoulders freely without lifting the hip belt.
Do I really need a separate summit-day pack?
For most 7-Summits expeditions, yes. On summit day you carry only essentials at 15-25 pounds. A 30-40L technical pack built for this load moves with you on steep ground and strips weight versus a half-empty 80L expedition pack. On smaller peaks like Kilimanjaro and Elbrus, a single pack can cover both roles. On Denali, Everest, Aconcagua, or Vinson, carry both.
What are the best expedition packs for 7-Summits?
Current benchmarks include Mystery Ranch Crewcab or Marshall 80 (legendary load carry), Osprey Aether Plus 85 (value balance), Gregory Baltoro 85 (adjustable fit), and Black Diamond Mission 75 for technical use. For summit-day packs, Arc’teryx Alpha SK 32, Black Diamond Speed 30, Hyperlite Ice Pack 40, and Osprey Mutant 38 dominate. Match pack to expedition — Mystery Ranch for heavy hauling, Black Diamond for technical climbing features.
Should I use a hydration reservoir or bottles in my pack?
For cold-weather mountaineering above freezing, insulated bottles win over hydration reservoirs — hose valves freeze even with insulation sleeves. Most high-altitude climbers carry insulated Nalgene bottles in reverse (cap-down) in parka side pockets. For lower-altitude approaches and non-freezing trekking, reservoirs are more convenient. On 7-Summits expeditions, plan for bottle-based hydration above 4,000m.
How should I pack an expedition pack for weight distribution?
Follow the three-zone rule: lightest items at the bottom (sleeping bag, puffy layers), heaviest items in the middle against your back (food, stove, water, tent), and medium-weight items on top or in outer pockets. This puts the center of gravity between your shoulder blades at spine level, which balances naturally. Keep frequently-accessed items in hip belt pockets or the lid.
Related posts:
 Conquer Peaks: Global Summit Guide for Mountain Climbing
 Altitude Sickness Treatment: How to Recover Safely
 Best Trekking Poles in 2026: Ranked for Every Hiker
 Mountain Climbing Gear List: Everything You Need
 Best Mountaineering Boots: Complete Guide and Reviews 2025
 Best Mountaineering Crampons: Buyer’s Guide
Leave a Reply