<

Author: Travis Ludlow

  • Best Time to Climb Kilimanjaro: Month-by-Month Guide

    Best Time to Climb Kilimanjaro: Month-by-Month Guide

    Cluster 06 · Kilimanjaro · Updated April 2026

    Best Time to Climb Kilimanjaro: Month-by-Month Guide

    Every month covered — rainfall, temperature, crowds, moon phases, and the specific reasons each month works or doesn’t. From the January dry-season brilliance to the November short rains, pick your climb date with confidence using the most detailed seasonal framework available.

    2
    Dry seasons
    per year
    Aug–Sep
    Peak
    season
    Apr
    Wettest
    month
    4–6 mo
    Peak booking
    lead time
    Global Summit Guide A guide in Cluster 06 · Kilimanjaro View master hub →

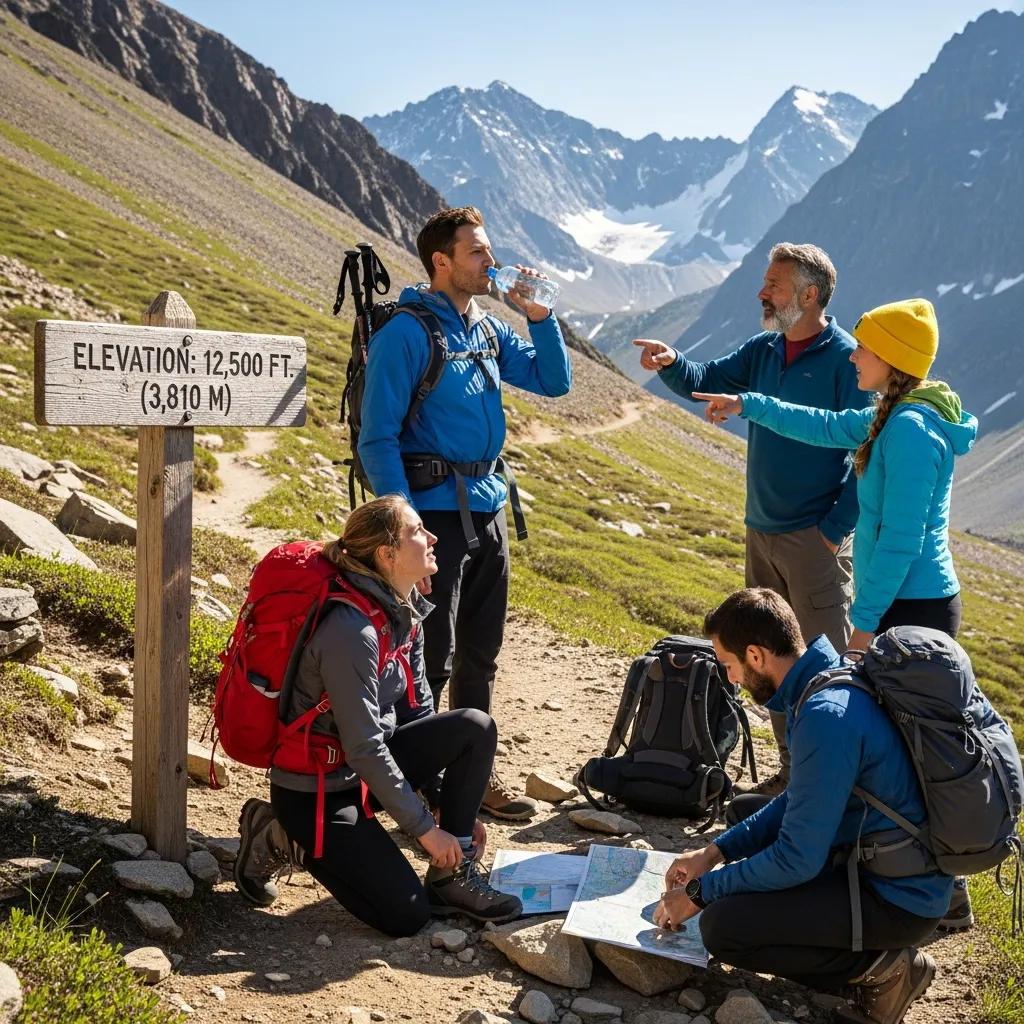
    Kilimanjaro sits 3 degrees south of the equator — its seasons aren’t defined by temperature but by rainfall patterns. Temperature at altitude stays remarkably constant year-round (always -10°C to -20°C at the summit), but rainfall varies dramatically across the calendar. Two dry seasons deliver ideal conditions; two rainy seasons range from challenging (short rains) to genuinely difficult (long rains). Timing your climb correctly is the single most important planning decision after route choice — and this guide gives you every month’s reality, weather patterns, crowd levels, and the hidden timing considerations most guides skip over.

    How this guide was built

    Weather data reflects 30-year averages from the Tanzania Meteorological Agency for the Moshi and Kilimanjaro weather stations. Crowd data drawn from TANAPA visitor statistics and operator booking patterns. Full moon dates verified against NASA astronomical calendar for 2026-2027. Ramadan dates verified against the Islamic Hijri calendar. Temperature ranges reflect typical conditions at five altitude zones. Reviewed by KINAPA-licensed guides operating year-round on Kilimanjaro. Fact-check date: April 19, 2026.

    Kilimanjaro Climbing Calendar: The Full Year at a Glance

    Kilimanjaro’s year breaks into five distinct climbing windows. Here’s the entire calendar visualized by climbing quality — peak conditions in deep green, long rains in red.

    Annual Kilimanjaro climbing conditions by month

    Climbing quality rating · January through December
    Jan
    Feb
    Mar
    Apr
    May
    Jun
    Jul
    Aug
    Sep
    Oct
    Nov
    Dec
    Peak season · best conditions
    Excellent · highly recommended
    Shoulder · good with caveats
    Short rains · manageable
    Long rains · avoid

    The key pattern: January-mid March and mid-June-October are the two primary dry seasons, delivering the best weather, views, and summit success rates. The rest of the year has climbing trade-offs — lower crowds and prices but higher weather risk. Skip only the long rains (mid-March to late May) if your trip is inflexible.


    Every Month Analyzed: The Detailed Breakdown

    01
    Primary Dry Season · Peak Start

    January

    Warmer, clearer, dramatic photography
    ExcellentRecommended
    Rainfall (Moshi)~60mm
    Summit temp-10 to -18°C
    Crowd levelHigh
    Daily sunshine8–9 hrs

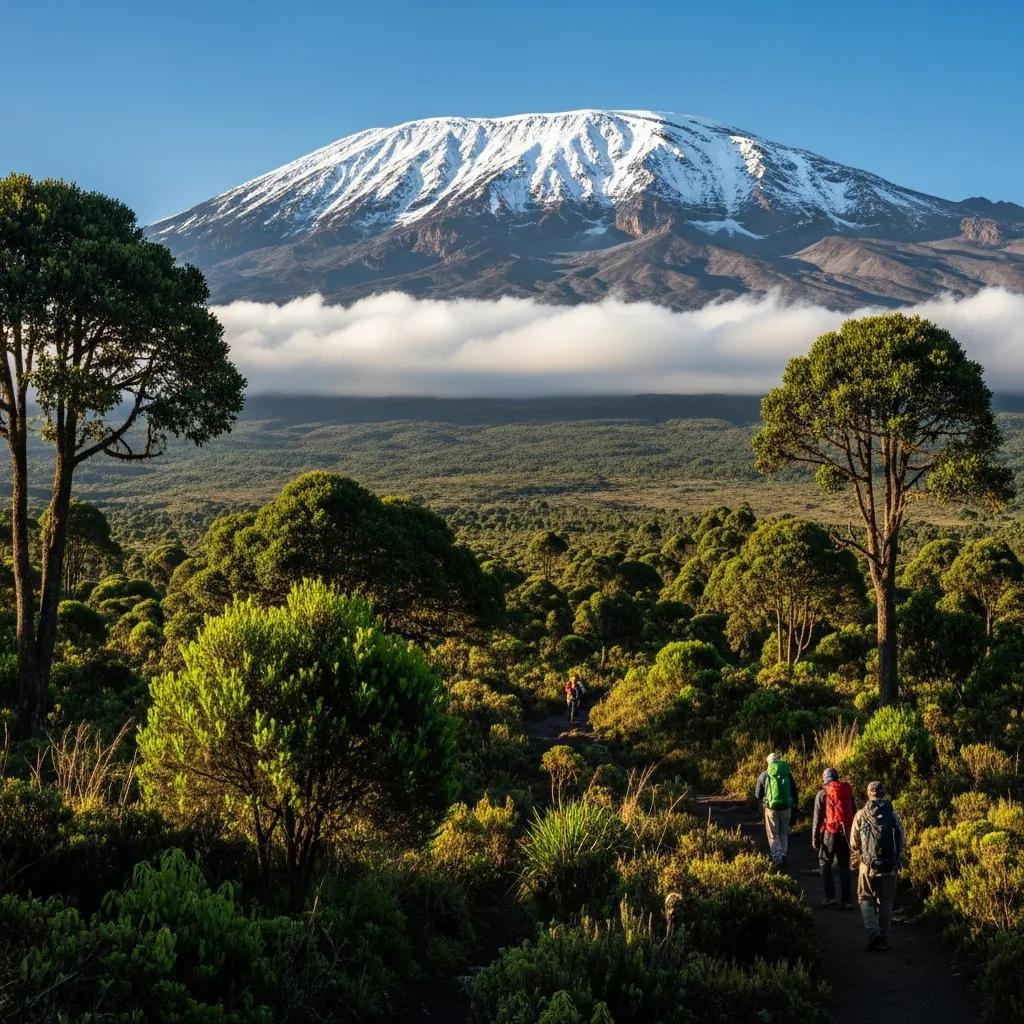
    January opens Kilimanjaro’s primary dry season with warmer temperatures and clearer skies than any other month. The equator sun is high, lower-mountain rainforest is beautifully green from December’s short rains, and summit views are frequently pristine. This is many photographers’ favorite month — dramatic cloud formations over the summit combined with possible snow on Uhuru create postcard conditions.

    The main drawback is high demand. Post-New Year climbs fill quickly as international travelers book holiday vacations. Expect 4-6 months advance booking minimum. Full moon dates see premium pricing. Overall conditions rival September as the single best climbing month — the choice comes down to whether you prefer warmer climbs (January) or coolest clearest (September).

    02
    Primary Dry Season · Peak

    February

    Peak primary season — busiest dry-season month
    ExcellentRecommended
    Rainfall (Moshi)~80mm
    Summit temp-10 to -18°C
    Crowd levelPeak
    Daily sunshine8–9 hrs

    February is the peak of the primary dry season — most consistent weather windows, driest conditions, warmest summit temperatures. Snow on Uhuru Peak is still common, creating the iconic glaciated summit view. Wildlife viewing in Serengeti is excellent for those adding safari (Great Migration calving season).

    The trade-off is maximum crowds across all routes. Machame sections fill with groups starting every day; Lemosho’s lower-crowd reputation fades after Day 4 when it joins Machame. Prices reach peak levels (5-15% above shoulder season). February full moons typically create the most booked-out climbing dates of the year. For guaranteed good weather with flexible dates, February is hard to beat.

    03
    Transition Month · Primary to Rainy

    March

    First half excellent, second half deteriorating
    Good (first half)Shoulder timing
    Rainfall (Moshi)~150mm
    Summit temp-10 to -20°C
    Crowd levelModerate → Low
    Daily sunshine7–8 hrs

    March splits sharply between the first two weeks (still excellent) and the final two weeks as the long rains begin moving in. Early March climbs enjoy February-quality conditions with lower crowds and 5-10% price reductions. By mid-month, afternoon clouds build, rainfall increases on the lower mountain, and trails become muddier.

    The transition day varies year-to-year — some years remain dry through late March; others see long rains beginning by the 15th. Smart shoulder-season climbers target March 1-15 for the rare sweet spot of peak conditions plus reduced crowds and prices. After March 15, climbing becomes progressively more weather-challenging through April.

    04
    Long Rains Season

    April

    Wettest month · not recommended for most
    ChallengingAvoid if possible
    Rainfall (Moshi)~370mm
    Summit temp-10 to -22°C
    Crowd levelVery low
    Daily sunshine5–6 hrs

    April is Kilimanjaro’s wettest month. The long rains peak with ~370mm rainfall in Moshi and even heavier amounts in the rainforest zone. Trails become slippery and muddy. Cloud cover obscures views for days at a time. Campsite conditions are genuinely uncomfortable — saturated tents, wet clothing, cold nights.

    Despite this, a small minority of climbers choose April for solitude and lower prices (often 20-30% operator discounts). Summit success rates drop to 60-75% even on 8-9 day routes due to conditions. If you climb in April: pack for serious rain, accept that views will be limited, focus on the physical challenge rather than scenery. Cold wet conditions also increase AMS risk substantially.

    05
    Long Rains Continuing

    May

    Still rainy — slight improvement late month
    ChallengingLast avoid month
    Rainfall (Moshi)~270mm
    Summit temp-10 to -22°C
    Crowd levelVery low
    Daily sunshine5–6 hrs

    May continues the long rains, though with somewhat reduced rainfall compared to April. The mountain remains deeply wet and challenging, with limited visibility and difficult trail conditions. Some experienced operators close mountain operations entirely in May for trail maintenance.

    Late May sees the first signs of the dry season return — by May 25-30, rainfall pattern often shifts and June’s dry season begins approaching. For most climbers, May remains in the “skip this month” category. The 20-30% discount doesn’t compensate for reduced summit success probability and unpleasant conditions. Wait for June or later. See how route duration affects success especially during wet-season attempts.

    06
    Dry Season Returns · Shoulder

    June

    Dry season arriving — excellent value month
    Very GoodShoulder value
    Rainfall (Moshi)~50mm
    Summit temp-12 to -22°C
    Crowd levelModerate
    Daily sunshine8–9 hrs

    June marks the return of reliable dry conditions and one of the year’s best value windows. The long rains have ended, trails are drying out, and conditions rapidly approach peak quality. Prices remain 10-15% below peak season (July-August) while weather is nearly identical.

    Temperature is slightly cooler than February — summit conditions can be the coldest of the year, with clear skies amplifying the cold. Crowd levels are moderate as school holidays haven’t begun (US) and European peak travel is still ahead. Experienced repeat climbers often target June specifically for the combination of quality weather, reduced crowds, and shoulder pricing. Advance booking 2-3 months is sufficient.

    07
    Main Dry Season · Busy

    July

    Peak crowds begin — consistent excellent weather
    ExcellentRecommended
    Rainfall (Moshi)~30mm
    Summit temp-12 to -22°C
    Crowd levelHigh
    Daily sunshine9–10 hrs

    July is the start of peak international climbing season. Summer holidays bring American, European, and Australian families to Kilimanjaro in volume. Weather is exceptional — among the year’s lowest rainfall, high sunshine hours, reliable summit conditions.

    The drawback is entirely crowd-related: popular campsites fill completely, trail bottlenecks form on summit day, and operators are busy. Premium pricing is standard (5-15% above shoulder season). Book 4-6 months ahead minimum. Full moon climbs in July are often the year’s most-booked. The climbing experience is fantastic; just plan for crowds and secure your spots early.

    08
    Peak Dry Season · Maximum Crowds

    August

    Highest volume month — best reliability
    ExcellentRecommended
    Rainfall (Moshi)~30mm
    Summit temp-13 to -22°C
    Crowd levelPeak
    Daily sunshine9–10 hrs

    August is typically Kilimanjaro’s highest-volume month — ~4,500+ summit attempts. Conditions are statistically the most reliable of the year: lowest rainfall, highest sunshine, most consistent weather windows. Summit success rates peak at quality operators (92-97% on 8-day Lemosho).

    The trade-offs are pure logistics: everything fills. Hotels in Moshi/Arusha book 3-6 months out. Popular operators decline new bookings 4+ months ahead. Campsites feel crowded on summit night as dozens of groups start Uhuru push together. Prices reach annual peaks (10-20% above shoulder season). For climbers with fixed dates tied to summer vacations, August delivers reliability. For flexible climbers, September offers nearly identical weather with slightly reduced crowds.

    09
    Peak Dry Season · Best Overall

    September

    Widely considered the best month overall
    Best MonthTop choice
    Rainfall (Moshi)~20mm
    Summit temp-12 to -20°C
    Crowd levelHigh → Moderate
    Daily sunshine9–10 hrs

    September is widely considered the best overall month to climb Kilimanjaro by experienced operators and guides. Weather matches August’s excellence — lowest rainfall of the year, highest sunshine, clearest views. Crowds begin reducing as summer holidays end, particularly in the second half of the month.

    Prices begin their decline from August peaks (5-10% reduction). Serengeti wildlife viewing peaks during the Great Migration river crossings, making September ideal for safari add-ons. Temperature is slightly warmer than August’s coldest but still genuinely cold at summit — dramatic conditions for photography. Book 3-4 months ahead for flexibility; 5-6 months for specific dates. If you can choose any month, choose September.

    10
    Dry Season Closing · Great Value

    October

    Excellent conditions, crowds declining, shoulder pricing
    ExcellentRecommended
    Rainfall (Moshi)~40mm
    Summit temp-10 to -18°C
    Crowd levelModerate
    Daily sunshine9–10 hrs

    October combines August’s weather quality with June’s shoulder pricing — arguably the year’s best value. Dry season conditions persist through most of the month, with crowds substantially reduced from the July-August-September peak. Prices drop 10-15% from peak season.

    Late October can see the first signs of the approaching short rains, but typically not until very late in the month. Early-to-mid October is an ideal window for first-time climbers who want peak-quality conditions without peak-crowd logistics. Advance booking of 2-3 months is usually sufficient. Many experienced repeat Kilimanjaro climbers specifically target October for the optimal value equation.

    11
    Short Rains Season

    November

    Wet but manageable — significant price reductions
    ShoulderWith caveats
    Rainfall (Moshi)~170mm
    Summit temp-10 to -20°C
    Crowd levelLow
    Daily sunshine6–8 hrs

    November brings the short rains — significantly less intense than April-May’s long rains but still bringing regular afternoon and evening showers. Rainfall concentrates in afternoons; mornings often remain clear. The rainforest and moorland zones get wet; the summit is typically unaffected other than potential snow.

    Trade-offs favor the budget-conscious: operator prices drop 15-25% below peak season, advance booking requirements relax to 1-2 months, crowds are minimal. Summit success rates remain respectable at 75-85% on 8-day routes. November is the value month for climbers who accept weather uncertainty. Pack premium rain gear, build 2-3 flex days into your schedule, and expect views to be less consistent. See our Kilimanjaro Cost 2026 guide for how November pricing affects total budget.

    12
    Short Rains Ending · Holiday Season

    December

    Rain tapering, holidays drive demand despite weather
    Good (late)Christmas peak
    Rainfall (Moshi)~120mm
    Summit temp-10 to -20°C
    Crowd levelModerate → High (late)
    Daily sunshine7–8 hrs

    December splits distinctly: early month remains wet (short rains continuing), late month improves dramatically as the rains taper heading into January’s dry season. Christmas and New Year’s climbs are extremely popular despite the shoulder-season weather — operators report December 22-January 5 as one of the year’s highest-demand windows.

    Pricing reflects this: Christmas/NYE climbs command premium rates ($200-$500 surcharge) with 6+ months advance booking required for specific dates. The tradition of climbing on New Year’s Eve to summit at midnight at 5,895m is genuinely memorable — many climbers rate NYE summits among their most cherished mountaineering experiences. For flexible climbers avoiding holiday premiums, late December after January 5 delivers excellent weather with rapidly reducing crowds.


    Full Moon Climbing: Summit Night Illumination

    Full moon climbs are popular for the natural illumination they provide during the pre-dawn summit push (00:00-06:00). While not technically necessary — all climbers use headlamps — moonlit glaciers and terrain create dramatic photography and enhanced visibility.

    2026–2027 Full Moon Dates During Climbing Seasons

    Target summit night within 2-3 days of these dates for full moon illumination
    🌕Feb 3, 2026Primary dry
    🌕Mar 5, 2026Shoulder
    🌕Jun 30, 2026Dry return
    🌕Jul 29, 2026Peak
    🌕Aug 28, 2026Peak
    🌕Sep 26, 2026Peak
    🌕Oct 26, 2026Excellent
    🌕Dec 24, 2026Christmas peak
    🌕Jan 23, 2027Primary dry
    🌕Feb 22, 2027Primary dry
    🌕Jul 19, 2027Peak
    🌕Aug 17, 2027Peak

    Planning your climb around the moon

    Summit night is typically Day 6 of a 7-day climb or Day 7 of an 8-day climb. Work backwards from your target full moon to calculate your climb start date. For example:

    • Target: September 26, 2026 full moon summit
    • Summit night = September 25-26
    • 8-day Lemosho start date = September 19
    • Arrival in Moshi = September 17-18 (allow 2 rest days)
    • Book flights arriving September 17 at latest
    Book full moon climbs 6+ months ahead

    Full moon dates during peak season (July-October) are the most booked-out climbing dates on the entire Kilimanjaro calendar. Reputable operators fill these dates 6-9 months in advance. Premium pricing typically adds $100-$300 to operator rates. If a full moon summit matters to you, book as soon as dates open — typically 12-18 months ahead. Alternatively, accept a summit 2-3 days before or after the full moon: visibility is still excellent and operator pricing drops.


    Month-by-Month Quick Comparison

    MonthSeasonRain (Moshi)CrowdsPrice vs PeakBook Ahead
    JanuaryDry Peak60mmHigh+5%4–6 months
    FebruaryDry Peak80mmPeak+10%4–6 months
    March (early)Transition150mmModerateBaseline2–4 months
    AprilLong Rains370mmVery low-25%1–2 months
    MayLong Rains270mmVery low-25%1–2 months
    JuneShoulder50mmModerate-10%2–3 months
    JulyDry Main30mmHigh+10%4–6 months
    AugustPeak30mmPeak+20%6 months
    SeptemberPeak20mmHigh+10%4–6 months
    OctoberShoulder40mmModerate-5%2–3 months
    NovemberShort Rains170mmLow-20%1–2 months
    DecemberHoliday Peak120mmModerate → High+15% (NYE)6–9 months (NYE)

    Special Timing Considerations

    Ramadan timing

    Many Tanzanian mountain crew are Muslim. During Ramadan, Muslim guides and porters fast from sunrise to sunset — eating and drinking only in early morning (pre-dawn) and evening (after sunset). This typically doesn’t affect climb operations as mountain work continues, but meal timing shifts slightly. Ramadan dates shift ~10 days earlier each Gregorian year:

    • 2026 Ramadan: February 17 to March 19
    • 2027 Ramadan: February 7 to March 8
    • 2028 Ramadan: January 27 to February 25

    Climbing during Ramadan is entirely possible and welcomed — Muslim crew continue professional service and appreciate respectful travelers. No negative impact on climb quality; cultural awareness of the religious context is the main consideration.

    Christmas and New Year’s Eve specifics

    December 22 through January 5 is the single most popular Kilimanjaro climbing window outside the July-August summer peak. NYE summits at midnight create a unique bucket-list moment. Key considerations:

    • Book 6-9 months ahead minimum for specific dates
    • Premium pricing ($200-$500 surcharge standard)
    • Weather variable — short rains may still affect early December
    • Hotels in Moshi/Arusha fully book 3+ months ahead
    • Some operators offer special NYE packages timed to reach Uhuru at exactly 00:00
    • Arrive 3+ days early — Christmas travel delays are common

    Summit photography timing

    For photographers specifically planning around light:

    • Golden hour summit: Arrive at Uhuru 30-45 minutes before sunrise (05:30-06:00 typical). Start summit push 00:00-01:00.
    • Blue hour: Pre-dawn 04:30-05:15 offers dramatic deep-blue sky conditions.
    • Full moon nights: Combined moonlight + first sunrise light creates layered photography opportunities.
    • Post-rain clarity: First clear days after long rains end (late May-June) often have exceptional atmospheric clarity.
    • Snow on Uhuru: More common January-March. Enhances summit dramatically.

    Kilimanjaro Timing FAQ: Your Common Questions Answered

    When is the best month to climb Kilimanjaro?

    The best months to climb Kilimanjaro are January, February, August, and September — all fall within Kilimanjaro’s two dry seasons with optimal weather. January and February offer warmer temperatures, clearer summit views, and more snow on top (dramatic photography). August and September provide the driest and most stable conditions with cold but reliable weather. July and October are excellent secondary choices. March and June are good shoulder months. Avoid mid-March through late May (long rains) and November (short rains) unless you specifically want fewer crowds and lower prices. The absolute best single month is often cited as September — combining peak dry season stability with moderately cooler temperatures and peak month crowds slightly reducing from August highs. If summit photography matters, aim for nights near a full moon for natural illumination on the pre-dawn summit push.

    When is the rainy season on Kilimanjaro?

    Kilimanjaro has two rainy seasons annually. (1) The long rains run from mid-March through late May, with heavy rainfall especially in April (peak wet month). Trails become muddy, cloud cover obscures views for days, and rainforest sections receive 200-300mm rainfall monthly. This is the most challenging climbing period and not recommended for most climbers. (2) The short rains run through November and into early December, less intense than the long rains but still bringing daily afternoon showers. Some climbers choose November for fewer crowds despite the wet conditions. Key patterns: Rainfall concentrates in afternoon/evening on Kilimanjaro; mornings often remain clear during rainy seasons. Lower mountain (rainforest zone) gets most precipitation; summit zone may see snow rather than rain. High elevation tends to be drier than the forest belt. Equatorial position means temperature doesn’t change seasonally — it’s always the same at altitude (-10°C to -20°C summit). Rainfall is what varies, not temperature.

    Can you climb Kilimanjaro year-round?

    Yes, Kilimanjaro is climbable year-round, though some months are significantly better than others. Year-round climbing breakdown: (1) Primary recommended seasons — January through mid-March, June through October (the two dry seasons). (2) Shoulder acceptable — June (transitioning), late October/early November (transitioning). (3) Shoulder with compromises — November (short rains starting), early December (still wet). (4) Acceptable with planning — Christmas/New Year period (late December to early January, often drier despite being short rains season). (5) Challenging but possible — mid-March to late May (long rains). Expect muddy trails, obscured views, greater AMS risk due to cold wet conditions, but also fewer crowds and lower prices (some operators reduce rates 15-25%). Kilimanjaro’s equatorial location means temperatures remain relatively constant year-round; what changes is rainfall. Some experienced climbers deliberately choose November or April for budget and solitude reasons. For first-time climbers with limited flexibility, stick to the primary seasons for highest success probability.

    What is the weather like on Kilimanjaro?

    Kilimanjaro’s weather transforms dramatically across the five ecosystem zones traversed during the climb. Daily temperatures by zone: (1) Cultivation and rainforest (800-2,800m): 20-30°C daytime, 12-18°C nighttime, high humidity, possible daily showers. (2) Moorland/heather (2,800-4,000m): 10-18°C daytime, 0-8°C nighttime, lower humidity, mixed sun and cloud. (3) Alpine desert (4,000-5,000m): 5-15°C daytime sun, -5 to +5°C nighttime, intense UV, dry, variable wind. (4) Summit zone (5,000-5,895m): -5 to +5°C on clear days, -15 to -25°C before dawn on summit night, often windy, possible snow year-round. (5) Summit day temps at Uhuru: typically -10°C to -20°C in darkness, rising to -5 to +5°C with sunrise. Other weather factors: High UV radiation at altitude (bring UV 400 sunglasses, SPF 50 sunscreen). Afternoon clouds common year-round on lower mountain. Clear mornings are the norm even during rainy seasons. Wind increases with altitude. Summit night weather is the critical variable — cold, dark, potentially windy, 04:00-06:00 arrival for sunrise.

    Is a full moon important for Kilimanjaro summit?

    Climbing Kilimanjaro during a full moon is a popular choice but not essential for summit success. Benefits of full moon climbs: (1) Natural illumination on the pre-dawn summit push (typically 00:00-06:00 ascent). (2) Dramatic photography opportunities showing moonlit glaciers and terrain. (3) Enhanced visibility reduces stumbling on loose scree. (4) Psychological comfort from natural light in darkness. Drawbacks: (1) Higher demand means crowded trails and booked-out dates — book 6+ months ahead. (2) Some operators charge premium pricing for full moon dates ($100-$300 surcharge). (3) Crowds at summit viewpoint for sunrise. (4) Stars less visible due to moon brightness. Key 2026 full moons during climbing seasons: February 3, March 5, July 31, August 29, September 27, October 27, December 26. 2027 full moons: January 25, February 23, July 20, August 18, September 17, October 16, November 15. Alternative consideration: new moon nights provide the darkest skies for stargazing but no summit illumination. Most climbers successfully summit on any moon phase — headlamps provide adequate light. The full moon preference is aesthetic rather than technical.

    Should I climb Kilimanjaro in August or September?

    Both August and September are excellent months to climb Kilimanjaro — the choice between them depends on your priorities. August advantages: (1) Peak dry season conditions — lowest rainfall, most stable weather. (2) Coldest/clearest summit views with dramatic sky colors. (3) Longest dry period confidence for weather windows. (4) School holidays mean family groups common. Disadvantages: (1) Absolute peak crowds — trails and campsites busiest of the year. (2) Highest prices — operators often charge 5-15% premium. (3) Hotels in Moshi/Arusha fully booked. (4) Advance booking essential (4-6 months minimum). September advantages: (1) Virtually identical weather to August. (2) Slightly reduced crowds as summer holidays end. (3) Prices begin declining 5-10% from peak. (4) Wildlife viewing in Serengeti improves (Great Migration) for those adding safari. (5) Generally considered the best overall climbing month by operators. Disadvantages: (1) Still peak season with substantial crowds. (2) Still requires 3-4 months advance booking. Recommendation: Book September if flexibility allows; August works well if dates are fixed around summer vacation. Either month delivers 85-90% summit success with reputable operators.

    Is it worth climbing Kilimanjaro during Christmas and New Year?

    Climbing Kilimanjaro during Christmas and New Year is popular and worthwhile despite technically falling in the short rains season. Key considerations for the Dec 22 – Jan 5 window: (1) Weather: Short rains typically ending by mid-December, weather improving into January. Clear days increasingly common. (2) Crowds: Very busy period with holiday travelers; book 6 months ahead minimum. (3) Pricing: Premium rates ($200-$500 surcharge common) due to demand. (4) Unique experience: Summit on New Year’s Eve for 00:00 celebrations at altitude is a memorable bucket-list moment. Some operators offer special NYE climbs arriving at Uhuru for midnight. (5) Hotels: Full booking required weeks in advance. (6) Cultural: Christmas celebrations in Moshi and Arusha are festive and welcoming. (7) Climate: Temperatures at summit similar to September (cold but not extreme). (8) Visibility: Generally good for summit photography as weather window opens. Practical tips: Book earliest available 7+ day route (Lemosho 8-day ideal), pay for reliable operator, bring proper gear, build 2-day weather flex into schedule, arrange NYE celebrations with operator in advance if desired. Many climbers consider Christmas-NYE climbs to be among their most memorable mountaineering experiences.

    How far ahead should I book my Kilimanjaro climb?

    Kilimanjaro booking timing depends on your target month and trip complexity. Recommended advance booking windows: (1) Peak season climbs (January-February, July-August, September): 4-6 months advance booking. Christmas/NYE specifically: 6-9 months. (2) Shoulder season climbs (June, October, early November): 2-4 months advance. (3) Off-peak climbs (March-May rainy season, November short rains): 1-2 months minimum, can sometimes book 2-3 weeks out. (4) If combining safari: Add 2-3 months to all timelines. (5) If requesting specific operators: Popular KPAP-partnered operators book 6-9 months ahead in peak season. Factors affecting booking timeline: flights are often the longest lead time (book 4-6 months ahead for best rates regardless of climb timing), international travel insurance policies with pre-existing conditions may need 30-60 days advance enrollment, Tanzania e-visa takes 3-10 business days to process so apply 1-2 months ahead. What locks in first: flights (save $200-$500 with 4+ month advance), refundable hotel nights, operator deposit (typically 20-30% at booking, balance due 60-90 days before climb). Shoulder season last-minute bookings (2-4 weeks out) can save 10-20% if dates are flexible.


    Authoritative Sources & Further Reading

    Content reflects meteorological and astronomical data from authoritative sources:

    • Tanzania Meteorological Agency (TMA) — meteo.go.tz — Kilimanjaro region climate data
    • KINAPA (Kilimanjaro National Park Authority) — Seasonal climbing regulations
    • NASA Astronomy Calendar — nasa.gov — Full moon dates 2026-2027
    • TANAPA visitor statistics — Monthly crowd data and seasonal patterns
    • Islamic Hijri Calendar — Ramadan dates and Islamic observances
    • Weather station data: Moshi Airport (KMJ), Kibo summit meteorological reference
    • Climbing season reports from: Altezza Travel, Climbing Kilimanjaro, Mount Kilimanjaro Climb, African Scenic Safaris, Tusker Trail — all KPAP-certified operators
    • Reference texts: Kilimanjaro: The Trekking Guide (Henry Stedman), Kilimanjaro and Mount Kenya Climbing and Trekking Guide (Cameron Burns)
    • Academic sources: Climate variability on Mount Kilimanjaro research papers from University of Dar es Salaam and international climate studies
    Published: March 7, 2026
    Last updated: April 19, 2026
    Next review: July 2026
    Part of the Global Summit Guide

    Back to the Master Hub

    This guide is one of 71 across 12 thematic clusters on Global Summit Guide. The master hub organizes every guide by experience tier, specific peak, skill area, and region.

    View the Hub →

  • Denali Climbing Guide

    Denali Climbing Guide

    Cluster 07 · Seven Summits · Updated April 2026

    Denali Climbing Guide: Complete Expedition Planning for North America’s Highest Peak

    The definitive 2026 guide to climbing Denali — all routes, permits, costs, camps, weather, and gear for the 20,310-foot subarctic summit. From the West Buttress classic to the Cassin Ridge technical route, everything you need to plan your Alaskan expedition to the coldest mountain in the Seven Summits.

    20,310 ft
    Summit
    elevation
    18–24
    Expedition
    days
    ~50%
    Summit
    success
    $395
    NPS permit
    2026
    Global Summit Guide A guide in Cluster 07 · Seven Summits View master hub →

    Denali is the cold, committing, self-supported crown of the Seven Summits. At 20,310 feet, it’s not the highest peak on the list — Everest is 9,000 feet taller — but its subarctic location at 63° North creates thin-air effects making it feel like a 22,000+ ft mountain. Climbers haul their own gear, food, and fuel up glaciers and ridges in temperatures that can drop to -40°F even in peak season. This is the mountain that kills Everest aspirants who skipped the “easier” peaks — and produces the most complete expedition mountaineers on Earth. If you can climb Denali self-supported, you can climb almost anywhere. This guide covers everything: routes, permits, costs, timeline, gear, and what makes Alaska’s Great One uniquely challenging.

    How this guide was built

    Expedition data verified against National Park Service Denali Mountaineering official records, Talkeetna Ranger Station annual reports, and American Alpine Club accident databases. Cost figures confirmed with Alaska Mountaineering & Hiking, Alpine Ascents International, RMI Expeditions, and Mountain Trip (2026 rates). Route descriptions verified against Colby Coombs’s Denali’s West Buttress guidebook and updated USGS topographic data. Weather and climatology references drawn from National Weather Service Alaska and the University of Alaska Geophysical Institute. Reviewed by practicing Alaska mountain guides with 2025 season experience. Fact-check date: April 19, 2026.

    Denali Overview: The Great One

    Denali (formerly Mount McKinley) is North America’s highest mountain and the third of the Seven Summits by base-to-summit relief. Located in the Alaska Range 130 miles north of Anchorage, the peak rises dramatically from the surrounding lowlands — its 18,000-foot base-to-summit rise is actually greater than Everest’s 12,000-foot rise from its plateau base.

    Key Denali facts

    • Summit elevation: 20,310 feet (6,190 meters)
    • Prominence: 20,156 feet — 3rd highest in the world
    • Base-to-summit rise: ~18,000 feet (greater than Everest)
    • Location: Alaska Range, Denali National Park, Alaska, USA
    • Name meaning: “The Great One” in Koyukon Athabascan
    • Official name: Restored to “Denali” by Secretarial Order 2015 (formerly Mount McKinley)
    • First ascent: June 7, 1913 — Hudson Stuck, Harry Karstens, Walter Harper, Robert Tatum (Muldrow/Harper Glacier route)
    • First West Buttress ascent: 1951 — Bradford Washburn led the first-ever ascent of what became the standard route
    • Climbing season: April 15 through approximately July 15
    • Annual climbers: ~1,200 attempts per year
    • Summit success rate: ~50% across all attempts (varies by year and route)
    Why Denali is harder than it looks

    At 63° North latitude, Denali’s atmosphere is significantly thinner than equivalent-elevation peaks at lower latitudes. The Earth’s rotation creates a bulge at the equator, making atmospheric layers thicker there — and much thinner near the poles. Result: Denali’s 20,310-foot summit feels more like 22,000-23,000 feet at Himalayan latitudes. Combined with -40°F temperatures and self-supported expedition style, this creates a mountain that consistently ranks among the hardest Seven Summits to complete. See our Seven Summits guide for comparative context.


    Denali Routes: From Classic to Expert

    Denali has multiple established climbing routes, but approximately 90% of all climbers use the West Buttress. Other routes are largely the domain of experienced expedition climbers.

    The Classic · 90% of Climbers

    West Buttress

    16.8 mi · 13,110 ft gain · Grade Alaska 2

    Bradford Washburn’s 1951 first-ascent route, now the standard. Non-technical glacier climb with fixed lines on the Headwall. 18-21 days expedition length. The most-climbed 20,000+ foot route in North America.

    Historic North Approach

    Muldrow/Harper Glacier

    ~40 mi approach · Grade Alaska 3

    The original 1913 first-ascent route (Stuck, Karstens, Harper, Tatum). Begins at Wonder Lake and traverses from north, requiring long approach and more remote logistics. Sees 5-10 expeditions per year. Requires experience and self-sufficiency.

    Elite Technical Route

    Cassin Ridge

    ~2 mi technical · Grade Alaska 5 · 65° ice

    Italian first-ascent 1961 — regarded as one of world’s premier alpine climbs. Sustained 65° ice climbing on the south face with minimal escape options. Typically 8-12 days of technical climbing. Only expert alpinists attempt this. Approximately 5-10 ascents per year.

    Intermediate Technical

    West Rib

    Variable · Grade Alaska 4

    Technical ridge climb offering middle ground between West Buttress and Cassin. Requires ice climbing and mixed terrain skills. Sees 10-30 ascents per year. Good progression step for climbers seeking more technical Denali experience.

    Other notable routes include the Messner Couloir (elegant line up south face, technical), Orient Express (south buttress variation), and Pioneer Ridge (rarely climbed north approach).


    The West Buttress Expedition: Camp by Camp

    Since the West Buttress dominates Denali climbing, understanding its standard camp sequence is essential. Here’s what a typical expedition looks like:

    0
    Starting Point

    Kahiltna Base Camp

    Arrival via ski plane from Talkeetna. Mandatory NPS check-in. Home of base camp manager, radio equipment, weather observations. Sleep here 1-2 nights before climbing.

    7,200 ft
    Elevation
    1
    Day 2-3 of Expedition

    Camp 1 (Ski Hill)

    First move above base camp. Ski Hill approach, relatively gentle grade. Sled-hauling begins. Typically 5-6 miles with cache-and-carry method. First night on route.

    7,800 ft
    Elevation
    2
    Day 5-7 of Expedition

    Camp 2 (Kahiltna Pass)

    Above Ski Hill and Motorcycle Hill. Route through Polo Field. Frequently windy. Last significant sled-hauling camp; gear transitions to backpacks above.

    11,200 ft
    Elevation
    3
    Day 8-11 of Expedition

    Camp 3 (“The 14 Camp”)

    The social hub of Denali. NPS medical tent, ranger presence, multiple expedition teams. Rest day(s) here for acclimatization. Windy Corner ascent precedes this camp.

    14,200 ft
    Elevation
    4
    Day 12-16 of Expedition

    High Camp (17,200 ft)

    Above the fixed-line Headwall and Washburn’s Thumb. Final camp. Summit attempts launched from here. Weather often forces multiple rest days. Most climbing fatalities occur between High Camp and summit.

    17,200 ft
    Elevation
    Summit Day · 12-16 Hours

    Denali Summit

    From High Camp via Denali Pass, Football Field, Pig Hill, and Summit Ridge. Round trip typically 12-16 hours. Cold and windy with dangerous Denali Pass traverse section.

    20,310 ft
    Summit
    The Headwall between Camp 2 and Camp 3

    The section between Camp 2 (11,200 ft) and Camp 3 (14,200 ft) includes Windy Corner and the fixed-line Headwall — a 50-60° ice slope protected by NPS-installed fixed rope. Climbers use ascenders (jumars) to ascend this section safely. This is where many expeditions experience their first significant altitude effects. Sled-hauling transitions to backpack-only above here. Weather at this elevation can change rapidly, and teams sometimes spend 2-3 days waiting for good conditions before continuing up.


    Typical Denali Expedition Timeline

    Most Denali expeditions run 18-24 days total. Here’s what a typical 21-day timeline looks like:

    Day 1

    Arrive Anchorage

    Fly into Ted Stevens Anchorage International Airport. Meet team, buy last-minute supplies, gear check with local outfitters if renting.

    Day 2

    Transfer to Talkeetna

    2-hour drive north via Parks Highway. Settle into Talkeetna, meet guides, organize expedition food and personal gear. Dinner in town.

    Day 3

    NPS Ranger Briefing

    Mandatory check-in at Talkeetna Ranger Station. Current route conditions, weather briefing, safety protocol review, waste management training (Clean Mountain Can distribution).

    Day 4

    Fly to Kahiltna Base Camp

    Ski plane departure from Talkeetna via Talkeetna Air Taxi, K2 Aviation, or Sheldon Air Service. 40-minute flight over the Alaska Range. Arrive at 7,200 ft base camp. Organize gear, rest.

    Days 5-7

    Move to Camp 1 & 2

    Double-carry method: Day 5 cache gear at Camp 1, return to Base. Day 6 move to Camp 1 with remaining gear. Day 7 cache gear at Camp 2, return to Camp 1. Acclimatization begins.

    Days 8-11

    Windy Corner to Camp 3

    Ascend Motorcycle Hill and Windy Corner with backpacks. Cache at Camp 3 (14 Camp). Return to Camp 2 for sleep. Move to Camp 3. Rest and acclimatize at 14,200 ft.

    Days 12-14

    The Headwall to High Camp

    Ascend fixed-line Headwall with ascenders. Cache at 17,200 ft High Camp. Return to Camp 3 for sleep. Day 14 move to High Camp. Weather delays likely.

    Days 15-18

    Summit Window

    Rest days at High Camp awaiting weather window. Most expeditions have 1-3 summit attempt opportunities. Summit day is 12-16 hours round trip via Denali Pass, Football Field, and Summit Ridge.

    Days 19-20

    Descent to Base Camp

    Fast descent — typically 2 days from High Camp to Kahiltna Base Camp. Teams pack out all gear and waste. Radio Talkeetna Air Taxi for pickup.

    Day 21

    Flight Out & Return

    Fly back to Talkeetna, check out with rangers, return waste containers. Shower, celebratory meal, transfer to Anchorage. Fly home.


    Denali Cost Breakdown: 2026 Budget Planning

    Denali expeditions cost $5,000-$18,000 depending on approach. The choice between guided and independent is the single largest cost factor.

    Approach 1

    Guided Expedition

    $12,000–$18,000
    • Guide service$9,000–$15,000
    • NPS permit$395
    • Air taxi to Base$1,200
    • Personal gear$2,500–$5,000
    • Travel to Anchorage$500–$1,500
    • Guide tips (~18%)$1,800–$2,700
    • Insurance$400–$700
    • Lodging/meals$500–$1,000
    Approach 2

    Independent Climbing

    $5,000–$10,000
    • NPS permit$395
    • Air taxi to Base$1,200
    • Personal gear$4,000–$7,000
    • Group gear (rented)$800–$1,500
    • Expedition food$300–$500
    • Fuel & supplies$200–$400
    • Travel to Anchorage$500–$1,500
    • Insurance$300–$500
    • Lodging/meals$400–$800

    For comparison with other Seven Summits peaks, see our complete mountain climbing costs guide. Denali is typically the second or third most expensive 7SS peak after Everest and Vinson, primarily due to the self-supported nature requiring complete personal gear purchase.


    When to Climb Denali: Narrow Seasonal Window

    PeriodTemperatureClimber trafficRecommended for
    Mid-April – Early May-40°F to -70°FVery few (5-10 teams)Experienced expedition climbers only
    Mid-May – Early June-20°F to -50°FModerate (50-100 at any time)Experienced teams wanting fewer crowds
    June (peak season)-10°F to -40°FPeak (100-300 at any time)First-time Denali climbers, guided teams
    Early July0°F to -30°FModerate (declining)Late-season experienced teams
    Mid-July onwardVariable, melt beginsVery few (season closing)Not recommended for general climbers

    June is the universal peak month — most guide services operate this window, fixed lines are well-established by rangers, and summit day weather windows occur most frequently. Expect 18-24 hours of daylight during peak season due to subarctic latitude, which significantly reduces summit-day stress despite temperature extremes.


    Preparing for Denali: Minimum Prerequisites

    Technical skills required

    • Glacier travel: Roped travel with team, crevasse identification, proper rope management techniques.
    • Crevasse rescue: Both self-rescue and team rescue procedures. Prusik system, hauling systems (C-pulley, Z-pulley).
    • Fixed-line climbing: Use of ascender/jumar on fixed ropes (essential for Headwall).
    • Winter camping: Extended winter camping in extreme cold (-30°F or below overnight).
    • Sled hauling: Experience hauling sleds on glacier terrain. Essential for lower mountain.
    • Self-rescue: Individual capability to arrest falls, ascend rope, manage equipment.
    • Navigation: Compass, GPS, map reading in whiteout conditions.

    Recommended prior climbs

    • Mount Rainier (14,411 ft): The classic Denali prep peak. Similar glacier travel skills, comparable altitude exposure.
    • Baker, Shuksan, Eldorado (Washington): Multi-day glacier mountaineering.
    • Aconcagua (22,838 ft): Altitude comparable to Denali summit. Different style but tests physical endurance.
    • Mt. Elbrus (18,510 ft): Good altitude exposure with glacier terrain.
    • Alaska peaks before Denali: Matanuska Glacier courses, Mt. Marathon training.

    Physical training (6-9 months before)

    • Aerobic base: 4-5 cardio sessions weekly, 45-90 minutes each. Progressive overload.
    • Weighted pack hiking: Regular 10+ mile hikes with 50-70 lb pack, building over months.
    • Strength training: Leg strength (squats, lunges, step-ups) and core (stability, planks).
    • Altitude simulation: If possible, weekend trips to 10,000+ ft. Altitude tents (hypoxic) for acclimatization.
    • Sled-pull training: Pull tires or weighted sleds on pavement to simulate sled-hauling.
    • Cold exposure: Accustom to winter camping, wet-cold conditions.

    See our complete high altitude training program for detailed periodized training principles applicable to Denali preparation.


    Denali Safety Considerations

    • Altitude illness: AMS affects most climbers above 14,000 ft. HAPE and HACE risks above 17,000 ft. Descend immediately if serious symptoms develop. See our altitude sickness guide.
    • Frostbite: Most common at extremities (fingers, toes, nose, ears). Temperatures at -40°F with wind create frostbite risk in minutes. See our frostbite guide.
    • Crevasse falls: Always travel roped on glacier. Crevasse rescue capability essential.
    • Avalanches: Possible on various route sections. Listen to ranger advisories.
    • Weather: Temperature can drop 40°F in hours. Storms produce 100+ mph winds. Carry storm-ready gear always.
    • Denali Pass: Dangerous wind-exposed traverse between High Camp and Football Field. Most summit-day fatalities occur here on descent.
    • Exhaustion: Summit day is 12-16 hours at altitude. Physical collapse on descent is serious risk.
    • Communications: Satellite phone or inReach essential. Cell coverage effectively zero on mountain.
    The Denali Pass descent

    The Denali Pass traverse between High Camp and Football Field is responsible for more summit-day fatalities than any other section of the route. On descent, exhausted climbers returning from the summit cross this exposed, wind-blasted section in deteriorating condition. Combined with 45° slope angles, afternoon weather changes, and altitude-induced cognitive impairment, fatal falls have occurred here multiple times. Never rush this descent. Rope up if conditions warrant. Accept slower pace. If exhausted, sit at the bottom of Football Field and rest rather than pushing blindly forward. The summit is won on descent, not on ascent.


    Denali FAQ: Your Common Questions Answered

    How hard is it to climb Denali?

    Denali is one of the most challenging Seven Summits peaks despite not being the highest. The difficulty comes from extreme cold, self-supported expedition style, and variable weather rather than technical climbing. Key difficulty factors: (1) Summit elevation: 20,310 feet (6,190 m) — North America’s highest point, significant altitude effects. (2) Self-supported expedition: Unlike Everest or Aconcagua, climbers haul all gear, food, and fuel themselves — no porters, no mules. (3) Extreme cold: Summit temperatures regularly drop to -40°F even in peak season. Summit winds 60-100 mph common. (4) Subarctic latitude: At 63° North, Denali sits far closer to the pole than any other Seven Summits peak — creating thinner atmosphere effect where 20,310 ft feels like 22,000+ ft elsewhere. (5) Expedition length: 18-24 days typical, significantly longer than most 7SS peaks. (6) Weather windows: Limited summit days — many expeditions wait 1-2 weeks for suitable conditions. (7) Physical demand: Carrying 50-80 lb packs with 40-60 lb sleds (double-carrying technique) requires exceptional fitness. (8) Technical skills required: Glacier travel, crevasse rescue, fixed-line climbing, winter camping, sled hauling. Success rate: Approximately 50-60% of climbers who attempt Denali reach the summit. Main reasons for non-summit: weather (40% of failures), altitude illness (25%), physical fitness issues (15%), frostbite/injury (10%), other (10%). Most difficult Seven Summit after Everest — considerably harder than Aconcagua, Elbrus, Kilimanjaro, or Carstensz/Kosciuszko. Preparation recommendation: minimum 2 years of expedition mountaineering experience, including at least one 5,000+ m peak and winter camping skills.

    How much does it cost to climb Denali?

    Climbing Denali costs $5,000-$12,000 for independent climbers and $9,000-$15,000 for guided expeditions. Complete cost breakdown for 2026: Permits and fees: (1) NPS Denali permit: $395 per person (2026 rate). (2) Required 60-day advance registration. (3) Talkeetna check-in mandatory for briefing. Guide service fees (if guided): (4) Full-service guided expedition: $9,000-$12,000 for standard West Buttress. (5) Premium outfitters (Alpine Ascents, RMI, Mountain Trip, AAI): $11,000-$15,000. (6) Includes: guides, group gear, group food, meals in Talkeetna, flight in/out. Flights and transport: (7) International/domestic flight to Anchorage: $500-$1,500. (8) Anchorage to Talkeetna transport: $100-$200. (9) Talkeetna Air Taxi glacier flight to Kahiltna Base Camp: $1,000-$1,200 round trip. Personal gear and food: (10) Complete expedition gear (if buying new): $4,000-$7,000. Sleeping bags, down parka, plastic boots, glacier glasses, crampons, ice axe, sleds, tents, ropes. (11) Renting some items (boots, tents, ropes): $800-$1,500. (12) 3 weeks of expedition food: $300-$500 if self-provisioning. (13) Personal items: fuel canisters, cooking supplies, emergency gear: $200-$400. Insurance: (14) Mandatory for guided services: travel/medical/evacuation insurance: $200-$500. (15) Recommended Global Rescue or similar expedition evacuation: $400-$700. Miscellaneous: (16) Lodging in Anchorage and Talkeetna (5-7 nights): $500-$1,000. (17) Meals before/after expedition: $150-$300. (18) Tips for guides (15-20%): $1,500-$2,500. Total ranges: Self-guided/independent: $5,000-$8,000. Fully guided: $12,000-$18,000 including all gear and tips. Most climbers budget $10,000-$14,000 for a fully-supported guided Denali expedition with personal gear. See our complete mountain climbing costs guide for comparison pricing.

    When is the best time to climb Denali?

    The best time to climb Denali is May through mid-July, with peak season being June — approximately 80% of summit attempts happen between late May and early July. Monthly breakdown: (1) April-early May: Early season. Cold temperatures still very harsh, limited established camps. Few climbers. Not recommended for first-time Denali attempts. (2) Mid-May to early June: Classic early season. Cold but manageable, lighter crowds, good snow conditions. Daylight 18-20 hours. Recommended for experienced climbers. (3) June: Peak climbing season. Warmest temperatures, most climbers on mountain (100-300 at once on West Buttress), best weather probability. Daylight 20-22 hours. Fixed lines established by rangers and climbers. Most commercial guide services operate this month. (4) Early July: Late season. Warming temperatures, crevasses beginning to open, fewer crowds. Good for experienced climbers. (5) Mid-July onward: Climbing season officially ends approximately July 15. Snow conditions deteriorate rapidly, crevasses become treacherous, guided services cease. Why June dominates: (6) Temperature range: Summit -10°F to -40°F in June vs. -40°F to -70°F in April/May. (7) Daylight: 24-hour daylight above Arctic Circle effect — reduces summit stress. (8) Snow stability: Consolidated snowpack from winter, before summer melt destabilizes glaciers. (9) Established routes: Fixed lines, wands, and trail established by early climbers reduce navigation burden. (10) Weather windows: More frequent good-weather periods than early/late season. Weather forecasting: (11) Check National Weather Service Alaska forecasts. (12) Outfitters provide daily weather briefings from Base Camp. (13) Satellite weather reports received at camps from Anchorage meteorologists. (14) Summit-day weather window typically 24-48 hours, occurring 5-8 times per month in June. Plan for 3 weeks on mountain minimum — weather can delay summit bids significantly.

    What is the West Buttress route on Denali?

    The West Buttress is Denali’s most popular climbing route — approximately 90% of all Denali ascents use this route. Developed by Bradford Washburn in 1951, it’s considered the ‘classic’ Denali ascent. West Buttress route overview: (1) Total distance: Approximately 16.8 miles one-way from Kahiltna Base Camp (7,200 ft) to summit (20,310 ft). (2) Total elevation gain: 13,110 feet from base camp to summit. (3) Starting point: Kahiltna Base Camp at 7,200 ft (accessed by ski plane from Talkeetna). (4) Expedition duration: 18-21 days typical, including cache and rest days. (5) Camp sequence: Base Camp → Camp 1 (7,800 ft) → Camp 2 (11,200 ft) → Camp 3 (14,200 ft, ‘the 14 camp’ — medical tent location) → High Camp (17,200 ft) → Summit. (6) Key features: Ski Hill, Motorcycle Hill, Squirrel Hill, Polo Field, Windy Corner, Washburn’s Thumb, Denali Pass, Football Field, Pig Hill, Summit Ridge. Technical climbing requirements: (7) Glacier travel with rope team — mandatory crevasse rescue capability. (8) Fixed lines on Headwall between Camp 2 and Camp 3. (9) Denali Pass traverse — dangerous windy section between High Camp and summit. (10) Summit Ridge — narrow corniced ridge. Cache-and-carry technique: (11) Climbers typically ‘double-carry’ loads — carry gear up to next camp, return to lower camp, sleep, then move up with remaining gear. Effectively hiking each section twice. (12) Creates acclimatization benefit. (13) Sled hauling below 11,000 ft; backpacks above. Alternative Denali routes: (14) Muldrow/Harper: Traditional north approach, longer and less-climbed. (15) Cassin Ridge: Technical ridge climb, expert only. (16) West Rib: Intermediate technical route. (17) Messner Couloir, Orient Express: Technical variations. For most climbers, West Buttress remains the standard route and the subject of nearly all commercial expeditions.

    Do you need a permit to climb Denali?

    Yes, a mandatory permit is required to climb Denali or Mount Foraker. The National Park Service operates a strict registration system requiring 60-day advance application. Permit details for 2026: (1) Permit cost: $395 per climber. (2) Registration deadline: 60 days before climb start date. (3) Application: Online via NPS Denali Mountaineering website. (4) Required information: Climbing experience, team members, route selection, emergency contacts. (5) Check-in required: All climbers must check in at Talkeetna Ranger Station for mandatory briefing before expedition. Why advance registration: (6) NPS tracks climbers for safety and rescue coordination. (7) Ranger patrols and guide station supplies are planned based on registrations. (8) Search and rescue operations funded partially through permit fees. (9) Expedition educational briefings prepare climbers for specific hazards. Permit regulations: (10) Climbing party must be minimum 2 people (safety requirement for roped glacier travel). (11) Adults only: All climbers must be 18+. (12) Solo climbing prohibited on Denali and Foraker. (13) Climbing season typically April 15 through July 15. Additional requirements: (14) Clean Mountain Can: Human waste carry-out mandatory using approved containers. (15) Waste bag returns required at Talkeetna. (16) Leave No Trace principles strictly enforced. (17) Satellite communication device required (satellite phone or reliable alternative). Check-in briefing covers: (18) Recent route conditions. (19) Weather patterns for expedition period. (20) Safety protocols. (21) Rescue procedures. (22) Environmental ethics. (23) Waste management requirements. Talkeetna Ranger Station contact: Open late April through mid-July. Permit applications are available at www.nps.gov/dena/planyourvisit/mountaineering.htm. Guided climbers typically have permits arranged by their outfitter; independent climbers handle permits themselves.

    How long does it take to climb Denali?

    Most Denali expeditions take 18-24 days from arrival in Talkeetna to return, with time on the mountain itself typically 14-21 days. Typical expedition timeline: Pre-expedition (Anchorage/Talkeetna): (1) Day 1: Arrive Anchorage. (2) Day 2: Transfer to Talkeetna, meet team, check gear. (3) Day 3: Ranger briefing, final gear check, food organization. Mountain approach: (4) Day 4: Weather permitting — fly to Kahiltna Base Camp at 7,200 ft. (5) Day 4-5: Weather delays common at this stage. Climbing phase (14-18 days on mountain): (6) Days 5-6: Move to Camp 1 (7,800 ft). Usually two carries — cache and move. (7) Days 7-9: Move to Camp 2 (11,200 ft). Establish camp and cache for next move. (8) Days 10-12: Move to Camp 3 at 14,200 ft (‘the 14 Camp’). Medical tent location. Rest and acclimatization day. (9) Days 13-16: Move to High Camp at 17,200 ft. Weather delays common. Acclimatization and summit prep. (10) Day 17-19: Summit attempt. Approximately 12-16 hour summit day. If unsuccessful, rest at High Camp and retry. (11) Days 20-21: Descent to Base Camp. Fast — typically 2-3 days from summit down. (12) Day 22: Flight out to Talkeetna. (13) Day 23-24: Travel home. Factors affecting timeline: (14) Weather: Major delays at multiple stages. 5-10 weather days typical. (15) Acclimatization: Individual response varies significantly. (16) Fitness: Strong climbers move faster between camps. (17) Route conditions: Snow/ice/wind affect pace. (18) Summit attempts: Most teams get 1-2 summit attempt opportunities per expedition. Conservative planning: Budget 21-28 days total expedition time including travel. Many climbers allow 24-day window. Faster ‘speed climbers’ complete in 14-15 days but require perfect conditions and exceptional fitness. Fastest recorded Denali West Buttress: approximately 11 hours 48 minutes round-trip from base camp (Kilian Jornet, 2014).

    What gear do you need to climb Denali?

    Denali requires complete expedition mountaineering gear optimized for subarctic temperatures and self-supported glacier travel. The comprehensive gear list divides into essential categories. Footwear: (1) Double plastic boots or modern insulated mountaineering boots rated for -40°F (La Sportiva Olympus Mons, Scarpa Phantom 8000). (2) Overboots for summit day. (3) Insulated camp booties. (4) Vapor barrier socks. Clothing (layering system): (5) Base layer: Merino wool long underwear (top and bottom). (6) Insulation: Synthetic puffy jacket and pants. (7) Expedition down parka and down pants (-40°F rated). (8) Hard shell: Gore-Tex pants and jacket. (9) Softshell pants for day climbing. (10) Balaclava, face mask, neck gaiter. (11) 2-3 pairs expedition gloves and mitts. Technical climbing gear: (12) 12-point steel crampons (front points essential). (13) Mountaineering ice axe (55-60 cm). (14) Climbing harness with adjustable leg loops for fully clothed use. (15) Locking and non-locking carabiners (6-8). (16) Ascender (for fixed lines on Headwall). (17) Ice screws (if team lead). (18) Prusik cords for crevasse rescue. (19) Two ropes per team (8-9mm, 50m). Camping and sleeping: (20) -40°F rated expedition sleeping bag. (21) Vapor barrier liner. (22) Full-length sleeping pad + foam backup. (23) Expedition 4-season tent rated for high winds. (24) Snow stakes, snow anchors. (25) Kitchen kit for high-altitude cooking. Transport and load-carrying: (26) Expedition backpack (80+ liters). (27) Sled (pulk) with traces and harness. (28) Dry bags for food and fuel. (29) Ski poles. Safety and navigation: (30) Glacier glasses (category 4 UV protection). (31) Goggles for wind/storm. (32) Avalanche transceiver, probe, shovel. (33) GPS, compass, map. (34) Satellite phone or inReach device. (35) First aid kit including altitude medications. Food and fuel: (36) 3 weeks of expedition food (freeze-dried meals, bars, nuts). (37) White gas fuel (12-14 liters per climber). (38) Stoves rated for subarctic conditions. Specialty items: (39) Clean Mountain Can (required waste carry-out). (40) Urine bottle. (41) Sunscreen (SPF 50+). (42) Lip balm (SPF). (43) Headlamp with extra batteries. Renting strategy: Many climbers rent high-cost items (tents, ropes, sleds) from Alaska Mountaineering & Hiking in Anchorage — reduces total gear budget by $1,500-$2,500. See our complete mountain gear list.

    Do I need a guide to climb Denali?

    While guides are not legally required for Denali, they are strongly recommended unless climbers have significant prior expedition mountaineering experience. Approximately 60-70% of Denali climbers use guide services. When guides are essential: (1) First expedition peak above 15,000 ft. (2) No prior glacier travel experience. (3) Never done winter camping in extreme cold (-30°F or below). (4) No crevasse rescue training. (5) Solo trip without pre-formed climbing team. When independent climbing is feasible: (6) Multiple expedition peaks completed (Aconcagua, Elbrus, Denali-comparable peaks). (7) Extensive glacier travel experience in Alaska, Canada, or similar. (8) Pre-formed team of 4-6 with complementary skills. (9) Winter mountaineering and subarctic camping proficiency. (10) Cash budget savings of $5,000-$8,000 vs. guided service. Major Denali guide services: (11) Alpine Ascents International (AAI) — Concession holder, extensive experience. (12) Rainier Mountaineering Inc. (RMI) — Largest guide service, structured programs. (13) Mountain Trip — Alaska-focused, personalized approach. (14) American Alpine Institute (AAI) — Skills-focused expeditions. (15) International Mountain Guides (IMG) — Global expedition operator. What guide services provide: (16) Technical instruction on glacier travel, crevasse rescue, fixed-line climbing. (17) Pre-expedition gear check and advice. (18) Group gear (tents, stoves, ropes, medical kit). (19) Meals during climb (simplified planning). (20) Emergency response coordination. (21) Daily weather briefings. (22) Strategic decision-making on summit timing. (23) Recent route condition intelligence. Independent climber requirements: (24) Every piece of gear, food, and fuel planning. (25) Weather interpretation capability. (26) Permit and logistics management. (27) Emergency self-rescue capability. (28) Communication equipment. Cost-benefit analysis: Guided expedition adds approximately $6,000-$9,000 over independent. For first-time expedition climbers, this investment pays back through higher summit success rates (65-75% guided vs. 45-55% independent), safety, and learning. Experienced mountaineers save significant money going independent if they have the skills. Many Denali climbers guide their first expedition, then return independently on subsequent climbs.


    Authoritative Sources & Further Reading

    Content reflects authoritative Alaska mountaineering sources:

    • National Park Service Denali — nps.gov/dena — Official mountaineering program and statistics
    • Talkeetna Ranger Station — 907-733-2231 — Season reports and conditions
    • American Alpine Club — americanalpineclub.org — Accident reports and historical data
    • Colby Coombs, Denali’s West Buttress: A Climber’s Guide — The standard route reference
    • Washburn & Roberts, Mount McKinley: The Conquest of Denali — Historical first ascents
    • National Weather Service Alaska — weather.gov/anchorage — Mountain forecasts
    • University of Alaska Geophysical Institute — Denali climate research
    • Guide services: Alpine Ascents, RMI Expeditions, Mountain Trip, American Alpine Institute, International Mountain Guides
    Published: March 6, 2026
    Last updated: April 19, 2026
    Next review: July 2026
    Part of the Global Summit Guide

    Back to the Master Hub

    This guide is one of 71 across 12 thematic clusters on Global Summit Guide. The master hub organizes every guide by experience tier, specific peak, skill area, and region.

    View the Hub →

  • Best Trekking Poles in 2026: Ranked for Every Hiker

    Best Trekking Poles in 2026: Ranked for Every Hiker

    Best Trekking Poles in 2026: Tested, Ranked, and Expert-Recommended for Every Hiker

    As outdoor enthusiasts gear up for their adventures in 2026, the importance of choosing the right trekking poles cannot be overstated. These essential tools not only enhance stability and balance on uneven terrain but also help reduce strain on joints, making hikes more enjoyable. This comprehensive guide will delve into the best trekking poles available this year, highlighting their features, materials, and innovations. Readers will learn about the latest advancements in trekking pole technology, how to select the right length and adjustability, and the top brands leading the market. By addressing common concerns and providing expert recommendations, this article aims to equip hikers with the knowledge they need to make informed decisions.

    Which Trekking Pole Materials and Technologies Lead in 2026?

    The materials and technologies used in trekking poles have evolved significantly, impacting their performance and user experience. In 2026, the most common materials are carbon fiber and aluminum, each offering distinct advantages. Carbon fiber poles are known for their lightweight and high strength-to-weight ratio, making them ideal for long-distance hikers. Conversely, aluminum poles are typically more durable and cost-effective, appealing to budget-conscious adventurers.

    What Are the Benefits of Carbon Fiber vs. Aluminum Poles?

    Carbon fiber trekking poles provide several benefits, including reduced weight, which can enhance endurance during long hikes. They also offer excellent shock absorption, minimizing the impact on joints. However, they tend to be more expensive and can be less durable than aluminum poles, which are known for their robustness and resistance to bending. Aluminum poles are often favored for rugged terrains due to their durability, making them a reliable choice for heavy use. Ultimately, the choice between carbon fiber and aluminum poles depends on the hiker’s specific needs and budget.

    Further research underscores the exceptional properties that make carbon fiber a superior material for high-performance sports equipment, including trekking poles.

    Carbon Fiber Advantages for Trekking Poles

    Carbon fiber-reinforced composite materials by virtue of its high temperature resistance, corrosion resistance, light weight, high mechanical strength outstanding advantages emerge in the new material, in the sport of rowing or sailing, bike, badminton, skiing, golf, sleigh, archery, everywhere this black fiber figure.

    Study on carbon fiber composite materials in sports equipment, 2013

    How Do Shock Absorbing Features Improve Hiking Safety and Comfort?

    Shock absorbing features in trekking poles significantly enhance hiking safety and comfort by reducing the impact on joints during descents. These mechanisms work by dampening the force exerted on the poles, which can alleviate stress on the knees and ankles. Various technologies, such as internal springs or flexible shafts, are employed to provide this cushioning effect. Hikers using shock absorbing poles often report less fatigue and discomfort, allowing them to enjoy longer treks with greater ease.

    How to Choose the Right Trekking Pole Length and Adjustability for Your Needs?

    Selecting the appropriate trekking pole length is crucial for maintaining proper posture and balance while hiking. The right length allows for efficient energy transfer and reduces strain on the upper body. Adjustable poles offer versatility, accommodating different terrains and user preferences.

    What Are the Best Practices for Measuring and Adjusting Pole Length?

    To measure the correct pole length, hikers should stand upright and bend their elbows at a 90-degree angle. The grip of the pole should align with the wrist when the arm is at this angle. For adjustable poles, familiarizing oneself with the locking mechanisms is essential to ensure stability during use. Common mistakes include using poles that are too long or too short, which can lead to discomfort and inefficient hiking techniques.

    Which Adjustable Pole Mechanisms Offer Durability and Ease of Use?

    Several adjustable mechanisms are available in trekking poles, including twist-lock, lever-lock, and push-button systems. Twist-lock mechanisms are lightweight and easy to use but may require more frequent adjustments. Lever-lock systems provide a secure hold and are generally more durable, making them suitable for rugged conditions. Push-button mechanisms offer quick adjustments but may be less reliable over time. Choosing a mechanism that balances durability and ease of use is essential for a satisfying hiking experience.

    What Are the Top Trekking Pole Brands and Their Innovations in 2026?

    In 2026, several brands stand out for their innovative designs and commitment to quality in trekking poles. These brands are continuously pushing the boundaries of technology to enhance user experience and performance.

    Which Brands Lead in Lightweight and Durable Pole Designs?

    Brands like Black Diamond and Leki are renowned for their lightweight and durable trekking poles. Black Diamond’s Carbon Z poles are particularly popular among ultralight hikers, offering a compact design without sacrificing strength. Leki’s Micro Vario series combines lightweight materials with robust construction, making them a favorite for both casual and serious trekkers. User reviews often highlight the balance of weight and durability as key factors in their purchasing decisions.

    How Are Brands Integrating Eco-Friendly Materials and Technology?

    Sustainability is becoming increasingly important in the outdoor industry, and many trekking pole brands are responding by integrating eco-friendly materials. Companies like REI and MSR are leading the charge by using recycled materials in their pole designs and adopting sustainable manufacturing practices. This shift not only reduces environmental impact but also appeals to environmentally conscious consumers who prioritize sustainability in their purchasing decisions.

    How Do Shock Absorbing Trekking Poles Reduce Impact and Enhance Performance?

    Shock absorbing trekking poles are designed to minimize the impact on joints, enhancing overall performance during hikes. By absorbing shock, these poles help reduce fatigue and discomfort, allowing hikers to maintain their energy levels over longer distances.

    What Types of Shock Absorbing Systems Are Available?

    Various shock absorbing systems are available in trekking poles, including internal springs and flexible shafts. Internal springs compress upon impact, providing immediate cushioning, while flexible shafts allow for a slight bend during use, distributing force more evenly. Each system has its advantages, and the choice often depends on personal preference and hiking style.

    When Should Hikers Opt for Shock Absorbing Poles?

    Hikers should consider using shock absorbing poles when traversing steep descents or uneven terrain, where the impact on joints is more pronounced. These poles are particularly beneficial for individuals with pre-existing joint issues or those looking to enhance comfort during long hikes. Expert recommendations suggest that shock absorbing poles can significantly improve the hiking experience, especially on challenging trails.

    What Are the Essential Maintenance Tips and Accessories for Trekking Poles?

    Proper maintenance of trekking poles is essential for ensuring their longevity and performance. Regular care can prevent wear and tear, allowing hikers to enjoy their poles for many seasons.

    How to Properly Clean and Store Your Trekking Poles?

    Cleaning trekking poles involves wiping down the shafts and grips with a damp cloth after each use to remove dirt and moisture. For storage, poles should be kept in a dry place, preferably disassembled if they are collapsible. Avoid leaving them in direct sunlight or extreme temperatures, as this can degrade materials over time.

    Which Accessories Enhance Pole Functionality and Longevity?

    Several accessories can enhance the functionality and longevity of trekking poles. Rubber tips provide better traction on hard surfaces, while baskets prevent sinking into soft ground. Additionally, wrist straps can improve grip and control, making them a valuable addition for serious hikers. Investing in these accessories can significantly enhance the overall hiking experience.

    How Do Lightweight and Collapsible Trekking Poles Improve Travel Convenience?

    Lightweight and collapsible trekking poles are designed for convenience, making them ideal for travelers and backpackers. Their compact design allows for easy packing and transport, ensuring that hikers can take them on any adventure.

    What Are the Advantages of Collapsible Poles for Backpackers?

    Collapsible poles offer several advantages for backpackers, including reduced weight and space-saving capabilities. They can be easily stowed in a backpack or attached externally without adding significant bulk. This feature is particularly beneficial for long-distance hikers who need to minimize their pack weight while maintaining essential gear.

    How to Balance Weight and Durability in Lightweight Pole Selection?

    When selecting lightweight trekking poles, hikers should consider the balance between weight and durability. While lighter materials like carbon fiber are appealing for their weight savings, they may sacrifice some durability. Conversely, heavier aluminum poles offer robustness but can add unnecessary weight. Hikers should assess their specific needs and choose poles that provide the best combination of both attributes for their hiking style.

    What Are Common FAQs About Trekking Poles Answered by Experts?

    As trekking poles gain popularity, many common questions arise regarding their use and benefits. Addressing these FAQs can help new hikers make informed decisions.

    How Long Should Trekking Poles Be for Different Terrains?

    The ideal length of trekking poles varies based on terrain. For flat surfaces, poles should be adjusted to a height that allows for a 90-degree elbow angle. On steep inclines, shorter poles can provide better stability, while longer poles may be beneficial on descents. Adjusting the length according to the terrain can enhance comfort and efficiency.

    Can Trekking Poles Help Reduce Knee Pain and Fatigue?

    Yes, trekking poles can significantly reduce knee pain and fatigue by distributing weight more evenly and providing additional support. Studies have shown that using poles can decrease the load on the knees by up to 25%, making them a valuable tool for hikers, especially those with joint concerns. Many users report a noticeable reduction in fatigue during long hikes when using poles.

    Indeed, scientific studies confirm that the use of trekking poles actively contributes to mitigating physical strain and muscle damage during strenuous activities.

    Trekking Poles Reduce Muscle Soreness & Damage

    poles reduces muscle damage after a day of hiking [18]. The authors measured less delayed-onset muscle soreness in the trekking pole.

    A review of biomechanical and physiological effects of using poles in sports, N Nagengast, 2023

    Where to Find Trusted Reviews and How to Interpret Trekking Pole Ratings?

    Finding reliable reviews and understanding trekking pole ratings is crucial for making informed purchasing decisions. With numerous options available, knowing where to look can save time and money.

    What Criteria Are Used in Expert Pole Performance Testing?

    Expert performance testing typically evaluates several criteria, including weight, durability, adjustability, and shock absorption. These tests often involve real-world hiking scenarios to assess how poles perform under various conditions. Understanding these criteria can help consumers identify which poles best meet their needs.

    How to Use Comparison Tables and User Feedback Effectively?

    When researching trekking poles, utilizing comparison tables can provide a clear overview of features and specifications. Additionally, reading user feedback can offer insights into real-world performance and durability. Combining these resources allows hikers to make well-rounded decisions based on both expert evaluations and user experiences.

    Conclusion

    Choosing the right trekking poles can significantly enhance your hiking experience by providing stability, reducing joint strain, and improving overall comfort. With advancements in materials and technology, options like carbon fiber and shock-absorbing features cater to various hiking needs and preferences. By understanding the benefits and selecting the right poles, you can enjoy longer, more enjoyable treks. Explore our curated selection of top-rated trekking poles to find the perfect fit for your next adventure.

  • Hikers trekking on a mountain path with backpacks, surrounded by lush greenery and snow-capped peaks, illustrating outdoor adventure and exploration.

    Hiking vs Trekking vs Mountaineering: What’s the Difference?

    Cluster 02 · Beginner Progression · Updated April 2026

    Hiking vs Trekking vs Mountaineering: What’s the Difference?

    The three outdoor disciplines look similar from outside but demand radically different skills, gear, and commitment. This guide distinguishes them clearly — what each is, what each requires, the equipment boundaries between them, and how climbers naturally progress from one to the next.

    3
    Distinct
    disciplines
    1–30+
    Days per
    typical trip
    $200–15K
    Complete kit
    cost range
    2–5 yrs
    Typical
    progression
    Global Summit Guide A guide in Cluster 02 · Beginner Progression View master hub →

    Hiking, trekking, and mountaineering all involve walking uphill in scenic places, which is why people treat them as interchangeable. They aren’t. The equipment, skills, and risk profiles differ enough that confusing them leads to genuinely consequential mistakes — climbers booking “a trekking trip” that turns out to be a mountaineering expedition, or hikers attempting peaks that require technical training they haven’t received. This guide draws the lines cleanly and shows how climbers naturally progress between them over years of building experience.

    Why these definitions matter

    Definitions reflect usage by AMGA-certified guide services, the American Alpine Club, the Nepal Mountaineering Association, and long-established international outdoor associations. “Mountaineering” in particular has a specific technical meaning that tour operators sometimes blur for marketing reasons — our goal is the working definitions used by the people who actually teach these skills. Fact-check date: April 19, 2026.

    01 · The Three Disciplines at a Glance

    Each discipline has a defining characteristic, a typical trip structure, and a specific equipment baseline. Most outdoor activities map cleanly to one of the three, though scrambling and high-altitude trekking occupy genuine edge cases.

    Discipline 01

    Hiking

    Single day or weekend, established trails
    Walking on established trails with minimal technical demands. Return home or to a single base each night.
    5–20 km per day, 1–3 days total
    Hiking boots, daypack, water, weather layer. Total kit: $200–$600.
    Basic fitness, trail-reading, outdoor awareness.
    Discipline 02

    Trekking

    Multi-day, remote or extended terrain
    Multi-day walking in remote or extended terrain. Often 4 days to several weeks. Self-sufficient or with support staff.
    80–300 km, 4–30 days total
    All hiking gear plus larger pack, sleeping system, stove, shelter if not using huts. Total kit: $800–$2,500.
    Multi-day stamina, navigation, camp-craft, weather assessment.
    Discipline 03

    Mountaineering

    Technical ascent of peaks
    Ascending peaks using technical equipment — crampons, ice axe, rope, harness — on snow, ice, or steep terrain.
    2 days to 2+ months per objective
    All trekking gear plus boots, crampons, axe, harness, helmet, ropes, hardware. Total kit: $3,000–$15,000.
    Formal course training, rope work, glacier travel, self-arrest, weather judgment.

    02 · Detailed Comparison Across Every Factor

    Quick reference for the practical differences across the dimensions that matter when choosing which discipline fits your current situation.

    FactorHikingTrekkingMountaineering
    DurationHours to 1 day4 days to 30+ days1 day to 2+ months
    TerrainEstablished trailsTrails + rough pathsSnow, ice, rock, glacier
    ElevationUnder 4,000 m typicalUp to 5,500 m (EBC, Annapurna)Up to 8,849 m (Everest)
    Technical gearNoneNoneCrampons, axe, rope, harness
    Formal trainingOptionalStrongly recommended for remote routesRequired
    Self-sufficiencyLow (day return)Medium to highHigh (remote camps)
    Weather exposureLimitedMulti-day sustainedExtreme (summit windows)
    Physical demandModerateSustained enduranceEndurance + technical
    Risk of serious injuryLowModerate (remoteness)Real (every season)
    Typical cost per trip$0–$200$500–$5,000$1,500–$100,000+
    ExampleYosemite day hikeEverest Base Camp TrekClimbing Mount Everest

    03 · What Counts as Hiking?

    Hiking is the broadest and most accessible outdoor discipline. Any walk on established terrain, returning to a trailhead or base each evening, fits the category. The trail may be flat or steep, dry or muddy, short or long — what matters is that it’s established, signed, and single-day.

    What hiking looks like in practice

    • Day hikes in national or state parks — Angel’s Landing in Zion, the Half Dome cable route in Yosemite, Cactus to Clouds in California
    • Summit day hikes on non-technical peaks — Mount Washington in summer, Ben Nevis via the Mountain Track, most Colorado Class 1-2 14ers
    • Weekend trail loops that cover 20–40 km across 2–3 days, returning to a campground or trailhead — typically considered “backpacking” when overnighting but essentially hiking extended
    • Urban-adjacent trail systems like the Welsh coast path or Pacific Crest Trail day sections

    Where hiking ends

    Hiking stops being hiking when the terrain requires equipment beyond boots and a daypack — when you need crampons for persistent snow, a rope for exposure, or technical scrambling that requires using hands for balance and progress. A trail in summer may be hiking; the same trail in winter with ice may require mountaineering gear. The terrain determines the category, not the trail’s name.


    04 · What Counts as Trekking?

    Trekking is hiking extended across multiple days in remote or consequential terrain. The word entered English from the Dutch/Afrikaans “trek” (to journey) and retains the sense of a journey rather than a day out. Most treks are at least 4 days long; the classic ones are 10–20 days.

    Classic trek examples

    • Everest Base Camp Trek — 12-day round trip from Lukla through Namche to 5,364 m EBC. Non-technical throughout. See our EBC trek guide.
    • Tour du Mont Blanc — 10–11-day circuit around the Mont Blanc massif crossing France, Italy, and Switzerland. See our TMB guide.
    • Annapurna Circuit — 10–15-day Nepali trek reaching 5,416 m Thorong La Pass without technical equipment
    • Torres del Paine W or O Circuit — 4–8 days in Patagonia’s granite-tower country. See our TdP comparison.
    • K2 Base Camp Trek — 15–18 days across the Baltoro Glacier and Concordia. See our K2 BC guide.

    High-altitude trekking: the tricky category

    Treks above 5,000 m (EBC, Annapurna Circuit, K2 Base Camp) look like mountaineering to outsiders but don’t use technical gear — no crampons, no roped glacier travel, no fixed lines. They’re trekking, even at extreme elevation. The discipline is still walking on paths, just paths that happen to be very high and very remote. What trekking at altitude shares with mountaineering is the altitude physiology — AMS, HACE, HAPE — which is why our altitude acclimatization guide applies equally to both disciplines.


    05 · What Counts as Mountaineering?

    Mountaineering is defined by the technical tools required to move safely: crampons, ice axe, harness, rope, carabiners. These aren’t optional accessories — they’re the minimum equipment that makes the terrain climbable at all. When a route requires any of them, you’ve crossed into mountaineering.

    Mountaineering’s terrain signatures

    • Glaciers — Any route crossing crevassed glacier requires roped team movement, crampons, and crevasse rescue capability
    • Steep snow or ice — Slopes where you cannot walk without slipping require crampons and ice axe for self-arrest
    • Technical rock sections — Class 4 or higher (YDS) often requires roped protection even when not strictly climbing moves
    • Exposed ridges — Knife-edge terrain where a fall is unrecoverable without belay protection
    • High-altitude camps — Multi-week expeditions above 5,500 m where supplemental oxygen, expedition-grade shelters, and coordinated team logistics define the trip

    Mountaineering’s skill requirements

    Unlike hiking and trekking, mountaineering requires formal training. Self-taught mountaineers exist but consistently show higher accident and fatality rates than climbers who started with certified courses. Our Mountaineering for Beginners guide covers the skill acquisition path in detail — the short version is: take an AMGA- or IFMGA-certified 5–7 day introductory course before any technical climb.

    The “scrambling” edge case

    Scrambling is the genuine gray area between hiking and mountaineering. YDS Class 2–3 scrambling (using hands for balance, no rope) generally counts as advanced hiking in dry conditions. YDS Class 4 (real exposure, fall consequences) is often roped by competent parties and should be treated as mountaineering. In winter snow or ice conditions, any scrambling of any grade needs mountaineering gear. Examples: Longs Peak’s Keyhole Route is Class 3 scrambling in summer (hiking); Mount Cook’s Linda Glacier route is technically scrambling-grade on rock but mountaineering throughout because of the glacier.


    06 · How Climbers Progress Between Disciplines

    Most climbers move through the three disciplines over 2–5 years, picking up trekking and mountaineering as skills accumulate. The progression isn’t mandatory but reflects how the skills actually build.

    01
    Hiking
    Outdoor base, fitness, weather comfort
    02
    Trekking
    Multi-day stamina, altitude response
    03
    Mountaineering
    Formal course, technical skills

    Hiking → Trekking (typically 6 months to 2 years)

    Transitioning from day hiking to trekking mostly requires building multi-day stamina and learning basic camping/lodging systems. The technique is the same — walking on trails — but extended across days. Good first treks: TMB, the Icelandic Laugavegur trail, the Inca Trail, or a North American backpacking loop like the Teton Crest Trail.

    Trekking → Mountaineering (typically 1–3 years additional)

    This is the bigger leap because it requires formal skills training. A trekker with strong high-altitude experience has the fitness and altitude base for mountaineering, but still needs the technical foundation — crampon technique, rope work, glacier travel, self-arrest. A 5–7 day certified introductory course on Mount Baker, Mount Hood, or an equivalent European alpine peak provides this. See our 10 best mountains for beginners guide for specific course peaks.

    Skipping steps

    You can technically skip straight from hiking to mountaineering via a formal course, and plenty of climbers do. What you lose is the multi-day endurance calibration that trekking builds. Climbers who’ve done major treks tend to handle expedition rhythm (carrying loads for days, camping in weather, eating on schedule) better than climbers who’ve only done day hikes. It’s not required, but the progression exists for sound reasons.


    07 · Choosing What Fits Your Situation

    The right discipline depends on what you want from your outdoor time — and climbers often switch between all three across a year rather than committing to just one.

    Choose hiking if

    You want accessible outdoor time with limited training or equipment investment, you have limited vacation time (weekend blocks only), you’re not yet sure whether extended outdoor commitment fits your life, or you’re just building the fitness base for later disciplines. Hiking has the lowest cost of entry and the widest range of terrain availability.

    Choose trekking if

    You want multi-day outdoor immersion without technical skill requirements, you have 1–4 weeks of annual vacation for major trips, you’re drawn to remote locations (Nepal, Patagonia, Karakoram), or you want altitude experience without the gear and training commitment of mountaineering. Trekking is the richest outdoor experience available without technical training.

    Choose mountaineering if

    You’re attracted specifically to summiting peaks, you’re willing to invest in formal skills training ($1,500–$3,000 for the first course), you can commit to ongoing training and gear accumulation, and you accept higher objective risk than the other disciplines. Mountaineering offers objectives no other discipline can reach — glaciated peaks, technical routes, and the famous summits (Kilimanjaro, Denali, Everest, Mont Blanc, Matterhorn).

    Many climbers find they genuinely enjoy all three, using them for different purposes: weekend hiking near home for fitness, an annual trek to a remote region, and one or two mountaineering objectives per year for the specific satisfaction of summits. For starter mountaineering peaks, see our 10 best mountains for beginners; for starter treks, see our top 50 non-technical peaks guide.


    Frequently Asked Questions

    What’s the difference between hiking and trekking?

    Hiking is a single-day or weekend activity on established trails, typically covering 5–20 km per day and returning home or to a single base. Trekking is a multi-day journey across extended terrain — typically 4 days to several weeks — often in remote areas, carrying more equipment, sometimes covering 100+ km total. The Appalachian Trail, Everest Base Camp Trek, and Tour du Mont Blanc are classic treks; a weekend hike in a state park is hiking. The boundary is duration and self-sufficiency: hiking returns to civilization each night, trekking doesn’t always.

    What’s the difference between trekking and mountaineering?

    Trekking is hiking-style walking on trails over multi-day distances, with no specialized technical equipment required. Mountaineering is ascending peaks using technical techniques: crampons, ice axe, rope, harness, and glacier travel skills. The Everest Base Camp Trek reaches 5,364 m without a single piece of mountaineering equipment — it’s still trekking. Climbing Island Peak (6,189 m) from the same region requires roping up, crampons, fixed lines, and summit-day technical skills — that’s mountaineering. The distinction isn’t elevation or difficulty; it’s whether specialized gear and skills are required to move safely.

    Is mountaineering harder than hiking?

    Mountaineering is categorically more demanding than hiking because it requires specialized skills, equipment, and risk management that hiking doesn’t. A 10-hour hike can be physically exhausting; a 10-hour mountaineering climb is physically exhausting AND requires competence with crampons, self-arrest, rope team travel, and weather assessment — any of which, if neglected, can be fatal. That said, mountaineering difficulty varies enormously: an easy alpine scramble in dry summer conditions may be less demanding than a long winter trek in severe cold. The defining difference isn’t the absolute difficulty but the consequence of mistakes.

    Do I need to hike before I can trek or mountaineer?

    Hiking experience is the natural foundation for both trekking and mountaineering, though the skills transfer imperfectly. Regular hiking builds the aerobic base, foot and leg conditioning, and outdoor comfort that both advanced disciplines require. However, a serious hiker can progress directly to trekking with minimal additional training (the techniques are similar), while moving to mountaineering requires formal instruction regardless of hiking background. Most committed climbers spend 2–5 years hiking before adding trekking, then another year or two before adding technical mountaineering. This progression isn’t mandatory but is strongly recommended.

    What equipment do I need for each discipline?

    Hiking requires basic outdoor equipment: sturdy footwear, weather-appropriate clothing, water, food, and a light daypack. Total cost $200–$600 for a complete kit. Trekking requires all of the above plus multi-day equipment: larger pack (50–65 L), sleeping bag and pad, stove, shelter if not using huts, navigation gear, and more rigorous layering for multi-day weather exposure. Total cost $800–$2,500. Mountaineering adds technical equipment on top: mountaineering boots, crampons, ice axe, harness, helmet, ropes, carabiners, belay device, and more specialized clothing systems. Total mountaineering kit cost is $3,000–$6,000 for entry-level, $8,000–$15,000 for expedition-capable.

    Is scrambling hiking or mountaineering?

    Scrambling is the intermediate category between hiking and mountaineering — typically off-trail movement on steep rocky terrain that requires using hands for balance but doesn’t require ropes or technical gear. Scrambling is commonly graded Class 2, 3, or 4 in the Yosemite Decimal System (YDS), with Class 5 and above counted as technical rock climbing. Longs Peak’s Keyhole Route (Class 3), the approach to Denali’s Kahiltna Base Camp, or the summit ridge of Mount Cook are all scrambling. Scrambling counts as advanced hiking when dry and straightforward; it counts as mountaineering when it involves snow, ice, or objective hazards that require gear to manage.


    Authoritative Sources & Further Reading

    Definitions and terminology reflect usage by certification bodies, alpine clubs, and long-established outdoor publications:

    • American Mountain Guides Association (AMGA) — US certification standards distinguishing hiking, trekking, and mountaineering terrain
    • IFMGA/UIAGM — International Federation of Mountain Guides Associations, standard terminology
    • American Alpine Club / American Alpine Journal — Annual accident reports categorized by discipline
    • Nepal Mountaineering Association (NMA) — Official distinction between trekking peaks and expedition peaks
    • Yosemite Decimal System (YDS) — Standard grading for hiking (Class 1–2), scrambling (Class 3–4), and technical climbing (Class 5)
    • Mountaineering: The Freedom of the Hills (The Mountaineers, current edition) — The foundational text’s definition and scope of mountaineering
    • Wilderness Medical Society — Practice guidelines by wilderness category
    • Operator curricula from Alpine Ascents International, RMI Expeditions, American Alpine Institute, Mountain Madness, and international IFMGA guide services
    Published: February 15, 2026
    Last updated: April 19, 2026
    Next review: July 2026
    Part of the Global Summit Guide

    Back to the Master Hub

    This guide is one of 71 across 12 thematic clusters on Global Summit Guide. The master hub organizes every guide by experience tier, specific peak, skill area, and region — return anytime to navigate to your next topic.

    View the Hub →
  • 10 Best Mountains to Climb for Beginners

    10 Best Mountains to Climb for Beginners

    Anchor Guide · Cluster 02 · Updated April 2026

    Mountaineering for Beginners: Complete Getting Started Guide

    The honest starter guide to mountaineering — what it actually is, whether it’s right for you, the core skills you’ll need to build, a realistic first-year progression, how to buy gear without wasting money, and where to find reputable instruction. Written for someone who hikes confidently but has never roped up or used crampons.

    8
    Core
    sections
    6–9
    Core skills
    to master
    $3.5–6.5K
    Realistic
    year-1 budget
    12 mo
    To your first
    major peak
    Global Summit Guide A guide in Cluster 02 · Beginner Progression View master hub →

    Most beginner mountaineering content tries to excite you. This guide tries to calibrate you. If you’ve spent a decade hiking and are now drawn to something harder — the high alpine, peaks that require equipment and skills — the honest question isn’t whether you can start mountaineering (you probably can). The question is whether the commitment the sport actually requires — skills, time, money, risk tolerance — fits your life. If it does, here’s the framework for starting well. If it doesn’t, better to know now than five thousand dollars into an expedition that goes wrong.

    How this guide was built

    Skills progression and course recommendations reflect AMGA (American Mountain Guides Association) certification standards, IFMGA/UIAGM international guide curricula, and pre-course briefings from major US mountaineering schools — Alpine Ascents, RMI Expeditions, American Alpine Institute, Mountain Madness, and Mountain Trip. Training guidance is drawn from peer-reviewed altitude physiology research and the American Alpine Club‘s educational materials. Fact-check date: April 19, 2026.

    01 · What Mountaineering Actually Is

    Mountaineering is ascending peaks using technical techniques and equipment — rope work, crampons, ice axes, harnesses, and route-finding on snow, ice, or steep rock. The boundary that separates mountaineering from hiking isn’t elevation or distance. It’s whether the terrain requires specialized gear and skills to move safely.

    A Colorado 14er on a non-technical trail — even at 14,000 ft — is hiking. A 3,000 m Cascade volcano via a glaciated route is mountaineering. The difference is that the glaciated route crosses crevasses, demands crampons for icy sections, and requires roped team movement to protect against a fall into a hidden crevasse. Those demands are what define the sport.

    The continuum of outdoor objectives

    Most climbers progress through a rough sequence: hiking (established trails) → trekking (multi-day hiking, sometimes at altitude) → scrambling (off-trail but hands-free, no gear) → mountaineering (technical equipment and skills required). Our dedicated hiking vs trekking vs mountaineering guide covers these distinctions in detail. You don’t have to move through every stage — some climbers transition straight from hiking to mountaineering through a formal course — but understanding where you are on that continuum clarifies what you need to learn next.

    Why the distinction matters

    Mountaineering’s technical requirements exist because the terrain is genuinely more consequential than hiking. A fall on a steep snow slope without an ice axe can accelerate into an uncontrolled slide; a fall into a crevasse without rope protection can be fatal; a summit-day storm without weather-reading skills can trap you above the safe descent window. Every piece of gear and every skill in mountaineering exists to manage a specific category of risk that hiking doesn’t produce. Understanding this from day one shapes how seriously you’ll take the skills-learning phase.


    02 · Is Mountaineering Right for You?

    Before committing to courses or gear, the honest self-assessment matters. Mountaineering asks for specific things — not all of them physical — and climbers who don’t have them tend to wash out quickly.

    The commitments the sport actually requires

    • Physical base. Can you hike 6–8 hours with a 10–15 kg pack over 2,000+ ft of gain without needing a recovery day? If not, that’s the first milestone — and it’s achievable in 3–6 months of consistent training, not a lifetime.
    • Financial flexibility. $3,500–$6,500 for your first year, primarily in a skills course and essential gear. $2,000–$5,000 per year for subsequent years depending on goals. Not trivial, but nowhere near the Seven Summits tier.
    • Time commitment. 4–8 hours per week of training during active prep periods, plus 1–2 weeks per year for actual climbing objectives. Weekend training is the baseline for most committed beginners.
    • Risk tolerance. Mountaineering produces consequential injuries and occasional fatalities every season, even among well-trained climbers. If any level of real risk is unacceptable, mountaineering may not be the right sport.
    • Comfort with discomfort. Cold, wet, tired, hungry, slightly scared, above your comfort zone — this is most of what mountaineering feels like most of the time. The summit moments are brief; the discomfort is the medium.
    • Judgment and humility. The mountaineering skill that matters most isn’t physical or technical — it’s knowing when to turn around. Climbers who summit at all costs don’t last long in the sport.
    The simplest fit test

    Spend one long weekend hiking in adverse conditions — cold, wind, rain, heavier pack than usual — and see if you enjoyed the hard parts afterward. Mountaineers who thrive in the sport come back from Type 2 fun days energized; mountaineers who wash out remember only the discomfort. That internal reaction is the best predictor of whether the sport will stick, regardless of your current fitness level.


    03 · The Core Skills You’ll Build First

    Beginner mountaineering rests on a defined set of foundational skills. A competent introductory course will teach most of them in 5–7 days. These are the skills that make every subsequent climb safer, and the skills gaps that cause most beginner incidents.

    01
    Snow travel technique

    Kick-stepping efficiently on firm snow, French technique (flat-footing) on moderate slopes, plunge-stepping on descent, and controlled glissading when appropriate. Foundation for every glaciated climb.

    02
    Ice axe & self-arrest

    Proper grip orientations (cane, piolet, dagger), self-arrest from four body positions, self-belay on moderate slopes. This is the skill that prevents a slip from becoming a slide.

    03
    Crampon technique

    Fitting crampons correctly, French technique on moderate slopes, front-pointing on steeper ground, the critical transitions between techniques. Catching a crampon on your pants is how most beginners fall.

    04
    Basic rope skills

    Figure-eight knot, clove hitch, rewoven figure-eight, tying into a harness, basic belaying with a device, rappelling. The foundation for every roped climb and crevasse rescue.

    05
    Glacier travel

    Roped team spacing, short-roping on easy ground, reading crevasse patterns, basic crevasse rescue systems (Z-pulley or drop-loop). Non-negotiable before any glaciated climb.

    06
    Navigation

    Map and compass, altimeter use, GPS as backup not primary, maintaining orientation in whiteout conditions. You’ll navigate back down in weather you didn’t expect when you started up.

    07
    Weather reading

    Pressure trends, cloud formations that predict deterioration, mountain-specific forecasts (vs valley forecasts), recognizing the signs a summit window is closing. See our mountain weather guide for deeper coverage.

    08
    Decision-making

    Setting turnaround times and actually honoring them, assessing risk honestly when tired, recognizing summit fever in yourself and teammates. The most consequential skill in the sport, and the hardest to teach.

    Avalanche awareness is a ninth skill that becomes essential as soon as you climb outside formal course environments on winter or snow-covered objectives. Our avalanche safety guide covers terrain evaluation, conditions assessment, rescue fundamentals, and the specific avalanche training courses (Level 1/AIARE) every climber should take before backcountry snow travel.


    04 · Your First Year: A Realistic Progression

    A committed first-year beginner, training consistently and climbing with appropriate guides, can go from zero to a non-technical 5,000 m peak in about 12 months. Here’s what that looks like month by month.

    Months 1–3 · Foundation
    Physical base & research

    Build hiking fitness with weighted pack work 2–3× per week. Start reading broadly — trip reports, skills manuals (Mountaineering: The Freedom of the Hills is the classic text), this site’s altitude and gear guides. No climbs yet; you’re calibrating your body and your knowledge base.

    Months 4–5 · Skills course
    Formal introductory course

    5–7 day introductory course on a peak like Mount Baker or Mount Rainier. Covers all eight foundational skills in an actual alpine environment with certified instruction. Cost: $1,500–$3,000 including gear rental. This is the most important investment of your first year.

    Months 6–8 · First objectives
    Your first moderate peaks

    Guided or semi-guided attempts on accessible peaks — Mount Adams, Mount Hood, Glacier Peak, Mount Saint Helens. These are 2–3 day climbs that let you apply course skills on real objectives. Build a portfolio of 2–4 moderate summits over this period.

    Months 9–12 · First big peak
    Your first 5,000 m+ objective

    By month 12, you’re ready for a first major altitude objective — Kilimanjaro (5,895 m, non-technical), Mexico’s Pico de Orizaba (5,636 m), or Mount Rainier (4,392 m) if you want a technically demanding cap to the year. This is the peak that demonstrates you’ve completed the beginner progression.

    See our 10 Best Mountains to Climb for Beginners guide for specific first-peak recommendations with routes and logistics. If you’re curious about where a structured progression leads, the Seven Summits for Beginners guide covers the next major objective most committed beginners set their sights on.


    05 · Gear: Buy in Phases, Not All at Once

    The most expensive beginner mistake is buying $5,000 of gear before you know what you need. Introductory courses rent boots, crampons, ice axes, and harnesses — letting you try equipment before committing. Build your kit in phases, keyed to when you’ll actually use each item.

    Phase 1 · Year 1
    Buy now
    • Hiking boots (day hikes + training)
    • Waterproof shell jacket
    • Waterproof shell pants
    • Mid-weight layering system
    • Down jacket
    • Headlamp + backup
    • Sunglasses (Cat 3 or 4)
    • Trekking poles
    • Sun hat + warm hat
    • Daypack (30–40 L)
    • Water bottles + hydration
    • First-aid kit
    Phase 2 · First climb
    Rent first, buy if committed
    • Mountaineering boots (single)
    • Crampons (12-point)
    • Ice axe (general mountaineering)
    • Climbing harness
    • Helmet
    • Larger pack (50–65 L)
    • Expedition-rated sleeping bag
    • Sleeping pad (R-4+)
    • Locking carabiners (2–3)
    • Belay device
    • Climbing rope (50 m half)
    • Gaiters
    Phase 3 · Year 2+
    Add as goals expand
    • Double boots (for 5,000 m+)
    • Down suit (for 7,000 m+)
    • Expedition bag (−29 °C)
    • Satellite communicator
    • Crevasse rescue kit
    • Ice screws (if alpine ice)
    • Technical ice tools (if ice climbing)
    • Skis or snowshoes (approach)
    • Specialized harness (alpine)
    • Expedition tent
    • Bigger pack (75 L+)
    • Vapor barrier liner

    For detailed buyer’s guides on specific gear, see our master mountain climbing gear list, the mountaineering boots guide, the crampons buyer’s guide, and the sleeping bags guide. For budgeting, the mountain climbing costs guide breaks down spending by level.


    06 · Finding Reputable Instruction

    Your first mountaineering course matters more than any gear decision. Good instruction compresses months of trial-and-error into a week; bad instruction teaches habits you’ll spend years unlearning. Use certification standards and reputable schools to find the right fit.

    Certification matters

    In the United States, look for guides certified by the American Mountain Guides Association (AMGA). Internationally, the IFMGA/UIAGM designation (International Federation of Mountain Guides Associations) is the gold standard — a fully-certified IFMGA guide has passed rigorous alpine, rock, and ski assessments. Not every good guide is IFMGA-certified, but the credential reliably filters for quality. AMGA-certified guides meet a similar standard for North American terrain.

    Major US mountaineering schools

    What to ask before signing up

    The course instructor’s specific experience on your objective (not just mountaineering broadly), the student-to-instructor ratio (1:4 is typical, 1:6 is pushing it), what’s included vs what you pay extra for, the cancellation and weather policies, and references from recent clients in your experience bracket. A good school will answer all of these clearly; a sketchy one will evade them.

    Our How to Use Global Summit Guides Effectively walks through operator research in more detail.


    07 · Training for a Beginner Climb

    Mountaineering fitness is specific. Pure runners get crushed by weighted pack hikes; pure lifters run out of endurance at hour 4; pure rock climbers don’t have the leg-endurance base. The right training builds the exact profile the sport rewards: long-duration aerobic capacity, leg strength under load, and the ability to keep moving when tired.

    The four training pillars

    1. Aerobic base (3–4 sessions/week). Long, slow efforts — 60–120 minutes of moderate-effort hiking, cycling, or running. This builds the mitochondrial density and cardiovascular base that lets you sustain 8-hour summit days.
    2. Weighted pack hikes (1–2 sessions/week). Steep trails with a pack gradually increasing from 10 kg to 20+ kg. Simulates actual climbing loads. The single most specific training for mountaineering.
    3. Leg strength (2 sessions/week). Squats, lunges, step-ups, single-leg deadlifts, and calf raises. Not bodybuilding — endurance-strength work in moderate-rep ranges (8–15 reps).
    4. Stairs and hill repeats (1 session/week). Sustained vertical effort, ideally with a pack. Simulates the continuous uphill work of summit days when you can’t hike hills outdoors.

    A beginner climber training 4–5 hours per week across these four pillars for 4–6 months will arrive at a beginner mountaineering course physically prepared. More ambitious objectives require more training — our complete high-altitude training program covers structured schedules for specific peaks. The altitude acclimatization guide covers the physiology that fitness alone can’t solve.


    08 · Common Beginner Mistakes

    Patterns in how beginners get into trouble are remarkably consistent. Knowing them in advance doesn’t make you immune — but it helps you recognize when you’re making one.

    Buying gear before taking a course
    Fix: Rent or borrow for your first course. Let the course itself reveal what fits your body and style before spending $2,000+ on boots and hardware you might regret.
    Skipping the formal skills course
    Fix: YouTube is not a mountaineering school. Book a 5–7 day AMGA-certified course. Self-taught beginners consistently miss foundational skills that cause later incidents.
    Jumping to altitude too fast
    Fix: Respect the progression. Your body’s altitude response is only partially predictable from fitness. Climb something at 5,000 m before committing to a 6,000 m peak.
    Climbing solo too early
    Fix: Stay with guides, courses, or experienced partners for your first 5–10 climbs. Solo mountaineering requires judgment that only comes from accumulated partnered experience.
    Ignoring weather forecasts
    Fix: Check mountain-specific forecasts (not valley forecasts) for 5–7 days before every climb. Be willing to cancel. Most climbing incidents correlate with climbers pushing into bad weather they had warning about.
    Refusing to turn around
    Fix: Set a hard turnaround time before you leave high camp. Honor it even if the summit looks close. The mountain will still be there next season; injuries may not heal fully.

    09 · Your Next Steps

    If you’ve read this far and the sport still fits, here’s the concrete next action. Not someday — this week.

    1. This week: Start the baseline fitness test. Plan a weighted pack hike on the steepest local terrain you have access to. 10 kg pack, 2,000 ft gain, measure your time and how you feel at the top.
    2. This month: Book a reputable introductory course 3–6 months out. Having the date on the calendar focuses training in a way that vague intention doesn’t.
    3. This quarter: Start the 4-pillar training routine above. Consistency matters more than peak intensity — 4 hours a week every week beats 10 hours a week once a month.
    4. Across the year: Use this hub’s other clusters. Altitude physiology, gear strategy, weather, and avalanche safety each deserve focused reading.
    5. Year-end: Book your first 5,000 m peak. Kilimanjaro is the default choice; our first-peak decision guide walks through alternatives.

    The climbers who make it in mountaineering aren’t the strongest or the bravest. They’re the ones who start slow, learn properly, build consistently, and stay humble about what the sport asks of them. That’s entirely a choice, and it’s the choice that opens the whole pipeline of what’s possible.


    Frequently Asked Questions

    What’s the difference between hiking and mountaineering?

    Hiking happens on established trails with minimal technical demands — sturdy shoes and basic fitness are enough. Mountaineering involves ascending peaks using technical techniques: rope work, crampons, ice axes, glacier travel, and route-finding on snow, ice, or steep terrain. The distinction isn’t about elevation or difficulty — it’s about whether the terrain requires specialized equipment and skills to move safely. A Colorado 14er via a non-technical trail is hiking (even at 14,000 ft); a 3,000 m alpine peak via a glaciated route is mountaineering. Most climbers progress from hiking to scrambling (off-trail but non-technical) to mountaineering over 1–3 years as skills develop.

    How do I start mountaineering as a complete beginner?

    Start with a formal skills course before attempting any technical climb. Reputable mountaineering schools (AMGA-certified in the US, IFMGA/UIAGM internationally) run week-long introductory courses on peaks like Mount Baker, Mount Rainier, or the Cascade volcanoes that teach the foundational skills: crampon use, ice axe technique, self-arrest, roped glacier travel, and crevasse rescue. These courses typically cost $1,500–$3,000. Starting with a course rather than trying to self-teach dramatically shortens the learning curve and builds the safety foundations you’ll need for every future climb. Most successful mountaineers can trace their start to a specific introductory course.

    What mountaineering skills do beginners need first?

    The foundational mountaineering skill set covers six areas, typically learned in order: snow travel (kick-stepping, French technique, glissading), ice axe use (proper grip, self-arrest, self-belay), crampon technique (front-pointing vs French technique, transitions), basic rope skills (figure-eight, clove hitch, basic knots, belaying), glacier travel (roped team movement, crevasse detection, basic crevasse rescue), and decision-making (weather assessment, turnaround calls, risk evaluation). Most formal courses teach these in 5–7 days. Additional skills like technical rock climbing, ice climbing, and avalanche assessment come later based on your specific climbing goals.

    How fit do I need to be to start mountaineering?

    Baseline fitness for beginner mountaineering is the ability to hike 6–8 hours carrying a 10–15 kg pack over significant elevation gain (2,000+ ft) without exhaustion — a level most committed recreational hikers can reach in 3–6 months of structured training. More demanding objectives require more fitness, but you don’t need to be an elite athlete to start. The fitness most mountaineering rewards is endurance-based: sustained aerobic capacity, leg strength under load, and the ability to keep moving when tired. Pure runners and pure lifters both struggle initially; the balanced profile develops with practice. Our complete altitude training program guide covers structured training schedules.

    How much does it cost to start mountaineering?

    Total first-year cost for a committed beginner is approximately $3,500–$6,500 including a formal skills course ($1,500–$3,000), essential gear you’ll actually need ($1,500–$2,500), and one or two guided peak attempts ($500–$1,500 depending on peak). You do NOT need $5,000 of gear on day one — most introductory courses rent boots, crampons, ice axes, and harnesses, letting you experience these items before buying. Year 1 gear purchases should focus on layering, a quality pack, headlamp, and basic safety items. Boots and hardware can wait until you know you’re committing to the sport. Our mountain climbing costs guide has full budget frameworks by level.

    How long before I can climb a major peak?

    Realistic timelines: 6–12 months of training and 2–3 guided day-climbs before attempting a peak like Mount Baker (3,286 m) or Mount Hood (3,429 m). 1–2 years before Kilimanjaro (5,895 m) or Elbrus (5,642 m). 2–4 years before Aconcagua (6,961 m) or Denali (6,190 m). 5–10 years before an 8,000 m peak or Everest. These are average paths — motivated climbers with strong fitness bases and good instruction can move faster; climbers balancing limited training time move slower. The timeline matters less than the progression logic: each peak builds skills needed for the next. Skipping steps dramatically increases risk and often failure rates.


    Authoritative Sources & Further Reading

    This beginner’s guide reflects the curricula and standards established by North American and international mountaineering certification bodies:

    • American Mountain Guides Association (AMGA) — US certification standards and instructor curricula
    • IFMGA/UIAGM — International Federation of Mountain Guides Associations, gold-standard international certification
    • American Alpine Club — Educational materials, Climbing magazine, annual accident reports
    • Mountaineering: The Freedom of the Hills (The Mountaineers, current edition) — The foundational instructional text for the sport
    • Wilderness Medical Society — Practice guidelines for altitude illness, cold injury, and wilderness first aid
    • AIARE (American Institute for Avalanche Research and Education) — Level 1/2 avalanche certification standards
    • Course curricula and pre-course briefings: Alpine Ascents International, RMI Expeditions, American Alpine Institute, Mountain Madness, Mountain Trip, International Mountain Guides
    • Peer-reviewed sports physiology research on mountaineering-specific training programming
    • Outdoor Industry Association — Participation and safety statistics
    Published: February 15, 2026
    Last updated: April 19, 2026
    Next review: July 2026
    Part of the Global Summit Guide

    Back to the Master Hub

    This guide is one of 71 across 12 thematic clusters on Global Summit Guide. The master hub organizes every guide by experience tier, specific peak, skill area, and region — return anytime to navigate to your next topic.

    View the Hub →

  • Altitude Sickness Treatment: How to Recover Safely

    Altitude Sickness Treatment: How to Recover Safely

    Mountain landscape with hiker at high elevation, representing altitude sickness treatment

    Altitude Sickness Treatment: How to Recover Safely at High Elevation

    Altitude sickness, also known as acute mountain sickness (AMS), occurs when individuals ascend to high elevations too quickly, leading to a range of symptoms that can affect their health and well-being. This comprehensive guide will explore effective treatments and recovery strategies for altitude sickness, ensuring that adventurers can enjoy their high-altitude experiences safely. Readers will learn about the symptoms of altitude sickness, the role of medications like Diamox, and various remedies and acclimatization techniques. Understanding these aspects is crucial for anyone planning to travel to high elevations, as it can significantly impact their safety and enjoyment. This article will cover the symptoms and early warning signs, the use of Diamox, effective remedies, acclimatization techniques, emergency treatments, and mountain-specific risks.

    What Are the Symptoms and Early Warning Signs of Altitude Sickness?

    Altitude sickness manifests through various symptoms that can escalate if not addressed promptly. Recognizing these early warning signs is essential for effective treatment and recovery. Common symptoms include headaches, nausea, dizziness, and fatigue, which can significantly hinder one’s ability to enjoy high-altitude activities.

    Which Symptoms Indicate Acute Mountain Sickness?

    Acute mountain sickness (AMS) is characterized by specific symptoms that can vary in severity. Key indicators include:

    • Severe Headache: Often described as a throbbing pain, this is one of the most common symptoms.
    • Confusion: Cognitive impairment can occur, making it difficult to think clearly.
    • Loss of Coordination: Difficulty in maintaining balance or performing physical tasks can signal worsening conditions.

    Recognizing these symptoms early can prompt timely intervention, preventing the progression to more severe forms of altitude sickness.

    Indeed, understanding the prevalence and severity of acute mountain sickness is crucial for effective intervention.

    Acute Mountain Sickness: Prevention & Treatment Interventions

    Up to half of people who ascend to heights above 2500 m may develop acute mountain sickness, pulmonary oedema, or cerebral oedema, with the risk being greater at higher altitudes, and with faster rates of ascent. We conducted a systematic review and aimed to answer the following clinical questions: What are the effects of interventions to prevent, and to treat, acute mountain sickness?

    Altitude sickness, 2010

    How to Recognize Severe Conditions: HAPE and HACE?

    High altitude pulmonary edema (HAPE) and high altitude cerebral edema (HACE) are severe forms of altitude sickness that require immediate attention.

    • Symptoms of HAPE: This condition is marked by shortness of breath, a persistent cough, and fluid retention, which can lead to respiratory failure if untreated.
    • Symptoms of HACE: Key signs include severe headaches, confusion, and loss of consciousness, indicating swelling in the brain.
    • Importance of Immediate Descent: Both HAPE and HACE are life-threatening and necessitate immediate descent to lower altitudes for recovery.

    Understanding these severe conditions is vital for anyone venturing into high-altitude environments, as early recognition can save lives.

    How Does Diamox Dosage Aid in Altitude Sickness Treatment?

    Close-up of Diamox tablets with mountain trail background, highlighting altitude sickness treatment

    Diamox, or acetazolamide, is a medication commonly used to prevent and treat altitude sickness. It works by accelerating the acclimatization process, allowing the body to adjust to lower oxygen levels more effectively.

    What Is the Recommended Diamox Dosage for Prevention and Recovery?

    For effective altitude sickness management, the recommended Diamox dosage varies based on individual needs:

    • Dosage for Prevention: Typically, a dose of 125-250 mg taken twice daily is advised for those ascending to high altitudes.
    • Dosage for Recovery: If symptoms develop, increasing the dosage to 250 mg twice daily can help alleviate symptoms.
    • Timing of Administration: It is best to start taking Diamox at least 24 hours before ascending to high altitudes for optimal effectiveness.

    Following these guidelines can significantly enhance the body’s ability to cope with altitude changes.

    What Are the Side Effects and Contraindications of Diamox?

    While Diamox is effective, it is essential to be aware of its potential side effects and contraindications:

    • Common Side Effects: These may include tingling in the fingers and toes, increased urination, and gastrointestinal disturbances.
    • Severe Reactions: Allergic reactions, though rare, can occur and may require immediate medical attention.
    • Who Should Avoid Diamox: Individuals with a known allergy to sulfa drugs or those with certain medical conditions should consult a healthcare provider before use.

    Understanding these factors can help individuals make informed decisions about using Diamox for altitude sickness.

    What Are Effective High Altitude Sickness Remedies and Medical Treatments?

    In addition to medications like Diamox, several remedies and medical treatments can aid in the recovery from altitude sickness.

    How Does Oxygen Therapy Support Recovery from Altitude Sickness?

    • Mechanism of Oxygen Therapy: By providing supplemental oxygen, it helps alleviate symptoms by increasing the amount of oxygen available to the body.
    • When to Use Oxygen Therapy: It is particularly beneficial for individuals experiencing severe symptoms or those with pre-existing respiratory conditions.
    • Benefits of Oxygen Therapy: This treatment can lead to rapid symptom relief and improved overall well-being, allowing individuals to acclimatize more effectively.

    Utilizing oxygen therapy can be a game-changer for those struggling with altitude sickness.

    Further research underscores the efficacy of oxygen therapy, comparing it favorably with other advanced treatments.

    Hyperbaric & Oxygen Therapy for AMS Treatment

    This study demonstrated that hyperbaric therapy was as effective as oxygen therapy for the immediate treatment of AMS. Both methods were successful in resolving or improving the symptoms of AMS.

    Treatment of acute mountain sickness: hyperbaric versus oxygen therapy, 1991

    What Alternative Medications and Natural Remedies Are Available?

    Several alternative treatments and natural remedies can complement traditional medical approaches to altitude sickness:

    • Ginger: Known for its anti-nausea properties, ginger can help alleviate gastrointestinal symptoms associated with altitude sickness.
    • Ginkgo Biloba: This herb may improve blood circulation and oxygen delivery, potentially reducing the risk of altitude sickness.
    • Hydration: Staying well-hydrated is crucial, as dehydration can exacerbate symptoms.

    These remedies can provide additional support for individuals seeking to manage altitude sickness effectively.

    How to Acclimatize to High Altitude: Prevention Tips and Techniques

    Climbers resting at high altitude, emphasizing acclimatization techniques for altitude sickness prevention

    Acclimatization is a vital process for preventing altitude sickness. Gradual ascent and proper preparation can significantly reduce the risk of developing symptoms.

    Effective prevention strategies often combine environmental adjustments with pharmacological support to enhance the body’s adaptation.

    Altitude Sickness Prevention: Acclimatization & Medications

    Acute exposure to high altitude can cause acute altitude illnesses and is associated with impaired cognitive and physical performance. The most effective preventive strategies currently recommended include environmental acclimatization (slow ascent and/or pre-acclimatization) or pharmacological support of acclimatization using acetazolamide.

    Dexamethasone for prevention of AMS, HACE, and

    HAPE and for limiting impairment of performance after rapid ascent to high altitude: a narrative review, H Gatterer, 2025

    What Are Best Practices for Gradual Acclimatization?

    To acclimatize effectively, consider the following best practices:

    • Adding Rest Days: Incorporate rest days into your itinerary to allow your body to adjust to higher elevations.
    • Climb High, Sleep Low: Ascend to higher altitudes during the day but return to lower elevations to sleep, promoting acclimatization.
    • Monitoring Symptoms: Pay close attention to how your body responds to altitude changes and be prepared to descend if symptoms arise.

    Implementing these strategies can enhance your body’s ability to adapt to high altitudes.

    How Do Hydration, Nutrition, and Rest Prevent Altitude Sickness?

    Proper hydration, nutrition, and rest are essential components of altitude sickness prevention:

    • Hydration Strategies: Drink plenty of fluids to maintain hydration levels, as dehydration can worsen symptoms.
    • Nutritional Needs: Consuming a balanced diet rich in carbohydrates can provide the energy needed for physical exertion at high altitudes.
    • Importance of Rest: Adequate rest is crucial for recovery and acclimatization, allowing the body to adapt to lower oxygen levels.

    By prioritizing these factors, individuals can significantly reduce their risk of altitude sickness.

    What Emergency Treatments and Descent Protocols Ensure Safe Recovery?

    In the event of altitude sickness, knowing the appropriate emergency treatments and descent protocols is critical for ensuring safety.

    When and How Should Descent Be Initiated?

    Descent should be initiated as soon as severe symptoms are recognized.

    • Setting Objective Cutoffs: Establish clear criteria for when to descend, such as the onset of severe headaches or confusion.
    • Turnaround Time: Implement a turnaround time to ensure that individuals do not push themselves beyond safe limits.
    • Safety Measures: Always prioritize safety by descending to lower altitudes where symptoms can be managed more effectively.

    Understanding when and how to descend can prevent complications associated with altitude sickness.

    What Are the Guidelines for Using Portable Oxygen and Medical Support?

    Using portable oxygen and seeking medical support can be lifesaving in severe cases of altitude sickness.

    • When to Use Portable Oxygen: If symptoms persist despite descent, using portable oxygen can provide immediate relief.
    • Benefits of Portable Oxygen: It helps restore oxygen levels in the body, alleviating symptoms and improving overall function.
    • Medical Support Considerations: Always have a plan for accessing medical support in remote areas, as timely intervention can be crucial.

    These guidelines can enhance safety and recovery for those affected by altitude sickness.

    How Do Mountain-Specific Risks Affect Altitude Sickness Treatment and Recovery?

    Different mountains present unique risks that can influence altitude sickness treatment and recovery strategies.

    What Are the Unique Altitude Sickness Risks on Everest, Kilimanjaro, and Denali?

    • Risks on Everest: Extreme altitude and harsh weather conditions increase the likelihood of severe altitude sickness.
    • Risks on Kilimanjaro: Rapid ascent without proper acclimatization can lead to AMS, HAPE, or HACE.
    • Risks on Denali: The combination of extreme cold and high altitude can exacerbate symptoms and complicate recovery.

    Understanding these risks is essential for developing effective treatment plans.

    How Should Treatment and Recovery Plans Be Tailored to Specific Mountains?

    Tailoring treatment and recovery plans to specific mountains involves considering various factors:

    • Acclimatization Strategies: Adjust ascent rates and rest days based on the mountain’s elevation and conditions.
    • Weather Considerations: Monitor weather patterns that may impact safety and recovery.
    • Logistical Planning: Ensure access to medical support and resources during the climb.

    By customizing plans to the specific challenges of each mountain, climbers can enhance their safety and recovery outcomes.

    Frequently Asked Questions

    What is the difference between Acute Mountain Sickness (AMS) and High Altitude Pulmonary Edema (HAPE)?

    Acute Mountain Sickness (AMS) is a common condition that occurs when individuals ascend to high altitudes too quickly, leading to symptoms like headaches, nausea, and fatigue. In contrast, High Altitude Pulmonary Edema (HAPE) is a more severe condition characterized by fluid accumulation in the lungs, resulting in symptoms such as shortness of breath and a persistent cough. While AMS can often be managed with acclimatization and hydration, HAPE requires immediate medical attention and descent to lower altitudes.

    How can I prepare for a high-altitude trek to minimize the risk of altitude sickness?

    Preparation for a high-altitude trek involves several key strategies. First, ensure you are physically fit and accustomed to hiking. Gradual ascent is crucial; plan your itinerary to include rest days and avoid rapid elevation changes. Staying well-hydrated and consuming a diet rich in carbohydrates can also help. Additionally, consider pre-acclimatization techniques, such as spending time at intermediate altitudes before your trek, and consult a healthcare provider about medications like Diamox for preventive measures.

    What should I do if I experience symptoms of altitude sickness while hiking?

    If you experience symptoms of altitude sickness while hiking, the first step is to stop ascending and rest. Monitor your symptoms closely; if they worsen, initiate a descent to lower altitudes immediately. Hydration is essential, so drink plenty of fluids. If symptoms persist or become severe, such as confusion or difficulty breathing, seek medical assistance as soon as possible. Always prioritize safety and do not push through severe symptoms.

    Are there specific foods or drinks that can help prevent altitude sickness?

    Yes, certain foods and drinks can aid in preventing altitude sickness. Staying well-hydrated is crucial, so drink plenty of water and consider electrolyte-rich beverages. Foods high in carbohydrates, such as pasta, rice, and fruits, can provide the necessary energy for physical exertion at high altitudes. Additionally, ginger tea may help alleviate nausea, while foods rich in antioxidants, like berries, can support overall health during your trek.

    What role does physical fitness play in preventing altitude sickness?

    Physical fitness plays a significant role in preventing altitude sickness. Individuals who are physically fit tend to have better cardiovascular health, which can enhance oxygen delivery to tissues during high-altitude activities. Regular aerobic exercise can improve your body’s ability to acclimatize to lower oxygen levels. However, even fit individuals can experience altitude sickness, so it’s essential to combine fitness with proper acclimatization strategies and hydration to minimize risks.

    How can I recognize when to seek medical help for altitude sickness?

    Recognizing when to seek medical help for altitude sickness is crucial for safety. If you experience severe symptoms such as persistent headaches, confusion, loss of coordination, or difficulty breathing, it’s essential to descend immediately and seek medical assistance. Additionally, if symptoms do not improve with rest and hydration, or if they worsen, do not hesitate to contact a healthcare professional. Early intervention can prevent serious complications associated with altitude sickness.

    Conclusion

    Effectively managing altitude sickness is essential for ensuring a safe and enjoyable high-altitude experience. By understanding symptoms, utilizing medications like Diamox, and implementing acclimatization strategies, adventurers can significantly reduce their risk of severe complications. Prioritizing preparation and awareness can enhance overall well-being during mountain treks. For more insights and resources on altitude sickness prevention and treatment, explore our comprehensive guides today.

  • The 7 Summits: Climbing Every Continent’s Highest Peak

    The 7 Summits: Climbing Every Continent’s Highest Peak

    Cluster 01 · Seven Summits & Flagship · Updated April 2026

    The 7 Summits: Climbing Every Continent’s Highest Peak

    The story behind mountaineering’s most famous collection — how the idea came about, who’s actually done it, what each peak contributes to the journey, and why the Seven Summits remains the goal climbers organize their decade around. This is the narrative companion to the Seven Summits planning framework: more stories, more character, fewer spreadsheets.

    1985
    First
    completer
    117
    Days
    (speed record)
    ~600
    Recorded
    completions
    7 / 7
    Continents
    covered
    Global Summit Guide A guide in Cluster 01 · Seven Summits & Flagship View master hub →

    Mountaineering produces very few goals that sound intuitive to outsiders. “Climb the 14 eight-thousanders” or “complete the Colorado 14ers” requires background knowledge to interpret. The Seven Summits doesn’t. The highest peak on each of the seven continents is legible to anyone who can read a globe, and that legibility is why the collection remains mountaineering’s best-known project — not because it’s the hardest, or the most elegant, or the one serious alpinists admire most, but because anyone can understand what you’re trying to do.

    How this guide was researched

    Historical records and completer statistics are drawn from Dick Bass’s 1986 book Seven Summits, Reinhold Messner’s collected writings, Adventure Stats by Explorersweb, the Seven Summits Club, and individual climber publications. Speed records are verified against contemporaneous reporting and the American Alpine Club. For expedition planning, cost breakdowns, and the framework for attempting the Seven Summits yourself, see the cluster’s anchor guide, Seven Summits Guide: How to Climb All 7 Continental Peaks. Fact-check date: April 19, 2026.

    01 · Where the Idea Came From

    The Seven Summits did not exist as a concept before 1981. Climbers had certainly summited the continental high points individually, but the idea of pursuing all seven as a set originated with Richard “Dick” Bass — a Texas oilman and ski resort owner (Snowbird, Utah) who became fascinated with the idea of climbing the highest peak on every continent.

    Bass was unusual for the time: a wealthy amateur approaching mountaineering with the organizational instincts of a businessman and the patience of someone with no particular rush. He teamed with Frank Wells, then president of Warner Bros., who shared the ambition but ultimately fell short of Everest. Bass summited Everest on April 30, 1985 at age 55, becoming the first person to complete the collection. Their book Seven Summits, co-written with climber Rick Ridgeway, was published in 1986 and did more than document the project — it created the category.

    What made Bass’s project work culturally was the timing. In 1985, commercial Everest climbing barely existed. Most Himalayan climbers were national expedition members or elite alpinists. Bass demonstrated that a fit, determined amateur with sufficient resources and the right guides could attempt the highest peaks in the world — not easily, but plausibly. The Seven Summits became an accessible benchmark at the exact moment mountaineering was becoming accessible.

    Reinhold Messner’s counter-proposal

    One year later in 1986, Reinhold Messner — arguably the greatest mountaineer of the 20th century — completed his own version of the Seven Summits, substituting Carstensz Pyramid (4,884 m, Indonesian Papua) for Mount Kosciuszko (2,228 m, Australia). Messner’s argument was straightforward: Kosciuszko is a walk-up, Carstensz is a technical rock climb, and the collection’s character demands the harder peak. Messner was also the first to complete the Seven Summits and the 14 eight-thousanders the same year — a benchmark no one has matched since.

    The two lists have coexisted ever since. Both remain legitimate; most modern completers favor the Messner list, partly for its intellectual consistency and partly because Carstensz is genuinely a serious climb in a way that Kosciuszko is not. A minority of climbers complete both Oceania peaks to satisfy either interpretation.

    Dick Bass
    1985
    First completer, Bass list, age 55
    Reinhold Messner
    1986
    First Messner-list completer
    Pat Morrow
    1986
    First to complete both lists

    02 · The Character of Each Peak

    Every Seven Summit feels like a different sport. The daily experience of Aconcagua’s high-altitude windswept camps has nothing in common with Carstensz’s rainforest approach; Denali’s minus-40 sleds bear no resemblance to Kilimanjaro’s rainforest first day. Understanding the character of each peak — beyond the stats — helps explain why climbers find the project transformative rather than just difficult.

    Everest: gravity and politics

    Above 8,000 m, Mount Everest functions less like a mountain and more like a high-stakes logistics exercise. Summit days begin at midnight; climbers move by headlamp on fixed ropes set days earlier by Sherpa teams. The route is rarely technically hard. What makes Everest consequential is the unrecoverable thinness of the margin: a broken regulator at 8,500 m, a weather window closing an hour earlier than forecast, a minor frostbite becoming a major one. Everest’s culture has also shifted radically since Bass’s climb. Commercial operators now handle routes that used to be reserved for national teams, and the climb is regularly criticized for commodification. For a Seven Summits climber, Everest is the peak where preparation either pays off or fails visibly.

    Aconcagua: wind and altitude

    South America’s roof feels, for most of the approach, like a hard hike. No crampons, no fixed ropes, no technical gear for most climbers. Then altitude takes over. Above Plaza de Mulas (4,300 m), the wind is the dominant character — Aconcagua’s summit-day winds routinely exceed 60 km/h, and climbers sometimes wait at high camps for a week for a workable window. The peak kills several climbers per year, almost always from altitude illness in undertrained summit attempts. Aconcagua is a lesson in how non-technical does not mean easy.

    Denali: cold and self-reliance

    Denali is the Seven Summits’ test of expedition-craft. Climbers haul sleds with roughly 60 kg of food and gear for three weeks, navigate glaciated terrain above 5,000 m in Arctic conditions, and deal with summit-day windchills that can exceed −50 °C. The climbing is moderate; the logistics and cold are extreme. More than any other Seven Summit, Denali teaches what modern expedition climbing actually feels like — which is why most experienced climbers consider it the non-negotiable prerequisite to Everest.

    Kilimanjaro: rainforest to ice cap

    Kilimanjaro is famously a walk-up — no ropes, no crampons, no technical demands. What makes it remarkable is the biome transition: climbers start in humid equatorial rainforest, pass through alpine moorland, cross the Shira Plateau’s high-altitude desert, and summit on a glacier. In roughly 40 horizontal kilometers, you move through every major climate zone on the planet. It’s also the peak where Seven Summits climbers most often first encounter the psychological weight of altitude. Fit climbers who haven’t been above 4,000 m before arrive at Barafu Camp (4,600 m) surprised by how bad they feel.

    Elbrus: alpine but accessible

    Europe’s highest (on the Messner list) is a glaciated volcano in Russia’s Caucasus. The climb itself is technically modest — the standard south route uses a cable car for initial elevation gain and crampons above Garabashi Hut. What makes Elbrus distinctive is its accessibility combined with altitude: 5,642 m is enough to produce real altitude illness, but the climb is short (6–9 days typically) and relatively inexpensive when climbed with Russian operators. Current geopolitics have complicated Western access since 2022, which has affected how Seven Summits climbers approach the peak.

    Vinson Massif: the expedition to the expedition

    Antarctica’s highest is the Seven Summit where getting to the mountain is a bigger deal than climbing it. Flights from Punta Arenas, Chile to Union Glacier Camp via Antarctic Logistics & Expeditions (ALE) are weather-dependent and expensive. Once on the glacier, the climb itself is moderate — steep snow, no technical rock. What Vinson delivers is the experience of Antarctica: 24-hour daylight, 3,000-km views, and the psychological weight of being farther from rescue than on any other Seven Summit.

    Carstensz Pyramid: jungle to vertical rock

    The Messner list’s Oceania peak is unlike any other Seven Summit. Located in Indonesia’s Papua province, Carstensz requires a jungle approach through limestone karst, then technical rock climbing (5.8–5.10 grade) on the peak itself. The climb is modest in altitude but demanding in skill; climbers who’ve only done non-technical Seven Summits sometimes find Carstensz’s rock moves harder than anything on their other six peaks. The logistics — Freeport mine area access, local guides, security considerations — are distinct from every other mountain in the collection.

    Kosciuszko: the anomaly

    Australia’s highest, on the Bass list, is a walk on a paved path. Most Seven Summits climbers pursuing both lists climb Kosciuszko as a half-day side trip during Australia travel — the climb itself takes about two hours round-trip from the Thredbo chairlift. It’s included here because it’s a Seven Summit, but no climber considers it part of their real training or achievement. The peak’s only real significance is that it’s the point of asymmetry that justifies the Bass/Messner split.


    03 · Who Actually Completes the Seven Summits

    Roughly 600 completions are on record as of 2026, depending on which list you accept and which tracking organization you consult. Adventure Stats by Explorersweb maintains one of the better public lists; the Seven Summits Club maintains another. Completions have accelerated dramatically since 2000 — approximately 70% of all recorded completers have finished since 2005 — because of the rise of commercial Everest operators and broader access to expedition-style guiding on all seven peaks.

    The demographic reality

    Seven Summits climbers are older on average than alpine climbers pursuing technical objectives. Many are completing the project in their 40s, 50s, or 60s after business or professional careers have created the financial flexibility the collection demands. This is a direct consequence of cost: $130,000 to $400,000+ is not a young-person’s budget. Younger completers (15-year-old Jordan Romero; a handful of climbers in their early 20s) are unusual.

    Gender balance remains skewed, though less dramatically than a generation ago. The first female Seven Summits completer was Junko Tabei (Japan), who finished her collection in 1992. Current female completers represent roughly 15–20% of recorded totals, reflecting broader mountaineering demographics rather than any Seven Summits-specific factor.

    National diversity

    Seven Summits completers have come from over 60 nations. The largest contingents remain from the United States, the United Kingdom, Germany, Japan, and Russia, reflecting the combination of mountaineering traditions and financial capacity in those countries. The first completer from many nations has become a national mountaineering milestone — the first Nepalese to climb all Seven Summits, the first Indian, the first Pakistani woman, and so on.


    04 · Notable Records and Completers

    Beyond Bass and Messner, the Seven Summits community has produced a dense catalog of notable achievements across decades. These are the records and personalities that frame how the community thinks about what’s possible.

    Fastest completion
    Steve Plain — 117 days
    Australia · 2018 · Messner list

    Project 7in4 targeted the Seven Summits in under 120 days. Plain’s climb required near-perfect weather windows and extraordinary logistical support. The record still stands.

    Fastest female completion
    Jennifer Drummond — 134 days
    USA · 2018

    Set the female speed record just months after Plain. The fact that both records came in the same year reflects a brief window of favorable weather and logistics that subsequent attempts haven’t matched.

    First female completer
    Junko Tabei
    Japan · 1992

    Already famous as the first woman on Everest in 1975, Tabei completed her Seven Summits 17 years later. She remained active in mountaineering and environmental advocacy until her death in 2016.

    Youngest completer
    Jordan Romero — age 15
    USA · 2011

    Completed with Vinson Massif in December 2011 after summiting Everest in 2010 at 13. Subsequent Nepal and China restrictions on under-16 Everest permits mean Romero’s record is unlikely to be broken.

    Oldest completer
    Werner Berger — age 76
    Canada · 2013

    Completed with Carstensz Pyramid. The oldest completer record is frequently updated as climbers continue attempting Everest well into their 70s — Yuichiro Miura summited Everest at 80 in 2013.

    First completer without oxygen
    Reinhold Messner
    Italy · 1986

    The Everest-without-oxygen component of Messner’s completion (first achieved in 1978 with Peter Habeler) remains the defining technical benchmark. Very few Seven Summits completers have climbed Everest without supplemental oxygen.


    05 · What Each Peak Contributes to the Journey

    Serious Seven Summits climbers often describe the collection less as a list and more as a curriculum. Each peak teaches something the next peak requires. The canonical progression (Kilimanjaro → Aconcagua → Denali → Elbrus/Vinson/Carstensz → Everest) isn’t just about building altitude — it’s about accumulating specific competencies in a specific order.

    Kilimanjaro teaches altitude. It’s the first experience most Seven Summits climbers have of functioning competently above 4,000 m, managing hydration in thin air, and making honest self-assessments about when to descend. Climbers who summit Kilimanjaro learn what their own body does at altitude — information no training program can provide.

    Aconcagua teaches expedition rhythm. Two to three weeks on a single objective, moving between camps, carrying loads, adapting to weather windows. The first 6,000 m+ summit is where climbers learn that expedition climbing is primarily about managing time and energy rather than the climbing itself.

    Denali teaches cold and self-support. No porters, no fixed camps set by local staff, no heated tea tents. Climbers haul their own gear, manage their own systems in −30 °C conditions, and learn to operate with slim physiological margins. Almost every Seven Summits climber describes Denali as the hardest single peak they climb, regardless of their earlier technical experience.

    Elbrus and Vinson teach adaptability. One is an inexpensive, high-volume commercial operation; the other is the most remote and expensive climb in the collection. Completing both teaches climbers to adjust their approach, pacing, and expectations to radically different operating contexts.

    Carstensz teaches rock technique. For climbers whose prior experience is glacier and altitude, Carstensz’s 5.8–5.10 rock climbing is a genuinely unfamiliar environment. The skills don’t transfer well, which is why the peak tends to surprise climbers who thought they were ready.

    Everest tests everything. By the time a climber reaches Everest — usually in year 5, 6, or 7 of the project — they are drawing on every prior peak simultaneously. Altitude tolerance from Kilimanjaro and Aconcagua; expedition discipline from Aconcagua and Denali; cold tolerance from Denali; logistical adaptability from Elbrus and Vinson; technical confidence from Carstensz. Everest doesn’t teach a new skill so much as demand that all the prior skills work in combination.


    06 · The Cultural Weight of the Collection

    Serious alpinists have long had a complicated relationship with the Seven Summits. The elegance of pursuing one peak many ways — Messner’s own 14 eight-thousanders project, Colin Haley’s Patagonia campaigns — has more aesthetic purity than the somewhat arbitrary logic of “one per continent.” Some of mountaineering’s most respected figures have declined to climb the Seven Summits entirely, preferring deep regional expertise.

    And yet the collection endures, partly because it accomplishes something other climbing projects don’t: it forces breadth. A Seven Summits completer has, by definition, climbed in tropical Africa, high Andes, Alaskan glacier, European volcano, Antarctic polar, Indonesian rainforest, and Himalayan altitude. The variety produces a type of competence that deep specialization doesn’t. Most climbers who complete the Seven Summits emerge as more adaptive mountaineers than they would be after climbing seven hard peaks in a single range.

    The collection also remains useful because it’s legible. In a sport where specific achievements often require context to appreciate (“she did the Cesen route on K2” means little to non-climbers), “she’s completed the Seven Summits” communicates immediately. That legibility makes the collection a reasonable proxy for serious mountaineering commitment, even if it doesn’t capture every dimension of the sport.

    The collection is one goal among many

    Pursuing the Seven Summits is a legitimate multi-year mountaineering project. So is pursuing deep regional expertise in the Alps, Andes, Cascades, or Nepal. So is focusing on technical climbing, or on first ascents, or on specific historical routes. The Seven Summits is often framed as the pinnacle of mountaineering ambition, but it is better understood as one of several equally defensible ways to structure a serious climbing life. See our Mountaineering for Beginners guide for a broader overview of how to think about climbing goals.


    07 · Is the Seven Summits Right for You?

    Before committing to a project that will take 5–10 years and a meaningful financial commitment, the honest question is whether the Seven Summits specifically is what you want — or whether you’re attracted to the legibility of the goal rather than the actual experience.

    The Seven Summits is a good fit if you value geographic and cultural breadth, enjoy the logistical project-management aspect of mountaineering as much as the climbing itself, have the financial flexibility to commit $150K–$300K across a decade, and accept that several of the peaks (Kosciuszko, Elbrus on a cable-car day, Kilimanjaro) will not feel like serious climbing to you.

    The Seven Summits may not be the right fit if you’re drawn primarily to technical rock and ice climbing (the collection is mostly non-technical), want deeper expertise in a single range (Alps Classics, Cascades, or Nepal’s technical peaks reward regional focus), have constrained time or budget (better to do two peaks deeply than seven superficially), or are primarily motivated by Everest and could skip the rest. In that last case, simply climb Everest with appropriate prerequisites — Aconcagua and Denali at minimum — and don’t commit to the broader project.

    The Seven Summits for Beginners guide in this cluster walks through the first-peak decision in detail if you’ve concluded the project is right for you. If you want the comprehensive planning framework with costs, operators, and progression sequences, the anchor Seven Summits Guide is where to go next.


    Frequently Asked Questions

    Who climbed the Seven Summits first?

    American businessman Dick Bass became the first person to complete the Seven Summits in 1985, finishing with Mount Everest on April 30 of that year at age 55. Frank Wells (co-author of the book Seven Summits) completed six of the seven but stopped short of Everest. Bass’s completion used what is now called the Bass list, with Mount Kosciuszko as Oceania’s peak. Reinhold Messner became the first to complete the alternative Messner list (using Carstensz Pyramid instead of Kosciuszko) in 1986, the same year he completed the 14 eight-thousanders.

    How many people have climbed all Seven Summits?

    Approximately 600 verified completions exist as of 2026, though exact numbers vary depending on which list (Bass or Messner) is used and which tracking organization you reference. Adventure Stats by Explorersweb and the Seven Summits Club maintain the most comprehensive lists. Completion rates have accelerated significantly since 2000 with the rise of commercial Everest operators — approximately 70% of all recorded completions have happened since 2005.

    What is the fastest Seven Summits completion?

    Australian climber Steve Plain holds the Seven Summits speed record at 117 days, completed on May 14, 2018. His attempt was called ‘Project 7in4’ and targeted completing the Seven Summits in under 120 days. Plain’s climb deliberately used the Messner list. Jennifer Drummond set the fastest female completion at 134 days in 2018. Both records remain impressive but are the product of extraordinary commitment, elite support, and near-perfect weather windows — not attempts ordinary climbers should benchmark against.

    Who was the youngest person to climb the Seven Summits?

    Jordan Romero of the United States completed the Seven Summits on December 24, 2011 at age 15, summiting Vinson Massif as his final peak. Romero had summited Everest in 2010 at age 13, making him the youngest Everest summiteer at the time. The record has been controversial — Nepal subsequently banned climbers under 16 from Everest permits in 2010, and China implemented similar restrictions. Most achievement-tracking organizations recognize Romero’s completion while noting the age restrictions that now limit similar attempts.

    Why do some climbers pursue the Seven Summits?

    Climbers pursue the Seven Summits for overlapping reasons: the challenge of completing a globally-recognized mountaineering benchmark, the opportunity to experience radically different climbing cultures and environments (tropical Africa, Andean high desert, Alaskan glacier, Antarctic polar, European alpine, Asian Himalaya), and the multi-year personal project that the collection represents. For many, the pursuit forces growth as a mountaineer in ways that climbing a single peak repeatedly cannot. For others, it’s simply that ‘Seven Summits’ is a recognizable goal in a sport where specific achievements often go unremarked.

    Is the Seven Summits worth pursuing?

    The Seven Summits is worth pursuing if you value the multi-year progression, cultural breadth, and skill development it demands — but not if you’re primarily chasing social recognition or Everest alone. The collection requires substantial money, time, and sustained physical commitment across 5–10 years; climbers who complete it almost universally report that the side effect of becoming a competent global mountaineer was more valuable than the badge itself. Climbers looking for one spectacular climb may find more fulfillment in deep regional expertise (Alps Classics, Cascade Volcanoes, or Nepal’s trekking peaks) than in spreading commitment across seven continents.


    Authoritative Sources & Further Reading

    This narrative guide is built from primary historical sources and the mountaineering publications that track Seven Summits achievements:

    • Dick Bass, Frank Wells, Rick Ridgeway — Seven Summits (1986) — The founding book of the Seven Summits concept
    • Reinhold Messner — collected writings and expedition memoirs — Source for the Messner list logic and first-person accounts
    • Pat Morrow — Beyond Everest: Quest for the Seven Summits (1986) — First dual-list completer’s account
    • Junko Tabei — collected writings and biographical sources — First female Everest and Seven Summits completer
    • Adventure Stats by Explorersweb — Contemporary tracking of Seven Summits completions and records
    • Seven Summits Club (7summitsclub.com) — Alternative tracking organization and completion database
    • American Alpine Club & American Alpine Journal — Annual record including notable Seven Summits attempts
    • Steve Plain — Project 7in4 documentation (2018) — Source for current speed record
    • The Himalayan Database — Authoritative source for Everest components of Seven Summits climbs
    • NPS Denali National Park — Denali-specific expedition records
    • Reports from operators handling Seven Summits clients: International Mountain Guides, Alpine Ascents, Madison Mountaineering, Mountain Professionals
    Published: February 15, 2026
    Last updated: April 19, 2026
    Next review: July 2026
    Part of the Global Summit Guide

    Back to the Master Hub

    This guide is one of 71 across 12 thematic clusters on Global Summit Guide. The master hub organizes every guide by experience tier, specific peak, skill area, and region — start there if you’re new to the site, or return to navigate to your next topic.

    View the Hub →


  • What Is Altitude Sickness? Symptoms, Causes, How to Treat It

    What Is Altitude Sickness? Symptoms, Causes, How to Treat It

    What Is Altitude Sickness? Comprehensive Guide to Symptoms, Causes, and Effective Treatments

    Altitude sickness, also known as acute mountain sickness (AMS), is a condition that arises when individuals ascend to high altitudes too quickly, leading to a range of symptoms due to reduced oxygen levels. This guide will delve into the symptoms, causes, and effective treatments for altitude sickness, providing valuable insights for those planning high-altitude adventures. Many travelers and mountaineers experience discomfort or health issues when exposed to elevations above 8,000 feet, making it crucial to understand how to recognize and manage these symptoms. We will explore common symptoms, the physiological mechanisms behind altitude sickness, prevention techniques, and treatment options. Additionally, we will identify high-risk locations and answer frequently asked questions to equip you with the knowledge needed for safe mountain excursions.

    Further research provides a comprehensive overview of acute mountain sickness, detailing its underlying mechanisms, preventive measures, and therapeutic approaches.

    Acute Mountain Sickness: Pathophysiology, Prevention & Treatment

    In this article, we describe the setting and clinical features of acute mountain sickness and high-altitude cerebral edema, including an overview of the known pathophysiology, and practical recommendations for prevention and treatment.

    Acute mountain sickness: pathophysiology, prevention, and treatment, C Imray, 2010

    What Are the Common Symptoms of Acute Mountain Sickness and High Altitude Illness?

    Altitude sickness manifests through various symptoms that can range from mild to severe. Recognizing these symptoms early is essential for effective management and prevention of complications. mountains k2 climb guide pakistan china

    How to Recognize Headache, Nausea, and Dizziness as Early Warning Signs

    Person experiencing headache and nausea at high altitude, illustrating early signs of altitude sickness

    The initial symptoms of altitude sickness often include headache, nausea, and dizziness. These early warning signs typically occur within hours of ascending to high altitudes. A headache may feel similar to a tension headache, while nausea can lead to vomiting if not addressed promptly. Dizziness often accompanies these symptoms, making it difficult for individuals to maintain balance or focus. If you experience these symptoms, it is crucial to descend to a lower altitude and rest to alleviate discomfort.

    What Are the Differences Between Mild and Severe Symptoms?

    Mild symptoms of altitude sickness may include fatigue, loss of appetite, and sleep disturbances. In contrast, severe symptoms can escalate to high altitude pulmonary edema (HAPE) or high altitude cerebral edema (HACE), which are life-threatening conditions. HAPE is characterized by shortness of breath, a persistent cough, and fluid accumulation in the lungs, while HACE involves confusion, ataxia, and altered consciousness. Understanding these differences is vital for recognizing when to seek medical attention.

    The complex interplay between HACE, AMS, and HAPE, including their pathophysiology and individual susceptibility, continues to be a subject of ongoing study.

    HACE & AMS: Pathophysiology, Susceptibility & Prevention

    The diagnosis, treatment and prevention of high altitude cerebral edema (HACE) are fairly well established. The major unresolved issues are 1) the pathophysiology, 2) the individual susceptibility, and 3) the relationship of HACE to acute mountain sickness (AMS) and to high altitude pulmonary edema (HAPE).

    High altitude cerebral edema and acute mountain sickness: a pathophysiology update, 1999

    What Causes Altitude Sickness? Understanding Hypoxia and Rapid Ascent Effects

    Altitude sickness primarily results from hypoxia, a condition where the body receives insufficient oxygen due to lower atmospheric pressure at high altitudes.

    How Does Low Oxygen at High Altitude Trigger Mountain Sickness?

    As altitude increases, the partial pressure of oxygen decreases, leading to reduced oxygen saturation in the blood. This lack of oxygen can impair cellular function and lead to symptoms associated with altitude sickness. The body struggles to adapt to these changes, resulting in physiological stress that manifests as headaches, nausea, and fatigue. Understanding the mechanisms of hypoxia is crucial for preventing altitude sickness.

    Why Does Rapid Ascent Increase Risk of Acute Mountain Sickness?

    Rapid ascent to high altitudes significantly increases the risk of developing altitude sickness. When individuals ascend too quickly, the body does not have adequate time to acclimatize to the lower oxygen levels. Studies indicate that ascending more than 1,000 feet per day without proper acclimatization can lead to a higher incidence of AMS. To mitigate this risk, it is essential to plan gradual ascents and incorporate rest days into your itinerary.

    How Can You Prevent Altitude Sickness? Proven Acclimatization and Safety Techniques

    Preventing altitude sickness involves a combination of acclimatization strategies and lifestyle adjustments.

    What Are Stepwise Acclimatization Schedules to Reduce Risk?

    Hikers discussing acclimatization strategies on a mountain trail, emphasizing prevention of altitude sickness

    A stepwise acclimatization schedule is vital for reducing the risk of altitude sickness. This approach involves ascending gradually, allowing the body to adjust to changes in oxygen levels. A common recommendation is to ascend no more than 1000 feet per day after reaching 8,000 feet, with additional rest days for every 3,000 feet gained. This method helps the body adapt and can significantly decrease the likelihood of developing AMS.

    Effective acclimatization strategies are crucial for anyone venturing to high altitudes, ensuring the body can adapt to reduced oxygen levels.

    High-Altitude Acclimatization for Travelers

    adaptation at high altitudes is vital for soldiers, travelers, and athletes to avoid high-altitude sickness.

    A study of survival strategies for improving acclimatization of lowlanders at high-altitude, 2023

    Which Lifestyle and Medication Strategies Help in Prevention?

    In addition to acclimatization, certain lifestyle changes and medications can aid in preventing altitude sickness. Staying well-hydrated, avoiding alcohol, and consuming a high-carbohydrate diet can enhance oxygen delivery and energy levels. Medications such as acetazolamide (Diamox) can also be prescribed to help prevent AMS by promoting acclimatization. Consulting with a healthcare provider before your trip can help determine the best prevention strategies for your specific needs.

    What Are the Recommended Treatments for Mountain Sickness? Comparing Medications and Methods

    When altitude sickness occurs, prompt treatment is essential to prevent complications.

    How Do Acclimatization and Oxygen Therapy Aid Recovery?

    Acclimatization remains the most effective treatment for altitude sickness. Descending to a lower altitude can alleviate symptoms significantly. In cases of severe altitude sickness, supplemental oxygen therapy may be necessary to restore adequate oxygen levels in the body. This therapy can provide immediate relief and is often used in conjunction with descent to ensure a safe recovery.

    What Medications Are Effective for High Altitude Pulmonary and Cerebral Edema?

    For severe cases of altitude sickness, particularly HAPE and HACE, medications such as dexamethasone may be administered to reduce inflammation and swelling in the brain and lungs. These medications can be life-saving when used in conjunction with immediate descent. Understanding the appropriate use of these treatments is crucial for anyone venturing into high-altitude environments.

    When Should You Seek Emergency Help for Severe Altitude Sickness?

    Recognizing when to seek emergency help is critical for individuals experiencing severe altitude sickness.

    What Are the Signs of High Altitude Pulmonary Edema and Cerebral Edema?

    Signs of HAPE include a persistent cough, difficulty breathing, and chest tightness, while HACE symptoms may involve confusion, severe headache, and loss of coordination. If these symptoms occur, it is imperative to seek medical assistance immediately. Delaying treatment can lead to serious complications or even death.

    What Immediate Actions Should Be Taken in Emergency Situations?

    In emergency situations, the first step is to descend to a lower altitude as quickly as possible. Administering supplemental oxygen, if available, can also provide immediate relief. It is essential to remain calm and ensure that the affected individual is monitored closely until help arrives.

    Which Mountains Pose the Highest Risk for Altitude Sickness? Identifying High-Risk Locations

    Certain mountains are known for their increased risk of altitude sickness due to their elevation and accessibility.

    What Are the Characteristics of High-Risk Mountains Worldwide?

    Mountains such as Mount Everest, K2, and Denali are notorious for their high altitudes and challenging conditions. These peaks often exceed 8,000 feet, where the risk of altitude sickness significantly increases. Understanding the characteristics of these high-risk mountains can help climbers prepare adequately for their expeditions.

    How to Prepare Specifically for High-Risk Mountain Expeditions?

    Preparation for high-risk mountain expeditions should include thorough research, physical conditioning, and a well-structured acclimatization plan. Engaging in pre-expedition training, such as hiking at increasing elevations, can enhance physical fitness and improve the body’s ability to adapt to high altitudes. Additionally, carrying essential supplies, including medications and oxygen, can be crucial for safety.

    Frequently Asked Questions

    What Are the Long-Term Effects of Altitude Sickness?

    While most individuals recover from altitude sickness without lasting effects, some may experience long-term complications, particularly if they have suffered from severe forms like HAPE or HACE. These complications can include persistent respiratory issues or cognitive difficulties. It’s essential to monitor any ongoing symptoms after descending and consult a healthcare professional if concerns arise. Understanding the potential long-term effects can help individuals make informed decisions about future high-altitude activities.

    How Can You Differentiate Between Altitude Sickness and Other Illnesses?

    Altitude sickness can mimic other conditions such as dehydration, flu, or food poisoning. Key differentiators include the timing of symptoms, which typically arise within hours of ascent, and their correlation with altitude gain. Symptoms like headache, nausea, and dizziness are common in altitude sickness but may not be present in other illnesses. If symptoms persist or worsen with altitude, it is crucial to descend and seek medical advice to rule out other serious conditions.

    Are Certain Individuals More Susceptible to Altitude Sickness?

    Yes, susceptibility to altitude sickness can vary significantly among individuals. Factors such as age, pre-existing health conditions, and previous experiences with altitude can influence risk. For instance, individuals with respiratory or cardiovascular issues may be at higher risk. Additionally, those who have previously experienced altitude sickness are more likely to encounter it again. Understanding personal risk factors can help in planning safer high-altitude excursions.

    What Role Does Hydration Play in Preventing Altitude Sickness?

    Hydration is crucial in preventing altitude sickness, as it helps maintain blood volume and supports overall physiological function. At high altitudes, the body loses moisture more rapidly due to increased respiration and lower humidity levels. Staying well-hydrated can enhance oxygen delivery to tissues and reduce the likelihood of symptoms. It is recommended to drink plenty of fluids, particularly water, and to avoid alcohol and caffeine, which can contribute to dehydration.

    Can You Develop Altitude Sickness After Acclimatizing?

    Yes, it is possible to develop altitude sickness even after a period of acclimatization. Factors such as rapid ascent, individual susceptibility, and the altitude reached can all contribute to the onset of symptoms. Acclimatization helps reduce the risk but does not eliminate it entirely. Continuous monitoring of symptoms and readiness to descend if they occur is essential, even for those who have acclimatized successfully.

    What Should You Do If Symptoms of Altitude Sickness Persist?

    If symptoms of altitude sickness persist despite descending to a lower altitude, it is crucial to seek medical attention. Persistent symptoms may indicate a more severe condition, such as HAPE or HACE, which require immediate treatment. Healthcare professionals can provide necessary interventions, including supplemental oxygen or medications, to address complications. Being proactive about health and safety is vital when dealing with altitude-related issues.

    How Long Does It Take to Recover from Altitude Sickness?

    Recovery from altitude sickness typically occurs within 24-48 hours after descending to a lower altitude. However, the duration may vary depending on the severity of symptoms and individual health factors. It is essential to monitor symptoms closely and seek medical attention if they persist.

    Can Altitude Sickness Occur at Moderate Elevations?

    Yes, altitude sickness can occur at moderate elevations, particularly for individuals who ascend rapidly or have a history of AMS. Symptoms may arise at elevations as low as 6,000 feet, especially in those unaccustomed to high altitudes. Awareness of this risk is crucial for anyone planning to travel to elevated regions.

    Conclusion

    Understanding altitude sickness is essential for anyone planning high-altitude adventures, as it can significantly impact your experience and safety. By recognizing symptoms, implementing effective prevention strategies, and knowing when to seek treatment, you can enjoy your journey with confidence. Equip yourself with the knowledge to tackle high elevations and ensure a safe expedition. Explore our resources for more tips and guidance on high-altitude travel today.

  • Vinson Massif: Complete Guide to Climbing Antarctica’s Highest Peak

    Vinson Massif: Complete Guide to Climbing Antarctica’s Highest Peak

    Cluster 07 · Seven Summits · Updated April 2026

    Vinson Massif: Complete Guide to Climbing Antarctica’s Highest Peak

    The definitive 2026 guide to climbing Vinson Massif — Antarctica’s highest peak at 16,050 feet. The most remote of the Seven Summits, requiring specialized logistics via Punta Arenas, Chile and ALE’s Ilyushin IL-76 flights to Union Glacier Camp. Everything you need for the most expensive and logistically complex continental high point on Earth.

    16,050 ft
    Summit
    elevation
    16–22
    Expedition
    days
    ~60–70%
    Summit
    success
    $45K–60K
    Expedition
    cost
    Global Summit Guide A guide in Cluster 07 · Seven Summits View master hub →

    Vinson Massif is Antarctica’s highest peak, rising to 16,050 feet in the Sentinel Range of the Ellsworth Mountains — just 600 miles from the South Pole. It’s not the hardest Seven Summit technically, nor the highest, but it is the most remote, the most expensive, and logistically the most complex. There are no roads, no rescue helicopters, no base camp infrastructure beyond what is flown in each season by Antarctic Logistics & Expeditions (ALE) — the single operator that makes Vinson expeditions possible. Climbers fly to Punta Arenas, Chile, wait for weather, board a Russian Ilyushin IL-76 cargo jet, land on a blue-ice runway in Antarctica, and then climb in 24-hour daylight at temperatures that regularly drop to -50°F. This is the cluster finale — completing our Seven Summits coverage with the continent most climbers save for last.

    How this guide was built

    Route and logistics data verified against Antarctic Logistics & Expeditions (ALE) published information and operational briefings. Cost figures confirmed with Alpine Ascents International, Mountain Madness, International Mountain Guides, Adventure Consultants, and Jagged Globe (2026 rates). Historical first-ascent data from the American Alpine Club archives. Technical route details cross-checked with the American Alpine Journal reports and the climbing record from ALE’s seasonal reports. Reviewed by practicing Antarctic expedition guides with 2025 season experience. Fact-check date: April 19, 2026.

    Vinson Massif Overview: The Seventh Continent’s High Point

    Vinson Massif was only discovered in 1958 during aerial surveys — the last continental high point to be identified. Named after American congressman Carl Vinson for his support of Antarctic research, the mountain sits in the Sentinel Range of the Ellsworth Mountains, approximately 600 miles from the South Pole. The first ascent came in 1966 by an American Alpine Club expedition.

    Key Vinson Massif facts

    • Summit elevation: 16,050 feet (4,892 meters) — Antarctica’s highest
    • Prominence: 16,050 feet (rises from sea level)
    • Location: Sentinel Range, Ellsworth Mountains, West Antarctica
    • Distance from South Pole: ~600 miles
    • Coordinates: 78°31′30″S 85°37′02″W
    • First ascent: December 18, 1966 — American Alpine Club expedition led by Nicholas Clinch (Barry Corbet, John Evans, Bill Long, Pete Schoening, Sam Silverstein, Dick Wahlstrom)
    • Named for: Carl Vinson, US Congressman (1914-1965), supporter of Antarctic exploration funding
    • Climbing season: November through January (Antarctic summer)
    • Only commercial operator: Antarctic Logistics & Expeditions (ALE), headquartered in Punta Arenas, Chile
    • Annual climbers: ~150-250 per year
    • Summit success rate: ~60-70% for guided expeditions
    Why Vinson is the Seven Summits capstone

    Most climbers pursuing all Seven Summits save Vinson for last for several reasons. First, the cost — at $45,000-$60,000, Vinson represents 30-40% of the total Seven Summits budget. Second, logistics — ALE’s flight availability is limited and expensive. Third, experience — Vinson benefits from prior glaciated peak experience on Denali or Elbrus. Finally, the sense of accomplishment — completing the Seven Summits on Antarctica’s highest peak provides a fitting conclusion to the journey. See our Seven Summits guide for the full progression framework.


    The Standard Route: Branscomb Glacier / West Face

    Approximately 95% of Vinson climbers use the Branscomb Glacier / West Face route, the standard line established by ALE and used by all major guide services. The route progresses from Base Camp through Low Camp and High Camp to the summit via the West Face headwall and summit ridge.

    0
    Starting Point

    Vinson Base Camp

    On the Branscomb Glacier. Arrival via Twin Otter ski plane from Union Glacier Camp. Basic camp with group dining tent, communications tent. Typically 1-2 night stay to organize and acclimatize.

    7,000 ft
    Elevation
    1
    Day 8-9 of Expedition

    Low Camp

    5-6 miles up the Branscomb Glacier. Cache-and-carry method typical — cache gear day one, move day two. Acclimatization important. First real alpine camp experience of the expedition.

    9,200 ft
    Elevation
    2
    Day 10-13 of Expedition

    High Camp

    Below the West Face headwall. Final camp before summit. Weather often forces rest days here. Most serious cold-weather conditions of the expedition — summit push staged from here.

    12,400 ft
    Elevation
    Summit Day · 10-14 Hours

    Vinson Massif Summit

    From High Camp via the fixed-line headwall and summit ridge. Two false summits before the true summit. Temperature typically -30°F to -50°F. Wind common. 24-hour daylight means summit attempts can happen at any hour.

    16,050 ft
    Summit
    The West Face headwall and summit ridge

    The section between High Camp and the summit features the West Face headwall — a steep snow and ice slope fixed with ropes by early-season climbers each year. Climbers use ascenders (jumars) to ascend this section. Above the headwall, the long summit ridge extends to the true summit, passing two false summits that test climber psychology. The ridge is exposed with dramatic drops to either side, and summit-day winds can exceed 60 mph. Despite being non-technical, this section demands concentration, cold-weather tolerance, and careful pace management. Most summit-day retreats occur on this ridge, either from weather, exhaustion, or cold injury.


    Antarctic Logistics: The ALE System

    Vinson’s unique challenge isn’t climbing — it’s getting there. Antarctic Logistics & Expeditions (ALE) operates the only commercial access to interior Antarctica for mountaineers. Understanding their system is essential to planning a Vinson expedition.

    The ALE operation

    • Base of operations: Punta Arenas, Chile — southernmost major city on the South American continent.
    • Primary aircraft: Ilyushin IL-76 (Russian heavy-lift cargo aircraft) — flies climbers from Punta Arenas to Union Glacier Camp in Antarctica.
    • Flight distance: ~1,860 miles across the Southern Ocean and Drake Passage.
    • Flight duration: ~4.5 hours.
    • Landing site: Union Glacier Camp on a blue-ice runway at 79° South.
    • Union Glacier Camp: ALE’s main Antarctic base. Heated tent facilities, dining, communications, medical tent. Hub for Vinson climbers, South Pole traverses, and Antarctic researchers.
    • Final transport: Twin Otter ski plane from Union Glacier to Vinson Base Camp — ~1 hour flight.

    Why ALE is the only option

    • Antarctic Treaty restrictions limit commercial operations.
    • ALE holds operational permits and infrastructure investment ($millions annually).
    • Ilyushin IL-76 aircraft operations extremely expensive and specialized.
    • Blue-ice runway maintenance and meteorological systems require year-round logistics.
    • Twin Otter ski plane fleet and pilots dedicated to Antarctic operations.
    • Emergency response systems operated by ALE alone.
    Weather determines everything

    The single largest source of uncertainty in Vinson expeditions is weather delays at four different stages: (1) Ilyushin IL-76 flight from Punta Arenas to Union Glacier. (2) Twin Otter flight from Union Glacier to Vinson Base Camp. (3) Climbing conditions on the mountain. (4) Return flights both legs. Any of these can delay climbers 1-5 days. Most expeditions factor 3-5 weather days into their schedules, but rare major delays can push expeditions 28+ days. Budget expedition windows of 21-28 days minimum.


    Typical Vinson Expedition Timeline

    Most Vinson expeditions run 16-22 days total. Here’s what a typical 21-day timeline looks like:

    Days 1-2

    Travel to Punta Arenas

    International flights via Santiago, Chile to Punta Arenas. Total travel time 24-36 hours from North America or Europe. Check into hotel, rest, adjust to time zone.

    Day 3

    ALE Orientation

    Mandatory ALE briefing at Punta Arenas headquarters. Equipment inspection, safety protocols, environmental requirements. Guide service gear check.

    Days 4-5

    Weather Standby

    Wait for Ilyushin IL-76 flight authorization. Weather at Union Glacier must meet landing requirements. Most expeditions experience 1-2 days of standby.

    Day 6

    Fly to Antarctica

    Ilyushin IL-76 flight from Punta Arenas to Union Glacier Camp. 4.5 hours. Arrive Antarctica, orientation at Union Glacier, settle into heated tent accommodation.

    Day 7

    Twin Otter to Vinson Base Camp

    1-hour Twin Otter ski plane flight from Union Glacier to Vinson Base Camp at 7,000 ft. Establish camp, rest, begin acclimatization. Weather may delay flight 1-2 days.

    Days 8-9

    Move to Low Camp

    Cache-and-carry method: Day 8 cache gear at Low Camp (9,200 ft), return to Base Camp to sleep. Day 9 move to Low Camp with remaining gear.

    Days 10-12

    Move to High Camp

    Progressive moves from Low Camp to High Camp at 12,400 ft. Cache and move pattern. Rest and acclimatization days. Weather assessment for summit window.

    Day 13

    Rest Day at High Camp

    Acclimatization day at 12,400 ft. Weather monitoring. Summit day preparation. Most serious cold encountered here — extreme tent-based living.

    Day 14

    Summit Day

    10-14 hour summit day from High Camp. Via West Face headwall and summit ridge. Temperatures -30°F to -50°F. Return to High Camp for sleep.

    Days 15-16

    Descent to Base Camp

    Rapid descent from High Camp to Low Camp to Base Camp. Pack camp, prepare for flight out.

    Days 17-18

    Twin Otter and Union Glacier

    Twin Otter flight to Union Glacier Camp. Weather delays possible. Wait for Ilyushin flight schedule.

    Day 19

    Return to Punta Arenas

    Ilyushin IL-76 flight back to Punta Arenas, Chile (weather permitting). Celebration dinner, hotel rest.

    Days 20-21

    Travel Home

    Rest day in Punta Arenas. International flights home via Santiago.


    Vinson Cost Breakdown: 2026 Budget Planning

    Vinson is the most expensive Seven Summit — typically $45,000-$60,000 for a fully guided expedition. Understanding where the money goes helps plan realistically:

    Approach 1

    Fully Guided Expedition

    $52,000–$68,000
    • ALE + guide package$48,000–$58,000
    • International flights$1,500–$3,000
    • Personal gear$5,000–$8,000
    • Hotel Punta Arenas$300–$500
    • Insurance/evacuation$500–$1,500
    • Guide tips (~18%)$3,000–$5,000
    • Weather contingency$2,000–$4,000
    Approach 2

    Logistics-Only (Self-Guided)

    $42,000–$56,000
    • ALE logistics only$35,000–$45,000
    • International flights$1,500–$3,000
    • Personal gear (full)$5,000–$8,000
    • Hotel Punta Arenas$300–$500
    • Insurance/evacuation$500–$1,500
    • Group equipment$500–$1,500
    • Weather contingency$2,000–$4,000

    Why Vinson is so expensive

    • Antarctic Treaty compliance — Environmental requirements add significant overhead.
    • Ilyushin IL-76 operations — Extremely expensive cargo flight operations from Chile.
    • Union Glacier Camp — ALE builds and maintains entire facility annually.
    • Twin Otter ski plane logistics — Specialized pilots, equipment, fuel staging.
    • Emergency response — No rescue helicopters available; ALE handles all emergencies.
    • Short season — Operations compressed into 10-week November-January window.
    • Remote location — All supplies must be flown in; no road access anywhere.

    For comparison with other Seven Summits peaks, see our complete mountain climbing costs guide. Vinson is approximately 3-4x the cost of Denali ($12,000-$18,000) and 5-7x the cost of Aconcagua ($6,000-$9,000).


    Preparing for Vinson: Essential Prerequisites

    Prior climbing experience required

    • Glaciated peak experience: Denali, Elbrus, Mt. Rainier, or European alpine peaks essential.
    • Extended winter camping: Multiple nights at sub-zero temperatures.
    • Crevasse rescue proficiency: Roped team travel, self-rescue, team rescue techniques.
    • Fixed-line climbing: Use of ascender on fixed ropes.
    • At minimum: One prior Seven Summits peak (often Denali or Elbrus).

    Physical training (6-9 months before)

    • Aerobic base: 4-5 cardio sessions weekly. Maintain strong cardiovascular capacity.
    • Weighted pack hiking: Simulate expedition load (50-65 lbs).
    • Leg strength: Squats, lunges, step-ups with progressive weight.
    • Altitude exposure: Weekend trips to 10,000+ ft if possible. Hypoxic training tents.
    • Cold exposure: Practice extreme cold camping — Vinson’s -50°F conditions cannot be replicated, but cold tolerance can be built.
    • Gear testing: Use all expedition gear in cold weather before Antarctica.

    See our complete high altitude training program for detailed periodized training applicable to Vinson preparation.


    Vinson Massif FAQ: Your Common Questions Answered

    How much does it cost to climb Vinson Massif?

    Climbing Vinson Massif costs $45,000-$60,000 for a guided expedition — making it the most expensive of the Seven Summits. Complete 2026 cost breakdown: ALE logistics (mandatory): (1) Antarctic Logistics & Expeditions charges approximately $45,000-$50,000 for their standard Vinson expedition package. This is unavoidable — ALE operates the only commercial flights from Punta Arenas to Union Glacier Camp. (2) Package includes: Ilyushin IL-76 round trip flight Punta Arenas to Union Glacier, Union Glacier Camp accommodation, Twin Otter flight to Vinson Base Camp, guide services, all meals at Union Glacier, group gear. Major guide services partnering with ALE: (3) Alpine Ascents International: $48,000-$58,000. (4) Mountain Madness: $47,000-$55,000. (5) International Mountain Guides (IMG): $48,000-$56,000. (6) Adventure Consultants: $50,000-$58,000. (7) Jagged Globe: $48,000-$54,000. Additional costs: (8) International flight to Punta Arenas, Chile: $1,500-$3,000 from North America/Europe. (9) Pre/post expedition hotel in Punta Arenas: $300-$500. (10) Gear if buying new: $5,000-$8,000. (11) Personal insurance and evacuation coverage: $500-$1,500. (12) Tips for guides (15-20%): $3,000-$5,000. (13) Contingency budget for weather delays: Recommended $2,000-$4,000. Total realistic budget: (14) Mid-range: $52,000-$62,000 total. (15) Premium outfitter: $60,000-$72,000 total. (16) Budget-conscious: $48,000-$55,000 with gear rental. Why so expensive: (17) Antarctica has no infrastructure — ALE builds entire camp each season. (18) Ilyushin IL-76 flight operations extremely expensive. (19) Twin Otter ski planes require specialized pilots and fuel logistics. (20) Season limited to November-January (Antarctic summer). (21) Antarctic Treaty environmental requirements increase costs. Vinson is approximately 3-4x the cost of Denali ($12,000-$18,000) and 5-7x the cost of Aconcagua ($6,000-$9,000). Most Seven Summits aspirants save Vinson for last due to the expense. See our complete mountain climbing costs guide.

    How hard is Vinson Massif to climb?

    Vinson Massif is moderate in technical difficulty for a 16,050-foot peak, but the extreme cold, remoteness, and weather dependency make it more challenging than the elevation suggests. Difficulty factors: (1) Summit elevation: 16,050 ft (4,892 m) — lower than Aconcagua, Denali, or Everest. (2) Technical rating: Non-technical glacier climb. Roped travel required, crampons and ice axes essential. No rock climbing or roped technical sections in standard route. (3) Physical demand: Moderate. Total summit day distance ~12 miles round trip with 3,000-4,000 ft elevation gain. (4) Climate: Extreme cold. Summit temperatures -30°F to -50°F typical. Wind chill often much colder. (5) Wind: Summit winds routinely 30-60 mph, can exceed 80 mph in storms. (6) Remoteness: Most remote Seven Summit. Emergency evacuation takes days. No rescue helicopters. (7) Weather dependency: 1-5 day weather delays common. Ilyushin IL-76 cannot land in bad weather. (8) Technical skills required: Glacier travel, crevasse rescue, roped team climbing, extreme cold weather camping. (9) Success rate: Approximately 60-70% for guided expeditions — higher than Denali due to ALE’s established operation. Comparative difficulty: (10) Easier technically than Denali. (11) Easier than Aconcagua (shorter, less altitude). (12) Similar technical difficulty to Elbrus but much colder and more remote. (13) Harder than Kilimanjaro due to glacier terrain and cold. (14) Much easier than Everest technically. Why Vinson still demands respect: (15) Extreme cold makes every task harder — eating, drinking, gear management. (16) No infrastructure — no barrel huts, no cable cars, no rescue response. (17) Weather dictates everything — you wait for windows or fail. (18) Antarctic conditions test equipment and technique. (19) Crevasse hazards throughout route. (20) Summit day length: 10-14 hours at altitude in extreme cold. Preparation requirements: (21) Prior glaciated peak experience strongly recommended (Denali, Elbrus, Mt. Rainier, European alpine peaks). (22) Crevasse rescue proficiency. (23) Extended winter camping experience. (24) Excellent physical fitness — not the most demanding 7SS but still serious.

    How do you get to Vinson Massif?

    Getting to Vinson Massif requires a multi-stage journey: international flight to Punta Arenas, Chile, then a unique Ilyushin IL-76 charter flight to Antarctica’s Union Glacier Camp, then a Twin Otter ski plane to Vinson Base Camp. Complete journey breakdown: Stage 1: International to Punta Arenas (1) Fly to Santiago, Chile (SCL) — major international gateway. (2) Domestic flight Santiago to Punta Arenas (PUQ) — 3.5 hours. (3) Total travel time from North America/Europe: 24-36 hours. (4) Airlines serving Punta Arenas: LATAM, Sky Airline. Stage 2: Punta Arenas to Antarctica via ALE (5) Antarctic Logistics & Expeditions (ALE) operates the only commercial access to interior Antarctica. (6) ALE headquarters in Punta Arenas briefs all climbers on logistics, safety, environmental protocols. (7) 1-3 days weather delay typical before flight authorization. (8) Ilyushin IL-76 cargo/passenger aircraft — Russian heavy lift aircraft — flies climbers to Union Glacier. (9) Flight duration: ~4.5 hours over Drake Passage. (10) Lands on blue-ice runway at Union Glacier Camp (79° S, 2,800 ft elevation). Stage 3: Union Glacier to Vinson Base Camp (11) Union Glacier Camp is ALE’s main base, serving Vinson climbers and South Pole traverses. (12) Climbers overnight at Union Glacier, receive final briefings. (13) Twin Otter ski plane flights to Vinson Base Camp — ~1 hour. (14) Vinson Base Camp at 7,000 ft on Branscomb Glacier. (15) Weather can delay Twin Otter flights 1-3 days. Stage 4: Climbing Vinson (16) Standard 7-10 day climb from Base Camp. (17) Return to Base Camp after summit. (18) Twin Otter flight back to Union Glacier. Stage 5: Return to civilization (19) Ilyushin IL-76 flight Union Glacier to Punta Arenas. (20) Weather delays routinely add 2-5 days at either end. (21) International flights home from Punta Arenas via Santiago. Total round-trip time: (22) Minimum 14 days in good weather. (23) Typical 18-22 days with weather buffers. (24) Maximum 28+ days if multiple weather delays. This unique logistics chain is why Vinson costs $45,000-$60,000 — you’re paying for ALE’s entire Antarctic operation.

    When is the best time to climb Vinson Massif?

    The best time to climb Vinson Massif is November through January — Antarctica’s summer season, when 24-hour daylight and comparatively milder temperatures enable climbing. Monthly breakdown: (1) November: Early season. Colder temperatures, fewer expeditions, slightly less reliable weather. First ALE flights of season typically mid-November. (2) Early-mid December: Peak season. Warmest temperatures, most reliable weather windows, multiple expeditions running concurrently. Most popular month for commercial Vinson climbs. (3) Late December: Christmas/New Year season — still excellent but higher demand. (4) January: Prime climbing month. Best weather typically, long daylight, most commercial expeditions. (5) Late January: Season winding down. Cooling temperatures, last ALE flights approximately January 25. (6) February through October: No climbing — Antarctic winter. 24-hour darkness, extreme cold (-80°F+), no flights possible. Why the short window: (7) Antarctic summer provides 24-hour daylight — necessary for safe climbing and logistics. (8) Temperatures ‘only’ -30°F to -50°F at summit in summer vs. -80°F+ in winter. (9) ALE’s Ilyushin IL-76 flights require daylight and weather windows. (10) Union Glacier Camp operates only during this window. Daily conditions: (11) Summit temperature: -30°F to -50°F in summer. (12) Summit wind: 30-60 mph typical; can exceed 80 mph in storms. (13) Base camp temperature: -10°F to 10°F. (14) 24-hour daylight: Sun never sets in climbing season. (15) Summit days can be any time — climbers often start early afternoon to reach summit during ‘warmer’ part of night. Weather considerations: (16) Ilyushin flights depend on blue-ice runway conditions at Union Glacier. (17) Twin Otter flights depend on Vinson Base Camp conditions. (18) Weather delays can strand climbers 3-7 days at various points. (19) Budget 21-day expedition window minimum to accommodate delays.

    What is the standard route up Vinson Massif?

    The standard route up Vinson Massif is the Branscomb Glacier / West Face route, which approximately 95% of climbers use. Route overview: (1) Base Camp: Branscomb Glacier at 7,000 ft. (2) Low Camp: 9,200 ft — on the Branscomb Glacier. (3) High Camp: 12,400 ft — below the West Face. (4) Summit: 16,050 ft via the summit ridge. (5) Distance: Approximately 8 miles one way from Base Camp to summit. (6) Technical rating: Non-technical glacier climb. Crampons and ice axes essential. Roped travel throughout. (7) Fixed lines: Fixed on the steeper headwall between High Camp and summit. Route progression: (8) Base Camp to Low Camp: 5-6 miles on Branscomb Glacier. Gradual elevation gain. Typically cache-and-carry method. (9) Low Camp to High Camp: 4 miles with steeper section near the headwall. Establish high camp. (10) High Camp to Summit: 4 miles with the steepest terrain of the climb. Fixed lines on headwall. Long summit ridge to the top. Key features: (11) Branscomb Glacier: Main glacier approach, heavily crevassed in places. (12) The Headwall: 1,000 ft steep snow/ice section between High Camp and summit ridge. Often fixed with ropes by early-season teams. (13) Summit Ridge: Long, exposed ridge with dramatic views of the Sentinel Range. (14) False Summits: Two false summits before the true summit — psychologically challenging. Alternative routes (rarely climbed): (15) Wessbach Ridge: Technical ridge climb, seldom attempted commercially. (16) East Face: Steep ice and mixed terrain, expert-only. (17) North Ridge: Historical route from first ascent era. Modern climbing: Commercial Vinson expeditions use the Branscomb/West Face route exclusively.

    How long does it take to climb Vinson Massif?

    Vinson Massif expeditions typically take 16-22 days total, including travel to Punta Arenas, ALE logistics, Antarctic flights, the climb itself, and weather buffers. Typical 21-day timeline: Pre-expedition: (1) Day 1-2: Travel to Punta Arenas, Chile. Rest and acclimatization to time zone. (2) Day 3: ALE orientation and briefing. Equipment check. Weather assessment. (3) Day 4-5: Weather delay likely. Standby for Ilyushin IL-76 flight authorization. Antarctic travel: (4) Day 6: Ilyushin IL-76 flight to Union Glacier Camp (weather permitting). 4.5 hours. Arrive in Antarctica. Orientation at Union Glacier. (5) Day 7: Twin Otter ski plane to Vinson Base Camp (7,000 ft). Establish base camp. Weather may delay 1-2 days. Climbing phase: (6) Days 8-9: Move to Low Camp (9,200 ft). Cache-and-carry method. Acclimatization. (7) Days 10-12: Move to High Camp (12,400 ft). Cache gear and establish. Rest for acclimatization. (8) Day 13: Rest day at High Camp. Weather assessment. (9) Day 14: Summit day. 10-14 hours round trip to 16,050 ft summit via headwall and summit ridge. Return to High Camp. Descent: (10) Day 15: Descend High Camp to Low Camp. (11) Day 16: Descend Low Camp to Base Camp. Pack for departure. (12) Day 17: Twin Otter flight to Union Glacier. Weather delays possible. (13) Day 18: Rest at Union Glacier. Await Ilyushin flight. (14) Day 19: Ilyushin IL-76 flight back to Punta Arenas (weather permitting). (15) Day 20-21: Rest in Punta Arenas, international flights home. Factors affecting timeline: (16) Weather delays: Multiple delays possible at each flight stage. Add 1-5 days. (17) Summit windows: Most teams get 1-2 summit attempt opportunities. (18) Acclimatization: Individual response varies. (19) Fitness: Strong teams may complete in 16-17 days; slower teams 22-24 days. Most climbers book 21-day commercial expedition packages.

    Do you need a guide to climb Vinson Massif?

    Yes, functionally you need a guide to climb Vinson Massif — independent climbing is technically possible but impractical due to ALE’s monopoly on Antarctic logistics. Guide requirements: (1) ALE operates the only commercial flights to Union Glacier Camp. (2) ALE allows both guided and ‘logistics-only’ (self-guided) expeditions. (3) Logistics-only packages include transportation and Union Glacier camp but no climbing guides. (4) Logistics-only typically $35,000-$45,000 — saves roughly $10,000-$15,000 vs. guided. (5) Requires exceptional self-sufficiency and prior Antarctic/polar experience. Why most climbers use guides: (6) First Antarctic expedition — completely unique environment. (7) ALE logistics coordination is complex and best handled by operators. (8) Guides have season-specific route information. (9) Group gear and fixed line setup handled. (10) Emergency response and decision-making. (11) Weather interpretation and summit timing. (12) Approximately 90-95% of Vinson climbers use full-service guides. Major Vinson guide services: (13) Alpine Ascents International — One of largest Vinson operators, ~20 expeditions per season. (14) Mountain Madness — Established operator since 1980s. (15) International Mountain Guides (IMG) — Global expedition company. (16) Adventure Consultants — New Zealand-based premium operator. (17) Jagged Globe — UK-based operator. (18) Madison Mountaineering — Smaller premium outfitter. (19) RMI Expeditions — Expanding into Antarctica. For 95% of Vinson aspirants, guided expeditions are the only practical approach. The $10,000-$15,000 extra cost vs. logistics-only is reasonable insurance given the unique Antarctic environment and lack of rescue infrastructure.

    What gear do you need for Vinson Massif?

    Vinson Massif requires the most extreme cold-weather mountaineering gear of the Seven Summits, optimized for -50°F temperatures and Antarctic conditions. Complete gear checklist: Footwear: (1) Double plastic or modern insulated boots rated for -60°F — La Sportiva Olympus Mons, Scarpa Phantom 8000, or Millet Everest Summit. (2) Overboots for summit day. (3) Insulated camp booties (heated optional). (4) Vapor barrier socks. Clothing (extreme cold layering): (5) Base layer: Heavy merino wool long underwear. (6) Mid-insulation: Synthetic mid-weight puffy jacket and pants. (7) Heavy insulation: Expedition-weight down parka and down pants — rated for -40°F or colder. (8) Hard shell: Gore-Tex expedition suit or separates. (9) Softshell pants for lower-camp climbing. (10) Balaclava and neoprene face mask. (11) Expedition mitts (heavily insulated). (12) Liner gloves (2 pairs) and insulated gloves. (13) Neck gaiter. Technical gear: (14) 12-point steel crampons. (15) Mountaineering ice axe (60 cm). (16) Climbing harness with adjustable leg loops (for gloved hands). (17) Locking carabiners (4-6). (18) Ascender for fixed lines on headwall. (19) Prusik cords for crevasse rescue. (20) Ice screws (if carrying group gear). (21) Rope (group gear — typically 50m 8.5mm). Camping gear: (22) Expedition 4-season tent rated for hurricane-force winds. (23) -40°F to -50°F rated expedition sleeping bag. (24) Vapor barrier liner. (25) Full-length inflatable sleeping pad + closed-cell foam backup. (26) Snow pickets and snow anchors. Rental strategy: Most climbers buy rather than rent for Vinson — extreme cold-weather gear rarely rentable. ALE provides some group gear. Gear investment typically $5,000-$8,000 if buying new. Many items (down parka, sleeping bag, boots) usable for future Denali or Everest expeditions. See our complete mountain gear list.


    Authoritative Sources & Further Reading

    Content reflects authoritative Antarctic mountaineering sources:

    • Antarctic Logistics & Expeditions (ALE) — antarctic-logistics.com — Sole commercial operator
    • American Alpine Club — americanalpineclub.org — Historical first-ascent records and expedition archives
    • American Alpine Journal — Annual expedition reports from Vinson
    • Antarctic Treaty Secretariat — Environmental protocols and regulations
    • Nicholas Clinch, expedition reports from 1966 first ascent
    • US Antarctic Program (USAP) — Research and meteorological data
    • Guide services: Alpine Ascents International, Mountain Madness, International Mountain Guides, Adventure Consultants, Jagged Globe, Madison Mountaineering
    Published: March 3, 2026
    Last updated: April 19, 2026
    Next review: July 2026
    Part of the Global Summit Guide

    Back to the Master Hub

    This guide is one of 71 across 12 thematic clusters on Global Summit Guide. The master hub organizes every guide by experience tier, specific peak, skill area, and region.

    View the Hub →


  • Conquer Peaks: Global Summit Guide for Mountain Climbing

    Conquer Peaks: Global Summit Guide for Mountain Climbing

    Positive femele mountain climbers having a break on Aiguille d’Entreves mountain ridge

    Master Hub · Updated April 2026

    Conquer Peaks: Your Global Summit Guide for Mountain Climbing

    The master index for every guide on Global Summit Guide — 71 in-depth guides organized into 12 thematic clusters covering beginner progression, the Seven Summits, Everest, Kilimanjaro, altitude physiology, gear, technical mountaineering, and regional expeditions. Whether you’re researching your first 5,000 m peak or planning an 8,000 m project, this is the starting point.

    71
    In-depth
    guides
    12
    Thematic
    clusters
    24+
    Major peaks
    covered
    4
    Progression
    tiers

    Mountain climbing rewards careful preparation more than almost any other adventure pursuit. The peaks are demanding, the conditions unpredictable, and the difference between a memorable summit and a serious incident usually comes down to decisions made weeks — sometimes months — before you ever set foot on the mountain. This hub is the orientation document we wish every climber had before their first major objective: a complete index of every guide on Global Summit Guide, organized so you can find what you need without wading through a 200-post blog archive.

    How the hub is organized

    Every guide on Global Summit Guide is built from primary climbing databases — the Himalayan Database, American Alpine Club / American Alpine Journal, UIAA standards, regional park authorities (NPS, TANAPA, Argentine Provincial Parks), and current operator publications. Guides are grouped into 12 thematic clusters matching how climbers actually research: by experience tier, by specific peak, by skill area, and by region. Every cluster has an anchor guide (marked ★) that serves as the natural entry point if you’re new to that cluster’s topic. Fact-check date: April 19, 2026.

    What This Hub Actually Is

    Most mountaineering sites are organized chronologically — latest blog post at the top, older posts buried below. That works for news. It doesn’t work for climbers researching a specific peak or skill.

    Global Summit Guide is built differently. The 71 guides indexed below are organized by how climbers actually use them: by current experience level, by the peak you’re targeting, by the skill you’re trying to build. If you’re planning Kilimanjaro, you don’t need to wade through Everest content to find what you need. If you’re training for altitude, the physiology guides live together. If you’re debating which 6,000 m peak should be your first, the Seven Summits and Beginner Progression clusters sit next to each other.

    Three design principles shape the hub:

    • Every guide stands alone — you can land on any one of the 71 guides without reading anything else and still get a complete answer.
    • Every guide links back here — no orphan pages, no dead ends. Wherever you land, you can navigate up to this hub and laterally to sibling guides.
    • Clusters reflect real use cases — not arbitrary categories. A climber planning Everest reads differently than a beginner choosing their first climb; the hub reflects that.

    If you’re brand new to the site, scroll to the Progression Ladder below — it maps the natural reading sequence from complete beginner to expedition-level climber. If you’re researching a specific topic, use the sidebar Table of Contents or jump directly to the relevant cluster in Section 03.


    The 12 Clusters at a Glance

    Each cluster is a coherent research area — a set of guides that belong together because climbers use them together. The table below summarizes all 12; the detailed cluster sections follow.

    #ClusterGuidesPrimary tierAnchor guide
    01Seven Summits & Flagship3Intermediate → ExpertSeven Summits Guide
    02Beginner Progression5BeginnerMountaineering for Beginners
    03Technical & Expert5ExpertTop 50 Technical Objectives
    04Non-Technical Treks8All levelsTop 50 Non-Technical Peaks
    05Everest3ExpertHow to Climb Everest
    06Kilimanjaro7Beginner → IntermediateKilimanjaro Climbing Guide
    07Other Seven Summits Peaks7Intermediate → AdvancedDenali / Mont Blanc / Aconcagua
    08Altitude, Training & Physiology10All levelsAltitude Acclimatization Explained
    09Gear & Equipment7All levelsMountain Climbing Gear List
    10Regional Guides6VariesGreatest Alps Compared
    11Japan & Local (Fuji, Utah)6BeginnerMount Fuji Climb Guide
    12Planning, Safety & Weather4All levelsMountain Climbing Costs

    Total: 71 guides across 12 clusters. Every guide appears in exactly one cluster.


    Every Guide, Organized by Cluster

    The anchor guide for each cluster (marked ★) is the best starting point if you’re new to the cluster’s topic. All other guides can be read in any order.

    02
    Beginner · 5 guides

    Beginner Progression

    Starting from zero — terminology, first peaks, and how to use this site.

    For climbers just entering the sport. These guides answer the foundational questions: what’s the difference between hiking and mountaineering, which peak should I attempt first, and how do I actually use a guide to plan a climb. Start here if you haven’t yet completed a 4,000 m+ objective.

    05
    Peak-specific · 3 guides

    Everest

    The world’s highest mountain — permits, costs, routes, and current-season updates.

    Mount Everest (8,849 m) is the most consequential climb on Earth. These guides cover everything from current 2026 season changes through complete cost breakdowns to route-by-route selection. For training and EBC trekking, see Clusters 04 and 08.

    08
    Skill area · 10 guides

    Altitude, Training & Physiology

    The biggest single factor in high-altitude success — managing your body above 3,000 m.

    Every 6,000 m+ climber needs to master altitude. These guides cover the physiology of acclimatization, the full spectrum of altitude illness (AMS, HACE, HAPE), structured training programs, frostbite and breathing techniques — the skills that separate people who make it to the summit from those who turn around sick.

    11
    Local & accessible · 6 guides

    Japan & Local Peaks (Fuji, Utah)

    High-quality peaks close to home — Japan’s iconic volcano and Utah’s Wasatch range.

    Not every great climb requires international travel. Japan’s Mount Fuji is a classic cultural summit accessible to fit hikers; Utah’s Wasatch and Timpanogos ranges offer genuine alpine experience within two hours of Salt Lake City. These guides cover the peaks that let you build skills close to home.

    12
    Planning · 4 guides

    Planning, Safety & Weather

    The cross-cutting skills: budgeting, avalanche awareness, forecasting, industry trends.

    These guides don’t belong to a single peak or region — they’re the cross-cutting decisions every climber faces. How to budget a multi-year project, how to read a mountain forecast, how to stay out of avalanche terrain, and what’s changed in the broader mountaineering landscape this season.


    Progression: From Beginner to Expert

    Most climbers work through these tiers sequentially, though some skip ahead with proven prior experience. Each tier lists the handful of guides we’d read first if we were starting at that level today.

    Tier 1 · Beginner
    01
    First Peaks

    Hiking experience, no technical skills. Looking for first 4,000–5,000 m objectives.

    Tier 2 · Intermediate
    02
    Altitude & Glacier

    2–4 prior trips. Comfortable with crampons. Targeting 5,000–6,000 m peaks like Kilimanjaro or Aconcagua.

    Tier 3 · Advanced
    03
    Expedition Level

    Proven 6,000 m+ experience. Pursuing Denali, Aconcagua, Mont Blanc, and the Seven Summits project.

    Tier 4 · Expert
    04
    Extreme & Technical

    7,000 m+ summits and technical climbing. 8,000 m expeditions, Nepal’s technical peaks, polar objectives.

    Match your goals to your timeline

    Progression is measured in years, not months. Most climbers spend 1–2 years at Tier 1, 2–3 years at Tier 2 before their first major 6,000 m peak, 3–5 years at Tier 3 completing progressively harder Seven Summits, and ongoing years at Tier 4 for technical or 8,000 m objectives. Skipping tiers dramatically elevates risk — the progressions exist for sound physiological and skills-building reasons.


    Frequently Asked Questions

    What is the Global Summit Guide hub?

    The Global Summit Guide hub is the master index page that organizes every guide on the site — 71 in total — into 12 thematic clusters. It serves as the starting point for climbers researching a specific peak, planning their first major climb, or progressing through a multi-year mountaineering project. Every other guide on the site links back to this hub, and the hub links forward to every guide.

    Which guide should I start with?

    Start with the cluster that matches your current goal. Complete beginners should start with the Beginner Progression cluster — specifically Mountaineering for Beginners and 10 Best Mountains to Climb for Beginners. Climbers planning a first major peak should look at the Seven Summits & Flagship cluster, then drill into the relevant peak-specific cluster (Kilimanjaro, Everest, or Other Seven Summits Peaks). Climbers building skills should read the Altitude & Physiology cluster alongside the Gear cluster.

    How are the 12 clusters organized?

    Clusters are organized by the way climbers actually use guides: by experience level (Beginner Progression, Technical & Expert), by specific peak (Everest, Kilimanjaro, Other Seven Summits Peaks), by skill area (Altitude & Physiology, Gear), by objective type (Non-Technical Treks, Seven Summits & Flagship), and by region (Regional Guides, Japan & Local). A single guide may naturally touch multiple clusters but is listed once, in its primary cluster.

    Do I need to read the guides in any particular order?

    No. Each guide is written to stand alone. That said, most climbers benefit from working broad-to-narrow: start with a flagship overview (Seven Summits Guide or Mountaineering for Beginners), then read the peak-specific guide for your target climb, then drill into the skill-specific guides (Altitude Acclimatization, Gear List, Training for High Altitude). The Progression Ladder section above maps a typical reading sequence by experience tier.

    How often are the guides updated?

    Every guide is reviewed at least twice per year. Peak-specific guides (Everest, Kilimanjaro, Aconcagua, Denali) are updated each climbing season to reflect current permit fees, operator pricing, route changes, and season-specific trends. Gear guides are refreshed annually. The most recent update date for each guide is shown on the guide itself, and every guide cites its source databases (Himalayan Database, AAJ, UIAA, national park authorities) for fact-checking.

    Where can I find information about a specific peak not listed?

    The 71 guides in this hub cover the most-climbed and most-searched peaks. If you’re researching a lesser-known peak, check the Regional Guides cluster first — it covers the Alps, Andes, Atlas, Nepal’s technical peaks, Oceania, and culturally significant summits. The Peak Profile Template in the Technical & Expert cluster is also useful for structuring your own research on any peak not covered.


    Authoritative Sources & Further Reading

    Every guide in this hub is researched and fact-checked against the primary databases and authorities that document mountaineering activity, route information, and expedition statistics:

    • The Himalayan Database — Authoritative source for 8,000 m peak statistics, originally compiled by Elizabeth Hawley
    • American Alpine Club & American Alpine Journal — Annual record of North American and international climbing expeditions
    • UIAA (International Mountaineering and Climbing Federation) — Global climbing standards, route grading, and stewardship
    • NPS Denali National Park — Official Denali permits, route data, and seasonal statistics
    • TANAPA (Tanzania National Parks Authority) — Kilimanjaro regulations and fee structure
    • Argentine Provincial Park Authority — Aconcagua permitting and seasonal summit data
    • Wilderness Medical Society — Practice guidelines for altitude illness diagnosis and treatment
    • Leave No Trace Center for Outdoor Ethics — Backcountry stewardship principles for alpine environments
    • Peer-reviewed altitude physiology research (acclimatization, hydration, supplemental oxygen)
    • Operator pre-trip briefings: International Mountain Guides, RMI Expeditions, Mountain Madness, Alpine Ascents
    Published: February 15, 2026
    Last updated: April 19, 2026
    Next review: July 2026
    Start Your Climbing Journey

    Choose Your Mountain — Plan Your Next Climb

    This hub is the navigation layer. When you’re ready to commit to a specific objective, start with the Beginner Progression cluster if you’re new, the Seven Summits cluster if you’re planning a multi-year project, or the peak-specific clusters (Everest, Kilimanjaro, Other Seven Summits Peaks) for your target climb.

    Browse the 12 Clusters →
Language »