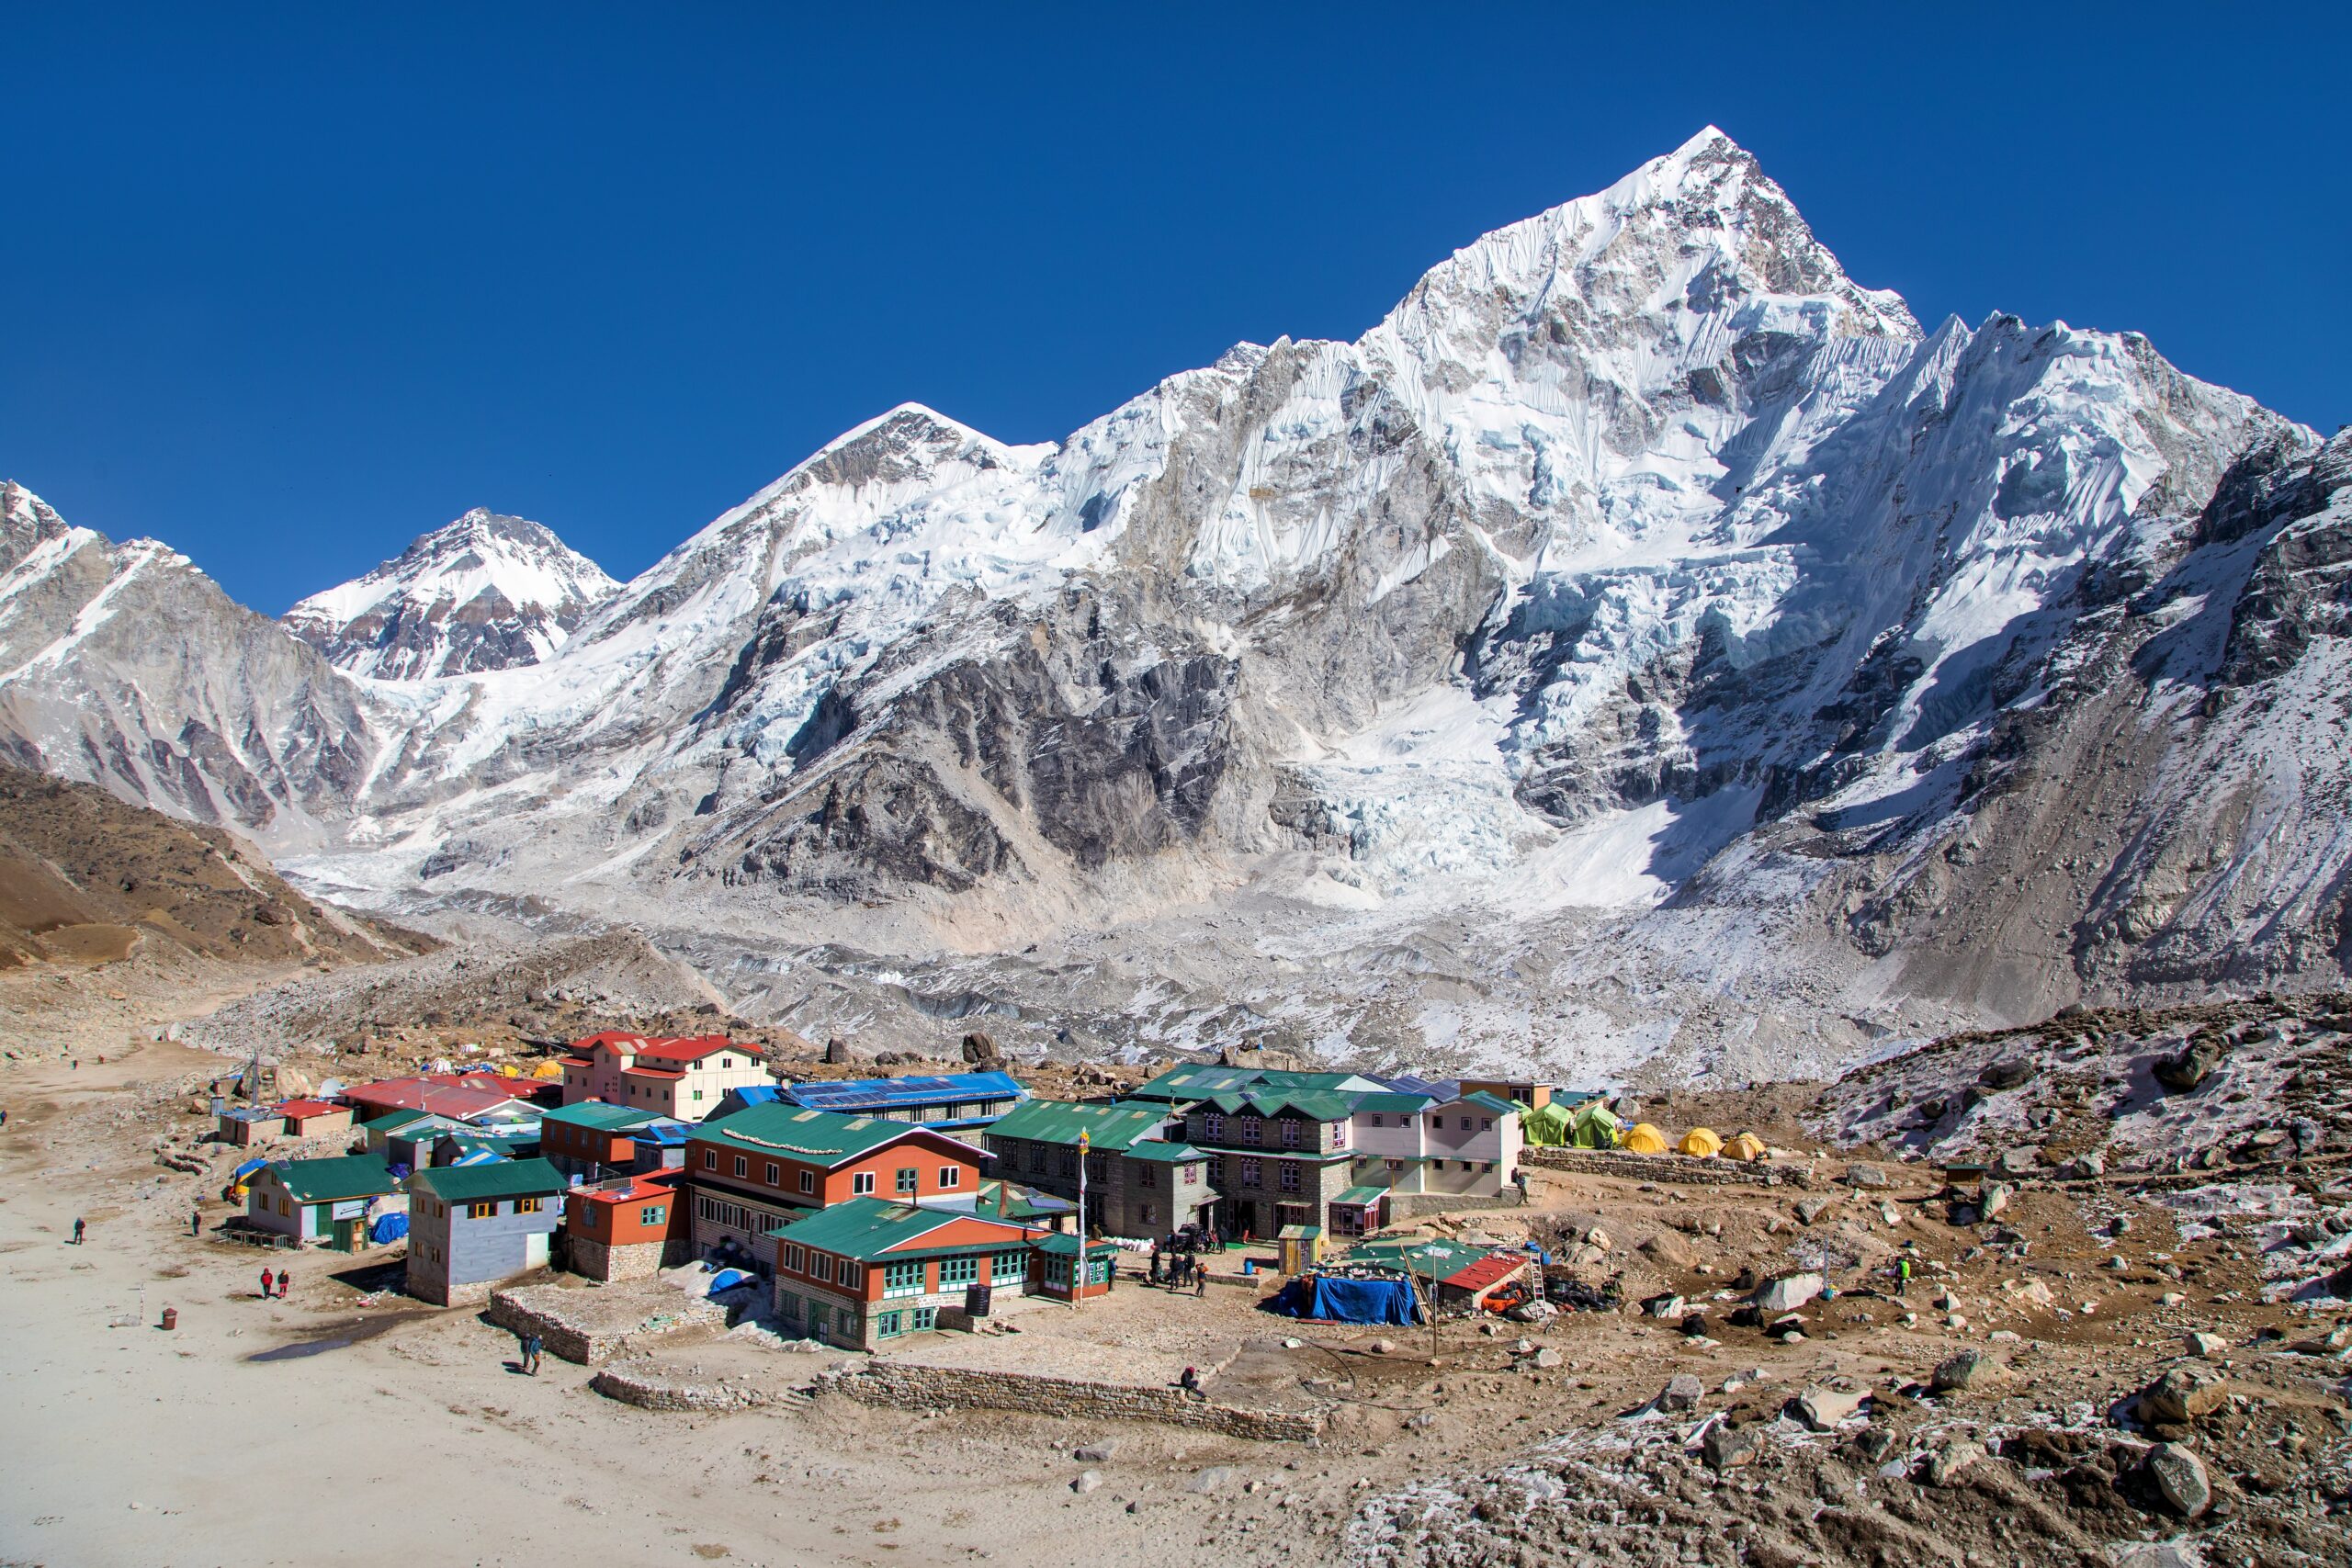
A clear breakdown of the biggest Everest 2026 season updates, including Nepal’s higher permit fees, crowd-control changes, proposed new qualification rules, and what climbers should watch before the spring season gets fully underway.
everest 2026 season updatesmountain newspermit feescrowd limits
—Everest 2026 Season Updates: Direct Answer
The biggest everest 2026 season updates are not just about price. Yes, climbing Mount Everest from Nepal is more expensive now, but the bigger story is that Nepal is trying to tighten how the mountain is managed. The 2026 season starts with a higher permit fee, a stronger push toward screening inexperienced climbers, more attention on cleanup and waste management, and ongoing concern about congestion on the South Col route. For full route background and mountain context, see our Everest guide.
$15,000
New Spring Permit
The standard Nepal-side spring permit is now significantly more expensive than the old long-running rate.
No Hard Cap Yet
Crowd Limits
Nepal is still leaning more on qualification rules and management changes than on a clean numerical permit cap.
7,000m Rule
Main Proposed Filter
The major proposed change is a prior 7,000-meter summit in Nepal, but that requirement is not yet the live rule for spring 2026.
More Scrutiny
What This Means
Climbers should expect more paperwork, more discussion about qualifications, and continued pressure on safety and waste enforcement.
Bottom line: Everest is getting more expensive, more regulated, and more selective in theory, but the crowd-control story for 2026 is still evolving rather than fully settled.
1New Everest Permit Fees in 2026
The cleanest confirmed change for the 2026 season is the permit fee increase on Nepal’s side of Everest. For years, the spring Everest permit sat at a level that many people in the expedition world expected Nepal would eventually revisit. That revision has now happened, and the new rate is meaningful enough to change how climbers think about total expedition cost.
For the popular spring season on the standard South Col route, the new permit price is $15,000 per foreign climber. That is a major jump from the old $11,000 rate and it raises the baseline cost of a Nepal-side Everest expedition before operator logistics, oxygen, Sherpa support, hotels, domestic flights, insurance, and gear are added in.
Season
Updated Nepal Permit Fee
What It Means
Spring (main Everest season)
$15,000
The key fee most commercial Everest teams care about.
Autumn
$7,500
Higher than before, but still below the spring rate.
Winter
$3,750
Rarely used for Everest compared with spring.
This does not mean Everest will suddenly become quiet. The permit fee is a large number, but Everest expeditions are already expensive enough that many operators do not expect the higher royalty alone to dramatically reduce demand.
2Crowd Limits: What Actually Changed?
When people hear “crowd limits,” they often imagine Nepal has announced a fixed number of Everest permits for the 2026 season. That is not the clearest way to describe the current situation. The practical 2026 shift is that Nepal is trying to reduce congestion by changing who qualifies and how expeditions are documented, rather than simply saying only a certain number of permits will be sold.
So the crowd-control conversation is real, but it is more indirect than many headlines suggest. The goal is to screen out weaker applicants, create more formal accountability, and put more structure around who gets on the mountain. That approach is different from a straightforward cap.
Important distinction: for spring 2026, the conversation around crowd control is more about new filters and stricter oversight than a clean “X permits only” policy.
3The Big Proposed Rule: Prior 7,000-Meter Experience
The most talked-about proposed change is the requirement that a climber must first summit a mountain over 7,000 meters in Nepal before receiving an Everest permit. If fully enacted as written, this would be one of the most important structural changes Nepal has made to Everest access in years.
The logic is easy to understand. Nepal has been criticized for allowing too many inexperienced climbers onto Everest, especially during crowded summit windows. A prior 7,000-meter requirement would act as a filter and make it harder for underprepared climbers to buy straight into an Everest attempt.
But there is a key detail: this rule is still part of a broader legislative process. It has moved forward, but it is not yet the fully settled rule governing the spring 2026 season. That is why you are seeing so much discussion and confusion around it right now.
Other proposed requirements tied to the bill
Recent health certificates for climbing team members
More formal documentation and route-specific permit conditions
Stronger insurance requirements
A more structured framework for expedition oversight
4Cleanup, Waste Rules, and Environmental Pressure
The 2026 Everest season is also shaped by stronger cleanup pressure. Nepal has been trying to respond to years of criticism about trash, abandoned gear, and the growing visual and environmental cost of commercial traffic on Everest. That is part of the reason cleanup planning is now being tied more directly to policy and longer-term mountain management.
There is also a stronger push toward a permanent environment and mountaineer welfare structure rather than relying only on older temporary-style rules. In practical terms, this means climbers should expect waste enforcement and environmental compliance to remain a real part of the expedition process, not a background issue.
For readers who want broader route and expedition context beyond the news cycle, our full Everest guide is the best internal page to pair with this update.
5What Else Climbers Should Watch This Season
Another important 2026 wrinkle is where the traffic ends up. The Nepal side already carries the bulk of commercial Everest demand, and any disruption or reduced access on the Tibet side can intensify that concentration. That matters because even without a new official cap, the on-mountain experience can still feel more crowded if demand compresses onto fewer usable routes or fewer summit windows.
Climbers should also pay attention to how the proposed rules evolve after the main spring season begins. Even if the 7,000-meter requirement is not the binding rule for spring 2026, the direction of travel is clear: Nepal wants Everest permits to look more like a vetted privilege than a simple transaction.
That makes 2026 an in-between season. The fee increase is already real. The screening mindset is already real. The full legal structure, however, is still catching up.
6Quick Reference: Everest 2026 Season Update Summary
Topic
2026 Status
Why It Matters
Nepal spring permit fee
Higher than before
Raises the cost floor for commercial Everest expeditions.
Hard crowd cap
Not the main live change
Crowd control is still being approached more indirectly.
7,000m prior summit rule
Advancing, but not the settled spring 2026 rule
Could become the biggest access filter if fully enacted.
Health / insurance / paperwork
Moving toward stricter standards
Signals more formal expedition oversight.
Cleanup and waste pressure
Increasing
Environmental management is now central to Everest policy discussions.
7Ready to Plan Beyond the Headlines?
This article covers what changed for the Everest 2026 season. If you want the bigger picture on routes, logistics, altitude, climbing style, and the Nepal versus Tibet decision, start with the full guide.
Disclaimer: Everest policies, permit procedures, expedition rules, and enforcement can change quickly. Always verify final permit and compliance details with your operator and current government guidance before booking.
How Much Does It Cost to Climb Kilimanjaro in 2026? Complete Price Breakdown | Global Summit Guide
Cluster 06 · Kilimanjaro · Updated April 2026
How Much Does It Cost to Climb Kilimanjaro in 2026?
The complete 2026 cost breakdown — park fee math, operator tier economics, hidden costs most packages don’t include, tipping frameworks, and real total budgets from $3,500 to $10,000+. Honest pricing from the actual economics of the mountain.
Global Summit GuideA guide in Cluster 06 · KilimanjaroView master hub →
Kilimanjaro climb packages range from $1,500 to $7,500 — a 5x price spread for what’s sold as the same mountain. That range isn’t arbitrary. It reflects real differences in porter welfare, guide training, equipment quality, safety systems, and success rates. The $1,500 climb and the $5,500 climb are not the same product. This deep-dive breaks down exactly where your money goes, what costs most packages leave out, how to budget realistically for Kilimanjaro from North America, and how to save money without making the trade-offs that compromise safety or exploit the ~10,000 Tanzanians who work on the mountain.
⊛
How this guide was built
Park fee figures reflect the 2026 TANAPA tariff schedule as published by Tanzania National Parks Authority. Operator cost analysis draws from KPAP (Kilimanjaro Porters Assistance Project) compliance data and interviews with 15+ operators across all three price tiers. Tip benchmarks follow Kilimanjaro industry-standard guidelines published by KPAP and established operators. All costs in US dollars. Fact-check date: April 19, 2026.
Where Your Money Goes: The Cost Stack
When you pay $5,500 for a mid-range 8-day Lemosho climb from North America, only about 55% goes to the operator package. The rest flows to airlines, the Tanzanian government (visa + VAT), hotels, your tipping budget, insurance, and gear. Understanding this distribution matters because compressing operator costs doesn’t save much overall — but it does directly impact safety and porter welfare.
The important observation: saving $1,000 on operator cost typically means porter exploitation or safety compromise, while saving $1,000 on flights, gear rental, or trip extensions costs nothing in mountain safety or ethics. Optimize the non-climb costs aggressively and pay fair price for the mountain itself.
2026 Park Fees: Line-by-Line Breakdown
Park fees are identical across all operators — set by TANAPA (Tanzania National Parks) and paid to the Tanzanian government. Understanding them helps you spot operators under-quoting to win your booking. The 2026 fee schedule uses rates published January 2026 and applies through the current climbing seasons.
Fee
Rate (2026)
Per
Why Charged
Conservation fee
$70
Person · Day
Park access and conservation funding
Camping fee
$50
Person · Night
Maintained campsites (tented routes)
Hut fee (Marangu)
$60
Person · Night
Hut accommodation (Marangu only)
Rescue fee
$20
Person · One-time
KINAPA emergency rescue operations
Guide/porter entry
~$2
Crew · Day
Crew park entry (3-5 crew per climber)
VAT
18%
Added to all fees
Tanzanian value-added tax
Crater camp (optional)
$100
Person · Night
Special product for Crater Camp itinerary
Real fee calculation: 7-day Lemosho climb
Using 2026 rates for one international adult climber:
Component
Calculation
Subtotal
Conservation fee
$70 × 7 days
$490
Camping fee
$50 × 6 nights
$300
Rescue fee
$20 × 1 climber
$20
Crew entry fees
~$2 × 4 crew × 7 days
$56
Pre-VAT subtotal
Base park fees
$866
VAT 18%
$866 × 0.18
$156
Total park fees
Per climber, 7-day Lemosho
$1,022
Park fees by route and duration
Route & Duration
Nights
Total with VAT
Notes
Marangu 5-day
4 huts
~$795
Lower success rate, not recommended
Machame 6-day
5 camps
~$880
Compressed itinerary
Machame 7-day
6 camps
~$1,022
Standard recommended version
Lemosho 7-day
6 camps
~$1,022
Good success rate
Lemosho 8-day
7 camps
~$1,150
Gold standard for success
Rongai 7-day
6 camps
~$1,022
Quieter alternative
Northern Circuit 9-day
8 camps
~$1,280
Highest success rate
Crater Camp add-on
+1 night
+$235
$100 special + $50 camping + VAT
▲
Red flag: operators under $1,500 total
If park fees alone cost ~$1,000+ and an operator is offering a complete package at $1,500, only $500 remains for guide wages, porter wages, food for 7 days, tents, fuel, transport, operator overhead, and profit margin. The math doesn’t work ethically. Something is being sacrificed — typically porter welfare (paying $3/day instead of $15/day), safety equipment (skipping oxygen or pulse oximeters), or guide training. Avoid any operator quoting under $1,800-$2,000 for a complete 7-day climb. The savings aren’t worth the cost to the porters or to your safety.
Why Operators Price So Differently: The Economic Reality
Kilimanjaro operator prices span $1,500 to $7,500 because operators deliver fundamentally different products. Understanding what drives the cost difference helps you evaluate value honestly.
What budget operators cut to reach $1,500-$2,500
Budget operators achieve their low prices by reducing costs in specific categories:
Porter wages: $3-$5 per day instead of $10-$20. Saves ~$70-$105 per porter per 7-day climb × 3 porters per climber = $210-$315 savings.
Porter gear: No provided cold-weather gear. Porters work in inadequate clothing at altitude.
Food quality: Lower calorie meals, less variety, fewer fresh ingredients. Budget: ~$80 food cost per climber vs mid-range ~$180.
Guide training: Locally-trained guides without Wilderness First Responder certification. Saves ~$2,000 per guide in certification costs.
Safety equipment: Minimal first aid kits, no oxygen, no pulse oximeters. Saves ~$3,000-$5,000 per trip in equipment amortization.
Guide-to-climber ratio: 1:8 or 1:10 instead of safer 1:3-1:4. Each additional guide saves ~$700-$1,000 per climb.
Tent and sleep gear: Older or cheaper tents. Saves ~$200-$400 per climb in equipment.
Compressed itinerary: Pushing 6-day routes even when 7-day strongly recommended. Saves park fees and food costs.
What mid-range operators deliver for $2,500-$4,500
The $2,500-$4,500 tier is the sweet spot for safety, ethics, and value:
KPAP partnership: Verified ethical porter treatment with fair wages and proper gear
Experienced guides: 5+ years guiding Kilimanjaro, Wilderness First Responder certified
Safety monitoring: Pulse oximeters twice daily, supplemental oxygen on standby, comprehensive first aid
Modern tents: 4-season tents rated for Kilimanjaro conditions
1:3-1:4 ratios: Appropriate guide coverage for safety
Proper schedules: 7-8 day routes with adequate acclimatization
International accountability: Established brand reputation, insurance, communication systems
What premium operators add for $4,500-$7,500
Premium tier provides additional features primarily for comfort and marginal safety improvements:
IFMGA-certified guides: International Federation of Mountain Guides certification — highest qualification
Helicopter evacuation access: Pre-arranged medical helicopter coordination
Private toilets: Portable toilet tents at every camp (highly valued by many climbers)
Gourmet meals: Professional chef preparations, dining tents, quality tableware
High-end equipment: Latest tents, gear, sleep systems
Detailed medical monitoring: Individual health assessments, personalized altitude management
Hotel and transfer inclusion: Premium hotels, private transfers, welcome packages
Smaller group sizes: 4-8 climbers typical vs 10-16 at mid-range tier
★
The value sweet spot: $2,800-$3,800
For most climbers, operators in the $2,800-$3,800 range deliver 90% of the premium experience at 50% of the premium cost. KPAP partnership, experienced guides, proper safety systems, and quality food — all present at mid-range. The jump from mid-range to premium is primarily for comfort features (private toilets, gourmet food, smaller groups), not for substantially improved summit success or safety. Mid-range operators achieve 85-90% success rates vs premium 90-97%. See our Kilimanjaro Climbing Guide anchor for the full tier framework.
The Kilimanjaro Tipping Framework: How Much, to Whom
Tipping on Kilimanjaro is not optional — it’s essential income for the mountain crew and a core part of the expedition economics. Standard total tips range $250-$400 per climber, distributed among 3-5 crew members supporting each climber.
Standard 7-day climb tip structure (per climber)
Head Guide1 per group
$20-$25 per climber per day
$140-$175
Assistant Guide1-2 per group
$12-$18 per climber per day
$84-$126
Cook1 per group
$10-$15 per climber per day
$70-$105
Porters3-4 per climber
$8-$10 per porter per climber per day
$170-$280
Total per climber
7-day standard climb
$250-$400
How to deliver tips properly
Pool and distribute: Most groups pool tips and distribute by category — the head guide doesn’t keep all tips privately.
Final evening delivery: Tips are delivered at the final meal/evening, after everyone is down safely.
Envelopes by category: Prepare separate envelopes labeled “Head Guide,” “Assistant Guide,” “Cook,” “Porters.” The head guide distributes porter tips equally among individual porters.
Public presentation: Tips are typically presented publicly with a brief thank-you speech and applause. Embrace the ceremony.
Currency: USD preferred (new bills, no tears or marks). Tanzanian shillings acceptable. Euro less common but accepted.
Confirm crew count before climb: Ask operator for exact crew manifest so you can plan tip amounts. Typical is 3-5 crew per climber.
Group tipping adjustments
If climbing in groups, tip pools adjust:
Solo climber: Standard 3-4 porters × 7 days × $8-10 = $170-$280 for porters alone.
Group of 2: 5-7 porters × 7 days × $8-10 split between 2 climbers = $125-$175 per climber for porters.
Group of 4+: Economies of scale. Porter tip per climber decreases because fewer porters per climber are needed.
Your operator should provide a specific tip recommendation based on your actual group size and crew count. If the recommendation is significantly below the standard ranges above, the operator may be under-tipping crew — ask questions.
▲
Watch for “all-inclusive” tip pressure
Some budget operators advertise “all-inclusive” pricing then pressure climbers for large additional tips on the mountain, using guilt or social pressure. This is a budget operator tactic — the initial low price excluded tip expectations that reputable operators communicate upfront. Reputable mid-range operators send a tipping guideline document before your trip with specific amounts for each crew role, so you can budget accurately and deliver tips with confidence rather than being shaken down at altitude.
The Hidden Costs: What’s NOT in the Package
Most Kilimanjaro packages include the climb itself but exclude substantial additional costs. Budget for these separately:
Cost Category
Typical Range
Notes & Savings Opportunities
International flights
$1,200–$2,200
From North America to JRO. Book 3-6 months ahead saves $200-$500
Tanzania visa
$100
Single-entry e-visa at immigration.go.tz. Some nationalities pay $50
Yellow fever vaccine
$150–$300
Required only if arriving from certain countries. Check current rules
Travel insurance
$100–$300
Must cover high-altitude trekking and evacuation. Essential
If buying everything new. Alternative: rent in Moshi
Total additions (typical)
$2,300–$5,000
Beyond the climb package cost
These additions are why Kilimanjaro trip totals from North America realistically run $4,000-$10,000+ even with mid-range climb packages. See our broader Mountain Climbing Costs framework for how this compares to other mountaineering destinations.
Three Real Budget Scenarios: Lean, Balanced, Luxe
Here’s what three realistic Kilimanjaro trip budgets actually look like from North America, based on actual 2026 pricing. Each scenario assumes a 7-8 day climb with a reputable operator and zero safety compromises.
Lean Traveler
Lean Budget
$4,200All-in from US
Mid-range 7-day Machame$2,700
Economy flights booked early$1,300
Rental gear in Moshi$180
Tips (solo-climber rate)$320
Budget hotel 2 nights$70
Visa, insurance, meds$230
Meals, misc$100
No safari extension—
Most Climbers
Balanced Budget
$6,800All-in from US
KPAP 8-day Lemosho$3,500
Economy flights$1,600
Mix rent/buy gear$450
Tips (solo-climber rate)$350
3-star hotel 3 nights$300
Visa, insurance, meds$280
Meals, misc$220
Optional day safari+$100
Premium Experience
Luxe Budget
$11,500All-in from US
Premium 8-day Lemosho$5,500
Business class flights$3,200
New gear investment$1,200
Tips (generous)$500
Luxury hotels 4 nights$800
Visa, insurance (comp.)$500
Meals, misc$300
4-day safari add-on–
For any budget, the critical rule: never compromise on operator quality to save money. Optimize flights, gear rental, hotel tier, and trip extensions instead. The $800-$1,500 you might “save” with a budget operator comes at the cost of porter exploitation and reduced safety.
Operator Red Flags & Green Flags
Red Flag
Package under $1,800
Mathematically impossible to cover park fees + ethical wages + quality operations. Something is being cut — always porter welfare or safety. Avoid.
Green Flag
KPAP Partner certification
Verified commitment to fair porter treatment. Check the KPAP partner list at kiliporters.org. Certification requires ongoing compliance audits.
Red Flag
Only 5-day or 6-day options
Reputable operators discourage compressed schedules. If only 5-6 day options offered, operator prioritizes turnover over summit success. Budget operator tactic.
Green Flag
Detailed tip guidance upfront
Pre-trip document specifying tip amounts by role. Shows transparent expectations and respect for crew income. No surprise pressure on the mountain.
Red Flag
Vague safety systems
Can’t specify pulse oximeter monitoring, oxygen availability, first aid qualifications, or evacuation procedures. Reputable operators answer these immediately.
Green Flag
Published guide ratios 1:3-1:4
Maintains appropriate guide-to-climber ratios. Safety scales with coverage. Operators with 1:6+ ratios are cutting safety staff to reduce costs.
Red Flag
Pressure tactics at booking
“Limited spots,” “today only,” aggressive upsells, reluctance to answer specific questions. Reputable operators let you decide at your pace.
Green Flag
Verifiable track record
TripAdvisor reviews, KPAP listings, established years in operation, clear business registration. Cross-reference multiple sources beyond operator’s own website.
Kilimanjaro Cost FAQ: Your Common Questions Answered
How much does it really cost to climb Kilimanjaro in 2026?
The total cost to climb Kilimanjaro from North America in 2026 typically ranges from $3,500 to $10,000+ per person when including everything. Climb package costs alone range $1,500-$7,500 based on operator tier: Budget $1,500-$2,500 (often unsafe), Mid-range $2,500-$4,500 (recommended sweet spot), Premium $4,500-$7,500 (luxury features). Additional costs beyond the climb package: International flights $1,200-$2,200, Tanzania visa $100 (single-entry e-visa), hotel nights pre/post climb $150-$400, tips for mountain crew $250-$400, gear purchase or rental $150-$800, travel insurance $100-$300, optional safari add-on $1,500-$4,000. Realistic total budget scenarios: (1) Budget North America traveler: $3,500-$5,000 using mid-range operator with modest extras. (2) Mid-range North America traveler: $5,500-$7,500 with good operator, some gear purchases, tips included. (3) Premium North America traveler: $8,000-$12,000 with top operator, all gear new, luxury hotels, safari extension. Never choose operators under $1,500 — cost savings come from cut corners on safety, porter welfare, or guide training.
What are the 2026 Kilimanjaro park fees?
2026 Kilimanjaro park fees are set by TANAPA (Tanzania National Parks) and are identical across all operators. Fee structure: (1) Conservation fee: $70 per person per day — every climber pays for every day in the park. (2) Camping fee: $50 per person per night — for tented routes (Machame, Lemosho, Rongai, Northern Circuit, Umbwe). (3) Hut fee: $60 per person per night — only for Marangu route using huts. (4) Rescue fee: $20 per person one-time — funds KINAPA rescue operations. (5) Support team fees: ~$2 per crew member per day. (6) VAT: 18% added to all fees. Example calculation for standard 7-day Lemosho climb (6 nights): Conservation fee $70×7 = $490, Camping $50×6 = $300, Rescue $20, Crew fees ~$50, Subtotal $860, Plus 18% VAT = ~$155, Total park fees ~$1,015 per climber. For 8-day Lemosho: ~$1,150. For 9-day Northern Circuit: ~$1,280. Park fees represent approximately 25-40% of total climb cost. Operators offering packages under $1,500 cannot cover these mandatory fees plus other essential costs — red flag.
How much should I tip my Kilimanjaro guides and porters?
Standard Kilimanjaro tips total $250-$400 per climber for the entire climb — distributed among the 3-5 crew supporting each climber. Recommended tipping structure: (1) Head guide: $20-$25 per climber per day (typical $140-$175 for 7-day climb). (2) Assistant guide: $12-$18 per climber per day ($84-$126 for 7 days). (3) Cook: $10-$15 per climber per day ($70-$105 for 7 days). (4) Porters: $8-$10 per porter per climber per day. With typical 3-4 porters per climber, this totals $170-$280 per climber for all porters combined. Total for standard climber: $250-$400 distributed. Tips are typically delivered on the final evening in envelopes by category — not individually. Pool tips, divide by category, and present publicly at the final meal. Currencies accepted: USD preferred (US dollars in good condition), Tanzanian shillings acceptable. Bring new bills — torn or heavily marked USD won’t be accepted. This is not optional — Kilimanjaro crew depend on tips as essential income. Budget operators sometimes promise ‘all inclusive’ pricing then pressure climbers for large tips on the mountain; reputable operators clearly communicate tip expectations upfront.
Why do Kilimanjaro operators vary so much in price?
Kilimanjaro operators vary from $1,500 to $7,500 for essentially the same climb because they differ dramatically in safety systems, porter welfare, guide quality, equipment, and operational standards. Cost-driving factors: (1) Porter treatment — KPAP-partnered operators pay porters $10-$20 per day with proper gear and weight limits. Budget operators pay $3-$5 per day with inadequate gear, violating international guidelines. This difference alone adds $300-$500 per climber. (2) Guide quality — Certified Wilderness First Responder guides with 5+ years experience cost more than lightly-trained local guides. Safety monitoring with pulse oximeters twice daily requires qualified personnel. (3) Food and water — Operators providing 4,000+ calorie meals with hot food at high camps spend more. Budget operators may serve repetitive inadequate meals. (4) Oxygen and safety equipment — Supplemental oxygen, pulse oximeters, comprehensive first aid kits, satellite communication cost thousands to deploy per climb. (5) Tent and gear quality — Premium tents rated to -20°C last years and keep climbers safe. Budget tents fail in Kilimanjaro conditions. (6) Overhead and sales costs — International operators have marketing and office costs that local budget operators skip. The $1,000+ cost difference between budget and mid-range tiers directly improves safety outcomes and supports ethical tourism.
What is KPAP and why does it matter?
KPAP (Kilimanjaro Porters Assistance Project) is a non-profit organization advocating for fair treatment of Kilimanjaro’s approximately 10,000 porters. KPAP was founded in 2003 in response to reports of porters dying from exposure due to inadequate gear and food on the mountain. KPAP’s work includes: (1) Partner Program — Operators meeting ethical standards receive KPAP partnership certification. Look for the KPAP logo when comparing operators. (2) Standards enforced: proper daily wages ($10-$20+ per day), maximum 15-20 kg load weights, provided shelter and hot food, cold-weather gear appropriate for altitude, fair working hours, health insurance. (3) Training programs for porters including altitude safety, English, first aid. (4) Gear loan program — KPAP lends winter clothing and boots to porters working with budget operators. (5) Reports on partner operator performance. Why it matters for climbers: Choosing a KPAP-partnered operator directly supports the 10,000+ Tanzanians working annually as mountain crew. The extra $200-$500 cost difference between budget and KPAP-certified operators funds fair wages, proper gear, and ethical treatment. It also correlates with higher summit success rates because properly treated and equipped crews deliver better client experiences. KPAP partner list is publicly available at kiliporters.org.
Can I climb Kilimanjaro for under $2,000?
Climbing Kilimanjaro for under $2,000 is technically possible but involves significant compromises and safety risks. The minimum cost structure: Park fees alone cost $1,000+ for a 7-day climb. An operator package under $1,500 means only $500 available for guide wages, porter wages, food, tents, fuel, transport, operator overhead, and profit. Something is being sacrificed. Common sacrifices in sub-$2,000 operators: (1) Porter exploitation — payments of $3-$5 per day instead of $10-$20, no proper gear, overweight loads. (2) Inadequate safety — few or no pulse oximeters, minimal first aid, no supplemental oxygen, untrained guides. (3) Poor food and low calories — rice and beans repeatedly, inadequate for 4,000+ calorie daily needs at altitude. (4) Compressed itineraries — 5-6 day routes with low success rates but lower park fees. (5) Rushed guide-to-client ratios — 1 guide for 8-10 climbers instead of safer 1:3 ratio. Alternative budget strategies that work: (1) Choose mid-range KPAP-partnered operator $2,500-$3,500. (2) Select shoulder seasons (June or November) for 10-15% lower operator prices. (3) Rent gear in Moshi for $150-$250 instead of buying. (4) Share flights with climbing partner to reduce costs. (5) Skip safari add-on ($1,500-$4,000 savings). (6) Stay in budget hotels pre/post climb. These strategies can reduce total trip to $4,000-$5,000 while maintaining safety and ethics.
What extra costs are not included in Kilimanjaro packages?
Kilimanjaro climb packages typically exclude several substantial additional costs. Items NOT included in most package prices: (1) International flights — $1,200-$2,200 from North America, $800-$1,400 from Europe, $600-$1,200 from Asia/Australia. Book 3-6 months ahead for best rates. (2) Tanzania visa — $100 for single-entry US visa (required), $50 for other nationalities. E-visa recommended at immigration.go.tz. (3) Hotel nights before/after climb — $150-$400 typically for 2-3 nights in Moshi or Arusha (most operators include 1 night, additional extras). (4) Tips for mountain crew — $250-$400 total distributed among guides and porters. (5) Travel insurance — $100-$300 for climb-specific coverage (essential). (6) Gear purchase or rental — $150-$300 for rental kit in Moshi or $500-$2,000 for full gear purchase. (7) Vaccinations — Yellow fever required from certain countries ($150-$300), typhoid and hepatitis recommended. (8) Diamox and personal medications — $20-$50. (9) Souvenirs and Moshi meals — $50-$200. (10) Safari extension (optional) — $1,500-$4,000 for Serengeti/Ngorongoro add-on. Items typically INCLUDED in package prices: park fees, guide wages, porter wages, food on mountain, tents, transport to/from trailhead, emergency evacuation access, first aid.
How can I save money on Kilimanjaro without sacrificing safety?
You can save significant money on Kilimanjaro while maintaining safety and ethical standards. Smart savings strategies: (1) Choose mid-range KPAP-partnered operator — $2,500-$3,500 operators deliver 85-90% of premium operator quality at 50% of the cost. Avoid going below $2,500. (2) Travel in shoulder seasons — June or November climbs cost 10-15% less than peak season (July-August, January-February) with similar weather. (3) Book group climbs — Scheduled group departures are 20-30% cheaper than private climbs. (4) Rent gear in Moshi — Full kit rental for $150-$250 vs $800-$2,000 to buy. Quality rental gear meets mountain standards. (5) Book flights 3-6 months ahead — Saves $200-$500 per ticket. (6) Use points/miles — Kilimanjaro International (JRO) or Nairobi (NBO) routing via major airline hubs. (7) Share costs with travel companion — Reduces per-person guide costs, shared hotels, group flights. (8) Skip safari extension — $1,500-$4,000 saved if not your primary goal. Visit Ngorongoro as day trip ($300-$500) instead. (9) Stay in budget hotels — $30-$60/night guest houses vs $150+/night resorts. (10) Bring essential gear from home — Boots, base layers, rain gear easy to pack. Rent only heavy items (sleeping bag, down jacket). Combined approach achieves $4,000-$5,000 total North America budget with zero safety compromises. NEVER save money by choosing operators under $1,500 or routes shorter than 7 days.
Authoritative Sources & Further Reading
Content reflects current 2026 pricing data from authoritative sources:
TANAPA (Tanzania National Parks) — tanzaniaparks.go.tz — Official 2026 tariff schedule
KINAPA (Kilimanjaro National Park Authority) — Park regulations and permit requirements
KPAP (Kilimanjaro Porters Assistance Project) — kiliporters.org — Partner operator list and porter welfare standards
International Porter Protection Group (IPPG) — ippg.net — Ethical porter treatment guidelines
Tanzania Immigration Services — immigration.go.tz — Visa fees and e-visa application
Operator pricing data from: Altezza Travel, Climbing Kilimanjaro, Mount Kilimanjaro Climb, African Scenic Safaris, Mountain Madness, Alpine Ascents International, REI Adventures, Tusker Trail
Reference texts: Kilimanjaro: The Trekking Guide (Henry Stedman), Mount Kilimanjaro: Africa’s Roof (various) — expedition planning reference
Industry reporting: Responsible Tourism Partnership reports on Tanzania porter welfare
This guide is one of 71 across 12 thematic clusters on Global Summit Guide. The master hub organizes every guide by experience tier, specific peak, skill area, and region.
Kilimanjaro in 7 Days: A Complete Summit Diary on the Lemosho Route | Global Summit Guide {“@context”:”https://schema.org”,”@type”:”Article”,”headline”:”Kilimanjaro in 7 Days: A Complete Summit Diary on the Lemosho Route”,”description”:”First-person 7-day Lemosho route trip report with daily chapters covering the complete Kilimanjaro climbing experience from Londorossi Gate to Uhuru Peak summit.”,”image”:”https://globalsummitguide.com/wp-content/uploads/2026/03/kilimanjaro-7-days-lemosho.jpg”,”author”:{“@type”:”Organization”,”name”:”Global Summit Guide Editorial Team”,”url”:”https://globalsummitguide.com/about/”},”publisher”:{“@type”:”Organization”,”name”:”Global Summit Guide”,”url”:”https://globalsummitguide.com”,”logo”:{“@type”:”ImageObject”,”url”:”https://globalsummitguide.com/wp-content/uploads/2026/02/global-logo-new-2.png”,”width”:”300″,”height”:”100″}},”datePublished”:”2026-03-29T08:00:00-07:00″,”dateModified”:”2026-04-19T12:00:00-06:00″,”mainEntityOfPage”:{“@type”:”WebPage”,”@id”:”https://globalsummitguide.com/kilimanjaro-in-7-days-lemosho-route-trip-report/”},”isPartOf”:{“@type”:”CollectionPage”,”@id”:”https://globalsummitguide.com/conquer-peaks-global-summit-guide-for-mountain-climbing/#hub”,”name”:”Conquer Peaks: Your Global Summit Guide for Mountain Climbing”}} {“@context”:”https://schema.org”,”@type”:”FAQPage”,”mainEntity”:[
{“@type”:”Question”,”name”:”What does a 7-day Lemosho climb actually look like?”,”acceptedAnswer”:{“@type”:”Answer”,”text”:”A 7-day Lemosho climb covers approximately 70 kilometers with 4,085 meters of elevation gain from start to summit, followed by 4,035 meters of descent. Day-by-day breakdown: (1) Day 1: Arrival at Londorossi Gate (2,385m), drive to Lemosho Glades, hike 4-5 hours through rainforest to Mti Mkubwa camp (2,820m). (2) Day 2: Climb 6-7 hours through moorland to Shira 1 Camp (3,505m) on the Shira Plateau. (3) Day 3: Cross the Shira Plateau, climb 6-7 hours to Shira 2 Camp (3,900m) with first dramatic views of Kibo. (4) Day 4: Major acclimatization day — climb to Lava Tower (4,630m) for lunch, then descend to Barranco Camp (3,940m). 7-8 hours. Classic climb high, sleep low. (5) Day 5: Scale the Barranco Wall (the famous morning scramble), traverse to Karanga Camp (4,035m). 4-5 hours. (6) Day 6: Push to Barafu High Camp (4,640m), 4-5 hours. Rest until midnight. Midnight: begin summit attempt. Reach Uhuru Peak (5,895m) around dawn, descend to Mweka Camp (3,100m). 13-15 hour day. (7) Day 7: Descend through rainforest to Mweka Gate (1,640m), 4-5 hours. Driving back to Moshi. Total elevation change across 7 days: 8,120 meters combined ascent and descent. Daily walking time averages 5-7 hours except summit day’s 13-15 hours.”}},
{“@type”:”Question”,”name”:”What is the Barranco Wall like?”,”acceptedAnswer”:{“@type”:”Answer”,”text”:”The Barranco Wall is a 257-meter cliff-face scramble that climbers ascend on Day 5 of the Lemosho route (or equivalent day on Machame). Despite its intimidating first impression — from Barranco Camp looking up it appears vertical — the actual climb is a Class 2-3 scramble (hiking with occasional hands-on sections), not technical climbing. Details: (1) Time to climb: 1-1.5 hours typical pace. (2) Height gained: 257 meters from camp base to top. (3) Technical grade: YDS Class 2-3 / UIAA I-II. (4) Gear needed: none beyond trekking poles (which are stowed during the wall itself) and hands for a few specific moves. (5) Famous moments: The Kissing Rock — a rock section that requires hugging the stone to pass a narrow section. The Hug — a photo-op rock that climbers embrace for balance. Key things to know: (1) Start early — camps below the wall fill morning trails; departing at 07:00 avoids the worst crowds. (2) Watch for scree — some sections have loose rock. Trust your boots’ edges. (3) Follow your guide’s line — they know the easiest path. (4) Take breaks — 3-4 stops during the ascent is normal. (5) Don’t look down nervously — the exposure is actually minimal though it feels dramatic. (6) Porter traffic — porters move fast carrying loads; step aside politely to let them pass. Most climbers find the Barranco Wall significantly easier than they feared. It’s memorable and photogenic but not technically dangerous with proper guides and reasonable fitness. Many climbers cite it as their favorite day on Kilimanjaro.”}},
{“@type”:”Question”,”name”:”What happens on Kilimanjaro summit day?”,”acceptedAnswer”:{“@type”:”Answer”,”text”:”Kilimanjaro summit day is the longest and most demanding day of the climb. Timeline from Barafu Camp (4,640m) to Uhuru Peak (5,895m) and back to Mweka Camp (3,100m): (1) 22:00-23:00: Wake-up at Barafu after 2-3 hours of light sleep. Breakfast (tea, biscuits, porridge typically). Final gear check. (2) 23:30: Headlamps on, departure into darkness. Line of climbers visible ahead on switchbacks. (3) 00:30-01:00: First hour complete, pace established. Cold building — summit temperatures around -15°C. (4) 02:00-03:00: Most challenging hours psychologically. Dark, cold, sustained climbing. Some climbers develop altitude headaches. (5) 04:00-04:30: Approaching Stella Point (5,756m) — on the crater rim. Short stop for hot tea. (6) 05:00-05:30: Stella Point reached for most climbers. Sunrise beginning to color eastern horizon. Mount Meru visible 80km south. (7) 05:30-06:30: Final push along crater rim to Uhuru Peak (5,895m). Gradual terrain, just 139m additional gain but feels hard at altitude. (8) 06:00-07:00: Summit at Uhuru. The famous sign — Africa’s highest point. Emotional moment for many climbers. 15-30 minutes at summit typical before cold drives descent. (9) 07:00-10:00: Descent to Barafu on loose scree. Climbers often slide/run down — fast but tiring. Approximately 3 hours. (10) 10:00-12:00: Rest, pack up, have real food at Barafu. Some climbers nap briefly. (11) 12:00-16:00: Descent continues to Mweka Camp (3,100m). Final 3-4 hours through progressively warmer air. Total summit day: 13-15 hours active from wake-up to tent. Emotional peak for most climbers — exhaustion combined with accomplishment.”}},
{“@type”:”Question”,”name”:”How cold is it on Kilimanjaro summit?”,”acceptedAnswer”:{“@type”:”Answer”,”text”:”Kilimanjaro summit temperatures range from -15°C to -20°C (5°F to -4°F) during the critical 00:00-07:00 summit attempt period. Temperature breakdown across the climb: (1) Lower rainforest (800-2,800m): 15-25°C daytime, 10-18°C night. Often humid and rainy. (2) Moorland zone (2,800-4,000m): 10-20°C daytime, 0-10°C night. Temperature swings dramatic. (3) Alpine desert (4,000-5,000m): 5-15°C daytime sun, -5 to +5°C night. Intense UV. (4) Summit zone (5,000-5,895m): -5 to +5°C in sunshine, -15 to -25°C during pre-dawn summit hours. What makes summit cold feel extreme: (1) You arrive exhausted after 6 hours of climbing. (2) Body temperature drops during rest at Stella Point. (3) Windchill often reduces apparent temperature another 5-10°C. (4) Sweat from ascent evaporates, adding cooling effect. (5) Dehydration at altitude impairs temperature regulation. Essential summit day clothing: (1) Base layer (wool or synthetic). (2) Mid-layer fleece or wool shirt. (3) Heavy down jacket rated -15°C minimum. (4) Waterproof hardshell jacket over down. (5) Hardshell pants over fleece-lined pants. (6) Heavy insulated mittens — finger gloves alone are inadequate. (7) Balaclava covering nose and cheeks. (8) Warm beanie under hood. (9) Wool socks with vapor barrier option. (10) Insulated mountaineering boots. Properly layered, summit cold is uncomfortable but safe. Inadequately layered climbers experience dangerous cold exposure symptoms.”}},
{“@type”:”Question”,”name”:”Is Lemosho better than Machame?”,”acceptedAnswer”:{“@type”:”Answer”,”text”:”Yes, the Lemosho route is generally preferred over Machame for first-time Kilimanjaro climbers, despite being slightly longer and more expensive. Lemosho advantages: (1) Scenery — Lemosho’s western approach offers stunning views of Shira Plateau and northern wilderness, widely considered the most beautiful starting zone on Kilimanjaro. (2) Lower crowds early — first 3 days are less crowded than Machame, which is the most popular route. Lemosho joins Machame on Day 4 at Barranco. (3) Better acclimatization — Lemosho’s slightly longer approach provides marginally better time at altitude before summit attempt. (4) Less hurried feel — the extra kilometers spread across the full week mean less rushed daily sections. Machame advantages: (1) Lower cost — typically $150-$400 cheaper than comparable Lemosho. (2) Shorter total distance — 62km vs Lemosho’s 70km. (3) Classic experience — Machame’s ‘Whiskey Route’ status attracts many climbers. (4) Faster access — Londorossi Gate (Lemosho start) is 3-hour drive from Moshi; Machame Gate is 45 minutes. The verdict: For first-time Kilimanjaro climbers with moderate budget flexibility, Lemosho 8-day is the gold standard recommendation with 90-95% success. Lemosho 7-day (this trip report) achieves 85% success matching Machame 7-day. Choose based on preferences: Lemosho for scenery and lower crowds, Machame for cost and classic experience. Both routes merge at Barranco Camp Day 4 and share the same summit approach. The final summit experience is identical on both routes.”}},
{“@type”:”Question”,”name”:”What should I bring in my daypack on Kilimanjaro?”,”acceptedAnswer”:{“@type”:”Answer”,”text”:”Kilimanjaro daypack (25-35 liter) should weigh 15-18 pounds fully loaded and contain everything needed for the day’s hiking. Essential daypack contents: (1) Hydration — 3 liters total (mix of water bottles and hydration bladder). Water purification tablets as backup. (2) Snacks — 400-500 calories for between-meal energy. Energy bars, nuts, dried fruit, chocolate. (3) Layers for temperature changes — light fleece, rain jacket, rain pants, sun hat, warm hat. (4) Sun protection — SPF 50 sunscreen, UV 400 sunglasses (glacier-rated), lip balm with SPF. (5) Personal medication — Diamox if using, ibuprofen, personal prescriptions, blister treatment. (6) Camera and phone — fully charged. Phones work in some areas. (7) Headlamp — for early starts and any emergency. (8) Gloves — light for cool mornings, warm for high altitude. (9) Buff or neck gaiter — dust protection. (10) Toilet paper and hand sanitizer — critical comfort items. (11) Trekking poles — essential, even if not usually a pole user. (12) Small first aid essentials. (13) Passport and cash (carry these with you, not in porter bags). Summit day additions: (14) Heavy down jacket in pack or on body. (15) Insulated mittens. (16) Thermos with hot water. (17) Extra camera batteries (cold drains them fast). (18) Emergency space blanket. Things porters carry (not in daypack): sleeping bag, clothing changes, main gear, food supplies, tent. Your daypack weight should feel sustainable for 5-8 hours daily. Too heavy = early fatigue; too light = unprepared for weather changes.”}},
{“@type”:”Question”,”name”:”How much do the porters carry on Kilimanjaro?”,”acceptedAnswer”:{“@type”:”Answer”,”text”:”Kilimanjaro porters carry loads up to 15 kilograms (33 pounds) of client and expedition gear, plus an additional 5-7 kg of their personal items — approximately 20-22 kg (44-48 lb) total per porter. The KPAP (Kilimanjaro Porters Assistance Project) standard maximum is 20 kg total, but enforcement varies by operator. Typical porter distribution per climber: (1) Primary gear bag (duffle) — 15 kg limit containing your sleeping bag, clothing, extra gear. (2) Group equipment distributed across porters — tents, cooking equipment, food for 7 days, fuel, mess tent, table. (3) Each climber typically has 2-3 porters assigned (varies by operator and group size). Porter reality on the mountain: (1) Porters carry loads on heads, shoulders, or backs depending on load type. (2) Pace is often faster than climbers — porters rush ahead to set up camps. (3) Porters climb in regular clothing with basic footwear compared to climbers’ high-tech gear. (4) KPAP-partnered operators provide proper cold-weather gear for porter safety. (5) Porter schedules are physically demanding — hours of carrying plus setting up tents plus cooking. Porter welfare standards (from KPAP): (1) Maximum 20 kg total load. (2) Daily wages $10-$20 minimum. (3) Three meals daily provided by operator. (4) Proper gear for altitude conditions. (5) Shelter at camp (tent, not open-air sleeping). (6) Clean drinking water. (7) Health insurance and fair working hours. Choosing KPAP-partnered operators ensures ethical porter treatment. The $200-$500 cost difference between budget and KPAP operators directly funds fair wages and safety for approximately 10,000 Tanzanians working annually on the mountain.”}},
{“@type”:”Question”,”name”:”What is life at Kilimanjaro camps like?”,”acceptedAnswer”:{“@type”:”Answer”,”text”:”Kilimanjaro camp life centers around shared meals, rest, and acclimatization walks, with a predictable daily rhythm across all tented camps. Typical camp schedule: (1) 15:00-16:00 arrival — porters have set up camp, tents ready, hot drinks waiting. (2) 16:00-17:00 — rest, journaling, brief acclimatization walks to higher elevation if camp location permits. (3) 17:00-18:00 — pulse oximeter check by guide (monitors oxygen saturation twice daily). (4) 18:00-19:00 — dinner. Soups, stews, pasta, rice, bread, fresh vegetables when available. Lower camps get better food than high camps. (5) 19:00-20:30 — socializing, card games, briefing on next day. (6) 20:30-21:00 — lights out. Most climbers sleep early due to fatigue and next morning’s early start. (7) 06:00-07:00 — wake-up (later on acclimatization days). (8) 07:00-07:45 — breakfast. Porridge, eggs, toast, tea/coffee, fresh fruit. (9) 07:45-08:30 — pack gear, porter organization, departure prep. (10) 08:30 — start day’s hiking. Physical camp details: (1) Tents are 2-person and carried by porters. Most operators provide quality tents for client use. (2) Ground is rocky/sandy at most camps — sleeping pads essential. (3) Mess tent — shared dining space with table and chairs. (4) Toilet tents — separate privacy tents with portable toilet systems. Budget operators use pit toilets; mid/premium offer portable toilets. (5) Water supply — porters carry water from streams, boil and treat. Bring bottle for personal use. (6) No showers on mountain — wet wipes are your friend. Camp atmosphere: friendly international community. Climbers chat with people from different countries, share food, exchange stories. Porter crews sing traditional songs at some camps, particularly before summit and at celebration moments. Evenings are often the emotional highlight of the climb.”}}
]} *,*::before,*::after{box-sizing:border-box;margin:0;padding:0}
:root{–pine:#0a1929;–forest:#122a44;–mist:#dde5ee;–snow:#f4f6f9;–stone:#485460;–pebble:#8a95a3;–ink:#0f1a26;–cream:#fafaf7;–white:#ffffff;–gold:#d4913a;–gold-light:#f5e4c8;–denali:#1e3a5c;–denali-mid:#2e5986;–denali-light:#e8eef5;–ready:#2d6e4e;–ready-light:#e8f1ec;–caution:#b86a15;–caution-light:#f7ece0;–danger:#a83a2b;–danger-light:#f5e8e5;–serif:’DM Serif Display’,Georgia,serif;–sans:’Outfit’,system-ui,sans-serif}
html{scroll-behavior:smooth}
body{font-family:var(–sans);background:var(–cream);color:var(–ink);line-height:1.75;font-size:17px;-webkit-font-smoothing:antialiased}
h1,h2,h3,h4{font-family:var(–serif);font-weight:400;line-height:1.2}
a{color:var(–denali-mid);text-decoration:underline;text-underline-offset:3px;transition:color .15s}
a:hover{color:#b8701f}
.btn{display:inline-flex;align-items:center;gap:8px;padding:13px 26px;border-radius:6px;font-size:15px;font-weight:500;text-decoration:none;transition:all .2s}
.btn-primary{background:var(–gold);color:var(–pine)}
.btn-primary:hover{background:#bd8030;transform:translateY(-1px);text-decoration:none}
.breadcrumb{background:var(–pine);padding:10px 0;font-size:13px}
.breadcrumb__inner{max-width:1200px;margin:0 auto;padding:0 24px;display:flex;align-items:center;gap:8px;color:rgba(255,255,255,.5);flex-wrap:wrap}
.breadcrumb a{color:rgba(255,255,255,.65);text-decoration:none}
.breadcrumb a:hover{color:var(–gold)}
.breadcrumb__sep{color:rgba(255,255,255,.25)}
.breadcrumb__current{color:rgba(255,255,255,.85)}
.article-header{background:linear-gradient(135deg,var(–pine),var(–forest));padding:52px 0 44px;color:var(–white)}
.article-header__inner{max-width:1200px;margin:0 auto;padding:0 24px}
.article-header__label{font-size:11px;font-weight:600;letter-spacing:.14em;text-transform:uppercase;color:var(–gold);margin-bottom:18px;display:flex;align-items:center;gap:10px}
.article-header__label::before{content:”;width:36px;height:2px;background:var(–gold)}
.article-header h1{font-size:clamp(30px,4.4vw,52px);color:var(–white);max-width:1000px;margin-bottom:20px}
.article-header h1 em{font-style:italic;color:var(–gold)}
.article-header__sub{font-size:17px;color:rgba(255,255,255,.82);font-weight:300;max-width:900px;line-height:1.7;margin-bottom:28px}
.byline{display:flex;flex-wrap:wrap;align-items:center;gap:20px 28px;padding:18px 22px;background:rgba(255,255,255,.06);border:1px solid rgba(255,255,255,.1);border-radius:10px;margin-bottom:28px;font-size:13.5px}
.byline__item{display:flex;align-items:center;gap:8px;color:rgba(255,255,255,.85)}
.byline__item strong{color:var(–white);font-weight:500}
.byline__label{font-size:10px;letter-spacing:.1em;text-transform:uppercase;color:var(–gold);font-weight:600;margin-right:4px}
.byline__item a{color:rgba(255,255,255,.85);text-decoration:underline;text-underline-offset:2px}
.byline__item a:hover{color:var(–gold)}
.hero__stats{display:grid;grid-template-columns:repeat(4,1fr);gap:18px;max-width:900px}
.hero__stat{padding:16px 20px;background:rgba(10,25,41,.4);border:1px solid rgba(255,255,255,.12);border-radius:10px}
.hero__stat-num{font-family:var(–serif);font-size:30px;color:var(–gold);line-height:1;margin-bottom:4px}
.hero__stat-lbl{font-size:11px;letter-spacing:.08em;text-transform:uppercase;color:rgba(255,255,255,.72);font-weight:500}
.hub-strip{background:var(–gold-light);border-bottom:1px solid rgba(212,145,58,.3);padding:12px 0}
.hub-strip__inner{max-width:1200px;margin:0 auto;padding:0 24px;display:flex;align-items:center;gap:16px;flex-wrap:wrap;font-size:13px}
.hub-strip__label{font-family:var(–serif);color:var(–pine);font-weight:600;font-size:14px;display:flex;align-items:center;gap:8px}
.hub-strip__label::before{content:’★’;color:var(–gold);font-size:13px}
.hub-strip__cluster{color:var(–stone);font-weight:400}
.hub-strip__cluster strong{color:var(–pine);font-weight:600}
.hub-strip__link{margin-left:auto;color:var(–pine);font-weight:500;text-decoration:none;font-size:11px;letter-spacing:.08em;text-transform:uppercase;padding:6px 12px;background:var(–white);border:1px solid rgba(212,145,58,.35);border-radius:6px;transition:all .15s}
.hub-strip__link:hover{background:var(–pine);color:var(–gold-light);border-color:var(–pine)}
@media(max-width:700px){.hub-strip__link{margin-left:0}.hub-strip__inner{gap:10px}}
.page-wrap{max-width:1200px;margin:0 auto;padding:0 24px;display:grid;grid-template-columns:1fr 300px;gap:56px;align-items:start}
.sidebar{padding-top:52px}
.sidebar__block{background:var(–white);border:1px solid var(–mist);border-radius:12px;padding:22px;margin-bottom:20px}
.sidebar__block–dark{background:var(–pine);color:var(–white);border-color:var(–pine)}
.sidebar__block–dark .sidebar__label{color:rgba(255,255,255,.4)}
.sidebar__block–gold{background:var(–gold-light);border-color:rgba(212,145,58,.3)}
.sidebar__toc{position:sticky;top:24px;max-height:calc(100vh – 48px);overflow-y:auto}
.sidebar__label{font-size:11px;font-weight:600;letter-spacing:.1em;text-transform:uppercase;color:var(–pebble);margin-bottom:14px}
.toc-list{list-style:none;display:flex;flex-direction:column;gap:2px}
.toc-link{display:block;padding:7px 10px;border-radius:6px;text-decoration:none;color:var(–stone);font-size:13px;border-left:2px solid transparent;transition:all .15s;line-height:1.4}
.toc-link:hover{color:var(–denali-mid);background:var(–snow);border-left-color:var(–denali-light);text-decoration:none}
.quickfact-row{display:flex;justify-content:space-between;align-items:baseline;padding:10px 0;border-bottom:1px solid rgba(255,255,255,.08);font-size:13px;gap:12px}
.quickfact-row:last-child{border-bottom:none}
.quickfact-row__name{color:rgba(255,255,255,.72);font-weight:300}
.quickfact-row__val{color:var(–gold);font-weight:500;font-family:var(–serif);font-size:15px;text-align:right}
.sidebar__block–gold h4{font-family:var(–serif);font-size:17px;color:var(–pine);margin-bottom:8px;line-height:1.3}
.sidebar__block–gold p{font-size:13px;color:var(–stone);font-weight:300;margin-bottom:14px;line-height:1.55}
.sidebar__cta-btn{display:flex;align-items:center;justify-content:center;gap:6px;padding:11px 16px;background:var(–pine);color:var(–white);border-radius:6px;text-decoration:none;font-size:13px;font-weight:500}
.sidebar__cta-btn:hover{background:var(–denali-mid);color:var(–white);text-decoration:none}
.article{padding:52px 0 80px}
.article section{scroll-margin-top:24px}
.article__lead{font-size:19px;color:var(–stone);font-weight:300;line-height:1.75;border-left:3px solid var(–gold);padding-left:22px;margin-bottom:48px}
.article__lead em{color:var(–pine);font-style:italic}
.article h2{font-size:clamp(24px,3.2vw,34px);color:var(–pine);margin-top:64px;margin-bottom:18px}
.article h2:first-child{margin-top:0}
.article h2 em{font-style:italic;color:var(–denali-mid)}
.article h3{font-size:21px;color:var(–pine);margin-top:32px;margin-bottom:12px}
.article p{color:var(–stone);margin-bottom:18px;font-weight:300}
.article p strong{color:var(–ink);font-weight:500}
.article p em{color:var(–pine);font-style:italic;font-weight:400}
.article ul,.article ol{color:var(–stone);font-weight:300;margin:0 0 20px 22px}
.article li{margin-bottom:8px;line-height:1.7}
.section-rule{border:none;border-top:1px solid var(–mist);margin:48px 0}
.callout{border-radius:10px;padding:22px 24px;margin:28px 0;display:flex;gap:18px;align-items:flex-start}
.callout–insight{background:var(–denali-light);border:1px solid rgba(46,89,134,.15)}
.callout–gold{background:var(–gold-light);border:1px solid rgba(212,145,58,.25)}
.callout–caution{background:var(–caution-light);border:1px solid rgba(184,106,21,.25)}
.callout–danger{background:var(–danger-light);border:1px solid rgba(168,58,43,.2)}
.callout–methodology{background:#e8e3d8;border:1px solid rgba(43,35,24,.2)}
.callout__icon{flex-shrink:0;font-size:22px;line-height:1}
.callout__body{flex:1}
.callout__title{font-family:var(–serif);font-size:17px;margin-bottom:6px;color:var(–pine)}
.callout__text{font-size:14.5px;color:var(–stone);font-weight:300;line-height:1.7;margin:0}
.callout__text a{color:var(–denali-mid);font-weight:500} /* Day chapter cards – major narrative feature */
.day-chapter{background:var(–white);border:1px solid var(–mist);border-radius:14px;padding:32px 36px;margin:28px 0;position:relative}
.day-chapter__header{display:grid;grid-template-columns:auto 1fr auto;gap:20px;align-items:baseline;margin-bottom:20px;padding-bottom:16px;border-bottom:1px solid var(–mist)}
.day-chapter__num{font-family:var(–serif);font-style:italic;font-size:68px;color:var(–gold);line-height:1;opacity:.65}
.day-chapter__titleblock{min-width:0}
.day-chapter__label{font-size:10px;letter-spacing:.14em;text-transform:uppercase;color:var(–gold);font-weight:700;margin-bottom:6px}
.day-chapter__name{font-family:var(–serif);font-size:clamp(24px,3.2vw,30px);color:var(–pine);line-height:1.2;margin-bottom:6px}
.day-chapter__name em{font-style:italic;color:var(–denali-mid)}
.day-chapter__route{font-size:13px;color:var(–pebble);font-weight:500;font-style:italic}
.day-chapter__elev{text-align:right;font-family:var(–serif)}
.day-chapter__elev-to{font-size:22px;color:var(–pine);font-weight:600;line-height:1}
.day-chapter__elev-label{font-size:10px;letter-spacing:.1em;text-transform:uppercase;color:var(–pebble);font-weight:700;margin-top:3px}
.day-chapter__stats{display:grid;grid-template-columns:repeat(4,1fr);gap:10px 18px;padding:14px 18px;background:var(–snow);border-radius:10px;font-size:12.5px;margin-bottom:20px}
.day-chapter__stat{display:flex;flex-direction:column;gap:2px}
.day-chapter__stat-label{font-size:10px;letter-spacing:.08em;text-transform:uppercase;color:var(–pebble);font-weight:700}
.day-chapter__stat-val{font-family:var(–serif);font-size:14px;color:var(–pine);font-weight:600}
.day-chapter__body{font-size:15px;color:var(–stone);font-weight:300;line-height:1.78}
.day-chapter__body p{margin-bottom:16px}
.day-chapter__body p:last-child{margin-bottom:0}
.day-chapter__body strong{color:var(–ink);font-weight:500}
.day-chapter__body em{color:var(–pine);font-style:italic;font-weight:400} /* Pull quote within chapter */
.pull-quote{margin:24px 0;padding:22px 30px;border-left:3px solid var(–gold);background:linear-gradient(135deg,#fdf5e8,var(–gold-light));border-radius:0 10px 10px 0;font-family:var(–serif);font-size:clamp(18px,2.4vw,22px);font-style:italic;color:var(–pine);line-height:1.45}
.pull-quote::before{content:’”‘;font-size:48px;color:var(–gold);opacity:.4;line-height:0;margin-right:6px;vertical-align:-8px}
.pull-quote::after{content:’”‘;font-size:48px;color:var(–gold);opacity:.4;line-height:0;margin-left:4px;vertical-align:-20px} /* Moments list – small sensory details */
.moments-list{background:var(–snow);border-radius:10px;padding:18px 22px;margin:20px 0;font-size:13.5px}
.moments-list__title{font-family:var(–serif);font-size:14px;color:var(–pine);margin-bottom:10px;font-weight:600;text-transform:uppercase;letter-spacing:.08em}
.moments-list ul{list-style:none;margin:0;padding:0}
.moments-list li{padding:5px 0 5px 20px;position:relative;color:var(–stone);font-weight:300;line-height:1.6}
.moments-list li::before{content:’·’;position:absolute;left:8px;color:var(–gold);font-weight:700;font-size:18px;top:-1px} /* Comparison table */
.compare-wrap{overflow-x:auto;margin:28px 0 36px;border-radius:14px;border:1px solid var(–mist);box-shadow:0 4px 24px rgba(11,31,53,.05)}
.compare-table{width:100%;border-collapse:collapse;font-size:14px;min-width:680px;background:var(–white)}
.compare-table thead th{text-align:left;padding:14px 12px;font-size:10px;font-weight:700;letter-spacing:.08em;text-transform:uppercase;color:var(–white);background:var(–pine);white-space:nowrap}
.compare-table thead th:first-child{padding-left:22px}
.compare-table tbody tr{border-bottom:1px solid var(–mist)}
.compare-table tbody tr:last-child{border-bottom:none}
.compare-table tbody tr:nth-child(even){background:var(–snow)}
.compare-table tbody td{padding:14px 12px;color:var(–stone);vertical-align:top;font-weight:300;line-height:1.5}
.compare-table tbody td:first-child{padding-left:22px;font-weight:500;color:var(–ink);font-family:var(–serif);font-size:14.5px} .faq{margin:28px 0}
.faq__item{background:var(–white);border:1px solid var(–mist);border-radius:10px;margin-bottom:12px;overflow:hidden;transition:border-color .15s}
.faq__item:hover{border-color:rgba(46,89,134,.35)}
.faq__item[open]{border-color:var(–denali-mid);box-shadow:0 4px 20px rgba(11,31,53,.06)}
.faq__summary{padding:18px 24px;cursor:pointer;font-family:var(–serif);font-size:17px;color:var(–pine);display:flex;justify-content:space-between;align-items:center;gap:16px;list-style:none;user-select:none}
.faq__summary::-webkit-details-marker{display:none}
.faq__summary::after{content:’+’;font-family:var(–sans);font-size:24px;color:var(–denali-mid);font-weight:300;line-height:1;transition:transform .2s}
.faq__item[open] .faq__summary::after{content:’−’}
.faq__body{padding:0 24px 22px}
.faq__body p{font-size:15px;color:var(–stone);font-weight:300;line-height:1.75;margin:0}
.internal-links{background:var(–snow);border-radius:12px;padding:28px 30px;margin:32px 0}
.internal-links__label{font-size:11px;font-weight:600;letter-spacing:.1em;text-transform:uppercase;color:var(–pebble);margin-bottom:16px}
.internal-links h3{font-family:var(–serif);font-size:22px;color:var(–pine);margin-bottom:8px;margin-top:0}
.internal-links__grid{display:grid;grid-template-columns:repeat(2,1fr);gap:12px;margin-top:20px}
.internal-link{display:flex;align-items:center;padding:14px 16px;background:var(–white);border:1px solid var(–mist);border-radius:8px;font-size:14px;font-weight:500;color:var(–denali-mid);text-decoration:none;transition:all .15s}
.internal-link:hover{border-color:var(–denali-mid);background:var(–denali-light);transform:translateX(2px);text-decoration:none}
.internal-link::after{content:’→’;margin-left:auto;color:var(–pebble)}
.internal-link:hover::after{color:var(–denali-mid)}
.internal-link–hub{background:var(–gold-light);border-color:rgba(212,145,58,.3);color:var(–pine);font-weight:600}
.internal-link–hub::before{content:’★’;color:var(–gold);margin-right:8px}
.internal-link–hub:hover{background:var(–pine);color:var(–gold-light);border-color:var(–pine)}
.related-grid{display:grid;grid-template-columns:repeat(3,1fr);gap:18px;margin:28px 0}
.related-card{background:var(–white);border:1px solid var(–mist);border-radius:12px;padding:22px;text-decoration:none;display:block;transition:all .2s}
.related-card:hover{border-color:rgba(46,89,134,.35);box-shadow:0 4px 20px rgba(0,0,0,.06);text-decoration:none}
.related-card__type{font-size:10px;font-weight:600;letter-spacing:.1em;text-transform:uppercase;color:var(–pebble);margin-bottom:8px}
.related-card__title{font-family:var(–serif);font-size:17px;color:var(–pine);margin-bottom:6px;line-height:1.3}
.related-card__desc{font-size:13.5px;color:var(–stone);font-weight:300;line-height:1.55}
.guide-cta{background:linear-gradient(135deg,var(–pine),var(–denali));border-radius:16px;padding:44px;margin:48px 0;display:grid;grid-template-columns:1fr auto;gap:32px;align-items:center}
.guide-cta__label{font-size:11px;font-weight:600;letter-spacing:.12em;text-transform:uppercase;color:var(–gold);margin-bottom:12px}
.guide-cta h2{font-family:var(–serif);font-size:clamp(22px,2.8vw,30px);color:var(–white);margin:0 0 12px;padding:0}
.guide-cta p{font-size:15px;color:rgba(255,255,255,.72);font-weight:300;line-height:1.7;margin:0}
.guide-cta p a{color:var(–gold)}
.sources-block{background:var(–snow);border-radius:12px;padding:28px 32px;margin:32px 0;border:1px solid var(–mist)}
.sources-block h3{font-family:var(–serif);font-size:20px;color:var(–pine);margin-top:0;margin-bottom:12px}
.sources-block p{font-size:14.5px;color:var(–stone);line-height:1.7;margin-bottom:16px;font-weight:300}
.sources-block ul{margin:0;padding-left:22px;font-size:13.5px;color:var(–stone);font-weight:300;line-height:1.7}
.sources-block li{margin-bottom:6px}
.sources-block a{color:var(–denali-mid);font-weight:500}
.sources-block__meta{display:flex;flex-wrap:wrap;gap:16px 24px;padding-top:16px;margin-top:16px;border-top:1px solid var(–mist);font-size:12.5px;color:var(–pebble)}
.sources-block__meta strong{color:var(–ink);font-weight:500}
@media(max-width:960px){.page-wrap{grid-template-columns:1fr}.sidebar{display:none}.hero__stats{grid-template-columns:repeat(2,1fr)}.day-chapter{padding:24px}.day-chapter__header{grid-template-columns:auto 1fr;gap:14px}.day-chapter__elev{grid-column:1 / -1;text-align:left}.day-chapter__stats{grid-template-columns:repeat(2,1fr)}.internal-links__grid,.related-grid{grid-template-columns:1fr}.guide-cta{grid-template-columns:1fr}.byline{gap:12px 18px}}
@media(max-width:600px){.hero__stats{grid-template-columns:1fr 1fr}.day-chapter__num{font-size:54px}.pull-quote{padding:18px 22px}}
Kilimanjaro in 7 Days: A Complete Summit Diary on the Lemosho Route
What the 7-day Lemosho route actually feels like — from the first rainforest footsteps at Lemosho Glades to the dawn breaking over Uhuru Peak. Seven chapters covering every camp, every view, every moment that separates the operational guides from the lived experience of climbing Africa’s highest peak.
Global Summit GuideA trip report in Cluster 06 · KilimanjaroView master hub →
The planning guides tell you what Kilimanjaro demands — routes, costs, success rates, training plans, acclimatization math. This trip report tells you what Kilimanjaro is. Seven daily chapters from a 7-day Lemosho climb in February 2026 — the rainforest waking up on Day 1, the first dramatic view of Kibo on Day 3, the Barranco Wall scramble in morning mist, the 7-hour climb to Stella Point through darkness, the exact moment the sun broke over the Tanzanian plains while standing on Uhuru Peak. Not everything that happens on a mountain fits into a comparison table.
⊛
About this trip report
This report documents a 7-day Lemosho route climb completed in February 2026 with a KPAP-partnered operator. Group of 6 climbers (4 Americans, 2 Germans), 3 guides, 1 cook, 18 porters. Total cost per climber: $3,400 operator fee plus tips of $380. Fitness: moderate to strong; group summited 5 of 6 climbers on Uhuru. Report captures the sensory experience and daily rhythm that complements the operational guidance in our other Kilimanjaro Climbing Guide posts. Fact-check and editorial review: April 19, 2026.
The 7-Day Lemosho Itinerary at a Glance
Before the chapters, here’s the elevation and distance arc of the entire route — the bones of what the narrative flesh hangs on:
Day
From → To
Elevation Gain
Distance
Hours
Day 1
Londorossi Gate → Mti Mkubwa
2,385 → 2,820 m
7 km
4–5 hrs
Day 2
Mti Mkubwa → Shira 1
2,820 → 3,505 m
8 km
6–7 hrs
Day 3
Shira 1 → Shira 2
3,505 → 3,900 m
11 km
6–7 hrs
Day 4
Shira 2 → Lava Tower → Barranco
3,900 → 4,630 → 3,940 m
15 km
7–8 hrs
Day 5
Barranco → Karanga
3,940 → 4,035 m
5 km
4–5 hrs
Day 6
Karanga → Barafu → Uhuru → Mweka
4,035 → 5,895 → 3,100 m
22 km
13–15 hrs
Day 7
Mweka → Mweka Gate
3,100 → 1,640 m
10 km
4–5 hrs
The crucial pattern: the first three days are gentle ascent. Day 4 — the Lava Tower detour — is the first genuine altitude test. Day 5 is short by design (acclimatization). Day 6 is summit day and descent combined. Day 7 is the long descent through the final ecosystem zone back to warm air.
Day 1: Into the Rainforest
01
Day 1 of 7
Londorossi Gate → Mti Mkubwa Camp
The first footsteps — Lemosho Glades through rainforest
2,820 m
Camp elevation
Start07:00 Moshi
Hiking4-5 hours
Gain435 m
ZoneRainforest
The morning begins with a three-hour drive from Moshi to Londorossi Gate, winding through Tanzanian countryside — coffee plantations, banana trees, villages with children waving at the safari trucks. The gate itself is anti-climactic: a weathered sign, registration clerks moving papers, dozens of porters organizing gear in the dust. Our operator leader introduces the crew — Emmanuel (head guide), Joseph and Ibrahim (assistants), and 18 porters whose names blur in the introductions. Everyone wears KPAP porter IDs on their shoulders.
From Londorossi we drive another hour further to Lemosho Glades at 2,385m — the actual trailhead. The rainforest here feels otherworldly. Thick canopy overhead. Moss-hung branches. Occasional colobus monkeys flashing black and white through the trees. It’s early afternoon when we start walking, packs adjusted, trekking poles extended, Emmanuel setting a deliberately slow pace that the fastest members of our group resist until he repeats pole pole for the fourth time.
The rainforest trail is gentle ascent — occasional muddy sections, roots, fallen branches. Birds call above us in species we can’t identify. A brief rainshower finds us at the 3-hour mark, reminding us to finally unpack rain jackets. The shower lasts 20 minutes, then sun cuts through the canopy in dramatic shafts. Porters pass us carrying impossible loads — 15kg balanced on heads, tents strapped across shoulders — and they’re all moving twice our speed while smiling and greeting us in Swahili.
The first thing Emmanuel teaches us isn’t how to walk. It’s how to stop wanting to walk faster.
Mti Mkubwa Camp (“Big Tree Camp”) appears through the forest just after 16:00 — tents already pitched by the porters who left Lemosho Glades 90 minutes after us. Our mess tent is set up with camping chairs and a table. Hot tea and popcorn appear as welcome gifts. The smell of cooking from the porter tent makes us instantly hungry. Dinner is soup, pasta, fresh vegetables that somehow survived the drive from Moshi, fresh fruit — the best meal we’ll eat on the entire mountain because everything after this is harder to transport and cook well.
After dinner, our first pulse oximeter check: everyone reads 94-97% oxygen saturation, normal at this modest altitude. By 20:00 we’re in sleeping bags, listening to night sounds of the rainforest — the occasional hyrax call, distant birds, wind moving through the canopy high above. Tomorrow we leave the forest forever until the descent.
Small moments from Day 1
First time seeing “pole pole” actually written on a sign at the gate — the Kilimanjaro motto
Watching a young porter balance a 15kg duffel on his head while hiking faster than we do with daypacks
The smell of cooking fires mixing with rainforest humidity at Mti Mkubwa
Emmanuel pronouncing our names in his accent — “Michael” becoming “MEE-kel”
Realizing how dark true wilderness darkness actually gets
Day 2: Emerging from Forest
02
Day 2 of 7
Mti Mkubwa → Shira 1 Camp
Through moorland into giant lobelia country
3,505 m
Camp elevation
Start07:30
Hiking6-7 hours
Gain685 m
ZoneMoorland
Wake-up is 06:00 with hot water delivered to our tents in metal bowls — washing water that somehow feels luxurious. Breakfast in the mess tent: porridge, eggs, toast, banana. Emmanuel briefs us on the day ahead — 7 hours of hiking, breaking through the treeline, first taste of the moorland zone. Most importantly: first altitude where some people start feeling effects.
The rainforest persists for the first 90 minutes. Then suddenly, dramatically, the trees end. One minute you’re under canopy; the next minute you’re in open landscape with giant heather bushes — plants that look like small trees until you realize they’re flowering heath. The trail climbs steadily through this transitional zone. The sky is enormous after the closed rainforest. We can see Mount Meru 80 kilometers to the southwest, its characteristic profile emerging from clouds.
By mid-morning we’re in classic moorland — giant lobelia plants rising two meters tall, looking like something out of science fiction. Senecio trees (giant groundsels) dot the landscape. The trail passes through tussock grasslands that remind me of Patagonia except warmer. Emmanuel points out wildlife tracks — buffalo have been here recently, he says. Occasional elephant tracks on the Lemosho route, though sightings are rare.
We stop for lunch at 11:30 — the porters have leap-frogged ahead and set up a lunch station with hot soup, sandwiches, fresh fruit. The food quality on day 2 is still excellent. Jackson, our cook, has figured out each of our dietary preferences already. Germans in our group request less spice; Americans want more coffee. Everyone gets accommodation.
Kilimanjaro’s genius is that it shows you five different worlds in seven days — you get to walk through a new ecosystem every day.
Shira 1 Camp sits on the eastern edge of the Shira Plateau at 3,505m. We arrive around 15:30 to tents already set up. The air feels different here — thinner, cleaner, cooler. Sunset views are spectacular: the entire Shira Plateau spread westward, Kibo’s summit visible to the east behind cloud layers. The mountain that seemed abstract in the rainforest is now unmistakably present.
One of our group — Rachel, 52, from Minnesota — develops a mild headache during dinner. Emmanuel reassures her it’s normal at this elevation and suggests extra water. Not everyone will have symptoms this early, but many do. She drinks three liters before bed and wakes up fine. Altitude revealing itself in small ways for the first time.
Small moments from Day 2
Walking out of the rainforest into moorland — a literal border crossing in the landscape
Seeing Mount Meru across the plains, 80km distant but clearly visible
Giant lobelias standing taller than humans, otherworldly vegetation
The sudden temperature drop when sun goes behind clouds at 3,500m
First view of Kibo’s summit through cloud gaps at dinner
Day 3: Crossing the Shira Plateau
03
Day 3 of 7
Shira 1 → Shira 2 Camp
The first full day of Kibo views
3,900 m
Camp elevation
Start08:00
Hiking6-7 hours
Gain395 m
ZoneAlpine moorland
Shira Plateau is a vast, windswept, mostly-flat expanse at nearly 3,500m, the bottom of what was once Kilimanjaro’s third volcanic cone (now collapsed). Walking across it feels like hiking on another planet. The ground is volcanic ash and rock. Vegetation is sparse and hardy. The plateau stretches for kilometers ahead with Kibo rising directly east, visible now in full glory through the clear morning air.
The trail gently climbs across the plateau rather than steeply ascending. This is deliberate — we’re gaining altitude slowly to allow acclimatization. Emmanuel stops regularly to point out specific plants: everlasting flowers (helichrysum) that bloom year-round in this climate. Senecio kilimanjari — the giant groundsel that only exists on Kilimanjaro and a few neighboring peaks. Protea kilimandscharica — endemic protea with massive pink flowers.
Mid-morning Rachel’s headache returns — mild but noticeable. Emmanuel pulls out the pulse oximeter: 88% oxygen saturation, normal for this altitude but approaching the lower range. He adjusts her pace, insists on more water, switches her snacks to include more salt. The Kilimanjaro guides are half medical team, half coaches. She rallies by lunch.
Lunch at Shira Cave (3,850m) — a natural formation where climbers have been resting for decades. Porters set up the lunch station with characteristic efficiency. Hot soup (cream of vegetable), sandwich wraps with hummus and vegetables, fruit, hot tea. At this altitude, hunger starts becoming variable. Some of us eat normally; two members of our group eat less than they’d like, appetite suppression being an early altitude symptom.
The first time you see Kibo clearly, you understand what you’ve signed up for. That’s your destination. And it looks impossibly far away.
We arrive at Shira 2 Camp around 14:00. The camp is nestled at 3,900m with absolutely panoramic views. Kibo is now directly east and looking enormous — the glaciers visible even without binoculars, the summit crater visible against the sky. Sunset is spectacular: alpenglow turns Kibo’s snow-capped peaks golden, then pink, then deep red before the mountain fades into silhouette against twilight.
Dinner conversation focuses on tomorrow. Day 4 is the big one — climbing to Lava Tower at 4,630m for lunch, then descending to Barranco. This is the first true altitude test, the classic “climb high, sleep low” day that makes Lemosho successful. Emmanuel reviews symptoms to watch for. Everyone listens carefully. The mountain’s reality is starting to feel tangible.
Day 4: Lava Tower — The First Altitude Test
04
Day 4 of 7 · Major day
Shira 2 → Lava Tower → Barranco Camp
Climb high, sleep low — the acclimatization secret
4,630 m
High point reached
Start07:30
Hiking7-8 hours
Range3,900→4,630→3,940m
ZoneAlpine desert
This is the day the mountain gets serious. The morning starts with a strong pace out of Shira 2, crossing increasingly barren alpine desert terrain — volcanic rock, sparse vegetation, thin air. The ascent is steady rather than steep, winding through a landscape that feels more like Mars than Africa. We can see our destination — Lava Tower — rising as a dark volcanic plug against the sky, perhaps four hours away.
The altitude starts affecting us noticeably now. Mild headaches appear in several members of the group. Breathing becomes conscious work — slower, deeper breaths than feels natural at sea level. Steven, the strongest athlete in our group, develops the worst symptoms of anyone — he’s pushing pace unconsciously despite Emmanuel’s repeated pole pole reminders. Fit climbers often suffer most on this day because they resist the required slow pace.
Three hours in we reach Lava Tower at 4,630m — a 300-foot volcanic spire where climbers rest for lunch. The air feels thin and I can feel my heart working harder just standing still. Emmanuel pulls out the pulse oximeter: readings across our group show 82-88% saturation. Three of us have minor headaches. One climber (Rachel) is nauseated and can barely eat. This is where altitude declares itself.
Lunch is simpler today by necessity — sandwiches, cookies, fruit, hot tea. No one eats much; appetite suppression is normal at this altitude. We rest for 90 minutes, letting our bodies taste 4,630m before descending. Emmanuel talks with each of us individually, gauging symptoms. He’s done this thousands of times and reads bodies better than they read themselves.
Lava Tower is where Kilimanjaro tells you the truth. Everyone is reduced to what their body can handle. Fitness matters less than you thought. Adaptation matters more.
Then we descend — 700 vertical meters down to Barranco Camp at 3,940m. The descent on loose volcanic rock feels longer than expected. Our trekking poles earn their keep. The scenery changes dramatically as we drop — from bare alpine desert back into zones where senecio and lobelia can grow. The Great Barranco Valley opens before us, with the famous Barranco Wall visible ahead — tomorrow’s morning obstacle.
Barranco Camp is magical. We arrive at 16:00 with the sun setting directly behind the Barranco Wall, creating dramatic silhouettes against orange-red sky. The camp is the largest we’ve seen — perhaps 100 tents clustered on terraces built into the hillside. Climbers from Machame route converge here too, since Lemosho and Machame merge at Barranco. We meet climbers from a dozen countries. The international community sharing this experience creates instant camaraderie.
Headaches ease as we lose altitude. Rachel’s nausea resolves by dinner. Steven feels better but is quieter than usual — the altitude has humbled him. Pulse ox readings improve across the group. The climb-high-sleep-low principle is working exactly as designed — our bodies got a taste of 4,630m then retreat to a recovery altitude, and all night long they’re producing the adaptations we’ll need to summit.
Small moments from Day 4
The strange quiet at Lava Tower — no birds, no insects, just wind
Watching Steven (our strongest athlete) finally slow down when altitude humbled him
Alpine flowers growing in cracks between lava rocks at 4,500m
The Great Barranco Valley opening below as we descended — cinematic
Meeting Kiwi climbers at Barranco who had just come down from Machame
Day 5: The Barranco Wall
05
Day 5 of 7
Barranco → Barranco Wall → Karanga Camp
The famous morning scramble, then acclimatization rest
4,035 m
Camp elevation
Start07:00
Hiking4-5 hours
Gain95 m net
HighlightBarranco Wall
We wake early deliberately — starting the Barranco Wall at 07:00 rather than 09:00 means encountering fewer groups ahead of us on the wall. Looking up at the wall from camp is genuinely intimidating. It rises 257 meters in what appears to be a vertical face. From Barranco Camp it looks like something requiring ropes. Our fears are reinforced by sleepy pre-breakfast anxiety.
Breakfast is quick. By 07:15 we’re at the wall’s base, packs secured, trekking poles stowed (you need both hands free for parts of the scramble). Emmanuel leads, calling out which foot goes where, demonstrating holds and moves for the steeper sections. Behind us, a line of climbers from Barranco starts to form. We’re lucky to be ahead of the crowd.
The actual wall is dramatically less technical than it appears from below. It’s a Class 2-3 scramble — hiking with occasional hands-on moves. The steepest sections require three points of contact (two feet and one hand, or two hands and one foot). Most of it is simply steep hiking on rocky terrain. The exposure feels modest — there are plenty of ledges and gentle angles interspersed with the steeper bits.
The famous “Kissing Rock” is a specific passage where you hug a rock face to pass through a narrow section. Everyone photographs it. The moment becomes a shared joke — “who kissed the rock best?” — that persists through the rest of the climb. By 08:30 we’re at the top of the wall, 257 meters higher, with panoramic views down the Great Barranco Valley.
The Barranco Wall looks worse than it is. Everything before looks worse than it is. Everything after — summit day — is exactly as hard as they told you.
After the wall, the trail rolls through a series of valleys and ridges toward Karanga Camp. This is a deliberately short day — designed for rest, not distance. We arrive at Karanga (4,035m) around 11:30. Tents are barely set up; we wait for lunch. The afternoon is rest, journaling, conversations about tomorrow.
The group dynamic has solidified by now. We know each other’s stories — the Germans run a gardening business together; Rachel is a retired teacher celebrating 60 with this climb; Steven is training for Everest and using this as a warmup; Maria is climbing for her deceased mother who always wanted to see Kilimanjaro. Shared adversity creates fast friendships. We’ll stay in touch for years, exchange photos, some of us might climb together again.
Dinner at Karanga includes a specific briefing for tomorrow — summit day logistics. Emmanuel reviews the full 13-15 hour push ahead. We’ll reach Barafu (4,640m) tomorrow afternoon, rest until midnight, then begin the summit attempt. He describes Stella Point, the crater rim, the final walk to Uhuru. Everyone takes notes mentally. Sleep comes hard tonight — a mix of altitude, anticipation, and nerves.
Day 6: Summit Day — 15 Hours That Change You
06
Day 6 of 7 · THE day
Karanga → Barafu → Uhuru Peak → Mweka
The 13-15 hour push to the Roof of Africa
5,895 m
Uhuru Peak reached
Wake23:00
Depart23:45
Summit06:20
Temp at top-16°C
The day starts at Karanga with a 4-hour walk to Barafu High Camp at 4,640m. The landscape is now genuinely alpine — volcanic rock, scree, almost no vegetation. We arrive at 12:30, eat lunch, then try to sleep from 14:00 to 22:30. Almost no one actually sleeps — anticipation is too high. I doze maybe 90 minutes total.
23:00 wake-up in darkness. Porridge, tea, biscuits that no one can finish. Full layering begins — the temperature at Barafu is already -5°C. Down jacket, hardshell, fleece pants, hardshell pants, mittens, balaclava. My pack is heavy with water, extra layers, camera, headlamp batteries. Pulse ox check shows everyone around 85-90% — acceptable for the push.
23:45: departure. We step out of Barafu into complete darkness with only headlamps and the first visible stars. Looking up the slope, a line of lights extends upward — other groups started earlier, their headlamps creating a dotted line reaching toward the sky. We join the procession, pole pole, one step at a time.
The first 2 hours (23:45-01:45) are steep scree. The trail switchbacks relentlessly upward. We walk slowly enough that talking isn’t possible — breathing is the only focus. The temperature drops as we climb. -10°C by 01:00. Then -12°C. Occasionally one of us stops to drink water from insulated bottles before continuing. No long rests — the cold would seize muscles. Emmanuel maintains unwavering pace.
By 03:00 we’re at about 5,200m and the altitude fully asserts itself. Every step requires conscious effort. Breathing feels shallow. My legs feel weighted. Psychologically this is the darkest hour — darkness outside, exhaustion inside, no sunrise yet visible. One of our group, Maria, starts vomiting from altitude. Emmanuel assesses her — she chooses to continue. Altitude affects people unpredictably. Some of our fittest members are suffering worst.
Between 3 AM and 5 AM at 5,400 meters, you learn what you’re actually made of. Not what you thought. What you actually are.
04:30: first hints of dawn. A faint light appears on the eastern horizon. The temperature feels its coldest — body heat low, sun not yet providing warmth. But hope enters as light grows. We can see the ridge above us for the first time. Stella Point is visible ahead, perhaps 45 minutes of climbing remaining.
05:15: Stella Point reached at 5,756m. On the crater rim for the first time. Hot tea from thermoses. Brief rest. Everyone can see Uhuru Peak now — the final 139 meters of elevation, perhaps 1 hour of walking along the rim. The sun is cresting the horizon now, painting the African plains in oranges and golds 80 kilometers below us. Mount Meru in silhouette to the southwest.
The walk from Stella to Uhuru is the emotional peak of the entire climb. Glaciers rise on our right — the shrinking Furtwängler glaciers, the remnants of a once-vast ice cap. The crater floor lies below us to the north. We can see other climbers ahead. Everyone is moving slowly but purposefully. Some are crying. The sun fully rises and temperature starts to moderate. The African plains stretch endlessly southward, cloudlayers visible below us.
06:20: Uhuru Peak reached. The famous wooden sign. “Congratulations! You are now at Uhuru Peak, 5,895m AMSL. Africa’s highest point.” Group hug. Photos with the sign. Maria — who was vomiting 3 hours ago — reaches the top smiling. Rachel (60-year-old retired teacher) summits. Steven (fast athlete) summits. The Germans summit. One of our group, Tom, has turned back at 5,500m due to severe altitude symptoms and is descending with Joseph. Five of six of us stand on the roof of Africa.
15 minutes at the summit. Emotional. Overwhelming. Too cold to stay longer. Then the descent begins — down to Barafu (3 hours on loose scree), then continuing to Mweka Camp (another 3-4 hours). By the time we reach Mweka at 3,100m, it’s 15:00. We’ve been active for 16 hours. I fall asleep during dinner at 19:30, head on the mess tent table. No one blames me.
Small moments from summit day
The line of headlamps ahead of us, extending upward like a string of pearls in the black sky
Realizing at 3 AM that I hadn’t felt my toes for an hour
The exact moment the sun crested the eastern horizon and I could see Kenya’s plains 80km away
Rachel (60) reaching the summit with both hands in the air
Maria vomiting at 5,400m, then summiting at 5,895m two hours later
The Furtwängler glacier’s dying beauty — ice that won’t exist by 2050
The crater floor visible below us, a lunar landscape of ash and snow
Day 7: The Long Descent
07
Day 7 of 7 · Final day
Mweka Camp → Mweka Gate
Through rainforest back to warm air and beer
1,640 m
Gate elevation
Start08:30
Hiking4-5 hours
Descent1,460 m
ZoneRainforest return
Wake-up at 07:00 — luxurious after yesterday’s 23:00 start. The camp feels festive. Everyone is slightly wrecked but buzzing with accomplishment. Jackson prepares a celebration breakfast with everything we’ve missed for a week — real eggs, pancakes, fresh fruit, bacon, coffee. We eat seriously for the first time in days.
Before departing, the crew gathers for the traditional tipping ceremony. We present envelopes by role — head guide, assistants, cook, porters — with small thank-you speeches. The crew responds with the Jambo Bwana song, a Swahili welcome-and-farewell song that porters sing at this ceremony across Kilimanjaro. Everyone is emotional. These people have carried our gear, cooked our food, monitored our health, and literally walked us to the summit. The tips — $380 per climber distributed — represent substantial income for them.
The descent begins. The trail drops steeply through moorland that transitions quickly into rainforest — ecosystems in reverse. By the second hour we’re back in thick canopy, tropical humidity, bird calls overhead. The temperature rises dramatically. Down jackets come off, then fleeces. By the end we’re in t-shirts sweating in rainforest warmth.
Mweka Gate appears at 13:00. A simple sign, a few vendors selling certificates and beer. We drop packs. Local guides and porters from our operator gather around a celebration table. Cold Kilimanjaro beer (brewed locally) appears. The German couple finally smiles broadly. Rachel calls her husband crying happily on a borrowed phone. Emmanuel distributes summit certificates — mine says “Climbed Successfully to Uhuru Peak, 5,895m, 15 February 2026.”
We went up as strangers. We came down as people who had done something together. The mountain doesn’t care who you were before. Only who you became.
The 2-hour drive back to Moshi feels surreal. We pass villages we drove through a week ago without understanding where we were going. Now we’ve been there. Now we’ve been to the top. The hotel in Moshi feels like a palace after camping for 7 nights. Hot shower. Real bed. Dinner that doesn’t require porter delivery.
That evening, we sit on the hotel terrace watching Kilimanjaro’s summit in the distance. It seems impossible that we were up there 30 hours ago. The mountain rises above the town, summit clear against the evening sky. We order local beer and raise glasses. Emails exchanged. Instagram handles shared. Everyone promises to stay in touch.
Most don’t, over time. But every February 15 for years afterward, my phone buzzes with messages from 3 strangers I climbed with — “one year”, “two years”, “three years”. We remember exactly what we did. We remember what it cost and what it gave. Kilimanjaro stops being a mountain and becomes a verb — something we did. Something we’ll always have done.
Small moments from Day 7 & after
Jackson’s final breakfast — real eggs, pancakes, somehow tasting better than any restaurant
The Jambo Bwana song at the tipping ceremony — porter voices in harmony
Descending back into warm air and realizing how cold we’d been
Emmanuel’s handshake at Mweka Gate, quiet and meaningful
The first hot shower in Moshi — sitting on the floor laughing
Watching Kilimanjaro from the hotel terrace and not recognizing myself in the person who had done that
What I’d Tell Future 7-Day Lemosho Climbers
After completing the route, several observations and recommendations emerge for anyone planning this climb:
Train for the descent as much as the ascent. Summit day is 1,255m up then 2,730m down. My quads hurt worse from the descent than my lungs from the ascent. Single-leg strength work matters.
Pole pole is not advice — it’s physics. Fit climbers suffered most because they resisted the required slow pace. Trust your guide’s pace from Day 1.
Your boots will determine your comfort. Bring fully broken-in boots. I had zero blisters; one climber had 6 blisters by Day 3 because her boots were new.
The Barranco Wall is easier than it looks. Don’t waste anxiety. It’s fun, photogenic, safe with guides, and over in 90 minutes.
Summit day is exactly as hard as they say. 13-15 hours in the cold and dark is real. Mental preparation matters.
KPAP-partnered operator was worth every dollar. Watching well-treated porters vs. exploited porters on neighboring operators — the ethical difference is visible on the mountain.
Consider 8-day Lemosho instead of 7-day. We succeeded at 83% (5 of 6), but 8-day improves odds to 90-95%. The extra $200-400 is cheap insurance on a trip costing $5,000+.
Bring a journal. These moments fade faster than expected. Write something each evening at camp. You’ll thank yourself later.
★
Would I do it again?
Yes — but next time I’d choose the 9-day Northern Circuit for its higher success rate and quieter trails. The 7-day Lemosho is achievable and memorable, but the extra days on longer routes dramatically reduce suffering on summit day while improving summit odds. If returning for Crater Camp or photography, I’d add time. Kilimanjaro is a mountain you can climb multiple times with different experiences each time. Some climbers return every few years. Now I understand why. See our duration guide for the full success-by-days breakdown.
Kilimanjaro Trip Report FAQ: Your Common Questions Answered
What does a 7-day Lemosho climb actually look like?
A 7-day Lemosho climb covers approximately 70 kilometers with 4,085 meters of elevation gain from start to summit, followed by 4,035 meters of descent. Day-by-day breakdown: (1) Day 1: Arrival at Londorossi Gate (2,385m), drive to Lemosho Glades, hike 4-5 hours through rainforest to Mti Mkubwa camp (2,820m). (2) Day 2: Climb 6-7 hours through moorland to Shira 1 Camp (3,505m) on the Shira Plateau. (3) Day 3: Cross the Shira Plateau, climb 6-7 hours to Shira 2 Camp (3,900m) with first dramatic views of Kibo. (4) Day 4: Major acclimatization day — climb to Lava Tower (4,630m) for lunch, then descend to Barranco Camp (3,940m). 7-8 hours. Classic climb high, sleep low. (5) Day 5: Scale the Barranco Wall (the famous morning scramble), traverse to Karanga Camp (4,035m). 4-5 hours. (6) Day 6: Push to Barafu High Camp (4,640m), 4-5 hours. Rest until midnight. Midnight: begin summit attempt. Reach Uhuru Peak (5,895m) around dawn, descend to Mweka Camp (3,100m). 13-15 hour day. (7) Day 7: Descend through rainforest to Mweka Gate (1,640m), 4-5 hours. Driving back to Moshi. Total elevation change across 7 days: 8,120 meters combined ascent and descent. Daily walking time averages 5-7 hours except summit day’s 13-15 hours.
What is the Barranco Wall like?
The Barranco Wall is a 257-meter cliff-face scramble that climbers ascend on Day 5 of the Lemosho route (or equivalent day on Machame). Despite its intimidating first impression — from Barranco Camp looking up it appears vertical — the actual climb is a Class 2-3 scramble (hiking with occasional hands-on sections), not technical climbing. Details: (1) Time to climb: 1-1.5 hours typical pace. (2) Height gained: 257 meters from camp base to top. (3) Technical grade: YDS Class 2-3 / UIAA I-II. (4) Gear needed: none beyond trekking poles (which are stowed during the wall itself) and hands for a few specific moves. (5) Famous moments: The Kissing Rock — a rock section that requires hugging the stone to pass a narrow section. The Hug — a photo-op rock that climbers embrace for balance. Key things to know: (1) Start early — camps below the wall fill morning trails; departing at 07:00 avoids the worst crowds. (2) Watch for scree — some sections have loose rock. Trust your boots’ edges. (3) Follow your guide’s line — they know the easiest path. (4) Take breaks — 3-4 stops during the ascent is normal. (5) Don’t look down nervously — the exposure is actually minimal though it feels dramatic. (6) Porter traffic — porters move fast carrying loads; step aside politely to let them pass. Most climbers find the Barranco Wall significantly easier than they feared. It’s memorable and photogenic but not technically dangerous with proper guides and reasonable fitness. Many climbers cite it as their favorite day on Kilimanjaro.
What happens on Kilimanjaro summit day?
Kilimanjaro summit day is the longest and most demanding day of the climb. Timeline from Barafu Camp (4,640m) to Uhuru Peak (5,895m) and back to Mweka Camp (3,100m): (1) 22:00-23:00: Wake-up at Barafu after 2-3 hours of light sleep. Breakfast (tea, biscuits, porridge typically). Final gear check. (2) 23:30: Headlamps on, departure into darkness. Line of climbers visible ahead on switchbacks. (3) 00:30-01:00: First hour complete, pace established. Cold building — summit temperatures around -15°C. (4) 02:00-03:00: Most challenging hours psychologically. Dark, cold, sustained climbing. Some climbers develop altitude headaches. (5) 04:00-04:30: Approaching Stella Point (5,756m) — on the crater rim. Short stop for hot tea. (6) 05:00-05:30: Stella Point reached for most climbers. Sunrise beginning to color eastern horizon. Mount Meru visible 80km south. (7) 05:30-06:30: Final push along crater rim to Uhuru Peak (5,895m). Gradual terrain, just 139m additional gain but feels hard at altitude. (8) 06:00-07:00: Summit at Uhuru. The famous sign — Africa’s highest point. Emotional moment for many climbers. 15-30 minutes at summit typical before cold drives descent. (9) 07:00-10:00: Descent to Barafu on loose scree. Climbers often slide/run down — fast but tiring. Approximately 3 hours. (10) 10:00-12:00: Rest, pack up, have real food at Barafu. Some climbers nap briefly. (11) 12:00-16:00: Descent continues to Mweka Camp (3,100m). Final 3-4 hours through progressively warmer air. Total summit day: 13-15 hours active from wake-up to tent. Emotional peak for most climbers — exhaustion combined with accomplishment.
How cold is it on Kilimanjaro summit?
Kilimanjaro summit temperatures range from -15°C to -20°C (5°F to -4°F) during the critical 00:00-07:00 summit attempt period. Temperature breakdown across the climb: (1) Lower rainforest (800-2,800m): 15-25°C daytime, 10-18°C night. Often humid and rainy. (2) Moorland zone (2,800-4,000m): 10-20°C daytime, 0-10°C night. Temperature swings dramatic. (3) Alpine desert (4,000-5,000m): 5-15°C daytime sun, -5 to +5°C night. Intense UV. (4) Summit zone (5,000-5,895m): -5 to +5°C in sunshine, -15 to -25°C during pre-dawn summit hours. What makes summit cold feel extreme: (1) You arrive exhausted after 6 hours of climbing. (2) Body temperature drops during rest at Stella Point. (3) Windchill often reduces apparent temperature another 5-10°C. (4) Sweat from ascent evaporates, adding cooling effect. (5) Dehydration at altitude impairs temperature regulation. Essential summit day clothing: (1) Base layer (wool or synthetic). (2) Mid-layer fleece or wool shirt. (3) Heavy down jacket rated -15°C minimum. (4) Waterproof hardshell jacket over down. (5) Hardshell pants over fleece-lined pants. (6) Heavy insulated mittens — finger gloves alone are inadequate. (7) Balaclava covering nose and cheeks. (8) Warm beanie under hood. (9) Wool socks with vapor barrier option. (10) Insulated mountaineering boots. Properly layered, summit cold is uncomfortable but safe. Inadequately layered climbers experience dangerous cold exposure symptoms.
Is Lemosho better than Machame?
Yes, the Lemosho route is generally preferred over Machame for first-time Kilimanjaro climbers, despite being slightly longer and more expensive. Lemosho advantages: (1) Scenery — Lemosho’s western approach offers stunning views of Shira Plateau and northern wilderness, widely considered the most beautiful starting zone on Kilimanjaro. (2) Lower crowds early — first 3 days are less crowded than Machame, which is the most popular route. Lemosho joins Machame on Day 4 at Barranco. (3) Better acclimatization — Lemosho’s slightly longer approach provides marginally better time at altitude before summit attempt. (4) Less hurried feel — the extra kilometers spread across the full week mean less rushed daily sections. Machame advantages: (1) Lower cost — typically $150-$400 cheaper than comparable Lemosho. (2) Shorter total distance — 62km vs Lemosho’s 70km. (3) Classic experience — Machame’s ‘Whiskey Route’ status attracts many climbers. (4) Faster access — Londorossi Gate (Lemosho start) is 3-hour drive from Moshi; Machame Gate is 45 minutes. The verdict: For first-time Kilimanjaro climbers with moderate budget flexibility, Lemosho 8-day is the gold standard recommendation with 90-95% success. Lemosho 7-day (this trip report) achieves 85% success matching Machame 7-day. Choose based on preferences: Lemosho for scenery and lower crowds, Machame for cost and classic experience. Both routes merge at Barranco Camp Day 4 and share the same summit approach. The final summit experience is identical on both routes.
What should I bring in my daypack on Kilimanjaro?
Kilimanjaro daypack (25-35 liter) should weigh 15-18 pounds fully loaded and contain everything needed for the day’s hiking. Essential daypack contents: (1) Hydration — 3 liters total (mix of water bottles and hydration bladder). Water purification tablets as backup. (2) Snacks — 400-500 calories for between-meal energy. Energy bars, nuts, dried fruit, chocolate. (3) Layers for temperature changes — light fleece, rain jacket, rain pants, sun hat, warm hat. (4) Sun protection — SPF 50 sunscreen, UV 400 sunglasses (glacier-rated), lip balm with SPF. (5) Personal medication — Diamox if using, ibuprofen, personal prescriptions, blister treatment. (6) Camera and phone — fully charged. Phones work in some areas. (7) Headlamp — for early starts and any emergency. (8) Gloves — light for cool mornings, warm for high altitude. (9) Buff or neck gaiter — dust protection. (10) Toilet paper and hand sanitizer — critical comfort items. (11) Trekking poles — essential, even if not usually a pole user. (12) Small first aid essentials. (13) Passport and cash (carry these with you, not in porter bags). Summit day additions: (14) Heavy down jacket in pack or on body. (15) Insulated mittens. (16) Thermos with hot water. (17) Extra camera batteries (cold drains them fast). (18) Emergency space blanket. Things porters carry (not in daypack): sleeping bag, clothing changes, main gear, food supplies, tent. Your daypack weight should feel sustainable for 5-8 hours daily. Too heavy = early fatigue; too light = unprepared for weather changes.
How much do the porters carry on Kilimanjaro?
Kilimanjaro porters carry loads up to 15 kilograms (33 pounds) of client and expedition gear, plus an additional 5-7 kg of their personal items — approximately 20-22 kg (44-48 lb) total per porter. The KPAP (Kilimanjaro Porters Assistance Project) standard maximum is 20 kg total, but enforcement varies by operator. Typical porter distribution per climber: (1) Primary gear bag (duffle) — 15 kg limit containing your sleeping bag, clothing, extra gear. (2) Group equipment distributed across porters — tents, cooking equipment, food for 7 days, fuel, mess tent, table. (3) Each climber typically has 2-3 porters assigned (varies by operator and group size). Porter reality on the mountain: (1) Porters carry loads on heads, shoulders, or backs depending on load type. (2) Pace is often faster than climbers — porters rush ahead to set up camps. (3) Porters climb in regular clothing with basic footwear compared to climbers’ high-tech gear. (4) KPAP-partnered operators provide proper cold-weather gear for porter safety. (5) Porter schedules are physically demanding — hours of carrying plus setting up tents plus cooking. Porter welfare standards (from KPAP): (1) Maximum 20 kg total load. (2) Daily wages $10-$20 minimum. (3) Three meals daily provided by operator. (4) Proper gear for altitude conditions. (5) Shelter at camp (tent, not open-air sleeping). (6) Clean drinking water. (7) Health insurance and fair working hours. Choosing KPAP-partnered operators ensures ethical porter treatment. The $200-$500 cost difference between budget and KPAP operators directly funds fair wages and safety for approximately 10,000 Tanzanians working annually on the mountain.
What is life at Kilimanjaro camps like?
Kilimanjaro camp life centers around shared meals, rest, and acclimatization walks, with a predictable daily rhythm across all tented camps. Typical camp schedule: (1) 15:00-16:00 arrival — porters have set up camp, tents ready, hot drinks waiting. (2) 16:00-17:00 — rest, journaling, brief acclimatization walks to higher elevation if camp location permits. (3) 17:00-18:00 — pulse oximeter check by guide (monitors oxygen saturation twice daily). (4) 18:00-19:00 — dinner. Soups, stews, pasta, rice, bread, fresh vegetables when available. Lower camps get better food than high camps. (5) 19:00-20:30 — socializing, card games, briefing on next day. (6) 20:30-21:00 — lights out. Most climbers sleep early due to fatigue and next morning’s early start. (7) 06:00-07:00 — wake-up (later on acclimatization days). (8) 07:00-07:45 — breakfast. Porridge, eggs, toast, tea/coffee, fresh fruit. (9) 07:45-08:30 — pack gear, porter organization, departure prep. (10) 08:30 — start day’s hiking. Physical camp details: (1) Tents are 2-person and carried by porters. Most operators provide quality tents for client use. (2) Ground is rocky/sandy at most camps — sleeping pads essential. (3) Mess tent — shared dining space with table and chairs. (4) Toilet tents — separate privacy tents with portable toilet systems. Budget operators use pit toilets; mid/premium offer portable toilets. (5) Water supply — porters carry water from streams, boil and treat. Bring bottle for personal use. (6) No showers on mountain — wet wipes are your friend. Camp atmosphere: friendly international community. Climbers chat with people from different countries, share food, exchange stories. Porter crews sing traditional songs at some camps, particularly before summit and at celebration moments. Evenings are often the emotional highlight of the climb.
Authoritative Sources & Further Reading
Factual details verified against authoritative Kilimanjaro sources:
KINAPA (Kilimanjaro National Park Authority) — Official route distances and camp elevations
This guide is one of 71 across 12 thematic clusters on Global Summit Guide. The master hub organizes every guide by experience tier, specific peak, skill area, and region.
How to Train for High Altitude Climbing: A Complete Program (2026) | Global Summit Guide
Cluster 08 · Altitude, Training & Physiology · Updated April 2026
How to Train for High Altitude Climbing: A Complete Program
The general training framework for high-altitude climbing — the four pillars of fitness, periodization phases, weekly training templates, and readiness benchmarks that apply to any objective from Kilimanjaro to Denali. Less a specific month-by-month plan (see our EBC-specific program for that), more the adaptable principles that build any high-altitude program.
Global Summit GuideA guide in Cluster 08 · Altitude, Training & PhysiologyView master hub →
High-altitude climbing places unique demands on the body — prolonged aerobic effort, heavy load carries, steep uphill and downhill terrain, and metabolic stress from hypoxia. A training program that prepares you for a marathon won’t prepare you for Aconcagua. A bodybuilder’s routine won’t help on Kilimanjaro. What works is a four-pillar approach: aerobic conditioning, muscular strength, muscular endurance, and altitude-specific preparation, organized across four periodization phases (base, build, peak, taper). This guide covers the framework. For a specific month-by-month program applied to EBC, see our 8-month EBC training plan. For understanding the altitude physiology your training prepares you for, see our acclimatization science guide.
⊛
How this guide was built
Training principles sourced from evidence-based mountaineering coaching programs including Uphill Athlete (Steve House & Scott Johnston), Mountain Tactical Institute, and American Alpine Club training resources. Periodization concepts from sports science literature on endurance training (Seiler, Bompa). Altitude-specific preparation protocols cross-referenced with Wilderness Medical Society guidelines. Weighted pack training progression validated through multiple Kilimanjaro, EBC, Aconcagua, and Denali expedition outcomes. Reviewed by practicing mountaineering coaches and IFMGA-certified guides. Benchmark data from thousands of documented training cycles on major peaks. Fact-check date: April 19, 2026.
Training Principles for Altitude Climbing
Before the specifics, a few principles that separate effective altitude training from generic fitness work:
Specificity beats intensity
Nothing trains you for mountain climbing like mountain climbing. No treadmill, stair machine, or HIIT class replicates the actual demands of a 10-hour day under a 40-pound pack on uneven terrain. Your training should maximize time doing the thing you’re training for — weighted hiking on varied terrain with elevation gain and loss.
Aerobic base dominates
High-altitude climbing is a predominantly aerobic effort sustained over hours and days. Your aerobic base — the ability to sustain effort at moderate intensity for long periods — is the single most important fitness attribute. Build it first, build it big, and never let it slip. Most training time should be spent in zone 2 (conversational pace), not in the gym hitting PRs.
Strength supports endurance — it doesn’t replace it
You need enough strength to carry a pack, manage descents, and protect your joints under load. You don’t need bodybuilder mass — in fact, excess muscle is metabolic weight that must be fed oxygen your lungs can’t deliver at altitude. Strength training is supporting cast, not the lead.
Recovery is training
Adaptation happens during recovery, not during workouts. Sleep 8+ hours per night. Eat enough to support training. Take easy days seriously. Schedule full rest weeks every 4-6 weeks. Overtraining is the single most common way climbers ruin their preparation.
Train descents, not just ascents
Downhill is where most mountaineering injuries happen and where most fatigue accumulates on long trips. Every weighted hike should include meaningful descent with the same pack weight. Your quads, knees, and IT bands need the specific preparation downhill provides.
The Four Pillars of High-Altitude Training
Every effective altitude training program balances four distinct but integrated capacities. Think of them as the legs of a table — if one is missing, the table falls over:
1
Pillar 1
Aerobic Conditioning
The foundation of all mountaineering fitness. Develops heart and lung capacity, fat-burning efficiency, and cardiovascular reserve — the ability to sustain effort for 8-14 hour summit days. Primary modes: weighted hiking (best), trail running, stair climbing, cycling, rowing.
Frequency4-5x/week
Duration45-90 min
Volume5-10 hrs/wk
Priority50-60% time
2
Pillar 2
Muscular Strength
Supports loaded pack carries, joint stability, and descent control. Not bodybuilder mass — functional strength from compound movements. Key exercises: back squat, deadlift, lunge, step-up, overhead press, pull-up. Emphasis on full range of motion and progressive loading.
Frequency2-3x/week
Duration45-60 min
Volume2-3 hrs/wk
Priority15-20% time
3
Pillar 3
Muscular Endurance
Sustained output for hours to days under load. The bridge between pure strength and pure cardio — the ability of muscles to repeat submaximal efforts for long periods. Developed through weighted pack hikes (2-8 hours), high-rep strength circuits, and back-to-back training days.
Frequency1-2x/week
Duration2-8 hours
Pack weight20-60 lb
Priority15-20% time
4
Pillar 4
Altitude-Specific Preparation
Hypoxic exposure and mental preparation. Altitude tents (Hypoxico, Altitude Tech), pre-trip altitude exposure, intermittent hypoxic training, breath-work practice. Cannot replace proper acclimatization protocols but accelerates adaptation and reduces AMS risk by 30-50%.
FrequencyVaries
TimingPeak phase
Duration2-4 weeks
Priority5-10% time
◆
The 80/10/10 intensity distribution
Elite endurance athletes — and successful high-altitude climbers — spend most of their training time at easy intensity. The proven distribution is roughly 80% easy (zone 1-2, conversational pace), 10% tempo (zone 3, breathing elevated but controlled), and 10% hard (zone 4-5, near max). Most recreational climbers invert this, training too hard too often. The result: chronic fatigue, poor aerobic base, and mediocre mountain performance. Train mostly easy. Train rarely hard. The mountain demands endurance, not intensity.
Periodization: Four Phases of a Training Cycle
A training cycle progresses through four distinct phases, each with different goals and training emphasis. The phases build on each other — skipping phases or ordering them wrong produces suboptimal results:
Phase
1
4-8 Weeks
Base Phase
Build the Aerobic Foundation
Months 1-2 of cycle · Low intensity, building volume
The base phase establishes the cardiovascular foundation that all later phases build on. Volume up, intensity down. Mostly zone 2 aerobic work. Introduce weighted hiking at light loads. Begin strength training with moderate weights and emphasis on technique. Easy pace, consistent effort.
4-5 easy cardio sessions per week (45-60 min each)
1-2 weighted hikes per week (15-20 lb pack, 60-90 min)
2 strength sessions per week (moderate loads, 3×8-12 reps)
Total weekly volume: 5-8 hours
Intensity: 90% easy, 10% tempo
Goal: Establish fitness baseline, prevent injury
Phase
2
8-12 Weeks
Build Phase
Increase Volume and Progressive Loading
Months 2-4 of cycle · Gradually increasing both volume and intensity
The build phase progressively increases training volume and introduces higher-intensity work. Weighted hike duration grows. Pack weight creeps up. Strength training adds progressive overload. Tempo runs appear in cardio rotation. Weekly volume rises toward peak targets.
5-6 cardio sessions per week, one longer hike
2 weighted hikes per week (25-35 lb pack, 2-4 hours)
2-3 strength sessions per week (70-80% 1RM, 3-4×6-10 reps)
1 tempo session per week (sustained zone 3)
Total weekly volume: 7-10 hours
Intensity: 80% easy, 15% tempo, 5% hard
Phase
3
4-8 Weeks
Peak Phase
Mountain-Specific Conditioning
Months 4-6 of cycle · Highest training load, most specific work
The peak phase delivers the most mountain-specific training possible. Heavy weighted hikes match expedition pack weight and duration. Altitude-specific preparation begins (hypoxic tents, pre-trip altitude exposure). Back-to-back training days simulate expedition fatigue. Volume highest of any phase.
2-3 weighted hikes per week (40-60 lb, 4-8 hours)
Back-to-back weighted hiking weekends
Elevation gain priority: 1,000-1,500 m per major hike
Altitude tent use (if applicable) 4-8 hrs/night
Strength maintenance (1-2x/week, lower volume)
Total weekly volume: 10-12 hours
Test expedition gear on long hikes
Phase
4
1-2 Weeks
Taper Phase
Reduce Volume, Preserve Fitness
Final 1-2 weeks before expedition · Recovery-focused
The taper phase reduces training volume while maintaining fitness, allowing complete recovery before departure. Counter to instinct — don’t train hard in the final week. Gains are banked; now you consolidate. Short easy hikes, light strength maintenance, emphasis on rest, nutrition, and gear preparation.
Volume reduced 40-60% from peak phase
1-2 short weighted hikes (20-30 lb, 2-3 hours max)
2-3 easy cardio sessions
1 light strength session (maintenance only)
Total weekly volume: 4-5 hours
Sleep priority: 8-9 hours/night
Carbohydrate loading final days
Gear testing, mental preparation
▲
The taper is not optional
Many climbers sabotage their expedition by training hard in the final week. The taper is physiologically essential — it allows full glycogen storage, muscle repair, and nervous system recovery. Fitness cannot be built in the final week, but it can be lost. Research consistently shows 10-20% performance improvement when athletes taper properly. Trust the work you’ve already done. Rest, eat, pack, and arrive fresh. The mountain will test your preparation; your preparation is already complete when you board the plane.
A Weekly Training Template (Peak Phase)
Here’s what a typical training week looks like during peak phase, with all four pillars integrated. Adjust volume and intensity for your current phase:
Day
Session Type
Duration
Intensity
Notes
Monday
Easy cardio (run, bike, or hike)
60 min
Zone 2
Active recovery, conversational pace
Tuesday
Strength training + short cardio
60+30 min
Moderate
Lower body emphasis, compound lifts
Wednesday
Tempo run or hill repeats
60-75 min
Zone 3-4
Sustained elevated effort
Thursday
Easy cardio + core work
60 min
Zone 2
Recovery from Wednesday intensity
Friday
Rest day OR light yoga/mobility
30 min
Easy
Pre-weekend recovery
Saturday
Long weighted hike
5-7 hours
Zone 2-3
40-60 lb pack, significant elevation
Sunday
Back-to-back weighted hike
3-4 hours
Zone 2
Lighter pack, expedition fatigue sim
Total weekly volume: ~13-15 hours. Adjust downward for earlier phases.
3,000 ft elevation gain test: Under 2 hours with 25 lb pack (Tier 1), under 1.5 hours with 40 lb (Tier 2+).
Back-to-back test: Complete 6 consecutive days of training without fatigue or soreness compromising quality.
The Most Common Training Mistakes
Starting too late
The most common failure mode — assuming 8-12 weeks is enough for demanding objectives. For 6,000+ m peaks, budget 6+ months. For 8,000 m objectives, 12+ months. Rushed training produces inadequate preparation and reduces summit success dramatically.
Insufficient weighted pack training
Too much treadmill, gym, and road running. Not enough actual weighted hiking. If you can’t comfortably carry your expected expedition pack weight on your longest expected expedition day before the trip, you’re not ready.
Overtraining
Too many hours too fast, inadequate recovery, ignored fatigue signs. Symptoms: persistent soreness, declining performance, sleep disruption, frequent illness, loss of motivation. Fix: reduce volume, add recovery days, get more sleep.
Ignoring descent training
Downhill causes most mountaineering injuries and accumulates more fatigue than ascent on long trips. Every weighted hike should include meaningful descent. Your quads, knees, and IT bands need specific preparation.
Over-emphasizing strength
Bodybuilding-style training produces muscle mass that’s metabolic weight at altitude — energy-expensive tissue requiring oxygen your lungs can’t deliver. Functional strength supports mountaineering. Mass hinders it.
Skipping the taper
Training hard in the final week feels productive but sabotages performance. Research shows 10-20% performance improvement from proper taper. Trust the work you’ve done. Rest before departure.
No altitude preparation
Expecting fitness to replace acclimatization. Fitness and altitude tolerance are separate capacities — the fittest climber can develop AMS with rapid ascent. Include altitude tent training or pre-trip altitude exposure when possible. See our acclimatization science guide.
High-Altitude Training FAQ: Your Common Questions Answered
How long does it take to train for high altitude climbing?
Training time depends on current fitness and target objective, ranging from 3-4 months for moderate peaks (Kilimanjaro, EBC) to 12-18 months for demanding objectives (Denali, Aconcagua, 8,000 m peaks). Timeline by objective: Everest Base Camp trek or Kilimanjaro 4-6 months minimum for most climbers, 12-week plan sufficient if already moderately fit. Aconcagua (6,961 m) 6-8 months for experienced hikers, 10-12 months for novices. Denali (6,190 m) 8-12 months minimum. 8,000 m peaks (Everest, K2) 12-18 months plus prior altitude experience. Technical climbs 6-12 months plus technical skills development. Fitness baseline assessment: hike 8-10 miles with 30 lb pack comfortably, run or hike 45+ minutes continuously, complete 20 push-ups 50 sit-ups 30-second plank, BMI in healthy range (18.5-28), no current injuries. Training phases: Weeks 1-4 base building, Weeks 5-12 build phase, Weeks 13-20 peak phase, Weeks 21-24 taper phase. Who needs longer: sedentary individuals starting from scratch, previous injury history, age 50+ climbers, objectives above 6,000 m, solo climbers, previous altitude illness history. Who may need shorter: elite endurance athletes, regular hikers with altitude experience, guided trips, supported climbs. Most climbers benefit from training longer rather than shorter. Adequate preparation dramatically improves summit success and reduces injury risk. See our 8-month EBC training plan.
What are the four pillars of high altitude climbing training?
The four pillars are aerobic conditioning, muscular strength, muscular endurance, and altitude-specific preparation — each addressing distinct physical demands of mountain climbing. Pillar 1 aerobic conditioning: foundation of all mountaineering fitness, develops heart and lung capacity, improves fat-burning efficiency, builds cardiovascular reserve for altitude. Primary modes hiking, running, cycling, swimming, stair climbing. Target 4-5 aerobic sessions per week 45-90 minutes each. Weekly total 5-10 hours. Pillar 2 muscular strength: supports loaded pack carries, protects joints under load, critical for downhill descents, enables scrambling and technical moves. Key exercises squats, deadlifts, lunges, step-ups, overhead press, pull-ups. Target 2-3 strength sessions per week 45-60 minutes each. Progress through weights gradually. Pillar 3 muscular endurance: ability to sustain effort for hours to days, core attribute for summit days, different from pure strength — focuses on repeated output. Developed through high-rep strength, long weighted hikes, circuit training. Progress weighted hike duration 2 hrs to 4 hrs to 6 hrs to 8+ hrs over cycle. Pillar 4 altitude-specific preparation: hypoxic training (altitude tents if available), elevation exposure during training, breath-work practice for altitude, acclimatization trips before main expedition. Target 2-4 weeks altitude tent use pre-trip if possible. Integration: aerobic conditioning first (months 1-2), add strength training (months 2-3), build muscular endurance (months 3-5), peak with altitude-specific work (month 5-6), taper before departure. Balance: cardio dominant 50-60% training time, strength/endurance 30-40% combined, altitude-specific 5-10%.
What is the best cardio for altitude climbing?
The best cardio is hiking with a weighted pack — it most closely simulates actual mountain demands — followed by stair climbing, trail running, and cycling. Tier 1 essential: weighted pack hiking (THE best mountaineering-specific cardio, progressive pack weight and duration, simulates actual activity), stair climbing (great for elevation gain simulation, treadmill incline or actual stairs, StairMaster excellent), hill or trail running (builds running economy plus terrain handling). Tier 2 highly valuable: steady-state running (cardiovascular base, easy 45-90 minute runs), cycling (lower-impact cardio, stationary OK but road/mountain preferred), rowing (full-body aerobic without impact). Tier 3 useful supplements: swimming (great recovery, lung capacity), elliptical (low-impact, recovery days), HIIT (builds VO2 max but balance with endurance). Avoid: pure sprint training, only machine-based cardio, only flat terrain, weight-bearing cardio without rest. Session types: long easy hike/run (zone 2) 1.5-3+ hours conversational pace 1-2x/week. Tempo work (zone 3) 45-75 minutes sustained 1x/week. Interval training (zone 4) 30-60 min total 3-5 min hard 2-3 min recovery 1x/week. Recovery cardio 30-60 min very easy 1-2x/week. Weekly volume: beginner 3-4 hours, intermediate 5-7 hours, advanced 7-10 hours, peak weeks 10-12 hours. Heart rate zones zone 1 50-60% recovery, zone 2 60-70% aerobic base, zone 3 70-80% tempo, zone 4 80-90% VO2 max, zone 5 90-100% peak. Intensity distribution 80% easy 10% tempo 10% hard. Weighted pack hiking is the single most valuable cardio for altitude climbing.
What strength training do mountaineers need?
Mountaineers need functional strength focused on lower body power, core stability, and load-bearing capacity — not bodybuilder mass but strength that translates to carrying packs, ascending terrain, handling descents. Core principles: compound movements over isolation, full range of motion, functional patterns, progressive overload, 2-3 sessions per week. Essential exercises lower body: back squat 3×8-12, deadlift 3×6-10, lunges 3×10-12 per leg, step-ups to box weighted 3×10 per leg, Bulgarian split squats 3×8-10, hip thrusts 3×10-15. Core stability: planks 3×30-60 sec, dead bugs 3×10-15, Pallof press 3×10-12, farmer’s carries 3×30-60 sec. Upper body: pull-ups 3×5-10, push-ups 3×10-20, overhead press 3×8-12, rows 3×8-12. Specific load-bearing: weighted step-ups 3×10 per leg (direct transfer), weighted carries 3 sets × 100 m, suitcase carries 3 sets × 30-60 sec. Programming phases base (weeks 1-4) 2x/week 3 sets × 8-12 reps 60-70% 1RM technique focus. Build (weeks 5-12) 2-3x/week 3-4 sets × 6-10 reps 70-80% 1RM progressive loading add weighted carry work. Peak (weeks 13-20) 2x/week 3 sets × 5-8 reps heavier emphasis muscular endurance (lots of carries) add balance challenges. Taper (weeks 21-24) 1x/week lighter loads maintenance avoid new exercises or PRs. Common mistakes: too much bodybuilding-style work, neglecting single-leg work, ignoring core beyond sit-ups, skipping grip training, not progressing weights, adding strength when already tired from cardio. Strength supports mountain performance — don’t let it dominate your training time. Cardio remains primary.
How much weighted pack training do you need?
Weighted pack training is the single most mountain-specific training mode — most climbers need 2-3 weighted hikes per week in the final 3 months before a major expedition, with progressive pack weight building from 20 lb to 40-60 lb depending on objective. Progression: Phase 1 adaptation (weeks 1-4) 1 hike/week 15-20 lb 60-90 minutes flat or rolling terrain easy pace. Phase 2 base building (weeks 5-12) 1-2 hikes/week 20-30 lb 1.5-3 hours rolling to moderately steep 300-600 m elevation gain. Phase 3 build (weeks 13-18) 2 hikes/week 30-40 lb 3-5 hours steep technical 600-1,200 m elevation gain. Phase 4 peak (weeks 19-22) 2-3 hikes/week 40-60 lb (match expedition) 4-8 hours match expected conditions 1,000-1,500 m elevation gain. Phase 5 taper (weeks 23-24) 1 hike/week 20-30 lb 2-3 hours easy to moderate maintain fitness prevent fatigue. Pack weight targets: Kilimanjaro (porter-supported) 15-25 lb training weight, EBC trek (with porters) 15-25 lb, Aconcagua 35-50 lb, Denali (self-supported) 50-80 lb, Alpine climbs 20-35 lb plus technical gear. Terrain progression: level walking paths to rolling hills to hiking trails with elevation to steep trails with significant elevation to mixed surfaces stream crossings scrambling. Pack packing: start with waterbottles or sandbags, use actual pack and gear for final phases, test expedition pack weight distribution, never cheat weight. Safety: never jump pack weight more than 20% in one week, back off if lower back pain develops, focus on posture and core engagement, build knee strength before heavy weight, use trekking poles for descents. Downhill training critical — downhill stresses knees, quads, IT band — include in all weighted training — actually more injury-causing than uphill.
Do I need altitude training before a climbing expedition?
Altitude-specific training is highly valuable but not always essential — the best altitude preparation is real altitude exposure, with hypoxic tents and elevation training as beneficial alternatives when real altitude isn’t accessible. Hierarchy: Best real altitude exposure — nothing matches actual altitude adaptation, trips to 2,500-3,500 m altitude 2-4 weeks before expedition, extended stays at moderate altitude, weekend trips to mountain areas, acclimatization begins before expedition. Second best hypoxic tent/chamber systems — simulate altitude at home, brands Hypoxico, Altitude Tech, Higher Peak, sleep at simulated 2,500-4,000 m, use 4-8 hours per night, 3-4 weeks pre-expedition typical, cost $3,000-$8,000 purchase or $200-$400/month rental, proven 30-50% AMS reduction. Third option Intermittent Hypoxic Training (IHT) — breathing masks that reduce oxygen, short intense sessions 30-45 minutes, 3-4 sessions per week for 4-6 weeks, less effective than tent systems, cost $300-$600 device. Altitude training camps Colorado, Utah, Ecuador, Nepal, California. Without altitude access: high-intensity interval training, VO2 max development, breathing practice techniques, hiking at highest accessible elevation, long cardio sessions. Who benefits most: previous AMS history, sea-level residents heading to high altitude, time-constrained trips, short expedition windows, professional climbers, solo expedition planners. Limitations: individual response varies significantly, benefits diminish rapidly after cessation, cannot replicate full altitude physiology, best as supplement not replacement for acclimatization days, does not eliminate ascent rate rules. Pre-trip altitude experience: summit easier peak before main expedition, spend acclimatization week at moderate altitude, stay at altitude before major exposure, combine vacation with altitude training. Persistence: benefits last 7-14 days after descent, significant loss after 30 days, plan main trip within 30-60 days of altitude training. See our altitude acclimatization science guide.
What are the most common high altitude training mistakes?
Most common mistakes include insufficient training time, neglecting weighted pack practice, overtraining, ignoring weak points, improper periodization, and not training descents. Top mistakes: Starting too late — most common issue underestimating training time needed, 8-12 weeks too short for demanding objectives, better to over-prepare than rush, 6+ months recommended for 6,000+ m objectives. Not enough weighted pack training — too much treadmill/gym work, insufficient actual weighted hiking, failing to test expedition pack weight, no downhill descent practice. Overtraining — too many hours too fast, not enough recovery time, inadequate sleep, ignoring signs of fatigue, leads to injury, illness, poor performance. Ignoring weak points — avoiding uncomfortable exercises, neglecting weaknesses (core, single-leg, etc.), only doing what you already do well. Poor periodization — not varying training intensity by phase, peaking too early or too late, no taper before expedition, missing recovery-adaptation cycle. Over-emphasizing strength — bodybuilder-style training, too much weight not enough endurance, creates unnecessary muscle mass, altitudes demand cardio more than power. Under-emphasizing cardio — running only once a week, ignoring aerobic base, missing zone 2 training, cardio is primary for altitude success. Skipping altitude preparation — no altitude-specific training, expecting fitness to replace acclimatization, ignoring hypoxic training options, no pre-trip altitude exposure. Inadequate hiking time — short duration training sessions, no practice at expedition daily hiking length, missing mental preparation for long days, endurance requires long sessions. Wrong test benchmarks — using pure fitness tests, not testing actual mountain movements, no assessment of technique under load, missing psychological preparation. Consequences: reduced summit success, injuries during training or expedition, early exhaustion on summit day, increased altitude sickness susceptibility, poor recovery. Avoid: plan timeline carefully, include weighted hiking weekly, follow structured program, include recovery days, progress gradually, test readiness, consult coaches. See our altitude sickness guide.
How do I know if I’m ready for high altitude climbing?
Readiness depends on passing specific physical benchmarks tailored to target peak, combined with technical skills and altitude experience. Kilimanjaro/EBC trek: hike 8-10 miles with 25-30 lb pack comfortably, ascend 3,000 ft in 2 hours carrying pack, run 5K in under 35 minutes OR walk at 4 mph on 10% incline for 45 minutes, complete 12-15 push-ups 20 sit-ups 1-minute plank, back-to-back 4-hour hiking days, no significant joint pain. Aconcagua/6,000 m peak: 10-14 hour day hikes with 40-50 lb pack, ascend 4,000 ft in 3-4 hours with pack, run 10K under 55 minutes OR rucking equivalent, back-to-back 2-3 days heavy weighted hiking, multiple prior altitude experiences (above 4,500 m), basic crampon and ice axe proficiency, winter hiking experience. Denali: haul 75+ lb pack on 10-hour days, climb 5,000+ ft with full load in one day, sled pulling practice (Denali-specific), multiple 6,000+ m ascent experiences, cold-weather camping, crevasse rescue skills, 3-week self-supported expeditions prior. 8,000 m peak: all Denali benchmarks plus previous 8,000 m or high 7,000 m success, extensive altitude experience above 6,500 m, oxygen system familiarity, expedition-length commitment tolerance, 12+ months prior altitude expeditions. Fitness tests: VO2 max above 40-50 ml/kg/min for men 35-45 for women, weighted step-up 30 per leg in 60 seconds, push-up 30+ strict form, squat 50 air squats without stopping, deadlift 1.5x bodyweight minimum, pull-up count 5+. Technical skills: crampon techniques, ice axe arrest, rope team travel, crevasse rescue, weather forecasting, navigation, emergency response. Altitude progression: day hikes above 3,500 m (many times), multi-day trips above 3,500 m (multiple), any altitude above 4,500 m (minimum for serious objectives), 5,500 m+ experience (essential for demanding peaks), individual altitude tolerance pattern established. Psychological: comfort with discomfort, decision-making under stress, group dynamics awareness, risk tolerance appropriate. Red flags: recent significant illness or injury, training not completed, limited altitude experience, family/personal crises, financial stress, gear not tested. Better to delay than attempt unprepared.
This guide is one of 70 across 12 thematic clusters on Global Summit Guide. The master hub organizes every guide by experience tier, specific peak, skill area, and region.
Frostbite Prevention & Treatment for Climbers: What to Do in the Field
Suspected frostbite? Get out of the cold, protect the tissue, assess for hypothermia, and do not rub it. If the tissue is frozen, intentionally rewarm it only when you can prevent refreezing. Once thawing is appropriate, controlled warm-water rewarming is the standard approach, followed by medical evaluation for true frostbite.
Medical/safety explainer · Updated August 31, 2026
The emergency answer
What Should You Do First?
Stop the cold exposure. Move to shelter, replace wet clothing, protect the affected area from pressure and friction, and assess the whole person—not just the fingers or toes.
If the climber is also hypothermic, hypothermia takes priority. Frostbite matters, but a falling core temperature can become immediately life-threatening.
DoShelter + insulate
DoProtect tissue
DoAssess hypothermia
Do notRub or massage
Do notUse direct dry heat
CriticalAvoid refreezing
Medical note: This page is educational and cannot diagnose frostbite severity. True frostbite, blistering, persistent numbness after warming, or concern for hypothermia deserves professional medical evaluation.
Snippet-ready field decision
Frostbite: Immediate Action Table
Situation
Immediate action
Cold, pale or numb skin but still soft
Stop exposure, protect and warm gently; reassess for frostnip vs deeper injury
Firm, waxy, frozen or persistently numb tissue
Treat as suspected frostbite and plan evacuation/medical evaluation
Refreezing is possible
Do not intentionally thaw yet; protect the frozen tissue
Refreezing can be prevented
Controlled rapid rewarming can be appropriate
Hypothermia is present
Prioritize whole-body rewarming and emergency care
Blisters or deep injury appear
Protect the area and seek urgent medical evaluation
Fire/heating pad is available
Do not use direct uncontrolled heat
Someone suggests rubbing or snow massage
Do not rub or massage
Know the distinction
Frostnip vs Frostbite
Feature
Frostnip
Frostbite
Tissue freezing
No
Yes
Typical early look
Pale/numb exposed skin
White, gray-yellow, firm or waxy tissue may occur
After warming
Color and sensation return quickly
Pain, persistent sensory change and later blistering may develop
Tissue loss
No
Possible in deeper injury
Medical evaluation
Usually not required if it fully resolves
Recommended for suspected true frostbite
The 2024 Wilderness Medical Society guidance defines frostnip as a superficial nonfreezing cold injury. It can precede frostbite, but it does not involve tissue freezing or tissue loss.
The key field decision
When Should You Rewarm Frostbite?
The central wilderness decision is not simply “rewarm or don’t rewarm.” It is:
Can you prevent refreezing after thawing?
If yes: controlled rapid rewarming is generally preferred. If no: protect the frozen tissue and delay intentional thawing until a stable environment is available.
Safe shelterRewarming possible
Continued exposureDelay thawing
After thawNever refreeze
CDC guidance describes warm—not hot—water when immediate medical care is unavailable. The goal is controlled warming, not extreme heat. If the water would be uncomfortably hot for an unaffected hand, it is too hot for numb tissue.
Why this matters: thaw-refreeze injury can be more damaging than keeping already-frozen tissue protected until definitive thawing can occur.
Common harmful mistakes
What Not to Do
Never
Rub or massage
Mechanical trauma can worsen damaged tissue.
Never
Rub with snow
This adds friction and cold instead of treatment.
Never
Use a fire or stove
Numb skin can burn before the climber realizes it.
Never
Use a heating pad
Uncontrolled dry heat can create thermal injury.
Avoid
Walking on frozen feet
When possible, minimize weight-bearing and mechanical trauma.
Avoid
Thawing before refreezing risk is solved
The post-thaw environment is part of the treatment decision.
Severity is clearer after thawing
How Frostbite Severity Develops
Traditional medical classification uses degrees, but climbers should not rely on an exact self-diagnosis while tissue is still frozen. The full depth of injury is often more apparent after thawing and over time.
Pattern
What it can mean
Action
Persistent numbness / waxy tissue
True freezing injury possible
Protect, rewarm appropriately, seek medical care
Clear blisters after thawing
Superficial frostbite pattern may be present
Medical evaluation
Blood-filled blisters
Deeper injury can be present
Urgent specialist evaluation
Hard, insensate deeper tissue
Deep frostbite concern
Urgent evacuation and hospital treatment
Do not intentionally puncture blisters in the field simply because you have identified them. Wound care decisions belong in a medical plan, especially for deeper injury.
Evacuation
When Frostbite Becomes an Urgent Medical Problem
Urgent
Blistering
True frostbite with blistering deserves medical evaluation.
Urgent
Persistent loss of sensation
Symptoms that do not resolve with appropriate warming raise concern for deeper injury.
Emergency
Hypothermia
Confusion, slurred speech, severe shivering changes or altered consciousness require emergency action.
Urgent
Large area / multiple digits
Extent matters because severe injury can threaten function and tissue survival.
Advanced hospital treatments for severe frostbite may include specialized imaging, wound management and—in selected cases—medications designed to improve blood flow or dissolve clots. Those therapies require medical screening and are not field self-treatment instructions.
The best treatment is prevention
Frostbite Prevention for Climbers
System
What to do
Hands
Use a glove system with warm mitts available before hands become numb; carry dry backups on serious cold climbs
Feet
Use appropriately warm boots with enough room for circulation; avoid overtight lacing and wet socks
Face
Cover cheeks, nose and chin when wind chill rises; monitor partners because facial numbness may go unnoticed
Moisture
Manage sweat before it soaks insulation; change wet layers when possible
Fuel
Eat and drink enough to support heat production and judgment
Wind
Treat forecast wind as a cold-injury multiplier, not just a comfort issue
Buddy checks
Look at each other’s face and ask about fingers/toes before numbness becomes normalized
Turnaround
Do not trade tissue for a summit; loss of sensation is a decision signal
Mountain-specific risk
Why High Altitude Makes Cold Injury Harder to Manage
Cold, wind, dehydration, exhaustion, impaired judgment, tight boots or gloves, reduced movement and long summit-night exposure can combine on major mountains. A climber may also ignore early numbness because stopping feels operationally expensive.
Use a simple rule: numbness that persists is not an acceptable “normal summit-night feeling.” Stop, assess, protect and correct the cause before it progresses.
This rebuild uses the Wilderness Medical Society Clinical Practice Guidelines for the Prevention and Treatment of Frostbite: 2024 Update as its primary wilderness-medicine framework. The WMS update covers frostbite classification, prevention, field management, rewarming and advanced therapies.
CDC cold-weather guidance was used to cross-check the core public first-aid actions: get out of the cold, do not rub frostbitten tissue, avoid walking on affected feet when possible, use warm rather than hot water when rewarming is appropriate, and avoid heating pads, fires and other uncontrolled heat sources.
What this page intentionally does not do: prescribe thrombolytics, vasodilators or other advanced medications to climbers in the field. Those therapies may have a role in selected severe frostbite cases, but require professional medical assessment.
FAQ
Frostbite FAQ for Climbers
What should I do first?
Get out of the cold, protect the tissue, assess for hypothermia and avoid rubbing or uncontrolled heat.
When should I rewarm frostbite?
When you can prevent the thawed tissue from refreezing. If refreezing is likely, protect the frozen tissue until definitive thawing is possible.
What is frostnip?
A superficial nonfreezing cold injury that resolves with warming and does not cause tissue loss.
Should I rub frostbitten skin?
No. Do not rub or massage it.
Can I use a fire or heating pad?
No. Numb tissue can burn easily from uncontrolled direct heat.
Can I walk on frostbitten feet?
Avoid it when possible. Mechanical trauma can worsen injury.
Is hypothermia more urgent?
Yes. Hypothermia can be immediately life-threatening and takes priority.
Do severe cases need hospital care?
Yes. Severe frostbite can require specialist evaluation and advanced treatment.
The field rule
Protect the Tissue. Prevent Refreezing. Treat the Whole Climber.
Frostbite decisions are easier when the priorities are clear: stop exposure, identify hypothermia, avoid mechanical and heat injury, rewarm only when the tissue can stay thawed, and get true frostbite evaluated medically.
Australian & Oceania Peaks: A Complete Summit Guide (2026) | Global Summit Guide {“@context”:”https://schema.org”,”@type”:”Article”,”headline”:”Australian & Oceania Peaks: A Complete Summit Guide (2026)”,”description”:”Complete guide to Australian and Oceania peaks — Kosciuszko, Carstensz Pyramid, Aoraki/Mt Cook, and the Seven Summits Oceania debate. Regional climbing routes, costs, and seasons.”,”image”:”https://globalsummitguide.com/wp-content/uploads/2026/02/australian-oceania-peaks.jpg”,”author”:{“@type”:”Organization”,”name”:”Global Summit Guide Editorial Team”,”url”:”https://globalsummitguide.com/about/”},”publisher”:{“@type”:”Organization”,”name”:”Global Summit Guide”,”url”:”https://globalsummitguide.com”,”logo”:{“@type”:”ImageObject”,”url”:”https://globalsummitguide.com/wp-content/uploads/2026/02/global-logo-new-2.png”,”width”:”300″,”height”:”100″}},”datePublished”:”2026-02-15T08:00:00-07:00″,”dateModified”:”2026-04-19T12:00:00-06:00″,”mainEntityOfPage”:{“@type”:”WebPage”,”@id”:”https://globalsummitguide.com/australian-oceania-peaks-a-complete-summit-guide/”},”isPartOf”:{“@type”:”CollectionPage”,”@id”:”https://globalsummitguide.com/conquer-peaks-global-summit-guide-for-mountain-climbing/#hub”,”name”:”Conquer Peaks: Your Global Summit Guide for Mountain Climbing”}} {“@context”:”https://schema.org”,”@type”:”FAQPage”,”mainEntity”:[
{“@type”:”Question”,”name”:”What is the highest mountain in Oceania?”,”acceptedAnswer”:{“@type”:”Answer”,”text”:”The highest mountain in Oceania depends on how Oceania is defined. By continental definition including the Australian continental plate and New Guinea, the highest peak is Puncak Jaya (Carstensz Pyramid) at 4,884 meters (16,024 feet) in Papua, Indonesia — the western half of New Guinea. By political Australian continent (mainland + Tasmania), the highest is Mount Kosciuszko at 2,228 meters (7,310 feet). The Seven Summits debate centers on this distinction: the Messner List uses Carstensz Pyramid as Oceania’s Seven Summit; the Bass List uses Kosciuszko. In Papua New Guinea, Mount Wilhelm (4,509 m) is the highest peak. Across New Zealand, Aoraki/Mount Cook is the highest at 3,724 m. The entire Oceanic continental region, including Melanesian, Micronesian, and Polynesian island peaks, contains fewer 4,000 m peaks than any other Seven Summits continent.”}},
{“@type”:”Question”,”name”:”Kosciuszko vs Carstensz: which is the Seven Summit?”,”acceptedAnswer”:{“@type”:”Answer”,”text”:”Kosciuszko vs Carstensz Pyramid is mountaineering’s most-debated Seven Summits question. Two lists have coexisted for decades: (1) The Bass List (Dick Bass, 1985) uses Mount Kosciuszko (2,228 m, Australia) as Oceania’s Seven Summit. (2) The Messner List (Reinhold Messner) uses Carstensz Pyramid / Puncak Jaya (4,884 m, Indonesia) as the Seven Summit. The Messner List is considered the more ‘serious’ mountaineering challenge because Carstensz requires technical rock climbing (5.10 difficulty), remote jungle approach, and serious altitude. Kosciuszko is essentially a walk-up peak that most fit hikers can complete in a day. For serious Seven Summits climbers, completing the Messner List (including Carstensz) is the recognized achievement. The Bass List with Kosciuszko is sometimes called ‘light Seven Summits.’ Many completer climbers do both to satisfy both lists. The debate reflects different definitions of the Oceania continent — some view New Guinea as part of Oceania, others include only mainland Australia.”}},
{“@type”:”Question”,”name”:”How hard is it to climb Carstensz Pyramid?”,”acceptedAnswer”:{“@type”:”Answer”,”text”:”Carstensz Pyramid (4,884 m, Indonesia) is a serious technical climbing objective — graded D+ (Difficile) on the IFAS scale with sustained 5.9-5.10 rock climbing on the summit ridge. The challenges include: (1) Technical rock climbing on the final 300 m summit ridge, including tyrolean traverses and exposed scrambling. (2) Equatorial jungle approach requiring 4-7 days of trekking through remote Papua terrain. (3) Extreme humidity and rainfall — one of the wettest regions on Earth. (4) Political complexity — Indonesia requires special permits and Papua region entry coordination. (5) Logistical difficulty — flights to Timika are unreliable, and the full expedition takes 10-14 days. Guided expeditions cost $18,000-$28,000 including all logistics and permits. Success rates approximate 60-70% in favorable conditions. Carstensz is notably harder than Kosciuszko but requires different preparation than high-altitude 8,000ers — more technical rock climbing than altitude endurance.”}},
{“@type”:”Question”,”name”:”What is the highest mountain in New Zealand?”,”acceptedAnswer”:{“@type”:”Answer”,”text”:”Aoraki/Mount Cook is the highest mountain in New Zealand at 3,724 m (12,218 ft) — part of the Southern Alps on the South Island. The mountain has dual naming: ‘Aoraki’ is the Māori name meaning ‘cloud piercer,’ while ‘Mount Cook’ is the English name honoring Captain James Cook. New Zealand officially uses the combined ‘Aoraki/Mount Cook’ designation. The mountain was climbed first in 1894 by Tom Fyfe, George Graham, and Jack Clarke. The standard Linda Glacier route is graded AD+ with sustained snow and ice climbing over 2-3 days. Aoraki has killed approximately 240+ climbers since record-keeping began, making it proportionally one of the most dangerous peaks in the Southern Hemisphere. A major rockfall event in December 1991 reduced the mountain’s height by 10 meters. Current commercial climbing costs NZ$4,000-$8,000 for guided 3-5 day programs. Access is via Aoraki/Mount Cook Village with flights from Christchurch or scenic drives through Canterbury.”}},
{“@type”:”Question”,”name”:”When is the best time to climb Oceania peaks?”,”acceptedAnswer”:{“@type”:”Answer”,”text”:”Best times vary significantly across Oceania due to Southern Hemisphere seasonality and equatorial locations: (1) Mount Kosciuszko (Australia): December-February is the classic summer hiking season; snow climbing December-March; other times possible but more challenging weather. (2) Carstensz Pyramid (Indonesia): Late July through early December offers drier conditions — Papua has year-round rainfall but these months are least wet. (3) Aoraki/Mount Cook (New Zealand): November through early March is the Southern Hemisphere summer climbing season; peak conditions December-February. (4) Australian Alps peaks (Victoria, NSW): December-February for summer hiking; winter peaks July-September for ski mountaineering. (5) Mount Taranaki (New Zealand North Island): November-April for standard climbing. (6) Papua New Guinea peaks (Mount Wilhelm): May-September dry season. (7) Pacific volcanoes (Fiji, Vanuatu): June-October dry season avoiding cyclone season November-April. Southern Hemisphere seasonality reverses the traditional alpine climbing calendar — Oceania’s best climbing window is typically December-February when most other destinations are in winter.”}},
{“@type”:”Question”,”name”:”How do you climb Mount Kosciuszko?”,”acceptedAnswer”:{“@type”:”Answer”,”text”:”Mount Kosciuszko (2,228 m) is the easiest of the Seven Summits — essentially a summer hike rather than a climb. Three main routes: (1) Main Range Track from Thredbo: Take the Kosciuszko Express chairlift from Thredbo Village to 1,930 m, then walk 6.5 km one-way along a well-maintained track. Total 13 km round trip, 400 m elevation gain, typically 4-6 hours. Popular and accessible. (2) Summit Walk from Charlotte Pass: 9 km one-way walk, 18 km round trip, 500 m elevation gain. More scenic with fewer crowds. (3) Mount Kosciuszko Summit Ride: Some operators offer cycle access via maintained fire roads. Kosciuszko National Park entry fee is AU$29 per vehicle per day. Best season is December-March for snow-free conditions. No guide required, no special permits. Thredbo Village is approximately 500 km south of Sydney, 6 hours drive. For Seven Summits collectors using the Bass List, Kosciuszko is the quickest Seven Summit — most climbers complete summit and descent in a single day.”}},
{“@type”:”Question”,”name”:”What peaks are in the Australian Alps?”,”acceptedAnswer”:{“@type”:”Answer”,”text”:”The Australian Alps are a mountain range spanning the Australian Capital Territory, New South Wales, and Victoria. Major peaks include: (1) Mount Kosciuszko (2,228 m, NSW) — Australia’s highest mainland peak. (2) Mount Townsend (2,209 m, NSW) — Australia’s second-highest at the time of first measurement (originally thought to be highest). (3) Mount Twynam (2,196 m, NSW) — third-highest. (4) Mount Bogong (1,986 m, Victoria) — Victoria’s highest peak. (5) Mount Feathertop (1,922 m, Victoria). (6) Mount Hotham (1,862 m, Victoria) — major ski resort. (7) Mount Jagungal (2,061 m, NSW). (8) The Main Range including Mount Carruthers and Mount Lee. The Alps extend roughly 500 km from the ACT through southern NSW into Victoria. Home to Kosciuszko National Park, Alpine National Park, and Namadgi National Park. The range includes Australia’s main ski resorts (Thredbo, Perisher, Mount Hotham, Falls Creek) operating primarily June-September. Summer hiking season December-March offers wildflower displays and accessible peaks for day walks and multi-day treks.”}},
{“@type”:”Question”,”name”:”Can you climb peaks in Papua New Guinea?”,”acceptedAnswer”:{“@type”:”Answer”,”text”:”Yes, peaks in Papua New Guinea are climbable though involve significant logistical complexity. Mount Wilhelm (4,509 m) is PNG’s highest peak and a genuine climbing objective — primarily a strenuous multi-day trek rather than technical climbing, typically 3-5 days from the town of Kundiawa. Other major PNG peaks include Mount Giluwe (4,367 m, a volcanic peak), Mount Hagen (3,778 m), and Mount Victoria (4,072 m in the Owen Stanley Range). Key considerations for PNG climbing: (1) Political stability varies by region — consult current travel advisories. (2) Infrastructure is limited outside main towns. (3) Local communities control land access — working with licensed operators is essential. (4) Malaria is present in lowland approaches. (5) Best climbing season is May-September dry season. (6) Costs are higher than expected due to logistical complexity — Mount Wilhelm climbs run $3,000-$6,000 guided. Operators like PNG Trekking Adventures and No Roads Expeditions specialize in PNG mountain expeditions. Experienced climbers find PNG peaks offer some of the most remote and culturally distinctive mountain experiences in the world.”}}
]} *,*::before,*::after{box-sizing:border-box;margin:0;padding:0}
:root{–pine:#0a1929;–forest:#122a44;–mist:#dde5ee;–snow:#f4f6f9;–stone:#485460;–pebble:#8a95a3;–ink:#0f1a26;–cream:#fafaf7;–white:#ffffff;–gold:#d4913a;–gold-light:#f5e4c8;–denali:#1e3a5c;–denali-mid:#2e5986;–denali-light:#e8eef5;–ready:#2d6e4e;–ready-light:#e8f1ec;–caution:#b86a15;–caution-light:#f7ece0;–danger:#a83a2b;–danger-light:#f5e8e5;–great-black:#2b2318;–great-black-light:#e8e3d8;–serif:’DM Serif Display’,Georgia,serif;–sans:’Outfit’,system-ui,sans-serif}
html{scroll-behavior:smooth}
body{font-family:var(–sans);background:var(–cream);color:var(–ink);line-height:1.75;font-size:17px;-webkit-font-smoothing:antialiased}
h1,h2,h3,h4{font-family:var(–serif);font-weight:400;line-height:1.2}
a{color:var(–denali-mid);text-decoration:underline;text-underline-offset:3px;transition:color .15s}
a:hover{color:#b8701f}
.btn{display:inline-flex;align-items:center;gap:8px;padding:13px 26px;border-radius:6px;font-family:var(–sans);font-size:15px;font-weight:500;text-decoration:none;transition:all .2s ease}
.btn-primary{background:var(–gold);color:var(–pine)}
.btn-primary:hover{background:#bd8030;transform:translateY(-1px);text-decoration:none}
.breadcrumb{background:var(–pine);padding:10px 0;font-size:13px}
.breadcrumb__inner{max-width:1200px;margin:0 auto;padding:0 24px;display:flex;align-items:center;gap:8px;color:rgba(255,255,255,.5);flex-wrap:wrap}
.breadcrumb a{color:rgba(255,255,255,.65);text-decoration:none}
.breadcrumb a:hover{color:var(–gold)}
.breadcrumb__sep{color:rgba(255,255,255,.25)}
.breadcrumb__current{color:rgba(255,255,255,.85)}
.article-header{background:linear-gradient(135deg,var(–pine),var(–forest));padding:52px 0 44px;color:var(–white)}
.article-header__inner{max-width:1200px;margin:0 auto;padding:0 24px}
.article-header__label{font-size:11px;font-weight:600;letter-spacing:.14em;text-transform:uppercase;color:var(–gold);margin-bottom:18px;display:flex;align-items:center;gap:10px}
.article-header__label::before{content:”;width:36px;height:2px;background:var(–gold)}
.article-header h1{font-size:clamp(30px,4.4vw,52px);color:var(–white);max-width:1000px;margin-bottom:20px}
.article-header h1 em{font-style:italic;color:var(–gold)}
.article-header__sub{font-size:17px;color:rgba(255,255,255,.82);font-weight:300;max-width:900px;line-height:1.7;margin-bottom:28px}
.byline{display:flex;flex-wrap:wrap;align-items:center;gap:20px 28px;padding:18px 22px;background:rgba(255,255,255,.06);border:1px solid rgba(255,255,255,.1);border-radius:10px;margin-bottom:28px;font-size:13.5px}
.byline__item{display:flex;align-items:center;gap:8px;color:rgba(255,255,255,.85)}
.byline__item strong{color:var(–white);font-weight:500}
.byline__label{font-size:10px;letter-spacing:.1em;text-transform:uppercase;color:var(–gold);font-weight:600;margin-right:4px}
.byline__item a{color:rgba(255,255,255,.85);text-decoration:underline;text-underline-offset:2px}
.byline__item a:hover{color:var(–gold)}
.hero__stats{display:grid;grid-template-columns:repeat(4,1fr);gap:18px;max-width:900px}
.hero__stat{padding:16px 20px;background:rgba(10,25,41,.4);border:1px solid rgba(255,255,255,.12);border-radius:10px}
.hero__stat-num{font-family:var(–serif);font-size:30px;color:var(–gold);line-height:1;margin-bottom:4px}
.hero__stat-lbl{font-size:11px;letter-spacing:.08em;text-transform:uppercase;color:rgba(255,255,255,.72);font-weight:500}
.hub-strip{background:var(–gold-light);border-bottom:1px solid rgba(212,145,58,.3);padding:12px 0}
.hub-strip__inner{max-width:1200px;margin:0 auto;padding:0 24px;display:flex;align-items:center;gap:16px;flex-wrap:wrap;font-size:13px}
.hub-strip__label{font-family:var(–serif);color:var(–pine);font-weight:600;font-size:14px;display:flex;align-items:center;gap:8px}
.hub-strip__label::before{content:’★’;color:var(–gold);font-size:13px}
.hub-strip__cluster{color:var(–stone);font-weight:400}
.hub-strip__cluster strong{color:var(–pine);font-weight:600}
.hub-strip__link{margin-left:auto;color:var(–pine);font-weight:500;text-decoration:none;font-size:11px;letter-spacing:.08em;text-transform:uppercase;padding:6px 12px;background:var(–white);border:1px solid rgba(212,145,58,.35);border-radius:6px;transition:all .15s}
.hub-strip__link:hover{background:var(–pine);color:var(–gold-light);border-color:var(–pine)}
@media(max-width:700px){.hub-strip__link{margin-left:0}.hub-strip__inner{gap:10px}}
.page-wrap{max-width:1200px;margin:0 auto;padding:0 24px;display:grid;grid-template-columns:1fr 300px;gap:56px;align-items:start}
.sidebar{padding-top:52px}
.sidebar__block{background:var(–white);border:1px solid var(–mist);border-radius:12px;padding:22px;margin-bottom:20px}
.sidebar__block–dark{background:var(–pine);color:var(–white);border-color:var(–pine)}
.sidebar__block–dark .sidebar__label{color:rgba(255,255,255,.4)}
.sidebar__block–gold{background:var(–gold-light);border-color:rgba(212,145,58,.3)}
.sidebar__toc{position:sticky;top:24px;max-height:calc(100vh – 48px);overflow-y:auto}
.sidebar__label{font-size:11px;font-weight:600;letter-spacing:.1em;text-transform:uppercase;color:var(–pebble);margin-bottom:14px}
.toc-list{list-style:none;display:flex;flex-direction:column;gap:2px}
.toc-link{display:block;padding:7px 10px;border-radius:6px;text-decoration:none;color:var(–stone);font-size:13px;border-left:2px solid transparent;transition:all .15s;line-height:1.4}
.toc-link:hover{color:var(–denali-mid);background:var(–snow);border-left-color:var(–denali-light);text-decoration:none}
.quickfact-row{display:flex;justify-content:space-between;align-items:baseline;padding:10px 0;border-bottom:1px solid rgba(255,255,255,.08);font-size:13px;gap:12px}
.quickfact-row:last-child{border-bottom:none}
.quickfact-row__name{color:rgba(255,255,255,.72);font-weight:300}
.quickfact-row__val{color:var(–gold);font-weight:500;font-family:var(–serif);font-size:15px;text-align:right}
.sidebar__block–gold h4{font-family:var(–serif);font-size:17px;color:var(–pine);margin-bottom:8px;line-height:1.3}
.sidebar__block–gold p{font-size:13px;color:var(–stone);font-weight:300;margin-bottom:14px;line-height:1.55}
.sidebar__cta-btn{display:flex;align-items:center;justify-content:center;gap:6px;padding:11px 16px;background:var(–pine);color:var(–white);border-radius:6px;text-decoration:none;font-size:13px;font-weight:500}
.sidebar__cta-btn:hover{background:var(–denali-mid);color:var(–white);text-decoration:none}
.article{padding:52px 0 80px}
.article section{scroll-margin-top:24px}
.article__lead{font-size:19px;color:var(–stone);font-weight:300;line-height:1.75;border-left:3px solid var(–gold);padding-left:22px;margin-bottom:48px}
.article__lead em{color:var(–pine);font-style:italic}
.article h2{font-size:clamp(24px,3.2vw,34px);color:var(–pine);margin-top:64px;margin-bottom:18px}
.article h2:first-child{margin-top:0}
.article h2 em{font-style:italic;color:var(–denali-mid)}
.article h3{font-size:21px;color:var(–pine);margin-top:32px;margin-bottom:12px}
.article p{color:var(–stone);margin-bottom:18px;font-weight:300}
.article p strong{color:var(–ink);font-weight:500}
.article p em{color:var(–pine);font-style:italic;font-weight:400}
.article ul,.article ol{color:var(–stone);font-weight:300;margin:0 0 20px 22px}
.article li{margin-bottom:8px;line-height:1.7}
.section-rule{border:none;border-top:1px solid var(–mist);margin:48px 0}
.callout{border-radius:10px;padding:22px 24px;margin:28px 0;display:flex;gap:18px;align-items:flex-start}
.callout–insight{background:var(–denali-light);border:1px solid rgba(46,89,134,.15)}
.callout–gold{background:var(–gold-light);border:1px solid rgba(212,145,58,.25)}
.callout–caution{background:var(–caution-light);border:1px solid rgba(184,106,21,.25)}
.callout–danger{background:var(–danger-light);border:1px solid rgba(168,58,43,.2)}
.callout–methodology{background:var(–great-black-light);border:1px solid rgba(43,35,24,.2)}
.callout__icon{flex-shrink:0;font-size:22px;line-height:1}
.callout__body{flex:1}
.callout__title{font-family:var(–serif);font-size:17px;margin-bottom:6px;color:var(–pine)}
.callout__text{font-size:14.5px;color:var(–stone);font-weight:300;line-height:1.7;margin:0}
.callout__text a{color:var(–denali-mid);font-weight:500} /* Versus split – for Kosciuszko vs Carstensz */
.versus-split{display:grid;grid-template-columns:1fr auto 1fr;gap:0;align-items:stretch;margin:32px 0;background:var(–white);border:1px solid var(–mist);border-radius:14px;overflow:hidden}
.versus-side{padding:32px 28px;background:var(–white)}
.versus-side–left{border-right:1px solid var(–mist);background:#fef9f2}
.versus-side–right{background:#f2f6fa}
.versus-divider{display:flex;align-items:center;justify-content:center;padding:0 12px;background:var(–pine);color:var(–gold);font-family:var(–serif);font-style:italic;font-size:32px;letter-spacing:.05em;min-width:80px}
.versus-side__label{font-size:10px;letter-spacing:.12em;text-transform:uppercase;color:var(–gold);font-weight:700;margin-bottom:4px}
.versus-side__name{font-family:var(–serif);font-size:26px;color:var(–pine);margin-bottom:4px;line-height:1.2}
.versus-side__height{font-family:var(–serif);font-size:18px;color:var(–pine);font-weight:600;margin-bottom:14px;padding-bottom:12px;border-bottom:1px solid var(–mist)}
.versus-side__list{list-style:none;margin:0;padding:0;font-size:13px}
.versus-side__list li{padding:6px 0 6px 18px;position:relative;color:var(–stone);font-weight:300;line-height:1.55}
.versus-side__list li::before{content:’▸’;position:absolute;left:0;color:var(–gold);font-size:11px;top:7px}
.versus-side__list li strong{color:var(–ink);font-weight:500} /* Peak profile card */
.peak-profile{background:var(–white);border:1px solid var(–mist);border-radius:14px;padding:32px;margin:28px 0;border-left:4px solid var(–denali-mid)}
.peak-profile–seven{border-left-color:var(–gold)}
.peak-profile–flagship{border-left-color:var(–caution)}
.peak-profile–technical{border-left-color:var(–danger)}
.peak-profile__header{display:grid;grid-template-columns:auto 1fr auto;gap:20px;align-items:baseline;margin-bottom:18px;padding-bottom:16px;border-bottom:1px solid var(–mist)}
.peak-profile__rank{font-family:var(–serif);font-style:italic;font-size:48px;color:var(–gold);line-height:1;opacity:.7}
.peak-profile__titleblock{min-width:0}
.peak-profile__eyebrow{font-size:10px;letter-spacing:.12em;text-transform:uppercase;color:var(–gold);font-weight:700;margin-bottom:4px}
.peak-profile__name{font-family:var(–serif);font-size:clamp(22px,3vw,28px);color:var(–pine);margin-bottom:4px;line-height:1.2}
.peak-profile__name em{font-style:italic;color:var(–denali-mid)}
.peak-profile__location{font-size:13px;color:var(–pebble);font-weight:500}
.peak-profile__height{font-family:var(–serif);font-size:22px;color:var(–pine);font-weight:600;white-space:nowrap;text-align:right}
.peak-profile__height small{display:block;font-family:var(–sans);font-size:10px;letter-spacing:.1em;text-transform:uppercase;color:var(–pebble);font-weight:700;margin-top:2px}
.peak-profile__body{font-size:15px;color:var(–stone);font-weight:300;line-height:1.75;margin-bottom:18px}
.peak-profile__body p{margin-bottom:14px}
.peak-profile__body p:last-child{margin-bottom:0}
.peak-profile__body strong{color:var(–ink);font-weight:500}
.peak-profile__body em{color:var(–pine);font-style:italic;font-weight:400}
.peak-profile__stats{background:var(–snow);border-radius:10px;padding:16px 22px;display:grid;grid-template-columns:repeat(4,1fr);gap:14px 20px}
.peak-profile__stat{display:flex;flex-direction:column;gap:2px}
.peak-profile__stat-label{font-size:10px;letter-spacing:.08em;text-transform:uppercase;color:var(–pebble);font-weight:700}
.peak-profile__stat-val{font-family:var(–serif);font-size:14px;color:var(–pine);font-weight:600} /* Country overview cards */
.country-grid{display:grid;grid-template-columns:repeat(2,1fr);gap:16px;margin:28px 0}
.country-card{background:var(–white);border:1px solid var(–mist);border-radius:12px;padding:24px 26px;border-top:3px solid var(–gold)}
.country-card–au{border-top-color:#2e5986}
.country-card–nz{border-top-color:var(–ready)}
.country-card–png{border-top-color:var(–caution)}
.country-card–id{border-top-color:var(–danger)}
.country-card__flag{font-size:10px;letter-spacing:.12em;text-transform:uppercase;color:var(–gold);font-weight:700;margin-bottom:4px}
.country-card__name{font-family:var(–serif);font-size:20px;color:var(–pine);margin-bottom:4px;line-height:1.2}
.country-card__highlight{font-family:var(–serif);font-size:13px;color:var(–denali-mid);font-style:italic;margin-bottom:12px;padding-bottom:12px;border-bottom:1px solid var(–mist)}
.country-card__desc{font-size:13.5px;color:var(–stone);font-weight:300;line-height:1.65;margin-bottom:12px}
.country-card__desc strong{color:var(–ink)}
.country-card__stats{display:grid;grid-template-columns:repeat(2,1fr);gap:8px 16px;font-size:12px}
.country-card__stat{display:flex;flex-direction:column;gap:2px}
.country-card__stat-label{font-size:10px;letter-spacing:.08em;text-transform:uppercase;color:var(–pebble);font-weight:700}
.country-card__stat-val{font-family:var(–serif);font-size:13px;color:var(–pine);font-weight:600} /* Comparison table */
.compare-wrap{overflow-x:auto;margin:28px 0 36px;border-radius:14px;border:1px solid var(–mist);box-shadow:0 4px 24px rgba(11,31,53,.05)}
.compare-table{width:100%;border-collapse:collapse;font-size:14px;min-width:680px;background:var(–white)}
.compare-table thead th{text-align:left;padding:14px 12px;font-size:10px;font-weight:700;letter-spacing:.08em;text-transform:uppercase;color:var(–white);background:var(–pine);white-space:nowrap}
.compare-table thead th:first-child{padding-left:22px}
.compare-table tbody tr{border-bottom:1px solid var(–mist)}
.compare-table tbody tr:last-child{border-bottom:none}
.compare-table tbody tr:nth-child(even){background:var(–snow)}
.compare-table tbody td{padding:14px 12px;color:var(–stone);vertical-align:top;font-weight:300;line-height:1.5}
.compare-table tbody td:first-child{padding-left:22px;font-weight:500;color:var(–ink);font-family:var(–serif);font-size:14.5px}
.grade-pill{display:inline-block;padding:2px 8px;border-radius:4px;font-size:11px;font-weight:700;color:var(–white);font-family:var(–sans)}
.grade-pill–f{background:#4a9e5e}
.grade-pill–pd{background:#8bba3f}
.grade-pill–ad{background:var(–denali-mid)}
.grade-pill–d{background:var(–caution)}
.grade-pill–td{background:#cc4e24} .faq{margin:28px 0}
.faq__item{background:var(–white);border:1px solid var(–mist);border-radius:10px;margin-bottom:12px;overflow:hidden;transition:border-color .15s}
.faq__item:hover{border-color:rgba(46,89,134,.35)}
.faq__item[open]{border-color:var(–denali-mid);box-shadow:0 4px 20px rgba(11,31,53,.06)}
.faq__summary{padding:18px 24px;cursor:pointer;font-family:var(–serif);font-size:17px;color:var(–pine);display:flex;justify-content:space-between;align-items:center;gap:16px;list-style:none;user-select:none}
.faq__summary::-webkit-details-marker{display:none}
.faq__summary::after{content:’+’;font-family:var(–sans);font-size:24px;color:var(–denali-mid);font-weight:300;line-height:1;transition:transform .2s}
.faq__item[open] .faq__summary::after{content:’−’}
.faq__body{padding:0 24px 22px}
.faq__body p{font-size:15px;color:var(–stone);font-weight:300;line-height:1.75;margin:0}
.internal-links{background:var(–snow);border-radius:12px;padding:28px 30px;margin:32px 0}
.internal-links__label{font-size:11px;font-weight:600;letter-spacing:.1em;text-transform:uppercase;color:var(–pebble);margin-bottom:16px}
.internal-links h3{font-family:var(–serif);font-size:22px;color:var(–pine);margin-bottom:8px;margin-top:0}
.internal-links__grid{display:grid;grid-template-columns:repeat(2,1fr);gap:12px;margin-top:20px}
.internal-link{display:flex;align-items:center;padding:14px 16px;background:var(–white);border:1px solid var(–mist);border-radius:8px;font-size:14px;font-weight:500;color:var(–denali-mid);text-decoration:none;transition:all .15s}
.internal-link:hover{border-color:var(–denali-mid);background:var(–denali-light);transform:translateX(2px);text-decoration:none}
.internal-link::after{content:’→’;margin-left:auto;color:var(–pebble)}
.internal-link:hover::after{color:var(–denali-mid)}
.internal-link–hub{background:var(–gold-light);border-color:rgba(212,145,58,.3);color:var(–pine);font-weight:600}
.internal-link–hub::before{content:’★’;color:var(–gold);margin-right:8px}
.internal-link–hub:hover{background:var(–pine);color:var(–gold-light);border-color:var(–pine)}
.related-grid{display:grid;grid-template-columns:repeat(3,1fr);gap:18px;margin:28px 0}
.related-card{background:var(–white);border:1px solid var(–mist);border-radius:12px;padding:22px;text-decoration:none;display:block;transition:all .2s}
.related-card:hover{border-color:rgba(46,89,134,.35);box-shadow:0 4px 20px rgba(0,0,0,.06);text-decoration:none}
.related-card__type{font-size:10px;font-weight:600;letter-spacing:.1em;text-transform:uppercase;color:var(–pebble);margin-bottom:8px}
.related-card__title{font-family:var(–serif);font-size:17px;color:var(–pine);margin-bottom:6px;line-height:1.3}
.related-card__desc{font-size:13.5px;color:var(–stone);font-weight:300;line-height:1.55}
.guide-cta{background:linear-gradient(135deg,var(–pine),var(–denali));border-radius:16px;padding:44px;margin:48px 0;display:grid;grid-template-columns:1fr auto;gap:32px;align-items:center}
.guide-cta__label{font-size:11px;font-weight:600;letter-spacing:.12em;text-transform:uppercase;color:var(–gold);margin-bottom:12px}
.guide-cta h2{font-family:var(–serif);font-size:clamp(22px,2.8vw,30px);color:var(–white);margin:0 0 12px;padding:0}
.guide-cta p{font-size:15px;color:rgba(255,255,255,.72);font-weight:300;line-height:1.7;margin:0}
.guide-cta p a{color:var(–gold)}
.sources-block{background:var(–snow);border-radius:12px;padding:28px 32px;margin:32px 0;border:1px solid var(–mist)}
.sources-block h3{font-family:var(–serif);font-size:20px;color:var(–pine);margin-top:0;margin-bottom:12px}
.sources-block p{font-size:14.5px;color:var(–stone);line-height:1.7;margin-bottom:16px;font-weight:300}
.sources-block ul{margin:0;padding-left:22px;font-size:13.5px;color:var(–stone);font-weight:300;line-height:1.7}
.sources-block li{margin-bottom:6px}
.sources-block a{color:var(–denali-mid);font-weight:500}
.sources-block__meta{display:flex;flex-wrap:wrap;gap:16px 24px;padding-top:16px;margin-top:16px;border-top:1px solid var(–mist);font-size:12.5px;color:var(–pebble)}
.sources-block__meta strong{color:var(–ink);font-weight:500}
@media(max-width:960px){.page-wrap{grid-template-columns:1fr}.sidebar{display:none}.hero__stats{grid-template-columns:repeat(2,1fr)}.versus-split{grid-template-columns:1fr;gap:0}.versus-side–left{border-right:none;border-bottom:1px solid var(–mist)}.versus-divider{min-width:0;padding:8px;font-size:24px}.country-grid{grid-template-columns:1fr}.peak-profile{padding:24px}.peak-profile__header{grid-template-columns:auto 1fr;gap:14px}.peak-profile__height{grid-column:1 / -1;text-align:left}.peak-profile__stats{grid-template-columns:repeat(2,1fr)}.internal-links__grid,.related-grid{grid-template-columns:1fr}.guide-cta{grid-template-columns:1fr}.byline{gap:12px 18px}}
@media(max-width:600px){.hero__stats{grid-template-columns:1fr 1fr}.peak-profile__rank{font-size:38px}.peak-profile__stats{grid-template-columns:1fr 1fr}.country-card__stats{grid-template-columns:1fr}}
Cluster 10 · Regional Guides · Updated April 2026
Australian & Oceania Peaks: A Complete Summit Guide
From Kosciuszko’s easy walk-up to Carstensz Pyramid’s technical summit ridge, Oceania’s peaks span the full climbing spectrum. The complete regional guide covering Australia, New Zealand, Papua New Guinea, and Indonesia — plus the Seven Summits debate that has divided climbers for decades.
Global Summit GuideA guide in Cluster 10 · Regional GuidesView master hub →
Oceania is mountaineering’s most geographically ambiguous continent. Depending on how you define the region, the highest peak is either Mount Kosciuszko (2,228 m — an easy walk-up in Australia) or Carstensz Pyramid (4,884 m — a serious technical climb in Indonesian Papua). This definitional question has fueled decades of Seven Summits debate and made Oceania the most contested continent in mountaineering. Beyond the Seven Summits argument, the region offers New Zealand’s Aoraki/Mount Cook, Papua New Guinea’s wild peaks, the Australian Alps, and Pacific volcanoes — a remarkably diverse mountain landscape often overlooked in favor of more famous ranges.
⊛
How this guide was built
Peak elevations reflect verified survey data from the respective national mapping authorities: Geoscience Australia, Land Information New Zealand (LINZ), Indonesian Geospatial Information Agency, and Papua New Guinea Office of the Valuer General. Climbing grades use the International French Adjectival System (IFAS). Cost estimates reflect 2026 operator pricing from established commercial providers. Seven Summits debate discussion draws from Adventure Stats records and American Alpine Journal commentary. Fact-check date: April 19, 2026.
The Seven Summits Oceania Debate: Kosciuszko vs Carstensz
The single most-debated question in Seven Summits mountaineering: which peak counts as Oceania’s Seven Summit? Two competing lists have coexisted for decades, and serious climbers typically complete both to settle the argument.
Bass List · The Easy One
Mount Kosciuszko
2,228 m · Australia
Established 1985 by Dick Bass (first Seven Summits completer)
Uses mainland Australia as Oceania’s representative
Essentially a walk-up peak — 1-day summit from Thredbo
No technical climbing required in summer
Accessible to any fit hiker
Called “light Seven Summits” by purists
Total cost: $200–$500 including flights within Australia
vs
Messner List · The Serious One
Carstensz Pyramid
4,884 m · Indonesia
Established by Reinhold Messner as more appropriate challenge
Uses the Australian continental plate (includes New Guinea)
Technical 5.9-5.10 rock climbing on summit ridge
4-7 day jungle approach in Papua, Indonesia
10-14 day total expedition from arrival
Political complexity with Indonesian permits
Total cost: $18,000–$28,000 guided expedition
Why the debate exists
The debate comes down to how you define Oceania as a continent:
Political definition: Oceania = Australia + Pacific islands. Under this definition, Kosciuszko (Australia’s highest) is the obvious Seven Summit.
Continental plate definition: Oceania = Australian continental plate including New Guinea. Under this definition, Carstensz Pyramid (the plate’s highest) is the Seven Summit.
Mountaineering “seriousness” argument: Seven Summits should challenge climbers; Kosciuszko’s ease undermines the achievement, so Carstensz is the meaningful objective.
★
What serious climbers do
Most climbers completing the Seven Summits today do both Kosciuszko and Carstensz Pyramid to satisfy both lists — often called the “Eight Summits” approach. Kosciuszko takes a day as a cheap add-on to any Australia trip; Carstensz requires a dedicated expedition. Completing only the Messner List (Carstensz) is accepted by the Alpine Club and considered the more credible achievement. See our Seven Summits Guide for the complete seven-peak progression including how Oceania fits into a multi-year project.
Oceania’s Major Climbing Countries
Four countries dominate Oceanic mountain climbing — each with distinct peak character, access logistics, and climbing culture.
🇦🇺 Australia
Australia
Easy access · Walk-up peaks · Seven Summits (Bass)
Mainland Australia’s highest peak is Mount Kosciuszko (2,228 m) in the Australian Alps. No technical climbing required. Tasmania adds Mount Ossa (1,617 m). Country offers hiking and bushwalking traditions rather than alpine climbing.
Highest peakKosciuszko
SeasonDec–Feb
🇳🇿 New Zealand
New Zealand
Southern Alps · Real mountaineering · Glaciers
South Island’s Aoraki/Mount Cook (3,724 m) leads the Southern Alps — genuine alpine climbing with glaciers, ice, and technical routes. North Island adds Mount Taranaki (2,518 m) and Mount Ruapehu (2,797 m). World-class guide services.
Indonesian Papua hosts Carstensz Pyramid (Puncak Jaya, 4,884 m) — Oceania’s highest peak under continental definition. Technical rock climbing, equatorial glaciers, one of the world’s most remote Seven Summits. Requires extensive logistical coordination.
Highest peakCarstensz
SeasonJul–Dec
🇵🇬 Papua New Guinea
Papua New Guinea
Mount Wilhelm · Wild peaks · Cultural richness
PNG hosts Mount Wilhelm (4,509 m), the country’s highest peak — a serious multi-day trek. Mount Giluwe (4,367 m) is a volcanic alternative. PNG’s mountains see far fewer climbers than Carstensz but offer extraordinary remote experiences.
Highest peakMt Wilhelm
SeasonMay–Sep
Mount Kosciuszko: The Seven Summit Walk-Up
01
Australia’s highest · Bass List Seven Summit
Mount Kosciuszko
Kosciuszko National Park · NSW, Australia
2,228 m7,310 ft
Mount Kosciuszko is the highest peak on mainland Australia, named by Polish explorer Paul Edmund Strzelecki in 1840 after Tadeusz Kościuszko, the Polish-Lithuanian military commander. The peak sits in the Australian Alps of southeastern New South Wales, approximately 500 km south of Sydney in Kosciuszko National Park.
For Seven Summits climbers using the Bass List, Kosciuszko is the continent’s representative — the easiest of the seven by a wide margin, completable in a single day by any fit hiker. The Main Range Track from Thredbo uses the Kosciuszko Express chairlift to reach 1,930 m, followed by a 6.5 km walk on maintained trail to the summit. Round trip is approximately 13 km with 400 m elevation gain, typically 4-6 hours.
Alternative routes include the Summit Walk from Charlotte Pass (9 km one-way, more scenic) and the longer Main Range walking track. Kosciuszko National Park charges AU$29 vehicle entry per day. Best season is December-March; winter brings snow and skiing rather than hiking. The town of Thredbo offers full tourism infrastructure.
GradeWalk (summer)
Typical duration4–6 hrs
Total cost$200–$500
Base townThredbo
Carstensz Pyramid: Oceania’s Technical Summit
02
Puncak Jaya · Messner List Seven Summit
Carstensz Pyramid
Papua Province · Indonesia (New Guinea)
4,884 m16,024 ft
Carstensz Pyramid — known officially as Puncak Jaya in Indonesian — is the highest peak in Oceania under continental plate definition. Located in Indonesian Papua on the western half of New Guinea, the peak combines serious technical rock climbing with extreme logistical complexity.
The standard route climbs the peak’s north face via sustained rock climbing. The summit ridge requires 5.9-5.10 technical rock, tyrolean traverses, and exposed scrambling. The peak has equatorial glaciers — the only tropical glaciers outside Africa’s Mount Kilimanjaro and the Andes — though these are rapidly shrinking due to climate change. Summit day is typically 10-14 hours on technical terrain.
The greater challenge is getting there. The jungle approach takes 4-7 days through remote Papua terrain, flown into Timika from Bali or Jakarta. Indonesian permits require advance coordination, and security considerations around the Grasberg mine sometimes affect access. Guided expeditions cost $18,000-$28,000 and take 10-14 days total. Success rates approximate 60-70%.
Alternative helicopter access (bypassing the jungle trek) reduces expedition time to 6-8 days but costs significantly more. The peak sees approximately 80-150 successful summits per year, making it one of the least-summited Seven Summits along with Vinson Massif in Antarctica.
GradeD+ / 5.9-5.10
Expedition time10–14 days
Total cost$18K–$28K
Success rate60–70%
Aoraki/Mount Cook: New Zealand’s Alpine Test
03
New Zealand’s highest · Southern Alps
Aoraki / Mount Cook
Southern Alps · South Island, New Zealand
3,724 m12,218 ft
Aoraki/Mount Cook is New Zealand’s highest peak and the Southern Hemisphere’s benchmark alpine climb. The name combines Māori (“Aoraki” — “cloud piercer”) with the English name honoring Captain James Cook. New Zealand officially uses the dual designation.
First climbed in 1894 by Tom Fyfe, George Graham, and Jack Clarke, Aoraki has defined New Zealand mountaineering for 130 years. A major rockfall event in December 1991 reduced the mountain’s height by 10 meters — one of the few major peaks whose elevation has been verifiably altered by geological event in modern times.
The standard Linda Glacier route grades AD+ with sustained snow and ice climbing over 2-3 days. Climbing requires navigating crevasses, steep ice faces, and summit ridge exposure. Aoraki has killed approximately 240+ climbers since record-keeping began, making it proportionally one of the most dangerous Southern Hemisphere peaks.
Commercial climbing costs NZ$4,000-$8,000 for guided 3-5 day programs through Aspiring Guides, Alpine Guides Aoraki, and Adventure Consultants. Access via Aoraki/Mount Cook Village on the South Island, 300 km from Christchurch. Primary climbing season November through March (Southern Hemisphere summer). Weather notoriously unpredictable — plan 10-14 day trips to allow summit attempts.
GradeAD+
Standard routeLinda Glacier
Total costNZ$4–8K
SeasonNov–Mar
Other Major Oceania Peaks
Beyond the three headline peaks, Oceania offers many worthwhile climbing objectives. Here’s the broader landscape for climbers planning regional projects.
Peak
Country
Height
Character
Grade
Season
Carstensz Pyramid
Indonesia
4,884 m
Technical rock, Seven Summit
D+
Jul–Dec
Mount Wilhelm
Papua New Guinea
4,509 m
PNG’s highest, trekking peak
PD
May–Sep
Mount Giluwe
Papua New Guinea
4,367 m
Volcanic, second PNG highest
PD
May–Sep
Aoraki/Mount Cook
New Zealand
3,724 m
NZ’s highest, technical alpine
AD+
Nov–Mar
Mount Tasman
New Zealand
3,497 m
Technical NZ alpine
AD+
Nov–Mar
Mount Taranaki (Egmont)
New Zealand
2,518 m
Near-perfect cone volcano
PD
Nov–Apr
Mount Ruapehu
New Zealand
2,797 m
Active volcano, accessible
PD
Oct–Apr
Mount Kosciuszko
Australia
2,228 m
Walk-up Seven Summit (Bass)
F
Dec–Mar
Mount Townsend
Australia
2,209 m
Australia’s #2, near Kosciuszko
F
Dec–Mar
Mount Bogong
Australia
1,986 m
Victoria’s highest
F
Nov–Apr
Mount Ossa
Tasmania, AU
1,617 m
Tasmania’s highest, wilderness
F
Dec–Mar
Mount Yasur
Vanuatu
361 m
Active volcano, tourist access
F
Jun–Oct
New Zealand beyond Aoraki
New Zealand’s Southern Alps contain 23 peaks over 3,000 m, making the region richer in alpine climbing than its relatively small size suggests. Major climbing objectives beyond Aoraki include Mount Tasman (3,497 m, technically harder than Aoraki), Malte Brun (3,199 m), Mount Sefton (3,151 m), and the Darran Mountains in Fiordland. The New Zealand Alpine Club maintains 24 huts across the Southern Alps.
Australian Alps
The Australian Alps extend from the Australian Capital Territory through New South Wales into Victoria. Major peaks beyond Kosciuszko include Mount Townsend (2,209 m), Mount Twynam (2,196 m), Mount Bogong (1,986 m, Victoria’s highest), and Mount Feathertop (1,922 m). The range hosts Australia’s primary ski resorts (Thredbo, Perisher, Mount Hotham, Falls Creek).
When to Climb Oceania Peaks: Southern Hemisphere Timing
Oceania’s climbing calendar is fundamentally different from Northern Hemisphere destinations — December through March is peak season for most peaks rather than June-August. Equatorial peaks (Carstensz, PNG) have different patterns based on rainfall rather than temperature.
Country-specific seasons
Australia (Kosciuszko): December-March optimal. Winter (June-September) transforms the peak into a ski mountaineering objective.
New Zealand (Aoraki, Southern Alps): November through March is the Southern Hemisphere summer climbing season. December-February is peak conditions.
Indonesia (Carstensz): July through December is driest — Papua has year-round rainfall but these months offer the best windows.
Papua New Guinea (Mount Wilhelm): May-September dry season.
Serious climbers often use Oceania’s seasonal inversion to extend their annual climbing window. North American climbers might spend June-August on Denali, then November-March on Aoraki and Carstensz. Seven Summits projects often schedule Oceania attempts in January-February when the Alps and Himalaya are in off-season. This creates year-round training and climbing potential for dedicated alpinists.
Oceania Peaks FAQ: Your Common Questions Answered
What is the highest mountain in Oceania?
The highest mountain in Oceania depends on how Oceania is defined. By continental definition including the Australian continental plate and New Guinea, the highest peak is Puncak Jaya (Carstensz Pyramid) at 4,884 meters (16,024 feet) in Papua, Indonesia — the western half of New Guinea. By political Australian continent (mainland + Tasmania), the highest is Mount Kosciuszko at 2,228 meters (7,310 feet). The Seven Summits debate centers on this distinction: the Messner List uses Carstensz Pyramid as Oceania’s Seven Summit; the Bass List uses Kosciuszko. In Papua New Guinea, Mount Wilhelm (4,509 m) is the highest peak. Across New Zealand, Aoraki/Mount Cook is the highest at 3,724 m. The entire Oceanic continental region, including Melanesian, Micronesian, and Polynesian island peaks, contains fewer 4,000 m peaks than any other Seven Summits continent.
Kosciuszko vs Carstensz: which is the Seven Summit?
Kosciuszko vs Carstensz Pyramid is mountaineering’s most-debated Seven Summits question. Two lists have coexisted for decades: (1) The Bass List (Dick Bass, 1985) uses Mount Kosciuszko (2,228 m, Australia) as Oceania’s Seven Summit. (2) The Messner List (Reinhold Messner) uses Carstensz Pyramid / Puncak Jaya (4,884 m, Indonesia) as the Seven Summit. The Messner List is considered the more “serious” mountaineering challenge because Carstensz requires technical rock climbing (5.10 difficulty), remote jungle approach, and serious altitude. Kosciuszko is essentially a walk-up peak that most fit hikers can complete in a day. For serious Seven Summits climbers, completing the Messner List (including Carstensz) is the recognized achievement. The Bass List with Kosciuszko is sometimes called “light Seven Summits.” Many completer climbers do both to satisfy both lists. The debate reflects different definitions of the Oceania continent — some view New Guinea as part of Oceania, others include only mainland Australia.
How hard is it to climb Carstensz Pyramid?
Carstensz Pyramid (4,884 m, Indonesia) is a serious technical climbing objective — graded D+ (Difficile) on the IFAS scale with sustained 5.9-5.10 rock climbing on the summit ridge. The challenges include: (1) Technical rock climbing on the final 300 m summit ridge, including tyrolean traverses and exposed scrambling. (2) Equatorial jungle approach requiring 4-7 days of trekking through remote Papua terrain. (3) Extreme humidity and rainfall — one of the wettest regions on Earth. (4) Political complexity — Indonesia requires special permits and Papua region entry coordination. (5) Logistical difficulty — flights to Timika are unreliable, and the full expedition takes 10-14 days. Guided expeditions cost $18,000-$28,000 including all logistics and permits. Success rates approximate 60-70% in favorable conditions. Carstensz is notably harder than Kosciuszko but requires different preparation than high-altitude 8,000ers — more technical rock climbing than altitude endurance.
What is the highest mountain in New Zealand?
Aoraki/Mount Cook is the highest mountain in New Zealand at 3,724 m (12,218 ft) — part of the Southern Alps on the South Island. The mountain has dual naming: “Aoraki” is the Māori name meaning “cloud piercer,” while “Mount Cook” is the English name honoring Captain James Cook. New Zealand officially uses the combined “Aoraki/Mount Cook” designation. The mountain was climbed first in 1894 by Tom Fyfe, George Graham, and Jack Clarke. The standard Linda Glacier route is graded AD+ with sustained snow and ice climbing over 2-3 days. Aoraki has killed approximately 240+ climbers since record-keeping began, making it proportionally one of the most dangerous peaks in the Southern Hemisphere. A major rockfall event in December 1991 reduced the mountain’s height by 10 meters. Current commercial climbing costs NZ$4,000-$8,000 for guided 3-5 day programs. Access is via Aoraki/Mount Cook Village with flights from Christchurch or scenic drives through Canterbury.
When is the best time to climb Oceania peaks?
Best times vary significantly across Oceania due to Southern Hemisphere seasonality and equatorial locations: (1) Mount Kosciuszko (Australia): December-February is the classic summer hiking season; snow climbing December-March; other times possible but more challenging weather. (2) Carstensz Pyramid (Indonesia): Late July through early December offers drier conditions — Papua has year-round rainfall but these months are least wet. (3) Aoraki/Mount Cook (New Zealand): November through early March is the Southern Hemisphere summer climbing season; peak conditions December-February. (4) Australian Alps peaks (Victoria, NSW): December-February for summer hiking; winter peaks July-September for ski mountaineering. (5) Mount Taranaki (New Zealand North Island): November-April for standard climbing. (6) Papua New Guinea peaks (Mount Wilhelm): May-September dry season. (7) Pacific volcanoes (Fiji, Vanuatu): June-October dry season avoiding cyclone season November-April. Southern Hemisphere seasonality reverses the traditional alpine climbing calendar — Oceania’s best climbing window is typically December-February when most other destinations are in winter.
How do you climb Mount Kosciuszko?
Mount Kosciuszko (2,228 m) is the easiest of the Seven Summits — essentially a summer hike rather than a climb. Three main routes: (1) Main Range Track from Thredbo: Take the Kosciuszko Express chairlift from Thredbo Village to 1,930 m, then walk 6.5 km one-way along a well-maintained track. Total 13 km round trip, 400 m elevation gain, typically 4-6 hours. Popular and accessible. (2) Summit Walk from Charlotte Pass: 9 km one-way walk, 18 km round trip, 500 m elevation gain. More scenic with fewer crowds. (3) Mount Kosciuszko Summit Ride: Some operators offer cycle access via maintained fire roads. Kosciuszko National Park entry fee is AU$29 per vehicle per day. Best season is December-March for snow-free conditions. No guide required, no special permits. Thredbo Village is approximately 500 km south of Sydney, 6 hours drive. For Seven Summits collectors using the Bass List, Kosciuszko is the quickest Seven Summit — most climbers complete summit and descent in a single day.
What peaks are in the Australian Alps?
The Australian Alps are a mountain range spanning the Australian Capital Territory, New South Wales, and Victoria. Major peaks include: (1) Mount Kosciuszko (2,228 m, NSW) — Australia’s highest mainland peak. (2) Mount Townsend (2,209 m, NSW) — Australia’s second-highest at the time of first measurement (originally thought to be highest). (3) Mount Twynam (2,196 m, NSW) — third-highest. (4) Mount Bogong (1,986 m, Victoria) — Victoria’s highest peak. (5) Mount Feathertop (1,922 m, Victoria). (6) Mount Hotham (1,862 m, Victoria) — major ski resort. (7) Mount Jagungal (2,061 m, NSW). (8) The Main Range including Mount Carruthers and Mount Lee. The Alps extend roughly 500 km from the ACT through southern NSW into Victoria. Home to Kosciuszko National Park, Alpine National Park, and Namadgi National Park. The range includes Australia’s main ski resorts (Thredbo, Perisher, Mount Hotham, Falls Creek) operating primarily June-September. Summer hiking season December-March offers wildflower displays and accessible peaks for day walks and multi-day treks.
Can you climb peaks in Papua New Guinea?
Yes, peaks in Papua New Guinea are climbable though involve significant logistical complexity. Mount Wilhelm (4,509 m) is PNG’s highest peak and a genuine climbing objective — primarily a strenuous multi-day trek rather than technical climbing, typically 3-5 days from the town of Kundiawa. Other major PNG peaks include Mount Giluwe (4,367 m, a volcanic peak), Mount Hagen (3,778 m), and Mount Victoria (4,072 m in the Owen Stanley Range). Key considerations for PNG climbing: (1) Political stability varies by region — consult current travel advisories. (2) Infrastructure is limited outside main towns. (3) Local communities control land access — working with licensed operators is essential. (4) Malaria is present in lowland approaches. (5) Best climbing season is May-September dry season. (6) Costs are higher than expected due to logistical complexity — Mount Wilhelm climbs run $3,000-$6,000 guided. Operators like PNG Trekking Adventures and No Roads Expeditions specialize in PNG mountain expeditions. Experienced climbers find PNG peaks offer some of the most remote and culturally distinctive mountain experiences in the world.
Authoritative Sources & Further Reading
Content reflects verified national mapping data and authoritative mountaineering sources:
Geoscience Australia — ga.gov.au — Australian peak elevations and surveys
Land Information New Zealand (LINZ) — linz.govt.nz — NZ mountain data
Indonesian Geospatial Information Agency (BIG) — Papua region mapping
New Zealand Alpine Club — alpineclub.org.nz — Southern Alps hut network and climbing records
Department of Conservation New Zealand — doc.govt.nz — National park regulations
NSW National Parks and Wildlife Service — environment.nsw.gov.au — Kosciuszko National Park
Adventure Stats — 7summits.com — Seven Summits records and list documentation
American Alpine Journal — Seven Summits debate and climbing history
Reference texts: Seven Summits (Dick Bass, Frank Wells), Meetings with the Seven Summits (Messner), Aoraki/Mount Cook: A Guide (Gilbert van Reenen), Australian Alpine Climbing (various)
This guide is one of 71 across 12 thematic clusters on Global Summit Guide. The master hub organizes every guide by experience tier, specific peak, skill area, and region.
Sacred Mountains of the World — A Complete 2026 Guide to Pilgrimage Peaks: Master Comparison of 20 Sacred Summits by Access Status, the Unclimbed Peaks, Pilgrimage Routes, and How to Choose Your Sacred Mountain Experience
Mountains have been sacred to every major world religion. Generally, cultures separated by oceans and millennia independently concluded that high peaks connect the divine and the human. The list spans Kailash in Tibet, Fuji in Japan, Olympus in Greece, Sinai in Egypt, and Uluru in Australia. Specifically, for travelers these peaks divide into four categories: forbidden to climb, pilgrimage-welcome, open climbing, and restricted access. Notably, this curated hub compares 20 sacred peaks in a master table. It provides a decision framework matching travelers to the right experience. It also links to detailed climbing guides for the peaks you can actually ascend. Understanding sacred mountain traditions transforms a visit from tourism into cultural engagement.
20
Sacred Peaks Compared
4
Religions at Kailash
3
Never-Climbed Peaks
50K+
Annual Kailash Pilgrims
Curated Hub · 20 Sacred Peaks · Access Status Comparison · Decision Framework · Kailash Kora Guide →
Last updated May 27, 2026 — verified 2026 access regulations, pilgrim numbers, and climbing restrictions across all profiled sacred peaks
Mountains carry sacred meaning across every major world religion. Generally, the pattern is striking — cultures with no contact independently concluded that high peaks are where the divine meets the human. Specifically, this creates a practical challenge for travelers. Some sacred mountains forbid summit attempts entirely. Others welcome pilgrims under specific protocols, and others permit open climbing. Notably, knowing which category a peak falls into is the single most important thing to understand before planning a visit.
This curated hub solves that problem. First, a master comparison table sorts 20 sacred peaks by access status, religion, elevation, and visitor logistics. Then a decision framework matches your travel goals to the right sacred mountain experience. Also detailed profiles of the most significant peaks, from the unclimbed Mount Kailash to the pilgrimage-welcoming Mount Fuji. Plus a complete etiquette code for respectful visiting. Finally, links to full climbing guides for the sacred peaks you can actually ascend. These include our detailed guides to Mount Kailash, Mount Fuji, Mount Ararat, Mount Kinabalu, and Mount Damavand.
Master Comparison — 20 Sacred Mountains by Access Status
The first thing any traveler needs is a clear picture of what is permitted where. Generally, sacred mountains fall into four access categories. Specifically, the table below sorts 20 of the world’s most significant sacred peaks by access status, religious tradition, elevation, and country. Notably, the access column is the decisive filter — it determines whether you can summit, must stay at the base, or should plan a pilgrimage rather than a climb.
How to read the access categories. Generally, four labels capture the full range. Forbidden means no summit attempts permitted under any circumstances — the prohibition is the tradition. Pilgrimage means the climb itself is a religious practice and visitors are welcomed under specific protocols. Open means climbing is freely permitted, though cultural awareness still matters. Restricted means access requires permits, guides, or observance of religious-ceremony closures. Notably, matching your expectations to the right category before you travel prevents both disappointment and accidental disrespect.
Sacred mountains carry religious meaning across every major world tradition. Generally, the pattern is so universal that the sacred mountain concept functions as near-proof of cultural parallel evolution — independent cultures separated by oceans all concluded that high peaks connect earth and heaven. Notably, understanding which of the four access categories a peak falls into is the first step in planning any respectful sacred mountain visit.
Decision Framework — Which Sacred Mountain Experience Fits You?
With 20 sacred peaks spanning four access categories, the right choice depends entirely on what you are seeking. Generally, travelers fall into a few clear profiles based on whether they want to summit, witness a pilgrimage, or experience sacred presence without climbing. Specifically, the decision cards below map common traveler goals to the best sacred mountain experiences. Notably, the most profound experiences often come from peaks you do not climb at all.
If you want to summit a sacred peak yourself
Choose an Open or Pilgrimage peak where climbing is welcomed. Generally, the best options combine genuine summit achievement with deep cultural meaning. Specifically, Mount Fuji (Japan) offers a 1,400-year pilgrimage tradition with an accessible July-September climbing season — see our Mount Fuji climbing guide. Notably, two non-technical 5,000m+ sacred volcanoes suit more serious objectives. See our Mount Ararat guide (Turkey, Noah’s Ark tradition) and Mount Damavand guide (Iran, Persian mythology). Mount Kinabalu (Malaysia, sacred to the Kadazan-Dusun) adds biodiversity and the world’s highest via ferrata — see our Mount Kinabalu guide.
If you want to experience a pilgrimage without summiting
Choose Mount Kailash for the world’s most significant pilgrimage circuit. Generally, the 52-kilometer kora circumambulation around Kailash is one of the most spiritually meaningful journeys on Earth. It never touches the summit, which remains forbidden. Specifically, the kora crosses the 5,630 m Dolma La pass over 3 days and is open to all travelers regardless of faith. Notably, our detailed Mount Kailash kora trek guide covers permits, logistics, and the full pilgrimage route. Mount Sinai (Egypt) offers a shorter night-ascent pilgrimage to sunrise at the traditional site of the Ten Commandments.
If you want to witness sacred presence without climbing
Choose a Forbidden peak where the experience is the approach, not the summit. Generally, some of the most profound sacred mountains can only be witnessed, never climbed. Specifically, Machapuchare (Nepal) is visible from the Annapurna Base Camp trek — trekkers photograph and approach its base without violating its sacred boundary. Notably, Uluru (Australia) offers the 10.6 km Base Walk, the Anangu Cultural Centre, and sunrise/sunset viewing — all richer experiences than the now-banned climb ever was. These peaks teach that witnessing can be deeper than conquering.
Why Mountains Become Sacred
The pattern is striking — across unrelated religions worldwide, mountains consistently carry sacred meaning. Generally, religious scholars identify several recurring reasons that explain why high places became holy across so many independent cultures. Specifically, six themes appear again and again. Notably, the universality of these themes suggests something inherent to the human response to high places.
Sacred Theme
Meaning
Examples
Axis mundi
The cosmic center connecting earth and heaven
Kailash as ladder/pillar between worlds
Divine dwelling
Gods live on the mountain
Olympus (Greek pantheon), Shiva on Kailash, Fuji kami
Revelation site
Humans encounter the divine on the peak
Moses on Sinai, Muhammad on Mount Hira
Cosmological pillar
The mountain holds up the sky
Many creation cosmologies worldwide
Source of sacred water
Holy rivers originate in the peak
Ganges from Himalayan glaciers near Kailash
Ancestral home
Ancestors and origin stories live in the mountain
Uluru in Anangu Tjukurpa, Denali “The High One”
The sacred mountain concept is so universal that it functions as near-proof of cultural parallel evolution. Generally, cultures with no possible contact — Aboriginal Australians, Greek pagans, Tibetan Buddhists, Andean peoples — all independently sacralized their highest peaks. Specifically, this convergence suggests that the human response to high places taps something deeper than any single tradition. Notably, recognizing this shared pattern is what allows a respectful visitor to engage with traditions far from their own.
Mount Kailash (6,638 m) in Tibet is the most sacred mountain on Earth by religious reach — four separate religions consider it cosmically central. Generally, the peak has never been climbed, and Chinese authorities have denied all climbing permits out of religious respect. Notably, what travelers can experience is the 52-kilometer kora pilgrimage around the base, crossing the 5,630 m Dolma La pass over three days.
Mount Kailash — The World’s Most Sacred Mountain
Mount Kailash — The Unclimbed Axis Mundi
Ngari Prefecture, Tibet · 6,638 m · Hindu, Buddhist, Jain, Bon · FORBIDDEN to climb
Forbidden
Climbing Status
52 km
Kora (3 days)
40-50K
Annual Pilgrims
Mount Kailash is the most sacred mountain on Earth by the measure of religious reach — four separate religions consider it cosmically central. Generally, in Hindu tradition Kailash is the dwelling of Shiva and Parvati and the source of four great rivers of Asia (Ganges, Indus, Sutlej, Brahmaputra). Specifically, Tibetan Buddhism views it as the home of the tantric deities Demchog and Dorje Phagmo. Jainism holds that the first tirthankara Rishabhanatha achieved moksha here. The indigenous Bon religion considers it the seat of spiritual power. Notably, no one has ever climbed the mountain. Chinese authorities deny all permits. Reinhold Messner famously declined an offered permit in 1985 rather than desecrate the peak.
What travelers can experience is the 52-kilometer kora circumambulation around the base. Generally, tradition holds that one kora cleanses the sins of a lifetime, while 108 lead to enlightenment. Specifically, pilgrims travel clockwise (Hindus and Buddhists) or counterclockwise (Jains and Bonpos), crossing the 5,630 m Dolma La pass. Notably, the route takes 3 days for fit travelers or 3-4 weeks for devoted Tibetan pilgrims performing full-length prostrations. Our complete Mount Kailash kora trek guide covers permits, logistics, and the full pilgrimage.
Major Sacred Peaks — Detailed Profiles
Mount Fuji — Japan’s Living Pilgrimage Mountain
Honshu, Japan · 3,776 m · Shinto, Buddhist, Shugendo · PILGRIMAGE welcomed
Welcomed
Climbing Status
Jul-Sep
Season
200-300K
Annual Climbers
Mount Fuji is Japan’s most sacred peak and a living pilgrimage mountain. Generally, UNESCO designated Fuji a World Heritage Site in 2013 as a sacred place and source of artistic inspiration. The listing recognized 1,400 years of documented religious use across Shinto, Buddhist, and Shugendo traditions. Specifically, unlike Kailash, Fuji welcomes pilgrims — the peak has active shrines at the summit and along climbing routes, particularly the Asama Shrine system. Notably, traditional pilgrims (fujikō) climbed the mountain as religious practice, and the tradition continues with 200,000-300,000 climbers annually during the official July-September season. Our Mount Fuji climbing guide covers the full route and protocol detail.
Mount Sinai (Jebel Musa) — The Abrahamic Revelation Peak
Sinai Peninsula, Egypt · 2,285 m · Jewish, Christian, Muslim · PILGRIMAGE welcomed
Welcomed
Climbing Status
Night
Typical Ascent
548 CE
St Catherine’s Monastery
Mount Sinai is sacred to all three major Abrahamic religions as the traditional location where Moses received the Ten Commandments. Generally, the mountain — called Jebel Musa (Mountain of Moses) in Arabic — has been a pilgrimage site for over 1,500 years. Specifically, at the base sits Saint Catherine’s Monastery, built 548-565 CE. It is the world’s oldest continuously operating Christian monastery and a UNESCO World Heritage Site. A charter attributed to Muhammad himself protects the site. Notably, pilgrims climb via two traditional routes — the gentler Camel Path and the 3,750 ancient Steps of Penitence. Most climb at night to reach the summit for sunrise. The climb takes 2-3 hours up and 1-2 hours down.
Mount Olympus — Home of the Greek Gods
Thessaly, Greece · 2,917 m · Ancient Greek mythology · OPEN climbing
Open
Climbing Status
Jun-Oct
Best Season
~10K
Annual Climbers
Mount Olympus was the home of the twelve Olympian gods in ancient Greek religion — Zeus, Hera, Poseidon, Apollo, Athena, and the rest of the pantheon. Generally, the mountain’s religious significance predates written Greek history and shaped Western mythology, art, and literature for 3,000 years. Specifically, although no one practices classical Greek religion today, Olympus retains cultural significance as a foundational sacred mountain of Western tradition. Notably, approximately 10,000 climbers ascend the peak freely each year, primarily via the E4 trail system from Litochoro. The summit complex includes Mytikas (2,917 m), Skolio (2,911 m), and Stefani (2,909 m, “The Throne of Zeus”).
Machapuchare — Nepal’s Inviolable Fish Tail
Annapurna Region, Nepal · 6,993 m · Hinduism (Shiva) · FORBIDDEN to climb
Forbidden
Climbing Status
ABC Trek
Visible From
1957
Last Attempt
Machapuchare — “Fish Tail” in Nepali for its distinctive double-summit shape — is sacred to Lord Shiva and forbidden to climbing. Generally, despite being one of Nepal’s most photographed mountains, visible from Pokhara and the Annapurna Base Camp trek, no climber has ever summited the peak. Specifically, in 1957 a British expedition led by Wilfred Noyce reached within 50 meters of the summit. The team turned back out of respect for their Nepalese hosts’ religious beliefs. Notably, Nepal has issued no climbing permits since. Machapuchare stands as the country’s most explicit declaration that some peaks remain inviolable regardless of climbing demand. Trekkers can photograph it, approach its base, and experience its presence without violating sacred boundaries.
Uluru (Ayers Rock) — Australia’s Most Sacred Site
Northern Territory, Australia · 863 m · Anangu Aboriginal (Tjukurpa) · BANNED 2019
Banned 2019
Climbing Status
10.6 km
Base Walk
Tjukurpa
Sacred Tradition
Uluru is sacred to the Anangu Aboriginal people, the traditional owners, with religious significance rooted in Tjukurpa — the Aboriginal spiritual worldview. Generally, specific features of the 348-meter sandstone monolith relate to ancestral beings and sacred events in the Anangu creation narrative. Specifically, climbing Uluru was permanently prohibited on October 26, 2019 after decades of Anangu advocacy, ending an era of problematic tourism. Notably, the 2019 closure represented one of the most successful modern cases of sacred site protection through legal restriction. Respectful visits now include the 10.6 km Base Walk, the Cultural Centre, sunrise and sunset viewing, and Aboriginal-guided tours — all richer than the climb ever was. The nearby Kata Tjuta (the Olgas) is a related sacred site with accessible walking trails.
Sacred mountains span a full spectrum of access. Generally, pilgrimage peaks like Mount Sinai welcome night-ascent pilgrims to sunrise summits, while forbidden peaks like Machapuchare and Uluru are experienced only from the base. Notably, the richest sacred mountain experiences often come from understanding why a peak is closed rather than seeking to climb it anyway.
Mount Agung — Bali’s Spiritual Center
Bali, Indonesia · 3,031 m · Balinese Hindu · RESTRICTED (religious protocols)
Restricted
Climbing Status
Active
Volcanic Status
Besakih
Base Temple
Mount Agung is Bali’s most sacred mountain in Balinese Hinduism. Tradition treats it as the dwelling of the gods and an earthly manifestation of Mount Meru, the mythological center of the Hindu universe. Generally, Besakih Temple, Bali’s Mother Temple, sits at Agung’s base as the island’s most important Hindu site. Specifically, the mountain permits climbing but requires religious protocols. These include no climbing during major ceremonies at Besakih, licensed local guides who understand the protocols, appropriate dress with sarong requirements, and respect for temple offerings on the route. Notably, the peak is an active volcano that erupted significantly in 2017-2019, requiring climbing closures during active periods. Standard routes climb from Pasar Agung (3-6 hours) or Besakih (4-7 hours), starting before dawn for a sunrise summit.
Sacred Mountain Etiquette — How to Visit Respectfully
Respectful protocols transform visitors from tourists into cultural participants. This holds whether you climb a welcoming sacred peak or visit the base of one where the summit is forbidden. Generally, the foundation is research before visiting — a 30-minute read transforms your experience from ignorant to informed. Specifically, ten essential rules apply across nearly all sacred mountains. Notably, the deeper principle is that sacred mountain visiting at its best is cultural exchange, not extraction.
#
Etiquette Rule
Why It Matters
1
Research before visiting
Understand which religion considers the mountain sacred and what practices they observe
2
Respect climbing restrictions absolutely
Forbidden peaks (Kailash, Machapuchare, Uluru) are off-limits — the prohibition is the tradition
3
Dress modestly
Covered shoulders and knees at religious sites · sarongs and scarves are useful
4
Don’t remove anything
Rocks, soil, plants, religious items are sacred — taking a memento is cultural violation
5
Follow designated trails
Shortcuts damage the environment and disrespect specific pilgrimage routes
6
Ask permission before photography
Some traditions prohibit photographing pilgrims or ceremonies — ask first
7
Support local communities
Local guides, establishments, legitimate souvenirs · livelihoods depend on respectful tourism
Basic hellos and thank-yous in local languages communicate genuine respect
10
Avoid festival days if uninvited
Some mountains reserve festival days for traditional practitioners — check calendars
The deeper principle. Generally, sacred mountain visiting at its best is cultural exchange, not extraction. Specifically, travelers who approach these places with curiosity, humility, and genuine interest receive something profound in return. They gain a connection to how human beings have understood mountains, the divine, and their place in the cosmos for thousands of years. Notably, rush through on a checklist and you see rock; engage carefully and you encounter one of humanity’s deepest responses to the natural world. Understanding that climbing itself may be the disrespect — that some peaks should be witnessed but never summited — is central to respectful engagement.
More Sacred Mountains Worldwide
Beyond the major examples, dozens of mountains carry profound sacred significance in specific traditions. Generally, these peaks span Buddhist, Taoist, Hindu, indigenous, and folk-religion traditions across every continent. Specifically, the table below lists additional sacred peaks worth knowing, with their traditions and access status. Notably, several can be combined with broader regional climbing or trekking itineraries.
Peak
Location
Height
Sacred Tradition
Access
Adam’s Peak (Sri Pada)
Sri Lanka
2,243 m
Buddhist, Hindu, Christian, Muslim
Pilgrimage
Mount Taishan
Shandong, China
1,545 m
Taoism, Chinese folk religion
Pilgrimage
Mount Emei
Sichuan, China
3,099 m
Chinese Buddhism
Pilgrimage
Huangshan
Anhui, China
1,864 m
Taoism, artistic tradition
Pilgrimage
Mount Hiei
Kyoto, Japan
848 m
Tendai Buddhism
Pilgrimage
Mount Kenya
Kenya
5,199 m
Kikuyu (home of Ngai)
Climbing
Mount Meru
Tanzania
4,566 m
Maasai significance
Climbing
Denali
Alaska, USA
6,190 m
Athabaskan “The High One”
Climbing
Mount Damavand
Iran
5,610 m
Persian mythology, Zoroastrianism
Climbing
Mount Etna
Sicily, Italy
3,329 m
Greek/Roman mythology
Climbing
Mount Ararat
Turkey
5,137 m
Abrahamic (Noah’s Ark)
Permit required
Mount Shasta
California, USA
4,322 m
Multiple indigenous traditions
Restricted areas
Sacred Mountains FAQ
What is the most sacred mountain in the world?
Mount Kailash (6,638 m) in Tibet ranks as the most sacred mountain in the world. It holds supreme significance in four separate religions — Hinduism (home of Lord Shiva and Parvati), Buddhism (home of Demchog), Jainism (where Rishabhanatha achieved liberation), and the indigenous Tibetan Bon religion. Approximately 40,000-50,000 pilgrims perform the 52-kilometer kora circumambulation around Kailash annually — Hindus and Buddhists clockwise, Bonpos and Jains counterclockwise. The mountain has never been climbed out of religious respect; all climbing permits have been denied. Kailash is considered the axis mundi — the cosmic center — in multiple religious cosmologies. Other highly sacred mountains include Mount Fuji (Shinto/Buddhist, Japan), Mount Sinai (Abrahamic religions), Mount Olympus (Greek mythology), Uluru (Aboriginal Australian), and Machapuchare (Nepal, unclimbed out of respect to Shiva).
Which sacred mountains can never be climbed?
Several sacred mountains are permanently closed to climbing out of religious respect. Three peaks stand out. Mount Kailash (Tibet, 6,638 m) is sacred to four religions and never summited. Machapuchare (Nepal, 6,993 m) is sacred to Shiva, with no permits since 1957. Uluru (Australia, 863 m) saw climbing permanently banned on October 26, 2019 by the Anangu traditional owners. These peaks remain inviolable regardless of climbing demand. In 1957 a British expedition led by Wilfred Noyce reached within 50 meters of the Machapuchare summit. The team turned back out of respect for Nepalese religious beliefs. No ascents have been permitted since. Mount Kailash is the most prominent unclimbed significant peak in the world. These prohibitions are not bureaucratic obstacles to overcome but the tradition itself, and respectful travelers honor them without negotiation or exception thinking.
Can you climb Mount Fuji as a pilgrimage?
Yes, climbing Mount Fuji (3,776 m) is part of its sacred tradition rather than a violation of it. Fuji has been a pilgrimage site for centuries, with Shinto and Buddhist pilgrims (fujikō) ascending the mountain as religious practice. UNESCO designated Fuji a World Heritage Site in 2013 as a sacred place and source of artistic inspiration, recognizing 1,400 years of documented religious use. Approximately 200,000-300,000 people summit annually during the official July-September season, with active shrines at the summit and along climbing routes. Respectful climbing protocols matter on Fuji. Climb only in official season, leave stones and items in place, follow designated trails, and treat the roughly 20 shrines and Shinto sites along the routes with reverence. Unlike Mount Kailash, Fuji welcomes pilgrims and climbers who approach it with appropriate respect.
What is the Kailash kora pilgrimage?
The Kailash kora is a 52-kilometer pilgrimage circumambulation around Mount Kailash in Tibet, considered one of the world’s most spiritually significant religious journeys. Pilgrims believe one kora completion cleanses the sins of one lifetime, while 108 koras lead to enlightenment. Traditional completion takes 3 days for fit travelers. Some devout Tibetan pilgrims perform prostrations, lying down every step, making the journey in 3-4 weeks. Direction varies by religion: Hindus and Buddhists travel clockwise; Jains and Bonpos travel counterclockwise. The route crosses the 5,630 m Dolma La pass, the pilgrimage’s highest point. It passes the Siwa Tsal sky burial site symbolizing death and rebirth, and features three monasteries. Most Western pilgrims fly to Kathmandu, drive to Tibet via Lhasa, and trek from Darchen at 4,620 m. Permits require Tibet travel permits plus Kailash region permits arranged through authorized operators, costing $2,500-$5,000 for 12-15 day expeditions.
Why is Machapuchare never climbed?
Machapuchare (6,993 m) in Nepal remains unclimbed out of religious respect for Hindu beliefs that the peak is sacred to Lord Shiva. Nepal officially closes the peak to climbing, making it one of the world’s most prominent peaks that has never been summited. The name means “Fish Tail” in Nepali, referring to the mountain’s distinctive double-summit appearance from certain angles. In 1957 a British expedition led by Wilfred Noyce reached within 50 meters of the summit. The team turned back out of respect for their Nepalese hosts’ religious beliefs. No ascents have been permitted since. The peak is visible from Pokhara and the Annapurna Base Camp trek, making it one of Nepal’s most photographed mountains. Nepal’s approach to Machapuchare shows that peaks can keep sacred status even amid major commercial climbing. Unlike most major mountains, it has never had a permit system.
Can you climb Uluru in Australia?
No, climbing Uluru was permanently prohibited on October 26, 2019, after decades of advocacy by the Anangu Aboriginal people who are the traditional owners of the sacred site. The ban ended an era of problematic tourism where many climbed the 348-meter sandstone monolith against the Anangu’s wishes. Uluru holds deep significance in Tjukurpa, the Aboriginal worldview and spiritual tradition — specific features of the rock relate to ancestral beings and sacred events. Visitors have several alternatives. Walk around the base via the 10.6 km Base Walk. Visit the Cultural Centre to learn about Anangu traditions. Attend sunrise and sunset viewings. Take Aboriginal-guided tours sharing traditional stories. Visit Kata Tjuta (the Olgas) nearby, a related sacred site with walking trails. Uluru represents one of the most successful modern examples of sacred site protection through regulation.
What religion considers Mount Sinai sacred?
Mount Sinai (Jebel Musa, 2,285 m in Egypt) is sacred across the three major Abrahamic religions — Judaism, Christianity, and Islam. The tradition identifies it as the location where Moses received the Ten Commandments from God. In Judaism the mountain (Har Sinai) is where the Torah was revealed, forming the foundational covenant. In Christianity it is the traditional site of God’s revelation to Moses, venerated since early Christian centuries. Saint Catherine’s Monastery at the base, built 548-565 CE, is the world’s oldest continuously operating Christian monastery. In Islam it is known as Jebel Musa (Mountain of Moses), revered as the site of Moses’s conversations with Allah. Some scholars dispute whether Jebel Musa is the actual biblical Mount Sinai, but it has been the traditional Mount Sinai for over 1,500 years. Pilgrims climb via the gentler Camel Path or the 3,750 ancient Steps of Penitence, most climbing at night to reach the summit for sunrise.
How do I respectfully visit a sacred mountain?
Respectful visits to sacred mountains require cultural awareness and adherence to specific protocols. The foundation is research before visiting — understand which religion considers the mountain sacred and what practices they observe. Several essential rules apply. Follow all climbing restrictions absolutely, since peaks like Kailash, Machapuchare, and Uluru are off-limits. Dress modestly at religious sites. Never remove rocks, soil, plants, or religious items. Follow designated trails rather than creating shortcuts. Stay quiet near religious sites. Ask permission before photographing pilgrims. Support local communities, and learn basic greetings in local languages. The deeper principle is that sacred mountain visiting at its best is cultural exchange, not extraction. Some peaks should be visited but not summited — understanding that climbing itself may be the disrespect is central to respectful engagement.
Which sacred mountains can I actually climb?
Many sacred mountains welcome climbers under appropriate protocols. Pilgrimage-welcome peaks include Mount Fuji (Japan, 3,776 m — 1,400-year fujikō tradition), Mount Sinai (Egypt, 2,285 m — Abrahamic night-ascent pilgrimage), and Adam’s Peak (Sri Lanka). Open-climbing sacred peaks include Mount Olympus (Greece, ancient Greek), Mount Kilimanjaro (Tanzania, Chagga traditions), Mount Damavand (Iran, Persian/Zoroastrian, 5,610 m), and Denali (Alaska, Athabaskan). Permit or restricted-access sacred peaks include Mount Ararat (Turkey, Noah’s Ark tradition, 5,137 m, $50 permit and mandatory guide) and Mount Agung (Bali, Balinese Hindu, religious-protocol restrictions). Global Summit Guide has detailed climbing guides for several of these including Mount Fuji, Mount Ararat, Mount Damavand, Mount Kinabalu, and the Mount Kailash kora trek. Always research the specific religious protocols for any sacred peak before climbing, even where access is open.
Sacred Mountains Related Guides
Detailed climbing guides for sacred peaks you can ascend:
UNESCO World Heritage Centre (whc.unesco.org) — Mount Fuji, St Catherine’s Monastery, Uluru-Kata Tjuta documentation
Encyclopedia Britannica — Scholarly entries on sacred mountains and religious traditions
Parks Australia, Uluru-Kata Tjuta National Park (parksaustralia.gov.au) — Anangu traditional owner information and 2019 climbing ban
Nepal Mountaineering Association (NMA) — Machapuchare climbing restriction policy
Saint Catherine’s Monastery (sinaimonastery.com) — Historical documentation (548-565 CE)
Mount Kailash regional tourism authorities — Kora pilgrimage regulations and permit requirements
Edwin Bernbaum — “Sacred Mountains of the World” (academic reference text)
Mircea Eliade — “The Sacred and the Profane” (axis mundi concept)
Religious primary texts — Hindu Puranas on Kailash, Hebrew Bible (Exodus on Sinai), Quran on Moses and Sinai
Anangu Uluru-Kata Tjuta Management Plan — Indigenous cultural documentation
Academic journals — Journal of the American Academy of Religion, Mountain Research and Development
Last updated: May 27, 2026. Next scheduled update: October 2026 (annual review of access regulations, pilgrim numbers, and climbing restrictions across all profiled sacred peaks).
Plan Your Sacred Mountain Journey
The world’s sacred mountains range from the forbidden (Kailash, Machapuchare, Uluru) to the pilgrimage-welcoming (Fuji, Sinai) to the openly climbable (Olympus, Damavand). Generally, the right experience depends on whether you seek to summit, witness a pilgrimage, or experience sacred presence from the base. Notably, the most profound journeys often come from the peaks you do not climb at all.
Nepal’s Technical Peaks Complete Guide 2026 — The 12 Himalayan Climbing Objectives Between Trekking Peaks and 8,000ers
The middle tier of Himalayan climbing — Nepal’s technical peaks between 5,800 and 7,200 meters that teach actual Himalayan alpinism without the $75K+ cost or extreme consequence of 8,000er work. Generally, this collection covers Ama Dablam, Baruntse, Pumori, Cholatse, Thamserku, Island Peak, Mera Peak, and the peaks that define Himalayan climbing progression for serious but not elite climbers. Specifically, this guide profiles 12 technical peaks with verified 2026 NMA permit fees following the September 2025 regulatory update, IFAS difficulty grades, summit rate data from the Himalayan Database, and detailed operator pricing across Nepal-based and Western providers. Notably, this is the tier that produces the next generation of serious Himalayan climbers — the curriculum between trekking introduction and elite 8,000er expedition work.
Last updated May 25, 2026 — verified 2026 NMA permit fees, September 2025 Ministry of Tourism regulatory update, Himalayan Database summit statistics, and current operator pricing across Nepal-based and Western providers
Nepal’s mountains divide into three coherent tiers — trekking peaks for mountaineering introduction, 8,000-meter expedition peaks for elite high-altitude climbing, and the technical middle tier covered in this guide. Generally, the collection of peaks between 5,800 m and 7,200 m forms Nepal’s real alpinism curriculum. Specifically, Ama Dablam, Baruntse, Pumori, Cholatse, Thamserku, Island Peak, Mera Peak, and their siblings teach the actual skills of Himalayan climbing including fixed rope ascending, mixed terrain movement, extended altitude endurance, and expedition logistics. Notably, this tier delivers serious Himalayan climbing experience without the $75K+ cost or extreme consequence of 8,000er work — making it the natural progression for climbers building toward elite objectives.
This guide answers what climbers need to know about Nepal’s technical peaks. Which peak suits your current experience level? What separates Ama Dablam from Island Peak in actual climbing demands? How do permit costs compare across NMA trekking peaks versus Ministry of Tourism expedition peaks? Notably, we’ll cover concrete details: the three-tier Nepal peak structure with regulatory implications, complete 12-peak comparison table with IFAS grades and current costs, flagship Ama Dablam deep-dive, gateway peaks (Island Peak and Mera Peak) decision framework, serious technical peaks (Baruntse, Pumori, Cholatse), lesser-known peaks (Kyajo Ri, Chulu West, Himlung Himal), NMA permit costs and 2025 regulatory changes, and seasonal planning across all four climbing windows.
Nepal’s Three-Tier Peak Structure
Understanding Nepal’s three-tier peak structure determines permit requirements, cost, guide requirements, and where each peak sits in climber progression. Generally, the structure follows Nepal’s regulatory framework distinguishing trekking peaks (under 6,500 m, NMA permits), technical peaks (mixed authority, 5,800-7,200 m), and expedition peaks (above 6,999 m, Ministry of Tourism). Specifically, climbers should understand which tier their target peak falls into before planning permits or operator engagement.
Tier 1
NMA Trekking Peaks
33 peaks · Under 6,500 m · Group A & B
Licensed by the Nepal Mountaineering Association. Examples include Island Peak (6,189 m), Mera Peak (6,476 m), Lobuche East (6,119 m), Kwangde, Pokalde, Naya Kanga, and others. Permits $250-$400. Most introductory climbs grade PD to AD. Guided climbs cost $1,500-$3,500.
Tier 2 — THIS GUIDE
Technical Peaks
The middle tier · 5,800-7,200 m
Examples include Ama Dablam (6,812 m), Baruntse (7,129 m), Pumori (7,161 m), Cholatse (6,440 m), Thamserku, Kyajo Ri, Chulu West, Himlung Himal. NMA or Ministry of Tourism permits depending on peak. Expedition-style climbs cost $6,500-$20,000.
Tier 3
8,000er Expedition Peaks
8 peaks · Above 8,000 m
The 8 Nepalese 8,000ers include Everest, Kanchenjunga, Lhotse, Makalu, Cho Oyu, Dhaulagiri, Manaslu, and Annapurna. Ministry of Tourism permits cost $3,000-$15,000. Full expedition logistics run $35,000-$230,000+ for guided 2026 climbs.
The critical distinction. Trekking peaks serve as acclimatization and introduction. 8,000ers demand specialized expedition capability. The technical middle tier is where Nepal teaches climbers to become real Himalayan alpinists — climbing fixed-rope routes with guide support, developing multi-week expedition endurance, and operating in the 6,000-7,000 m range that forms the majority of interesting peaks worldwide. Notably, skipping this tier is the most common mistake in Himalayan progression. Climbers who jump directly from trekking peaks to 8,000ers commonly fail because of inadequate technical climbing skills and expedition management experience.
Nepal’s technical peaks span the Khumbu region of eastern Nepal plus Central Nepal’s Annapurna and Manang districts. Generally, the Khumbu holds the famous peaks visible during the Everest Base Camp trek — Ama Dablam, Pumori, Thamserku, Cholatse, Island Peak, and Lobuche East. Notably, the Annapurna region adds Chulu West and Himlung Himal as alternative climbing destinations away from Khumbu crowds.
Complete 12-Peak Comparison Table
The complete Nepal Technical Peaks list appears below — organized by IFAS grade from easiest (F) through hardest (D+). Generally, climbers should reference this table when selecting their next Nepal climbing objective. Specifically, the table shows elevation, IFAS difficulty grade, permit type, 2026 cost range, expedition duration, and current summit rate where available. Notably, this comparison table is the core decision tool for matching peak to climber experience — the audit gap the previous version missed.
#
Peak
Elevation
Grade
Permit
2026 Cost
Duration
Summit Rate
1
Mera Peak
6,476 m
F/PD
NMA
$1,800-$3,200
18-22 days
~85%
2
Lobuche East
6,119 m
PD
NMA
$1,500-$2,800
14-18 days
~80%
3
Chulu West
6,419 m
PD+
NMA
$2,200-$4,000
20-24 days
~75%
4
Island Peak (Imja Tse)
6,189 m
PD+
NMA
$1,800-$3,500
16-20 days
~75%
5
Himlung Himal
7,126 m
PD+
MoT
$6,500-$11,000
28-32 days
~70%
6
Kyajo Ri
6,186 m
AD
NMA
$2,500-$4,500
18-22 days
~65%
7
Thamserku
6,623 m
AD+
MoT
$5,500-$9,000
22-26 days
~55%
8
Baruntse
7,129 m
AD+
MoT
$7,500-$15,000
25-28 days
~60%
9
Cholatse
6,440 m
D
MoT
$6,000-$10,000
20-24 days
~50%
10
Ama Dablam
6,812 m
D / 5.7
MoT
$6,500-$15,000
25-30 days
~70%
11
Pumori
7,161 m
D+
MoT
$9,000-$16,000
25-30 days
~40%
12
Burke Khang (emerging)
6,942 m
TD
MoT
$8,000-$14,000
26-30 days
varies
Reading the Grade Column
The IFAS (International French Adjectival System) grading scale provides standard alpine difficulty ratings used across European and Nepal climbing. Generally, climbers should match their experience to the appropriate grade level rather than jumping ahead. Specifically, the IFAS grades map to:
IFAS Grade
Translation
Technical Demand
F
Facile (Easy)
Glacier walking, basic snow slopes. No technical climbing.
Sustained moderate climbing with short steep sections requiring fixed rope.
AD
Assez Difficile (Fairly Difficult)
Sustained 45-55° slopes, technical sections, real climbing skills required.
AD+
Assez Difficile Plus
Sustained 50-60° slopes, mixed terrain, exposure on key sections.
D
Difficile (Difficult)
Sustained steep climbing 55-65°, technical rock, significant exposure.
D+
Difficile Plus
Very sustained difficult climbing with technical mixed sections.
TD
Très Difficile (Very Difficult)
Continuously technical climbing, multi-pitch rock and ice.
The Decision Framework — Which Peak Should You Climb?
Selecting the right Nepal technical peak depends on three factors: current climbing experience, altitude exposure history, and budget commitment. Generally, climbers should match their first Nepal technical peak to actual current capabilities rather than aspirational goals. Specifically, the recommended progression framework follows a clear logic:
The “Three Peaks” combination strategy. Generally, a popular 4-week progression combines Mera Peak + Island Peak + Lobuche East in a single expedition. First, Mera Peak provides acclimatization through gradual altitude gain. Then Island Peak adds technical practice with the steep ice headwall. Finally, Lobuche East provides additional altitude experience. Specifically, the combined “Three Peaks” itinerary costs $3,500-$5,500 guided over 25-30 days. Notably, many climbers do this as their entry into serious Nepal climbing before moving on to Ama Dablam or Himlung Himal. The combination delivers maximum experience per trip cost.
The Two Most Common Progression Paths
Most serious Nepal climbing progression follows one of two paths. Generally, climbers choose between technical-focused and altitude-focused progression depending on their ultimate objective. Specifically, the two standard paths produce different skill development:
Three Peaks (Mera/Island/Lobuche) → Ama Dablam → Baruntse
3-4 years
Climbers with prior international mountaineering
Ama Dablam (“Mother’s Necklace”) at 6,812 m anchors the Khumbu region as the most iconic technical peak in Nepal. Generally, the distinctive pyramid shape dominates the approach to Everest Base Camp, making it one of the most photographed peaks in the world. Notably, the Southwest Ridge standard route combines 5.7 rock climbing on the famous Yellow Tower with sustained fixed-rope ascending on steep snow and ice.
Flagship Peak — Ama Dablam
Ama Dablam — The Definitive Nepal Technical Peak
Khumbu Region · Eastern Nepal · “Mother’s Necklace”
6,812 m
Elevation
D / 5.7
IFAS Grade
$6.5-15K
2026 Cost
25-30 days
Duration
Ama Dablam (“Mother’s Necklace” in Sherpa) is the most iconic peak in the Khumbu region and the definitive technical objective in Nepal outside the 8,000ers. Generally, the distinctive pyramid shape dominates the approach to Everest Base Camp, making it one of the most photographed peaks in the world. Specifically, the Southwest Ridge standard route is graded D (Difficile) requiring technical rock climbing on the Yellow Tower up to 5.7, sustained fixed-rope climbing, and extended exposure on narrow ridges above 6,000 m. Notably, the peak is typically attempted as the culmination of a Nepal technical peak progression — climbers often complete Island Peak or Lobuche East first for 6,000 m experience.
Ama Dablam Route Structure
Base camp sits at 4,600 m with two higher camps used during summit pushes. Generally, the climbing structure progresses through several distinct stages. First, Camp 1 establishes at 5,700 m below the main ridge. Then Camp 2 sits at 6,000 m on the ridge proper. Also Camp 3 (used by some operators) at 6,300 m provides a final acclimatization point. Specifically, summit day from Camp 2 takes 10-14 hours through the famous Yellow Tower rock section, the Grey Tower mixed climbing, the Mushroom Ridge snow traverse, and the final summit cone.
Climbers selecting an Ama Dablam operator should evaluate several factors. Generally, Nepali operators (Nepal Alpine Expeditions, 8K Expeditions, Asian Trekking) provide lowest cost with strong local expertise. Specifically, mid-tier operators (Seven Summit Treks, Imagine Nepal) offer balance of cost and Western communication standards. Notably, Western operators (Alpine Ascents International, Mountain Professionals, Adventure Consultants) provide highest cost with extensive pre-trip support and English-speaking guides. Generally, climbers should match operator choice to their experience level — first-time Himalayan climbers benefit from Western operator support while experienced climbers can save considerably with Nepali operators.
Summit Statistics
Ama Dablam summit rate is approximately 70% in favorable weather, with fatality rate around 2%. Generally, the favorable summit rate reflects the well-established fixed-rope route plus experienced guide infrastructure. Specifically, summit failures typically result from weather windows, AMS at high camps, or technical inability rather than route conditions. Notably, expedition duration is 25-30 days from Kathmandu arrival to Kathmandu departure — making it one of the more time-committing objectives relative to altitude.
Gateway Technical Peaks — Island Peak and Mera Peak
The two most-climbed gateway peaks in Nepal serve different progression purposes. Generally, Island Peak provides technical practice while Mera Peak provides altitude experience. Specifically, most serious climbers eventually climb both. Notably, the two peaks combine well in single 4-week expeditions with proper sequencing.
Island Peak (Imja Tse) — Technical Practice + Everest Views
Khumbu Region · Eastern Nepal
6,189 m
Elevation
PD+
IFAS Grade
$1.8-3.5K
2026 Cost
16-20 days
Duration
Island Peak gets its English name from its island-like appearance rising from the Imja Valley. Generally, the standard route is graded PD+ with a steep headwall ice section requiring fixed rope and jumar, plus a summit ridge traverse on snow and ice. Specifically, this makes Island Peak the preferred introductory 6,000 m peak for climbers who want to practice technical skills before bigger objectives. Notably, the peak is commonly combined with the Everest Base Camp trek — adding 3-4 days for the summit attempt after reaching EBC. Approach via Chhukhung, high camp at 5,600 m, summit day 8-12 hours. Guided climbs cost $1,800-$3,500 including permit, guide, gear, and porters. Fatality rate approximately 1%.
Mera Peak — Highest Altitude, Forgiving Terrain
Hinku Valley · Eastern Nepal
6,476 m
Elevation
F / PD
IFAS Grade
$1.8-3.2K
2026 Cost
18-22 days
Duration
Mera Peak is Nepal’s highest-altitude trekking peak — taller than Island Peak but technically easier, rated F/PD. Generally, the climb is primarily glacier travel with gentle snow slopes, culminating in a short steep section (30-40°) just below the summit. Specifically, the approach through the Hinku Valley avoids the Everest trekking route’s crowds. Notably, the peak is the preferred first 6,000 m experience for climbers without prior technical climbing background — its forgiving terrain lets climbers focus on altitude adaptation without managing complex technical moves. Summit views from 6,476 m include five 8,000ers (Everest, Lhotse, Makalu, Cho Oyu, Kanchenjunga). Guided climbs cost $1,800-$3,200.
Serious Technical Peaks — Baruntse, Pumori, and Cholatse
The graduate-level technical peaks in Nepal demand prior 6,000 m experience, strong technical skills, and serious expedition commitment. Generally, these peaks form the next progression step after Ama Dablam for climbers building toward elite objectives. Specifically, Pumori rivals Ama Dablam for technical demand while Baruntse provides the natural 7,000m stepping stone to 8,000ers.
Baruntse — The 7,000m Training Ground
Mahalangur Himal · Eastern Nepal
7,129 m
Elevation
AD+
IFAS Grade
$7.5-15K
2026 Cost
25-28 days
Duration
Baruntse is the natural stepping stone to 8,000 m peaks. Generally, at 7,129 m, Baruntse delivers full expedition-style altitude experience without the extreme costs of 8,000ers. Specifically, the Southeast Ridge standard route is graded AD+ with sustained snow and ice to 60°, several technical sections, and a committing summit day. Notably, Baruntse is popular with climbers preparing for Everest or other 8,000ers as proof of 7,000 m capability. Expedition duration 25-28 days, operator costs $7,500-$15,000. The approach through the Hongu Valley is remote and spectacular, distinct from the Khumbu traffic patterns.
Pumori — The Everest-View Technical Peak
Khumbu Region · Eastern Nepal
7,161 m
Elevation
D+
IFAS Grade
$9-16K
2026 Cost
25-30 days
Duration
Pumori sits directly across from Everest Base Camp and is known for its technical Southeast Ridge. Generally, the standard route is graded D+ with sustained steep ice and mixed terrain. Specifically, the peak’s fatality rate around 4% is notably higher than Ama Dablam because of avalanche hazard on the standard routes. Notably, Pumori is less commonly attempted than Ama Dablam but considered more technical. Pumori requires major prior technical experience — not an appropriate first Nepal peak. Most climbers attempt it after Ama Dablam or a 7,000 m peak elsewhere. Expedition cost $9,000-$16,000, duration 25-30 days.
Cholatse — The Khumbu’s Hidden Technical Gem
Khumbu Region · Eastern Nepal
6,440 m
Elevation
D
IFAS Grade
$6-10K
2026 Cost
20-24 days
Duration
Cholatse is a connoisseur’s peak — less famous than Ama Dablam but equally technical in its own way. Generally, the Southwest Ridge is graded D with sustained mixed climbing and exposed ridge traverses. Specifically, the peak sees far fewer ascents than Ama Dablam but offers similar technical challenge. Notably, Cholatse suits climbers who want Ama Dablam-level technical difficulty without the crowds. Expedition cost $6,000-$10,000, duration 20-24 days. Best climbed in October-November.
Nepal’s permit system regulates climbing across two distinct authorities. Generally, the Nepal Mountaineering Association (NMA) handles trekking peaks under 6,500 m while the Ministry of Tourism manages expedition peaks above 6,500 m. Notably, the September 2025 regulatory update reinforced guide requirements, insurance verification, GPS tracking on some peaks, and biodegradable waste management standards.
Lesser-Known but Excellent — Kyajo Ri, Chulu West, Himlung
Beyond the famous peaks, Nepal offers remarkable technical objectives that see far fewer climbers. Generally, these peaks reward climbers who want real Himalayan experience without tourist-route congestion. Specifically, three lesser-known peaks deserve attention from intermediate climbers.
Kyajo Ri — Technical Peak Near Namche
Khumbu Region · Eastern Nepal · Opened 2003
6,186 m
Elevation
AD
IFAS Grade
$2.5-4.5K
2026 Cost
18-22 days
Duration
Kyajo Ri is a newer NMA trekking peak that opened in 2003. Generally, the peak combines technical rock and mixed climbing in a less-visited valley. Specifically, the standard Southwest Face route is graded AD with genuine rock climbing sections. Notably, Kyajo Ri provides a strong alternative to the crowded Island Peak and Mera Peak circuit for climbers wanting Khumbu region access without tourist density.
Chulu West — Annapurna Region Trekking Peak
Manang District · Central Nepal
6,419 m
Elevation
PD+
IFAS Grade
$2.2-4K
2026 Cost
20-24 days
Duration
Chulu West combines excellent altitude experience with access from the Annapurna Circuit trek. Generally, the peak is graded PD+ with moderate snow slopes and a short technical section near the summit. Specifically, Chulu West is a strong choice for Annapurna-region climbers wanting to combine trekking and climbing in a single expedition. Notably, the Annapurna region access provides cultural and scenic variety distinct from the Khumbu-focused alternatives.
Himlung Himal — 7,000m Peak with Moderate Difficulty
Manang District · Central Nepal · Near Tibet Border
7,126 m
Elevation
PD+
IFAS Grade
$6.5-11K
2026 Cost
28-32 days
Duration
Himlung is increasingly popular as a 7,000 m objective with moderate technical demands. Generally, the peak is graded PD+ with mostly snow and ice slopes. Specifically, Himlung provides excellent 8,000er preparation without the extreme commitment of Baruntse or more technical 7,000ers. Notably, the remote location near the Tibet border adds cultural appeal — climbers experience Tibetan-influenced villages during the approach. Himlung represents the best “first 7,000m peak” option for climbers building altitude experience with lower technical demands.
NMA Permits and 2026 Logistics
Nepal’s permit system distinguishes trekking peaks (NMA) from expedition peaks (Ministry of Tourism). Generally, understanding the permit structure affects cost, timeline, and what operators can legally offer. Specifically, the September 2025 regulatory update introduced several mandatory requirements that affect 2026 climbing planning.
Permit Costs by Peak Type and Season
Peak / Type
Spring (Mar-May)
Autumn (Sep-Nov)
Winter/Summer
Authority
Group A NMA (Ama Dablam, Baruntse, Pumori)
$400-$500
$400-$500
$200-$250
MoT
Group B NMA (Island, Mera, Lobuche)
$250-$400
$250-$400
$125-$200
NMA
8,000m peaks (Everest)
$15,000
$7,500
$3,750
MoT
Other 8,000ers (Cho Oyu, Manaslu)
$1,800
$900
$450
MoT
What the September 2025 Regulatory Update Changed
Several major changes from the September 2025 update affect technical peak climbers. Generally, the changes reinforce existing safety requirements while adding new tracking and environmental standards. Specifically, the key changes include several mandatory provisions:
Mandatory guide requirements reinforced — no solo or unsupported climbing on permitted peaks. Independent climbing is not legally permitted on technical peaks.
Insurance requirements verified at permit application — high-altitude rescue coverage now required. Coverage minimums increased.
GPS tracking required on some expedition peaks — 8,000 m+ mandatory, technical 7,000ers encouraged. Affects Ama Dablam, Baruntse, Pumori, Himlung.
Biodegradable waste management required on all peaks — operators must provide waste collection systems. Refundable garbage deposits enforced.
Climber-to-guide ratios codified — most technical peaks require 1:1 to 2:1 climber-to-guide. Ama Dablam typically requires 1:1 or 2:1 depending on experience.
Insurance coverage minimums raised — high-altitude guide insurance raised from NPR 1.5 million to NPR 2 million (~$15,000 USD coverage minimum).
Ama Dablam specific 2026 requirements. Generally, the Ama Dablam permit application now requires several documents at submission. First, certified climbing resume showing 6,000m experience. Then a medical certificate. Also a Liaison Officer fee deposit (~$3,000 per team). Plus proof of high-altitude rescue insurance. Finally, a $2,000 refundable garbage deposit. Notably, climbers should begin permit applications 2-3 months before climbing dates because of processing time and document verification requirements. Late applications during peak season frequently face delays.
Seasonal Planning — When to Climb
Nepal’s seasons strongly determine climbing feasibility on technical peaks. Generally, post-monsoon October-November is the prime season for most peaks. Specifically, pre-monsoon April-May is the secondary window. Notably, winter and summer climbing requires specialized planning for most peaks.
Season
Months
Conditions
Best For
Post-Monsoon (Primary)
October-November
Clear, cold, stable weather; minimal precipitation; longer daylight than winter
Ama Dablam, Baruntse, Pumori, Cholatse, all technical peaks
Pre-Monsoon (Secondary)
April-May
Warmer temperatures; more afternoon storms; higher avalanche risk
Most peaks but less stable than autumn; preferred for some 7,000m peaks
Winter (Specialized)
December-February
Extreme cold but stable weather; short days limit summit windows
Only experienced cold-weather climbers; Island Peak and Mera Peak possible
Monsoon (Avoid)
June-September
Constant precipitation; high avalanche hazard; poor visibility
Not suitable for most technical peaks
Why October-November is the prime season. Generally, the post-monsoon window produces optimal climbing conditions for several reasons. First, the monsoon precipitation has ended creating clear weather patterns. Then daytime temperatures are cold but not extreme. Also avalanche risk decreases as snowpack stabilizes. Plus visibility is exceptional with cleared mountain views. Finally, daylight remains sufficient for summit pushes through mid-November. Notably, the window narrows rapidly after mid-November as winter conditions arrive — climbers should plan summit attempts in the first three weeks of October through mid-November for maximum weather safety.
Frequently Asked Questions About Nepal’s Technical Peaks
What are Nepal’s technical climbing peaks?
Nepal’s technical climbing peaks are mountains between trekking peaks (under 6,500 m) and the 8,000-meter expedition peaks. These peaks form the middle tier where climbers learn actual Himalayan alpinism — fixed rope ascending, mixed terrain movement, extended altitude endurance. The 12 technical peaks include Ama Dablam (6,812 m), Baruntse (7,129 m), Pumori (7,161 m), Cholatse (6,440 m), Thamserku (6,623 m), Island Peak (6,189 m), Mera Peak (6,476 m), Lobuche East (6,119 m), Kyajo Ri (6,186 m), Chulu West (6,419 m), and Himlung Himal (7,126 m). These peaks require real climbing skills but not the expedition logistics or extreme cost of 8,000ers. NMA-classified peaks cost $250-$400 in permit fees while Ministry of Tourism expedition peaks like Ama Dablam cost $400-$500.
How hard is Ama Dablam to climb?
Ama Dablam (6,812 m) is graded D (Difficile) on the IFAS scale and is considered one of Nepal’s most technical peaks for its size. The standard Southwest Ridge route requires technical rock climbing on the Yellow Tower up to 5.7, sustained fixed-rope ascending on steep snow and ice, extended exposure on narrow ridge sections above 6,000 m, and acclimatization to 6,800 m over typically 3-4 weeks. Ama Dablam has approximately 2% fatality rate — safer than most 8,000ers but considerably more dangerous than trekking peaks. The peak is typically attempted after climbers complete Island Peak or Mera Peak. Guided expeditions cost $6,500-$15,000 with operators like Asian Trekking, Nepal Alpine Expeditions, and Alpine Ascents International. The November-December season is preferred for stable weather.
What is the difference between Mera Peak and Island Peak?
Mera Peak (6,476 m) and Island Peak (6,189 m) are Nepal’s most popular NMA trekking peaks but serve different purposes. Mera Peak is taller but technically easier — rated F/PD (Facile to Peu Difficile) with mostly glacier travel and one short ice face near the summit. Mera Peak is the better choice for first 6,000 m experience as introduction to altitude climbing. Island Peak is shorter but more technical — rated PD+ with a steep ice section requiring fixed rope and jumar, plus a summit ridge traverse. Island Peak is the better choice for climbers wanting to practice technical skills before Ama Dablam. Both peaks cost similar ($250-$400 NMA permit plus $1,500-$3,500 for guided climb). Many expeditions combine them — Mera first for acclimatization and altitude, Island Peak second for technical practice.
How much does it cost to climb Ama Dablam?
A guided Ama Dablam expedition in 2026 costs $6,500-$15,000 depending on operator, group size, and included services. Typical cost breakdown includes Nepal Ministry of Tourism permit $400 (spring/autumn) or $200 (winter/summer), Sagarmatha National Park entry $30, Khumbu Pasang Lhamu Rural Municipality fee $17, Liaison Officer fees (~$3,000 per team), guide fees and Sherpa support $2,500-$4,000, base camp and porterage logistics $1,200-$2,000, food, tents, fixed rope, and optional oxygen $800-$1,500. Budget Nepali operators run at the lower end ($6,500-$9,000); Western operators like Alpine Ascents run $12,000-$15,000 for more services. Plus international flight to Kathmandu $1,200-$2,500. Plus travel insurance with high-altitude rescue coverage $200-$500. Total trip cost including flights and pre/post trek is typically $8,000-$18,000.
When is the best time to climb Nepal’s technical peaks?
The two best seasons for climbing Nepal’s technical peaks are post-monsoon (October-November) and pre-monsoon (April-May). Post-monsoon October-November is preferred for most technical peaks including Ama Dablam, Pumori, and Baruntse — clear, cold, stable weather with minimal precipitation and longer daylight than winter. Pre-monsoon April-May also works for most peaks but brings warmer temperatures, more afternoon storm activity, and avalanche hazard from winter snowpack warming. Winter climbing (December-February) is possible on lower peaks but brings extreme cold and shorter days. Monsoon season (June-September) is unsuitable for most technical peaks because of constant precipitation, avalanche hazard, and poor visibility. Plan 3-4 weeks for most technical peak expeditions including approach trek, acclimatization, summit push, and weather contingency.
Do I need a guide for Nepal trekking peaks?
Yes, Nepal requires all climbers on NMA-permitted trekking peaks and Ministry of Tourism expedition peaks to use registered guides. The September 2025 regulatory update reinforced existing rules requiring licensed sirdar/guide and appropriate Sherpa support for all climbing activities above trekking peak status. Independent climbing is not legally permitted on these peaks. Climber-to-guide ratios vary by peak. NMA trekking peaks like Island Peak and Mera Peak typically have 4:1 or 2:1 climber-to-guide ratios. Expedition peaks like Ama Dablam and Baruntse use 1:1 or 2:1 depending on experience. Highly technical routes or winter climbs typically require 1:1 ratios. The guide requirement adds $1,500-$4,000 to expedition cost but provides essential local knowledge, rescue capability, and regulatory compliance. Attempting to climb without proper permits risks permit seizure, fines, and future restrictions on return visits.
What is the NMA permit for Nepal climbing peaks?
The Nepal Mountaineering Association (NMA) permit system regulates climbing on designated trekking peaks in Nepal. NMA categorizes peaks into Group A (27 peaks above 6,500 m requiring Ministry of Tourism permits) and Group B (peaks under 6,500 m requiring NMA permits). NMA trekking peak permits cost $250-$400 depending on peak and season, with spring (March-May) being the highest fee. Permit application requires several documents. First, a certified climbing resume showing relevant experience. Then a medical certificate. Also a licensed Nepali guide and climbing crew. Plus proof of travel insurance including high-altitude rescue coverage. Finally, a $2,000+ refundable security deposit in some cases. Applications are submitted through registered trekking agencies in Kathmandu. Processing time is 2-7 days for most peaks. Permit revenue supports Nepal’s mountaineering infrastructure and conservation programs.
Which Nepal peak is best for first 6000m climb?
Mera Peak (6,476 m) is widely considered the best first 6,000 m peak for climbers progressing beyond trekking. Several factors support this recommendation. First, it’s technically moderate — mostly glacier travel and gentle snow slopes with one short ice section near the summit. Then it has an excellent acclimatization profile — the approach takes 10-12 days of steady altitude gain before summit push. Also it delivers full Himalayan experience — base camp and high camp structure, guide-led teams, fixed rope where needed. Plus strong commercial infrastructure — many operators run Mera Peak expeditions year-round. Finally, it’s affordable — total trip cost $1,800-$3,500 including permits and guides. Island Peak (6,189 m) is the alternative with more technical demands — better for climbers with prior mountaineering experience. Lobuche East (6,119 m) combines nicely with the Everest Base Camp trek for climbers wanting to add a peak to a trekking trip. Avoid Ama Dablam as a first 6,000 m peak.
What changed in Nepal’s September 2025 permit update?
Several major changes from the September 2025 update affect technical peak climbers. The changes reinforce existing safety requirements while adding new tracking and environmental standards. Key changes include mandatory guide requirements reinforced — no solo or unsupported climbing on permitted peaks. Insurance requirements verified at permit application — high-altitude rescue coverage now required. GPS tracking required on some expedition peaks — 8,000 m+ mandatory, technical 7,000ers encouraged. Biodegradable waste management required on all peaks — operators must provide waste collection systems. Climber-to-guide ratios codified — most technical peaks require 1:1 to 2:1 climber-to-guide. Insurance coverage minimums raised — high-altitude guide insurance increased from NPR 1.5 million to NPR 2 million. Nepal also introduced the FastClimb Premium Summit+ permit for Everest at $12,000 surcharge over the standard $15,000 permit cost — allowing wealthy climbers to skip bottlenecks.
How do I choose between Nepali and Western operators?
Climbers selecting between Nepali and Western operators for technical peaks should evaluate several factors. Nepali operators (Nepal Alpine Expeditions, 8K Expeditions, Asian Trekking, Imagine Nepal, Pioneer Adventure) provide lowest cost ($6,500-$9,000 for Ama Dablam) with strong local expertise. They typically include all permits, food, base camp setup, and English-speaking guides. Western operators (Alpine Ascents International, Mountain Professionals, Adventure Consultants, Climbing the Seven Summits) provide highest cost ($12,000-$15,000 for Ama Dablam) with extensive pre-trip support, Western communication standards, comprehensive medical screening, and detailed gear lists. The decision often comes down to climbing experience — first-time Himalayan climbers benefit from Western operator support and communication. Experienced climbers can save considerably with Nepali operators. Mid-tier operators (Seven Summit Treks, 8K Expeditions) offer balance between cost and Western communication standards at $9,000-$12,000 for Ama Dablam.
Reference texts: Trekking Peaks of Nepal (O’Connor), Nepal: A Trekker’s Guide (McGuinness), Freedom of the Hills (The Mountaineers)
Climbing association records from the Nepal Mountaineering Association Alpine Club and international climbing federations
Access Nepal Tour and Hop Nepal — Verified 2026 Ama Dablam permit cost data
The Everest Holiday and Green Valley Nepal Treks — Verified 2026 NMA permit fee structures
Summit Climb — Operator-side Ama Dablam permit and Liaison Officer fee information
Last updated: May 25, 2026. Next scheduled update: November 2026 (verify autumn 2026 season completion data, current permit fee structure, and any additional regulatory changes).
Start Your Nepal Technical Peak Progression
Nepal’s technical peaks form the curriculum that produces real Himalayan climbers. Generally, climbers should start with Mera Peak or Island Peak for first 6,000 m experience, then progress through Ama Dablam as the definitive technical objective before considering 7,000 m peaks like Baruntse or Himlung Himal. Notably, the September 2025 regulatory update reinforces guide requirements and insurance verification — climbers should plan permit applications 2-3 months ahead and verify all requirements before committing to operator contracts.
Mountain Climbing Costs 2026: What It Costs From Rainier to Everest
Mountain climbing can cost a few hundred dollars for local objectives, about $3,000–$12,000 for many guided first-expedition peaks, and $40,000–$80,000 for most Everest climbs before ultra-premium options. The useful number is not a single “average mountaineering cost.” It is the operator price plus permits, personal gear, travel, insurance, tips, preparation and contingency.
Current 2026 published examples include $3,475 for a three-day Mount Rainier climb, $7,100 for Aconcagua, $12,250 for Denali, €2,580 for a Mont Blanc 1:2 package and a typical $40,000–$80,000 Everest spend.
Named 2026 operator examplesPackage price kept separate from total tripPermit / gear / travel costs separatedPer-peak detail handed to cost pages
Reviewed August 19, 2026 · Alpine Ascents + RMI + Compagnie des Guides de Chamonix + Alan Arnette 2026 Everest analysis
$3,475Rainier 3-day published example
$7,100Aconcagua published example
$12,250Denali published example
$40K–$80KTypical Everest spend
$399KPublished ultra-premium Everest example
By Travis Ludlow · Founder & Head of Research · Cost review: Walker Ludlow
Prices are source-specific snapshots; always reconfirm the exact operator package before paying
The direct answer
How much does mountain climbing cost?
There is no useful single average. A guided Mount Rainier climb can cost about $3,475, a current Aconcagua program about $7,100–$9,800 depending on operator, Denali about $12,250 with a major U.S. guide service, and most Everest climbers pay roughly $40,000–$80,000 before the ultra-premium end of the market.
The climb invoice is only one line.
A complete mountain budget also includes permits, gear, flights, ground transport, insurance, training or prerequisite peaks, tips and a contingency reserve.
On a first technical expedition, those outside costs can be large enough to move the trip into a different budget tier.
The most reliable way to compare mountains is therefore: first compare published operator prices, then compare what those prices include, and only then build the all-in trip budget.
Local / day objective: hundreds to low thousands.
First guided glacier peak: roughly $3K–$6K package.
Expedition peak: roughly $7K–$13K package.
Remote logistics peak: tens of thousands.
Everest: most pay ~$40K–$80K.
Ultra-premium Everest: can exceed $200K by a wide margin.
A climbing career is a cost ladder
Five Mountain-Climbing Cost Levels
The purpose of the tiers is to show how logistics and technical systems grow—not to force every mountain into one fixed price.
1 · Local objective$0–$1,000+Local hikes, scrambling peaks and self-guided day objectives. Main costs: transport and basic gear.2 · Guided starter$3,000–$6,000+Rainier-style glacier climbs, courses and first guided technical objectives.3 · Expedition peak$7,000–$15,000+Aconcagua, Denali and similar multi-week or highly supported expeditions.4 · Remote / 8,000 m$20,000–$70,000+Major logistics, high-altitude staff, fixed ropes, oxygen on some peaks and long expeditions.5 · Everest / premium$40,000–$399,000+Huge support range—from lean commercial Everest to private ultra-premium programs.
These are planning tiers, not market quotations. A peak can cross tiers depending on operator, route, guide ratio, private support, oxygen allocation and whether flights or gear are included.
Named current products are more useful than vague ranges
2026 Mountain-Climbing Prices by Peak
These are representative published operator prices—not market-wide averages and not all-in travel budgets.
Peak
Published 2026 example
Operator / model
What the number represents
Mount Rainier
$3,475
Alpine Ascents · 3-day Muir
Guided climb including guide fees, park/climbing fees, Seattle transport and group equipment; excludes personal gear, Seattle hotel, lunches, insurance and tips.
Kilimanjaro
$5,900
Alpine Ascents · Machame climb-only
Premium U.S.-operator example. Local operators can price substantially differently.
Mont Blanc
€2,580 pp
Chamonix Guides · 5-day Duo 1:2
Guide, two half-board hut nights and lifts; excludes valley lodging, lunches, personal gear and travel.
Aconcagua
$7,100
Alpine Ascents · Normal / Vacas
Guided expedition package; separate personal porter costs may apply.
Aconcagua
$9,800
RMI · 23-day expedition
Different operator/inclusion structure; climbing permit is not included.
Denali
$12,250
Alpine Ascents
Published guided expedition price before personal gear and travel.
Vinson
$55,500
Alpine Ascents · 2025–26 program
Antarctic expedition product where aviation and polar logistics dominate.
Everest
$40K–$80K typical
2026 market analysis
Alan Arnette’s broad typical spend; Nepalese median ~$45,250 and international-guide median ~$76,000.
Everest
$399,000
CTSS Formula
Published ultra-premium Everest example with extensive private support and pre-acclimatization.
The table is intentionally selective.
Detailed pricing belongs on each mountain’s cost page, where permits, operators, route differences and currency can be updated without turning this hub into a duplicate of every peak-specific guide.
The number on the operator page is the starting point
The real climbing budget is a stack.
Guide fee + permits + gear + travel + insurance + preparation + tips + contingency = the trip you actually have to fund.
The formula matters because two $10,000 expeditions can produce very different finished budgets.
One may include permits, hotels and group equipment; another may exclude the permit, airport transfers, personal porters and several thousand dollars of specialized gear.
Eight lines build almost every climbing budget
Where the Money Goes
The ranges below are planning categories, not claims that every climb reaches the maximum.
Category
What it covers
Why it grows
Operator / guide
Guide time, logistics, camps, group equipment, staff
Trip length, guide ratio, remoteness and support level
Tips are not wages. Staff wages, summit bonuses, tips and operator service prices are different money flows.
Keep them separate when comparing expeditions.
Gear accumulates as objectives get colder and higher
How Gear Changes the Budget
A climber upgrading an existing kit spends far less than someone building from zero.
These are the items most likely to make a “cheap” expedition expensive after booking.
Prerequisite climbsDenali or Everest readiness is built on earlier expeditions that also cost money.Extra hotel nightsWeather, flights and early descents create nights not in the base package.Gear replacementBoots, gloves, sleeping bags and shells wear out between major objectives.Excess baggageExpedition duffels and technical equipment can trigger airline charges.Personal portersAconcagua and Himalayan load support can sit outside the published package.Single supplementPrivate rooms can add hundreds or thousands across long trips.Cancellation / interruptionRigid mountain bookings create financial exposure when travel fails.Repeat attemptThe most expensive hidden cost is paying for the mountain again.
First serious mountain
What Should a First Guided Glacier Climb Cost?
Rainier gives a useful 2026 benchmark because the guide market and published inclusions are unusually transparent.
Published climb
$3,475
Alpine Ascents’ three-day Muir program includes guide fees, NPS climbing/entrance fees, Seattle transport and group equipment.
Common additions
Gear + hotel + food
Personal equipment, Seattle lodging, lunches, insurance and guide gratuities are excluded.
Training version
$4,595
An eight-day Rainier mountaineering course costs more because it buys instruction and progression, not only a summit attempt.
The next jump is duration and self-sufficiency
Aconcagua & Denali Budget Benchmarks
These mountains show why “expedition cost” is different from a short guided climb.
RMI’s current Aconcagua price explicitly excludes the climbing permit, and personal porters cost extra.
That is exactly why operator invoices cannot be compared without reading the inclusion list.
Denali adds another cost layer through expedition duration, cold-weather equipment and the expectation of significant self-sufficiency.
$15,000 permit · oxygen · weeks of support · huge service spread
Everest is not one price.
Most people pay roughly $40,000–$80,000, but the same mountain now supports ultra-premium products approaching $400,000.
2026 Everest market
Why Everest Has the Widest Price Spread
Permit, oxygen and expedition infrastructure create a high floor; guide model and private support create the enormous ceiling.
2026 Everest price signal
Amount
Meaning
Most climbers
$40K–$80K
Alan Arnette’s 2026 broad spending range.
Nepalese guide-service median
$45,250
2026 median in Arnette’s operator analysis.
International guide-service median
$76,000
2026 Nepal-side median with international guide service.
Ultra-premium example
$399,000
CTSS Formula published example with extensive private support.
Everest is therefore a poor mountain for a single “average cost” headline.
A $45,000 Nepalese-guided product and a $399,000 private product are not simply expensive and more expensive versions of the same package; they are different service models.
The cheaper package is not automatically cheaper after the exclusions are added.
1 · Normalize the product
Same route? Same trip length? Same guide ratio? Same number of acclimatization days?
2 · Normalize inclusions
Permit, hotels, local flights, meals, porters, oxygen, lifts, group gear and rescue systems.
3 · Add personal costs
Flights, insurance, equipment, tips, single rooms, baggage and contingency.
4 · Check cancellation terms
Deposits and weather/fitness Plan B rules can change the economic risk substantially.
5 · Check staff model
Guide credentials, support ratios and high-altitude staffing can explain major price differences.
6 · Compare the finished budget
Only after all of the above should you decide which trip is actually less expensive.
Price can correlate with support, but price alone is not a safety score. Alan Arnette found that 23 of 26 Everest member deaths in 2023–2024 were with operators charging below the median price, while also noting that larger operators have more members and therefore require careful per-capita interpretation.
Use price as one due-diligence signal, not a substitute for evaluating the operator.
Continue planning
Mountain Cost & Budget Library
Use this hub for cross-mountain budget comparison, then open the individual cost guide for the detailed price breakdown of a specific objective.
These answers use current published examples rather than one universal average.
How much does mountain climbing cost?
It ranges from hundreds of dollars for local objectives to thousands for guided glacier climbs and tens of thousands for major expeditions. Current 2026 examples include $3,475 for an Alpine Ascents Mount Rainier climb, $7,100 for its Aconcagua program, $12,250 for Denali and roughly $40,000–$80,000 for most Everest climbers.
How much does a first guided mountain climb cost?
A current three-day Mount Rainier Muir climb with Alpine Ascents is $3,475. Personal gear, Seattle lodging, some meals, insurance and gratuities are additional.
Current major U.S.-operator examples include $7,100 with Alpine Ascents and $9,800 with RMI. The packages differ, and RMI’s published price does not include the climbing permit.
How much does Denali cost?
Alpine Ascents currently lists its Denali expedition at $12,250 before personal equipment and travel. Other guide services may price differently.
How much does Everest cost in 2026?
Alan Arnette’s 2026 market analysis says most climbers pay roughly $40,000–$80,000. His median is about $45,250 for Nepalese guide service and $76,000 for international guide service on the Nepal side. Ultra-premium products can cost several hundred thousand dollars.
What are the biggest hidden climbing costs?
Prerequisite climbs, personal gear, insurance, extra hotel nights, baggage, personal porters, tips, cancellation losses and the cost of returning for another attempt are the most important expenses outside the advertised operator fee.
Is a cheaper guide company less safe?
Price alone is not a safety score. Lower prices can reflect fewer inclusions, lower guide ratios, different staffing or simply lower overhead. Evaluate qualifications, support, oxygen policy where relevant, rescue planning, insurance and cancellation terms alongside price.
How should I compare climbing prices?
First compare the same route, duration and guide ratio. Then normalize permits, accommodation, local transport, group gear, meals, porters, oxygen and rescue support. Finally add your own flights, gear, insurance, tips and contingency.
Sources & methodology
How This Cost Comparison Is Built
The hub uses representative published prices to anchor each tier and sends mountain-specific detail to dedicated cost pages.
Published operator prices are labeled as examples, not market averages.
Package price is kept separate from all-in travel cost.
Tips are not described as staff wages.
Per-peak price detail stays on dedicated mountain cost pages.
Price is not used as a stand-alone safety rating.
All current prices should be reconfirmed before booking.
The cost rule to remember
Compare the finished trip, not the sticker price. A $7,000 expedition with a permit, hotels and local transport included can be cheaper than a $6,000 expedition that excludes them.
The mountain-budget takeaway
Start With the Published Guide Price. Finish With the Trip You Actually Have to Fund.
Rainier, Aconcagua, Denali and Everest live in different cost worlds because the logistics grow with altitude, duration and remoteness.
Use the operator quote as the first line—not the whole budget.
Andes Expedition Planning Guide: Peru, Bolivia, Ecuador, Chile & Argentina
The best Andes expedition starts with country and season, then builds around a staging city, acclimatization objective, recovery days and the main peak. Peru and Bolivia align around the drier May–August period; Aconcagua and many southern high-Andes objectives align with austral summer; Ecuador needs its own equatorial planning logic.
Regional expedition logistics hub · Updated September 1, 2026
The direct answer
How Should You Plan an Andes Climbing Expedition?
Start with the seasonal region, not the mountain list. Then choose a staging city, build a conservative altitude sequence, add one or more preparation objectives, protect recovery days and leave enough weather and transport margin that the main summit is not forced by airline dates.
The Andes can be logistically faster than the Himalaya because roads and cities reach high altitude quickly. Your body does not acclimatize faster simply because the road does.
PeruHuaraz
BoliviaLa Paz
EcuadorQuito
ArgentinaMendoza
ChileAtacama gateways
Core ruleBuild margin
Start with geography
Which Andes Region Fits Your Expedition?
Region
Primary base
Broad climbing window
Best use
Peru — Cordillera Blanca
Huaraz
May–Aug
Technical glaciated 5,000–6,700 m objectives
Bolivia — Cordillera Real
La Paz
May–Aug / early Sep
Accessible 5,000–6,500 m progression and multi-peak trips
Ecuador — Volcanoes
Quito
Multiple drier windows
Fast-access volcano progression and acclimatization sequences
Argentina — Aconcagua
Mendoza
Austral summer
6,961 m non-technical high-altitude expedition
Chile — Atacama
Copiapó / regional desert bases
Austral summer
Remote 6,000 m desert volcanoes including Ojos del Salado
Do not treat “the Andes” as one season. The northern tropical Andes, equatorial volcanoes, central dry Andes and southern mountains operate on different weather calendars.
Staging strategy
Use the Right City Before You Use the Mountain
Peru
Huaraz
The practical hub for the Cordillera Blanca, with guide services, gear logistics, transport and access to acclimatization peaks.
Bolivia
La Paz
A high urban base with fast access to the Cordillera Real. Arrival itself creates altitude stress, so early days should be conservative.
Ecuador
Quito
A strong base for progressive volcano itineraries using lower objectives before Cotopaxi or Chimborazo.
Argentina
Mendoza
The commercial and administrative gateway for Aconcagua, with permits, transport and operator logistics concentrated here.
Chile
Atacama gateways
Ojos del Salado programs use regional desert logistics rather than one universal high-altitude staging city.
Season matrix
Andes Climbing Seasons Are Regional
Period
Best regional fit
Planning implication
May–August
Peru + Bolivia
Best alignment for a northern Andes technical/high-altitude trip
September–October
Transition
Conditions become less predictable regionally; verify mountain-specific windows
November–March
Argentina + northern Chile high Andes
Core austral-summer expedition period for Aconcagua and Atacama objectives
Equatorial windows
Ecuador
Plan around mountain-specific precipitation, wind and volcanic conditions rather than a single Andes rule
Altitude logistics
Road Access Can Be Fast. Acclimatization Cannot.
One of the Andes’ great logistical advantages is that roads, cities and refuges can place climbers at high altitude quickly. That reduces approach days. It does not justify assuming the physiology can be compressed at the same rate.
Logistical advantage
What it changes
What it does not change
High staging cities
Less time needed to reach altitude
Individual acclimatization response
Road access
Shorter approaches
Safe ascent-rate principles
Multiple nearby peaks
Better progression options
Need for recovery
Short mountain phases
Less expedition overhead
Need for pre-summit acclimatization
Huascarán illustrates the difference clearly: the mountain phase itself may take roughly six to seven days, while a responsible complete program commonly needs much longer once acclimatization and preparation are included. citeturn962146search1
At least one true rest/reset day before the main mountain
Transport
Road, flight and border-transfer buffers included
Permits
Current park and route requirements verified
Insurance
Maximum altitude and exact activity covered
Weather
Contingency days exist rather than a forced summit schedule
Exit
International departure is not tied to summit day
Methodology
What This Andes Page Owns
Regional logistics
Country and season selection.
Staging-city strategy.
Multi-peak and multi-country sequencing.
Recovery, transport and contingency logic.
Regional permit decision framework.
Kept on specialist pages
Altitude physiology and symptom management.
Mountain-specific permit fees.
Route descriptions and condition reports.
Operator comparison and pricing.
Detailed training prescriptions.
This keeps the page useful without competing with its own supporting cluster.
FAQ
Andes Expedition Planning FAQ
What country is best for a first Andes expedition?
Bolivia and Ecuador often offer the simplest high-altitude logistics; Peru is stronger for technical glaciated climbing, while Aconcagua is a full expedition-style objective.
When is the Andes climbing season?
There is no single season. Peru and Bolivia align broadly with May–August, while Aconcagua and many southern high-Andes peaks align with austral summer.
How long should I allow?
Roughly two to three weeks is a practical starting range for many single-objective high-altitude trips once acclimatization and weather margin are included.
Does road access mean I can acclimatize faster?
No. It shortens travel, not human adaptation to altitude.
Can Peru and Bolivia be combined?
Yes. Their main dry-season timing aligns well enough to make them one of the stronger multi-country combinations.
Can I combine Aconcagua and Peru?
Usually not efficiently because their strongest seasons are separated.
What are the main staging cities?
Huaraz, La Paz, Quito, Mendoza and regional Atacama gateways are the key planning bases for the regions covered here.
Where should I plan acclimatization in detail?
Use the dedicated altitude acclimatization and mountain-specific pages; this page owns regional logistics and sequencing.
The Andes planning rule
Compress the Logistics—Not the Acclimatization.
The Andes reward good sequencing: choose the right season, stage intelligently, climb a preparation objective, recover properly, protect the main summit with contingency days and never let a fast road create a rushed altitude schedule.