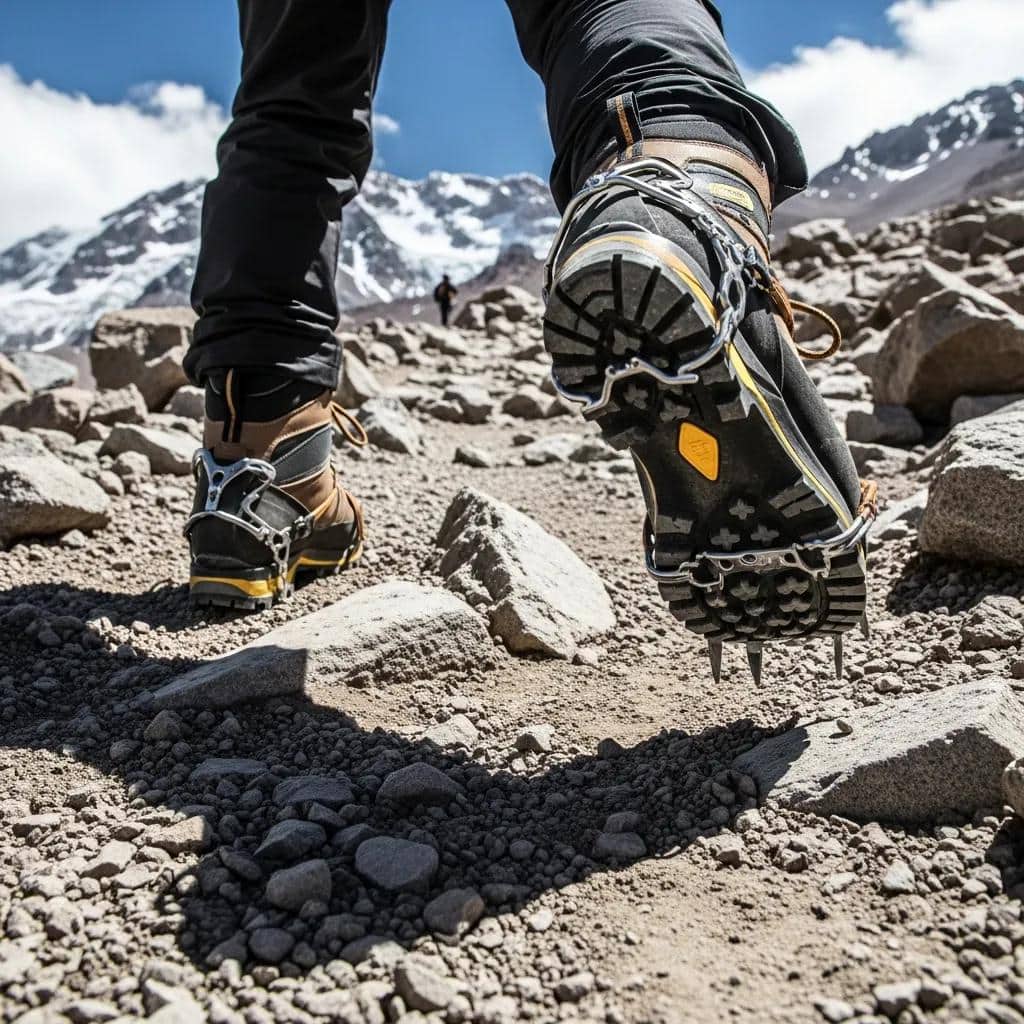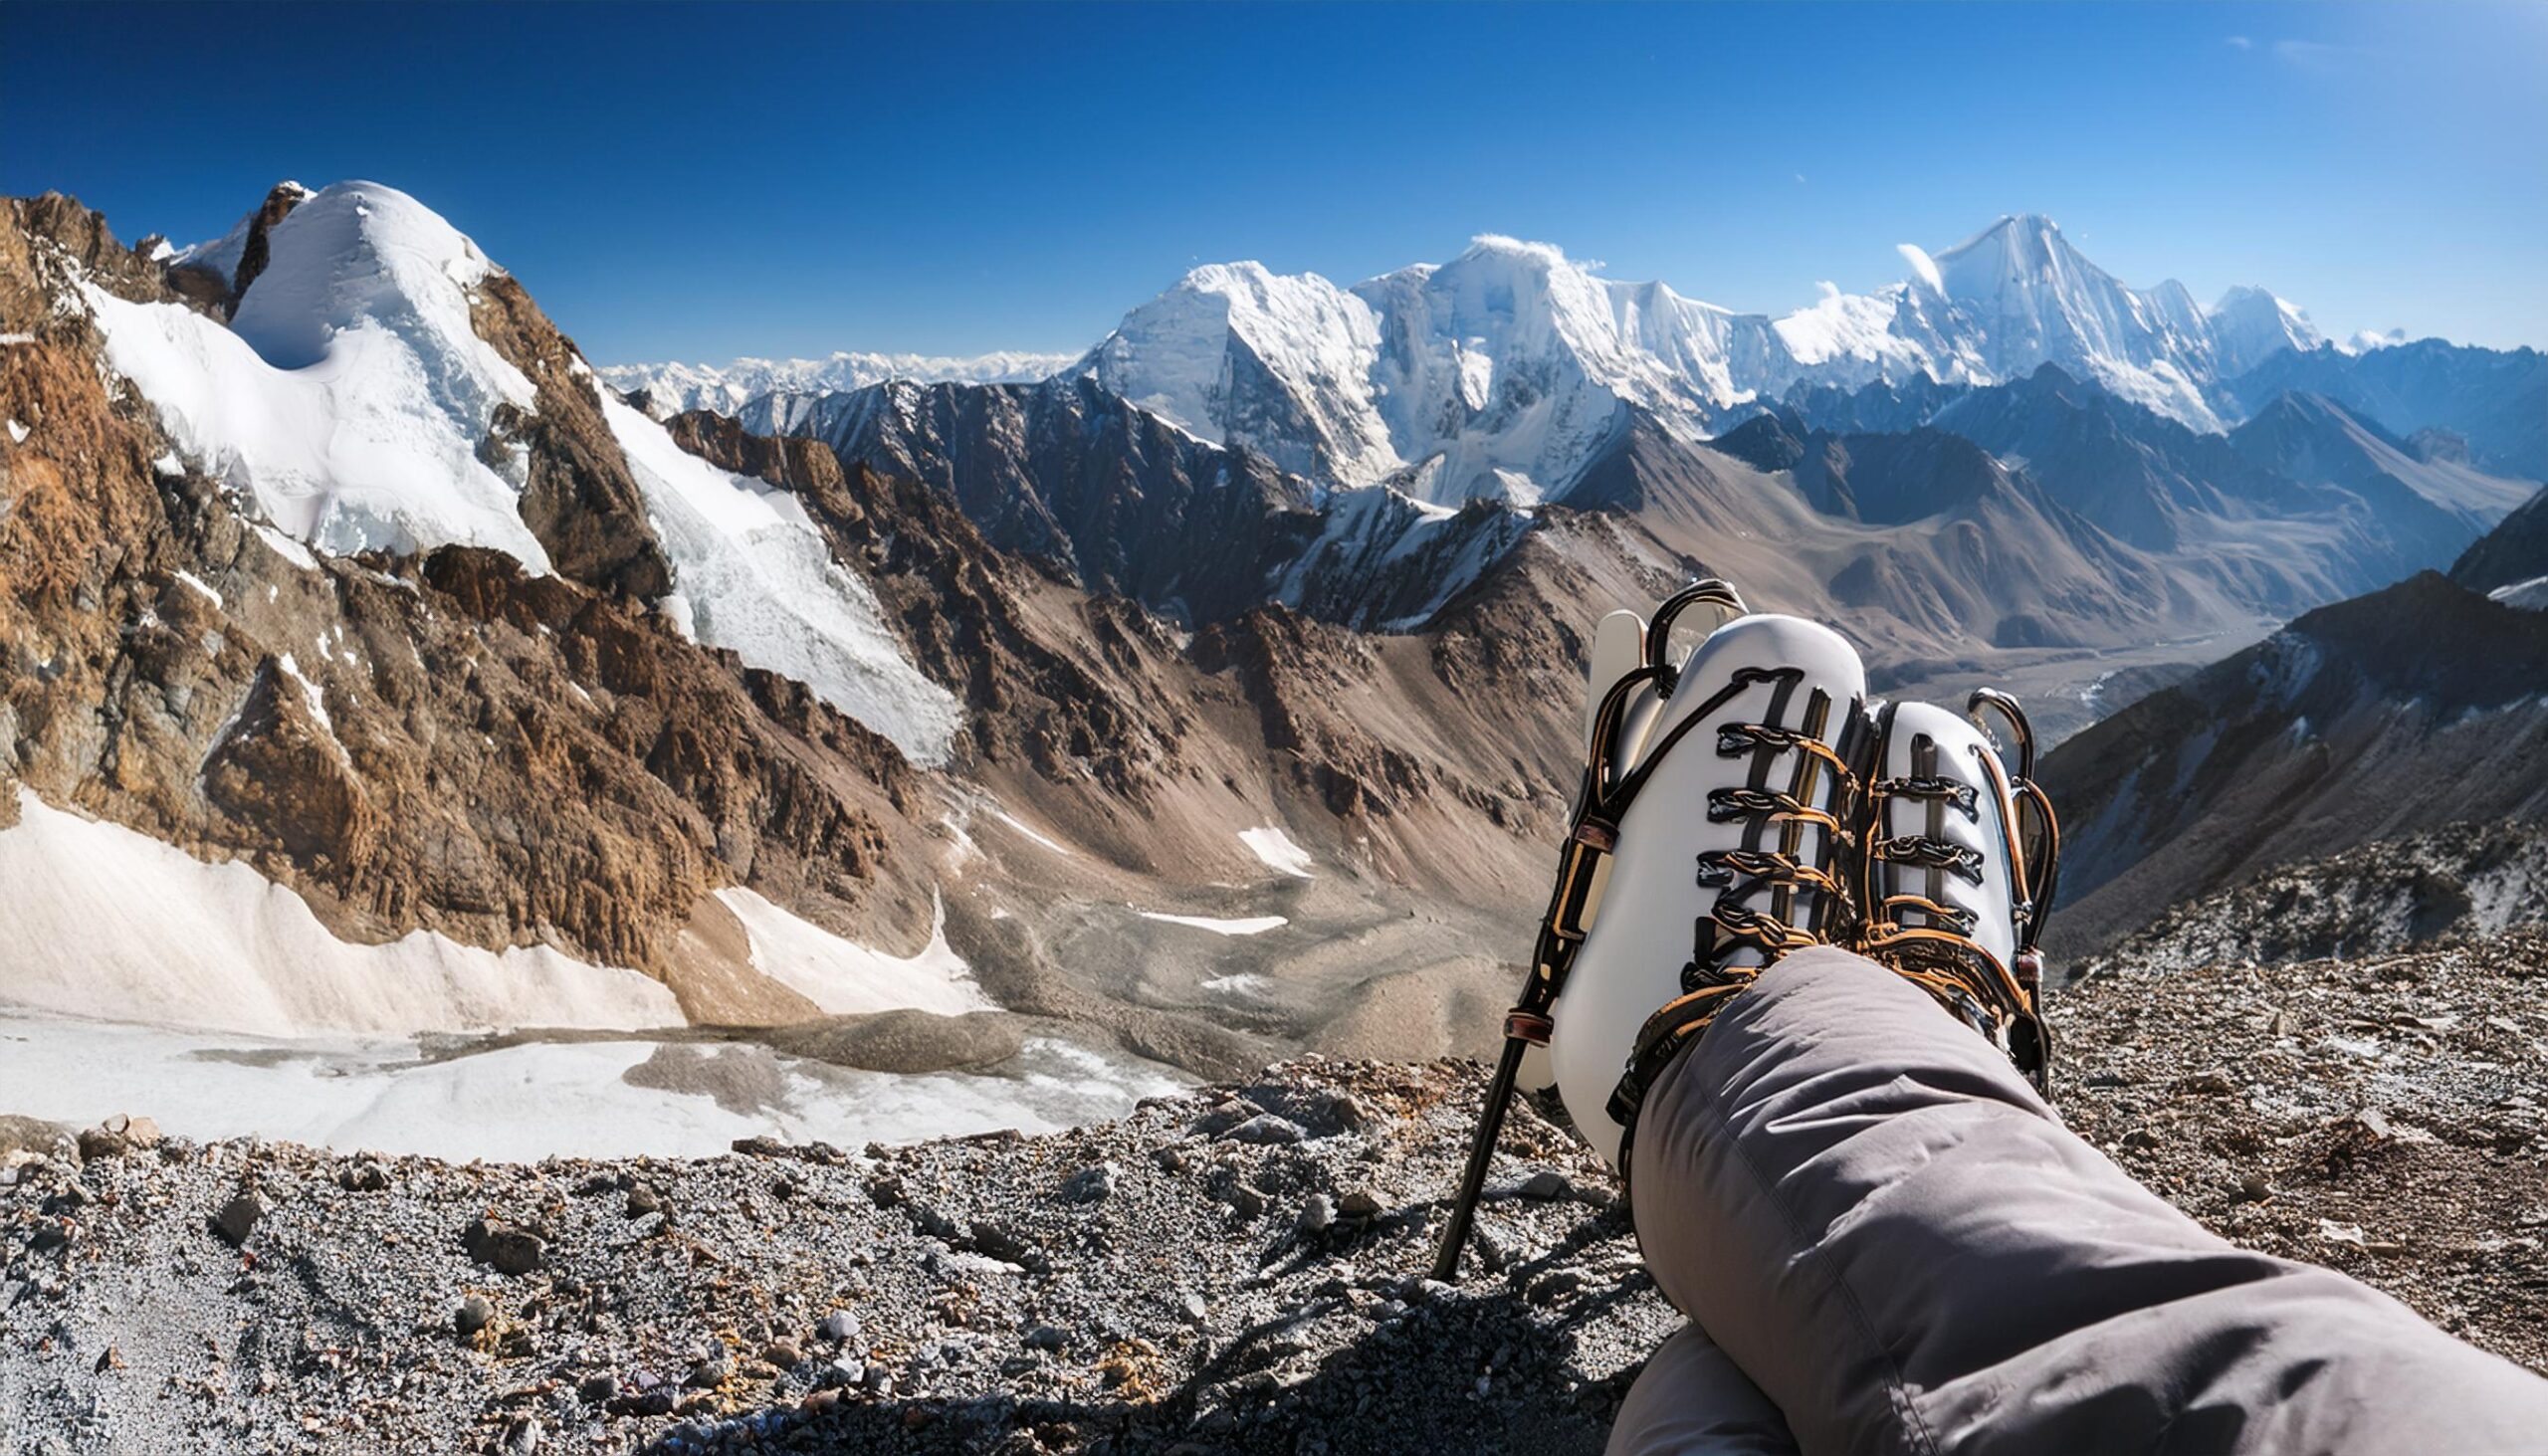
web analytics

Author: Travis Ludlow

  • Best Mountaineering Crampons 2026: 8 Picks Compared

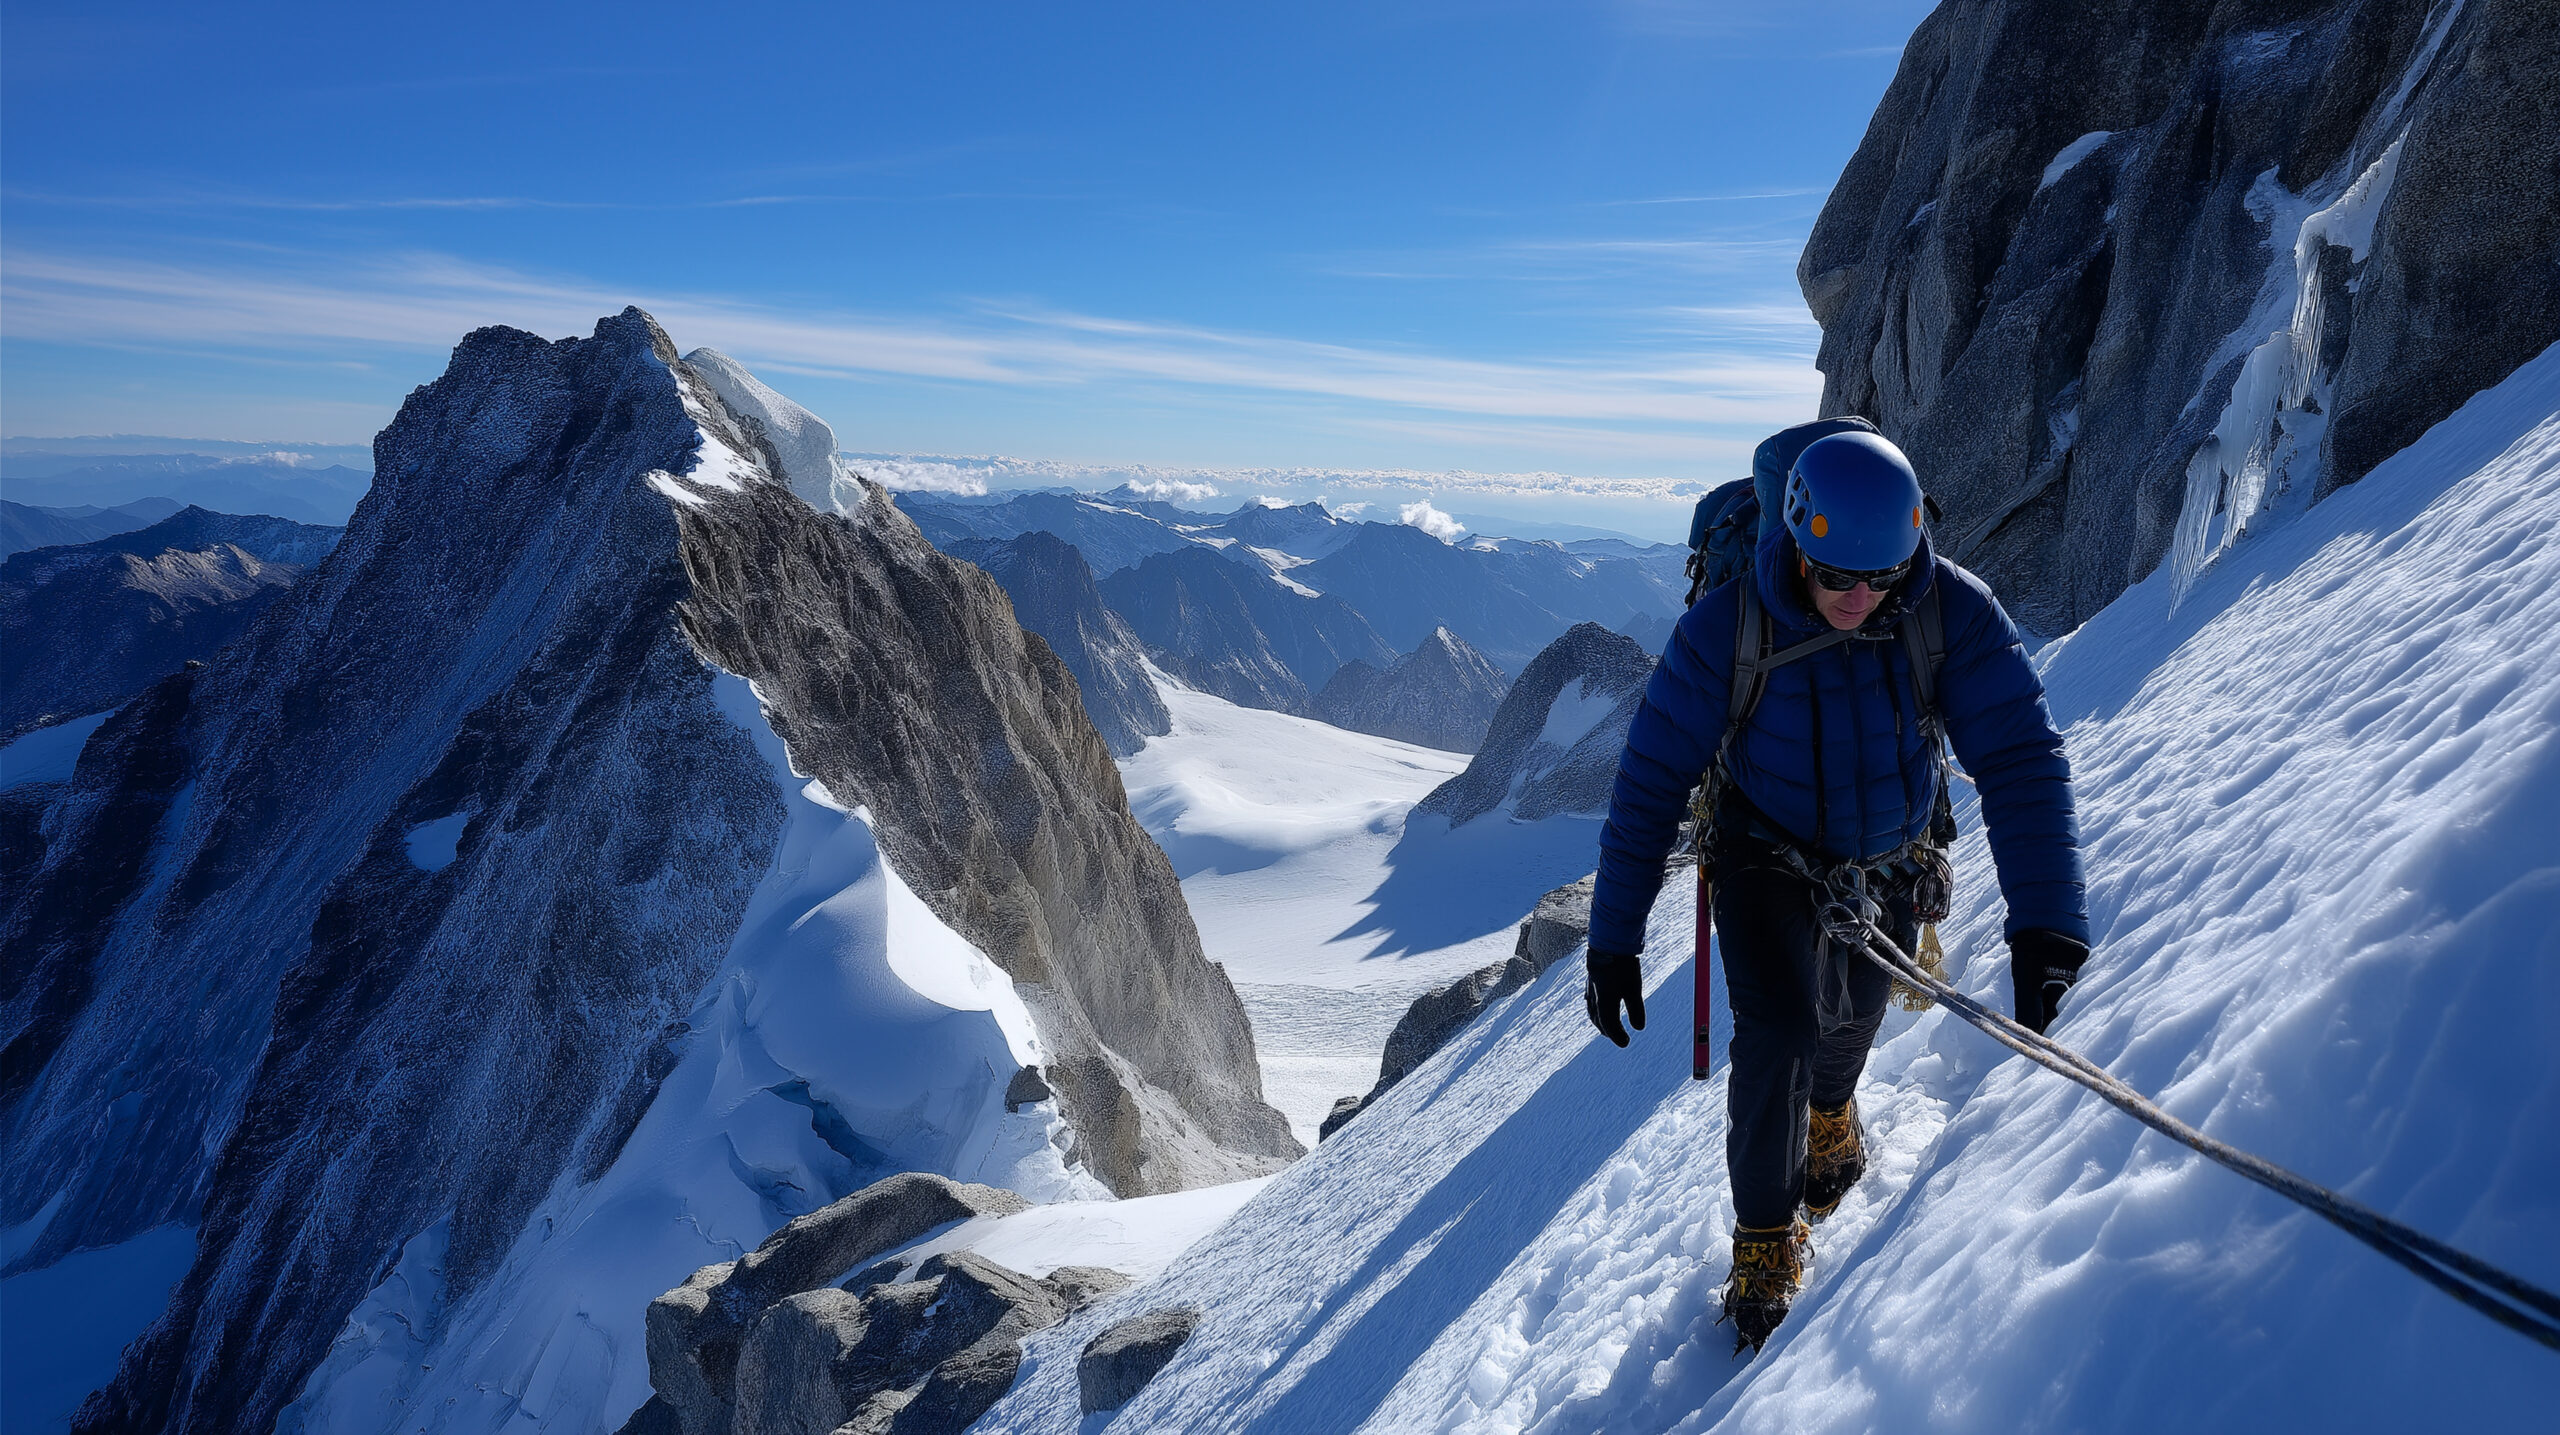
    Mountaineer wearing crampons in steep alpine snow and ice terrain
    Glacier Travel · Alpine Climbing · Ice · Boot Compatibility

    Best Mountaineering Crampons: 8 Picks by Boot & Terrain

    The best crampon is the one that fits your exact boot securely and matches the terrain you will climb. Start with binding compatibility, then choose steel, aluminum or hybrid construction and the front-point configuration that fits the objective.

    8 current crampon families steel · aluminum · hybrid strap · hybrid · automatic bindings glacier to technical ice boot fit before brand
    Affiliate disclosure: Global Summit Guide may earn a commission from qualifying purchases through selected gear partners at no additional cost to you. Commercial relationships do not determine the editorial framework or terrain recommendations.
    Match the terrain first
    Glacier walking10-point steel or light hybrid can be enough when terrain stays moderate.
    Classic mountaineering12-point steel all-round crampons are the center of the category.
    Technical alpineMore aggressive secondary points and secure automatic/hybrid bindings become important.
    Ice & mixedModular vertical or mono-point designs belong on steeper, more technical terrain.
    The direct answer

    For Most General Mountaineers, Start With a Steel All-Round Crampon That Fits the Boot Correctly.

    If your climbing is mostly glaciers, snow couloirs, alpine routes and moderate ice, the practical center of the market is a durable steel crampon with horizontal front points. The Grivel G12 LT, Petzl VASAK and Black Diamond Sabretooth all sit in that broad all-round category.

    Go lighter only when snow travel and pack weight dominate. Move more technical only when sustained ice, mixed climbing or precise front-pointing actually justify it. The binding must match the boot, and the exact pair still needs to be adjusted and tested before the mountain.

    If you are unsure whether you need crampons at all, start with our Microspikes vs Crampons decision guide. If you already own crampons and need technique, use How to Use Crampons.

    Most versatile12-point steel
    Lowest weightAluminum / hybrid
    Technical iceModular vertical points
    First checkExact boot fit
    Current shortlist

    8 Mountaineering Crampons Worth Comparing

    The lineup is organized by use case rather than a single universal ranking. Current Petzl and Black Diamond lines were rechecked in September 2026, and the Grivel lineup was carried forward from the most recent Global Summit Guide manufacturer-verification pass.

    All-round classic mountaineering

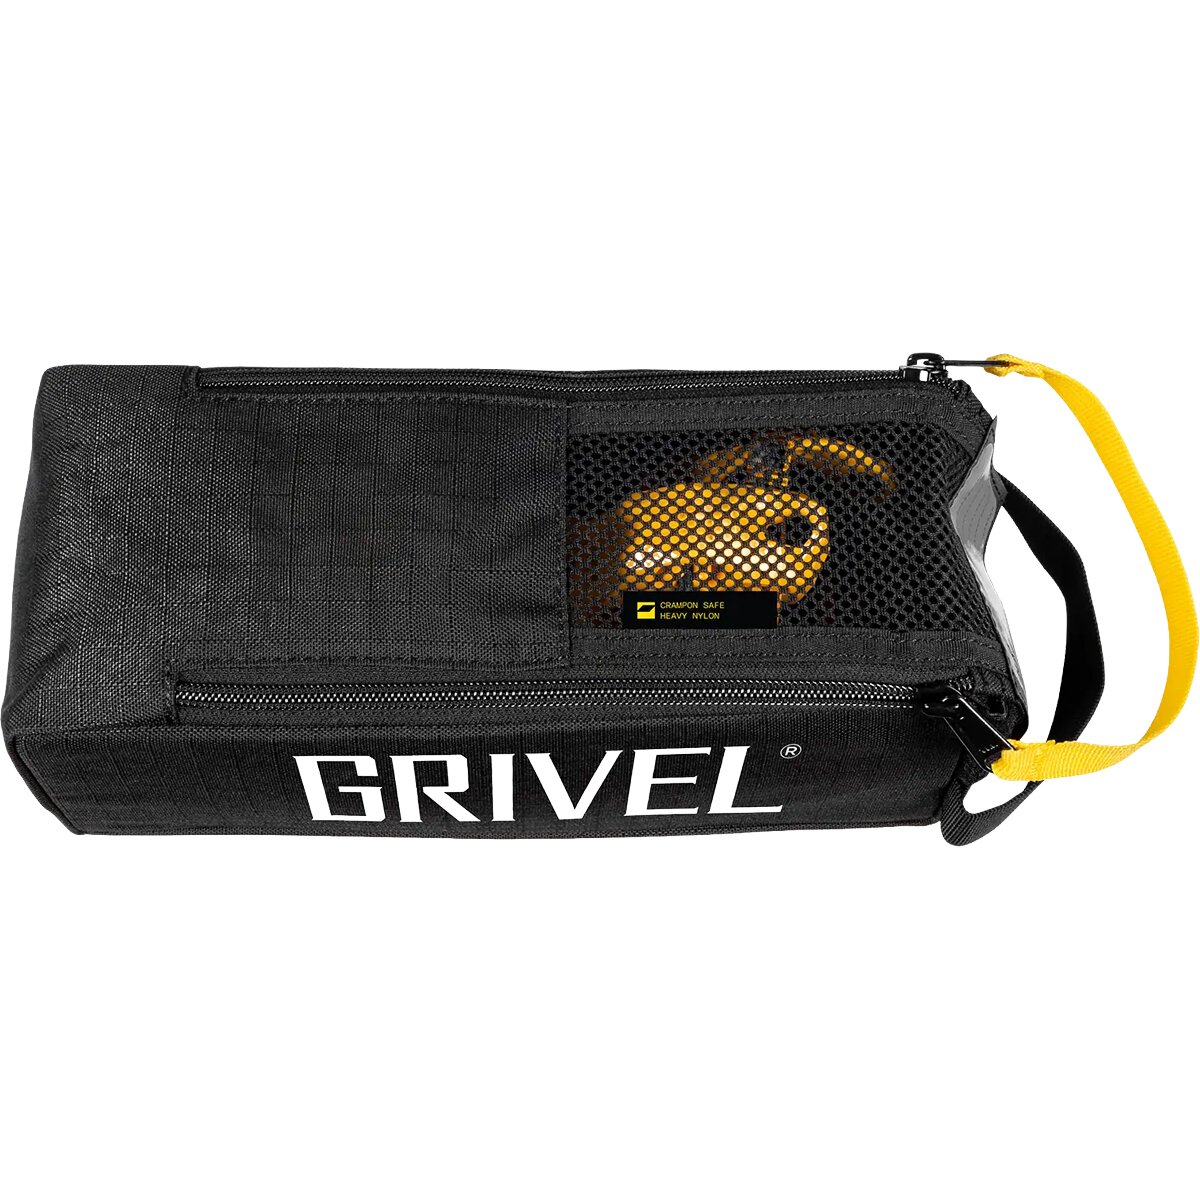
    Grivel G12 LT

    A classic 12-point steel platform for general alpine climbing, glacier routes and snow where durability matters.

    • Best match: general mountaineering
    • Why compare: proven all-round geometry
    • Trade-off: more weight than light hybrid systems
    Classic 12-point alternative

    Petzl VASAK

    Petzl’s current classic-mountaineering model uses 12 points and wide horizontal front points for glaciers, snow couloirs and general alpine routes.

    • Best match: classic mountaineering
    • Binding options: welted or non-welted footwear
    • Trade-off: not designed as a technical ice specialist
    Technical all-rounder

    Black Diamond Sabretooth

    A stainless-steel all-around platform with horizontal front points and technical secondary points for a wide spectrum of frozen terrain.

    • Best match: alpine routes that mix walking and steeper sections
    • Current Pro and Clip binding variants
    • Trade-off: heavier than aluminum approaches
    Glacier / easy alpine

    Grivel G10 LT

    A lighter 10-point steel design aimed at glacier walking and classic mountaineering where full technical geometry is unnecessary.

    • Best match: glacier travel
    • Why compare: simpler 10-point steel format
    • Trade-off: less technical bite than 12-point models
    Ultralight snow travel

    Petzl LEOPARD

    An ultralight crampon family aimed at ski touring and snow approaches where packability and weight matter more than rock durability.

    • Best match: snow travel and ski objectives
    • Why compare: very low carried weight
    • Trade-off: aluminum wears quickly on rock
    Hybrid approach specialist

    Petzl IRVIS HYBRID

    A steel front with aluminum heel and flexible linking system that balances bite at the front with reduced weight and packed volume.

    • Best match: ski touring and glacier approaches
    • 10-point configuration
    • Trade-off: aluminum heel is not the choice for repeated rocky abuse
    Technical ice & mixed

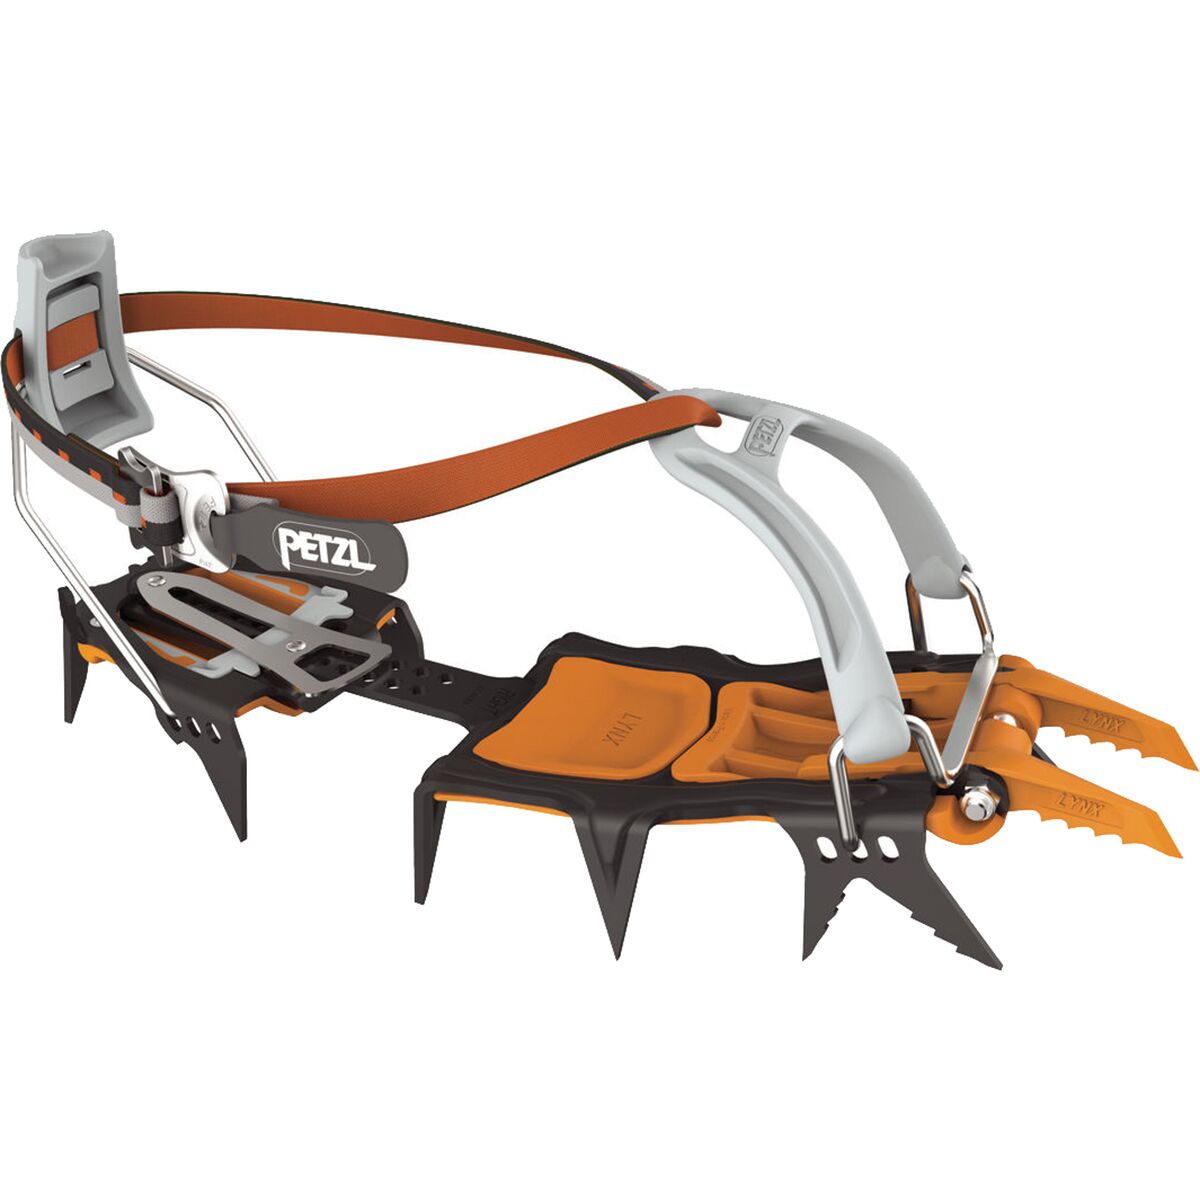
    Petzl LYNX

    A modular crampon built for technical mountaineering, ice and mixed climbing, with front-point options that can be configured for the route.

    • Best match: steep ice and mixed terrain
    • Why compare: modular front-point system
    • Trade-off: unnecessary complexity for basic glacier travel
    Light mono-point technical

    Grivel G20+ LT

    A lightweight mono-point direction for steep ice and mixed climbing where front-point precision matters more than flat-foot snow travel.

    • Best match: steep technical terrain
    • Why compare: focused mono-point geometry
    • Trade-off: specialized rather than all-purpose

    Editorial note: Global Summit Guide does not claim hands-on testing of every model listed. The page combines current manufacturer specifications, published technical use, compatibility requirements and first-hand crampon experience on glaciated climbs to organize the market by terrain.

    ModelConstructionPoint styleBest terrainBinding directionMain trade-off
    Grivel G12 LTSteel12-point horizontalGeneral mountaineeringMultiple versionsWeight
    Petzl VASAKSteel12-point horizontalClassic mountaineeringFlexible or lever-lock systemsNot a pure ice specialist
    BD SabretoothStainless steelHorizontal + technical secondaryAlpine / moderate icePro or ClipWeight
    Grivel G10 LTSteel10-point horizontalGlacier walkingMultiple versionsLess technical
    Petzl LEOPARDAluminumLight snow-travel geometrySki touring / snow approachesFlexible linkingRock wear
    Petzl IRVIS HYBRIDSteel front / aluminum rear10-pointGlacier approachesHeel welt orientedRear durability on rock
    Petzl LYNXSteelModular verticalTechnical ice / mixedAutomatic-orientedOverkill for easy snow
    Grivel G20+ LTTechnical steel platformMono-pointSteep ice / mixedTechnical bootsSpecialized use
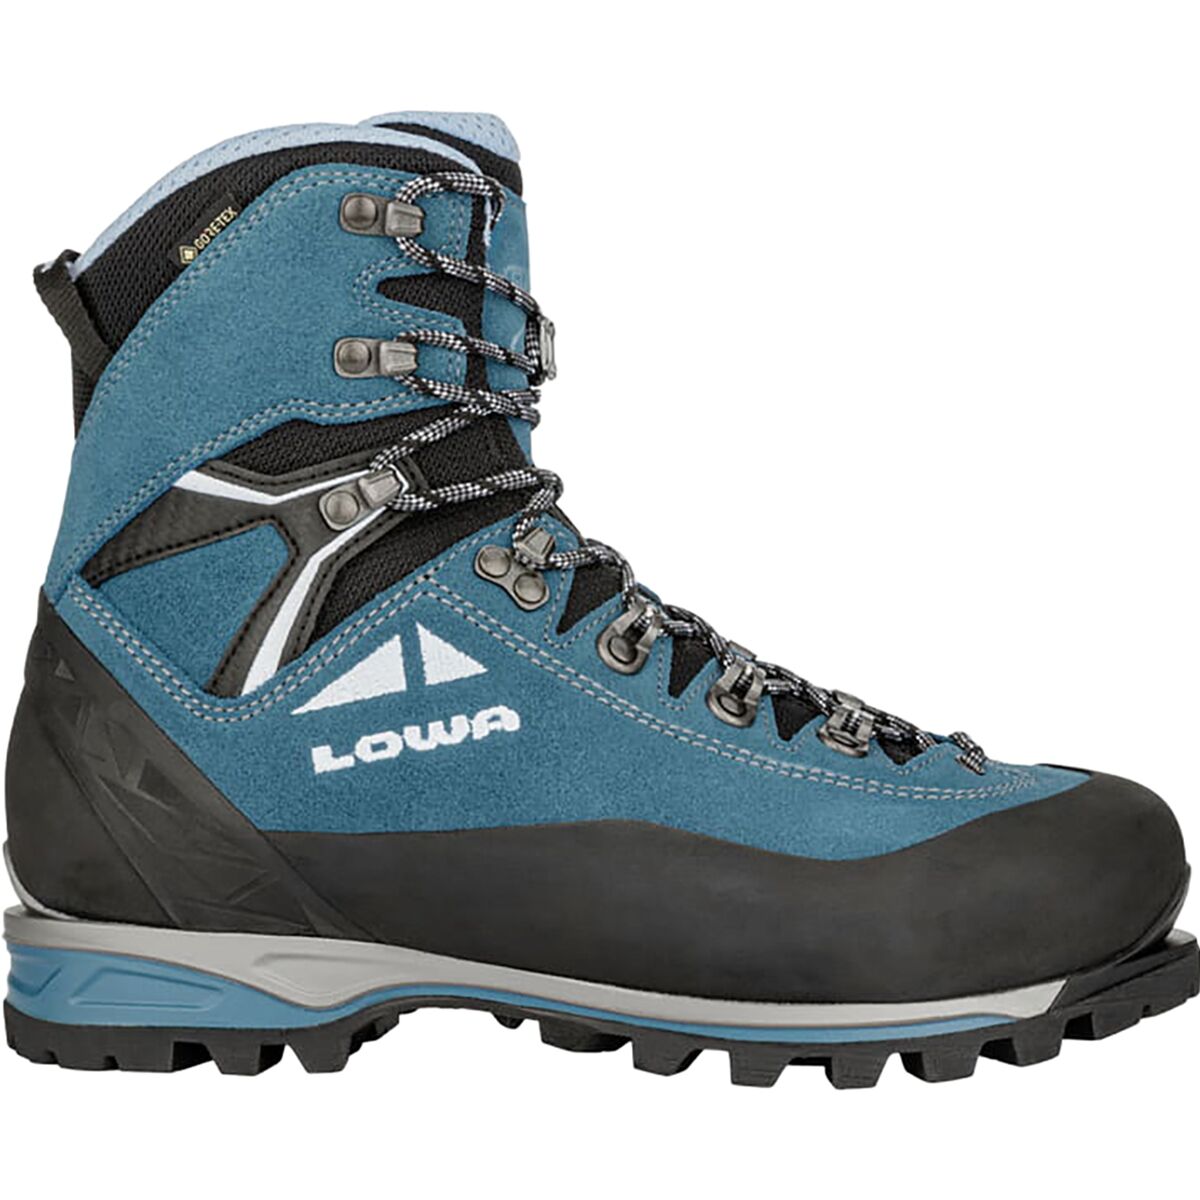
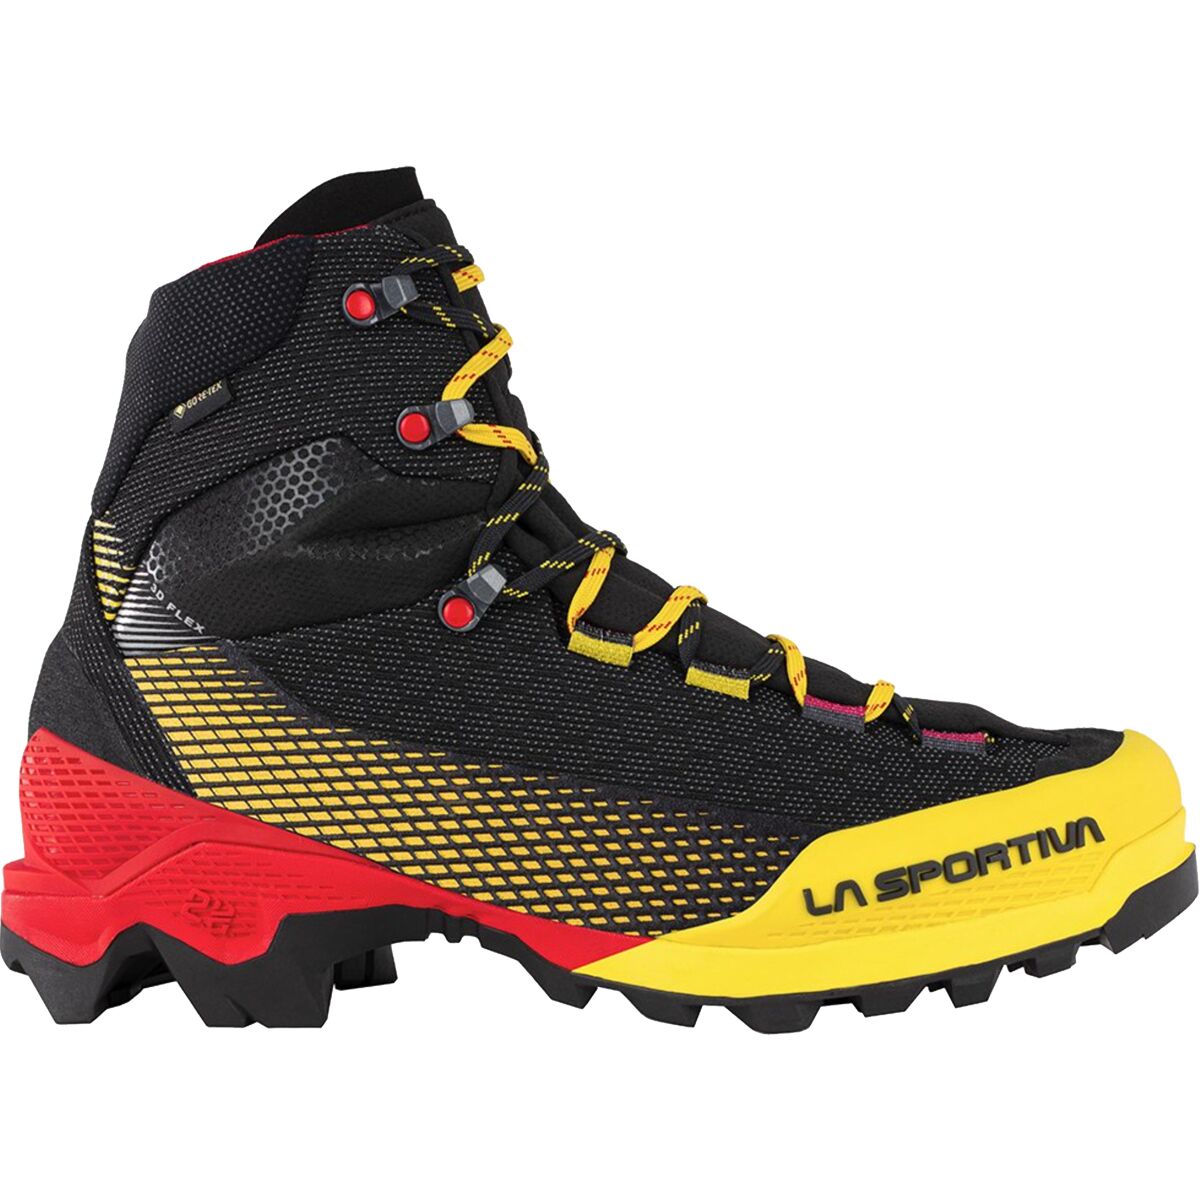
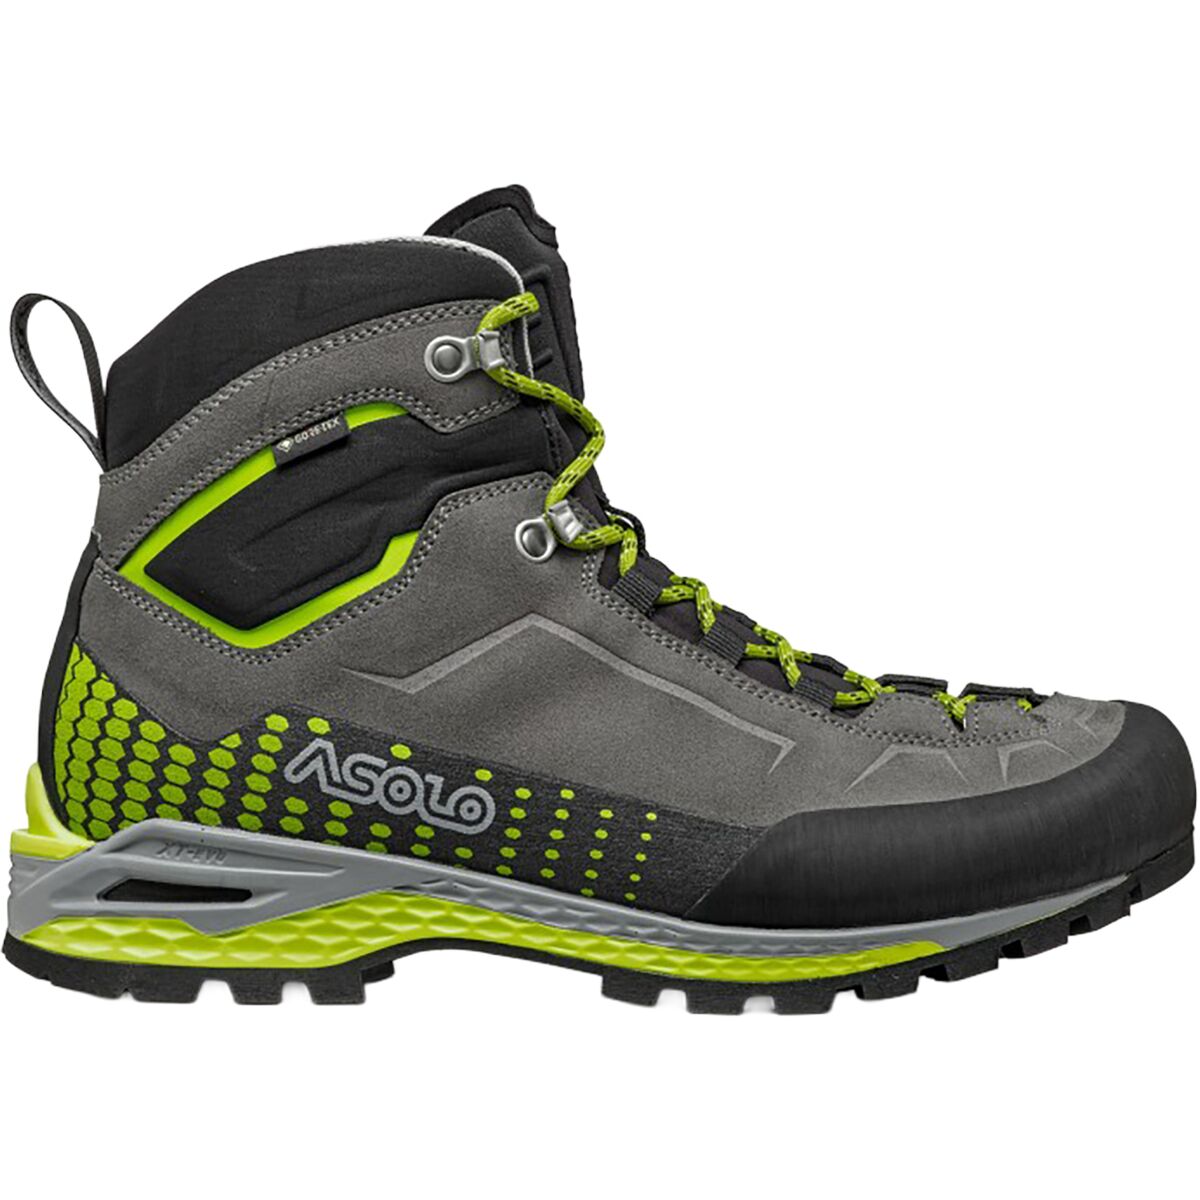
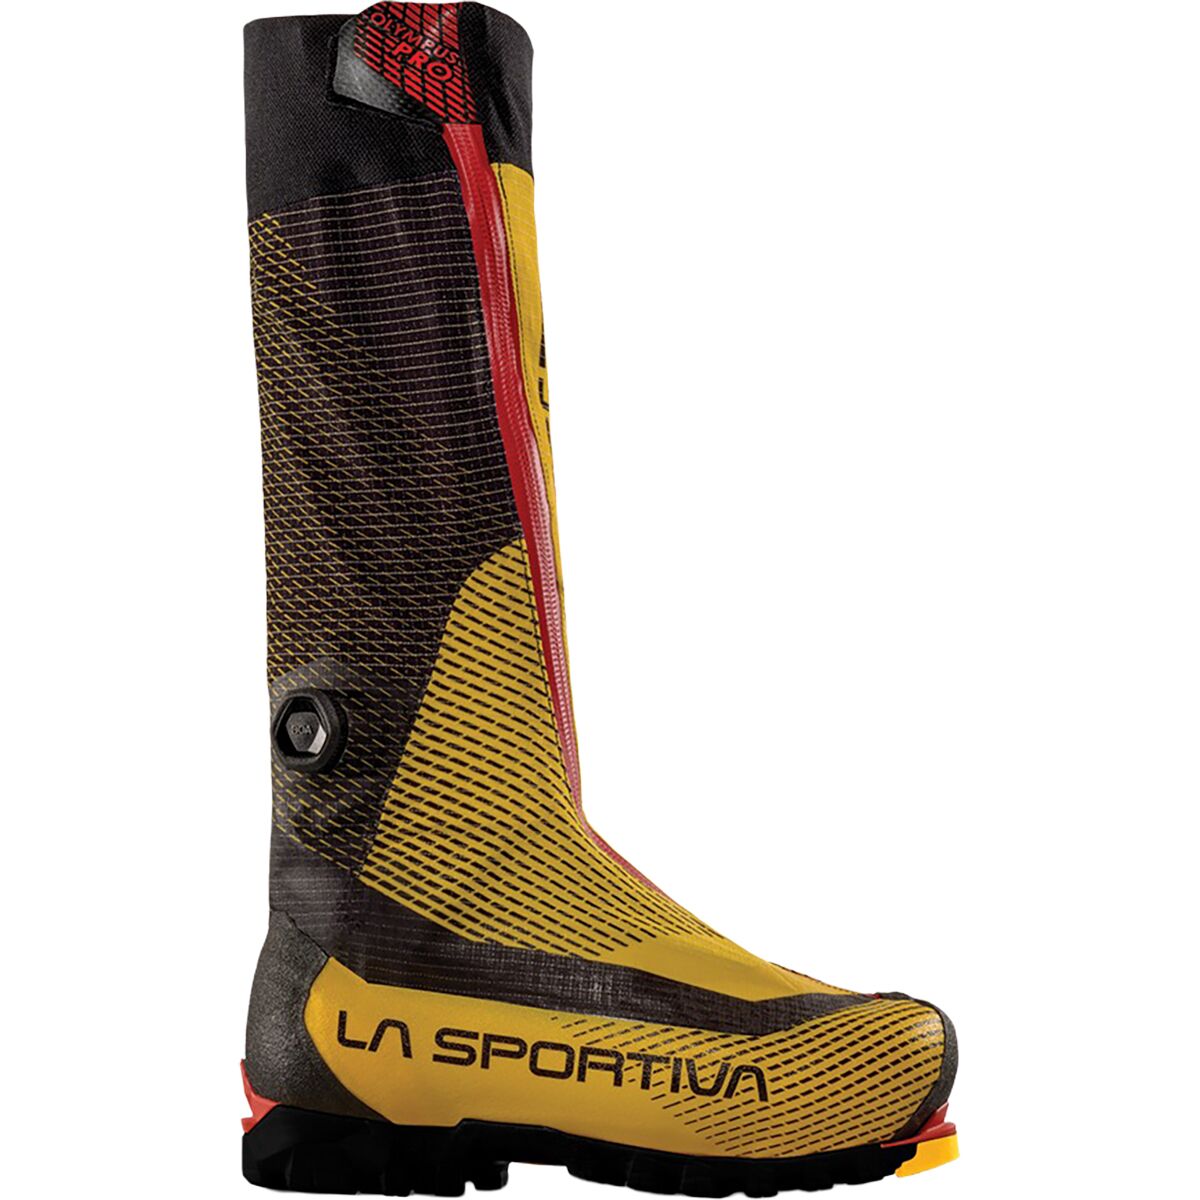
    Mountaineering boots and crampons being matched for alpine climbing
    Compatibility first

    The Best Crampon Is Useless if It Does Not Fit the Boot.

    Start with the exact boot. Check sole stiffness, heel welt, toe welt and the manufacturer’s approved binding type. Then adjust the crampon to each boot individually.

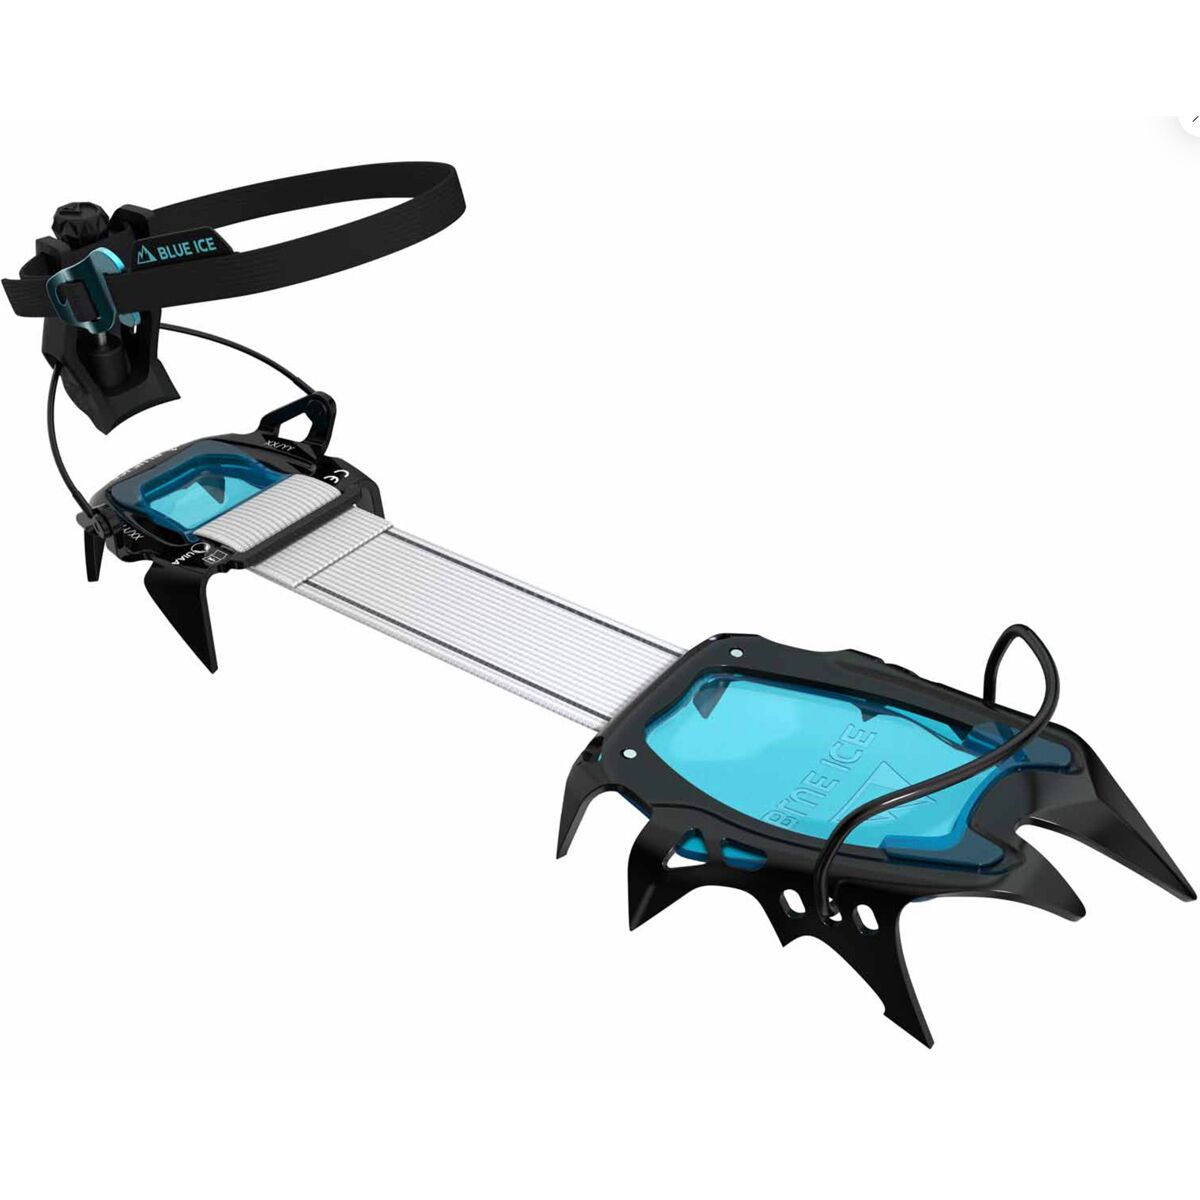
    Strap-on systems use flexible front and rear baskets and can fit a broader range of appropriate mountain footwear. Hybrid systems use a rear lever and flexible front basket. Automatic systems use a heel lever plus metal toe bail and require the correct technical boot geometry.

    B1/B2/B3 and C1/C2/C3 are useful retail shorthand, but they are not official UIAA boot/crampon certification systems. UIAA 153 and EN 893 are crampon safety standards.

    Safety rule: never assume the label alone guarantees compatibility. Fit the exact crampon to the exact boot, tension the binding correctly and test for vertical, lateral and lengthwise movement before relying on the system.
    Material choice

    Steel vs Aluminum vs Hybrid Crampons

    Material is mostly a durability-versus-weight decision. Choose based on how much rock, hard ice and repeated technical use the crampon will actually see.

    Steel

    Default for serious mountaineering

    Durable on ice, firm snow and incidental rock. The sensible choice when one pair must handle repeated alpine use.

    Aluminum

    Save weight on snow-focused objectives

    Excellent when carried weight matters and contact is mostly snow. Rock can wear points rapidly.

    Hybrid

    Steel bite where it matters most

    Steel front sections keep durable traction while aluminum rear sections and flexible links cut weight and pack volume.
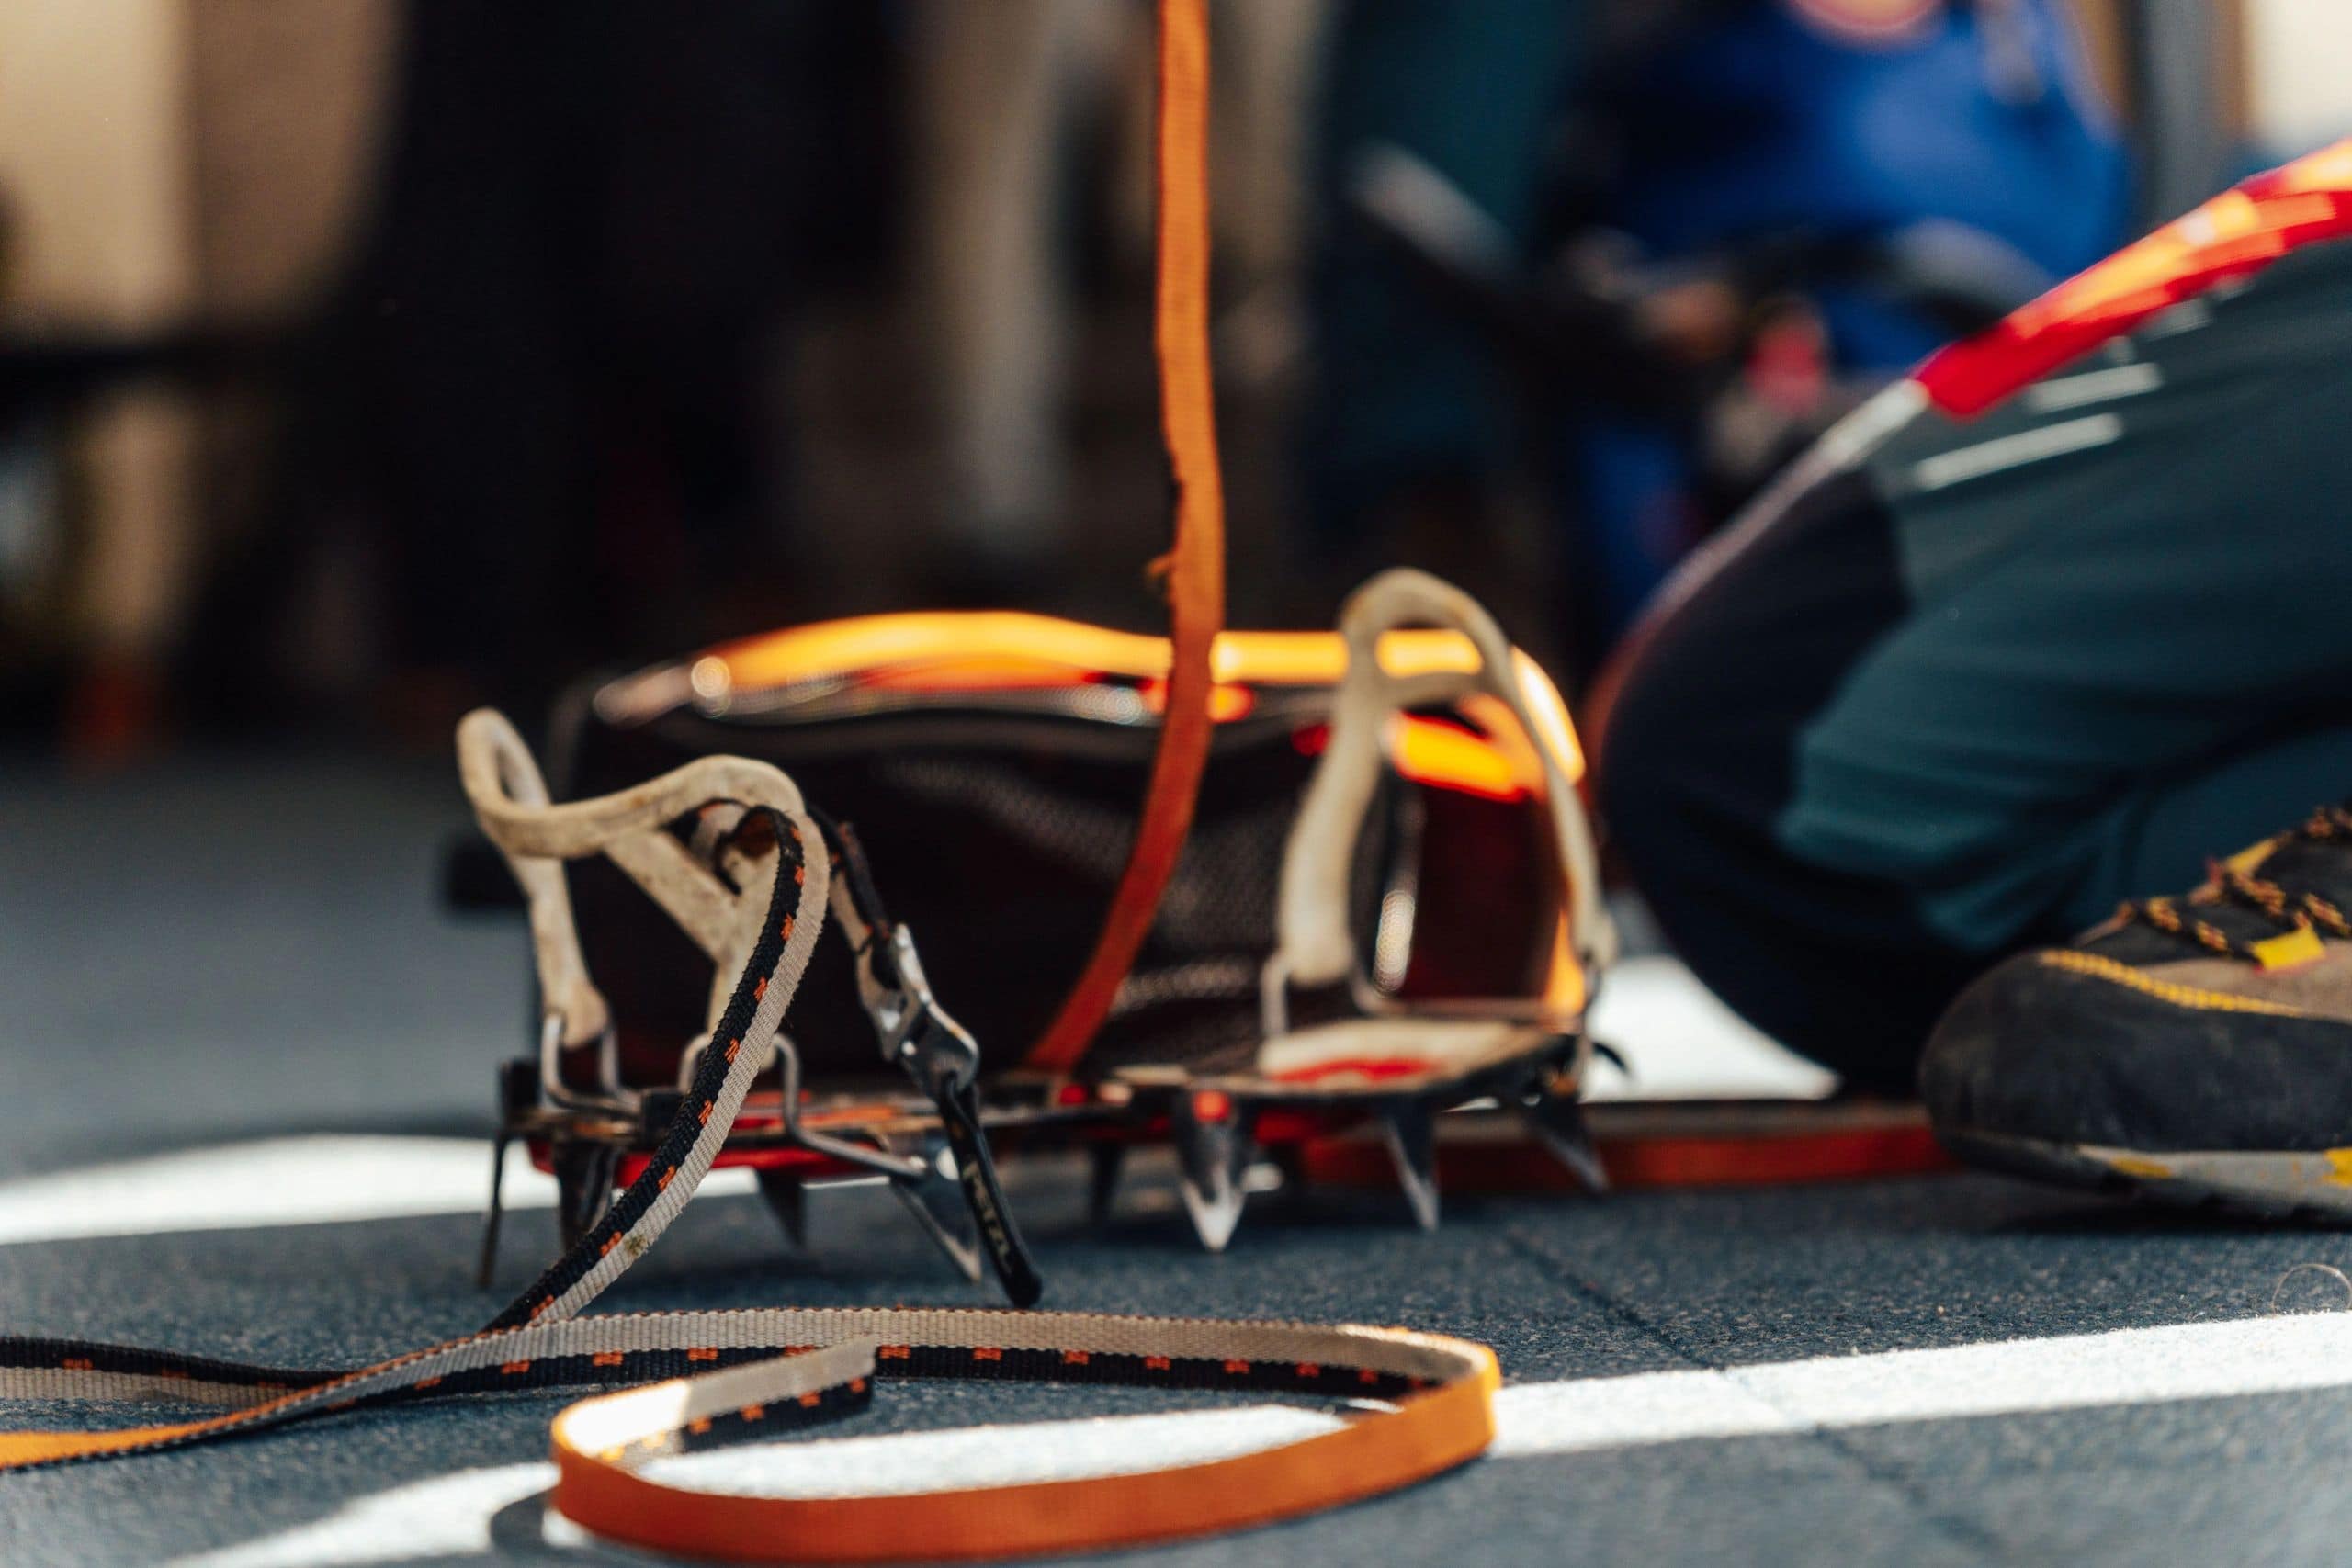
    Crampons used on hard alpine snow where material and point geometry matter
    Repeated rock contact is the fastest way to expose the limits of an ultralight aluminum system.
    10 vs 12 points

    Point Count Changes the Platform, but Terrain Matters More Than the Number.

    Ten-point crampons can be excellent for glacier travel, firm snow and ski mountaineering. They are lighter, simpler and often more compact.

    Twelve-point crampons add secondary points that create a broader platform and improve bite as terrain steepens. This is why the 12-point steel format dominates classic mountaineering.

    Technical ice crampons may reach 14 points, but the important change is usually the shape and orientation of the front and secondary points, not the headline number alone.
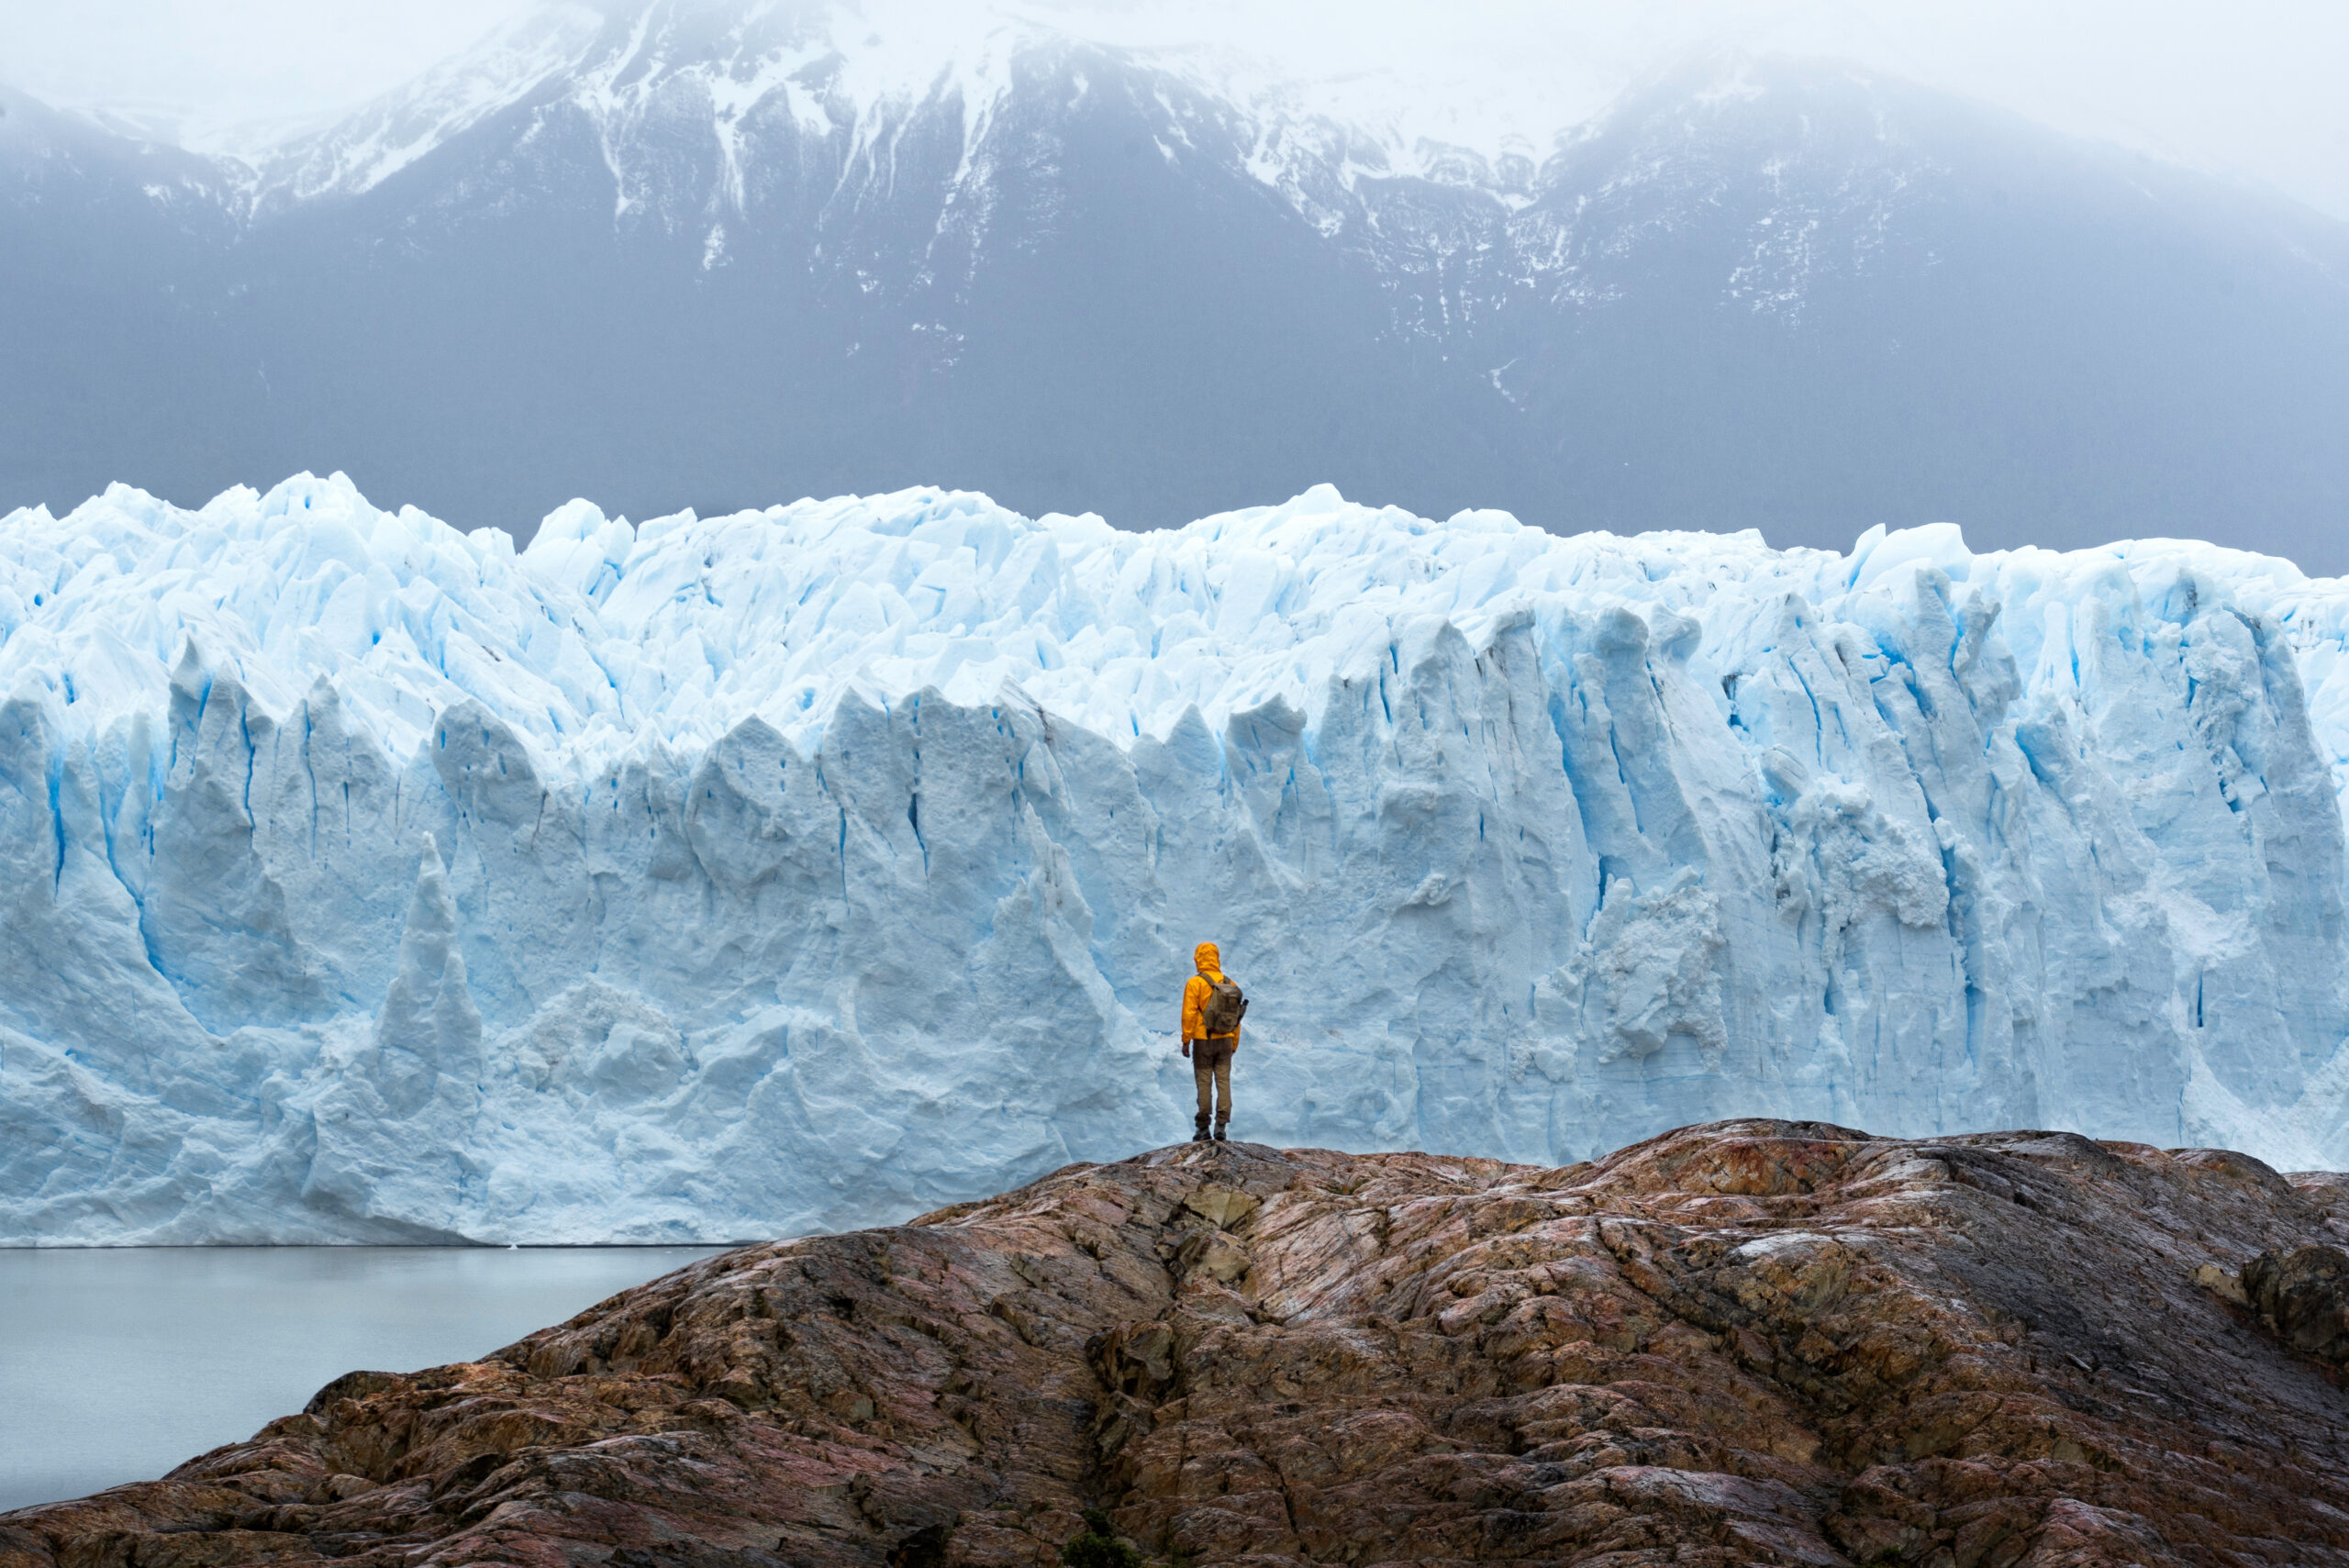
    Mountaineer moving across steep snow with crampons
    Front-point geometry

    Horizontal Front Points for Snow. Vertical or Mono Points for Technical Ice.

    The front-point design tells you more about the intended terrain than the marketing category.

    Horizontal

    Classic mountaineering

    Wide horizontal points provide a stable platform in snow and firm alpine terrain and work well for flat-foot technique.

    Vertical dual

    Steeper ice

    Narrower vertically oriented front points penetrate hard ice with greater precision and are common on technical ice crampons.

    Mono-point

    Maximum precision

    A single front point gives precise placements on steep ice and mixed terrain but is a specialist choice rather than a general glacier tool.

    Choose by objective

    Which Crampon Category Fits Your Terrain?

    The correct category should be obvious once you define the steepest recurring terrain, boot system and how much rock the crampon will contact.

    TerrainConstructionPoint directionBinding priorityModels to compare
    Low-angle glacier travelSteel or light hybrid10-point horizontalSecure fit to walking-oriented bootGrivel G10 LT · Petzl IRVIS / IRVIS HYBRID
    Classic alpine routesSteel12-point horizontalHybrid or automatic as boot allowsGrivel G12 LT · Petzl VASAK
    Mixed alpine climbingSteelHorizontal + aggressive secondarySecure technical fitBlack Diamond Sabretooth
    Ski mountaineeringAluminum / hybridLight 10-pointCompact, boot-specificPetzl LEOPARD · IRVIS HYBRID
    Technical iceSteelVertical modular pointsAutomatic technical bootPetzl LYNX
    Steep mixed / mono-pointTechnical steelMono-pointRigid technical bootGrivel G20+ LT
    Climber using crampons on a steep snow and ice route
    Choose for the steepest terrain you will repeatedly climb, not the most technical route you may try years from now.
    Current retail inventory

    Current Mountaineering Crampons Through Backcountry

    The live module comes from the Global Summit Guide gear catalog. Your gear plan currently assigns the crampons category to this page, so it can rotate current inventory instead of hard-coding retail prices.

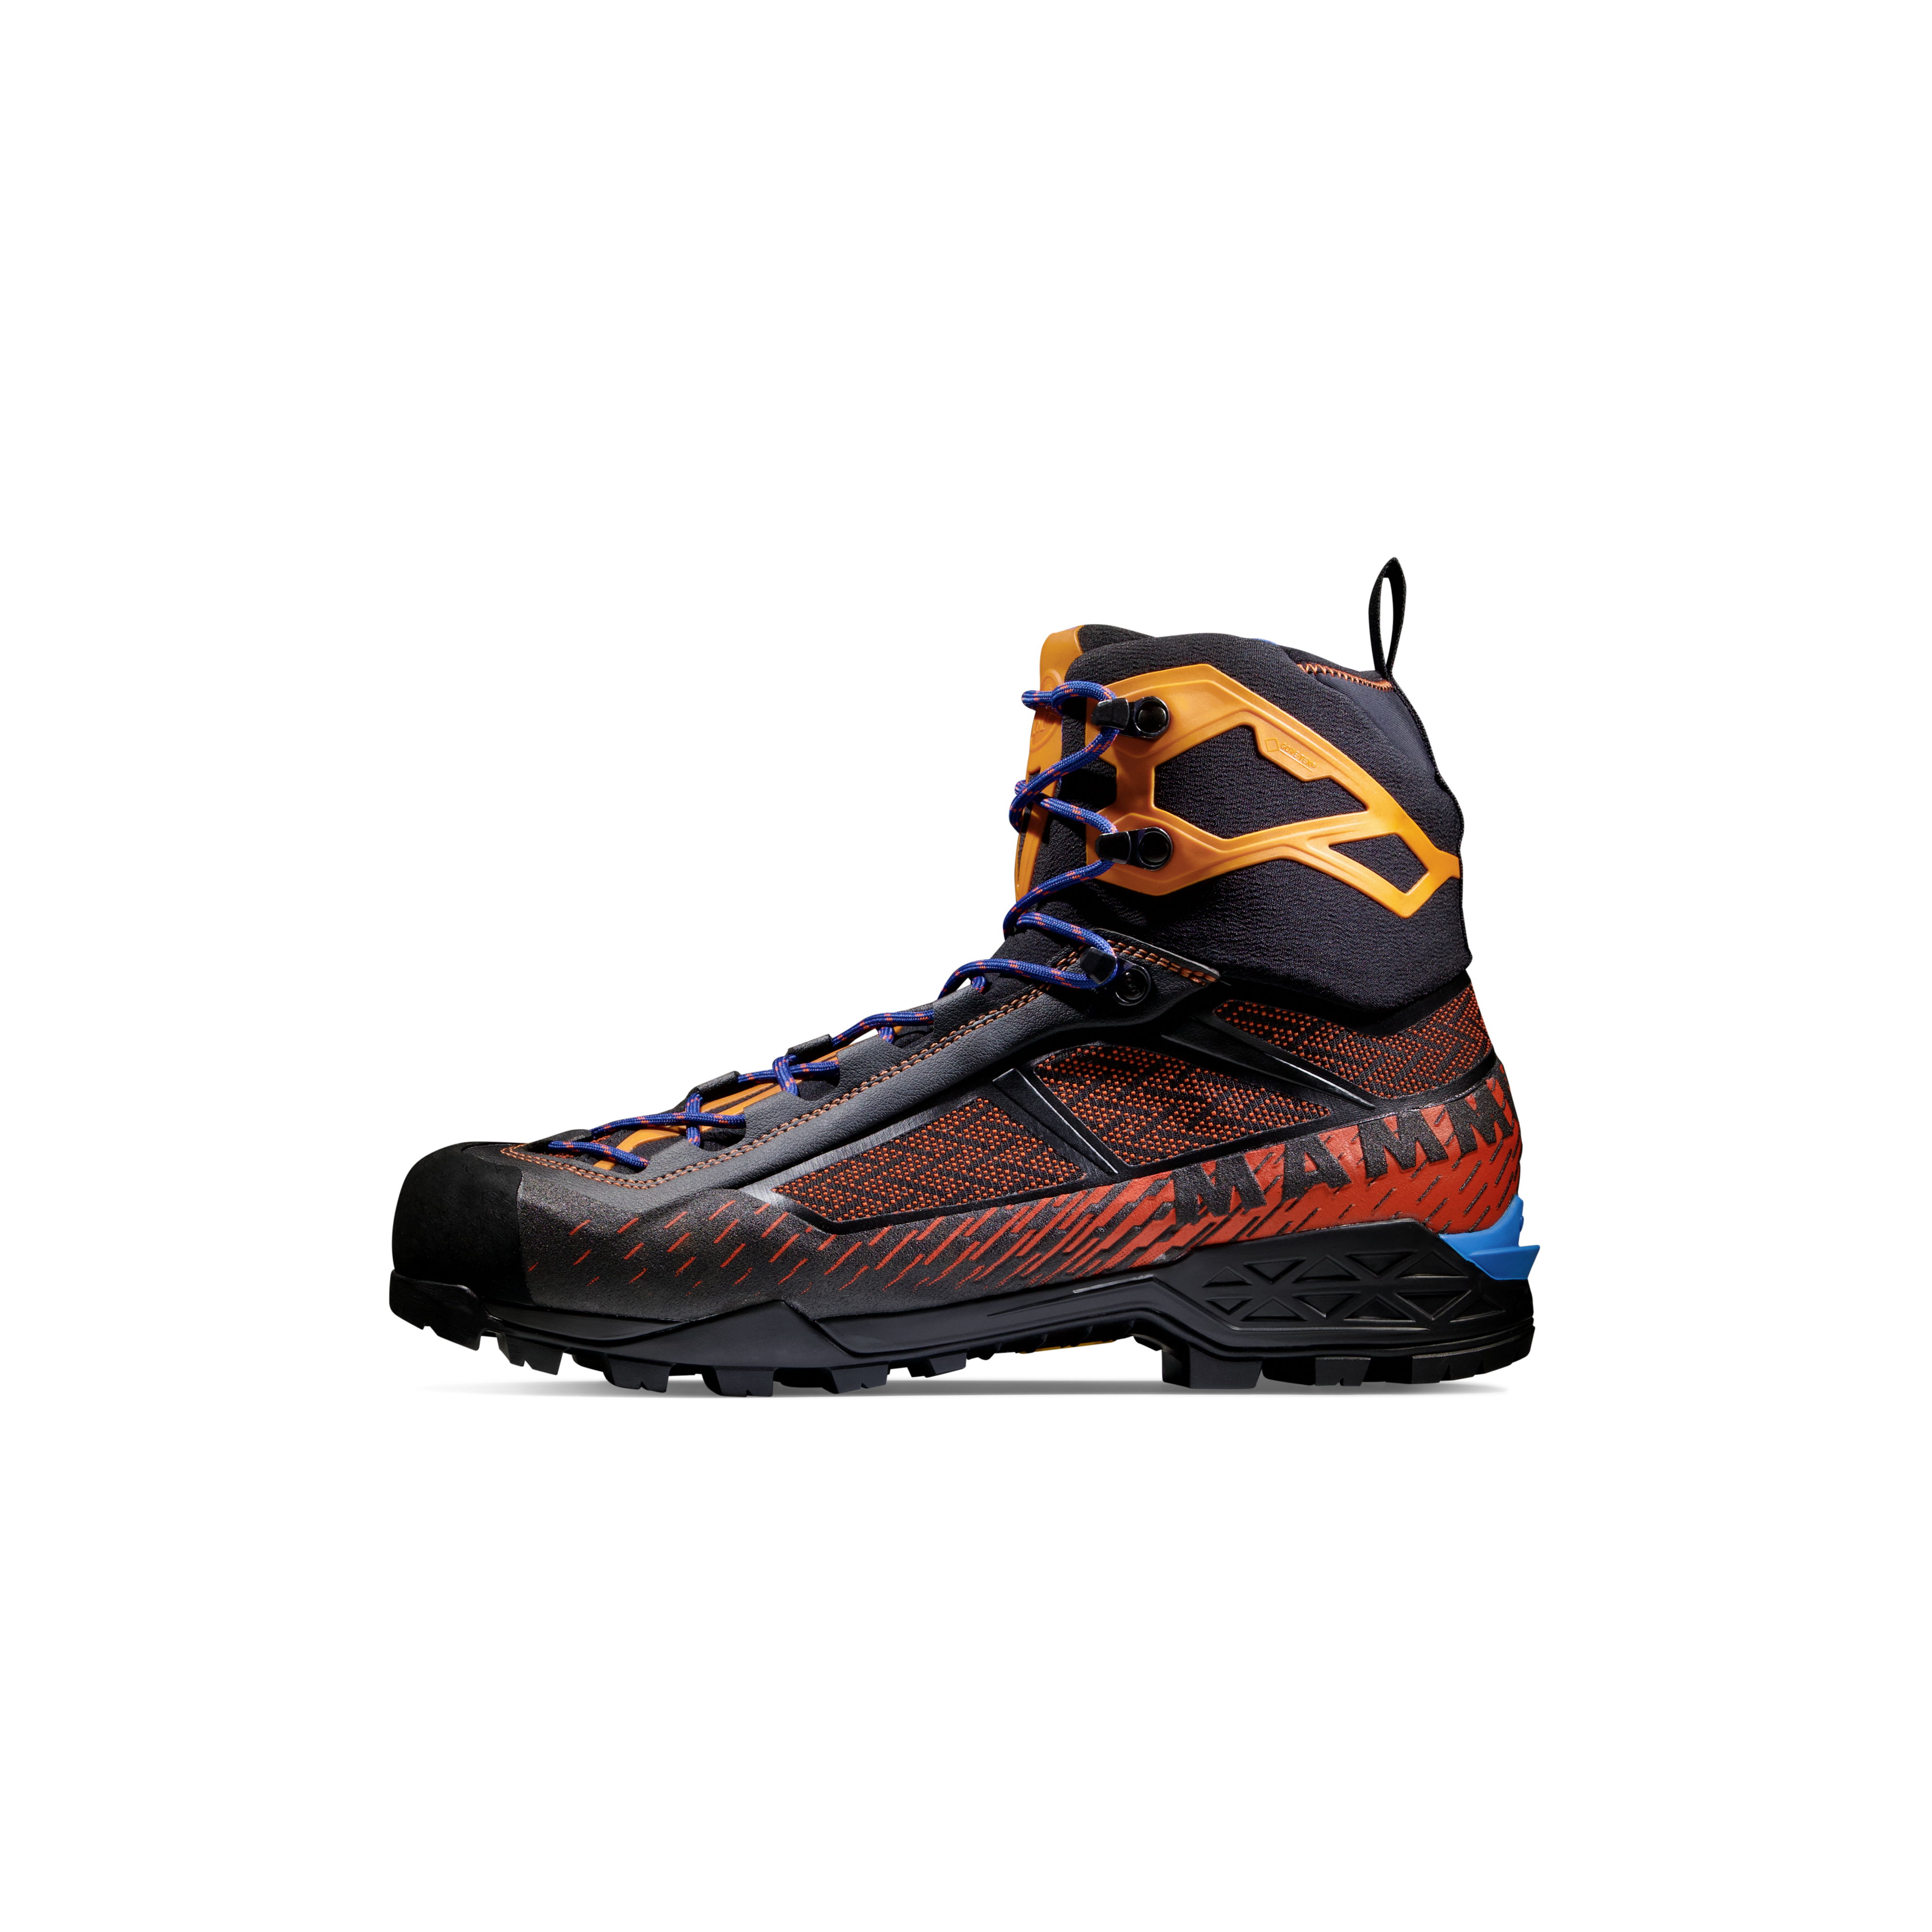
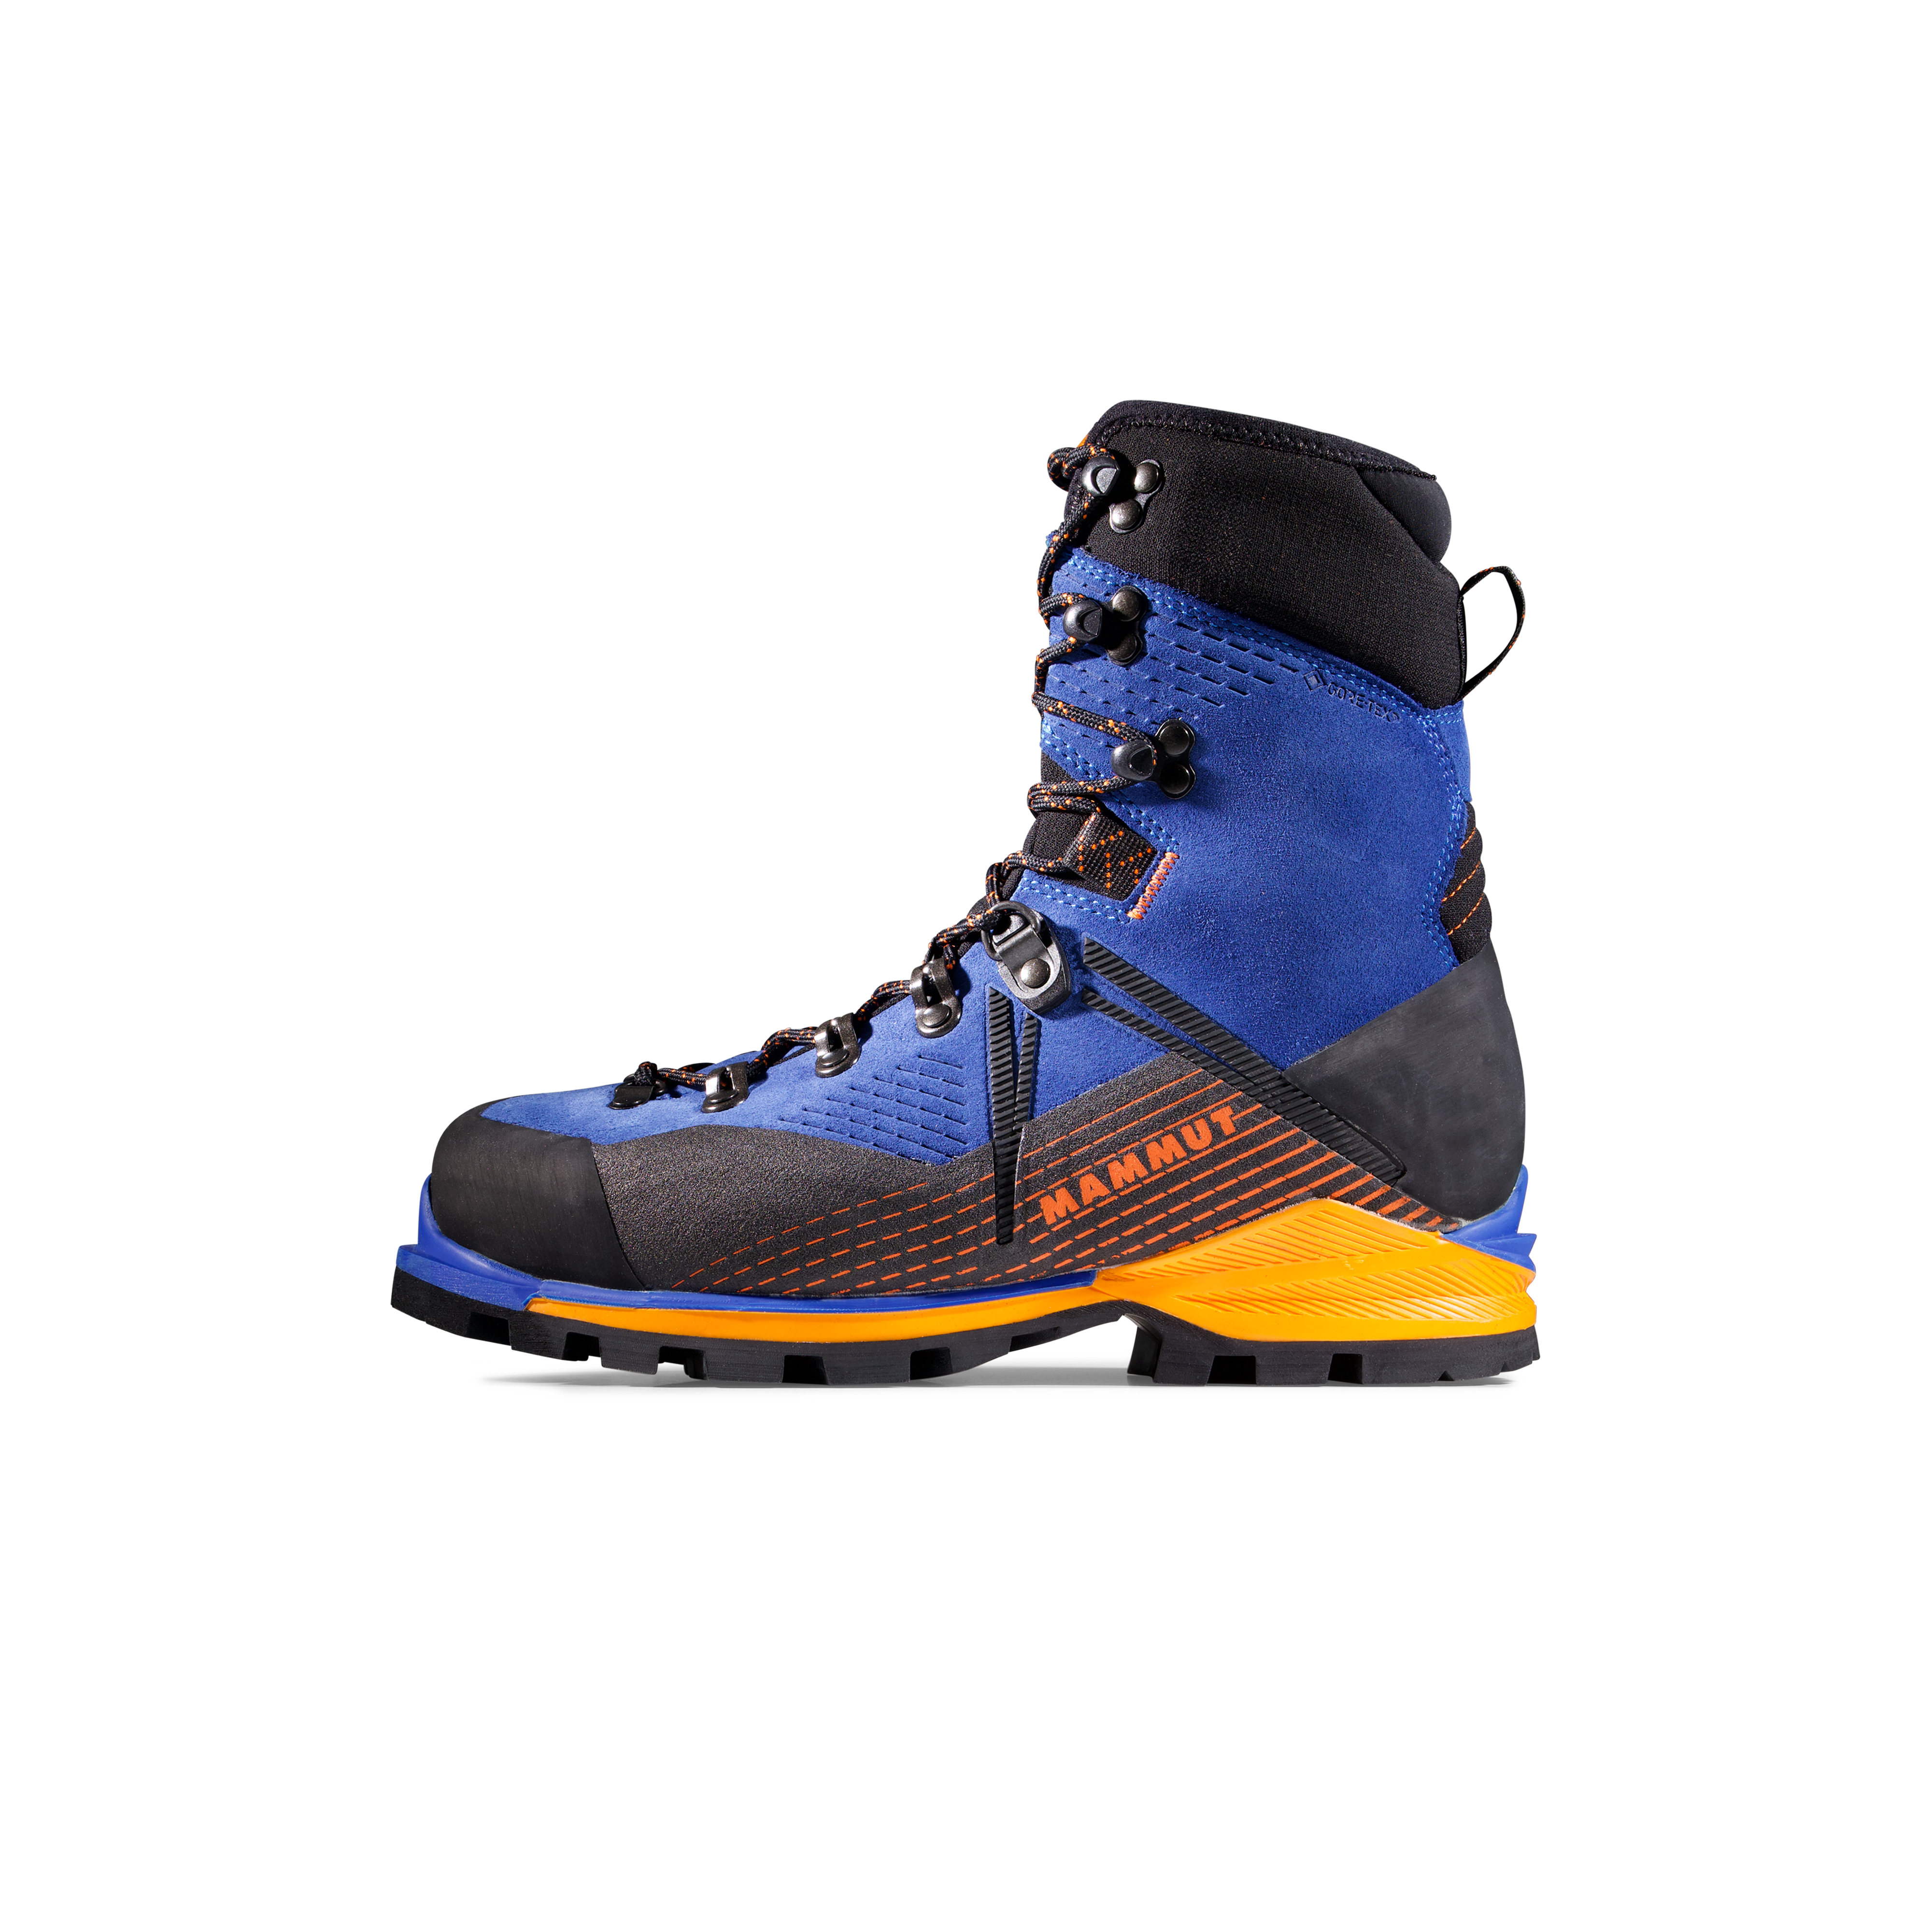
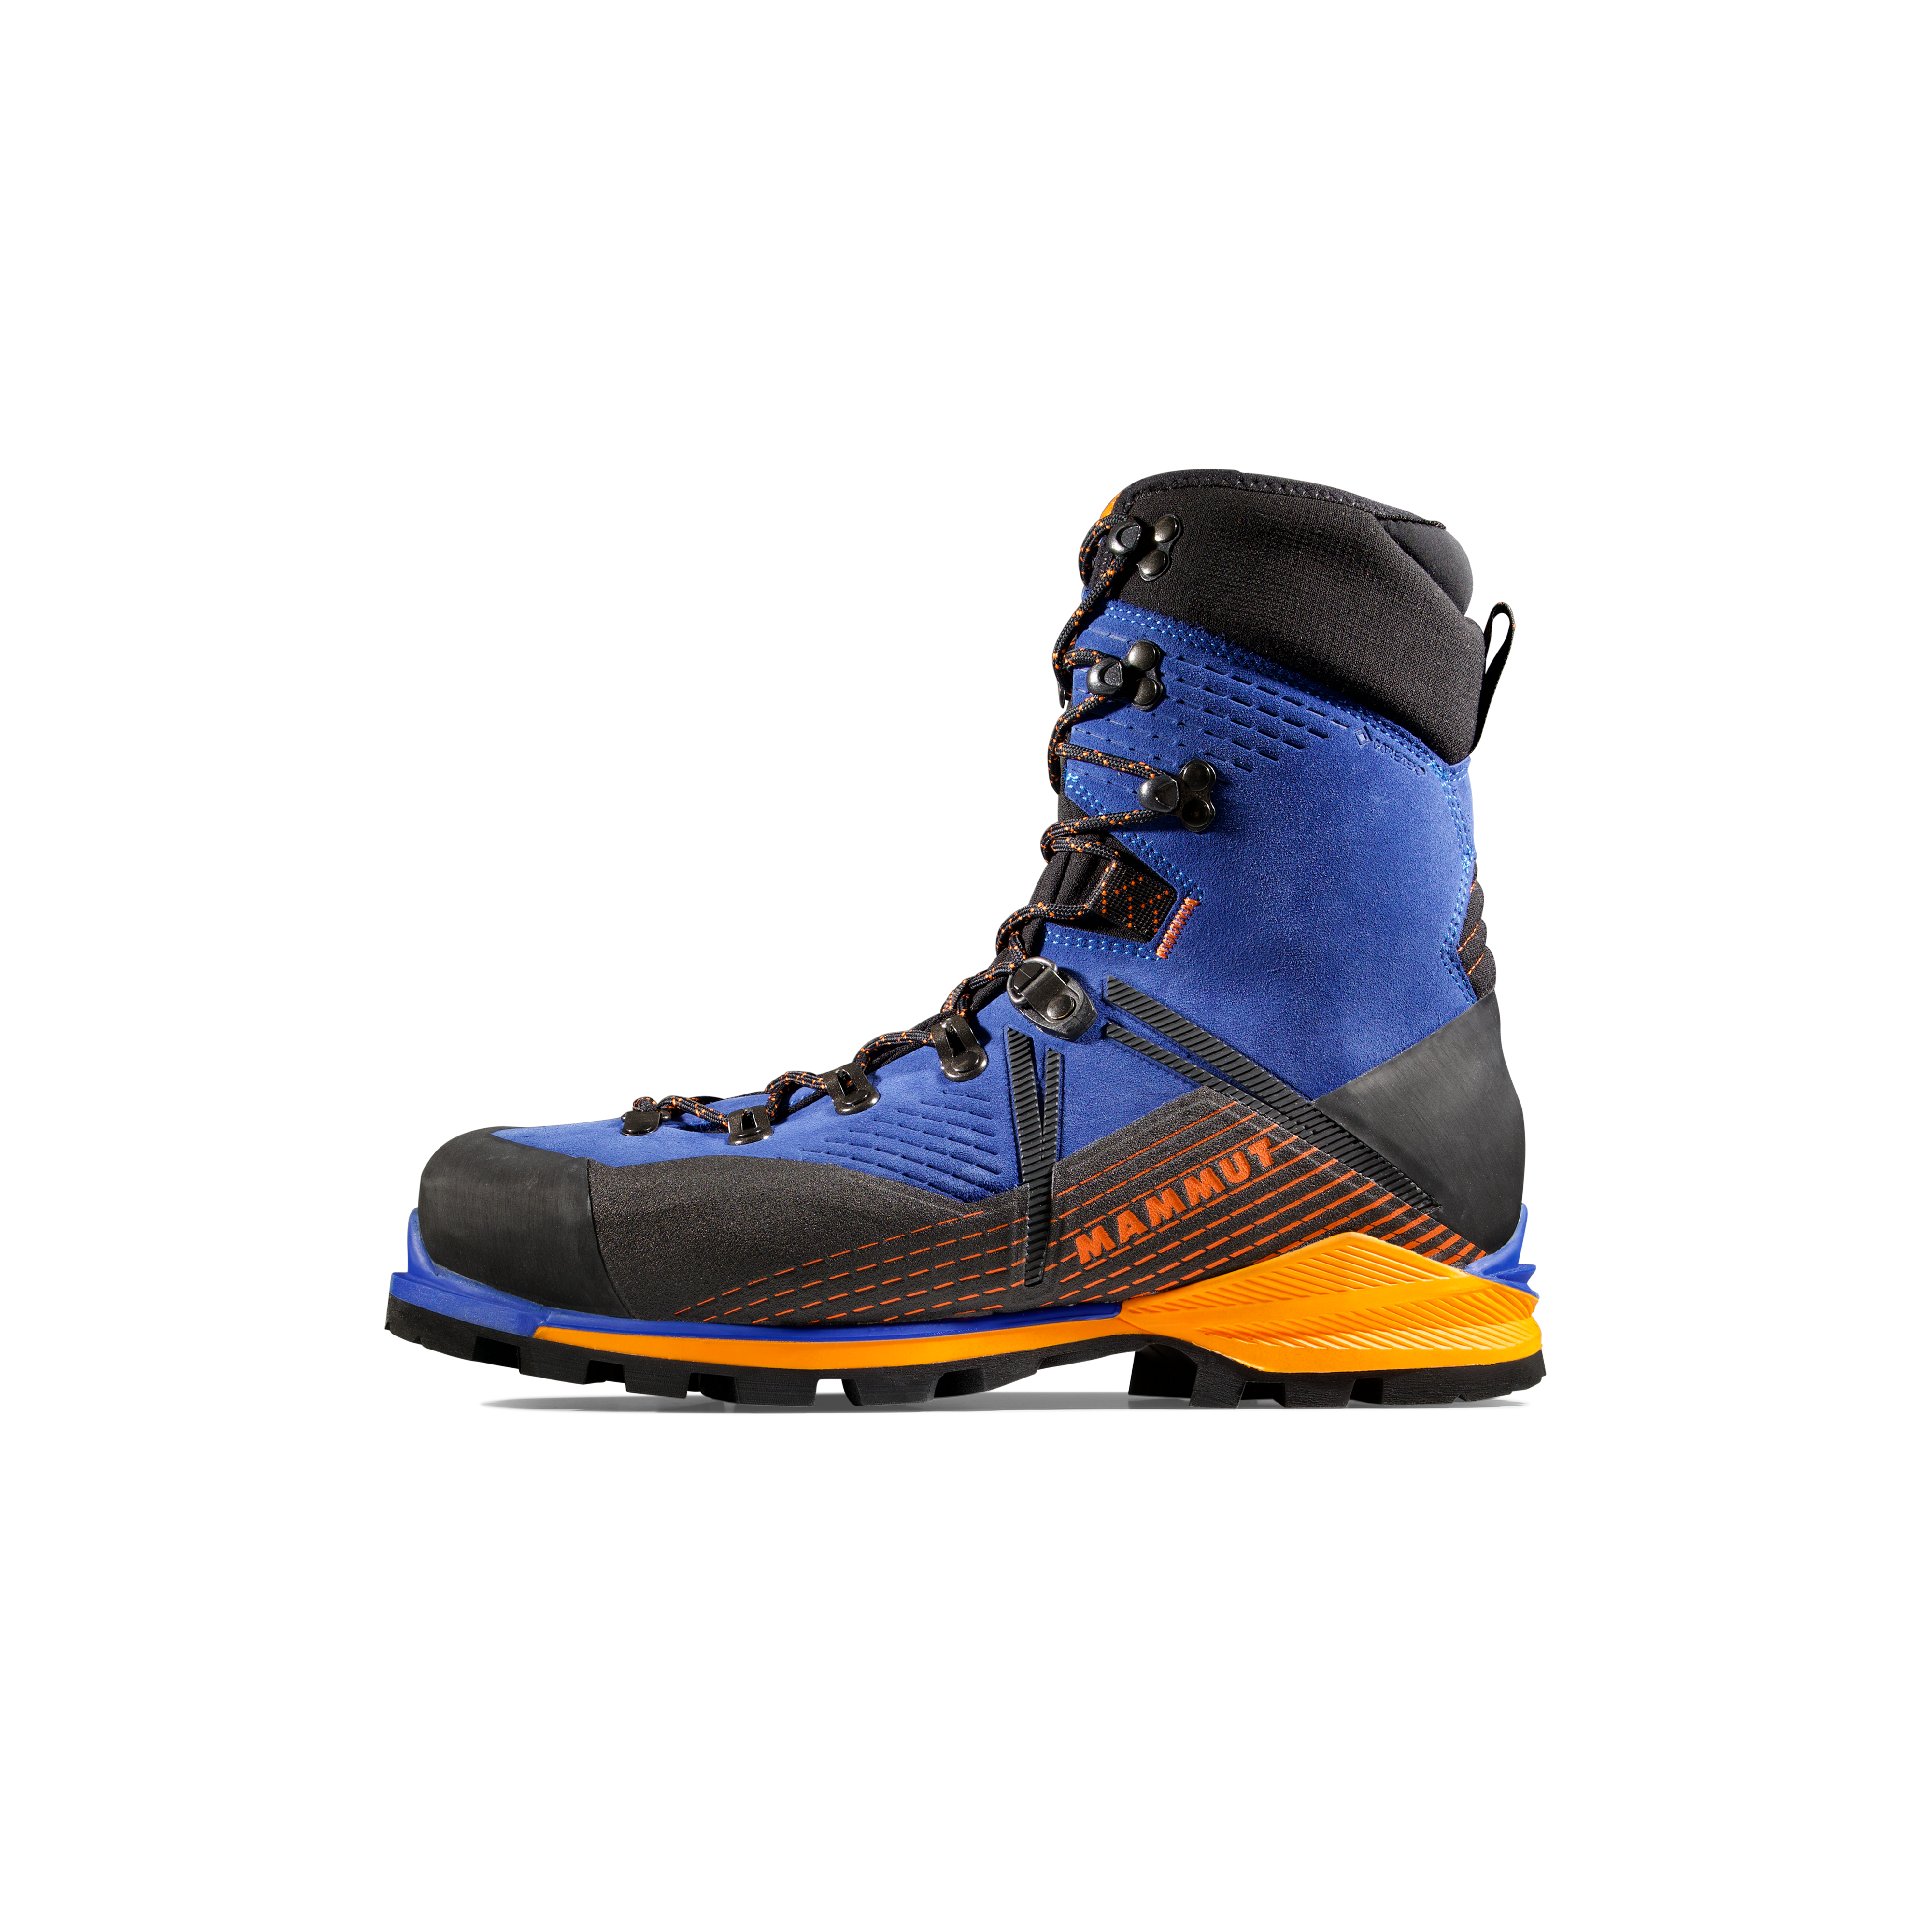
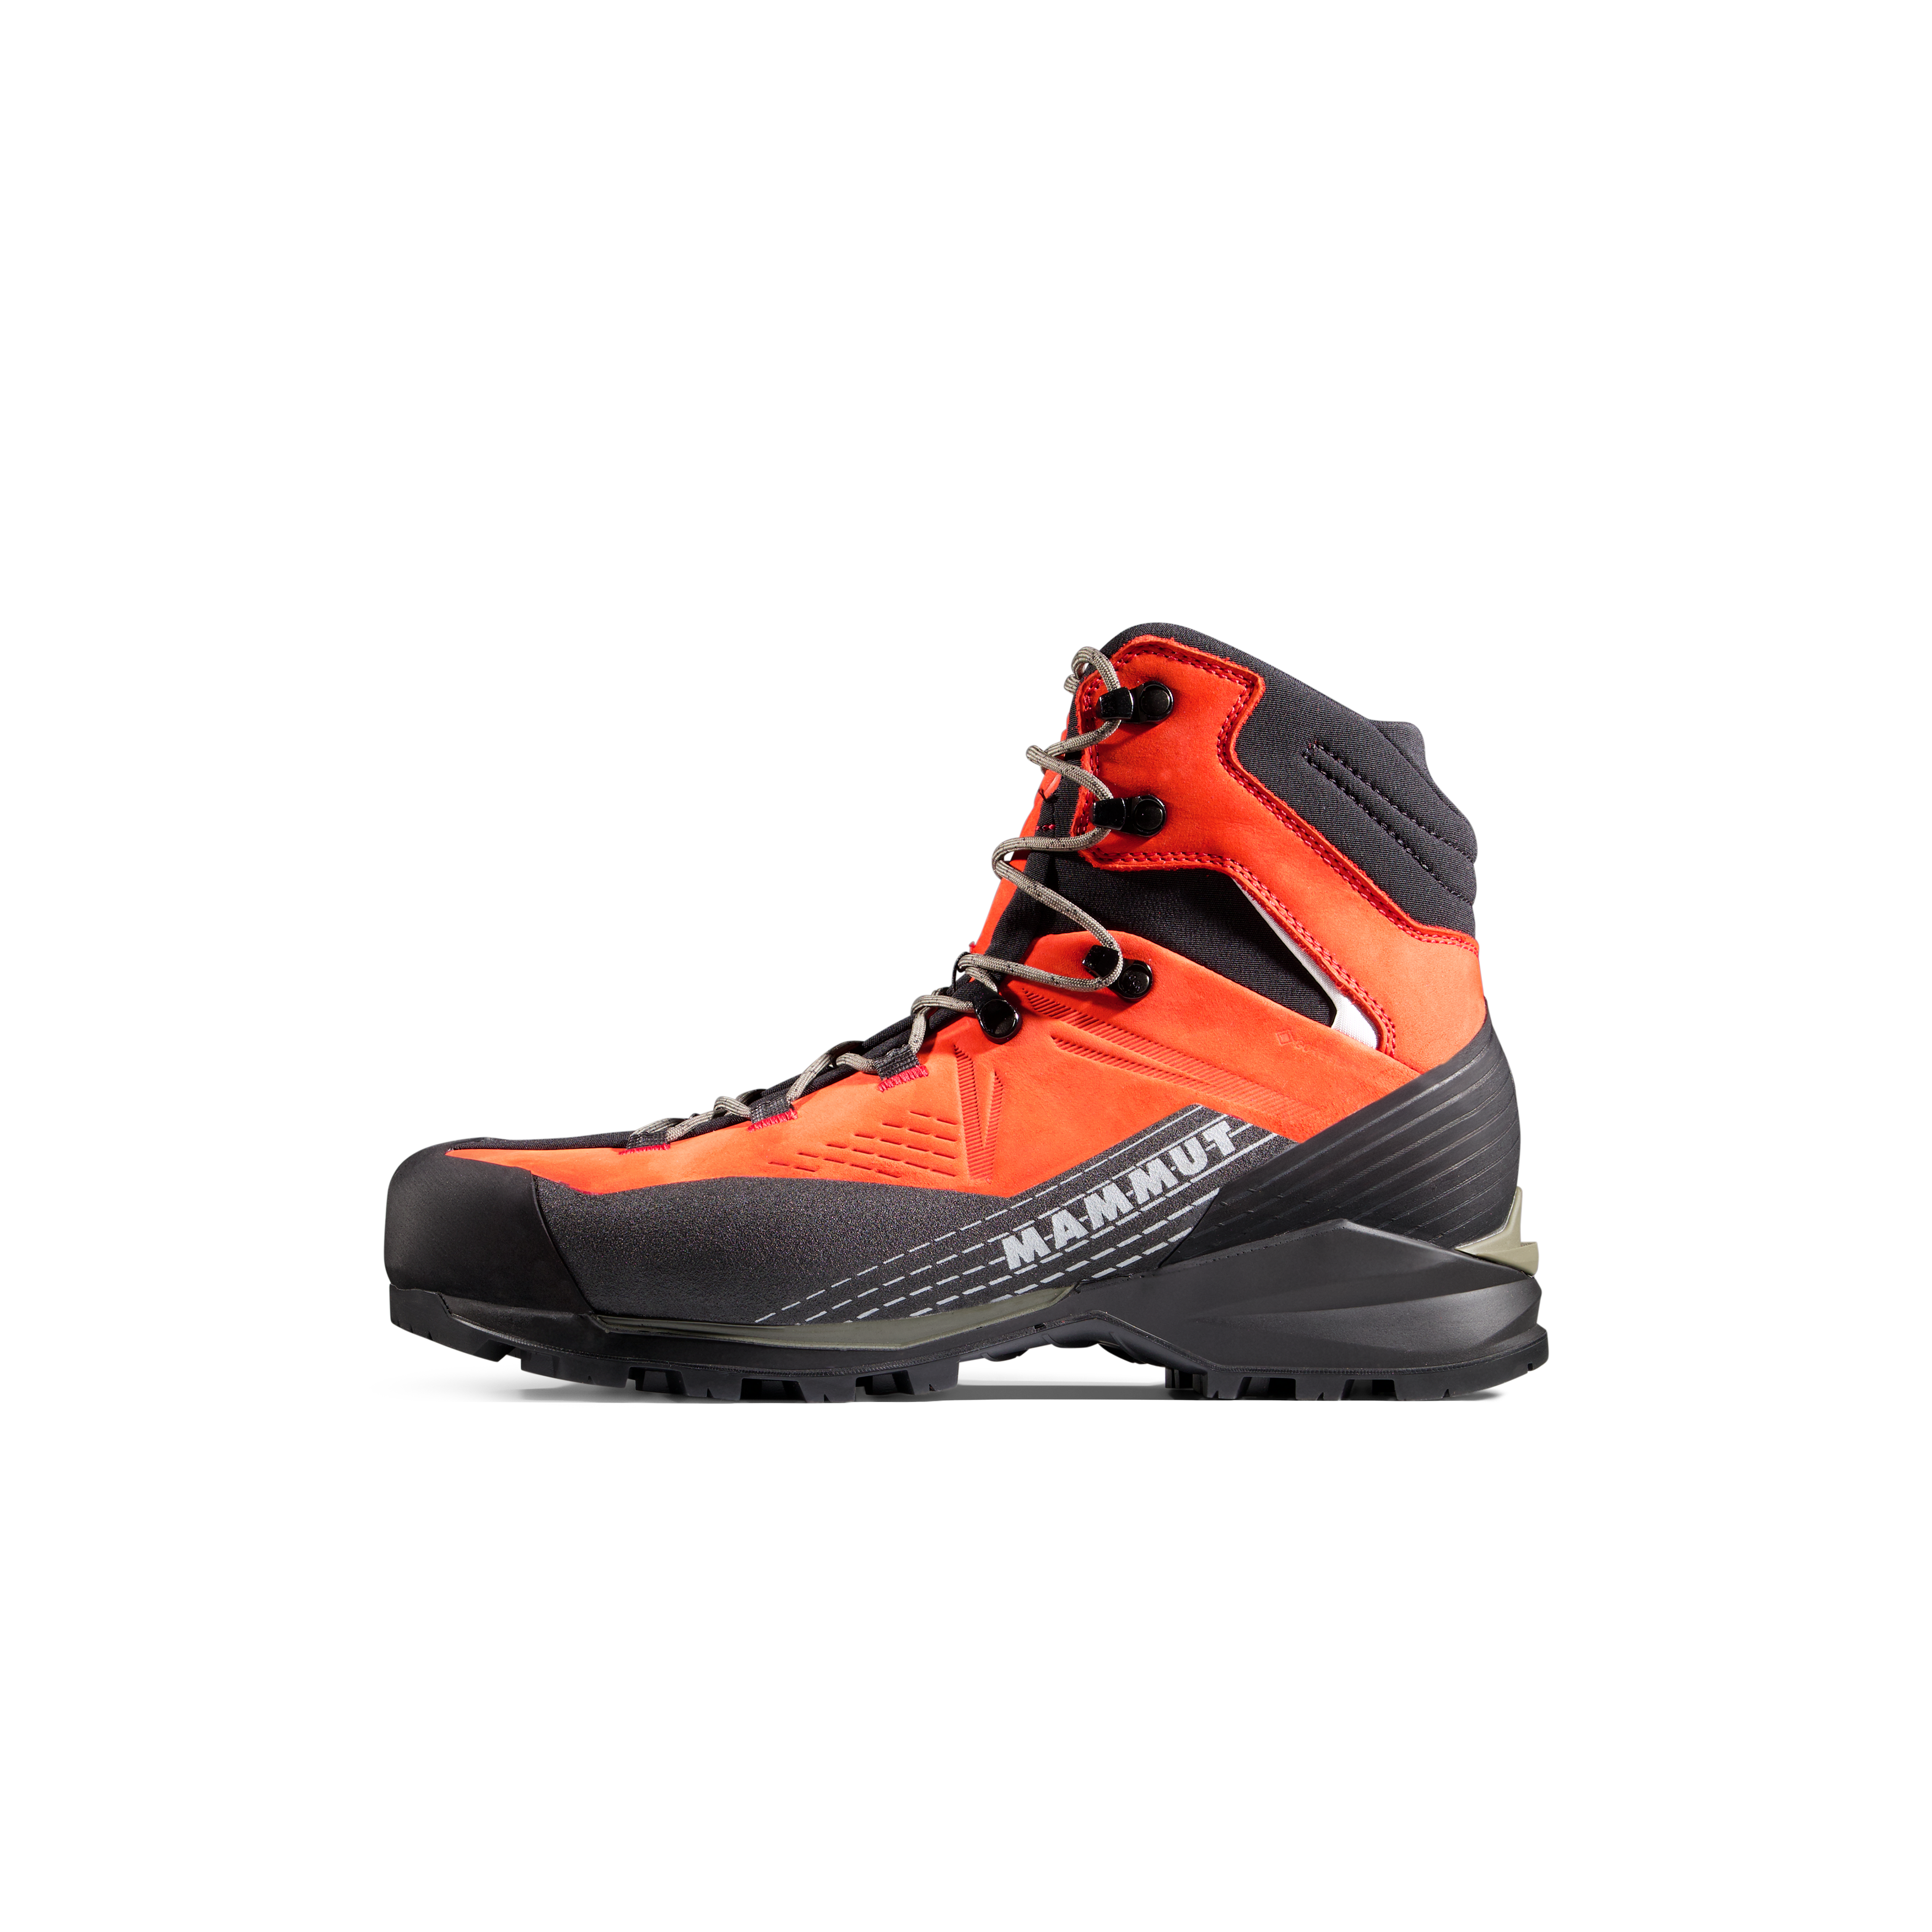
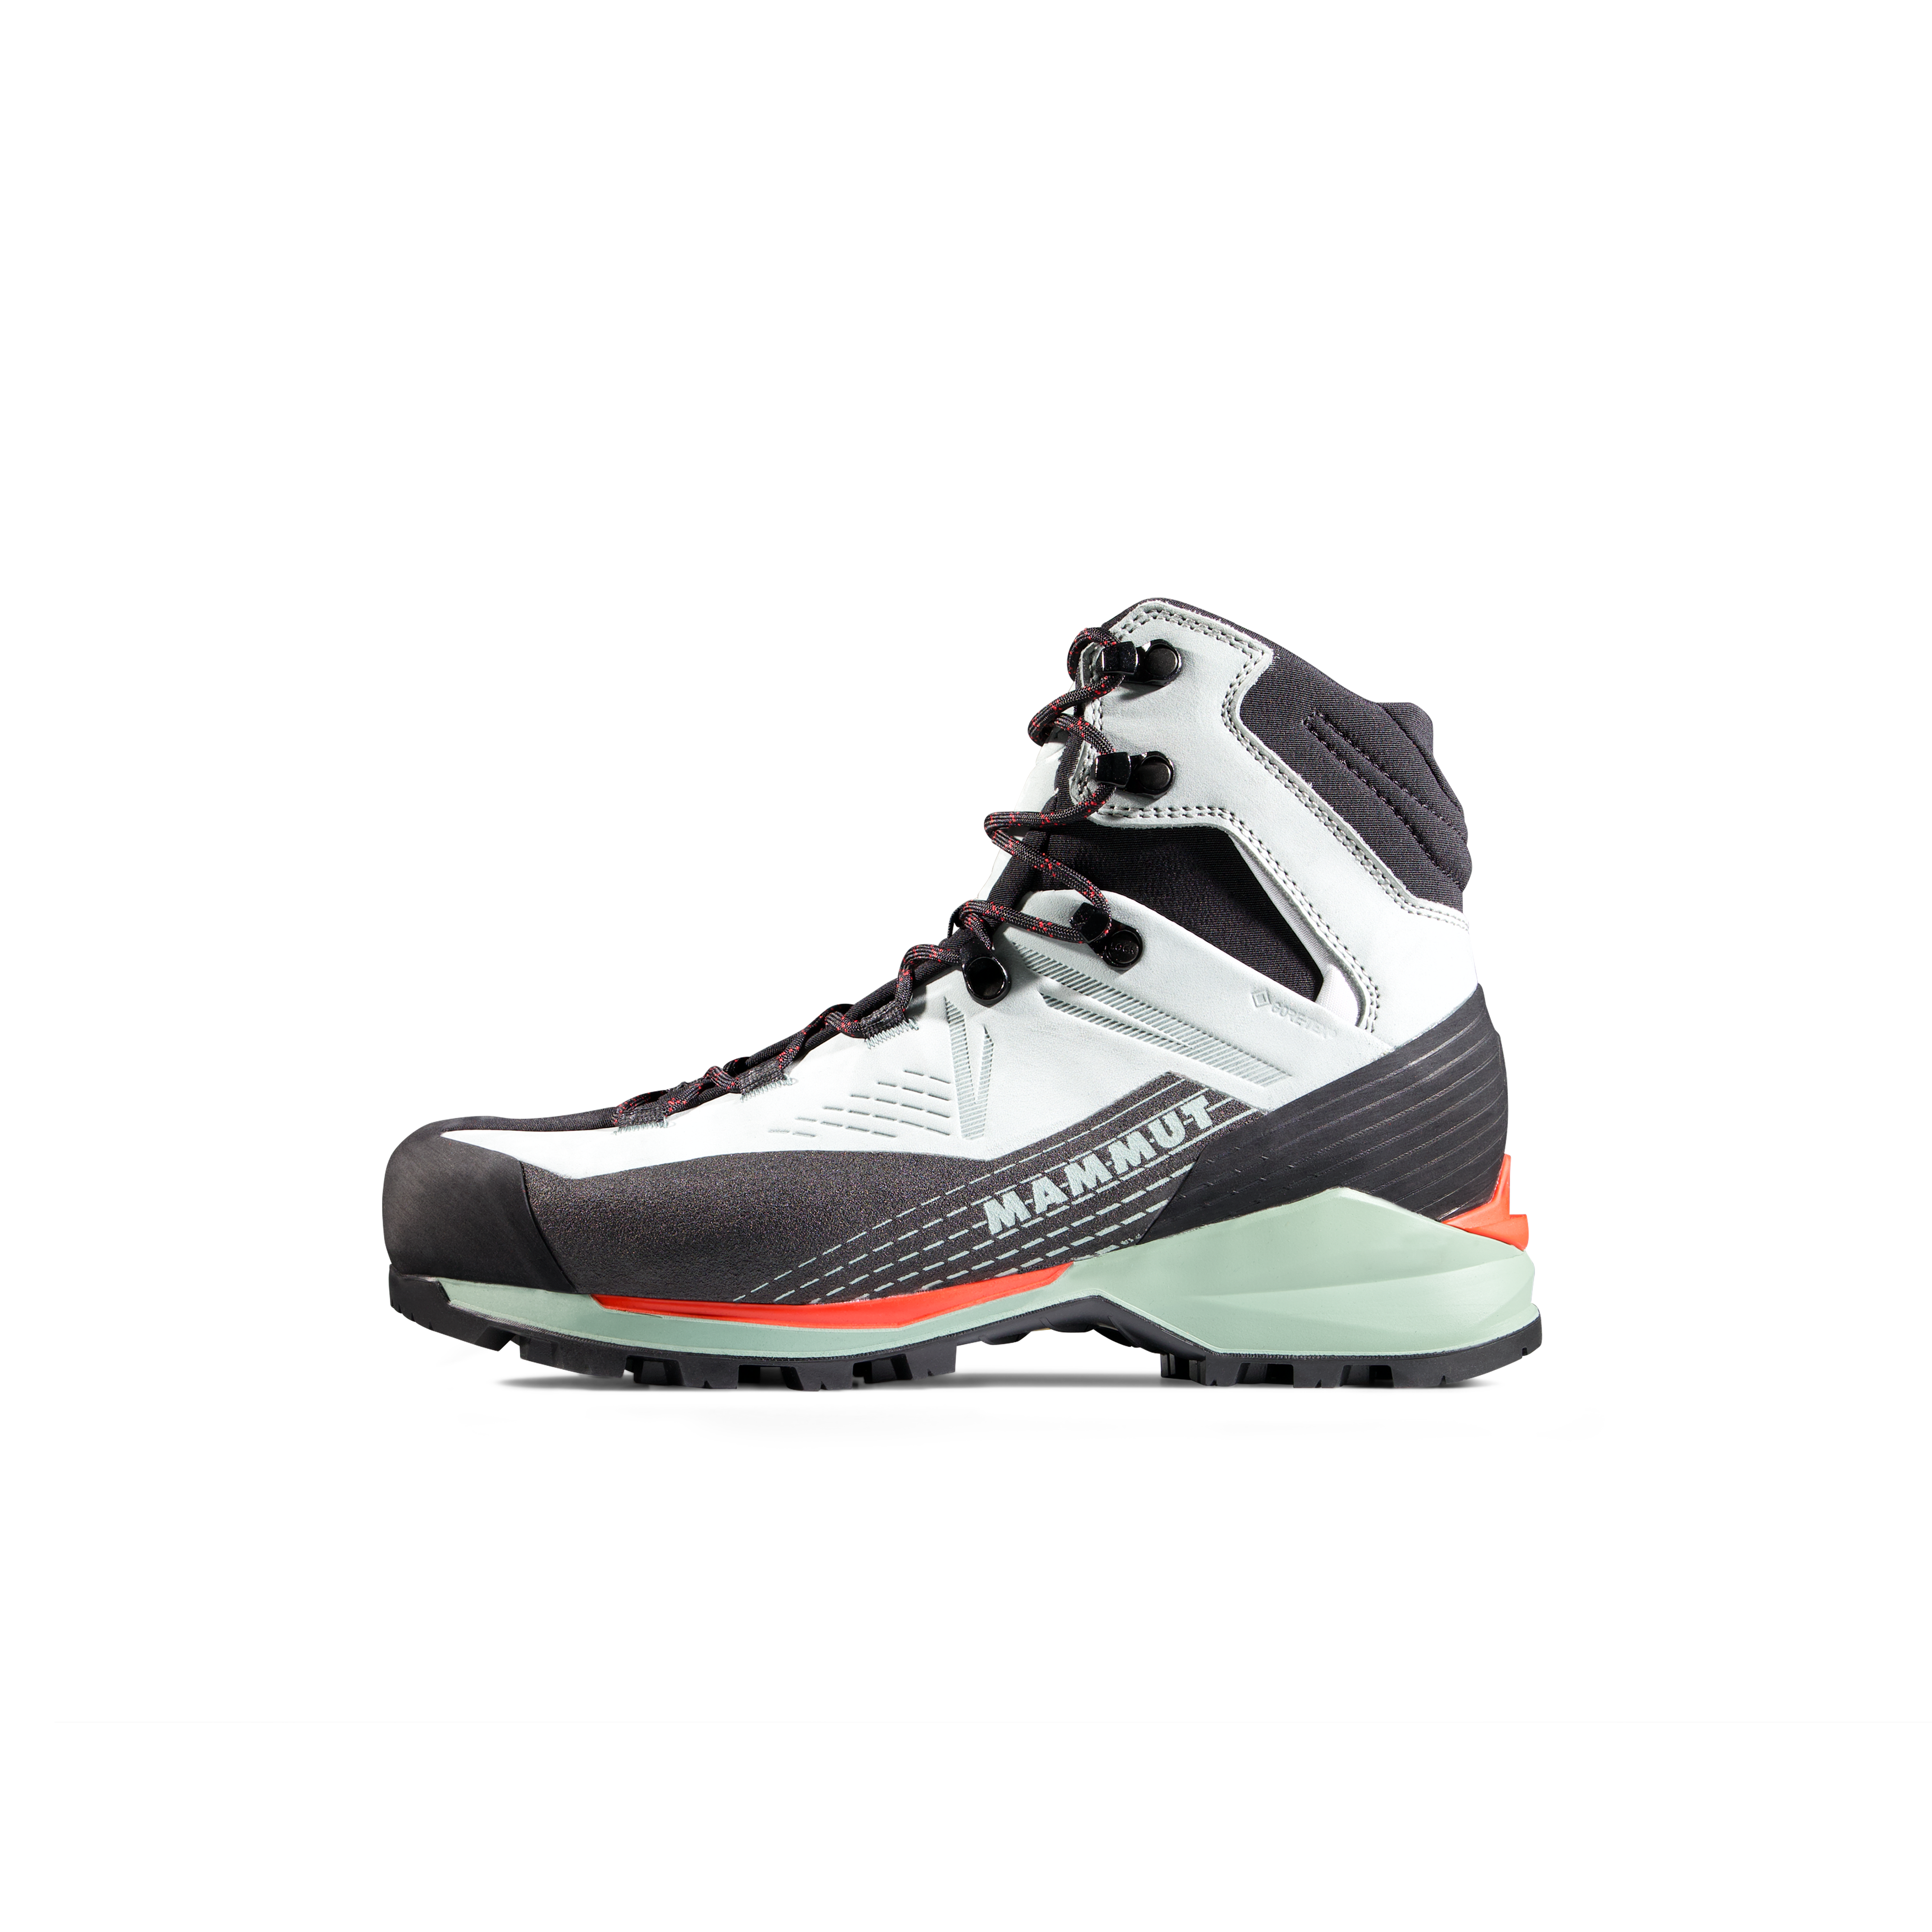
    Mammut partner · boot compatibility

    Crampon Compatibility Starts With the Boot

    Mammut’s current mountaineering footwear includes technical and fully crampon-compatible models. This secondary partner module belongs here because the safest crampon purchase starts with the exact boot rather than the crampon brand.

    Mammut crampon-compatible boots
    Mountaineer adjusting and testing crampons on boots
    Before the mountain

    Physically Test the Exact Boot + Crampon Combination.

    1. Adjust each crampon separately. Boot lengths can differ slightly.
    2. Seat the heel and toe system completely. Check the lever and bail, not just the center bar.
    3. Check all directions. Try to shift the crampon lengthwise, laterally and vertically.
    4. Confirm the anti-balling plates. They should be intact and installed correctly.
    5. Walk before climbing. Test on safe snow and moderate terrain before technical use.
    6. Recheck after transport. Center bars and binding adjustments can move in a gear bag.
    Maintenance

    Dry Them, Inspect Them and Sharpen With Control.

    Rinse off salt and grit when necessary, dry crampons before storage and inspect the frame, center bar, binding hardware, straps and anti-balling plates before every major objective.

    Points should be sharp enough to penetrate hard snow and ice, but aggressive grinder use can overheat the metal or remove unnecessary material. Follow the manufacturer’s maintenance guidance and use a hand file when appropriate.

    Aluminum points need more conservative treatment because there is less material to sacrifice. If the frame is cracked, deformed or the binding cannot hold securely, retire or replace the affected component.
    Mountaineering crampons being inspected and maintained
    Editorial method

    How This Crampon Guide Is Built

    This page consolidates the commercial crampon-comparison intent while the separate how-to pages handle technique and broader selection education.

    Current source verification without non-affiliate outbound links

    Global Summit Guide rechecked the current Petzl crampon line in September 2026, including VASAK, IRVIS HYBRID and LYNX, and verified the current Black Diamond Sabretooth construction and binding variants. The Grivel G12 LT, G10 LT and G20+ LT lineup was preserved from the latest Global Summit Guide manufacturer-verification pass.

    Primary technical references reviewed include Petzl’s current crampon catalog, Black Diamond’s current Sabretooth specifications, Grivel’s current crampon line, UIAA 153 / EN 893 safety-standard references and Mammut’s current crampon-compatibility guidance. These source names are shown for transparency but are not linked because outbound commercial links on this page are reserved for Global Summit Guide affiliate partners.

    No fabricated ratings: we do not assign fake stars or claim laboratory testing that did not happen. This page organizes current products by terrain, construction and compatibility so the final choice can be made around the exact boot and route.
    FAQ

    Best Mountaineering Crampons FAQ

    What are the best mountaineering crampons for most climbers?

    For classic mountaineering, start with a durable steel all-round crampon with horizontal front points, provided it fits your exact boot. Grivel G12 LT, Petzl VASAK and Black Diamond Sabretooth represent this category.

    Are C1, C2 and C3 official UIAA crampon ratings?

    No. They are widely used compatibility shorthand rather than an official UIAA crampon certification. UIAA 153 and EN 893 are crampon safety standards. Exact boot-crampon fit still needs to be verified.

    Are steel or aluminum crampons better?

    Steel is usually better for repeated mountaineering and terrain that includes hard ice or rock. Aluminum saves weight for snow-focused approaches and ski touring but wears faster on rock.

    Do I need 10-point or 12-point crampons?

    Ten-point designs are often sufficient for glacier travel and lower-angle snow. Twelve-point steel crampons are common for classic mountaineering because the extra secondary points give a broader technical platform.

    Are automatic crampons safer than strap-on crampons?

    Not automatically. The safest system is the one designed for the boot and terrain, adjusted correctly and physically tested. Automatic crampons require the correct toe and heel welts.

    When should I choose mono-point crampons?

    Mono-points are specialized for steep technical ice and mixed climbing where precise front-point placements matter. They are not the default choice for glacier travel or general snow climbing.

    Do crampons need anti-balling plates?

    For snow travel, anti-balling plates are an important part of the system because snow buildup under a crampon can reduce point penetration and create a dangerous platform under the foot.

    High alpine snow and ice terrain at the end of the crampon guide
    The crampon rule

    Fit the Boot First. Match the Terrain Second. Buy the Crampon Third.

    The safest purchase is not the most aggressive crampon. It is the model whose binding fits your boot securely and whose material and point geometry match the terrain you actually climb.
    Was this helpful?

    Yes
    No
    Thanks for your feedback!
  • Atlas Mountains Hiking: Complete Guide for Trekkers

    {“@context”:”https://schema.org”,”@type”:”Article”,”headline”:”Atlas Mountains Hiking: Complete Guide for Trekkers (2026)”,”description”:”Complete guide to trekking Morocco’s Atlas Mountains — Toubkal, High Atlas routes, Berber guides, costs, seasons, and cultural context.”,”image”:”https://globalsummitguide.com/wp-content/uploads/2026/02/atlas-mountains-hiking.jpg”,”author”:{“@type”:”Organization”,”name”:”Global Summit Guide Editorial Team”,”url”:”https://globalsummitguide.com/about/”},”publisher”:{“@type”:”Organization”,”name”:”Global Summit Guide”,”url”:”https://globalsummitguide.com”,”logo”:{“@type”:”ImageObject”,”url”:”https://globalsummitguide.com/wp-content/uploads/2026/02/global-logo-new-2.png”,”width”:”300″,”height”:”100″}},”datePublished”:”2026-02-15T08:00:00-07:00″,”dateModified”:”2026-04-19T12:00:00-06:00″,”mainEntityOfPage”:{“@type”:”WebPage”,”@id”:”https://globalsummitguide.com/atlas-mountains-hiking-complete-guide-for-trekkers/”},”isPartOf”:{“@type”:”CollectionPage”,”@id”:”https://globalsummitguide.com/#hub”,”name”:”Conquer Peaks: Your Global Summit Guide for Mountain Climbing”}} {“@context”:”https://schema.org”,”@type”:”FAQPage”,”mainEntity”:[ {“@type”:”Question”,”name”:”What is the highest mountain in the Atlas Mountains?”,”acceptedAnswer”:{“@type”:”Answer”,”text”:”Mount Toubkal (Jebel Toubkal) at 4,167 meters (13,671 feet) is the highest mountain in the Atlas Mountains and in North Africa. Located in Morocco’s High Atlas range approximately 60 km south of Marrakech, Toubkal sees approximately 20,000-25,000 trekkers per year. The peak requires no technical climbing under normal summer conditions — it is primarily a strenuous hike via the standard South Cirque route. The second-highest peak is Ouanoukrim (4,089 m) nearby, with Irhil M’Goun (4,068 m) being the highest peak in the M’Goun Massif region. Toubkal has been accessible to hikers since the 1920s when French colonial trekkers established the Neltner Hut (now Refuge du Toubkal). The peak’s accessibility, moderate altitude, and dramatic views make it one of the most popular North African trekking objectives.”}}, {“@type”:”Question”,”name”:”How hard is it to climb Mount Toubkal?”,”acceptedAnswer”:{“@type”:”Answer”,”text”:”Mount Toubkal is graded F (Facile / Easy) on the IFAS alpine scale during summer conditions — a strenuous hike rather than technical climbing. The standard 2-day ascent from Imlil involves: Day 1, trek from Imlil (1,740 m) to Toubkal Refuge (3,207 m) — approximately 5-6 hours and 1,500 m elevation gain. Day 2, summit push from the refuge to 4,167 m summit and return — approximately 6-8 hours with 960 m gain. The route is well-marked but includes scree sections, steep switchbacks, and altitude. Winter conditions (November through April) transform Toubkal into a serious mountaineering objective requiring crampons, ice axe, and often avalanche awareness. Summer trekkers face primarily altitude and heat challenges. Physical fitness equivalent to completing a 1,500-meter uphill hike in a day is essential. Total round-trip Imlil-summit-Imlil is typically 2 days; longer 3-4 day programs include acclimatization.”}}, {“@type”:”Question”,”name”:”When is the best time to hike the Atlas Mountains?”,”acceptedAnswer”:{“@type”:”Answer”,”text”:”The best time to hike the Atlas Mountains is April through May (spring) and September through October (autumn), with these shoulder seasons offering optimal combinations of stable weather, moderate temperatures, and manageable crowds. Monthly breakdown: (1) April-May: Spring blooms, snow clearing from Toubkal summit area, warm days and cool nights, occasional spring storms. (2) June-August: Hot season — valley temperatures can exceed 40°C though altitude moderates this; start hikes early. (3) September-October: Autumn is ideal — stable weather, cooler temperatures, harvest activity in Berber villages. (4) November-March: Winter mountaineering conditions — Toubkal becomes technical with snow and ice. (5) Ramadan considerations — the Islamic lunar calendar means Ramadan shifts yearly; during Ramadan some services reduce, though tourism continues. Plan treks avoiding the hottest summer midday hours and respecting Friday prayer times in villages.”}}, {“@type”:”Question”,”name”:”How much does it cost to trek the Atlas Mountains?”,”acceptedAnswer”:{“@type”:”Answer”,”text”:”Atlas Mountains trekking costs are among the lowest in world mountaineering destinations. 2026 cost ranges: (1) Toubkal 2-day guided trek: $150-$400 per person including guide, mule support, accommodation, meals. (2) Toubkal Circuit 5-7 day trek: $400-$900 per person. (3) M’Goun traverse 8-10 days: $600-$1,200 per person. (4) Full High Atlas traverse 15+ days: $1,500-$3,000 per person. (5) Independent trekking without guide: Refuge du Toubkal costs 200-250 MAD per night ($20-$25) with half-board. Meals in Imlil village cost $5-$15. Local guides cost 400-600 MAD per day ($40-$60). Mule rental 150-250 MAD per day ($15-$25). International flights to Marrakech run $600-$1,200 from North America, $150-$400 from Europe. Total trip including flights for 7-10 day Atlas adventure runs $1,500-$3,500 from North America — a fraction of Alpine or Himalayan costs.”}}, {“@type”:”Question”,”name”:”Do I need a guide for Toubkal?”,”acceptedAnswer”:{“@type”:”Answer”,”text”:”Guide requirements for Toubkal changed significantly after the 2018 tragedy when two Scandinavian hikers were killed, following which Morocco tightened guide regulations for safety and economic reasons. Current 2026 requirements: (1) Independent climbing is technically allowed but strongly discouraged by authorities and refuge staff. (2) The Toubkal area requires hikers to check in at Imlil and typically hire local guides. (3) Licensed Berber mountain guides are available at Imlil for 400-600 MAD per day. (4) Tour operators include guide services in their packages. (5) Winter ascents (November-April) effectively require guides due to technical conditions. Benefits of local guides beyond safety: cultural interpretation, language support (most guides speak French and English, some Spanish/German), navigation in weather, refuge booking help, and economic support for Berber communities. Most experienced trekkers now use local guides both for compliance and richer cultural experience. Independent climbers should register at Imlil and inform Refuge du Toubkal of plans.”}}, {“@type”:”Question”,”name”:”What is the Toubkal Circuit trek?”,”acceptedAnswer”:{“@type”:”Answer”,”text”:”The Toubkal Circuit is a 5-7 day trek around Mount Toubkal through the heart of the High Atlas, typically covering Imlil, Tizi n’Mzik, Azib Tamsoult, Tizi n’Ouagane, Azib Likemt, Amsouzerte, Lac d’Ifni, Tizi n’Ouanoums, and back to the Toubkal Refuge for summit day. Typical 7-day itinerary: Day 1 Imlil to Tizi n’Mzik; Day 2 to Azib Tamsoult; Day 3 over Tizi n’Ouagane pass; Day 4 to Lac d’Ifni; Day 5 over Tizi n’Ouanoums to Toubkal Refuge; Day 6 Toubkal summit and back to refuge; Day 7 descent to Imlil. Total distance approximately 80-100 km with 6,000 m cumulative elevation gain. The circuit visits remote Berber villages, crosses high passes above 3,000 m, and includes Toubkal summit. Costs $400-$900 per person with local guide and mule support. The experience combines physical trekking with cultural immersion impossible on the direct Toubkal ascent alone.”}}, {“@type”:”Question”,”name”:”What are Berber guides and porters?”,”acceptedAnswer”:{“@type”:”Answer”,”text”:”Berber guides and porters are the indigenous Amazigh (Berber) people of the Atlas Mountains who have lived in these valleys for millennia before Arab arrival. Modern Berber mountain support includes: (1) Licensed mountain guides (accompagnateurs de montagne) trained through Morocco’s Royal Guide School — approximately 400 licensed guides operate in the Toubkal region. (2) Muleteers who manage pack mules carrying expedition gear — standard practice rather than human porters as in Nepal. (3) Refuge staff at the Toubkal Refuge and other mountain huts. (4) Cooks for trekking camps. Most guides speak Amazigh languages (Tashelhiyt primarily) plus French and English, with some Arabic and additional European languages. Cultural protocol: Berbers are traditionally hospitable, food-sharing is important, modest dress is appreciated especially in villages, and respecting Islamic religious practices (Friday prayers, Ramadan) builds strong relationships. Tipping Berber staff is important — budget 10-15% of trip cost for tips distributed fairly among guides, muleteers, and cooks.”}}, {“@type”:”Question”,”name”:”Is it safe to hike in Morocco?”,”acceptedAnswer”:{“@type”:”Answer”,”text”:”Morocco is generally safe for mountain trekking, with the Atlas Mountains being among the safer world trekking destinations. Key safety considerations: (1) Mountain-specific risks — altitude (up to 4,167 m at Toubkal), weather changes, scree-fall on steep sections, exposure to heat in valleys. (2) Political stability — Morocco is politically stable with strong tourism infrastructure and minimal crime in mountain areas. (3) The 2018 Toubkal incident where two Scandinavian hikers were murdered by ISIS-inspired attackers was an isolated event that led to significant security improvements and guide regulations. (4) Winter mountaineering on Toubkal has killed climbers through avalanches and cold exposure. Practical safety measures: use licensed local guides, trek with companions rather than solo, respect local customs and dress, carry mountain rescue insurance (Global Rescue, Ripcord), bring water purification, adapt to altitude properly. Avoid political demonstrations in cities and monitor government travel advisories before booking. Morocco’s Royal Gendarmerie patrols mountain areas and coordinates rescue. Most trekkers experience Morocco as welcoming, beautiful, and remarkably safe.”}} ]} *,*::before,*::after{box-sizing:border-box;margin:0;padding:0} :root{–pine:#0a1929;–forest:#122a44;–mist:#dde5ee;–snow:#f4f6f9;–stone:#485460;–pebble:#8a95a3;–ink:#0f1a26;–cream:#fafaf7;–white:#ffffff;–gold:#d4913a;–gold-light:#f5e4c8;–denali:#1e3a5c;–denali-mid:#2e5986;–denali-light:#e8eef5;–ready:#2d6e4e;–ready-light:#e8f1ec;–caution:#b86a15;–caution-light:#f7ece0;–danger:#a83a2b;–danger-light:#f5e8e5;–great-black:#2b2318;–great-black-light:#e8e3d8;–serif:’DM Serif Display’,Georgia,serif;–sans:’Outfit’,system-ui,sans-serif} html{scroll-behavior:smooth} body{font-family:var(–sans);background:var(–cream);color:var(–ink);line-height:1.75;font-size:17px;-webkit-font-smoothing:antialiased} h1,h2,h3,h4{font-family:var(–serif);font-weight:400;line-height:1.2} a{color:var(–denali-mid);text-decoration:underline;text-underline-offset:3px;transition:color .15s} a:hover{color:#b8701f} .btn{display:inline-flex;align-items:center;gap:8px;padding:13px 26px;border-radius:6px;font-family:var(–sans);font-size:15px;font-weight:500;text-decoration:none;transition:all .2s ease} .btn-primary{background:var(–gold);color:var(–pine)} .btn-primary:hover{background:#bd8030;transform:translateY(-1px);text-decoration:none} .breadcrumb{background:var(–pine);padding:10px 0;font-size:13px} .breadcrumb__inner{max-width:1200px;margin:0 auto;padding:0 24px;display:flex;align-items:center;gap:8px;color:rgba(255,255,255,.5);flex-wrap:wrap} .breadcrumb a{color:rgba(255,255,255,.65);text-decoration:none} .breadcrumb a:hover{color:var(–gold)} .breadcrumb__sep{color:rgba(255,255,255,.25)} .breadcrumb__current{color:rgba(255,255,255,.85)} .article-header{background:linear-gradient(135deg,var(–pine),var(–forest));padding:52px 0 44px;color:var(–white)} .article-header__inner{max-width:1200px;margin:0 auto;padding:0 24px} .article-header__label{font-size:11px;font-weight:600;letter-spacing:.14em;text-transform:uppercase;color:var(–gold);margin-bottom:18px;display:flex;align-items:center;gap:10px} .article-header__label::before{content:”;width:36px;height:2px;background:var(–gold)} .article-header h1{font-size:clamp(30px,4.4vw,52px);color:var(–white);max-width:1000px;margin-bottom:20px} .article-header h1 em{font-style:italic;color:var(–gold)} .article-header__sub{font-size:17px;color:rgba(255,255,255,.82);font-weight:300;max-width:900px;line-height:1.7;margin-bottom:28px} .byline{display:flex;flex-wrap:wrap;align-items:center;gap:20px 28px;padding:18px 22px;background:rgba(255,255,255,.06);border:1px solid rgba(255,255,255,.1);border-radius:10px;margin-bottom:28px;font-size:13.5px} .byline__item{display:flex;align-items:center;gap:8px;color:rgba(255,255,255,.85)} .byline__item strong{color:var(–white);font-weight:500} .byline__label{font-size:10px;letter-spacing:.1em;text-transform:uppercase;color:var(–gold);font-weight:600;margin-right:4px} .byline__item a{color:rgba(255,255,255,.85);text-decoration:underline;text-underline-offset:2px} .byline__item a:hover{color:var(–gold)} .hero__stats{display:grid;grid-template-columns:repeat(4,1fr);gap:18px;max-width:900px} .hero__stat{padding:16px 20px;background:rgba(10,25,41,.4);border:1px solid rgba(255,255,255,.12);border-radius:10px} .hero__stat-num{font-family:var(–serif);font-size:30px;color:var(–gold);line-height:1;margin-bottom:4px} .hero__stat-lbl{font-size:11px;letter-spacing:.08em;text-transform:uppercase;color:rgba(255,255,255,.72);font-weight:500} .hub-strip{background:var(–gold-light);border-bottom:1px solid rgba(212,145,58,.3);padding:12px 0} .hub-strip__inner{max-width:1200px;margin:0 auto;padding:0 24px;display:flex;align-items:center;gap:16px;flex-wrap:wrap;font-size:13px} .hub-strip__label{font-family:var(–serif);color:var(–pine);font-weight:600;font-size:14px;display:flex;align-items:center;gap:8px} .hub-strip__label::before{content:’★’;color:var(–gold);font-size:13px} .hub-strip__cluster{color:var(–stone);font-weight:400} .hub-strip__cluster strong{color:var(–pine);font-weight:600} .hub-strip__link{margin-left:auto;color:var(–pine);font-weight:500;text-decoration:none;font-size:11px;letter-spacing:.08em;text-transform:uppercase;padding:6px 12px;background:var(–white);border:1px solid rgba(212,145,58,.35);border-radius:6px;transition:all .15s} .hub-strip__link:hover{background:var(–pine);color:var(–gold-light);border-color:var(–pine)} @media(max-width:700px){.hub-strip__link{margin-left:0}.hub-strip__inner{gap:10px}} .page-wrap{max-width:1200px;margin:0 auto;padding:0 24px;display:grid;grid-template-columns:1fr 300px;gap:56px;align-items:start} .sidebar{padding-top:52px} .sidebar__block{background:var(–white);border:1px solid var(–mist);border-radius:12px;padding:22px;margin-bottom:20px} .sidebar__block–dark{background:var(–pine);color:var(–white);border-color:var(–pine)} .sidebar__block–dark .sidebar__label{color:rgba(255,255,255,.4)} .sidebar__block–gold{background:var(–gold-light);border-color:rgba(212,145,58,.3)} .sidebar__toc{position:sticky;top:24px;max-height:calc(100vh – 48px);overflow-y:auto} .sidebar__label{font-size:11px;font-weight:600;letter-spacing:.1em;text-transform:uppercase;color:var(–pebble);margin-bottom:14px} .toc-list{list-style:none;display:flex;flex-direction:column;gap:2px} .toc-link{display:block;padding:7px 10px;border-radius:6px;text-decoration:none;color:var(–stone);font-size:13px;border-left:2px solid transparent;transition:all .15s;line-height:1.4} .toc-link:hover{color:var(–denali-mid);background:var(–snow);border-left-color:var(–denali-light);text-decoration:none} .quickfact-row{display:flex;justify-content:space-between;align-items:baseline;padding:10px 0;border-bottom:1px solid rgba(255,255,255,.08);font-size:13px;gap:12px} .quickfact-row:last-child{border-bottom:none} .quickfact-row__name{color:rgba(255,255,255,.72);font-weight:300} .quickfact-row__val{color:var(–gold);font-weight:500;font-family:var(–serif);font-size:15px;text-align:right} .sidebar__block–gold h4{font-family:var(–serif);font-size:17px;color:var(–pine);margin-bottom:8px;line-height:1.3} .sidebar__block–gold p{font-size:13px;color:var(–stone);font-weight:300;margin-bottom:14px;line-height:1.55} .sidebar__cta-btn{display:flex;align-items:center;justify-content:center;gap:6px;padding:11px 16px;background:var(–pine);color:var(–white);border-radius:6px;text-decoration:none;font-size:13px;font-weight:500} .sidebar__cta-btn:hover{background:var(–denali-mid);color:var(–white);text-decoration:none} .article{padding:52px 0 80px} .article section{scroll-margin-top:24px} .article__lead{font-size:19px;color:var(–stone);font-weight:300;line-height:1.75;border-left:3px solid var(–gold);padding-left:22px;margin-bottom:48px} .article__lead em{color:var(–pine);font-style:italic} .article h2{font-size:clamp(24px,3.2vw,34px);color:var(–pine);margin-top:64px;margin-bottom:18px} .article h2:first-child{margin-top:0} .article h2 em{font-style:italic;color:var(–denali-mid)} .article h3{font-size:21px;color:var(–pine);margin-top:32px;margin-bottom:12px} .article p{color:var(–stone);margin-bottom:18px;font-weight:300} .article p strong{color:var(–ink);font-weight:500} .article p em{color:var(–pine);font-style:italic;font-weight:400} .article ul,.article ol{color:var(–stone);font-weight:300;margin:0 0 20px 22px} .article li{margin-bottom:8px;line-height:1.7} .section-rule{border:none;border-top:1px solid var(–mist);margin:48px 0} .callout{border-radius:10px;padding:22px 24px;margin:28px 0;display:flex;gap:18px;align-items:flex-start} .callout–insight{background:var(–denali-light);border:1px solid rgba(46,89,134,.15)} .callout–gold{background:var(–gold-light);border:1px solid rgba(212,145,58,.25)} .callout–caution{background:var(–caution-light);border:1px solid rgba(184,106,21,.25)} .callout–danger{background:var(–danger-light);border:1px solid rgba(168,58,43,.2)} .callout–methodology{background:var(–great-black-light);border:1px solid rgba(43,35,24,.2)} .callout–cultural{background:#fdf4e8;border:1px solid rgba(212,145,58,.3)} .callout__icon{flex-shrink:0;font-size:22px;line-height:1} .callout__body{flex:1} .callout__title{font-family:var(–serif);font-size:17px;margin-bottom:6px;color:var(–pine)} .callout__text{font-size:14.5px;color:var(–stone);font-weight:300;line-height:1.7;margin:0} .callout__text a{color:var(–denali-mid);font-weight:500} /* Range overview cards */ .range-grid{display:grid;grid-template-columns:repeat(3,1fr);gap:14px;margin:28px 0} .range-card{background:var(–white);border:1px solid var(–mist);border-radius:10px;padding:20px 22px;border-top:3px solid var(–gold)} .range-card–high{border-top-color:var(–danger)} .range-card–mid{border-top-color:var(–caution)} .range-card–anti{border-top-color:var(–ready)} .range-card__region{font-size:10px;letter-spacing:.12em;text-transform:uppercase;color:var(–gold);font-weight:700;margin-bottom:4px} .range-card__name{font-family:var(–serif);font-size:18px;color:var(–pine);margin-bottom:4px;line-height:1.2} .range-card__alt{font-size:13px;color:var(–pebble);font-weight:500;margin-bottom:10px;padding-bottom:10px;border-bottom:1px solid var(–mist)} .range-card__desc{font-size:13px;color:var(–stone);font-weight:300;line-height:1.6} .range-card__desc strong{color:var(–ink)} /* Trek route cards */ .trek-grid{display:grid;grid-template-columns:repeat(2,1fr);gap:16px;margin:28px 0} .trek-card{background:var(–white);border:1px solid var(–mist);border-radius:12px;padding:24px 26px;border-left:4px solid var(–denali-mid)} .trek-card–iconic{border-left-color:var(–caution)} .trek-card–circuit{border-left-color:var(–denali-mid)} .trek-card–remote{border-left-color:var(–ready)} .trek-card__label{font-size:10px;letter-spacing:.12em;text-transform:uppercase;color:var(–gold);font-weight:700;margin-bottom:4px} .trek-card__name{font-family:var(–serif);font-size:19px;color:var(–pine);margin-bottom:4px;line-height:1.2} .trek-card__details{font-family:var(–serif);font-size:13px;color:var(–stone);font-weight:600;margin-bottom:12px;padding-bottom:10px;border-bottom:1px solid var(–mist)} .trek-card__desc{font-size:13.5px;color:var(–stone);font-weight:300;line-height:1.65;margin-bottom:12px} .trek-card__desc strong{color:var(–ink)} .trek-card__stats{display:grid;grid-template-columns:repeat(2,1fr);gap:8px 16px;font-size:12px} .trek-card__stat{display:flex;flex-direction:column;gap:2px} .trek-card__stat-label{font-size:10px;letter-spacing:.08em;text-transform:uppercase;color:var(–pebble);font-weight:700} .trek-card__stat-val{font-family:var(–serif);font-size:13px;color:var(–pine);font-weight:600} /* Toubkal day block */ .day-block{background:var(–white);border:1px solid var(–mist);border-radius:14px;padding:28px 32px;margin:24px 0;border-left:4px solid var(–caution)} .day-block–summit{border-left-color:var(–danger)} .day-block__header{display:grid;grid-template-columns:auto 1fr auto;gap:20px;align-items:baseline;margin-bottom:16px;padding-bottom:14px;border-bottom:1px solid var(–mist)} .day-block__num{font-family:var(–serif);font-style:italic;font-size:48px;color:var(–gold);line-height:1;opacity:.7} .day-block__titleblock{min-width:0} .day-block__label{font-size:10px;letter-spacing:.12em;text-transform:uppercase;color:var(–gold);font-weight:700;margin-bottom:4px} .day-block__title{font-family:var(–serif);font-size:22px;color:var(–pine);margin-bottom:4px;line-height:1.2} .day-block__title em{font-style:italic;color:var(–denali-mid)} .day-block__route{font-size:12.5px;color:var(–pebble);font-weight:500} .day-block__stats{display:grid;grid-template-columns:repeat(4,1fr);gap:10px 18px;padding:14px 18px;background:var(–snow);border-radius:10px;margin-bottom:14px;font-size:12.5px} .day-block__stat{display:flex;flex-direction:column;gap:2px} .day-block__stat-label{font-size:10px;letter-spacing:.08em;text-transform:uppercase;color:var(–pebble);font-weight:700} .day-block__stat-val{font-family:var(–serif);font-size:14px;color:var(–pine);font-weight:600} .day-block__body{font-size:14.5px;color:var(–stone);font-weight:300;line-height:1.7} .day-block__body p{margin-bottom:12px} .day-block__body p:last-child{margin-bottom:0} .day-block__body strong{color:var(–ink);font-weight:500} .day-block__body em{color:var(–pine);font-style:italic;font-weight:400} /* Cultural context cards */ .culture-grid{display:grid;grid-template-columns:repeat(2,1fr);gap:14px;margin:24px 0} .culture-card{background:#fdf4e8;border:1px solid rgba(212,145,58,.3);border-radius:10px;padding:18px 22px;border-left:4px solid var(–gold)} .culture-card__name{font-family:var(–serif);font-size:16px;color:var(–pine);margin-bottom:6px;line-height:1.3} .culture-card__desc{font-size:13px;color:var(–stone);font-weight:300;line-height:1.65} .culture-card__desc strong{color:var(–ink)} /* Comparison table */ .compare-wrap{overflow-x:auto;margin:28px 0 36px;border-radius:14px;border:1px solid var(–mist);box-shadow:0 4px 24px rgba(11,31,53,.05)} .compare-table{width:100%;border-collapse:collapse;font-size:14px;min-width:680px;background:var(–white)} .compare-table thead th{text-align:left;padding:14px 12px;font-size:10px;font-weight:700;letter-spacing:.08em;text-transform:uppercase;color:var(–white);background:var(–pine);white-space:nowrap} .compare-table thead th:first-child{padding-left:22px} .compare-table tbody tr{border-bottom:1px solid var(–mist)} .compare-table tbody tr:last-child{border-bottom:none} .compare-table tbody tr:nth-child(even){background:var(–snow)} .compare-table tbody td{padding:14px 12px;color:var(–stone);vertical-align:top;font-weight:300;line-height:1.5} .compare-table tbody td:first-child{padding-left:22px;font-weight:500;color:var(–ink);font-family:var(–serif);font-size:14.5px} /* Season cards */ .season-grid{display:grid;grid-template-columns:repeat(4,1fr);gap:12px;margin:24px 0} .season-card{background:var(–white);border:1px solid var(–mist);border-radius:10px;padding:16px 14px;text-align:center;border-top:3px solid var(–denali-mid)} .season-card–peak{border-top-color:var(–ready)} .season-card–ok{border-top-color:var(–caution)} .season-card–avoid{border-top-color:var(–danger)} .season-card__name{font-family:var(–serif);font-size:15px;color:var(–pine);margin-bottom:4px;line-height:1.2} .season-card__months{font-size:11px;color:var(–pebble);font-weight:600;letter-spacing:.05em;text-transform:uppercase;margin-bottom:8px} .season-card__rating{font-family:var(–serif);font-size:13px;font-weight:600;margin-bottom:6px} .season-card–peak .season-card__rating{color:var(–ready)} .season-card–ok .season-card__rating{color:var(–caution)} .season-card–avoid .season-card__rating{color:var(–danger)} .season-card__desc{font-size:11.5px;color:var(–stone);line-height:1.5;font-weight:300} .faq{margin:28px 0} .faq__item{background:var(–white);border:1px solid var(–mist);border-radius:10px;margin-bottom:12px;overflow:hidden;transition:border-color .15s} .faq__item:hover{border-color:rgba(46,89,134,.35)} .faq__item[open]{border-color:var(–denali-mid);box-shadow:0 4px 20px rgba(11,31,53,.06)} .faq__summary{padding:18px 24px;cursor:pointer;font-family:var(–serif);font-size:17px;color:var(–pine);display:flex;justify-content:space-between;align-items:center;gap:16px;list-style:none;user-select:none} .faq__summary::-webkit-details-marker{display:none} .faq__summary::after{content:’+’;font-family:var(–sans);font-size:24px;color:var(–denali-mid);font-weight:300;line-height:1;transition:transform .2s} .faq__item[open] .faq__summary::after{content:’−’} .faq__body{padding:0 24px 22px} .faq__body p{font-size:15px;color:var(–stone);font-weight:300;line-height:1.75;margin:0} .internal-links{background:var(–snow);border-radius:12px;padding:28px 30px;margin:32px 0} .internal-links__label{font-size:11px;font-weight:600;letter-spacing:.1em;text-transform:uppercase;color:var(–pebble);margin-bottom:16px} .internal-links h3{font-family:var(–serif);font-size:22px;color:var(–pine);margin-bottom:8px;margin-top:0} .internal-links__grid{display:grid;grid-template-columns:repeat(2,1fr);gap:12px;margin-top:20px} .internal-link{display:flex;align-items:center;padding:14px 16px;background:var(–white);border:1px solid var(–mist);border-radius:8px;font-size:14px;font-weight:500;color:var(–denali-mid);text-decoration:none;transition:all .15s} .internal-link:hover{border-color:var(–denali-mid);background:var(–denali-light);transform:translateX(2px);text-decoration:none} .internal-link::after{content:’→’;margin-left:auto;color:var(–pebble)} .internal-link:hover::after{color:var(–denali-mid)} .internal-link–hub{background:var(–gold-light);border-color:rgba(212,145,58,.3);color:var(–pine);font-weight:600} .internal-link–hub::before{content:’★’;color:var(–gold);margin-right:8px} .internal-link–hub:hover{background:var(–pine);color:var(–gold-light);border-color:var(–pine)} .related-grid{display:grid;grid-template-columns:repeat(3,1fr);gap:18px;margin:28px 0} .related-card{background:var(–white);border:1px solid var(–mist);border-radius:12px;padding:22px;text-decoration:none;display:block;transition:all .2s} .related-card:hover{border-color:rgba(46,89,134,.35);box-shadow:0 4px 20px rgba(0,0,0,.06);text-decoration:none} .related-card__type{font-size:10px;font-weight:600;letter-spacing:.1em;text-transform:uppercase;color:var(–pebble);margin-bottom:8px} .related-card__title{font-family:var(–serif);font-size:17px;color:var(–pine);margin-bottom:6px;line-height:1.3} .related-card__desc{font-size:13.5px;color:var(–stone);font-weight:300;line-height:1.55} .guide-cta{background:linear-gradient(135deg,var(–pine),var(–denali));border-radius:16px;padding:44px;margin:48px 0;display:grid;grid-template-columns:1fr auto;gap:32px;align-items:center} .guide-cta__label{font-size:11px;font-weight:600;letter-spacing:.12em;text-transform:uppercase;color:var(–gold);margin-bottom:12px} .guide-cta h2{font-family:var(–serif);font-size:clamp(22px,2.8vw,30px);color:var(–white);margin:0 0 12px;padding:0} .guide-cta p{font-size:15px;color:rgba(255,255,255,.72);font-weight:300;line-height:1.7;margin:0} .guide-cta p a{color:var(–gold)} .sources-block{background:var(–snow);border-radius:12px;padding:28px 32px;margin:32px 0;border:1px solid var(–mist)} .sources-block h3{font-family:var(–serif);font-size:20px;color:var(–pine);margin-top:0;margin-bottom:12px} .sources-block p{font-size:14.5px;color:var(–stone);line-height:1.7;margin-bottom:16px;font-weight:300} .sources-block ul{margin:0;padding-left:22px;font-size:13.5px;color:var(–stone);font-weight:300;line-height:1.7} .sources-block li{margin-bottom:6px} .sources-block a{color:var(–denali-mid);font-weight:500} .sources-block__meta{display:flex;flex-wrap:wrap;gap:16px 24px;padding-top:16px;margin-top:16px;border-top:1px solid var(–mist);font-size:12.5px;color:var(–pebble)} .sources-block__meta strong{color:var(–ink);font-weight:500} @media(max-width:960px){.page-wrap{grid-template-columns:1fr}.sidebar{display:none}.hero__stats{grid-template-columns:repeat(2,1fr)}.range-grid{grid-template-columns:1fr}.trek-grid,.culture-grid{grid-template-columns:1fr}.day-block{padding:22px}.day-block__header{grid-template-columns:auto 1fr;gap:14px}.day-block__stats{grid-template-columns:repeat(2,1fr)}.season-grid{grid-template-columns:repeat(2,1fr)}.internal-links__grid,.related-grid{grid-template-columns:1fr}.guide-cta{grid-template-columns:1fr}.byline{gap:12px 18px}} @media(max-width:600px){.hero__stats{grid-template-columns:1fr 1fr}.day-block__num{font-size:38px}.day-block__stats{grid-template-columns:1fr 1fr}}
    Cluster 10 · Regional Guides · Updated April 2026

    Atlas Mountains Hiking: Complete Guide for Trekkers

    Morocco’s High Atlas range — Mount Toubkal at 4,167 m, Berber villages, mule-supported treks, and the most affordable mountain destination in the world for trekkers. The complete 2026 guide covering routes, costs, seasons, culture, and practical detail for planning your North African mountain adventure.

    4,167 m
    Mt Toubkal
    highest peak
    3
    Major Atlas
    ranges
    $150–$900
    Trek cost
    range
    Apr–Oct
    Primary
    season
    Global Summit Guide A guide in Cluster 10 · Regional Guides View master hub →

    The Atlas Mountains offer something the Alps and Himalaya cannot: serious altitude trekking at budget prices, embedded in one of the world’s most distinctive mountain cultures. Morocco’s Berber (Amazigh) communities have inhabited these valleys for millennia, and a week in the High Atlas combines Mount Toubkal’s 4,167 m summit — North Africa’s highest peak — with stays in remote Berber villages, mule-supported gear transport, and meals cooked over wood fires in guesthouses that have hosted travelers for generations. The total cost of a 7-day Atlas adventure is often less than three nights in Chamonix.

    ⊛
    How this guide was built

    Content reflects current operational information from Morocco-licensed mountain guides (accompagnateurs de montagne) trained through the Moroccan Royal Guide School (Centre de Formation aux Métiers de Montagne), updated 2026 refuge pricing from the Toubkal Refuge (Refuge du Toubkal), and regulatory guidance from the Moroccan Ministry of Tourism. Regional geography sourced from Morocco’s Royal Geographic Society and peer-reviewed mountain geography publications. Fact-check date: April 19, 2026.

    The Three Atlas Mountain Ranges of Morocco

    Morocco’s Atlas system is actually three distinct mountain ranges, each with different character, altitude, and culture. Understanding which range you’re visiting matters for planning — they deliver fundamentally different experiences.

    The Headliner

    High Atlas

    Up to 4,167 m · Toubkal

    Morocco’s highest range, home to Toubkal, the M’Goun Massif, and the heart of Berber mountain culture. Traditional villages at 1,500-2,500 m, snow-capped summits, dramatic valleys. The primary trekking destination.

    The Middle Range

    Middle Atlas

    Up to 3,340 m · Jebel Bou Naceur

    Forested, alpine-character range between the High Atlas and Mediterranean coast. Known for cedar forests, Barbary macaques, and moderate trekking. Ifrane and Azrou are base towns. Lower altitude, cooler climate than High Atlas.

    The Southern Range

    Anti-Atlas

    Up to 2,531 m · Jebel Aklim

    The southernmost range bordering the Sahara. Arid, volcanic terrain with dramatic rock formations. Jebel Saghro and Jebel Sirwa are primary trekking peaks. Culturally Berber but with strong Saharan influences. Best for desert-edge trekking.

    Most first-time Atlas trekkers visit the High Atlas for Toubkal. Repeat visitors often explore the Middle Atlas for shoulder-season hiking or the Anti-Atlas for the striking desert-mountain landscape. The three ranges together cover approximately 2,400 km across Morocco.


    Mount Toubkal: North Africa’s Highest Peak

    At 4,167 meters (13,671 feet), Toubkal is the highest mountain in North Africa and Morocco’s headline peak. Located approximately 60 km south of Marrakech in the High Atlas, Toubkal is accessible via a road journey to Imlil village (1,740 m) followed by a 2-day trek.

    The standard 2-day Toubkal ascent

    01
    Day One · Approach

    Imlil to Toubkal Refuge

    Imlil (1,740 m) → Sidi Chamharouch (2,310 m) → Toubkal Refuge (3,207 m)
    Distance~11 km
    Elevation gain~1,470 m
    Duration5–7 hours
    TerrainMule trail

    Start: Leave Imlil village after breakfast, typically 08:00–09:00. The trail climbs steadily through the valley past walnut and apple orchards, small Berber farms, and the village of Aroumd. Mules carry heavier gear; trekkers carry daypacks.

    Mid-point: Arrive at Sidi Chamharouch (2,310 m), a small shrine settlement where many trekkers stop for mint tea at roadside cafes. The shrine has religious significance for Moroccan pilgrims.

    Upper trail: Beyond Sidi Chamharouch, the trail climbs through scree slopes and rocky terrain, increasingly sparse vegetation. Water sources become limited. The final 500 m gain to the refuge is steady but not technical.

    Refuge arrival: Refuge du Toubkal (Neltner) at 3,207 m arrives in afternoon. Staff serve tagines and mint tea. Dormitory accommodation — bunks with blankets provided. Dinner around 19:00, early bedtime for summit start.

    02
    Day Two · Summit + Return

    Refuge to Summit to Imlil

    Refuge (3,207 m) → Toubkal summit (4,167 m) → Refuge → Imlil
    Summit gain~960 m
    Summit time3–4 hours up
    Total day10–12 hrs
    TerrainScree + rock

    Early start: Wake-up 03:30–04:00, breakfast at refuge. Leave headlamp-on around 04:30–05:00 to summit for sunrise. Trail climbs steeply through scree fields — challenging underfoot but not technical in summer conditions.

    South Cirque route: The standard ascent follows the South Cirque (Ikhibi Sud), gaining 960 m over approximately 3 hours of sustained uphill. The final 200 m to the summit is on rocky terrain with easy scrambling. Winter conditions require crampons and ice axe on this section.

    Summit: Arrive at the 4,167 m summit around 07:00–08:00 for spectacular sunrise views. The famous metal tripod marks the summit. Visible peaks include Ouanoukrim, Ras Ouanoukrim, and Afella. On clear days, the Sahara is visible to the south. Stay 20-30 minutes for photos.

    Descent: Return to refuge for second breakfast and gear collection. Continue down to Imlil — approximately 4-5 hours total descent. Arrive in Imlil afternoon, transfer to Marrakech or overnight in Imlil guesthouses.


    Atlas Mountain Trek Routes: The Major Options

    Beyond the standard 2-day Toubkal ascent, the Atlas Mountains offer longer trek routes for climbers wanting deeper cultural immersion and more mountain time.

    Classic · Most Popular

    Toubkal Summit Trek

    2–3 days · 22 km round trip

    The standard ascent — Imlil to Toubkal Refuge to summit and back. Accessible for most fit hikers in summer. Combines well with 1-2 days in Marrakech for a 4-5 day total trip.

    Altitude1,740–4,167 m
    Cost$150–$400
    Extended · Cultural

    Toubkal Circuit

    5–7 days · 80–100 km

    Full circuit around Toubkal through remote Berber villages, Lac d’Ifni, high passes above 3,000 m, including summit day. The deep-dive High Atlas experience. Cultural value exceeds summit-only trek.

    Highest point4,167 m
    Cost$400–$900
    Challenging · Remote

    M’Goun Traverse

    7–10 days · 120 km

    Trek across the M’Goun Massif (4,068 m) — Morocco’s second-highest massif. Less crowded than Toubkal, more genuine Berber village experience, crosses high passes and river valleys. For experienced trekkers seeking remote country.

    Highest point4,068 m
    Cost$600–$1,200
    Desert-Edge · Volcanic

    Jebel Saghro

    5–7 days · 80 km

    Trek through the Anti-Atlas volcanic landscape bordering the Sahara. Dramatic rock formations, fewer crowds, best in winter when High Atlas is snow-covered. Culturally distinct — Saharan Berber traditions.

    Highest point2,712 m
    Cost$400–$800
    Quieter · Alternate

    Ouanoukrim

    3–4 days · 30 km

    Alternative 4,000 m summit at 4,089 m accessible from the Toubkal Refuge. Less crowded than Toubkal itself. Often combined with Toubkal for climbers wanting two summits in one trip.

    Highest point4,089 m
    Cost$250–$500
    Ultimate · Long

    Full High Atlas Traverse

    15–20+ days · 200+ km

    The complete High Atlas traverse — Imlil to Midelt or similar long-distance route. Visits multiple Berber valleys, crosses numerous 3,000 m+ passes, summits 2-3 peaks. The pinnacle Atlas experience requiring serious commitment.

    Altitude range1,500–4,167 m
    Cost$1,500–$3,000

    When to Hike the Atlas Mountains: Seasonal Planning

    Atlas Mountains seasonality is quite different from European Alps or Himalaya — the shoulder seasons (spring and autumn) are preferred, while summer brings uncomfortable heat and winter adds technical mountaineering demands.

    Spring

    Apr – May
    Prime Season

    Wildflowers, warm days, cool nights. Snow clearing from Toubkal by late April. Ideal balance of weather and views.

    Summer

    Jun – Aug
    Workable

    Hot in valleys (40°C+), pleasant at altitude. Start hikes early. Ramadan may affect services some years.

    Autumn

    Sep – Oct
    Prime Season

    Stable weather, cooler temperatures, harvest in villages. Arguably the best season with fewer crowds than spring.

    Winter

    Nov – Mar
    Technical

    Snow and ice on Toubkal require crampons, ice axe, mountaineering skills. For experienced climbers only.

    Ramadan considerations

    Ramadan follows the Islamic lunar calendar and moves ~10 days earlier each Gregorian year. Check the current date before booking — during Ramadan: (1) Some village services reduce during daylight. (2) Restaurants in non-tourist towns may close. (3) Berber staff serving trekkers generally continue normal service — tourism needs accommodate Ramadan. (4) Fast-breaking iftar meals at sunset are memorable cultural experiences. Trekking during Ramadan is entirely feasible but requires cultural awareness.


    Berber Culture: The Heart of Atlas Trekking

    The Atlas Mountains’ most distinctive feature isn’t the landscape — it’s the Berber (Amazigh) culture that has shaped these valleys for thousands of years before Arab arrival. Understanding this cultural context transforms Atlas trekking from a physical exercise into a genuine cultural exchange.

    Berber Identity & Language

    Berbers — who call themselves Amazigh (“free people”) — are the indigenous inhabitants of North Africa, predating Arab conquest by millennia. Atlas Berbers speak Tashelhiyt, one of three major Amazigh languages in Morocco. Most mountain guides speak Tashelhiyt, French, Arabic, and English.

    Village Hospitality

    Berber villages operate on deep hospitality traditions — guests are honored. Visiting homes, sharing tea, and extended meal protocols are common. Refusing tea is rude; accepting politely and finishing the small glass is expected. Tips: bring small gifts from home, learn “Azul” (hello) and “Tanemmirt” (thank you).

    Mule Support (Not Human Porters)

    Unlike Nepal’s porter system, Atlas trekking uses pack mules managed by muleteers. Mules carry expedition gear, food, and camping equipment. Muleteers (mkhaznis) are skilled animal handlers — respect their work and the mules. Budget 150-250 MAD per mule-day, plus tips for muleteers.

    Islamic Context

    Morocco is Muslim, and Atlas communities are generally conservative. Modest dress (covering shoulders and knees) in villages shows respect. Friday is the day of congregational prayer — avoid disturbing worship times. Alcohol is generally not sold in mountain villages (though tourist hotels in Imlil may have it).

    Food & Tagines

    Trek meals feature tagine — slow-cooked stews of lamb, chicken, or vegetables with spices. Couscous is typical on Fridays. Mint tea is served constantly. Meals are communal — eat with your right hand from shared dishes. Bread (khobz) is ubiquitous. Vegetarians can be accommodated but communicate dietary needs to guides in advance.

    Tipping Etiquette

    Budget 10-15% of trek cost for tips distributed as: lead guide 40%, assistant guide/muleteer 30%, cook 20%, refuge staff 10%. Tip in local currency (Moroccan dirhams) rather than foreign currency. Envelope-based tipping at trip end is standard; small daily tips for exceptional service are appreciated.

    ✦
    The “traveler’s tax”: respecting culture enriches the experience

    Trekkers who approach the Atlas Mountains as a cultural exchange — not just a mountain checklist — have fundamentally different experiences than those who treat it as exercise with scenery. Learn basic Amazigh phrases. Accept second cups of tea. Spend an evening in a village guesthouse rather than staying in Marrakech. The mountains are inseparable from the people who’ve lived among them for thousands of years, and genuine engagement transforms the trip.


    Atlas Mountains Trekking Costs: The Budget Reality

    The Atlas Mountains offer some of the lowest mountain trekking costs worldwide. Here’s how the math works for different trip types.

    Trip TypeDurationGuided Cost/PersonWhat’s Included
    Toubkal Summit2 days$150–$400Guide, mule, refuge, meals
    Toubkal Circuit5–7 days$400–$900Full support, village stays
    M’Goun Traverse7–10 days$600–$1,200Full support + camping
    Jebel Saghro5–7 days$400–$800Anti-Atlas, tented camps
    Full High Atlas Traverse15–20 days$1,500–$3,000Complete expedition logistics
    Independent Toubkal2 days$75–$150Refuge + meals (no guide)

    Individual costs

    • Refuge du Toubkal: 200-250 MAD/night ($20-$25) with half-board
    • Local guide: 400-600 MAD/day ($40-$60)
    • Mule rental: 150-250 MAD/day ($15-$25)
    • Imlil guesthouses: 200-500 MAD/night ($20-$50)
    • Meals in villages: 50-150 MAD ($5-$15)
    • Marrakech to Imlil transport: 500-800 MAD ($50-$80) private taxi or 100 MAD ($10) shared grand taxi
    • International flights: $150-$400 from Europe, $600-$1,200 from North America

    Compare these numbers against Alpine peaks ($1,800-$5,500 for Mont Blanc guided) or Himalayan climbs ($6,500+ for Ama Dablam). See our Mountain Climbing Costs framework for complete budget context across all tiers.


    Safety, Permits & Practical Logistics

    Permits and regulations

    Morocco doesn’t require climbing permits for Toubkal or other Atlas peaks — unlike Nepal’s NMA system. However, regulations changed significantly after the 2018 Toubkal incident where two Scandinavian hikers were murdered by ISIS-inspired attackers near the Toubkal Refuge. Current requirements:

    • Licensed guides strongly recommended for all Toubkal trekking
    • Register at the gendarmerie checkpoint in Imlil before starting
    • Inform the Toubkal Refuge of your planned summit date
    • Winter climbing (Nov-Apr) effectively requires guided support
    • Solo trekking is discouraged though not legally prohibited

    Getting there

    Marrakech Menara International Airport (RAK) is the primary gateway. Flights from Europe (Paris, London, Madrid, Milan) run $150-$400; North America $600-$1,200. From Marrakech to Imlil (60 km, ~90 minutes): private taxi $50-$80 each way or shared grand taxi from Souika taxi station $10. Many trekking operators include Marrakech pickup in their packages.

    Required gear

    • Summer Toubkal: Trekking boots, layers, rain jacket, sun protection, sleeping bag (30°F rating for refuges), warm hat and gloves
    • Winter Toubkal: Add crampons (B2 boots required), ice axe, mountaineering gloves, expedition-grade down jacket, gaiters
    • Extended circuits: Same as summer Toubkal plus water purification, multi-day food strategy discussion with guide

    Health and altitude

    Toubkal at 4,167 m is below the threshold where altitude sickness becomes severe, but AMS is still possible for underprepared trekkers. Budget 2-3 nights in Imlil (1,740 m) before ascent for basic acclimatization. See our Altitude Acclimatization guide. Water purification is essential — mountain streams may carry pathogens. Food safety in villages is generally good when following guides’ recommendations.

    Insurance

    Comprehensive travel insurance with mountain trekking coverage is essential. Global Rescue or Ripcord annual memberships work for Atlas trekking. See our Mountain Climbing Insurance guide for provider comparison.


    Atlas Mountains FAQ: Your Common Questions Answered

    What is the highest mountain in the Atlas Mountains?

    Mount Toubkal (Jebel Toubkal) at 4,167 meters (13,671 feet) is the highest mountain in the Atlas Mountains and in North Africa. Located in Morocco’s High Atlas range approximately 60 km south of Marrakech, Toubkal sees approximately 20,000-25,000 trekkers per year. The peak requires no technical climbing under normal summer conditions — it is primarily a strenuous hike via the standard South Cirque route. The second-highest peak is Ouanoukrim (4,089 m) nearby, with Irhil M’Goun (4,068 m) being the highest peak in the M’Goun Massif region. Toubkal has been accessible to hikers since the 1920s when French colonial trekkers established the Neltner Hut (now Refuge du Toubkal). The peak’s accessibility, moderate altitude, and dramatic views make it one of the most popular North African trekking objectives.

    How hard is it to climb Mount Toubkal?

    Mount Toubkal is graded F (Facile / Easy) on the IFAS alpine scale during summer conditions — a strenuous hike rather than technical climbing. The standard 2-day ascent from Imlil involves: Day 1, trek from Imlil (1,740 m) to Toubkal Refuge (3,207 m) — approximately 5-6 hours and 1,500 m elevation gain. Day 2, summit push from the refuge to 4,167 m summit and return — approximately 6-8 hours with 960 m gain. The route is well-marked but includes scree sections, steep switchbacks, and altitude. Winter conditions (November through April) transform Toubkal into a serious mountaineering objective requiring crampons, ice axe, and often avalanche awareness. Summer trekkers face primarily altitude and heat challenges. Physical fitness equivalent to completing a 1,500-meter uphill hike in a day is essential. Total round-trip Imlil-summit-Imlil is typically 2 days; longer 3-4 day programs include acclimatization.

    When is the best time to hike the Atlas Mountains?

    The best time to hike the Atlas Mountains is April through May (spring) and September through October (autumn), with these shoulder seasons offering optimal combinations of stable weather, moderate temperatures, and manageable crowds. Monthly breakdown: (1) April-May: Spring blooms, snow clearing from Toubkal summit area, warm days and cool nights, occasional spring storms. (2) June-August: Hot season — valley temperatures can exceed 40°C though altitude moderates this; start hikes early. (3) September-October: Autumn is ideal — stable weather, cooler temperatures, harvest activity in Berber villages. (4) November-March: Winter mountaineering conditions — Toubkal becomes technical with snow and ice. (5) Ramadan considerations — the Islamic lunar calendar means Ramadan shifts yearly; during Ramadan some services reduce, though tourism continues. Plan treks avoiding the hottest summer midday hours and respecting Friday prayer times in villages.

    How much does it cost to trek the Atlas Mountains?

    Atlas Mountains trekking costs are among the lowest in world mountaineering destinations. 2026 cost ranges: (1) Toubkal 2-day guided trek: $150-$400 per person including guide, mule support, accommodation, meals. (2) Toubkal Circuit 5-7 day trek: $400-$900 per person. (3) M’Goun traverse 8-10 days: $600-$1,200 per person. (4) Full High Atlas traverse 15+ days: $1,500-$3,000 per person. (5) Independent trekking without guide: Refuge du Toubkal costs 200-250 MAD per night ($20-$25) with half-board. Meals in Imlil village cost $5-$15. Local guides cost 400-600 MAD per day ($40-$60). Mule rental 150-250 MAD per day ($15-$25). International flights to Marrakech run $600-$1,200 from North America, $150-$400 from Europe. Total trip including flights for 7-10 day Atlas adventure runs $1,500-$3,500 from North America — a fraction of Alpine or Himalayan costs.

    Do I need a guide for Toubkal?

    Guide requirements for Toubkal changed significantly after the 2018 tragedy when two Scandinavian hikers were killed, following which Morocco tightened guide regulations for safety and economic reasons. Current 2026 requirements: (1) Independent climbing is technically allowed but strongly discouraged by authorities and refuge staff. (2) The Toubkal area requires hikers to check in at Imlil and typically hire local guides. (3) Licensed Berber mountain guides are available at Imlil for 400-600 MAD per day. (4) Tour operators include guide services in their packages. (5) Winter ascents (November-April) effectively require guides due to technical conditions. Benefits of local guides beyond safety: cultural interpretation, language support (most guides speak French and English, some Spanish/German), navigation in weather, refuge booking help, and economic support for Berber communities. Most experienced trekkers now use local guides both for compliance and richer cultural experience. Independent climbers should register at Imlil and inform Refuge du Toubkal of plans.

    What is the Toubkal Circuit trek?

    The Toubkal Circuit is a 5-7 day trek around Mount Toubkal through the heart of the High Atlas, typically covering Imlil, Tizi n’Mzik, Azib Tamsoult, Tizi n’Ouagane, Azib Likemt, Amsouzerte, Lac d’Ifni, Tizi n’Ouanoums, and back to the Toubkal Refuge for summit day. Typical 7-day itinerary: Day 1 Imlil to Tizi n’Mzik; Day 2 to Azib Tamsoult; Day 3 over Tizi n’Ouagane pass; Day 4 to Lac d’Ifni; Day 5 over Tizi n’Ouanoums to Toubkal Refuge; Day 6 Toubkal summit and back to refuge; Day 7 descent to Imlil. Total distance approximately 80-100 km with 6,000 m cumulative elevation gain. The circuit visits remote Berber villages, crosses high passes above 3,000 m, and includes Toubkal summit. Costs $400-$900 per person with local guide and mule support. The experience combines physical trekking with cultural immersion impossible on the direct Toubkal ascent alone.

    What are Berber guides and porters?

    Berber guides and porters are the indigenous Amazigh (Berber) people of the Atlas Mountains who have lived in these valleys for millennia before Arab arrival. Modern Berber mountain support includes: (1) Licensed mountain guides (accompagnateurs de montagne) trained through Morocco’s Royal Guide School — approximately 400 licensed guides operate in the Toubkal region. (2) Muleteers who manage pack mules carrying expedition gear — standard practice rather than human porters as in Nepal. (3) Refuge staff at the Toubkal Refuge and other mountain huts. (4) Cooks for trekking camps. Most guides speak Amazigh languages (Tashelhiyt primarily) plus French and English, with some Arabic and additional European languages. Cultural protocol: Berbers are traditionally hospitable, food-sharing is important, modest dress is appreciated especially in villages, and respecting Islamic religious practices (Friday prayers, Ramadan) builds strong relationships. Tipping Berber staff is important — budget 10-15% of trip cost for tips distributed fairly among guides, muleteers, and cooks.

    Is it safe to hike in Morocco?

    Morocco is generally safe for mountain trekking, with the Atlas Mountains being among the safer world trekking destinations. Key safety considerations: (1) Mountain-specific risks — altitude (up to 4,167 m at Toubkal), weather changes, scree-fall on steep sections, exposure to heat in valleys. (2) Political stability — Morocco is politically stable with strong tourism infrastructure and minimal crime in mountain areas. (3) The 2018 Toubkal incident where two Scandinavian hikers were murdered by ISIS-inspired attackers was an isolated event that led to significant security improvements and guide regulations. (4) Winter mountaineering on Toubkal has killed climbers through avalanches and cold exposure. Practical safety measures: use licensed local guides, trek with companions rather than solo, respect local customs and dress, carry mountain rescue insurance (Global Rescue, Ripcord), bring water purification, adapt to altitude properly. Avoid political demonstrations in cities and monitor government travel advisories before booking. Morocco’s Royal Gendarmerie patrols mountain areas and coordinates rescue. Most trekkers experience Morocco as welcoming, beautiful, and remarkably safe.


    Authoritative Sources & Further Reading

    Content reflects current Morocco regulatory information and authoritative mountain trekking sources:

    • Moroccan Ministry of Tourism — tourisme.gov.ma — Official tourism regulations
    • Centre de Formation aux Métiers de Montagne (CFAMM) — Morocco’s Royal Guide School for mountain guide certification
    • Refuge du Toubkal (Neltner) — refugetoubkal.com — High camp operations and booking
    • Royal Gendarmerie du Maroc — Mountain rescue coordination
    • Club Alpin Français — Morocco section — Historical climbing records
    • Moroccan Federation of Skiing and Mountaineering (FRMSM) — National climbing body
    • U.S. State Department Morocco travel advisory — Current security information
    • Reference texts: Trekking in the Moroccan Atlas (Alan Palmer), The Atlas Mountains: A Walking and Trekking Guide (Karl Smith), Morocco: The Rough Guide
    • Operator websites: Mountain Voyage Morocco, Mohammed Aztat Trekking, Wild Morocco, Journey Beyond Travel, Atlas Mountain Guides
    • Cultural sources: Institut Royal de la Culture Amazighe (IRCAM) — Amazigh cultural research
    Published: February 15, 2026
    Last updated: April 19, 2026
    Next review: July 2026
    Part of the Global Summit Guide

    Back to the Master Hub

    This guide is one of 71 across 12 thematic clusters on Global Summit Guide. The master hub organizes every guide by experience tier, specific peak, skill area, and region.

    View the Hub →

    Was this helpful?

    Yes
    No
    Thanks for your feedback!
  • Mountain Weather: How to Read Forecasts and Stay Safe

    Cluster 12 · Planning, Safety & Weather · Updated April 2026

    Mountain Weather: How to Read Forecasts and Stay Safe

    The single most important non-fitness skill in mountaineering — reading forecasts accurately, recognizing warning signs, and making safe summit-day decisions. This is the guide climbers consistently wish they’d read before their first expedition.

    5
    Forecast
    elements
    40 km/h
    Everest
    summit threshold
    24–72h
    Most reliable
    forecast range
    85–90%
    24-hour forecast
    accuracy
    Global Summit Guide A guide in Cluster 12 · Planning, Safety & Weather View master hub →

    Fitness gets you to base camp; weather judgment gets you to the summit and back. Most climbing fatalities at altitude involve weather decisions made with incomplete information or incorrect interpretation — not catastrophic terrain errors or sudden illness. This guide covers the weather skills every serious climber needs: reading forecasts accurately, recognizing warning signs, and making summit-day go/no-go decisions that keep you climbing for years rather than ending a promising career on one bad call.

    ⊛
    How this weather guide was built

    Content reflects standard meteorological practice as applied to mountaineering by professional expedition forecasters including Michael Fagin (West Coast Weather) and Chris Tomer (Tomer Weather Solutions), alongside published guidance from the American Alpine Club, the Wilderness Medical Society, and the American Mountain Guides Association (AMGA). Forecast source reviews reflect 2026 app capabilities and expedition-service pricing. Fact-check date: April 19, 2026.

    How to Read a Mountain Weather Forecast: The 5 Elements

    A mountain weather forecast contains far more information than a city forecast, and the elements matter in a specific order. Reading them correctly separates climbers who use forecasts effectively from climbers who glance at summaries and miss what’s coming.

    01
    Pressure Trend
    Rising = stable. Falling = incoming system. Watch 3-hour changes.
    02
    Wind at Summit
    500 mb or 300 mb winds. Summit-level, not base.
    03
    Temperature + Wind Chill
    At your camp elevation, with wind chill calculated.
    04
    Precipitation
    Type, amount, freezing level. Snow above vs rain below.
    05
    Confidence Interval
    How certain the forecast is. Check model agreement.

    Why pressure matters most

    Pressure is the leading indicator — it changes before clouds form, before winds rise, before precipitation arrives. A rapidly falling barometer (3 millibars or more drop in 3 hours) predicts incoming weather 12–24 hours before visual signs appear. Every expedition should carry a barometric altimeter or a satellite device with pressure tracking (Garmin inReach, Suunto altimeter watches). Watch the trend, not just the current reading.

    The altitude problem with wind speeds

    Surface winds are nearly irrelevant for summit decisions. What matters is wind at your actual climbing elevation. Professional forecasts provide winds at pressure levels: 850 mb (~1,500 m), 700 mb (~3,000 m), 500 mb (~5,500 m), and 300 mb (~9,000 m). For Everest, check 500 mb for Camp 2 and Camp 3, and 300 mb for summit day. Apps like Mountain-Forecast.com automatically provide summit-elevation wind — this is the single most important number on the page.


    Best Weather Apps and Forecast Sources for Mountaineers

    Weather source selection matters — free apps cover basic monitoring, but professional expedition services deliver the summit-window confidence that justifies $90K expedition investments. Use both.

    Tier 1 · Free Tools

    Mountain-Forecast.com

    Free · Web + mobile
    Best for

    Daily monitoring of most major peaks worldwide. Provides summit-elevation forecasts, 6-day outlooks, and separate forecasts for different elevations on the same peak. The default free tool used by most self-guided climbers and many commercial operators for routine monitoring.

    Tier 1 · Free Tools

    Windy.com

    Free · Premium $20/year
    Best for

    Wind pattern visualization and multi-model comparison. Lets you switch between ECMWF, GFS, and ICON models to identify forecast agreement. Premium tier unlocks higher-resolution data and extended forecast ranges.

    Tier 1 · Free Tools

    Meteoblue

    Free · Premium available
    Best for

    Strong European coverage and multi-model consensus forecasting. Particularly valuable for Alps climbing where local terrain effects are significant. Meteoblue Expedition service offers custom summit forecasts for major peaks.

    Tier 2 · Professional

    West Coast Weather (Michael Fagin)

    $200–$1,500 per expedition
    Best for

    Summit-window decisions on major expeditions. Daily expert-interpreted briefings, satellite-delivered to base camp, with confidence intervals and specific summit-day go/no-go recommendations. Used by Alpine Ascents, IMG, and Madison Mountaineering.

    Tier 2 · Professional

    Tomer Weather Solutions (Chris Tomer)

    $200–$1,500 per expedition
    Best for

    Alternative to West Coast Weather with strong reputation on Everest and 8,000 m peaks. Multi-model consensus forecasting with explicit confidence intervals. Many operators subscribe to both services for independent confirmation on summit decisions.

    Tier 2 · Professional

    Garmin inReach Weather

    $15–$65/month subscription
    Best for

    Satellite-delivered forecasts beyond cell coverage. Essential for any expedition operating above base camp where internet access fails. Request forecasts from anywhere on the mountain, including emergency condition updates.

    For any climb above 5,000 m, combine daily free-app monitoring during expedition prep with professional expedition forecasting during summit-window decisions. The $500 invested in professional forecasting on a $90K Everest expedition is well spent.


    Warning Signs of Bad Mountain Weather You Can See

    Forecast data is powerful but limited — visual weather signs add real-time information that apps can’t deliver. These signs have saved countless lives when climbers recognized them and turned around despite forecasts that hadn’t yet updated.

    Lenticular Clouds
    Lead time: 12–24 hours

    Lens-shaped clouds forming over or downwind of peaks. Indicate strong winds aloft (often 80+ km/h) even when surface conditions feel calm. Classic warning that a weather system is approaching or has already established jet-stream winds over the summit. Never start a summit push when lenticulars are forming.

    Halo Around Sun or Moon
    Lead time: 12–36 hours

    Bright ring caused by cirrus clouds at high altitude, typically the leading edge of an approaching warm front. Often appears 24+ hours before deteriorating conditions reach the surface. Particularly valuable at night when other signs are harder to observe.

    Rapidly Falling Barometer
    Lead time: 6–24 hours

    A pressure drop of 3 millibars or more in 3 hours predicts incoming weather. The faster and steeper the drop, the more intense the system. Barometric altimeters make this trivially observable — check your watch regularly during summit window periods.

    Humidity & Temperature Rising Together
    Lead time: 6–12 hours

    Counterintuitive but important — a warm front approach brings moisture and rising temperatures before precipitation. If it’s unexpectedly warm and humid at high elevation, weather is deteriorating, not improving. Most climbers misread this as a “nice day” signal.

    Anvil-Shaped Cumulonimbus
    Immediate hazard

    Thunderstorm cells with flat tops and towering bodies. Signal immediate severe weather including lightning, hail, extreme winds. Common on afternoon climbs in summer alpine conditions. Descend immediately and aggressively — don’t wait to see where the cell goes.

    Sudden Wind Direction Shift
    Lead time: 1–4 hours

    Wind that suddenly shifts direction, particularly from west to south/southwest in North America, signals a frontal passage. Often accompanied by temperature change and increased gusts. Expect deteriorating conditions within hours.

    Unusual Calm Before Wind
    Lead time: Minutes to hours

    A strange, abrupt calm in normally breezy conditions — the “calm before the storm” effect. Can precede violent downslope winds, severe thunderstorms, or sudden front arrivals. Rare but extremely dangerous when it occurs.

    Snow Plumes From Summit Ridges
    Current conditions

    Visible snow plumes streaming off summit ridges indicate wind speeds typically 40+ km/h at elevation even if base camp is calm. Good proxy for summit-level wind when forecast data is unavailable. Plume length correlates roughly with wind speed.


    What Wind Speed Is Too Dangerous for Climbing?

    Wind speed thresholds are context-dependent, but general guidelines hold across most mountaineering. These thresholds assume summit-elevation winds, not base camp winds — check your forecast carefully for which elevation the number represents.

    < 30 km/h
    Safe
    Ideal climbing conditions
    30–50 km/h
    Moderate
    Manageable with experience
    50–70 km/h
    Challenging
    Exposed terrain dangerous
    70–90 km/h
    Dangerous
    Most teams abort summits
    > 90 km/h
    Fatal Risk
    Evacuate to lower camps

    Everest’s 40 km/h threshold

    On Everest, professional expedition forecasters typically recommend under 40 km/h at summit for summit-day attempts. The South Col to summit traverse is highly exposed, and the combination of -30°C temperatures with even moderate winds produces severe wind chill that defeats most layering systems. Most commercial operators won’t send climbers to the summit when forecasts predict over 45 km/h sustained. The 2019 “summit queue” deaths occurred partly because teams rushed marginal windows rather than waiting for better conditions.

    Wind chill amplifies the danger

    Temperature and wind interact multiplicatively, not additively. At -30 °C, adding 40 km/h wind produces an effective temperature around -45 °C. At 60 km/h wind, the same temperature feels like -52 °C. Most expedition-grade clothing systems start failing above 50 km/h sustained wind — the gear manages either extreme cold OR high wind, not both simultaneously for extended periods.


    Understanding Weather Windows and Summit Timing

    A weather window is a period of forecasted clear conditions long enough to safely execute your climb. Finding them, evaluating their reliability, and committing at the right moment is the defining expedition skill.

    Summit windows by region

    Each major climbing region has a predictable summit-window pattern driven by jet stream behavior, monsoon patterns, and seasonal transitions.

    Region / PeakPrimary windowSecondary windowDefining factor
    Everest & Himalayan 8,000ersMay 15–23Late Sept–OctJet stream lift + pre/post monsoon
    AconcaguaDec 15–Feb 15NoneSouthern Hemisphere summer
    DenaliMay 15–Jul 5NonePost-winter, pre-rain season
    KilimanjaroJan–Feb, Jun–OctN/A — monthly windowsDry seasons between rains
    Mont Blanc / MatterhornJun 15–Sep 15NoneAlpine summer conditions
    Cascades / RockiesJul 1–Sep 10NoneStable summer high pressure
    Antarctica (Vinson)Nov 15–Jan 31NonePolar summer logistics window
    Patagonia (Fitz Roy)Nov 15–Mar 15NoneBrief summer weather breaks

    Window length requirements

    Different climbs need different window durations. An alpine day route might need 8–12 hours of clear weather. Rainier’s summit push needs 18–24 hours. Aconcagua’s typical summit day needs 14–18 hours. Everest’s summit push from Camp 4 back to Camp 2 needs 36–48 hours of low winds and no precipitation. Always check whether the forecast window is long enough for your objective before committing.

    Early-morning summit strategy

    Most summits happen in early morning — typically 2 AM to 8 AM with summit reached by 6–11 AM. Three reasons: (1) Afternoon thunderstorm development is the most common weather hazard in summer alpine climbing. (2) Wind intensification through the day due to solar heating creates late-morning wind buildup. (3) Snow conditions deteriorate with sun exposure — harder to climb, higher avalanche risk, softer cornices. Summit-day starts of 10 PM to 2 AM are standard for expedition-style climbs.

    ◆
    The “false window” trap

    Expeditions consistently get fooled by false windows — apparent weather breaks that don’t actually materialize or close early. Signs of false windows: short duration (under 36 hours), low forecast confidence, models disagreeing, or the window appearing only in one forecast source. Wait for windows confirmed by multiple sources with high confidence ratings. The climbers who died in 2019’s Everest queue were partly victims of a false window that teams committed to before waiting for better confirmed conditions.


    Summit-Day Go/No-Go Decisions: A Framework

    The decision to attempt or abort a summit is typically made 12–24 hours before the summit push. A disciplined framework replaces gut decisions that tend to fail under the pressure of sunk-cost thinking.

    01

    Check forecast data 24–48 hours ahead

    Review your primary forecast source plus at least one independent source. For expedition climbs, your professional forecaster’s briefing. For independent climbs, cross-reference Mountain-Forecast, Windy, and Meteoblue. Disagreement between sources is itself a signal — lower confidence forecasts require more conservative decisions.

    02

    Apply explicit thresholds

    Write down your thresholds before the summit day. Don’t negotiate them during the push. Typical thresholds: summit winds under X km/h, no precipitation forecast, confidence above 70%, storm timing at least Y hours after expected descent. If any threshold is violated, default to abort.

    03

    Observe current conditions at your camp

    Visual signs override forecasts when they conflict. If you see lenticular clouds, falling pressure, or unusual wind patterns — these trump what the app says. Apps have the past and predicted future; your eyes have the present, which is usually more accurate than the forecast at that moment.

    04

    Assess team readiness honestly

    Weather is one factor; team condition is another. Even perfect weather doesn’t save a climber with HAPE symptoms, frostbitten fingers, or severe exhaustion. Aborting for weather is routine; aborting for health is the right call even more often. Integrate both into the decision.

    05

    Set a turnaround time — and honor it

    Every summit push needs an absolute turnaround time regardless of progress. Typical turnaround: 11 AM on alpine climbs, 1–2 PM on big mountains. Climbers who missed the summit by an hour but returned alive made the right decision. Climbers who continued past turnaround to summit and died didn’t. The mountain will be there next year.

    06

    Accept that patience beats ambition

    The hardest decision in mountaineering is waiting. Sitting at Camp 4 for another day while weather clears tests every climber. But summit-window discipline is what separates long climbing careers from short, spectacular, tragic ones. Budget for patience in every expedition — the financial cost of waiting is always less than the cost of disasters.


    When Is the Best Time to Summit a Mountain?

    Summit timing works at two scales: seasonal timing (which month or year), and daily timing (what hour of the specific day). Both matter.

    Seasonal summit timing

    As shown in the regional windows table above, each major peak has its own seasonal summit calendar driven by hemisphere position, monsoon patterns, and jet stream behavior. Plan expeditions 12–18 months ahead to align with these windows — trying to climb Aconcagua in July (Southern Hemisphere winter) or Everest in August (peak monsoon) doesn’t work regardless of individual fitness or determination.

    Daily summit timing

    Within any summit day, start between 10 PM and 2 AM with the goal of summiting by 6–11 AM and being below the summit by noon. This pattern optimizes for: afternoon thunderstorm avoidance (peaks form in afternoon heat), wind minimization (winds typically build through the day), snow condition management (stable overnight snow softens rapidly with sun), and turnaround-time discipline (forces early decisions before sunk-cost bias accumulates).

    Multi-day summit windows

    Big-peak summit windows on Everest, Aconcagua, Denali, and Vinson typically involve multi-day staged pushes rather than single-day attempts. Climbers move up through camps over 3–5 days with summit day being the final push from the highest camp. Weather decisions apply to each camp move, not just the final summit day — aborting at Camp 2 is always preferable to aborting at Camp 4 because descent is far less dangerous.


    Mountain Weather FAQ: Your Common Questions Answered

    How do you read a mountain weather forecast?

    Reading a mountain weather forecast requires looking at five critical elements in order: (1) Pressure trends — rising pressure generally signals stable weather, falling pressure signals incoming systems. (2) Wind speed at summit elevation, not just base level — most mountain forecasts provide wind speeds at 500 mb (around 5,500 m) or 300 mb (around 9,000 m). (3) Temperature at altitude including wind chill calculation. (4) Precipitation type and amount, with attention to freezing levels. (5) Storm timing including the confidence interval of the forecast. Professional climbing weather services like Michael Fagin’s West Coast Weather or Chris Tomer provide these elements in expedition-formatted briefings. For self-service forecasting, Mountain-Forecast.com, Windy.com, and Meteoblue are the most reliable free tools.

    What is the best weather app for mountaineering?

    The best weather apps for mountaineering in 2026 are: (1) Mountain-Forecast.com — free, covers most major peaks worldwide with summit-elevation forecasts and 6-day outlooks. (2) Windy.com — free with premium tier, excellent wind and pressure visualization, multiple weather model comparison. (3) Meteoblue — strong European coverage, multi-model consensus forecasts, premium expedition packages. (4) inReach Weather — satellite-delivered forecasts for expeditions beyond cell coverage. (5) Professional services like West Coast Weather (Michael Fagin) or Tomer Weather Solutions (Chris Tomer) for major expeditions — $200–$1,500 per expedition for expert-interpreted daily briefings. For serious expeditions, combine a free app for daily monitoring with a professional service for summit-window decisions.

    What are the warning signs of bad mountain weather?

    Key warning signs of approaching bad mountain weather include: (1) Rapidly falling barometric pressure — a drop of 3 mb or more in 3 hours indicates an incoming storm. (2) Lenticular clouds (lens-shaped clouds over peaks) — signal high winds aloft and often precede storm systems by 12–24 hours. (3) Halo around the sun or moon — caused by high cirrus clouds, often the first sign of an approaching warm front. (4) Sudden wind shifts, especially from west to south or southwest in North America. (5) Increasing humidity and warmer temperatures at altitude (counterintuitive but a warm front signal). (6) Anvil-shaped cumulonimbus clouds — immediate thunderstorm hazard. (7) Sudden silence or unusual calm before wind — can precede severe systems. Combined with forecast data, these visual signs add critical real-time information that apps miss.

    What is a weather window for climbing?

    A weather window is a period of forecasted clear, stable conditions long enough to complete a specific climb or summit push. On large expeditions like Everest, a typical summit window requires 36–48 hours of low winds (under 40 km/h at summit) and no precipitation. On shorter alpine routes, a weather window might be 8–12 hours. Weather windows are identified by monitoring multi-day forecasts and watching for patterns where jet stream winds lift off the summit. Everest’s spring summit window typically falls May 15–23 when the jet stream briefly moves north before monsoon arrival. False windows — apparent breaks that don’t actually materialize — are common, which is why professional expedition forecasters build confidence intervals into their predictions.

    How accurate are mountain weather forecasts?

    Mountain weather forecast accuracy degrades significantly with forecast distance and elevation. At 24 hours, forecasts from quality services (Mountain-Forecast, Meteoblue, professional forecasters) are approximately 85–90% accurate for general conditions and 70–80% accurate for specific timing. At 3–5 days, accuracy drops to 60–70%. Beyond 7 days, mountain forecasts become increasingly unreliable. Forecast accuracy is worse in complex terrain where local effects dominate — summit-specific forecasts for peaks like Denali or the Eiger are harder than large-valley forecasts. This is why professional expeditions use multi-model consensus forecasting (comparing ECMWF, GFS, and ICON model outputs) and why summit-window decisions are typically made on 48–72 hour forecasts rather than longer-range predictions.

    What wind speed is too dangerous for climbing?

    Wind speed safety thresholds depend on terrain exposure, altitude, and climber experience. General guidelines: (1) Under 30 km/h (19 mph) at summit — ideal conditions, most climbers can proceed safely. (2) 30–50 km/h (19–31 mph) — challenging but manageable with full expedition gear and experienced climbers. (3) 50–70 km/h (31–43 mph) — dangerous on exposed ridges, standing upright becomes difficult, frostbite risk elevated. (4) 70–90 km/h (43–56 mph) — extremely dangerous, most commercial expeditions abort summit attempts. (5) Above 90 km/h — fatal risk, cannot safely move above 7,000 m, evacuate to lower camps. On Everest specifically, 40 km/h at summit is the common upper threshold for go/no-go decisions. Wind chill compounds the danger — -30°C with 40 km/h wind feels like -45°C.

    When is the best time to summit a mountain based on weather?

    The best summit timing varies by region and altitude. Major peak windows: (1) Everest and Himalayan 8,000ers — mid-to-late May (pre-monsoon) or late September–October (post-monsoon). (2) Aconcagua — December to February (Southern Hemisphere summer). (3) Denali — May to early July. (4) Kilimanjaro — January–February and June–October (dry seasons). (5) European Alps (Mont Blanc, Matterhorn) — mid-June to mid-September. (6) Cascades and Rockies — July to early September. Within a season, most summits happen in the early morning (2–8 AM) to avoid afternoon thunderstorm development, wind-intensification, and deteriorating snow conditions. Summit-day starts typically begin 10 PM to 2 AM with the goal of summiting by 8–11 AM and being below the summit by noon.

    How far in advance can you predict mountain weather?

    Reliable mountain weather prediction extends approximately 3–5 days for specific events and 7–10 days for general pattern identification. Beyond 10 days, forecasts become educational rather than actionable. For climbing decisions: (1) Summit-day decisions are made on 24–48 hour forecasts with the highest confidence. (2) Expedition start-date decisions are made on 5–7 day pattern forecasts. (3) Season selection is based on climatological averages and long-range pattern indicators but not specific predictions. Modern ensemble forecasting (running multiple model scenarios) helps identify forecast confidence — when all ensemble members agree, the prediction is more reliable; when they diverge significantly, weather is less predictable. Professional expedition forecasters provide both the prediction and its confidence interval.


    Authoritative Sources & Further Reading

    Weather forecasting content reflects standard meteorological practice as applied to mountaineering by recognized experts and organizations:

    • Michael Fagin — West Coast Weather (westcoastweather.com) — Professional expedition weather forecasting, Everest summit-window analysis
    • Chris Tomer — Tomer Weather Solutions — Professional mountain weather forecasting, multi-model consensus analysis
    • American Mountain Guides Association (AMGA) — Guide certification standards including weather competency requirements
    • American Alpine Club / American Alpine Journal — Accident reports with weather-incident analysis
    • Wilderness Medical Society — Practice guidelines for weather-related wilderness emergencies
    • European Centre for Medium-Range Weather Forecasts (ECMWF) — Primary global forecasting model used in expedition forecasting
    • NOAA / National Weather Service — US mountain-region forecasting standards
    • Reference texts: Mountain Weather (Dunlop), Mountain Weather and Climate (Barry), Freedom of the Hills (The Mountaineers)
    • Apps and services: Mountain-Forecast.com, Windy.com, Meteoblue, Garmin inReach Weather
    Published: February 15, 2026
    Last updated: April 19, 2026
    Next review: July 2026
    Part of the Global Summit Guide

    Back to the Master Hub

    This guide is one of 71 across 12 thematic clusters on Global Summit Guide. The master hub organizes every guide by experience tier, specific peak, skill area, and region.

    View the Hub →

    Was this helpful?

    Yes
    No
    Thanks for your feedback!
  • Tour du Mont Blanc: TMB Trek Guide, Itinerary & Refuges

    Mont Blanc massif above an alpine lake near Chamonix on the Tour du Mont Blanc
    France · Italy · Switzerland · Europe’s classic hut-to-hut trek

    Tour du Mont Blanc: Complete TMB Trek Guide

    The Tour du Mont Blanc circles the Mont Blanc massif for roughly 170 kilometres through France, Italy and Switzerland. Most hikers spend 7–11 days crossing Alpine passes, sleeping in refuges and villages, and climbing close to 10,000 metres in total. This guide covers the route, 11-stage itinerary, 2027 refuge booking, cost, difficulty, best season, variants, gear and logistics.

    ≈170 km / 105 mi ≈10,000 m ascent 7–11 days France · Italy · Switzerland 2027 booking dates included
    The direct answer

    What Is the Tour du Mont Blanc?

    The Tour du Mont Blanc—usually shortened to TMB—is a roughly 170 km / 105 mi walking circuit around the Mont Blanc massif. It crosses France, Italy and Switzerland and accumulates close to 10,000 metres / 33,000 feet of ascent. The official TMB organization says most hikers complete the circuit in 7–11 days. The standard route is non-technical in normal summer conditions, but consecutive long climbs, high passes, weather and carrying a pack make it a serious endurance trek rather than an easy walking holiday.

    Planning the 2027 Tour du Mont Blanc?

    The official TMB refuge system opens bookings for the 2027 season on October 15, 2026. Popular accommodation can fill rapidly, so hikers with fixed dates should build the itinerary around the hardest-to-get beds rather than waiting until spring.

    Distance ≈170 km About 105 miles around the Mont Blanc massif.
    Total climbing ≈10,000 m Roughly 33,000 feet of cumulative ascent.
    Classic route high point 2,537 m Grand Col Ferret between Italy and Switzerland.
    Typical duration 7–11 days Ten or eleven stages provide a balanced first TMB.
    One massif · three countries

    Tour du Mont Blanc Route Map.

    The classic counter-clockwise circuit normally begins around Les Houches, passes through the French Val Montjoie, enters Italy at Col de la Seigne, crosses into Switzerland at Grand Col Ferret and returns to the Chamonix Valley via Trient and Col de Balme.

    The route line is schematic and intended for orientation only. Variants, accommodation choices, trail closures and lift use can change the exact route. Use current official mapping for navigation.
    Balanced full circuit

    Tour du Mont Blanc 11-Day Itinerary.

    This is a classic full-circuit framework rather than a rigid reservation plan. Exact overnight locations vary with availability, route variants and whether you use valley transport or lifts.

    DayStageCountryKey terrainPlanning note
    1Les Houches → Les ContaminesFranceCol de Voza; optional Col de Tricot variantThe first sustained climbing day. Do not make the opening stage a fitness test.
    2Les Contamines → Les Chapieux / Bonhomme areaFranceCol du Bonhomme and Croix du BonhommeA major Alpine stage and an early-season snow checkpoint.
    3Les Chapieux → Rifugio Elisabetta areaFrance → ItalyVallée des Glaciers and Col de la SeigneThe first international border crossing and one of the defining TMB days.
    4Elisabetta / Val Veny → CourmayeurItalyVal Veny, Miage glacier views, Mont Blanc’s Italian sideCourmayeur provides hotels, restaurants, supplies and a natural recovery point.
    5Courmayeur → Rifugio BonattiItalyMont de la Saxe / Val FerretShorter distance does not mean easy—there is substantial climbing out of Courmayeur.
    6Bonatti → La FoulyItaly → SwitzerlandGrand Col Ferret, 2,537 mThe highest point of the standard TMB and a long descent into Swiss Val Ferret.
    7La Fouly → Champex-LacSwitzerlandVal Ferret villages and forest trailsA comparatively gentler stage between major pass days.
    8Champex-Lac → TrientSwitzerlandAlp Bovine route or Fenêtre d’Arpette variantChoose the variant according to weather, snow, energy and mountain experience.
    9Trient → Tré-le-Champ / ArgentièreSwitzerland → FranceCol de BalmeThe circuit crosses back into France with big views toward the Chamonix Valley.
    10Tré-le-Champ → La Flégère / Lac Blanc areaFranceAiguilles RougesOne of the best Mont Blanc panorama days; variants and lift access can change the stage.
    11Flégère / Chamonix side → Les HouchesFranceBrévent / Chamonix ValleyComplete the circuit, with route choices depending on accommodation and lift use.

    The official TMB route is normally divided into 10–11 stages, with typical stage distances of roughly 10–20 km and individual days sometimes exceeding 1,000 m of ascent. The exact itinerary should be built around refuge availability and current conditions.

    Mont Blanc seen from Col de la Seigne on the Tour du Mont Blanc
    France → Italy

    Col de la Seigne Is Where the TMB Becomes an International Journey.

    The pass marks the natural border between France and Italy. Behind you is the Vallée des Glaciers; ahead are Val Veny, the glaciers of the Italian side of Mont Blanc and eventually Courmayeur.

    Photo: Rémih · Wikimedia Commons · CC BY-SA
    The most important itinerary choice

    7 Days, 10 Days or 11–12 Days?

    The TMB can be compressed or expanded, but the number of days changes the experience much more than the total route distance changes.

    Fast · athletic

    7 Days

    Official TMB guidance suggests roughly 24 km and 1,400 m of climbing per day at this pace. It is appropriate for strong hikers who already know they recover well from consecutive mountain days.

    Balanced

    10 Days

    About 17 km and 1,000 m of ascent per day on average. This is an excellent target for fit hikers who want the full circuit without turning every day into a race.

    More comfortable

    11–12 Days

    Shorter stages create more margin for weather, photographs, long lunches, variants and recovery. This is often the strongest first-TMB format.

    Non-technical does not mean easy

    How Hard Is the Tour du Mont Blanc?

    The official organization identifies cumulative climbing, pack weight and repeated days as the main difficulty rather than technical mountaineering.

    Total distance ≈170 km

    Distance is spread across consecutive mountain days rather than one isolated effort.

    Total ascent ≈10,000 m

    The vertical total is the number many first-time TMB hikers underestimate.

    Highest classic pass 2,537 m

    Grand Col Ferret is high enough for cold wind and lingering early-season snow.

    Technical level Hiking

    The classic summer route normally requires hiking skills rather than ropes or glacier travel.

    The main training target is consecutive climbing days.

    A hiker who can complete one large mountain day but cannot recover for another 1,000 metres of climbing the next morning is not yet fully prepared for the TMB. Training should include back-to-back hiking days, long descents and time carrying the same pack weight you intend to use on the circuit.

    Either direction works

    Clockwise or Counter-Clockwise?

    The official TMB organization says counter-clockwise is the most common direction and generally the best marked, while clockwise travel can reduce encounters with the main flow of hikers on some stages.

    Most common

    Counter-Clockwise

    Les Houches → Les Contamines → Italy → Switzerland → Chamonix. The classic sequence and the easiest itinerary to compare with mainstream guidebooks.

    Alternative

    Clockwise

    The same circuit in reverse. It can feel quieter because you meet the main flow rather than moving inside it.

    More important than direction

    Refuge Availability

    If one direction gives you a substantially stronger accommodation sequence for fixed dates, the booking calendar may be more important than tradition.

    The hardest logistical problem

    Tour du Mont Blanc Refuge Booking for 2027.

    The TMB’s infrastructure makes the trek accessible, but it also creates a reservation bottleneck. Beds—not trail permits—often determine the final itinerary.

    2027 season

    Bookings Open October 15, 2026.

    Official system

    Member refuges and gîtes become available through the official Tour du Mont-Blanc booking platform.

    Book fixed dates early

    The official organization warns that the most popular accommodation can fill quickly after booking opens.

    Build around bottlenecks

    Secure the hardest nights first, then connect the easier stages around them.

    How TMB Refuges Work

    Accommodation ranges from traditional mountain refuges and gîtes to hotels in larger villages such as Courmayeur and Chamonix.

    • Half-board is common: overnight stay, dinner and breakfast.
    • Dormitory half-board: official guidance currently suggests roughly €65–€95 per person per night.
    • Accommodation total: roughly €500–€900 for a direct-booked 7–10 day trek is a current official planning range.
    • Sleeping bag liner: normally expected in refuges; blankets are supplied.
    • Cash: carry euros and Swiss francs for places where cards are unreliable or unavailable.
    • Opening dates matter: June and September itineraries should verify that every planned refuge is operating.
    Italian Val Ferret

    Why Rifugio Bonatti Is One of the TMB’s Signature Nights.

    Rifugio Walter Bonatti sits above Val Ferret opposite the Mont Blanc massif. It represents the classic TMB refuge experience: walk in, sleep in the mountains, eat communally and begin the next stage already high above the valley floor.

    The Bonatti stage is also why accommodation should shape the itinerary early. Highly desired huts can become the fixed points around which the rest of a self-guided circuit is built.

    Rifugio Walter Bonatti in Val Ferret on the Tour du Mont Blanc Rifugio Walter Bonatti · Cboon · Wikimedia Commons · CC BY-SA 3.0
    Price the trip in layers

    How Much Does the Tour du Mont Blanc Cost?

    The clearest way to budget is to separate the unavoidable trail costs from optional comfort and international travel.

    Refuge half-board €65–€95

    Current official planning range per person per night in a dormitory.

    7–10 day lodging €500–€900

    Official approximate accommodation range when booking refuges directly.

    Town upgrades Variable

    Private rooms and hotels in Courmayeur or Chamonix can raise the budget significantly.

    Guided packages Higher

    Guiding, baggage transfer and pre-arranged accommodation trade higher cost for simpler logistics.

    Do not compare a dormitory self-guided TMB with an all-inclusive guided package.

    They are different products. Add lunches, trail snacks, drinks, local transport, luggage transfer, hotels before or after the trek, Geneva transfers, insurance and international travel before comparing total trip prices.

    Grand Col Ferret on the Tour du Mont Blanc between Italy and Switzerland
    Italy → Switzerland · 2,537 m

    Grand Col Ferret Is the High Point of the Classic TMB.

    The climb from Italian Val Ferret is steady rather than technical, but weather can change the character of the pass quickly. Wind, cloud and lingering snow make an early start and a mountain forecast more important than the altitude number alone.

    Photo: Rémih · Wikimedia Commons · CC BY-SA
    A short Alpine season

    Best Time to Hike the Tour du Mont Blanc.

    The official classic season is mid-June through mid-September, but the experience changes substantially inside that three-month window.

    PeriodTrail conditionsRefugesCrowdsMain issue
    Early–mid JuneSnow can remain on major passesSome may not yet be openLowerEarly-season snow and incomplete services
    Late JuneUsually improving rapidlyMost seasonal systems operatingModerateLingering snow can still affect north-facing terrain
    JulyPrime summer conditionsFully activeHighAccommodation demand and afternoon storms
    AugustPrime summer conditionsFully activeVery highHeat, crowds and booking scarcity
    Early SeptemberOften excellent, coolerGenerally operatingLowerShorter daylight and colder mornings
    Mid–late SeptemberMore variableClosures beginLowerCold, early snow and reduced infrastructure

    Check the forecast for the passes, not Chamonix.

    The official TMB organization specifically recommends watching the freezing level, expected thunderstorm timing and wind at roughly 2,500 metres. Summer storms often develop during the afternoon, making early starts one of the simplest risk-management tools on the circuit.

    Tour du Mont Blanc trail through Val Ferret above Courmayeur in Italy
    Italian Val Ferret

    The TMB’s Best Days Are Often the Traverses Between the Passes.

    The trail above Courmayeur and through Val Ferret keeps the Mont Blanc massif directly across the valley. This is why rushing the TMB into the fewest possible days can miss part of the experience: the route is not only a sequence of cols to be crossed.

    Photo: Rémih · Wikimedia Commons · CC BY-SA
    The standard route is only the beginning

    Tour du Mont Blanc Variants Worth Understanding.

    Variants make the TMB unusually flexible, but some require substantially more experience than the standard route.

    France

    Col de Tricot

    A higher and more mountainous alternative early in the circuit. Weather and snow can make the standard route preferable.

    France

    Col des Fours

    A high variant around the Bonhomme section that can retain snow early in the season.

    Switzerland

    Fenêtre d’Arpette

    At roughly 2,665 m, this is one of the route’s most demanding popular variants. The official organization recommends it for experienced, fit hikers comfortable on rocky terrain.

    France

    Lac Blanc

    The Aiguilles Rouges side of the Chamonix Valley provides one of the classic views across to the Mont Blanc massif.

    France

    Brévent

    A high finish above Chamonix that can be adapted according to weather, energy and lift operation.

    Everywhere

    Lower Route

    Do not treat a high variant as compulsory. Poor visibility, snow, thunderstorms or fatigue are valid reasons to use the standard or lower route.

    Three ways to organize the circuit

    Self-Guided, Guided or Self-Guided With Luggage Transfer?

    The standard TMB does not require a guide in normal summer conditions. The useful question is how much logistics and decision-making you want to manage yourself.

    Most independent

    Self-Guided

    You reserve beds, manage navigation, choose variants and respond to weather yourself. Strong fit for experienced hikers comfortable traveling independently in the Alps.

    Most support

    Guided

    A guide handles route decisions, mountain interpretation and much of the trip structure. Packages may also include luggage transfer and pre-arranged lodging.

    Middle ground

    Luggage Transfer

    Walk independently with a daypack while a transfer service moves a larger bag between selected valley accommodations. Remote refuges may not be reachable by luggage services.

    Mont Blanc seen from the Tour du Mont Blanc hiking trail
    The mountain stays at the center

    You Are Circling Mont Blanc—not Climbing It.

    The TMB is a hiking circuit around the massif. Reaching the 4,800-metre-class summit of Mont Blanc is a completely different mountaineering objective involving glacier travel, altitude and technical skills.

    Travel light without pretending it is summer at sea level

    Tour du Mont Blanc Gear List.

    The official TMB planning guidance recommends a roughly 35–45 litre pack and a total pack weight around 8–12 kg. Refuge accommodation means you do not need a full expedition camping system for a standard hut-to-hut itinerary.

    Pack

    35–45 Litres

    Large enough for layers, food, water and refuge essentials without encouraging unnecessary equipment.

    Weather

    Waterproof + Warm Layer

    Carry rain protection and insulation even when the Chamonix Valley forecast looks warm.

    Feet

    Broken-In Footwear

    Choose mountain walking footwear you have already tested over long descents and consecutive days.

    Refuges

    Sleeping Bag Liner

    Refuges supply bedding or blankets; a liner is normally part of the hut system.

    Efficiency

    Trekking Poles

    Particularly useful on the repeated long descents from the major passes.

    Navigation

    Offline Map

    The route is well established, but mist, snow, variants and closures still require real navigation ability.

    The Alps are unusually accessible

    How to Get to the Tour du Mont Blanc.

    Most international hikers use the Chamonix Valley as their gateway. The circuit is unusually easy to combine with public transportation compared with many world-class mountain treks.

    Common airport

    Geneva

    Geneva Airport is the primary international gateway for the Chamonix Valley, with scheduled shared and private transfer services.

    Traditional start

    Les Houches

    Les Houches is the standard start and finish for the complete walking circuit and sits immediately down-valley from Chamonix.

    Useful town

    Chamonix

    Chamonix offers lodging, outdoor shops, transportation, restaurants and easy pre- or post-trek mountain days.

    You do not need a rental car to hike the TMB.

    A point-to-point transfer from Geneva combined with local valley transportation is normally much more useful than parking a vehicle for more than a week while you walk an international circuit.

    Direct search answers

    Tour du Mont Blanc FAQ.

    The main questions hikers need answered before booking the circuit.

    How long is the Tour du Mont Blanc?

    The Tour du Mont Blanc is approximately 170 kilometres / 105 miles around the Mont Blanc massif through France, Italy and Switzerland.

    How many days does the Tour du Mont Blanc take?

    The official TMB organization says the circuit is commonly completed in 7–11 days. Seven days creates a fast, athletic schedule; ten days is a balanced pace; and 11–12 days allows shorter stages and more margin.

    How much elevation gain is on the Tour du Mont Blanc?

    The complete circuit accumulates close to 10,000 metres, or about 33,000 feet, of positive elevation gain.

    What is the highest point on the Tour du Mont Blanc?

    Grand Col Ferret at 2,537 metres is generally the highest point on the standard classic route. The popular Fenêtre d’Arpette variant rises higher, to about 2,665 metres.

    How difficult is the Tour du Mont Blanc?

    The classic summer TMB is a non-technical hiking route, but it is physically demanding because of approximately 170 kilometres, close to 10,000 metres of climbing and repeated mountain days. Fitness and recovery matter more than technical climbing skill.

    Do you need a guide for the Tour du Mont Blanc?

    No guide is required for the classic TMB. Experienced hikers can complete it self-guided in normal summer conditions, provided they can navigate, make weather decisions and manage their own itinerary.

    When is the best time to hike the Tour du Mont Blanc?

    The normal season runs from mid-June to mid-September. July and August generally provide the fullest refuge and transport infrastructure but also the greatest demand. June can retain snow on high passes, while September brings shorter days and colder weather.

    When do 2027 Tour du Mont Blanc refuges open for booking?

    The official Tour du Mont-Blanc booking system says participating refuges and gîtes open reservations for summer 2027 on October 15, 2026.

    How much do TMB refuges cost?

    The official TMB organization currently advises roughly €65–€95 per person per night for dormitory half-board. It estimates approximately €500–€900 in accommodation costs for a directly booked 7–10 day trek.

    Do you need to camp on the Tour du Mont Blanc?

    No. The classic TMB can be completed using mountain refuges, gîtes and hotels. Camping is therefore not required for a standard hut-to-hut itinerary.

    Should you hike the TMB clockwise or counter-clockwise?

    Counter-clockwise is the most common direction and is the traditional itinerary used by many guidebooks. Clockwise is also valid and can reduce time spent moving with the main flow of hikers.

    Where does the Tour du Mont Blanc start?

    Les Houches in the Chamonix Valley is the standard start and finish for the complete circuit, although a circular trail can technically be started from several accommodation areas around the massif.

    Is the Tour du Mont Blanc the same as climbing Mont Blanc?

    No. The TMB is a hiking circuit around the massif. Climbing Mont Blanc is a high-altitude mountaineering objective involving glacier travel and technical skills. The two should be planned as completely different mountain objectives.

    Is the Tour du Mont Blanc good for a first hut-to-hut trek?

    For a fit hiker with prior mountain day-hiking experience, the TMB can be an excellent first major hut-to-hut trek because accommodation, food, villages and transportation are unusually well developed. The physical challenge still requires serious preparation.

    The TMB planning rule

    Book the Beds First. Then Build the Perfect Walking Day Around Them.

    The Tour du Mont Blanc is one of the world’s easiest great mountain treks to reach—but one of the easiest to plan badly if accommodation is left too late. Secure the difficult refuge nights, choose a pace you can repeat for more than a week, keep the high variants optional and give mountain weather authority over the original itinerary.

    Great Long-Distance Walks · The Alps

    The TMB & the World’s Great Long-Distance Walks

    The Tour du Mont Blanc is Europe’s classic multi-day trek – kin to the great pilgrimage routes that cross the same continent. Explore the pilgrimage trails and the Alpine walks below.

    Was this helpful?

    Yes
    No
    Thanks for your feedback!
  • Best Trekking Poles for Mountain Hiking: Complete Guide 2026

    Hiker using trekking poles on a steep mountain trail
    Mountain hiking · backpacking · steep descents · rugged trails

    Best Trekking Poles for Mountain Hiking in 2026

    For most mountain hikers, start with an adjustable aluminum pole and an external lever lock. Aluminum tolerates rough trail use well, the length can be changed for steep climbs and descents, and lever locks are easy to inspect in the field. Move to carbon when lower swing weight matters enough to justify the higher price and lower tolerance for sharp impacts; choose a folding design when you frequently stow the poles on a small pack.

    current 2026 models checked manufacturer specs used mountain use, not trail hype research claims kept in context
    5current picks
    12–25%downhill knee-force reductions in one study
    2 materialscarbon vs aluminum
    3 formatstelescoping · folding · fixed
    2026availability checked
    The short answer

    What Trekking Poles Are Best for Mountain Hiking?

    LEKI Makalu Lite is the strongest all-around mountain-hiking pick in this group. It uses an HTS 6.5 aluminum shaft, a simple external Speed Lock Plus system, an extended Aergon Air grip and a 100–135 cm adjustment range. It is not the lightest option here; that is part of the appeal when the goal is everyday mountain durability rather than shaving every gram.

    Black Diamond Alpine Carbon Cork is the premium choice if you want lower swing weight and a cork grip in a full-length adjustable pole. Black Diamond Trail Back is the simpler value choice for hikers who would rather spend less and accept a little more weight.

    For fastpacking, travel and routes where the poles spend time strapped to the pack, Black Diamond Distance Carbon FLZ is the compact option. REI’s current Traverse is a strong value alternative if you want cork grips and aluminum shafts.

    Best overallLEKI Makalu Lite
    Premium carbonBD Alpine Carbon Cork
    Simple valueBD Trail Back
    Value corkREI Traverse
    Ultralight foldingBD Distance Carbon FLZ
    Default materialaluminum
    Prices move faster than pole designs. Model availability was checked for this update, but use the linked manufacturer or retailer page for the current price, size inventory and replacement-parts availability.
    Current models, different jobs

    2026 Mountain Hiking Pole Comparison

    Weights come from current manufacturer or retailer listings. Where a brand lists weight per pole rather than per pair, it is labeled that way.

    ModelEditorial roleShaftGripLock / formatWeightBest fit
    LEKI Makalu Lite
    Best overall
    Durable adjustableHTS 6.5 aluminumAergon Air foamSpeed Lock Plus · telescoping248 g per poleGeneral mountain hiking, backpacking, steep terrain
    Black Diamond Alpine Carbon Cork
    Premium carbon
    Light full-length mountain pole100% carbonCork + grip extensionDual FlickLock Pro · telescoping~1.07 lb pairLong mileage, backpacking, hikers who value lower swing weight
    Black Diamond Trail Back
    Simple value
    Durable no-frills poleAluminumFoam + extensionFlickLock · telescoping~1 lb 2 oz pairDay hikes, backpacking, mixed mountain terrain
    REI Co-op Traverse
    Value cork
    Comfortable adjustable value7001 aluminumCorkExternal lever · telescoping~1 lb 2.5–3.5 oz pairLong trail days, backpacking, budget-conscious cork users
    Black Diamond Distance Carbon FLZ
    Ultralight folding
    Packability + low swing weight100% carbonFoamFolding / adjustable~0.68–0.8 lb pairFastpacking, travel, alpine approaches, frequent stowing
    Five useful choices

    Best Trekking Poles for Mountain Hiking

    These are use-case picks, not a claim that one pole is best for every hiker, body size or route.

    01
    Best overall mountain-hiking pole

    LEKI Makalu Lite

    aluminum100–135 cm67 cm packed248 g eachlever lock

    The Makalu Lite has the combination most mountain hikers actually need: aluminum shafts, quick external adjustment, an extended grip for traverses and steep pitches, and enough length range for varied terrain. LEKI’s Aergon Air grip gives you a broad top for palming on descents and a lower extension for quick hand changes.

    The tradeoff is pack size. At 67 cm collapsed, it is not a small folding pole. If you spend a lot of time scrambling with poles on your pack, move down this list to a folding design.

    Choose it for: a durable one-pair solution for mountain hiking, trekking and backpacking where the poles stay in your hands most of the day.
    Current LEKI specs →
    02
    Best premium carbon mountain pole

    Black Diamond Alpine Carbon Cork

    100% carboncork griplever lock~1.07 lb pair

    Black Diamond places the Alpine series at the rugged end of its trekking-pole line, and this model keeps a conventional three-section adjustable format rather than chasing the smallest folded size. Cork grips and grip extensions suit long days where you change hand position often.

    Carbon saves swing weight and feels quiet on hard trail surfaces, but sharp lateral impacts remain the reason some mountain hikers stay with aluminum. If you routinely wedge poles between boulders or beat them through talus, lighter is not automatically better.

    Choose it for: long mountain days and backpacking where low swing weight matters and you are willing to pay for a premium carbon shaft.
    Black Diamond trekking-pole guide →
    03
    Best simple durable value pole

    Black Diamond Trail Back

    aluminum100–140 cm61.5 cm collapsed~1 lb 2 oz pair

    Trail Back is the uncomplicated choice: three aluminum sections, external FlickLocks, foam grips and a broad adjustment range. The current version also includes trekking and snow baskets, which makes it more useful across shoulder-season hiking than a trail-only pole with a fixed small basket.

    It is heavier than carbon and folding options, but that extra weight buys a straightforward design and leaves more room in the budget for boots, pack or rain gear.

    Choose it for: hikers who want a dependable aluminum pole for steep trails, backpacking and occasional snow without paying premium-pole prices.
    Current Trail Back specs →
    04
    Best value cork-grip adjustable pole

    REI Co-op Traverse

    7001 aluminumcorkexternal levertwo size ranges

    The current Traverse keeps the design mountain hikers tend to live with easily: aluminum, external lever locks, extended cork grips and two length ranges rather than one oversized universal pole. The smaller size also packs slightly shorter.

    It is not ultralight. That is less important on ordinary hiking and backpacking routes than a comfortable grip, secure adjustment and a size range that actually fits the user.

    Choose it for: hikers who want cork grips and a conventional adjustable aluminum design at a midrange price.
    Current Traverse specs →
    05
    Best ultralight folding option

    Black Diamond Distance Carbon FLZ

    100% carbonfoldingadjustable~0.68–0.8 lb pair

    The Distance Carbon FLZ solves a different problem: how to carry poles when you do not want them in your hands all day. The folding chassis packs far shorter than a standard telescoping pole, while FLZ adjustment gives more flexibility than a fixed-length running pole.

    That makes it useful for fastpacking, air travel, alpine approaches and hikes that alternate between open trail and hands-on terrain. It is a poor value if the poles simply stay extended from trailhead to trailhead.

    Choose it for: low weight and compact storage on long-distance, fast or mixed hiking days.
    Current Distance series →
    Carbon-fiber and aluminum trekking poles compared on rocky mountain terrain
    Material choice

    Carbon Saves Weight. Aluminum Buys Forgiveness.

    Carbon feels light in the hand and cuts repeated swing weight over a long day. Aluminum is less elegant but tends to tolerate rough contact better. For a first pair of mountain poles, durability usually matters more than winning a scale comparison.

    The material decision

    Carbon vs Aluminum Trekking Poles

    Neither material is universally stronger. They fail differently, which is more useful to understand than a simple light-versus-heavy label.

    FactorCarbon fiberAluminumWhat matters in the mountains
    WeightUsually lowerUsually higherLow swing weight adds up on very long days
    Impact behaviorCan crack after a sharp impactMore likely to bend before complete failureAluminum is easier to trust around talus, scree and rough handling
    VibrationTypically damps vibration wellMore direct feelMostly a comfort preference
    PriceUsually higherUsually lowerSpend on fit and lock quality before chasing carbon
    Best useHigh-mileage, fastpacking, weight-sensitive tripsGeneral mountain hiking, backpacking, rough trailsAluminum is the safer default for most buyers
    How the pole packs

    Telescoping vs Folding vs Fixed-Length

    Default

    Telescoping

    Best for general mountain hiking. You get the widest adjustment range, easy inspection of the locks and simple changes between climbs, descents and side-hill traverses. The penalty is a longer collapsed size.

    Packability

    Folding / Z-pole

    Best when the poles go on and off the pack repeatedly. They collapse short and deploy quickly. Adjustment range may be narrower, and the internal cord/joint system adds another mechanism to inspect.

    Specialist

    Fixed-length

    Light and mechanically simple, but poorly suited to hikers who want different lengths for steep ascents and descents. Better for running and consistent terrain than a first pair of mountain poles.

    What we would buy first

    Three-section lever-lock aluminum

    It is not the lightest or smallest solution. It is the easiest format to understand, adjust and use across ordinary mountain terrain.

    For detailed sizing, grip technique and how to change pole length on steep ground, use the separate Trekking Poles Guide: How to Choose & Use Them.

    Small details you notice every mile

    Locks, Grips, Straps & Baskets

    Lock

    External lever locks

    They are easy to see, open and retension in the field. Check the lever before each hike; any adjustable pole can slip if the lock is loose or contaminated.

    Grip

    Cork vs foam

    Cork feels good through warm, long days and gradually conforms to the hand. Foam is light, comfortable with gloves and common on performance poles. Shape and fit matter more than marketing around the material.

    Grip extension

    Useful on traverses

    An extended lower grip lets you choke down on the uphill pole without stopping to change the shaft length. This is one feature worth having on irregular mountain terrain.

    Baskets

    Match them to the surface

    Small trekking baskets snag less on rock and brush. Wider snow baskets keep the pole from punching deeply into soft snow. Interchangeable baskets add useful four-season flexibility.

    Match the pole to the route

    Which Pole Type Fits Your Mountain Terrain?

    Terrain / tripBest pole setupWhyModel from this page
    Rocky mountain trailAluminum telescoping, lever lockImpact tolerance and easy adjustmentLEKI Makalu Lite / BD Trail Back
    Long backpacking tripCork or foam grip, adjustableComfort and multiple hand positionsBD Alpine Carbon Cork / REI Traverse
    FastpackingCarbon foldingLow swing weight and short packed lengthBD Distance Carbon FLZ
    Steep descentsAdjustable lever-lock pairLength can be increased and both poles used for supportMakalu Lite / Traverse / Trail Back
    Soft snowAdjustable pole with snow-basket compatibilityWider basket reduces deep punchingTrail Back with included snow baskets
    Frequent scramblingFolding pole or compact telescoping modelEasier to stow when hands are neededDistance Carbon FLZ
    Travel-heavy itineraryFoldingShort packed size simplifies checked luggage and small packsDistance Carbon FLZ
    What the research actually supports

    Do Trekking Poles Reduce Fatigue or Knee Load?

    The useful answer is “sometimes, depending on terrain and technique.” The evidence is stronger than a marketing claim but narrower than saying poles prevent injury.

    Mountain day · 2011

    Less soreness and lower perceived exertion

    Howatson and colleagues studied 37 active participants on an ascent and descent of Snowdon. The pole group reported lower perceived exertion on the ascent and showed lower post-trek muscle soreness and several lower markers of muscle damage.

    PubMed study →
    Downhill biomechanics · 1999

    Lower knee forces in steep downhill testing

    On a 25-degree downhill ramp, researchers reported significant reductions in several ground-reaction, knee moment and tibiofemoral force measures when poles were used; the reported differences in key measures were roughly 12–25%.

    PubMed study →
    Loaded uphill · 2000

    Work shifted away from the lower body

    In uphill treadmill backpacking with a pack equal to 30% of body mass, poles reduced activity in several lower-extremity muscles and lowered perceived exertion, while increasing upper-body involvement.

    PubMed study →
    Important limit · 2011

    Level walking did not show the same knee benefit

    A separate biomechanics study found that increasing pole force during level walking did not reduce estimated knee compressive force. That is a useful reminder that steep downhill results should not be generalized to every surface.

    PubMed study →
    Practical takeaway: poles are most compelling when the route is steep, uneven, loaded or long. They add contact points and let the upper body share some work. They do not make unstable terrain safe, and they are not a treatment for knee pain.
    Five-minute inspection

    Make the Poles Reliable Before the Trailhead

    Before hiking

    Load-test the locks

    Extend both poles to your normal length, close every lever and put body weight through them. Retension a loose lever before the trail rather than after the first slip.

    After wet days

    Dry the sections apart

    Separate telescoping sections after prolonged rain or stream crossings. Let them dry before storage, especially with aluminum shafts and internal hardware.

    Wear points

    Inspect tips, baskets and joints

    Replace worn carbide tips and cracked baskets. On folding poles, inspect the joints and tension cord for play before a long trip.

    Carbon

    Look for cracks, not just bends

    Carbon damage may be less obvious than a bent aluminum section. Retire a shaft with visible cracking, crushing or suspicious soft spots.

    How these picks were made

    Selection Method

    What matters

    Mountain use first

    We weighted shaft durability, locking system, adjustment, grip extension, packability, basket compatibility and current availability. A trail-running pole can be excellent and still rank lower here if it gives up too much durability or adjustment for ordinary mountain hiking.

    What does not decide the list

    Lowest weight alone

    A 50-gram saving is not automatically an upgrade. On rough mountain trails, a secure lock and a pole you trust under load are often more useful than a spec-sheet win.

    Product status: model specifications and current availability were checked on September 2, 2026. Manufacturers revise products and retailers change inventory, so confirm the exact model and size before buying.
    Trekking-pole questions

    Frequently Asked Questions

    What trekking poles are best for mountain hiking?

    For most hikers, use an adjustable aluminum pole with an external lever lock. It is durable, easy to inspect and simple to change for steep terrain. LEKI Makalu Lite and Black Diamond Trail Back are good examples of that format.

    Are carbon or aluminum trekking poles better?

    Choose aluminum when durability and value matter most. Choose carbon when lower swing weight matters enough to justify the price and you are comfortable with its lower tolerance for sharp impacts. Neither material is automatically better for every route.

    Are folding poles good in the mountains?

    Yes. They are especially useful when the route alternates between hiking and hands-on terrain because they pack shorter. Standard telescoping poles usually offer more adjustment and are simpler as an all-purpose first pair.

    Do trekking poles reduce knee stress?

    They can during steep downhill walking. One biomechanics study reported lower knee forces and moments with poles on a steep ramp, while a later level-walking study did not find reduced knee compression. Terrain and technique matter.

    Are anti-shock poles better?

    Not necessarily. Anti-shock systems soften the feel of pole plants, which some hikers like on long descents. Standard rigid poles give direct feedback and use fewer moving parts. Treat shock absorption as a comfort preference, not a requirement.

    What grip is best: cork or foam?

    Cork works well for long warm-weather days and changes shape slightly with use. Foam is light, warm and comfortable with gloves. Choose the grip that fits your hand; a poorly shaped cork grip is not better than a comfortable foam one.

    Should trekking poles have snow baskets?

    If you hike on soft snow, yes. A wider basket keeps the shaft from punching deeply into the surface. Small trekking baskets are better on dry trail because they catch less on rocks and vegetation.

    How do I size trekking poles?

    Use the separate GSG trekking-pole technique guide for sizing. As a starting point on flat ground, many hikers adjust the pole so the elbow is near a right angle, then shorten it for steep climbs and lengthen it for descents.

    The buying rule

    Buy for the Roughest Terrain You Use Regularly.

    If your hiking is steep, rocky and loaded, start with adjustable aluminum poles and good lever locks. If you regularly hike long distances and carry the poles on your pack, lighter carbon or a folding chassis begins to earn its cost. Fit, lock security and route match matter more than the brand name on the grip.

    Was this helpful?

    Yes
    No
    Thanks for your feedback!
  • K2 Base Camp Trek: Cost, Route & 22-Day Itinerary

    Trekkers approaching K2 Base Camp through the Karakoram mountains of Pakistan
    Pakistan · Karakoram · Baltoro Glacier · Concordia · K2 Base Camp

    K2 Base Camp Trek Guide: Route, Itinerary, Cost & Planning

    For most trekkers, the best first choice is the classic K2 Base Camp out-and-back route through Askole, Paiju, Baltoro Glacier and Concordia. Choose Gondogoro La only if you specifically want the harder traverse and have the experience, operator support and conditions for snow, ice and fixed-rope travel.

    20–22 days typicalJuly–August primeCamping trekNo K2 climbing required
    8,611 mK2 summit above you
    ~5,150 mBase Camp elevation
    20–22 daysTypical door-to-door
    $1.8K–$3K+Many local 2026 groups
    1 harder optionGondogoro La traverse
    The direct answer

    What Is the K2 Base Camp Trek Really Like?

    The K2 Base Camp trek is a remote, strenuous, high-altitude camping journey through Pakistan’s Karakoram. The traditional approach runs from Skardu toward Askole, then follows the Braldu Valley to Paiju, crosses the Baltoro Glacier to Concordia, and continues toward Broad Peak and K2 Base Camp.

    It is not a technical ascent of K2. The challenge is the combination of rough moraine, glacier travel, repeated 6–9 hour days, nights in tents, altitude around 5,000 metres, weather exposure and limited bailout options.

    Best first choiceOut-and-back
    Best harder optionGondogoro La
    GatewaySkardu
    Trail startAskole
    Scenic climaxConcordia
    Prime seasonJuly–August
    Do not confuse the classic trek with Gondogoro La. The standard K2 Base Camp trek can be completed without crossing the pass. Gondogoro La adds a very different level of snow, ice, fixed-rope and weather exposure and should be treated as a separate route decision.
    The main trip decision

    Classic K2 Base Camp or Gondogoro La?

    OptionTypical formatTechnical demandBest for
    Classic out-and-backAskole → Baltoro → Concordia → K2 BC → return same wayStrenuous trekkingMost first-time K2 trekkers
    Gondogoro La traverseK2 BC → Ali Camp → Gondogoro La → HusheSnow/ice, fixed ropes, crampon/axe competence depending conditionsExperienced trekkers wanting a harder circuit
    Concordia-focused tripReach Concordia, with K2 BC side trip when conditions/time allowStrenuous trekkingTrekkers prioritizing scenery and schedule flexibility

    My default recommendation: choose the classic out-and-back unless the pass itself is one of your trip goals. The classic route already gives you the Baltoro Glacier, Concordia, Broad Peak and K2 Base Camp without turning the trip into a semi-technical high pass crossing.

    K2 and Karakoram mountain terrain above the Baltoro region of Pakistan
    Why this trek is different

    The Route Gets Wilder as You Get Higher.

    Unlike a teahouse trek, the Baltoro journey becomes more remote each day. Camps, porters, food systems, toilets and weather margin are part of the expedition—not side details.

    A realistic planning framework

    Example 20–22 Day K2 Base Camp Itinerary

    Exact camps vary by operator, conditions and acclimatization needs.

    DayTypical stageWhat matters
    1–2IslamabadArrival, briefing, permit/logistics check
    3Islamabad → SkarduFly when operating; road contingency if weather disrupts flights
    4–5SkarduGear, acclimatization, final supplies, jeep logistics
    6Skardu → Askole / trail gatewayLong 4WD access day
    7Askole → Jhola / Korofon zoneHot lower valley, first camp
    8Jhola → PaijuLong day toward the Baltoro
    9Paiju rest/acclimatizationUseful before committing to glacier days
    10Paiju → KhoburtseEnter Baltoro Glacier terrain
    11Khoburtse → UrdukasStrong views, rough moraine
    12Urdukas → Goro IIMore sustained glacier travel
    13Goro II → ConcordiaMajor scenic milestone
    14Concordia rest / weatherAcclimatization and flexibility
    15Concordia → Broad Peak BC / K2 BC zoneCloser K2 access
    16K2 Base Camp visitTrip high point; weather dependent
    17–20Return via BaltoroReverse route toward Askole
    21–22Skardu / Islamabad bufferWeather and transport margin
    Do not book a tight international connection after Skardu. Weather can disrupt mountain flights, and road fallbacks add substantial time. Buffer days are part of a sensible itinerary, not wasted days.
    Karakoram season

    Best Time to Trek to K2 Base Camp

    WindowWhat to expectVerdict
    Mid-JuneEarly season, more snow/ice uncertainty, cooler nightsPossible but less forgiving
    JulyPeak trekking and expedition seasonBest overall month
    AugustStill strong, warmer lower valleys, weather can varyExcellent option
    Early SeptemberQuieter, colder nights, shorter windowGood with margin
    Outside main seasonSnow and pass access become bigger issuesSpecialist planning only

    The broad trekking window is usually mid-June through mid-September, with July the most popular month. For Gondogoro La, the weather and snow state of the pass matter even more than the calendar.

    Getting to the trail

    Islamabad → Skardu → Askole

    The trek is not just the Baltoro Glacier. Access is part of the trip. International teams generally assemble in Islamabad, then travel to Skardu, the main gateway to the Karakoram. From Skardu, a long jeep journey continues toward Askole, the traditional final village before the wilderness approach.

    Step 1

    Islamabad

    International arrival, briefing, permits and contingency days.

    Step 2

    Skardu

    Final major town for hotels, equipment checks, supplies and porter/crew logistics.

    Step 3

    Askole

    Traditional trekking gateway before the Braldu and Baltoro wilderness.

    Step 4

    Baltoro Glacier

    Once you enter the glacier system, camps and logistics become fully expedition-style.

    Karakoram mountain and glacier terrain near K2 in Pakistan
    The visual climax

    Concordia Is More Than a Camp.

    It is the junction of major glaciers and one of the great high-mountain viewpoints of the Karakoram. For many trekkers, Concordia is as memorable as the final visit to K2 Base Camp.

    2026 market reality

    How Much Does the K2 Base Camp Trek Cost?

    There is no single “correct” price because operators bundle very different levels of leadership, hotels, porterage, domestic travel, insurance and contingency support.

    Package style2026 planning rangeWhat to check
    Pakistan-based group departure~US$1,800–$3,000Permits, hotels, domestic flight/road, porter weight, tips, insurance
    Gondogoro La groupOften modestly higherPass crew, fixed-rope support, rescue arrangements
    Premium Western-led programCan exceed US$9,000Western leader, small group, hotels, flights, support and contingencies

    For 2026, Pakistan-based operators advertise Base Camp departures around the high-$1,000s to high-$2,000s, while Adventure Consultants lists a 22-day program from US$9,500. The lesson is not that one is “right”; it is that the inclusion list matters as much as the sticker price.

    Compare

    Domestic flights

    Is Islamabad–Skardu included, and what happens if the flight is cancelled?

    Compare

    Porter allowance

    How much personal gear can be carried, and what counts as excess?

    Compare

    Hotels + meals

    Which nights and meals are included before and after the trek?

    Compare

    Rescue + insurance

    What is operator support versus what must your own policy cover?

    Altitude progression

    How High Does the K2 Base Camp Trek Go?

    K2 Base Camp is around 5,150 metres / 16,900 feet, and Concordia sits lower at roughly 4,600 metres. The important point is not just the maximum altitude—it is that you spend multiple nights high while continuing to move across rough glacier terrain.

    Altitude is individual. A prior successful high-altitude trek is useful evidence of experience, not a guarantee. The itinerary should include staged ascent and enough flexibility to stop, rest or descend when symptoms require it.
    The biggest difference from Nepal

    Camping, Food & Porter Support

    K2 Base Camp is a camping expedition. There is no continuous teahouse network like the Everest Base Camp route in Nepal. Most guided groups use trekking crews, cooks, porters, sleeping tents, dining tents and toilet systems.

    SystemWhat to verify before booking
    Sleeping tentShared vs single supplement, tent quality, sleeping-mat inclusion
    PorteragePersonal weight allowance and duffel limit
    MealsTrail meals, snacks, dietary accommodation, water treatment
    ToiletsToilet tent and waste-management practices
    PowerCharging availability, solar backup, power bank strategy
    CommunicationsSatellite device / emergency communication carried by team
    Optional harder exit

    What Changes if You Cross Gondogoro La?

    Gondogoro La turns the trip from a difficult trek into a much more committing high-pass journey. Instead of returning down the Baltoro, the traverse crosses toward the Hushe Valley.

    Terrain

    Snow + ice

    The crossing can require crampons, ice axe and fixed-rope movement depending on conditions.

    Timing

    Very early start

    Operators commonly use a midnight or pre-dawn start for the pass.

    Weather

    Pass can close

    Your itinerary needs a fallback plan if snow or weather makes the pass unsafe.

    Best fit

    Experienced trekkers

    Choose it because you want the traverse, not because you dislike retracing the Baltoro.

    Illustrated K2 Base Camp trekking itinerary through the Baltoro Glacier and Concordia
    Route logic

    The Trek Is a Chain of Logistics, Not One Long Trail.

    International arrival, Skardu weather, jeep access, porter organization, glacier camps, acclimatization and return transport all affect whether the itinerary works.

    Fitness decision

    How Fit Do You Need to Be?

    You do not need climbing fitness, but you do need expedition trekking durability: repeated 6–9 hour days, rough footing, pack carry, long descents, cold mornings and enough reserve to keep functioning after a poor night in a tent.

    Build

    Long uphill days

    Train for duration and sustained climbing rather than short intense workouts alone.

    Build

    Back-to-back effort

    The trek is cumulative; one strong day is not enough.

    Build

    Rough-footing tolerance

    Moraine and glacier surfaces require more concentration than smooth trails.

    Build

    Camping resilience

    Sleep, appetite and recovery become performance factors at altitude.

    Trip checklist

    Before You Book

    QuestionWhat a good answer should clarify
    Classic or Gondogoro La?Your exact route and fallback plan
    How many buffer days?Skardu flight and weather disruption strategy
    Who arranges permits?Operator responsibility and documents needed from you
    What is included?Hotels, domestic flights, jeeps, meals, porters, tips, permits
    What insurance is required?High-altitude trekking and evacuation terms
    What is the porter allowance?Duffel weight and personal carry expectations
    What happens if the pass closes?Essential for Gondogoro La itineraries
    What is the group size?Pace, leadership, camp logistics and support ratio
    Compare before deciding

    K2 Base Camp vs Everest Base Camp

    FactorK2 Base CampEverest Base Camp
    AccommodationCamping expeditionTeahouses/lodges
    Trail surfaceRough moraine + glacierMore developed trekking trail
    RemotenessVery highHigh but more infrastructure
    LogisticsOperator/porter/camp systemMuch easier village-based support
    Altitude~5,150 m K2 BC5,364 m EBC
    Best fitExperienced trekker wanting expedition-style wildernessFirst major Himalayan trek for many hikers
    Compare Everest Base Camp
    Methodology

    How This Guide Was Built

    Route and gateway descriptions were cross-checked against the Gilgit-Baltistan tourism department’s K2 access description, which identifies Skardu as the gateway and the traditional route through Askole, Paiju, Urdukas, Goro and Concordia before Broad Peak and K2 Base Camp.

    Season framing was cross-checked against current trekking guidance that places the general window from mid-June to mid-September, with July the most popular month. Cost ranges were built from multiple 2026 operator listings rather than a single quote.

    Removed from the previous version: unsupported universal “success rate” claims, definitive statements calling Baltoro the world’s longest non-polar glacier, and broad climbing content that does not belong on a trek-planning page.

    FAQ

    K2 Base Camp Trek FAQ

    How long is the K2 Base Camp trek?

    Most international itineraries run about 20–22 days door to door, including Islamabad, Skardu, acclimatization and weather margin.

    What is the best time to go?

    Mid-June to mid-September is the main window; July is generally the most popular month and July–August is the strongest overall period.

    How hard is it?

    Strenuous rather than technical: rough glacier terrain, long days, altitude, camping and remoteness create the difficulty.

    Do I need a guide?

    Foreign trekkers normally use a licensed Pakistani operator/guide because permits and regulated-zone logistics are part of the trip.

    How much does it cost?

    Many Pakistan-based 2026 group trips list around US$1,800–$3,000, while premium Western-led programs can exceed US$9,000.

    Is Gondogoro La included?

    Only on specific traverse itineraries. The classic K2 Base Camp trek can return via the Baltoro without crossing the pass.

    Where does the trek start?

    International itineraries typically begin in Islamabad, continue to Skardu, then travel by jeep toward Askole.

    Is it harder than Everest Base Camp?

    For many trekkers, yes, because K2 Base Camp is more remote, uses camping and involves rougher glacier and moraine terrain.

    The planning rule

    Choose the Route Before You Choose the Operator.

    Decide whether you want classic K2 Base Camp or the Gondogoro La traverse first. Then compare operators by the exact itinerary, inclusions, porter system, buffer days and contingency plan—not by price alone.

    Great Long-Distance Walks · The Karakoram

    The K2 Base Camp Trek & the World’s Great Walks

    The trek up the Baltoro Glacier to the foot of K2 is one of the great long-distance walks on Earth – kin to the pilgrimage routes and iconic treks that draw walkers across the world. Explore them below.

    Current planning update · September 2026 K2 Base Camp · Baltoro · Concordia

    The trek itself is only half the plan. Permits, registration, Skardu transport and the return route matter too.

    The classic K2 Base Camp trek remains the best default for most trekkers: Skardu to Askole, then Paiju, the Baltoro Glacier, Concordia, Broad Peak Base Camp and K2 Base Camp before returning the same way. The harder Gondogoro La traverse is a separate decision because it adds steep snow, crampon travel, fixed ropes and objective hazard.

    For 2026–27 planning, the biggest gap is not another itinerary table. It is understanding what must be arranged before the trek starts: a reputable registered operator, the correct trekking permissions, foreign-national registration, transport contingency and insurance that remains valid for the permitted route.

    Current official planning rule: Gilgit-Baltistan Tourism says K2 Base Camp permits and fees are normally handled by the tour operator. UK travel guidance says all foreign nationals must register with local authorities when visiting Gilgit-Baltistan, and that trekking or mountaineering permission can take up to two months. Do not treat permit processing as a last-week task.

    GB Tourism: K2 UK: Gilgit-Baltistan risks

    Location & route context

    Where is K2 Base Camp?

    The trek begins far southwest of K2 and progressively enters the Karakoram through the Braldu and Baltoro systems. Skardu is the regional gateway; Askole is the traditional final village before the wilderness trek.

    Marker shows the K2 Base Camp / upper Godwin-Austen Glacier area for geographic orientation. The approach begins much farther west through Askole and the Baltoro Glacier. Map data © OpenStreetMap contributors. Open larger map →
    Regional gatewaySkarduFlights and road connections from Islamabad; schedules can change with weather.
    Trail gatewayAskoleTraditional final village before the Braldu–Baltoro wilderness.
    Core glacierBaltoroThe expedition-style camping route leads toward Concordia.
    Scenic junctionConcordiaMajor glacier junction and central Karakoram viewpoint.
    Base-camp zone~5,050–5,150 mPublished operators and guides use slightly different camp-elevation conventions.
    Permits, registration & operator check

    What foreign trekkers should verify before paying the balance

    The important distinction is between what the operator normally handles and what you still need to confirm has actually been completed.

    Operator registration

    Use a reputable registered company.

    Gilgit-Baltistan maintains a registered-tour-operator system, and current Tourism Department guidance discourages unauthorized expedition travel. Ask for the operator’s current registration or licence details rather than relying only on a website.

    Trekking permission

    Make the operator own the permit process.

    Official GB Tourism guidance says permits and fees are normally handled by the tour operator. Ask what documents they need from you and the date the application will be submitted.

    Foreign registration

    Gilgit-Baltistan has an additional registration step.

    Current UK guidance says all foreign nationals must register with local authorities while visiting Gilgit-Baltistan. Your operator should explain when and where that happens.

    Insurance

    Permit status can affect coverage.

    UK guidance explicitly warns that insurance validity may be affected if you do not have the correct permits. Confirm altitude, trekking, evacuation, political disruption and route coverage in writing.

    Skardu contingency

    Do not build the trip around one mountain flight.

    Skardu flight schedules can change at short notice. A good itinerary protects international connections with buffer days and has a realistic road contingency.

    Group travel

    This is not a good independent-trek experiment.

    Official GB Tourism recommends group travel because of remoteness and weather, while UK guidance advises reputable agencies, established routes and not trekking alone.

    Classic route vs Gondogoro La

    The return route changes the technical category of the trip

    Gilgit-Baltistan Tourism’s own Gondogoro Pass description is much stronger than calling it simply “the scenic harder option.”

    DecisionClassic out-and-backGondogoro La traverse
    ReturnReverse Baltoro route toward AskoleCross pass and descend toward Hushe
    Technical categoryStrenuous high-altitude trekkingHigh-pass snow/ice travel with technical systems
    Official pass elevationNot applicable5,585 m per GB Tourism
    Slope / terrainMoraine, glacier surface, rough trailOfficial description notes snow slopes up to ~50°
    EquipmentNormal expedition-trekking equipmentCrampons; fixed-rope sections may be required
    Objective hazardAltitude, weather, glacier/moraine travelAdd avalanche and rockfall exposure on steep pass terrain
    Best first choiceMost trekkersExperienced teams
    Do not buy the Gondogoro itinerary just to avoid retracing your steps. GB Tourism describes terrain that can require crampons and hundreds of metres of fixed rope, with avalanche and rockfall hazard. If those systems are outside your experience, the classic return is the stronger itinerary—not the lesser one.

    Official Gondogoro Pass description

    Current premium-market benchmark

    What does a fully supported K2 Base Camp trek cost now?

    The existing guide correctly shows that local Pakistan-based and premium Western-led programs are different products. A current 2027 listing confirms that gap remains large.

    ExamplePublished tripPublished priceWhat it demonstrates
    Adventure Consultants22 days · K2 Base Camp + Gondogoro LaUS$9,500 for 7+ people; US$10,500 for 5–6Premium Western-led/support model remains far above local group-market pricing.
    Gilgit-Baltistan TourismK2 trek destination guidanceNo universal package priceOfficial duration guidance is roughly 14–20 days depending on route; operator inclusions drive the final trip price.
    Price-comparison rule: compare the route first. Adventure Consultants’ current itinerary includes Gondogoro La, two nights at K2 Base Camp, Western pre-trip support and a 22-day program. It should not be compared directly with a lower-cost classic Baltoro out-and-back package unless the inclusions and route are made equivalent.

    Adventure Consultants current program

    Transport & security margin

    The trek can be ready while the access chain is not

    Page-one K2 Base Camp content should explain not just the beautiful glacier route but the real operational weak points before and after it.

    Skardu flights

    Build at least one meaningful buffer into the return.

    UK travel guidance says Gilgit and Skardu flight schedules may be unreliable and can change at short notice. A road fallback is much slower, and weather can also affect mountain roads. Avoid a same-day Skardu-to-international-flight connection.

    Road routing

    Do not assume every Islamabad–Skardu road option is equally advisable.

    Current UK guidance advises against all travel on part of the Karakoram Highway between Mansehra and Chilas. Your operator’s flight-cancellation plan should specify the actual route they intend to use and reflect current travel advice.

    Remote security

    Local advice matters once you leave major towns.

    Gilgit-Baltistan’s remote mountain terrain is difficult to police. Current UK guidance recommends local security advice, reputable trekking agencies, established routes and group travel.

    Evacuation reality

    Insurance is not the same as immediate rescue access.

    Weather, terrain and communications can delay assistance. Ask what emergency communication the team carries, who makes an evacuation decision, and what costs must be authorized through your insurer.

    2026–27 practical FAQ

    K2 Base Camp permits, route choice & current logistics

    These answers extend the main guide with the current regulatory and transport questions that most affect booking.

    Do foreign trekkers need a permit for the K2 Base Camp trek?

    Gilgit-Baltistan Tourism says permits and fees are normally handled by the tour operator. UK travel guidance also says foreign nationals must register with local authorities in Gilgit-Baltistan and that trekking or mountaineering permits may be required, with processing potentially taking up to two months.

    Should I book classic K2 Base Camp or Gondogoro La?

    The classic out-and-back route is the better default for most first-time trekkers. Gondogoro La adds steep snow and ice, crampon use, fixed ropes and avalanche or rockfall exposure, so choose it because you specifically want the harder traverse and have the appropriate support and experience.

    How high is Gondogoro La?

    The Gilgit-Baltistan Tourism Department lists Gondogoro Pass at 5,585 metres. Its official description notes steep snow slopes up to about 50 degrees, crampon use and sections that may require fixed ropes.

    How much does a premium K2 Base Camp trek cost?

    Adventure Consultants currently lists its July 2027 K2 Base Camp trek from US$9,500 per person for seven or more participants and US$10,500 for groups of five or six. Lower-cost Pakistan-based group products can differ substantially in leadership, hotels, flights, porter systems, route and contingencies.

    What should I know about travel to Gilgit-Baltistan?

    Skardu flights can change at short notice, mountain roads can be affected by weather, and remote areas are difficult to police. Foreign nationals must register locally. Current UK advice recommends reputable trekking agencies, established routes and group travel rather than trekking alone.

    How long should I allow for the K2 Base Camp trek?

    Gilgit-Baltistan Tourism describes the destination as roughly 14–20 days depending on route. International itineraries commonly expand to around 20–22 days after Islamabad, Skardu, acclimatization and transport buffers are added.

    Was this helpful?

    Yes
    No
    Thanks for your feedback!
  • Torres del Paine: W Circuit vs O Circuit

    { “@context”: “https://schema.org”, “@type”: “Article”, “headline”: “Torres del Paine W Circuit vs O Circuit 2026: Complete Comparison Guide — Day-by-Day Itineraries, 2026 CONAF Permits and Refugio Booking, Full Cost Breakdowns, Season Analysis, and Which Patagonia Trek to Choose”, “description”: “Complete 2026 comparison of the Torres del Paine W Circuit and O Circuit in Chilean Patagonia. Generally, the W Circuit is the popular classic — approximately 80 km over 4-5 days hitting the three main highlights (Mirador Las Torres, the French Valley, and Grey Glacier). Specifically, the O Circuit is the complete circumnavigation of the Paine Massif — approximately 130 km over 7-10 days that adds the remote backside wilderness loop through Seron, Dickson, and Los Perros camps and crosses the dramatic Paso John Gardner (1,241 m) with views over the Southern Patagonian Ice Field. This guide provides day-by-day itineraries for both circuits, verified 2026 CONAF park entry fees ($39 USD for under 3 days, $55 USD for 3 or more days), the current refugio booking system through Las Torres Patagonia (formerly Fantastico Sur) and Vertice Patagonia, full cost breakdowns from budget camping through guided expeditions, the December-March season analysis, transport logistics from Puerto Natales, and a decision framework for choosing between the two circuits. Both treks share the same iconic landmarks but deliver fundamentally different experiences in scope, duration, crowds, and wilderness character.”, “image”: “https://globalsummitguide.com/wp-content/uploads/2026/03/AdobeStock_581609867-scaled.jpeg”, “author”: {“@type”: “Organization”, “name”: “Global Summit Guide Editorial Team”}, “publisher”: {“@type”: “Organization”, “name”: “Global Summit Guide”}, “datePublished”: “2026-03-10”, “dateModified”: “2026-05-27” } { “@context”: “https://schema.org”, “@type”: “FAQPage”, “mainEntity”: [ {“@type”: “Question”, “name”: “Which is better, the W Circuit or O Circuit in Torres del Paine?”, “acceptedAnswer”: {“@type”: “Answer”, “text”: “The choice depends on available time, fitness, and desired experience. The W Circuit suits first-timers and shorter schedules. The O Circuit suits experienced trekkers wanting the full wilderness experience. Generally, the W Circuit works for most trekkers because its 4-5 days fit tight schedules, its 80 km is more manageable, it hits all three main highlights (Mirador Las Torres, French Valley, Grey Glacier), and roughly 90% of Torres del Paine trekkers choose it. Specifically, the O Circuit rewards experienced hikers with 7-10 days of deeper immersion across 130 km, adding the backside wilderness and the Paso John Gardner (1,241 m) crossing with its Southern Patagonian Ice Field view, though only about 10% of visitors attempt it. Notably, a practical decision matrix: 5 days available means W, 7-10 days means O; first-timers choose W, experienced trekkers seeking wilderness choose O. A realistic progression is to do the W first and return for the O on a second Patagonia trip.”}}, {“@type”: “Question”, “name”: “How long is the W Circuit in Torres del Paine?”, “acceptedAnswer”: {“@type”: “Answer”, “text”: “The W Circuit is approximately 80 km (50 miles) and typically takes 4-5 days, with variations from 3 to 6 days. Generally, the standard 5-day itinerary covers a W-shaped ground plan connecting the three main valleys. Specifically, Day 1 reaches the Las Torres sector. Day 2 makes the pre-dawn hike to Mirador Las Torres, the three granite towers. Day 3 explores the French Valley to Mirador Britanico. Day 4 reaches the Grey Glacier area. Day 5 returns via the catamaran across Lake Pehoe to Puerto Natales. Notably, maximum altitude is around 1,000 m at the viewpoints, daily hiking runs 4-9 hours, and cumulative elevation gain is approximately 3,000-4,000 m. The trek is moderate — not altitude-challenging but endurance-demanding. Conservative planning budgets 6-7 days total including Puerto Natales arrival and departure, with refugios or camps booked 6-9 months ahead for peak season.”}}, {“@type”: “Question”, “name”: “How long is the O Circuit in Torres del Paine?”, “acceptedAnswer”: {“@type”: “Answer”, “text”: “The O Circuit is approximately 130 km (80 miles) and typically takes 7-10 days, with 8 days standard. Generally, it includes all W Circuit landmarks plus the backside wilderness loop, hiked counter-clockwise. Specifically, the standard 8-day itinerary runs Laguna Amarga to Seron (Day 1), Seron to Dickson (Day 2), Dickson to Los Perros (Day 3), Los Perros to Grey via Paso John Gardner at 1,241 m (Day 4, the longest and hardest at 9-11 hours), then the W section over Days 5-8 ending with the pre-dawn Torres Base viewpoint. Notably, maximum altitude is 1,241 m at Paso John Gardner, cumulative elevation gain is approximately 4,500-5,500 m, and the pass can close for days in bad weather. The remote Dickson and Los Perros camps have limited exits, so trekkers should plan a 10-11 day total trip window and book 6-9 months in advance.”}}, {“@type”: “Question”, “name”: “How much does the Torres del Paine trek cost in 2026?”, “acceptedAnswer”: {“@type”: “Answer”, “text”: “Torres del Paine treks cost roughly $500-$2,500 for self-guided trekking depending on route and accommodation, or $1,500-$6,500 for guided tours. Generally, the 2026 CONAF park entry fee is $39 USD for visits under 3 days or $55 USD for 3 or more days. Specifically, accommodation ranges from Vertice camping (around $10-$15 per person per night) and Las Torres camping (around $37-$50) up to refugio dormitory beds with half-board ($120-$250 per night). Notably, transport adds cost — the bus from Puerto Natales to the park runs $15-$25 each way, the Lake Pehoe catamaran is $30-$40 one way, and the bus from Punta Arenas to Puerto Natales is $25-$40. Realistic total budgets: self-guided W camping $800-$1,200 with flights, mid-range W with refugios $1,800-$2,800, self-guided O camping $1,200-$1,800, mid-range O $2,500-$3,800, and premium guided trips $4,000-$6,500.”}}, {“@type”: “Question”, “name”: “When is the best time to hike Torres del Paine?”, “acceptedAnswer”: {“@type”: “Answer”, “text”: “The best time is December through March — Chilean Patagonia’s summer. Generally, this window offers the warmest temperatures, the longest daylight (17+ hours in December), and full operation of all refugios, camps, catamarans, and bus transfers. Specifically, December begins peak season, January and February are the warmest and most crowded months, and March is late summer with fewer crowds and cooler temperatures. Notably, from May to September the refugios and camps close and the full O Circuit and parts of the W become inaccessible without a certified guide. Patagonian wind is a constant factor and can exceed 100 km/h any day, especially on the Paso John Gardner crossing on the O Circuit. The iconic three-towers sunrise requires calm pre-dawn weather and sometimes takes 2-3 attempts. Book the W Circuit 6-9 months ahead and the O Circuit 9-12 months ahead for peak-season dates.”}} ] } .tdp-page { font-family: ‘Outfit’, sans-serif; color: #122a44; line-height: 1.65; max-width: 1200px; margin: 0 auto; padding: 0; } .tdp-page h1, .tdp-page h2, .tdp-page h3, .tdp-page h4 { font-family: ‘DM Serif Display’, serif; font-weight: 400; color: #0a1929; line-height: 1.15; } .tdp-page p { font-size: 1.02rem; margin-bottom: 1.1em; } .tdp-page a { color: #2e5986; text-decoration: none; border-bottom: 1px solid rgba(46,89,134,0.3); } .tdp-page a:hover { color: #d4913a; border-bottom-color: #d4913a; } .tdp-hero { position: relative; min-height: 580px; background: linear-gradient(135deg, rgba(10,25,41,0.85) 0%, rgba(18,42,68,0.72) 100%), url(‘https://globalsummitguide.com/wp-content/uploads/2026/03/AdobeStock_581609867-scaled.jpeg’); background-size: cover; background-position: center; color: #f5e4c8; padding: 70px 40px; display: flex; flex-direction: column; justify-content: center; overflow: hidden; } .tdp-hero::before { content: ”; position: absolute; top: -100px; right: -100px; width: 400px; height: 400px; background: radial-gradient(circle, rgba(212,145,58,0.35) 0%, transparent 70%); pointer-events: none; } .tdp-hero-content { max-width: 900px; position: relative; z-index: 2; } .tdp-hero-breadcrumb { font-size: 0.85rem; color: rgba(245,228,200,0.7); margin-bottom: 14px; letter-spacing: 1px; text-transform: uppercase; } .tdp-hero-breadcrumb a { color: rgba(245,228,200,0.85); border-bottom: none; } .tdp-hero h1 { font-size: 3.1rem; color: #f5e4c8; margin: 0 0 20px; line-height: 1.05; } .tdp-hero h1 em { color: #d4913a; font-style: italic; } .tdp-hero-tagline { font-size: 1.15rem; color: rgba(245,228,200,0.92); margin-bottom: 32px; max-width: 760px; } .tdp-stat-grid { display: grid; grid-template-columns: repeat(4, 1fr); gap: 20px; margin-top: 24px; } .tdp-stat { background: rgba(245,228,200,0.08); border: 1px solid rgba(212,145,58,0.3); border-radius: 8px; padding: 18px 16px; backdrop-filter: blur(4px); } .tdp-stat-num { font-family: ‘DM Serif Display’, serif; font-size: 1.85rem; color: #d4913a; line-height: 1; margin-bottom: 6px; } .tdp-stat-label { font-size: 0.78rem; color: rgba(245,228,200,0.85); text-transform: uppercase; letter-spacing: 0.8px; } .tdp-hub-strip { background: #122a44; color: rgba(245,228,200,0.85); padding: 14px 40px; font-size: 0.86rem; text-align: center; } .tdp-hub-strip a { color: #d4913a; border-bottom: none; } .tdp-hub-strip a:hover { color: #f5e4c8; } .tdp-main { display: grid; grid-template-columns: 1fr 280px; gap: 50px; padding: 60px 40px; } .tdp-content h2 { font-size: 2.2rem; margin-top: 60px; margin-bottom: 20px; padding-bottom: 12px; border-bottom: 2px solid #d4913a; } .tdp-content h2:first-child { margin-top: 0; } .tdp-content h2 em { color: #d4913a; font-style: italic; } .tdp-content h3 { font-size: 1.5rem; margin-top: 32px; margin-bottom: 14px; color: #0a1929; } .tdp-content h4 { font-size: 1.2rem; margin-top: 24px; margin-bottom: 10px; color: #122a44; } .tdp-sidebar { font-size: 0.92rem; } .tdp-sidebar-card { background: #f8f4ec; border-radius: 10px; padding: 22px; margin-bottom: 22px; position: sticky; top: 20px; } .tdp-sidebar-card h4 { margin: 0 0 14px; font-size: 1.1rem; color: #0a1929; border-bottom: 1px solid #d4c8a8; padding-bottom: 8px; } .tdp-sidebar-card ul { margin: 0; padding-left: 18px; } .tdp-sidebar-card li { margin-bottom: 6px; font-size: 0.88rem; } .tdp-sidebar-facts { background: #0a1929; color: #f5e4c8; border-radius: 10px; padding: 22px; margin-bottom: 22px; } .tdp-sidebar-facts h4 { color: #d4913a; margin: 0 0 14px; font-size: 1rem; border-bottom: 1px solid rgba(212,145,58,0.3); padding-bottom: 8px; } .tdp-sidebar-facts dl { margin: 0; } .tdp-sidebar-facts dt { color: rgba(245,228,200,0.7); font-size: 0.78rem; text-transform: uppercase; letter-spacing: 0.5px; margin-top: 10px; } .tdp-sidebar-facts dd { margin: 2px 0 0; font-size: 0.95rem; color: #f5e4c8; } .tdp-table { width: 100%; border-collapse: collapse; margin: 24px 0; font-size: 0.92rem; } .tdp-table th { background: #0a1929; color: #f5e4c8; padding: 12px 14px; text-align: left; font-weight: 500; font-size: 0.82rem; letter-spacing: 0.5px; text-transform: uppercase; } .tdp-table td { padding: 11px 14px; border-bottom: 1px solid #e8e2d4; vertical-align: top; } .tdp-table tr:nth-child(even) td { background: #fbf7ef; } .tdp-table.tdp-compact { font-size: 0.86rem; } .tdp-table.tdp-compact th { padding: 10px 8px; font-size: 0.74rem; } .tdp-table.tdp-compact td { padding: 8px 10px; } .tdp-callout-info { background: #e8f0f7; border-left: 4px solid #2e5986; padding: 18px 22px; border-radius: 6px; margin: 24px 0; } .tdp-callout-info strong { color: #2e5986; } .tdp-callout-warning { background: #fdf3e8; border-left: 4px solid #b86a15; padding: 18px 22px; border-radius: 6px; margin: 24px 0; } .tdp-callout-warning strong { color: #b86a15; } .tdp-callout-tip { background: #ebf2ec; border-left: 4px solid #2d5a3a; padding: 18px 22px; border-radius: 6px; margin: 24px 0; } .tdp-callout-tip strong { color: #2d5a3a; } .tdp-route-card { background: #f8f4ec; border-radius: 12px; padding: 26px; margin: 22px 0; border-left: 5px solid #d4913a; } .tdp-route-card.w { border-left-color: #2e5986; background: linear-gradient(135deg, #f8f4ec 0%, #ecf1f6 100%); } .tdp-route-card.o { border-left-color: #2d5a3a; background: linear-gradient(135deg, #f8f4ec 0%, #ebf2ec 100%); } .tdp-route-card h3 { color: #0a1929; margin-top: 0; margin-bottom: 6px; font-size: 1.55rem; } .tdp-route-meta { font-weight: 600; font-size: 0.92rem; margin-bottom: 12px; color: #b86a15; } .tdp-route-stats { display: grid; grid-template-columns: repeat(4, 1fr); gap: 12px; margin: 16px 0; padding: 14px; background: rgba(10,25,41,0.04); border-radius: 6px; } .tdp-route-stat { text-align: center; } .tdp-route-stat-num { font-family: ‘DM Serif Display’, serif; font-size: 1.15rem; color: #0a1929; line-height: 1.1; } .tdp-route-stat-label { font-size: 0.7rem; color: #5a4f30; text-transform: uppercase; letter-spacing: 0.4px; margin-top: 4px; } .tdp-feature-img { margin: 32px 0; border-radius: 10px; overflow: hidden; box-shadow: 0 4px 20px rgba(10,25,41,0.12); } .tdp-feature-img img { width: 100%; display: block; } .tdp-feature-img figcaption { padding: 12px 18px; background: #f8f4ec; font-size: 0.85rem; color: #5a4f30; font-style: italic; } .tdp-decision { background: #f8f4ec; border-radius: 12px; padding: 22px 26px; margin: 18px 0; border-left: 5px solid #6a4a86; } .tdp-decision h4 { margin-top: 0; margin-bottom: 8px; color: #6a4a86; font-size: 1.15rem; } .tdp-decision .verdict { display: inline-block; background: #6a4a86; color: #fff; padding: 3px 12px; border-radius: 20px; font-size: 0.78rem; font-weight: 600; margin-bottom: 10px; } .tdp-faq { margin: 30px 0; } .tdp-faq-item { background: #f8f4ec; border-radius: 8px; margin-bottom: 12px; padding: 0; } .tdp-faq-item summary { padding: 18px 24px; cursor: pointer; font-family: ‘DM Serif Display’, serif; font-size: 1.1rem; color: #0a1929; list-style: none; } .tdp-faq-item summary::after { content: ‘+’; float: right; color: #d4913a; font-size: 1.4rem; line-height: 0.8; } .tdp-faq-item[open] summary::after { content: ‘−’; } .tdp-faq-item div { padding: 0 24px 20px; font-size: 0.95rem; } .tdp-related { background: #f8f4ec; padding: 26px; border-radius: 10px; margin: 30px 0; } .tdp-related h4 { margin-top: 0; margin-bottom: 16px; color: #0a1929; } .tdp-related ul { margin: 0; padding-left: 20px; } .tdp-related li { margin-bottom: 8px; font-size: 0.95rem; } .tdp-sources { background: #fbf7ef; border: 1px solid #e8d8ad; padding: 22px 26px; border-radius: 8px; margin: 30px 0; font-size: 0.9rem; } .tdp-sources h4 { margin-top: 0; color: #5a4f30; } .tdp-sources ul { margin: 0; padding-left: 20px; } .tdp-sources li { margin-bottom: 6px; } .tdp-updated-banner { background: #d4913a; color: #0a1929; padding: 12px 24px; border-radius: 6px; font-weight: 600; text-align: center; font-size: 0.95rem; margin: 24px 0; } .tdp-final-cta { background: linear-gradient(135deg, #122a44 0%, #1e3a5f 100%); color: #f5e4c8; padding: 36px 32px; border-radius: 12px; margin: 40px 0 0; text-align: center; } .tdp-final-cta h3 { color: #d4913a; margin: 0 0 12px; font-size: 1.6rem; } .tdp-final-cta p { color: rgba(245,228,200,0.9); font-size: 1rem; margin: 0 0 22px; max-width: 600px; margin-left: auto; margin-right: auto; line-height: 1.6; } .tdp-cta-button { display: inline-block; background: #d4913a; color: #0a1929; padding: 14px 28px; border-radius: 6px; font-weight: 600; text-decoration: none; border: none !important; font-size: 1rem; } .tdp-cta-button:hover { background: #f5e4c8; color: #0a1929; } @media (max-width: 900px) { .tdp-main { grid-template-columns: 1fr; padding: 40px 20px; } .tdp-hero { padding: 40px 20px; min-height: auto; } .tdp-hero h1 { font-size: 2rem; } .tdp-stat-grid { grid-template-columns: repeat(2, 1fr); } .tdp-sidebar-card { position: static; } .tdp-table.tdp-compact { font-size: 0.75rem; } .tdp-table.tdp-compact th, .tdp-table.tdp-compact td { padding: 6px 5px; } .tdp-route-stats { grid-template-columns: repeat(2, 1fr); } }
    Home · Mountains · Torres del Paine W vs O Circuit

    Torres del Paine: W Circuit vs O Circuit — Complete 2026 Comparison with Day-by-Day Itineraries, CONAF Permits, Refugio Booking, Costs, and Which Patagonia Trek to Choose

    The definitive 2026 comparison of Chilean Patagonia’s two legendary trekking circuits. Generally, the W Circuit is the popular classic — roughly 80 km over 4-5 days hitting the three main highlights (Mirador Las Torres, the French Valley, and Grey Glacier). Specifically, the O Circuit is the complete circumnavigation of the Paine Massif — roughly 130 km over 7-10 days. It adds the remote backside wilderness loop and the dramatic Paso John Gardner crossing with views over the Southern Patagonian Ice Field. Notably, both treks share the same iconic landmarks but deliver fundamentally different experiences. This guide gives you day-by-day itineraries, verified 2026 CONAF fees, the current refugio booking system, full cost breakdowns, and a clear decision framework.

    80 / 130 km
    W / O Distance
    4-5 / 7-10
    W / O Days
    $39-55
    2026 CONAF Entry
    Dec-Mar
    Best Season
    Chilean Patagonia · Magallanes Region · W Circuit (Classic) vs O Circuit (Full Loop) · Patagonia Trekking Overview →
    Last updated May 27, 2026 — verified 2026 CONAF park entry fees ($39 / $55 USD), current Las Torres Patagonia (formerly Fantastico Sur) and Vertice refugio booking system, and December-March season logistics

    Torres del Paine National Park sits in Chilean Patagonia’s Magallanes Region. It is home to two of the world’s most famous multi-day trekking routes — the W Circuit and the O Circuit. Generally, they share the same iconic destinations (the three granite towers, the French Valley amphitheater, Grey Glacier) but differ fundamentally in scope, duration, and character. Specifically, the W Circuit is the popular classic at roughly 80 km in 4-5 days. The O Circuit is the complete experience at roughly 130 km in 7-10 days, adding the remote backside wilderness loop. Notably, choosing between them is the single most important decision a first-time Patagonia trekker makes.

    This guide answers every question first-time Patagonia trekkers ask. How do the two circuits actually compare day by day? What does the 2026 CONAF permit cost and how do you book the refugios? Notably, we cover several concrete topics. First, a master side-by-side comparison of both circuits. Then day-by-day itineraries for the standard W (5 days) and O (8 days). Also the 2026 permit and refugio booking system through Las Torres Patagonia and Vertice. Plus full cost breakdowns from budget camping through guided expeditions. Plus the December-March season analysis and Patagonian weather realities. Finally, a clear decision framework for choosing your circuit.

    Torres del Paine at a Glance

    DetailInformation
    LocationMagallanes Region, Chilean Patagonia (southernmost Chile)
    Park size227,298 hectares (UNESCO Biosphere Reserve, 1978)
    Annual visitors~250,000 (all activities)
    Highest peakPaine Grande (3,050 m / 10,007 ft)
    The three towersTorre Central 2,850 m · Torre Norte 2,248 m · Torre Sur 2,500 m
    W Circuit~80 km · 4-5 days · ~90% of trekkers
    O Circuit~130 km · 7-10 days · ~10% of trekkers
    Best seasonDecember – March (Patagonian summer)
    Gateway townPuerto Natales (2.5 hr bus to park)
    Closest airportPunta Arenas (PUQ), 3 hr bus to Puerto Natales
    2026 park entry$39 USD (under 3 days) · $55 USD (3+ days)
    Refugio operatorsLas Torres Patagonia (formerly Fantastico Sur) + Vertice
    WildlifeGuanacos, pumas, Andean condors, foxes, rheas

    W vs O Circuit — The Master Comparison

    Before the day-by-day detail, here is the head-to-head comparison that answers most trekkers’ core question. Generally, the W Circuit wins on accessibility, schedule, and success rate, while the O Circuit wins on wilderness, solitude, and the complete-loop experience. Specifically, the table below summarizes every decisive factor. Notably, both circuits hit the same three marquee highlights — the O simply adds the backside wilderness around them.

    AttributeW CircuitO Circuit
    Total distance~80 km (50 miles)~130 km (80 miles)
    Standard duration4-5 days7-10 days (standard 8)
    Daily hiking15-20 km · 5-8 hours15-20 km · 6-11 hours (pass day longest)
    Maximum altitude~1,000 m at viewpoints1,241 m at Paso John Gardner
    Cumulative gain~3,000-4,000 m~4,500-5,500 m
    Signature highlightsTorres base, French Valley, Grey GlacierAll W highlights + Paso John Gardner + backside
    InfrastructureWell-developed refugios + campsW-side refugios + basic backside camps
    CrowdsModerate-heavy peak seasonHeavy on W section, light on backside
    Weather exposureModerateHigh (Paso crossing)
    Booking lead time6-9 months for peak9-12 months (backside limited)
    Typical cost$800-$2,500$1,200-$3,800
    DirectionEast-to-West or West-to-EastCounter-clockwise only
    Success rate85-90%75-80%
    Share of trekkers~90%~10%
    Ideal forFirst-time Patagonia, 5-7 daysExperienced trekkers, 8-12 days
    Torres del Paine National Park Chilean Patagonia three granite towers turquoise lake dramatic peaks W Circuit O Circuit trekking Magallanes Region
    Torres del Paine National Park in Chilean Patagonia centers on the Paine Massif — a dramatic granite range dominated by the three signature towers that give the park its name. Generally, the W Circuit (80 km, 4-5 days) and O Circuit (130 km, 7-10 days) both traverse this 227,298-hectare UNESCO Biosphere Reserve. Notably, the iconic three-tower sunrise at Mirador Las Torres remains one of trekking’s most photographed moments, shared by both routes.

    The W Circuit — The Classic Route

    W Circuit — 80 km Over 4-5 Days

    All three main highlights · well-developed infrastructure · ~90% of trekkers · 85-90% success
    ~80 km
    Distance
    4-5 days
    Duration
    ~1,000 m
    Max Altitude
    85-90%
    Success Rate

    The W Circuit follows a W-shaped ground plan that connects Torres del Paine’s three main valleys. Generally, these are three valleys. The Ascencio Valley leads to Mirador Las Torres, the iconic three granite towers. The French Valley holds the dramatic Mirador Britanico amphitheater, and the Grey Valley ends at Glacier Grey. Specifically, each leg of the W requires hiking in and out of its respective valley, with connecting sections along Lake Nordenskjold and Lake Pehoe. Notably, this is Patagonia’s most accessible major multi-day trek.

    Several features make the W Circuit achievable for fit first-time Patagonia trekkers. These include well-developed refugios with dormitory beds and meals, clearly marked trails, catamaran service across Lake Pehoe, and abundant guided tour options. Generally, around 90% of Torres del Paine multi-day hikers choose the W, and it is overwhelmingly the right choice for most international visitors. Specifically, the main downsides are crowds during peak season (December-February) and the feeling of being on a popular route. Notably, the W hits all three marquee features, and for most trekkers the iconic three-towers sunrise makes any crowd worthwhile.

    W Circuit Day-by-Day Itinerary (Standard 5 Days)

    The standard 5-day W itinerary runs west-to-east or east-to-west. Generally, the east-to-west direction below starts at the Las Torres sector and finishes at the Lake Pehoe catamaran. Specifically, the towers sunrise hike happens early to maximize the chance of clear weather. Notably, daily distances and times assume moderate fitness and typical Patagonian conditions.

    DayRouteDistance / TimeHighlight
    Day 1Puerto Natales bus to park, hike to Las Torres sector~7 km · 2-3 hrsArrival, settle into Central/Chileno
    Day 2Pre-dawn hike to Mirador Las Torres, then transfer to Los Cuernos/Frances~22 km · 8-9 hrsThree granite towers at sunrise
    Day 3French Valley to Mirador Britanico, move to Paine Grande~25 km · 8-9 hrsFrench Valley amphitheater
    Day 4Hike to Grey Glacier viewpoint, stay Paine Grande/Refugio Grey~22 km · 6-7 hrsGrey Glacier and icebergs
    Day 5Catamaran across Lake Pehoe, bus to Puerto Natales~4 km + ferryDeparture

    W Circuit itinerary variations. Generally, the W flexes from 3 to 6 days. Specifically, a compressed 4-day W skips a rest stop, the standard 5-day W is most common, and a comfortable 6-day W adds a buffer/rest day for weather. Notably, a minimal 3-day W covers only the Torres Base Camp and French Valley, skipping Grey Glacier. The three-towers sunrise is weather-dependent — only 30-50% of trekkers get a clear sunrise on the first attempt, so building in flexibility helps. Compare the W’s difficulty to other classic treks in our Tour du Mont Blanc guide.

    The O Circuit — The Full Loop

    O Circuit — 130 km Over 7-10 Days

    Complete circumnavigation · backside wilderness + Paso John Gardner · ~10% of trekkers · 75-80% success
    ~130 km
    Distance
    7-10 days
    Duration
    1,241 m
    Paso John Gardner
    75-80%
    Success Rate

    The O Circuit is a complete circumnavigation of the Paine Massif. Generally, it includes all W Circuit highlights plus a backside wilderness loop. The loop runs through Seron, Dickson, and Los Perros camps before crossing the dramatic Paso John Gardner (1,241 m). Specifically, the pass offers sweeping views of the Southern Patagonian Ice Field. It then descends to rejoin the Grey Glacier area. From there you complete the standard W route back to the start. Notably, this backside section sees maybe 10% of park visitors, meaning long stretches of solitude through glaciated valleys and lenga forests.

    Paso John Gardner’s crossing day is the trek’s physical and emotional climax. Generally, it is 9-11 hours of hiking culminating in the panoramic ice field view that has become one of Patagonia’s most famous vistas. Specifically, the O Circuit delivers the complete Torres del Paine experience but requires significantly more time, fitness, and advance planning. Notably, the backside camps (Seron, Dickson, Los Perros) are more basic than W Circuit refugios. Weather can close Paso John Gardner for days. Reservations are tighter because of the limited capacity on the backside.

    O Circuit Day-by-Day Itinerary (Standard 8 Days)

    The O Circuit is hiked counter-clockwise, starting with the backside wilderness loop and finishing on the W section. Generally, this direction is mandatory — park rules require the O to start from Seron and proceed counter-clockwise. Specifically, the standard 8-day itinerary below front-loads the remote camps and saves the iconic towers for the final morning. Notably, Day 4 (the Paso John Gardner crossing) is the longest and hardest day of either circuit.

    DayRouteDistance / TimeHighlight
    Day 1Laguna Amarga entrance to Seron camp~15 km · 6-7 hrsEnter the quiet backside
    Day 2Seron to Dickson camp~18 km · 7-8 hrsRemote Lake Dickson
    Day 3Dickson to Los Perros camp~12 km · 5-6 hrsPerros Glacier
    Day 4Los Perros to Grey via Paso John Gardner (1,241 m)~15 km · 9-11 hrsIce Field view — longest, hardest day
    Day 5Grey to Paine Grande (now on W section)~11 km · 4-5 hrsGrey Glacier
    Day 6Paine Grande to French Valley and Los Cuernos~6-7 hrsFrench Valley amphitheater
    Day 7Los Cuernos to Chileno~6-8 hrsPosition for towers sunrise
    Day 8Pre-dawn Torres Base viewpoint, descend to exit, bus to Puerto NatalesFull dayThree towers at sunrise, departure

    Paso John Gardner weather warning. Generally, the Paso John Gardner crossing is the O Circuit’s crux and its biggest weather risk. Specifically, the 1,241 m pass can close for days when high winds or snow hit — Patagonian wind regularly exceeds 100 km/h at exposed elevations. Notably, the remote Dickson and Los Perros camps have limited exit options, so trekkers caught by weather may need to wait it out. Always build buffer days into an O Circuit plan, and review our mountain weather guide for reading Patagonian forecasts. The O Circuit’s lower 75-80% success rate compared to the W’s 85-90% largely reflects pass closures and the longer, more committing route.

    Torres del Paine Paso John Gardner pass O Circuit Southern Patagonian Ice Field backside wilderness Dickson Los Perros camps glaciated valleys trekking
    The O Circuit’s backside wilderness loop crosses Paso John Gardner (1,241 m), the trek’s physical climax with sweeping views over the Southern Patagonian Ice Field. Generally, this backside section through Seron, Dickson, and Los Perros camps sees only about 10% of park visitors. Notably, the pass crossing is a 9-11 hour day that can close for days in bad weather, contributing to the O Circuit’s lower 75-80% success rate.

    2026 Permits & Refugio Booking

    Torres del Paine requires two separate things: a CONAF park entry permit and advance reservations for every overnight refugio or campsite. Generally, dispersed camping is prohibited and advance reservations have been mandatory since October 2016. Specifically, you cannot simply show up and improvise — park rangers check that you are booked at the correct camp for each night. Notably, the booking system involves multiple operators, which makes Torres del Paine’s logistics more complex than the trekking itself.

    Requirement2026 DetailHow to Book
    CONAF park entry (under 3 days)$39 USD foreignersOnline or added to refugio booking
    CONAF park entry (3+ days)$55 USD foreignersOnline or added to refugio booking
    W/O camp + refugio reservationsMandatory for every nightLas Torres Patagonia + Vertice (two operators)
    Lake Pehoe catamaran$30-$40 one wayBook ahead in peak season
    Puerto Natales to park bus$15-$25 each wayBus companies in Puerto Natales

    The Two Refugio Operators (2026)

    Two private companies operate all the bookable refugios and campsites along the circuits. Generally, knowing which operator runs which camp is essential because you book directly with each. Specifically, Las Torres Patagonia (formerly named Fantastico Sur) runs the eastern and central camps, while Vertice runs the western and backside camps. Notably, the formerly free CONAF campsites (Paso, Italiano, and the old Torres site) have remained closed since the COVID-19 pandemic with no announced reopening. This closure affects O Circuit itinerary planning.

    OperatorCamps / Refugios RunBooking Site
    Las Torres Patagonia (formerly Fantastico Sur)Central, Seron, Frances, Cuernos, Chilenolastorres.com
    Vertice PatagoniaDickson, Los Perros, Grey, Paine Grandevertice.travel
    CONAF (closed)Paso, Italiano, old Torres — closed since COVIDNot currently bookable
    Aggregator optionCombines both operators’ availabilityBooking Patagonia Travel / TorresHike

    How to book for 2026. Generally, reservations for each season typically open in late May or early June, though the 2025/2026 season opened as early as April 1. Specifically, you can book in two ways. Make two separate bookings directly through Vertice and Las Torres for lower cost and more control. Or make one combined booking through an aggregator like Booking Patagonia Travel or TorresHike for convenience, but with a markup. Notably, the O Circuit’s backside camps (Dickson, Los Perros) have limited capacity and fill first. Book the O 9-12 months ahead and the W 6-9 months ahead for peak-season dates. The park entry fee is usually added automatically when booking through an aggregator.

    Torres del Paine Costs in 2026

    Torres del Paine trek costs vary widely by route, accommodation style, and whether you go self-guided or with a tour. Generally, self-guided camping is the budget approach while guided refugio tours are the premium. Specifically, the largest variables are accommodation choice (camping versus refugio with meals) and guided versus independent. Notably, the table below breaks down realistic 2026 total budgets including the major cost components.

    Trek Style2026 Total CostWhat’s Included
    Self-guided W — camping$800-$1,200Park entry + camping + bus/ferry + self-cooked food (with flights)
    Self-guided W — refugios + meals$1,800-$2,800Park entry + refugio half-board + transport + flights
    Self-guided O — camping$1,200-$1,800Park entry + camping + transport + self-cooked food
    Self-guided O — refugios + meals$2,500-$3,800Park entry + refugio half-board + transport
    Guided W tour$1,500-$3,000Reservations, meals, guide, transport from Puerto Natales
    Guided O tour$2,500-$4,500All logistics, guide, meals, transport
    Premium guided (either)$4,000-$6,500Private guide, premium refugios, full service

    Cost Component Detail

    Component2026 CostNotes
    CONAF park entry$39 (under 3 days) / $55 (3+ days)Foreigner multi-day rate
    Vertice camping~$10-$15 / person / nightDickson, Los Perros, Grey, Paine Grande
    Las Torres camping~$37-$50 / nightCentral, Seron, Frances, Cuernos, Chileno
    Refugio dorm bed$60-$125 / nightHigher with meals
    Refugio with half-board$120-$250 / nightBed plus breakfast and dinner
    Refugio meals (a la carte)$20-$35 / mealSelf-cooking saves ~$10-$15 per meal
    Bus Puerto Natales to park$15-$25 each way2.5 hour ride
    Lake Pehoe catamaran$30-$40 one wayW Circuit west end
    Bus Punta Arenas to Puerto Natales$25-$40 each way3 hour ride
    Flight Santiago to Punta Arenas$100-$250LATAM, Sky Airline
    Gear rental (Puerto Natales)$15-$30 / dayTent, sleeping bag, stove available
    Torres del Paine season weather Patagonian summer December March wind guanacos refugios Puerto Natales gateway trekking conditions best time to hike
    The Torres del Paine trekking season runs December through March during the Patagonian summer. Generally, this window offers the warmest temperatures, the longest daylight (17+ hours in December), and full operation of refugios, camps, and transport. Notably, Patagonian wind is a constant factor year-round and can exceed 100 km/h on any given day, especially on the exposed Paso John Gardner crossing.

    Season & Weather Analysis

    The Torres del Paine trekking calendar runs December through March — Chilean Patagonia’s summer. Generally, this window offers the warmest temperatures, the longest daylight, and full operation of all refugios, camps, catamarans, and bus transfers. Specifically, from May through September the refugios and camps close, and the full O Circuit plus parts of the W become inaccessible without a certified guide. Notably, Patagonian wind is the defining weather factor and can exceed 100 km/h on any day regardless of season.

    PeriodConditionsTrekking Notes
    DecemberSummer begins · PEAK season · 17+ hr daylightLong days · advance reservations essential
    JanuaryPeak summer · warmest · most crowdedHighest demand · book months ahead
    FebruaryContinued peak · similar to JanuaryBusy on W · backside still quiet
    MarchLate summer · fewer crowds · coolerGood balance of weather and quiet
    NovemberSpring · wildflowers · refugios openingFewer crowds · some camps still closed
    OctoberSpring beginning · some refugios openingVariable · limited services
    AprilFall · temperatures droppingShoulder · services winding down
    May – SeptemberWinter · refugios and camps closedGuided winter W only · O Circuit closed

    Temperature and Daylight Reference

    FactorSummer (Dec-Feb)Late Summer (Mar)
    Daytime high60-75°F (15-24°C)Cooler · 50-65°F
    Valley lows40-55°F (4-13°C)Colder nights
    Daylight17+ hours (December)13-14 hours
    WindConstant · gusts to 100+ km/hCan be calmer
    RainPossible any dayPossible any day

    Which Circuit Should You Choose?

    The decision between W and O comes down to time available, experience, and what you want from Patagonia. Generally, the W is the right answer for most trekkers, while the O rewards those with more time and experience. Specifically, the decision cards below map common trekker profiles to the recommended circuit. Notably, a realistic progression for many travelers is to do the W first and return for the O on a second Patagonia trip.

    Choose W

    First Patagonia Trek

    The W Circuit is correct for a first visit. Generally, it includes all three main highlights, offers established infrastructure, has a higher success rate, and requires easier reservations. Specifically, it is a far less intimidating first experience than the remote O Circuit backside.

    Choose W

    5-7 Day Schedule

    The W fits tight schedules. Generally, a 4-5 day trek plus Puerto Natales travel totals 6-7 days. Specifically, the O Circuit requires a minimum 10-11 day window including travel buffers, which does not fit a one-week trip.

    Choose W

    Moderate Fitness

    The W suits reasonably fit hikers. Generally, it involves 15-20 km per day over 5-8 hour days with no major pass crossings. Specifically, it is achievable without expedition-level fitness, unlike the O’s 9-11 hour Paso John Gardner day.

    Choose O

    Experienced Multi-Day Trekker

    The O rewards experience. Generally, prior multi-day treks like Everest Base Camp, the Tour du Mont Blanc, or long Appalachian sections build the right foundation. Specifically, the remote sections and the Paso crossing demand maturity and self-sufficiency.

    Choose O

    Wilderness Priority

    The O delivers solitude and backside wilderness. Generally, the Dickson and Los Perros camps see only about 10% of park visitors. Specifically, the Paso John Gardner ice field view is a genuine life-list moment that W-only trekkers never experience.

    Do W, then O

    Return Patagonia Visitors

    The best approach for repeat visitors is sequential. Generally, do the W first on an initial visit, then return for the O on a second Patagonia trip. Specifically, choosing different seasons (one summer, one shoulder) adds variety to the two experiences.

    The first-timer recommendation. Generally, if this is your first Patagonia experience, the W Circuit is almost certainly the right choice. Specifically, it delivers all three of Torres del Paine’s iconic destinations — the three towers, French Valley, and Grey Glacier — with manageable difficulty and well-developed infrastructure. Notably, the O Circuit’s backside adds genuine wilderness character but demands significantly more time, fitness, and planning. Most trekkers return for the O on a second Patagonia trip after building confidence on the W. The W’s popularity should not deter you — it is a world-class trek by any measure, and the three-towers sunrise alone justifies the trip. For the wider Patagonia picture including Argentine options like Fitz Roy, see our Patagonia trekking overview.

    Torres del Paine FAQ

    Which is better, the W Circuit or O Circuit in Torres del Paine?

    The choice depends on available time, fitness, and desired experience. The W Circuit suits first-timers and shorter schedules. The O Circuit suits experienced trekkers wanting the full wilderness experience. The W Circuit works for most trekkers. Its 4-5 days fit tight schedules and its 80 km is manageable. It hits all three main highlights — Mirador Las Torres, French Valley, and Grey Glacier. Roughly 90% of Torres del Paine trekkers choose it. The O Circuit rewards experienced hikers with 7-10 days of deeper immersion across 130 km. It adds the backside wilderness and the Paso John Gardner (1,241 m) crossing with its Southern Patagonian Ice Field view. Only about 10% of visitors attempt it. A practical decision matrix: 5 days available means W, 7-10 days means O; first-timers choose W, experienced trekkers seeking wilderness choose O. A realistic progression is to do the W first and return for the O on a second Patagonia trip.

    How long is the W Circuit in Torres del Paine?

    The W Circuit is approximately 80 km (50 miles) and typically takes 4-5 days, with variations from 3 to 6 days. The standard 5-day itinerary covers a W-shaped ground plan connecting the three main valleys. Day 1 reaches the Las Torres sector. Day 2 makes the pre-dawn hike to Mirador Las Torres, the three granite towers. Day 3 explores the French Valley to Mirador Britanico. Day 4 reaches the Grey Glacier area. Day 5 returns via the catamaran across Lake Pehoe to Puerto Natales. Maximum altitude is around 1,000 m at the viewpoints, daily hiking runs 4-9 hours, and cumulative elevation gain is approximately 3,000-4,000 m. The trek is moderate — not altitude-challenging but endurance-demanding. Conservative planning budgets 6-7 days total including Puerto Natales arrival and departure, with refugios or camps booked 6-9 months ahead for peak season.

    How long is the O Circuit in Torres del Paine?

    The O Circuit is approximately 130 km (80 miles) and typically takes 7-10 days, with 8 days standard. It includes all W Circuit landmarks plus the backside wilderness loop, hiked counter-clockwise. The standard 8-day itinerary front-loads the backside. It runs Laguna Amarga to Seron (Day 1), Seron to Dickson (Day 2), and Dickson to Los Perros (Day 3). Day 4 crosses Paso John Gardner at 1,241 m — the longest and hardest day at 9-11 hours. The W section then fills Days 5-8, ending with the pre-dawn Torres Base viewpoint. Maximum altitude is 1,241 m at Paso John Gardner, cumulative elevation gain is approximately 4,500-5,500 m, and the pass can close for days in bad weather. The remote Dickson and Los Perros camps have limited exits, so trekkers should plan a 10-11 day total trip window and book 6-9 months in advance.

    How much does the Torres del Paine trek cost in 2026?

    Torres del Paine treks cost roughly $500-$2,500 for self-guided trekking depending on route and accommodation, or $1,500-$6,500 for guided tours. The 2026 CONAF park entry fee is $39 USD for visits under 3 days or $55 USD for 3 or more days. Accommodation spans a wide range. Vertice camping runs around $10-$15 per person per night and Las Torres camping around $37-$50. Refugio dormitory beds with half-board reach $120-$250 per night. Transport adds cost. The bus from Puerto Natales to the park runs $15-$25 each way. The Lake Pehoe catamaran is $30-$40 one way, and the bus from Punta Arenas to Puerto Natales is $25-$40. Realistic total budgets: self-guided W camping $800-$1,200 with flights, mid-range W with refugios $1,800-$2,800, self-guided O camping $1,200-$1,800, mid-range O $2,500-$3,800, and premium guided trips $4,000-$6,500.

    When is the best time to hike Torres del Paine?

    The best time is December through March — Chilean Patagonia’s summer. This window offers the warmest temperatures, the longest daylight (17+ hours in December), and full operation of all refugios, camps, catamarans, and bus transfers. December begins peak season, January and February are the warmest and most crowded months, and March is late summer with fewer crowds and cooler temperatures. From May to September the refugios and camps close and the full O Circuit and parts of the W become inaccessible without a certified guide. Patagonian wind is a constant factor and can exceed 100 km/h any day, especially on the Paso John Gardner crossing on the O Circuit. The iconic three-towers sunrise requires calm pre-dawn weather and sometimes takes 2-3 attempts. Book the W Circuit 6-9 months ahead and the O Circuit 9-12 months ahead for peak-season dates.

    How hard is the Torres del Paine trek?

    Torres del Paine treks are moderately strenuous — not technically difficult but physically demanding. The W Circuit covers 80 km over 4-5 days, around 16-20 km per day. Maximum altitude is about 1,000 m, so altitude illness is not a concern. Cumulative elevation is 3,000-4,000 m, with daily hiking of 5-9 hours on well-maintained paths. Its success rate is 85-90%. The O Circuit covers 130 km over 7-10 days. Maximum altitude is 1,241 m at Paso John Gardner, with cumulative elevation of 4,500-5,500 m. Daily hiking runs 6-11 hours, and the pass-crossing day stretches to 9-11 hours. Its success rate is 75-80%. Both circuits share Patagonia’s defining physical challenge — wind that regularly exceeds 100 km/h. They also share weather exposure, cumulative fatigue, and steep descents hard on the knees. The W is comparable to the Tour du Mont Blanc in distance but easier in altitude and infrastructure. Three to six months of regular hiking with a weighted pack is good preparation for either circuit.

    Do I need a guide for Torres del Paine?

    No, you do not legally need a guide for Torres del Paine. Both the W and O Circuits can be hiked independently with proper planning. Roughly 70-80% of trekkers go self-guided. Self-guided trekking works because trails are well-marked, the infrastructure is established for international hikers, English is widely spoken at refugios, and maps and GPS apps are available. Self-guided trekking does require planning. You need advance reservation of refugios and camps 6-12 months ahead for peak season, plus park entry, catamaran, and bus bookings. You also need basic navigation skills and comfort with variable weather. Consider a guided tour if it is your first Patagonia trek, you prefer group travel, you want logistics handled, you have limited Spanish, or you are traveling with family. Guided tours pre-book all reservations, plan meals, provide professional guides and transport, and handle emergency response. Baggage transfer services between refugios are also available for an extra cost. For most trekkers, self-guided Torres del Paine is feasible with 3-6 months of advance reservation planning.

    What are the best viewpoints on the W Circuit?

    The W Circuit’s three definitive viewpoints are Mirador Las Torres (the iconic three granite towers), Mirador Britanico in the French Valley, and Grey Glacier. Mirador Las Torres sits at about 890 m. It requires a pre-dawn hike from Chileno or Torres Base Camp, 4-5 hours round trip. The three granite towers (Torre Central, Norte, and Sur) glow pink and orange at sunrise. Only 30-50% of trekkers get a clear sunrise on the first attempt. Mirador Britanico in the French Valley is a 5-7 hour round-trip day hike. It enters an amphitheater of the Paine Grande glacier face and hanging glaciers. It is less visited than the towers but equally spectacular. The Grey Glacier area offers views of the 28 km long, 1,200 m deep glacier flowing from the Southern Patagonian Ice Field. Blue icebergs fill Lago Grey, with optional kayaking or boat tours. By trekker consensus, the towers are most photographed, the French Valley most immersive, and Grey Glacier most serene — all three are essential for the complete W experience.

    How do I book the Torres del Paine refugios and campsites?

    You book Torres del Paine refugios and campsites through two private operators plus the CONAF park entry. Las Torres Patagonia (formerly named Fantastico Sur) runs the Central, Seron, Frances, Cuernos, and Chileno camps. Vertice Patagonia runs the Dickson, Los Perros, Grey, and Paine Grande camps. You can make two separate direct bookings through both operators’ websites for lower cost and more control. Alternatively, use an aggregator like Booking Patagonia Travel or TorresHike that combines availability across both, which is easier but adds a markup. The formerly free CONAF campsites (Paso, Italiano, and the old Torres site) have remained closed since the COVID-19 pandemic. Reservations typically open in late May or early June, though the 2025/2026 season opened as early as April 1. Book the O Circuit 9-12 months ahead because its limited-capacity backside camps fill first, and book the W Circuit 6-9 months ahead for peak-season dates. Advance reservations have been mandatory for every overnight since October 2016, and dispersed camping is prohibited.

    Torres del Paine Related Guides

    Sources & Verified References

    • CONAF (Chile’s National Forest Corporation), conaf.cl — Official park management and 2026 entry fees
    • Las Torres Patagonia (formerly Fantastico Sur), lastorres.com — W Circuit east/central refugio operator
    • Vertice Patagonia, vertice.travel — W Circuit west side and O Circuit backside operator (2025/26 rates)
    • Booking Patagonia Travel / TorresHike — Aggregated reservation platforms and 2026 entry fee data
    • Rudolf Abraham, “Torres del Paine: Trekking in Chile’s Premier National Park” (Cicerone) — Authoritative English reference
    • Lonely Planet, “Trekking in the Patagonian Andes” — Regional reference
    • Chilean Alpine Club (Club Andino de Chile) — Patagonia trekking protocols
    • Guide services: Chile Nativo, Quetralahue, Knowmad Adventures, REI Adventures (2026 rates)
    • Park reservation regulations effective October 15, 2016 — Mandatory advance reservations and camping rules

    Last updated: May 27, 2026. Next scheduled update: September 2026 (pre-season update incorporating 2026/2027 CONAF fees, refugio rates, and booking-window opening dates).

    Plan Your Torres del Paine Trek

    The W Circuit and O Circuit both deliver Patagonia’s iconic granite towers, French Valley, and Grey Glacier. Generally, the W is the accessible 4-5 day classic for first-timers, while the O adds the wild backside loop and Paso John Gardner for experienced trekkers with 8-10 days. Notably, whichever you choose, book the refugios early and build in buffer days for Patagonian weather.

    Explore All Patagonia Routes →

    Was this helpful?

    Yes
    No
    Thanks for your feedback!
  • Alpine · Ice · Glacier · High Altitude · Expedition

    Best Mountaineering Boots: Choose by Terrain, Warmth & Fit

    The best mountaineering boot is not the stiffest, warmest or most expensive. It is the least-bulky boot that is warm enough for the objective, rigid enough for the hardest terrain, compatible with the exact crampon system and shaped correctly for your foot.

    7 current models compared Single vs double boots B1/B2/B3 explained correctly Boot + crampon fit protocol
    Affiliate disclosure: Global Summit Guide may earn a commission from qualifying purchases through partner links on this page, at no extra cost to you. Commercial relationships do not determine the editorial recommendations.
    Mountaineering boots and crampons in high mountain terrain
    By Travis Ludlow · Global Summit Guide
    Updated September 29, 2026 · Research-based gear comparison
    7 Current boot picks
    3 Main boot systems
    UIAA 153 Crampon safety standard
    Fit first Before brand or rating
    Exact test Boot + crampon
    The direct answer

    For Most Classic Alpine Climbs, Start With a Warm Technical Single Boot—Then Move Warmer Only When the Objective Demands It.

    For general glacier travel, classic alpine mountaineering and technical routes in moderate-to-cold conditions, the practical center of the market is a stiff, insulated single boot that can securely accept the crampon system your route requires. The SCARPA Mont Blanc Pro GTX and La Sportiva Nepal Cube GTX are current examples of that traditional all-around category.

    Fast alpine objectives may favor lighter boots such as the La Sportiva Aequilibrium Top GTX. Technical ice and mixed climbing may justify an integrated-gaiter boot such as the SCARPA Phantom Tech HD. Multi-day extreme cold and high-altitude expeditions push toward removable-liner systems such as the SCARPA Phantom 6000 HD, Mammut Nordwand 6000 High or an 8,000-meter boot such as the La Sportiva Olympus Mons Cube.

    None of those model names overrides fit. A boot that is theoretically perfect for the route but crushes your forefoot, lifts at the heel or allows your toes to hit the front on descent is the wrong boot.

    Classic alpine Warm technical single
    Technical ice Rigid integrated-gaiter boot
    Cold expedition Double / removable-liner system
    Research-based shortlist

    7 Best Mountaineering Boots by Use Case

    These are not seven versions of the same boot. They occupy different points on the spectrum from fast alpine movement to extreme expedition warmth. Choose the category first, then fit competing models in person whenever possible.

    How to read this list: Global Summit Guide has not laboratory-tested every model below. The shortlist is based on current manufacturer specifications, intended use, construction, crampon interface, route demands and cross-checking against established field-review sources. Fit remains individual and cannot be ranked from a specification sheet.
    Use caseBootConstructionCrampon interfaceWhy it stands outMain trade-off
    Best all-around classicSCARPA Mont Blanc Pro GTXInsulated single leather/synthetic alpine bootAutomatic + semi-automaticDurable, supportive and built for high-altitude and mixed crampon terrain without jumping to expedition-boot bulk.Heavier and less walkable than fast/light alpine boots.
    Warm traditional singleLa Sportiva Nepal Cube GTXInsulated technical single bootTechnical crampon-compatible platformLong-established category for big peaks, glacier travel and vertical ice where warmth and rigidity both matter.Too much boot for long dry approaches and lower, warmer objectives.
    Fast & light alpineLa Sportiva Aequilibrium Top GTXLight integrated-gaiter alpine bootSemi-automaticManufacturer reference weight of 650 g per boot, strong walkability and a BOA-assisted closure for quick alpine movement.Not the choice for the coldest expeditions or full automatic-crampon requirements.
    Technical ice & mixedSCARPA Phantom Tech HDInsulated integrated-gaiter technical bootAutomatic + semi-automaticPrecise, weather-protected design focused on winter mountaineering, ice and mixed climbing; SCARPA lists an 800 g reference weight.Premium price and more specialized than a traditional all-around leather alpine boot.
    Cold 6,000 m categorySCARPA Phantom 6000 HDDouble boot with removable insulated inner bootAutomatic + semi-automaticBuilt for high altitude, cold and multi-day use where a removable liner improves drying and camp management.More bulk and less precision than a single technical boot.
    6000 m BOA alternativeMammut Nordwand 6000 HighGaiter expedition boot with removable linerAutomatic / C3-style interfaceRigid, highly insulated construction with BOA fit adjustment and a removable liner for demanding high-altitude use.Expedition-level weight, bulk and cost are unnecessary for moderate alpine climbing.
    Extreme 8,000 m / polarLa Sportiva Olympus Mons CubeExtreme-cold expedition system with removable thermal bootiesExpedition crampon platformDesigned for maximum thermal insulation and the world’s coldest, highest objectives rather than ordinary alpine use.Massive overkill for lower peaks; expensive and bulky.
    The selection order

    Choose the Mountain First. Then Choose the Boot.

    Boot selection becomes easier when you stop asking which model is “best” and define the actual problem. How much of the day is walking? Will you front-point? Is there a glacier? What is the coldest camp? Can liners be dried overnight? What crampons are required? Are you carrying your own load?

    A summer Alpine route with a long rocky approach rewards walkability and moderate warmth. Waterfall ice rewards rigidity and precision. Denali-style expedition climbing rewards insulation, durability and drying strategy. An 8,000-meter summit push makes thermal protection the dominant requirement.

    The common mistake: buying a colder, stiffer boot because it feels more “serious.” Excess boot can make approaches inefficient, reduce ankle movement and create heat or fit problems long before its extra insulation becomes useful.
    Mountain footwear on a rocky approach trail illustrating fit and walkability
    Objective typePriorityLikely boot directionWhat not to overbuy
    Snow hiking / easy glacier approachWalkability, weather protection, compatible tractionFlexible-to-moderately stiff mountain footwearRigid technical ice boot
    Classic glacier mountaineeringWarmth, secure crampon fit, all-day walkingStiff insulated single boot8,000 m expedition boot
    Technical ice / mixedRigidity, precision, front-point controlRigid technical or integrated-gaiter bootSoft hiking-oriented boot
    Cold multi-day 5,000–6,500 m expeditionWarmth, drying, insulation marginWarm integrated boot or removable-liner double bootLight summer alpine boot
    Extreme 7,000–8,000 m / polar coldThermal protection and expedition reliabilityPurpose-built extreme-cold expedition bootSingle boot chosen only for precision
    Affiliate partner · approach & hiking category

    NORTIV 8: A Budget Option for the Approach—Not a Technical Mountaineering Boot

    NORTIV 8 currently sells waterproof hiking and trekking boots. That can make the brand relevant for trail approaches, lower-elevation hiking and non-technical mountain days. Do not substitute a hiking boot for a true technical crampon-compatible mountaineering boot when the route requires rigid footwear, toe/heel welts, sustained snow, steep ice or serious cold.

    See NORTIV 8 Hiking Boots
    Mountaineering team moving in high mountain terrain where footwear and crampon systems must work together
    The real system

    The Boot Has to Work After Hours of Movement—not Just on the Shop Floor.

    Heel lift, toe impact, lace pressure, cold spots and crampon movement often appear only after real climbing time. Treat the return window as a testing period and simulate the socks, footbeds, gaiters and crampons you will actually use.

    That is why Global Summit Guide treats the final decision as a systems choice rather than a simple “best boot” list. Fit, socks, footbeds, gaiters and the exact crampon setup all need to be tested together.

    Template 8.0 rule: when text needs to carry real meaning, keep it off the photo and place it in a clear content block beside the image.
    Compatibility language

    B1, B2 & B3 Are Useful Shorthand—Not an Official UIAA Footwear Certification

    B1, B2 and B3 are widely used retail and mountaineering shorthand for increasing boot stiffness and the type of crampon interface a boot is likely to support. They are useful as a first sorting tool. They should not be presented as an official UIAA boot-certification system.

    The UIAA publishes UIAA 153 for crampons, which is tied to EN 893. The standards describe crampon safety requirements. The final compatibility decision still comes down to the exact boot, the exact binding and the manufacturer’s instructions.

    Flexible end

    B1-style shorthand

    Walkability dominates. Think compatible flexible/strap attachment systems rather than automatic crampons. Do not assume every hiking boot is suitable simply because a strap can wrap around it.

    General mountaineering

    B2-style shorthand

    A stiffer mountain boot often with a heel welt. This is the practical middle ground for many general mountaineering and glacier objectives when paired with a compatible hybrid/semi-automatic crampon.

    Rigid / technical

    B3-style shorthand

    Rigid technical or expedition footwear commonly built with toe and heel interfaces for automatic crampons. The exact bail shape and boot geometry still need to match.

    Do not use a simple “boot number ≥ crampon number” rule as your final safety check. Petzl specifically instructs climbers to verify the exact boot, binding system and crampon fit, including movement in every direction and whether bindings can come off the welts.
    Boot + crampon system

    The Welt Is a Clue. The Physical Fit Is the Test.

    The same crampon may fit one boot securely and another poorly even when the broad category looks compatible. Test the exact pair before the climb.

    Strap / flexible

    No technical welts required

    Flexible toe and heel baskets can work with a wider range of boots, but the boot still needs enough structure for the intended terrain and the binding must remain secure under twisting and flex.

    Hybrid

    Heel lever + flexible toe

    Common on general mountaineering setups. The heel lever typically relies on a compatible heel welt while the front basket accommodates boots without a front welt.

    Automatic

    Toe bail + heel lever

    Common on rigid technical boots with both front and rear interfaces. The metal toe bail must seat correctly on the exact boot shape; a visible welt alone is not enough.

    Warmth strategy

    Single vs Double vs Extreme Expedition Boots

    There is no universal altitude where a single boot becomes unsafe and a double boot becomes mandatory. Temperature, duration, weather, circulation, pace and the ability to dry insulation matter as much as elevation.

    Single boot

    Lighter + more precise

    Best when the objective needs mountaineering stiffness and insulation but does not require a removable liner for multi-day extreme cold. The Mont Blanc Pro GTX and Nepal Cube GTX live in this broad category.

    Double boot

    Warmth + removable inner

    A removable inner boot can be dried and kept warm in camp or inside a sleeping system. That becomes increasingly valuable as trips get colder and longer.

    Extreme expedition

    Thermal protection dominates

    Purpose-built 7,000–8,000 m and polar boots prioritize insulation and protection over approach efficiency. They are not “better” on ordinary alpine routes—only better for their environment.

    Mountaineer in cold snowy mountain conditions illustrating the need for route-specific boot insulation
    At expedition scale, thermal margin, moisture management and drying strategy can matter more than the precision you would choose for a one-day Alpine route.
    Mountaineering boots on rocky mountain terrain illustrating the importance of boot fit
    Fit is the final veto

    How Mountaineering Boots Should Fit

    Do not size a mountaineering boot from a generic “half-size up” rule. Last shape, liner volume, sock thickness, orthotics and how your feet swell under load all change the answer.

    The correct fit protects your toes on descents, holds the heel securely enough for front-pointing, leaves circulation intact and creates enough volume for the exact sock and footbed system you will use. More internal space is not automatically warmer if it lets the foot slide and forces you to overtighten the laces.

    1

    Fit late in the day

    Feet often swell after hours of movement. Morning fit can hide a boot that becomes too short or tight later.

    2

    Use the real sock + footbed system

    Bring the socks, insoles and orthotics you will climb in. Do not size around a store sock you will never use.

    3

    Lock the heel without crushing the forefoot

    Heel lift causes friction and reduces technical control; excessive lower-lace tension can restrict circulation.

    4

    Simulate a steep descent

    Your toes should not strike the front repeatedly. Use a shop ramp, stairs or a safe incline before the return window closes.

    5

    Fit the actual crampons

    Adjust each foot separately, then twist, flex and kick-test the system according to the crampon manufacturer’s instructions.

    6

    Do a full-length training day

    Only real time reveals lace bite, hot spots, liner compression, heel lift and whether the boot is too stiff for the approach.

    Seven current models

    What Each Boot Is Actually Built to Do

    Avoid the “best brand” shortcut. Even within one brand, lasts and constructions differ enough that a climber can fit one model well and another poorly.

    SCARPA Mont Blanc Pro GTX

    The durable classic-alpine choice

    SCARPA describes the Mont Blanc Pro GTX as a classic mountaineering boot for technical mountaineering, high altitude and mixed crampon terrain. The current model uses a Perwanger suede upper, insulated GORE-TEX lining and an automatic/semi-automatic crampon-compatible sole.

    Choose it when you want a conventional, durable single boot and do not need the removable liner of a full expedition double.

    La Sportiva Nepal Cube GTX

    The warm technical-single benchmark category

    La Sportiva positions the Nepal Cube GTX for big peaks, mixed terrain, glacier travel and vertical ice. Its value is versatility: enough structure and insulation for serious mountaineering without stepping into 6,000- or 8,000-meter boot bulk.

    La Sportiva Aequilibrium Top GTX

    The fast-movement alpine choice

    This model emphasizes walkability and low weight. La Sportiva lists a 650 g reference weight, an integrated gaiter, BOA-assisted closure and semi-automatic crampon compatibility.

    It makes the most sense where approaches and efficient movement matter more than maximum cold-weather insulation.

    SCARPA Phantom Tech HD

    The technical ice and mixed choice

    The Phantom Tech HD is designed around high-output winter mountaineering, ice and mixed climbing. SCARPA lists an 800 g reference weight, integrated weather protection and automatic/semi-automatic crampon compatibility.

    SCARPA Phantom 6000 HD

    The cold high-altitude double

    SCARPA builds the Phantom 6000 HD as a removable-liner double boot for high-altitude cold, long expeditions and technical climbing. The removable inner boot is a major advantage when drying and overnight warmth become part of the system.

    Mammut Nordwand 6000 High

    The BOA-equipped 6000-meter alternative

    Mammut positions the Nordwand 6000 High as a rigid, crampon-compatible expedition boot with a removable liner, BOA fit adjustment and automatic-crampon compatibility. It belongs in the cold-expedition comparison rather than the summer-Alps comparison.

    La Sportiva Olympus Mons Cube

    The extreme-cold 8,000-meter system

    La Sportiva describes the Olympus Mons Cube around maximum warmth and minimal weight for the highest, coldest mountains and Arctic environments. It uses dual BOA closure and removable thermal booties.

    Fit reality

    Try competing lasts, not just competing features

    A climber who fits the Mont Blanc poorly may fit a La Sportiva model well—or the reverse. Brand stereotypes are too crude for a decision this fit-sensitive. Compare heel volume, forefoot width, instep pressure and toe-box shape on your foot.

    Different mountaineering boot materials including leather, synthetic fabric and rubber
    Leather, synthetic uppers, integrated gaiters, insulation and sole construction change durability, weather protection, precision, drying and weight.
    Translate the category to real climbs

    Which Mountaineering Boots for Rainier, the Alps, Aconcagua, Denali & Everest?

    These are starting categories, not route-specific commands. Season, route, weather, guide requirements and personal cold tolerance can move the recommendation warmer or lighter.

    Mountain / environmentTypical starting categoryWhyVerify before buying
    Summer Alps 4,000ersLight-to-warm technical singleLong approaches, glacier travel and mixed terrain reward walkability plus crampon security.Route difficulty, hut approach, expected snow/ice and guide list.
    Mount RainierInsulated general-mountaineering single for many summer climbsGlacier travel, predawn cold and crampon use without expedition-duration exposure.Season, route, cold tolerance and guide-service list.
    AconcaguaWarm single or double depending route, season and cold toleranceHigh altitude and wind create cold stress even when technical climbing is limited on the Normal Route.Operator requirement, route, forecast and previous cold-foot history.
    Denali / Alaska expedition coldExpedition double / very warm integrated systemLong duration, low temperatures, snow camps and moisture management make removable liners valuable.Guide-service boot list and overboot requirements.
    6,000 m Andes / HimalayaWarm single through 6000 m double depending objectiveTechnical difficulty, camp temperatures and time exposed vary enormously.Exact route and expedition logistics—not altitude alone.
    Everest / 8,000 mPurpose-built extreme-cold expedition bootMulti-week duration, high camps and extreme cold overwhelm the priorities of an ordinary alpine boot.Operator’s current approved boot list and oxygen/camp strategy.
    Guided climb rule: the current guide-service equipment list controls. Do not arrive with a boot outside the operator’s required category because a general internet guide suggested it.
    Cold and circulation

    Warmer Is Not Only About Insulation Thickness

    A boot that is too tight can reduce circulation and undermine the thermal advantage you bought it for. Socks that occupy too much internal volume can create the same problem. Moisture also matters: damp liners and socks increase conductive heat loss, which is why removable liners become so valuable on multi-day cold expeditions.

    This is one reason universal temperature claims are unreliable. Two climbers can wear the same boot on the same mountain and have completely different thermal experiences because pace, circulation, sock system, moisture, medication, previous cold injury and time spent standing still all differ.

    Cold-foot history matters. If you have previous frostbite, circulation problems or repeatedly cold feet, use a more conservative boot strategy and discuss the expedition requirement with a qualified guide or medical professional rather than relying on a generic altitude chart.
    Make expensive boots last

    Care, Drying, Resoling & When to Replace Them

    Brush dirt and salt away before storage, dry boots away from direct high heat, remove liners and insoles when appropriate, and maintain leather or water-repellent materials according to the manufacturer’s instructions.

    Do not wait for a sole to detach on a trip. Inspect the outsole, rand, welt, stitching, gaiter zipper, liner, lacing hardware and midsole before every major objective. Any repair or resole that changes the boot shape deserves a fresh crampon fit test.

    Replace by condition, not mileage. Mountaineering boots experience very different loads. Retire or repair them when the sole platform, welt, upper, waterproof structure, insulation or crampon fit can no longer do its job reliably.
    Person cleaning mountaineering boots to extend footwear life
    The final boot rule

    Buy Enough Boot for the Hardest Required Terrain—Not the Most Extreme Mountain You Might Climb Someday.

    A well-fitted boot matched to today’s route will usually serve you better than an expedition boot bought years early. Build your footwear system as your mountains, crampon skills and cold-weather experience progress.

    That approach usually saves money, improves performance on current objectives and reduces the chance of ending up with an expensive expedition boot that only comes out of the closet once every few years.

    Bottom line: buy the boot that serves the mountains on your calendar now, then upgrade when your route, cold exposure and expedition length truly require it.
    Climber wearing mountaineering boots on rocky expedition terrain
    Technical references

    Standards & Current Manufacturer Sources

    Product specifications can change by season and market. The references below identify the standards and manufacturer materials reviewed for this guide. We intentionally do not link to non-affiliate retailer or manufacturer sites; confirm current specifications before purchasing.

    Primary references reviewed

    • UIAA Safety Standards — UIAA 153 Crampons
    • Petzl — Choosing Your Crampons & Binding Systems
    • SCARPA — Mont Blanc Pro GTX
    • SCARPA — Phantom Tech HD
    • SCARPA — Phantom 6000 HD
    • La Sportiva — Nepal Cube GTX
    • La Sportiva — Aequilibrium Top GTX
    • La Sportiva — Olympus Mons Cube
    • Mammut — Nordwand 6000 High
    No fabricated ratings: Global Summit Guide does not assign fake star ratings or claim hands-on testing that did not occur. The page is designed to help you identify the right boot category, compare current models and then make the final decision with real fit and compatibility testing.
    FAQ

    Mountaineering Boots FAQ

    What are the best mountaineering boots for most climbers?

    There is no single best boot for every climber. For classic alpine and general technical mountaineering, a well-fitted insulated single boot such as the SCARPA Mont Blanc Pro GTX or La Sportiva Nepal Cube GTX is a strong starting category. Colder and longer expeditions require warmer double or expedition boots.

    Are B1, B2 and B3 official UIAA boot ratings?

    No. They are widely used compatibility shorthand, not an official UIAA footwear certification. UIAA 153 covers crampons. Always verify the exact boot/crampon combination using the manufacturer instructions for both products.

    What is the difference between single and double mountaineering boots?

    Single boots integrate the footwear and insulation into one structure and are usually lighter and more precise. Double boots use a removable insulated inner boot or liner, which improves drying and camp management on long, very cold trips.

    Can I use hiking boots for mountaineering?

    Sometimes for non-technical snow travel with an appropriate flexible traction system, but hiking boots are not substitutes for technical mountaineering boots when the route requires rigid footwear, serious insulation or automatic crampons.

    How should mountaineering boots fit?

    The heel should remain secure, toes should not hit the front on descents and the boot should leave enough volume for the actual socks and footbeds you will use without restricting circulation. Test late in the day and under load.

    Do I need double boots for Aconcagua?

    Not every Aconcagua climb requires the same footwear. Route, season, forecast, personal cold tolerance and operator requirements matter. Some climbers use warm single boots; others choose double boots for a larger thermal margin. Follow the current guide-service requirement for a guided climb.

    What boots should I use for Denali?

    Denali is a cold, multi-week expedition environment, so warm expedition double boots or other very warm systems are common. Guide services may specify approved boot models or require overboots. Use the current operator equipment list rather than a generic internet recommendation.

    How do I know whether my crampons fit my boots?

    Confirm the binding type and manufacturer compatibility, adjust each crampon to the specific boot, then conduct the manufacturer’s recommended fit test. The boot should not shift vertically, laterally or lengthwise and the binding should not come off the welts under force.

    Gear cluster

    Build the Rest of the Footwear & Technical Gear System

    Boots are only one interface in the system. Move next into crampons, layers, complete equipment planning and mountain-specific packing lists.

    Was this helpful?

    Yes
    No
    Thanks for your feedback!
  • How to Climb Mount Everest: Cost, Permits, Routes,

    {“@context”:”https://schema.org”,”@type”:”Article”,”headline”:”How to Climb Mount Everest: Cost, Permits, Routes (2026 Guide)”,”description”:”The complete 2026 Everest planning guide — routes, current $15,000 permit cost, operator ranges from $33K to $230K, realistic timeline, acclimatization strategy, and what the mountain actually demands.”,”image”:”https://globalsummitguide.com/wp-content/uploads/2026/02/how-to-climb-everest.jpg”,”author”:{“@type”:”Organization”,”name”:”Global Summit Guide Editorial Team”,”url”:”https://globalsummitguide.com/about/”},”publisher”:{“@type”:”Organization”,”name”:”Global Summit Guide”,”url”:”https://globalsummitguide.com”,”logo”:{“@type”:”ImageObject”,”url”:”https://globalsummitguide.com/wp-content/uploads/2026/02/global-logo-new-2.png”,”width”:”300″,”height”:”100″}},”datePublished”:”2026-02-15T08:00:00-07:00″,”dateModified”:”2026-04-19T12:00:00-06:00″,”mainEntityOfPage”:{“@type”:”WebPage”,”@id”:”https://globalsummitguide.com/how-to-climb-mount-everest-cost-permits-routes/”},”isPartOf”:{“@type”:”CollectionPage”,”@id”:”https://globalsummitguide.com/conquer-peaks-global-summit-guide-for-mountain-climbing/#hub”,”name”:”Conquer Peaks: Your Global Summit Guide for Mountain Climbing”}} {“@context”:”https://schema.org”,”@type”:”FAQPage”,”mainEntity”:[ {“@type”:”Question”,”name”:”How much does it cost to climb Mount Everest in 2026?”,”acceptedAnswer”:{“@type”:”Answer”,”text”:”Climbing Everest in 2026 costs approximately $45,000 to $230,000 depending on operator tier and expedition style. The median price is around $55,000. The Nepal government permit alone is $15,000 per climber as of September 2025 (up from $11,000). Budget Nepali operators start around $33,000-$45,000; reputable Western operators (Alpine Ascents, International Mountain Guides, Madison Mountaineering, Mountain Professionals) charge $65,000-$95,000; premium operators like Furtenbach Adventures charge up to $230,000 for signature expeditions with pre-acclimatization and enhanced oxygen. Add $8,000-$15,000 for gear, flights, insurance, and training trips not included in operator pricing.”}}, {“@type”:”Question”,”name”:”What’s the permit fee for Mount Everest?”,”acceptedAnswer”:{“@type”:”Answer”,”text”:”The Nepal government Everest climbing permit costs $15,000 per foreign climber during the spring (March-May) season, effective September 2025. This is a 36% increase from the previous $11,000 fee. Autumn permits cost $7,500 (up from $5,500) and winter/monsoon permits cost $3,750 (up from $2,750). Permits are now valid for 55 days (reduced from 75 days). On the Tibet/China side, permits are typically bundled into operator pricing and cost approximately $15,000-$20,000 effectively. Additional mandatory costs include a $4,000 garbage deposit per team, liaison officer fees (~$3,000 per team), and guide fees.”}}, {“@type”:”Question”,”name”:”Which route is best for climbing Everest?”,”acceptedAnswer”:{“@type”:”Answer”,”text”:”The Southeast Ridge (South Col route) from Nepal is the most-climbed route by a wide margin — accounting for over 57% of all Everest ascents. It’s the standard commercial route, technically moderate, with established infrastructure, fixed ropes, and rescue access. The Northeast Ridge from Tibet is the second option — technically similar but with different logistical challenges, historically colder, and operating under Chinese permit restrictions. For 2026, China has restricted spring climbing on Everest. Most commercial climbers choose the South Col. Non-standard routes (Kangshung Face, West Ridge, Southwest Face) have produced 21% of Everest deaths despite only 2% of ascents and are not appropriate for commercial climbing.”}}, {“@type”:”Question”,”name”:”What are the new 2026 Everest regulations?”,”acceptedAnswer”:{“@type”:”Answer”,”text”:”Major 2026 regulations include: (1) Permit fee raised to $15,000 per foreign climber for spring season. (2) Permit validity reduced from 75 to 55 days. (3) Mandatory guide ratio of 1 licensed guide per 2 climbers on all peaks above 8,000 m. (4) Mandatory GPS tracking for all climbers. (5) Biodegradable waste bags required — all human waste must be carried back to base camp. (6) Discussion of requiring applicants to have summited a 7,000 m peak in Nepal before Everest, though this rule remains under parliamentary review. (7) $4,000 garbage deposit per team, refundable upon proof of waste removal. The regulations aim to address overcrowding and environmental damage.”}}, {“@type”:”Question”,”name”:”How long does it take to climb Everest?”,”acceptedAnswer”:{“@type”:”Answer”,”text”:”A complete Everest expedition typically takes 55-70 days from arrival in Kathmandu to summit and return. The climb itself follows a phased acclimatization schedule: approach trek to Everest Base Camp (8-10 days), first acclimatization rotation to Camp 2 (5-7 days), second acclimatization rotation higher on the mountain (5-7 days), rest at base camp (5-10 days), and summit push once a weather window opens (5-8 days). Most summits occur between May 15-23 during the spring season. Express or flash expeditions using pre-acclimatization in hypoxic tents can reduce total time to 30-40 days but cost significantly more. The full commitment including training, travel, and recovery spans 6-12 months.”}}, {“@type”:”Question”,”name”:”What’s the death rate on Mount Everest?”,”acceptedAnswer”:{“@type”:”Answer”,”text”:”Everest has become significantly safer despite increased traffic. From 2000 to 2025, there were 12,567 summits with 169 deaths above base camp — a fatality rate of approximately 1.3%. This compares to 14.5% from 1923-1999. The Southeast Ridge (standard route) accounts for 57% of all deaths, and approximately 33% of member fatalities occur during descent when climbers are most exhausted. Elevated-death years include 1996, 2014, 2015, 2019, and 2023. Death rates correlate strongly with operator pricing — in 2023 and 2024, 23 of 26 fatalities occurred on expeditions operating at or below the median price point, highlighting the safety premium of well-resourced operators.”}} ]} *,*::before,*::after{box-sizing:border-box;margin:0;padding:0} :root{–pine:#0a1929;–forest:#122a44;–mist:#dde5ee;–snow:#f4f6f9;–stone:#485460;–pebble:#8a95a3;–ink:#0f1a26;–cream:#fafaf7;–white:#ffffff;–gold:#d4913a;–gold-light:#f5e4c8;–denali:#1e3a5c;–denali-mid:#2e5986;–denali-light:#e8eef5;–ready:#2d6e4e;–ready-light:#e8f1ec;–caution:#b86a15;–caution-light:#f7ece0;–danger:#a83a2b;–danger-light:#f5e8e5;–great-black:#2b2318;–great-black-light:#e8e3d8;–serif:’DM Serif Display’,Georgia,serif;–sans:’Outfit’,system-ui,sans-serif} html{scroll-behavior:smooth} body{font-family:var(–sans);background:var(–cream);color:var(–ink);line-height:1.75;font-size:17px;-webkit-font-smoothing:antialiased} h1,h2,h3,h4{font-family:var(–serif);font-weight:400;line-height:1.2} a{color:var(–denali-mid);text-decoration:underline;text-underline-offset:3px;transition:color .15s} a:hover{color:#b8701f} .btn{display:inline-flex;align-items:center;gap:8px;padding:13px 26px;border-radius:6px;font-family:var(–sans);font-size:15px;font-weight:500;text-decoration:none;transition:all .2s ease} .btn-primary{background:var(–gold);color:var(–pine)} .btn-primary:hover{background:#bd8030;transform:translateY(-1px);text-decoration:none} .breadcrumb{background:var(–pine);padding:10px 0;font-size:13px} .breadcrumb__inner{max-width:1200px;margin:0 auto;padding:0 24px;display:flex;align-items:center;gap:8px;color:rgba(255,255,255,.5);flex-wrap:wrap} .breadcrumb a{color:rgba(255,255,255,.65);text-decoration:none} .breadcrumb a:hover{color:var(–gold)} .breadcrumb__sep{color:rgba(255,255,255,.25)} .breadcrumb__current{color:rgba(255,255,255,.85)} .article-header{background:linear-gradient(135deg,var(–pine),var(–forest));padding:52px 0 44px;color:var(–white)} .article-header__inner{max-width:1200px;margin:0 auto;padding:0 24px} .article-header__label{font-size:11px;font-weight:600;letter-spacing:.14em;text-transform:uppercase;color:var(–gold);margin-bottom:18px;display:flex;align-items:center;gap:10px} .article-header__label::before{content:”;width:36px;height:2px;background:var(–gold)} .article-header h1{font-size:clamp(30px,4.4vw,52px);color:var(–white);max-width:1000px;margin-bottom:20px} .article-header h1 em{font-style:italic;color:var(–gold)} .article-header__sub{font-size:17px;color:rgba(255,255,255,.82);font-weight:300;max-width:900px;line-height:1.7;margin-bottom:28px} .byline{display:flex;flex-wrap:wrap;align-items:center;gap:20px 28px;padding:18px 22px;background:rgba(255,255,255,.06);border:1px solid rgba(255,255,255,.1);border-radius:10px;margin-bottom:28px;font-size:13.5px} .byline__item{display:flex;align-items:center;gap:8px;color:rgba(255,255,255,.85)} .byline__item strong{color:var(–white);font-weight:500} .byline__label{font-size:10px;letter-spacing:.1em;text-transform:uppercase;color:var(–gold);font-weight:600;margin-right:4px} .byline__item a{color:rgba(255,255,255,.85);text-decoration:underline;text-underline-offset:2px} .byline__item a:hover{color:var(–gold)} .hero__stats{display:grid;grid-template-columns:repeat(4,1fr);gap:18px;max-width:900px} .hero__stat{padding:16px 20px;background:rgba(10,25,41,.4);border:1px solid rgba(255,255,255,.12);border-radius:10px} .hero__stat-num{font-family:var(–serif);font-size:30px;color:var(–gold);line-height:1;margin-bottom:4px} .hero__stat-lbl{font-size:11px;letter-spacing:.08em;text-transform:uppercase;color:rgba(255,255,255,.72);font-weight:500} .hub-strip{background:var(–gold-light);border-bottom:1px solid rgba(212,145,58,.3);padding:12px 0} .hub-strip__inner{max-width:1200px;margin:0 auto;padding:0 24px;display:flex;align-items:center;gap:16px;flex-wrap:wrap;font-size:13px} .hub-strip__label{font-family:var(–serif);color:var(–pine);font-weight:600;font-size:14px;display:flex;align-items:center;gap:8px} .hub-strip__label::before{content:’★’;color:var(–gold);font-size:13px} .hub-strip__cluster{color:var(–stone);font-weight:400} .hub-strip__cluster strong{color:var(–pine);font-weight:600} .hub-strip__link{margin-left:auto;color:var(–pine);font-weight:500;text-decoration:none;font-size:11px;letter-spacing:.08em;text-transform:uppercase;padding:6px 12px;background:var(–white);border:1px solid rgba(212,145,58,.35);border-radius:6px;transition:all .15s} .hub-strip__link:hover{background:var(–pine);color:var(–gold-light);border-color:var(–pine)} @media(max-width:700px){.hub-strip__link{margin-left:0}.hub-strip__inner{gap:10px}} .page-wrap{max-width:1200px;margin:0 auto;padding:0 24px;display:grid;grid-template-columns:1fr 300px;gap:56px;align-items:start} .sidebar{padding-top:52px} .sidebar__block{background:var(–white);border:1px solid var(–mist);border-radius:12px;padding:22px;margin-bottom:20px} .sidebar__block–dark{background:var(–pine);color:var(–white);border-color:var(–pine)} .sidebar__block–dark .sidebar__label{color:rgba(255,255,255,.4)} .sidebar__block–gold{background:var(–gold-light);border-color:rgba(212,145,58,.3)} .sidebar__toc{position:sticky;top:24px;max-height:calc(100vh – 48px);overflow-y:auto} .sidebar__label{font-size:11px;font-weight:600;letter-spacing:.1em;text-transform:uppercase;color:var(–pebble);margin-bottom:14px} .toc-list{list-style:none;display:flex;flex-direction:column;gap:2px} .toc-link{display:block;padding:7px 10px;border-radius:6px;text-decoration:none;color:var(–stone);font-size:13px;border-left:2px solid transparent;transition:all .15s;line-height:1.4} .toc-link:hover{color:var(–denali-mid);background:var(–snow);border-left-color:var(–denali-light);text-decoration:none} .quickfact-row{display:flex;justify-content:space-between;align-items:baseline;padding:10px 0;border-bottom:1px solid rgba(255,255,255,.08);font-size:13px;gap:12px} .quickfact-row:last-child{border-bottom:none} .quickfact-row__name{color:rgba(255,255,255,.72);font-weight:300} .quickfact-row__val{color:var(–gold);font-weight:500;font-family:var(–serif);font-size:15px;text-align:right} .sidebar__block–gold h4{font-family:var(–serif);font-size:17px;color:var(–pine);margin-bottom:8px;line-height:1.3} .sidebar__block–gold p{font-size:13px;color:var(–stone);font-weight:300;margin-bottom:14px;line-height:1.55} .sidebar__cta-btn{display:flex;align-items:center;justify-content:center;gap:6px;padding:11px 16px;background:var(–pine);color:var(–white);border-radius:6px;text-decoration:none;font-size:13px;font-weight:500} .sidebar__cta-btn:hover{background:var(–denali-mid);color:var(–white);text-decoration:none} .article{padding:52px 0 80px} .article section{scroll-margin-top:24px} .article__lead{font-size:19px;color:var(–stone);font-weight:300;line-height:1.75;border-left:3px solid var(–gold);padding-left:22px;margin-bottom:48px} .article__lead em{color:var(–pine);font-style:italic} .article h2{font-size:clamp(24px,3.2vw,34px);color:var(–pine);margin-top:64px;margin-bottom:18px} .article h2:first-child{margin-top:0} .article h2 em{font-style:italic;color:var(–denali-mid)} .article h3{font-size:21px;color:var(–pine);margin-top:32px;margin-bottom:12px} .article p{color:var(–stone);margin-bottom:18px;font-weight:300} .article p strong{color:var(–ink);font-weight:500} .article p em{color:var(–pine);font-style:italic;font-weight:400} .article ul,.article ol{color:var(–stone);font-weight:300;margin:0 0 20px 22px} .article li{margin-bottom:8px;line-height:1.7} .section-rule{border:none;border-top:1px solid var(–mist);margin:48px 0} .stats-panel{background:var(–white);border:1px solid var(–mist);border-radius:14px;padding:28px 32px;margin:32px 0;display:grid;grid-template-columns:repeat(3,1fr);gap:24px 32px} .stats-panel__item{border-left:3px solid var(–gold);padding-left:16px} .stats-panel__label{font-size:11px;letter-spacing:.08em;text-transform:uppercase;color:var(–pebble);font-weight:600;margin-bottom:6px} .stats-panel__value{font-family:var(–serif);font-size:24px;color:var(–pine);line-height:1.15;margin-bottom:4px} .stats-panel__sub{font-size:13px;color:var(–stone);font-weight:300;line-height:1.4} .callout{border-radius:10px;padding:22px 24px;margin:28px 0;display:flex;gap:18px;align-items:flex-start} .callout–insight{background:var(–denali-light);border:1px solid rgba(46,89,134,.15)} .callout–gold{background:var(–gold-light);border:1px solid rgba(212,145,58,.25)} .callout–caution{background:var(–caution-light);border:1px solid rgba(184,106,21,.25)} .callout–danger{background:var(–danger-light);border:1px solid rgba(168,58,43,.2)} .callout–methodology{background:var(–great-black-light);border:1px solid rgba(43,35,24,.2)} .callout__icon{flex-shrink:0;font-size:22px;line-height:1} .callout__body{flex:1} .callout__title{font-family:var(–serif);font-size:17px;margin-bottom:6px;color:var(–pine)} .callout__text{font-size:14.5px;color:var(–stone);font-weight:300;line-height:1.7;margin:0} .callout__text a{color:var(–denali-mid);font-weight:500} /* Route cards */ .route-grid{display:grid;grid-template-columns:repeat(2,1fr);gap:18px;margin:32px 0} .route-card{background:var(–white);border:1px solid var(–mist);border-radius:14px;padding:28px 30px;border-top:4px solid var(–denali-mid)} .route-card–south{border-top-color:var(–ready)} .route-card–north{border-top-color:var(–caution)} .route-card__badge{display:inline-block;font-size:10px;letter-spacing:.12em;text-transform:uppercase;color:var(–white);font-weight:700;padding:4px 10px;border-radius:4px;margin-bottom:10px;background:var(–ready)} .route-card–north .route-card__badge{background:var(–caution)} .route-card__title{font-family:var(–serif);font-size:22px;color:var(–pine);margin-bottom:4px;line-height:1.2} .route-card__sub{font-size:12px;color:var(–pebble);font-weight:500;margin-bottom:16px;padding-bottom:16px;border-bottom:1px solid var(–mist)} .route-card__desc{font-size:14.5px;color:var(–stone);font-weight:300;line-height:1.7;margin-bottom:16px} .route-card__desc strong{color:var(–ink)} .route-card__stats{display:grid;grid-template-columns:repeat(2,1fr);gap:10px;padding:14px;background:var(–snow);border-radius:8px;font-size:12.5px} .route-card__stat{display:flex;flex-direction:column;gap:2px} .route-card__stat-label{font-size:10px;letter-spacing:.08em;text-transform:uppercase;color:var(–pebble);font-weight:600} .route-card__stat-val{color:var(–ink);font-weight:500;font-family:var(–serif);font-size:14px} /* Cost tier cards */ .tier-grid{display:grid;grid-template-columns:repeat(3,1fr);gap:16px;margin:28px 0} .tier-card{background:var(–white);border:1px solid var(–mist);border-radius:12px;padding:22px 24px;border-top:4px solid var(–denali-mid)} .tier-card–budget{border-top-color:var(–ready)} .tier-card–standard{border-top-color:var(–denali-mid)} .tier-card–premium{border-top-color:var(–caution)} .tier-card__label{font-size:10px;letter-spacing:.12em;text-transform:uppercase;color:var(–gold);font-weight:700;margin-bottom:4px} .tier-card__title{font-family:var(–serif);font-size:19px;color:var(–pine);margin-bottom:4px;line-height:1.2} .tier-card__price{font-family:var(–serif);font-size:22px;color:var(–gold);margin-bottom:10px} .tier-card__desc{font-size:13px;color:var(–stone);font-weight:300;line-height:1.55;margin-bottom:10px} .tier-card__ops{font-size:12px;color:var(–pebble);padding-top:10px;border-top:1px solid var(–mist);font-weight:500;line-height:1.5} .tier-card__ops strong{color:var(–ink);font-weight:600} /* Timeline */ .timeline{margin:28px 0;border-left:2px solid var(–gold);padding-left:24px;padding-bottom:4px} .timeline-item{margin-bottom:22px;position:relative} .timeline-item::before{content:”;position:absolute;left:-31px;top:4px;width:12px;height:12px;border-radius:50%;background:var(–gold);border:3px solid var(–cream)} .timeline-item__period{font-size:11px;letter-spacing:.1em;text-transform:uppercase;color:var(–gold);font-weight:700;margin-bottom:4px} .timeline-item__title{font-family:var(–serif);font-size:18px;color:var(–pine);margin-bottom:6px;line-height:1.25} .timeline-item__desc{font-size:14px;color:var(–stone);font-weight:300;line-height:1.65} .faq{margin:28px 0} .faq__item{background:var(–white);border:1px solid var(–mist);border-radius:10px;margin-bottom:12px;overflow:hidden;transition:border-color .15s} .faq__item:hover{border-color:rgba(46,89,134,.35)} .faq__item[open]{border-color:var(–denali-mid);box-shadow:0 4px 20px rgba(11,31,53,.06)} .faq__summary{padding:18px 24px;cursor:pointer;font-family:var(–serif);font-size:17px;color:var(–pine);display:flex;justify-content:space-between;align-items:center;gap:16px;list-style:none;user-select:none} .faq__summary::-webkit-details-marker{display:none} .faq__summary::after{content:’+’;font-family:var(–sans);font-size:24px;color:var(–denali-mid);font-weight:300;line-height:1;transition:transform .2s} .faq__item[open] .faq__summary::after{content:’−’} .faq__body{padding:0 24px 22px} .faq__body p{font-size:15px;color:var(–stone);font-weight:300;line-height:1.75;margin:0} .internal-links{background:var(–snow);border-radius:12px;padding:28px 30px;margin:32px 0} .internal-links__label{font-size:11px;font-weight:600;letter-spacing:.1em;text-transform:uppercase;color:var(–pebble);margin-bottom:16px} .internal-links h3{font-family:var(–serif);font-size:22px;color:var(–pine);margin-bottom:8px;margin-top:0} .internal-links__grid{display:grid;grid-template-columns:repeat(2,1fr);gap:12px;margin-top:20px} .internal-link{display:flex;align-items:center;padding:14px 16px;background:var(–white);border:1px solid var(–mist);border-radius:8px;font-size:14px;font-weight:500;color:var(–denali-mid);text-decoration:none;transition:all .15s} .internal-link:hover{border-color:var(–denali-mid);background:var(–denali-light);transform:translateX(2px);text-decoration:none} .internal-link::after{content:’→’;margin-left:auto;color:var(–pebble)} .internal-link:hover::after{color:var(–denali-mid)} .internal-link–hub{background:var(–gold-light);border-color:rgba(212,145,58,.3);color:var(–pine);font-weight:600} .internal-link–hub::before{content:’★’;color:var(–gold);margin-right:8px} .internal-link–hub:hover{background:var(–pine);color:var(–gold-light);border-color:var(–pine)} .related-grid{display:grid;grid-template-columns:repeat(3,1fr);gap:18px;margin:28px 0} .related-card{background:var(–white);border:1px solid var(–mist);border-radius:12px;padding:22px;text-decoration:none;display:block;transition:all .2s} .related-card:hover{border-color:rgba(46,89,134,.35);box-shadow:0 4px 20px rgba(0,0,0,.06);text-decoration:none} .related-card__type{font-size:10px;font-weight:600;letter-spacing:.1em;text-transform:uppercase;color:var(–pebble);margin-bottom:8px} .related-card__title{font-family:var(–serif);font-size:17px;color:var(–pine);margin-bottom:6px;line-height:1.3} .related-card__desc{font-size:13.5px;color:var(–stone);font-weight:300;line-height:1.55} .guide-cta{background:linear-gradient(135deg,var(–pine),var(–denali));border-radius:16px;padding:44px;margin:48px 0;display:grid;grid-template-columns:1fr auto;gap:32px;align-items:center} .guide-cta__label{font-size:11px;font-weight:600;letter-spacing:.12em;text-transform:uppercase;color:var(–gold);margin-bottom:12px} .guide-cta h2{font-family:var(–serif);font-size:clamp(22px,2.8vw,30px);color:var(–white);margin:0 0 12px;padding:0} .guide-cta p{font-size:15px;color:rgba(255,255,255,.72);font-weight:300;line-height:1.7;margin:0} .guide-cta p a{color:var(–gold)} .sources-block{background:var(–snow);border-radius:12px;padding:28px 32px;margin:32px 0;border:1px solid var(–mist)} .sources-block h3{font-family:var(–serif);font-size:20px;color:var(–pine);margin-top:0;margin-bottom:12px} .sources-block p{font-size:14.5px;color:var(–stone);line-height:1.7;margin-bottom:16px;font-weight:300} .sources-block ul{margin:0;padding-left:22px;font-size:13.5px;color:var(–stone);font-weight:300;line-height:1.7} .sources-block li{margin-bottom:6px} .sources-block a{color:var(–denali-mid);font-weight:500} .sources-block__meta{display:flex;flex-wrap:wrap;gap:16px 24px;padding-top:16px;margin-top:16px;border-top:1px solid var(–mist);font-size:12.5px;color:var(–pebble)} .sources-block__meta strong{color:var(–ink);font-weight:500} @media(max-width:960px){.page-wrap{grid-template-columns:1fr}.sidebar{display:none}.hero__stats{grid-template-columns:repeat(2,1fr)}.stats-panel{grid-template-columns:repeat(2,1fr)}.route-grid,.tier-grid{grid-template-columns:1fr}.internal-links__grid,.related-grid{grid-template-columns:1fr}.guide-cta{grid-template-columns:1fr}.byline{gap:12px 18px}} @media(max-width:600px){.hero__stats{grid-template-columns:1fr 1fr}.stats-panel{grid-template-columns:1fr}}
    Anchor Guide · Cluster 05 · Updated April 2026

    How to Climb Mount Everest: Cost, Permits, Routes (2026 Guide)

    The complete 2026 Everest planning guide — the two viable routes, the new $15,000 permit cost, operator tiers from $33K to $230K, the realistic 55-to-70 day timeline, the acclimatization strategy that determines whether you summit, and what the mountain actually demands of climbers arriving at 8,849 m.

    8,849 m
    Summit
    elevation
    $15,000
    2026 permit
    (up from $11K)
    ~1.3%
    Modern
    fatality rate
    13,737
    Total recorded
    summits
    Global Summit Guide A guide in Cluster 05 · Everest View master hub →

    Everest is the most consequential climb on Earth — not the most technical, but the one where the largest gap opens between what climbers imagine and what the mountain actually demands. In 2026, Nepal raised the permit fee 36% to $15,000, shortened permit validity to 55 days, and made a licensed guide mandatory for every two climbers on any 8,000 m peak. This guide covers every cost, every route decision, and the acclimatization strategy that separates the ~70% who summit from the ~30% who don’t — written for climbers serious enough to want the current version, not the decade-old version.

    ⊛
    How this 2026 guide was researched

    Costs, permits, and regulations reflect Nepal’s September 2025 regulatory update as implemented for the 2026 spring season. Summit and death statistics are drawn from the Himalayan Database (free, updated through December 2025). Operator pricing reflects published 2026 expedition rates from Alpine Ascents, International Mountain Guides, Madison Mountaineering, Mountain Professionals, Furtenbach Adventures, Climbing the Seven Summits, Seven Summit Treks, 8K Expeditions, and Imagine Nepal. Route analysis draws on Alan Arnette’s 2026 Everest coverage and AAC accident records. Fact-check date: April 19, 2026.

    01 · What Climbing Everest Actually Involves

    Everest sits at 8,849 m on the border of Nepal and Tibet. Two routes accept commercial traffic: the Southeast Ridge from Nepal (also called the South Col) and the Northeast Ridge from Tibet. Both are technically moderate by elite alpine standards — what makes Everest consequential isn’t the climbing grade, it’s the altitude, the exposure duration, the cold, and the consequence of any mistake above 8,000 m.

    The current landscape

    In 2025, 731 climbers summited from Nepal and 120 from Tibet. For spring 2026, projected totals are 900 to 1,000 summits combined, exceeding 2019’s previous high-water mark of 877. China has restricted 2026 spring climbing on its three 8,000ers (Everest, Cho Oyu, Shishapangma), concentrating most commercial traffic on the Nepal side. Nepal has issued 544 climbing permits to 69 teams across 23 peaks as of mid-April 2026.

    Everest has become markedly safer despite the traffic. The 2000–2025 fatality rate is approximately 1.3% (169 deaths against 12,567 summits above base camp), compared to 14.5% for 1923–1999. Safer, but not safe — 23 of 26 Everest fatalities in 2023–2024 occurred on expeditions operating at or below the median price, highlighting the correlation between operator resources and outcomes.

    Total recorded summits
    13,737
    Through Dec 2025 (HDB)
    Modern death rate
    ~1.3%
    2000–2025, above base camp
    Spring 2026 projected
    900–1,000
    Both sides combined

    02 · The Two Viable Routes

    Non-standard Everest routes (Kangshung Face, West Ridge, Southwest Face) have produced 21% of all Everest deaths despite only 2% of ascents. The last new route was completed in 2009. For commercial climbers, two routes are effectively available:

    Standard · 57% of ascents

    Southeast Ridge (South Col, Nepal)

    The route Hillary and Tenzing climbed in 1953. Most climbed by a wide margin.

    The standard commercial route. Approach via the Khumbu Icefall to Camp 1 (6,065 m), up the Western Cwm to Camp 2 (6,500 m), the Lhotse Face to Camp 3 (7,200 m), then across to the South Col at Camp 4 (7,950 m) and the summit ridge. Fixed ropes are installed by the Icefall Doctors and rope-fixing teams each season. Rescue access is practical; infrastructure is established; most guide services concentrate here.

    Base camp5,364 m
    Permit cost$15,000 (spring)
    Duration55–70 days
    Summit windowMay 15–23 typical
    Alternative · Often colder

    Northeast Ridge (Tibet/China)

    Historically colder and windier; currently under Chinese spring 2026 restrictions.

    Accessed via Tibet with Chinese permits. Route follows the North Col (7,000 m), the North Ridge, and a traverse to the summit via the Three Steps. Currently complicated — China closed climbing on Everest, Cho Oyu, and Shishapangma for spring 2026. Historically colder and windier than the South Col due to exposure, but with less icefall risk on the approach. When open, climbers access via Tibet permits typically bundled into operator pricing.

    Base camp5,150 m
    Permit cost~$15–20K (bundled)
    Duration55–65 days
    2026 statusSpring restricted

    Most 2026 commercial climbers will use the South Col route. Climbers committed to the North Ridge typically plan for autumn seasons or future years when Chinese access reopens. For a detailed route comparison see our South Col vs North Ridge guide.


    03 · Cost: Three Operator Tiers

    Everest expedition pricing in 2026 spans roughly $33,000 to $230,000 with a median of approximately $55,000. The tier you choose determines oxygen supply, Sherpa support ratio, summit-day guide ratio, and the resources available if something goes wrong at 8,000 m.

    Tier 1 · Budget
    Nepali Sherpa-supported
    $33,000–$55,000

    Nepali-owned operators with experienced Sherpa staff. Larger team sizes (often 15–30+ members). Lower cost reflects fewer Western guides, lower support ratios, and minimum-spec oxygen allotments.

    Operators: 8K Expeditions · Elite Expeditions · Imagine Nepal · Pioneer · Seven Summit Treks · 14 Peaks · Asian Trekking
    Tier 2 · Standard
    Western-guided
    $65,000–$95,000

    IFMGA/AMGA-certified Western guides, small team sizes (typically under 20), generous oxygen allotments, low guide-to-client ratios, established base camp infrastructure. Safety premium shows in incident data.

    Operators: Alpine Ascents · International Mountain Guides · Madison Mountaineering · Mountain Professionals · Climbing the Seven Summits
    Tier 3 · Premium
    Signature / Flash
    $130,000–$230,000

    Pre-acclimatization in hypoxic tents, reduced expedition duration (30–40 days), enhanced oxygen systems, highest Sherpa-to-client ratios, helicopter support where permitted. Appeals to time-constrained climbers.

    Operators: Furtenbach Adventures (Signature) · Climbing the Seven Summits (Flash) · Specialized Western operators

    What’s included vs. additional

    Operator pricing typically includes: permit fee, Sherpa support, oxygen allotment (usually 4–7 bottles per climber), base camp infrastructure, meals, Kathmandu-to-EBC logistics, and guide services. Typically excluded: international flights to Kathmandu ($1,500–$5,000), personal gear ($8,000–$15,000 for a full expedition kit), travel insurance with high-altitude rescue coverage ($800–$2,500 — non-negotiable), tips for Sherpa and staff ($1,500–$3,500), pre-expedition training trips, and contingency budget for failed summit attempts. Total realistic all-in cost: operator price + $15,000 to $25,000 in additional expenses.

    For complete cost breakdowns by tier including hidden costs, see our dedicated Everest cost guide and the broader Mountain Climbing Costs by Level framework.


    04 · The New 2026 Permit & Regulations

    September 2025 brought the most significant Everest regulatory changes in over a decade. Every 2026 climber needs to understand what changed.

    The seven key regulatory updates

    • Spring permit fee: $15,000 per foreign climber (up from $11,000 — a 36% increase). The increase reflects Nepal’s push to reduce overcrowding and fund safety/environmental programs.
    • Autumn permit: $7,500 (up from $5,500). Winter/monsoon: $3,750 (up from $2,750). For Nepali citizens, spring permit doubled from NPR 75,000 to NPR 150,000.
    • Permit validity reduced to 55 days (previously 75 days). This compresses expedition timelines and leaves less flexibility for extended weather waits.
    • Mandatory 1:2 guide ratio on all peaks above 8,000 m. Every two climbers must have one licensed guide. This directly raises cost floors for solo-style attempts.
    • GPS tracking required for all climbers — supports rescue coordination but adds logistical overhead.
    • Biodegradable waste bags mandatory. All human waste must be carried back to base camp. Responds to 85 tonnes of waste (including 28 tonnes of human waste) collected from the Everest region in spring 2024.
    • Experience requirement under review. Nepal has discussed requiring applicants to have previously summited a 7,000 m peak in Nepal before Everest. This is under parliamentary review and not yet enforced.

    Mandatory additional fees

    Beyond the climbing permit, every expedition pays: $4,000 garbage deposit per team (refundable on proof of waste removal), ~$3,000 liaison officer fee per team, and guide fees bundled into operator pricing. Expect roughly $6,000–$8,000 in mandatory non-permit government fees per team beyond the $15,000 individual climbing permit.

    ▲
    97 free peaks: the alternative Nepal is promoting

    Nepal has waived permit fees for 97 peaks in the Karnali and Sudurpaschim provinces for the 2025–2026 and 2026–2027 climbing seasons. Some of these peaks exceed 7,000 m. The free peaks are remote (complicated access via flights and challenging roads) but represent a legitimate alternative for climbers who want 7,000 m+ Himalayan experience before committing to Everest’s new $15K permit. This is also a natural pathway if the 7,000 m summit prerequisite becomes mandatory. See our Nepal free peaks 2026 guide.


    05 · The Realistic 55-to-70 Day Timeline

    A standard Everest expedition spans 55–70 days from Kathmandu arrival to summit-and-return. The schedule is built around progressive altitude exposure — skip the acclimatization rotations and your summit chances collapse regardless of fitness.

    Days 1–3 · Kathmandu
    Arrival, gear check, briefings

    Team assembly in Kathmandu. Equipment check, operator briefings, permit finalization, satellite phone and GPS setup. Some operators include a cultural day in the Thamel district before flying to Lukla.

    Days 4–13 · Approach trek
    Lukla to Everest Base Camp

    Fly to Lukla (2,860 m), trek through Namche Bazaar (3,440 m) with acclimatization days, on to Dingboche (4,410 m) and Lobuche (4,940 m), finally reaching Everest Base Camp (5,364 m). Most teams now add a Lobuche East acclimatization climb (6,119 m) en route.

    Days 14–25 · First rotation
    Base Camp to Camp 2 acclimatization

    Through the Khumbu Icefall to Camp 1 (6,065 m), up the Western Cwm to Camp 2 (6,500 m). Sleep at progressive altitudes. Return to base camp for recovery. Icefall Doctors fix the route each season; in 2026, drones are being increasingly used to ferry ropes and ladders, reducing Sherpa exposure.

    Days 26–35 · Second rotation
    Lhotse Face exposure

    Second rotation takes climbers up the Lhotse Face to Camp 3 (7,200 m). Sleep at 7,200 m. This rotation is critical — climbers who tolerate Camp 3 overnight have substantially higher summit-day success rates than those who don’t.

    Days 36–50 · Rest & weather watch
    Recovery and waiting for summit window

    Descend to base camp. Rest, eat, recover. Some teams drop to lower villages (Pheriche, Namche) for better oxygen and food. Watch weather forecasts obsessively. Most teams summit between May 15–23. The jet stream typically lifts off Everest briefly in this window.

    Days 51–60 · Summit push
    Base Camp to summit and return

    Four to six day push: BC → C2 → C3 → C4 (South Col, 7,950 m) → summit (8,849 m) → descent. Summit day starts at 10 PM from C4 with headlamps. Summit reached typically 5–9 AM. 33% of member fatalities occur on descent when exhaustion overtakes strength.

    Days 61–70 · Return
    Trek out, fly home

    Trek back to Lukla, fly to Kathmandu, decompress. Some operators include post-expedition medical checks. Plan for substantial weight loss (typically 4–9 kg) and 4–8 weeks of physical recovery at home.


    06 · Acclimatization: The Most Important Factor

    Physical fitness matters on Everest. But acclimatization matters more. Climbers who ignore the rotation schedule, try to compress acclimatization, or arrive with insufficient prior altitude exposure consistently fail — regardless of how fit they were at sea level.

    Why acclimatization is non-negotiable

    At 8,849 m, atmospheric pressure is approximately one-third of sea level. Your blood carries one-third the oxygen it does in a training gym. The physiological response to this — increased red blood cell production, improved oxygen transport, cardiovascular adaptation — takes weeks of progressive altitude exposure. There is no supplement, drug, or training protocol that shortcuts this process. Supplemental oxygen helps at the summit; it doesn’t acclimatize you.

    The three-rotation strategy

    Standard acclimatization involves three overlapping exposures: the approach trek (gradual altitude gain to 5,364 m over 8–10 days), Rotation 1 (sleeps at Camp 1 and Camp 2, 6,065 m and 6,500 m), and Rotation 2 (sleeps at Camp 3, 7,200 m). Each rotation is followed by recovery at base camp. By the time climbers begin the summit push, their bodies have adapted to sustained exposure above 6,000 m.

    Pre-acclimatization alternatives

    Premium operators offer hypoxic tent pre-acclimatization — climbers sleep in hypoxia simulators at home for weeks before the expedition, arriving pre-adapted and reducing on-mountain time to 30–40 days. This works but costs significantly more and isn’t universally accepted as equivalent to on-mountain rotations. The physiological research is still evolving.

    For the physiology foundation see our Altitude Acclimatization Explained and Altitude Sickness guides.


    07 · Prerequisites: What You Need Before Everest

    Everest should be climbed after a substantial mountaineering foundation — not as a first major peak, not as an ambitious second climb. Summit rates correlate directly with prior accumulated altitude experience.

    The expected climbing resume

    • Minimum 4–6 years of serious mountaineering experience
    • Formal skills training from an AMGA- or IFMGA-certified program
    • Kilimanjaro (5,895 m) or similar — confirmed altitude tolerance to 5,500 m+
    • Aconcagua (6,961 m) or Denali (6,190 m) — confirmed summit above 6,000 m with expedition-style logistics
    • At least one 7,000 m peak — Aconcagua qualifies. Nepalese trekking peaks (Island Peak, Mera Peak) provide 6,000 m calibration but not 7,000 m.
    • Strong cold-weather expedition experience — Denali is the gold standard here
    • 12–18 months of structured training beyond your baseline fitness

    The experience requirement question

    Nepal has discussed (but not yet enforced) a requirement that Everest applicants have previously summited a 7,000 m peak in Nepal. This rule is under parliamentary review as of spring 2026. If enforced, it would make previous Aconcagua or Denali climbs insufficient on paper — climbers would need a Nepalese 7,000 m peak. The 97 free peaks initiative in Karnali and Sudurpaschim provinces is partly positioning for this rule, offering climbers a cost-effective way to build the qualifying climbs.

    ◆
    Climbers who skip prerequisites fail at elevated rates

    The strongest single predictor of Everest summit success is prior altitude experience above 6,500 m. Climbers with documented Aconcagua or Denali summits have summit rates approaching 80% on reputable Western operator expeditions. Climbers without prior 6,000 m+ experience see summit rates fall to 40–50%, and incident rates rise substantially. This is not a guidance you can outwork — altitude physiology responds to exposure, not effort. See our Seven Summits Guide for the canonical progression.


    08 · Essential Gear & Training

    An Everest expedition requires the most specialized gear kit in climbing. Many items are single-use (you’ll buy them for Everest, use them once, and never need them again at that spec). Build the kit over months, not weeks.

    The big four gear investments

    • 8,000 m boots ($900–$1,400) — La Sportiva Olympus Mons, Millet Everest Summit, or equivalent. Triple boots with integrated gaiter and overboot compatibility.
    • Down suit ($1,500–$2,200) — Feathered Friends Expedition Down Parka and Pants, or equivalent. 850+ fill down, full zipper systems for ventilation and function at 8,000 m.
    • Sleeping bag ($800–$1,500) — Rated to −40 °C minimum. Western Mountaineering Kodiak MF, Mountain Hardwear Phantom −40, or equivalent.
    • Oxygen system (supplied by operator) — Masks, regulators, and 4–7 bottles per climber. Budget $3,000–$7,000 if sourced independently (rare; most operators include).

    For the full expedition gear list see our master gear list, the boots guide, and the sleeping bags guide.

    Training commitment

    12–18 months of structured Everest-specific training: sustained aerobic base (60–120 minute efforts 4× weekly), weighted pack hikes (20+ kg, steep terrain), leg strength endurance, and minimum 2–3 altitude training trips within the prep year (Aconcagua in January, European alpine peaks in summer, altitude tents at home). See our complete high-altitude training program.


    09 · Your Concrete Next Steps

    If you’ve read this far and Everest still fits, the actual execution path:

    1. Confirm your prerequisite climbs. Without Aconcagua or Denali (or equivalents), book those first — plan 2–3 years of prerequisite climbing before your Everest attempt.
    2. Book your operator 12–18 months ahead. Reputable operators fill their teams early. Alpine Ascents, IMG, and Madison Mountaineering often have waitlists for spring seasons.
    3. Start the training program today. 12–18 months is the realistic minimum. Our training program guide has the structured plan.
    4. Budget conservatively. Operator cost + $15K–$25K in additional expenses + contingency for a failed summit requiring a re-attempt. The minimum realistic all-in budget for a reputable operator is $85K.
    5. Secure insurance with high-altitude rescue coverage. Global Rescue or Ripcord are the standards. Budget $800–$2,500. Non-negotiable above 6,000 m.
    6. Acquire gear progressively. 8,000 m boots, down suit, and sleeping bag are the three large investments. Buy for your prerequisite Denali or Aconcagua climbs first; those items transfer to Everest.
    7. Document your climbing resume. Some operators request proof of prior summits. Keep photos, logs, and summit certifications from every major peak.

    Everest rewards patience more than any other mountain. Climbers who build the foundation properly and approach Everest in year 5 or 6 of their mountaineering career consistently succeed. Climbers who try to compress the project into 2–3 years frequently don’t.


    Frequently Asked Questions

    How much does it cost to climb Mount Everest in 2026?

    Climbing Everest in 2026 costs approximately $45,000 to $230,000 depending on operator tier and expedition style. The median price is around $55,000. The Nepal government permit alone is $15,000 per climber as of September 2025 (up from $11,000). Budget Nepali operators start around $33,000–$45,000; reputable Western operators (Alpine Ascents, International Mountain Guides, Madison Mountaineering, Mountain Professionals) charge $65,000–$95,000; premium operators like Furtenbach Adventures charge up to $230,000 for signature expeditions with pre-acclimatization and enhanced oxygen. Add $8,000–$15,000 for gear, flights, insurance, and training trips not included in operator pricing.

    What’s the permit fee for Mount Everest?

    The Nepal government Everest climbing permit costs $15,000 per foreign climber during the spring (March–May) season, effective September 2025. This is a 36% increase from the previous $11,000 fee. Autumn permits cost $7,500 (up from $5,500) and winter/monsoon permits cost $3,750 (up from $2,750). Permits are now valid for 55 days (reduced from 75 days). On the Tibet/China side, permits are typically bundled into operator pricing and cost approximately $15,000–$20,000 effectively. Additional mandatory costs include a $4,000 garbage deposit per team, liaison officer fees (~$3,000 per team), and guide fees.

    Which route is best for climbing Everest?

    The Southeast Ridge (South Col route) from Nepal is the most-climbed route by a wide margin — accounting for over 57% of all Everest ascents. It’s the standard commercial route, technically moderate, with established infrastructure, fixed ropes, and rescue access. The Northeast Ridge from Tibet is the second option — technically similar but with different logistical challenges, historically colder, and operating under Chinese permit restrictions. For 2026, China has restricted spring climbing on Everest. Most commercial climbers choose the South Col. Non-standard routes (Kangshung Face, West Ridge, Southwest Face) have produced 21% of Everest deaths despite only 2% of ascents and are not appropriate for commercial climbing.

    What are the new 2026 Everest regulations?

    Major 2026 regulations include: (1) Permit fee raised to $15,000 per foreign climber for spring season. (2) Permit validity reduced from 75 to 55 days. (3) Mandatory guide ratio of 1 licensed guide per 2 climbers on all peaks above 8,000 m. (4) Mandatory GPS tracking for all climbers. (5) Biodegradable waste bags required — all human waste must be carried back to base camp. (6) Discussion of requiring applicants to have summited a 7,000 m peak in Nepal before Everest, though this rule remains under parliamentary review. (7) $4,000 garbage deposit per team, refundable upon proof of waste removal. The regulations aim to address overcrowding and environmental damage.

    How long does it take to climb Everest?

    A complete Everest expedition typically takes 55–70 days from arrival in Kathmandu to summit and return. The climb itself follows a phased acclimatization schedule: approach trek to Everest Base Camp (8–10 days), first acclimatization rotation to Camp 2 (5–7 days), second acclimatization rotation higher on the mountain (5–7 days), rest at base camp (5–10 days), and summit push once a weather window opens (5–8 days). Most summits occur between May 15–23 during the spring season. Express or flash expeditions using pre-acclimatization in hypoxic tents can reduce total time to 30–40 days but cost significantly more. The full commitment including training, travel, and recovery spans 6–12 months.

    What’s the death rate on Mount Everest?

    Everest has become significantly safer despite increased traffic. From 2000 to 2025, there were 12,567 summits with 169 deaths above base camp — a fatality rate of approximately 1.3%. This compares to 14.5% from 1923–1999. The Southeast Ridge (standard route) accounts for 57% of all deaths, and approximately 33% of member fatalities occur during descent when climbers are most exhausted. Elevated-death years include 1996, 2014, 2015, 2019, and 2023. Death rates correlate strongly with operator pricing — in 2023 and 2024, 23 of 26 fatalities occurred on expeditions operating at or below the median price point, highlighting the safety premium of well-resourced operators.


    Authoritative Sources & Further Reading

    2026 Everest data reflects primary authoritative sources, updated for the current regulatory environment:

    • Nepal Ministry of Culture, Tourism & Civil Aviation — September 2025 permit fee revisions and mandatory guide regulations
    • Nepal Department of Tourism — 2026 permit issuance data and climbing statistics
    • The Himalayan Database (HDB) — Authoritative summit and fatality statistics through December 2025
    • Alan Arnette — Everest 2026 Coverage (alanarnette.com) — Primary independent reporting on current-season developments
    • American Alpine Club & American Alpine Journal — Accident reporting and historical statistics
    • UIAGM/IFMGA — International mountain guide certification standards
    • Operator 2026 expedition publications: Alpine Ascents International, International Mountain Guides (IMG), Madison Mountaineering, Mountain Professionals, Climbing the Seven Summits, Furtenbach Adventures, Seven Summit Treks, 8K Expeditions, 14 Peaks Expedition, Imagine Nepal, Pioneer, Elite Expeditions, Asian Trekking
    • Wilderness Medical Society — Practice guidelines for high-altitude illness
    • High Altitude Medicine & Biology journal — Peer-reviewed altitude physiology research
    Published: February 15, 2026
    Last updated: April 19, 2026
    Next review: July 2026
    Part of the Global Summit Guide

    Back to the Master Hub

    This guide is one of 71 across 12 thematic clusters on Global Summit Guide. The master hub organizes every guide by experience tier, specific peak, skill area, and region.

    View the Hub →

    Was this helpful?

    Yes
    No
    Thanks for your feedback!
  • Patagonia Trekking: Best Routes, Tips

    {“@context”:”https://schema.org”,”@type”:”Article”,”headline”:”Patagonia Trekking: Best Routes, Tips & Trip Planning Guide”,”description”:”Complete 2026 guide to the best trekking routes across Patagonia’s Chilean and Argentine sides — including Fitz Roy, Torres del Paine, Dientes de Navarino, Huemul Circuit, Cerro Castillo, trip planning, and regional tips.”,”image”:”https://globalsummitguide.com/wp-content/uploads/2026/03/patagonia-trekking-routes.jpg”,”author”:{“@type”:”Organization”,”name”:”Global Summit Guide Editorial Team”,”url”:”https://globalsummitguide.com/about/”},”publisher”:{“@type”:”Organization”,”name”:”Global Summit Guide”,”url”:”https://globalsummitguide.com”,”logo”:{“@type”:”ImageObject”,”url”:”https://globalsummitguide.com/wp-content/uploads/2026/02/global-logo-new-2.png”,”width”:”300″,”height”:”100″}},”datePublished”:”2026-03-08T08:00:00-03:00″,”dateModified”:”2026-04-19T12:00:00-06:00″,”mainEntityOfPage”:{“@type”:”WebPage”,”@id”:”https://globalsummitguide.com/patagonia-trekking-best-routes-tips/”},”isPartOf”:{“@type”:”CollectionPage”,”@id”:”https://globalsummitguide.com/conquer-peaks-global-summit-guide-for-mountain-climbing/#hub”,”name”:”Conquer Peaks: Your Global Summit Guide for Mountain Climbing”}} {“@context”:”https://schema.org”,”@type”:”FAQPage”,”mainEntity”:[ {“@type”:”Question”,”name”:”What are the best trekking routes in Patagonia?”,”acceptedAnswer”:{“@type”:”Answer”,”text”:”Patagonia’s best trekking routes span both Chilean and Argentine sides, offering everything from world-famous multi-day circuits to hidden gems. Top 10 Patagonia trekking routes ranked: (1) Torres del Paine W Circuit (Chile): 80 km, 4-5 days. The iconic classic hitting three main highlights — Towers, French Valley, Grey Glacier. Most popular Patagonia trek. (2) Torres del Paine O Circuit (Chile): 130 km, 7-10 days. Complete circumnavigation of Paine Massif including Paso John Gardner and Southern Patagonian Ice Field views. (3) Fitz Roy (Laguna de los Tres) Day Hike (Argentina): 20 km round trip, 8-10 hours. From El Chaltén to iconic Fitz Roy view at alpine lake. World-class day hike. (4) Laguna Torre Day Hike (Argentina): 19 km round trip, 6-8 hours. Cerro Torre view from alpine lake with iceberg-filled waters. (5) Huemul Circuit (Argentina): 65 km, 4-5 days. Advanced loop from El Chaltén with views of Southern Patagonian Ice Field. Technical sections. (6) Dientes de Navarino Circuit (Chile): 53 km, 4-5 days. World’s southernmost trek on Isla Navarino near Cape Horn. Remote wilderness. (7) Cerro Castillo Trek (Chile): 51 km, 4-5 days. Dramatic granite peaks along Carretera Austral. Less crowded Torres del Paine alternative. (8) Cerro Torre + Fitz Roy combined day hikes (Argentina): 2-3 day El Chaltén base. Two world-class day hikes in one trip. (9) Perito Moreno Glacier trekking (Argentina): Half-day ice trek on the advancing glacier. Unique experience. (10) Mirador Maestri (Argentina): Day hike from El Chaltén with Cerro Torre viewpoint. Each route offers distinctive character — circuits for immersive multi-day experience, day hikes for shorter itineraries. Most Patagonia trip planners combine Torres del Paine with El Chaltén day hikes for the classic Patagonia trip.”}}, {“@type”:”Question”,”name”:”How long should I spend trekking in Patagonia?”, “acceptedAnswer”:{“@type”:”Answer”,”text”:”A comprehensive Patagonia trekking trip takes 14-21 days total, though shorter 7-10 day trips covering one main region are also popular. Typical Patagonia itinerary lengths: (1) Quick Patagonia (7-10 days): One main destination — either Torres del Paine OR El Chaltén day hikes. Intense but possible. (2) Standard Patagonia (14-17 days): Torres del Paine multi-day trek + El Chaltén day hikes + travel. The classic Patagonia trip. (3) Extended Patagonia (18-21 days): Torres del Paine + El Chaltén + Perito Moreno + buffer days. More complete regional experience. (4) Comprehensive Patagonia (21-28 days): Adds Aysén region, Tierra del Fuego, or Huemul Circuit. For dedicated trekkers. Time allocation recommendations: (5) Arrival/departure travel: 3-4 days each direction from North America/Europe. (6) Santiago or Buenos Aires transit: 1-2 days. (7) Torres del Paine: 6-8 days including travel to/from Puerto Natales. (8) El Chaltén/Fitz Roy: 4-6 days for multiple day hikes. (9) Perito Moreno Glacier (El Calafate): 1-2 days. (10) Buffer for weather delays: 2-3 days essential. Sample 14-day itinerary: (11) Days 1-2: Santiago arrival, domestic flight to Punta Arenas. (12) Day 3: Punta Arenas to Puerto Natales, gear preparation. (13) Days 4-8: Torres del Paine W Circuit (5 days). (14) Day 9: Return to Puerto Natales, rest. (15) Day 10: Bus to El Calafate, Argentina. (16) Day 11: Perito Moreno Glacier. (17) Day 12: Bus to El Chaltén. (18) Days 13-14: Fitz Roy day hike, Laguna Torre day hike. (19) Day 15: Return via El Calafate, fly to Buenos Aires. (20) Days 16-17: Buenos Aires and international return. Sample 21-day extended itinerary adds: Huemul Circuit (4-5 days) in El Chaltén area, Torres del Paine O Circuit instead of W (7-10 days), or Dientes de Navarino in Chilean Patagonia extreme south. Season considerations: Patagonia trekking season December-March. Shoulder months (November, April) offer fewer crowds but more variable weather. Most visitors budget 14-18 days for rewarding Patagonia experience.”}}, {“@type”:”Question”,”name”:”Which is better, Argentine or Chilean Patagonia?”,”acceptedAnswer”:{“@type”:”Answer”,”text”:”Most Patagonia trekkers visit both Chilean and Argentine sides rather than choosing — they offer complementary experiences. However, if constrained to one, the choice depends on priorities and time available. Chilean Patagonia strengths: (1) Torres del Paine National Park — world’s most iconic Patagonian trek (W and O Circuits). (2) Puerto Natales as established tourism base with restaurants and gear infrastructure. (3) Punta Arenas airport (PUQ) — primary access point. (4) Carretera Austral (Route 7) — 1,240 km driving adventure through Aysén. (5) Dientes de Navarino — world’s southernmost trek. (6) Marble Caves of Lago General Carrera. (7) Multiple multi-day trek options. (8) Developed refugio and camping infrastructure. Argentine Patagonia strengths: (9) El Chaltén — ‘Argentina’s trekking capital’ with world-class day hikes. (10) Fitz Roy massif — arguably more dramatic single-mountain scenery than Torres del Paine. (11) Perito Moreno Glacier — accessible glacier-front viewing. (12) Bariloche and Lakes District — northern Patagonia scenery. (13) Tierra del Fuego — Ushuaia and southernmost accessible region. (14) Better English infrastructure in some areas. (15) Less-crowded day hikes compared to Torres del Paine multi-days. (16) Excellent Argentine cuisine and wine. Choose Chilean if: (17) First Patagonia trip focused on Torres del Paine. (18) Want multi-day circuit trekking. (19) Prefer organized refugio infrastructure. (20) Budget considerations (Chilean Patagonia slightly cheaper). (21) Want mountaineering adjacencies. Choose Argentine if: (22) Want day-hike focused experience. (23) Fitz Roy specifically is the goal. (24) Glacier viewing priority (Perito Moreno). (25) Prefer flexibility without multi-day camping/refugio commitments. (26) Combining with other Argentine travel. Best approach — combine both: (27) Fly into Santiago. (28) Domestic flight to Punta Arenas. (29) Torres del Paine (5-7 days). (30) Bus to El Calafate (Argentina). (31) Perito Moreno Glacier (1 day). (32) Bus to El Chaltén. (33) Fitz Roy and Cerro Torre day hikes (3-5 days). (34) Fly back from El Calafate to Buenos Aires. Border crossings via bus are straightforward with valid passports. The classic ‘circular’ trip combines both countries’ best trekking.”}}, {“@type”:”Question”,”name”:”When is the best time to trek in Patagonia?”,”acceptedAnswer”:{“@type”:”Answer”,”text”:”The best time to trek in Patagonia is December through March — the Southern Hemisphere summer — with January-February being peak season. Monthly breakdown: (1) April-May: Fall season. Cooling temperatures. Many refugios and lodges closing. Beautiful autumn colors in Nothofagus forests. Fewer crowds. (2) June-August: Winter. Most trekking impossible due to snow on passes. Some lower-elevation day hikes possible. Limited tourism infrastructure. Puma tracking peak season in Torres del Paine. (3) September-October: Spring beginning. Snow melting from passes gradually. Refugios opening in stages. Unpredictable weather. Fewer crowds. (4) November: Late spring. Shoulder season. Wildflowers emerging. Weather improving. Growing crowds toward December. Many refugios open. (5) December: Peak season begins. All infrastructure operating. Warm temperatures. Long daylight. Very crowded. (6) January-February: Peak summer. Warmest temperatures 50-75°F. Longest daylight (17+ hours). Most crowded. Book 6-12 months ahead. (7) March: Excellent season. Slightly cooler than peak. Fewer crowds. Beautiful autumn colors beginning. Last reliable trekking month. Why December-March optimal: (8) All tourism infrastructure operating. (9) Longest daylight enables full trek days. (10) Warmest temperatures reduce hypothermia risk. (11) Most stable weather windows. (12) Bus and flight schedules fully operating. (13) Refugios and camping available. Regional timing nuances: (14) Torres del Paine: December-February peak, March offers best balance of weather and fewer crowds. (15) El Chaltén (Fitz Roy): Best weather often November-December and February-March. (16) Perito Moreno Glacier: Operates year-round but winter limits viewing. (17) Aysén Region: November-March optimal, sparse infrastructure outside season. (18) Dientes de Navarino: Limited to January-February for most trekkers. Peak season considerations: (19) Advance reservations essential (6-12 months for Torres del Paine refugios). (20) Crowded trails and viewpoints. (21) Premium pricing on accommodations. (22) Full infrastructure availability. Shoulder season advantages: (23) November and March fewer crowds. (24) Better availability for last-minute planning. (25) Unique lighting and atmospheric conditions. (26) Some risk of closures or limited infrastructure. Most trekkers aim for January-February peak season but seasoned travelers increasingly prefer March for balance of good weather and reasonable crowds.”}}, {“@type”:”Question”,”name”:”How much does a Patagonia trekking trip cost?”,”acceptedAnswer”:{“@type”:”Answer”,”text”:”A comprehensive Patagonia trekking trip costs $3,000-$8,000 total depending on duration, accommodation choices, and whether self-guided or tour-based. Cost breakdown for 14-day classic Patagonia trip: International transportation: (1) Flight to Santiago or Buenos Aires from North America/Europe: $800-$2,000. (2) Domestic flight Santiago to Punta Arenas: $100-$250. (3) Domestic flights between Patagonian airports: $100-$250 each. (4) Buses between Torres del Paine, El Calafate, El Chaltén: $30-$80 per segment, $150-$300 total. Accommodation: (5) Santiago/Buenos Aires transit hotels: $60-$200/night. (6) Puerto Natales 2 nights: $40-$300 total. (7) Torres del Paine refugios 5 nights: $300-$900 (with meals). (8) El Calafate 2 nights: $100-$400 total. (9) El Chaltén 4 nights: $200-$600 total. (10) Total accommodation: $700-$2,500. Food: (11) Refugio meals included in half-board: covered above. (12) Lunches on trail: $15-$25/day. (13) Restaurant meals: $25-$50 in Puerto Natales/El Chaltén, $15-$30 in other areas. (14) Total food beyond refugios: $300-$600. Park entries and tours: (15) Torres del Paine entrance: $35 for foreigners multi-day. (16) Perito Moreno Glacier entrance: $40 for foreigners. (17) El Chaltén park entrance: Free (Parque Nacional Los Glaciares has no entry fee for day hikes). (18) Optional tours (kayaking, puma tracking, boat trips): $80-$300 each. Activities and gear: (19) Gear rental (Puerto Natales): $50-$150 for trek. (20) Personal gear if buying: $500-$2,000. (21) Tips for guides/porters: $100-$300. Insurance: (22) Travel insurance with evacuation: $100-$400. Self-guided vs guided: (23) Self-guided classic 14-day Patagonia: $3,000-$5,500. (24) Guided tour classic 14-day Patagonia: $5,500-$9,000. (25) Premium guided tour: $8,000-$12,000. Budget level options: (26) Budget (camping, hostels): $3,000-$4,500. (27) Mid-range (refugios with meals, mid-hotels): $5,000-$7,500. (28) Premium (best accommodations, private guides): $8,000-$15,000. Money-saving tips: (29) Book refugios directly vs. through tour operators. (30) Camp in Torres del Paine vs. refugios ($15 vs $60-$180/night). (31) Rent gear in Puerto Natales. (32) Travel during shoulder season (November, March). (33) Book international flights 3-6 months ahead. Most Patagonia trekkers budget $5,000-$7,500 for 14-day classic trip including international flights. See our complete mountain climbing costs guide.”}}, {“@type”:”Question”,”name”:”What is the Fitz Roy trek like?”,”acceptedAnswer”:{“@type”:”Answer”,”text”:”The Fitz Roy day hike to Laguna de los Tres is one of Patagonia’s most iconic treks — a 20 km round trip from El Chaltén, Argentina, leading to a dramatic alpine lake with Fitz Roy massif reflected in the water. Route details: (1) Starting point: El Chaltén, Argentina (405 m). (2) Destination: Laguna de los Tres (1,170 m) with Fitz Roy view. (3) Distance: 20 km round trip. (4) Duration: 8-10 hours typical. (5) Elevation gain: ~700 m. (6) Technical rating: Non-technical hiking with steep final kilometer. (7) Final ascent: Steep 400 m climb in last 1 km to lake. (8) Trail character: Well-marked, mix of forest, open valley, and rocky final section. The classic experience: (9) Pre-dawn start (4:00-5:00 AM) for sunrise at Laguna de los Tres. (10) Sunrise alpenglow on Fitz Roy — the iconic moment. (11) Fitz Roy (Cerro Chaltén) at 3,405 m (11,171 ft). (12) Aguja Saint-Exupéry, Aguja Poincenot, Cerro Torre also visible. (13) Turquoise alpine lake reflecting the massif. (14) Extraordinary photography opportunity. Route sections: (15) El Chaltén to Laguna Capri: 4 km forest trail. Optional short stop. (16) Laguna Capri to Poincenot camp: Forest and valley hiking. (17) Poincenot to Laguna de los Tres: Final 2 km, last 1 km steep. (18) Return same route. Trail signage: (19) Well-marked throughout. (20) Spanish language signs but easily navigable. (21) Park rangers monitor popular sections. Conditions: (22) Weather-dependent — Fitz Roy often obscured by clouds. (23) 30-50% of trekkers get clear view on first attempt. (24) Pre-dawn start increases chances of clear views. (25) Strong winds common above treeline. (26) Weather forecasts unreliable — plan multiple days. Fitness requirements: (27) Good hiking fitness required. (28) Last kilometer is the hardest part — steep rocky ascent. (29) Most visitors reach the lake successfully. (30) Can be done in camping trip style (multi-day) or single long day. El Chaltén as base: (31) Village population ~1,500. (32) 3-4 hour bus from El Calafate. (33) Good infrastructure — hostels, restaurants, gear shops. (34) Multiple trailheads directly from town. Compared to other Patagonia treks: (35) Shorter than Torres del Paine W Circuit but comparable dramatic experience. (36) More concentrated viewpoint experience. (37) No multi-day commitment required. (38) Better for travelers with limited time. Combined with Laguna Torre day hike (view of Cerro Torre), El Chaltén delivers two world-class day hikes in 2-3 days base — making it arguably the best Patagonia day-hike destination.”}}, {“@type”:”Question”,”name”:”What is El Chaltén and how is it different from Torres del Paine?”,”acceptedAnswer”:{“@type”:”Answer”,”text”:”El Chaltén is a small Argentine village (population ~1,500) that serves as Argentina’s trekking capital — offering world-class day hikes to Fitz Roy, Cerro Torre, and surrounding areas without requiring multi-day commitments. Fundamentally different from Torres del Paine. Key differences: El Chaltén (Argentina): (1) Village-based: All treks return to El Chaltén each evening. (2) Day-hike focus: No mandatory multi-day treks. (3) Multiple trails from town: Direct access to trailheads. (4) Hostels and hotels in village: $30-$250/night. (5) Restaurants and gear shops: Modern infrastructure. (6) Atmosphere: Backpacker-focused village with international vibe. (7) Weather: Often windier than Torres del Paine. (8) Costs: Mid-range for Patagonia. Torres del Paine (Chile): (9) Park-based: Multi-day treks required for main experiences. (10) Circuit focus: W or O Circuit are primary activities. (11) Refugio and camping infrastructure: On-trail accommodation. (12) No permanent villages inside park: Puerto Natales 2.5 hours away. (13) Atmosphere: More wilderness-focused. (14) Weather: Similar to El Chaltén but with more sheltered valleys. (15) Costs: Similar to Argentine Patagonia. El Chaltén signature day hikes: (16) Laguna de los Tres (Fitz Roy): 20 km round trip, 8-10 hours. Iconic. (17) Laguna Torre (Cerro Torre): 19 km round trip, 6-8 hours. Also iconic. (18) Mirador Maestri: Shorter Cerro Torre viewpoint. 3 hours. (19) Loma del Pliegue Tumbado: Longer panoramic day hike. 6-8 hours. (20) Huemul Circuit: Technical 4-5 day loop for experienced trekkers. Why combine both: (21) Torres del Paine gives multi-day immersive trek experience. (22) El Chaltén gives concentrated day-hike variety with Fitz Roy. (23) Together they represent the complete Patagonia trekking experience. (24) Most visitors spend 5-7 days in each. (25) Bus between El Calafate (gateway to El Chaltén) and Puerto Natales — 5-6 hours with border crossing. El Chaltén specific advantages: (26) No camping required for world-class views. (27) Flexibility to move between hikes. (28) Weather options — can shift plans. (29) Better suited to shorter Patagonia trips (5-7 days). (30) International backpacker community. (31) Close to Perito Moreno Glacier via El Calafate. Getting to El Chaltén: (32) Fly to El Calafate (FTE) international airport. (33) Bus 3 hours to El Chaltén ($15-$30). (34) Rental car option for flexibility. (35) Alternatively from Torres del Paine via Puerto Natales bus (5-6 hours with border crossing). For first-time Patagonia visitors, combining 5-7 days in Torres del Paine with 3-5 days in El Chaltén gives the complete Patagonia experience.”}}, {“@type”:”Question”,”name”:”Do I need a guide for Patagonia trekking?”,”acceptedAnswer”:{“@type”:”Answer”,”text”:”Most Patagonia trekking does not legally require a guide — both Chilean (Torres del Paine) and Argentine (El Chaltén area) popular trails can be hiked independently by experienced trekkers. About 70-80% of Patagonia trekkers go self-guided. Self-guided feasibility: (1) Torres del Paine: Well-marked trails, established refugio system, common route choices. (2) El Chaltén day hikes: Well-signed trailheads, frequent trail traffic. (3) Perito Moreno Glacier: Tour operators lead ice treks but glacier viewing is self-access. (4) Patagonian infrastructure generally supports international independent travelers. When guides are required: (5) Perito Moreno Glacier ice treks (Mini Trekking, Big Ice): Licensed guides mandatory on glacier surface. (6) Technical routes (Huemul Circuit tyrolean crossings): Professional guides strongly recommended. (7) Remote Aysén Region trekking: Local guides provide essential support. (8) Off-trail Andes exploration: Always requires guide. When guides are recommended: (9) First Patagonia trekking experience. (10) Limited Spanish language skills. (11) Multi-day trekking with limited experience. (12) Photography or wildlife-focused trips. (13) Family travel with children. (14) Complex multi-destination itineraries. Guide service options: (15) Puma tracking: Specialized Torres del Paine tours. (16) Multi-day trek guides: Torres del Paine W/O Circuit, Huemul Circuit. (17) Day hike guides: El Chaltén area, available for most routes. (18) Full trip packages: Knowmad Adventures, REI Adventures, Mountain Madness. Major Patagonia guide services: (19) Chile Nativo (Chilean operator). (20) Fantastico Sur (Torres del Paine refugio operator and tours). (21) Knowmad Adventures (US-based specialist). (22) REI Adventures (US outdoor retailer adventures). (23) Mountain Madness (international operator). (24) Swoop Patagonia (UK-based specialist). (25) Eclipse Travel (UK-based). (26) Local Argentine operators: Patagonia Adventure (El Chaltén), Hielo y Aventura (Perito Moreno). Cost comparisons: (27) Self-guided 14-day trip: $3,000-$5,500. (28) Guided tours: $5,500-$9,000. (29) Premium guided: $8,000-$15,000. (30) Savings of 35-50% with self-guided approach. Patagonia cultural considerations: (31) Basic Spanish helpful but English widely understood in tourism areas. (32) Cash and cards both useful. (33) Respect local customs and park regulations. (34) Tipping 10% standard at restaurants. Most Patagonia trekkers find self-guided approach manageable with 3-6 months advance planning for Torres del Paine reservations. Guides add valuable context and convenience at meaningful additional cost. Compare to Nepal (licensed guide legally required since 2023) — Patagonia remains more accessible to independent trekkers.”}} ]} *,*::before,*::after{box-sizing:border-box;margin:0;padding:0} :root{–pine:#0a1929;–forest:#122a44;–mist:#dde5ee;–snow:#f4f6f9;–stone:#485460;–pebble:#8a95a3;–ink:#0f1a26;–cream:#fafaf7;–white:#ffffff;–gold:#d4913a;–gold-light:#f5e4c8;–denali-mid:#2e5986;–denali-light:#e8eef5;–ready:#2d6e4e;–ready-light:#e8f1ec;–caution:#b86a15;–caution-light:#f7ece0;–danger:#a83a2b;–danger-light:#f5e8e5;–emerald:#1e8e7e;–emerald-light:#d4ede9;–serif:’DM Serif Display’,Georgia,serif;–sans:’Outfit’,system-ui,sans-serif} html{scroll-behavior:smooth} body{font-family:var(–sans);background:var(–cream);color:var(–ink);line-height:1.75;font-size:17px;-webkit-font-smoothing:antialiased} h1,h2,h3,h4{font-family:var(–serif);font-weight:400;line-height:1.2} a{color:var(–denali-mid);text-decoration:underline;text-underline-offset:3px;transition:color .15s} a:hover{color:#b8701f} .btn{display:inline-flex;align-items:center;gap:8px;padding:13px 26px;border-radius:6px;font-size:15px;font-weight:500;text-decoration:none;transition:all .2s} .btn-primary{background:var(–gold);color:var(–pine)} .btn-primary:hover{background:#bd8030;transform:translateY(-1px);text-decoration:none} .breadcrumb{background:var(–pine);padding:10px 0;font-size:13px} .breadcrumb__inner{max-width:1200px;margin:0 auto;padding:0 24px;display:flex;align-items:center;gap:8px;color:rgba(255,255,255,.5);flex-wrap:wrap} .breadcrumb a{color:rgba(255,255,255,.65);text-decoration:none} .breadcrumb a:hover{color:var(–gold)} .breadcrumb__sep{color:rgba(255,255,255,.25)} .breadcrumb__current{color:rgba(255,255,255,.85)} .article-header{background:linear-gradient(135deg,var(–pine),var(–forest));padding:52px 0 44px;color:var(–white)} .article-header__inner{max-width:1200px;margin:0 auto;padding:0 24px} .article-header__label{font-size:11px;font-weight:600;letter-spacing:.14em;text-transform:uppercase;color:var(–gold);margin-bottom:18px;display:flex;align-items:center;gap:10px} .article-header__label::before{content:”;width:36px;height:2px;background:var(–gold)} .article-header h1{font-size:clamp(30px,4.4vw,52px);color:var(–white);max-width:1000px;margin-bottom:20px} .article-header h1 em{font-style:italic;color:var(–gold)} .article-header__sub{font-size:17px;color:rgba(255,255,255,.82);font-weight:300;max-width:900px;line-height:1.7;margin-bottom:28px} .byline{display:flex;flex-wrap:wrap;align-items:center;gap:20px 28px;padding:18px 22px;background:rgba(255,255,255,.06);border:1px solid rgba(255,255,255,.1);border-radius:10px;margin-bottom:28px;font-size:13.5px} .byline__item{display:flex;align-items:center;gap:8px;color:rgba(255,255,255,.85)} .byline__item strong{color:var(–white);font-weight:500} .byline__label{font-size:10px;letter-spacing:.1em;text-transform:uppercase;color:var(–gold);font-weight:600;margin-right:4px} .byline__item a{color:rgba(255,255,255,.85);text-decoration:underline;text-underline-offset:2px} .byline__item a:hover{color:var(–gold)} .hero__stats{display:grid;grid-template-columns:repeat(4,1fr);gap:18px;max-width:900px} .hero__stat{padding:16px 20px;background:rgba(10,25,41,.4);border:1px solid rgba(255,255,255,.12);border-radius:10px} .hero__stat-num{font-family:var(–serif);font-size:30px;color:var(–gold);line-height:1;margin-bottom:4px} .hero__stat-lbl{font-size:11px;letter-spacing:.08em;text-transform:uppercase;color:rgba(255,255,255,.72);font-weight:500} .hub-strip{background:var(–gold-light);border-bottom:1px solid rgba(212,145,58,.3);padding:12px 0} .hub-strip__inner{max-width:1200px;margin:0 auto;padding:0 24px;display:flex;align-items:center;gap:16px;flex-wrap:wrap;font-size:13px} .hub-strip__label{font-family:var(–serif);color:var(–pine);font-weight:600;font-size:14px;display:flex;align-items:center;gap:8px} .hub-strip__label::before{content:’★’;color:var(–gold);font-size:13px} .hub-strip__cluster{color:var(–stone);font-weight:400} .hub-strip__cluster strong{color:var(–pine);font-weight:600} .hub-strip__link{margin-left:auto;color:var(–pine);font-weight:500;text-decoration:none;font-size:11px;letter-spacing:.08em;text-transform:uppercase;padding:6px 12px;background:var(–white);border:1px solid rgba(212,145,58,.35);border-radius:6px;transition:all .15s} .hub-strip__link:hover{background:var(–pine);color:var(–gold-light);border-color:var(–pine)} @media(max-width:700px){.hub-strip__link{margin-left:0}.hub-strip__inner{gap:10px}} .page-wrap{max-width:1200px;margin:0 auto;padding:0 24px;display:grid;grid-template-columns:1fr 300px;gap:56px;align-items:start} .sidebar{padding-top:52px} .sidebar__block{background:var(–white);border:1px solid var(–mist);border-radius:12px;padding:22px;margin-bottom:20px} .sidebar__block–dark{background:var(–pine);color:var(–white);border-color:var(–pine)} .sidebar__block–dark .sidebar__label{color:rgba(255,255,255,.4)} .sidebar__block–gold{background:var(–gold-light);border-color:rgba(212,145,58,.3)} .sidebar__toc{position:sticky;top:24px;max-height:calc(100vh – 48px);overflow-y:auto} .sidebar__label{font-size:11px;font-weight:600;letter-spacing:.1em;text-transform:uppercase;color:var(–pebble);margin-bottom:14px} .toc-list{list-style:none;display:flex;flex-direction:column;gap:2px} .toc-link{display:block;padding:7px 10px;border-radius:6px;text-decoration:none;color:var(–stone);font-size:13px;border-left:2px solid transparent;transition:all .15s;line-height:1.4} .toc-link:hover{color:var(–denali-mid);background:var(–snow);border-left-color:var(–denali-light);text-decoration:none} .quickfact-row{display:flex;justify-content:space-between;align-items:baseline;padding:10px 0;border-bottom:1px solid rgba(255,255,255,.08);font-size:13px;gap:12px} .quickfact-row:last-child{border-bottom:none} .quickfact-row__name{color:rgba(255,255,255,.72);font-weight:300} .quickfact-row__val{color:var(–gold);font-weight:500;font-family:var(–serif);font-size:15px;text-align:right} .sidebar__block–gold h4{font-family:var(–serif);font-size:17px;color:var(–pine);margin-bottom:8px;line-height:1.3} .sidebar__block–gold p{font-size:13px;color:var(–stone);font-weight:300;margin-bottom:14px;line-height:1.55} .sidebar__cta-btn{display:flex;align-items:center;justify-content:center;gap:6px;padding:11px 16px;background:var(–pine);color:var(–white);border-radius:6px;text-decoration:none;font-size:13px;font-weight:500} .sidebar__cta-btn:hover{background:var(–denali-mid);color:var(–white);text-decoration:none} .article{padding:52px 0 80px} .article section{scroll-margin-top:24px} .article__lead{font-size:19px;color:var(–stone);font-weight:300;line-height:1.75;border-left:3px solid var(–gold);padding-left:22px;margin-bottom:48px} .article__lead em{color:var(–pine);font-style:italic} .article h2{font-size:clamp(24px,3.2vw,34px);color:var(–pine);margin-top:64px;margin-bottom:18px} .article h2:first-child{margin-top:0} .article h2 em{font-style:italic;color:var(–denali-mid)} .article h3{font-size:21px;color:var(–pine);margin-top:32px;margin-bottom:12px} .article p{color:var(–stone);margin-bottom:18px;font-weight:300} .article p strong{color:var(–ink);font-weight:500} .article p em{color:var(–pine);font-style:italic;font-weight:400} .article ul,.article ol{color:var(–stone);font-weight:300;margin:0 0 20px 22px} .article li{margin-bottom:8px;line-height:1.7} .section-rule{border:none;border-top:1px solid var(–mist);margin:48px 0} .callout{border-radius:10px;padding:22px 24px;margin:28px 0;display:flex;gap:18px;align-items:flex-start} .callout–insight{background:var(–denali-light);border:1px solid rgba(46,89,134,.15)} .callout–gold{background:var(–gold-light);border:1px solid rgba(212,145,58,.25)} .callout–caution{background:var(–caution-light);border:1px solid rgba(184,106,21,.25)} .callout–methodology{background:#e8e3d8;border:1px solid rgba(43,35,24,.2)} .callout__icon{flex-shrink:0;font-size:22px;line-height:1} .callout__body{flex:1} .callout__title{font-family:var(–serif);font-size:17px;margin-bottom:6px;color:var(–pine)} .callout__text{font-size:14.5px;color:var(–stone);font-weight:300;line-height:1.7;margin:0} .callout__text a{color:var(–denali-mid);font-weight:500} .country-flag{display:inline-block;padding:2px 8px;border-radius:4px;font-size:10px;font-weight:700;letter-spacing:.08em;text-transform:uppercase;color:var(–white);margin-right:6px;font-family:var(–sans)} .flag-cl{background:#a83a2b} .flag-ar{background:#2e5986} .rank-card{background:var(–white);border:1px solid var(–mist);border-radius:14px;padding:28px 32px;margin:24px 0;position:relative;border-left:4px solid var(–gold);display:grid;grid-template-columns:auto 1fr;gap:28px;align-items:start} .rank-card–cl{border-left-color:#a83a2b} .rank-card–ar{border-left-color:#2e5986} .rank-badge{background:linear-gradient(135deg,var(–pine),var(–forest));color:var(–white);border-radius:12px;padding:16px 20px;text-align:center;min-width:110px;box-shadow:0 4px 16px rgba(11,31,53,.15)} .rank-badge__label{font-size:9px;font-weight:700;letter-spacing:.15em;text-transform:uppercase;color:rgba(255,255,255,.5);margin-bottom:2px} .rank-badge__num{font-family:var(–serif);font-size:56px;color:var(–gold);line-height:1;font-weight:400;font-style:italic} .rank-badge__of{font-size:10px;color:rgba(255,255,255,.5);letter-spacing:.08em;text-transform:uppercase;margin-top:4px} .rank-card__body-wrap{min-width:0} .rank-card__header{display:grid;grid-template-columns:1fr auto;gap:16px;align-items:baseline;margin-bottom:14px;padding-bottom:12px;border-bottom:1px solid var(–mist)} .rank-card__titleblock{min-width:0} .rank-card__country{display:inline-block;font-size:9px;letter-spacing:.15em;text-transform:uppercase;color:var(–white);font-weight:700;padding:3px 10px;border-radius:4px;margin-bottom:6px;background:#a83a2b} .rank-card__country–ar{background:#2e5986} .rank-card__country–both{background:var(–emerald)} .rank-card__name{font-family:var(–serif);font-size:26px;color:var(–pine);line-height:1.15;margin-bottom:4px} .rank-card__name em{font-style:italic;color:var(–denali-mid)} .rank-card__tag{font-size:13px;color:var(–pebble);font-weight:500;font-style:italic} .rank-card__elev{text-align:right;font-family:var(–serif);white-space:nowrap} .rank-card__elev-num{font-size:22px;color:var(–gold);font-weight:600;line-height:1} .rank-card__elev-label{font-size:10px;letter-spacing:.1em;text-transform:uppercase;color:var(–pebble);font-weight:700;margin-top:2px} .rank-card__why{font-size:14.5px;color:var(–stone);font-weight:300;line-height:1.7;margin-bottom:14px} .rank-card__why p{margin-bottom:10px} .rank-card__why strong{color:var(–ink);font-weight:500} .rank-card__why em{color:var(–pine);font-style:italic;font-weight:400} .rank-card__why a{color:var(–denali-mid);font-weight:500} .rank-card__stats{display:grid;grid-template-columns:repeat(4,1fr);gap:10px 16px;padding:14px 18px;background:var(–snow);border-radius:10px;font-size:12.5px;margin-bottom:12px} .rank-card__stat{display:flex;flex-direction:column;gap:2px} .rank-card__stat-label{font-size:9.5px;letter-spacing:.08em;text-transform:uppercase;color:var(–pebble);font-weight:700} .rank-card__stat-val{font-family:var(–serif);font-size:13px;color:var(–pine);font-weight:600} .rank-card__meta{display:flex;flex-wrap:wrap;gap:8px;font-size:11.5px} .rank-meta{background:var(–denali-light);color:var(–denali-mid);padding:4px 10px;border-radius:4px;font-weight:600;letter-spacing:.03em} .day-block{background:var(–white);border:1px solid var(–mist);border-radius:14px;padding:22px 26px;margin:14px 0;border-left:4px solid var(–denali-mid);display:grid;grid-template-columns:auto 1fr auto;gap:20px;align-items:center} .day-block–cl{border-left-color:#a83a2b} .day-block–ar{border-left-color:#2e5986} .day-block__day{font-family:var(–serif);font-style:italic;font-size:30px;line-height:1;opacity:.65;color:var(–denali-mid)} .day-block–cl .day-block__day{color:#a83a2b;opacity:.85} .day-block–ar .day-block__day{color:#2e5986;opacity:.85} .day-block__info{min-width:0} .day-block__label{font-size:10px;letter-spacing:.12em;text-transform:uppercase;color:var(–pebble);font-weight:700;margin-bottom:2px} .day-block__title{font-family:var(–serif);font-size:17px;color:var(–pine);margin-bottom:4px;line-height:1.2} .day-block__desc{font-size:13px;color:var(–stone);font-weight:300;line-height:1.5} .day-block__elev{text-align:right;font-family:var(–serif);white-space:nowrap;font-size:12px;color:var(–stone);font-weight:500} .day-block__elev strong{color:var(–pine);font-size:13px;display:block} .compare-wrap{overflow-x:auto;margin:28px 0 36px;border-radius:14px;border:1px solid var(–mist);box-shadow:0 4px 24px rgba(11,31,53,.05)} .compare-table{width:100%;border-collapse:collapse;font-size:14px;min-width:680px;background:var(–white)} .compare-table thead th{text-align:left;padding:14px 12px;font-size:10px;font-weight:700;letter-spacing:.08em;text-transform:uppercase;color:var(–white);background:var(–pine);white-space:nowrap} .compare-table thead th:first-child{padding-left:22px} .compare-table tbody tr{border-bottom:1px solid var(–mist)} .compare-table tbody tr:last-child{border-bottom:none} .compare-table tbody tr:nth-child(even){background:var(–snow)} .compare-table tbody td{padding:14px 12px;color:var(–stone);vertical-align:top;font-weight:300;line-height:1.5} .compare-table tbody td:first-child{padding-left:22px;font-weight:500;color:var(–ink);font-family:var(–serif);font-size:14.5px} .faq{margin:28px 0} .faq__item{background:var(–white);border:1px solid var(–mist);border-radius:10px;margin-bottom:12px;overflow:hidden;transition:border-color .15s} .faq__item:hover{border-color:rgba(46,89,134,.35)} .faq__item[open]{border-color:var(–denali-mid);box-shadow:0 4px 20px rgba(11,31,53,.06)} .faq__summary{padding:18px 24px;cursor:pointer;font-family:var(–serif);font-size:17px;color:var(–pine);display:flex;justify-content:space-between;align-items:center;gap:16px;list-style:none;user-select:none} .faq__summary::-webkit-details-marker{display:none} .faq__summary::after{content:’+’;font-family:var(–sans);font-size:24px;color:var(–denali-mid);font-weight:300;line-height:1;transition:transform .2s} .faq__item[open] .faq__summary::after{content:’−’} .faq__body{padding:0 24px 22px} .faq__body p{font-size:15px;color:var(–stone);font-weight:300;line-height:1.75;margin:0} .internal-links{background:var(–snow);border-radius:12px;padding:28px 30px;margin:32px 0} .internal-links__label{font-size:11px;font-weight:600;letter-spacing:.1em;text-transform:uppercase;color:var(–pebble);margin-bottom:16px} .internal-links h3{font-family:var(–serif);font-size:22px;color:var(–pine);margin-bottom:8px;margin-top:0} .internal-links__grid{display:grid;grid-template-columns:repeat(2,1fr);gap:12px;margin-top:20px} .internal-link{display:flex;align-items:center;padding:14px 16px;background:var(–white);border:1px solid var(–mist);border-radius:8px;font-size:14px;font-weight:500;color:var(–denali-mid);text-decoration:none;transition:all .15s} .internal-link:hover{border-color:var(–denali-mid);background:var(–denali-light);transform:translateX(2px);text-decoration:none} .internal-link::after{content:’→’;margin-left:auto;color:var(–pebble)} .internal-link:hover::after{color:var(–denali-mid)} .internal-link–hub{background:var(–gold-light);border-color:rgba(212,145,58,.3);color:var(–pine);font-weight:600} .internal-link–hub::before{content:’★’;color:var(–gold);margin-right:8px} .internal-link–hub:hover{background:var(–pine);color:var(–gold-light);border-color:var(–pine)} .related-grid{display:grid;grid-template-columns:repeat(3,1fr);gap:18px;margin:28px 0} .related-card{background:var(–white);border:1px solid var(–mist);border-radius:12px;padding:22px;text-decoration:none;display:block;transition:all .2s} .related-card:hover{border-color:rgba(46,89,134,.35);box-shadow:0 4px 20px rgba(0,0,0,.06);text-decoration:none} .related-card__type{font-size:10px;font-weight:600;letter-spacing:.1em;text-transform:uppercase;color:var(–pebble);margin-bottom:8px} .related-card__title{font-family:var(–serif);font-size:17px;color:var(–pine);margin-bottom:6px;line-height:1.3} .related-card__desc{font-size:13.5px;color:var(–stone);font-weight:300;line-height:1.55} .guide-cta{background:linear-gradient(135deg,var(–pine),#1e3a5c);border-radius:16px;padding:44px;margin:48px 0;display:grid;grid-template-columns:1fr auto;gap:32px;align-items:center} .guide-cta__label{font-size:11px;font-weight:600;letter-spacing:.12em;text-transform:uppercase;color:var(–gold);margin-bottom:12px} .guide-cta h2{font-family:var(–serif);font-size:clamp(22px,2.8vw,30px);color:var(–white);margin:0 0 12px;padding:0} .guide-cta p{font-size:15px;color:rgba(255,255,255,.72);font-weight:300;line-height:1.7;margin:0} .guide-cta p a{color:var(–gold)} .sources-block{background:var(–snow);border-radius:12px;padding:28px 32px;margin:32px 0;border:1px solid var(–mist)} .sources-block h3{font-family:var(–serif);font-size:20px;color:var(–pine);margin-top:0;margin-bottom:12px} .sources-block p{font-size:14.5px;color:var(–stone);line-height:1.7;margin-bottom:16px;font-weight:300} .sources-block ul{margin:0;padding-left:22px;font-size:13.5px;color:var(–stone);font-weight:300;line-height:1.7} .sources-block li{margin-bottom:6px} .sources-block a{color:var(–denali-mid);font-weight:500} .sources-block__meta{display:flex;flex-wrap:wrap;gap:16px 24px;padding-top:16px;margin-top:16px;border-top:1px solid var(–mist);font-size:12.5px;color:var(–pebble)} .sources-block__meta strong{color:var(–ink);font-weight:500} @media(max-width:960px){.page-wrap{grid-template-columns:1fr}.sidebar{display:none}.hero__stats{grid-template-columns:repeat(2,1fr)}.rank-card{padding:22px;grid-template-columns:1fr;gap:18px}.rank-badge{justify-self:start;padding:12px 18px;min-width:100px}.rank-badge__num{font-size:44px}.rank-card__header{grid-template-columns:1fr;gap:8px}.rank-card__elev{text-align:left}.rank-card__stats{grid-template-columns:repeat(2,1fr)}.day-block{grid-template-columns:auto 1fr;gap:14px}.day-block__elev{grid-column:1 / -1;text-align:left}.internal-links__grid,.related-grid{grid-template-columns:1fr}.guide-cta{grid-template-columns:1fr}.byline{gap:12px 18px}} @media(max-width:600px){.hero__stats{grid-template-columns:1fr 1fr}}
    Cluster 04 · Non-Technical Treks · Updated April 2026

    Patagonia Trekking: Best Routes, Tips & Trip Planning

    The definitive 2026 guide to trekking across all of Patagonia — the complete regional overview covering both Chilean and Argentine sides. Ranked top routes, a classic 14-day itinerary, border crossings, and the planning framework for 2-4 week Patagonian expeditions. From Torres del Paine to Fitz Roy, Dientes de Navarino to the Huemul Circuit, this guide ties the region together.

    10
    Ranked
    routes
    2
    Countries
    covered
    14–21
    Classic trip
    days
    Dec–Mar
    Best
    season
    Global Summit Guide A guide in Cluster 04 · Non-Technical Treks View master hub →

    Patagonia spans more than 1 million square kilometers across southern Chile and Argentina — from the Neuquén lakes at 40°S to Cape Horn at 55°S. The region hosts some of the planet’s most distinctive trekking destinations: granite-spire national parks, advancing tidewater glaciers, sub-Antarctic forests, and the world’s southernmost developed hiking trails. Most guides focus on just Torres del Paine (our detailed W vs O Circuit guide and destination guide cover that in full). This guide zooms out to the regional level — ranking the ten best Patagonia trek routes across both countries, presenting a classic 14-day two-country itinerary, and explaining how to combine destinations into the 2-4 week Patagonian expedition that serious trekkers dream about.

    ⊛
    How these routes were ranked

    Ranking weighs five factors equally: scenic impact, regional significance, accessibility and infrastructure, distinctive character vs. other Patagonia routes, and trek-completion experience. Data verified against CONAF (Chile) and Argentina’s Administración de Parques Nacionales records. Route details confirmed with Knowmad Adventures, Swoop Patagonia, Chile Nativo, Patagonia Adventure (El Chaltén), and Hielo y Aventura (2026 rates). Cross-border logistics verified with Bus Sur and Chaltén Travel. Trek statistics cross-referenced against Lonely Planet Trekking in the Patagonian Andes and specialist guidebooks. Reviewed by practicing Patagonia trek guides with 2024-2025 season experience across both countries. Fact-check date: April 19, 2026.

    Patagonia Trekking: The Big Picture

    Patagonia divides politically between Chile (western side) and Argentina (eastern side) — but the trekking geography doesn’t respect borders. The Andes form the backbone, with Chile’s ice fields and fjords on the Pacific side, and Argentina’s steppe and glacier-fed lakes on the Atlantic side. Most serious Patagonia trips cross the border, combining highlights from both countries.

    The five main trekking regions

    • Torres del Paine (Chile) — the icon: W Circuit, O Circuit, day hikes. Magallanes Region. Access via Puerto Natales.
    • El Chaltén & Los Glaciares (Argentina) — the day-hike capital: Fitz Roy, Cerro Torre, Huemul Circuit. Santa Cruz Province. Access via El Calafate.
    • Aysén & Carretera Austral (Chile) — the wild middle: Cerro Castillo, Queulat, San Rafael Glacier. Route 7 driving adventure.
    • Lakes District (Chile/Argentina) — the northern Patagonia: Bariloche, Pumalín, Lanin volcanoes. More developed tourism.
    • Tierra del Fuego & Cape Horn region — the far south: Dientes de Navarino, Ushuaia, Isla Navarino. Sub-Antarctic character.
    ◆
    The two-country rule

    Most first-time Patagonia trekkers assume they need to choose between Chilean (Torres del Paine) and Argentine (El Chaltén) sides. In practice, the two sides are only 5-6 hours apart by bus, cross-border logistics are straightforward, and the experiences complement rather than duplicate each other. Chilean Patagonia delivers multi-day circuit trekking (Torres del Paine W/O). Argentine Patagonia delivers world-class day hikes (El Chaltén). The classic 14-day Patagonia trip combines both — and it’s almost always the right call for anyone with more than 10 days available.


    Top 10 Patagonia Trek Routes: Counting Down from 10 to 1

    Rank
    10
    of 10
    Argentina

    Perito Moreno Glacier Ice Trek

    Los Glaciares NP · Half-day glacier walk · El Calafate base
    Half-day
    Duration

    Perito Moreno earns #10 as Patagonia’s most accessible glacier experience — a guided ice trek on the advancing face of one of the world’s few growing glaciers. The “Mini Trekking” option offers 1.5 hours on the ice, while “Big Ice” provides 3-4 hours for more experienced walkers. Both require licensed guides with crampons provided.

    Why it ranks here: Not technically a multi-day trek, but an essential Patagonia experience. The glacier is 5 km wide, 74 m tall at the front face, and actively calves into Lago Argentino. No other accessible glacier in the world offers this combination of scale and active movement. Tour operators: Hielo y Aventura (primary). Cost $150-$300. Easily combined with El Chaltén visits via El Calafate.

    DurationHalf day
    Cost$150-$300
    BaseEl Calafate
    GuideRequired
    Active glacier Accessible experience Single day
    Rank
    9
    of 10
    Chile

    Cerro Castillo Trek

    Aysén Region · Carretera Austral · Torres del Paine alternative
    51 km
    4-5 days

    Cerro Castillo earns #9 as the less-crowded alternative to Torres del Paine. The trek traverses Cerro Castillo National Park along Chile’s Carretera Austral (Route 7) — 51 km through dramatic granite peaks, glacial lakes, and lenga forests. Cerro Castillo (2,675 m) is often called “Torres del Paine in miniature” for its distinctive jagged profile.

    Why it ranks: Offers the multi-day circuit trekking experience with a fraction of Torres del Paine’s crowds. Currently sees ~1/20th the visitors of Torres del Paine. 4-5 days total, moderate difficulty. Access requires longer logistics than Torres del Paine (driving the Carretera Austral) — which is itself part of the adventure. For returning Patagonia visitors seeking solitude.

    Distance51 km
    Duration4-5 days
    Cost$600-$1,200
    CrowdsLow
    TdP alternative Carretera Austral Less crowded
    Rank
    8
    of 10
    Chile

    Dientes de Navarino Circuit

    Isla Navarino · World’s southernmost trek · Cape Horn region
    53 km
    4-5 days

    Dientes de Navarino earns #8 as the world’s southernmost developed trekking circuit. Located on Isla Navarino near Cape Horn, the 53 km loop climbs through sub-Antarctic forests, alpine lakes, and the dramatic “Teeth of Navarino” peaks. Puerto Williams (population ~2,500) is the southernmost permanent settlement on Earth.

    Why it ranks here: A genuinely unique trek — few places on Earth match this combination of remoteness and accessibility. 4-5 days self-supported with camping. Weather notoriously variable. Access via boat or flight from Punta Arenas to Puerto Williams. For committed trekkers willing to reach the bottom of the world. Arguably the most exclusive trek experience in Patagonia.

    Distance53 km
    Duration4-5 days
    Cost$1,000-$2,000
    Latitude54.9°S
    Southernmost trek Near Cape Horn Sub-Antarctic
    Rank
    7
    of 10
    Argentina

    Huemul Circuit

    El Chaltén · Technical Patagonian loop · Southern Patagonian Ice Field views
    65 km
    4-5 days

    The Huemul Circuit earns #7 as Argentine Patagonia’s hardest and most rewarding multi-day loop. From El Chaltén, the 65 km circuit climbs two passes with tyrolean crossings (zipline rope cable rigs) over glacial rivers and delivers jaw-dropping views of the Southern Patagonian Ice Field.

    Why it ranks this high: Offers Patagonia’s only direct view of the Southern Patagonian Ice Field (SPI) from a multi-day trekking route. The SPI is the world’s third-largest ice mass outside polar regions — 13,000 km² of continuous ice. Technical demands (tyrolean crossings, steep snow passes) limit this to experienced trekkers. Self-supported camping throughout. Guide strongly recommended. For the serious trekker seeking a harder alternative to Torres del Paine O.

    Distance65 km
    Duration4-5 days
    Cost$1,500-$3,000
    DifficultyAdvanced
    Ice field views Tyrolean crossings Technical
    Rank
    6
    of 10
    Argentina

    Loma del Pliegue Tumbado

    El Chaltén · Panoramic day hike · Full Patagonia massif view
    1,490 m
    Summit

    Loma del Pliegue Tumbado earns #6 as the single best panoramic day hike in El Chaltén. This 20 km round trip climb delivers views of Fitz Roy, Cerro Torre, Lago Viedma, and the Southern Patagonian Ice Field from a single 1,490 m summit.

    Why it ranks above more famous day hikes: Most day hikers miss this one — it’s less iconic than Laguna de los Tres but delivers a more complete Patagonia panorama. 6-8 hour round trip from El Chaltén. Moderate difficulty. Offers perspective unavailable from any other single viewpoint. Strong choice for visitors who’ve done Fitz Roy day hike and want something different, or photographers seeking distinctive compositions.

    Distance~20 km RT
    Duration6-8 hours
    Elevation~900 m gain
    BaseEl Chaltén
    Panoramic summit Less crowded Ice field view
    Rank
    5
    of 10
    Argentina

    Laguna Torre Day Hike

    El Chaltén · Cerro Torre view · Iceberg-filled alpine lake
    19 km
    Round trip

    Laguna Torre earns #5 as El Chaltén’s second signature day hike — a 19 km round trip to the alpine lake at the base of Cerro Torre (3,128 m). Unlike Fitz Roy’s Laguna de los Tres, Laguna Torre features floating icebergs calved from Grande Glacier and the distinctive needle profile of Cerro Torre.

    Why it ranks here: Gentler terrain than Fitz Roy day hike but equally spectacular destination. Most El Chaltén visitors do both Fitz Roy and Laguna Torre on consecutive days — the 5-6 hour duration makes this feasible. Cerro Torre’s ice-capped summit has an iconic reputation among climbers as one of the world’s hardest technical ascents. Floating icebergs offer unique photography opportunities.

    Distance19 km RT
    Duration5-7 hours
    Elevation~500 m gain
    DifficultyModerate
    Cerro Torre view Icebergs Gentler than Fitz Roy
    Rank
    4
    of 10
    Chile

    Torres del Paine W Circuit

    Torres del Paine NP · The iconic Patagonian classic · Three granite towers
    80 km
    4-5 days

    The W Circuit earns #4 as Patagonia’s defining multi-day trek experience. The 80 km route traces a W-shape through Torres del Paine National Park, hitting the three iconic highlights: Mirador Las Torres (three granite towers), French Valley (Mirador Britanico amphitheater), and Grey Glacier. 90% of Torres del Paine multi-day trekkers choose the W.

    Why it ranks this way: The definitive Chilean Patagonia experience. Well-developed refugio infrastructure, 4-5 days, iconic destinations, achievable by fit hikers. Crowds during peak season (December-February) are the only real downside. The three-towers sunrise alone justifies the trip for most trekkers. See our detailed guide: W vs O Circuit complete comparison.

    Distance~80 km
    Duration4-5 days
    Cost$800-$2,500
    Max elev~1,000 m
    Iconic classic Three towers Refugio infrastructure
    Rank
    3
    of 10
    Chile

    Torres del Paine O Circuit

    Torres del Paine NP · Complete Paine Massif circumnavigation · Paso John Gardner
    130 km
    7-10 days

    The O Circuit earns #3 as Chilean Patagonia’s complete expedition-style trek. The 130 km full loop includes all W Circuit highlights plus the backside wilderness loop with Seron, Dickson, and Los Perros camps, culminating in the dramatic Paso John Gardner (1,241 m) with sweeping Southern Patagonian Ice Field views.

    Why it ranks above the W: Paso John Gardner’s ice field panorama is genuinely life-list material. The backside sees only ~10% of park visitors, delivering wilderness character impossible on the W alone. 7-10 days of deep Patagonia immersion. Requires significant fitness and 6-12 months of advance booking. For experienced multi-day trekkers willing to commit to the full experience.

    Distance~130 km
    Duration7-10 days
    Cost$1,200-$3,800
    Max pass1,241 m
    Complete circuit Paso John Gardner Ice field views
    Rank
    2
    of 10
    Argentina

    Fitz Roy Day Hike (Laguna de los Tres)

    El Chaltén · Argentina’s iconic day hike · Alpine lake with Fitz Roy backdrop
    1,170 m
    Laguna de los Tres

    Fitz Roy day hike to Laguna de los Tres earns #2 as the single best day hike in all of Patagonia. 20 km round trip from El Chaltén to an alpine lake at 1,170 m with Fitz Roy (3,405 m) as backdrop. The final 400 m climb in the last 1 km is brutal — but the reward is one of the world’s great mountain views.

    Why it ranks #2: No other single day in Patagonia delivers this concentration of scenery. Fitz Roy (aka Cerro Chaltén) is the Patagonia Inc. logo mountain — you’ve seen this exact view even if you haven’t been. Aguja Poincenot, Aguja Saint-Exupéry, and Cerro Torre visible from the viewpoint. Pre-dawn sunrise attempts for alpenglow. Weather-dependent — 30-50% clear view success first attempt. Combined with Laguna Torre (#5), makes El Chaltén Patagonia’s premier day-hike destination.

    Distance~20 km RT
    Duration8-10 hours
    Elevation~700 m gain
    CostFree park
    Iconic viewpoint Pre-dawn start No camping needed
    Rank
    1
    of 10
    Combined

    The Classic Patagonia Trip (TdP + El Chaltén)

    Chile + Argentina · 14-day two-country expedition · The complete experience
    14 days
    Classic trip

    The Classic Patagonia Trip takes #1 as the definitive Patagonia trekking experience — combining Torres del Paine’s multi-day circuit trekking with El Chaltén’s world-class day hikes. 14-18 days total covers both sides of the Andes, crosses the border twice, and delivers all of Patagonia’s iconic highlights in a single expedition.

    Why it ranks first: Patagonia is a regional experience, not a single-destination trip. Chilean side for multi-day circuit (Torres del Paine W or O), Argentine side for day-hike variety (Fitz Roy, Cerro Torre). Together they’re greater than the sum — the combination is the quintessential Patagonia adventure. 5-7 days Torres del Paine, 4-5 days El Chaltén, plus Perito Moreno Glacier and border transits. This is almost always the right Patagonia trip for anyone with 12+ days available. See our 14-day itinerary below.

    Duration14-18 days
    CountriesChile + Argentina
    Cost$5,000-$8,000
    ExperienceComplete
    Two-country trip Complete experience Classic route

    The Classic 14-Day Patagonia Itinerary

    Here’s the proven 14-day framework for combining both Chilean and Argentine Patagonia into a single trip. Color-coded by country:

    01–02
    CLDays 1-2 · Travel

    Arrive Santiago → Fly to Punta Arenas

    International arrival Santiago (SCL). Rest overnight. Domestic flight LATAM/Sky to Punta Arenas (PUQ) ~3.5 hours. Transit night in Punta Arenas or proceed to Puerto Natales.

    SCL → PUQDomestic flight
    03
    CLDay 3 · Ground transfer

    Bus Punta Arenas → Puerto Natales

    3-hour bus ride ($25-$40). Check into Puerto Natales hotel. Gear preparation at Yamana or Erratic Rock. Pre-trek dinner at El Asador Patagónico. Final briefing for Torres del Paine.

    Puerto NatalesGateway base
    04–08
    CLDays 4-8 · Torres del Paine

    W Circuit Trek (5 days)

    Bus from Puerto Natales to park entrance (2.5 hours). Hike W Circuit: Torres Base sunrise → French Valley → Grey Glacier. Refugio accommodations with half-board. Return to Puerto Natales on Day 8.

    Torres del Paine80 km circuit
    09
    ARDay 9 · Border crossing

    Bus Puerto Natales → El Calafate (Argentina)

    5-6 hour bus with Chile-Argentina border crossing. Passport stamps. Bus Sur or Cootra. Arrive El Calafate. Check into hotel. Rest evening after border transit.

    El CalafateAR gateway
    10
    ARDay 10 · Glacier day

    Perito Moreno Glacier Day Trip

    Full-day Perito Moreno Glacier. Boardwalk viewing or optional Mini Trekking ice walk ($150-$200) or Big Ice ($200-$300). Calving glacier face is constantly active. Return to El Calafate.

    Perito Moreno74 m glacier face
    11
    ARDay 11 · Transfer

    Bus El Calafate → El Chaltén

    3-hour bus ($15-$30). Chaltén Travel or TAQSA. Arrive El Chaltén. Check into hostel/hotel. Orientation walks — multiple trailheads directly from town. Evening dinner in El Chaltén.

    El Chaltén1,500 population
    12
    ARDay 12 · Iconic day hike

    Laguna de los Tres (Fitz Roy) Day Hike

    Pre-dawn start (4:00-5:00 AM) for Fitz Roy sunrise alpenglow. 20 km round trip to Laguna de los Tres at 1,170 m. Steep final kilometer. Return to El Chaltén in afternoon. Celebrate the day.

    1,170 mLake elevation
    13
    ARDay 13 · Cerro Torre day

    Laguna Torre Day Hike

    19 km round trip to Laguna Torre at base of Cerro Torre (3,128 m). Gentler terrain than Fitz Roy. Iceberg-filled alpine lake. 5-7 hours. Return for final El Chaltén evening. Both iconic day hikes completed.

    Cerro Torre3,128 m peak
    14
    ARDay 14 · Return

    Bus El Chaltén → El Calafate → Fly to Buenos Aires

    Morning bus to El Calafate (3 hours). Flight El Calafate (FTE) to Buenos Aires (EZE) ~3 hours. Overnight in Buenos Aires. International return flight next day. Classic Patagonia trip complete.

    FTE → EZEArgentine return
    ★
    Why this itinerary works

    This 14-day framework maximizes highlights while minimizing wasted travel days. The counter-clockwise routing (Chile first, Argentina second) aligns with the most common international flight pattern (Santiago arrival, Buenos Aires departure). Border crossings are built in strategically. Rest days are embedded (Day 3 gear prep, Day 9 border transit, Day 11 relocation). For visitors with 18+ days, add: Torres del Paine O instead of W (+3 days), Huemul Circuit in El Chaltén area (+5 days), or buffer days for weather. For visitors with only 10-12 days, prioritize: Torres del Paine W (5 days) + El Chaltén day hikes (3-4 days) without Perito Moreno glacier.


    Chilean vs Argentine Patagonia Comparison

    AspectChilean PatagoniaArgentine Patagonia
    Signature destinationTorres del Paine NPEl Chaltén / Los Glaciares NP
    Main trek typeMulti-day circuits (W, O)World-class day hikes
    Gateway townPuerto NatalesEl Calafate + El Chaltén
    Main airportPunta Arenas (PUQ)El Calafate (FTE)
    AccommodationRefugios + campingVillage hotels + hostels
    Park entry fee$35 foreigners multi-day$40 Perito Moreno, free El Chaltén
    CrowdsHigh (TdP W Circuit)High (Fitz Roy day hike)
    InfrastructureEstablished refugio systemVillage-based flexibility
    Ice field accessGrey Glacier (trek), Southern Patagonian Ice Field (O)Perito Moreno glacier front, Southern Patagonian Ice Field (Huemul)
    CurrencyChilean Peso (CLP)Argentine Peso (ARS)
    Typical trip cost (14 days)$3,000-$5,500$2,800-$5,200
    Best forMulti-day circuit trekkingDay-hike variety and flexibility
    Minimum days6-8 days (W Circuit + travel)5-7 days (El Chaltén + travel)

    Trip Planning: Essential Patagonia Logistics

    Timing and booking windows

    • International flights: Book 3-6 months ahead for best prices. $800-$2,000 from North America.
    • Domestic flights (Santiago-Punta Arenas, El Calafate-Buenos Aires): 1-3 months ahead. $100-$250 each.
    • Torres del Paine refugios (W Circuit): 6-9 months ahead for peak season.
    • Torres del Paine O Circuit: 9-12 months ahead due to limited backside camp capacity.
    • El Chaltén accommodations: 3-6 months ahead for December-February peak.
    • Perito Moreno ice treks: Book 1-2 weeks ahead for Mini/Big Ice.
    • Cross-border buses: 1-4 weeks ahead for peak season.

    Cross-border logistics

    • Puerto Natales to El Calafate: 5-6 hour bus with Chilean exit + Argentine entry border stops. $30-$60 one way. Bus Sur, Cootra.
    • Passport required: US, EU, most South American citizens visa-free for both countries up to 90 days.
    • Border open hours: Cerro Castillo (Chile) / Río Turbio (Argentina) crossing 08:00-22:00 typical.
    • Customs declarations: Fresh food, plants, animal products restricted both directions.
    • Currency exchange: Exchange at banks in Puerto Natales or El Calafate. ATM access variable.

    Packing and gear

    • Essential: Waterproof shell jacket and pants, insulating layers, quick-dry pants, broken-in hiking boots, warm hat, gloves.
    • Wind protection critical: Patagonian winds exceed 100 km/h regularly. Windproof gear essential.
    • Sleeping bag: 20-30°F rating if using refugios, 0-15°F if camping backside O Circuit.
    • Gear rental: Puerto Natales (Yamana, Erratic Rock, Patagonic) and El Chaltén (gear shops in town) both have excellent rental options at $15-$30/day.
    • Backpack: 40-60L for multi-day treks, 25-35L for day hikes.

    Health and safety

    • Altitude: No significant altitude concerns — max elevations under 1,500 m in most Patagonia trekking.
    • Water: Generally safe to drink from high alpine streams. Purification tablets recommended below 1,000 m.
    • Weather emergencies: Rapid weather changes — strong winds, sudden rain, cold exposure. Always carry full rain/wind shell.
    • Medical facilities: Puerto Natales and El Calafate have basic clinics. Serious emergencies require evacuation to Punta Arenas or Buenos Aires.
    • Travel insurance with evacuation: Recommended — $100-$400 for comprehensive coverage.

    For comprehensive gear recommendations, see our complete mountain gear list. For cost planning details, consult the mountain climbing costs guide.


    Patagonia Trekking FAQ: Your Common Questions Answered

    What are the best trekking routes in Patagonia?

    Patagonia’s best routes span Chilean and Argentine sides, offering everything from world-famous multi-day circuits to hidden gems. Top 10 ranked: Torres del Paine W Circuit (Chile) 80 km, 4-5 days — the iconic classic hitting three main highlights. Torres del Paine O Circuit (Chile) 130 km, 7-10 days — complete circumnavigation including Paso John Gardner and Southern Patagonian Ice Field views. Fitz Roy (Laguna de los Tres) Day Hike (Argentina) 20 km round trip, 8-10 hours — from El Chaltén to iconic Fitz Roy view. Laguna Torre Day Hike (Argentina) 19 km round trip, 6-8 hours — Cerro Torre view from alpine lake. Huemul Circuit (Argentina) 65 km, 4-5 days — advanced loop with Southern Patagonian Ice Field views, technical sections. Dientes de Navarino Circuit (Chile) 53 km, 4-5 days — world’s southernmost trek near Cape Horn. Cerro Castillo Trek (Chile) 51 km, 4-5 days — dramatic granite peaks along Carretera Austral, less crowded TdP alternative. Loma del Pliegue Tumbado (Argentina) panoramic El Chaltén day hike. Perito Moreno Glacier trekking (Argentina) half-day ice trek on advancing glacier. Each route offers distinctive character — circuits for immersive multi-day experience, day hikes for shorter itineraries. Most Patagonia trip planners combine Torres del Paine with El Chaltén day hikes for the classic Patagonia trip.

    How long should I spend trekking in Patagonia?

    A comprehensive Patagonia trekking trip takes 14-21 days total, though shorter 7-10 day trips covering one main region are popular. Itinerary lengths: Quick Patagonia (7-10 days) one destination — either Torres del Paine OR El Chaltén day hikes, intense but possible. Standard Patagonia (14-17 days) Torres del Paine multi-day trek + El Chaltén day hikes + travel, the classic. Extended Patagonia (18-21 days) adds Perito Moreno + buffer days. Comprehensive (21-28 days) adds Aysén region, Tierra del Fuego, or Huemul Circuit. Time allocation: arrival/departure travel 3-4 days each direction, Santiago or Buenos Aires transit 1-2 days, Torres del Paine 6-8 days including travel to/from Puerto Natales, El Chaltén/Fitz Roy 4-6 days for multiple day hikes, Perito Moreno Glacier 1-2 days, buffer for weather delays 2-3 days essential. Sample 14-day: Days 1-2 Santiago arrival fly to Punta Arenas, Day 3 Puerto Natales gear prep, Days 4-8 Torres del Paine W Circuit, Day 9 rest, Day 10 bus to El Calafate Argentina, Day 11 Perito Moreno Glacier, Day 12 bus to El Chaltén, Days 13-14 Fitz Roy and Laguna Torre day hikes, Day 15 return via El Calafate fly Buenos Aires, Days 16-17 Buenos Aires international return. Extended 21-day adds Huemul Circuit or O Circuit instead of W or Dientes de Navarino. Season: December-March trekking peak. Most visitors budget 14-18 days for rewarding Patagonia experience.

    Which is better, Argentine or Chilean Patagonia?

    Most Patagonia trekkers visit both sides rather than choosing — they offer complementary experiences. If constrained to one, choice depends on priorities. Chilean strengths: Torres del Paine NP (world’s most iconic Patagonian trek W and O Circuits), Puerto Natales established tourism base, Punta Arenas airport primary access, Carretera Austral 1,240 km driving adventure through Aysén, Dientes de Navarino world’s southernmost trek, Marble Caves of Lago General Carrera, developed refugio and camping infrastructure. Argentine strengths: El Chaltén Argentina’s trekking capital with world-class day hikes, Fitz Roy massif arguably more dramatic single-mountain scenery than TdP, Perito Moreno Glacier accessible glacier-front viewing, Bariloche and Lakes District, Tierra del Fuego Ushuaia, better English infrastructure some areas, less-crowded day hikes compared to TdP multi-days, excellent Argentine cuisine and wine. Choose Chilean if: first Patagonia trip focused on Torres del Paine, want multi-day circuit, prefer refugio infrastructure, budget considerations, want mountaineering adjacencies. Choose Argentine if: want day-hike focused experience, Fitz Roy specifically the goal, glacier viewing priority, prefer flexibility without multi-day commitments, combining with other Argentine travel. Best approach — combine both: fly Santiago, domestic to Punta Arenas, Torres del Paine 5-7 days, bus to El Calafate, Perito Moreno 1 day, bus to El Chaltén, Fitz Roy and Cerro Torre day hikes 3-5 days, fly back from El Calafate to Buenos Aires. Border crossings via bus straightforward with valid passports.

    When is the best time to trek in Patagonia?

    Best time is December through March — Southern Hemisphere summer — with January-February peak season. April-May fall cooling temperatures, many refugios closing, autumn colors in Nothofagus forests. June-August winter, most trekking impossible due to snow on passes, puma tracking peak season. September-October spring snow melting from passes, refugios opening gradually. November late spring, shoulder season, wildflowers, growing crowds. December peak season begins, all infrastructure operating, warm temperatures, long daylight, crowded. January-February peak summer, warmest 50-75°F, longest daylight 17+ hours, most crowded. March excellent slightly cooler, fewer crowds, autumn colors beginning, last reliable month. Why optimal: all tourism infrastructure operating, longest daylight enables full trek days, warmest reduces hypothermia risk, most stable weather windows, bus and flight schedules fully operating. Regional nuances: Torres del Paine December-February peak, March best balance of weather and fewer crowds. El Chaltén best often November-December and February-March. Perito Moreno operates year-round. Aysén November-March. Dientes de Navarino limited to January-February. Peak season considerations: advance reservations essential (6-12 months for TdP refugios), crowded trails, premium pricing, full infrastructure. Shoulder season advantages: November and March fewer crowds, better availability, unique lighting, some risk of closures. Most trekkers aim for January-February peak but seasoned travelers increasingly prefer March for balance.

    How much does a Patagonia trekking trip cost?

    Comprehensive Patagonia trip costs $3,000-$8,000 total depending on duration, accommodation, self-guided vs tour. 14-day classic trip breakdown: International transportation: Santiago/Buenos Aires flight $800-$2,000, Santiago to Punta Arenas $100-$250, domestic flights $100-$250 each, buses between parks $30-$80 per segment total $150-$300. Accommodation: Santiago/Buenos Aires hotels $60-$200/night, Puerto Natales 2 nights $40-$300, Torres del Paine refugios 5 nights $300-$900 with meals, El Calafate 2 nights $100-$400, El Chaltén 4 nights $200-$600. Total accommodation $700-$2,500. Food: refugio meals included in half-board, lunches on trail $15-$25/day, restaurant meals $25-$50 Puerto Natales/El Chaltén, total food beyond refugios $300-$600. Park entries: TdP $35, Perito Moreno $40, El Chaltén free for day hikes, optional tours $80-$300 each. Activities and gear: gear rental $50-$150 for trek, personal gear if buying $500-$2,000, tips $100-$300. Insurance: $100-$400. Self-guided vs guided: self-guided classic 14-day $3,000-$5,500, guided tour $5,500-$9,000, premium guided $8,000-$12,000. Budget options: budget (camping, hostels) $3,000-$4,500, mid-range $5,000-$7,500, premium $8,000-$15,000. Money-saving tips: book refugios directly, camp vs refugios in TdP, rent gear in Puerto Natales, shoulder season, book flights 3-6 months ahead. Most trekkers budget $5,000-$7,500 for 14-day classic trip including international flights. See our complete mountain climbing costs guide.

    What is the Fitz Roy trek like?

    The Fitz Roy day hike to Laguna de los Tres is one of Patagonia’s most iconic treks — 20 km round trip from El Chaltén Argentina to dramatic alpine lake with Fitz Roy massif reflected in water. Route: starting El Chaltén (405 m), destination Laguna de los Tres (1,170 m), distance 20 km round trip, duration 8-10 hours, elevation gain ~700 m, non-technical hiking with steep final kilometer, final ascent steep 400 m climb in last 1 km, trail well-marked forest, open valley, rocky final section. Classic experience: pre-dawn start (4:00-5:00 AM) for sunrise at Laguna de los Tres, sunrise alpenglow on Fitz Roy (iconic moment), Fitz Roy (Cerro Chaltén) at 3,405 m (11,171 ft), Aguja Saint-Exupéry, Aguja Poincenot, Cerro Torre also visible, turquoise alpine lake reflecting massif, extraordinary photography. Route sections: El Chaltén to Laguna Capri 4 km forest trail, Laguna Capri to Poincenot camp forest and valley, Poincenot to Laguna de los Tres final 2 km last 1 km steep. Trail well-marked, Spanish signs but easily navigable, park rangers monitor popular sections. Conditions: weather-dependent Fitz Roy often obscured by clouds, 30-50% get clear view first attempt, pre-dawn start increases clear view chances, strong winds common above treeline, forecasts unreliable. Fitness: good hiking fitness required, last kilometer hardest — steep rocky ascent, most visitors reach lake successfully, can be done camping multi-day or single long day. El Chaltén village 1,500 population, 3-4 hour bus from El Calafate, good infrastructure. Combined with Laguna Torre day hike El Chaltén delivers two world-class day hikes in 2-3 days base.

    What is El Chaltén and how is it different from Torres del Paine?

    El Chaltén is a small Argentine village (~1,500 population) serving as Argentina’s trekking capital — world-class day hikes to Fitz Roy, Cerro Torre, and surrounding areas without multi-day commitments. Fundamentally different from Torres del Paine. El Chaltén (Argentina): village-based all treks return to town each evening, day-hike focus no mandatory multi-day treks, multiple trails from town, hostels and hotels $30-$250/night, restaurants and gear shops modern infrastructure, atmosphere backpacker-focused village, weather often windier than TdP, costs mid-range. Torres del Paine (Chile): park-based multi-day treks required for main experiences, circuit focus W or O are primary, refugio and camping infrastructure on-trail, no permanent villages inside park (Puerto Natales 2.5 hours away), wilderness atmosphere, weather similar but more sheltered valleys, costs similar. El Chaltén signature day hikes: Laguna de los Tres (Fitz Roy) 20 km round trip 8-10 hours iconic. Laguna Torre (Cerro Torre) 19 km round trip 6-8 hours iconic. Mirador Maestri shorter Cerro Torre viewpoint 3 hours. Loma del Pliegue Tumbado panoramic day hike 6-8 hours. Huemul Circuit technical 4-5 day loop for experienced trekkers. Why combine both: Torres del Paine gives multi-day immersive trek experience, El Chaltén gives concentrated day-hike variety with Fitz Roy, together they represent complete Patagonia trekking experience, most visitors spend 5-7 days each, bus between El Calafate and Puerto Natales 5-6 hours with border crossing. El Chaltén advantages: no camping required for world-class views, flexibility to move between hikes, weather options can shift plans, better suited to shorter Patagonia trips, international backpacker community, close to Perito Moreno via El Calafate. For first-time Patagonia visitors, combining 5-7 days in Torres del Paine with 3-5 days in El Chaltén gives the complete experience.

    Do I need a guide for Patagonia trekking?

    Most Patagonia trekking does not legally require a guide — both Chilean (Torres del Paine) and Argentine (El Chaltén area) popular trails can be hiked independently by experienced trekkers. About 70-80% of Patagonia trekkers go self-guided. Self-guided feasibility: Torres del Paine well-marked trails and established refugio system, El Chaltén day hikes well-signed trailheads and frequent traffic, Perito Moreno Glacier tour operators lead ice treks but glacier viewing is self-access, Patagonian infrastructure supports international independent travelers. When guides required: Perito Moreno Glacier ice treks (Mini Trekking, Big Ice) licensed guides mandatory on glacier surface, technical routes (Huemul Circuit tyrolean crossings) professional guides strongly recommended, remote Aysén Region trekking local guides provide essential support, off-trail Andes exploration always requires guide. When guides recommended: first Patagonia experience, limited Spanish, multi-day trekking with limited experience, photography or wildlife-focused, family travel with children, complex multi-destination itineraries. Guide options: puma tracking Torres del Paine tours, multi-day trek guides W/O/Huemul Circuit, day hike guides El Chaltén area, full trip packages Knowmad Adventures REI Adventures Mountain Madness. Major operators: Chile Nativo, Fantastico Sur, Knowmad Adventures, REI Adventures, Mountain Madness, Swoop Patagonia, Eclipse Travel, local Argentine operators Patagonia Adventure, Hielo y Aventura. Cost comparisons: self-guided 14-day $3,000-$5,500, guided tours $5,500-$9,000, premium guided $8,000-$15,000. Savings 35-50% with self-guided. Cultural: basic Spanish helpful, English widely understood in tourism, cash and cards useful, respect customs, tipping 10% standard. Most trekkers find self-guided manageable with 3-6 months advance planning for TdP reservations. Patagonia remains more accessible to independent trekkers than Nepal (guides required since 2023).


    Authoritative Sources & Further Reading

    Content reflects authoritative Patagonia trekking sources:

    • CONAF (Chile’s National Forest Corporation) — conaf.cl — Chilean park management
    • Administración de Parques Nacionales (Argentina) — Argentine park management
    • Parque Nacional Los Glaciares — El Chaltén and Perito Moreno management
    • Cerro Castillo National Park — Carretera Austral trekking
    • Lonely Planet, Trekking in the Patagonian Andes — Authoritative regional reference
    • Bruce Chatwin, In Patagonia — Classic Patagonia travel writing
    • Rudolf Abraham, Torres del Paine (Cicerone) — Detailed Torres del Paine reference
    • Patagonia National Park Network — Regional conservation
    • Guide services: Knowmad Adventures, Swoop Patagonia, Chile Nativo, Eclipse Travel, Patagonia Adventure (El Chaltén), Hielo y Aventura (Perito Moreno), REI Adventures, Mountain Madness
    • Bus operators: Bus Sur, Cootra, Chaltén Travel, TAQSA
    Published: March 8, 2026
    Last updated: April 19, 2026
    Next review: July 2026
    Part of the Global Summit Guide

    Back to the Master Hub

    This guide is one of 71 across 12 thematic clusters on Global Summit Guide. The master hub organizes every guide by experience tier, specific peak, skill area, and region.

    View the Hub →

    Was this helpful?

    Yes
    No
    Thanks for your feedback!
Language »