web analytics

Author: Travis Ludlow

  • Mountain Climbing Gear by Climb Type: 6 Equipment Levels

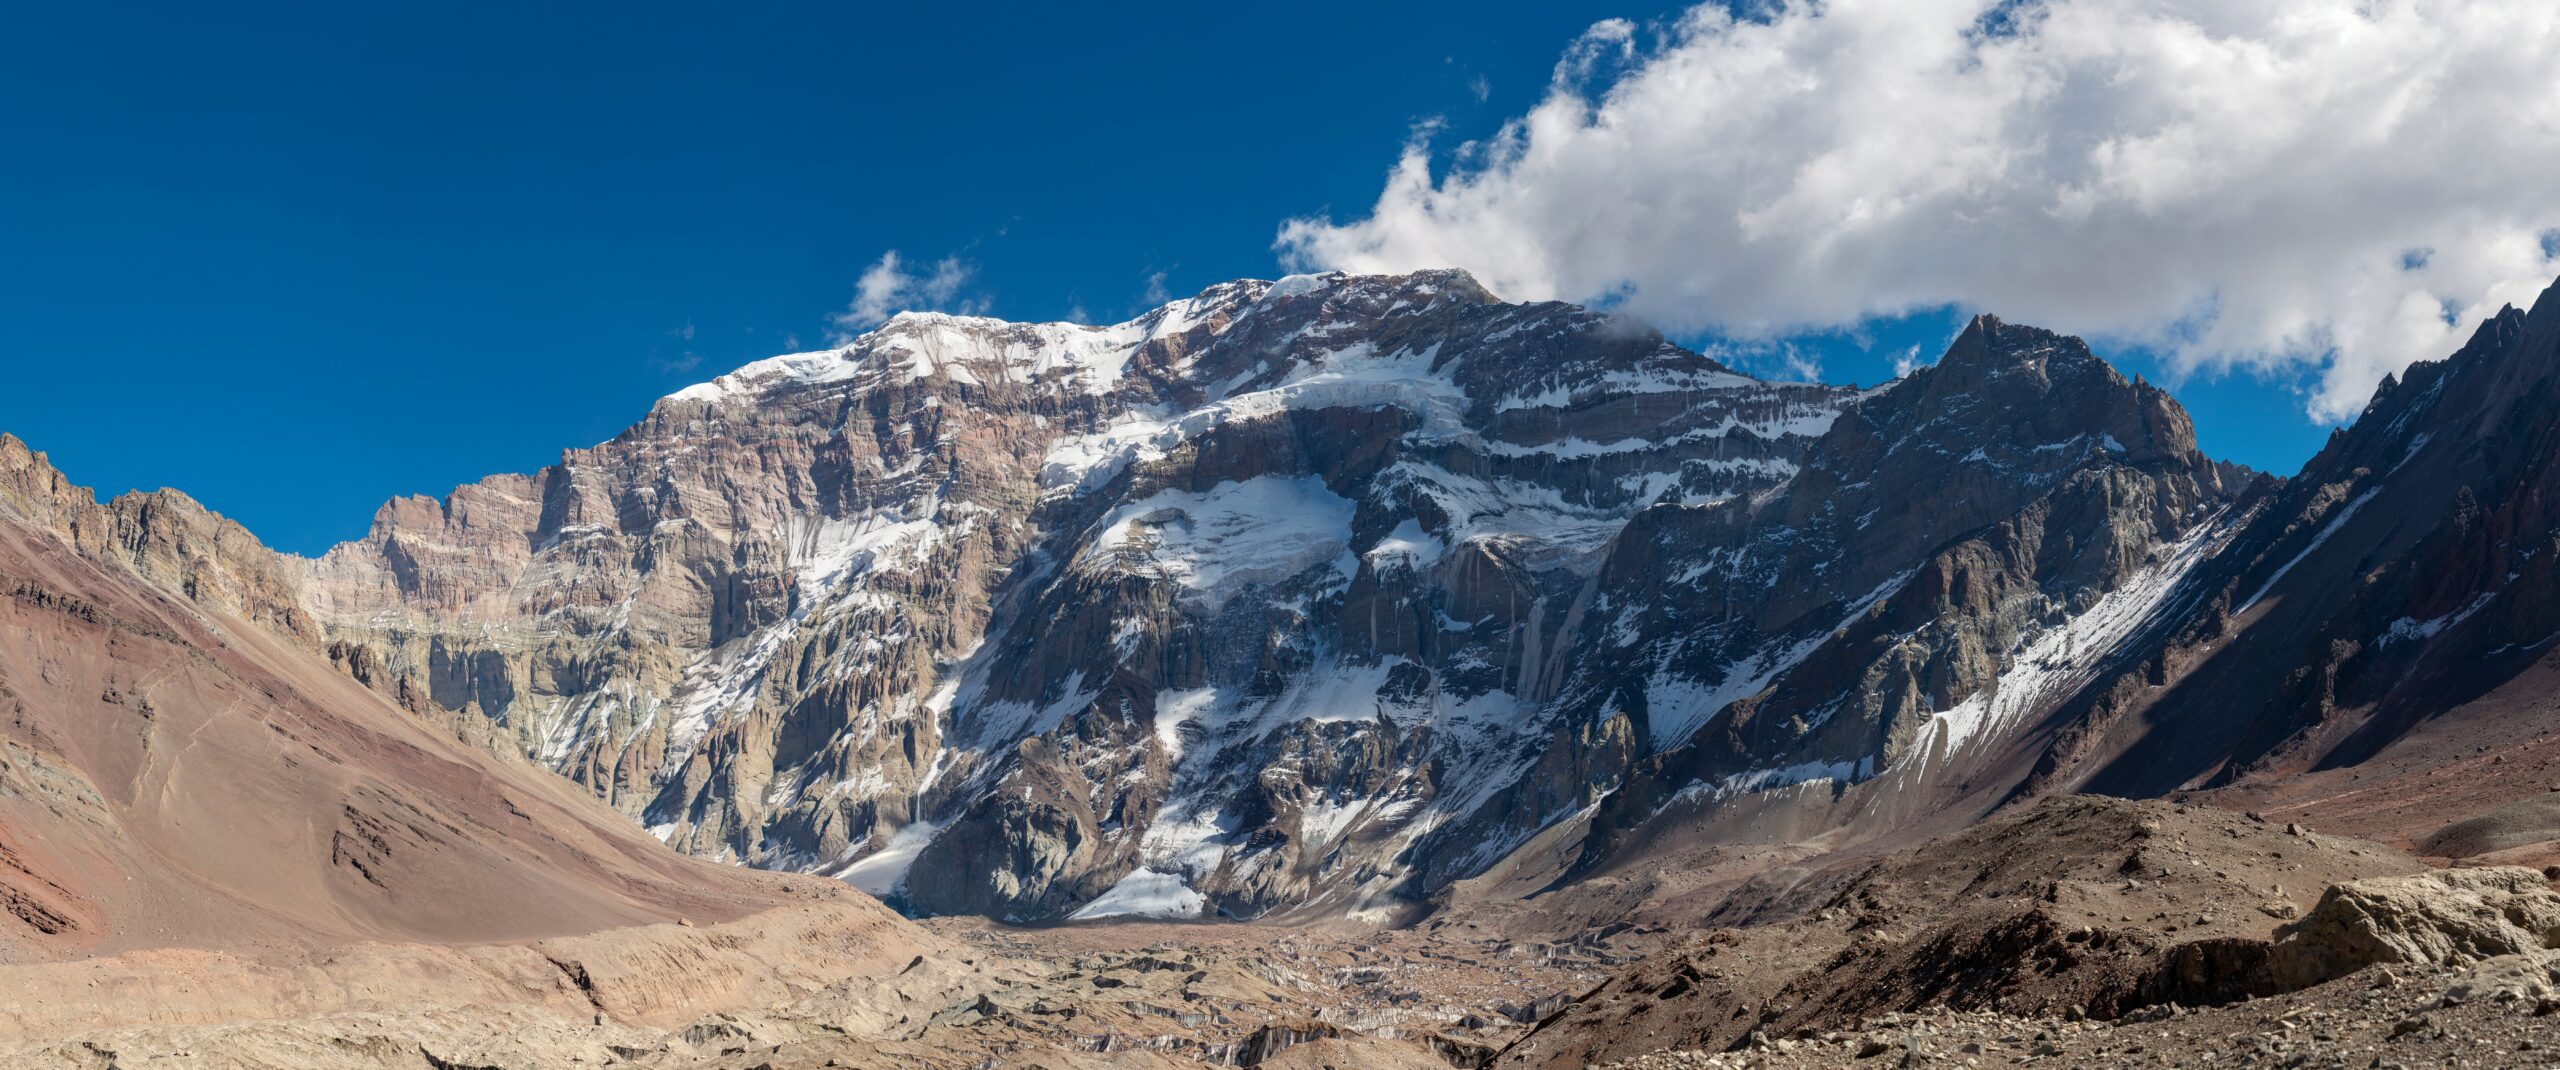
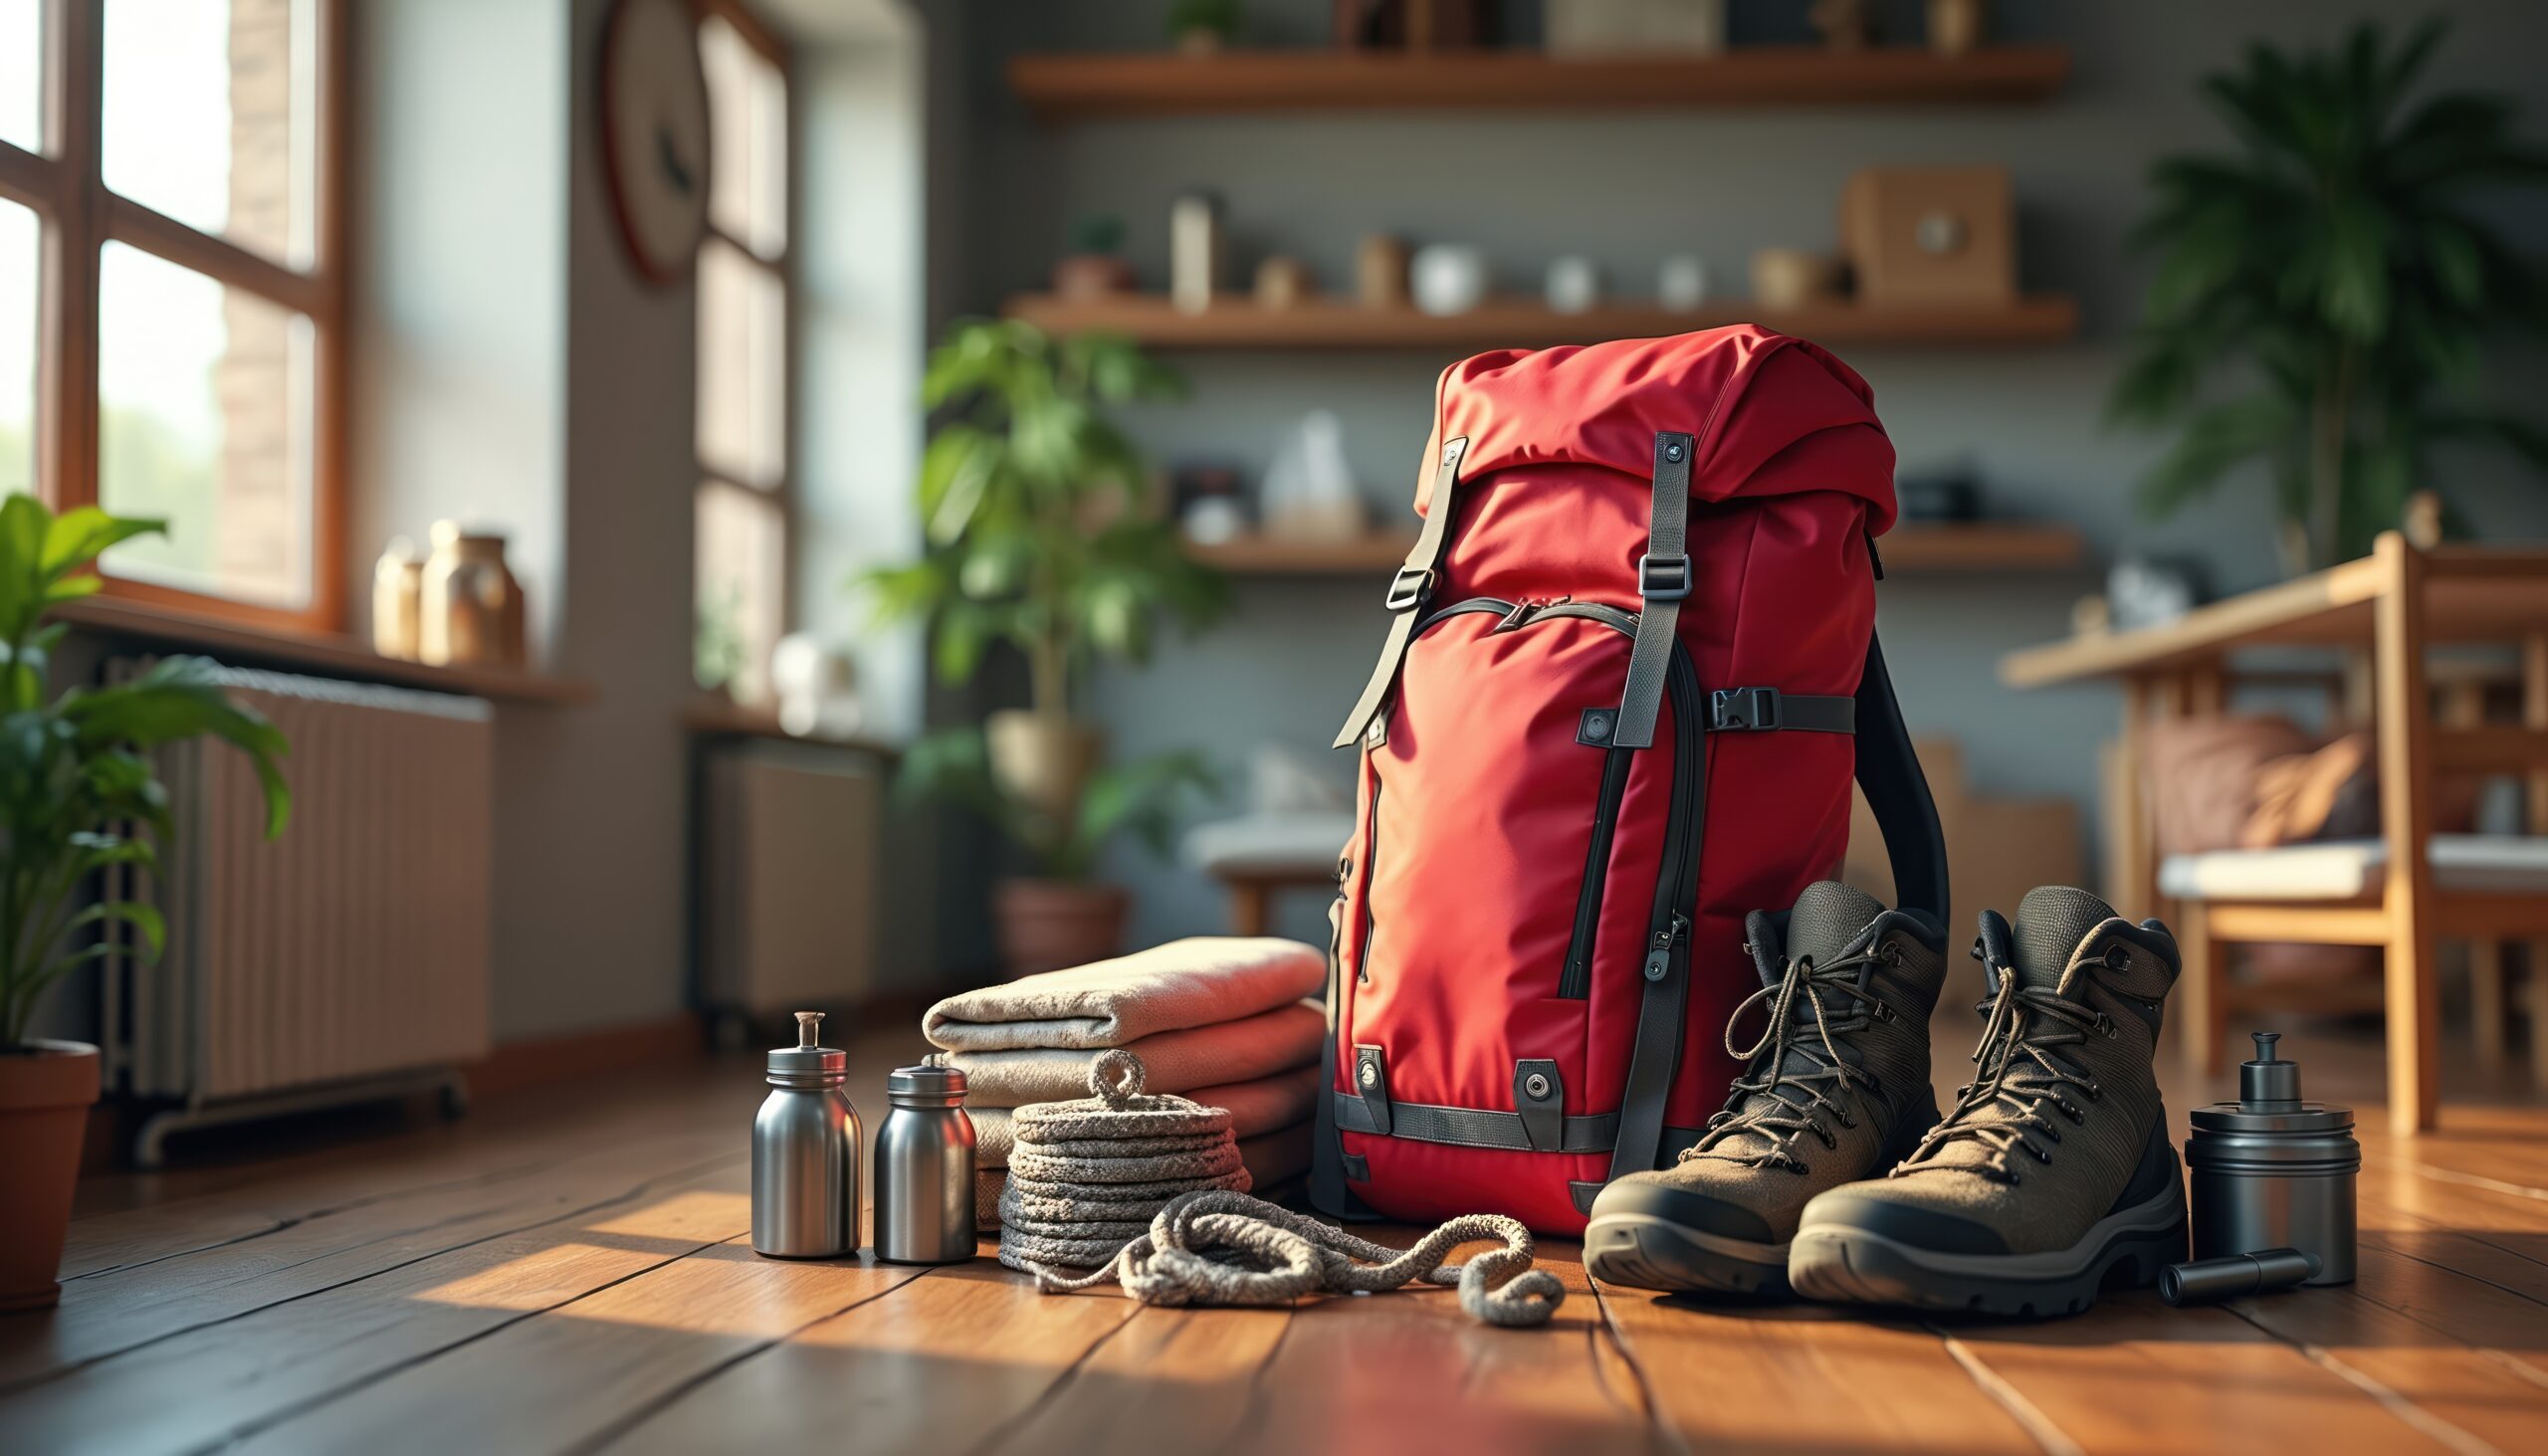
    Mountaineering equipment prepared for an alpine climbing objective
    Gear & Safety · Route-Based Equipment Planning

    Mountain Climbing Gear by Climb Type: What You Actually Need

    There is no single mountain climbing gear list. A summer hiking summit, a glaciated Cascade climb, a technical Alpine route, Denali and an 8,000-meter expedition solve completely different equipment problems. Start with the route, terrain, weather, duration and support model—then build the gear.

    6 objective types terrain before altitude guided vs independent buy · rent · borrow system compatibility
    The direct answer

    What Gear Do You Need for Mountain Climbing?

    Every mountain kit starts with the same foundation: navigation, headlamp, sun protection, first aid, repair tools, emergency shelter, extra food, extra water and extra clothing, plus footwear, layers and a pack appropriate to the objective.

    Technical equipment is then added only when the route requires it. Snow can add an ice axe and crampons. Glacier travel can add a harness, rope-team and rescue system. Steep ice can add technical tools and protection. Extreme cold can add insulated double boots and a larger sleep system. Fixed-line expeditions can add an ascender and route-specific connection hardware.

    Need an item-by-item packing list? Use the separate Mountaineering Gear Checklist . This page answers a different question: which category of gear does your mountain actually require?
    6 types From summer hiking to 8,000 m expeditions
    Route first Terrain matters more than altitude alone
    10 essentials Baseline emergency systems
    Test together Compatibility is part of the equipment decision
    Start with the objective

    Six Mountain Types Require Six Different Gear Systems.

    These are not difficulty grades. They are equipment environments. A mountain can move between categories when route, season or weather changes.

    Type 1 · Summer hiking summit

    Trail & Non-Technical Peak

    trail footwear daypack layers Ten Essentials

    Dry summer objectives such as many lower peaks, easier Colorado 14ers and normal hiking summits do not automatically require crampons, an axe, a helmet or a rope.

    The important gear is weather protection, navigation, water, food, emergency reserve and reliable footwear.

    Type 2 · Multi-day mountain trek

    Overnight Trek & High Route

    40–60 L pack sleep system water treatment camp layers

    Multi-day trekking adds load carrying, shelter, sleep, food and water systems without necessarily adding technical climbing hardware.

    Think Everest Base Camp, hut-to-hut routes or long mountain approaches: the problem is endurance and self-sufficiency rather than technical climbing.

    Type 4 · Technical alpine

    Steep Snow, Ice, Rock or Mixed Terrain

    technical tools protection rope technical crampons

    The gear system changes when the climb requires pitched movement, steep ice, mixed terrain or technical rock protection.

    This category is defined by terrain—not summit elevation. A relatively low Alpine route can require substantially more technical hardware than a much higher trekking peak.

    Type 5 · Cold expedition

    Remote, Multi-Week or Very Cold Mountain

    double boots large pack expedition insulation camp system

    Denali is the clearest example: glacier travel is important, but cold, wind, load hauling, repeated camps and moisture management drive many of the biggest gear decisions.

    Cold-exposure duration can matter more than altitude. Do not choose expedition boots from summit elevation alone.

    Mountaineering equipment and climbing layers prepared for alpine terrain
    The most important rule

    Do Not Buy Gear for the Mountain Name. Buy It for the Route.

    Aconcagua’s Normal Route, Denali’s West Buttress and a steep 3,000-meter Alpine ice climb can all require radically different equipment despite what their summit elevations might suggest. Route terrain, exposure and duration determine the system.

    Quick comparison

    How Gear Changes as the Mountain Becomes More Complex.

    The important progression is not “more altitude = more gear.” It is the addition of new terrain, cold, duration and consequence.

    Climb typeFootwearTraction / toolsRope systemPack / sleepDefining problem
    1 · Summer hiking summitTrail or hiking footwear matched to terrainUsually none in dry conditionsNone on normal hiking routeDaypack; emergency shelterWeather, navigation, endurance
    2 · Multi-day trekHiking footwear matched to trail and loadCondition dependentUsually none40–60 L class; sleep/camp systemLoad, weather, multi-day self-sufficiency
    3 · Glacier mountaineeringMountaineering boots with suitable crampon interfaceCrampons + classic axeHarness + trained glacier systemRoute dependentSnow, ice and hidden crevasses
    4 · Technical alpineStiffer climbing-focused bootTerrain-specific crampons/toolsPitching / protection systemFast/light or bivouac depending routeSteep technical terrain
    5 · Cold expeditionInsulated single/double/expedition system as conditions requireRoute specificGlacier or climbing system as route requiresLarge pack + expedition camp systemCold, load hauling, duration, remoteness
    6 · High-altitude fixed-line expeditionHigh-altitude insulated boot systemCrampons + route-specific axe/toolHarness + ascender + operator-defined fixed-line systemExpedition sleep/camp systemAltitude + cold + repeated high camps
    One mountain can move categories. Mount Hood in dry summer conditions, Mount Hood under hard winter ice, and a technical Hood variation do not have the same gear requirements. Always identify the actual route and season.
    Technical gear

    Add Hardware Only When the Terrain Requires It.

    Technical equipment is not a badge of seriousness. Carrying equipment you do not need—or do not know how to use—does not make a route safer.

    Boots

    Terrain + Warmth + Fit

    Choose enough stiffness and insulation for the route, then verify the exact crampon interface. B1/B2/B3 can be useful shorthand but is not an official UIAA footwear certification.

    Mountaineering boots guide →
    Crampons

    Boot Fit Comes First

    Select attachment and point design for the exact boot and terrain. Physically fit the crampon to the boot before relying on it.

    Crampon buyer’s guide →
    Ice axe

    Classic Axe Before Technical Tools

    Most general snow and glacier mountaineering uses a classic axe. A pair of technical tools belongs on sustained steep ice or mixed terrain, not automatically on every “serious” mountain.

    Ice axe guide →
    Helmet

    Hazard Dependent

    Falling rock, ice, technical terrain and exposed climbing commonly make a climbing helmet appropriate. A helmet is not automatically required on every hiking summit.

    Harness

    Only Part of a System

    A harness matters when the route requires roped glacier travel, fixed-line attachment or technical climbing. Owning one does not replace the skills around it.

    Rope

    Team Equipment

    Rope diameter, length and use are route- and team-specific. Guided clients should not assume they personally need to supply the rope.

    Climber using technical mountaineering equipment in alpine terrain
    Equipment follows skill

    An Ice Axe, Rope or Ascender Is Not Useful Without the System Around It.

    Snow travel, self-arrest, glacier rope teams, fixed-line movement, rappelling and protection placement are hands-on skills. Gear selection should follow training rather than substitute for it.

    Cold & high altitude

    Do Not Choose Boots or Sleeping Bags From Summit Elevation Alone.

    The old version of this page treated altitude bands as if they automatically determined boot warmth and sleeping-bag temperature. Real equipment decisions depend on far more: expected minimum temperature, wind, duration, moisture, high-camp strategy, individual cold tolerance and how long you may be inactive.
    Altitude Changes physiology and often overlaps with cold—but does not define gear by itself.
    Temperature Use the expected environment and operator requirements, not a magic elevation line.
    Duration Three cold hours and three weeks of repeated high camps are different problems.
    Moisture Drying liners and insulation becomes a major expedition system issue.
    Wind Exposed ridges can create far greater heat loss than calm camps at similar elevation.
    Circulation Over-tight boots and gloves can undermine insulation by reducing blood flow.
    Support model Porters, sleds, stocked camps and guides change what you personally carry.
    Personal tolerance Climbers differ substantially in hands, feet and sleep-system warmth needs.
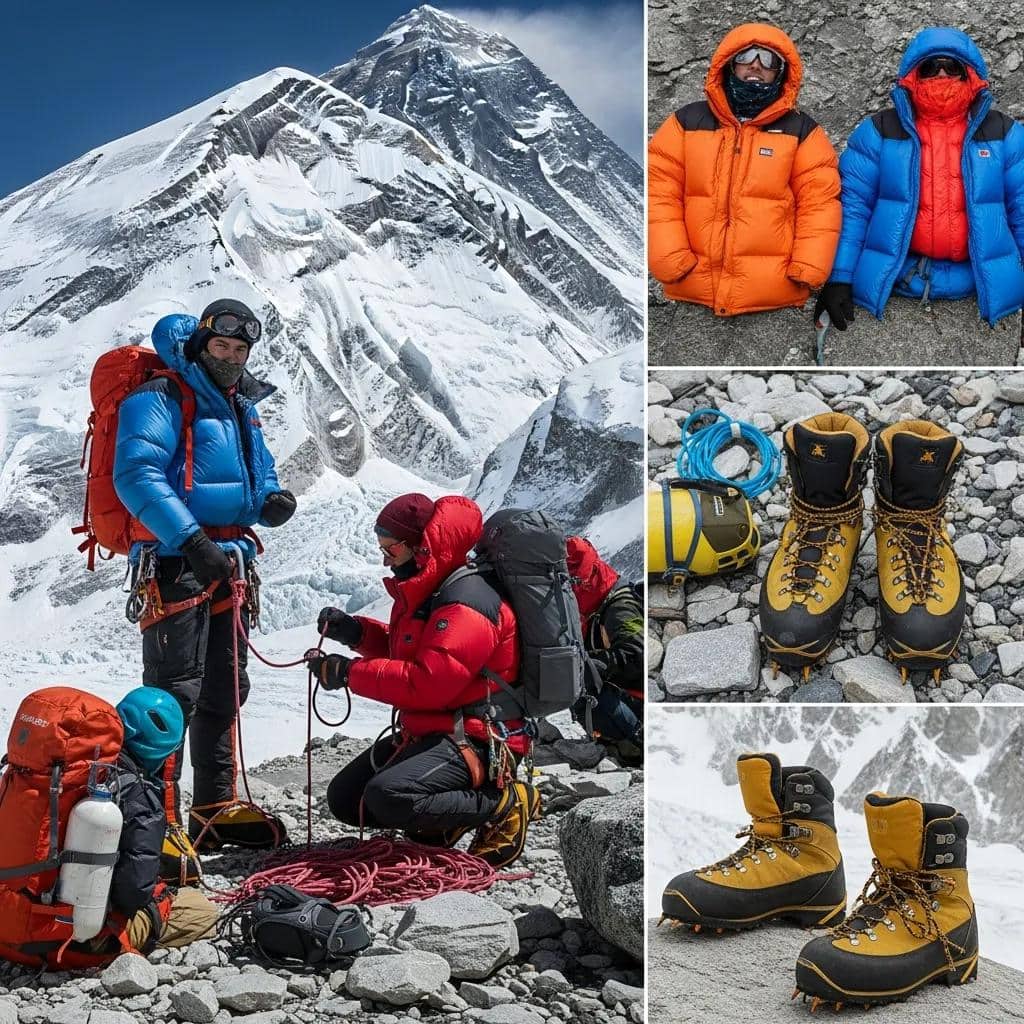
    High-altitude climbers preparing expedition equipment
    Expedition scale

    At High Altitude, Personal Gear and Operator Gear Must Be Separated.

    High-altitude boots, clothing, gloves, eyewear, harness and personal sleep gear are different decisions from tents, ropes, oxygen infrastructure, stoves, radios and communal medical systems. Confirm responsibility before buying.

    Support model

    Guided Climbers and Independent Teams Do Not Carry the Same Kit.

    One of the fastest ways to overbuy is to take a complete independent-team equipment list and treat every item as a personal requirement for a guided climb.

    SystemGuided climberGuide / operator may supplyIndependent team
    Personal clothingPersonalUsually not suppliedPersonal
    BootsOwn or rent depending programRental may be availablePersonal
    Crampons / axeOften own or rentLoan/rental variesTeam member responsibility
    RopesUsually not personalCommon group equipmentTeam selects system
    Protection rackOnly as instructedGuide commonly controls rackRoute-specific team responsibility
    Tent / stoveVaries by tripCommonly supplied on commercial expeditionsTeam responsibility
    CommunicationsPersonal backup may be usefulGuide/operator team systemTeam must build redundancy
    Supplemental oxygenOperator-defined when usedSystem generally integrated by expedition providerSpecialist planning required
    Before buying: ask the guide service for the current trip-specific equipment list. Use that as the final requirement for a guided climb.
    Mountain expedition terrain representing route-specific equipment planning
    Buy less intelligently

    The Best First Gear Strategy Is Often Own + Rent + Borrow.

    Buy fit-critical and frequently used equipment first. Rent expensive technical items while you learn what you prefer. Borrow selectively when fit and life-safety performance are not compromised.

    Sourcing strategy

    What Should You Buy, Rent or Borrow?

    Do not turn a first mountain into a permanent $8,000 gear commitment before you know what kind of climbing you actually want to continue.

    Usually buy

    Fit & Personal Systems

    • Base layers
    • Socks
    • Gloves
    • Headlamp
    • Eyewear
    • Personal footwear once fit is known
    Often rent first

    Expensive Technical Gear

    • Mountaineering boots for a first climb
    • Crampons
    • Ice axe
    • Harness
    • Helmet
    • Specialist expedition equipment
    Confirm first

    Team Equipment

    • Ropes
    • Tents
    • Stoves
    • Protection rack
    • Communications
    • Oxygen systems
    Before departure

    Test the Whole Kit as One System.

    Many equipment failures are not failures of individual products. They are failures between products that were never tested together.
    1 Boot + Crampon Physically mount the exact crampon to the exact boot and test under load.
    2 Layer Stack Wear base, mid, insulation and shell together and confirm movement.
    3 Gloves + Hardware Operate buckles, carabiners, zippers and headlamp in the real gloves.
    4 Pack Under Load Carry the expected trip weight long enough to find pressure points.
    5 Full Dress Rehearsal Use the whole system on a training day before the mountain.
    Do not mark gear “ready” because you own it. Ready means fitted, compatible, packed and tested in conditions close enough to reveal problems before the expedition.
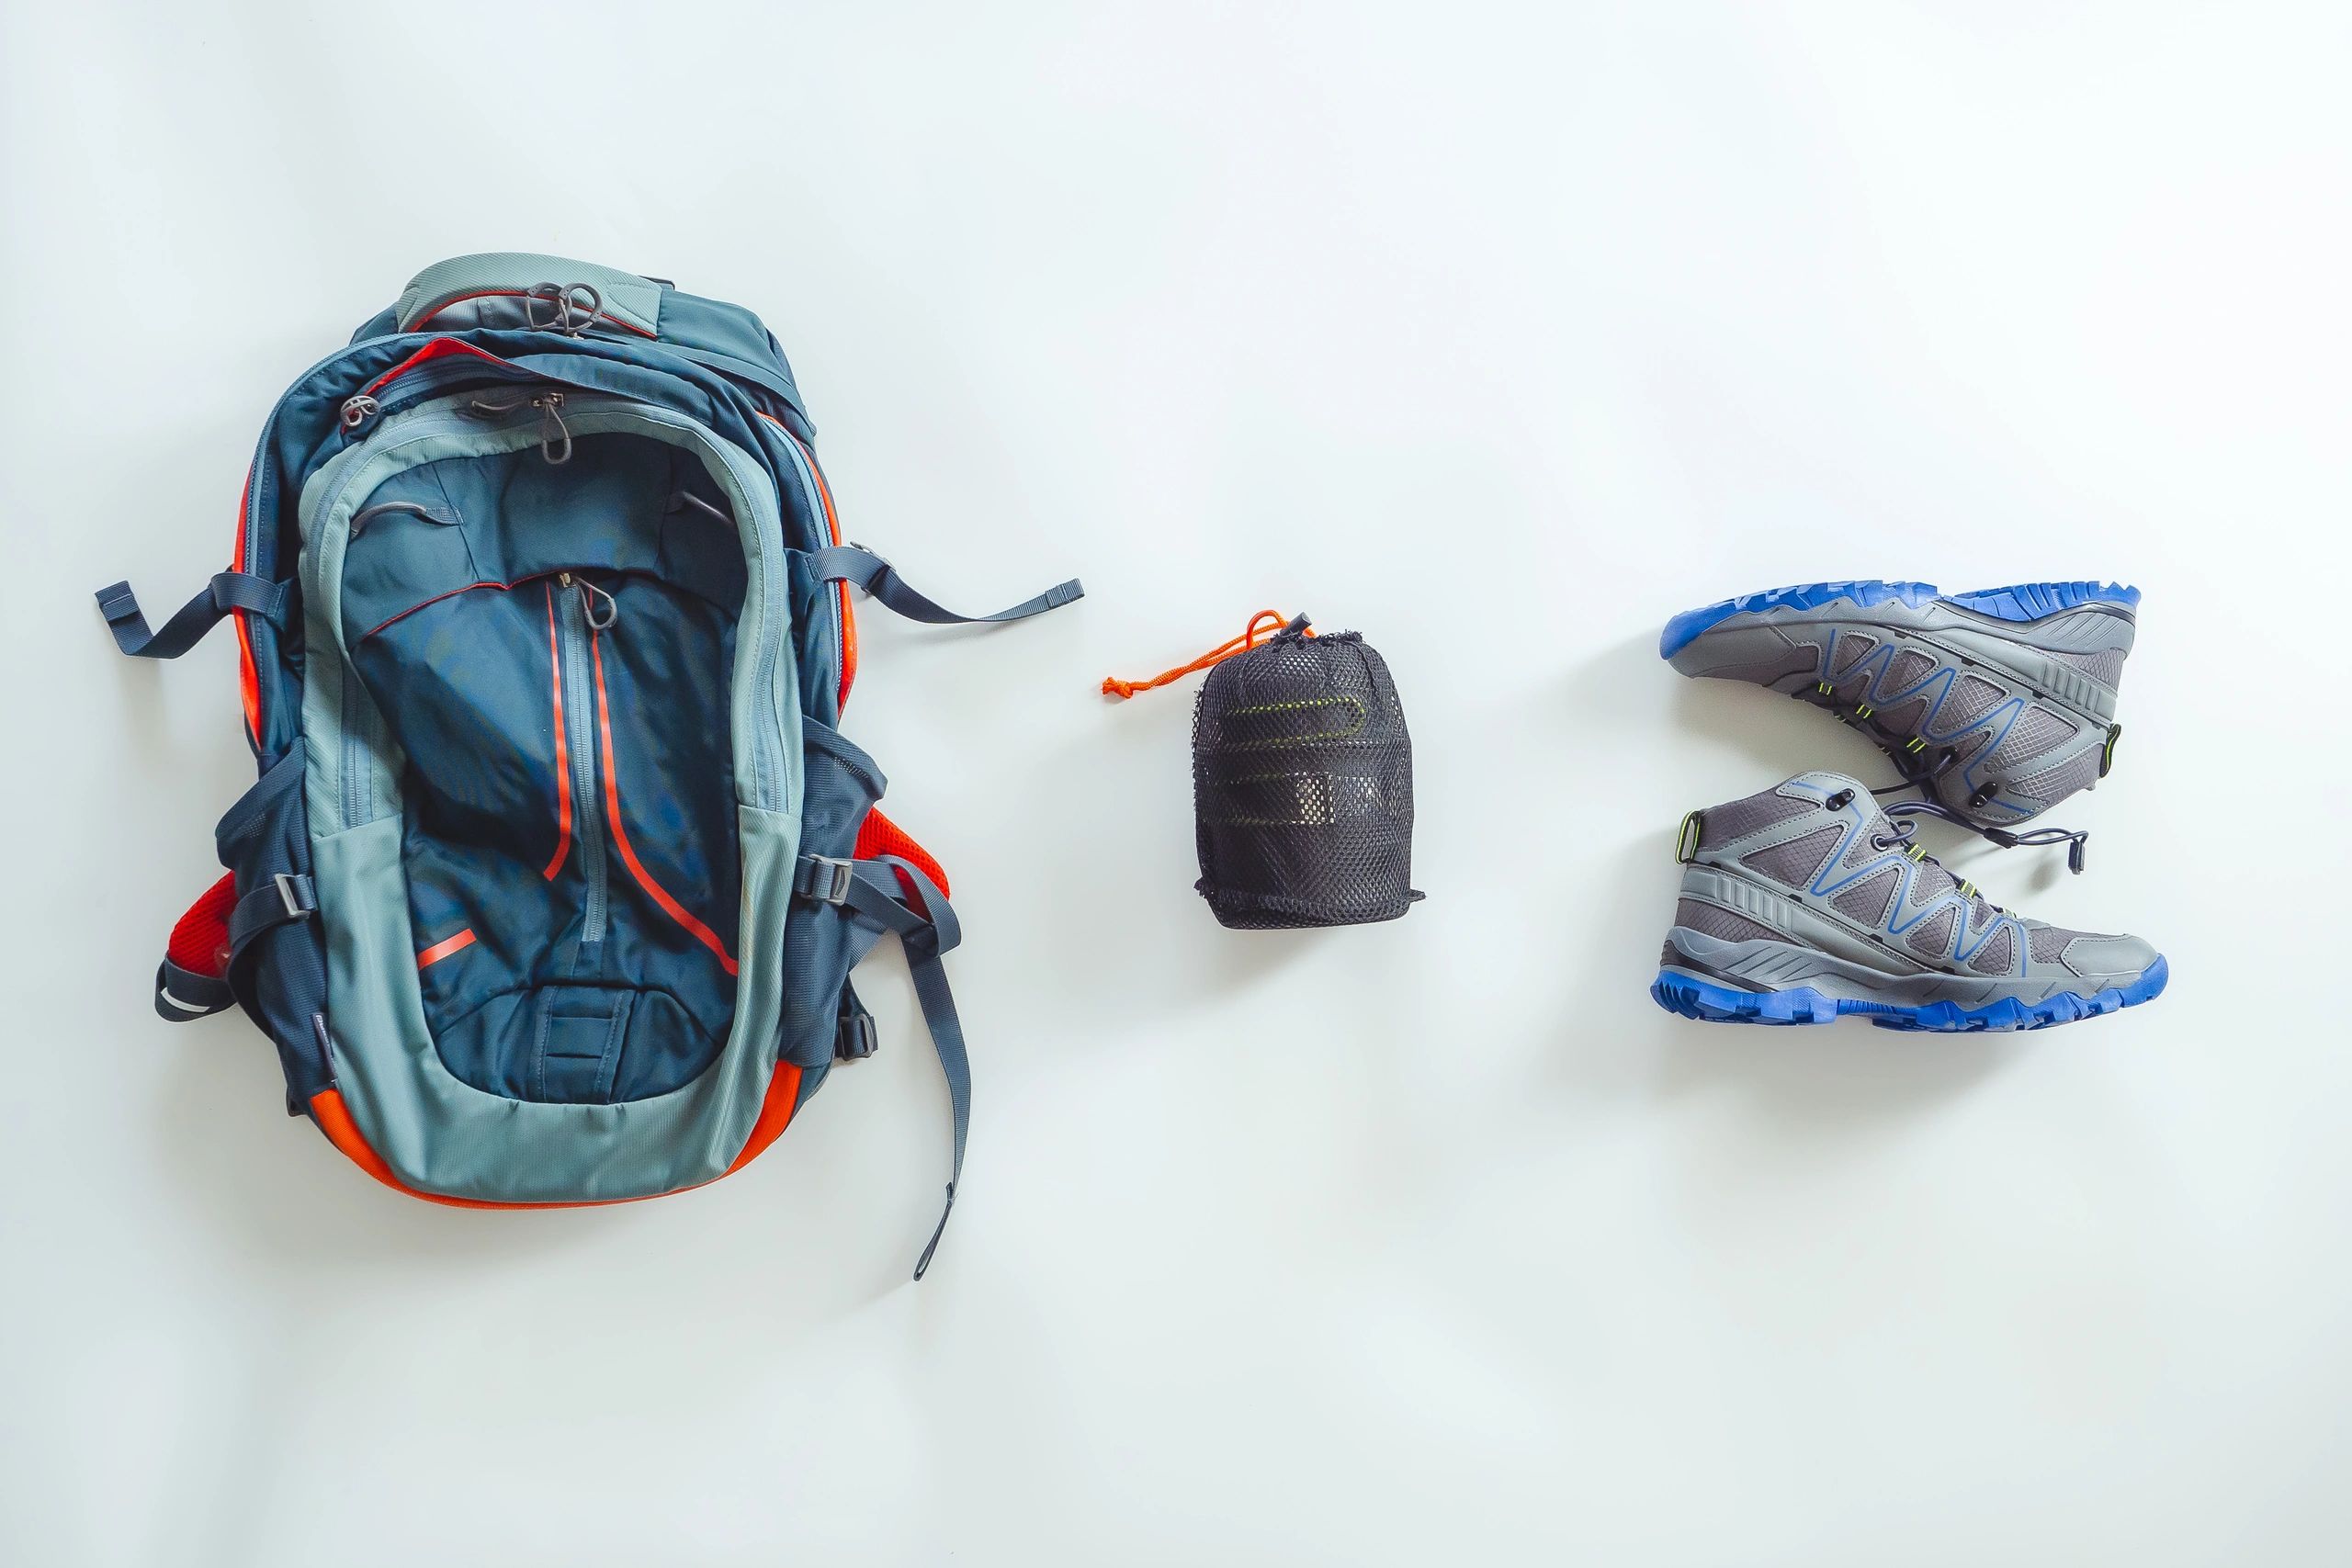
    Mountaineering equipment used together as a complete alpine system
    Compatibility beats brand names

    A Great Product Can Still Be Wrong for Your System.

    Fit, attachment interface, layering compatibility, glove dexterity, pack carry and route suitability matter more than whether an individual piece of gear wins a review.

    Emergency baseline

    The Ten Essentials Still Belong Under the Technical Kit.

    Technical hardware does not replace the equipment needed to survive delay, weather change, navigation error or an unplanned night out.

    Core systems

    Prevent & Respond

    • Navigation
    • Headlamp + reserve power
    • Sun protection
    • First aid
    • Repair tools
    Emergency reserve

    Survive the Delay

    • Fire / ignition where appropriate
    • Emergency shelter
    • Extra food
    • Extra water or treatment
    • Extra clothing
    Scale the reserve to the outing. The Mountaineers’ Ten Essentials framework is intentionally adaptable: remoteness, weather and route complexity determine how much emergency margin each system needs.
    High mountain environment illustrating changing equipment demands by region
    Same climber, different mountain

    Regional Climate Can Change the Kit Even When Difficulty Looks Similar.

    A hut-based Alpine route, a wet Cascade volcano, a windy Andes expedition and a cold Alaskan climb can sit near the same technical level while demanding different insulation, shelter, footwear and moisture-management systems.

    Regional orientation

    Where You Climb Changes the Gear Problem.

    Geography changes weather, expedition duration, infrastructure, resupply and the amount of equipment a climber personally carries.

    Cascades Wet snow, glaciers and changing freezing levels make waterproofing and glacier systems central.
    European Alps Huts and lifts often reduce camping loads while technical terrain remains serious.
    Andes Dry air, strong sun, wind and expedition altitude shift the layering and hydration problem.
    Alaska Cold, sled hauling, snow camping and expedition duration dominate gear decisions.
    Himalaya & Karakoram High camps, fixed lines, extreme altitude and operator support create specialist systems.
    Direct search answers

    Mountain Climbing Gear FAQ.

    Start with the route. Then decide which equipment systems the route adds.

    What gear do I need for mountain climbing?

    Start with appropriate footwear, clothing layers, a pack and the Ten Essentials. Add technical equipment only when the route requires it: crampons and an ice axe for appropriate snow and ice terrain, harness and rope systems for glacier or technical climbing, and more specialized cold or fixed-line equipment for expedition objectives.

    Do all mountain climbs require crampons and an ice axe?

    No. Dry summer hiking routes often require neither. Crampons and an ice axe become relevant when snow, ice, glacier or route conditions require them.

    What is the difference between a mountain-climbing gear list and a mountaineering checklist?

    A checklist tells you the individual items to pack. A gear-by-climb-type guide first determines which equipment categories your route requires. Global Summit Guide maintains a separate printable mountaineering checklist for the item-by-item packing step.

    Do higher mountains always require warmer or more technical gear?

    No. Altitude is only one factor. Terrain, expected temperature, wind, duration, glacier exposure, technical difficulty, season and support model can matter as much or more than summit elevation.

    Are B1, B2 and B3 official UIAA mountaineering boot ratings?

    No. B1, B2 and B3 are commonly used compatibility and stiffness shorthand, not an official UIAA footwear certification. Use the boot manufacturer’s intended-use information and physically confirm compatibility with the exact crampon.

    Should a beginner buy all of their mountaineering gear?

    Usually not. Buying fit-critical and frequently used personal gear while renting specialized technical equipment for early climbs can reduce cost and help the climber learn personal preferences before making major purchases.

    What gear do I need for glacier climbing?

    Depending on the route and team system, glacier mountaineering commonly adds crampon-compatible boots, crampons, a classic ice axe, helmet, harness and roped-glacier equipment. Those systems require hands-on training in glacier travel and crevasse rescue before independent use.

    What changes for Denali or other cold expeditions?

    Cold exposure, expedition duration, repeated camps, moisture management, load hauling and remoteness become major equipment drivers. Insulated footwear, sleep systems, larger packs and expedition camp equipment become more important.

    What gear changes for an 8,000-meter expedition?

    High-altitude insulated boots, extreme-cold clothing, expedition mitts, fixed-line equipment, high-camp sleeping systems and operator-defined oxygen or communication systems may be required. Exact requirements vary by mountain, route and expedition provider.

    Equipment framework

    Use Standards and Current Trip Requirements—not Universal Rules.

    Equipment needs change with the route and conditions. The most reliable planning process combines established emergency-system frameworks, current manufacturer compatibility information, qualified guide or course requirements, and the exact equipment list for the objective.

    Final rule: for a guided climb, the current guide-service equipment list controls. For an independent climb, equipment selection must come from the actual route, current conditions and the team’s skills—not from a generic altitude chart.

    The gear decision

    Choose the Climb First. Then Build the Kit.

    Start with terrain, season, weather, duration and support model. Add technical equipment only when the route creates the need. Test the complete system before departure—and let the mountain you are actually climbing determine the gear, not the mountain you hope to climb someday.

    Was this helpful?

    Yes
    No
    Thanks for your feedback!
  • Trekking in Nepal: The 10 Best Routes for Every Level

    Cluster 04 · Non-Technical Treks · Updated April 2026

    Trekking in Nepal: The 10 Best Routes for Every Level

    The definitive 2026 ranked list of Nepal’s finest trekking routes — from the beginner-friendly Poon Hill loop to the demanding Three Passes circuit. Detailed profiles of each route, difficulty tiers, permit requirements, and the progression path from first-time trekkers to experienced Himalayan adventurers.

    10
    Ranked
    routes
    4–26
    Trek duration
    days
    10.5K–18.2K
    Altitude
    range (ft)
    $400–5.5K
    Cost
    range
    Global Summit Guide A guide in Cluster 04 · Non-Technical Treks View master hub →

    Nepal is the undisputed capital of high-altitude trekking — home to eight of the world’s fourteen 8,000-meter peaks and thousands of kilometers of established trails. The country offers routes for every skill level, from 4-day beginner hikes that deliver breathtaking Himalayan views with minimal altitude to 26-day expedition treks through restricted areas that few travelers ever see. This ranked list covers Nepal’s 10 finest treks, ordered by overall hiking experience — combining scenery, cultural immersion, accessibility, and the distinctive character each route offers. We’ve tiered by difficulty so you can find your match whether you’re planning a first Himalayan trek or returning for something more ambitious.

    ⊛
    How we ranked these treks

    Ranking weighs five factors equally: scenic reward (mountain views and trail aesthetics), cultural depth (village immersion and regional heritage), accessibility (logistics and trail infrastructure), iconic status (Nepal’s trekking community recognition), and challenge balance (reasonable effort for reward). Data verified against Nepal Tourism Board records and Nepal Mountaineering Association route documentation. Trek statistics confirmed with Kathmandu-based operators including Nepal Hiking Team, Himalayan Glacier, and Everest Trekking Guide (2026 rates). Altitude protocols reference Himalayan Rescue Association guidelines. Reviewed by Nepali guides with current Himalayan trekking experience. Fact-check date: April 19, 2026.

    Before the List: Understanding Nepal’s Trekking Regions

    Nepal’s trekking geography divides into five main regions, each with distinct characteristics. Knowing the regions helps match your preferences:

    Nepal’s five major trekking regions

    • Everest region (Sagarmatha National Park): The iconic region. High-altitude routes including EBC, Three Passes, Gokyo. Accessed via Lukla flight from Kathmandu. Sherpa culture, dramatic glaciated peaks.
    • Annapurna region (Annapurna Conservation Area): The most diverse region. Multiple routes from beginner to expert — Poon Hill, Annapurna Base Camp, Annapurna Circuit, Mardi Himal. Accessed via overland drive from Pokhara. Variety of cultures and ecosystems.
    • Langtang region (Langtang National Park): Close to Kathmandu (7-hour drive). Less crowded alternative to Everest/Annapurna. Tamang and Sherpa cultures. Moderate altitudes.
    • Manaslu region (Manaslu Conservation Area): Growing popularity as alternative to Annapurna Circuit. Requires special permits. Remote character, Tibetan Buddhist influence.
    • Restricted areas (Upper Mustang, Upper Dolpo, Kanchenjunga): Special permit required. Remote, culturally distinct, often rain-shadow ecosystems. Expedition-style trekking.

    How to work through the list

    • First-time Nepal trekkers: Start with #10 (Poon Hill) or #9 (Mardi Himal) for manageable introduction.
    • Experienced hikers new to Nepal: Jump in at #7-6 (Langtang, Annapurna Base Camp) for solid moderate-difficulty options.
    • Returning trekkers: Consider higher-ranked treks you haven’t done — Manaslu (#4), Gokyo Lakes (#3), or the iconic #1.
    • Expedition-style seekers: Target the Three Passes (#2) or restricted areas (Upper Dolpo #6).
    • Fitness progression: Don’t jump more than 3-4 rank spots without prior similar experience.

    The Ranking: Counting Down from 10 to 1

    Rank
    10
    of 10
    Beginner

    Ghorepani Poon Hill

    Annapurna region · Classic beginner trek · 4-5 days
    10,531 ft
    High point

    Poon Hill earns #10 as Nepal’s definitive beginner trek — a short circuit in the Annapurna foothills that delivers stunning Himalayan sunrise views without requiring serious altitude or fitness. The route climbs through rhododendron forests (spectacular in spring) to the viewpoint at Poon Hill, offering panoramic views of Dhaulagiri, Annapurna South, Machapuchare, and Hiunchuli.

    Why it ranks: Accessibility without compromise. 4-5 days is short enough for constrained schedules. Max altitude of 10,531 ft minimizes AMS risk. Gurung villages like Ghandruk provide authentic cultural immersion. Well-maintained stone steps make it achievable for reasonably fit hikers without technical experience. Accessed via overland drive from Pokhara — no flight delays. Perfect introduction to Nepal trekking.

    Duration4-5 days
    Distance~32 km
    Cost$400-$700
    AccessPokhara
    No altitude issues Rhododendron blooms Beginner-friendly
    Rank
    9
    of 10
    Beginner+

    Mardi Himal Trek

    Annapurna region · Emerging alternative · 4-5 days
    14,764 ft
    High point

    Mardi Himal earns #9 as the quieter alternative to Poon Hill. A relatively new trek (only widely known since 2012), Mardi Himal climbs a previously unused ridge to a dramatic viewpoint below Mardi Himal peak at 14,764 ft. Close-up views of Machapuchare (Fishtail) are extraordinary.

    Why it ranks here: Higher altitude and more dramatic scenery than Poon Hill in similar timeframe. Less crowded than neighboring Annapurna routes. Views of Annapurna South, Hiunchuli, Mardi Himal, and Machapuchare. Requires slightly more altitude tolerance than Poon Hill — max elevation meaningful. Best for beginners wanting something beyond Poon Hill but not yet ready for longer treks. Accessed from Pokhara.

    Duration4-5 days
    Distance~40 km
    Cost$500-$800
    AccessPokhara
    Quieter alternative Machapuchare views Spring wildflowers
    Rank
    8
    of 10
    Moderate

    Langtang Valley Trek

    Langtang region · Less crowded · 7-10 days
    12,780 ft
    High point

    Langtang Valley earns #8 as Nepal’s most underrated major trek. Located closer to Kathmandu than Everest or Annapurna (7-hour drive), Langtang sees far fewer trekkers despite offering comparable scenery. The trek passes through Tamang villages, yak pastures, and culminates at Kyanjin Gompa monastery with options to climb Tserko Ri (15,912 ft) for panoramic views.

    Why it ranks well: Authentic Himalayan trekking experience without the crowds. Strong cultural component — Langtang was historically part of the Tamang kingdom with Tibetan Buddhist heritage. 2015 earthquake devastation has rebuilt into resilient community. Lower altitude than EBC makes it more accessible. Yala Peak climbing options for advanced trekkers. No flight required. Excellent for returning visitors who’ve done EBC or Annapurna and want something different.

    Duration7-10 days
    Distance~65 km
    Cost$600-$1,200
    AccessKathmandu drive
    Less crowded Tamang culture No flight needed
    Rank
    7
    of 10
    Moderate

    Annapurna Base Camp (ABC)

    Annapurna region · Sanctuary trek · 7-11 days
    13,550 ft
    Base Camp

    Annapurna Base Camp earns #7 as the classic Annapurna trek with dramatic amphitheater views. The trek enters the Annapurna Sanctuary — a natural amphitheater surrounded by 7,000-8,000 m peaks including Annapurna I (26,545 ft), Annapurna South, Machapuchare, and Hiunchuli. Base Camp sits at 13,550 ft surrounded by glaciers on three sides.

    Why it ranks: Best balance of accessibility and dramatic scenery in Nepal. Shorter than EBC (7-11 days vs 12-14). Lower maximum elevation makes altitude issues less severe. The enclosed sanctuary creates a unique sense of being inside the mountains rather than below them. Multiple approach options including combinations with Poon Hill. Gurung village stops like Chomrong and Deurali enrich the cultural experience.

    Duration7-11 days
    Distance~70 km
    Cost$700-$1,500
    AccessPokhara
    Sanctuary amphitheater Combines with Poon Hill Classic choice
    Rank
    6
    of 10
    Expert

    Upper Dolpo Trek

    Restricted area · Remote expedition · 20-26 days
    17,388 ft
    High point

    Upper Dolpo earns #6 as Nepal’s most remote and culturally preserved trekking region. Closed to foreigners until 1989, Upper Dolpo remains one of the most authentic Tibetan Buddhist cultures in the world — preserved by geographic isolation behind the Dhaulagiri and Annapurna ranges. The trek visits the turquoise Phoksundo Lake (12,580 ft), traverses high passes, and reaches the Shey Gompa monastery.

    Why it ranks here despite remoteness: An expedition that rivals anything in the Himalayas for cultural preservation and landscape uniqueness. Rain-shadow location means trekking possible June-September when monsoon floods other regions. Inspired Peter Matthiessen’s classic book The Snow Leopard. Requires $500 special permit for first 10 days, $50 per additional day. Camping trek — no teahouse infrastructure. 20-26 days total commitment. Reserved for experienced trekkers seeking the ultimate remote Himalayan experience.

    Duration20-26 days
    Distance~280 km
    Cost$3,500-$5,500
    Permit$500+
    Restricted area Camping expedition Tibetan Buddhist culture
    Rank
    5
    of 10
    Expert

    Upper Mustang Trek

    Restricted area · Tibetan plateau · 12-14 days
    12,530 ft
    High point

    Upper Mustang earns #5 as the former Kingdom of Lo — a medieval Tibetan Buddhist culture preserved in the rain-shadow of the Himalayas. The walled capital Lo Manthang sits at 12,530 ft, surrounded by painted caves, ancient monasteries, and stunning eroded rock formations. The region was closed to foreigners until 1992 and still requires a $500 special permit.

    Why it ranks highly: Like stepping into 15th-century Tibet. The Tibetan Buddhist culture survives essentially intact due to geographic isolation and permit restrictions. Desert landscapes contrast dramatically with Nepal’s typical green trekking regions. Rain-shadow location means trekking viable in monsoon months (June-August) when other regions flood. Lower elevation than expedition-level treks but remoteness and cultural significance earn high ranking. 12-14 days typical, drive from Pokhara to Jomsom then trek.

    Duration12-14 days
    Distance~140 km
    Cost$2,000-$4,000
    Permit$500+
    Restricted area Tibetan culture Rain-shadow trek
    Rank
    4
    of 10
    Strenuous

    Manaslu Circuit Trek

    Manaslu region · Alternative to Annapurna Circuit · 14-16 days
    16,752 ft
    Larkya La pass

    Manaslu Circuit earns #4 as the finest alternative to the Annapurna Circuit. The trek circumnavigates Mount Manaslu (26,781 ft), Nepal’s 8th highest peak, crossing the dramatic Larkya La pass at 16,752 ft. The route passes through Nubri and Tsum valleys with strong Tibetan Buddhist heritage and increasingly popular teahouse infrastructure.

    Why it ranks above Annapurna Circuit: Manaslu offers the classic Annapurna Circuit experience with fewer crowds and more authentic cultural preservation. Road construction has impacted parts of Annapurna Circuit but Manaslu remains trekker-focused. Required special permit ($100/week in high season, $75/week low season) preserves the experience. Larkya La pass crossing is comparable to Annapurna’s Thorong La. Rising popularity means book accommodations in advance. For serious trekkers who want iconic Himalayan circuit without the crowds.

    Duration14-16 days
    Distance~180 km
    Cost$1,200-$2,500
    Permit$100/week
    Annapurna alternative Restricted area Larkya La pass
    Rank
    3
    of 10
    Strenuous

    Gokyo Lakes Trek

    Everest region · Sacred turquoise lakes · 12-14 days
    17,575 ft
    Gokyo Ri

    Gokyo Lakes earns #3 as the Everest region’s stunning alternative or complement to EBC. The trek follows the same Lukla flight start as EBC but branches west into the Gokyo Valley, reaching a series of six sacred turquoise lakes at 15,450-16,100 ft. The climax is the ascent of Gokyo Ri (17,575 ft) for arguably the best panoramic view in the Himalayas — visible from here are four of the world’s six highest peaks: Everest, Lhotse, Makalu, and Cho Oyu.

    Why it ranks this high: The panorama from Gokyo Ri is superior to Kala Patthar’s view — four 8,000 m peaks visible simultaneously rather than one. Ngozumpa Glacier (Nepal’s longest) crossing is dramatic. Six sacred lakes provide unique scenery. Can be combined with EBC as part of the Three Passes trek. Less crowded than direct EBC route. Similar duration and cost to EBC. Strong option for climbers returning to Everest region wanting something beyond the standard trek.

    Duration12-14 days
    Distance~90 km
    Cost$1,200-$2,000
    AccessLukla flight
    4 x 8,000m peaks Sacred lakes EBC alternative
    Rank
    2
    of 10
    Expert

    Annapurna Circuit Trek

    Annapurna region · Classic circumnavigation · 15-20 days
    17,769 ft
    Thorong La pass

    Annapurna Circuit earns #2 as one of the world’s greatest trekking routes — a 15-20 day circumnavigation of the Annapurna massif that crosses the dramatic Thorong La pass at 17,769 ft. The Circuit passes through some of the most diverse landscapes on Earth: subtropical valleys, rhododendron forests, alpine meadows, high desert (in Manang), and the arid rain-shadow of Mustang.

    Why #2 and not #1: Road construction has impacted sections of the Circuit, reducing some of the trekking experience. However, the Thorong La crossing, cultural diversity (Hindu, Tibetan Buddhist, and unique mountain communities), landscape variety, and historical trekking significance keep Annapurna Circuit near the top. Natural hot springs at Tatopani provide welcome recovery. Muktinath pilgrimage site is both Hindu and Buddhist sacred. Can be combined with Jomsom-Poon Hill extensions. The classic Himalayan circuit that introduced Nepal to mass trekking.

    Duration15-20 days
    Distance~200 km
    Cost$900-$2,500
    AccessOverland drive
    Thorong La pass Landscape variety Hot springs
    Rank
    1
    of 10
    Strenuous

    Everest Base Camp (EBC) Trek

    Everest region · Nepal’s iconic trek · 12-14 days
    18,209 ft
    Kala Patthar

    Everest Base Camp takes #1 as Nepal’s most iconic trek and the world’s most famous high-altitude hike. Walking to the base of the world’s highest mountain through the Khumbu Valley, past ancient Buddhist monasteries and Sherpa villages, to Kala Patthar’s 18,209 ft viewpoint offers an experience no other trek can replicate. 40,000-50,000 trekkers per year can’t all be wrong.

    What makes EBC the #1: The combination of iconic status, accessible difficulty, genuine altitude experience, and rich Sherpa cultural heritage makes EBC a bucket-list completion with lasting significance. The Lukla flight adventure, Namche Bazaar’s amphitheater, Tengboche Monastery, Dughla Pass memorials, and the Kala Patthar sunrise view combine into Nepal’s definitive trekking experience. At 12-14 days and $1,500-$3,500, it’s achievable for reasonably fit trekkers with proper preparation. The complete detailed guide: See our dedicated EBC Trek guide for comprehensive itinerary, costs, and planning. This is the trek that inspires more lifetime Himalayan adventures than any other.

    Duration12-14 days
    Distance~130 km
    Cost$1,200-$3,500
    AccessLukla flight
    Iconic bucket-list Kala Patthar view Sherpa culture

    Honorable Mention: Three Passes EBC

    One additional route deserves special mention as the ultimate Everest region experience:

    Honor
    ★
    mention
    Expert

    Three Passes EBC Trek

    Everest region · Combining EBC + Gokyo + 3 high passes · 18-21 days
    18,209 ft
    Kala Patthar

    The Three Passes trek is the ultimate Everest region experience — combining EBC, Gokyo Lakes, and crossings of three 17,000+ ft passes (Kongma La, Cho La, Renjo La) into an 18-21 day expedition. Reserved for experienced trekkers with strong fitness and prior altitude experience.

    Why it’s an honorable mention rather than ranked: Three Passes is essentially an extended EBC experience rather than a standalone trek. Most trekkers who do Three Passes have already done EBC. For those seeking the definitive Khumbu experience, Three Passes represents the apex challenge. See our related Everest region guides for more details.

    Duration18-21 days
    Distance~170 km
    Cost$1,500-$3,500
    AccessLukla flight
    3 x 17,000+ ft passes EBC + Gokyo combined Apex Khumbu trek

    Nepal Treks Quick Comparison

    RankTrekMax ElevDaysDifficultyCost
    1Everest Base Camp18,209 ft12-14Strenuous$1,200-$3,500
    2Annapurna Circuit17,769 ft15-20Expert$900-$2,500
    3Gokyo Lakes17,575 ft12-14Strenuous$1,200-$2,000
    4Manaslu Circuit16,752 ft14-16Strenuous$1,200-$2,500
    5Upper Mustang12,530 ft12-14Expert$2,000-$4,000
    6Upper Dolpo17,388 ft20-26Expert$3,500-$5,500
    7Annapurna Base Camp13,550 ft7-11Moderate$700-$1,500
    8Langtang Valley12,780 ft7-10Moderate$600-$1,200
    9Mardi Himal14,764 ft4-5Moderate$500-$800
    10Ghorepani Poon Hill10,531 ft4-5Beginner$400-$700
    ▲
    Don’t skip difficulty tiers

    The ranking represents a progression of skill and commitment. Attempting Manaslu Circuit or Upper Mustang as your first Nepal trek is risky — the altitude, duration, and wilderness demands require foundations built on easier treks. Recommended progression: complete at least one beginner/moderate trek (Poon Hill, Mardi Himal, Langtang, or ABC) before attempting expert-tier treks (Annapurna Circuit, Three Passes, Upper Dolpo, Manaslu). The Himalaya rewards preparation and punishes overconfidence. See our mountaineering for beginners guide for skill progression fundamentals.


    Nepal Trekking FAQ: Your Common Questions Answered

    What is the best trek in Nepal for beginners?

    The best beginner trek in Nepal is Ghorepani Poon Hill — a 4-5 day trek in the Annapurna region that delivers stunning Himalayan views with minimal altitude and moderate physical demands. Why Poon Hill is ideal: Maximum elevation 10,531 ft minimizes AMS risk. Duration only 4-5 days total. Daily hiking 4-6 hours on well-maintained trails. Stone steps throughout, well-marked paths. Abundant comfortable teahouse accommodation. Cost $400-$700 for complete guided trek including permits. Short drive from Pokhara — no flight required. Wider weather window than high-altitude treks. Other beginner-friendly treks: Annapurna Base Camp (7-11 days, 13,550 ft max), Langtang Valley (7-10 days, 12,780 ft max), Mardi Himal (4-5 days, 14,764 ft max), Khopra Ridge (5-6 days, 12,139 ft max). What makes beginner-friendly: Under 12,000 ft maximum elevation, under 7 days total, daily hiking under 6 hours, good teahouse infrastructure, reliable weather windows, moderate trail surface. Preparation: 2-3 months cardio training, weighted pack day hikes, broken-in hiking boots. Book guided tour — Nepal requires licensed guides since April 2023. Most first-time Nepal trekkers choose Poon Hill for the combination of Himalayan scenery and accessible difficulty.

    How hard is trekking in Nepal?

    Trekking difficulty in Nepal ranges dramatically from easy 4-day Poon Hill hikes to demanding 20+ day Upper Dolpo expeditions. Difficulty factors: altitude (8,000 ft to 20,000+ ft), duration (4 days minimum to 3+ weeks), technical demands (mostly non-technical), trail conditions, teahouse availability. BEGINNER: Ghorepani Poon Hill (4-5 days, 10,531 ft), Mardi Himal (4-5 days, 14,764 ft), Khopra Ridge (5-6 days, 12,139 ft). MODERATE: Annapurna Base Camp (7-11 days, 13,550 ft), Langtang Valley (7-10 days, 12,780 ft), Everest Base Camp (12-14 days, 18,209 ft). DEMANDING: Annapurna Circuit (15-20 days, 17,769 ft at Thorong La), Manaslu Circuit (14-16 days, 16,752 ft at Larkya La), Gokyo Lakes (12-14 days, 17,575 ft). EXPERT: Three Passes EBC (18-21 days, 18,209 ft with three 17,000+ ft passes), Upper Mustang (12-14 days, restricted area, 12,530 ft), Upper Dolpo (20-26 days, 17,388 ft, remote expedition). Key considerations: All Nepal treks require licensed guides since April 2023. Altitude is biggest factor. Weather conditions dramatically change difficulty. Individual fitness, altitude response, prior experience all affect perceived difficulty. For first-time Nepal trekkers, Poon Hill or Annapurna Base Camp offer best introduction.

    When is the best time to trek in Nepal?

    The best time to trek in Nepal is March-May (pre-monsoon spring) and September-November (post-monsoon autumn), with October being the single most popular month. Monthly breakdown: December-February winter, very cold at altitude, high-altitude teahouses may close. March early spring, snow clearing from passes. April peak spring trekking, rhododendrons in bloom. May late spring, warmer. June-August monsoon, heavy rain, leeches, slippery trails, cloudy mountains — NOT recommended except for rain-shadow treks (Upper Mustang, Upper Dolpo). September post-monsoon begins, clearing skies. October PEAK month, clearest atmospheric conditions of year, moderate temperatures, largest crowds. November excellent late autumn conditions, colder but fewer crowds. Regional considerations: Everest region (EBC, Three Passes, Gokyo) October-November optimal. Annapurna region (Circuit, ABC, Poon Hill) April or October best. Langtang region April-May or October-November. Manaslu region September-October ideal. Upper Mustang/Dolpo can trek June-September due to rain-shadow location behind Himalayas. October premium pricing, April combines blooms with better availability, November offers quietest conditions during prime weather.

    What is the most popular trek in Nepal?

    The Everest Base Camp (EBC) trek is Nepal’s most popular trek, attracting 40,000-50,000 trekkers annually, followed closely by Annapurna Circuit and Annapurna Base Camp routes. Top 5 most popular by annual trekkers: Everest Base Camp ~40,000-50,000 annually — iconic high-altitude trek, 12-14 days, 18,209 ft Kala Patthar peak. Annapurna Circuit ~30,000-40,000 annually — classic 15-20 day circumnavigation including Thorong La pass at 17,769 ft. Annapurna Base Camp ~25,000-30,000 annually — 7-11 day trek to base of Annapurna I at 13,550 ft. Ghorepani Poon Hill ~20,000-25,000 annually — short 4-5 day beginner-friendly trek at 10,531 ft. Langtang Valley ~10,000-15,000 annually — less-crowded alternative to Everest/Annapurna regions. Why these dominate: Infrastructure of teahouses every few hours. Iconic scenery. Accessibility close to Kathmandu or Pokhara. Guide services widely available. Cultural significance. Lesser-known alternatives worth considering: Three Passes EBC (harder variant), Manaslu Circuit (growing popularity), Upper Mustang (restricted permit area), Gokyo Lakes (Everest region alternative with turquoise lakes). Choosing your trek: first-time Nepal visitor — EBC or Annapurna Circuit or Base Camp. Second visit — try Manaslu, Langtang, or Gokyo Lakes. Avoid crowds — choose Langtang or Manaslu.

    How much does trekking in Nepal cost?

    Trekking in Nepal costs $400-$3,500 depending on trek choice and duration — one of the most affordable major trekking destinations worldwide. Cost by difficulty: Budget treks (4-6 days): Ghorepani Poon Hill $400-$700, Mardi Himal $500-$800, Khopra Ridge $550-$800. Standard treks (7-12 days): Annapurna Base Camp $700-$1,500, Langtang Valley $600-$1,200, Gokyo Lakes $1,200-$2,000. Premium treks (12+ days): Everest Base Camp $1,200-$3,500, Annapurna Circuit $900-$2,500, Manaslu Circuit $1,200-$2,500 (includes special permit), Three Passes EBC $1,500-$3,500. Restricted area treks: Upper Mustang $2,000-$4,000 including $500 special permit (10 days), Upper Dolpo $3,500-$5,500 including $500/10 days special permit. Common cost factors: International flight to Kathmandu $600-$1,500, Nepal visa $50, domestic flights $180-$220 one way, licensed guide $30-$40/day mandatory since 2023, porter $20-$30/day optional, teahouse accommodation $5-$50/night, meals $25-$50/day, permits $25-$500, travel insurance $100-$300. Budget-saving tips: Book with Kathmandu-based operators, rent gear in Thamel district, share guide/porter, trek in shoulder seasons, choose shorter treks. Most trekkers budget $2,000-$3,500 for complete Nepal trek including international flights. Nepal offers exceptional value compared to European treks ($3,000-$5,000) or Patagonia ($3,500-$6,000). See our complete mountain climbing costs guide.

    Which is better for trekking: Annapurna or Everest?

    The choice between Annapurna and Everest regions depends on priorities — Everest offers iconic summit views and more dramatic altitude gain, while Annapurna provides more varied landscapes, better teahouse infrastructure, and multiple route options. Everest region advantages: iconic status, Kala Patthar sunrise view, Sherpa cultural experience, direct flight access via Lukla, well-established trails, higher altitude experience (EBC 17,598 ft vs ABC 13,550 ft). Everest region disadvantages: weather-dependent Lukla flights cause delays, single main route with limited alternatives, crowds during peak season, less landscape variety, more expensive due to flight costs. Annapurna region advantages: multiple trek options (Circuit, ABC, Poon Hill, Mardi Himal, Khopra), diverse landscapes (subtropical to high desert to alpine), rhododendron forests in spring, Thorong La pass crossing on Circuit, natural hot springs at Tatopani, cultural diversity (Gurung, Magar, Manangi, Thakali), access via overland drive from Pokhara (no flight dependency), lower overall cost. Annapurna region disadvantages: road construction has impacted some Circuit sections, less dramatic single-mountain focus than Everest, ABC alone doesn’t reach same altitudes as EBC. Recommendations: First-time Nepal visitor — Annapurna Base Camp for accessibility, Poon Hill for beginners. Bucket-list seekers — EBC for iconic Everest experience. Return visitors — Annapurna Circuit for variety. Serious altitude goals — Three Passes (Everest region). Cultural focus — Annapurna Circuit. Photography — both excellent.

    Do I need permits for trekking in Nepal?

    Yes, all Nepal treks require permits — specific permits vary by region, with some restricted areas requiring additional expensive special permits. Standard permits required: TIMS Card (Trekker’s Information Management System) NPR 2,000 (~$17) for independent trekkers, NPR 1,000 (~$8) for group. Issued in Kathmandu or Pokhara. Regional conservation area or national park entry fee varies by region. Regional permit costs (2026): Sagarmatha National Park (EBC, Gokyo, Three Passes) NPR 3,000 (~$25). Khumbu Rural Municipality fee NPR 2,000 (~$17). Annapurna Conservation Area Permit (ACAP) NPR 3,000 (~$25) — covers all Annapurna treks. Langtang National Park NPR 3,000 (~$25). Manaslu Conservation Area Permit NPR 3,000 (~$25) — plus special permit. Restricted area special permits: Upper Mustang $500 for first 10 days, $50 per additional day. Upper Dolpo $500 for first 10 days, $50 per additional day. Manaslu $100 per week (September-November), $75 per week (December-August). Nar Phu Valley $100/$75 per week. Kanchenjunga $20 per week. Lower Dolpo $20 per week. Visa: Nepal tourist visa $50 USD for 30-day visa on arrival, $125 for 90-day. Guide regulation: April 2023 all trekking national parks require licensed guides, $30-$40 per day additional cost. How to obtain: through registered trekking operator (easiest), directly at Nepal Tourism Board office in Kathmandu, ACAP/TIMS at Tourist Information Centre Pokhara. Total permit costs by trek: EBC ~$59, Annapurna Circuit ~$42, Manaslu Circuit ~$200-$400 depending on season, Upper Mustang ~$525-$550.

    What gear do I need for trekking in Nepal?

    Nepal trekking gear requirements vary significantly by trek altitude and season — EBC/high-altitude treks need winter-expedition gear, while Poon Hill or lower treks need moderate hiking equipment. UNIVERSAL essentials: broken-in hiking boots with ankle support, 4-5 pairs merino wool hiking socks, moisture-wicking shirts, hiking pants (preferably convertible), fleece jacket, waterproof rain jacket and pants, warm beanie and sun hat, gloves, category 3-4 sunglasses, trekking poles, headlamp with extra batteries, SPF 50+ sunscreen, water purification tablets, small first aid kit. HIGH-ALTITUDE TREKS (EBC, ABC, Manaslu, Three Passes): down jacket for cold camps, sleeping bag rated 0°F or -10°F, thermal base layers, insulated trekking pants for summit days, expedition mittens, gaiters for snow sections, altitude medications (Diamox). BEGINNER/LOWER TREKS (Poon Hill, Langtang below 13,000 ft): lighter insulation adequate, sleeping bag rated 20°F sufficient, lighter layering system, standard hiking gloves. RESTRICTED AREA TREKS (Upper Mustang, Dolpo): more self-sufficient camping gear often needed, 4-season tent for camping sections, stove and fuel, water storage bladders. Kathmandu vs. bring from home: recommended to bring boots, backpack, insulation layers, technical outerwear. Can buy/rent in Kathmandu’s Thamel district: fleeces, hiking pants, gloves, sleeping bags, trekking poles. Rental cost reduction $500-$1,500. Authenticity concerns — inspect items carefully, avoid fake branded equipment. See our complete mountain gear list.


    Authoritative Sources & Further Reading

    Content reflects authoritative Nepal trekking sources:

    • Nepal Tourism Board — welcomenepal.com — Official tourism and permit information
    • Nepal Mountaineering Association — nepalmountaineering.org — Trekking route management
    • Himalayan Rescue Association (HRA) — Altitude medicine protocols and aid posts
    • Jamie McGuinness, Trekking in the Everest Region — Classic Everest reference
    • Bryn Thomas, Trekking in the Annapurna Region — Annapurna classic reference
    • Peter Matthiessen, The Snow Leopard — Upper Dolpo literary reference
    • Lonely Planet Nepal — Comprehensive trekking overview
    • Guide services: Nepal Hiking Team, Himalayan Glacier Trekking, Everest Trekking Guide, Mountain Madness, Alpine Ascents International
    Published: March 8, 2026
    Last updated: April 19, 2026
    Next review: July 2026
    Part of the Global Summit Guide

    Back to the Master Hub

    This guide is one of 71 across 12 thematic clusters on Global Summit Guide. The master hub organizes every guide by experience tier, specific peak, skill area, and region.

    View the Hub →

    Was this helpful?

    Yes
    No
    Thanks for your feedback!
  • Kilimanjaro Climbing Guide: Routes, Costs, Difficulty

    {“@context”:”https://schema.org”,”@type”:”Article”,”headline”:”Kilimanjaro Climbing Guide: Routes, Costs & Difficulty (2026)”,”description”:”Complete Kilimanjaro climbing guide covering all 6 major routes, 2026 park fees, success rates by route and duration, difficulty framework, and planning for Africa’s highest peak.”,”image”:”https://globalsummitguide.com/wp-content/uploads/2026/03/kilimanjaro-climbing-guide.jpg”,”author”:{“@type”:”Organization”,”name”:”Global Summit Guide Editorial Team”,”url”:”https://globalsummitguide.com/about/”},”publisher”:{“@type”:”Organization”,”name”:”Global Summit Guide”,”url”:”https://globalsummitguide.com”,”logo”:{“@type”:”ImageObject”,”url”:”https://globalsummitguide.com/wp-content/uploads/2026/02/global-logo-new-2.png”,”width”:”300″,”height”:”100″}},”datePublished”:”2026-03-08T08:00:00-07:00″,”dateModified”:”2026-04-19T12:00:00-06:00″,”mainEntityOfPage”:{“@type”:”WebPage”,”@id”:”https://globalsummitguide.com/kilimanjaro-climbing-guide-routes-costs-difficulty/”},”isPartOf”:{“@type”:”CollectionPage”,”@id”:”https://globalsummitguide.com/#hub”,”name”:”Conquer Peaks: Your Global Summit Guide for Mountain Climbing”}} {“@context”:”https://schema.org”,”@type”:”FAQPage”,”mainEntity”:[ {“@type”:”Question”,”name”:”How much does it cost to climb Kilimanjaro in 2026?”,”acceptedAnswer”:{“@type”:”Answer”,”text”:”Climbing Kilimanjaro in 2026 typically costs between $1,500 and $7,500 per person, varying significantly by operator tier and route length. Cost breakdown: (1) Budget operators: $1,500-$2,500 — typically local Tanzanian companies with minimal overhead. Safety and porter welfare concerns at this tier. (2) Mid-range operators: $2,500-$4,500 — reputable international and local companies with KPAP partnership for porter welfare, experienced guides, good equipment. (3) Premium operators: $4,500-$7,500 — full-service international companies with comprehensive safety systems, top-tier guides, quality gear, and excellent logistics. TANAPA park fees alone are approximately $820 plus 18% VAT (~$955-$1,000 total) for a standard 7-day climb, set by the Tanzanian government and identical across all operators. Park fees include $70/day conservation, $50/night camping, $20 rescue fee. Additional costs not always included: flights ($1,200-$2,200 from North America), tips ($250-$400 for guides and porters), travel insurance ($100-$300), gear rental or purchase ($150-$800), visa and hotel nights before/after climb ($150-$400). Total trip budget: $3,500-$10,000+ from North America. Never climb with operators offering under $1,500 — corners will be cut on safety or porter welfare.”}}, {“@type”:”Question”,”name”:”What is the best route to climb Kilimanjaro?”,”acceptedAnswer”:{“@type”:”Answer”,”text”:”The best route to climb Kilimanjaro depends on your priorities, but the 8-day Lemosho route is widely considered the optimal choice for most climbers. Why Lemosho 8-day is the best: (1) 90-95% summit success rate — among the highest of all routes. (2) Excellent ‘climb high, sleep low’ acclimatization profile. (3) Beautiful scenery through five distinct ecosystems. (4) Less crowded than Machame (Lemosho joins Machame on Day 4). (5) Western approach provides fresh perspective. Alternative best choices: (a) 9-day Northern Circuit — highest success rate (95%+) and most comprehensive acclimatization, ideal for cautious climbers with extra time. (b) 7-day Machame — 85% success rate, most popular route (~35% of climbers), good balance of time, cost, and scenery. (c) 7-day Rongai — 85% success rate, northern approach, fewer crowds, better in rainy season. Routes to avoid: (1) 5-day Marangu — only 27% summit success, too rushed for acclimatization. (2) 6-day Umbwe — 50% success, steepest route on the mountain. (3) 6-day variants of any route — too compressed for safe acclimatization. Choose 7+ days minimum; 8+ days strongly preferred for summit success.”}}, {“@type”:”Question”,”name”:”How difficult is climbing Kilimanjaro?”,”acceptedAnswer”:{“@type”:”Answer”,”text”:”Kilimanjaro is rated as moderately difficult — the easiest of the Seven Summits but significantly harder than typical hiking due to altitude. Difficulty factors: (1) No technical climbing required — it’s a trek, not a climb. No ropes, crampons, or ice axes needed on standard routes. (2) Altitude is the primary challenge — Uhuru Peak at 5,895 m means 50% less oxygen than sea level. Approximately 77% of climbers experience some altitude sickness symptoms. (3) Distance and elevation gain — 50-70 km total with 4,000 m elevation gain over 5-9 days depending on route. (4) Physical demand — 5-8 hours hiking per day with a daypack (porters carry main gear). Summit day is 10-14 hours with pre-dawn start. (5) Weather — temperatures range from +30°C in rainforest to -15°C at summit. Fitness requirement: Ability to hike 6-8 hours per day with a daypack for 7+ consecutive days. Training: 3-6 months of cardio (hiking, running, cycling) plus strength work builds appropriate fitness. Success rate across all routes averages 65% — primarily determined by route length rather than fitness level. Longer routes (8+ days) dramatically improve summit odds.”}}, {“@type”:”Question”,”name”:”How many days do you need to climb Kilimanjaro?”,”acceptedAnswer”:{“@type”:”Answer”,”text”:”Most climbers need 7-9 days to climb Kilimanjaro safely and successfully. Day requirements by route: (1) Marangu — 5 or 6 days (5-day option has only 27% summit success and is strongly discouraged). (2) Machame — 6 or 7 days (7-day much better with 85% success vs 44% for 6-day). (3) Rongai — 6 or 7 days (7-day recommended). (4) Lemosho — 7 or 8 days (8-day has 90-95% success). (5) Northern Circuit — 9 days only (95%+ success). (6) Umbwe — 6 or 7 days (steep, lower success rates overall). Why duration matters so much: Each additional day above 3,000 m adds approximately 5-7 percentage points to summit success. The difference between 6-day and 9-day climbs is primarily physiological — your body needs time to produce additional red blood cells and adapt to reduced oxygen. Industry average success: 5-day routes 27%, 6-day 44%, 7-day 64-85%, 8-day 85-95%, 9-day 95%+. Budget minimum 7 days on the mountain; prefer 8-9 days if budget and time allow. The extra days pay for themselves in dramatically higher summit probability and much more enjoyable experience with less altitude suffering.”}}, {“@type”:”Question”,”name”:”Can you climb Kilimanjaro without a guide?”,”acceptedAnswer”:{“@type”:”Answer”,”text”:”No, you cannot legally climb Kilimanjaro without a guide. Tanzanian law requires all climbers to book through licensed tour operators and be accompanied by registered guides. Key regulations: (1) Only KINAPA-licensed (Kilimanjaro National Park Authority) operators can obtain climbing permits. (2) All climbers must be accompanied by registered Tanzanian mountain guides. (3) Independent or solo trekking is strictly prohibited — violations result in deportation, fines, or imprisonment. (4) Every climber requires a support team of at least 3-5 staff including guide, assistant guide, cook, and porters. (5) Rangers check permits and guide credentials at park entrances and along trails. Why the rule exists: safety (altitude rescue, navigation), environmental protection (pack-out requirements), and economic support for local Tanzanian communities. Porter-to-climber ratios typically range from 3:1 to 5:1 by regulation. Groups must include certified first aid personnel and maintain guide-to-climber ratios of 1:3 or better for safety. All operator packages include guides, permits, and crew as standard — there is no legal way to attempt Kilimanjaro independently. Budget appropriately for this regulatory structure which adds significant cost but ensures safety and fair employment for ~10,000 Tanzanians who work annually as mountain crew.”}}, {“@type”:”Question”,”name”:”What is the success rate on Kilimanjaro?”,”acceptedAnswer”:{“@type”:”Answer”,”text”:”The overall Kilimanjaro summit success rate is approximately 65% across all routes and durations — meaning roughly 1 in 3 climbers does not reach Uhuru Peak. However, success varies dramatically by route length and quality: (1) By days on mountain: 5-day routes 27%, 6-day 44%, 7-day 64-85%, 8-day 85-95%, 9-day 95%+. (2) By specific route (industry average): Northern Circuit 9-day 92%+, Lemosho 8-day 90%, Lemosho 7-day 85%, Machame 7-day 85%, Rongai 7-day 85%, Machame 6-day 73%, Lemosho 6-day 75%, Rongai 6-day 70%, Marangu 6-day 50-60%, Marangu 5-day 27%, Umbwe 6-day 50%. (3) Top-quality operators report 90-97% success rates on their 8-day Lemosho and 9-day Northern Circuit programs, vs industry averages 80-92%. Main failure cause: 77% of unsuccessful climbs result from inadequate acclimatization rather than fitness. Other failure causes: severe altitude sickness (AMS/HAPE/HACE), injury, illness, mental fatigue, weather. Maximize your success: (1) Choose 8+ day route. (2) Select quality operator with experienced guides. (3) Arrive 2-3 days before climb to start acclimatization. (4) Train specifically for multi-day hiking. (5) Hydrate aggressively (4-5 L/day on mountain). (6) Consider Diamox on doctor’s recommendation. (7) Walk slowly — ‘pole pole’ in Swahili is the summit motto.”}}, {“@type”:”Question”,”name”:”What should I pack for Kilimanjaro?”,”acceptedAnswer”:{“@type”:”Answer”,”text”:”Packing for Kilimanjaro requires gear for 5 distinct climate zones from tropical rainforest to arctic summit. Essential gear categories: (1) Boots and footwear — Waterproof hiking boots (broken in), camp shoes/sandals, gaiters for wet sections. (2) Layering system — Base layers (wool/synthetic, 3 sets), insulating mid-layers (fleece + down puffy jacket), hardshell jacket and pants (waterproof/windproof). (3) Summit layers — Heavy down jacket (-15°C rated), warm hat, balaclava, insulated mittens + liner gloves. (4) Sleeping — Sleeping bag rated to -10°C or warmer, inflatable sleeping pad (if camping route). (5) Head and eyes — Sun hat, headlamp + spare batteries, quality sunglasses (UV 400, glacier protection). (6) Hydration — 3 L water capacity (Nalgene + hydration bladder), water purification tablets as backup. (7) Small daypack — 25-35 L for daily items (main gear carried by porters up to 15 kg limit per porter). (8) Trekking poles (essential for descents), first aid kit including Diamox prescription, blister treatment, personal medications. (9) Snacks and electrolyte supplements. (10) Duffel bag for porter gear (most operators provide). Gear rental is widely available in Moshi and Arusha — budget $150-$300 for full kit rental. Operators typically provide detailed packing lists; follow them carefully as weather conditions vary dramatically across the climb.”}}, {“@type”:”Question”,”name”:”When is the best time to climb Kilimanjaro?”,”acceptedAnswer”:{“@type”:”Answer”,”text”:”The best time to climb Kilimanjaro is during the two dry seasons: January through mid-March and mid-June through October. Detailed monthly breakdown: (1) January-mid March: Dry season, warmer, clearer skies on summit nights, ideal for photography. Increasing crowds toward February-March peak. Snow on summit more common. (2) Mid-March to late May: Long rainy season. Heavy rainfall on lower mountain, trails muddy, cloud cover obscures views. Not recommended for most climbers. (3) June: Rain easing, cooler temperatures, preparing for peak season. Good shoulder month. (4) July-October: Main dry season and peak climbing season. Busy trails, best weather, cold but clear. July-August see highest volumes. (5) November-December: Short rainy season, less intense than spring rains but still challenging. December becomes drier toward month-end. (6) Late December: Christmas and New Year’s climbs popular despite occasional rain. Best months for summit weather: January (warmer, clearer), August-September (reliable dry conditions), late December-early January (peak conditions). Full moon considerations: Summit nights near full moon provide natural light on final summit push (04:00-06:00 ascent to watch sunrise from Uhuru). Book 4-6 months ahead for peak season; 2-3 months for shoulder seasons.”}} ]} *,*::before,*::after{box-sizing:border-box;margin:0;padding:0} :root{–pine:#0a1929;–forest:#122a44;–mist:#dde5ee;–snow:#f4f6f9;–stone:#485460;–pebble:#8a95a3;–ink:#0f1a26;–cream:#fafaf7;–white:#ffffff;–gold:#d4913a;–gold-light:#f5e4c8;–denali:#1e3a5c;–denali-mid:#2e5986;–denali-light:#e8eef5;–ready:#2d6e4e;–ready-light:#e8f1ec;–caution:#b86a15;–caution-light:#f7ece0;–danger:#a83a2b;–danger-light:#f5e8e5;–great-black:#2b2318;–great-black-light:#e8e3d8;–serif:’DM Serif Display’,Georgia,serif;–sans:’Outfit’,system-ui,sans-serif} html{scroll-behavior:smooth} body{font-family:var(–sans);background:var(–cream);color:var(–ink);line-height:1.75;font-size:17px;-webkit-font-smoothing:antialiased} h1,h2,h3,h4{font-family:var(–serif);font-weight:400;line-height:1.2} a{color:var(–denali-mid);text-decoration:underline;text-underline-offset:3px;transition:color .15s} a:hover{color:#b8701f} .btn{display:inline-flex;align-items:center;gap:8px;padding:13px 26px;border-radius:6px;font-family:var(–sans);font-size:15px;font-weight:500;text-decoration:none;transition:all .2s ease} .btn-primary{background:var(–gold);color:var(–pine)} .btn-primary:hover{background:#bd8030;transform:translateY(-1px);text-decoration:none} .breadcrumb{background:var(–pine);padding:10px 0;font-size:13px} .breadcrumb__inner{max-width:1200px;margin:0 auto;padding:0 24px;display:flex;align-items:center;gap:8px;color:rgba(255,255,255,.5);flex-wrap:wrap} .breadcrumb a{color:rgba(255,255,255,.65);text-decoration:none} .breadcrumb a:hover{color:var(–gold)} .breadcrumb__sep{color:rgba(255,255,255,.25)} .breadcrumb__current{color:rgba(255,255,255,.85)} .article-header{background:linear-gradient(135deg,var(–pine),var(–forest));padding:52px 0 44px;color:var(–white)} .article-header__inner{max-width:1200px;margin:0 auto;padding:0 24px} .article-header__label{font-size:11px;font-weight:600;letter-spacing:.14em;text-transform:uppercase;color:var(–gold);margin-bottom:18px;display:flex;align-items:center;gap:10px} .article-header__label::before{content:”;width:36px;height:2px;background:var(–gold)} .article-header h1{font-size:clamp(30px,4.4vw,52px);color:var(–white);max-width:1000px;margin-bottom:20px} .article-header h1 em{font-style:italic;color:var(–gold)} .article-header__sub{font-size:17px;color:rgba(255,255,255,.82);font-weight:300;max-width:900px;line-height:1.7;margin-bottom:28px} .byline{display:flex;flex-wrap:wrap;align-items:center;gap:20px 28px;padding:18px 22px;background:rgba(255,255,255,.06);border:1px solid rgba(255,255,255,.1);border-radius:10px;margin-bottom:28px;font-size:13.5px} .byline__item{display:flex;align-items:center;gap:8px;color:rgba(255,255,255,.85)} .byline__item strong{color:var(–white);font-weight:500} .byline__label{font-size:10px;letter-spacing:.1em;text-transform:uppercase;color:var(–gold);font-weight:600;margin-right:4px} .byline__item a{color:rgba(255,255,255,.85);text-decoration:underline;text-underline-offset:2px} .byline__item a:hover{color:var(–gold)} .hero__stats{display:grid;grid-template-columns:repeat(4,1fr);gap:18px;max-width:900px} .hero__stat{padding:16px 20px;background:rgba(10,25,41,.4);border:1px solid rgba(255,255,255,.12);border-radius:10px} .hero__stat-num{font-family:var(–serif);font-size:30px;color:var(–gold);line-height:1;margin-bottom:4px} .hero__stat-lbl{font-size:11px;letter-spacing:.08em;text-transform:uppercase;color:rgba(255,255,255,.72);font-weight:500} .hub-strip{background:var(–gold-light);border-bottom:1px solid rgba(212,145,58,.3);padding:12px 0} .hub-strip__inner{max-width:1200px;margin:0 auto;padding:0 24px;display:flex;align-items:center;gap:16px;flex-wrap:wrap;font-size:13px} .hub-strip__label{font-family:var(–serif);color:var(–pine);font-weight:600;font-size:14px;display:flex;align-items:center;gap:8px} .hub-strip__label::before{content:’★’;color:var(–gold);font-size:13px} .hub-strip__cluster{color:var(–stone);font-weight:400} .hub-strip__cluster strong{color:var(–pine);font-weight:600} .hub-strip__link{margin-left:auto;color:var(–pine);font-weight:500;text-decoration:none;font-size:11px;letter-spacing:.08em;text-transform:uppercase;padding:6px 12px;background:var(–white);border:1px solid rgba(212,145,58,.35);border-radius:6px;transition:all .15s} .hub-strip__link:hover{background:var(–pine);color:var(–gold-light);border-color:var(–pine)} @media(max-width:700px){.hub-strip__link{margin-left:0}.hub-strip__inner{gap:10px}} .page-wrap{max-width:1200px;margin:0 auto;padding:0 24px;display:grid;grid-template-columns:1fr 300px;gap:56px;align-items:start} .sidebar{padding-top:52px} .sidebar__block{background:var(–white);border:1px solid var(–mist);border-radius:12px;padding:22px;margin-bottom:20px} .sidebar__block–dark{background:var(–pine);color:var(–white);border-color:var(–pine)} .sidebar__block–dark .sidebar__label{color:rgba(255,255,255,.4)} .sidebar__block–gold{background:var(–gold-light);border-color:rgba(212,145,58,.3)} .sidebar__toc{position:sticky;top:24px;max-height:calc(100vh – 48px);overflow-y:auto} .sidebar__label{font-size:11px;font-weight:600;letter-spacing:.1em;text-transform:uppercase;color:var(–pebble);margin-bottom:14px} .toc-list{list-style:none;display:flex;flex-direction:column;gap:2px} .toc-link{display:block;padding:7px 10px;border-radius:6px;text-decoration:none;color:var(–stone);font-size:13px;border-left:2px solid transparent;transition:all .15s;line-height:1.4} .toc-link:hover{color:var(–denali-mid);background:var(–snow);border-left-color:var(–denali-light);text-decoration:none} .quickfact-row{display:flex;justify-content:space-between;align-items:baseline;padding:10px 0;border-bottom:1px solid rgba(255,255,255,.08);font-size:13px;gap:12px} .quickfact-row:last-child{border-bottom:none} .quickfact-row__name{color:rgba(255,255,255,.72);font-weight:300} .quickfact-row__val{color:var(–gold);font-weight:500;font-family:var(–serif);font-size:15px;text-align:right} .sidebar__block–gold h4{font-family:var(–serif);font-size:17px;color:var(–pine);margin-bottom:8px;line-height:1.3} .sidebar__block–gold p{font-size:13px;color:var(–stone);font-weight:300;margin-bottom:14px;line-height:1.55} .sidebar__cta-btn{display:flex;align-items:center;justify-content:center;gap:6px;padding:11px 16px;background:var(–pine);color:var(–white);border-radius:6px;text-decoration:none;font-size:13px;font-weight:500} .sidebar__cta-btn:hover{background:var(–denali-mid);color:var(–white);text-decoration:none} .article{padding:52px 0 80px} .article section{scroll-margin-top:24px} .article__lead{font-size:19px;color:var(–stone);font-weight:300;line-height:1.75;border-left:3px solid var(–gold);padding-left:22px;margin-bottom:48px} .article__lead em{color:var(–pine);font-style:italic} .article h2{font-size:clamp(24px,3.2vw,34px);color:var(–pine);margin-top:64px;margin-bottom:18px} .article h2:first-child{margin-top:0} .article h2 em{font-style:italic;color:var(–denali-mid)} .article h3{font-size:21px;color:var(–pine);margin-top:32px;margin-bottom:12px} .article p{color:var(–stone);margin-bottom:18px;font-weight:300} .article p strong{color:var(–ink);font-weight:500} .article p em{color:var(–pine);font-style:italic;font-weight:400} .article ul,.article ol{color:var(–stone);font-weight:300;margin:0 0 20px 22px} .article li{margin-bottom:8px;line-height:1.7} .section-rule{border:none;border-top:1px solid var(–mist);margin:48px 0} .callout{border-radius:10px;padding:22px 24px;margin:28px 0;display:flex;gap:18px;align-items:flex-start} .callout–insight{background:var(–denali-light);border:1px solid rgba(46,89,134,.15)} .callout–gold{background:var(–gold-light);border:1px solid rgba(212,145,58,.25)} .callout–caution{background:var(–caution-light);border:1px solid rgba(184,106,21,.25)} .callout–danger{background:var(–danger-light);border:1px solid rgba(168,58,43,.2)} .callout–methodology{background:var(–great-black-light);border:1px solid rgba(43,35,24,.2)} .callout__icon{flex-shrink:0;font-size:22px;line-height:1} .callout__body{flex:1} .callout__title{font-family:var(–serif);font-size:17px;margin-bottom:6px;color:var(–pine)} .callout__text{font-size:14.5px;color:var(–stone);font-weight:300;line-height:1.7;margin:0} .callout__text a{color:var(–denali-mid);font-weight:500} /* Route profile cards */ .route-profile{background:var(–white);border:1px solid var(–mist);border-radius:14px;padding:30px 32px;margin:22px 0;border-left:4px solid var(–gold)} .route-profile–machame{border-left-color:var(–caution)} .route-profile–lemosho{border-left-color:var(–gold)} .route-profile–marangu{border-left-color:var(–stone)} .route-profile–rongai{border-left-color:var(–ready)} .route-profile–northern{border-left-color:var(–denali-mid)} .route-profile–umbwe{border-left-color:var(–danger)} .route-profile__header{display:grid;grid-template-columns:auto 1fr auto;gap:20px;align-items:baseline;margin-bottom:18px;padding-bottom:14px;border-bottom:1px solid var(–mist)} .route-profile__num{font-family:var(–serif);font-style:italic;font-size:44px;color:var(–gold);line-height:1;opacity:.7} .route-profile__titleblock{min-width:0} .route-profile__label{font-size:10px;letter-spacing:.12em;text-transform:uppercase;color:var(–gold);font-weight:700;margin-bottom:4px} .route-profile__name{font-family:var(–serif);font-size:clamp(22px,3vw,26px);color:var(–pine);margin-bottom:4px;line-height:1.2} .route-profile__name em{font-style:italic;color:var(–denali-mid)} .route-profile__nickname{font-size:13px;color:var(–pebble);font-weight:500;font-style:italic} .route-profile__success{font-family:var(–serif);font-size:28px;color:var(–ready);font-weight:600;white-space:nowrap;text-align:right} .route-profile__success small{display:block;font-family:var(–sans);font-size:10px;letter-spacing:.1em;text-transform:uppercase;color:var(–pebble);font-weight:700;margin-top:2px} .route-profile__body{font-size:14.5px;color:var(–stone);font-weight:300;line-height:1.7;margin-bottom:16px} .route-profile__body p{margin-bottom:12px} .route-profile__body p:last-child{margin-bottom:0} .route-profile__body strong{color:var(–ink);font-weight:500} .route-profile__body em{color:var(–pine);font-style:italic;font-weight:400} .route-profile__stats{background:var(–snow);border-radius:10px;padding:14px 18px;display:grid;grid-template-columns:repeat(4,1fr);gap:10px 18px;font-size:12.5px} .route-profile__stat{display:flex;flex-direction:column;gap:2px} .route-profile__stat-label{font-size:10px;letter-spacing:.08em;text-transform:uppercase;color:var(–pebble);font-weight:700} .route-profile__stat-val{font-family:var(–serif);font-size:14px;color:var(–pine);font-weight:600} /* Cost tier cards */ .cost-tier-grid{display:grid;grid-template-columns:repeat(3,1fr);gap:16px;margin:28px 0} .cost-tier{background:var(–white);border:1px solid var(–mist);border-radius:12px;padding:24px 26px;border-top:4px solid var(–gold)} .cost-tier–budget{border-top-color:var(–stone)} .cost-tier–mid{border-top-color:var(–denali-mid)} .cost-tier–premium{border-top-color:var(–gold)} .cost-tier__label{font-size:10px;letter-spacing:.12em;text-transform:uppercase;color:var(–gold);font-weight:700;margin-bottom:4px} .cost-tier__name{font-family:var(–serif);font-size:20px;color:var(–pine);margin-bottom:4px;line-height:1.2} .cost-tier__price{font-family:var(–serif);font-size:28px;color:var(–pine);font-weight:600;margin-bottom:12px;padding-bottom:12px;border-bottom:1px solid var(–mist)} .cost-tier__list{list-style:none;margin:0;padding:0;font-size:13px} .cost-tier__list li{padding:4px 0 4px 16px;position:relative;color:var(–stone);font-weight:300;line-height:1.55} .cost-tier__list li::before{content:’▸’;position:absolute;left:0;color:var(–gold);font-size:11px;top:5px} .cost-tier__list li strong{color:var(–ink);font-weight:500} /* Peak facts */ .peak-facts{background:linear-gradient(135deg,#fdf5e8,var(–white));border:1px solid rgba(212,145,58,.25);border-radius:14px;padding:32px 36px;margin:32px 0;display:grid;grid-template-columns:1fr 1fr;gap:24px} .peak-facts__col h3{font-family:var(–serif);font-size:18px;color:var(–pine);margin-bottom:10px;padding-bottom:8px;border-bottom:1px solid rgba(212,145,58,.3)} .peak-facts__col dl{margin:0;font-size:13.5px;color:var(–stone);font-weight:300} .peak-facts__col dt{font-weight:500;color:var(–ink);margin-top:8px;font-family:var(–serif);font-size:13px} .peak-facts__col dt:first-child{margin-top:0} .peak-facts__col dd{margin-left:0;margin-bottom:4px;font-weight:300} /* Success rate visual */ .success-viz{background:var(–white);border:1px solid var(–mist);border-radius:12px;padding:28px 32px;margin:28px 0} .success-viz h3{font-family:var(–serif);font-size:19px;color:var(–pine);margin-bottom:14px;margin-top:0} .success-bar-row{display:grid;grid-template-columns:110px 1fr 60px;gap:12px;align-items:center;margin-bottom:10px;font-size:13px} .success-bar-row:last-child{margin-bottom:0} .success-bar-label{color:var(–ink);font-weight:500;font-family:var(–serif);font-size:14px} .success-bar-label small{display:block;font-family:var(–sans);font-size:10px;color:var(–pebble);font-weight:500;letter-spacing:.05em;text-transform:uppercase} .success-bar-track{background:var(–snow);border-radius:4px;height:18px;overflow:hidden;position:relative} .success-bar-fill{height:100%;border-radius:4px;transition:width .3s;background:linear-gradient(90deg,var(–gold),var(–ready))} .success-bar-fill–low{background:linear-gradient(90deg,var(–danger),var(–caution))} .success-bar-fill–mid{background:linear-gradient(90deg,var(–caution),var(–gold))} .success-bar-fill–high{background:linear-gradient(90deg,var(–gold),var(–ready))} .success-bar-fill–top{background:linear-gradient(90deg,var(–ready),#1e854b)} .success-bar-pct{font-family:var(–serif);font-size:15px;color:var(–pine);font-weight:600;text-align:right} /* Ecosystem grid */ .ecosystem-grid{display:grid;grid-template-columns:repeat(5,1fr);gap:10px;margin:24px 0} .ecosystem-card{background:var(–white);border:1px solid var(–mist);border-radius:10px;padding:14px 12px;text-align:center;border-top:3px solid var(–gold)} .ecosystem-card–farm{border-top-color:#5e8844} .ecosystem-card–rainforest{border-top-color:var(–ready)} .ecosystem-card–heather{border-top-color:#8b9b6e} .ecosystem-card–alpine{border-top-color:var(–caution)} .ecosystem-card–arctic{border-top-color:var(–denali-mid)} .ecosystem-card__name{font-family:var(–serif);font-size:14px;color:var(–pine);margin-bottom:2px;line-height:1.2} .ecosystem-card__alt{font-size:10px;color:var(–pebble);font-weight:600;letter-spacing:.04em;margin-bottom:6px} .ecosystem-card__desc{font-size:11px;color:var(–stone);line-height:1.45;font-weight:300} /* Comparison table */ .compare-wrap{overflow-x:auto;margin:28px 0 36px;border-radius:14px;border:1px solid var(–mist);box-shadow:0 4px 24px rgba(11,31,53,.05)} .compare-table{width:100%;border-collapse:collapse;font-size:14px;min-width:680px;background:var(–white)} .compare-table thead th{text-align:left;padding:14px 12px;font-size:10px;font-weight:700;letter-spacing:.08em;text-transform:uppercase;color:var(–white);background:var(–pine);white-space:nowrap} .compare-table thead th:first-child{padding-left:22px} .compare-table tbody tr{border-bottom:1px solid var(–mist)} .compare-table tbody tr:last-child{border-bottom:none} .compare-table tbody tr:nth-child(even){background:var(–snow)} .compare-table tbody td{padding:14px 12px;color:var(–stone);vertical-align:top;font-weight:300;line-height:1.5} .compare-table tbody td:first-child{padding-left:22px;font-weight:500;color:var(–ink);font-family:var(–serif);font-size:14.5px} .pct-pill{display:inline-block;padding:2px 8px;border-radius:4px;font-size:11px;font-weight:700;color:var(–white);font-family:var(–sans)} .pct-pill–low{background:var(–danger)} .pct-pill–mid{background:var(–caution)} .pct-pill–high{background:var(–ready)} .pct-pill–top{background:#1e854b} .faq{margin:28px 0} .faq__item{background:var(–white);border:1px solid var(–mist);border-radius:10px;margin-bottom:12px;overflow:hidden;transition:border-color .15s} .faq__item:hover{border-color:rgba(46,89,134,.35)} .faq__item[open]{border-color:var(–denali-mid);box-shadow:0 4px 20px rgba(11,31,53,.06)} .faq__summary{padding:18px 24px;cursor:pointer;font-family:var(–serif);font-size:17px;color:var(–pine);display:flex;justify-content:space-between;align-items:center;gap:16px;list-style:none;user-select:none} .faq__summary::-webkit-details-marker{display:none} .faq__summary::after{content:’+’;font-family:var(–sans);font-size:24px;color:var(–denali-mid);font-weight:300;line-height:1;transition:transform .2s} .faq__item[open] .faq__summary::after{content:’−’} .faq__body{padding:0 24px 22px} .faq__body p{font-size:15px;color:var(–stone);font-weight:300;line-height:1.75;margin:0} .internal-links{background:var(–snow);border-radius:12px;padding:28px 30px;margin:32px 0} .internal-links__label{font-size:11px;font-weight:600;letter-spacing:.1em;text-transform:uppercase;color:var(–pebble);margin-bottom:16px} .internal-links h3{font-family:var(–serif);font-size:22px;color:var(–pine);margin-bottom:8px;margin-top:0} .internal-links__grid{display:grid;grid-template-columns:repeat(2,1fr);gap:12px;margin-top:20px} .internal-link{display:flex;align-items:center;padding:14px 16px;background:var(–white);border:1px solid var(–mist);border-radius:8px;font-size:14px;font-weight:500;color:var(–denali-mid);text-decoration:none;transition:all .15s} .internal-link:hover{border-color:var(–denali-mid);background:var(–denali-light);transform:translateX(2px);text-decoration:none} .internal-link::after{content:’→’;margin-left:auto;color:var(–pebble)} .internal-link:hover::after{color:var(–denali-mid)} .internal-link–hub{background:var(–gold-light);border-color:rgba(212,145,58,.3);color:var(–pine);font-weight:600} .internal-link–hub::before{content:’★’;color:var(–gold);margin-right:8px} .internal-link–hub:hover{background:var(–pine);color:var(–gold-light);border-color:var(–pine)} .related-grid{display:grid;grid-template-columns:repeat(3,1fr);gap:18px;margin:28px 0} .related-card{background:var(–white);border:1px solid var(–mist);border-radius:12px;padding:22px;text-decoration:none;display:block;transition:all .2s} .related-card:hover{border-color:rgba(46,89,134,.35);box-shadow:0 4px 20px rgba(0,0,0,.06);text-decoration:none} .related-card__type{font-size:10px;font-weight:600;letter-spacing:.1em;text-transform:uppercase;color:var(–pebble);margin-bottom:8px} .related-card__title{font-family:var(–serif);font-size:17px;color:var(–pine);margin-bottom:6px;line-height:1.3} .related-card__desc{font-size:13.5px;color:var(–stone);font-weight:300;line-height:1.55} .guide-cta{background:linear-gradient(135deg,var(–pine),var(–denali));border-radius:16px;padding:44px;margin:48px 0;display:grid;grid-template-columns:1fr auto;gap:32px;align-items:center} .guide-cta__label{font-size:11px;font-weight:600;letter-spacing:.12em;text-transform:uppercase;color:var(–gold);margin-bottom:12px} .guide-cta h2{font-family:var(–serif);font-size:clamp(22px,2.8vw,30px);color:var(–white);margin:0 0 12px;padding:0} .guide-cta p{font-size:15px;color:rgba(255,255,255,.72);font-weight:300;line-height:1.7;margin:0} .guide-cta p a{color:var(–gold)} .sources-block{background:var(–snow);border-radius:12px;padding:28px 32px;margin:32px 0;border:1px solid var(–mist)} .sources-block h3{font-family:var(–serif);font-size:20px;color:var(–pine);margin-top:0;margin-bottom:12px} .sources-block p{font-size:14.5px;color:var(–stone);line-height:1.7;margin-bottom:16px;font-weight:300} .sources-block ul{margin:0;padding-left:22px;font-size:13.5px;color:var(–stone);font-weight:300;line-height:1.7} .sources-block li{margin-bottom:6px} .sources-block a{color:var(–denali-mid);font-weight:500} .sources-block__meta{display:flex;flex-wrap:wrap;gap:16px 24px;padding-top:16px;margin-top:16px;border-top:1px solid var(–mist);font-size:12.5px;color:var(–pebble)} .sources-block__meta strong{color:var(–ink);font-weight:500} @media(max-width:960px){.page-wrap{grid-template-columns:1fr}.sidebar{display:none}.hero__stats{grid-template-columns:repeat(2,1fr)}.route-profile{padding:22px}.route-profile__header{grid-template-columns:auto 1fr;gap:14px}.route-profile__success{grid-column:1 / -1;text-align:left}.route-profile__stats{grid-template-columns:repeat(2,1fr)}.cost-tier-grid{grid-template-columns:1fr}.peak-facts{grid-template-columns:1fr;padding:26px}.ecosystem-grid{grid-template-columns:repeat(2,1fr)}.success-bar-row{grid-template-columns:90px 1fr 50px;gap:8px;font-size:12px}.internal-links__grid,.related-grid{grid-template-columns:1fr}.guide-cta{grid-template-columns:1fr}.byline{gap:12px 18px}} @media(max-width:600px){.hero__stats{grid-template-columns:1fr 1fr}.route-profile__num{font-size:36px}.route-profile__stats{grid-template-columns:1fr 1fr}}
    Cluster 06 · Kilimanjaro · Anchor · Updated April 2026

    Kilimanjaro Climbing Guide: Routes, Costs & Difficulty

    The complete 2026 guide to climbing Africa’s highest peak — all seven routes compared, $70/day park fees, the 8-day Lemosho vs 7-day Machame decision, success rates from 27% to 95%, and everything you need to know before booking the most-climbed peak in the Seven Summits.

    5,895 m
    Uhuru Peak
    summit
    7
    Climbing
    routes
    ~65%
    Overall
    success rate
    $1,500–$7,500
    Total cost
    range 2026
    Global Summit Guide Anchor guide for Cluster 06 · Kilimanjaro View master hub →

    Kilimanjaro is the world’s tallest freestanding mountain, the highest peak in Africa, and the most-climbed of the Seven Summits — approximately 40,000 people attempt it each year. But for a mountain often dismissed as “just a walk,” Kilimanjaro’s reality is more complex: roughly 1 in 3 climbers fails to summit, primarily due to altitude sickness compounded by route choice. This anchor guide covers everything you need to plan a successful Kilimanjaro climb in 2026 — the seven routes, the cost structure, the success rate math, and the critical decisions that separate summit-day celebrations from helicopter evacuations.

    ⊛
    How this guide was built

    Content reflects 2026 regulations from KINAPA (Kilimanjaro National Park Authority) and TANAPA (Tanzania National Parks), current operator pricing from KPAP-partnered companies, and Wilderness and Environmental Medicine research on Kilimanjaro altitude sickness and summit success determinants. Route statistics compiled from Altezza Travel, Climb Kilimanjaro Guide, Mount Kilimanjaro Climb, and independent operator data. Reviewed by Tanzanian KINAPA-licensed mountain guides. Fact-check date: April 19, 2026.

    Kilimanjaro: What You’re Actually Climbing

    Kilimanjaro is a dormant stratovolcano in northern Tanzania, standing 5,895 meters (19,341 feet) above sea level. It comprises three distinct volcanic cones — Kibo (the summit), Mawenzi, and Shira — though only Kibo is climbed via standard routes. The mountain rises approximately 4,900 m directly from the surrounding plains, making it the world’s tallest freestanding peak (peaks like Everest and Denali rise from already-elevated plateaus).

    The Summit & Geography

    Uhuru Peak
    5,895 m (19,341 ft) — the highest point in Africa
    Volcanic cones
    Kibo (climbed), Mawenzi (technical), Shira (collapsed)
    Location
    Tanzania · 3°S of the equator
    National park
    Kilimanjaro National Park — UNESCO World Heritage 1987
    Glaciers
    Shrinking — may be ice-free by 2040-2050

    The Climbing Picture

    Annual climbers
    ~35,000-40,000 attempting per year
    Total all-time summits
    Estimated 380,000+ since first ascent
    First ascent
    Hans Meyer & Ludwig Purtscheller, 1889
    Seven Summits status
    Africa’s Seven Summit — one of seven continental highs
    Climbing style
    Trek (no technical climbing on standard routes)

    The climb passes through five distinct ecosystems — a ecological traverse unmatched by most mountains in the world. Each zone presents different challenges, temperatures, and scenery:

    Cultivation

    800–1,800 m

    Farmland, coffee & banana plantations, Chagga villages

    Rainforest

    1,800–2,800 m

    Dense canopy, monkeys, waterfalls, heavy humidity

    Heather/Moorland

    2,800–4,000 m

    Giant heather, lobelia, groundsels, sweeping views

    Alpine Desert

    4,000–5,000 m

    Barren volcanic terrain, extreme UV, thin air

    Arctic Summit

    5,000–5,895 m

    Glaciers, freezing temps, 50% oxygen, summit zone

    ★
    Why Kilimanjaro is the accessible Seven Summit

    Among the Seven Summits, Kilimanjaro stands alone as a genuine non-technical peak — no ropes, no crampons, no ice axes on the standard routes. This is why it’s the most popular of the seven. But its accessibility masks altitude challenges equivalent to any 5,000 m+ trek. The dropout rate from altitude sickness is comparable to much more technical peaks. Respect the altitude, choose the right route, and the summit is genuinely achievable for most reasonably fit adults.


    The Seven Routes Up Kilimanjaro: Detailed Profiles

    Kilimanjaro has seven established routes to the summit plus the Mweka trail used for descent only. Choosing the right route is the single most important decision in planning your climb — it determines success probability, cost, scenery, and physical demands more than any other factor.

    01
    Most Popular · “The Whiskey Route”

    Machame Route

    ~35% of all climbers · Southern approach
    85%7-day success

    Machame is Kilimanjaro’s most popular route — used by approximately one-third of all climbers. The nickname “Whiskey Route” reflects its reputation as tougher than Marangu’s “Coca-Cola Route.” Southern approach from Machame Gate, ascending through rainforest to Shira Plateau, then Lava Tower (4,630 m), Barranco Camp with its famous Barranco Wall (a non-technical scramble), Karanga Camp, Barafu summit base camp, and final push to Uhuru Peak.

    Excellent “climb high, sleep low” acclimatization profile makes the 7-day version highly successful. Trekkers pass all five ecosystem zones with dramatic scenery throughout. Camping only — no hut option. Can get crowded at peak times. The 7-day version is strongly preferred; 6-day Machame drops success to just 44-73%.

    Days6 or 7
    Distance~62 km
    AccommodationCamping
    Best forPopular choice
    02
    Best Success Rate · “Lemosho Gold Standard”

    Lemosho Route

    Western approach · Most scenic
    90–95%8-day success

    Lemosho is the preferred route for most serious climbers and has become the “gold standard” for Kilimanjaro ascents. Western approach starting at Londorossi Gate, traversing the stunning Shira Plateau from west to east, then joining the Machame route on Day 4 at Barranco Camp. Remote opening days offer some of the best scenery on any route, with fewer climbers until the Machame merger.

    The 8-day version provides excellent acclimatization — extra day at high altitude before summit attempt dramatically improves success. This is the route recommended by most experienced operators. The 7-day variant still achieves 85% success. The 6-day compressed version is not recommended — too rushed for safe acclimatization despite costing less.

    Days7 or 8
    Distance~70 km
    AccommodationCamping
    Best forMost climbers
    03
    Highest Success · “The Long Circuit”

    Northern Circuit

    Longest route · Newest option
    95%+9-day success

    The Northern Circuit is Kilimanjaro’s newest and longest route, approved in 2010. It follows Lemosho for the first days, then breaks off to circle the mountain’s northern slopes — terrain no other route visits. At 9 days minimum, it provides the best acclimatization of any Kilimanjaro route with success rates above 95%.

    Significantly less crowded than Machame or Lemosho’s shared sections. The extra days mean higher cost ($3,500-$6,500 typical) but also dramatically higher summit probability. Best choice for cautious climbers, older trekkers, or anyone prioritizing summit success over cost. Also ideal if you have 10+ days available in Tanzania and want a fully comprehensive experience.

    Days9 days
    Distance~90 km
    AccommodationCamping
    Best forHighest success
    04
    Hut Accommodation · “The Coca-Cola Route”

    Marangu Route

    Only hut route · Lowest success rates
    27–60%5-6 day success

    Marangu is Kilimanjaro’s oldest and only hut-based route — climbers sleep in dormitory huts (Mandara, Horombo, Kibo) rather than tents. Often marketed as the “easiest” route due to its shorter duration and hut comforts, but the 5-day version has only 27% summit success — by far the lowest of any option. Only Marangu uses the same trail for ascent and descent.

    The 6-day version improves success to 50-60% but still trails other routes significantly. Avoid Marangu unless you specifically need hut accommodations for medical reasons or strongly dislike tents. The compressed schedule provides inadequate acclimatization. Cheaper than most routes (~$1,800-$3,500) but success rate reflects the cost compromise. Often chosen by price-first climbers who later regret not completing.

    Days5 or 6
    Distance~72 km
    AccommodationHuts
    Best forHut preference only
    05
    Northern Side · Quieter Alternative

    Rongai Route

    Only northern approach · Wildlife potential
    85%7-day success

    Rongai is the only route approaching Kilimanjaro from the north, starting near the Kenyan border. Significantly less crowded than southern routes, with occasional wildlife sightings (elephants, buffalo) in the lower forest sections. Drier than southern routes — good choice during the short rainy season (November).

    The main weakness is acclimatization profile — Rongai doesn’t offer the classic “climb high, sleep low” pattern of Machame/Lemosho. This makes the 7-day version strongly preferred over 6-day (85% vs 70% success). Descends via the southern Marangu route, so you see both sides of the mountain. Good option for returning climbers seeking quieter experience.

    Days6 or 7
    Distance~65 km
    AccommodationCamping
    Best forQuieter experience
    06
    Steepest · For Experienced Climbers Only

    Umbwe Route

    Most direct · Lowest success rate
    50–70%6-7 day success

    Umbwe is Kilimanjaro’s steepest and most challenging route — a direct southern approach that gains altitude rapidly through dense rainforest. Less than 2% of climbers choose Umbwe. The route’s speed and direct path mean poor acclimatization profile and correspondingly lower summit success.

    Joins the Machame route at Barranco Camp. Recommended only for experienced mountain climbers with prior altitude exposure — ideally those with Mt. Meru (4,566 m) or similar acclimatization before Kilimanjaro. The solitude and challenge appeal to some climbers but the summit success drops to 50% on 6-day Umbwe, making it a poor choice for first-time Kilimanjaro climbers regardless of fitness.

    Days6 or 7
    Distance~53 km
    AccommodationCamping
    Best forExperienced only
    07
    Rarely Used Ascent · Mostly Joined with Lemosho

    Shira Route

    High starting altitude · Risky profile
    60–70%Estimated

    The Shira route is essentially a Lemosho variant that drives climbers to Shira Gate at 3,600 m, skipping the rainforest walking days. The high starting altitude without prior acclimatization makes Shira risky — many climbers experience immediate altitude sickness on Day 1. Now rarely offered by reputable operators.

    Most modern Shira-branded packages are actually Lemosho 7-day trips that start at Lemosho Glades. The true Shira drop-off approach should be avoided unless you have specific prior altitude acclimatization. If your operator offers “Shira Route,” clarify which version — legitimate Lemosho at lower start or risky 3,600 m drop-off.

    Days6–7
    Distance~56 km
    AccommodationCamping
    Best forNot recommended

    Success Rates: The Math of Summit Success

    Kilimanjaro summit success depends primarily on days spent above 3,000 m rather than fitness or operator quality. The data shows a remarkably linear relationship between duration and success:

    Kilimanjaro Success Rate by Route & Duration (Industry Averages)

    Marangu 5-dayNot recommended
    27%
    Machame 6-dayCompressed
    44%
    Marangu 6-dayAdequate acc.
    55%
    Rongai 6-dayNorthern
    70%
    Machame 7-dayStandard
    85%
    Lemosho 7-dayScenic
    85%
    Rongai 7-dayQuieter
    85%
    Lemosho 8-dayGold standard
    90%+
    Northern Circuit 9-daySafest
    95%+

    The pattern is unambiguous: each additional day above 3,000 m adds approximately 5-7 percentage points to summit probability. This is physiology, not fitness — your body needs time to produce additional red blood cells and adapt to reduced oxygen. See our Altitude Acclimatization Explained guide for the full physiological picture.

    Research published in Wilderness and Environmental Medicine confirms that 77% of unsuccessful climbs result from inadequate acclimatization rather than fitness failure. Fit climbers on compressed schedules fail; moderately fit climbers on 8-9 day routes succeed. The route choice matters more than training.


    Kilimanjaro Costs in 2026: What You’ll Actually Pay

    Kilimanjaro costs cluster into three distinct tiers based on operator quality and inclusions. Total trip costs range from $1,500 to $7,500 per person, with major variations in safety, porter welfare, and summit success.

    Avoid this tier

    Budget

    $1,500–$2,500
    • Local Tanzanian companies, minimal overhead
    • Safety concerns: reduced guide training, limited oxygen
    • Porter welfare issues — often not KPAP-certified
    • Lower-quality gear and food
    • Compressed itineraries (6-day routes common)
    • Success rates 50-65%
    • Not recommended for first climb
    Recommended tier

    Mid-Range

    $2,500–$4,500
    • Reputable international + local operators
    • KPAP-partnered — ethical porter treatment
    • Experienced guides, good safety systems
    • Quality meals, modern tents
    • 7-8 day route options preferred
    • Success rates 80-90%
    • Best value for most climbers
    Full-service tier

    Premium

    $4,500–$7,500
    • Top international operators
    • IFMGA guides, medical certification
    • Best equipment, private toilets, gourmet meals
    • Pulse oximeter monitoring twice daily
    • Helicopter evacuation access
    • Success rates 92-97%
    • Includes hotel nights, transfers, some gear

    Park fees: the mandatory baseline

    TANAPA/KINAPA park fees are identical across all operators — set by the Tanzanian government. For a standard 7-day Kilimanjaro climb (2026 rates):

    Fee ComponentRateCalculationTotal
    Conservation fee$70/day7 days × $70$490
    Camping fee$50/night6 nights × $50$300
    Rescue fee$20 one-timePer climber$20
    Support team feesVariableGuides + porters (3-5 crew per climber)~$50
    Subtotal (pre-VAT)—Per climber~$860
    VAT (18%)—Added to all fees~$155
    Total park fees—Per climber, 7 days~$1,015

    Park fees alone represent approximately 25-40% of your total climb cost. Operators below $2,000 total are either compressing the itinerary to reduce fees, cutting operator margins dangerously thin, or underpaying porters. See our Kilimanjaro Cost 2026 deep-dive for complete cost breakdown including hidden expenses and tipping protocols.

    ▲
    Why porter welfare matters for your choice

    Kilimanjaro porters — typically 2-4 per climber — carry up to 15 kg of gear plus their personal items, often up to 6,000 m. Historically, porters were paid $3-5/day, many suffering exposure injuries in inadequate gear. KPAP (Kilimanjaro Porters Assistance Project) partner operators commit to ethical standards: proper pay ($10-20/day), provided shelter and food, weight limits enforced, appropriate gear. Budget operators frequently violate these standards. Choosing KPAP-partnered companies directly improves the lives of ~10,000 Tanzanians working on the mountain annually. Look for the KPAP logo when comparing operators.


    How Hard Is Kilimanjaro? The Difficulty Framework

    Kilimanjaro occupies a unique position in mountaineering difficulty — easier than most 5,000 m+ peaks technically, but altitude-equivalent to many that require more skill. Understanding the specific demands helps calibrate preparation.

    The four difficulty factors

    • 1. Altitude (the primary challenge): Uhuru at 5,895 m means ~50% oxygen of sea level. Approximately 77% of climbers experience some AMS symptoms. This is the dominant difficulty factor on all routes.
    • 2. Physical endurance: 5-8 hours of hiking per day for 5-9 consecutive days, with summit day reaching 10-14 hours. Cumulative fatigue matters more than peak intensity.
    • 3. Weather exposure: Temperature range from +30°C (rainforest) to -15°C (summit). Rain common on lower mountain, snow possible at altitude year-round. Proper layering essential.
    • 4. Mental resilience: Summit day starts at midnight with 7-8 hours of uphill hiking in darkness and cold, at maximum altitude. Many climbers reach their psychological breaking point here.

    Fitness requirements

    Baseline fitness for Kilimanjaro:

    • Minimum: Ability to hike 6-8 hours with a daypack on consecutive days without injury
    • Recommended: Multiple training hikes of 8+ miles with 1,000 m+ elevation gain in preceding months
    • Optimal: Prior experience at altitude (3,000 m+ even briefly) and running/cycling base of 30-40 km/week

    See our 12-Week Kilimanjaro Training Plan for a structured program that prepares you specifically for the demands of Kilimanjaro.

    ◆
    The Seven Summits ranking

    Among the Seven Summits, Kilimanjaro ranks #6 in difficulty — easier only than Kosciuszko (walk-up). It’s significantly easier than Elbrus (5,642 m glaciated, requires crampons), Aconcagua (6,961 m, altitude extreme), Denali (6,190 m, technical + extreme cold), Carstensz Pyramid (4,884 m, D+ technical climbing), Vinson (4,892 m, Antarctica logistics), and Everest (8,849 m, death zone). But don’t misread this: Kilimanjaro still has a ~35% failure rate. It’s the accessible Seven Summit, not a trivial one.


    When to Climb: Best Seasons Overview

    Kilimanjaro sits 3° south of the equator — temperature is less seasonal than rainfall. The two dry seasons are the primary climbing windows.

    • Primary dry season (January–mid March): Warmer, clearer summit nights, best photography. Growing crowds toward March.
    • Main climbing season (June–October): Peak crowds but most reliable weather. Cold but clear summits. August is busiest.
    • Avoid long rains (mid-March to late May): Heavy rainfall on lower mountain, muddy trails, obscured views.
    • Short rains (November–December): Less intense, often climbable, less crowded.

    See our Best Time to Climb Kilimanjaro month-by-month guide for detailed seasonal analysis including weather patterns, crowd levels, moon phases, and optimal booking strategies.


    Kilimanjaro Climbing FAQ: Your Common Questions Answered

    How much does it cost to climb Kilimanjaro in 2026?

    Climbing Kilimanjaro in 2026 typically costs between $1,500 and $7,500 per person, varying significantly by operator tier and route length. Cost breakdown: (1) Budget operators: $1,500-$2,500 — typically local Tanzanian companies with minimal overhead. Safety and porter welfare concerns at this tier. (2) Mid-range operators: $2,500-$4,500 — reputable international and local companies with KPAP partnership for porter welfare, experienced guides, good equipment. (3) Premium operators: $4,500-$7,500 — full-service international companies with comprehensive safety systems, top-tier guides, quality gear, and excellent logistics. TANAPA park fees alone are approximately $820 plus 18% VAT (~$955-$1,000 total) for a standard 7-day climb, set by the Tanzanian government and identical across all operators. Park fees include $70/day conservation, $50/night camping, $20 rescue fee. Additional costs not always included: flights ($1,200-$2,200 from North America), tips ($250-$400 for guides and porters), travel insurance ($100-$300), gear rental or purchase ($150-$800), visa and hotel nights before/after climb ($150-$400). Total trip budget: $3,500-$10,000+ from North America. Never climb with operators offering under $1,500 — corners will be cut on safety or porter welfare.

    What is the best route to climb Kilimanjaro?

    The best route to climb Kilimanjaro depends on your priorities, but the 8-day Lemosho route is widely considered the optimal choice for most climbers. Why Lemosho 8-day is the best: (1) 90-95% summit success rate — among the highest of all routes. (2) Excellent “climb high, sleep low” acclimatization profile. (3) Beautiful scenery through five distinct ecosystems. (4) Less crowded than Machame (Lemosho joins Machame on Day 4). (5) Western approach provides fresh perspective. Alternative best choices: (a) 9-day Northern Circuit — highest success rate (95%+) and most comprehensive acclimatization, ideal for cautious climbers with extra time. (b) 7-day Machame — 85% success rate, most popular route (~35% of climbers), good balance of time, cost, and scenery. (c) 7-day Rongai — 85% success rate, northern approach, fewer crowds, better in rainy season. Routes to avoid: (1) 5-day Marangu — only 27% summit success, too rushed for acclimatization. (2) 6-day Umbwe — 50% success, steepest route on the mountain. (3) 6-day variants of any route — too compressed for safe acclimatization. Choose 7+ days minimum; 8+ days strongly preferred for summit success.

    How difficult is climbing Kilimanjaro?

    Kilimanjaro is rated as moderately difficult — the easiest of the Seven Summits but significantly harder than typical hiking due to altitude. Difficulty factors: (1) No technical climbing required — it’s a trek, not a climb. No ropes, crampons, or ice axes needed on standard routes. (2) Altitude is the primary challenge — Uhuru Peak at 5,895 m means 50% less oxygen than sea level. Approximately 77% of climbers experience some altitude sickness symptoms. (3) Distance and elevation gain — 50-70 km total with 4,000 m elevation gain over 5-9 days depending on route. (4) Physical demand — 5-8 hours hiking per day with a daypack (porters carry main gear). Summit day is 10-14 hours with pre-dawn start. (5) Weather — temperatures range from +30°C in rainforest to -15°C at summit. Fitness requirement: Ability to hike 6-8 hours per day with a daypack for 7+ consecutive days. Training: 3-6 months of cardio (hiking, running, cycling) plus strength work builds appropriate fitness. Success rate across all routes averages 65% — primarily determined by route length rather than fitness level. Longer routes (8+ days) dramatically improve summit odds.

    How many days do you need to climb Kilimanjaro?

    Most climbers need 7-9 days to climb Kilimanjaro safely and successfully. Day requirements by route: (1) Marangu — 5 or 6 days (5-day option has only 27% summit success and is strongly discouraged). (2) Machame — 6 or 7 days (7-day much better with 85% success vs 44% for 6-day). (3) Rongai — 6 or 7 days (7-day recommended). (4) Lemosho — 7 or 8 days (8-day has 90-95% success). (5) Northern Circuit — 9 days only (95%+ success). (6) Umbwe — 6 or 7 days (steep, lower success rates overall). Why duration matters so much: Each additional day above 3,000 m adds approximately 5-7 percentage points to summit success. The difference between 6-day and 9-day climbs is primarily physiological — your body needs time to produce additional red blood cells and adapt to reduced oxygen. Industry average success: 5-day routes 27%, 6-day 44%, 7-day 64-85%, 8-day 85-95%, 9-day 95%+. Budget minimum 7 days on the mountain; prefer 8-9 days if budget and time allow. The extra days pay for themselves in dramatically higher summit probability and much more enjoyable experience with less altitude suffering.

    Can you climb Kilimanjaro without a guide?

    No, you cannot legally climb Kilimanjaro without a guide. Tanzanian law requires all climbers to book through licensed tour operators and be accompanied by registered guides. Key regulations: (1) Only KINAPA-licensed (Kilimanjaro National Park Authority) operators can obtain climbing permits. (2) All climbers must be accompanied by registered Tanzanian mountain guides. (3) Independent or solo trekking is strictly prohibited — violations result in deportation, fines, or imprisonment. (4) Every climber requires a support team of at least 3-5 staff including guide, assistant guide, cook, and porters. (5) Rangers check permits and guide credentials at park entrances and along trails. Why the rule exists: safety (altitude rescue, navigation), environmental protection (pack-out requirements), and economic support for local Tanzanian communities. Porter-to-climber ratios typically range from 3:1 to 5:1 by regulation. Groups must include certified first aid personnel and maintain guide-to-climber ratios of 1:3 or better for safety. All operator packages include guides, permits, and crew as standard — there is no legal way to attempt Kilimanjaro independently. Budget appropriately for this regulatory structure which adds significant cost but ensures safety and fair employment for ~10,000 Tanzanians who work annually as mountain crew.

    What is the success rate on Kilimanjaro?

    The overall Kilimanjaro summit success rate is approximately 65% across all routes and durations — meaning roughly 1 in 3 climbers does not reach Uhuru Peak. However, success varies dramatically by route length and quality: (1) By days on mountain: 5-day routes 27%, 6-day 44%, 7-day 64-85%, 8-day 85-95%, 9-day 95%+. (2) By specific route (industry average): Northern Circuit 9-day 92%+, Lemosho 8-day 90%, Lemosho 7-day 85%, Machame 7-day 85%, Rongai 7-day 85%, Machame 6-day 73%, Lemosho 6-day 75%, Rongai 6-day 70%, Marangu 6-day 50-60%, Marangu 5-day 27%, Umbwe 6-day 50%. (3) Top-quality operators report 90-97% success rates on their 8-day Lemosho and 9-day Northern Circuit programs, vs industry averages 80-92%. Main failure cause: 77% of unsuccessful climbs result from inadequate acclimatization rather than fitness. Other failure causes: severe altitude sickness (AMS/HAPE/HACE), injury, illness, mental fatigue, weather. Maximize your success: (1) Choose 8+ day route. (2) Select quality operator with experienced guides. (3) Arrive 2-3 days before climb to start acclimatization. (4) Train specifically for multi-day hiking. (5) Hydrate aggressively (4-5 L/day on mountain). (6) Consider Diamox on doctor’s recommendation. (7) Walk slowly — ‘pole pole’ in Swahili is the summit motto.

    What should I pack for Kilimanjaro?

    Packing for Kilimanjaro requires gear for 5 distinct climate zones from tropical rainforest to arctic summit. Essential gear categories: (1) Boots and footwear — Waterproof hiking boots (broken in), camp shoes/sandals, gaiters for wet sections. (2) Layering system — Base layers (wool/synthetic, 3 sets), insulating mid-layers (fleece + down puffy jacket), hardshell jacket and pants (waterproof/windproof). (3) Summit layers — Heavy down jacket (-15°C rated), warm hat, balaclava, insulated mittens + liner gloves. (4) Sleeping — Sleeping bag rated to -10°C or warmer, inflatable sleeping pad (if camping route). (5) Head and eyes — Sun hat, headlamp + spare batteries, quality sunglasses (UV 400, glacier protection). (6) Hydration — 3 L water capacity (Nalgene + hydration bladder), water purification tablets as backup. (7) Small daypack — 25-35 L for daily items (main gear carried by porters up to 15 kg limit per porter). (8) Trekking poles (essential for descents), first aid kit including Diamox prescription, blister treatment, personal medications. (9) Snacks and electrolyte supplements. (10) Duffel bag for porter gear (most operators provide). Gear rental is widely available in Moshi and Arusha — budget $150-$300 for full kit rental. Operators typically provide detailed packing lists; follow them carefully as weather conditions vary dramatically across the climb.

    When is the best time to climb Kilimanjaro?

    The best time to climb Kilimanjaro is during the two dry seasons: January through mid-March and mid-June through October. Detailed monthly breakdown: (1) January-mid March: Dry season, warmer, clearer skies on summit nights, ideal for photography. Increasing crowds toward February-March peak. Snow on summit more common. (2) Mid-March to late May: Long rainy season. Heavy rainfall on lower mountain, trails muddy, cloud cover obscures views. Not recommended for most climbers. (3) June: Rain easing, cooler temperatures, preparing for peak season. Good shoulder month. (4) July-October: Main dry season and peak climbing season. Busy trails, best weather, cold but clear. July-August see highest volumes. (5) November-December: Short rainy season, less intense than spring rains but still challenging. December becomes drier toward month-end. (6) Late December: Christmas and New Year’s climbs popular despite occasional rain. Best months for summit weather: January (warmer, clearer), August-September (reliable dry conditions), late December-early January (peak conditions). Full moon considerations: Summit nights near full moon provide natural light on final summit push (04:00-06:00 ascent to watch sunrise from Uhuru). Book 4-6 months ahead for peak season; 2-3 months for shoulder seasons.


    Authoritative Sources & Further Reading

    Content reflects current 2026 regulations and peer-reviewed mountaineering research:

    • KINAPA (Kilimanjaro National Park Authority) — tanzaniaparks.go.tz — Official park authority and regulations
    • TANAPA (Tanzania National Parks) — tanzaniaparks.go.tz — National park fee structure and climbing permits
    • KPAP (Kilimanjaro Porters Assistance Project) — kiliporters.org — Porter welfare standards and certified operators
    • Wilderness and Environmental Medicine journal — “Determinants of Summiting Success and Acute Mountain Sickness on Mt. Kilimanjaro (5895m)”
    • International Porter Protection Group (IPPG) — ippg.net — Porter safety guidelines
    • UIAA (International Climbing and Mountaineering Federation) — altitude acclimatization research
    • Operator websites: Altezza Travel, Climbing Kilimanjaro, Mount Kilimanjaro Climb, African Scenic Safaris, Tranquil Kilimanjaro, Eco-Africa Climbing, Mountain Madness, Alpine Ascents International, REI Adventures
    • Reference texts: Kilimanjaro and Mount Kenya: A Climbing and Trekking Guide (Cameron Burns), Kilimanjaro: The Trekking Guide (Henry Stedman), Mountaineering in Kilimanjaro National Park (TANAPA publications)
    Published: March 8, 2026
    Last updated: April 19, 2026
    Next review: July 2026
    Part of the Global Summit Guide

    Back to the Master Hub

    This guide is one of 71 across 12 thematic clusters on Global Summit Guide. The master hub organizes every guide by experience tier, specific peak, skill area, and region.

    View the Hub →

    Was this helpful?

    Yes
    No
    Thanks for your feedback!
  • Everest Base Camp Trek: Itinerary, Cost & Complete Guide

    Mount Everest viewed from Kala Patthar above the Everest Base Camp trail
    Nepal · Khumbu · Sagarmatha National Park · World Treks

    Everest Base Camp Trek: Itinerary, Cost & Complete Guide

    The Everest Base Camp trek climbs from Lukla through Namche Bazaar, Tengboche, Dingboche and the upper Khumbu to Everest Base Camp at 5,364 metres. It requires no technical climbing in normal trekking-season conditions, but altitude makes the 12–14 day journey far more serious than its distance suggests. This guide covers the itinerary, current permits, cost, Lukla flights, acclimatization, difficulty, best season, teahouses, training and gear.

    ≈130 km / 80 mi round trip 5,364 m Base Camp 12–14 days Teahouse trek Current permit rules checked
    The direct answer

    How Hard Is the Everest Base Camp Trek?

    Everest Base Camp is a strenuous high-altitude trek, not a technical climb. The classic route is roughly 130 km / 80 miles round trip from Lukla and normally takes 12–14 days. Everest Base Camp itself is about 5,364 m / 17,598 ft. Most itineraries also include Kala Patthar at roughly 5,545 m or higher depending on the exact viewpoint because it provides the classic panorama toward Everest. The trail does not normally require ropes, crampons or glacier travel, but the sleeping elevations above 4,000 metres make conservative acclimatization essential.

    Current planning reality

    Nepal Tourism Board currently lists the Everest Base Camp Trek among routes requiring a licensed trekking guide and a trekking-agency-issued TIMS card. Foreign trekkers also encounter the Sagarmatha National Park entry system and Khumbu Pasang Lhamu Rural Municipality Trek-Card. Peak-season Lukla flights may operate through Manthali/Ramechhap rather than Kathmandu, so confirm the departure airport shortly before travel.

    Base Camp 5,364 m 17,598 ft on the moraine beside the Khumbu Glacier.
    Typical trek 12–14 days Long enough to build two major acclimatization stops into the ascent.
    Distance ≈130 km About 80 miles round trip; exact distance changes with side hikes and lodging.
    Main challenge Altitude The trail is hiking terrain; reduced oxygen is what changes the experience.
    Lukla → Base Camp → Lukla

    Everest Base Camp Trek Route Map.

    The route climbs the Dudh Koshi Valley to Namche Bazaar, turns deeper into the Khumbu through Tengboche and Dingboche, then follows the glacial valley past Lobuche to Gorak Shep, Everest Base Camp and Kala Patthar.

    Schematic orientation only—not a navigation track. Trail alignments, bridges and local conditions change. Follow current maps and guide instructions on the trek.
    The classic acclimatized route

    Everest Base Camp 12-Day Trek Itinerary.

    Nepal Tourism Board describes the normal EBC journey as approximately two weeks. The itinerary below protects acclimatization days at both Namche and Dingboche rather than trying to win time by sleeping higher too quickly.

    DayRouteSleepApprox. elevationPurpose
    1Fly to Lukla → PhakdingPhakding2,610 mShort first walking day after the flight.
    2Phakding → Namche BazaarNamche3,440 mEnter Sagarmatha National Park and make the first major altitude gain.
    3Namche acclimatization hikeNamche3,440 mHike higher during the day, return lower to sleep.
    4Namche → TengbocheTengboche / Deboche≈3,860 mCross forested ridges to the monastery zone with Ama Dablam views.
    5Tengboche → DingbocheDingboche4,410 mLeave the dense forest and enter the high Khumbu.
    6Dingboche acclimatization hikeDingboche4,410 mSecond major acclimatization day before sleeping near 5,000 m.
    7Dingboche → LobucheLobuche≈4,940 mPass the Thukla memorials and move into glacial terrain.
    8Lobuche → Gorak Shep → Everest Base CampGorak Shep5,164 mReach Base Camp at 5,364 m, then return to Gorak Shep to sleep.
    9Kala Patthar → PherichePheriche≈4,240 mOptional high viewpoint, then a major descent to thicker air.
    10Pheriche → Namche BazaarNamche3,440 mLong descent through the central Khumbu.
    11Namche → LuklaLukla2,860 mFinal full walking day.
    12Fly from LuklaKathmandu / onward≈1,400 m KathmanduWeather-dependent exit from the Khumbu.

    Add weather buffer outside the 12-day route.

    Do not schedule an inflexible international departure immediately after the planned Lukla flight. Weather can delay fixed-wing operations, and current Ramechhap road logistics can add additional travel complexity. A stronger Nepal itinerary protects at least one or two contingency days.

    Lukla and Tenzing Hillary Airport in Nepal at the start of the Everest Base Camp trek
    2,860 m · gateway to Everest

    The Trek Usually Begins With the Lukla Flight.

    Tenzing-Hillary Airport turns a long approach through the lower Solu into a short flight followed by immediate mountain travel. Its short runway and mountain weather make schedule flexibility important, but the flight is only the gateway—the altitude problem begins after you start walking.

    Photo: Vyacheslav Argenberg · Wikimedia Commons · CC BY 4.0
    The trek’s real difficulty

    Everest Base Camp Is an Acclimatization Problem.

    Walking fitness helps you move efficiently, but fitness does not protect you from acute mountain sickness. The itinerary has to control sleeping altitude even when your legs feel strong enough to keep climbing.

    First checkpoint

    Namche Bazaar

    Sleeping at 3,440 m after arriving from Lukla is a major physiological step. A second night here gives the body time before the route climbs higher.

    Second checkpoint

    Dingboche

    At 4,410 m, a second acclimatization day creates valuable time before sleeping at Lobuche and Gorak Shep.

    Safety rule

    Symptoms Override the Schedule

    Do not ascend to a higher sleeping altitude while symptoms of altitude illness are worsening. Severe symptoms require urgent descent and medical assessment.

    Namche Bazaar viewed from the Everest View acclimatization trail
    Namche Bazaar · 3,440 m

    The Most Productive Day on the Trek May Be the Day You Do Not Move Forward.

    The Namche acclimatization day is not a wasted day. Hiking higher toward Khumjung or Everest View and returning to Namche to sleep gives your body an altitude stimulus without immediately raising the sleeping elevation again.

    Photo: Rohit Sharma · Wikimedia Commons · CC BY-SA 4.0
    Strenuous trekking · non-technical route

    How Difficult Is Everest Base Camp?

    The standard EBC trail does not require technical climbing skills in normal trekking-season conditions. The difficulty comes from altitude, repeated walking days, rough trail, cold, sleep disruption and the cumulative fatigue of living above 4,000 metres.

    Technical terrain

    Low

    The normal trail uses established paths, stone steps and suspension bridges. You do not enter the Khumbu Icefall or climb on the Everest expedition route.

    Endurance

    Moderate–High

    Expect repeated five-to-seven-hour hiking days and a substantial amount of climbing and descending over nearly two weeks.

    Altitude

    Very High

    The final nights occur above 4,900 metres, where even normal walking can feel slow and sleep quality commonly deteriorates.

    Cold

    Season Dependent

    Higher villages can be well below freezing overnight even during normal spring and autumn trekking seasons.

    Pack weight

    Controllable

    Porter support can dramatically reduce daily load, but you should still train with the daypack you will carry yourself.

    Main mistake

    Going Too Fast

    A compressed itinerary can turn excellent fitness into a liability if it encourages faster ascent than your acclimatization allows.

    Tengboche Monastery in Nepal's Khumbu region on the Everest Base Camp trek
    Tengboche · Khumbu culture

    The EBC Route Is More Than the Destination.

    The approach passes Buddhist monasteries, mani walls, prayer wheels and Sherpa communities long before it reaches the glacial world around Base Camp. Tengboche sits at one of the cultural and scenic centers of the route with Everest, Lhotse and Ama Dablam surrounding the valley.

    Current official planning requirements

    Everest Base Camp Permits, TIMS and Guide Rules.

    The administrative system is easier to understand when the three different charges are separated rather than all being called “permits.”

    Sagarmatha National Park

    NPR 3,000

    Nepal Tourism Board currently lists the foreign visitor entry fee for Sagarmatha National Park at NPR 3,000 per person per entry. The EBC trail enters the park above Monjo.

    Khumbu municipality

    NPR 3,000

    Khumbu Pasang Lhamu Rural Municipality currently lists its Trek-Card fee at NPR 3,000 for visitors from countries outside SAARC and China. SAARC and Chinese visitors are listed at NPR 2,000.

    TIMS

    NPR 2,000

    Nepal Tourism Board currently lists EBC among the routes requiring a trekking-agency-issued TIMS card and licensed trekking guide. The listed non-SAARC TIMS charge is NPR 2,000.

    Use the current Nepal Tourism Board rule, not an old blog post.

    The official NTB page presently names Everest Base Camp specifically under its guide-and-TIMS requirement. Regulations and local implementation can change, so verify the rule with NTB and your registered trekking agency immediately before travel.

    The logistical wildcard

    Your Lukla Flight May Start in Ramechhap, Not Kathmandu.

    Lukla is the standard air gateway for EBC, but peak-season airport congestion changes how many itineraries actually begin.

    • Summit Air currently identifies Manthali Airport in Ramechhap as a high-season gateway for Lukla.
    • Manthali normally requires a road transfer from Kathmandu.
    • Road conditions can materially change transfer time.
    • Current fall-2026 itineraries from some operators have required an overnight in Manthali because of road disruption.
    • Flight schedules remain highly weather-dependent.

    Confirm three things shortly before departure: which airport your flight uses, when the ground transfer leaves, and how many contingency days your international itinerary protects.

    Aircraft and runway at Lukla Airport in Nepal Lukla is the normal EBC gateway, but the departure airport used to reach it can change with season and operations.
    Compare inclusions before comparing prices

    How Much Does the Everest Base Camp Trek Cost?

    There is no single correct EBC price. Current programs span from local guided teahouse trips to high-service international expeditions with helicopters and upgraded lodging.

    Local guided example ≈$1.4K–$1.8K

    Current local-operator group pricing can sit in this range when standard teahouses and local support are used.

    Fuller local package ≈$2.5K–$3K

    More inclusive Kathmandu, meal, porter and lodging packages move toward this level.

    Premium international ≈$4.9K–$6.5K

    Major expedition companies charge substantially more for leadership, staffing and premium logistics.

    Luxury $10K+

    Helicopters, luxury lodges and high-end expedition service can push the trip well beyond ordinary trekking budgets.

    The cheapest quoted trip is not necessarily the cheapest complete trip.

    Before comparing operators, check whether the price includes Lukla flights, Ramechhap transfers, TIMS, park and municipal fees, guide, porter, meals, Kathmandu hotel nights, airport transfers, insurance support, emergency oxygen, tips and contingency arrangements. A low headline price with major exclusions can cost more after the trek begins.

    Ama Dablam viewed from Dingboche on the Everest Base Camp route
    Dingboche · 4,410 m

    The Second Acclimatization Stop Comes With One of the Khumbu’s Great Views.

    Dingboche sits beneath Ama Dablam in open high-country terrain. By this point the trees are mostly behind you, nights are colder and altitude begins to dictate pace far more than fitness does.

    Photo: Kaibak · Wikimedia Commons · CC BY-SA 4.0
    Spring vs autumn

    Best Time for the Everest Base Camp Trek.

    Nepal Tourism Board identifies spring and autumn as the primary trekking seasons for Everest. Each has a different advantage.

    PeriodConditionsCrowdsWhat makes it attractiveMain trade-off
    MarchCold but improvingModerateEarly spring, quieter than AprilSnow and cold remain possible high on route
    AprilPrime springHighRhododendrons lower down; Everest expedition season developsBusy trail and lodges
    MayWarmer, pre-monsoonModerate–highEverest climbing season at Base CampCloud and afternoon weather become more common
    June–AugustMonsoonLowGreen lower valleysRain, cloud and more difficult flight reliability
    SeptemberTransition out of monsoonBuildingStart of autumn trekking seasonEarly September can retain monsoon influence
    OctoberPrime autumnVery highGenerally excellent mountain visibility and full servicesPeak demand and crowded teahouses
    NovemberClearer and colderModeratingStrong visibility with fewer trekkers later in monthCold nights increase sharply
    December–FebruaryWinterLowQuiet trail and often clear winter skiesSevere cold, snow and reduced services
    No camping required

    Teahouses, Food, Water and Charging.

    One reason EBC is accessible as a first Himalayan trek is the dense teahouse system. Beds and cooked meals are available throughout the normal route, but comfort decreases and prices rise as supplies move farther from the road network.

    Accommodation

    Simple Teahouse Rooms

    Expect basic twin rooms on standard itineraries. Bathrooms, showers and heated common rooms vary enormously by village and lodge level.

    Food

    Eat Enough

    Dal bhat, noodles, soups, potatoes, rice, eggs and simple Western dishes are widely available. Appetite often falls as altitude rises even though caloric need remains high.

    Water

    Treat Rather Than Depend on Bottles

    A reliable purification method reduces plastic waste and gives more flexibility than depending entirely on purchased bottled water.

    Electricity

    Expect Paid Charging

    Power becomes more limited and expensive higher on the route. Carry a power bank and keep batteries warm.

    Connectivity

    Useful, Not Guaranteed

    Wi-Fi and mobile service exist in parts of the Khumbu but should not be treated as an emergency communication system.

    Cash

    Carry Nepalese Rupees

    Higher villages are not where you want to discover that an electronic payment system or ATM is unavailable.

    Everest Base Camp and the Khumbu Glacier viewed from Kala Patthar
    Everest Base Camp · 5,364 m

    Base Camp Is the Destination—but Not the Best Everest View.

    Everest Base Camp places you beside the Khumbu Glacier and beneath the Khumbu Icefall, inside the landscape used by South Col expeditions. The summit of Everest itself is largely obscured from the trekking Base Camp area by the surrounding terrain. For the classic Everest panorama, climb Kala Patthar if your health and conditions allow.

    Photo: Goutam1962 · Wikimedia Commons · CC BY-SA
    The viewpoint above Gorak Shep

    Kala Patthar Is Often the Visual High Point of the Trek.

    Kala Patthar rises on the south side of Pumori above Gorak Shep. It opens a close panorama toward Everest, Nuptse, Changtse and the upper Khumbu Glacier.

    The elevation deserves a little honesty. Roughly 5,545 m remains widely cited for the normal viewpoint, while higher GPS readings around 5,643–5,644 m have been recorded farther up the rocky ridge. The practical implication is unchanged: you are hiking well above 5,000 metres.

    • Non-technical trail in normal trekking-season conditions.
    • Steep climbing immediately above Gorak Shep.
    • Cold and wind can be severe around sunrise.
    • Skip the climb if altitude symptoms or weather argue for descent.
    Mount Everest and Khumbu Glacier viewed from Kala Patthar Mount Everest from Kala Patthar · Matheus Hobold Sovernigo · Wikimedia Commons.
    Train for the work, not the altitude

    How to Train for Everest Base Camp.

    You cannot create altitude immunity in the gym, but you can arrive with enough aerobic fitness and leg durability that ordinary hiking does not consume the recovery capacity your body needs for acclimatization.

    Aerobic base

    Long, Easy Volume

    Build the ability to move comfortably for hours without turning every climb into a high-intensity effort.

    Vertical fitness

    Climb Repeatedly

    Use hills, stairs or an inclined treadmill to create the sustained climbing that flat-road fitness misses.

    Leg durability

    Train the Descent

    Downhill fatigue can be as limiting as climbing. Build quadriceps and connective-tissue tolerance gradually.

    Back-to-back work

    Two Days in a Row

    The EBC challenge is recovery. Consecutive hiking days reveal readiness better than one heroic weekend workout.

    Pack

    Use the Real Load

    Train with the daypack weight you expect to carry, even if a porter handles the larger duffel.

    Taper

    Arrive Recovered

    The last training week should not be an attempt to gain fitness. Begin the trek healthy rather than carrying fatigue into Lukla.

    Teahouse trek · genuine high-altitude weather

    What to Pack for Everest Base Camp.

    You do not need expedition climbing equipment for the normal route, but you do need a layering system capable of handling freezing nights, wind and long exposure above 4,000 metres.

    Feet

    Tested Hiking Footwear

    Use footwear already proven over long days. EBC is a poor place to discover a pressure point in new boots.

    Insulation

    Warm Down Layer

    A substantial insulating jacket becomes increasingly useful at Dingboche, Lobuche, Gorak Shep and Kala Patthar.

    Weather shell

    Waterproof + Windproof

    Carry a proper shell even in seasons known for clearer weather.

    Sleeping

    Cold-Rated Sleeping Bag

    Teahouse rooms are not necessarily heated. Choose a sleeping system suitable for expected nighttime conditions.

    Sun

    UV Protection

    Sunglasses, sunscreen, lip protection and a brimmed hat matter more as altitude and reflected light increase.

    Walking

    Trekking Poles

    Useful for long stone staircases, uneven moraine and repeated descents on tired legs.

    Mount Everest panorama from Kala Patthar in Nepal
    The final reward

    Everest Appears Best After You Leave Base Camp.

    Kala Patthar places the summit of Everest above the Khumbu Glacier and beside Nuptse in a way Base Camp cannot. The extra climb is optional; successful acclimatization and a safe descent are not.

    Direct search answers

    Everest Base Camp Trek FAQ.

    The planning questions that matter most before you book flights or choose an operator.

    How long is the Everest Base Camp trek?

    The classic Lukla-to-Everest-Base-Camp-and-return route is approximately 130 kilometres / 80 miles, although exact mileage varies with acclimatization hikes, accommodation and optional viewpoints.

    How many days does the Everest Base Camp trek take?

    Most standard itineraries take approximately 12–14 days from Lukla back to Lukla. Additional contingency days are wise because flights serving Lukla are weather-dependent.

    How high is Everest Base Camp?

    Everest Base Camp on the Nepal side is approximately 5,364 metres / 17,598 feet above sea level.

    What is the highest point on the normal EBC trek?

    Many itineraries include Kala Patthar above Gorak Shep. Approximately 5,545 metres is widely cited for the common viewpoint, while GPS measurements farther up the ridge have produced readings around 5,643–5,644 metres.

    Can you see the summit of Everest from Base Camp?

    The summit is largely obscured from the trekking Base Camp area by surrounding terrain. Kala Patthar is the classic nearby trekking viewpoint for a clear Everest panorama.

    Do you need climbing experience for Everest Base Camp?

    No technical climbing experience is normally required for the standard trek in normal trekking-season conditions. Strong hiking fitness, conservative acclimatization and appropriate mountain-weather judgment are more important.

    Do you need a guide for Everest Base Camp?

    Nepal Tourism Board currently lists Everest Base Camp among the trekking routes requiring a licensed trekking guide and trekking-agency-issued TIMS card. Verify the current rule before travel because regulations can change.

    What permits and fees are required for Everest Base Camp?

    Current official sources list Sagarmatha National Park entry, the Khumbu Pasang Lhamu Rural Municipality Trek-Card and TIMS among the relevant systems. For most foreign visitors, the currently published amounts are NPR 3,000 for the national park, NPR 3,000 for the local Trek-Card and NPR 2,000 for TIMS.

    What is the best time to trek to Everest Base Camp?

    Spring and autumn are the primary trekking seasons. March through May and late September through November generally provide the strongest combination of trail access, teahouse operation and mountain weather, with October typically among the busiest periods.

    How much does the Everest Base Camp trek cost?

    Current guided programs vary widely. Local standard programs may begin around the mid-$1,000s, while more inclusive local trips can approach $3,000. Premium international expedition companies can charge roughly $5,000–$6,500 or more, while luxury programs can exceed $10,000. Compare inclusions rather than headline price alone.

    Do Lukla flights leave from Kathmandu?

    Sometimes. During high-demand trekking periods many Lukla flights operate from Manthali Airport in Ramechhap rather than Kathmandu. The exact operational pattern can change, so confirm the departure airport and ground transfer shortly before travel.

    Where do you sleep on the EBC trek?

    The standard route uses teahouse lodges in villages such as Phakding, Namche Bazaar, Tengboche or Deboche, Dingboche, Lobuche and Gorak Shep. Camping is not required on the normal trekking itinerary.

    Can a beginner trek to Everest Base Camp?

    A fit first-time Himalayan trekker can complete EBC with adequate preparation, a conservative itinerary and proper support. It should not be treated as a casual beginner hike because the route sleeps above 5,000 metres and altitude response is unpredictable.

    How should you train for Everest Base Camp?

    Prioritize aerobic endurance, uphill walking, downhill leg strength and back-to-back hiking days. Train with the daypack you expect to carry. Fitness helps manage the workload but does not prevent altitude sickness.

    Is Everest Base Camp harder than Kilimanjaro?

    The challenges are different. EBC is longer and requires more consecutive trekking days, while Kilimanjaro climbs to a higher final altitude over a shorter period and culminates in a major summit day. Acclimatization strategy is critical on both.

    The most important EBC planning rule

    Do Not Try to Beat the Altitude.

    The walking distance is manageable. The trail is established. Teahouses remove the need for camping. None of that changes the fact that the final nights are spent at extreme trekking elevations. Protect the Namche and Dingboche acclimatization days, keep Lukla contingency time in the schedule and be willing to descend when symptoms say the itinerary is moving faster than your body.

    Great Long-Distance Walks · The Himalaya

    A Modern Pilgrimage to the Foot of Everest

    For many, the walk to Everest Base Camp – past ancient monasteries like Tengboche – is a pilgrimage in all but name. Explore the great pilgrimage trails and Himalayan sacred routes below.

    Was this helpful?

    Yes
    No
    Thanks for your feedback!
  • How Long Does It Take to Climb Kilimanjaro? Route-by-Route

    Cluster 06 · Kilimanjaro · Updated April 2026

    How Long Does It Take to Climb Kilimanjaro? Route-by-Route

    The answer isn’t “how fast can you do it?” — it’s how many days do you need to acclimatize? A complete breakdown of every duration option, the physiological science of altitude, and why the difference between 6 days and 8 days is the difference between 27% and 95% summit success.

    5–10
    Days on
    mountain
    8
    Gold standard
    duration
    27% vs 95%
    5-day vs
    9-day success
    5–7
    Points per
    extra day
    Global Summit Guide A guide in Cluster 06 · Kilimanjaro View master hub →

    There’s a common misconception about Kilimanjaro: that fitness determines summit success. The reality is that altitude physiology is time-based, not fitness-based. Your body needs 5-10 days to produce the additional red blood cells, capillary density, and respiratory adaptations that make Uhuru Peak achievable. Skip those days and even Olympic athletes fail. Embrace those days and relatively unfit climbers succeed. This guide breaks down every duration option — from the dangerous 5-day Marangu compression to the bulletproof 9-day Northern Circuit — and the physiological science that makes duration the single biggest predictor of Kilimanjaro summit success.

    ⊛
    How this guide was built

    Duration success statistics reflect industry-average data from Altezza Travel, Climbing Kilimanjaro, and peer-reviewed research in Wilderness and Environmental Medicine on AMS determinants. Physiological science draws from UIAA (International Climbing and Mountaineering Federation) altitude acclimatization guidelines and research from the Institute of Mountain Emergency Medicine. Reviewed by KINAPA-licensed guides and high-altitude medicine physicians. Fact-check date: April 19, 2026.

    Why Duration Matters: The Physiological Case

    Your body at sea level is optimized for sea-level oxygen — approximately 21% partial pressure. At Uhuru Peak (5,895 m), that’s approximately 50% of sea-level oxygen. Your body must undergo physical changes to function at that altitude, and those changes take days — not hours.

    Red Blood Cell Production

    At altitude, kidneys release erythropoietin (EPO), triggering bone marrow to produce more red blood cells carrying oxygen. Peak increase occurs 5-10 days after altitude exposure. This is the primary acclimatization mechanism.

    Capillary Density

    Your body develops more blood vessels in tissues to deliver oxygen more efficiently. Happens over weeks but meaningful increases occur within 5-7 days, enhancing tissue oxygen delivery.

    Respiratory Adaptation

    Breathing rate and depth both increase at altitude, within hours at first (hyperventilation response). Over days this stabilizes into sustainable breathing patterns that efficiently compensate for thin air.

    2,3-DPG Increase

    Red blood cells produce more 2,3-diphosphoglycerate, which shifts the oxygen-hemoglobin dissociation curve. Translation: RBCs release oxygen more readily to tissues. Takes 3-5 days.

    Acid-Base Rebalancing

    Increased breathing causes respiratory alkalosis (blood pH rises). Kidneys compensate over 2-4 days by excreting bicarbonate, returning pH toward normal and enabling sustainable deep breathing.

    Mitochondrial Changes

    Cellular mitochondria adapt their function at altitude, though incompletely during brief exposures. Extended climbs enable better cellular-level efficiency than rapid ascents.

    ◆
    The fitness misconception

    Research consistently shows that sea-level fitness does not predict altitude success. A 20-year-old Olympic athlete ascending to 5,895m in 5 days often has worse outcomes than a 60-year-old recreational hiker ascending in 8 days. Why? Because physiological adaptation is time-based, not fitness-based. Fitness helps you walk uphill; only time helps you breathe at altitude. See our Altitude Acclimatization Explained guide for the complete physiological picture.


    The Numbers: Success Rate by Duration

    The correlation between days on mountain and summit success is dramatic and linear. Research from operator data and academic studies shows each additional day above 3,000m adds approximately 5-7 percentage points to summit probability.

    Industry-Average Summit Success by Route Duration

    Based on aggregated data from Tanzanian operators and academic research
    5 daysMarangu only
    27%
    6 daysAll compressed
    44%
    7 daysStandard
    85%
    8 daysGold standard
    90%+
    9 daysNorthern Circuit
    95%+
    10 days+ Crater Camp
    95–97%

    The 6-to-7-day jump is the single largest improvement in the data — nearly doubling success from 44% to 85%. This is because 6 days forces most climbers above the critical acclimatization threshold; 7 days provides just enough margin for most people’s physiology to adapt. Beyond 7 days, additional gains are meaningful but smaller.


    Every Duration Option Analyzed

    Avoid · Unacceptable Success Rate

    5 Days · Marangu only

    Strongly discouraged — 3 in 4 climbers fail
    27%Success rate

    Only the Marangu route offers a 5-day option (called “Coca-Cola Route” 5-day). The itinerary compresses ascent to the point where almost no climbers have adequate time to acclimatize. Climbers reach Kibo Hut (4,700m) the afternoon of Day 4 — less than 3 days after leaving the gate at 1,860m. Summit attempt begins at midnight on Day 4/5.

    This is the only route option regularly marketed at unsafe compression. Reputable operators have largely stopped offering the 5-day Marangu. When it does appear in pricing, it reflects budget-cutting that harms both climbers and porters. Choose this only if you have extensive prior altitude acclimatization (multiple 5,000m+ peaks in recent months) — even then, the 6-day Marangu is safer.

    RouteMarangu
    Nights4 in huts
    Cost savings~$200
    VerdictAvoid
    Compressed · Risky

    6 Days · Machame, Marangu, Rongai, Lemosho, Umbwe

    Coin-flip success — only with prior acclimatization
    44–75%Route varies

    6-day options exist for most routes with dramatically varying success rates. The 6-day Machame achieves ~73% success thanks to its excellent “climb high, sleep low” profile; 6-day Marangu lands at 50-55%; 6-day Umbwe at 50%; 6-day Rongai at 70%; 6-day Lemosho at 75%.

    When 6-day actually works: Climbers with recent altitude acclimatization (Mt. Meru 4,566m or similar peak climbed within 2-3 months), strong cardiovascular fitness, and youth (under 35 adapts faster). For these specific climbers, 6-day Machame becomes viable because prior acclimatization compensates for compressed schedule. For general first-time Kilimanjaro climbers, 6-day is a false economy — the $150-$300 savings vs 7-day costs you dramatically reduced summit probability.

    Routes5 options
    Cost vs 7-day~$150-300 less
    Best 6-dayMachame (73%)
    VerdictWith caution
    Minimum Recommended · Standard

    7 Days · Machame, Lemosho, Rongai

    Industry baseline — good success, manageable cost
    85%Standard routes

    7 days is the minimum duration most reputable operators offer and is the baseline for first-time Kilimanjaro climbers. All three standard routes (Machame, Lemosho, Rongai) deliver ~85% success in their 7-day versions. This is the duration where physiology catches up to the ascent — most climbers’ bodies have adapted enough by summit night.

    The 7-day Machame is the most popular option globally (~35% of all Kilimanjaro attempts). 7-day Lemosho offers slightly less crowded experience on approach days. 7-day Rongai provides the quietest option and northern-side access. Pick 7-day if budget is tight, vacation time is limited to ~10 days total, or you’re youthful with reasonable fitness. Pick 8-day if you can — the 5-10% success improvement is worth $150-400 for most climbers.

    Routes3 main + others
    Most popularMachame 7
    Vs 8-day-5 to -10 pts
    VerdictBaseline
    Gold Standard · Best for Most

    8 Days · Lemosho primarily

    The operator-preferred duration — best balance
    90–95%Lemosho 8-day

    8-day Lemosho is the gold standard recommendation from most experienced Kilimanjaro operators. The extra day — typically spent on the Shira Plateau around 3,900m — provides meaningful physiological adaptation before the high-altitude summit push. Summit success jumps to 90-95%.

    Practical benefits: (1) Less rushed pace throughout — pole pole is easier to maintain. (2) Extra scenery day — Shira Plateau is one of Kilimanjaro’s most spectacular zones. (3) Summit day feels more manageable because you arrive at Barafu better adapted. (4) Safety margin — if one day is affected by weather or minor illness, you can still summit. (5) Only 10-15% cost increase over 7-day but 5-10% success improvement — the best ROI decision in Kilimanjaro planning. 8-day Machame is available but less common than 8-day Lemosho.

    Top choiceLemosho 8-day
    Vs 7-day cost+$150-400
    Vs 7-day success+5-10 pts
    VerdictRecommended
    Highest Success · Safest

    9 Days · Northern Circuit

    Maximum acclimatization — the cautious choice
    95%+Northern Circuit

    The Northern Circuit is the only 9-day standard route — it’s specifically designed around maximum acclimatization. Following Lemosho for 3 days, the route then breaks off to circle Kilimanjaro’s northern slopes, adding approximately 50km of “climb high, sleep low” cycles at the 4,000m range before turning south for the summit attempt.

    Summit success approaches 95%+. Also significantly less crowded than Machame/Lemosho shared sections — the Northern Circuit is the newest route (approved 2010) and sees fewer climbers. Best for: Climbers over age 55, first-time high-altitude attempts, anyone with health considerations affecting altitude adaptation, and climbers who want to maximize their one Kilimanjaro attempt. Costs $3,500-$6,500 typical — more expensive than shorter routes but offers the best probability of success for those who cannot afford to fail.

    RouteNorthern Circuit
    Cost range$3,500-6,500
    CrowdsLowest of majors
    VerdictSafest choice
    Extreme · Crater Camp

    10 Days · Lemosho + Crater Camp

    Sleeping inside the crater — for hardcore climbers
    95–97%Crater Camp

    The 10-day Lemosho itinerary adds Crater Camp at 5,729m inside Kilimanjaro’s summit crater. After reaching Uhuru Peak on summit day, climbers descend only ~170m to camp inside the crater floor, spend a night at extreme altitude, then summit again (or simply descend) the following morning.

    The experience is extraordinary: sleeping beside the Reusch glacier at 5,729m, second summit visit at less-crowded time, unique bucket-list achievement. Cost adds $500-$1,200 over 8-day Lemosho. Not for everyone: requires strong acclimatization foundation from 8-day approach, comfortable tolerance of -15°C nighttime temperatures, and willingness to accept risk of altitude symptoms worsening. Only 5-8% of Kilimanjaro climbers do Crater Camp. Choose this only after successful prior altitude experience. See our Lemosho 7-Day Trip Report for comparison with standard itineraries.

    RouteLemosho + Crater
    Extra cost+$500-1,200
    Climber share5-8% of total
    VerdictBucket list

    The Pace That Makes Duration Work: Pole Pole

    Swahili Mountain Philosophy
    “Pole pole”
    Pronounced “poh-lay poh-lay” — meaning slowly, slowly

    The single most important phrase in Kilimanjaro climbing. Tanzanian guides repeat pole pole constantly because walking slowly allows your cardiovascular and respiratory systems to function within acclimatized capacity. Walking fast triggers immediate oxygen debt that worsens altitude sickness. The slowest consistent pace beats a fast one that burns out.

    What pole pole actually means

    Pole pole is more than advice — it’s a physiological principle:

    • Aerobic-zone pacing: Walk slow enough that you can speak full sentences without gasping. This keeps you in aerobic metabolism (efficient oxygen use) rather than anaerobic (oxygen debt).
    • Rest steps: Pause briefly at each step to lock your knee — redistributes weight and reduces muscle fatigue. Guides teach this early in the climb.
    • Hourly pace: Good pole pole pace is roughly 1-1.5 km/h at altitude. This feels absurdly slow at sea level but exactly right above 4,000m.
    • Breathing with steps: Sync breathing to steps — 2-3 breaths per step at high altitude. Keeps oxygen delivery steady.

    Why fit climbers fail the pole pole test

    Paradoxically, fit climbers often struggle more with pole pole than less-fit climbers. Fit people are used to walking at 4-6 km/h naturally; slowing to 1 km/h feels frustrating. They push pace unconsciously, trigger oxygen debt, and develop AMS symptoms. Guides must actively slow them down. Less-fit climbers already walk slowly — they’re naturally in pole pole range and often acclimatize better.

    ★
    The summit-day pace test

    On summit day, proper pole pole pace from Barafu (4,640m) to Uhuru (5,895m) covers 1,255m elevation gain in approximately 5-6 hours — averaging roughly 250m elevation per hour. At this pace, you arrive at sunrise (06:00-06:30) starting from midnight. Climbers trying to arrive faster typically blow out and descend without summit. Climbers pacing proper pole pole summit reliably. Time is your friend, speed is your enemy on Kilimanjaro. See our 12-Week Kilimanjaro Training guide for pace training specifics.


    Total Trip Duration: Plan 10-14 Days

    Your Kilimanjaro climb is only part of the total trip. Budget 10-14 days minimum from leaving home to returning home for a realistic North American Kilimanjaro expedition.

    PhaseDaysWhat Happens
    International travel out1–2Flights from North America to JRO (15-24 hours including connections)
    Arrival & rest1Hotel night in Moshi/Arusha, jet lag recovery, 1,000m acclimatization
    Pre-climb briefing1Operator briefing, gear check, rental collection, last prep
    Kilimanjaro climb7–9On mountain for chosen route duration
    Post-climb rest1Hotel night, shower, celebration meal, packing
    International travel home1–2Return flights (15-24 hours)
    Typical total12–16 daysMinimum comfortable trip duration

    Trip extensions to consider

    • Safari add-on: +3-5 days for Serengeti/Ngorongoro/Tarangire. Highly recommended if flying all the way to Tanzania.
    • Zanzibar beach: +3-5 days for Indian Ocean beach recovery.
    • Mount Meru pre-acclimatization: +4 days to climb 4,566m Mt. Meru before Kilimanjaro. Significantly improves Kilimanjaro success probability.
    • Cultural day: +1 day for Moshi market, Chagga village visit, coffee plantation tour.

    Many Kilimanjaro climbers choose 14-21 day total trips to include safari or beach extensions. Given the cost and effort of reaching Tanzania, maximizing the experience is often worth the additional vacation time.


    Duration Quick Comparison

    DurationRoute OptionsSuccessCost TierBest For
    5 daysMarangu27%LowestPrior acclimatized only
    6 daysAll routes44–75%LowRisk tolerant, short time
    7 daysMachame, Lemosho, Rongai85%StandardBudget baseline
    8 daysLemosho (primarily)90–95%Standard+Most climbers
    9 daysNorthern Circuit95%+PremiumSafety priority
    10 daysLemosho + Crater Camp95–97%Premium+Bucket list experience
    ▲
    If you must compress: Machame 6-day over any other 6-day

    If budget or time forces a 6-day climb, choose Machame specifically. Its “climb high, sleep low” profile via Lava Tower (4,630m) Day 3 then descent to Barranco (3,950m) creates meaningful acclimatization even in 6 days. 6-day Marangu lacks this profile and delivers 20-30 percentage points lower success. Still — strongly prefer upgrading to 7-day if at all possible. The $150-300 extra for 7-day vs 6-day is the single best summit-success investment in Kilimanjaro planning.


    Kilimanjaro Duration FAQ: Your Common Questions Answered

    How many days does it take to climb Kilimanjaro?

    Kilimanjaro climb duration ranges from 5 to 10 days, with most climbers taking 7-9 days. The 6 main route options by duration: (1) Marangu 5-day — the shortest option but only 27% success rate, strongly discouraged. (2) Marangu 6-day or Machame 6-day — 44-55% success, compressed itineraries. (3) Machame 7-day, Lemosho 7-day, or Rongai 7-day — 85% success, the minimum recommended duration for most climbers. (4) Lemosho 8-day — 90-95% success, the gold standard recommended by most experienced operators. (5) Northern Circuit 9-day — 95%+ success, the longest and safest option. (6) Lemosho 10-day with Crater Camp — highest possible success rate with an extra high-altitude night. The industry average across all routes is ~65% summit success, with duration being the single biggest predictor. Each additional day above 3,000 meters adds approximately 5-7 percentage points to summit probability. For planning total trip time from arrival to departure in Tanzania: add 2-3 days before the climb (arrival, rest, briefing) and 1-2 days after (descent day, rest, departure) = 10-14 days total trip duration typical.

    Why do Kilimanjaro success rates increase with more days?

    Kilimanjaro success rates increase with more days because altitude acclimatization is a physiological process that literally takes time — not willpower. The science: (1) Red blood cell production — at altitude, your kidneys release erythropoietin (EPO) which triggers bone marrow to produce more red blood cells carrying oxygen. This process peaks 5-10 days after altitude exposure begins. (2) Capillary density increases — your body develops more blood vessels in tissues requiring oxygen. (3) Breathing patterns shift — respiratory rate and depth increase to compensate for thin air. (4) 2,3-DPG increases — red blood cells become better at releasing oxygen to tissues. All these adaptations take days, not hours. A fit 25-year-old ascending to 5,895m in 5 days and an unfit 60-year-old ascending in 9 days have dramatically different physiological environments on summit day. The fit fast climber may have HAPE (high altitude pulmonary edema) risk; the slow climber has adequate red blood cells and capillaries. Research from the journal Wilderness and Environmental Medicine confirms 77% of Kilimanjaro summit failures trace to inadequate acclimatization rather than fitness issues. The ‘climb high, sleep low’ principle built into Machame and Lemosho routes specifically triggers acclimatization adaptations. More days = more adaptation = more likely summit.

    What is the best duration for Kilimanjaro?

    The best duration for climbing Kilimanjaro is 8 days for most climbers, with the 8-day Lemosho route being the gold standard recommendation. Why 8 days wins: (1) 90-95% summit success rate — substantially higher than 7-day (85%) with only modest additional cost ($150-$400 difference typically). (2) Extra acclimatization day at ~3,900m (Shira 2 or similar) allows meaningful physiological adaptation. (3) Summit day is less exhausting — you arrive at high camp better acclimatized. (4) Better scenery experience — additional day often includes spectacular mid-mountain views like Shira Plateau. (5) Less rushed pace — pole pole (slowly slowly) philosophy easier to maintain. When 9 days wins: (1) Cautious climbers over age 55. (2) Anyone with health conditions affecting altitude adaptation. (3) First-time high-altitude climbers with no prior experience. (4) Anyone who can’t afford a failed attempt (remote work schedule, once-in-lifetime trip). The Northern Circuit 9-day route delivers 95%+ success with the best acclimatization profile. When 7 days is acceptable: Fit climbers with some prior altitude experience, budget constraints, or time limitations. 7-day Lemosho or Machame still delivers 85% success with quality operators. Choose less than 7 days only with strong prior altitude acclimatization.

    Can you climb Kilimanjaro in 5 or 6 days?

    Yes, you can climb Kilimanjaro in 5 or 6 days, but the success rates are dramatically lower and the experience is significantly more challenging. 5-day options (Marangu 5-day only): 27% success rate. This means 73% of 5-day climbers do not reach Uhuru Peak. The itinerary compresses ascent to the point where almost no climbers have time to acclimatize. Strong physical fitness does not overcome physiology at this compression. Only appropriate for climbers with substantial prior altitude acclimatization (multiple 5,000m+ peaks in recent months). 6-day options (Marangu 6-day, Machame 6-day, Rongai 6-day, Lemosho 6-day, Umbwe 6-day): 44-75% success depending on route. Machame 6-day specifically benefits from ‘climb high, sleep low’ profile making it more successful at 73% than Marangu 6-day at 55%. Lemosho 6-day compresses what should be 7-8 days into 6, typically reducing success to ~75%. When 6-day might work: (1) Prior altitude experience (recent 4,000m+ peaks like Mt. Meru or Mt. Kenya within 2-3 months). (2) Very strong cardiovascular fitness. (3) Excellent previous acclimatization history. (4) Youth (under 35) typically adapts faster. Even with these factors, upgrading to 7-day adds dramatic summit probability for minimal cost increase. The extra $150-$300 for 7-day vs 6-day is the best summit-success investment in Kilimanjaro planning.

    What is Crater Camp on Kilimanjaro?

    Crater Camp is a specialized high-altitude campsite at 5,729 meters (18,796 feet) inside Kilimanjaro’s summit crater, available only on extended Lemosho or Machame itineraries of 9-10 days. Key details: (1) Location: Inside the Reusch Crater on Kilimanjaro’s Kibo summit, just below Uhuru Peak. (2) Elevation: 5,729m — one of the world’s highest camping locations, approximately 166m below the actual summit. (3) Timing: Climbers arrive at Crater Camp on summit day afternoon (after reaching Uhuru from Barafu), then spend an additional night at this extreme altitude. (4) Uhuru Peak visits: Allows a second summit visit the following morning for sunrise at a less crowded time. Some climbers hike to the summit multiple times during the Crater Camp stay. (5) Cost: $100 per person per night additional park fee plus $50 camping fee, adding $170+ to park fees with VAT. Operator packages with Crater Camp typically cost $500-$1,200 more than standard 8-day Lemosho. (6) Challenges: Very cold (consistently -15°C), thin air (approximately 50% sea-level oxygen), requires strong acclimatization, and small percentage experiencing altitude symptoms may worsen. (7) Rewards: Extraordinary experience of sleeping inside a glaciated volcanic crater, proximity to Reusch glacier, dramatic photography, unique bucket-list achievement. Crater Camp is recommended only for climbers with good fitness, strong altitude tolerance, and adequate 8-day acclimatization foundation. Approximately 5-8% of Kilimanjaro climbers do Crater Camp.

    How long is summit day on Kilimanjaro?

    Summit day on Kilimanjaro is the longest and hardest day of the climb — typically 10-14 hours total from midnight start to afternoon camp arrival. The detailed summit day timeline: (1) Midnight wake at Barafu (4,640m) or similar high camp, quick breakfast, gear up. (2) 00:00-00:30 departure in darkness with headlamps. (3) 00:30-05:00 ascent on steep scree and switchbacks from Barafu to Stella Point (5,756m) — approximately 5-6 hours, 1,100m elevation gain. This is the most physically demanding section. (4) 05:00-05:30 rest at Stella Point for hot drinks and brief snack. (5) 05:30-06:30 ascent along crater rim to Uhuru Peak (5,895m) — approximately 1 hour, 139m gain. (6) 06:30-07:00 summit time at Uhuru — photos, rest, celebration, view of glaciers and sunrise. Usually 15-30 minutes at the actual summit. (7) 07:00-10:00 descent to Barafu high camp — approximately 3 hours on loose scree, often slipping which is tiring but fast. (8) 10:00-11:30 breakfast, rest, pack gear at Barafu. (9) 11:30-15:00 descent continues to Mweka Hut or similar lower camp — 3-4 additional hours. Total elevation: 1,255m up, 2,730m down. Total time active: 10-14 hours depending on pace. Climbers typically sleep 3-4 hours the night before, making this effectively a 20+ hour effort. Mental and physical exhaustion peaks here — this is where 77% of altitude-related failures occur. Proper acclimatization from extended route duration is what makes summit day achievable.

    Does climbing Kilimanjaro faster mean you’re fitter?

    No — climbing Kilimanjaro faster does not demonstrate better fitness; it often demonstrates worse judgment. Altitude physiology is not about fitness in the traditional sense. Research consistently shows: (1) Age doesn’t predict altitude tolerance — 20-year-olds and 60-year-olds have similar acclimatization capacity. (2) Sea-level VO2 max doesn’t correlate well with high-altitude performance. (3) Faster ascent increases HAPE/HACE risk regardless of fitness. (4) Professional athletes have failed Kilimanjaro on 5-6 day compressed itineraries while less-fit but better-acclimatized climbers succeeded on 8-day routes. What matters for summit success: (1) Time above 3,000m (the primary factor). (2) ‘Climb high, sleep low’ pattern utilization. (3) Hydration (4-5 liters daily at altitude). (4) Caloric intake (4,000+ calories daily). (5) Pace management (‘pole pole’ — slowly slowly). (6) Individual genetic variation in altitude tolerance. The ‘pole pole’ philosophy explained by Tanzanian guides captures this: walking slowly allows your cardiovascular and respiratory systems to function within acclimatized capacity. Walking fast triggers immediate oxygen debt that worsens altitude sickness. Guides often slow fit climbers down deliberately because speed ascent causes failures. The fittest 5-day climber will summit less often than a moderately-fit 8-day climber. Choose duration based on physiology science, not ego.

    How much total time should I plan for a Kilimanjaro trip?

    For a complete Kilimanjaro trip including travel, rest days, and the climb itself, plan 10-14 days minimum. Detailed timeline breakdown: (1) Day 1-2: International travel from North America (15-24 hours door-to-door typically including connections through Amsterdam, Addis Ababa, or Doha). Jet lag recovery needed before climb. (2) Day 2-3: Arrival in Moshi or Arusha (base towns near Kilimanjaro). Most operators include airport pickup and hotel night. Rest and acclimatize to Tanzania (1,000m altitude itself). (3) Day 3-4: Pre-climb briefing with operator, gear check, rental gear collection if needed, last preparation day. (4) Days 4-12: Climb duration — 7 to 9 days on mountain depending on chosen route. (5) Day 12-13: Post-climb descent day. Hotel night in Moshi or Arusha to shower, celebrate, share photos, and recover. (6) Day 13-14: Return flight to home country (15-24 hours). Alternative extended trips: (7) Safari extension — Add 3-5 days for Serengeti/Ngorongoro/Tarangire. Recommended if flying all the way to Tanzania. (8) Zanzibar beach extension — Add 3-5 days for Indian Ocean beach recovery. (9) Mount Meru acclimatization — Add 4 days before Kilimanjaro to climb 4,566m Mt. Meru as pre-acclimatization. Recommended total trip: 14-20 days to fully experience Tanzania. Vacation scheduling: Most North American travelers use 2-3 weeks of vacation time. Request time off 4-6 months in advance for peak season climbs.


    Authoritative Sources & Further Reading

    Content reflects peer-reviewed research and established operator statistics:

    • Wilderness and Environmental Medicine journal — “Determinants of Summiting Success and Acute Mountain Sickness on Mt. Kilimanjaro (5895m)”
    • UIAA (International Climbing and Mountaineering Federation) — Altitude acclimatization guidelines
    • Institute of Mountain Emergency Medicine — Altitude physiology research
    • KINAPA (Kilimanjaro National Park Authority) — Official route durations and regulations
    • International Society for Mountain Medicine — Acclimatization standards
    • Operator route and success data from: Altezza Travel, Climbing Kilimanjaro, Mount Kilimanjaro Climb, Climb Kilimanjaro Guide, Tusker Trail, Mountain Madness
    • Reference texts: Going Higher: Oxygen, Man, and Mountains (Houston), Kilimanjaro: The Trekking Guide (Henry Stedman), High Altitude: Human Adaptation to Hypoxia (Swenson & Bartsch)
    • Academic sources: Research on AMS prevention and acclimatization from Journal of Applied Physiology, High Altitude Medicine & Biology
    Published: March 8, 2026
    Last updated: April 19, 2026
    Next review: July 2026
    Part of the Global Summit Guide

    Back to the Master Hub

    This guide is one of 71 across 12 thematic clusters on Global Summit Guide. The master hub organizes every guide by experience tier, specific peak, skill area, and region.

    View the Hub →

    Was this helpful?

    Yes
    No
    Thanks for your feedback!
  • Aconcagua Routes: Complete Guide to All Major Climbing Routes

    Cluster 07 · Seven Summits · Updated April 2026

    Aconcagua Routes: Complete Guide to All Major Climbing Lines

    The definitive 2026 guide to Aconcagua’s five major routes — from the non-technical Normal Route via Plaza de Mulas to the Polish Glacier Direct, the 360 Traverse, and the world-class South Face. Everything you need to choose the right line to South America’s 22,838-foot summit in the heart of the Argentine Andes.

    22,838 ft
    Summit
    elevation
    5
    Major
    routes
    15–22
    Expedition
    days
    ~50%
    Summit
    success
    Global Summit Guide A guide in Cluster 07 · Seven Summits View master hub →

    Aconcagua is the highest mountain in the Americas and the Southern Hemisphere, rising to 22,838 feet in the Argentine Andes. It’s the second of the Seven Summits by altitude and one of the most accessible — no technical climbing required on the Normal Route, straightforward mule support, and a well-established expedition infrastructure. But route choice matters. A climber who picks the wrong line will find themselves either bored on a trade route or overwhelmed on technical terrain far beyond their capabilities. This guide walks through all five major routes — the Normal via Plaza de Mulas, the Polish Glacier Direct, the Falso de los Polacos (360 Traverse), the Guanacos Valley, and the legendary South Face — with enough detail to make an informed choice for your expedition.

    ⊛
    How this guide was built

    Route data verified against Aconcagua Provincial Park Authority official records and American Alpine Club expedition reports. Cost figures confirmed with Grajales Expeditions, Aconcagua Express, Fernando Grajales Expeditions, Alpine Ascents International, and Inka Expeditions (2026 rates). Technical route descriptions sourced from R. J. Secor’s Aconcagua: A Climbing Guide (current edition) and the American Alpine Club archives. Historical first-ascent data from The American Alpine Journal. Reviewed by practicing Mendoza mountain guides with 2025 season experience. Fact-check date: April 19, 2026.

    Aconcagua Overview: The Sentinel of the Andes

    Located in Mendoza Province of western Argentina, Aconcagua sits in the Aconcagua Provincial Park, protected since 1983. The mountain is the highest peak outside of Asia — significantly taller than Denali (20,310 ft), Mt. Kilimanjaro (19,341 ft), and every other Seven Summit except Everest. Its relatively accessible Normal Route has made it the “gateway to high-altitude mountaineering” for thousands of climbers preparing for Denali, Everest, or other major expeditions.

    Key Aconcagua facts

    • Summit elevation: 22,838 feet (6,962 meters)
    • Prominence: 22,841 feet — 2nd highest prominence in the world after Everest
    • Location: Mendoza Province, Argentina (Andes Range)
    • Name meaning: Disputed origin — possibly “Stone Sentinel” (Quechua: Ackon Cahuak) or “White Sentinel” (Aymara)
    • First ascent: January 14, 1897 — Matthias Zurbriggen (Swiss guide) via the Normal Route
    • Classification: Non-volcanic sedimentary peak (not a volcano, despite myth)
    • Access city: Mendoza (~2 hours from park entrance)
    • Climbing season: November 15 through March 15 (Southern Hemisphere summer)
    • Peak month: January (best weather probability)
    • Annual attempts: ~3,500-4,500 registered climbers
    • Summit success rate: ~40-60% across all routes and climbers
    ◆
    Why Aconcagua as a 7SS progression peak

    Aconcagua is widely considered the perfect preparation peak for Denali and Everest. The altitude (nearly 23,000 ft) provides authentic high-altitude experience, the expedition length (15-22 days) matches larger expeditions, and the logistics (mules, base camps, high camps) teach expedition systems. Non-technical terrain means climbers focus on altitude physiology and weather patience rather than technical skills — the exact skills needed for Denali, Everest, or Vinson. See our Seven Summits for beginners guide for the full progression framework.


    The Five Major Routes

    Aconcagua has many established lines, but five major routes account for essentially all ascents. Ranked from least to most technical:

    01
    The Standard · 75-80% of Climbers

    Normal Route (Ruta Normal / Plaza de Mulas)

    Horcones Valley approach · Non-technical · Most infrastructure
    Non-Tech
    Grade

    The classic since the 1897 first ascent by Matthias Zurbriggen. Approach via the Horcones Valley from Puente del Inca, base camp at Plaza de Mulas (14,270 ft), three high camps, summit via the Canaleta couloir. No technical climbing required — just high-altitude hiking on scree, rock, and occasional snow. The infrastructure at Plaza de Mulas is extensive: medical tent, mess tents, showers, internet. Mule support to base camp eliminates the need to haul heavy loads on the approach.

    Why most climbers choose it: The combination of non-technical terrain, strong mule and base camp infrastructure, and proven guiding networks makes the Normal Route the clear choice for first-time Aconcagua climbers. The downside is crowds — January on the Normal Route can feel like a line of people on the mountain. Summit day is long (10-14 hours) and the Canaleta couloir at the end is psychologically brutal.

    Distance RT~55 km
    Duration15-20 days
    Base Camp14,270 ft
    TechnicalNon-technical
    Mule support Full infrastructure Most guided services
    02
    Popular Alternative · Scenic Two-Valley

    Falso de los Polacos (360 Traverse / Polish Traverse)

    Vacas Valley approach · Traverse to Normal Route · Better acclimatization
    F+/PD
    Grade

    The “false Polish” is the smart alternative to the Normal Route. Approaches via the more remote and scenic Vacas Valley to Plaza Argentina base camp (13,775 ft), climbs the east side establishing intermediate camps, then traverses around the mountain’s south-east flank to join the Normal Route at Nido de Condores (Camp 2), continuing to the summit. Technically non-technical throughout most sections, with moderate scrambling on the traverse section.

    Why climbers love it: The two-valley approach provides dramatically better acclimatization than the direct Normal Route. Vacas Valley is less-trafficked than Horcones, offering genuine wilderness experience. The traverse itself is a highlight — circling Aconcagua’s mass while climbing provides stunning views and isolation. Joins the Normal Route for the summit push, giving the best of both worlds. Downside: longer (80+ km total), more days, slightly more complex logistics. Approximately 10-15% of climbers choose this route.

    Distance RT~80 km
    Duration18-21 days
    Base Camp13,775 ft
    TechnicalModerate
    Two-valley approach Best acclimatization Quieter trails
    03
    Technical · 1934 First Ascent · Rarely Climbed

    Polish Glacier Direct (Glaciar de los Polacos)

    Vacas Valley · Direct ice ascent · Requires alpine skills
    PD+/AD
    Grade

    Named after the 1934 Polish expedition (Ostrowski, Osiecki, Daszynski, Karpinski) that made the first ascent via this line. Approaches via Vacas Valley like the Falso de los Polacos, but instead of traversing around to Normal Route, climbs directly up the east face via the Polish Glacier. Sustained ice climbing on 45-60° slopes, ice-screw protection required, roped team ascent throughout.

    Current status: Significant glacier retreat over recent decades has exposed more bare ice and rock on the direct line. Modern attempts face variable conditions year to year. Now climbed by fewer than 5% of Aconcagua climbers — most “Polish route” ascents today are actually the Falso de los Polacos traverse. True Polish Glacier Direct is reserved for experienced alpine climbers with ice climbing background. Exceptional aesthetic line with sustained technical interest, but requires the full complement of alpine ice skills.

    Distance RT~80 km
    Duration18-22 days
    Base Camp13,775 ft
    TechnicalAlpine ice
    Ice climbing required Roped team Experts only
    04
    Remote · Wilderness Alternative

    Guanacos Valley Route

    East-side approach · Plaza Guanacos · Longest expedition
    PD
    Grade

    The Guanacos Valley approach sees fewer than 2-3% of Aconcagua climbers annually. Approach via Guanacos Valley from the east, base camp at Plaza Guanacos (approximately 13,500 ft), then traverses to join either the Polish Glacier area or the Normal Route. The most wilderness-feeling approach on the mountain, with minimal infrastructure and genuine solitude.

    Why consider it: For climbers who want the Aconcagua experience without the crowds, Guanacos Valley offers something Horcones and Vacas cannot — a truly remote approach with minimal human presence. The trade-offs are significant: longer approach (20-24 days total), reduced mule support options, limited rescue response, and increased self-reliance requirements. Best for experienced expedition climbers comfortable with minimal infrastructure. Named for the guanacos (South American camelids related to llamas) that inhabit the valley.

    Distance RT~95 km
    Duration20-24 days
    Base Camp~13,500 ft
    TechnicalModerate
    Remote wilderness Limited infrastructure Experienced teams
    05
    Elite Alpine Wall · 9,000+ ft Big Wall

    South Face (Pared Sur)

    Multi-day big wall · Technical alpine · World-class objective
    ED1+
    Grade

    Aconcagua’s South Face is a world-class alpine big-wall climb with over 9,000 feet of vertical relief — one of the great alpine faces on Earth. Multiple established lines including the French Route (1954 first ascent), Messner Route (1974), Central Route, and several more technical variations. Requires full big-wall alpine skills: ice climbing to WI5, mixed climbing, multi-day bivouacs, extreme weather tolerance.

    Reserved for world-class alpinists only: The South Face is attempted by perhaps 5-15 climbers per year, with success rates of 20-40% in good seasons and effectively 0% in bad conditions. Multiple fatalities occur annually on this face. The French Route is the most popular line (seven-eight days typical), but all South Face routes demand exceptional technical ability, physical endurance, and weather tolerance. This is not a route for Seven Summits seekers — it’s a standalone alpine objective pursued for its own sake by professional mountaineers. For reference and historical context rather than practical planning.

    Vertical9,000+ ft
    Duration7-15 days
    GradeWI5, M
    TechnicalExtreme alpine
    Elite alpinists only Multi-day bivouac Ice/mixed climbing

    Route Comparison at a Glance

    RouteApproachBase CampDaysTechnicalClimber %
    Normal RouteHorcones ValleyPlaza de Mulas15-20Non-technical75-80%
    Falso de los PolacosVacas ValleyPlaza Argentina18-21Moderate10-15%
    Polish Glacier DirectVacas ValleyPlaza Argentina18-22Alpine ice< 5%
    Guanacos ValleyGuanacos ValleyPlaza Guanacos20-24Moderate2-3%
    South FaceHorcones ValleyPlaza Francia7-15Extreme alpine< 1%

    Normal Route: The Standard Camp Sequence

    Since 75-80% of climbers choose the Normal Route, understanding its progression is essential. Here’s the camp-by-camp structure:

    0
    Day 4 · Park Entry

    Confluencia (Acclimatization Camp)

    Intermediate approach camp. Mandatory medical check here. Beautiful setting at the confluence of streams. Acclimatization hike to Plaza Francia viewpoint recommended before proceeding.

    11,000 ft
    Elevation
    1
    Day 5-7 · Base Camp

    Plaza de Mulas (Base Camp)

    The main base camp. Extensive infrastructure — medical tent, dining tents, showers, internet. Rest 2-3 days for acclimatization. Mules bring duffel bags here.

    14,270 ft
    Elevation
    2
    Day 8-10 · Cache and Move

    Camp Canada

    First high camp above base camp. Typically cache gear day 8, sleep at base. Move to Camp Canada day 9-10. Acclimatization key — often return to base for sleep after cache.

    16,400 ft
    Elevation
    3
    Day 11-13 · Second High Camp

    Nido de Condores (“Condor’s Nest”)

    Larger flat area named for the condors that soar here. Key acclimatization camp. Where Falso de los Polacos route joins the Normal Route. Often windy.

    17,700 ft
    Elevation
    4
    Day 13-15 · High Camp

    Camp Berlin / Colera (High Camp)

    Final camp before summit. Camp Berlin is the classic; Colera is slightly higher and less sheltered. Summit attempts launch from here. Very cold, often windy.

    19,350 ft
    Elevation
    ★
    Summit Day · 10-14 Hours

    Aconcagua Summit via Canaleta

    Final push from Camp Berlin/Colera. The infamous Canaleta couloir is the final 1,000 ft — loose scree at altitude that takes 2-4 hours of exhausted ascent. Summit plateau with memorial cross.

    22,838 ft
    Summit
    ▲
    The Canaleta: Aconcagua’s psychological breaking point

    The final section of the Normal Route is the Canaleta couloir — a 1,000 ft vertical chute of loose scree, rubble, and rock that climbers ascend in the final 2-4 hours of summit day. After 8-10 hours of climbing already, at 22,000+ feet, the Canaleta is where many climbers turn around. Each step causes loose material to slide back, creating the feeling of climbing an escalator going the wrong direction. The psychological challenge often exceeds the physical. Most successful summits involve climbers committing to the Canaleta with the knowledge that it will be brutal and slow — and then simply continuing, one step at a time. Expect to stop every 20-30 steps for breath. This is not a section to push through quickly; it’s a section to outlast.


    Permits and Logistics

    Park permits (mandatory)

    • Obtained in Mendoza: Provincial offices process all permits.
    • Season pricing: Varies significantly by date. High season (Dec 15 – Jan 31) ~$900-$1,100 for foreigners; mid-season ~$600-$800; low season ~$400-$500.
    • Requirements: Passport, proof of climbing insurance, medical certificate from some operators.
    • Duration: Permits valid for specific date range — register for expedition length.
    • Processing time: Same-day if you go in person; online applications take longer.

    Mule support

    • Purpose: Transport duffel bags from park entrance to base camp and return.
    • Cost: $600-$900 per climber for full round-trip service.
    • Weight allowance: Typically 20-25 kg per duffel, one duffel per climber.
    • Essential: Without mule support, climbers must carry everything — impractical for most.
    • Operators: Many Mendoza outfitters coordinate mule logistics.

    Base camp services

    • Plaza de Mulas infrastructure: Multiple operators run services from basic (tent and food) to full-service (heated dining, showers, medical).
    • Meal options: Self-catering or purchased meals. Many climbers buy meal packages for $300-$800 over 3-5 day base camp stay.
    • Medical support: Base camp medical tent with doctor. Emergency oxygen available. Helicopter rescue if needed.
    • Communications: Satellite internet at base camps. Limited phone coverage.

    Choosing Your Route: Decision Framework

    • First-time Aconcagua climber? → Normal Route. The infrastructure, established paths, and proven success patterns make this the right choice.
    • Experience with 5,000+ m peaks? → Consider Falso de los Polacos for a more interesting approach and better acclimatization.
    • Strong ice climbing background? → Polish Glacier Direct offers genuine technical challenge unique among 7SS peaks.
    • Want wilderness over infrastructure? → Guanacos Valley provides solitude but requires self-sufficiency.
    • World-class alpinist seeking elite objective? → South Face — but this isn’t about Seven Summits, it’s about alpinism.

    For the vast majority of climbers, the decision is Normal vs. Falso de los Polacos. Both deliver the summit via non-technical terrain; the choice depends on whether you prioritize efficiency (Normal) or scenic variety and acclimatization quality (Falso de los Polacos).


    Aconcagua Routes FAQ: Your Common Questions Answered

    What is the easiest route up Aconcagua?

    The easiest route up Aconcagua is the Normal Route (also called the Ruta Normal or Plaza de Mulas route), which ascends the mountain’s northwest side and sees approximately 75-80% of all summit attempts. Normal Route details: (1) Approach via Horcones Valley from Puente del Inca (~9,200 ft). (2) Base camp at Plaza de Mulas at 14,270 ft. (3) Three high camps: Camp 1 Canada (16,400 ft), Camp 2 Nido de Condores (17,700 ft), Camp 3 Berlin/Colera (19,350 ft). (4) Summit day from Camp 3 via Canaleta couloir to the summit. (5) Distance: approximately 55 km round trip from park entrance. (6) Total elevation gain: 13,600 ft from park entrance. (7) Technical rating: Non-technical (no ropes, crampons, or ice axes needed except in adverse conditions). Why it’s the ‘easiest’: (8) Non-technical throughout — just high-altitude hiking. (9) Established infrastructure — base camp with medical tent, mess tent, showers. (10) Mule support available to Plaza de Mulas — reduces pack weight significantly. (11) Well-marked route with no route-finding challenges. (12) Most guided services use this route. (13) Rescue response fastest on Normal Route. However, ‘easiest’ is relative — Aconcagua is still a 22,838-foot peak with ~50% success rate. Main difficulty: altitude effects, weather, and the brutal Canaleta couloir on summit day. For comparison, the Polish Glacier Direct is significantly harder (requires ropes and ice climbing), while the 360 Traverse via Falso de los Polacos offers a scenic alternative through two valleys with intermediate difficulty.

    What are the main routes on Aconcagua?

    Aconcagua has five main climbing routes, ranging from the non-technical Normal Route to the world-class South Face. Major routes overview: (1) Normal Route (Ruta Normal / Plaza de Mulas): The standard. 75-80% of climbers. Non-technical, northwest approach via Horcones Valley. Base camp Plaza de Mulas (14,270 ft). Summit via Canaleta couloir. Duration: 15-20 days. (2) Polish Glacier Direct (Ruta Glaciar de los Polacos): Technical variation ascending the Polish Glacier directly. Requires roped glacier travel, ice climbing skills. Approach via Vacas Valley to Plaza Argentina base camp (13,775 ft). Now rarely climbed due to glacier retreat creating exposed ice. Duration: 18-22 days. (3) Falso de los Polacos (360 Traverse/Polish Traverse): Most popular alternative. Approach via Vacas Valley and Plaza Argentina, traverse around the mountain, join Normal Route at Camp 2 Nido. Moderate technical demands but longer approach. Advantage: scenic variety and acclimatization hike across both valleys. Duration: 18-21 days. (4) Guanacos Valley Route: Less-traveled variation. Approach via Guanacos Valley (east side), base camp Plaza Guanacos. Connects to Polish Glacier area or traverses around to Normal Route. More remote, fewer climbers. Duration: 20-24 days. (5) South Face (Pared Sur): World-class alpine wall climb. Over 9,000 feet of vertical relief. Multiple established lines (French Route, Messner Route, Central Route). Requires multi-day big-wall climbing. Reserved for experienced alpinists only. Duration: 7-15 days depending on line. Route selection factors: (6) Experience level — Normal or 360 for most climbers. (7) Time available — Normal shortest, Guanacos longest. (8) Technical skill — Polish Glacier Direct and South Face require significant expertise. (9) Crowds — Normal busiest, Guanacos quietest. (10) Acclimatization — longer routes (360, Guanacos) offer better acclimatization through approach days.

    How much does it cost to climb Aconcagua?

    Climbing Aconcagua costs $4,000-$8,000 for the park permit and mountain expenses, or $4,500-$7,000 for a fully guided expedition. Total budgets vary widely based on independent vs. guided approach. Park permit (mandatory, 2026 rates approximate): (1) High season (Dec 15 – Jan 31): Approximately $900-$1,100 USD for foreigners. (2) Mid season (early Dec or Feb): Approximately $600-$800 USD. (3) Low season (Nov or early Mar): Approximately $400-$500 USD. (4) Argentine residents pay significantly less. (5) Permits obtained in Mendoza at provincial offices. Mule support and logistics: (6) Standard mule service to Plaza de Mulas and back: $600-$900 per climber for duffel transport. (7) Additional mule support for return: included in round-trip pricing. (8) Mules are the standard — essential for carrying group gear to base camp. Base camp services: (9) Plaza de Mulas base camp: Meals and facilities from major operators $600-$1,200 for 3-5 days. (10) Shared accommodations, heated dining tents, hot showers, internet. (11) Medical services available. Guided expedition costs: (12) Full-service guided: $4,500-$7,000 USD including permit, mules, base camp, guides, meals. (13) Major operators: Alpine Ascents International, Grajales Expeditions, Aconcagua Express, Fernando Grajales Expeditions. (14) Budget operators: $3,500-$4,500 for basic support. Independent climbing costs: (15) Park permit: $400-$1,100 (season dependent). (16) Mules: $600-$900. (17) Base camp services a la carte: $300-$800. (18) Food supplies (bought in Mendoza): $200-$400. (19) Travel to Mendoza from Buenos Aires or neighboring: $400-$800. (20) Hotel in Mendoza before/after: $300-$500. Personal gear: (21) Complete high-altitude gear: $2,000-$4,000 if buying new. Many items can be rented in Mendoza. Total budget ranges: Guided expedition: $6,000-$9,000 including international flights. Independent climber: $3,500-$6,000 plus flights. Most climbers budget $7,000-$8,000 for a fully-supported Aconcagua expedition including flight from North America. See our complete mountain climbing costs guide.

    When is the best time to climb Aconcagua?

    The best time to climb Aconcagua is December through February (Southern Hemisphere summer), with the peak season being mid-December through January. Monthly breakdown: (1) November: Early season. Cold temperatures, possible snow on routes. Most expeditions haven’t started. Limited infrastructure at base camps. (2) Early December: Shoulder season beginning. Warming temperatures, snow melting. Quieter trails. Less crowded base camps. Park permits at mid-season rates. (3) Late December: Peak season begins. Holiday period brings significant climber traffic. Weather generally stable. Base camp infrastructure fully operational. (4) January: Peak month. Warmest temperatures, longest daylight, best weather probability. Most climbers on mountain. Summit success rates highest. (5) February: Late peak season. Temperatures cooling slightly, fewer climbers. Often good weather windows. Locals’ favorite month. (6) Early March: Season ending. Colder temperatures returning. Base camp services winding down. Weather less stable. Why peak season: (7) Temperature range: Base camp 30-50°F, summit -15 to -5°F (lower than Denali but more typical of high-altitude climbing). (8) Weather stability: Summer high pressure creates more predictable weather patterns. (9) Snow conditions: Generally stable, less avalanche risk than shoulder seasons. (10) Infrastructure: All services operating — mules, base camps, medical support, guides. (11) Rescue response: Better helicopter and ranger response during peak season. The notorious ‘viento blanco’: (12) ‘White wind’ is Aconcagua’s signature weather hazard — sustained high winds (80-120 mph) that can develop rapidly even in peak season. (13) Forces climbers to pin down in camps for 2-5 days. (14) Can scrub summit attempts entirely. Most climbers plan 18-22 day expeditions to allow 2-3 summit windows. Summit-day conditions: (15) Weather-dependent. (16) Ideal summit days: clear skies, minimal wind, temperatures -20 to -5°F. (17) Summit success correlates strongly with weather patience — rushing through marginal conditions fails expeditions.

    What is the Polish Glacier route on Aconcagua?

    The Polish Glacier route (Ruta Glaciar de los Polacos) is a technical ice-climbing variation on Aconcagua’s east face, named after the 1934 Polish expedition that first ascended it. Route overview: (1) Approach: Vacas Valley (east side approach, longer than Horcones). (2) Base camp: Plaza Argentina at 13,775 feet. (3) Three high camps: Camp 1 (16,100 ft), Camp 2 (18,500 ft), Camp 3 (19,700 ft). (4) Summit via direct ascent of the Polish Glacier — sustained ice climbing. (5) Distance: Approximately 80 km round trip. (6) Total elevation gain: 13,638 ft from park entrance. (7) Technical rating: Alpine PD+ to AD, moderate ice climbing required. (8) Duration: 18-22 days typical. Current Polish Glacier status: (9) Significant glacier retreat over past decades has exposed more ice and rock on the direct line. (10) Modern Polish Glacier Direct sees relatively few climbers compared to historical. (11) Most ‘Polish’ climbers actually use the Falso de los Polacos (false/fake Polish) — a traverse variation. Polish Glacier Direct (true route): (12) Requires roped team climbing. (13) Ice screws for protection on steeper sections. (14) Crampons and ice tools essential. (15) Experience with alpine ice climbing required. (16) Ice conditions variable year to year — some seasons better than others. (17) Seen primarily by experienced alpinists seeking technical challenge. Falso de los Polacos (popular alternative): (18) Approaches via Vacas Valley like true Polish route. (19) Instead of climbing Polish Glacier directly, traverses around base to reach Normal Route. (20) Joins Normal Route at Nido de Condores (Camp 2). (21) Continues to summit via Normal Route. (22) Popularity reason: ‘false Polish’ delivers a two-valley experience, better acclimatization, and moderate technical demands while summiting via the standard route. Most climbers today who hear ‘Polish route’ mean the Falso de los Polacos, which is technically a Normal Route summit with an alternative approach.

    How long does it take to climb Aconcagua?

    Most Aconcagua expeditions take 15-21 days total, including travel to Mendoza, park permits, approach, climb, and descent. Typical timeline breakdown: Mendoza and preparation: (1) Day 1-2: Arrive Mendoza, obtain park permit, equipment check, gear rental if needed. (2) Day 3: Travel to Penitentes or Puente del Inca, expedition briefing. Approach and base camp: (3) Day 4: Trek into park, sleep at Confluencia (11,000 ft). Acclimatization day. (4) Day 5: Continue to base camp — Plaza de Mulas (Normal Route) or Plaza Argentina (360 Traverse). Mules transport duffel bags. (5) Days 6-7: Rest, acclimatize at base camp. Short acclimatization hikes. Climbing phase (8-12 days depending on route): (6) Day 8-9: Move to Camp 1 or Canada. Typically cache-and-return method for acclimatization. (7) Days 10-11: Rest day and move to Camp 2 (Nido de Condores). (8) Days 12-13: Rest, move to Camp 3 (Berlin/Colera). (9) Day 14-15: Summit attempt day. 10-14 hours round trip from Camp 3. Summit window may require waiting. Descent: (10) Days 15-16: Descend to base camp, pack out. (11) Day 17: Hike out of park to Puente del Inca. (12) Day 18: Return to Mendoza. Travel home: (13) Day 19: Rest in Mendoza. (14) Day 20-21: International flights home. Factors affecting timeline: (15) Weather: Summit attempts often delayed 2-5 days by weather. (16) Acclimatization: Individual response varies. (17) Fitness level: Strong climbers move faster. (18) Route choice: Normal Route faster than 360 Traverse or Guanacos Valley. (19) Weather windows: Multiple attempts possible on 21-day schedules; risk of bailing on 15-day. Conservative planning: Budget 18-21 days total for guided, 20-24 days for self-guided. Time pressure is the most common reason climbers fail — rushing acclimatization or attempting summit in marginal weather leads to failure or worse. Built-in buffer days are essential.

    Do you need a guide to climb Aconcagua?

    Guides are not legally required to climb Aconcagua, but approximately 70-80% of climbers use guide services due to the mountain’s altitude, remoteness, and weather challenges. Guide decision factors: When guides are essential: (1) First expedition peak above 15,000 ft. (2) No prior high-altitude climbing experience above 18,000 ft. (3) Limited Spanish language skills. (4) Solo climber without partners. (5) Short time window that requires efficient logistics. (6) Preference for safety infrastructure. When independent climbing is feasible: (7) Multiple expeditions above 17,000 ft completed. (8) Strong Spanish language skills or experienced partner. (9) Pre-formed team of 3-6 with complementary skills. (10) Previous experience with permit logistics in Argentina. (11) Comfort with self-supported high-altitude planning. Major Aconcagua guide services: (12) Alpine Ascents International (AAI) — Large American guide service, English-speaking. (13) Grajales Expeditions — Historic Mendoza-based operator, highly regarded. (14) Aconcagua Express — Specialized in 360 traverse routes. (15) Inka Expeditions — Established Mendoza operator. (16) Mountain Madness — American operator with Argentine infrastructure. (17) Amigos Aconcagua — Budget-friendly Argentine operator. What guide services provide: (18) Park permit coordination (complex Argentine bureaucracy). (19) Transfers from Mendoza to park entrance. (20) Mule support coordination. (21) Base camp services at Plaza de Mulas or Plaza Argentina. (22) All meals during expedition. (23) Group gear (tents, stoves, medical kit). (24) English-speaking guides (foreign clients). (25) Weather interpretation and summit timing decisions. (26) Emergency response coordination. Independent climber requirements: (27) Handle permit application in Mendoza. (28) Arrange mule transport directly. (29) Book base camp services separately. (30) Organize all food and supplies. (31) Weather forecasting capability. (32) Emergency communication equipment. (33) Self-rescue capability. Cost-benefit: Guided expedition adds approximately $3,000-$5,000 over independent. For first-time Aconcagua climbers, this pays back through higher summit success rates (70-80% guided vs. 40-55% independent), safety, and streamlined logistics in a non-English environment. Experienced mountaineers who have done Denali-equivalent trips save significant money going independent. See our Aconcagua trip report for real expedition experience.

    What is the summit success rate on Aconcagua?

    The summit success rate on Aconcagua is approximately 40-60% across all climbers, varying significantly by route, season, and guide status. Success rate breakdown: Overall statistics: (1) Normal Route: 45-55% average summit success. (2) Falso de los Polacos (360 Traverse): 50-60% success. (3) Polish Glacier Direct: 30-45% success (technical route, weather-sensitive). (4) Guanacos Valley: 40-50%. (5) South Face: Highly variable, typically 20-40% in good seasons. By approach type: (6) Guided expeditions: 65-75% average success. (7) Independent climbers: 40-55% average success. (8) Solo climbers (no partners/guides): 30-45% success. Main reasons for failure: (9) Weather (30-35% of failures): Viento blanco (white wind) forces retreat. (10) Altitude illness (25%): AMS, HAPE, or HACE symptoms. (11) Physical fitness/exhaustion (15%): Underestimating demands. (12) Insufficient time (10%): Not enough days for proper acclimatization or weather windows. (13) Equipment failure (5%): Cold-weather gear inadequacy. (14) Injury (5%): Falls, frostbite. (15) Other (5-10%): Stomach issues, group dynamics, personal reasons. Factors affecting success: (16) Acclimatization strategy — Longer expeditions (18+ days) have higher success than shorter ones. (17) Time of season — January typically has best weather patterns. (18) Route choice — Normal Route easier than Polish/Guanacos alternatives. (19) Prior altitude experience — Climbers with 5,000+ m experience succeed more often. (20) Weather patience — Willingness to wait for good conditions boosts success dramatically. (21) Team fitness — Group must move at pace of slowest capable member. Summit day itself: (22) Turning around before summit is common (30-40% of summit-day attempts fail). (23) Canaleta couloir is the psychological breaking point for many — the final 1,000 ft of vertical scree ascent takes 2-4 hours at altitude. (24) Weather can change mid-summit-day forcing retreat. (25) Cognitive impairment at altitude leads to poor decision-making on summit ridge. Compared to other Seven Summits: Aconcagua success rate is roughly similar to Denali (50% range), better than Everest (~35% all climbers), worse than Kilimanjaro (70-80%), better than Vinson (60-70% due to extreme selection of climbers). Budget expedition time for 2-3 summit attempts to maximize success probability.


    Authoritative Sources & Further Reading

    Content reflects authoritative Aconcagua mountaineering sources:

    • Aconcagua Provincial Park Authority — aconcagua.mendoza.gov.ar — Official park management and permit information
    • R. J. Secor, Aconcagua: A Climbing Guide — Definitive English-language route guide
    • American Alpine Journal — Expedition reports and first-ascent history
    • American Alpine Club — Accident reports and historical data
    • Grajales Expeditions — 40+ year history of Aconcagua operations
    • Fernando Grajales Expeditions — Original Aconcagua outfitter
    • Servicio Meteorológico Nacional (Argentina) — Weather forecasting
    • Guide services: Alpine Ascents International, Mountain Madness, Inka Expeditions, Aconcagua Express, Amigos Aconcagua
    Published: March 7, 2026
    Last updated: April 19, 2026
    Next review: July 2026
    Part of the Global Summit Guide

    Back to the Master Hub

    This guide is one of 71 across 12 thematic clusters on Global Summit Guide. The master hub organizes every guide by experience tier, specific peak, skill area, and region.

    View the Hub →

    Was this helpful?

    Yes
    No
    Thanks for your feedback!
  • Patagonia Hiking: Guide to Trekking in Torres del Paine

    {“@context”:”https://schema.org”,”@type”:”Article”,”headline”:”Patagonia Hiking: Complete Guide to Trekking in Torres del Paine”,”description”:”Complete 2026 destination-focused guide to hiking Torres del Paine in Chilean Patagonia — wildlife, day hikes, photography, cultural context, Puerto Natales base, and the complete experience beyond just the W and O Circuits.”,”image”:”https://globalsummitguide.com/wp-content/uploads/2026/03/patagonia-hiking-torres-del-paine.jpg”,”author”:{“@type”:”Organization”,”name”:”Global Summit Guide Editorial Team”,”url”:”https://globalsummitguide.com/about/”},”publisher”:{“@type”:”Organization”,”name”:”Global Summit Guide”,”url”:”https://globalsummitguide.com”,”logo”:{“@type”:”ImageObject”,”url”:”https://globalsummitguide.com/wp-content/uploads/2026/02/global-logo-new-2.png”,”width”:”300″,”height”:”100″}},”datePublished”:”2026-03-07T08:00:00-03:00″,”dateModified”:”2026-04-19T12:00:00-06:00″,”mainEntityOfPage”:{“@type”:”WebPage”,”@id”:”https://globalsummitguide.com/patagonia-hiking-guide-to-trekking-in-torres-del-paine/”},”isPartOf”:{“@type”:”CollectionPage”,”@id”:”https://globalsummitguide.com/conquer-peaks-global-summit-guide-for-mountain-climbing/#hub”,”name”:”Conquer Peaks: Your Global Summit Guide for Mountain Climbing”}} {“@context”:”https://schema.org”,”@type”:”FAQPage”,”mainEntity”:[ {“@type”:”Question”,”name”:”What wildlife can you see hiking Torres del Paine?”,”acceptedAnswer”:{“@type”:”Answer”,”text”:”Torres del Paine hosts some of South America’s richest Patagonian wildlife — including pumas, guanacos, Andean condors, culpeo foxes, and rheas. Complete wildlife list: Large mammals: (1) Guanaco (Lama guanicoe): Camelid relative of llamas, extremely common, seen in herds of 10-50 on open steppe. Park holds ~3,000-5,000 individuals. (2) Puma (Puma concolor): Torres del Paine is one of the best places in the world to see pumas in the wild. Estimated 50-100 pumas in park. Puma tracking tours available December-March. (3) South Andean huemul deer (Hippocamelus bisulcus): Endangered Patagonian deer. Occasional sightings in Valle del Francés and Valle del Toro. (4) Culpeo fox (Lycalopex culpaeus): Red-coated fox, visible near refugios and campsites especially at dawn and dusk. (5) Gray fox (Lycalopex griseus): Smaller fox species, less common. (6) Geoffroy’s cat (Leopardus geoffroyi): Small wildcat, very rarely seen. Birds: (7) Andean condor (Vultur gryphus): South America’s largest bird with 3 m wingspan. Commonly soars along ridges. (8) Rhea (Rhea pennata): Ostrich-like flightless bird on steppe. Darwin’s rhea subspecies. (9) Magellanic woodpecker (Campephilus magellanicus): Large red-headed woodpecker in lenga forests. (10) Upland goose (Chloephaga picta): Common around lakes. (11) Black-chested buzzard-eagle (Geranoaetus melanoleucus): Large raptor frequently spotted. (12) Austral parakeet (Enicognathus ferrugineus): Only parrot in Patagonia, forest-dwelling. Where to see wildlife: (13) Guanacos: Portería Sarmiento area near park entrance — open steppe. (14) Pumas: Puma tracking tours from Hotel Las Torres or Puerto Natales — Laguna Amarga sector especially. (15) Condors: Above French Valley and along cliff edges — often seen during day hikes. (16) Foxes: Near all refugios, especially at dawn/dusk. (17) Huemul: Valle del Francés, quiet forest sections. Wildlife tips: (18) Dawn and dusk (crepuscular activity) best for most species. (19) Puma tracking requires specialized tour guides. (20) Keep distance from all animals — guanacos especially when with young. (21) Condors best viewed at high viewpoints during thermal updrafts. (22) Wildlife photography excellent year-round but December-February best for variety. (23) Respect park wildlife distance regulations. Torres del Paine offers South America’s best combination of dramatic landscape and diverse wildlife — both are integral to the destination experience.”}}, {“@type”:”Question”,”name”:”What are the best day hikes in Torres del Paine?”,”acceptedAnswer”:{“@type”:”Answer”,”text”:”Torres del Paine’s best day hikes deliver exceptional Patagonian scenery without requiring the full W or O Circuit commitment — accessible to visitors with only 1-3 days in the park. Top 5 day hikes: (1) Base Torres Viewpoint Day Hike: 19 km round trip, 6-8 hours, from Hotel Las Torres parking. Hike to the iconic three granite towers viewpoint. Most popular day hike in park. 850 m elevation gain. Challenging but achievable in a day. Dawn starts for sunrise views. (2) Mirador Cuernos Day Hike: 5 km round trip, 2-3 hours, from Hotel Las Torres. Shorter hike to panoramic viewpoint of Paine Massif ‘Horns.’ Excellent for older hikers or photography. Strong Patagonian winds typical. (3) Grey Glacier Viewpoint Day Hike: Variable — 5-20 km round trip depending on start point. Catamaran to Paine Grande then hike to Grey Glacier viewpoint. Optional kayak tour on iceberg-filled lake. Half to full day. (4) Salto Grande Waterfall Hike: 2 km round trip, 1-2 hours, near Pudeto. Short walk to dramatic waterfall cascading from Lake Nordenskjöld. Accessible to all fitness levels. (5) Pudeto to Condor Lookout: 4 km round trip, 2-3 hours. Views across lakes with Paine Massif backdrop. Andean condor viewing opportunity. Alternative day options: (6) Laguna Azul: Drive + 1-hour walk. Alternative Torres views without the full hike. Blue lake photography. (7) Lago Sarmiento: Drive + 2-hour walk. Southern park less-visited section. (8) Rio Paine suspension bridge: Short walk from park roads. Good for families. Multi-day hikers’ day options: (9) Rest day hikes near refugios: Chileno Ridge, Mirador Las Torres variations. (10) Kayak tours on Lake Grey among icebergs ($80-$150). Planning day hikes: (11) Access requires bus from Puerto Natales (2.5 hours each way) plus internal park shuttles. (12) Day hikers can complete the classic ‘three viewpoints’ in 3 days — Torres Base, Cuernos, Grey Glacier — without camping. (13) Day tour operators offer full-day packages with transportation. (14) Weather-dependent — wind and rain can force plan changes. (15) Park entry $35 for multi-day foreign visitors. Day hikes are ideal for visitors with time constraints or those wanting Torres del Paine experience without multi-day commitment. See our W vs O Circuit comparison for multi-day options.”}}, {“@type”:”Question”,”name”:”How do you get to Torres del Paine?”,”acceptedAnswer”:{“@type”:”Answer”,”text”:”Getting to Torres del Paine requires a multi-stage journey: international flight to Santiago, Chile, domestic flight to Punta Arenas (PUQ), bus to Puerto Natales, then bus to the park. Most travelers allocate 2-3 travel days. Complete journey breakdown: Stage 1: International to Santiago (1) Fly to Santiago de Chile (SCL) — major international gateway. (2) Total travel time from North America/Europe: 15-24 hours. (3) Airlines serving Santiago: LATAM, Aerolíneas Argentinas, Copa, multiple US/European carriers. Stage 2: Santiago to Punta Arenas (4) Domestic flight Santiago to Punta Arenas (PUQ) — 3.5 hours. (5) Airlines: LATAM, Sky Airline, JetSmart. (6) Cost: $100-$250 one way, cheaper booked ahead. (7) Flight frequency: Multiple daily flights. Stage 3: Punta Arenas to Puerto Natales (8) Bus Punta Arenas to Puerto Natales: 3 hours, $25-$40 one way. (9) Bus companies: Bus Sur, Pacheco, Transfer Austral. (10) Alternative: Rental car 3 hours via Route 9. (11) Puerto Natales is the gateway town for Torres del Paine. Stage 4: Puerto Natales to Torres del Paine (12) Bus Puerto Natales to Torres del Paine: 2.5 hours, $15-$25 each way. (13) Two park entrance options: Laguna Amarga (for O Circuit start), Pudeto (for W Circuit west end via catamaran). (14) Bus schedules: 7:00 AM and 7:30 AM typically depart Puerto Natales. (15) Return buses: 14:00-17:00 from park. Alternative routes: (16) El Calafate (Argentina, FTE): Cross border from El Calafate to Puerto Natales. Bus 5-6 hours. Good for combining with Perito Moreno Glacier visit. (17) Ushuaia connection: Southern route combining Patagonia destinations. (18) Private transfers: Available for higher cost ($200-$400 each way). Accommodation pre/post park: (19) Puerto Natales: Budget hostels $15-$40, mid-range hotels $60-$150, boutique $150-$350. (20) Punta Arenas: Hotels $60-$200. Worth staying one night for rest before park. Travel timing considerations: (21) Allow 1-2 buffer days for weather/flight delays. (22) Peak season (December-February) book flights 3-6 months ahead. (23) International flights: $800-$1,800 from North America/Europe. (24) Domestic flights: $100-$250. (25) Ground transport: $50-$100 total. Total travel budget: International flights $800-$1,800, domestic flights $200-$500, ground transport $50-$100, pre/post hotels $100-$300. Minimum travel time: 3 days in transit each direction. Recommended: 2 days to Puerto Natales plus park time.”}}, {“@type”:”Question”,”name”:”What is the weather like in Torres del Paine?”,”acceptedAnswer”:{“@type”:”Answer”,”text”:”Torres del Paine weather is famously variable — often called ‘four seasons in one day’ — with strong winds, sudden rain, and rapid temperature changes regardless of season. Understanding the weather is essential to enjoying the destination. Seasonal patterns: (1) Summer (December-February): Warmest temperatures 50-75°F (10-24°C) daytime highs, 40-55°F overnight lows. Longest daylight 17+ hours. Strongest winds of year. Highest chance of clear sunrise Torres views. Peak crowds. (2) Fall (March-May): Cooling temperatures. Changing leaf colors in lenga forests. Fewer crowds. Some refugios closing. April-May too cold for most hiking. (3) Winter (June-August): Cold with regular snow. Most refugios closed. Short daylight. Accessible only for experienced winter trekkers. Dramatic frozen landscapes. (4) Spring (September-November): Transitional. Weather unpredictable. Refugios opening gradually. Wildflowers emerging. Fewer crowds than summer. Famous wind: (5) The Patagonia signature element. Winds regularly exceed 100 km/h (60 mph). (6) Wind can knock hikers over on exposed sections. (7) Paso John Gardner (O Circuit) regularly closed by winds. (8) Even summer months experience daily gusts. (9) Wind direction predominantly from west, accelerating over the Southern Patagonian Ice Field. Weather variability: (10) Precipitation: Possible any day regardless of season. Sunshine and rain often alternate in single day. (11) Temperature swings: 20+°F difference between noon and overnight common. (12) Cloud patterns: Clouds can obscure Torres peaks for days, then clear suddenly. (13) Wind patterns: Calmest typically early morning. Afternoon increases. Weather strategy for hikers: (14) Dress in layers — wind-proof shells essential. (15) Waterproof everything — rain gear, pack cover, dry bags inside pack. (16) Book multiple sunrise attempts for Torres Base viewpoint. (17) Be prepared to change plans based on weather. (18) Shelter planning important for backside O Circuit sections. Monthly weather breakdown: (19) December: Start of peak season. Long days. Often clear. (20) January: Peak weather typically most stable. Warmest month. (21) February: Continued peak conditions. (22) March: Transitioning. Less wind but cooler. (23) April: Significantly cooler, fewer clear days. (24) September-November: Variable, unpredictable. Torres del Paine specific conditions: (25) The sunrise Torres view requires calm weather — some trekkers try 3+ mornings before getting clear view. (26) Paso John Gardner on O Circuit weather-closed regularly. (27) Grey Glacier area can experience strong kathabatic winds from ice field. Weather determines many Patagonia experiences. Respecting its variability is key to enjoying the destination.”}}, {“@type”:”Question”,”name”:”What is Puerto Natales like and how long should I stay?”, “acceptedAnswer”:{“@type”:”Answer”,”text”:”Puerto Natales is Torres del Paine’s gateway town — a small port city of 22,000 on the Last Hope Sound (Seno Última Esperanza) with character, excellent restaurants, gear shops, and a charming Patagonian feel. Most visitors stay 1-2 nights pre-park and 1-2 nights post-park. About Puerto Natales: (1) Population: ~22,000 inhabitants. (2) Location: Chilean Patagonia, on Last Hope Sound fjord. (3) Founded: 1911 as wool shipping port. (4) Economy: Tourism (primary) and fishing. (5) Altitude: Sea level. (6) Distance to park: 2.5 hours by bus. (7) Atmosphere: Rustic Patagonian port town with modernization. What Puerto Natales offers: (8) Tourism base: Primary gateway for Torres del Paine, Perito Moreno (Argentina), Cerro Castillo. (9) Excellent restaurants: Fresh seafood (king crab, cod, shellfish), lamb (asado), Patagonian specialties. (10) Gear rental/purchase shops: Yamana, Erratic Rock, Patagonic — rent sleeping bags, stoves, tents, trekking poles. (11) Tour operators: Book W/O Circuit guided tours, puma tracking, boat tours. (12) Pre/post-park hotels: Range from $15 hostels to $350 boutique. Notable spots: (13) Milodon Cave: 10 minutes from town. Ancient ground sloth cave, paleontological interest. (14) Puerto Bories: Historic industrial warehouse converted to restaurants and hotels. (15) Waterfront promenade (Costanera): Walk along fjord with Patagonian flamingos often visible. (16) Plaza de Armas: Small central square with artisan craft vendors. (17) Last Hope Sound boat tours: Half-day fjord tours for $60-$100. Recommended stay duration: (18) Pre-park: 1 day minimum for arrival rest, gear preparation, acclimation. 2 days ideal. (19) Post-park: 1 day for unwind, laundry, celebration dinner. (20) Total Puerto Natales stay: 2-3 days recommended. (21) Some travelers use as base for multiple Patagonia trips. Day activities: (22) Boat tours on Last Hope Sound. (23) Visit Milodon Cave. (24) Gear shopping/rental. (25) Restaurant exploration — the cuisine is exceptional. (26) Wildlife watching (flamingos, condors visible around town). (27) Laguna Sofia or Cerro Benitez short hikes. Restaurants to visit: (28) El Asador Patagónico: Traditional Patagonian asado. (29) The Coffeemaker: Specialty coffee with regional touch. (30) Aldea: Refined Patagonian cuisine. (31) Mesita Grande: Pizza and casual. Logistics in Puerto Natales: (32) Airport: No commercial airport — fly to Punta Arenas and bus in (3 hours). (33) Currency: Chilean Pesos preferred, USD accepted some places. (34) Language: Spanish dominant, English widely understood in tourism. (35) Wi-Fi and cell service: Good in town center. Puerto Natales is more than transit — it’s a worthwhile Patagonian destination in its own right.”}}, {“@type”:”Question”,”name”:”When is the best time to see pumas in Torres del Paine?”,”acceptedAnswer”:{“@type”:”Answer”,”text”:”Torres del Paine is considered one of the best places on Earth to see pumas in the wild, with guanaco-rich eastern steppe areas providing prime habitat. Best time for puma viewing is May through October — Patagonian winter when guanaco prey is concentrated and pumas are more active in open terrain. Peak puma viewing season: (1) Winter (May-September): Best puma tracking success. Snow makes tracking easier. Guanacos concentrated in open areas for forage. Puma activity higher. Tours operate with specialized guides. (2) Spring (October-November): Continued good puma viewing. Shorter daylight. (3) Summer (December-February): Puma viewing possible but more challenging. Pumas in higher elevations, shorter hunts. Most tourists visit without seeing pumas. (4) Fall (March-April): Transitional period. Why Torres del Paine for pumas: (5) ~50-100 pumas estimated in park — highest density in Chile. (6) Guanaco population (~3,000-5,000) provides abundant prey. (7) Open Patagonian steppe makes sightings possible. (8) Park conservation protects population. (9) Experienced trackers and guides available. Puma tracking tour details: (10) Specialized operators: Awasi Patagonia, Pumas Chile, Fantastico Sur Lodge. (11) Tour format: 3-7 day specialized tracking trips. (12) Cost: $2,000-$4,000 for multi-day specialized tours. (13) Includes accommodation at Hotel Las Torres or Patagonia lodges. (14) Experienced guide/tracker ratio typically 1:2. (15) Dawn/dusk prime viewing times. (16) Photography-focused options available. (17) Best combined with broader Torres del Paine trek or lodge stay. Where pumas live in park: (18) Eastern sector: Laguna Amarga area, Portería Sarmiento, Río Paine. (19) Open steppe: Guanaco-rich zones. (20) Lenga forest edges: Transition areas. (21) Rarely seen near refugios — too much human traffic. (22) Most sightings from vehicles or specialized tracking tours. Encountering pumas while hiking: (23) Rare but possible. Estimated <1% of trekkers see pumas on W/O Circuit. (24) Pumas typically avoid humans. (25) Attacks on humans are extremely rare. (26) Stay calm if encountered — do not run. (27) Give space and continue route. (28) Report sightings to park rangers. Realistic expectations: (29) Most first-time visitors to Torres del Paine do not see pumas on standard treks. (30) For guaranteed(ish) puma viewing, book specialized tracking tour. (31) Winter tracking offers highest success rates but harsher conditions. (32) Photography-focused puma tours are an increasingly popular niche. Torres del Paine offers genuine wild puma viewing — rare experience requiring specialized approach for highest success."}}, {"@type":"Question","name":"What food should I try in Torres del Paine and Puerto Natales?","acceptedAnswer":{"@type":"Answer","text":"Patagonian cuisine combines traditional Chilean dishes, Argentine influences, and regional specialties — with exceptional lamb, seafood, and regional wines. Puerto Natales has become one of Patagonia's top dining destinations. Traditional Patagonian dishes: (1) Cordero al palo: Lamb roasted on a wooden cross over open fire. Traditional preparation takes 4-6 hours. The quintessential Patagonian meal. (2) Cordero Magellanico: Magellanic lamb — lamb specific to Patagonia's grazing lands. Exceptional quality due to wild herb-grazed sheep. (3) Centolla: King crab from Patagonian waters. Enormous legs, sweet flavor. Available December-March. (4) Milcao: Chilean Patagonia potato pancake from Chiloé region. (5) Curanto: Traditional Chilean seafood/meat stew cooked in earth oven. Authentic preparation rare but worth finding. (6) Pisco Sour: Chilean/Peruvian cocktail. Pisco, lime, sugar, egg white. Standard welcome drink. Seafood specialties: (7) Centolla (king crab): Pre-prepared or live. Best at restaurants near Puerto Natales waterfront. (8) Congrio: Cusk eel — Pablo Neruda's favorite fish, dramatic white fillet. (9) Ostion: Scallops, regional varieties. (10) Merluza austral: Southern hake. (11) Salmón: Farmed salmon from Chilean salmon farms. Best restaurants in Puerto Natales: (12) El Asador Patagónico: Traditional cordero al palo. Iconic Patagonian dining experience. Reserve ahead. (13) Aldea: Refined Patagonian cuisine. Small plates featuring regional ingredients. Higher-end option. (14) Mesa del Sur: Waterfront restaurant with local seafood. (15) La Mesita Grande: Wood-fired pizza and casual dining. Popular with backpackers. (16) Afrigonia: Fusion restaurant blending African and Patagonian influences. (17) The Coffeemaker: Specialty coffee with regional touches. Great breakfast. (18) Last Hope Distillery: Local gin and whiskey distillery with tasting room. Chilean wine regions: (19) Central Valley wines (Cabernet, Merlot, Carmenère). (20) Casablanca Valley (Sauvignon Blanc, Pinot Noir). (21) Maipo Valley (premium Cabernet). (22) Excellent value compared to European or US wines. (23) Patagonia lager beers increasing in quality. Trek food vs restaurant food: (24) Trek refugios offer half-board meals — varies by operator. (25) Bring high-calorie energy foods for day hikes. (26) Chilean food quality in refugios better than some international equivalents. Food safety: (27) Water purification recommended for backcountry. (28) Restaurant food generally safe for foreigners. (29) Fresh seafood some of the best in South America. Patagonian food culture: (30) Dining is social — meals are long and communal. (31) Lunch often the main meal. (32) Dinner often late (8:30 PM onwards). (33) Tipping: 10% standard. Torres del Paine visits should include significant time in Puerto Natales for food culture exploration — the cuisine is integral to the Patagonian experience."}}, {"@type":"Question","name":"How do you photograph Torres del Paine effectively?","acceptedAnswer":{"@type":"Answer","text":"Torres del Paine is one of the world's premier landscape photography destinations — but the famous weather variability, strong winds, and tourist crowds create specific challenges. Effective photography requires strategic planning around light, weather, and timing. Best photography locations: (1) Mirador Las Torres: Pre-dawn hike for sunrise alpenglow on three granite towers. The iconic shot. (2) French Valley (Mirador Britanico): Dramatic granite amphitheater. Afternoon/evening light best. (3) Grey Glacier: Glacier front and iceberg-filled lake. Golden hour excellent. (4) Mirador Cuernos: Paine Massif 'Horns' from east. Morning light. (5) Lago Pehoé: Turquoise lake with Paine Massif backdrop. Sunset viewing. (6) Salto Grande: Waterfall with Torres del Paine backdrop. (7) Wildlife locations: Laguna Amarga for guanacos, condor flights along ridges. Lighting strategy: (8) Golden hour sunrise: Torres glowing pink/orange — the classic 'amanecer' moment. 30-60 minutes pre-sunrise to 30 minutes post. (9) Golden hour sunset: Later light on west-facing faces. (10) Blue hour post-sunset: Dramatic mood shots with residual light. (11) Midday avoidance: Harsh light, strong contrasts. Use for water features or abstracts. Weather considerations: (12) Plan multiple sunrise attempts — 30-50% success rate on first attempt. (13) Weather forecast unreliable — monitor daily and adjust. (14) Wind affects tripod stability — use heavy bag on hook. (15) Rain gear for camera essential. (16) Lenses fog quickly in humidity changes. Equipment recommendations: (17) Wide-angle lens 14-35mm: Essential for landscape, towers, valley scenes. (18) Telephoto 70-200mm: Wildlife and compressed mountain perspectives. (19) Tripod: Sturdy but light. Peak Design Travel Tripod, Gitzo options. (20) Filters: ND graduated for skies, polarizer for water. (21) Extra batteries: Cold drains faster. (22) Weatherproofing: Rain covers, camera towels. (23) Backup SD cards. Photography tours: (24) Dedicated photo tours available with photographer-guides. (25) Cost: $2,500-$4,500 for multi-day photo-focused trips. (26) Advantages: Weather-optimal timing, expert locations. Wildlife photography specifics: (27) Guanacos: Open steppe, longer lenses useful. (28) Condors: Thermal updraft locations, telephoto essential. (29) Pumas: Specialized tracking tours ($2,000-$4,000). (30) Foxes: Dawn/dusk at refugios, shorter lenses OK. Social considerations: (31) Crowd timing: Arrive early to viewpoints. (32) Respect other hikers — Torres Base viewpoint gets crowded. (33) Tripod etiquette: Don't monopolize locations. Photography strategy by trek type: (34) Day hikers: Focus on Mirador Cuernos and short panoramic views. (35) W Circuit: Plan for Torres sunrise from Chileno. (36) O Circuit: Unique ice field views at Paso John Gardner. (37) Dedicated photography trips: Multiple viewpoints with flexible weather timing. Torres del Paine rewards patient, strategic photography. The combination of dramatic landscape, wildlife, and unpredictable weather creates opportunities unique to Patagonia."}} ]} *,*::before,*::after{box-sizing:border-box;margin:0;padding:0} :root{–pine:#0a1929;–forest:#122a44;–mist:#dde5ee;–snow:#f4f6f9;–stone:#485460;–pebble:#8a95a3;–ink:#0f1a26;–cream:#fafaf7;–white:#ffffff;–gold:#d4913a;–gold-light:#f5e4c8;–denali-mid:#2e5986;–denali-light:#e8eef5;–ready:#2d6e4e;–ready-light:#e8f1ec;–caution:#b86a15;–caution-light:#f7ece0;–danger:#a83a2b;–danger-light:#f5e8e5;–emerald:#1e8e7e;–emerald-light:#d4ede9;–serif:’DM Serif Display’,Georgia,serif;–sans:’Outfit’,system-ui,sans-serif} html{scroll-behavior:smooth} body{font-family:var(–sans);background:var(–cream);color:var(–ink);line-height:1.75;font-size:17px;-webkit-font-smoothing:antialiased} h1,h2,h3,h4{font-family:var(–serif);font-weight:400;line-height:1.2} a{color:var(–denali-mid);text-decoration:underline;text-underline-offset:3px;transition:color .15s} a:hover{color:#b8701f} .btn{display:inline-flex;align-items:center;gap:8px;padding:13px 26px;border-radius:6px;font-size:15px;font-weight:500;text-decoration:none;transition:all .2s} .btn-primary{background:var(–gold);color:var(–pine)} .btn-primary:hover{background:#bd8030;transform:translateY(-1px);text-decoration:none} .breadcrumb{background:var(–pine);padding:10px 0;font-size:13px} .breadcrumb__inner{max-width:1200px;margin:0 auto;padding:0 24px;display:flex;align-items:center;gap:8px;color:rgba(255,255,255,.5);flex-wrap:wrap} .breadcrumb a{color:rgba(255,255,255,.65);text-decoration:none} .breadcrumb a:hover{color:var(–gold)} .breadcrumb__sep{color:rgba(255,255,255,.25)} .breadcrumb__current{color:rgba(255,255,255,.85)} .article-header{background:linear-gradient(135deg,var(–pine),var(–forest));padding:52px 0 44px;color:var(–white)} .article-header__inner{max-width:1200px;margin:0 auto;padding:0 24px} .article-header__label{font-size:11px;font-weight:600;letter-spacing:.14em;text-transform:uppercase;color:var(–gold);margin-bottom:18px;display:flex;align-items:center;gap:10px} .article-header__label::before{content:”;width:36px;height:2px;background:var(–gold)} .article-header h1{font-size:clamp(30px,4.4vw,52px);color:var(–white);max-width:1000px;margin-bottom:20px} .article-header h1 em{font-style:italic;color:var(–gold)} .article-header__sub{font-size:17px;color:rgba(255,255,255,.82);font-weight:300;max-width:900px;line-height:1.7;margin-bottom:28px} .byline{display:flex;flex-wrap:wrap;align-items:center;gap:20px 28px;padding:18px 22px;background:rgba(255,255,255,.06);border:1px solid rgba(255,255,255,.1);border-radius:10px;margin-bottom:28px;font-size:13.5px} .byline__item{display:flex;align-items:center;gap:8px;color:rgba(255,255,255,.85)} .byline__item strong{color:var(–white);font-weight:500} .byline__label{font-size:10px;letter-spacing:.1em;text-transform:uppercase;color:var(–gold);font-weight:600;margin-right:4px} .byline__item a{color:rgba(255,255,255,.85);text-decoration:underline;text-underline-offset:2px} .byline__item a:hover{color:var(–gold)} .hero__stats{display:grid;grid-template-columns:repeat(4,1fr);gap:18px;max-width:900px} .hero__stat{padding:16px 20px;background:rgba(10,25,41,.4);border:1px solid rgba(255,255,255,.12);border-radius:10px} .hero__stat-num{font-family:var(–serif);font-size:30px;color:var(–gold);line-height:1;margin-bottom:4px} .hero__stat-lbl{font-size:11px;letter-spacing:.08em;text-transform:uppercase;color:rgba(255,255,255,.72);font-weight:500} .hub-strip{background:var(–gold-light);border-bottom:1px solid rgba(212,145,58,.3);padding:12px 0} .hub-strip__inner{max-width:1200px;margin:0 auto;padding:0 24px;display:flex;align-items:center;gap:16px;flex-wrap:wrap;font-size:13px} .hub-strip__label{font-family:var(–serif);color:var(–pine);font-weight:600;font-size:14px;display:flex;align-items:center;gap:8px} .hub-strip__label::before{content:’★’;color:var(–gold);font-size:13px} .hub-strip__cluster{color:var(–stone);font-weight:400} .hub-strip__cluster strong{color:var(–pine);font-weight:600} .hub-strip__link{margin-left:auto;color:var(–pine);font-weight:500;text-decoration:none;font-size:11px;letter-spacing:.08em;text-transform:uppercase;padding:6px 12px;background:var(–white);border:1px solid rgba(212,145,58,.35);border-radius:6px;transition:all .15s} .hub-strip__link:hover{background:var(–pine);color:var(–gold-light);border-color:var(–pine)} @media(max-width:700px){.hub-strip__link{margin-left:0}.hub-strip__inner{gap:10px}} .page-wrap{max-width:1200px;margin:0 auto;padding:0 24px;display:grid;grid-template-columns:1fr 300px;gap:56px;align-items:start} .sidebar{padding-top:52px} .sidebar__block{background:var(–white);border:1px solid var(–mist);border-radius:12px;padding:22px;margin-bottom:20px} .sidebar__block–dark{background:var(–pine);color:var(–white);border-color:var(–pine)} .sidebar__block–dark .sidebar__label{color:rgba(255,255,255,.4)} .sidebar__block–gold{background:var(–gold-light);border-color:rgba(212,145,58,.3)} .sidebar__toc{position:sticky;top:24px;max-height:calc(100vh – 48px);overflow-y:auto} .sidebar__label{font-size:11px;font-weight:600;letter-spacing:.1em;text-transform:uppercase;color:var(–pebble);margin-bottom:14px} .toc-list{list-style:none;display:flex;flex-direction:column;gap:2px} .toc-link{display:block;padding:7px 10px;border-radius:6px;text-decoration:none;color:var(–stone);font-size:13px;border-left:2px solid transparent;transition:all .15s;line-height:1.4} .toc-link:hover{color:var(–denali-mid);background:var(–snow);border-left-color:var(–denali-light);text-decoration:none} .quickfact-row{display:flex;justify-content:space-between;align-items:baseline;padding:10px 0;border-bottom:1px solid rgba(255,255,255,.08);font-size:13px;gap:12px} .quickfact-row:last-child{border-bottom:none} .quickfact-row__name{color:rgba(255,255,255,.72);font-weight:300} .quickfact-row__val{color:var(–gold);font-weight:500;font-family:var(–serif);font-size:15px;text-align:right} .sidebar__block–gold h4{font-family:var(–serif);font-size:17px;color:var(–pine);margin-bottom:8px;line-height:1.3} .sidebar__block–gold p{font-size:13px;color:var(–stone);font-weight:300;margin-bottom:14px;line-height:1.55} .sidebar__cta-btn{display:flex;align-items:center;justify-content:center;gap:6px;padding:11px 16px;background:var(–pine);color:var(–white);border-radius:6px;text-decoration:none;font-size:13px;font-weight:500} .sidebar__cta-btn:hover{background:var(–denali-mid);color:var(–white);text-decoration:none} .article{padding:52px 0 80px} .article section{scroll-margin-top:24px} .article__lead{font-size:19px;color:var(–stone);font-weight:300;line-height:1.75;border-left:3px solid var(–gold);padding-left:22px;margin-bottom:48px} .article__lead em{color:var(–pine);font-style:italic} .article h2{font-size:clamp(24px,3.2vw,34px);color:var(–pine);margin-top:64px;margin-bottom:18px} .article h2:first-child{margin-top:0} .article h2 em{font-style:italic;color:var(–denali-mid)} .article h3{font-size:21px;color:var(–pine);margin-top:32px;margin-bottom:12px} .article p{color:var(–stone);margin-bottom:18px;font-weight:300} .article p strong{color:var(–ink);font-weight:500} .article p em{color:var(–pine);font-style:italic;font-weight:400} .article ul,.article ol{color:var(–stone);font-weight:300;margin:0 0 20px 22px} .article li{margin-bottom:8px;line-height:1.7} .section-rule{border:none;border-top:1px solid var(–mist);margin:48px 0} .callout{border-radius:10px;padding:22px 24px;margin:28px 0;display:flex;gap:18px;align-items:flex-start} .callout–insight{background:var(–denali-light);border:1px solid rgba(46,89,134,.15)} .callout–gold{background:var(–gold-light);border:1px solid rgba(212,145,58,.25)} .callout–caution{background:var(–caution-light);border:1px solid rgba(184,106,21,.25)} .callout–methodology{background:#e8e3d8;border:1px solid rgba(43,35,24,.2)} .callout__icon{flex-shrink:0;font-size:22px;line-height:1} .callout__body{flex:1} .callout__title{font-family:var(–serif);font-size:17px;margin-bottom:6px;color:var(–pine)} .callout__text{font-size:14.5px;color:var(–stone);font-weight:300;line-height:1.7;margin:0} .callout__text a{color:var(–denali-mid);font-weight:500} .wildlife-grid{display:grid;grid-template-columns:repeat(3,1fr);gap:16px;margin:28px 0} .wildlife-card{background:var(–white);border:1px solid var(–mist);border-radius:12px;padding:22px;border-left:3px solid var(–emerald)} .wildlife-card–mammal{border-left-color:var(–caution)} .wildlife-card–bird{border-left-color:var(–denali-mid)} .wildlife-card–rare{border-left-color:var(–danger)} .wildlife-card__tag{font-size:10px;letter-spacing:.12em;text-transform:uppercase;font-weight:700;color:var(–pebble);margin-bottom:4px} .wildlife-card–mammal .wildlife-card__tag{color:var(–caution)} .wildlife-card–bird .wildlife-card__tag{color:var(–denali-mid)} .wildlife-card–rare .wildlife-card__tag{color:var(–danger)} .wildlife-card__name{font-family:var(–serif);font-size:20px;color:var(–pine);margin-bottom:4px;line-height:1.2} .wildlife-card__name em{font-style:italic;font-size:12px;color:var(–pebble);font-weight:normal;display:block;margin-top:2px;font-family:var(–sans)} .wildlife-card__desc{font-size:13.5px;color:var(–stone);font-weight:300;line-height:1.6;margin-top:10px} .wildlife-card__desc strong{color:var(–ink)} .dayhike-list{display:grid;grid-template-columns:1fr;gap:14px;margin:28px 0} .dayhike-card{background:var(–white);border:1px solid var(–mist);border-radius:14px;padding:22px 26px;border-left:4px solid var(–denali-mid);display:grid;grid-template-columns:auto 1fr auto;gap:20px;align-items:center} .dayhike-card–easy{border-left-color:var(–ready)} .dayhike-card–moderate{border-left-color:var(–caution)} .dayhike-card–challenging{border-left-color:var(–danger)} .dayhike-card__num{font-family:var(–serif);font-style:italic;font-size:34px;color:var(–denali-mid);line-height:1;opacity:.65} .dayhike-card–easy .dayhike-card__num{color:var(–ready);opacity:.85} .dayhike-card–moderate .dayhike-card__num{color:var(–caution);opacity:.85} .dayhike-card–challenging .dayhike-card__num{color:var(–danger);opacity:.85} .dayhike-card__info{min-width:0} .dayhike-card__difficulty{font-size:10px;letter-spacing:.12em;text-transform:uppercase;font-weight:700;color:var(–pebble);margin-bottom:2px} .dayhike-card–easy .dayhike-card__difficulty{color:var(–ready)} .dayhike-card–moderate .dayhike-card__difficulty{color:var(–caution)} .dayhike-card–challenging .dayhike-card__difficulty{color:var(–danger)} .dayhike-card__name{font-family:var(–serif);font-size:19px;color:var(–pine);margin-bottom:4px;line-height:1.2} .dayhike-card__desc{font-size:13px;color:var(–stone);font-weight:300;line-height:1.55} .dayhike-card__stats{text-align:right;font-family:var(–serif);white-space:nowrap;font-size:12px} .dayhike-card__stats div{color:var(–stone);font-weight:500;line-height:1.3} .dayhike-card__stats div strong{color:var(–pine);font-size:14px;font-weight:600} .season-grid{display:grid;grid-template-columns:repeat(4,1fr);gap:14px;margin:28px 0} .season-card{background:var(–white);border:1px solid var(–mist);border-radius:10px;padding:18px 20px;border-top:3px solid var(–gold)} .season-card–summer{border-top-color:var(–gold)} .season-card–fall{border-top-color:var(–caution)} .season-card–winter{border-top-color:var(–denali-mid)} .season-card–spring{border-top-color:var(–ready)} .season-card__label{font-size:10px;letter-spacing:.15em;text-transform:uppercase;font-weight:700;color:var(–pebble);margin-bottom:4px} .season-card–summer .season-card__label{color:var(–gold)} .season-card–fall .season-card__label{color:var(–caution)} .season-card–winter .season-card__label{color:var(–denali-mid)} .season-card–spring .season-card__label{color:var(–ready)} .season-card__name{font-family:var(–serif);font-size:17px;color:var(–pine);margin-bottom:8px;line-height:1.2} .season-card__desc{font-size:12.5px;color:var(–stone);font-weight:300;line-height:1.55} .season-card__desc strong{color:var(–ink)} .compare-wrap{overflow-x:auto;margin:28px 0 36px;border-radius:14px;border:1px solid var(–mist);box-shadow:0 4px 24px rgba(11,31,53,.05)} .compare-table{width:100%;border-collapse:collapse;font-size:14px;min-width:680px;background:var(–white)} .compare-table thead th{text-align:left;padding:14px 12px;font-size:10px;font-weight:700;letter-spacing:.08em;text-transform:uppercase;color:var(–white);background:var(–pine);white-space:nowrap} .compare-table thead th:first-child{padding-left:22px} .compare-table tbody tr{border-bottom:1px solid var(–mist)} .compare-table tbody tr:last-child{border-bottom:none} .compare-table tbody tr:nth-child(even){background:var(–snow)} .compare-table tbody td{padding:14px 12px;color:var(–stone);vertical-align:top;font-weight:300;line-height:1.5} .compare-table tbody td:first-child{padding-left:22px;font-weight:500;color:var(–ink);font-family:var(–serif);font-size:14.5px} .faq{margin:28px 0} .faq__item{background:var(–white);border:1px solid var(–mist);border-radius:10px;margin-bottom:12px;overflow:hidden;transition:border-color .15s} .faq__item:hover{border-color:rgba(46,89,134,.35)} .faq__item[open]{border-color:var(–denali-mid);box-shadow:0 4px 20px rgba(11,31,53,.06)} .faq__summary{padding:18px 24px;cursor:pointer;font-family:var(–serif);font-size:17px;color:var(–pine);display:flex;justify-content:space-between;align-items:center;gap:16px;list-style:none;user-select:none} .faq__summary::-webkit-details-marker{display:none} .faq__summary::after{content:’+’;font-family:var(–sans);font-size:24px;color:var(–denali-mid);font-weight:300;line-height:1;transition:transform .2s} .faq__item[open] .faq__summary::after{content:’−’} .faq__body{padding:0 24px 22px} .faq__body p{font-size:15px;color:var(–stone);font-weight:300;line-height:1.75;margin:0} .internal-links{background:var(–snow);border-radius:12px;padding:28px 30px;margin:32px 0} .internal-links__label{font-size:11px;font-weight:600;letter-spacing:.1em;text-transform:uppercase;color:var(–pebble);margin-bottom:16px} .internal-links h3{font-family:var(–serif);font-size:22px;color:var(–pine);margin-bottom:8px;margin-top:0} .internal-links__grid{display:grid;grid-template-columns:repeat(2,1fr);gap:12px;margin-top:20px} .internal-link{display:flex;align-items:center;padding:14px 16px;background:var(–white);border:1px solid var(–mist);border-radius:8px;font-size:14px;font-weight:500;color:var(–denali-mid);text-decoration:none;transition:all .15s} .internal-link:hover{border-color:var(–denali-mid);background:var(–denali-light);transform:translateX(2px);text-decoration:none} .internal-link::after{content:’→’;margin-left:auto;color:var(–pebble)} .internal-link:hover::after{color:var(–denali-mid)} .internal-link–hub{background:var(–gold-light);border-color:rgba(212,145,58,.3);color:var(–pine);font-weight:600} .internal-link–hub::before{content:’★’;color:var(–gold);margin-right:8px} .internal-link–hub:hover{background:var(–pine);color:var(–gold-light);border-color:var(–pine)} .related-grid{display:grid;grid-template-columns:repeat(3,1fr);gap:18px;margin:28px 0} .related-card{background:var(–white);border:1px solid var(–mist);border-radius:12px;padding:22px;text-decoration:none;display:block;transition:all .2s} .related-card:hover{border-color:rgba(46,89,134,.35);box-shadow:0 4px 20px rgba(0,0,0,.06);text-decoration:none} .related-card__type{font-size:10px;font-weight:600;letter-spacing:.1em;text-transform:uppercase;color:var(–pebble);margin-bottom:8px} .related-card__title{font-family:var(–serif);font-size:17px;color:var(–pine);margin-bottom:6px;line-height:1.3} .related-card__desc{font-size:13.5px;color:var(–stone);font-weight:300;line-height:1.55} .guide-cta{background:linear-gradient(135deg,var(–pine),#1e3a5c);border-radius:16px;padding:44px;margin:48px 0;display:grid;grid-template-columns:1fr auto;gap:32px;align-items:center} .guide-cta__label{font-size:11px;font-weight:600;letter-spacing:.12em;text-transform:uppercase;color:var(–gold);margin-bottom:12px} .guide-cta h2{font-family:var(–serif);font-size:clamp(22px,2.8vw,30px);color:var(–white);margin:0 0 12px;padding:0} .guide-cta p{font-size:15px;color:rgba(255,255,255,.72);font-weight:300;line-height:1.7;margin:0} .guide-cta p a{color:var(–gold)} .sources-block{background:var(–snow);border-radius:12px;padding:28px 32px;margin:32px 0;border:1px solid var(–mist)} .sources-block h3{font-family:var(–serif);font-size:20px;color:var(–pine);margin-top:0;margin-bottom:12px} .sources-block p{font-size:14.5px;color:var(–stone);line-height:1.7;margin-bottom:16px;font-weight:300} .sources-block ul{margin:0;padding-left:22px;font-size:13.5px;color:var(–stone);font-weight:300;line-height:1.7} .sources-block li{margin-bottom:6px} .sources-block a{color:var(–denali-mid);font-weight:500} .sources-block__meta{display:flex;flex-wrap:wrap;gap:16px 24px;padding-top:16px;margin-top:16px;border-top:1px solid var(–mist);font-size:12.5px;color:var(–pebble)} .sources-block__meta strong{color:var(–ink);font-weight:500} @media(max-width:960px){.page-wrap{grid-template-columns:1fr}.sidebar{display:none}.hero__stats{grid-template-columns:repeat(2,1fr)}.wildlife-grid{grid-template-columns:1fr}.dayhike-card{grid-template-columns:auto 1fr;gap:14px;padding:18px 22px}.dayhike-card__stats{grid-column:1 / -1;text-align:left}.season-grid{grid-template-columns:repeat(2,1fr)}.internal-links__grid,.related-grid{grid-template-columns:1fr}.guide-cta{grid-template-columns:1fr}.byline{gap:12px 18px}} @media(max-width:600px){.hero__stats{grid-template-columns:1fr 1fr}.season-grid{grid-template-columns:1fr}}
    Cluster 04 · Non-Technical Treks · Updated April 2026

    Patagonia Hiking: Complete Guide to Trekking in Torres del Paine

    The definitive 2026 destination guide to hiking Torres del Paine National Park — beyond just the W and O Circuits. Wildlife encounters, day-hike options, photography strategy, Puerto Natales as base, Patagonian cuisine, seasonal planning, and the cultural context that makes Chilean Patagonia one of the world’s great hiking destinations.

    227K ha
    Park
    size
    ~250K
    Annual
    visitors
    50–100
    Pumas in
    park
    3,050 m
    Paine Grande
    summit
    Global Summit Guide A guide in Cluster 04 · Non-Technical Treks View master hub →

    Torres del Paine is more than just two trekking circuits. It’s a 227,298-hectare UNESCO Biosphere Reserve at the southern edge of Chilean Patagonia, where granite spires rise from azure lakes, guanacos and pumas share the steppe, and Andean condors soar along ridges against a sky that changes four times an hour. Most guides focus on the W and O Circuit route decisions — but for visitors who treat Torres del Paine as a destination rather than just a trek, there’s far more to experience. Wildlife encounters that rival African safari destinations. Day hikes that deliver the park’s highlights without multi-day commitment. A remarkable food culture in Puerto Natales. Photography opportunities that have made this landscape globally iconic. This guide covers the complete Torres del Paine experience — wildlife, day hikes, seasons, logistics, cuisine, and everything you need to understand the place beyond the trail. For the route comparison, see our W Circuit vs O Circuit guide.

    ⊛
    How this guide was built

    Ecological and wildlife data verified against CONAF (Chile’s National Forest Corporation) park management records and Torres del Paine National Park ranger documentation. Wildlife population estimates from park census studies and the Wildlife Conservation Society. Cultural and historical context cross-referenced with Patagonian Tales by Bruce Chatwin and Chilean Patagonia ethnographic research. Restaurant and logistics information confirmed with Puerto Natales tourism board and multiple independent reviews. Puma viewing data from Awasi Patagonia, Pumas Chile, and Fantastico Sur specialized tour operators. Photography recommendations from practicing Patagonia landscape photographers with 2024-2025 season experience. Fact-check date: April 19, 2026.

    Torres del Paine as a Destination: More Than a Trek

    Torres del Paine National Park sits in Chile’s Magallanes Region — the country’s southernmost — at approximately 51° South latitude, placing it among the most dramatically sub-Antarctic ecosystems accessible to tourism. Designated a national park in 1959 and a UNESCO Biosphere Reserve in 1978, it protects 227,298 hectares (561,662 acres) of one of the world’s most distinctive landscapes: the Paine Massif.

    The Paine Massif geology

    • Paine Grande: 3,050 m (10,007 ft) — highest peak in park
    • The Torres (three towers): Torre Central 2,850 m, Torre Norte 2,248 m, Torre Sur 2,500 m — iconic granite spires
    • Los Cuernos (the Horns): Distinctive two-tone peaks — dark metamorphic rock cap over light granite base, created by 12 million-year-old geological events
    • Geologic origin: Granite intrusion ~12 million years ago, then glacially sculpted during multiple ice ages
    • Glaciers: Grey Glacier (28 km long, 6 km wide) and Tyndall Glacier part of Southern Patagonian Ice Field — 13,000 km² glaciated area
    • Lakes: Lago Grey, Lago Pehoé, Lago Sarmiento, Lago Nordenskjöld — turquoise glacial meltwater

    Why the destination matters

    • UNESCO designation: Biosphere Reserve (1978) — global conservation significance.
    • Endemic ecosystems: Patagonian steppe, sub-Antarctic forests, glacial terrain converging.
    • Wildlife density: Highest puma density in Chile — ~50-100 individuals in park.
    • Cultural heritage: Tehuelche indigenous peoples hunted guanacos here for thousands of years before European contact.
    • Conservation success: Park management has restored guanaco populations to ~3,000-5,000 from post-colonial lows.
    • Tourism impact: ~250,000 annual visitors contribute significantly to regional Chilean economy.
    ◆
    Understanding “Torres del Paine”

    The name “Torres del Paine” means “Blue Towers” in Tehuelche, the language of Patagonia’s indigenous inhabitants. “Paine” (pronounced pai-nee) refers to the distinctive blue-gray color of the granite. The three towers give the park its name and symbol, but the park itself encompasses vastly more: lenga forests, steppe grasslands, turquoise lakes, calving glaciers, and the dramatic amphitheaters formed by millions of years of glacial sculpting. Treating Torres del Paine as merely a destination for the W Circuit means missing much of what makes this place significant — both ecologically and culturally. For broader Patagonia context, see our Patagonia trekking guide.


    Wildlife: What You’ll See (and Where)

    Torres del Paine offers some of South America’s richest wildlife viewing. Understanding what lives here and where to find it elevates the hiking experience from scenic to genuinely immersive.

    The iconic species

    Mammal · Common

    GuanacoLama guanicoe

    ~3,000-5,000 individuals in park. Cousin of the llama, wild camelid native to Patagonia. Seen in herds of 10-50 on open steppe. Prime habitat near Laguna Amarga. Essential prey for pumas. Often first wildlife trekkers encounter.

    Mammal · Rare Sighting

    PumaPuma concolor

    ~50-100 individuals — highest density in Chile. Specialized puma tracking tours offer 60-80% sighting success. Hunts guanacos primarily. Rarely seen on standard W/O Circuit. Dedicated trips cost $2,000-$4,000 but near-guaranteed viewing.

    Bird · Iconic

    Andean CondorVultur gryphus

    South America’s largest bird, 3-meter wingspan. Commonly soars along ridgetops on thermal updrafts. Best viewed at French Valley and along Paine Massif cliffs. Watch for small black specks against sky — they grow large as they spiral closer.

    Mammal · Common

    Culpeo FoxLycalopex culpaeus

    Red-coated Patagonian fox. Frequently visits refugios and campsites at dawn and dusk seeking scraps. Photogenic and relatively habituated. Do not feed — keeps them wild. Smaller gray fox also present but less common.

    Bird · Flightless

    Lesser RheaRhea pennata

    Patagonia’s ostrich-like flightless bird. Darwin’s subspecies (ñandú). Often seen in groups on steppe. Males care for eggs and young — can see fathers with chick groups in spring. Eastern park sections best.

    Mammal · Endangered

    Huemul DeerHippocamelus bisulcus

    Endangered Patagonian deer — Chile’s national animal (appears on coat of arms). Occasional sightings in Valle del Francés and Valle del Toro. Park population ~30-50. Rare encounter worth celebrating.

    Where to see wildlife

    • Guanacos: Portería Sarmiento near park entrance — open steppe habitat. Often visible from bus on approach road.
    • Pumas: Laguna Amarga sector, Torres area at dawn/dusk. Specialized tracking tours for reliable viewing.
    • Condors: French Valley ridges, cliffs near Grey Glacier. Afternoon thermal flights.
    • Foxes: All refugios at dawn/dusk. Chileno and Paine Grande especially.
    • Huemul: Valle del Francés forest sections. Quiet approach essential.
    • Rheas: Steppe sections near entrance. Rare on main trek routes.

    Puma tracking tours

    Torres del Paine has become one of the world’s premier puma viewing destinations. Specialized tours use experienced trackers to locate pumas, often with near-guaranteed sightings:

    • Awasi Patagonia: Premium all-inclusive lodge with puma tracking. $1,200-$2,000 per night.
    • Pumas Chile (Jorge Cárdenas): Dedicated puma tracking specialists. Multi-day photography tours $2,500-$4,500.
    • Fantastico Sur Lodge: Hotel Las Torres package combining trekking and puma tracking.
    • Best season for tracking: May-October (winter) when guanacos concentrate on lower pastures. Summer viewing less reliable.
    • Success rate: 70-90% on specialized multi-day tours; ~10-20% for day trips.

    Day Hikes: Torres del Paine Without Multi-Day Commitment

    Not every visitor has 5-10 days for the W or O Circuit. Torres del Paine’s day-hike options deliver exceptional Patagonian experiences within single-day windows:

    01
    Challenging · All-Day Commitment

    Base Torres Viewpoint Day Hike

    The classic Torres del Paine day hike. From Hotel Las Torres parking to the iconic three granite towers viewpoint. 850 m elevation gain. Pre-dawn start recommended for sunrise alpenglow on towers.

    19 km round trip
    6-8 hours
    890 m viewpoint
    02
    Moderate · Half-Day

    Mirador Cuernos Day Hike

    Shorter hike to panoramic viewpoint of Paine Massif “Horns” — the distinctive two-tone peaks. Great for older hikers, families with teens, or photography focused days. Strong winds common.

    5 km round trip
    2-3 hours
    Los Cuernos views
    03
    Moderate · Full Day

    Grey Glacier Viewpoint

    Catamaran to Paine Grande, then hike to Grey Glacier viewpoint. Witness 28 km-long glacier calving into Lago Grey. Optional kayak tour among icebergs ($80-$150) or boat tour to glacier face.

    5-20 km variable
    4-8 hours
    Grey Glacier face
    04
    Easy · Short Walk

    Salto Grande Waterfall

    Short walk to dramatic waterfall where Lake Nordenskjöld spills into Lake Pehoé. Accessible to all fitness levels. Stunning waterfall with Paine Massif backdrop. Good first park experience.

    2 km round trip
    1-2 hours
    All ages
    05
    Easy · Half Day

    Laguna Azul Alternative Viewpoint

    Drive + 1-hour walk for different angle on Torres. Less crowded. Blue alpine lake in foreground with granite towers behind. Good for photography without the sunrise climb crowd.

    ~3 km walk
    2-3 hours
    Alt. Torres view
    ★
    The 3-day day-hiker itinerary

    Visitors with only 3 days in Torres del Paine can see all three main highlights without camping. Day 1: Arrive from Puerto Natales, Salto Grande + Mirador Cuernos. Hotel overnight. Day 2: Base Torres Viewpoint day hike (pre-dawn start from Hotel Las Torres for sunrise). Hotel overnight. Day 3: Catamaran to Paine Grande, Grey Glacier day visit, return to Puerto Natales. This approach hits all three main W Circuit highlights without the multi-day trek commitment — ideal for visitors whose primary travel is elsewhere in South America.


    Seasons: When to Visit for What Experience

    Torres del Paine experiences dramatic seasonal variation. Understanding what each season offers helps plan for specific experiences:

    December-February

    Summer (Peak)

    All refugios open. Long daylight (17+ hours). Strongest winds. Most crowded. Best for first-time visitors wanting infrastructure. Book 6-9 months ahead for W, 9-12 for O.

    March-May

    Fall (Shoulder)

    Lenga forests turn gold/red. Fewer crowds. Cooler temperatures. Some refugios closing. Excellent photography — lower tourist volume, changing colors, puma tracking season beginning.

    June-August

    Winter

    Snow-covered landscapes. Most refugios closed. Dramatic monochrome scenery. Peak puma tracking season. For experienced winter trekkers only. Daylight short 8-10 hours.

    September-November

    Spring (Shoulder)

    Wildflowers emerging. Baby guanacos and rheas. Weather unpredictable. Refugios gradually opening. Growing crowds toward November. Good for wildlife photography focus.

    Seasonal activities matrix

    ActivitySummerFallWinterSpring
    W Circuit hiking★★★ Ideal★★ Good✗ Closed★ Limited
    O Circuit hiking★★★ Ideal★ Marginal✗ Closed✗ Not recommended
    Day hikes★★★ All open★★ Most open★ Some★★ Opening
    Puma tracking★ Harder★★ Good★★★ Peak★★ Good
    Torres sunrise★★★ Best★★ Possible✗ Limited★★ Possible
    Wildlife variety★★ Good★★ Good★ Limited★★★ Newborns
    Photography★★ Crowded★★★ Best★★ Unique★★ Variable
    ReservationsMonths aheadWeeks aheadDays aheadWeeks ahead

    Puerto Natales: The Gateway Experience

    Most visitors pass through Puerto Natales en route to Torres del Paine — but the gateway town deserves its own attention. A small port city of 22,000 on the Last Hope Sound (Seno Última Esperanza), Puerto Natales has evolved into one of Chilean Patagonia’s most distinctive destinations in its own right.

    What makes Puerto Natales worth time

    • Remarkable cuisine: King crab (centolla), Patagonian lamb (cordero), fresh seafood, regional wines. Food quality rivals Santiago.
    • Gear infrastructure: Rental and purchase shops (Yamana, Erratic Rock, Patagonic) equip trekkers at reasonable prices.
    • Craft beer scene: Local breweries produce excellent Patagonian-influenced beers.
    • Patagonian character: Colorful corrugated-iron buildings, working fishing port, rustic-modern blend.
    • Tourism scale: Small enough for character, developed enough for comfort.
    • Fjord setting: Last Hope Sound offers dramatic water-land views.

    Must-do activities in Puerto Natales

    • Milodon Cave (Cueva del Milodón): 10 minutes from town. Ancient ground sloth cave, paleontological site. 1-2 hour visit.
    • Puerto Bories: Historic wool industry warehouse converted to restaurants, hotels. Architectural interest.
    • Waterfront promenade (Costanera): Walk along fjord at sunset. Flamingos often visible.
    • Boat tour on Last Hope Sound: Half-day excursions ($60-$100) visit glaciers and sea lions.
    • Plaza de Armas: Central square with artisan crafts, local atmosphere.

    Restaurants to prioritize

    • El Asador Patagónico: Traditional cordero al palo — lamb roasted 4-6 hours over open fire. The iconic Patagonian dining experience.
    • Aldea: Refined Patagonian cuisine, small plates featuring regional ingredients. Higher-end option.
    • Afrigonia: Fusion blending African and Patagonian influences. Distinctive flavor profiles.
    • La Mesita Grande: Wood-fired pizza, casual atmosphere. Popular with backpackers.
    • The Coffeemaker: Specialty coffee for pre-trek mornings. Regional touch.
    • Last Hope Distillery: Local gin and whiskey. Tasting room visit worthwhile.
    ▲
    Allow real time in Puerto Natales

    Many visitors treat Puerto Natales as pure logistics — arrive, sleep, depart to park. This misses significant Patagonian value. Recommended minimum: 1 full day pre-park (arrival, gear prep, exploration) and 1 day post-park (celebration dinner, rest, reflection). Two days each direction is better. The cuisine alone justifies time here — Patagonian lamb and king crab aren’t available everywhere, and Puerto Natales restaurants prepare these specialties exceptionally well. Treat Puerto Natales as part of the Torres del Paine experience, not just transit.


    Photography: Capturing Torres del Paine

    Torres del Paine is one of the world’s premier landscape photography destinations — but the famous weather variability, strong winds, and tourist crowds create specific challenges. Strategic planning around light, weather, and timing makes the difference between snapshot tourists and compelling photographs.

    Iconic photography locations

    • Mirador Las Torres: Pre-dawn sunrise alpenglow on three granite towers. The signature shot.
    • French Valley (Mirador Britanico): Dramatic granite amphitheater, afternoon/evening light best.
    • Grey Glacier: Glacier front and iceberg-filled lake. Golden hour excellent.
    • Mirador Cuernos: Paine Massif “Horns” from east. Morning light optimal.
    • Lago Pehoé: Turquoise lake with Paine Massif backdrop. Sunset dramatic.
    • Salto Grande: Waterfall with Torres del Paine backdrop.
    • Laguna Amarga: Guanaco herds with mountain backdrop. Wildlife-landscape combination.

    Lighting strategy

    • Golden hour sunrise: Torres glowing pink/orange — the classic “amanecer” moment.
    • Golden hour sunset: Later light on west-facing faces.
    • Blue hour post-sunset: Dramatic mood shots with residual light.
    • Midday avoidance: Harsh light, strong contrasts. Use for water features or abstracts.
    • Weather windows: 30-50% sunrise success on first attempt — plan multiple mornings.

    Equipment recommendations

    • Wide-angle (14-35mm): Essential for towers, valley scenes, landscapes.
    • Telephoto (70-200mm): Wildlife and compressed mountain perspectives.
    • Tripod: Sturdy but travel-friendly. Hang bag on hook for wind stability.
    • Filters: ND graduated for skies, polarizer for water.
    • Extra batteries: Cold drains faster than expected.
    • Weatherproofing: Rain covers, camera towels — essential.

    Photography tours

    For serious photographers, dedicated photo tours maximize time and conditions:

    • Muench Workshops: Multi-day photo-focused trips. $3,500-$5,500.
    • Awasi Patagonia: All-inclusive lodge with photography coordination.
    • Visionary Wild: Professional photographer-led workshops.
    • Advantages: Weather-optimal timing, expert locations, transport flexibility.

    Torres del Paine Destination FAQ

    What wildlife can you see hiking Torres del Paine?

    Torres del Paine hosts rich Patagonian wildlife — pumas, guanacos, Andean condors, culpeo foxes, and rheas. Large mammals: Guanaco (~3,000-5,000 individuals, herds of 10-50 on open steppe), Puma (~50-100 individuals, one of best wild puma viewing places on Earth), South Andean huemul deer (endangered, occasional sightings in Valle del Francés), culpeo fox (visible near refugios at dawn and dusk), gray fox (less common), Geoffroy’s cat (very rarely seen). Birds: Andean condor (3 m wingspan, commonly soars along ridges), rhea (ostrich-like flightless bird on steppe), Magellanic woodpecker (large red-headed woodpecker in lenga forests), upland goose, black-chested buzzard-eagle, austral parakeet (only parrot in Patagonia). Where to see wildlife: guanacos at Portería Sarmiento near park entrance, pumas via tracking tours from Hotel Las Torres, condors above French Valley, foxes near all refugios especially at dawn/dusk, huemul in Valle del Francés quiet forest sections. Wildlife tips: dawn and dusk (crepuscular activity) best for most species, puma tracking requires specialized tour guides, keep distance from all animals especially guanacos with young, condors best viewed at high viewpoints during thermal updrafts, wildlife photography excellent year-round but December-February best for variety. Torres del Paine offers South America’s best combination of dramatic landscape and diverse wildlife.

    What are the best day hikes in Torres del Paine?

    Torres del Paine’s best day hikes deliver exceptional Patagonian scenery without requiring full W or O Circuit. Top 5 day hikes: Base Torres Viewpoint Day Hike — 19 km round trip, 6-8 hours, from Hotel Las Torres to iconic three granite towers. Mirador Cuernos Day Hike — 5 km round trip, 2-3 hours, panoramic viewpoint of Paine Massif Horns. Grey Glacier Viewpoint — variable 5-20 km, catamaran to Paine Grande then hike, optional kayak among icebergs. Salto Grande Waterfall — 2 km round trip, 1-2 hours, dramatic waterfall from Lake Nordenskjöld. Pudeto to Condor Lookout — 4 km round trip, 2-3 hours, Andean condor viewing. Alternative options: Laguna Azul drive + 1-hour walk for alternative Torres views, Lago Sarmiento southern park less-visited section, Rio Paine suspension bridge good for families. Multi-day hikers’ day options: rest day hikes near refugios, kayak tours on Lake Grey among icebergs ($80-$150). Planning: bus from Puerto Natales 2.5 hours each way plus park shuttles, day hikers can complete ‘three viewpoints’ (Torres Base, Cuernos, Grey Glacier) in 3 days without camping, day tour operators offer full-day packages, weather-dependent, park entry $35 for multi-day foreign visitors. Day hikes ideal for visitors with time constraints. See our W vs O Circuit comparison for multi-day options.

    How do you get to Torres del Paine?

    Getting to Torres del Paine requires multi-stage journey: international flight to Santiago, domestic flight to Punta Arenas (PUQ), bus to Puerto Natales, then bus to park. Stage 1: Fly to Santiago de Chile (SCL) — 15-24 hours from North America/Europe. Airlines LATAM, Aerolíneas Argentinas, Copa. Stage 2: Domestic flight Santiago to Punta Arenas (PUQ) — 3.5 hours. Airlines LATAM, Sky Airline, JetSmart. Cost $100-$250 one way. Stage 3: Bus Punta Arenas to Puerto Natales — 3 hours, $25-$40 one way. Bus Sur, Pacheco, Transfer Austral. Alternative rental car 3 hours via Route 9. Puerto Natales is gateway town. Stage 4: Bus Puerto Natales to Torres del Paine — 2.5 hours, $15-$25 each way. Two park entrance options: Laguna Amarga (O Circuit start), Pudeto (W Circuit west end via catamaran). Buses depart 7:00-7:30 AM typically. Return buses 14:00-17:00 from park. Alternative routes: El Calafate (Argentina, FTE) cross border from El Calafate to Puerto Natales, bus 5-6 hours, good for combining with Perito Moreno Glacier visit. Ushuaia connection for combining Patagonia destinations. Private transfers $200-$400 each way. Accommodation pre/post park: Puerto Natales hostels $15-$40, mid-range $60-$150, boutique $150-$350. Punta Arenas hotels $60-$200. Travel timing: allow 1-2 buffer days for weather/flight delays, peak season book flights 3-6 months ahead. Minimum travel time 3 days transit each direction.

    What is the weather like in Torres del Paine?

    Torres del Paine weather is famously variable — ‘four seasons in one day’ — with strong winds, sudden rain, rapid temperature changes. Seasonal patterns: Summer (December-February) warmest temperatures 50-75°F daytime, 40-55°F overnight, longest daylight 17+ hours, strongest winds, highest chance clear sunrise Torres views, peak crowds. Fall (March-May) cooling temperatures, changing leaf colors in lenga forests, fewer crowds, some refugios closing, April-May too cold for most hiking. Winter (June-August) cold with regular snow, most refugios closed, short daylight, accessible only for experienced winter trekkers. Spring (September-November) transitional, unpredictable, refugios opening gradually, wildflowers emerging, fewer crowds than summer. Famous wind: Patagonia signature element, regularly exceed 100 km/h (60 mph), can knock hikers over on exposed sections, Paso John Gardner on O regularly closed by winds, even summer months experience daily gusts, direction predominantly from west. Weather variability: precipitation possible any day regardless of season, sunshine and rain often alternate in single day, temperature swings 20+°F between noon and overnight, clouds can obscure Torres peaks for days then clear suddenly. Weather strategy: dress in layers with wind-proof shells, waterproof everything, book multiple sunrise attempts for Torres Base viewpoint, be prepared to change plans, shelter planning important for O Circuit. Monthly: December-January peak stable, February continued peak, March transitioning cooler, April significantly cooler, September-November variable. Sunrise Torres view requires calm weather — some trekkers try 3+ mornings.

    What is Puerto Natales like and how long should I stay?

    Puerto Natales is Torres del Paine’s gateway — small port city of 22,000 on Last Hope Sound (Seno Última Esperanza) with character, excellent restaurants, gear shops. Most visitors stay 1-2 nights pre-park and 1-2 nights post-park. About Puerto Natales: population ~22,000, Chilean Patagonia location, on Last Hope Sound fjord, founded 1911 as wool shipping port, economy tourism and fishing, sea level altitude, 2.5 hours by bus to park, rustic Patagonian port town atmosphere with modernization. What Puerto Natales offers: primary gateway for Torres del Paine, Perito Moreno (Argentina), Cerro Castillo. Excellent restaurants: fresh seafood (king crab, cod), lamb (asado), Patagonian specialties. Gear rental/purchase shops Yamana, Erratic Rock, Patagonic. Tour operators for W/O Circuit bookings, puma tracking, boat tours. Pre/post-park hotels $15 hostels to $350 boutique. Notable spots: Milodon Cave 10 minutes from town (ancient ground sloth cave, paleontological interest), Puerto Bories historic industrial warehouse converted to restaurants and hotels, waterfront promenade Costanera with Patagonian flamingos, Plaza de Armas with artisan craft vendors, Last Hope Sound boat tours half-day for $60-$100. Recommended stay: pre-park 1-2 days, post-park 1 day, total 2-3 days. Day activities: boat tours Last Hope Sound, Milodon Cave, gear shopping, restaurant exploration, wildlife watching, laguna hikes. Restaurants: El Asador Patagónico (traditional asado), The Coffeemaker (specialty coffee), Aldea (refined cuisine), Mesita Grande (pizza and casual). Spanish dominant, English widely understood. Puerto Natales is more than transit — it’s a worthwhile Patagonian destination.

    When is the best time to see pumas in Torres del Paine?

    Torres del Paine is considered one of the best places on Earth to see pumas in the wild. Best time for puma viewing is May through October — Patagonian winter when guanaco prey is concentrated and pumas more active in open terrain. Peak puma viewing season: Winter (May-September) best tracking success, snow makes tracking easier, guanacos concentrated in open areas, puma activity higher, tours operate with specialized guides. Spring (October-November) continued good viewing. Summer (December-February) possible but more challenging, pumas in higher elevations, most tourists visit without seeing pumas. Fall (March-April) transitional period. Why Torres del Paine for pumas: ~50-100 pumas estimated in park (highest density in Chile), guanaco population ~3,000-5,000 provides abundant prey, open Patagonian steppe makes sightings possible, park conservation protects population. Puma tracking tour details: specialized operators Awasi Patagonia, Pumas Chile, Fantastico Sur Lodge. Tour format 3-7 day specialized tracking trips. Cost $2,000-$4,000 multi-day. Includes accommodation. Experienced guide/tracker ratio 1:2. Dawn/dusk prime viewing times. Photography-focused options available. Where pumas live: eastern sector Laguna Amarga, Portería Sarmiento, Río Paine. Open steppe with guanaco-rich zones. Lenga forest edges transition areas. Rarely seen near refugios. Encountering while hiking: rare but possible, estimated <1% of trekkers see pumas on W/O. Attacks on humans extremely rare. Stay calm if encountered, do not run, give space, report to park rangers. Realistic expectations: most first-time visitors don't see pumas on standard treks. For guaranteed viewing, book specialized tracking tour.

    What food should I try in Torres del Paine and Puerto Natales?

    Patagonian cuisine combines Chilean dishes, Argentine influences, regional specialties — exceptional lamb, seafood, wines. Traditional dishes: cordero al palo (lamb roasted on wooden cross over open fire, 4-6 hours), cordero Magellanico (Magellanic lamb wild herb-grazed), centolla (king crab December-March), milcao (Chilean Patagonia potato pancake), curanto (traditional Chilean seafood/meat stew in earth oven), Pisco Sour (Chilean/Peruvian cocktail). Seafood: centolla king crab, congrio (cusk eel Neruda’s favorite), ostion (scallops), merluza austral (southern hake), salmón. Best restaurants Puerto Natales: El Asador Patagónico (traditional cordero al palo — iconic experience, reserve ahead), Aldea (refined Patagonian small plates), Mesa del Sur (waterfront seafood), La Mesita Grande (wood-fired pizza casual), Afrigonia (African-Patagonian fusion), The Coffeemaker (specialty coffee great breakfast), Last Hope Distillery (local gin and whiskey tasting). Chilean wine regions Central Valley (Cabernet, Merlot, Carmenère), Casablanca Valley (Sauvignon Blanc, Pinot Noir), Maipo Valley (premium Cabernet). Patagonia lager beers increasing quality. Trek food vs restaurant: trek refugios offer half-board meals varies by operator, bring high-calorie energy foods for day hikes, Chilean refugio food quality better than some international. Food safety: water purification recommended for backcountry, restaurant food generally safe, fresh seafood some of best in South America. Patagonian food culture: dining is social, meals long and communal, lunch often main meal, dinner late 8:30 PM onwards, tipping 10% standard. Torres del Paine visits should include significant Puerto Natales time for food culture.

    How do you photograph Torres del Paine effectively?

    Torres del Paine is one of world’s premier landscape photography destinations. Best locations: Mirador Las Torres pre-dawn sunrise alpenglow on three granite towers (iconic shot), French Valley (Mirador Britanico) dramatic granite amphitheater afternoon/evening light, Grey Glacier golden hour excellent, Mirador Cuernos Paine Massif Horns morning light, Lago Pehoé turquoise lake with Paine Massif backdrop sunset, Salto Grande waterfall with backdrop, wildlife locations Laguna Amarga for guanacos condor flights along ridges. Lighting: golden hour sunrise Torres glowing pink/orange (amanecer moment), golden hour sunset later light on west-facing faces, blue hour post-sunset dramatic mood shots, midday avoidance harsh light. Weather: plan multiple sunrise attempts 30-50% success rate first attempt, weather forecast unreliable, wind affects tripod stability (use heavy bag on hook), rain gear for camera essential, lenses fog in humidity changes. Equipment: wide-angle 14-35mm essential, telephoto 70-200mm wildlife and compressed mountain, sturdy but light tripod, ND graduated and polarizer filters, extra batteries (cold drains faster), weatherproofing (rain covers, camera towels), backup SD cards. Photography tours: dedicated photo tours with photographer-guides, cost $2,500-$4,500 multi-day, advantages weather-optimal timing expert locations. Wildlife photography: guanacos open steppe longer lenses, condors thermal updraft locations telephoto, pumas specialized tracking tours $2,000-$4,000, foxes dawn/dusk at refugios. Social considerations: arrive early to viewpoints, respect other hikers, tripod etiquette. Strategy: day hikers focus Mirador Cuernos short panoramic, W Circuit plan Torres sunrise from Chileno, O Circuit unique ice field views Paso John Gardner, dedicated photography trips multiple viewpoints flexible timing.


    Authoritative Sources & Further Reading

    Content reflects authoritative Torres del Paine destination sources:

    • CONAF (Chile’s National Forest Corporation) — conaf.cl — Official park management
    • Torres del Paine National Park — Park rangers and visitor information
    • Wildlife Conservation Society — Puma and guanaco population studies
    • Chilean Alpine Club (Club Andino de Chile) — Regional trekking protocols
    • Bruce Chatwin, In Patagonia — Classic Patagonia travel writing
    • Awasi Patagonia, Pumas Chile, Fantastico Sur Lodge — Puma tracking specialists
    • Puerto Natales tourism board — Local destination information
    • Guide services: Chile Nativo, Quetralahue, Knowmad Adventures, REI Adventures
    • Reference texts: Rudolf Abraham’s Torres del Paine Cicerone guide, Lonely Planet Chile & Easter Island
    Published: March 7, 2026
    Last updated: April 19, 2026
    Next review: July 2026
    Part of the Global Summit Guide

    Back to the Master Hub

    This guide is one of 71 across 12 thematic clusters on Global Summit Guide. The master hub organizes every guide by experience tier, specific peak, skill area, and region.

    View the Hub →
    .gsg-thrumesh{–navy:#071a2b;–navy2:#0d263d;–blue:#214f75;–gold:#d4913a;–gold2:#f0b45d;–cream:#f7f2e8;–paper:#fffdfa;–ink:#122a44;–muted:#657482;–line:#e4d7bd;font:400 16px/1.6 ‘Outfit’,Arial,sans-serif;color:var(–ink);background:linear-gradient(180deg,var(–paper),var(–cream));border:1px solid var(–line);border-radius:14px;overflow:hidden;margin:34px 0} .gsg-thrumesh *{box-sizing:border-box} .gsg-thrumesh a{text-decoration:none} .gsg-thrumesh .tm-inner{max-width:1120px;margin:auto;padding:30px} .gsg-thrumesh .tm-kicker{display:block;margin:0 0 7px;color:#98611c;font-size:11px;font-weight:800;letter-spacing:1.15px;text-transform:uppercase} .gsg-thrumesh h2{margin:0;color:var(–navy);font:400 clamp(28px,4vw,42px)/1.08 ‘DM Serif Display’,Georgia,serif} .gsg-thrumesh .tm-intro{max-width:830px;margin:10px 0 20px;color:var(–muted);font-size:15px} .gsg-thrumesh .tm-parent{display:flex;justify-content:space-between;gap:18px;align-items:center;padding:18px 20px;margin-bottom:10px;background:var(–navy);border-radius:10px;color:#fff} .gsg-thrumesh .tm-parent span{display:block;color:var(–gold2);font-size:10px;font-weight:800;letter-spacing:.9px;text-transform:uppercase} .gsg-thrumesh .tm-parent strong{display:block;margin-top:3px;color:#fff;font:400 20px/1.15 ‘DM Serif Display’,Georgia,serif} .gsg-thrumesh .tm-arrow{flex:0 0 auto;color:var(–gold2);font-size:24px} .gsg-thrumesh .tm-grid{display:grid;grid-template-columns:repeat(3,minmax(0,1fr));gap:10px} .gsg-thrumesh .tm-card{display:block;min-height:126px;padding:16px;background:#fff;border:1px solid var(–line);border-radius:9px;color:var(–ink);transition:transform .15s ease,border-color .15s ease} .gsg-thrumesh .tm-card:hover{transform:translateY(-2px);border-color:#c9b28a} .gsg-thrumesh .tm-card span{display:block;color:#98611c;font-size:10px;font-weight:800;letter-spacing:.75px;text-transform:uppercase} .gsg-thrumesh .tm-card strong{display:block;margin:4px 0 5px;color:var(–navy);font:400 18px/1.15 ‘DM Serif Display’,Georgia,serif} .gsg-thrumesh .tm-card small{display:block;color:var(–muted);font-size:12px;line-height:1.45} @media(max-width:820px){.gsg-thrumesh .tm-grid{grid-template-columns:repeat(2,minmax(0,1fr))}} @media(max-width:560px){.gsg-thrumesh .tm-inner{padding:22px 16px}.gsg-thrumesh .tm-grid{grid-template-columns:1fr}.gsg-thrumesh .tm-parent{align-items:flex-start}.gsg-thrumesh .tm-card{min-height:auto}}

    Was this helpful?

    Yes
    No
    Thanks for your feedback!
  • Mont Blanc Climbing Guide: Summit Europe’s Highest Peak

    Mont Blanc Climbing Guide: How to Safely Summit Europe’s Highest Peak

    Climbing Mont Blanc, the highest peak in Western Europe, is a thrilling adventure that attracts mountaineers from around the globe. This comprehensive guide will equip you with essential knowledge about the various climbing routes, preparation strategies, and safety protocols necessary for a successful ascent. Many climbers face challenges such as altitude sickness and unpredictable weather, but with the right preparation and understanding, these obstacles can be effectively managed. In this article, we will explore the main climbing routes, essential gear, weather conditions, acclimatization strategies, guided tour options, and the latest safety technologies. By the end, you will be well-prepared to tackle the majestic Mont Blanc.

    Mont Blanc Routes Compared: Difficulty Levels and Details

    Mont Blanc offers several climbing routes, each with unique challenges and varying difficulty levels. The two most popular routes are the Gouter Route and the Trois Monts Route. Understanding these routes is crucial for climbers to choose the one that best fits their skill level and experience.

    How Does the Gouter Route Compare in Difficulty and Duration?

    Climbers on the Gouter Route of Mont Blanc, showcasing the path and mountain huts, emphasizing the accessibility of this climbing route

    The Gouter Route is often considered the most accessible path to the summit of Mont Blanc. It has a moderate difficulty rating, making it suitable for climbers with basic mountaineering skills. The average duration for this route is approximately 2 days, allowing climbers to acclimatize properly. Key features of the Gouter Route include its well-marked path and the availability of mountain huts for overnight stays, which provide essential rest and recovery.

    However, even on more accessible routes like the Gouter, specific hazards like rockfall in the Grand Couloir du Goûter demand careful attention and preparation.

    Mont Blanc Rockfall Hazard: Grand Couloir du Goûter Safety

    There are on average 35 fatal mountaineering accidents per summer in France. On average, since 1990, 3.7 of them have occurred every summer in the Grand Couloir du Goûter, on the classic route up Mont Blanc (4809 m a.s.l.). Rockfall is one of the main factors that explain this high accident rate and contribute to making it one of the most accident-prone areas in the Alps for mountaineers. In this particular context, the objective of this study is to document the rockfall activity and its triggering factors in the Grand Couloir du Goûter in order to disseminate the results to mountaineers and favour their adaptation to the local rockfall hazard.

    Rockfall and vulnerability of mountaineers on the west face of the Aiguille du Goûter (classic route up Mont Blanc, France), an interdisciplinary study, P Lacroix, 2021

    What Are the Features of the Trois Monts Route for Experienced Climbers?

    The Trois Monts Route is designed for more experienced climbers, featuring technical sections that require advanced skills. This route demands proficiency in glacier travel and the use of technical climbing gear. Climbers can expect to encounter challenging conditions, including steep ascents and potential crevasses. Safety considerations are paramount, as the route’s complexity increases the risk of accidents, making it essential for climbers to be well-prepared and experienced.

    How Should You Prepare and What Gear Is Essential for Mont Blanc?

    Preparation is key to a successful climb of Mont Blanc. Essential gear includes appropriate clothing layers, navigation tools, and emergency equipment. Climbers should invest in high-quality gear to ensure safety and comfort during their ascent.

    Gear TypeDescriptionImportance
    Clothing LayersInsulated and waterproof layers to protect against cold and wet conditionsEssential for maintaining body temperature
    Navigation ToolsGPS devices and maps for route planningCrucial for safe navigation in challenging terrain
    Emergency GearFirst aid kits, communication devices, and extra foodVital for handling emergencies and unexpected situations

    For those looking to enhance their climbing experience, Information Hub offers a range of climbing gear tailored for Mont Blanc expeditions.

    What Are the Typical Weather Conditions and Best Seasons to Climb Mont Blanc?

    Weather conditions on Mont Blanc can be unpredictable, making it essential for climbers to be aware of seasonal patterns. The best months to climb are typically June to September, when the weather is more stable and temperatures are milder, generally ranging from -10°C to 5°C (14°F to 41°F).

    How Do Seasonal Weather Patterns Affect Climbing Safety?

    Seasonal weather patterns significantly impact climbing safety. Climbers should monitor weather forecasts closely and be prepared to adjust their plans based on changing conditions. Understanding the importance of weather tracking can help climbers make informed decisions about when to proceed or retreat.

    What Are the Latest Weather Advisories and Forecast Resources?

    Reliable weather resources are crucial for climbers. Recommended websites and apps provide up-to-date weather advisories, helping climbers stay informed about potential storms or temperature drops. Utilizing these resources can enhance safety and improve the chances of a successful summit.

    Mont Blanc Routes Compared: Difficulty Levels and Details

    Acclimatization is vital for preventing altitude sickness, which can severely impact climbers’ performance and safety. Implementing effective acclimatization strategies and safety protocols can significantly enhance summit success.

    What Are Effective Acclimatization Strategies for Altitude Sickness Prevention?

    To prevent altitude sickness, climbers should incorporate rest days into their itinerary, allowing their bodies to adjust to higher elevations. The “climb high, sleep low” principle is also effective, as it encourages climbers to ascend to higher altitudes during the day and return to lower elevations for sleep.

    Studies emphasize the critical importance of these acclimatization strategies, as a rapid ascent significantly increases the risk of acute mountain sickness.

    Mont Blanc Altitude Sickness Risk & Prevention

    Despite a large variability in the scores of the participants, this study showed that a rapid ascent of Mount Blanc induces a high risk of acute mountain sickness since the prevalence

    Prevention of acute mountain sickness by low positive end-expiratory pressure in field conditions, 2004

    Which Safety Measures and Emergency Procedures Should Climbers Know?

    Essential climbing safety gear including first aid kit and communication devices, emphasizing the importance of safety measures for Mont Blanc climbers

    Climbers should be familiar with essential safety measures, including navigation and communication tools. Emergency readiness is crucial, as it prepares climbers to respond effectively to unexpected situations, such as injuries or severe weather changes.

    What Guided Tour Options and Permits Are Available for Mont Blanc Climbers?

    For those who prefer a guided experience, various tour options are available. Guided tours provide expert knowledge and support, enhancing the overall climbing experience.

    How to Select a Qualified Mont Blanc Guided Tour Service?

    When selecting a guided tour service, consider factors such as the guide’s experience, safety protocols, and group size. A qualified guide can significantly improve your chances of a successful summit while ensuring safety throughout the journey.

    Further research into guided mountaineering preparation highlights the comprehensive strategies professionals employ to mitigate risks and enhance overall safety for climbers. K2 Climb Guide

    Mountaineering Safety Strategies: Guide Preparation Model

    This paper examines an issue that has been little explored in ergonomics: safety in outdoor activities. Drawing on an analysis of guided mountaineering preparation, the paper focuses on studying and modelling feedback from professionals. Our premise is that preparation can be analyzed as a process of constraint satisfaction aimed at constructing manageable situations. This proposal is explored through a qualitative study conducted with mountain guides. Data were collected from 17 semi-structured interviews and 10 full days of filmed field observations, followed by individual and collective confrontation. The analysis focuses mainly on identifying the constraints of the preparation and the types of variables related to them. Five main types of variables which can be generalized were defined. A descriptive model was then produced, and safety issues were identified, along with corresponding strategies to improve safety.

    Safety Issues and Strategies for Outdoor Activities: A General Model Based on Guided Mountaineering Preparation, A Girard, 2024

    What Are the Permit Requirements and How to Obtain Them?

    Climbers must obtain the necessary permits to access certain routes on Mont Blanc. The application process typically involves submitting forms and paying fees. It’s essential to plan ahead to ensure all permits are secured before the climb.

    Where Can You Find Mountain Huts and Accommodation Along Mont Blanc Routes?

    Mountain huts provide essential accommodation for climbers along the Mont Blanc routes. Knowing where to find these huts can enhance the climbing experience by offering rest and recovery opportunities.

    What Are the Key Mountain Huts on the Gouter and Trois Monts Routes?

    Key mountain huts along the Gouter and Trois Monts Routes include the Tête Rousse Hut and the Cosmiques Hut. These huts offer basic amenities and shelter, making them ideal stopping points for climbers.

    How to Book Accommodation and What Facilities Are Provided?

    Booking accommodation in advance is recommended, especially during peak climbing seasons. Facilities typically include dormitory-style sleeping arrangements, meals, and access to essential services, ensuring climbers are well-prepared for their ascent. About

    What Are the Latest Safety Technologies and Climbing Statistics for Mont Blanc?

    Recent advancements in safety technologies have significantly improved climber safety on Mont Blanc. Understanding these technologies can help climbers make informed decisions about their gear and safety measures.

    How Have Recent Advances Improved Climber Safety on Mont Blanc?

    Recent safety technologies include improved communication devices and advanced weather tracking systems. These innovations enhance climbers’ ability to stay connected and informed, reducing risks associated with climbing in challenging conditions.

    What Do 2024-2026 Climbing Success and Incident Rates Indicate?

    Climbing statistics from recent years indicate a steady increase in summit success rates, attributed to better preparation and safety measures. However, incident rates also highlight the importance of adhering to safety protocols and being aware of environmental conditions.

    How to Use Interactive Maps and Multimedia Resources for Mont Blanc Planning?

    Interactive maps and multimedia resources can greatly enhance your planning process for climbing Mont Blanc. Utilizing these tools allows climbers to visualize routes and understand the terrain better.

    Where to Access Detailed Route Maps and Elevation Profiles?

    Detailed route maps and elevation profiles are available through various online platforms. These resources provide climbers with essential information about the terrain, helping them prepare for the challenges ahead. For more information, visit Globalsummitguide.

    How Can Videos and Gear Diagrams Enhance Climbing Preparation?

    Videos and gear diagrams offer valuable insights into climbing techniques and gear usage. These visual resources can enhance understanding and preparation, ensuring climbers are well-equipped for their journey.

    Conclusion

    Successfully summiting Mont Blanc requires thorough preparation, understanding of routes, and adherence to safety protocols. By equipping yourself with the right gear and knowledge, you can enhance your climbing experience and increase your chances of reaching the peak. Explore our comprehensive resources and expert-guided tours to ensure a safe and memorable adventure. Start planning your Mont Blanc expedition today!

    Was this helpful?

    Yes
    No
    Thanks for your feedback!
  • How Much Does It Cost to Climb Everest? Full Breakdown

    Costs, Permits & Money / Everest

    How much does it cost to climb Everest in 2026? A full breakdown

    $45-110K
    Standard range
    $11K-15K
    Nepal permit
    60-65 days
    Expedition length
    2-3 yrs
    Prep time
    ★ Part of the Hub This Everest cost breakdown sits inside our master mountaineering reference covering routes, training, gear, and budget for every major peak. Visit the Hub →

    Everest is the most expensive mountain in the world to climb, and the prices have moved sharply in the past five years. Permit fees, Sherpa wages, oxygen logistics, and rescue insurance have all gone up. The published operator fees range from 35,000 to over 200,000 USD, and the gap between what operators advertise and what climbers actually spend can run another 15,000 to 25,000. This breakdown walks through every line item on a 2026 Everest budget, what the three operator tiers actually deliver, what climbers consistently underestimate, and how the cost compares to other 7-Summits objectives covered in our master mountaineering hub.

    The 2026 cost at a glance

    An Everest expedition in 2026 costs most international climbers between 45,000 and 110,000 USD all-in. The wide range is structural: Everest has three distinct operator tiers, each delivering a different product. Nepalese budget operators run 35,000 to 45,000 USD. International operators with Western lead guides run 50,000 to 75,000. Premium programs with high Sherpa ratios, included logistics, and white-glove service run 80,000 to 110,000. Above that, 1:1 fully-bespoke programs from operators like Furtenbach or Kobler can reach 200,000 USD or more. The route choice (South Col from Nepal versus North Ridge from Tibet) and season (spring versus rare autumn attempts) also shift the number.

    The Nepal climbing permit is the largest single line item that does not vary by operator. The Nepal Ministry of Tourism set the permit at 11,000 USD for years and announced a raise to 15,000 USD for permits issued from September 2025 onward. Climbers booking 2026 spring expeditions are paying the new 15,000 figure. The full permit context, including liaison officer fees and the refundable garbage deposit, sits in the deeper route framework of our how to climb Mount Everest guide and the route-by-route comparison in our Everest South Col vs North Ridge analysis. The full peak-by-peak budgeting framework that contextualizes Everest against every other major peak lives in our master mountaineering hub.

    The 10 line items that make up the budget

    01

    Operator or expedition fee

    The single largest line item. This covers Sherpa staff, oxygen system, base camp infrastructure, food, fixed lines contribution, and (for international operators) Western lead guides. The number that defines what tier of expedition you are running.

    2026 range$30K-$110K
    02

    Nepal climbing permit

    Paid to the Nepal Ministry of Tourism, processed by your operator. Spring season permits issued from September 2025 onward are 15,000 USD per climber. Earlier permits were 11,000. Autumn permits are 7,500. Non-refundable.

    Per climber$11K-$15K
    03

    Liaison officer + garbage deposit + ancillary fees

    Liaison officer salary (2,500), TIMS card and conservation fees (small), garbage deposit (4,000 refundable on proper waste removal), and route fixing contribution to the SPCC and Sagarmatha Pollution Control Committee.

    Total ancillary$4K-$5K
    04

    Personal climbing Sherpa

    Most operators include one climbing Sherpa per client in the base price. Adding a second personal Sherpa (gold-standard safety configuration) costs 5,000 to 10,000 extra. Premium operators include 1:1 Sherpa support as standard.

    Standalone cost$8K-$15K
    05

    Oxygen system

    Standard configuration is 4 bottles for the climber and 3 for the Sherpa, plus the mask and regulator. Most operators use Summit Oxygen or Poisk bottles. Oxygen is the most logistically complex line item: bottles are pre-positioned at Camps 2, 3, and 4, with extras cached for emergencies.

    Per climber$4K-$8K
    06

    Personal gear and clothing

    The 8000m kit. Down suit, 8000m boots, expedition mittens, -40F sleeping bag, glacier glasses and goggles, layering systems. Building from scratch is expensive. Most climbers assemble incrementally and rent specialty items like the down suit if they only plan one 8000m climb.

    From scratch$7K-$15K
    07

    International flights and Kathmandu lodging

    Round trip to Kathmandu (1,500 to 3,500 depending on origin and season), Kathmandu hotel before and after expedition (300 to 700), domestic flight or helicopter to Lukla (180 to 500), and Lukla to base camp logistics (handled by operator).

    Travel total$2K-$4.5K
    08

    Travel and rescue insurance

    Standard travel insurance does not cover above 6,000m. Climbers need a high-altitude expedition policy with helicopter evacuation and full medical repatriation. Global Rescue, Ripcord, and the IFMGA-affiliated providers run policies in this range. Non-negotiable for serious operators.

    Full coverage$800-$2.5K
    09

    Pre-expedition training climbs

    Most operators require at least one prior 6,000m or 7,000m climb. Common pre-Everest objectives: Lobuche East, Island Peak, Mera Peak, Aconcagua, Denali, Cho Oyu (when available). The 7,000m+ qualifier alone runs 4,000 to 25,000 depending on choice.

    Qualifier climbs$5K-$25K
    10

    Tips and incidentals

    Standard tipping for the full expedition is 3,000 to 5,000 USD. Plus base camp incidentals (alcohol, satellite phone airtime, additional snacks), personal medical and dental prep, training travel during the year before, and the small but real cost of being away from work for two months.

    Tip + extras$3K-$6K

    The three operator tiers and what each delivers

    The 2026 Everest market splits cleanly into three tiers, each with distinct service models and price points. Choosing between them is the single most important budget decision.

    Line itemBudget NepaleseStandard intl.Premium
    Operator fee$30K-$45K$50K-$75K$80K-$110K
    Sherpa ratio1:1 (often)1:1 included1:1 to 2:1
    Western lead guideNoYesYes (small ratio)
    Oxygen included4 bottles5-6 bottles6-7 bottles
    Base camp serviceShared messPrivate diningWhite-glove
    CommunicationsSat phone accessDaily wifiAlways-on wifi
    Personal gearNot includedNot includedSome included
    Flights to KTM$2K-$2.5K$2.5K-$3.5K$3.5K-$4.5K
    Pre-trip qualifier$5K$10K$15K-$25K
    Tips$3K-$3.5K$3.5K-$5K$5K-$6K
    Insurance$800-$1.2K$1.2K-$2K$2K-$2.5K
    TOTAL ALL-IN$50K-$70K$78K-$108K$118K-$165K

    The budget tier is dominated by Nepalese operators like Seven Summit Treks, Pioneer Adventure, and Asian Trekking. The standard tier includes Madison Mountaineering, Climbing the Seven Summits, Adventure Consultants, IMG, Mountain Trip, and Alpenglow. The premium tier includes Furtenbach Adventures, Kobler & Partner, RMI, and the bespoke 1:1 programs that occasionally exceed 200,000 USD. Picking between them depends on your budget, your prior experience, and how much risk you are willing to absorb personally versus pay an operator to manage. The deeper route choice context (South Col vs North Ridge) is in our route comparison.

    What climbers actually report spending

    Reported 2024-2025 climber spending

    Standard international expedition, quoted at $65,000. Actual all-in spend reported by climbers averaged $89,500. The breakdown: $65,000 operator fee plus $11,000 permit absorbed in operator fee, $9,200 international flights and Kathmandu, $4,500 tips, $3,800 personal gear top-up, $3,200 insurance, $1,800 in incidentals (sat phone, base camp extras), and $2,000 in pre-trip travel for the required qualifier. The $24,500 gap between quote and reality matches the same 1.4x to 1.5x rule that shows up on most expedition climbs and gets discussed in our Aconcagua cost breakdown.

    The pattern is consistent across operator tiers. Whatever the published operator fee, the all-in number is roughly 1.4x to 1.5x higher once flights, tips, gear, insurance, and incidentals are added. Climbers who anchor on the operator quote and forget the rest get caught short. Setting the budget at 1.5x the operator fee from the start, then treating any underrun as windfall, is the discipline that protects you. The same anchor-low pattern is documented across multiple peak budgets in our global mountain climbing costs guide.

    The tipping breakdown in detail

    Tipping is a real economic line item on Everest, not an optional gesture. The tip pool funds a meaningful portion of Sherpa annual income, and the established norms are well-known to operators and climbers alike. The standard distribution at the base camp tipping ceremony on summit day:

    Personal climbing Sherpa (your dedicated 1:1 partner from BC to summit)
    $1,500-$2,500
    Sirdar (head Sherpa coordinating the team)
    $300-$500
    Cook + assistant cook (base camp meals for 60 days)
    $200-$400
    Base camp staff (kitchen, dishwashing, tents)
    $300-$500
    Liaison officer (Nepal government rep at base camp)
    $200-$400
    Lead Western guide (if international operator)
    $1,000-$2,500
    Total tip budget per climber
    $3,500-$5,800

    The tip is paid in cash at the base camp tipping ceremony. Bring it physically with you to Kathmandu. Most operators provide guidance in their welcome packet, and asking your operator for the current expected ranges before you depart is standard practice. The Sherpa labor economics that sit behind these numbers are covered in our analysis of mountain porter systems.

    The hidden costs that surprise climbers

    Six recurring categories that climbers consistently underestimate. None of these appear on the operator brochure. All of them appear in the actual final bill.

    Pre-expedition training climbs

    Most operators require a 6,000m+ qualifier and recommend at least one 7,000m climb. The qualifier might be Lobuche East (3,500), Island Peak (3,000), or Aconcagua (10,000 to 13,000). The 7,000m climb might be Cho Oyu (when available, 25,000 to 35,000), Aconcagua, or Denali (12,000 to 16,000). Building this resume costs real money and takes 18 to 36 months. The training-climb arc is detailed in our 8-month Everest training plan and the broader high-altitude training program.

    Travel and rescue insurance

    Standard travel insurance excludes above 6,000m and excludes mountaineering activities. Everest requires a specialized policy with helicopter evacuation, full medical repatriation, and high-altitude trekking and mountaineering coverage. Global Rescue, Ripcord, and IFMGA-affiliated providers offer Everest-specific policies in the 800 to 2,500 range. Skipping this is the single worst budget decision possible. The full insurance framework is in our mountain climbing insurance guide.

    The 8000m kit upgrade

    Most climbers arrive at Everest with kit from Aconcagua or Denali. Some of it works. Some of it does not. The down suit, 8000m boots, and expedition mittens are the most common upgrades. A used La Sportiva Olympus Mons or Scarpa Phantom 8000 saves 400 to 600 versus new. A new down suit is 1,500 to 2,200. The full kit context is in our expedition gear list and the boots selection guide, with cold-weather sleep systems covered in our altitude sleeping bag article.

    Kathmandu pre-trip costs

    Most teams spend 4 to 7 nights in Kathmandu before flying to Lukla. Hotel runs 80 to 200 per night. Last-minute gear purchases (gas canisters, batteries, sunscreen, snacks for high camps) easily hit 200 to 400. Pre-expedition team dinners and the obligatory pre-departure rest days add up. Budget 800 to 1,500 for the Kathmandu front-end alone.

    The lost-income cost

    Climbers leave home for 60 to 70 days. For self-employed climbers, contractors, or those without paid leave, the lost-income cost is real. A working climber averaging 200,000 USD annual income foregoes roughly 38,000 in earnings over the expedition window. This rarely shows up in budget conversations. It should.

    Post-expedition recovery costs

    Returning Everest climbers often need dental work (broken or cracked teeth from cold and oxygen mask use), medical follow-up (HACE/HAPE residual symptoms, frostbite consultation), and physical therapy for high-altitude muscle loss. Budget 1,000 to 3,000 for the back-end medical pipeline. The frostbite end of this is detailed in our frostbite prevention and treatment guide.

    Nepal South Col vs Tibet North Ridge: cost comparison

    The Tibet North Ridge route is roughly 10 to 15 percent cheaper than the Nepal South Col, but the access situation has been inconsistent since 2020. The China Tibet Mountaineering Association closed Tibet to foreign climbers from 2020 through 2023 due to COVID-19 protocols, and access has been season-dependent since. For climbers who can secure a Tibet permit, the math: TMA permit roughly 9,950 USD versus Nepal at 11,000 to 15,000, lower base camp logistics costs (vehicle access vs helicopter and yak), and slightly lower oxygen logistics. The trade-off is fewer operator choices, less established rescue infrastructure, and the unpredictable permit access. Most climbers picking between routes prioritize Nepal for its reliability. The full route-side comparison is in our South Col vs North Ridge analysis.

    How to reduce the total cost

    Five proven savings paths that do not compromise safety:

    1. Book with a reputable Nepalese operator. Seven Summit Treks, Pioneer Adventure, and Asian Trekking deliver competent climbing infrastructure at 30 to 40 percent below international operators. The trade-off is no Western lead guide, smaller English-language client base, and shared base camp dining. For climbers with strong prior expedition experience, this is the cleanest savings path.
    2. Rent the down suit and the boots. If Everest is your only 8000m climb, renting the down suit saves 1,200 to 1,800 against buying. Renting boots saves another 600 to 900. Many Kathmandu gear shops and your operator can arrange this.
    3. Use Aconcagua as your qualifier. Aconcagua delivers 7,000m exposure at 10,000 to 13,000 USD against Cho Oyu’s 25,000 to 35,000 or Denali’s 12,000 to 16,000. The Aconcagua qualifier path is detailed in our Aconcagua trip report and Aconcagua routes guide.
    4. Fly economy with a stopover. Stopover routings via Doha, Istanbul, or Bangkok save 800 to 1,500 against direct routings. The extra travel time is meaningful but the cost gap matters.
    5. Share Kathmandu hotel rooms. Most teams have at least one other solo climber willing to share. Saves 350 to 700 across the front-end and back-end Kathmandu stays.

    The cost paths that look attractive but should be avoided: skipping insurance, cutting Sherpa support below 1:1, choosing operators with no documented summit safety record, or going below the 4-bottle oxygen configuration. These savings are paid back as risk, and the 2014 and 2015 Khumbu events showed what happens when those margins compress.

    How Everest compares to other peaks

    The 7-Summits cost ladder, in approximate 2026 all-in figures: Kilimanjaro 2,500 to 8,000, Aconcagua 9,500 to 13,000, Elbrus 4,000 to 8,000, Vinson 45,000 to 55,000, Denali 12,000 to 16,000, Mount Kosciuszko 1,000 to 2,000, and Everest 50,000 to 110,000+. Everest is roughly 4 to 8 times more expensive than the second-most-expensive of the 7 Summits (Vinson), and 6 to 12 times more expensive than Denali. Climbers pursuing the full 7 Summits typically spend 130,000 to 220,000 across the full progression. The full ladder context lives in our Seven Summits guide, the entry-point comparison in our Kilimanjaro vs Aconcagua decision guide, and the cross-peak budgeting reference framework in our conquer-peaks mountaineering hub.

    The bottom line on Everest budgeting

    For most climbers planning Everest in 2026 or 2027, the realistic all-in budget falls between 75,000 and 110,000 USD. Budget below 75,000 only if you choose a Nepalese operator and have an existing 8000m kit. Budget above 110,000 if you want premium service, second Sherpa, or 1:1 guiding. The number that matters is not what the operator quotes but what shows up on your final accounting after the expedition. Plan for 1.4x to 1.5x the operator number, give yourself 18 to 24 months of pre-expedition runway to spread the costs, and treat the underspend (if any) as the bonus. The full mountaineering planning framework that sits around this decision is in our main mountaineering hub, with route choice in our Everest climbing guide.

    ★ Master Resource

    Plan your full expedition path

    Routes, training timelines, gear lists, cost frameworks, and operator picks for Everest and every other major peak.

    Visit the Master Hub →

    Frequently asked questions

    How much does it cost to climb Everest in 2026?

    A guided Everest expedition runs from 45,000 to 110,000 USD all-in for most international climbers in 2026. Budget Nepalese-operator trips start at 35,000 to 45,000. Standard international expeditions with Western lead guides run 50,000 to 75,000. Premium expeditions with high Sherpa-to-client ratios and fully included logistics run 80,000 to 110,000. Top-tier 1:1 guided programs can exceed 200,000.

    What does the Nepal Everest climbing permit cost in 2026?

    The Nepal Ministry of Tourism climbing permit for Everest is 11,000 USD per climber for the spring season (April through May). Nepal raised the fee to 15,000 USD for permits issued from September 2025 onward, so 2026 spring climbers paying after the fee increase took effect are paying 15,000. The autumn permit is 7,500. Climbers must also budget for the liaison officer fee of 2,500 and the garbage deposit of 4,000 (refundable on proper waste removal).

    Why is climbing Everest so expensive?

    Five structural drivers: the Nepal permit is the highest of any mountain at 11,000 to 15,000 USD per climber, oxygen logistics for a 60-day expedition cost 4,000 to 8,000 per person, Sherpa wages have risen sharply since 2018 and now run 8,000 to 15,000 per personal climbing Sherpa, base camp infrastructure for two months requires extensive porter and yak logistics, and helicopter rescue insurance now costs 1,500 to 2,500 USD given the elevated rescue rates.

    Is Everest cheaper from the Tibet/China side?

    Marginally, but the gap has narrowed. The China Tibet Mountaineering Association permit for the North Ridge route runs roughly 9,950 USD per climber, slightly below the Nepal permit. North side expeditions are typically 5,000 to 10,000 USD cheaper overall, but the route was closed to foreign climbers from 2020 through 2023, has had inconsistent access since, and offers fewer operator choices. Most climbers pick south side for reliability.

    What’s the cheapest legitimate way to climb Everest?

    The cheapest legitimate path is a budget Nepalese operator (Seven Summit Treks, Pioneer, Asian Trekking) at 35,000 to 45,000 USD for the operator portion, with you covering flights, gear, insurance, and tips separately. Total all-in lands at 50,000 to 60,000. Going below this almost always means cutting Sherpa support, oxygen, or rescue capability, and the 2014 and 2015 disasters showed what happens when those margins thin too far.

    How much do Sherpa climbing teams cost on Everest?

    A personal climbing Sherpa for the full Everest expedition costs 8,000 to 15,000 USD when broken out separately. Most operators include one personal climbing Sherpa per client in the base price. Adding a second personal Sherpa (the gold standard for safety) typically adds 5,000 to 10,000. Premium operators include 1:1 Sherpa support standard. Tipping for personal climbing Sherpa runs an additional 1,500 to 2,500 USD per Sherpa.

    How much should I tip on an Everest expedition?

    Standard tipping practice runs 3,000 to 5,000 USD per climber for the full expedition. The breakdown: 1,500 to 2,500 to your personal climbing Sherpa, 300 to 500 to the sirdar (head Sherpa), 200 to 400 to the cook and assistant cook, 300 to 500 to base camp staff, 200 to 400 to the liaison officer, and 1,000 to 2,500 to the lead Western guide if applicable. Operators provide a tipping ceremony at base camp on summit day.

    What does the operator fee NOT include that climbers underestimate?

    Eight common omissions: international flights to Kathmandu, Kathmandu hotel and meals before and after the expedition, personal climbing gear (parka, boots, harness, mitts), travel and rescue insurance, tips for the climbing team, alcohol and personal items at base camp, satellite communication airtime, and pre-expedition acclimatization climbs (Lobuche East or Island Peak training trips). These add 10,000 to 25,000 to the published operator price.

    How much does Everest gear cost if I don’t already own any?

    A complete new Everest kit from scratch runs 7,000 to 15,000 USD. The big-ticket items: 8000m down suit (1,500 to 2,200), 8000m boots like the Olympus Mons or Phantom 8000 (1,000 to 1,400), expedition mittens and gloves (300 to 500), -40F sleeping bag (700 to 1,000), backpack and high-altitude pack systems (400 to 700), goggles and glacier sunglasses (300 to 500), and the standard layering and base systems (1,500 to 2,500). Most climbers build kit incrementally over multiple expeditions.

    Was this helpful?

    Yes
    No
    Thanks for your feedback!
  • Best Time to Climb Kilimanjaro 2026: Month by Month

    {“@context”:”https://schema.org”,”@type”:”Article”,”headline”:”Best Time to Climb Kilimanjaro: Month-by-Month Guide (2026)”,”description”:”Complete monthly Kilimanjaro seasonal planning guide with rainfall data, temperature ranges, crowd levels, and full moon dates for optimal summit timing.”,”image”:”https://globalsummitguide.com/wp-content/uploads/2026/03/best-time-kilimanjaro.jpg”,”author”:{“@type”:”Organization”,”name”:”Global Summit Guide Editorial Team”,”url”:”https://globalsummitguide.com/about/”},”publisher”:{“@type”:”Organization”,”name”:”Global Summit Guide”,”url”:”https://globalsummitguide.com”,”logo”:{“@type”:”ImageObject”,”url”:”https://globalsummitguide.com/wp-content/uploads/2026/02/global-logo-new-2.png”,”width”:”300″,”height”:”100″}},”datePublished”:”2026-03-07T08:00:00-07:00″,”dateModified”:”2026-04-19T12:00:00-06:00″,”mainEntityOfPage”:{“@type”:”WebPage”,”@id”:”https://globalsummitguide.com/best-time-to-climb-kilimanjaro-month-by-month-guide/”},”isPartOf”:{“@type”:”CollectionPage”,”@id”:”https://globalsummitguide.com/conquer-peaks-global-summit-guide-for-mountain-climbing/#hub”,”name”:”Conquer Peaks: Your Global Summit Guide for Mountain Climbing”}} {“@context”:”https://schema.org”,”@type”:”FAQPage”,”mainEntity”:[ {“@type”:”Question”,”name”:”When is the best month to climb Kilimanjaro?”,”acceptedAnswer”:{“@type”:”Answer”,”text”:”The best months to climb Kilimanjaro are January, February, August, and September — all fall within Kilimanjaro’s two dry seasons with optimal weather. January and February offer warmer temperatures, clearer summit views, and more snow on top (dramatic photography). August and September provide the driest and most stable conditions with cold but reliable weather. July and October are excellent secondary choices. March and June are good shoulder months. Avoid mid-March through late May (long rains) and November (short rains) unless you specifically want fewer crowds and lower prices. The absolute best single month is often cited as September — combining peak dry season stability with moderately cooler temperatures and peak month crowds slightly reducing from August highs. If summit photography matters, aim for nights near a full moon for natural illumination on the pre-dawn summit push.”}}, {“@type”:”Question”,”name”:”When is the rainy season on Kilimanjaro?”,”acceptedAnswer”:{“@type”:”Answer”,”text”:”Kilimanjaro has two rainy seasons annually. (1) The long rains run from mid-March through late May, with heavy rainfall especially in April (peak wet month). Trails become muddy, cloud cover obscures views for days, and rainforest sections receive 200-300mm rainfall monthly. This is the most challenging climbing period and not recommended for most climbers. (2) The short rains run through November and into early December, less intense than the long rains but still bringing daily afternoon showers. Some climbers choose November for fewer crowds despite the wet conditions. Key patterns: Rainfall concentrates in afternoon/evening on Kilimanjaro; mornings often remain clear during rainy seasons. Lower mountain (rainforest zone) gets most precipitation; summit zone may see snow rather than rain. High elevation tends to be drier than the forest belt. Equatorial position means temperature doesn’t change seasonally — it’s always the same at altitude (-10°C to -20°C summit). Rainfall is what varies, not temperature.”}}, {“@type”:”Question”,”name”:”Can you climb Kilimanjaro year-round?”,”acceptedAnswer”:{“@type”:”Answer”,”text”:”Yes, Kilimanjaro is climbable year-round, though some months are significantly better than others. Year-round climbing breakdown: (1) Primary recommended seasons — January through mid-March, June through October (the two dry seasons). (2) Shoulder acceptable — June (transitioning), late October/early November (transitioning). (3) Shoulder with compromises — November (short rains starting), early December (still wet). (4) Acceptable with planning — Christmas/New Year period (late December to early January, often drier despite being short rains season). (5) Challenging but possible — mid-March to late May (long rains). Expect muddy trails, obscured views, greater AMS risk due to cold wet conditions, but also fewer crowds and lower prices (some operators reduce rates 15-25%). Kilimanjaro’s equatorial location means temperatures remain relatively constant year-round; what changes is rainfall. Some experienced climbers deliberately choose November or April for budget and solitude reasons. For first-time climbers with limited flexibility, stick to the primary seasons for highest success probability.”}}, {“@type”:”Question”,”name”:”What is the weather like on Kilimanjaro?”,”acceptedAnswer”:{“@type”:”Answer”,”text”:”Kilimanjaro’s weather transforms dramatically across the five ecosystem zones traversed during the climb. Daily temperatures by zone: (1) Cultivation and rainforest (800-2,800m): 20-30°C daytime, 12-18°C nighttime, high humidity, possible daily showers. (2) Moorland/heather (2,800-4,000m): 10-18°C daytime, 0-8°C nighttime, lower humidity, mixed sun and cloud. (3) Alpine desert (4,000-5,000m): 5-15°C daytime sun, -5 to +5°C nighttime, intense UV, dry, variable wind. (4) Summit zone (5,000-5,895m): -5 to +5°C on clear days, -15 to -25°C before dawn on summit night, often windy, possible snow year-round. (5) Summit day temps at Uhuru: typically -10°C to -20°C in darkness, rising to -5 to +5°C with sunrise. Other weather factors: High UV radiation at altitude (bring UV 400 sunglasses, SPF 50 sunscreen). Afternoon clouds common year-round on lower mountain. Clear mornings are the norm even during rainy seasons. Wind increases with altitude. Summit night weather is the critical variable — cold, dark, potentially windy, 04:00-06:00 arrival for sunrise.”}}, {“@type”:”Question”,”name”:”Is a full moon important for Kilimanjaro summit?”,”acceptedAnswer”:{“@type”:”Answer”,”text”:”Climbing Kilimanjaro during a full moon is a popular choice but not essential for summit success. Benefits of full moon climbs: (1) Natural illumination on the pre-dawn summit push (typically 00:00-06:00 ascent). (2) Dramatic photography opportunities showing moonlit glaciers and terrain. (3) Enhanced visibility reduces stumbling on loose scree. (4) Psychological comfort from natural light in darkness. Drawbacks: (1) Higher demand means crowded trails and booked-out dates — book 6+ months ahead. (2) Some operators charge premium pricing for full moon dates ($100-$300 surcharge). (3) Crowds at summit viewpoint for sunrise. (4) Stars less visible due to moon brightness. Key 2026 full moons during climbing seasons: February 3, March 5, July 31, August 29, September 27, October 27, December 26. 2027 full moons: January 25, February 23, July 20, August 18, September 17, October 16, November 15. Alternative consideration: new moon nights provide the darkest skies for stargazing but no summit illumination. Most climbers successfully summit on any moon phase — headlamps provide adequate light. The full moon preference is aesthetic rather than technical.”}}, {“@type”:”Question”,”name”:”Should I climb Kilimanjaro in August or September?”,”acceptedAnswer”:{“@type”:”Answer”,”text”:”Both August and September are excellent months to climb Kilimanjaro — the choice between them depends on your priorities. August advantages: (1) Peak dry season conditions — lowest rainfall, most stable weather. (2) Coldest/clearest summit views with dramatic sky colors. (3) Longest dry period confidence for weather windows. (4) School holidays mean family groups common. Disadvantages: (1) Absolute peak crowds — trails and campsites busiest of the year. (2) Highest prices — operators often charge 5-15% premium. (3) Hotels in Moshi/Arusha fully booked. (4) Advance booking essential (4-6 months minimum). September advantages: (1) Virtually identical weather to August. (2) Slightly reduced crowds as summer holidays end. (3) Prices begin declining 5-10% from peak. (4) Wildlife viewing in Serengeti improves (Great Migration) for those adding safari. (5) Generally considered the best overall climbing month by operators. Disadvantages: (1) Still peak season with substantial crowds. (2) Still requires 3-4 months advance booking. Recommendation: Book September if flexibility allows; August works well if dates are fixed around summer vacation. Either month delivers 85-90% summit success with reputable operators.”}}, {“@type”:”Question”,”name”:”Is it worth climbing Kilimanjaro during Christmas and New Year?”,”acceptedAnswer”:{“@type”:”Answer”,”text”:”Climbing Kilimanjaro during Christmas and New Year is popular and worthwhile despite technically falling in the short rains season. Key considerations for the Dec 22 – Jan 5 window: (1) Weather: Short rains typically ending by mid-December, weather improving into January. Clear days increasingly common. (2) Crowds: Very busy period with holiday travelers; book 6 months ahead minimum. (3) Pricing: Premium rates ($200-$500 surcharge common) due to demand. (4) Unique experience: Summit on New Year’s Eve for 00:00 celebrations at altitude is a memorable bucket-list moment. Some operators offer special NYE climbs arriving at Uhuru for midnight. (5) Hotels: Full booking required weeks in advance. (6) Cultural: Christmas celebrations in Moshi and Arusha are festive and welcoming. (7) Climate: Temperatures at summit similar to September (cold but not extreme). (8) Visibility: Generally good for summit photography as weather window opens. Practical tips: Book earliest available 7+ day route (Lemosho 8-day ideal), pay for reliable operator, bring proper gear, build 2-day weather flex into schedule, arrange NYE celebrations with operator in advance if desired. Many climbers consider Christmas-NYE climbs to be among their most memorable mountaineering experiences.”}}, {“@type”:”Question”,”name”:”How far ahead should I book my Kilimanjaro climb?”,”acceptedAnswer”:{“@type”:”Answer”,”text”:”Kilimanjaro booking timing depends on your target month and trip complexity. Recommended advance booking windows: (1) Peak season climbs (January-February, July-August, September): 4-6 months advance booking. Christmas/NYE specifically: 6-9 months. (2) Shoulder season climbs (June, October, early November): 2-4 months advance. (3) Off-peak climbs (March-May rainy season, November short rains): 1-2 months minimum, can sometimes book 2-3 weeks out. (4) If combining safari: Add 2-3 months to all timelines. (5) If requesting specific operators: Popular KPAP-partnered operators book 6-9 months ahead in peak season. Factors affecting booking timeline: flights are often the longest lead time (book 4-6 months ahead for best rates regardless of climb timing), international travel insurance policies with pre-existing conditions may need 30-60 days advance enrollment, Tanzania e-visa takes 3-10 business days to process so apply 1-2 months ahead. What locks in first: flights (save $200-$500 with 4+ month advance), refundable hotel nights, operator deposit (typically 20-30% at booking, balance due 60-90 days before climb). Shoulder season last-minute bookings (2-4 weeks out) can save 10-20% if dates are flexible.”}} ]} *,*::before,*::after{box-sizing:border-box;margin:0;padding:0} :root{–pine:#0a1929;–forest:#122a44;–mist:#dde5ee;–snow:#f4f6f9;–stone:#485460;–pebble:#8a95a3;–ink:#0f1a26;–cream:#fafaf7;–white:#ffffff;–gold:#d4913a;–gold-light:#f5e4c8;–denali:#1e3a5c;–denali-mid:#2e5986;–denali-light:#e8eef5;–ready:#2d6e4e;–ready-light:#e8f1ec;–caution:#b86a15;–caution-light:#f7ece0;–danger:#a83a2b;–danger-light:#f5e8e5;–great-black:#2b2318;–great-black-light:#e8e3d8;–serif:’DM Serif Display’,Georgia,serif;–sans:’Outfit’,system-ui,sans-serif} html{scroll-behavior:smooth} body{font-family:var(–sans);background:var(–cream);color:var(–ink);line-height:1.75;font-size:17px;-webkit-font-smoothing:antialiased} h1,h2,h3,h4{font-family:var(–serif);font-weight:400;line-height:1.2} a{color:var(–denali-mid);text-decoration:underline;text-underline-offset:3px;transition:color .15s} a:hover{color:#b8701f} .btn{display:inline-flex;align-items:center;gap:8px;padding:13px 26px;border-radius:6px;font-family:var(–sans);font-size:15px;font-weight:500;text-decoration:none;transition:all .2s ease} .btn-primary{background:var(–gold);color:var(–pine)} .btn-primary:hover{background:#bd8030;transform:translateY(-1px);text-decoration:none} .breadcrumb{background:var(–pine);padding:10px 0;font-size:13px} .breadcrumb__inner{max-width:1200px;margin:0 auto;padding:0 24px;display:flex;align-items:center;gap:8px;color:rgba(255,255,255,.5);flex-wrap:wrap} .breadcrumb a{color:rgba(255,255,255,.65);text-decoration:none} .breadcrumb a:hover{color:var(–gold)} .breadcrumb__sep{color:rgba(255,255,255,.25)} .breadcrumb__current{color:rgba(255,255,255,.85)} .article-header{background:linear-gradient(135deg,var(–pine),var(–forest));padding:52px 0 44px;color:var(–white)} .article-header__inner{max-width:1200px;margin:0 auto;padding:0 24px} .article-header__label{font-size:11px;font-weight:600;letter-spacing:.14em;text-transform:uppercase;color:var(–gold);margin-bottom:18px;display:flex;align-items:center;gap:10px} .article-header__label::before{content:”;width:36px;height:2px;background:var(–gold)} .article-header h1{font-size:clamp(30px,4.4vw,52px);color:var(–white);max-width:1000px;margin-bottom:20px} .article-header h1 em{font-style:italic;color:var(–gold)} .article-header__sub{font-size:17px;color:rgba(255,255,255,.82);font-weight:300;max-width:900px;line-height:1.7;margin-bottom:28px} .byline{display:flex;flex-wrap:wrap;align-items:center;gap:20px 28px;padding:18px 22px;background:rgba(255,255,255,.06);border:1px solid rgba(255,255,255,.1);border-radius:10px;margin-bottom:28px;font-size:13.5px} .byline__item{display:flex;align-items:center;gap:8px;color:rgba(255,255,255,.85)} .byline__item strong{color:var(–white);font-weight:500} .byline__label{font-size:10px;letter-spacing:.1em;text-transform:uppercase;color:var(–gold);font-weight:600;margin-right:4px} .byline__item a{color:rgba(255,255,255,.85);text-decoration:underline;text-underline-offset:2px} .byline__item a:hover{color:var(–gold)} .hero__stats{display:grid;grid-template-columns:repeat(4,1fr);gap:18px;max-width:900px} .hero__stat{padding:16px 20px;background:rgba(10,25,41,.4);border:1px solid rgba(255,255,255,.12);border-radius:10px} .hero__stat-num{font-family:var(–serif);font-size:30px;color:var(–gold);line-height:1;margin-bottom:4px} .hero__stat-lbl{font-size:11px;letter-spacing:.08em;text-transform:uppercase;color:rgba(255,255,255,.72);font-weight:500} .hub-strip{background:var(–gold-light);border-bottom:1px solid rgba(212,145,58,.3);padding:12px 0} .hub-strip__inner{max-width:1200px;margin:0 auto;padding:0 24px;display:flex;align-items:center;gap:16px;flex-wrap:wrap;font-size:13px} .hub-strip__label{font-family:var(–serif);color:var(–pine);font-weight:600;font-size:14px;display:flex;align-items:center;gap:8px} .hub-strip__label::before{content:’★’;color:var(–gold);font-size:13px} .hub-strip__cluster{color:var(–stone);font-weight:400} .hub-strip__cluster strong{color:var(–pine);font-weight:600} .hub-strip__link{margin-left:auto;color:var(–pine);font-weight:500;text-decoration:none;font-size:11px;letter-spacing:.08em;text-transform:uppercase;padding:6px 12px;background:var(–white);border:1px solid rgba(212,145,58,.35);border-radius:6px;transition:all .15s} .hub-strip__link:hover{background:var(–pine);color:var(–gold-light);border-color:var(–pine)} @media(max-width:700px){.hub-strip__link{margin-left:0}.hub-strip__inner{gap:10px}} .page-wrap{max-width:1200px;margin:0 auto;padding:0 24px;display:grid;grid-template-columns:1fr 300px;gap:56px;align-items:start} .sidebar{padding-top:52px} .sidebar__block{background:var(–white);border:1px solid var(–mist);border-radius:12px;padding:22px;margin-bottom:20px} .sidebar__block–dark{background:var(–pine);color:var(–white);border-color:var(–pine)} .sidebar__block–dark .sidebar__label{color:rgba(255,255,255,.4)} .sidebar__block–gold{background:var(–gold-light);border-color:rgba(212,145,58,.3)} .sidebar__toc{position:sticky;top:24px;max-height:calc(100vh – 48px);overflow-y:auto} .sidebar__label{font-size:11px;font-weight:600;letter-spacing:.1em;text-transform:uppercase;color:var(–pebble);margin-bottom:14px} .toc-list{list-style:none;display:flex;flex-direction:column;gap:2px} .toc-link{display:block;padding:7px 10px;border-radius:6px;text-decoration:none;color:var(–stone);font-size:13px;border-left:2px solid transparent;transition:all .15s;line-height:1.4} .toc-link:hover{color:var(–denali-mid);background:var(–snow);border-left-color:var(–denali-light);text-decoration:none} .quickfact-row{display:flex;justify-content:space-between;align-items:baseline;padding:10px 0;border-bottom:1px solid rgba(255,255,255,.08);font-size:13px;gap:12px} .quickfact-row:last-child{border-bottom:none} .quickfact-row__name{color:rgba(255,255,255,.72);font-weight:300} .quickfact-row__val{color:var(–gold);font-weight:500;font-family:var(–serif);font-size:15px;text-align:right} .sidebar__block–gold h4{font-family:var(–serif);font-size:17px;color:var(–pine);margin-bottom:8px;line-height:1.3} .sidebar__block–gold p{font-size:13px;color:var(–stone);font-weight:300;margin-bottom:14px;line-height:1.55} .sidebar__cta-btn{display:flex;align-items:center;justify-content:center;gap:6px;padding:11px 16px;background:var(–pine);color:var(–white);border-radius:6px;text-decoration:none;font-size:13px;font-weight:500} .sidebar__cta-btn:hover{background:var(–denali-mid);color:var(–white);text-decoration:none} .article{padding:52px 0 80px} .article section{scroll-margin-top:24px} .article__lead{font-size:19px;color:var(–stone);font-weight:300;line-height:1.75;border-left:3px solid var(–gold);padding-left:22px;margin-bottom:48px} .article__lead em{color:var(–pine);font-style:italic} .article h2{font-size:clamp(24px,3.2vw,34px);color:var(–pine);margin-top:64px;margin-bottom:18px} .article h2:first-child{margin-top:0} .article h2 em{font-style:italic;color:var(–denali-mid)} .article h3{font-size:21px;color:var(–pine);margin-top:32px;margin-bottom:12px} .article p{color:var(–stone);margin-bottom:18px;font-weight:300} .article p strong{color:var(–ink);font-weight:500} .article p em{color:var(–pine);font-style:italic;font-weight:400} .article ul,.article ol{color:var(–stone);font-weight:300;margin:0 0 20px 22px} .article li{margin-bottom:8px;line-height:1.7} .section-rule{border:none;border-top:1px solid var(–mist);margin:48px 0} .callout{border-radius:10px;padding:22px 24px;margin:28px 0;display:flex;gap:18px;align-items:flex-start} .callout–insight{background:var(–denali-light);border:1px solid rgba(46,89,134,.15)} .callout–gold{background:var(–gold-light);border:1px solid rgba(212,145,58,.25)} .callout–caution{background:var(–caution-light);border:1px solid rgba(184,106,21,.25)} .callout–danger{background:var(–danger-light);border:1px solid rgba(168,58,43,.2)} .callout–methodology{background:var(–great-black-light);border:1px solid rgba(43,35,24,.2)} .callout__icon{flex-shrink:0;font-size:22px;line-height:1} .callout__body{flex:1} .callout__title{font-family:var(–serif);font-size:17px;margin-bottom:6px;color:var(–pine)} .callout__text{font-size:14.5px;color:var(–stone);font-weight:300;line-height:1.7;margin:0} .callout__text a{color:var(–denali-mid);font-weight:500} /* Season band – annual overview */ .season-band{background:var(–white);border:1px solid var(–mist);border-radius:14px;padding:28px 32px;margin:28px 0} .season-band h3{font-family:var(–serif);font-size:19px;color:var(–pine);margin:0 0 6px;line-height:1.3} .season-band__sub{font-size:13px;color:var(–pebble);margin-bottom:18px;font-weight:500} .season-band-bar{display:grid;grid-template-columns:repeat(12,1fr);height:60px;border-radius:10px;overflow:hidden;margin-bottom:12px;box-shadow:0 2px 12px rgba(11,31,53,.08)} .season-band-seg{display:flex;align-items:center;justify-content:center;color:var(–white);font-size:11px;font-weight:700;font-family:var(–sans);letter-spacing:.05em;text-align:center;position:relative} .season-band-seg–peak{background:linear-gradient(180deg,var(–ready),#1e854b)} .season-band-seg–good{background:var(–ready)} .season-band-seg–shoulder{background:var(–gold)} .season-band-seg–rain{background:var(–caution)} .season-band-seg–heavy-rain{background:var(–danger)} .season-band-labels{display:grid;grid-template-columns:repeat(12,1fr);font-size:11px;color:var(–stone);text-align:center;font-weight:600;letter-spacing:.05em} .season-band-legend{display:flex;flex-wrap:wrap;gap:14px 20px;margin-top:18px;padding-top:16px;border-top:1px solid var(–mist);font-size:12px} .season-band-legend-item{display:flex;align-items:center;gap:6px;color:var(–stone)} .season-band-legend-swatch{width:12px;height:12px;border-radius:3px;flex-shrink:0} /* Month cards – major feature */ .month-card{background:var(–white);border:1px solid var(–mist);border-radius:14px;padding:26px 28px;margin:22px 0;border-left:4px solid var(–gold)} .month-card–peak{border-left-color:#1e854b} .month-card–good{border-left-color:var(–ready)} .month-card–shoulder{border-left-color:var(–gold)} .month-card–rain{border-left-color:var(–caution)} .month-card–heavy-rain{border-left-color:var(–danger)} .month-card__header{display:grid;grid-template-columns:auto 1fr auto;gap:20px;align-items:baseline;margin-bottom:14px;padding-bottom:12px;border-bottom:1px solid var(–mist)} .month-card__num{font-family:var(–serif);font-style:italic;font-size:42px;color:var(–gold);line-height:1;opacity:.7} .month-card__titleblock{min-width:0} .month-card__label{font-size:10px;letter-spacing:.12em;text-transform:uppercase;color:var(–gold);font-weight:700;margin-bottom:4px} .month-card__name{font-family:var(–serif);font-size:24px;color:var(–pine);margin-bottom:4px;line-height:1.2} .month-card__name em{font-style:italic;color:var(–denali-mid)} .month-card__verdict{font-size:13px;color:var(–pebble);font-weight:500;font-style:italic} .month-card__rating{font-family:var(–serif);font-weight:600;white-space:nowrap;text-align:right;font-size:15px} .month-card–peak .month-card__rating{color:#1e854b} .month-card–good .month-card__rating{color:var(–ready)} .month-card–shoulder .month-card__rating{color:var(–gold)} .month-card–rain .month-card__rating{color:var(–caution)} .month-card–heavy-rain .month-card__rating{color:var(–danger)} .month-card__rating small{display:block;font-family:var(–sans);font-size:10px;letter-spacing:.1em;text-transform:uppercase;color:var(–pebble);font-weight:700;margin-top:2px} .month-card__stats{display:grid;grid-template-columns:repeat(4,1fr);gap:8px 16px;padding:12px 16px;background:var(–snow);border-radius:8px;margin-bottom:14px;font-size:12px} .month-card__stat{display:flex;flex-direction:column;gap:2px} .month-card__stat-label{font-size:9.5px;letter-spacing:.08em;text-transform:uppercase;color:var(–pebble);font-weight:700} .month-card__stat-val{font-family:var(–serif);font-size:13px;color:var(–pine);font-weight:600} .month-card__body{font-size:14px;color:var(–stone);font-weight:300;line-height:1.7} .month-card__body p{margin-bottom:10px} .month-card__body p:last-child{margin-bottom:0} .month-card__body strong{color:var(–ink);font-weight:500} .month-card__body em{color:var(–pine);font-style:italic;font-weight:400} /* Moon phase list */ .moon-list{background:var(–pine);color:var(–white);border-radius:12px;padding:26px 30px;margin:28px 0} .moon-list h3{font-family:var(–serif);font-size:20px;color:var(–gold);margin:0 0 6px;line-height:1.3} .moon-list__sub{font-size:13px;color:rgba(255,255,255,.6);margin-bottom:20px;font-weight:500} .moon-grid{display:grid;grid-template-columns:repeat(3,1fr);gap:10px 16px;font-size:13px} .moon-item{display:flex;align-items:center;gap:10px;padding:8px 12px;background:rgba(255,255,255,.05);border:1px solid rgba(255,255,255,.1);border-radius:8px} .moon-icon{font-size:18px;line-height:1} .moon-date{color:var(–gold);font-weight:600;font-family:var(–serif);font-size:14px} .moon-month{color:rgba(255,255,255,.7);font-size:11px;margin-left:auto;font-weight:500} /* Comparison table */ .compare-wrap{overflow-x:auto;margin:28px 0 36px;border-radius:14px;border:1px solid var(–mist);box-shadow:0 4px 24px rgba(11,31,53,.05)} .compare-table{width:100%;border-collapse:collapse;font-size:14px;min-width:680px;background:var(–white)} .compare-table thead th{text-align:left;padding:14px 12px;font-size:10px;font-weight:700;letter-spacing:.08em;text-transform:uppercase;color:var(–white);background:var(–pine);white-space:nowrap} .compare-table thead th:first-child{padding-left:22px} .compare-table tbody tr{border-bottom:1px solid var(–mist)} .compare-table tbody tr:last-child{border-bottom:none} .compare-table tbody tr:nth-child(even){background:var(–snow)} .compare-table tbody td{padding:14px 12px;color:var(–stone);vertical-align:top;font-weight:300;line-height:1.5} .compare-table tbody td:first-child{padding-left:22px;font-weight:500;color:var(–ink);font-family:var(–serif);font-size:14.5px} .season-pill{display:inline-block;padding:2px 8px;border-radius:4px;font-size:11px;font-weight:700;color:var(–white);font-family:var(–sans)} .season-pill–peak{background:#1e854b} .season-pill–good{background:var(–ready)} .season-pill–shoulder{background:var(–gold)} .season-pill–rain{background:var(–caution)} .season-pill–heavy{background:var(–danger)} .faq{margin:28px 0} .faq__item{background:var(–white);border:1px solid var(–mist);border-radius:10px;margin-bottom:12px;overflow:hidden;transition:border-color .15s} .faq__item:hover{border-color:rgba(46,89,134,.35)} .faq__item[open]{border-color:var(–denali-mid);box-shadow:0 4px 20px rgba(11,31,53,.06)} .faq__summary{padding:18px 24px;cursor:pointer;font-family:var(–serif);font-size:17px;color:var(–pine);display:flex;justify-content:space-between;align-items:center;gap:16px;list-style:none;user-select:none} .faq__summary::-webkit-details-marker{display:none} .faq__summary::after{content:’+’;font-family:var(–sans);font-size:24px;color:var(–denali-mid);font-weight:300;line-height:1;transition:transform .2s} .faq__item[open] .faq__summary::after{content:’−’} .faq__body{padding:0 24px 22px} .faq__body p{font-size:15px;color:var(–stone);font-weight:300;line-height:1.75;margin:0} .internal-links{background:var(–snow);border-radius:12px;padding:28px 30px;margin:32px 0} .internal-links__label{font-size:11px;font-weight:600;letter-spacing:.1em;text-transform:uppercase;color:var(–pebble);margin-bottom:16px} .internal-links h3{font-family:var(–serif);font-size:22px;color:var(–pine);margin-bottom:8px;margin-top:0} .internal-links__grid{display:grid;grid-template-columns:repeat(2,1fr);gap:12px;margin-top:20px} .internal-link{display:flex;align-items:center;padding:14px 16px;background:var(–white);border:1px solid var(–mist);border-radius:8px;font-size:14px;font-weight:500;color:var(–denali-mid);text-decoration:none;transition:all .15s} .internal-link:hover{border-color:var(–denali-mid);background:var(–denali-light);transform:translateX(2px);text-decoration:none} .internal-link::after{content:’→’;margin-left:auto;color:var(–pebble)} .internal-link:hover::after{color:var(–denali-mid)} .internal-link–hub{background:var(–gold-light);border-color:rgba(212,145,58,.3);color:var(–pine);font-weight:600} .internal-link–hub::before{content:’★’;color:var(–gold);margin-right:8px} .internal-link–hub:hover{background:var(–pine);color:var(–gold-light);border-color:var(–pine)} .related-grid{display:grid;grid-template-columns:repeat(3,1fr);gap:18px;margin:28px 0} .related-card{background:var(–white);border:1px solid var(–mist);border-radius:12px;padding:22px;text-decoration:none;display:block;transition:all .2s} .related-card:hover{border-color:rgba(46,89,134,.35);box-shadow:0 4px 20px rgba(0,0,0,.06);text-decoration:none} .related-card__type{font-size:10px;font-weight:600;letter-spacing:.1em;text-transform:uppercase;color:var(–pebble);margin-bottom:8px} .related-card__title{font-family:var(–serif);font-size:17px;color:var(–pine);margin-bottom:6px;line-height:1.3} .related-card__desc{font-size:13.5px;color:var(–stone);font-weight:300;line-height:1.55} .guide-cta{background:linear-gradient(135deg,var(–pine),var(–denali));border-radius:16px;padding:44px;margin:48px 0;display:grid;grid-template-columns:1fr auto;gap:32px;align-items:center} .guide-cta__label{font-size:11px;font-weight:600;letter-spacing:.12em;text-transform:uppercase;color:var(–gold);margin-bottom:12px} .guide-cta h2{font-family:var(–serif);font-size:clamp(22px,2.8vw,30px);color:var(–white);margin:0 0 12px;padding:0} .guide-cta p{font-size:15px;color:rgba(255,255,255,.72);font-weight:300;line-height:1.7;margin:0} .guide-cta p a{color:var(–gold)} .sources-block{background:var(–snow);border-radius:12px;padding:28px 32px;margin:32px 0;border:1px solid var(–mist)} .sources-block h3{font-family:var(–serif);font-size:20px;color:var(–pine);margin-top:0;margin-bottom:12px} .sources-block p{font-size:14.5px;color:var(–stone);line-height:1.7;margin-bottom:16px;font-weight:300} .sources-block ul{margin:0;padding-left:22px;font-size:13.5px;color:var(–stone);font-weight:300;line-height:1.7} .sources-block li{margin-bottom:6px} .sources-block a{color:var(–denali-mid);font-weight:500} .sources-block__meta{display:flex;flex-wrap:wrap;gap:16px 24px;padding-top:16px;margin-top:16px;border-top:1px solid var(–mist);font-size:12.5px;color:var(–pebble)} .sources-block__meta strong{color:var(–ink);font-weight:500} @media(max-width:960px){.page-wrap{grid-template-columns:1fr}.sidebar{display:none}.hero__stats{grid-template-columns:repeat(2,1fr)}.season-band-bar{height:46px}.season-band-seg{font-size:9px}.season-band-labels{font-size:9px}.month-card{padding:22px}.month-card__header{grid-template-columns:auto 1fr;gap:14px}.month-card__rating{grid-column:1 / -1;text-align:left}.month-card__stats{grid-template-columns:repeat(2,1fr)}.moon-grid{grid-template-columns:1fr 1fr}.internal-links__grid,.related-grid{grid-template-columns:1fr}.guide-cta{grid-template-columns:1fr}.byline{gap:12px 18px}} @media(max-width:600px){.hero__stats{grid-template-columns:1fr 1fr}.moon-grid{grid-template-columns:1fr}.month-card__num{font-size:34px}.month-card__stats{grid-template-columns:1fr 1fr}}
    Cluster 06 · Kilimanjaro · Updated April 2026

    Best Time to Climb Kilimanjaro: Month-by-Month Guide

    Every month covered — rainfall, temperature, crowds, moon phases, and the specific reasons each month works or doesn’t. From the January dry-season brilliance to the November short rains, pick your climb date with confidence using the most detailed seasonal framework available.

    2
    Dry seasons
    per year
    Aug–Sep
    Peak
    season
    Apr
    Wettest
    month
    4–6 mo
    Peak booking
    lead time
    Global Summit Guide A guide in Cluster 06 · Kilimanjaro View master hub →

    Kilimanjaro sits 3 degrees south of the equator — its seasons aren’t defined by temperature but by rainfall patterns. Temperature at altitude stays remarkably constant year-round (always -10°C to -20°C at the summit), but rainfall varies dramatically across the calendar. Two dry seasons deliver ideal conditions; two rainy seasons range from challenging (short rains) to genuinely difficult (long rains). Timing your climb correctly is the single most important planning decision after route choice — and this guide gives you every month’s reality, weather patterns, crowd levels, and the hidden timing considerations most guides skip over.

    ⊛
    How this guide was built

    Weather data reflects 30-year averages from the Tanzania Meteorological Agency for the Moshi and Kilimanjaro weather stations. Crowd data drawn from TANAPA visitor statistics and operator booking patterns. Full moon dates verified against NASA astronomical calendar for 2026-2027. Ramadan dates verified against the Islamic Hijri calendar. Temperature ranges reflect typical conditions at five altitude zones. Reviewed by KINAPA-licensed guides operating year-round on Kilimanjaro. Fact-check date: April 19, 2026.

    Kilimanjaro Climbing Calendar: The Full Year at a Glance

    Kilimanjaro’s year breaks into five distinct climbing windows. Here’s the entire calendar visualized by climbing quality — peak conditions in deep green, long rains in red.

    Annual Kilimanjaro climbing conditions by month

    Climbing quality rating · January through December
    Jan
    Feb
    Mar
    Apr
    May
    Jun
    Jul
    Aug
    Sep
    Oct
    Nov
    Dec
    Peak season · best conditions
    Excellent · highly recommended
    Shoulder · good with caveats
    Short rains · manageable
    Long rains · avoid

    The key pattern: January-mid March and mid-June-October are the two primary dry seasons, delivering the best weather, views, and summit success rates. The rest of the year has climbing trade-offs — lower crowds and prices but higher weather risk. Skip only the long rains (mid-March to late May) if your trip is inflexible.


    Every Month Analyzed: The Detailed Breakdown

    01
    Primary Dry Season · Peak Start

    January

    Warmer, clearer, dramatic photography
    ExcellentRecommended
    Rainfall (Moshi)~60mm
    Summit temp-10 to -18°C
    Crowd levelHigh
    Daily sunshine8–9 hrs

    January opens Kilimanjaro’s primary dry season with warmer temperatures and clearer skies than any other month. The equator sun is high, lower-mountain rainforest is beautifully green from December’s short rains, and summit views are frequently pristine. This is many photographers’ favorite month — dramatic cloud formations over the summit combined with possible snow on Uhuru create postcard conditions.

    The main drawback is high demand. Post-New Year climbs fill quickly as international travelers book holiday vacations. Expect 4-6 months advance booking minimum. Full moon dates see premium pricing. Overall conditions rival September as the single best climbing month — the choice comes down to whether you prefer warmer climbs (January) or coolest clearest (September).

    02
    Primary Dry Season · Peak

    February

    Peak primary season — busiest dry-season month
    ExcellentRecommended
    Rainfall (Moshi)~80mm
    Summit temp-10 to -18°C
    Crowd levelPeak
    Daily sunshine8–9 hrs

    February is the peak of the primary dry season — most consistent weather windows, driest conditions, warmest summit temperatures. Snow on Uhuru Peak is still common, creating the iconic glaciated summit view. Wildlife viewing in Serengeti is excellent for those adding safari (Great Migration calving season).

    The trade-off is maximum crowds across all routes. Machame sections fill with groups starting every day; Lemosho’s lower-crowd reputation fades after Day 4 when it joins Machame. Prices reach peak levels (5-15% above shoulder season). February full moons typically create the most booked-out climbing dates of the year. For guaranteed good weather with flexible dates, February is hard to beat.

    03
    Transition Month · Primary to Rainy

    March

    First half excellent, second half deteriorating
    Good (first half)Shoulder timing
    Rainfall (Moshi)~150mm
    Summit temp-10 to -20°C
    Crowd levelModerate → Low
    Daily sunshine7–8 hrs

    March splits sharply between the first two weeks (still excellent) and the final two weeks as the long rains begin moving in. Early March climbs enjoy February-quality conditions with lower crowds and 5-10% price reductions. By mid-month, afternoon clouds build, rainfall increases on the lower mountain, and trails become muddier.

    The transition day varies year-to-year — some years remain dry through late March; others see long rains beginning by the 15th. Smart shoulder-season climbers target March 1-15 for the rare sweet spot of peak conditions plus reduced crowds and prices. After March 15, climbing becomes progressively more weather-challenging through April.

    04
    Long Rains Season

    April

    Wettest month · not recommended for most
    ChallengingAvoid if possible
    Rainfall (Moshi)~370mm
    Summit temp-10 to -22°C
    Crowd levelVery low
    Daily sunshine5–6 hrs

    April is Kilimanjaro’s wettest month. The long rains peak with ~370mm rainfall in Moshi and even heavier amounts in the rainforest zone. Trails become slippery and muddy. Cloud cover obscures views for days at a time. Campsite conditions are genuinely uncomfortable — saturated tents, wet clothing, cold nights.

    Despite this, a small minority of climbers choose April for solitude and lower prices (often 20-30% operator discounts). Summit success rates drop to 60-75% even on 8-9 day routes due to conditions. If you climb in April: pack for serious rain, accept that views will be limited, focus on the physical challenge rather than scenery. Cold wet conditions also increase AMS risk substantially.

    05
    Long Rains Continuing

    May

    Still rainy — slight improvement late month
    ChallengingLast avoid month
    Rainfall (Moshi)~270mm
    Summit temp-10 to -22°C
    Crowd levelVery low
    Daily sunshine5–6 hrs

    May continues the long rains, though with somewhat reduced rainfall compared to April. The mountain remains deeply wet and challenging, with limited visibility and difficult trail conditions. Some experienced operators close mountain operations entirely in May for trail maintenance.

    Late May sees the first signs of the dry season return — by May 25-30, rainfall pattern often shifts and June’s dry season begins approaching. For most climbers, May remains in the “skip this month” category. The 20-30% discount doesn’t compensate for reduced summit success probability and unpleasant conditions. Wait for June or later. See how route duration affects success especially during wet-season attempts.

    06
    Dry Season Returns · Shoulder

    June

    Dry season arriving — excellent value month
    Very GoodShoulder value
    Rainfall (Moshi)~50mm
    Summit temp-12 to -22°C
    Crowd levelModerate
    Daily sunshine8–9 hrs

    June marks the return of reliable dry conditions and one of the year’s best value windows. The long rains have ended, trails are drying out, and conditions rapidly approach peak quality. Prices remain 10-15% below peak season (July-August) while weather is nearly identical.

    Temperature is slightly cooler than February — summit conditions can be the coldest of the year, with clear skies amplifying the cold. Crowd levels are moderate as school holidays haven’t begun (US) and European peak travel is still ahead. Experienced repeat climbers often target June specifically for the combination of quality weather, reduced crowds, and shoulder pricing. Advance booking 2-3 months is sufficient.

    07
    Main Dry Season · Busy

    July

    Peak crowds begin — consistent excellent weather
    ExcellentRecommended
    Rainfall (Moshi)~30mm
    Summit temp-12 to -22°C
    Crowd levelHigh
    Daily sunshine9–10 hrs

    July is the start of peak international climbing season. Summer holidays bring American, European, and Australian families to Kilimanjaro in volume. Weather is exceptional — among the year’s lowest rainfall, high sunshine hours, reliable summit conditions.

    The drawback is entirely crowd-related: popular campsites fill completely, trail bottlenecks form on summit day, and operators are busy. Premium pricing is standard (5-15% above shoulder season). Book 4-6 months ahead minimum. Full moon climbs in July are often the year’s most-booked. The climbing experience is fantastic; just plan for crowds and secure your spots early.

    08
    Peak Dry Season · Maximum Crowds

    August

    Highest volume month — best reliability
    ExcellentRecommended
    Rainfall (Moshi)~30mm
    Summit temp-13 to -22°C
    Crowd levelPeak
    Daily sunshine9–10 hrs

    August is typically Kilimanjaro’s highest-volume month — ~4,500+ summit attempts. Conditions are statistically the most reliable of the year: lowest rainfall, highest sunshine, most consistent weather windows. Summit success rates peak at quality operators (92-97% on 8-day Lemosho).

    The trade-offs are pure logistics: everything fills. Hotels in Moshi/Arusha book 3-6 months out. Popular operators decline new bookings 4+ months ahead. Campsites feel crowded on summit night as dozens of groups start Uhuru push together. Prices reach annual peaks (10-20% above shoulder season). For climbers with fixed dates tied to summer vacations, August delivers reliability. For flexible climbers, September offers nearly identical weather with slightly reduced crowds.

    09
    Peak Dry Season · Best Overall

    September

    Widely considered the best month overall
    Best MonthTop choice
    Rainfall (Moshi)~20mm
    Summit temp-12 to -20°C
    Crowd levelHigh → Moderate
    Daily sunshine9–10 hrs

    September is widely considered the best overall month to climb Kilimanjaro by experienced operators and guides. Weather matches August’s excellence — lowest rainfall of the year, highest sunshine, clearest views. Crowds begin reducing as summer holidays end, particularly in the second half of the month.

    Prices begin their decline from August peaks (5-10% reduction). Serengeti wildlife viewing peaks during the Great Migration river crossings, making September ideal for safari add-ons. Temperature is slightly warmer than August’s coldest but still genuinely cold at summit — dramatic conditions for photography. Book 3-4 months ahead for flexibility; 5-6 months for specific dates. If you can choose any month, choose September.

    10
    Dry Season Closing · Great Value

    October

    Excellent conditions, crowds declining, shoulder pricing
    ExcellentRecommended
    Rainfall (Moshi)~40mm
    Summit temp-10 to -18°C
    Crowd levelModerate
    Daily sunshine9–10 hrs

    October combines August’s weather quality with June’s shoulder pricing — arguably the year’s best value. Dry season conditions persist through most of the month, with crowds substantially reduced from the July-August-September peak. Prices drop 10-15% from peak season.

    Late October can see the first signs of the approaching short rains, but typically not until very late in the month. Early-to-mid October is an ideal window for first-time climbers who want peak-quality conditions without peak-crowd logistics. Advance booking of 2-3 months is usually sufficient. Many experienced repeat Kilimanjaro climbers specifically target October for the optimal value equation.

    11
    Short Rains Season

    November

    Wet but manageable — significant price reductions
    ShoulderWith caveats
    Rainfall (Moshi)~170mm
    Summit temp-10 to -20°C
    Crowd levelLow
    Daily sunshine6–8 hrs

    November brings the short rains — significantly less intense than April-May’s long rains but still bringing regular afternoon and evening showers. Rainfall concentrates in afternoons; mornings often remain clear. The rainforest and moorland zones get wet; the summit is typically unaffected other than potential snow.

    Trade-offs favor the budget-conscious: operator prices drop 15-25% below peak season, advance booking requirements relax to 1-2 months, crowds are minimal. Summit success rates remain respectable at 75-85% on 8-day routes. November is the value month for climbers who accept weather uncertainty. Pack premium rain gear, build 2-3 flex days into your schedule, and expect views to be less consistent. See our Kilimanjaro Cost 2026 guide for how November pricing affects total budget.

    12
    Short Rains Ending · Holiday Season

    December

    Rain tapering, holidays drive demand despite weather
    Good (late)Christmas peak
    Rainfall (Moshi)~120mm
    Summit temp-10 to -20°C
    Crowd levelModerate → High (late)
    Daily sunshine7–8 hrs

    December splits distinctly: early month remains wet (short rains continuing), late month improves dramatically as the rains taper heading into January’s dry season. Christmas and New Year’s climbs are extremely popular despite the shoulder-season weather — operators report December 22-January 5 as one of the year’s highest-demand windows.

    Pricing reflects this: Christmas/NYE climbs command premium rates ($200-$500 surcharge) with 6+ months advance booking required for specific dates. The tradition of climbing on New Year’s Eve to summit at midnight at 5,895m is genuinely memorable — many climbers rate NYE summits among their most cherished mountaineering experiences. For flexible climbers avoiding holiday premiums, late December after January 5 delivers excellent weather with rapidly reducing crowds.


    Full Moon Climbing: Summit Night Illumination

    Full moon climbs are popular for the natural illumination they provide during the pre-dawn summit push (00:00-06:00). While not technically necessary — all climbers use headlamps — moonlit glaciers and terrain create dramatic photography and enhanced visibility.

    2026–2027 Full Moon Dates During Climbing Seasons

    Target summit night within 2-3 days of these dates for full moon illumination
    🌕Feb 3, 2026Primary dry
    🌕Mar 5, 2026Shoulder
    🌕Jun 30, 2026Dry return
    🌕Jul 29, 2026Peak
    🌕Aug 28, 2026Peak
    🌕Sep 26, 2026Peak
    🌕Oct 26, 2026Excellent
    🌕Dec 24, 2026Christmas peak
    🌕Jan 23, 2027Primary dry
    🌕Feb 22, 2027Primary dry
    🌕Jul 19, 2027Peak
    🌕Aug 17, 2027Peak

    Planning your climb around the moon

    Summit night is typically Day 6 of a 7-day climb or Day 7 of an 8-day climb. Work backwards from your target full moon to calculate your climb start date. For example:

    • Target: September 26, 2026 full moon summit
    • Summit night = September 25-26
    • 8-day Lemosho start date = September 19
    • Arrival in Moshi = September 17-18 (allow 2 rest days)
    • Book flights arriving September 17 at latest
    ★
    Book full moon climbs 6+ months ahead

    Full moon dates during peak season (July-October) are the most booked-out climbing dates on the entire Kilimanjaro calendar. Reputable operators fill these dates 6-9 months in advance. Premium pricing typically adds $100-$300 to operator rates. If a full moon summit matters to you, book as soon as dates open — typically 12-18 months ahead. Alternatively, accept a summit 2-3 days before or after the full moon: visibility is still excellent and operator pricing drops.


    Month-by-Month Quick Comparison

    MonthSeasonRain (Moshi)CrowdsPrice vs PeakBook Ahead
    JanuaryDry Peak60mmHigh+5%4–6 months
    FebruaryDry Peak80mmPeak+10%4–6 months
    March (early)Transition150mmModerateBaseline2–4 months
    AprilLong Rains370mmVery low-25%1–2 months
    MayLong Rains270mmVery low-25%1–2 months
    JuneShoulder50mmModerate-10%2–3 months
    JulyDry Main30mmHigh+10%4–6 months
    AugustPeak30mmPeak+20%6 months
    SeptemberPeak20mmHigh+10%4–6 months
    OctoberShoulder40mmModerate-5%2–3 months
    NovemberShort Rains170mmLow-20%1–2 months
    DecemberHoliday Peak120mmModerate → High+15% (NYE)6–9 months (NYE)

    Special Timing Considerations

    Ramadan timing

    Many Tanzanian mountain crew are Muslim. During Ramadan, Muslim guides and porters fast from sunrise to sunset — eating and drinking only in early morning (pre-dawn) and evening (after sunset). This typically doesn’t affect climb operations as mountain work continues, but meal timing shifts slightly. Ramadan dates shift ~10 days earlier each Gregorian year:

    • 2026 Ramadan: February 17 to March 19
    • 2027 Ramadan: February 7 to March 8
    • 2028 Ramadan: January 27 to February 25

    Climbing during Ramadan is entirely possible and welcomed — Muslim crew continue professional service and appreciate respectful travelers. No negative impact on climb quality; cultural awareness of the religious context is the main consideration.

    Christmas and New Year’s Eve specifics

    December 22 through January 5 is the single most popular Kilimanjaro climbing window outside the July-August summer peak. NYE summits at midnight create a unique bucket-list moment. Key considerations:

    • Book 6-9 months ahead minimum for specific dates
    • Premium pricing ($200-$500 surcharge standard)
    • Weather variable — short rains may still affect early December
    • Hotels in Moshi/Arusha fully book 3+ months ahead
    • Some operators offer special NYE packages timed to reach Uhuru at exactly 00:00
    • Arrive 3+ days early — Christmas travel delays are common

    Summit photography timing

    For photographers specifically planning around light:

    • Golden hour summit: Arrive at Uhuru 30-45 minutes before sunrise (05:30-06:00 typical). Start summit push 00:00-01:00.
    • Blue hour: Pre-dawn 04:30-05:15 offers dramatic deep-blue sky conditions.
    • Full moon nights: Combined moonlight + first sunrise light creates layered photography opportunities.
    • Post-rain clarity: First clear days after long rains end (late May-June) often have exceptional atmospheric clarity.
    • Snow on Uhuru: More common January-March. Enhances summit dramatically.

    Kilimanjaro Timing FAQ: Your Common Questions Answered

    When is the best month to climb Kilimanjaro?

    The best months to climb Kilimanjaro are January, February, August, and September — all fall within Kilimanjaro’s two dry seasons with optimal weather. January and February offer warmer temperatures, clearer summit views, and more snow on top (dramatic photography). August and September provide the driest and most stable conditions with cold but reliable weather. July and October are excellent secondary choices. March and June are good shoulder months. Avoid mid-March through late May (long rains) and November (short rains) unless you specifically want fewer crowds and lower prices. The absolute best single month is often cited as September — combining peak dry season stability with moderately cooler temperatures and peak month crowds slightly reducing from August highs. If summit photography matters, aim for nights near a full moon for natural illumination on the pre-dawn summit push.

    When is the rainy season on Kilimanjaro?

    Kilimanjaro has two rainy seasons annually. (1) The long rains run from mid-March through late May, with heavy rainfall especially in April (peak wet month). Trails become muddy, cloud cover obscures views for days, and rainforest sections receive 200-300mm rainfall monthly. This is the most challenging climbing period and not recommended for most climbers. (2) The short rains run through November and into early December, less intense than the long rains but still bringing daily afternoon showers. Some climbers choose November for fewer crowds despite the wet conditions. Key patterns: Rainfall concentrates in afternoon/evening on Kilimanjaro; mornings often remain clear during rainy seasons. Lower mountain (rainforest zone) gets most precipitation; summit zone may see snow rather than rain. High elevation tends to be drier than the forest belt. Equatorial position means temperature doesn’t change seasonally — it’s always the same at altitude (-10°C to -20°C summit). Rainfall is what varies, not temperature.

    Can you climb Kilimanjaro year-round?

    Yes, Kilimanjaro is climbable year-round, though some months are significantly better than others. Year-round climbing breakdown: (1) Primary recommended seasons — January through mid-March, June through October (the two dry seasons). (2) Shoulder acceptable — June (transitioning), late October/early November (transitioning). (3) Shoulder with compromises — November (short rains starting), early December (still wet). (4) Acceptable with planning — Christmas/New Year period (late December to early January, often drier despite being short rains season). (5) Challenging but possible — mid-March to late May (long rains). Expect muddy trails, obscured views, greater AMS risk due to cold wet conditions, but also fewer crowds and lower prices (some operators reduce rates 15-25%). Kilimanjaro’s equatorial location means temperatures remain relatively constant year-round; what changes is rainfall. Some experienced climbers deliberately choose November or April for budget and solitude reasons. For first-time climbers with limited flexibility, stick to the primary seasons for highest success probability.

    What is the weather like on Kilimanjaro?

    Kilimanjaro’s weather transforms dramatically across the five ecosystem zones traversed during the climb. Daily temperatures by zone: (1) Cultivation and rainforest (800-2,800m): 20-30°C daytime, 12-18°C nighttime, high humidity, possible daily showers. (2) Moorland/heather (2,800-4,000m): 10-18°C daytime, 0-8°C nighttime, lower humidity, mixed sun and cloud. (3) Alpine desert (4,000-5,000m): 5-15°C daytime sun, -5 to +5°C nighttime, intense UV, dry, variable wind. (4) Summit zone (5,000-5,895m): -5 to +5°C on clear days, -15 to -25°C before dawn on summit night, often windy, possible snow year-round. (5) Summit day temps at Uhuru: typically -10°C to -20°C in darkness, rising to -5 to +5°C with sunrise. Other weather factors: High UV radiation at altitude (bring UV 400 sunglasses, SPF 50 sunscreen). Afternoon clouds common year-round on lower mountain. Clear mornings are the norm even during rainy seasons. Wind increases with altitude. Summit night weather is the critical variable — cold, dark, potentially windy, 04:00-06:00 arrival for sunrise.

    Is a full moon important for Kilimanjaro summit?

    Climbing Kilimanjaro during a full moon is a popular choice but not essential for summit success. Benefits of full moon climbs: (1) Natural illumination on the pre-dawn summit push (typically 00:00-06:00 ascent). (2) Dramatic photography opportunities showing moonlit glaciers and terrain. (3) Enhanced visibility reduces stumbling on loose scree. (4) Psychological comfort from natural light in darkness. Drawbacks: (1) Higher demand means crowded trails and booked-out dates — book 6+ months ahead. (2) Some operators charge premium pricing for full moon dates ($100-$300 surcharge). (3) Crowds at summit viewpoint for sunrise. (4) Stars less visible due to moon brightness. Key 2026 full moons during climbing seasons: February 3, March 5, July 31, August 29, September 27, October 27, December 26. 2027 full moons: January 25, February 23, July 20, August 18, September 17, October 16, November 15. Alternative consideration: new moon nights provide the darkest skies for stargazing but no summit illumination. Most climbers successfully summit on any moon phase — headlamps provide adequate light. The full moon preference is aesthetic rather than technical.

    Should I climb Kilimanjaro in August or September?

    Both August and September are excellent months to climb Kilimanjaro — the choice between them depends on your priorities. August advantages: (1) Peak dry season conditions — lowest rainfall, most stable weather. (2) Coldest/clearest summit views with dramatic sky colors. (3) Longest dry period confidence for weather windows. (4) School holidays mean family groups common. Disadvantages: (1) Absolute peak crowds — trails and campsites busiest of the year. (2) Highest prices — operators often charge 5-15% premium. (3) Hotels in Moshi/Arusha fully booked. (4) Advance booking essential (4-6 months minimum). September advantages: (1) Virtually identical weather to August. (2) Slightly reduced crowds as summer holidays end. (3) Prices begin declining 5-10% from peak. (4) Wildlife viewing in Serengeti improves (Great Migration) for those adding safari. (5) Generally considered the best overall climbing month by operators. Disadvantages: (1) Still peak season with substantial crowds. (2) Still requires 3-4 months advance booking. Recommendation: Book September if flexibility allows; August works well if dates are fixed around summer vacation. Either month delivers 85-90% summit success with reputable operators.

    Is it worth climbing Kilimanjaro during Christmas and New Year?

    Climbing Kilimanjaro during Christmas and New Year is popular and worthwhile despite technically falling in the short rains season. Key considerations for the Dec 22 – Jan 5 window: (1) Weather: Short rains typically ending by mid-December, weather improving into January. Clear days increasingly common. (2) Crowds: Very busy period with holiday travelers; book 6 months ahead minimum. (3) Pricing: Premium rates ($200-$500 surcharge common) due to demand. (4) Unique experience: Summit on New Year’s Eve for 00:00 celebrations at altitude is a memorable bucket-list moment. Some operators offer special NYE climbs arriving at Uhuru for midnight. (5) Hotels: Full booking required weeks in advance. (6) Cultural: Christmas celebrations in Moshi and Arusha are festive and welcoming. (7) Climate: Temperatures at summit similar to September (cold but not extreme). (8) Visibility: Generally good for summit photography as weather window opens. Practical tips: Book earliest available 7+ day route (Lemosho 8-day ideal), pay for reliable operator, bring proper gear, build 2-day weather flex into schedule, arrange NYE celebrations with operator in advance if desired. Many climbers consider Christmas-NYE climbs to be among their most memorable mountaineering experiences.

    How far ahead should I book my Kilimanjaro climb?

    Kilimanjaro booking timing depends on your target month and trip complexity. Recommended advance booking windows: (1) Peak season climbs (January-February, July-August, September): 4-6 months advance booking. Christmas/NYE specifically: 6-9 months. (2) Shoulder season climbs (June, October, early November): 2-4 months advance. (3) Off-peak climbs (March-May rainy season, November short rains): 1-2 months minimum, can sometimes book 2-3 weeks out. (4) If combining safari: Add 2-3 months to all timelines. (5) If requesting specific operators: Popular KPAP-partnered operators book 6-9 months ahead in peak season. Factors affecting booking timeline: flights are often the longest lead time (book 4-6 months ahead for best rates regardless of climb timing), international travel insurance policies with pre-existing conditions may need 30-60 days advance enrollment, Tanzania e-visa takes 3-10 business days to process so apply 1-2 months ahead. What locks in first: flights (save $200-$500 with 4+ month advance), refundable hotel nights, operator deposit (typically 20-30% at booking, balance due 60-90 days before climb). Shoulder season last-minute bookings (2-4 weeks out) can save 10-20% if dates are flexible.


    Authoritative Sources & Further Reading

    Content reflects meteorological and astronomical data from authoritative sources:

    • Tanzania Meteorological Agency (TMA) — meteo.go.tz — Kilimanjaro region climate data
    • KINAPA (Kilimanjaro National Park Authority) — Seasonal climbing regulations
    • NASA Astronomy Calendar — nasa.gov — Full moon dates 2026-2027
    • TANAPA visitor statistics — Monthly crowd data and seasonal patterns
    • Islamic Hijri Calendar — Ramadan dates and Islamic observances
    • Weather station data: Moshi Airport (KMJ), Kibo summit meteorological reference
    • Climbing season reports from: Altezza Travel, Climbing Kilimanjaro, Mount Kilimanjaro Climb, African Scenic Safaris, Tusker Trail — all KPAP-certified operators
    • Reference texts: Kilimanjaro: The Trekking Guide (Henry Stedman), Kilimanjaro and Mount Kenya Climbing and Trekking Guide (Cameron Burns)
    • Academic sources: Climate variability on Mount Kilimanjaro research papers from University of Dar es Salaam and international climate studies
    Published: March 7, 2026
    Last updated: April 19, 2026
    Next review: July 2026
    Part of the Global Summit Guide

    Back to the Master Hub

    This guide is one of 71 across 12 thematic clusters on Global Summit Guide. The master hub organizes every guide by experience tier, specific peak, skill area, and region.

    View the Hub →

    Was this helpful?

    Yes
    No
    Thanks for your feedback!
Language »