<

Category: Mountain Guides

  • Mount Meru as Kilimanjaro acclimatization

    Mount Meru as Kilimanjaro Acclimatization: Why the Meru Mountains Are Tanzania’s Best Pre-Kilimanjaro Climb | Global Summit Guide
    Mountain Climbing Guides / Tanzania

    Mount Meru as Kilimanjaro acclimatization: why the Meru mountains are Tanzania’s best pre-Kilimanjaro climb

    4,562 m
    Meru summit
    3-4 days
    Meru climb duration
    +15-25%
    Kili success boost
    $800-$1.8K
    Meru cost range
    Part of the Tanzania peaks series This acclimatization guide supports our Mount Meru master page and our Kilimanjaro climbing guide. Master guide →

    Most Kilimanjaro climbers arrive at the mountain and start climbing immediately. Approximately 60-65% of them summit successfully. The remaining 35-40% turn back due to altitude sickness, exhaustion, or weather. There’s a simple intervention that dramatically improves these odds: climb Mount Meru first. The Meru mountains at 4,562 meters provide ideal altitude acclimatization for Kilimanjaro, and climbers who do Meru before Kili typically have summit success rates 15-25 percentage points higher than those who skip it. Mount Meru is also a legitimate mountaineering objective in its own right — Tanzania’s second-highest peak, a dramatic dormant volcano in Arusha National Park, and one of the most underrated African mountain experiences. This guide explains why the Meru-then-Kili sequence works and how to plan it. For broader context see our Mount Meru master page.

    Mount Meru in context Tanzania’s overlooked second peak

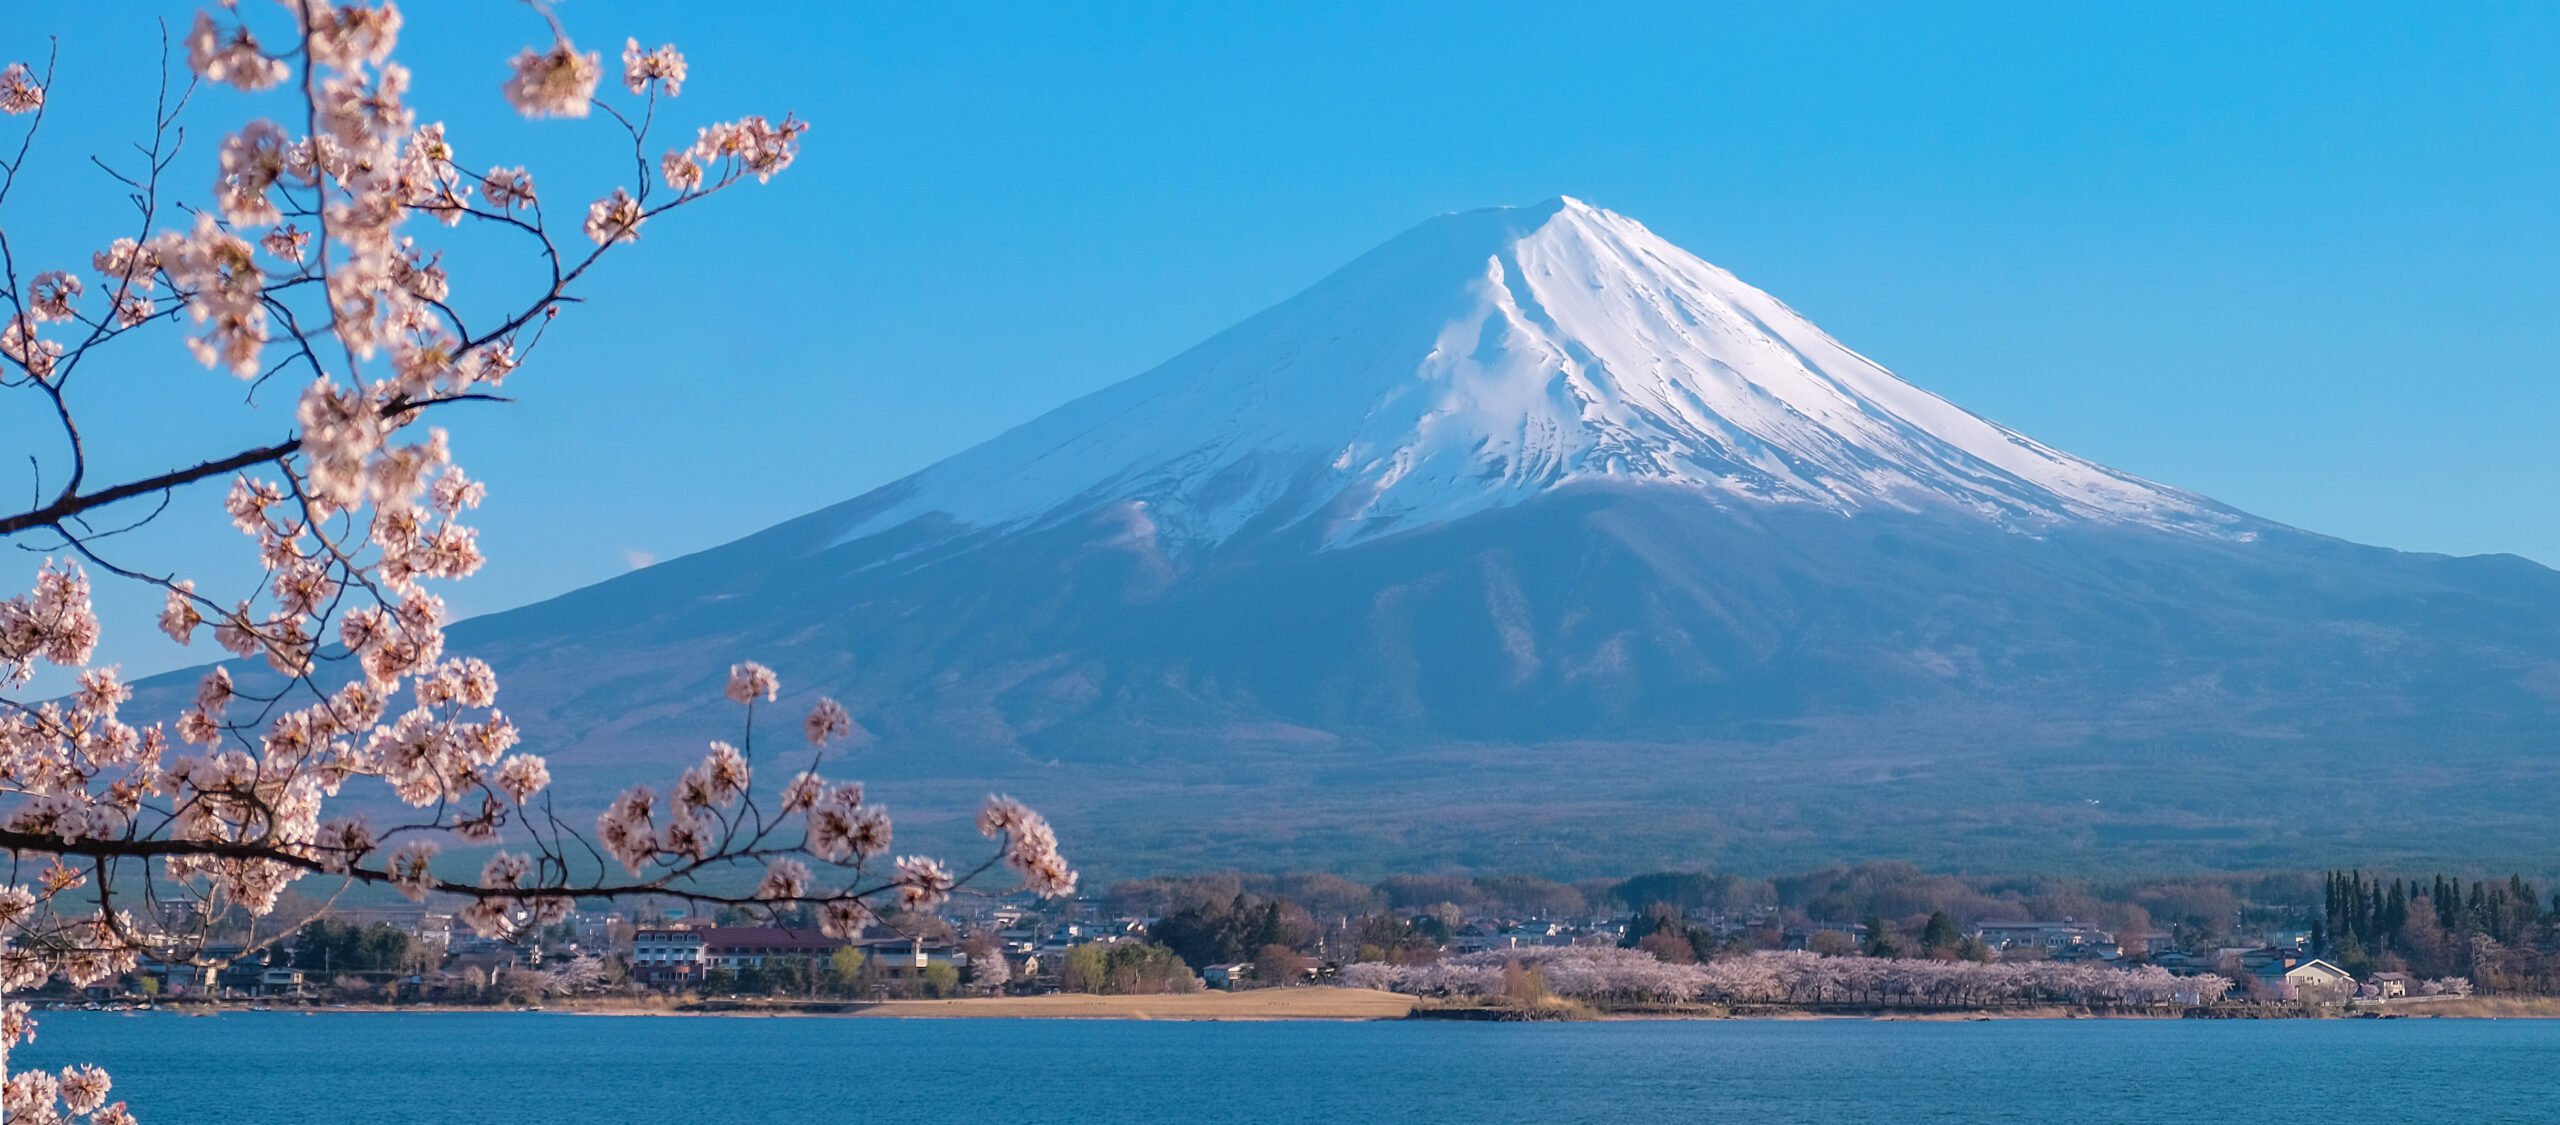
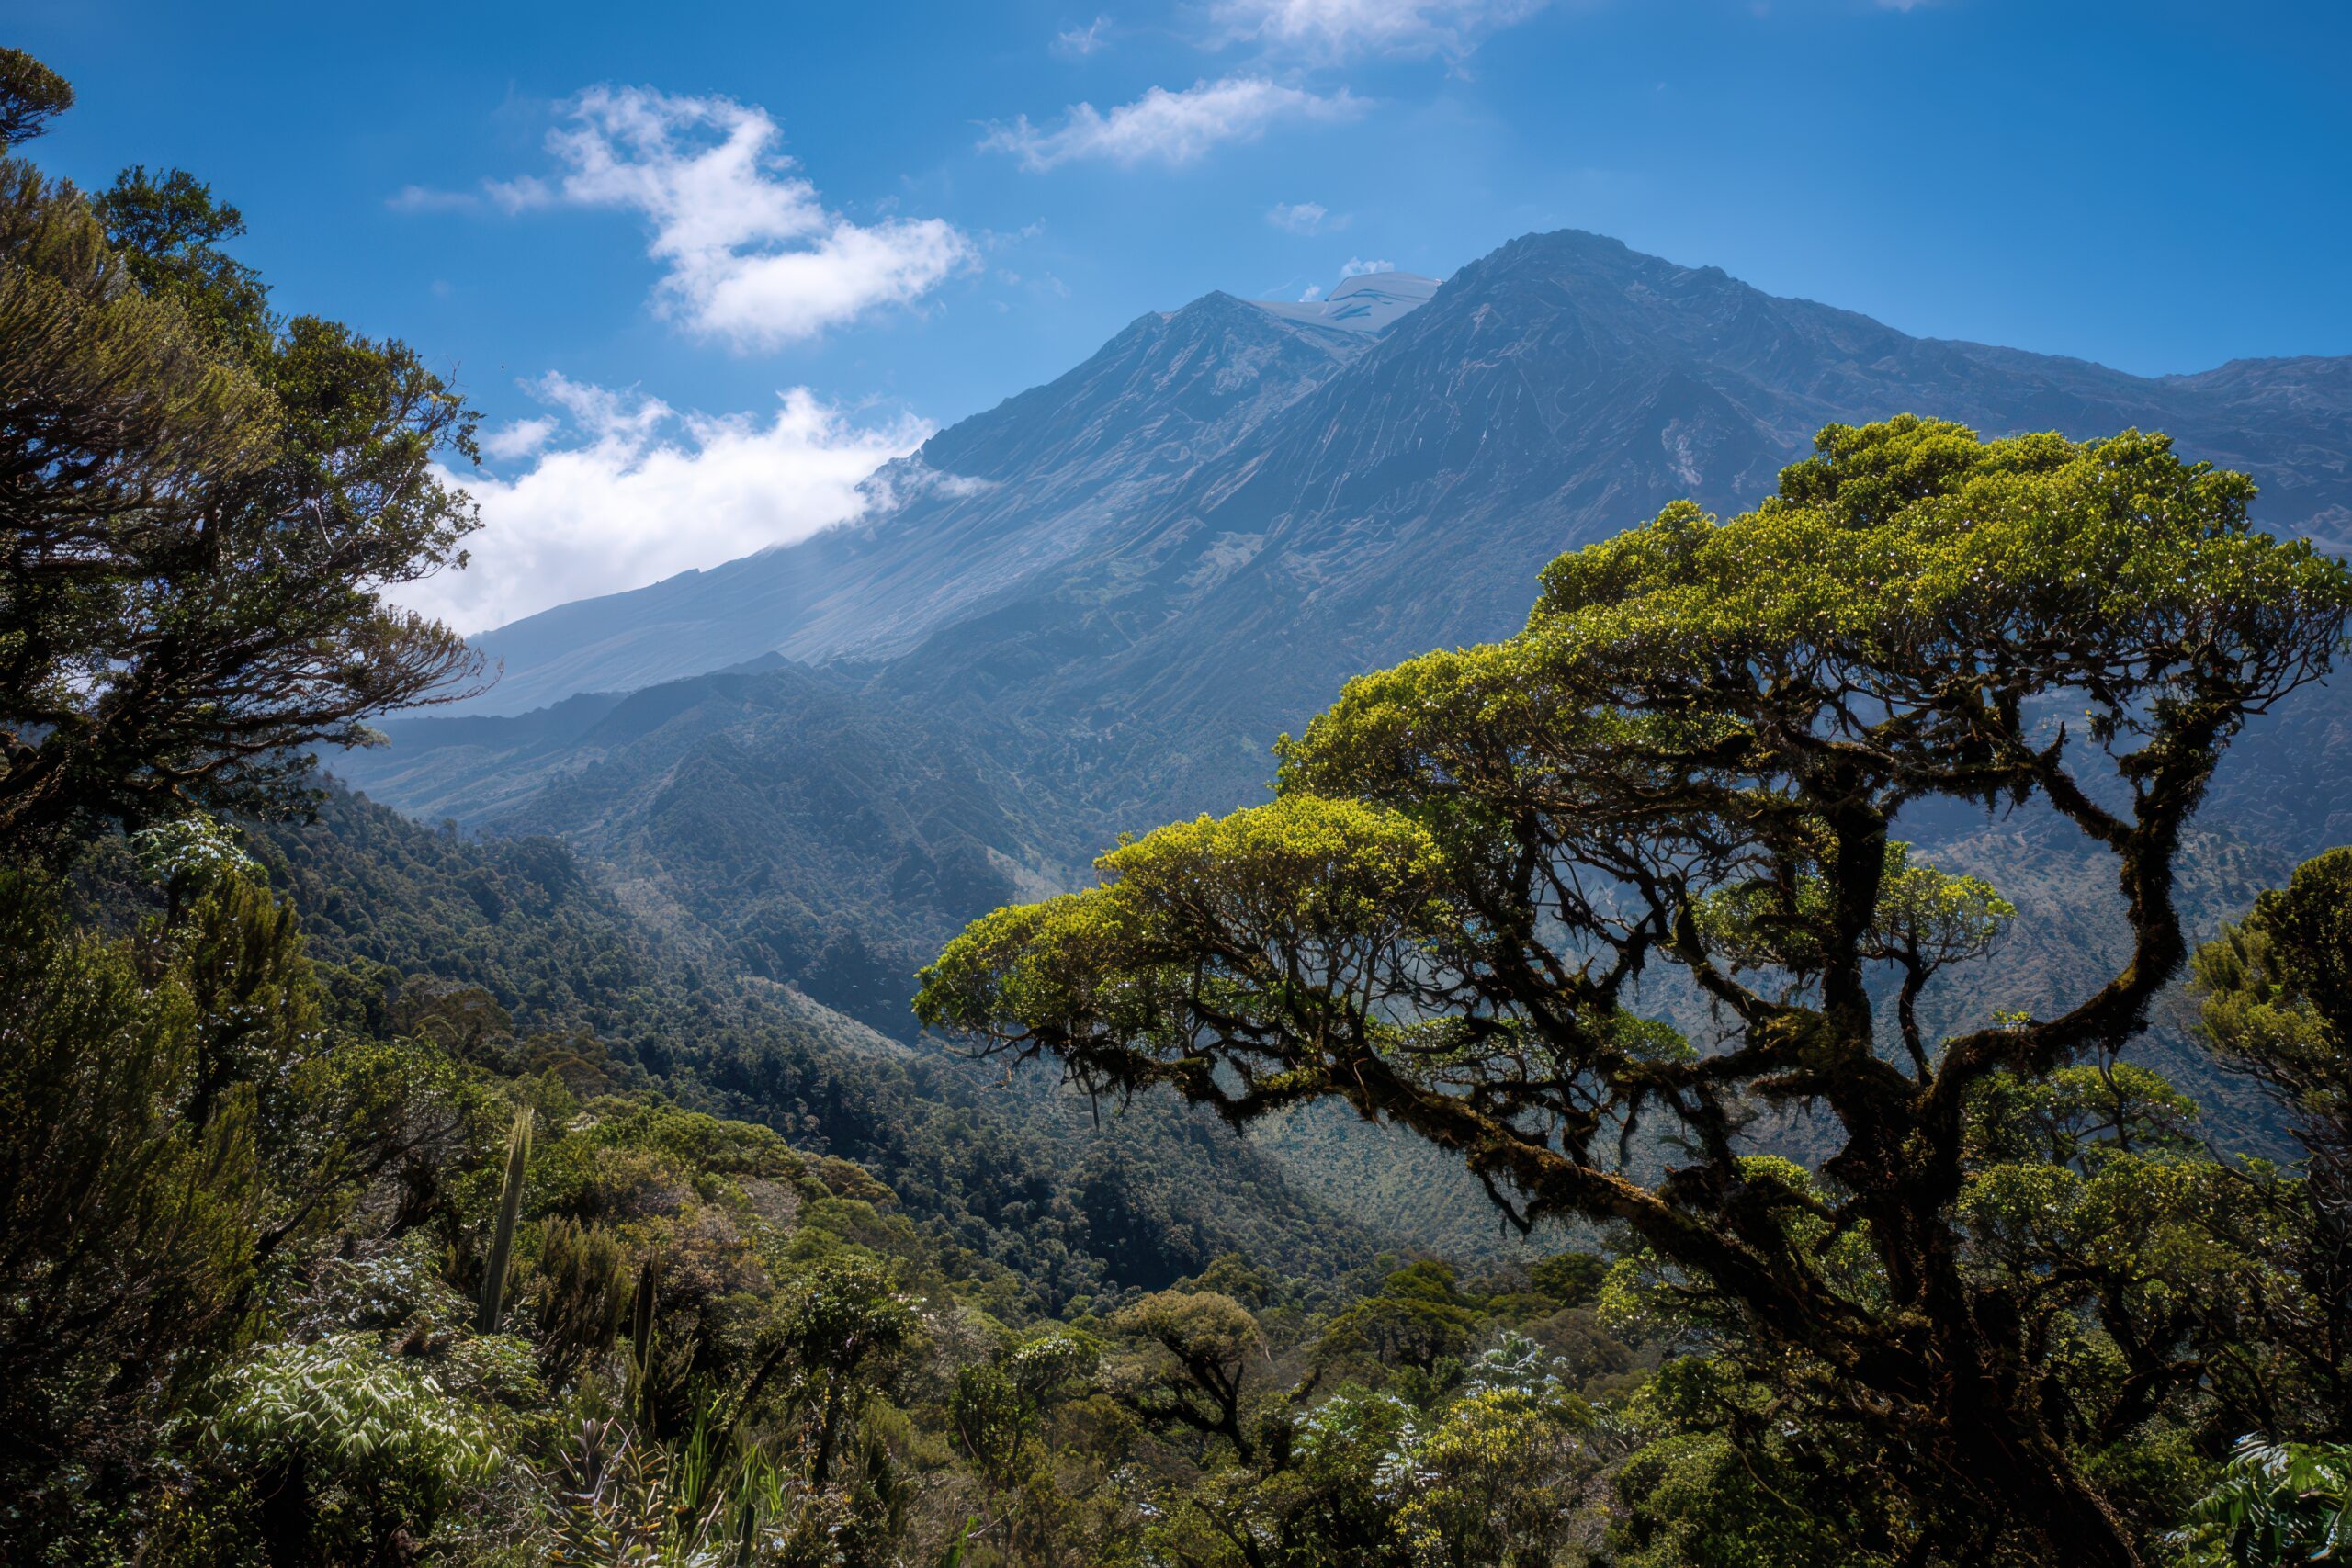
    Mount Meru is the fifth-highest mountain in Africa, the second-highest peak in Tanzania, and a dormant stratovolcano located approximately 70 kilometers west of Mount Kilimanjaro. The mountain dominates the Arusha skyline and sits at the heart of Arusha National Park — one of Tanzania’s smaller but most ecologically diverse national parks.

    Despite its proximity to Kilimanjaro and its impressive 4,562-meter elevation, Mount Meru receives a fraction of the climber traffic. Kilimanjaro sees 35,000-50,000 climbers per year; Mount Meru sees approximately 3,000-5,000. This dramatic disparity exists for a simple reason: most international visitors come to Tanzania specifically for Kilimanjaro and don’t know that adding Meru to their itinerary dramatically improves the chances of summiting their main target.

    Detail Mount Meru
    Elevation4,562 m (14,968 ft)
    Tanzania ranking2nd highest peak
    Africa ranking5th highest peak
    Distance from Kilimanjaro~70 km west
    LocationArusha National Park
    Geological typeDormant stratovolcano
    Last significant eruption~100 years ago
    Annual climbers~3,000-5,000
    Standard routeMomela Route
    Climbing duration3-4 days
    Park accessMomela Gate (45 min from Arusha)

    Why acclimatization is the difference between summiting and turning back

    Approximately 30-40% of Kilimanjaro climbers fail to summit. The single biggest reason isn’t lack of fitness or technical skill — it’s altitude sickness. Kilimanjaro’s 5,895-meter summit elevation is high enough that nearly everyone experiences some degree of altitude effects. Without proper acclimatization, those effects compound into Acute Mountain Sickness (AMS), High Altitude Pulmonary Edema (HAPE), or High Altitude Cerebral Edema (HACE) — conditions that force descent and end summit attempts.

    The standard Kilimanjaro climb structure compounds this problem. Most routes deliver climbers to summit elevation in 5-7 days, which is faster than most bodies can adapt. Even the longer Lemosho and Northern Circuit routes (8-9 days) provide marginal acclimatization compared to a proper altitude progression.

    The math that matters

    Kilimanjaro summit success rates by route duration: 5-day Marangu route ~50%, 6-day Marangu/Machame ~55-65%, 7-day Lemosho/Machame ~80%, 8-day Lemosho ~85%, 9-day Northern Circuit ~90%. The single biggest factor in these success rates is acclimatization time. Climbers who do Mount Meru first add the equivalent of 3-4 acclimatization days before Kili even begins, which is why their success rates on shorter Kili routes match the success rates of much longer Kili routes.

    Why Mount Meru works as acclimatization the four key reasons

    1.

    Ideal altitude profile

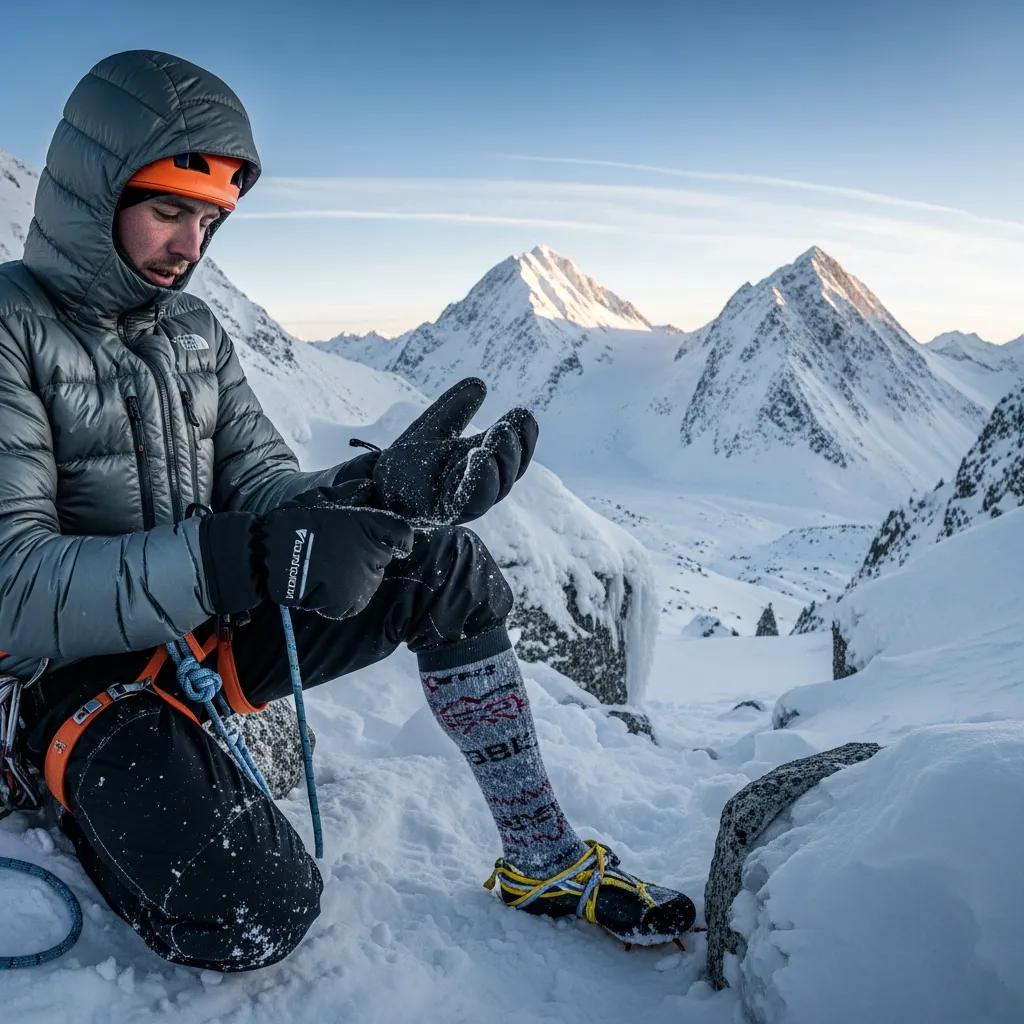
    Mount Meru’s 4,562m summit puts climbers above 4,500m for several hours, triggering the physiological adaptations needed for higher altitude success — increased red blood cell production, improved oxygen efficiency, and enhanced lung capacity.

    2.

    Sustained exposure

    The 3-4 day climb provides sustained altitude exposure rather than rapid summit-and-descent. Two nights above 2,500m and one above 3,500m create the gradient needed for meaningful acclimatization rather than just brief altitude touch.

    3.

    Perfect proximity

    The 70km distance from Kilimanjaro means climbers transition directly from Meru summit to Kilimanjaro within 1-3 days, preserving acclimatization benefits. The window for retained adaptation is roughly 1-2 weeks, which fits perfectly with the combined trip structure.

    4.

    Meaningful summit experience

    Unlike altitude tents or pre-climb hikes, Mount Meru is a real summit objective. The 4,562m peak is genuinely rewarding — climbers get a meaningful African mountain experience plus dramatic Kilimanjaro improvement. The “acclimatization” benefit is bonus value on top of an excellent climb in its own right.

    The combination of these four factors makes Mount Meru one of the best acclimatization climbs anywhere in the world. Most major mountains lack a similar “training peak” with this combination of accessibility, sustained altitude exposure, and proximity to the target summit. For comparison, Cotopaxi acclimatization for Andes climbing and the Mexican volcanoes for Aconcagua preparation are the closest analogs.

    Mount Meru in Tanzania at 4562 meters showing the dramatic dormant volcano cone in Arusha National Park where climbers acclimatize before attempting Mount Kilimanjaro the higher 5895 meter peak located 70 kilometers to the east
    Mount Meru in Arusha National Park, Tanzania — the dramatic 4,562-meter dormant volcano that provides ideal altitude acclimatization 70 kilometers west of Mount Kilimanjaro.

    The 4-day Mount Meru itinerary what each day looks like

    The standard Momela route takes 4 days from park gate to park gate. Some climbers shorten this to 3 days by skipping the second night at Miriakamba on descent, but the 4-day itinerary provides better acclimatization value and is the standard for combined Meru-Kili trips.

    1Day
    Momela Gate to Miriakamba Hut
    10 km · 4-6 hours · Wildlife-rich savanna and montane forest
    1,500m → 2,500m
    +1,000m gain

    The climb starts at Momela Gate on the eastern side of Arusha National Park. A park ranger accompanies the group due to wildlife presence — buffalo, giraffes, zebras, and occasionally elephants share the lower trail. The first day moves through dramatic savanna and into the montane forest zone. The trail is gentle and well-graded, designed to allow climbers to fully appreciate the wildlife and changing vegetation zones. Arrival at Miriakamba Hut (2,500m) in late afternoon.

    2Day
    Miriakamba to Saddle Hut
    5 km · 3-5 hours · Forest to alpine moorland transition
    2,500m → 3,570m
    +1,070m gain

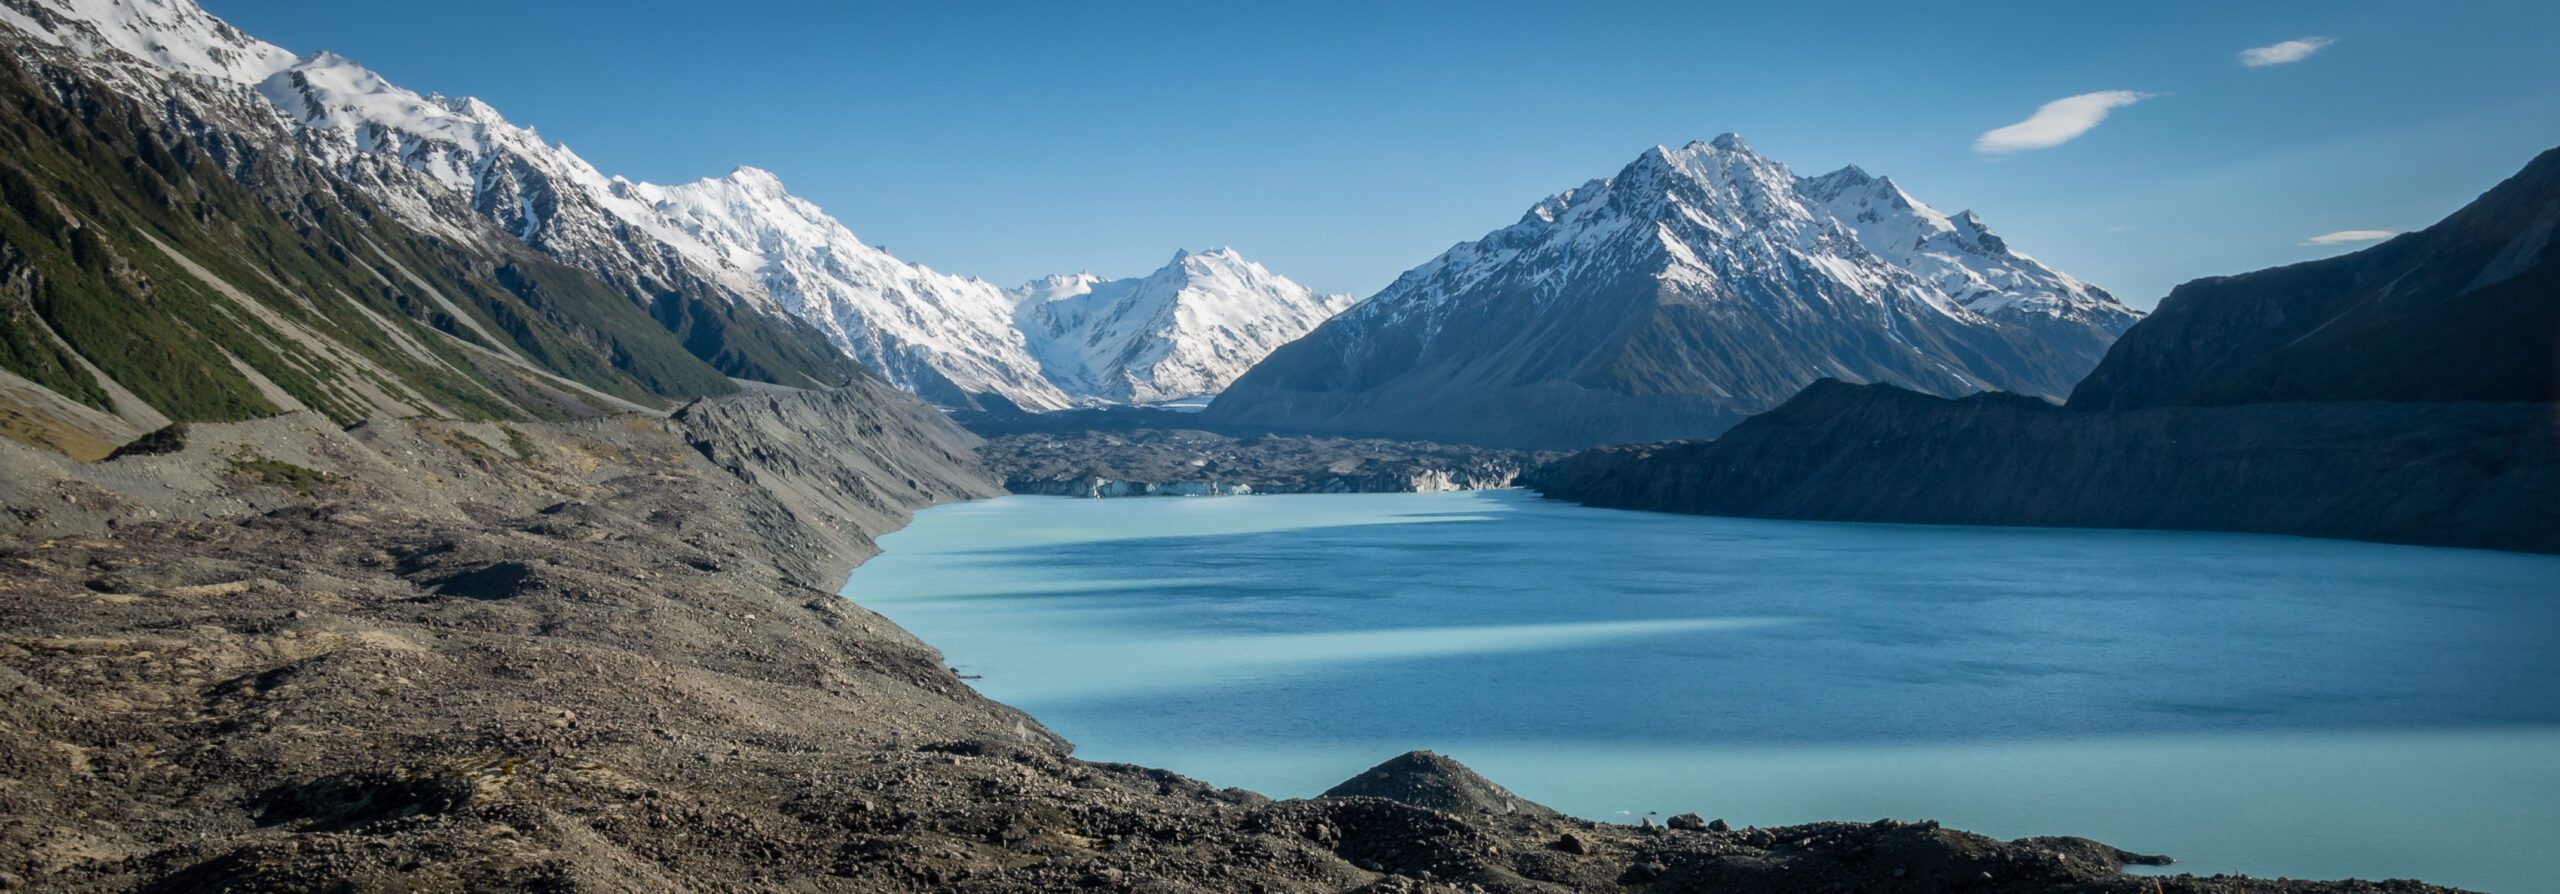
    Day 2 climbs steeply through the upper forest zone and into the open alpine moorland. The vegetation changes dramatically — giant heathers, lobelias, and senecios appear above the tree line. Views of Kilimanjaro begin to emerge as the trail climbs above the forest canopy. Saddle Hut sits in a dramatic position on the saddle between Mount Meru and the smaller Little Meru. Most climbers do an acclimatization hike up Little Meru (3,820m) in the afternoon for additional altitude exposure before the summit night.

    3Summit
    Saddle Hut to Socialist Peak summit, descend to Miriakamba
    12 km · 10-14 hours · Pre-dawn summit attempt
    3,570m → 4,562m → 2,500m
    +1,000m up, -2,000m down

    The summit day starts around 2:00 AM with a long traverse along the dramatic crescent-shaped ridge that defines Mount Meru’s geometry. The ridge is the remaining rim of the volcano after an ancient massive landslide collapsed the eastern flank. Walking along this knife-edge ridge before dawn, with Kilimanjaro silhouetted to the east and the crater dropping away thousands of meters below, is one of the most dramatic mountain experiences in Africa. Sunrise at Socialist Peak (4,562m). After the summit, the long descent retraces back to Saddle Hut and continues all the way to Miriakamba for the third night.

    4Day
    Miriakamba to Momela Gate, transfer to Kilimanjaro
    10 km · 3-4 hours descent · Then road transfer
    2,500m → 1,500m
    -1,000m down

    Final descent through forest and savanna back to the Momela Gate. Most climbers reach the gate by midday, allowing time for a celebratory lunch in Arusha and transfer to their Kilimanjaro accommodation. The acclimatization benefit transfers directly — climbers typically start their Kilimanjaro attempt within 24-48 hours of completing Meru, while red blood cell adaptation is at peak levels.

    The combined Meru + Kilimanjaro trip how the full expedition flows

    Most international climbers combining Meru with Kilimanjaro use one of two standard structures: the 10-day “compact” itinerary or the 13-day “premium” itinerary. Both produce excellent results compared to Kilimanjaro alone.

    Days 10-day compact itinerary 13-day premium itinerary
    1Arrive Kilimanjaro Airport, overnight ArushaArrive Kilimanjaro Airport, overnight Arusha
    2-5Mount Meru (4-day Momela route)Mount Meru (4-day Momela route)
    6Rest day in Moshi or ArushaRest day in Moshi or Arusha
    7-12Kilimanjaro (6-day Machame route)
    7-13Kilimanjaro (7-8 day Lemosho route)
    13/14DepartureOptional safari + departure
    The combination that actually works

    Meru + 6-day Machame Kilimanjaro produces approximately the same summit success rate as the standalone 9-day Northern Circuit Kilimanjaro — both around 85-90%. But the combination costs slightly less and provides two summit experiences instead of one. For climbers traveling internationally to Tanzania, this is dramatically better value than doing only Kilimanjaro on a longer route.

    Cost framework honest budgeting for combined trips

    Cost item Mount Meru only Meru + Kilimanjaro combined
    Park fees (Meru)$400-$600$400-$600
    Guide and porter services (Meru)$300-$600$300-$600
    Hut accommodations (Meru)Included in packageIncluded in package
    Park fees (Kilimanjaro)$800-$1,200
    Guide and porter services (Kilimanjaro)$1,000-$2,500
    Transport between mountains$50-$150
    Arusha/Moshi hotel nights$60-$200$200-$600 (multiple nights)
    Meals not on mountains$50-$100$100-$200
    International flights to JRO$800-$2,000$800-$2,000
    Tips for guides/porters$80-$150$300-$500
    TOTAL TRIP COST$1,700-$3,650$4,000-$8,300

    The math favors the combined trip: adding Mount Meru to a Kilimanjaro expedition costs an additional $800-$1,800 but increases the probability of successfully summiting Kilimanjaro by 15-25 percentage points. For a climber who has already invested $1,500+ in international flights and is paying $3,000+ for the Kilimanjaro climb itself, spending an additional 25-30% to dramatically improve summit success is excellent value. The full Kilimanjaro 2026 cost framework is in our Kilimanjaro cost guide.

    When to climb Mount Meru seasonal patterns

    Period Conditions Recommendation
    January-FebruaryDry season, warm tempsExcellent — popular window
    March-MayLong rainy seasonAvoid — trails muddy, summit views obscured
    JuneDry season returns, coolExcellent
    July-SeptemberPeak dry seasonOptimal — most stable conditions
    OctoberEnd of dry seasonVery good
    NovemberShort rainsVariable — some climbers proceed
    DecemberDrier window, holiday seasonGood but more crowded

    Mount Meru follows the same seasonal pattern as Kilimanjaro — the two dry seasons (January-February and June-October) are optimal, while the long rains in March-May should be avoided. Climbers planning a Meru + Kili combination should book during the dry windows. The full Kilimanjaro seasonal framework is in our Kilimanjaro climbing guide with detailed route comparison in our Kilimanjaro routes comparison.

    Logistics and access getting to Mount Meru

    Getting there

    International climbers fly into Kilimanjaro International Airport (JRO) which serves both Mount Meru and Mount Kilimanjaro. The airport sits between Arusha and Moshi, approximately 45 minutes from each city. Most operators include airport transfers. The drive from Arusha to the Momela Gate trailhead takes approximately 45 minutes through the eastern edge of Arusha National Park.

    Wildlife encounters

    One of Mount Meru’s distinctive features is the wildlife on the lower mountain. Day 1 of the climb passes through Arusha National Park where climbers regularly see:

    • Cape buffalo — frequently encountered on the lower trail. Generally peaceful but unpredictable.
    • Giraffes — common in the savanna sections.
    • Zebras — abundant on the lower mountain.
    • Warthogs — frequent in the savanna.
    • Black-and-white colobus monkeys — in the montane forest sections.
    • Elephants — present in the park; occasional encounters with proper guidance.

    The mandatory armed park ranger who accompanies all climbing parties exists specifically for this wildlife. The ranger is armed and trained but uses force only as a last resort — the protocol is normally to give wildlife wide berth and wait for natural movement. This is an unusual feature of African mountaineering that gives Mount Meru a distinct character from Kilimanjaro (which doesn’t have similar wildlife on its climbing routes).
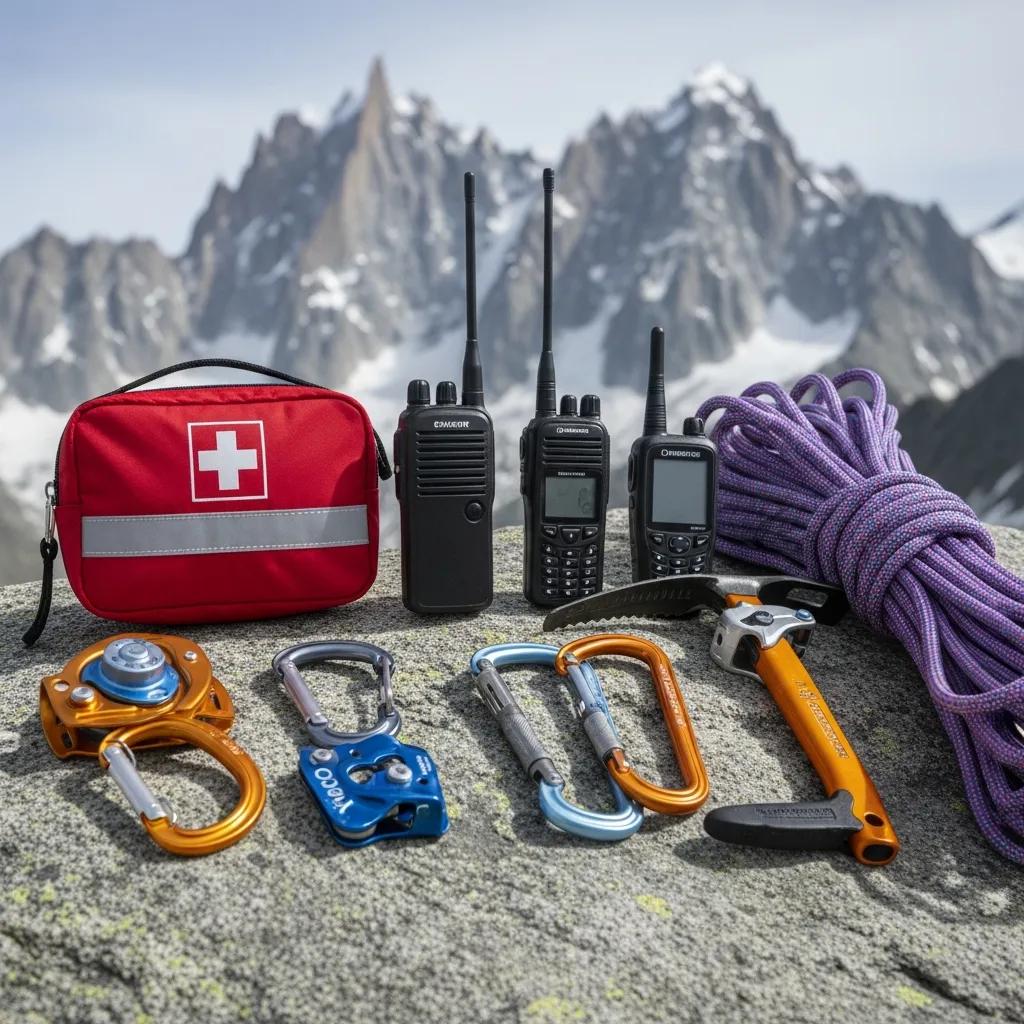
    What to bring

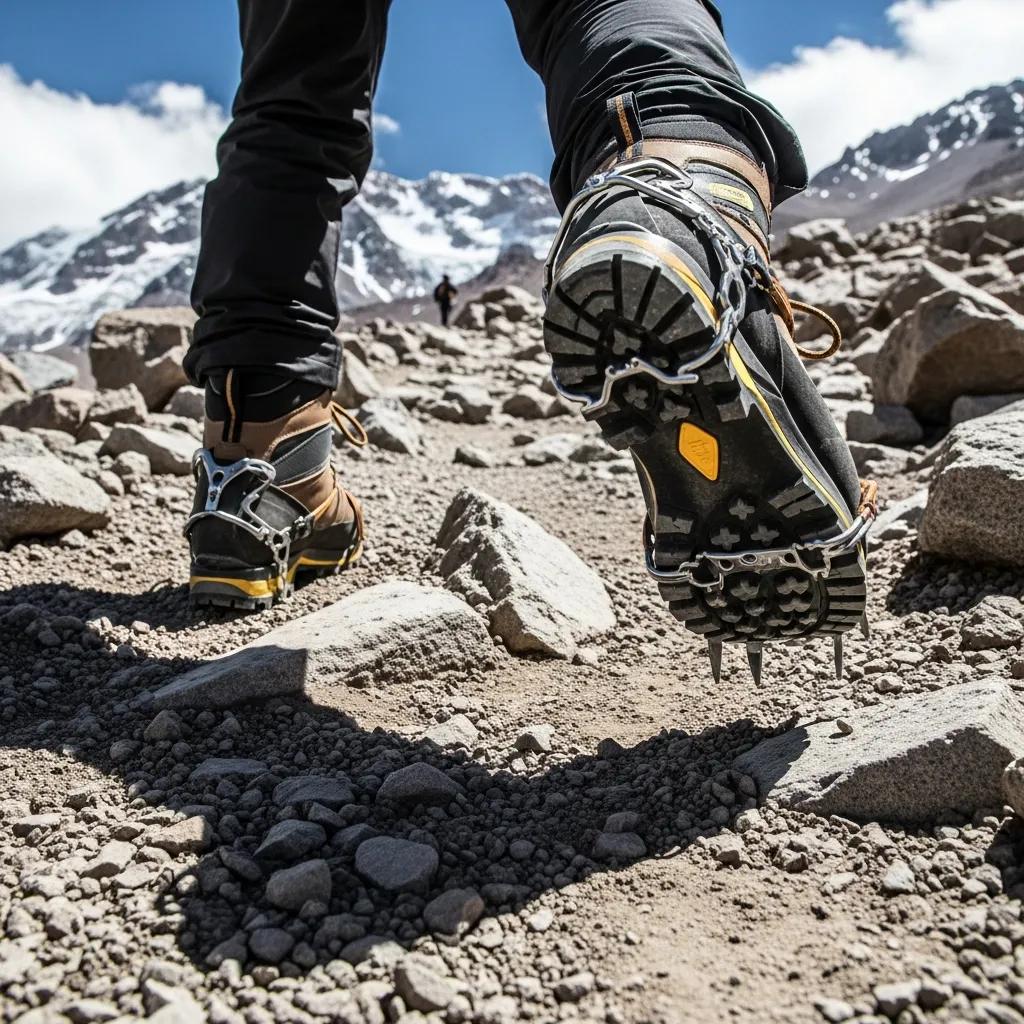
    Mount Meru gear requirements are similar to Kilimanjaro at lower altitudes — the climb tops out at 4,562m so extreme cold-weather gear isn’t needed. The basics:

    • Layered clothing system for cool nights and warm days
    • Down jacket for summit night (cold temps at 4,562m at 4 AM)
    • Mid-weight hiking boots (no mountaineering boots needed)
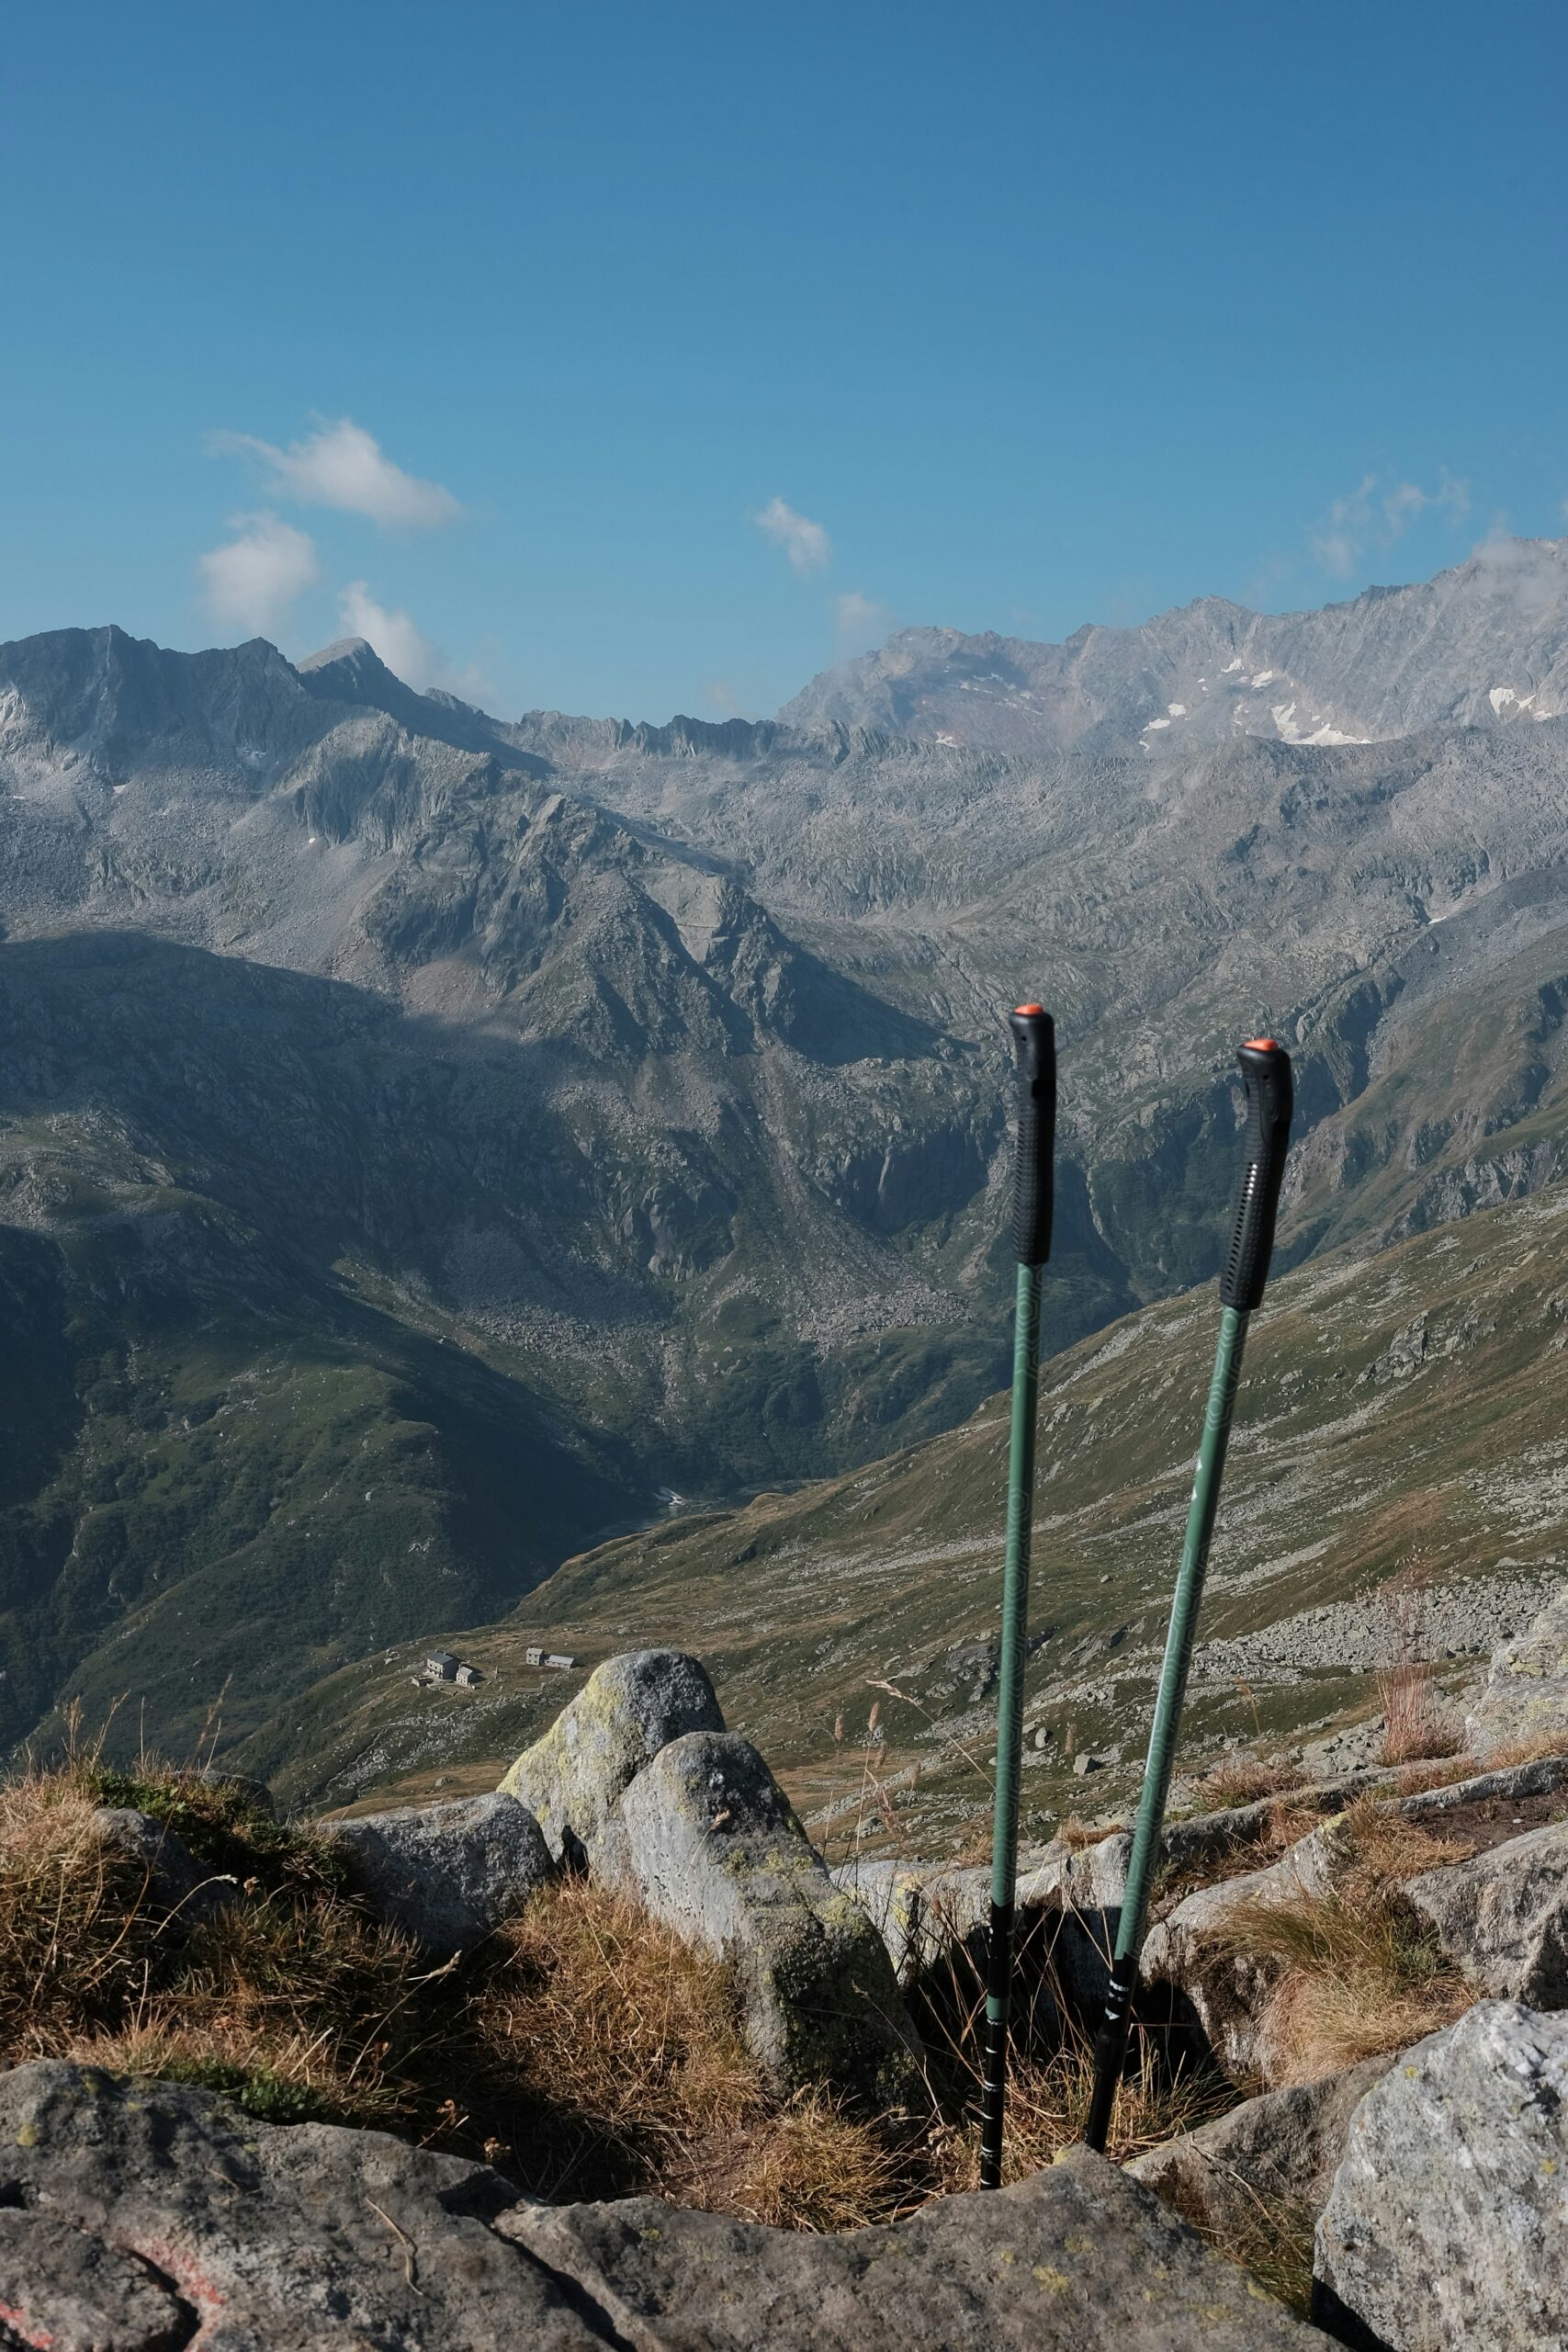
    • Trekking poles (helpful for steep summit ridge)
    • Headlamp with extra batteries (essential for summit attempt)
    • Standard hiking gear (rain shell, fleece, base layers, gloves, hat)
    • 4-season sleeping bag rated to about 20°F / -7°C

    The full equivalent Kilimanjaro gear list is in our Kilimanjaro gear list — Mount Meru requires approximately the same equipment minus the very-cold-weather items for the higher Kili summit.

    Mount Meru vs other acclimatization approaches honest comparison

    Acclimatization approach Effectiveness Cost Notes
    Mount Meru (4-day climb)★★★★★ Excellent$800-$1,800Best option — real climb, ideal altitude, perfect proximity
    Longer Kilimanjaro route (8-9 days)★★★★ Very good+$500-$1,200 vs shorter KiliEffective but adds significant cost and time to one climb
    Mount Kenya Lenana trekking peak★★★ Good$1,500-$2,5004,985m, but logistics complex from Tanzania
    Pre-trip altitude tent (8 weeks)★★ Moderate$1,000-$2,000Time-consuming, less proven effect, complex to use
    Diamox (acetazolamide) only★★ Pharmacological aid$30-$80Helps prevent AMS but doesn’t replace physical acclimatization
    Multiple high-altitude day hikes at home★★ VariableFree-$200Helps but depends entirely on local altitude availability
    No acclimatization preparation★ RiskyFree~50-65% Kili summit success rate

    Mount Meru is the clear best-value acclimatization option for international climbers attempting Kilimanjaro. The combination of real-summit experience, ideal altitude exposure, perfect proximity to Kili, and reasonable cost makes it dramatically better than alternatives.

    Who should do Mount Meru before Kilimanjaro honest fit assessment

    Mount Meru is essential for you if…

    • You’re climbing Kilimanjaro on a shorter route (5-7 days)
    • You’re from a low-altitude home environment (sea level to 1,500m)
    • You have no prior high-altitude experience above 3,000m
    • You want the highest possible Kilimanjaro summit success rate
    • You have time for 10-14 days in Tanzania rather than just 7-8
    • You’re traveling internationally and want to maximize value per trip
    • You like wildlife — Meru’s lower mountain offers wildlife experiences Kilimanjaro doesn’t

    Mount Meru is less critical if…

    • You’re climbing Kilimanjaro on the longer 8-9 day Northern Circuit or full Lemosho
    • You live at altitude (3,000m+) — you’re already acclimatized to a meaningful degree
    • You have recent (within 6 months) high-altitude experience above 4,000m
    • You’re severely time-constrained to a single mountain in Tanzania
    • You have specific medical reasons to avoid extended high-altitude exposure
    The honest recommendation

    For first-time international climbers attempting Kilimanjaro from sea-level environments, adding Mount Meru is one of the highest-value decisions you can make. The combination of dramatically improved summit success rate (15-25 percentage points), a meaningful additional summit experience, and the reasonable cost (~$1,000 extra) makes it consistently the right choice. The only reason to skip Meru is severe time constraint — if you have 14 days in Tanzania, do both mountains.

    ★ Tanzania Climbing Resources

    The complete Meru + Kilimanjaro framework

    Detailed mountain coverage including routes, gear, training, and the broader Tanzanian climbing context.

    Mount Meru master →

    The bottom line on Mount Meru as Kilimanjaro acclimatization

    Mount Meru at 4,562 meters is Tanzania’s second-highest peak and one of the best acclimatization climbs anywhere in the world for Kilimanjaro preparation. The mountain’s combination of ideal altitude profile, sustained 3-4 day exposure, perfect 70-kilometer proximity to Kilimanjaro, and meaningful summit experience makes it the optimal pre-Kilimanjaro climb for international visitors. Climbers who do Meru before Kilimanjaro typically achieve summit success rates 15-25 percentage points higher than those who skip it — turning a 60-65% standalone Kilimanjaro success rate into an 85-90% rate. The standard 4-day Momela route adds approximately $800-$1,800 USD to the total Tanzania trip cost — exceptional value given the dramatic improvement in summit probability. Beyond the acclimatization function, Mount Meru is a legitimate African mountaineering objective in its own right. The dramatic crescent-shaped summit ridge formed by an ancient volcanic landslide produces one of the most distinctive mountain experiences in Africa, the wildlife encounters on the lower mountain (buffalo, giraffes, occasionally elephants) add a uniquely African dimension absent from Kilimanjaro, and the smaller crowds compared to Kilimanjaro produce a more wild experience. Best season is the same as Kilimanjaro — January-February and June-October dry seasons. Most international climbers fly into Kilimanjaro International Airport (JRO) and use Arusha as the base city for both climbs. For climbers arriving from sea-level environments without prior high-altitude experience, doing Mount Meru before Kilimanjaro is one of the highest-value decisions in trip planning. The full Mount Meru framework is in our Mount Meru master page, with detailed Kilimanjaro coverage in our Kilimanjaro climbing guide, routes comparison, 8-week training plan, gear list, and 2026 cost framework. Broader African mountains context is in our highest mountains in Africa ranking.

    Frequently asked questions

    Should I climb Mount Meru before Kilimanjaro?

    Yes, climbing Mount Meru before Kilimanjaro is one of the most effective things you can do to improve your Kilimanjaro summit success rate. Mount Meru at 4,562 meters provides ideal altitude acclimatization that prepares your body for the higher Kilimanjaro summit at 5,895 meters. Climbers who do Meru before Kilimanjaro typically have summit success rates 15 to 25 percentage points higher than those climbing Kilimanjaro without prior acclimatization. The combined Meru-Kilimanjaro trip typically takes 10 to 14 days total and adds approximately $800 to $1,500 USD to the trip cost — exceptional value given the dramatic improvement in success probability.

    What is Mount Meru’s elevation?

    Mount Meru in Tanzania is 4,562 meters (14,968 feet) high. It is the fifth-highest mountain in Africa and the second-highest peak in Tanzania after Kilimanjaro. The mountain is located in Arusha National Park, approximately 70 kilometers west of Mount Kilimanjaro. Mount Meru is a dormant stratovolcano with its last significant eruption occurring approximately 100 years ago. The summit, known as Socialist Peak, sits on the dramatic crescent-shaped ridge that remains after a massive ancient landslide collapsed the original eastern flank of the volcano.

    How long does it take to climb Mount Meru?

    Mount Meru takes 3 to 4 days to climb via the standard Momela route. Most expeditions follow a 4-day itinerary: Day 1 from the Momela Gate at 1,500m to Miriakamba Hut at 2,500m through wildlife-rich savanna and montane forest. Day 2 from Miriakamba to Saddle Hut at 3,570m. Day 3 is the summit attempt starting around 2 AM and reaching Socialist Peak at 4,562m around sunrise, then descending all the way back to Miriakamba or out. Day 4 completes the descent to the park gate. The 3-day variant skips the second night at Miriakamba on descent. Some climbers add an extra acclimatization day at Saddle Hut for additional altitude preparation.

    Where is Mount Meru located?

    Mount Meru is located in Arusha National Park in northern Tanzania, approximately 70 kilometers west of Mount Kilimanjaro and 25 kilometers north of the city of Arusha. The mountain dominates the Arusha skyline and is the centerpiece of Arusha National Park, one of Tanzania’s smaller but most diverse national parks. The park includes savanna, montane forest, alpine moorland, and the dramatic volcanic crater landscape on the upper mountain. Climbers approach Mount Meru from the Momela Gate on the eastern side of the park, accessible by road from Arusha in approximately 45 minutes.

    How difficult is Mount Meru?

    Mount Meru is technically straightforward but physically demanding. The standard route involves no technical climbing – it is a long hike on well-defined trails with one section of moderate scrambling near the summit. The main difficulty is the altitude (4,562m at summit) and the long summit day distance and elevation. The final summit ridge has exposed sections that require careful footing but no rope or technical equipment. Most fit hikers without prior altitude experience can complete the climb successfully, though summit success rates improve dramatically with proper acclimatization. The climb is significantly easier than Kilimanjaro overall but the summit day is comparable in physical demand.

    Why is Mount Meru good acclimatization for Kilimanjaro?

    Mount Meru is excellent Kilimanjaro acclimatization for four key reasons. First, the 4,562m summit elevation puts climbers above 4,500m for several hours, triggering the physiological adaptations needed for higher altitude success. Second, the 3-4 day climb structure provides sustained altitude exposure rather than rapid summit-and-descent. Third, the proximity to Kilimanjaro means climbers can transition directly from Meru to Kilimanjaro within 1-3 days, preserving acclimatization benefits. Fourth, Meru itself is a meaningful summit experience rather than just a training peak. The combined Meru-Kilimanjaro itinerary has been shown to improve Kilimanjaro summit success rates by 15-25 percentage points compared to direct Kilimanjaro attempts.

    How much does Mount Meru cost?

    Mount Meru typically costs $800 to $1,800 USD for a 3-4 day guided climb. The cost includes park fees (approximately $100/day plus a ranger fee), guide and porter services, hut accommodations, meals on the mountain, and transport from Arusha. The price is similar to Kilimanjaro per day but the climb itself is shorter. A combined Meru-Kilimanjaro package typically costs $2,500 to $5,500 USD total for the full 10-14 day expedition including both mountains. International flights to Kilimanjaro International Airport (JRO) add $800-$2,000 USD depending on origin. Mount Meru offers excellent value for the altitude preparation it provides.

  • Unforgettable Views Await on Your Mount Fuji Climb

    Unforgettable Views Await on Your Mount Fuji Climb

    Unforgettable Views Await on Your Mount Fuji Climb (2026) | Global Summit Guide
    Cluster 11 · Japan & Local · Updated April 2026

    Unforgettable Views Await on Your Mount Fuji Climb

    The scenic guide to Japan’s sacred peak — Chureito Pagoda’s iconic view, the Five Lakes, the goraiko sunrise, the sea of clouds phenomenon, and the visual moments that have inspired 1,400 years of Japanese art.

    3,776 m
    Summit
    elevation
    5
    Fuji
    Five Lakes
    398
    Steps to
    Chureito
    200 km
    Summit
    visibility
    Global Summit Guide A guide in Cluster 11 · Japan & Local View master hub →

    Mount Fuji is not just a mountain — it is a visual icon that has shaped Japanese art, literature, and spirituality for centuries. From Hokusai’s legendary woodblock prints to modern Instagram posts, Fuji’s near-perfect volcanic cone has become one of the world’s most recognizable images. This guide covers what you’ll actually see on and around Fuji — the iconic Chureito Pagoda vantage, the five lakes that mirror the mountain, the goraiko sunrise from the summit, the spectacular sea of clouds phenomenon, and the five ecological zones you’ll traverse during the climb. Whether you’re climbing to the top or photographing from a distance, this is the scenic companion to our operational Mount Fuji climbing guide.

    How this guide was built

    Viewpoint data verified against Yamanashi Prefecture Tourism materials and Japan National Tourism Organization recommendations. Photography timing confirmed through Japan Meteorological Agency sunrise/sunset tables for Fuji’s coordinates. Cultural context draws from UNESCO World Heritage designation materials and Hokusai catalogue research. Ecological zones referenced against Japanese Ministry of the Environment classifications. Reviewed by Japanese photography guides and Fuji Five Lakes tourism authorities. Fact-check date: April 19, 2026.

    The Most Iconic Fuji View: Chureito Pagoda

    The Quintessential Japan Image

    忠霊塔 · Chureito PagodaThe five-story red pagoda that frames Mount Fuji

    If you’ve seen one image of Japan, it’s probably this one. Chureito Pagoda sits on a hillside in Arakurayama Sengen Park, a five-story vermilion tower built in 1963 as a war memorial. From a viewing platform 398 stone steps above the park entrance, the pagoda frames Mount Fuji in what has become the most photographed view in Japan. Cherry blossoms frame the scene in April. Golden light transforms it at sunrise. It’s featured on travel posters, magazine covers, and countless photos — but seeing it in person still exceeds expectations.

    01
    Most Iconic · 398-Step Climb

    Chureito Pagoda Viewing Platform

    Arakurayama Sengen Park · Fujiyoshida · Peak bloom late March-mid April

    The viewing platform sits above the pagoda, positioned to capture pagoda and Fuji together. Telephoto lens (200-400mm) compresses perspective to make Fuji appear closer than it actually is. Wide angle captures full scene including cherry blossoms and pagoda architecture.

    Best times: Sunrise (05:00-07:00) provides golden light and lowest haze. Cherry blossom season (late March-mid April) is the peak photography window but also maximum crowds — expect hundreds of photographers at sunrise. Autumn (October-November) offers cooler temps and fall color contrast. Arrive at least 2 hours early during cherry blossom season to claim a platform spot.

    Access from Tokyo: Fujikyu Line train to Shimoyoshida Station (2.5 hours from Shinjuku via Kawaguchiko), 15-minute walk to park entrance, 20-30 minute climb to platform. Free entry.


    The Fuji Five Lakes: Five Perspectives on One Mountain

    Clustered at Fuji’s northern base, the Fuji Five Lakes (Fujigoko, 富士五湖) are volcanic lakes each offering a distinct perspective on the mountain. Together they form the premier Fuji-viewing region — and the Lake Kawaguchi area is the most accessible from Tokyo.

    Kawaguchi
    河口湖

    Most accessible. Home to sakasa-Fuji reflection view and Oishi Park lavender.

    Yamanaka
    山中湖

    Largest lake, closest to Fuji, best sunset photography.

    Saiko
    西湖

    Quieter, traditional village atmosphere, fishing focus.

    Shoji
    精進湖

    Smallest lake, “Mother and Child” double-Fuji illusion.

    Motosu
    本栖湖

    ¥1,000 banknote view, deepest at 121m, less-developed.

    02
    Most Visited Lake · Best Access

    Lake Kawaguchi (河口湖)

    Fujikyu Line direct from Tokyo · Sakasa-Fuji reflection

    Lake Kawaguchi is the Fuji Five Lakes’ most visited destination. Direct train connection from Tokyo Shinjuku via Kawaguchiko makes it achievable as a day trip. The north shore offers the famous sakasa-Fuji (逆さ富士) — upside-down Fuji — when the lake reflects the mountain’s perfect image on calm mornings. Oishi Park on the north shore features lavender fields blooming June-July with Fuji backdrop. Kawaguchiko Music Forest and other museums provide cultural experiences.

    Best photography spots on the lake: (1) Nakaba Park north shore for sakasa-Fuji mirror shots at sunrise. (2) Oishi Park lavender fields during June-July bloom with Fuji behind. (3) Kawaguchiko Tenjoyama Park Ropeway for elevated lake-and-Fuji panorama. (4) Northern rocky shorelines for foreground-interest compositions.

    03
    Closest to Fuji · Highest Elevation

    Lake Yamanaka (山中湖)

    980m elevation · Sunset photography ideal

    Lake Yamanaka is the largest and highest of the Fuji Five Lakes at 980m elevation. Its proximity to Fuji (8km distant) means the mountain dominates the horizon view. Popular with watersports enthusiasts (swan boats, paddleboarding, sailing) and photographers. Evening light on Fuji from Yamanaka is particularly dramatic — the mountain often catches last sunlight after surrounding valleys have fallen into shadow.

    Accessible from Tokyo via bus from Shinjuku or train to Fujisan Station then local bus. The north shore offers best sunset photography positions. Swan boat rides on Yamanaka are a quintessential summer Japan experience.

    04
    The ¥1,000 Banknote View

    Lake Motosu (本栖湖)

    Crater lake · Cherry blossom reflection famous

    Lake Motosu features on Japan’s ¥1,000 banknote — the view from the lake showing Mount Fuji rising above cherry blossoms was photographed by Okada Koyo in 1935 and has been the currency design element since 2004. The lake is a volcanic crater with depths to 121m, Japan’s 9th deepest. Less developed than Kawaguchi, with camping and nature focus.

    Best photo position: Southwestern shore near the banknote viewpoint marker. Access via car is easiest; bus routes limited but available from Kawaguchiko. Capture the banknote view with cherry blossom framing for the quintessential Japanese currency image.


    From the Summit: What 3,776 Meters Reveals

    Climbing to Uhuru Peak of Mount Fuji rewards you with views unmatched anywhere else in Japan. The summit offers 360-degree panoramas extending up to 200 kilometers on exceptionally clear days.

    05
    The Reward for Climbing

    Goraiko (御来光) Sunrise

    “The arrival of light” · The sacred summit tradition

    The Japanese word goraiko means “the arrival of light” — the name given to sunrise viewed from Mount Fuji’s summit. For over 1,400 years, Japanese pilgrims have climbed Fuji specifically to witness dawn from the peak. Under 2026 regulations requiring mountain hut stays, goraiko is a mandatory overnight experience — you cannot bullet-climb through the night for sunrise anymore.

    The moment: stars begin to fade around 04:15 AM, followed by deep blue sky colors. Golden light breaks across the eastern horizon at approximately 04:30-05:00 AM depending on date. The first direct sunlight hits Fuji’s summit as it rises above the Pacific Ocean horizon. Climbers at 3,776m stand above essentially all of Japan’s geography. Clear summit sunrise occurs in approximately 30-40% of climb attempts — clouds frequently obscure views even after perfect weather forecasts.

    06
    Walking the Crater Rim

    Ohachimeguri (お鉢巡り) Crater Walk

    500m wide crater · 8 named peaks · 60-90 min walk

    The summit of Fuji is actually the rim of a 500-meter-wide, 250-meter-deep volcanic crater (Ohachi). The crater rim walk — called Ohachimeguri — circles the entire summit, passing eight named peaks over approximately 60-90 minutes. True summit is at Kengamine Peak (3,776m). Each peak around the rim has religious significance, with shrines, stone markers, and pilgrim offerings.

    What you’ll see on the walk: (1) Dramatic views down into the dormant crater (last eruption 1707). (2) Small year-round snowfields on north-facing slopes. (3) Kusushi Jinja — summit shrine of Sengen Taisha at 3,715m. (4) Traditional weather station ruins at Kengamine (closed 2004). (5) Centuries of pilgrimage artifacts. (6) Most spectacular 360-degree views available anywhere in Japan.

    07
    Meteorological Wonder

    Unkai (雲海) Sea of Clouds

    Cloud ocean below summit · 40-60% occurrence rate

    The sea of clouds (unkai) is a spectacular phenomenon where clouds form a layer below Fuji’s summit elevation, creating the visual illusion of Fuji as an island rising from a white ocean. Formed by temperature inversions — warm air trapping cooler moisture below — clouds stabilize at 2,000-3,000m, leaving summit climbers literally above the clouds.

    Occurrence rate: approximately 40-60% of summit visits encounter some form of cloud layer below; full horizon-to-horizon sea of clouds occurs in about 20-30% of visits. Most dramatic at sunrise when low-angle sunlight paints the cloud surface golden. When present, the sea of clouds transforms the summit experience from a mountain view into an otherworldly perspective.

    08
    Fuji Casts Its Own Shadow

    The Shadow of Fuji

    Triangular summit shadow · 15-20 minute window after sunrise

    At sunrise from the summit, Fuji casts its distinctive perfect pyramid-shaped shadow westward onto the atmosphere and any cloud layer below. The shadow appears as a dark triangle stretching dozens of kilometers from the mountain, bordered by warm morning light. Lasts approximately 15-20 minutes after sunrise before the sun rises high enough to dissolve the effect.

    Photographically: wide-angle lenses capture the full shadow extent. Long exposures blur any cloud movement for dreamy effect. The shadow is visible from Fuji’s eastern rim peaks, making early summit arrival on the east side essential for capturing this phenomenon. Many climbers miss the shadow because they’re focused on the sunrise itself — turn around and look west.


    The Five Ecosystem Zones: Five Worlds in One Climb

    Climbing Mount Fuji traverses five distinct ecological zones — from deciduous forests at the base to alpine desert at the summit. The transitions create one of Japan’s most dramatic vegetational progressions compressed into a single day’s climb.

    Mount Fuji’s Five Ecological Zones

    800–1,600m
    Deciduous
    1,600–2,000m
    Mixed Forest
    2,000–2,500m
    Subalpine
    2,500–3,200m
    Alpine Scrub
    3,200–3,776m
    Alpine Desert
    • Deciduous forest (800-1,600m): Oak, maple, beech forests. Spectacular autumn colors October-November. Typically driven through on Fuji Subaru Line rather than walked.
    • Temperate mixed forest (1,600-2,000m): Larch, birch, rhododendron mix. Wildflower blooms June-July. Subashiri Trail 5th Station (2,000m) begins here.
    • Subalpine coniferous (2,000-2,500m): Dense pine and fir. Yoshida 5th Station (2,305m) in this zone. Temperatures noticeably cooler.
    • Alpine scrub (2,500-3,200m): Stunted pine, shrubs, volcanic rock dominating. Most trail sections pass through here. Mountain huts cluster in this band.
    • Alpine desert (3,200-3,776m): Barren volcanic landscape, scattered lichen, dramatic red-black rock and scree. Upper huts and summit approach. Moonscape aesthetic.

    The ecological transition is most noticeable on Subashiri Trail, which begins in forest and emerges dramatically above the tree line. On Yoshida Trail, climbers skip the lower forest zones via the bus to 2,305m 5th Station.


    Seasonal Fuji Views: Year-Round Different Faces

    Mount Fuji presents different aesthetics through each of Japan’s four seasons. While climbing is restricted to summer, photography opportunities exist year-round from distant viewpoints.

    Season

    Spring

    Late March – April

    Cherry blossom season. Fuji framed by sakura creates iconic image. Chureito Pagoda peak photography. Still snow-capped for dramatic contrast.

    Season

    Summer

    July – August

    Climbing season. Mountain huts open, trails accessible. Summit views possible. Atmospheric haze can reduce distant visibility. Lavender blooms at Oishi Park June-July.

    Season

    Autumn

    October – November

    Fall colors. Japanese maple foreground with Fuji creates classic landscape. Clearer air than summer. Fewer crowds at viewpoints. First snow typically dusts peak.

    Season

    Winter

    December – February

    Snow-capped classic. Clearest atmospheric conditions of year. Sharpest views from distant Tokyo. Mountain climbing closed but photography optimal.

    Cherry blossom + Fuji: the ultimate Japan shot

    Peak cherry blossom timing varies 5-10 days year-to-year but typically runs late March to mid April in the Fuji region. Target destinations: (1) Chureito Pagoda — the iconic image. (2) Lake Kawaguchi Oishi Park shoreline. (3) Arakura Fuji Sengen Shrine grounds. (4) Oishi Park on Lake Kawaguchi’s north shore. Peak bloom lasts only 7-10 days — monitor Japan Weather Association’s sakura forecast (sakura.weathermap.jp) starting mid-February. Weekends during peak bloom see extreme crowds at all major viewpoints. Weekday early-morning visits are essential for photography.


    Distant Fuji Viewpoints: From Tokyo to Yokohama

    For travelers who don’t climb or visit the Fuji Five Lakes directly, Mount Fuji can still be photographed from the greater Tokyo region on clear days.

    09
    From Tokyo’s Center

    Tokyo Skytree & Observatory Decks

    100km distant · 30% annual visibility

    Tokyo Skytree (634m), Tokyo Tower (333m), Roppongi Hills Observatory (270m), and Shinjuku’s Tokyo Metropolitan Government Building (202m) all provide Fuji views on clear days. Annual visibility approximately 30% — best December through February, worst June through August. Early morning before urban pollution builds offers best odds.

    10
    Traditional Onsen Town Views

    Hakone Lake Ashi

    Classic ryokan stays · Fuji over volcanic caldera lake

    Hakone offers traditional ryokan stays with Fuji views across Lake Ashi. The red torii gate of Hakone Shrine standing in the lake with Fuji rising behind is another iconic Japan image. Accessible from Tokyo in 90 minutes via Odakyu Romance Car. Combine with onsen (hot spring) bathing for quintessential Japanese travel experience.

    11
    Japan’s Longest Suspension Bridge

    Mishima Skywalk

    400m suspension bridge · Panoramic Fuji

    The Mishima Skywalk is Japan’s longest suspension pedestrian bridge at 400 meters. Offers spectacular panoramic Fuji views from the bridge deck on clear days. Combines Fuji viewing with engineering marvel experience. Access from Tokyo via Tokaido Shinkansen to Mishima Station in 45 minutes, then local bus.

    12
    Moving View · Bullet Train Window

    Shinkansen Window Views

    Tokaido Line · Best Tokyo → Osaka direction

    The Tokaido Shinkansen (bullet train) between Tokyo and Osaka passes through Shizuoka with spectacular Fuji views from the right-side (northern) windows heading Tokyo-to-Osaka. Best seats: E-side window seats for Tokyo-bound, D-side for Osaka-bound. Fuji is visible for approximately 5-10 minutes as the train passes Shin-Fuji Station area. Cameras ready — the view appears suddenly. Perfect for travelers who pass through without dedicated Fuji visits.


    Photography Tips for Mount Fuji

    Whether climbing or viewing from distance, these technical and timing approaches yield the best Fuji images:

    • Golden hour dominates: Best light occurs 30 minutes before and after sunrise/sunset. Midday lighting is harsh and flattens the mountain’s volumetric form.
    • Weather forecasting: Check live webcams at multiple viewpoints 2-3 days ahead. Japan Weather Association (tenki.jp) provides dedicated Fuji visibility forecasts.
    • Clear days are gold: Fuji is visible from Tokyo only about 30% of days annually. From closer viewpoints, visibility rises to 50-70%. December-February has best visibility; June-August has worst.
    • Tripod essential: Low-light photography at Chureito Pagoda, lakes at sunrise/sunset, and summit dawn all require stabilization. Carbon fiber travel tripod recommended.
    • Lens selection: Wide angle (16-35mm) for scene-setting with foreground interest. Standard zoom (24-70mm) for versatility. Telephoto (70-300mm) for compressing perspective and isolating Fuji against distant backgrounds.
    • Foreground matters: Mount Fuji itself is iconic but photos benefit from foreground interest — cherry blossoms, torii gates, reflective lakes, shoreline rocks, lavender fields.
    • Reflections are rare: Sakasa-Fuji (upside-down Fuji reflections) only occurs on calm mornings with minimal wind. Target dawn visits at Lake Kawaguchi or Yamanaka’s calmer areas.
    • Be prepared for crowds: All major viewpoints fill during cherry blossom season and peak weekends. Arrive hours early, weekdays preferred, sunrise shots require pre-dawn positioning.

    Mount Fuji Views FAQ: Your Common Questions Answered

    What is the best viewpoint of Mount Fuji?

    The most iconic view of Mount Fuji is from Chureito Pagoda (忠霊塔) in Arakurayama Sengen Park — the five-story red pagoda with Mount Fuji rising behind it has become one of Japan’s most photographed scenes. Additional top Mount Fuji viewpoints: (1) Lake Kawaguchi north shore — the reflective ‘sakasa-Fuji’ (upside-down Fuji) phenomenon on calm mornings creates the postcard-perfect mirror image. Best at sunrise. (2) Lake Yamanaka — Fuji’s closest lake view, best for sunset photography with mountain reflection. (3) Lake Motosu — featured on the ¥1,000 banknote; less developed, more solitude. (4) Oishi Park on Kawaguchi’s north shore — lavender fields in summer with Fuji backdrop. (5) Mishima Skywalk — Japan’s longest suspension bridge with Fuji panorama. (6) Hakone area — traditional onsen town with classic Fuji views across Lake Ashi. (7) The summit itself — 360-degree panoramic views including sea of clouds, crater, surrounding peaks. (8) Shinkansen train passing through Shizuoka — moving Fuji views from the bullet train window. Chureito Pagoda specifically captures the platonic ideal of Japan: ancient pagoda, cherry blossoms (April), and Fuji. Visit at sunrise for golden light, or during cherry blossom season (late March to mid-April) for the iconic shot featured in countless travel magazines and Hokusai’s famous woodblock prints.

    When is the best time to photograph Mount Fuji?

    The best times to photograph Mount Fuji depend on your desired aesthetic, but clear weather is the universal requirement. Seasonal photography guide: (1) Winter (December-February) — Snow-capped Fuji is the classic image. Coldest, clearest air of the year, sharpest views from distant vantage points. Best visibility month is December. (2) Spring (late March-April) — Cherry blossom (sakura) season with Fuji backdrop creates iconic images. Chureito Pagoda at sunrise during peak bloom is the most-photographed scene in Japan. Bloom timing varies 5-10 days yearly. (3) Summer (June-August) — Climbing season reveals Fuji close-up. Atmospheric haze often reduces distant views but goraiko sunrise from summit is extraordinary. Clear summit views occur approximately 30-40% of attempts. (4) Autumn (October-November) — Fall colors with Fuji backdrop, similar visibility to winter, cooler temperatures without snow yet. Daily timing matters: (5) Early morning (5:00-7:00 AM) — Clearest atmospheric conditions, golden hour lighting, lowest haze. Most photographed Fuji images are from dawn. (6) Blue hour (just before sunrise) — Deep blue sky contrasts dramatically with snow-capped peak. (7) Late afternoon (3:00-5:00 PM) — Good lighting, lower crowds at viewpoints. (8) Night photography — Star trails and Milky Way behind Fuji silhouette. Weather forecasting: Check live cams at multiple viewpoints days ahead. Fuji is visible from Tokyo approximately 30% of days annually; from closer viewpoints 50-70% depending on season.

    What can you see from Mount Fuji summit?

    The summit of Mount Fuji offers extraordinary 360-degree views extending up to 200km on exceptionally clear days. Visible features from the summit: (1) Fuji’s crater (Ohachi) — the extinct volcanic crater is 500m wide and 250m deep, walking the crater rim (Ohachimeguri) takes approximately 60-90 minutes. Eight named peaks around the rim, with Kengamine at 3,776m being the true highest point. (2) Sea of Clouds (Unkai) — When low clouds form below summit elevation, Fuji rises as an island above them. Occurs in approximately 40-60% of summit visits depending on weather. Spectacular photography opportunity. (3) Shadow of Fuji — At sunrise, Fuji casts its distinctive pyramid-shaped shadow westward onto lower clouds. Lasts 15-20 minutes after sunrise. (4) Distant landmarks — Mount Kita (3,193m, Japan’s second-highest) visible to northwest; Pacific Ocean visible to south; Tokyo skyline faintly visible to northeast on clearest days; Izu Peninsula visible to south. (5) Surrounding peaks — Japanese Alps stretch north, including Mount Yatsugatake, Mount Kita, Mount Aino, and Mount Warusawa. (6) Five Lakes — Lakes Kawaguchi, Yamanaka, Saiko, Shoji, and Motosu visible to north. (7) Glacier remnants — Small permanent snowfields year-round on north-facing slopes. (8) Summit shrines — Kusushi Jinja (inner shrine of Sengen Taisha), traditional Japanese architecture at 3,715m elevation. (9) Weather station — Abandoned observatory at Kengamine Peak, closed 2004 but structures remain. (10) Pilgrimage markers — Stone lanterns, prayer stakes, coin offering boxes from centuries of spiritual climbs. Summit visits average 30-60 minutes for most climbers — longer for those doing crater rim walk.

    What are the Fuji Five Lakes?

    The Fuji Five Lakes (Fujigoko, 富士五湖) are a chain of volcanic lakes formed at Mount Fuji’s northern base, each offering distinct Fuji views and experiences. The five lakes in detail: (1) Lake Kawaguchi (河口湖) — Most developed and accessible, connected to Tokyo by direct rail (Fujikyu Railway). Home to Oishi Park (lavender fields), Kawaguchiko Music Forest, and the reflective ‘sakasa-Fuji’ north shore. 5.2 km² surface area. Best lake for first-time visitors. (2) Lake Yamanaka (山中湖) — Largest lake (6.8 km²), closest to Fuji, highest elevation at 980m. Popular for watersports and sunrise photography. Swan boat tours popular. (3) Lake Saiko (西湖) — Known for fishing and the Saiko Iyashi-no-Sato Nenba traditional village reconstructed to look like pre-modern Japan. Quieter, less touristy. (4) Lake Shoji (精進湖) — Smallest lake (0.5 km²), rural character, the famous ‘Mother and Child Fuji’ view where a smaller hill appears in front of Fuji creating the illusion of two mountains. (5) Lake Motosu (本栖湖) — Deepest lake (121m), featured on the ¥1,000 banknote view of Fuji with cherry blossoms. Crater lake character, popular for camping and less-developed scenery. Best Fuji Five Lakes experiences: (a) Rent a car and do a full-day loop around all five lakes. (b) Stay overnight at a ryokan (traditional inn) in Kawaguchiko. (c) Take a boat tour on Lake Kawaguchi. (d) Visit Chureito Pagoda from Kawaguchiko for iconic photo. (e) Cherry blossom viewing in April around Lake Kawaguchi’s Oishi Park. Access: Direct train from Tokyo Shinjuku to Kawaguchiko in 2 hours; local bus network connects all five lakes.

    Is Chureito Pagoda worth visiting?

    Yes, Chureito Pagoda (忠霊塔) is absolutely worth visiting — it’s arguably the most iconic viewpoint for photographing Mount Fuji in Japan. Chureito Pagoda essentials: (1) Location: Arakurayama Sengen Park, Fujiyoshida city, on a hillside north of Lake Kawaguchi. About 15-minute walk uphill from Shimoyoshida Station. (2) The climb: 398 stone steps from park entrance to pagoda viewing platform. Moderately steep but achievable for most visitors. (3) The iconic view: Five-story red pagoda (built 1963 as a war memorial) with Mount Fuji rising behind it. Cherry blossoms frame the scene during peak bloom. Appears in countless Japan travel posters, Instagram posts, magazine covers. (4) Best visiting times: (a) Cherry blossom season — late March to mid-April. Approximately 650 cherry trees bloom around the pagoda. Peak bloom varies 5-10 days yearly. (b) Sunrise — Pagoda receives warm golden light from 05:30-06:30 AM. Fuji visibility best in early morning. (c) Autumn — October-November has cooler weather and fall color contrast with red pagoda. (5) Crowds reality: The pagoda gets extremely crowded during cherry blossom season — expect hundreds of photographers at sunrise. Arrive 2+ hours before planned shot to secure position on the platform. Weekdays much less crowded than weekends. (6) Photography tips: Telephoto lens (200-400mm) compresses pagoda and Fuji perspective. Wide angle captures full scene. Tripod essential for low-light shots. Access: Train to Shimoyoshida Station on the Fujikyu Line from Tokyo (2.5 hours from Shinjuku via Kawaguchiko). Free entry to the park. Climb takes 20-30 minutes. Visit 1-2 hours for photography. Combine with Kawaguchiko visit on same day.

    What is the sea of clouds on Mount Fuji?

    The sea of clouds (unkai, 雲海) is a spectacular meteorological phenomenon where a layer of clouds forms below Mount Fuji’s summit elevation, creating the illusion of a cloud ocean with Fuji rising as an island above it. Sea of clouds science: (1) Formation conditions — Temperature inversion creates a stable cloud layer typically at 2,000-3,000m elevation. Warm air above cooler moisture layer causes clouds to form just below summit elevation. (2) Best weather patterns — Clear cold nights followed by warming mornings; high pressure systems; early summer to early autumn. (3) Frequency — Approximately 40-60% of summit visits encounter some form of cloud layer below. Full sea of clouds stretching to horizon: 20-30% of summit visits. (4) Timing — Most common at sunrise (04:30-06:00 AM) as temperature differentials peak. Dissipates mid-morning as clouds lift or dissolve. Viewing experiences: (1) From Fuji summit — Clouds stretch to horizon 360 degrees. Fuji’s shadow visible at sunrise projecting westward across cloud surface. (2) From high camp huts — 7th and 8th Station huts at 2,700-3,400m often positioned just above cloud layer for spectacular dawn views. (3) From airplane — Commercial flights passing near Fuji sometimes photograph sea of clouds from cruise altitude. (4) From distant peaks — Adjacent mountains like Mount Kita or Japanese Alps peaks offer views of Fuji rising from clouds. Photography considerations: (5) Golden hour light creates warm-colored cloud surface; blue hour creates cool-toned drama. (6) Long lens compresses Fuji and cloud layer. (7) Wide angle captures full horizon panorama. Not guaranteed: The phenomenon cannot be predicted precisely — it requires multiple climbs to reliably experience. Many climbers encounter sea of clouds by luck; dedicated photographers may make multiple attempts.

    What ecosystems do you pass climbing Mount Fuji?

    Climbing Mount Fuji traverses five distinct ecological zones, creating one of Japan’s most dramatic vegetational transitions in a single day. The five zones from base to summit: (1) Deciduous forest (800-1,600m) — Oak, maple, beech forests at lower elevations. Autumn colors spectacular October-November. Typically passed by car on Fuji Subaru Line; not walked in most climbs. (2) Temperate mixed forest (1,600-2,000m) — Coniferous and deciduous mix, larch, birch, rhododendron. Some 5th Stations begin here (Subashiri at 2,000m starts in this zone). Wildflowers bloom June-July. (3) Subalpine coniferous forest (2,000-2,500m) — Dense pine and fir forests, temperatures noticeably cooler, mountain hares and small birds common. Yoshida Trail 5th Station (2,305m) sits in this zone. (4) Alpine scrub (2,500-3,200m) — Stunted pine trees and shrubs, volcanic rock increasingly dominant, sparse vegetation. Most climbing trail sections pass through this zone. Mountain huts cluster in this band. (5) Alpine desert (3,200-3,776m) — Barren volcanic landscape, scattered lichen, no trees, dramatic red-black rock and scree. Upper mountain huts and summit approach. Dramatic color contrast at sunrise. Biological details worth noting: (6) Fuji’s volcanic soil and relatively young age (last eruption 1707) mean fewer endemic species than older Japanese mountains. (7) Wildlife sightings include Japanese macaques (lower elevations), deer, foxes, mountain birds. (8) Alpine flowers bloom late June through August: Fuji thistle, alpine lichens, yellow poppy. (9) Year-round snowfields persist on north-facing slopes above 3,000m — not true glaciers but permanent ice patches. The ecological diversity gives Fuji climbing a unique character — few climbs anywhere transition through five ecosystems in a single day’s ascent.

    Can you photograph Mount Fuji from Tokyo?

    Yes, Mount Fuji can be photographed from Tokyo on clear days — though visibility is highly weather-dependent. Best Tokyo Fuji viewpoints: (1) Tokyo Skytree (634m) — Japan’s tallest tower. Fuji visible from observation decks at 350m and 450m on clear days, approximately 100km distant. Best morning visibility. (2) Tokyo Tower (333m) — Iconic red tower. Similar Fuji visibility to Skytree, different angle, traditional aesthetic. (3) Roppongi Hills Observatory (270m) — Mori Tower 52nd floor. Excellent Fuji view westward. (4) Tokyo Metropolitan Government Building (Shinjuku) — Free observation at 202m. Good Fuji views westward on clear days. (5) Sumida River bridges at sunset — Rainbow Bridge and other waterfront locations capture Fuji silhouette with Tokyo skyline. (6) Shinjuku Gyoen Park — Traditional garden with Fuji in distance on clear days, cherry blossoms frame view in spring. Tokyo visibility statistics: (7) Fuji visible from Tokyo approximately 30% of days annually. (8) Best visibility months: December-February (cold, clear winter days). (9) Worst visibility: Summer months June-August (humid, hazy). (10) Daily timing: Early morning before air pollution builds. (11) After rain or wind: Clearest views typically follow weather fronts passing through. Specific recommended compositions: (12) Tokyo Skytree viewed with Fuji backdrop — iconic urban-meets-nature shot. (13) Tokyo cityscape with Fuji at golden hour — warm colors on buildings, snow-capped Fuji. (14) Full moon rising near Fuji — rare alignment photographed annually. For guaranteed Fuji views, travel 1-2 hours west from Tokyo to Hakone, Lake Kawaguchi, or Gotemba. These closer locations have 70-90% Fuji visibility during good weather windows.


    Authoritative Sources & Further Reading

    Content reflects authoritative Japanese tourism and photography sources:

    • Yamanashi Prefecture Tourism Organization — Official Fuji viewing information
    • Japan National Tourism Organization (JNTO) — japan.travel — Viewpoint recommendations
    • Japan Meteorological Agency — jma.go.jp — Sunrise/sunset tables and Fuji visibility
    • UNESCO World Heritage Centre — Fujisan cultural site designation (2013)
    • Sakura Weathermap — sakura.weathermap.jp — Cherry blossom forecast
    • Hokusai, Thirty-Six Views of Mount Fuji (1830s) — Historical visual reference
    • Reference texts: Fuji: The Mountain of Japan (Takayuki Kawakami), 100 Views of Edo (Hiroshige)
    • Photography resources from Lonely Planet Japan, National Geographic Japan coverage
    Published: April 16, 2026
    Last updated: April 19, 2026
    Next review: July 2026
    Part of the Global Summit Guide

    Back to the Master Hub

    This guide is one of 71 across 12 thematic clusters on Global Summit Guide. The master hub organizes every guide by experience tier, specific peak, skill area, and region.

    View the Hub →

  • Frostbite Prevention and Treatment: A Climber’s Guide

    Frostbite Prevention and Treatment: A Climber’s Guide

    Frostbite Prevention and Treatment: A Climber’s Complete Guide (2026) | Global Summit Guide
    Cluster 08 · Altitude, Training & Physiology · Updated April 2026

    Frostbite Prevention and Treatment: A Climber’s Complete Guide

    A practical wilderness medicine guide for cold injury — the four degrees of frostbite, prevention gear and behavior, field rewarming protocols, differential diagnosis from altitude sickness, and evacuation decisions. What climbers actually need to know when the cold starts to bite.

    4
    Degrees of
    frostbite
    37–39°C
    Rewarming
    temperature
    20–30
    Min rewarm
    duration
    ~90%
    Cases in
    fingers/toes
    Global Summit Guide A guide in Cluster 08 · Altitude, Training & Physiology View master hub →

    Frostbite is the most common cold-weather injury in mountaineering, and — unlike altitude sickness, which resolves with descent — frostbite injuries can be permanent and life-altering. Fingers amputated, toes lost, noses rebuilt through plastic surgery. The difference between a full recovery and a lifelong disability often comes down to recognition speed and correct field treatment. This guide covers the four degrees of frostbite, the prevention principles that keep it from happening, the rewarming protocol when it does, and the critical decisions around refreezing and evacuation. Distinct from our altitude sickness guide, this post focuses specifically on cold injury — though both conditions often coexist on high-altitude cold-weather expeditions.

    How this guide was built

    Medical content based on Wilderness Medical Society (WMS) frostbite practice guidelines, University of Washington’s Harborview Medical Center frostbite treatment protocols (a leading center for cold injury research), Institute for Altitude Medicine guidance, and University of Colorado’s frostbite research program. Field treatment protocols cross-referenced with the American Alpine Club medical resources and NOLS Wilderness Medicine curriculum. Case study data from Denali ranger rescues, Everest expedition medical reports, and Arctic military research. Reviewed by practicing wilderness medicine physicians and IFMGA-certified guides with cold injury experience. Fact-check date: April 19, 2026.

    The Four Degrees of Frostbite

    Frostbite is classified by depth of tissue damage, from superficial skin layer (1st degree) to full-thickness involving muscle and bone (4th degree). True depth often isn’t apparent until 1-2 weeks after rewarming — initial appearance is frequently misleading, and tissue that looks salvageable can later demarcate to necrosis. Field assessment should always err on the side of caution.

    1
    1st Degree · Frostnip

    Frostnip

    Outer skin layers only · Fully reversible
    Signs
    • Skin white or pale
    • Numbness and tingling
    • No blistering
    • Skin firm but still pliable
    • Reduced temperature sensation
    Recovery
    • Hours to 1-2 days
    • Full recovery expected
    • No long-term effects
    • Field warming sufficient
    2
    2nd Degree · Superficial

    Superficial Frostbite

    Full skin thickness · Some tissue damage
    Signs
    • Clear or milky fluid blisters (24 hrs)
    • Red and swollen on rewarming
    • Significant pain during thaw
    • Blisters may burst and scab
    • Skin hard when frozen
    Recovery
    • 2-4 weeks for healing
    • Usually full recovery
    • Cold sensitivity common
    • Medical evaluation recommended
    3
    3rd Degree · Deep

    Deep Frostbite

    Full skin + subcutaneous tissue · Permanent damage
    Signs
    • Blood-filled blisters (1-3 days)
    • Deep red, purple, or black skin
    • Significant swelling, hardening
    • Hemorrhagic appearance
    • Sensation absent
    Recovery
    • Months to resolution
    • Permanent tissue damage likely
    • Some amputation possible
    • Evacuation required
    4
    4th Degree · Full Thickness

    Full-Thickness Frostbite

    Muscle, tendon, bone · Life-threatening if extensive
    Signs
    • Tissue gangrenous (blackened)
    • No circulation in affected area
    • Muscle and bone involvement
    • No sensation or movement
    • Mummification appearance
    Recovery
    • Amputation typically required
    • Surgical debridement
    • Life-threatening if large area
    • Permanent disability
    • Emergency evacuation
    Assessment depth is not immediate

    Initial appearance of frostbite is frequently misleading. Tissue that looks salvageable in the first hours may demarcate to necrosis over 1-2 weeks, and conversely, tissue that looks terrible on day one may recover more than expected. This is why modern treatment emphasizes “wait and watch” rather than aggressive early debridement. If you’re assessing frostbite in the field, your job isn’t to predict outcome — it’s to protect the tissue, start rewarming safely if possible, and plan evacuation. Final depth assessment happens in a hospital over days to weeks.


    Body Parts Most at Risk

    Frostbite follows a predictable pattern — peripheral extremities with poor circulation and high exposure bear the brunt of injuries. Fingers and toes alone account for about 90% of cases, with ears, nose, and face completing the top risks:

    ~40%
    Most Common

    Fingers

    High blood flow normally but vulnerable when circulation drops. Often exposed for climbing tasks (gear manipulation, rope handling).

    ~30%
    Second Most

    Toes

    Enclosed in boots so climbers may not notice until severe. Extended blood return path, high mechanical stress from climbing.

    ~10%
    Often Overlooked

    Ears

    Thin tissue extremely sensitive to wind chill. Often not protected because they feel less important than fingers/toes.

    ~8%
    Wind-Exposed

    Nose Tip

    Thin skin and high surface area to volume ratio. Cold breathing increases risk. Hard to protect while climbing.

    ~7%
    Face Zone

    Cheeks

    Constant wind exposure. Often sunburn/frostbite combination. Requires balaclava or neck gaiter protection.

    ~5%
    Breath-Affected

    Chin

    Often partially protected by beard. Breath condensation creates ice buildup. Exposed when talking or drinking.


    Prevention: Gear, Behavior, and Awareness

    Frostbite prevention rests on three pillars: adequate gear to insulate against cold, behavioral practices that maintain core warmth and peripheral circulation, and awareness to recognize warning signs before damage occurs. Most frostbite cases are preventable — they happen when climbers are tired, dehydrated, or wearing inadequate gear for conditions.

    Gear fundamentals

    • Layered hands: Liner gloves (thin synthetic) + mid-weight gloves (wool or synthetic) + insulated overmitts + shell mitts for extreme cold. Four layers isn’t excessive for 8,000 m peaks.
    • Layered feet: Moisture-wicking sock + wool/synthetic mid-weight sock + insulated climbing boots matched to climate + gaiters to prevent snow entry.
    • Face protection: Goggles or glacier glasses + balaclava + face mask for wind + helmet with cold-weather lining.
    • Core protection: Never cotton. Merino base + fleece mid + down or synthetic insulation + waterproof shell.
    • Chemical warmers: Hand warmer packs and toe warmers. Cheap, effective, can save fingers.

    Behavioral practices

    • Keep moving — circulation is warmth. Avoid prolonged sitting in cold.
    • Swing arms, stomp feet during rest stops to maintain peripheral blood flow.
    • Layer before sweating, layer before cooling — transitions matter.
    • Eat frequently — calories are fuel for internal heat production. Include fats.
    • Stay hydrated — dehydration reduces circulation. Hot drinks provide warmth + calories.
    • Change wet clothing immediately — wet gear loses 25x its insulating value.

    Warning signs to watch for

    • Tingling or burning sensations in extremities — early warning.
    • White or yellow skin patches — visual confirmation of developing frostnip.
    • Loss of dexterity in fingers — can’t operate zippers, manipulate gear.
    • Clumsy movements or difficulty speaking clearly — cold affecting thought and motor control.
    • Numbness — tissue is already at risk. Act immediately.
    Check each other

    Climbers often cannot see their own face, and numbness means they can’t feel early frostbite on nose, cheeks, or ears. The buddy check is essential: every 30-60 minutes in extreme cold, visually inspect your partner’s face for waxy white patches, and have them do the same for you. Many cases of severe face frostbite begin because nobody was watching. This is one of the simplest and most effective prevention practices, and it costs nothing.


    Field Treatment Protocol

    If prevention fails, rapid rewarming in warm water is the gold-standard treatment — but only if you can guarantee the thawed tissue won’t refreeze. If refreezing is possible, the correct decision is to keep tissue frozen until you reach a safe warming environment. This is counterintuitive but medically validated.

    Critical rules — DO’s and DON’Ts

    DO

    Rewarm in 37-39°C (99-103°F) water

    Use a thermometer if possible. Water should feel comfortably warm, not hot, to unaffected skin. Maintain temperature throughout — 20-30 minutes typical duration. Continue until skin becomes pliable and red. Do NOT let tissue touch the container bottom (causes additional injury from direct heat contact).

    DON’T

    Rewarm if refreezing is possible

    Single freeze: 70-85% tissue recovery possible. Two freeze-thaw cycles: 45% recovery. Three or more cycles: under 15% recovery with high amputation rates. If you can’t maintain warmth and shelter for 24+ hours post-thaw, leave the tissue frozen and evacuate while frozen.

    DON’T

    Rub or massage frostbitten tissue

    Traditional “rubbing with snow” advice is dangerous — the mechanical trauma destroys already-damaged tissue and worsens outcomes. Similarly, never use direct heat (fire, stove, heating pad) which causes burns on top of frostbite, or pop blisters (introduces infection).

    DO

    Give ibuprofen 400-600 mg every 6 hours

    Anti-inflammatory that improves outcomes through thromboxane inhibition (reduces vascular damage). Start as soon as possible after rewarming and continue throughout evacuation. Avoid aspirin (increases bleeding). Consider acetaminophen for pain if ibuprofen contraindicated.

    DO

    Treat hypothermia first if present

    Hypothermia (core body temperature drop) is life-threatening in a way frostbite usually isn’t. If patient is hypothermic AND frostbitten, address hypothermia first — frostbite can wait, hypothermia cannot. Warm fluids, shared body heat, insulated shelter, monitor vitals.

    DON’T

    Walk on thawed feet

    Thawed tissue is extraordinarily fragile. Walking on recently rewarmed feet destroys the blood vessels and tissue that rewarming just saved. If feet are rewarmed in the field, the patient must be carried, sledded, or helicoptered out. Never walk on thawed frostbitten feet, even if it feels possible.

    Standard rewarming procedure

    1. Treat hypothermia first if present. Verify you can maintain warmth post-rewarming.
    2. Prepare water at 37-39°C (99-103°F) in a container large enough for the affected body part.
    3. Immerse affected area completely for 20-30 minutes. Keep tissue from touching container bottom.
    4. Maintain water temperature — add warm water as needed. Don’t let it cool.
    5. Provide pain management — rewarming is painful. Ibuprofen 400-600 mg.
    6. Give warm sweet fluids by mouth if patient is conscious and alert.
    7. Continue until skin is pliable and red, not white or gray.
    8. Dry gently, apply sterile dressings with gauze between digits.
    9. Elevate affected area, keep loose bandaging. Protect from pressure and cold.
    10. Evacuate for medical care — all frostbite beyond frostnip warrants physician assessment.

    When to Evacuate

    Evacuation decisions depend on severity, conditions, and medical care availability. This table summarizes the decision framework:

    SeverityEvacuation NeedWhy
    1st degree (Frostnip)Usually not requiredField warming sufficient. Continue expedition if conditions allow and monitoring continues.
    2nd degree (Superficial)Case-by-caseEvacuate for large areas, multiple sites, deteriorating patient, or poor conditions. Small stable areas may manage in field.
    3rd degree (Deep)Evacuation requiredProfessional medical care needed. Begin field treatment and plan careful evacuation with refreeze prevention.
    4th degree (Full-thickness)Emergency evacuationLife-threatening. Surgical intervention likely. Immediate transport to definitive care.
    Any + hypothermiaEmergency evacuationHypothermia is life-threatening. Treat hypothermia first, evacuate immediately.
    Any + associated traumaEmergency evacuationCombined injuries compound severity. Don’t delay.

    Evacuation methods

    • Helicopter: Ideal when available. Weather-dependent, altitude-limited (usually <5,500 m), expensive ($10,000-25,000). Insurance coverage essential.
    • Carry/sled: Team carries or drags patient. Protection from cold critical during transport.
    • Vehicle: Once at road access. Jeep or similar. Patient warmth maintained during transport.
    • Self-evacuation walking: Possible ONLY with hand frostbite, NEVER with foot frostbite. Slow and risky.
    When in doubt, evacuate

    The consequences of severe untreated frostbite — amputation, permanent disability, chronic pain, nerve damage, cold sensitivity for life — far outweigh the costs and disruption of evacuation. If you’re unsure whether evacuation is needed, the answer is almost always yes. Experienced expedition doctors consistently err on the side of evacuation, even when it means ending the trip. No summit is worth losing fingers over. If climbers have to weigh finger loss against a summit bid, they should descend.


    Frostbite vs Altitude Sickness: Differential Diagnosis

    Climbers can experience both frostbite and altitude sickness simultaneously, and the symptoms sometimes mask each other. Differentiating them matters because treatments are completely different:

    FeatureFrostbiteAltitude Sickness
    CauseCold temperature freezing tissueHypoxia (reduced oxygen pressure)
    LocationLocalized — fingers, toes, faceSystemic — whole body
    Primary symptomsNumb, white/pale skin, hard tissueHeadache, nausea, breathlessness
    Brain effectsNone directly (unless severe)Confusion, ataxia (HACE)
    Lung effectsNoneBreathlessness, crackles (HAPE)
    Onset speedMinutes to hours with exposureHours to days at altitude
    Primary treatmentRewarming, protect tissueDESCENT — everything else secondary
    ReversibilityOften permanent damageUsually fully reversible with descent
    Evacuation directionTo medical care (any altitude)To LOWER altitude first

    The treatments can conflict: altitude sickness requires descent (often into higher cold exposure), while severe frostbite management benefits from warm, sheltered conditions (often at higher altitude). When both are present, hypothermia and life-threatening altitude illness (HACE/HAPE) take precedence. For full details on altitude illness, see our altitude sickness complete guide and acclimatization science guide.


    Frostbite FAQ: Your Common Questions Answered

    What are the four degrees of frostbite?

    Frostbite is classified into four degrees of severity based on depth of tissue damage, from superficial (1st degree) to full-thickness with bone involvement (4th degree). First-degree frostbite (frostnip): most superficial affects only outer skin layers, skin appears white or pale, numbness and tingling in affected area, no blistering or tissue damage, skin feels firm to touch, temperature sensation reduced, usually reversible with proper treatment, recovery hours to 1-2 days, long-term effects rare. Second-degree frostbite: affects full thickness of skin, clear or milky fluid-filled blisters within 24 hours, skin becomes red and swollen upon rewarming, significant pain during rewarming, blisters may burst and form scabs, some tissue damage but recovery usually complete, recovery 2-4 weeks for full healing, long-term sensitivity to cold common. Third-degree frostbite: affects skin and underlying tissues, blood-filled blisters develop within 1-3 days, skin becomes deep red purple or black, significant swelling and hardening, permanent tissue damage likely, some amputation possible, recovery months to resolution, long-term effects significant. Fourth-degree frostbite: deepest level affects muscle tendon and bone, tissue becomes gangrenous (blackened), no circulation in affected area, muscle and bone involvement, amputation typically required, life-threatening if large area, recovery requires surgery, permanent disability likely. Assessment: wait for rewarming to assess, initial appearance often misleading, blisters develop within 24-72 hours, true depth visible after 1-2 weeks. Body parts most affected: fingers most common, toes second most common, ears very vulnerable often overlooked, nose affected by facial exposure, cheeks particularly in wind, chin often frozen from breathing into clothing. Classification helps guide treatment decisions and prognosis but field assessment is often difficult until tissue has been properly rewarmed.

    How do you prevent frostbite on a climbing expedition?

    Frostbite prevention combines proper gear, behavioral practices, nutrition, and hydration to maintain blood flow and insulation in the extremities during cold exposure. Essential prevention gear: layering system (base layer merino wool or synthetic never cotton, mid layer fleece or light insulation, insulation layer down or synthetic jacket, outer shell waterproof breathable, head protection insulated hat balaclava, neck protection buff or neck gaiter). Hand protection: liner gloves (thin synthetic), mid-weight gloves (wool or synthetic), insulated overmitts, shell mitts (for extreme cold), hand warmers (chemical), proper fit essential (not too tight). Foot protection: moisture-wicking socks, wool/synthetic mid-weight socks, insulated climbing boots (match climate), gaiters to prevent snow entry, toe warmers for extreme cold, dry socks change at camps. Face protection: goggles or glacier glasses, face mask for wind, balaclava for face coverage, helmet with cold-weather lining. Behavioral prevention: keep moving to maintain circulation, swing arms to warm hands, stomp feet to warm toes, avoid prolonged sitting in cold, take breaks to move and warm up. Recognition of warning signs: tingling or burning sensations, white or yellow skin patches, loss of dexterity, difficulty speaking clearly, mental confusion, clumsy movements. Temperature management: warm layers before cooling down, remove layers before sweating, add layers before getting cold, avoid cotton that holds moisture, keep clothing dry, change out of wet clothing immediately. Nutrition and hydration: eat frequent high-calorie meals, include fats for sustained energy, maintain hydration (water not alcohol), hot drinks provide warmth and calories, avoid caffeine excess. Chemical warmers: hand warmer packs in gloves, toe warmer packs in boots, body warmers for core warmth, replace as needed. Specific considerations at high altitude: reduced circulation at altitude, increased oxygen demand, dehydration from dry air, extended exposure times, wind exposure increased. Wind considerations: wind chill factor dramatic, face protection critical, windproof layers essential, wind direction awareness. Risk factors increasing susceptibility: previous frostbite (major risk factor), poor circulation conditions, inadequate gear, extreme exhaustion, dehydration, altitude sickness, certain medications. Frostbite prevention is always better than treatment. See our complete gear list.

    How do you treat frostbite in the field?

    Field treatment focuses on rapid rewarming in warm (not hot) water, protecting tissue from further damage, and preventing refreezing which causes far worse tissue damage than the original frostbite. Critical first rules: DO NOT rewarm if refreezing is possible, DO NOT rub or massage frostbitten tissue, DO NOT use direct heat (fire, stove, heating pad), DO NOT use snow or cold water, DO NOT remove frozen clothing until rewarming, DO NOT allow patient to walk on thawed feet. Assessment first: determine if rewarming is safe, check for hypothermia (treat first if present), evaluate extent and depth of frostbite, identify any associated injuries, assess overall patient condition, plan evacuation if needed. Rapid rewarming protocol — Water preparation: temperature 37-39°C (99-103°F), use thermometer if available, water should feel warm not hot to unaffected skin, maintain temperature throughout, container large enough for affected part, continuous gentle water flow ideal. Rewarming process: immerse affected area completely, do not let tissue touch container bottom, maintain 20-30 minutes typically, continue until skin is pliable and red, watch for rewarming indicators, provide pain management as needed. During rewarming: elevate affected limb, keep patient warm overall, provide warm sweet fluids by mouth, monitor for other cold injuries, keep affected area dry after warming, prevent any pressure on thawed tissue. Post-rewarming care: gentle cleaning with sterile technique, apply dry sterile dressings, separate affected digits with sterile gauze, apply loose non-restrictive bandages, elevate affected area, monitor for changes. Pain management: ibuprofen 400-600mg every 6 hours (anti-inflammatory), acetaminophen if ibuprofen contraindicated, avoid aspirin (increases bleeding), opioids if severe pain (in medical setting), address anxiety component. Field evacuation: never walk on frostbitten feet after thawing, carry or sled evacuation required, keep affected areas elevated, prevent refreezing during transport, maintain hydration, monitor for hypothermia. Field treatment can be life and limb-saving when performed correctly. The most common cause of severe outcomes is improper rewarming technique, particularly re-freezing after initial warming.

    Why is refreezing so dangerous after frostbite?

    Refreezing after frostbite causes dramatically worse tissue damage than the original injury and is the single most important factor determining long-term outcome. What happens during refreezing: ice crystals form inside cells (lethal to cells), blood vessels rupture from ice expansion, tissue dies more rapidly than initial freeze, inflammation causes additional damage, circulation permanently impaired, nerve damage becomes severe. Cellular damage mechanism: first freeze ice forms mostly outside cells, first thaw cells may survive if treated properly, refreeze ice forms inside cells (cytoplasm), cell membranes rupture, cellular contents spill out, cell death becomes inevitable. Clinical impact comparison — Initial frostbite without refreeze: 70-80% tissue recovery possible, blisters may heal without scarring, sensation may return gradually, mobility often maintained, amputation rates low. Initial frostbite with refreeze: 20-40% tissue recovery at best, severe blistering and scarring, permanent sensation loss common, mobility severely affected, amputation rates high. When refreezing occurs: premature rewarming without plan, inadequate transport warmth, weather changes unexpectedly, tent failures, poor decision making, overly aggressive initial warming. The ‘leave frozen’ decision: when rewarming can’t be maintained, extreme cold environments, extended rescue timelines, resource limitations, decision requires experienced judgment. Transport considerations: insulated transport preferred, continuous temperature monitoring, backup heating sources, shorter transport times safer. Outcome statistics: single freeze-thaw 85% tissue recovery, two freeze-thaw cycles 45% tissue recovery, three or more cycles under 15% recovery, amputation rates increase dramatically, long-term disability more common. Making the leave-frozen decision: weigh continued cold exposure risks, evaluate rescue timeline, consider environmental factors, assess team capabilities, plan for prolonged care. The principle is simple: one initial freeze with proper treatment has much better outcomes than multiple freeze-thaw cycles. When in doubt keep tissue frozen until you can ensure complete final rewarming.

    How do you tell the difference between frostnip and frostbite?

    Frostnip and frostbite are on the same continuum of cold injury, but frostnip is superficial and fully reversible while frostbite involves actual tissue freezing and permanent damage. The key distinction is whether the skin actually freezes — frostnip doesn’t, frostbite does. Frostnip characteristics — Physical signs: skin appears red initially, skin becomes pale or white, skin feels firm but not hard, no blisters or tissue damage, sensation of tingling or burning, temperature drops but no freezing. Symptom progression: initial cold sensation, numbness or tingling, pale/white appearance, pain during rewarming, full recovery within hours, no long-term effects. Common locations: ears (especially lobes), nose tip, cheeks, fingertips, toes, any exposed skin. Treatment response: complete recovery with warming, no blistering expected, full function returns, no tissue damage, within 30 minutes to 2 hours. Frostbite characteristics — Physical signs: skin appears pale white or gray, skin feels hard and rigid (frozen), ice crystals visible in skin, no normal temperature sensation, possible blistering, color changes post-warming. Symptom progression: initial cold and pain, loss of sensation, hard frozen feeling, color changes, blister development, tissue damage becomes apparent. Depth of freeze: skin layer affected (superficial), subcutaneous tissue involved, muscle/tendon involvement, bone involvement possible, extent determines severity. Treatment response: requires rapid controlled rewarming, blisters develop within 24-72 hours, tissue damage often permanent, recovery timeline in weeks-months, some permanent effects likely. Field assessment techniques — Temperature test: touch affected area, feel warmth compared to normal skin, frostnip slightly cool but pliable, frostbite hard frozen feeling, use back of hand for assessment. Color assessment: frostnip red pale pink, frostbite white gray blue black, assess after any rewarming, progressive changes noted, compare to normal areas. When in doubt treat as frostbite — it’s better to overtreat frostnip than undertreat frostbite. Field assessment should err on the side of caution especially in expedition environments where evacuation may be delayed.

    What body parts are most at risk for frostbite?

    Frostbite most commonly affects extremities with poor circulation or high exposure — fingers and toes account for about 90% of cases, followed by ears, nose, cheeks, and chin. Most common locations: Fingers (most common site over 40% of cases, high blood flow normally but vulnerable to cold, often exposed for climbing tasks, thin tissue over bone, long extensions from core, heat loss rapid). Toes (second most common site about 30%, similar vulnerabilities to fingers, enclosed in boots may not notice, extended blood return path, high mechanical stress, often neglected in gear planning). Ears (third most common about 10%, extremely sensitive to wind, thin tissue and skin, exposed to elements, often not protected, multiple ear areas vulnerable). Nose tip (particularly exposed, high surface area to volume, thin skin covering, cold air breathing increases risk, hard to protect while climbing). Cheeks (exposed to wind constantly, thin protective layer, high surface area, face protection critical). Chin (often covered by beard partial protection, exposed when talking or drinking, breath condensation issues). Why these areas are vulnerable — Physiological factors: poor circulation (farthest from heart, narrow blood vessels, higher resistance to blood flow, greater heat loss), surface area (small volume relative to surface, rapid heat loss, less thermal inertia), tissue type (less fatty insulation, more sensitive nervous tissue, delicate vascular structures). Environmental factors: wind exposure (increases heat loss dramatically), moisture (wet skin loses heat faster), contact with cold surfaces (metal equipment, rock surfaces, snow contact). Climbing-specific risks: climbing hands (bare fingers for grip, ice axe contact, rope handling), climbing feet (boot cramping, heel pressure, extended standing), climbing face (wind exposure from climbing, cold air breathing, helmet gaps). Protection strategies by area: extreme protection needed for fingers (liner gloves + insulation + shells), toes (insulated boots + socks + warmers), ears (covered hat or balaclava). High protection for nose (face mask or balaclava), cheeks (face coverage), chin (neck gaiter or balaclava). Monitoring frequency: fingers/toes every 15-30 minutes in extreme cold, ears every 30-60 minutes, nose/face continuously when exposed.

    When do you need to evacuate for frostbite?

    Evacuation for frostbite depends on severity, location, medical care availability, and environmental conditions. Third-degree and fourth-degree frostbite require immediate evacuation, while second-degree may allow treatment in the field with proper conditions. By severity: First-degree (frostnip) usually doesn’t require evacuation, continue expedition if conditions allow, rest and warm the affected area, monitor for progression, prevent further exposure, return to normal activity when warm. Second-degree evaluate situation individually, consider evacuation for large affected areas involvement of multiple areas poor prognosis factors patient condition deteriorating, field treatment may be sufficient if small affected area resources available weather improving patient stable. Third-degree evacuation required, professional medical care needed, field treatment while preparing, continue rewarming if safe, monitor for complications, plan evacuation carefully. Fourth-degree emergency evacuation required, often life-threatening, immediate medical care essential, surgical intervention likely, amputation often necessary, rehabilitation needed. Factors affecting decisions: extent and severity (number of body areas affected, depth of frostbite determined, rate of progression, associated injuries, patient’s overall condition). Treatment capabilities (medical supplies available, rewarming equipment, experienced personnel, communication resources, environmental conditions, time to medical care). Environmental factors (current weather conditions, weather forecast, access route conditions, altitude factors, distance to medical care, available transport). Evacuation methods: self-evacuation walking not possible with foot frostbite possible with hand frostbite only requires assistance usually weather must cooperate slow and dangerous. Carry/sled evacuation team members carry patient sled or improvised stretcher multiple rescuers needed protection from cold essential continuous patient monitoring. Vehicle evacuation jeep or similar vehicle road access required patient warmth maintained communication with hospital. Helicopter evacuation ideal when available weather dependent altitude limitations cost $10,000-25,000 insurance coverage important. Planning: evacuation insurance mandatory, route knowledge essential, communication devices, medical facility identification, transport resources, emergency contacts. When in doubt err on the side of evacuation — the consequences of severe frostbite are lifelong and potentially devastating.

    How is frostbite different from altitude sickness?

    Frostbite and altitude sickness are both serious high-altitude climbing risks but involve entirely different physiological mechanisms — frostbite is a local cold injury while altitude sickness is a systemic hypoxic response. Root cause differences: Frostbite causes tissue freezing from cold temperatures, local circulation problems, protection failures, environmental exposure, physical cold damage. Altitude sickness causes reduced oxygen availability, systemic physiological response, fluid balance changes, cardiovascular adaptations needed, brain function affected. Symptom locations: Frostbite localized to affected body parts (fingers, toes, ears, nose, face), cold sensation then numbness, visible skin color changes, pain during rewarming, local tissue damage. Altitude sickness systemic throughout body (brain headache confusion, lungs breathing problems, cardiovascular heart rate pressure, gastrointestinal nausea vomiting), generalized fatigue. Timeline of onset: Frostbite minutes to hours with exposure rapid progression possible weather dependent timing sudden onset possible reversible early stage. Altitude sickness hours to days at altitude gradual progression typical exposure time dependent individual susceptibility varies progressive worsening if untreated. Treatment approaches: Frostbite treatment local warming tissue protection gradual rewarming wound care pain management medical evaluation. Altitude sickness treatment descent (primary) oxygen administration medications (Acetazolamide Dexamethasone) rest and hydration hyperbaric treatment if available medical monitoring. Prevention strategies: Frostbite prevention proper clothing and layering keep body warm maintain circulation avoid cold exposure use appropriate gear monitor conditions. Altitude sickness prevention gradual ascent (500m/day above 3,000m) acclimatization days hydration medications if indicated physical preparation individual assessment. Overlapping situations: both can occur together at very high altitudes, in cold weather, with extreme conditions, during long exposures, in vulnerable individuals, with inadequate preparation. Emergency response differences — Frostbite emergency: warm the affected area protect from refreezing maintain core warmth evacuate if severe professional treatment extended recovery. Altitude sickness emergency: descend immediately provide oxygen administer medications rest and hydrate monitor progression hospital evaluation. Long-term effects — Frostbite: cold sensitivity possible amputation nerve damage skin discoloration joint issues chronic pain. Altitude sickness: usually full recovery increased future susceptibility heart condition impacts brain damage (rare) psychological effects. Both frostbite and altitude sickness are preventable with proper planning equipment and decision-making. See our altitude sickness complete guide.


    Authoritative Sources & Further Reading

    Content reflects evidence-based wilderness medicine and frostbite treatment research:

    • Wilderness Medical Society — Frostbite Practice Guidelines for Prevention and Treatment (latest revision 2019)
    • Harborview Medical Center, University of Washington — Frostbite treatment protocols and research
    • Institute for Altitude Medicine (Peter Hackett, MD) — Cold injury guidelines
    • University of Colorado Frostbite Research Program — Clinical outcome studies
    • American Alpine Club — Medical resources for climbers
    • NOLS Wilderness Medicine — Field treatment curriculum
    • Denali National Park Rangers — Case study frostbite rescues and outcomes
    • Military cold weather research (US Army, Canadian Forces)
    • IFMGA-certified guides with expedition cold injury experience
    • Reference texts: Wilderness Medicine (Paul Auerbach); Mountain Medicine and Physiology (Ward, Milledge & West)
    Published: April 17, 2026
    Last updated: April 19, 2026
    Next review: July 2026
    Part of the Global Summit Guide

    Back to the Master Hub

    This guide is one of 70 across 12 thematic clusters on Global Summit Guide. The master hub organizes every guide by experience tier, specific peak, skill area, and region.

    View the Hub →
  • Australian & Oceania Peaks: A Complete Summit Guide

    Australian & Oceania Peaks: A Complete Summit Guide

    Australian & Oceania Peaks: A Complete Summit Guide (2026) | Global Summit Guide
    Cluster 10 · Regional Guides · Updated April 2026

    Australian & Oceania Peaks: A Complete Summit Guide

    From Kosciuszko’s easy walk-up to Carstensz Pyramid’s technical summit ridge, Oceania’s peaks span the full climbing spectrum. The complete regional guide covering Australia, New Zealand, Papua New Guinea, and Indonesia — plus the Seven Summits debate that has divided climbers for decades.

    4,884 m
    Carstensz
    highest peak
    2,228 m
    Kosciuszko
    Australia high
    3,724 m
    Aoraki
    NZ highest
    4
    Major
    countries
    Global Summit Guide A guide in Cluster 10 · Regional Guides View master hub →

    Oceania is mountaineering’s most geographically ambiguous continent. Depending on how you define the region, the highest peak is either Mount Kosciuszko (2,228 m — an easy walk-up in Australia) or Carstensz Pyramid (4,884 m — a serious technical climb in Indonesian Papua). This definitional question has fueled decades of Seven Summits debate and made Oceania the most contested continent in mountaineering. Beyond the Seven Summits argument, the region offers New Zealand’s Aoraki/Mount Cook, Papua New Guinea’s wild peaks, the Australian Alps, and Pacific volcanoes — a remarkably diverse mountain landscape often overlooked in favor of more famous ranges.

    How this guide was built

    Peak elevations reflect verified survey data from the respective national mapping authorities: Geoscience Australia, Land Information New Zealand (LINZ), Indonesian Geospatial Information Agency, and Papua New Guinea Office of the Valuer General. Climbing grades use the International French Adjectival System (IFAS). Cost estimates reflect 2026 operator pricing from established commercial providers. Seven Summits debate discussion draws from Adventure Stats records and American Alpine Journal commentary. Fact-check date: April 19, 2026.

    The Seven Summits Oceania Debate: Kosciuszko vs Carstensz

    The single most-debated question in Seven Summits mountaineering: which peak counts as Oceania’s Seven Summit? Two competing lists have coexisted for decades, and serious climbers typically complete both to settle the argument.

    Bass List · The Easy One

    Mount Kosciuszko

    2,228 m · Australia
    • Established 1985 by Dick Bass (first Seven Summits completer)
    • Uses mainland Australia as Oceania’s representative
    • Essentially a walk-up peak — 1-day summit from Thredbo
    • No technical climbing required in summer
    • Accessible to any fit hiker
    • Called “light Seven Summits” by purists
    • Total cost: $200–$500 including flights within Australia
    vs
    Messner List · The Serious One

    Carstensz Pyramid

    4,884 m · Indonesia
    • Established by Reinhold Messner as more appropriate challenge
    • Uses the Australian continental plate (includes New Guinea)
    • Technical 5.9-5.10 rock climbing on summit ridge
    • 4-7 day jungle approach in Papua, Indonesia
    • 10-14 day total expedition from arrival
    • Political complexity with Indonesian permits
    • Total cost: $18,000–$28,000 guided expedition

    Why the debate exists

    The debate comes down to how you define Oceania as a continent:

    • Political definition: Oceania = Australia + Pacific islands. Under this definition, Kosciuszko (Australia’s highest) is the obvious Seven Summit.
    • Continental plate definition: Oceania = Australian continental plate including New Guinea. Under this definition, Carstensz Pyramid (the plate’s highest) is the Seven Summit.
    • Mountaineering “seriousness” argument: Seven Summits should challenge climbers; Kosciuszko’s ease undermines the achievement, so Carstensz is the meaningful objective.
    What serious climbers do

    Most climbers completing the Seven Summits today do both Kosciuszko and Carstensz Pyramid to satisfy both lists — often called the “Eight Summits” approach. Kosciuszko takes a day as a cheap add-on to any Australia trip; Carstensz requires a dedicated expedition. Completing only the Messner List (Carstensz) is accepted by the Alpine Club and considered the more credible achievement. See our Seven Summits Guide for the complete seven-peak progression including how Oceania fits into a multi-year project.


    Oceania’s Major Climbing Countries

    Four countries dominate Oceanic mountain climbing — each with distinct peak character, access logistics, and climbing culture.

    🇦🇺 Australia

    Australia

    Easy access · Walk-up peaks · Seven Summits (Bass)

    Mainland Australia’s highest peak is Mount Kosciuszko (2,228 m) in the Australian Alps. No technical climbing required. Tasmania adds Mount Ossa (1,617 m). Country offers hiking and bushwalking traditions rather than alpine climbing.

    Highest peakKosciuszko
    SeasonDec–Feb
    🇳🇿 New Zealand

    New Zealand

    Southern Alps · Real mountaineering · Glaciers

    South Island’s Aoraki/Mount Cook (3,724 m) leads the Southern Alps — genuine alpine climbing with glaciers, ice, and technical routes. North Island adds Mount Taranaki (2,518 m) and Mount Ruapehu (2,797 m). World-class guide services.

    Highest peakAoraki
    SeasonNov–Mar
    🇮🇩 Indonesia (Papua)

    Indonesia (Papua)

    Carstensz Pyramid · Seven Summits (Messner) · Technical

    Indonesian Papua hosts Carstensz Pyramid (Puncak Jaya, 4,884 m) — Oceania’s highest peak under continental definition. Technical rock climbing, equatorial glaciers, one of the world’s most remote Seven Summits. Requires extensive logistical coordination.

    Highest peakCarstensz
    SeasonJul–Dec
    🇵🇬 Papua New Guinea

    Papua New Guinea

    Mount Wilhelm · Wild peaks · Cultural richness

    PNG hosts Mount Wilhelm (4,509 m), the country’s highest peak — a serious multi-day trek. Mount Giluwe (4,367 m) is a volcanic alternative. PNG’s mountains see far fewer climbers than Carstensz but offer extraordinary remote experiences.

    Highest peakMt Wilhelm
    SeasonMay–Sep

    Mount Kosciuszko: The Seven Summit Walk-Up

    01
    Australia’s highest · Bass List Seven Summit

    Mount Kosciuszko

    Kosciuszko National Park · NSW, Australia
    2,228 m7,310 ft

    Mount Kosciuszko is the highest peak on mainland Australia, named by Polish explorer Paul Edmund Strzelecki in 1840 after Tadeusz Kościuszko, the Polish-Lithuanian military commander. The peak sits in the Australian Alps of southeastern New South Wales, approximately 500 km south of Sydney in Kosciuszko National Park.

    For Seven Summits climbers using the Bass List, Kosciuszko is the continent’s representative — the easiest of the seven by a wide margin, completable in a single day by any fit hiker. The Main Range Track from Thredbo uses the Kosciuszko Express chairlift to reach 1,930 m, followed by a 6.5 km walk on maintained trail to the summit. Round trip is approximately 13 km with 400 m elevation gain, typically 4-6 hours.

    Alternative routes include the Summit Walk from Charlotte Pass (9 km one-way, more scenic) and the longer Main Range walking track. Kosciuszko National Park charges AU$29 vehicle entry per day. Best season is December-March; winter brings snow and skiing rather than hiking. The town of Thredbo offers full tourism infrastructure.

    GradeWalk (summer)
    Typical duration4–6 hrs
    Total cost$200–$500
    Base townThredbo

    Carstensz Pyramid: Oceania’s Technical Summit

    02
    Puncak Jaya · Messner List Seven Summit

    Carstensz Pyramid

    Papua Province · Indonesia (New Guinea)
    4,884 m16,024 ft

    Carstensz Pyramid — known officially as Puncak Jaya in Indonesian — is the highest peak in Oceania under continental plate definition. Located in Indonesian Papua on the western half of New Guinea, the peak combines serious technical rock climbing with extreme logistical complexity.

    The standard route climbs the peak’s north face via sustained rock climbing. The summit ridge requires 5.9-5.10 technical rock, tyrolean traverses, and exposed scrambling. The peak has equatorial glaciers — the only tropical glaciers outside Africa’s Mount Kilimanjaro and the Andes — though these are rapidly shrinking due to climate change. Summit day is typically 10-14 hours on technical terrain.

    The greater challenge is getting there. The jungle approach takes 4-7 days through remote Papua terrain, flown into Timika from Bali or Jakarta. Indonesian permits require advance coordination, and security considerations around the Grasberg mine sometimes affect access. Guided expeditions cost $18,000-$28,000 and take 10-14 days total. Success rates approximate 60-70%.

    Alternative helicopter access (bypassing the jungle trek) reduces expedition time to 6-8 days but costs significantly more. The peak sees approximately 80-150 successful summits per year, making it one of the least-summited Seven Summits along with Vinson Massif in Antarctica.

    GradeD+ / 5.9-5.10
    Expedition time10–14 days
    Total cost$18K–$28K
    Success rate60–70%

    Aoraki/Mount Cook: New Zealand’s Alpine Test

    03
    New Zealand’s highest · Southern Alps

    Aoraki / Mount Cook

    Southern Alps · South Island, New Zealand
    3,724 m12,218 ft

    Aoraki/Mount Cook is New Zealand’s highest peak and the Southern Hemisphere’s benchmark alpine climb. The name combines Māori (“Aoraki” — “cloud piercer”) with the English name honoring Captain James Cook. New Zealand officially uses the dual designation.

    First climbed in 1894 by Tom Fyfe, George Graham, and Jack Clarke, Aoraki has defined New Zealand mountaineering for 130 years. A major rockfall event in December 1991 reduced the mountain’s height by 10 meters — one of the few major peaks whose elevation has been verifiably altered by geological event in modern times.

    The standard Linda Glacier route grades AD+ with sustained snow and ice climbing over 2-3 days. Climbing requires navigating crevasses, steep ice faces, and summit ridge exposure. Aoraki has killed approximately 240+ climbers since record-keeping began, making it proportionally one of the most dangerous Southern Hemisphere peaks.

    Commercial climbing costs NZ$4,000-$8,000 for guided 3-5 day programs through Aspiring Guides, Alpine Guides Aoraki, and Adventure Consultants. Access via Aoraki/Mount Cook Village on the South Island, 300 km from Christchurch. Primary climbing season November through March (Southern Hemisphere summer). Weather notoriously unpredictable — plan 10-14 day trips to allow summit attempts.

    GradeAD+
    Standard routeLinda Glacier
    Total costNZ$4–8K
    SeasonNov–Mar

    Other Major Oceania Peaks

    Beyond the three headline peaks, Oceania offers many worthwhile climbing objectives. Here’s the broader landscape for climbers planning regional projects.

    PeakCountryHeightCharacterGradeSeason
    Carstensz PyramidIndonesia4,884 mTechnical rock, Seven SummitD+Jul–Dec
    Mount WilhelmPapua New Guinea4,509 mPNG’s highest, trekking peakPDMay–Sep
    Mount GiluwePapua New Guinea4,367 mVolcanic, second PNG highestPDMay–Sep
    Aoraki/Mount CookNew Zealand3,724 mNZ’s highest, technical alpineAD+Nov–Mar
    Mount TasmanNew Zealand3,497 mTechnical NZ alpineAD+Nov–Mar
    Mount Taranaki (Egmont)New Zealand2,518 mNear-perfect cone volcanoPDNov–Apr
    Mount RuapehuNew Zealand2,797 mActive volcano, accessiblePDOct–Apr
    Mount KosciuszkoAustralia2,228 mWalk-up Seven Summit (Bass)FDec–Mar
    Mount TownsendAustralia2,209 mAustralia’s #2, near KosciuszkoFDec–Mar
    Mount BogongAustralia1,986 mVictoria’s highestFNov–Apr
    Mount OssaTasmania, AU1,617 mTasmania’s highest, wildernessFDec–Mar
    Mount YasurVanuatu361 mActive volcano, tourist accessFJun–Oct

    New Zealand beyond Aoraki

    New Zealand’s Southern Alps contain 23 peaks over 3,000 m, making the region richer in alpine climbing than its relatively small size suggests. Major climbing objectives beyond Aoraki include Mount Tasman (3,497 m, technically harder than Aoraki), Malte Brun (3,199 m), Mount Sefton (3,151 m), and the Darran Mountains in Fiordland. The New Zealand Alpine Club maintains 24 huts across the Southern Alps.

    Australian Alps

    The Australian Alps extend from the Australian Capital Territory through New South Wales into Victoria. Major peaks beyond Kosciuszko include Mount Townsend (2,209 m), Mount Twynam (2,196 m), Mount Bogong (1,986 m, Victoria’s highest), and Mount Feathertop (1,922 m). The range hosts Australia’s primary ski resorts (Thredbo, Perisher, Mount Hotham, Falls Creek).


    When to Climb Oceania Peaks: Southern Hemisphere Timing

    Oceania’s climbing calendar is fundamentally different from Northern Hemisphere destinations — December through March is peak season for most peaks rather than June-August. Equatorial peaks (Carstensz, PNG) have different patterns based on rainfall rather than temperature.

    Country-specific seasons

    • Australia (Kosciuszko): December-March optimal. Winter (June-September) transforms the peak into a ski mountaineering objective.
    • New Zealand (Aoraki, Southern Alps): November through March is the Southern Hemisphere summer climbing season. December-February is peak conditions.
    • Indonesia (Carstensz): July through December is driest — Papua has year-round rainfall but these months offer the best windows.
    • Papua New Guinea (Mount Wilhelm): May-September dry season.
    • Pacific volcanoes (Vanuatu, Fiji): June-October dry season, avoiding cyclone season November-April.

    Flipping the climbing calendar

    Serious climbers often use Oceania’s seasonal inversion to extend their annual climbing window. North American climbers might spend June-August on Denali, then November-March on Aoraki and Carstensz. Seven Summits projects often schedule Oceania attempts in January-February when the Alps and Himalaya are in off-season. This creates year-round training and climbing potential for dedicated alpinists.


    Oceania Peaks FAQ: Your Common Questions Answered

    What is the highest mountain in Oceania?

    The highest mountain in Oceania depends on how Oceania is defined. By continental definition including the Australian continental plate and New Guinea, the highest peak is Puncak Jaya (Carstensz Pyramid) at 4,884 meters (16,024 feet) in Papua, Indonesia — the western half of New Guinea. By political Australian continent (mainland + Tasmania), the highest is Mount Kosciuszko at 2,228 meters (7,310 feet). The Seven Summits debate centers on this distinction: the Messner List uses Carstensz Pyramid as Oceania’s Seven Summit; the Bass List uses Kosciuszko. In Papua New Guinea, Mount Wilhelm (4,509 m) is the highest peak. Across New Zealand, Aoraki/Mount Cook is the highest at 3,724 m. The entire Oceanic continental region, including Melanesian, Micronesian, and Polynesian island peaks, contains fewer 4,000 m peaks than any other Seven Summits continent.

    Kosciuszko vs Carstensz: which is the Seven Summit?

    Kosciuszko vs Carstensz Pyramid is mountaineering’s most-debated Seven Summits question. Two lists have coexisted for decades: (1) The Bass List (Dick Bass, 1985) uses Mount Kosciuszko (2,228 m, Australia) as Oceania’s Seven Summit. (2) The Messner List (Reinhold Messner) uses Carstensz Pyramid / Puncak Jaya (4,884 m, Indonesia) as the Seven Summit. The Messner List is considered the more “serious” mountaineering challenge because Carstensz requires technical rock climbing (5.10 difficulty), remote jungle approach, and serious altitude. Kosciuszko is essentially a walk-up peak that most fit hikers can complete in a day. For serious Seven Summits climbers, completing the Messner List (including Carstensz) is the recognized achievement. The Bass List with Kosciuszko is sometimes called “light Seven Summits.” Many completer climbers do both to satisfy both lists. The debate reflects different definitions of the Oceania continent — some view New Guinea as part of Oceania, others include only mainland Australia.

    How hard is it to climb Carstensz Pyramid?

    Carstensz Pyramid (4,884 m, Indonesia) is a serious technical climbing objective — graded D+ (Difficile) on the IFAS scale with sustained 5.9-5.10 rock climbing on the summit ridge. The challenges include: (1) Technical rock climbing on the final 300 m summit ridge, including tyrolean traverses and exposed scrambling. (2) Equatorial jungle approach requiring 4-7 days of trekking through remote Papua terrain. (3) Extreme humidity and rainfall — one of the wettest regions on Earth. (4) Political complexity — Indonesia requires special permits and Papua region entry coordination. (5) Logistical difficulty — flights to Timika are unreliable, and the full expedition takes 10-14 days. Guided expeditions cost $18,000-$28,000 including all logistics and permits. Success rates approximate 60-70% in favorable conditions. Carstensz is notably harder than Kosciuszko but requires different preparation than high-altitude 8,000ers — more technical rock climbing than altitude endurance.

    What is the highest mountain in New Zealand?

    Aoraki/Mount Cook is the highest mountain in New Zealand at 3,724 m (12,218 ft) — part of the Southern Alps on the South Island. The mountain has dual naming: “Aoraki” is the Māori name meaning “cloud piercer,” while “Mount Cook” is the English name honoring Captain James Cook. New Zealand officially uses the combined “Aoraki/Mount Cook” designation. The mountain was climbed first in 1894 by Tom Fyfe, George Graham, and Jack Clarke. The standard Linda Glacier route is graded AD+ with sustained snow and ice climbing over 2-3 days. Aoraki has killed approximately 240+ climbers since record-keeping began, making it proportionally one of the most dangerous peaks in the Southern Hemisphere. A major rockfall event in December 1991 reduced the mountain’s height by 10 meters. Current commercial climbing costs NZ$4,000-$8,000 for guided 3-5 day programs. Access is via Aoraki/Mount Cook Village with flights from Christchurch or scenic drives through Canterbury.

    When is the best time to climb Oceania peaks?

    Best times vary significantly across Oceania due to Southern Hemisphere seasonality and equatorial locations: (1) Mount Kosciuszko (Australia): December-February is the classic summer hiking season; snow climbing December-March; other times possible but more challenging weather. (2) Carstensz Pyramid (Indonesia): Late July through early December offers drier conditions — Papua has year-round rainfall but these months are least wet. (3) Aoraki/Mount Cook (New Zealand): November through early March is the Southern Hemisphere summer climbing season; peak conditions December-February. (4) Australian Alps peaks (Victoria, NSW): December-February for summer hiking; winter peaks July-September for ski mountaineering. (5) Mount Taranaki (New Zealand North Island): November-April for standard climbing. (6) Papua New Guinea peaks (Mount Wilhelm): May-September dry season. (7) Pacific volcanoes (Fiji, Vanuatu): June-October dry season avoiding cyclone season November-April. Southern Hemisphere seasonality reverses the traditional alpine climbing calendar — Oceania’s best climbing window is typically December-February when most other destinations are in winter.

    How do you climb Mount Kosciuszko?

    Mount Kosciuszko (2,228 m) is the easiest of the Seven Summits — essentially a summer hike rather than a climb. Three main routes: (1) Main Range Track from Thredbo: Take the Kosciuszko Express chairlift from Thredbo Village to 1,930 m, then walk 6.5 km one-way along a well-maintained track. Total 13 km round trip, 400 m elevation gain, typically 4-6 hours. Popular and accessible. (2) Summit Walk from Charlotte Pass: 9 km one-way walk, 18 km round trip, 500 m elevation gain. More scenic with fewer crowds. (3) Mount Kosciuszko Summit Ride: Some operators offer cycle access via maintained fire roads. Kosciuszko National Park entry fee is AU$29 per vehicle per day. Best season is December-March for snow-free conditions. No guide required, no special permits. Thredbo Village is approximately 500 km south of Sydney, 6 hours drive. For Seven Summits collectors using the Bass List, Kosciuszko is the quickest Seven Summit — most climbers complete summit and descent in a single day.

    What peaks are in the Australian Alps?

    The Australian Alps are a mountain range spanning the Australian Capital Territory, New South Wales, and Victoria. Major peaks include: (1) Mount Kosciuszko (2,228 m, NSW) — Australia’s highest mainland peak. (2) Mount Townsend (2,209 m, NSW) — Australia’s second-highest at the time of first measurement (originally thought to be highest). (3) Mount Twynam (2,196 m, NSW) — third-highest. (4) Mount Bogong (1,986 m, Victoria) — Victoria’s highest peak. (5) Mount Feathertop (1,922 m, Victoria). (6) Mount Hotham (1,862 m, Victoria) — major ski resort. (7) Mount Jagungal (2,061 m, NSW). (8) The Main Range including Mount Carruthers and Mount Lee. The Alps extend roughly 500 km from the ACT through southern NSW into Victoria. Home to Kosciuszko National Park, Alpine National Park, and Namadgi National Park. The range includes Australia’s main ski resorts (Thredbo, Perisher, Mount Hotham, Falls Creek) operating primarily June-September. Summer hiking season December-March offers wildflower displays and accessible peaks for day walks and multi-day treks.

    Can you climb peaks in Papua New Guinea?

    Yes, peaks in Papua New Guinea are climbable though involve significant logistical complexity. Mount Wilhelm (4,509 m) is PNG’s highest peak and a genuine climbing objective — primarily a strenuous multi-day trek rather than technical climbing, typically 3-5 days from the town of Kundiawa. Other major PNG peaks include Mount Giluwe (4,367 m, a volcanic peak), Mount Hagen (3,778 m), and Mount Victoria (4,072 m in the Owen Stanley Range). Key considerations for PNG climbing: (1) Political stability varies by region — consult current travel advisories. (2) Infrastructure is limited outside main towns. (3) Local communities control land access — working with licensed operators is essential. (4) Malaria is present in lowland approaches. (5) Best climbing season is May-September dry season. (6) Costs are higher than expected due to logistical complexity — Mount Wilhelm climbs run $3,000-$6,000 guided. Operators like PNG Trekking Adventures and No Roads Expeditions specialize in PNG mountain expeditions. Experienced climbers find PNG peaks offer some of the most remote and culturally distinctive mountain experiences in the world.


    Authoritative Sources & Further Reading

    Content reflects verified national mapping data and authoritative mountaineering sources:

    • Geoscience Australia — ga.gov.au — Australian peak elevations and surveys
    • Land Information New Zealand (LINZ) — linz.govt.nz — NZ mountain data
    • Indonesian Geospatial Information Agency (BIG) — Papua region mapping
    • New Zealand Alpine Club — alpineclub.org.nz — Southern Alps hut network and climbing records
    • Department of Conservation New Zealand — doc.govt.nz — National park regulations
    • NSW National Parks and Wildlife Service — environment.nsw.gov.au — Kosciuszko National Park
    • Adventure Stats — 7summits.com — Seven Summits records and list documentation
    • American Alpine Journal — Seven Summits debate and climbing history
    • Operator websites: Alpine Guides Aoraki, Adventure Consultants, Aspiring Guides, Alpine Ascents International, Mountain Trip, PNG Trekking Adventures, No Roads Expeditions
    • Reference texts: Seven Summits (Dick Bass, Frank Wells), Meetings with the Seven Summits (Messner), Aoraki/Mount Cook: A Guide (Gilbert van Reenen), Australian Alpine Climbing (various)
    Published: February 15, 2026
    Last updated: April 19, 2026
    Next review: July 2026
    Part of the Global Summit Guide

    Back to the Master Hub

    This guide is one of 71 across 12 thematic clusters on Global Summit Guide. The master hub organizes every guide by experience tier, specific peak, skill area, and region.

    View the Hub →
  • Top 50 Technical Mountaineering Objectives

    Top 50 Technical Mountaineering Objectives

    Top 50 Technical Mountaineering Objectives: Expert Ranked Guide (2026) | Global Summit Guide
    Anchor Guide · Cluster 03 · Updated April 2026

    Top 50 Technical Mountaineering Objectives: Expert Ranked Guide

    The definitive ranking of 50 technical climbing objectives worldwide — organized by difficulty tier, with route grade, summit rate, fatality statistics, and operator guidance. Written for serious alpinists progressing past standard mountaineering into genuine technical terrain.

    50
    Technical
    objectives
    PD–ED+
    Grade
    range
    6
    Major
    regions
    8,849 m
    Highest
    objective
    Global Summit Guide A guide in Cluster 03 · Technical & Expert View master hub →

    Technical mountaineering opens a different sport than standard guided climbing. These are objectives where the route is the challenge — not just the altitude, not just the approach, but sustained technical difficulty that demands years of deliberate preparation. This guide ranks 50 objectives across six major regions, tiers them by the International French Adjectival System (IFAS) plus regional grades, and delivers the data you need to plan a progression through them. Meant for climbers who’ve already summited standard 7,000 m peaks and are asking what’s next.

    How this ranking was built

    Grades use the International French Adjectival System (IFAS) as primary, with regional grades (NCCS in North America, Yosemite Decimal System for rock, Water Ice for ice) as supplements. Summit rate and fatality data draw from the Himalayan Database (Nepal), American Alpine Journal, Alpine Club of Canada, and peer-reviewed climbing statistics from national alpine associations. Route selection reflects both historical significance and current relevance to modern climbers. Reviewed by IFMGA-certified guides with extensive experience on the objectives listed. Fact-check date: April 19, 2026.

    How to Read Alpine Climbing Grades: The Difficulty System

    Before the rankings, a grounding in the grading system these objectives use. The International French Adjectival System (IFAS) is the standard for alpine climbing worldwide, running from F (Easy) to ABO (Abominable — beyond Grade VII). Each grade represents increasing commitment, technical difficulty, and objective hazard.

    PD
    Peu Difficile
    (Slightly Difficult)
    Easy routes
    AD
    Assez Difficile
    (Fairly Difficult)
    Classic alpine
    D
    Difficile
    (Difficult)
    Serious alpine
    TD
    Très Difficile
    (Very Difficult)
    Expert
    ED/ABO
    Extremely/
    Abominably Difficult
    Elite

    Beyond the letter grade

    Alpine grades combine technical difficulty + altitude + objective hazard + commitment. A PD route on Denali is more serious than a PD route in the Alps because altitude and cold amplify every difficulty. Modern climbers should also consider:

    • Rock grade (YDS): 5.5 through 5.12+ — the free-climbing difficulty of rock sections
    • Ice grade (WI): WI 2 through WI 6 — the water ice difficulty
    • Mixed grade (M): M4 through M8 — rock and ice combined
    • Commitment grade (I–VII): length and remoteness of the route
    • Serac/avalanche hazard: Often unwritten but critical

    The Six Major Regions for Technical Alpine Climbing

    The 50 objectives below span six climbing regions, each with distinctive character. Understanding regional differences helps climbers plan progressions that build relevant experience — Patagonia’s weather prepares you for similar patterns in Alaska, while Himalayan altitude demands transfer little to Alpine-style climbs.

    European Alps

    15 objectives · France/Switzerland/Italy

    The cradle of modern alpine climbing. Dense peak concentration, excellent hut network, reliable weather forecasting. Mont Blanc, Matterhorn, Eiger headline. Access ranges from cable cars to multi-day approaches.

    Himalaya & Karakoram

    12 objectives · Nepal/Pakistan/India

    The 8,000 m peaks plus technical 6,000-7,000 m objectives. Everest, K2, Annapurna, Nanga Parbat, Ama Dablam. Expedition logistics, altitude physiology, and serac hazards define the region.

    Patagonia

    6 objectives · Argentina/Chile

    The weather crucible. Cerro Torre, Fitz Roy, Torre Egger. Short summit windows demand waiting, technical rock and ice, and commitment. Storm-blown season of November–March.

    Alaska

    8 objectives · USA

    Cold and commitment. Denali, Mount Huntington, Mount Hunter, Ruth Gorge walls. Remote access via bush plane, extreme weather, classic ridges and steep faces. May-July climbing season.

    Andes

    5 objectives · Peru/Bolivia/Argentina

    Technical snow and ice at altitude. Alpamayo, Huascarán, Pisco, Salcantay. Cordillera Blanca concentration allows multiple objectives per trip. May-August dry season.

    Rockies & Other

    4 objectives · Canada/North America

    Robson, Columbia, Temple, plus select Pacific Northwest technical lines. Accessible training ground for North American climbers preparing for bigger ranges. Varied seasonal windows.


    Tier 1: European Alps (15 Objectives)

    The Alps concentrate more classic technical climbing than any equivalent range on Earth. The 15 objectives below span accessible classics (Matterhorn, Mont Blanc) to elite test pieces (Eiger North Face, Grandes Jorasses). Most require 2–3 days of climbing; approach via hut network allows compressed timelines unavailable in remote ranges.

    #Peak / RouteCountryHeightGradeDays
    Mont Blanc Massif · France/Italy
    1Mont Blanc · Goûter RouteFrance4,810 mPD+2–3
    2Grandes Jorasses · Walker SpurFrance4,208 mED12–3
    3Mont Blanc du Tacul · NE FaceFrance4,248 mD+1–2
    4Aiguille du Dru · West FaceFrance3,754 mTD+2–4
    Valais & Bernese Alps · Switzerland
    5Matterhorn · Hörnli RidgeSwitzerland4,478 mAD1–2
    6Matterhorn · North FaceSwitzerland4,478 mTD1–2
    7Eiger · Heckmair Route (North Face)Switzerland3,967 mED22–3
    8Eiger · Mittellegi RidgeSwitzerland3,967 mD2
    9Weisshorn · East RidgeSwitzerland4,506 mAD+2
    10Monte Rosa · Dufourspitze NormalItaly/CH4,634 mPD+2
    Dolomites & Eastern Alps · Italy/Austria
    11Cima Grande di Lavaredo · North FaceItaly2,999 mTD1
    12Tre Cime · Comici RouteItaly2,999 mD+1
    13Marmolada · South FaceItaly3,343 mD1–2
    14Piz Badile · NE FaceItaly/CH3,308 mTD1–2
    15Grossglockner · Normal RouteAustria3,798 mPD+2

    For detailed route comparisons see our Greatest Alps Mountains Compared guide and the Mont Blanc Climbing Guide.


    Tier 2: Himalaya & Karakoram (12 Objectives)

    The 8,000 m peaks plus the most technical 6,000–7,000 m objectives in Nepal and Pakistan. These objectives combine extreme altitude with sustained technical difficulty — the hardest combination in mountaineering. Most require expedition-style logistics, multiple weeks on approach, and $35,000–$230,000 operator costs.

    #Peak / RouteCountryHeightGradeFatality
    8,000 m Peaks · Himalaya/Karakoram
    16Mt Everest · South ColNepal8,849 mD~1.3%
    17K2 · Abruzzi SpurPakistan8,611 mTD~20%
    18Kangchenjunga · North FaceNepal/India8,586 mTD~15%
    19Lhotse · West FaceNepal8,516 mD+~3%
    20Annapurna I · North FaceNepal8,091 mTD+~28%
    21Nanga Parbat · Diamir FacePakistan8,126 mTD~22%
    22Makalu · NW RidgeNepal/China8,485 mD+~8%
    Technical Lower Peaks · Nepal/Pakistan
    23Ama Dablam · SW RidgeNepal6,812 mD~2%
    24Thamserku · South RidgeNepal6,623 mD~3%
    25Pumori · SE RidgeNepal7,161 mD+~4%
    26Laila Peak · SW RidgePakistan6,096 mTD~2%
    27Spantik · SW RidgePakistan7,027 mAD+<1%

    Fatality rates reflect historical averages through 2024. Modern rates on commercially supported peaks (Everest, Lhotse) have improved substantially; rates on less-supported peaks remain close to historical values. See our Nepal’s Technical Peaks Collection for deeper peak-specific coverage.


    Tier 3: Patagonia (6 Objectives)

    The weather crucible of technical mountaineering. Patagonian peaks are famous for requiring enormous patience for brief weather windows — climbers can wait weeks for conditions. When the windows arrive, sustained technical rock, ice, and mixed climbing at moderate altitude make these some of the world’s finest pure climbing.

    #Peak / RouteCountryHeightGradeDays
    Fitz Roy & Cerro Torre Group
    28Fitz Roy · California RouteArgentina3,405 mED12–4
    29Cerro Torre · Compressor RouteArgentina3,128 mED+3–5
    30Cerro Torre · Ragni RouteArgentina3,128 mTD+2–4
    31Torre Egger · Via dei RagniArgentina2,850 mED13–4
    32Aguja Poincenot · Whillans RouteArgentina3,002 mTD+1–2
    33Cerro Murallón · SE FaceArgentina2,831 mED23–5

    Patagonian climbing season runs November through March with peak summit windows typically in January. Plan for 4-6 week expeditions given the weather-waiting reality. Most climbers attempt 1–2 objectives per trip.


    Tier 4: Alaska (8 Objectives)

    Alaska delivers cold-weather committing climbing in some of the world’s most remote terrain. Bush plane access, extreme weather, and sustained technical difficulty define the range. Many of the Ruth Gorge walls offer Grade VI+ objectives that remain among the hardest mixed routes in the world.

    #Peak / RouteLocationHeightGradeDays
    Alaska Range
    34Denali · West ButtressAlaska6,190 mAD+14–21
    35Denali · Cassin RidgeAlaska6,190 mED110–14
    36Denali · South ButtressAlaska6,190 mTD+14–18
    37Mount Huntington · Harvard RouteAlaska3,731 mED12–4
    38Mount Hunter · North ButtressAlaska4,442 mED+4–7
    39Moose’s Tooth · Ham & EggsAlaska3,150 mTD+1–2
    40Mt Foraker · Sultana RidgeAlaska5,304 mTD10–14
    41Mount Dickey · The Wine BottleAlaska2,909 mED22–4

    Alaska climbing season runs mid-April through early July. Bush plane access via Talkeetna (Kahiltna Glacier for Denali/Foraker/Hunter) or other glacier landings. Weather forecasting critical given jet-stream exposure.


    Tier 5: Andes (5 Objectives)

    The Cordillera Blanca of Peru concentrates more technical snow-and-ice objectives than any other dense region on Earth. Classic peaks offer AD to TD+ climbing at accessible altitudes, making Peru an ideal stepping stone between Alpine and Himalayan climbing.

    #Peak / RouteCountryHeightGradeDays
    Peru & Bolivia
    42Alpamayo · Ferrari Route (SW Face)Peru5,947 mTD2–3
    43Huascarán Sur · Normal RoutePeru6,768 mAD+5–7
    44Artesonraju · SE FacePeru6,025 mD+2–3
    45Pisco · Normal RoutePeru5,752 mPD+2
    46Illimani · Normal RouteBolivia6,438 mAD4–5

    Peruvian climbing season runs May through August (dry season). Huaraz is the primary basing town, with excellent logistics and affordable local guiding. Most climbers attempt 2–3 peaks per trip, making Peru a cost-effective technical training ground.


    Tier 6: Rockies & Other North America (4 Objectives)

    North American climbers’ training ground for bigger ranges. Accessible approach and logistics make these peaks valuable for building technical skills before committing to Himalayan or Patagonian expeditions.

    #Peak / RouteLocationHeightGradeDays
    Canadian Rockies & Pacific NW
    47Mount Robson · Kain FaceBC, Canada3,954 mAD+3–4
    48Mt Temple · East RidgeAB, Canada3,543 mD2
    49Liberty Ridge · Mt RainierWA, USA4,392 mD3
    50Mount Columbia · NE RidgeAB, Canada3,747 mD+3

    North American technical climbing sees concentrated summer seasons (July–September) with brief shoulder windows. Canadian Rockies offer some of the best mixed climbing terrain on the continent; Cascades concentrate alpine ice opportunities.


    How to Prepare for Technical Alpine Climbing: The Progression

    Technical alpine climbing requires 3–5 years of systematic progression across four distinct skill domains. Climbers who skip tiers have dramatically higher accident rates and frequently fail on objectives that were within their physical capability but outside their skill ceiling.

    The four skill domains

    1. Rock climbing: 5.10 sport/trad proficiency on multi-pitch routes. Commit to building rack management and efficiency.
    2. Ice climbing: WI 4 in various conditions. The hardest modern alpine objectives require WI 5+ performance.
    3. Alpine mixed: Combining rock, ice, and snow on actual peaks. This is where the sport lives.
    4. High altitude: 4,000–6,000 m with expedition-style logistics. Physiological preparation can’t be skipped.

    Typical prerequisite progression

    • Year 1–2: AMGA Alpine Mountaineering courses, local alpine rock climbing, Mont Blanc or equivalent PD/AD objectives.
    • Year 2–3: Intermediate AD/D peaks — Matterhorn Hörnli, Mont Blanc harder routes, Mount Baker, Mount Hood advanced routes.
    • Year 3–4: First D+/TD objectives — Ama Dablam, Alpamayo, Huntington. First 6,000+ m peak.
    • Year 4–5: Serious TD/TD+ — Denali West Buttress, first 8,000er attempt, Patagonian shoulder season.
    • Year 5+: ED objectives if progression continues — Eiger North Face, Fitz Roy, Cassin Ridge.

    Most climbers plateau at the Grade V (TD) level where skills, physical demands, and risk tolerance align. Moving beyond requires genuine alpine-climbing commitment, often at the expense of other life priorities. See our Mountaineering for Beginners guide for earlier-stage progression and High-Altitude Training Program for physiological preparation.

    The peer-partnership reality

    Beyond Grade IV/D, most technical climbing is done with peer partners, not commercial guides. The skill progression up to TD often runs through professional guiding, but ED-level objectives are typically climbed in 2-person teams of equal expertise. This transition — from guided climber to independent partner — is itself a major psychological and skill shift that defines what technical alpinism actually is. Partners matter as much as peaks at this level.


    Technical Mountaineering FAQ: Your Common Questions Answered

    What is the hardest mountain in the world to climb?

    K2 (8,611 m) is widely considered the hardest major mountain in the world to climb. It has a historical fatality rate of approximately 20% among summiters, compared to Everest’s 1.3% modern rate. K2 demands sustained technical difficulty above 7,500 m including the infamous Bottleneck couloir, extreme weather exposure, and no commercial rescue infrastructure above Camp 2. Annapurna I (8,091 m) actually has the highest fatality rate of all 8,000 m peaks at approximately 28%, making it statistically deadlier though less technically demanding than K2. For shorter alpine peaks, routes like the Eiger North Face, Cerro Torre’s Compressor Route, and Fitz Roy’s harder lines represent the world’s most technical moderate-altitude objectives. Difficulty depends heavily on which metric matters: pure technical grade, altitude, exposure duration, or fatality statistics.

    What is grade VI alpine climbing?

    Grade VI in the International French Adjectival System (IFAS) represents expert-level alpine climbing objectives — typically multi-day routes with sustained technical difficulty, severe objective hazards, and major commitment. Grade VI routes include the Eiger North Face, the Walker Spur on Grandes Jorasses, and the North Face of Les Droites. These climbs require expert skills in rock climbing (5.10+), ice climbing (WI 5+), mixed terrain, glacier travel, and weather judgment. The French Alpine grading system runs from F (Facile/Easy) through Grade VII (extremely difficult) with additional technical sub-grades. IFAS Grade V objectives include major alpine routes like the Matterhorn’s Hörnli Ridge; Grade VII includes the hardest new routes in the Alps and Patagonia. Most commercial guided climbing operates at Grade III to V; Grade VI and above requires independent expert-level climbing teams.

    How many people die climbing K2?

    K2 has historically had a fatality rate of approximately 20–25% among summiters, compared to Everest’s modern 1.3% rate. Through 2024, approximately 700+ people had summited K2 with over 90 deaths on the mountain. The 2008 disaster alone killed 11 climbers in a single summit push, the deadliest day in K2’s history. Key fatality factors include: extreme altitude (8,611 m), the Bottleneck couloir with its active serac hazards above Camp 4, extreme weather exposure on narrow summit ridges, inability to helicopter rescue above Camp 2, and Pakistani rescue infrastructure that lacks Nepal’s Sherpa team capability. Modern commercial K2 expeditions run $35,000 to $55,000 and have improved summit rates to around 50% when weather permits, but the peak’s fundamental character as the world’s most technically demanding 8,000er remains unchanged. K2 is categorically different from Everest despite both being 8,000 m peaks.

    What is the Eiger North Face?

    The Eiger North Face is a 1,800-meter vertical wall in the Bernese Alps of Switzerland, considered one of the most famous and storied climbing objectives in alpine history. First successfully climbed in 1938, the face features named passages including the Difficult Crack, Hinterstoisser Traverse, Swallow’s Nest, Flat Iron, Ramp, Traverse of the Gods, White Spider, Exit Cracks, and Summit Icefield. Grading the classic Heckmair Route is IFAS D+ / 5.9 / WI 4 / 60° snow — sustained technical difficulty over multi-day climbs. The face has killed over 60 climbers since the first successful ascent, including the 1936 Kurz-Rainer party featured in the film ‘North Face’. Modern climbers typically complete the face in 1–3 days depending on conditions; speed ascents under 8 hours exist. The Eiger’s stone-fall hazard and notorious storm potential make it dangerous even for expert climbers with ideal conditions. It remains one of alpine climbing’s iconic objectives.

    What are the 14 eight-thousanders?

    The 14 eight-thousanders are all mountains on Earth exceeding 8,000 meters (26,247 feet), located entirely in the Himalaya and Karakoram ranges. The complete list: Mount Everest (8,849 m), K2 (8,611 m), Kangchenjunga (8,586 m), Lhotse (8,516 m), Makalu (8,485 m), Cho Oyu (8,188 m), Dhaulagiri (8,167 m), Manaslu (8,163 m), Nanga Parbat (8,126 m), Annapurna I (8,091 m), Gasherbrum I (8,080 m), Broad Peak (8,051 m), Gasherbrum II (8,034 m), and Shishapangma (8,027 m). As of 2025, approximately 50 climbers have completed all 14 eight-thousanders. The project typically spans 10–20 years and costs $500,000+ when done across multiple expeditions. Nirmal Purja’s ‘Project Possible’ in 2019 demonstrated all 14 could be completed in under 7 months with modern logistics; Kristin Harila broke speed records again in 2023. The 8,000ers project remains the apex of high-altitude mountaineering.

    What makes Annapurna so dangerous?

    Annapurna I (8,091 m) holds the highest fatality rate of the 14 eight-thousanders at approximately 28% through most of its climbing history — roughly one climber dies for every 3–4 who summit. Primary dangers include: (1) Extreme avalanche hazard on all routes, particularly the South Face. (2) Serac falls from massive hanging glaciers that commercial routes pass beneath. (3) Monsoon-influenced weather patterns that close summit windows rapidly. (4) Avalanche-prone fluted faces with no reliable safe passage. (5) Historically limited rescue infrastructure compared to Everest’s Khumbu region. The South Face ascent in 1970 by Chris Bonington’s team was groundbreaking but exemplified the mountain’s dangers. Modern commercial Annapurna expeditions have improved safety with better forecasting and logistics, but the mountain’s fundamental avalanche hazard cannot be fully mitigated. The peak is part of the 14 8,000ers project for completing climbers but almost always left for later in the journey — few climbers attempt Annapurna as their first 8,000er.

    What is the Matterhorn’s Hörnli Ridge difficulty?

    The Matterhorn’s Hörnli Ridge is graded IFAS AD (Assez Difficile / Fairly Difficult) — IFAS Grade III to IV with 5.5 rock climbing and sustained exposure on mixed terrain over approximately 1,200 m of elevation gain from the Hörnli Hut to the 4,478 m summit. It is the standard and most climbed route on the Matterhorn, typically completed in 8–12 hours round trip by fit, experienced climbers. The route features: fixed ropes in key sections (though reliance on them varies by guide), sustained scrambling on rock, several short steep sections requiring confident movement, and significant exposure throughout. Weather can turn the route dangerous rapidly. Approximately 500 climbers have died on the Matterhorn since its first ascent in 1865, primarily from falls and storms. Mont Blanc and Matterhorn together cause more climbing fatalities than any other European peak. See our Alps comparison guide for detailed Matterhorn route assessment.

    How do I prepare for technical alpine climbing?

    Preparing for technical alpine climbing requires 3–5 years of systematic progression across four skill domains: (1) Rock climbing to 5.10 sport and trad proficiency on multi-pitch routes. (2) Ice climbing to WI 4 in various conditions. (3) Alpine mixed climbing combining rock, ice, and snow terrain. (4) High-altitude experience at 4,000–6,000 m with expedition-style logistics. Formal courses are essential: AMGA Alpine Mountaineering certification, IFMGA guide programs in Europe, and university mountaineering clubs provide structured progression. Typical prerequisites for serious technical objectives: (a) Intermediate peaks like Mont Blanc, Weisshorn, or the Matterhorn’s Hörnli Ridge first. (b) North American alpine rock like Liberty Ridge on Rainier. (c) First 8,000er or similarly committing altitude experience. (d) Winter mountaineering experience in Patagonia or Alaska. The progression isn’t optional — climbers who skip tiers have dramatically higher accident rates. Most Grade V and above technical objectives require 5+ years of dedicated alpine progression.


    Authoritative Sources & Further Reading

    Route grading and summit statistics reflect primary climbing databases and authoritative alpine clubs:

    • The Himalayan Database (HDB) — himalayandatabase.com — Primary source for Himalaya/Karakoram summit and fatality statistics
    • American Alpine Club / American Alpine Journal — americanalpineclub.org — North American climbing records and accident analysis
    • Alpine Club of Canada — alpineclubofcanada.ca — Canadian Rockies route information
    • Club Alpin Français — ffcam.fr — French Alps route grades and conditions
    • Swiss Alpine Club (SAC) — sac-cas.ch — Swiss and Italian Alps route documentation
    • Alan Arnette — alanarnette.com — Annual Everest and 8,000 m peak coverage
    • American Mountain Guides Association (AMGA) — amga.com — North American technical climbing certification
    • IFMGA (UIAGM) — ifmga.info — International mountain guide certification standards
    • Kurt Diemberger archives and historical accounts for Karakoram climbing context
    • Reference texts: Freedom of the Hills (The Mountaineers), Extreme Alpinism (Mark Twight), Alpine Climbing: Techniques to Take You Higher (Houston & Cosley), K2: Life and Death on the World’s Most Dangerous Mountain (Viesturs)
    Published: February 15, 2026
    Last updated: April 19, 2026
    Next review: July 2026
    Part of the Global Summit Guide

    Back to the Master Hub

    This guide is one of 71 across 12 thematic clusters on Global Summit Guide. The master hub organizes every guide by experience tier, specific peak, skill area, and region.

    View the Hub →

  • Best Mountaineering Crampons: Buyer’s Guide

    Best Mountaineering Crampons: Buyer’s Guide

    Best Mountaineering Crampons: A Complete Buyer’s Guide 2025

    Mountaineering crampons are essential tools for climbers, providing the necessary traction on icy and snowy terrains. These specialized devices attach to boots, enhancing safety and performance during challenging climbs. In this comprehensive guide, we will explore the various types of crampons, their materials, and how to choose the best ones for your mountaineering adventures in 2025. Many climbers face difficulties in selecting the right crampons that balance weight, durability, and safety features. This guide aims to simplify that process by detailing the key aspects of crampons, including their types, maintenance, and the latest innovations in the market. We will also discuss how to assess your specific needs based on terrain and climbing style.

    What Are Mountaineering Crampons and Why Are They Essential?

    Mountaineering crampons are metal spikes attached to the soles of boots, designed to provide grip on ice and snow. They work by digging into the surface, preventing slips and falls, which is crucial for safety in mountaineering. The primary benefit of using crampons is the enhanced stability they offer on slippery surfaces, allowing climbers to navigate challenging terrains with confidence. Understanding their importance is vital for anyone looking to engage in mountaineering or ice climbing.

    Defining crampons: Types and primary uses in mountaineering

    Various types of mountaineering crampons displayed on rocky terrain, highlighting their unique designs

    Crampons come in various types, each suited for specific mountaineering activities. The main categories include:

    1. General Mountaineering Crampons: Designed for a variety of snow and ice conditions, these are versatile and suitable for most climbing situations.
    2. Ice Climbing Crampons: These crampons feature longer and more aggressive spikes for better penetration into hard ice, making them ideal for vertical ice climbing.
    3. Lightweight Crampons: Often made from aluminum, these are designed for alpine and mixed terrain, prioritizing weight savings for long ascents.

    Choosing the right type of crampon is essential for optimizing performance and safety during climbs.

    How crampons enhance safety and performance on ice and snow

    Crampons significantly enhance safety by providing superior traction on icy surfaces. Their design allows climbers to maintain stability, reducing the risk of slips and falls. Additionally, they improve performance by enabling climbers to ascend steeper slopes that would otherwise be impossible without proper gear. The right crampons can also help distribute weight evenly, allowing for more efficient movement across challenging terrains.

    Which Types of Crampons Are Best for Different Mountaineering Activities?

    Selecting the best crampons depends on the specific mountaineering activity you plan to undertake. Here are some recommendations:

    1. Best Crampons for Snow Travel: General mountaineering crampons are ideal for snow-covered trails and moderate slopes.
    2. Best Crampons for Glacier Travel: Crampons with a mix of horizontal and vertical points provide stability on glaciers, where conditions can vary.
    3. Best Crampons for Ice Climbing: Ice climbing crampons, with their aggressive spike design, are essential for tackling vertical ice routes.

    For those looking to purchase high-quality crampons, Information Hub offers a range of options tailored to different climbing needs.

    Ice climbing crampons vs. general mountaineering crampons: Key differences

    Ice climbing crampons differ from general mountaineering crampons primarily in their design and intended use. Ice climbing crampons feature longer, sharper spikes that provide better penetration into hard ice, making them suitable for vertical climbs. In contrast, general mountaineering crampons are designed for versatility, with shorter spikes that perform well on both snow and ice. Understanding these differences is crucial for selecting the right equipment based on your climbing objectives.

    Specialized designs are indeed crucial for the demands of technical ice climbing, as further emphasized by experts.

    Technical Crampon Design for Ice Climbers

    most ice climbers now use a twopiece style of crampon. Crampons designed for technical terrain will have more.

    Rucksack Guide-Winter Mountaineering, 2013

    Lightweight crampons for alpine and mixed terrain: Benefits and trade-offs

    Lightweight crampons are particularly beneficial for alpine and mixed terrain, where minimizing weight is essential for long ascents. These crampons often use aluminum, which reduces overall weight but may sacrifice some durability compared to steel options. The trade-off is that while they are easier to carry, they may not perform as well in extremely icy conditions. Climbers must consider their specific needs and the conditions they will face when choosing between lightweight and traditional steel crampons.

    How Do Materials Affect Crampon Performance and Durability?

    The materials used in crampon construction significantly impact their performance and durability. Steel crampons are known for their strength and longevity, making them ideal for challenging conditions. However, they can be heavier than aluminum options. On the other hand, aluminum crampons are lighter and suitable for less demanding environments but may not withstand the same level of wear and tear.

    Material TypeStrengthWeightDurability
    SteelHighHeavyLong-lasting
    AluminumModerateLightLess durable

    This comparison highlights the importance of selecting the right material based on your climbing style and the conditions you expect to encounter.

    Steel crampons for climbing: Strength, durability, and maintenance

    Steel crampons are favored for their exceptional strength and durability, making them suitable for technical climbs and harsh conditions. They can withstand significant wear and tear, ensuring longevity even with frequent use. However, proper maintenance is essential to keep them in optimal condition. Regular inspections, cleaning after use, and proper storage can extend the life of steel crampons significantly.

    Aluminum and lightweight materials: When to choose and safety considerations

    Aluminum crampons are an excellent choice for climbers looking to reduce weight without compromising too much on performance. They are particularly useful for long treks where every ounce counts. However, climbers should be aware of their limitations, especially in extremely icy conditions where steel may perform better. Safety considerations include ensuring that the crampons fit securely on your boots and are compatible with your climbing style.

    What Binding Systems Are Available and How Do They Impact Compatibility?

    Crampons come with various binding systems that affect their compatibility with different types of mountaineering boots. The main binding systems include:

    1. Step-in Bindings: These provide a secure fit and are ideal for technical climbing.
    2. Strap-on Bindings: These are versatile and can fit a range of boot types, making them suitable for general mountaineering.
    3. Hybrid Bindings: Combining features of both step-in and strap-on systems, these offer flexibility for various climbing scenarios.

    Choosing the right binding system is crucial for ensuring that your crampons perform effectively and safely.

    Adjustable crampons: Features and fitting advantages

    Adjustable crampons offer several advantages, particularly in terms of fit and versatility. They can be modified to accommodate different boot sizes, making them a practical choice for climbers who may share gear or experience changes in footwear. Features such as adjustable heel and toe pieces enhance comfort and security, allowing for a more customized fit during climbs.

    Compatibility with mountaineering boots: Step-in, strap-on, and hybrid bindings

    The compatibility of crampons with mountaineering boots is essential for effective performance. Step-in bindings require specific boot types designed for technical climbing, while strap-on bindings can fit a wider range of boots. Hybrid bindings offer the best of both worlds, allowing for flexibility in gear choices. Ensuring that your crampons are compatible with your boots will enhance safety and performance on the mountain.

    How Should You Maintain and Care for Your Mountaineering Crampons?

    Climber maintaining and inspecting mountaineering crampons in a cozy indoor setting, emphasizing gear care

    Proper maintenance of mountaineering crampons is vital for ensuring their longevity and performance. Regular inspections and cleaning can prevent rust and damage, extending the life of your gear. Here are some essential maintenance tips:

    1. Routine Inspection: Check for any signs of wear or damage before and after each use.
    2. Cleaning: Remove any snow or ice buildup after use to prevent corrosion.
    3. Storage: Store crampons in a dry place to avoid rust and deterioration.

    By following these maintenance practices, climbers can ensure their crampons remain in top condition for many adventures to come.

    Routine inspection and cleaning tips to extend crampon life

    To extend the life of your crampons, implement a routine inspection and cleaning regimen. Inspect the spikes for any signs of bending or wear, and ensure that all components are secure. After each use, clean the crampons with warm water to remove any ice or debris, and dry them thoroughly before storing. Proper storage in a cool, dry place will help prevent rust and prolong the lifespan of your equipment.

    Safety checks before and after use: Preventing accidents and equipment failure

    Conducting safety checks before and after using your crampons is crucial for preventing accidents. Before heading out, ensure that the crampons are securely attached to your boots and that all components are functioning correctly. After use, inspect for any damage or wear that may have occurred during your climb. Addressing any issues promptly can prevent equipment failure and enhance safety on future climbs.

    When selecting crampons, it’s essential to consider reputable brands known for quality and performance. Some of the top-rated brands for 2025 include:

    1. Petzl: Renowned for their innovative designs and reliability.
    2. Black Diamond: Offers a wide range of models suitable for various climbing styles.
    3. Grivel: Known for their durable and high-performance crampons.

    These brands provide options that cater to different climbing needs, ensuring that climbers can find the right gear for their adventures.

    Top-rated crampon brands: Petzl, Black Diamond, and others

    Petzl and Black Diamond are among the most trusted names in the mountaineering community, offering a variety of crampons that cater to both beginners and experienced climbers. Petzl’s designs often focus on innovation and user-friendliness, while Black Diamond is known for its robust construction and performance in extreme conditions. Other brands like Grivel also offer excellent options, making it essential for climbers to explore various models to find the best fit for their needs.

    When comparing crampons, it’s important to consider features such as weight, material, and binding systems. Popular models from leading brands typically range in price from $150 to $300, depending on their specifications and intended use. Here’s a brief overview of some popular models:

    BrandModelPrice RangeKey Features
    PetzlIrvis Hybrid$200-$250Lightweight, versatile binding
    Black DiamondSabretooth Pro$250-$300Aggressive spikes for ice climbing
    GrivelG12 New-Matic$160-$220Durable steel construction

    This comparison helps climbers make informed decisions based on their budget and climbing requirements.

    The mountaineering gear market is continually evolving, with new trends and innovations enhancing performance and safety. In 2025, some notable trends include:

    1. Anti-balling Plates: These features prevent snow from accumulating under the crampons, improving traction and safety.
    2. Adjustable Features: Many new models offer adjustable components for a better fit and increased versatility.
    3. Integration with Modern Gear: New crampons are designed to work seamlessly with the latest mountaineering boots and equipment.

    These innovations reflect the ongoing commitment to improving climber safety and performance in challenging environments.

    Anti-balling plates and adjustable features: Enhancing performance and safety

    Anti-balling plates are a significant innovation in crampon design, preventing snow from building up underfoot, which can lead to slips and falls. Additionally, adjustable features allow climbers to customize the fit of their crampons, ensuring maximum comfort and security during climbs. These enhancements contribute to overall safety and performance, making modern crampons more effective than ever.

    Indeed, the importance of these features for safety cannot be overstated, as highlighted by expert sources.

    Essential Anti-Balling Plates for Crampons

    Anti-balling plates are essential to prevent the buildup of snow on the underside of crampons, especially in wet snow conditions.

    Rucksack Guide-Winter Mountaineering, 2013

    Integration with modern mountaineering boots and gear

    The integration of crampons with modern mountaineering boots and gear is crucial for optimal performance. Many new crampons are designed to work with the latest boot technologies, ensuring a secure fit and efficient energy transfer during climbs. This compatibility enhances the overall climbing experience, allowing climbers to focus on their ascent rather than worrying about gear issues.

    How Can You Choose the Right Crampons for Your Specific Mountaineering Expedition?

    Choosing the right crampons for your mountaineering expedition involves assessing several factors, including terrain, climate, and technical difficulty. Here are some key considerations:

    1. Terrain: Identify the type of terrain you will encounter, such as snow, ice, or mixed conditions.
    2. Climate: Consider the weather conditions, as this will influence the type of crampon needed.
    3. Technical Difficulty: Evaluate the difficulty level of your climb to determine the appropriate crampon type.

    By carefully considering these factors, climbers can select the most suitable crampons for their specific needs.

    Assessing terrain, climate, and technical difficulty

    When planning a mountaineering expedition, assessing the terrain, climate, and technical difficulty is essential for selecting the right gear. For example, if you anticipate climbing on steep ice, ice climbing crampons with aggressive spikes will be necessary. Conversely, for less technical snow travel, general mountaineering crampons may suffice. Understanding these elements will help ensure a safe and successful climbing experience.

    Balancing weight, durability, and safety features for your needs

    Finding the right balance between weight, durability, and safety features is crucial when selecting crampons. Lightweight options are ideal for long treks but may sacrifice some durability. Conversely, heavier steel crampons offer superior strength but can be cumbersome. Climbers should evaluate their specific needs and preferences to find the best combination of these factors for their expeditions.

    To further assist in planning your next adventure, consider these trip planning resources.

    For more information on gear and safety, explore our gear and safety guides.

    If you have any questions or need assistance, please contact us.

    For those interested in exploring different mountain destinations, consider visiting Global Summit Guide for inspiration and resources.

    Conclusion

    Choosing the right mountaineering crampons is essential for enhancing safety and performance on icy terrains, allowing climbers to navigate challenging conditions with confidence. By understanding the various types, materials, and features available, you can make informed decisions that align with your specific climbing needs. Explore our curated selection of top-rated crampons to find the perfect fit for your next adventure. Start your journey towards safer climbs today by visiting our gear section.

    2026 Crampon Model Comparison: Top Picks Across All Categories

    Below is the comprehensive 2026 model comparison across the four major use categories: general mountaineering, technical ice climbing, ski mountaineering, and mixed climbing. Pricing is approximate retail USD as of 2026; expect 15-25% discounts during off-season sales (March-May, October-November).

    General Mountaineering Crampons (Glacier Travel + Moderate Snow/Ice)

    ModelMaterialPointsPrice (2026)Best For
    Petzl VasakSteel12$200-240Standard general mountaineering; durable; widely used
    Black Diamond SabretoothSteel12$200-220Tested mountaineering workhorse; semi-automatic
    Grivel G12 New-ClassicSteel12$150-180Budget option; reliable European brand
    CAMP USA Stalker UniversalSteel12$180-210Lightweight steel; good for technical glaciers
    Petzl Irvis HybridSteel/Aluminum10$220-260Hybrid weight-saving; ski mountaineering crossover
    Black Diamond ContactSteel10$160-180Entry-level glacier travel; B1 boot compatible

    Technical Ice Climbing Crampons (Vertical Ice / Steep Mixed)

    ModelMaterialConfigurationPrice (2026)Best For
    Petzl LynxSteelModular dual-front (mono or dual point)$290-330Versatile technical ice / mixed climbing
    Black Diamond Cyborg ProSteelDual modular front points$280-320Technical alpine; modular configuration
    Grivel G22 PlusSteelMono-point$280-310Pure ice climbing; mono-point precision
    Petzl DartSteelMono-point$300-340Vertical ice; competition climbing
    Black Diamond StingerSteelMono-point with secondary spike$340-380Mixed climbing; M-class objectives

    Ski Mountaineering Crampons (Lightweight / Quick Switch)

    ModelMaterialPointsWeight (pair)Price (2026)
    Petzl Leopard FLAluminum10360 g$200-230
    CAMP USA XLC 490Aluminum10490 g$220-250
    Black Diamond SnaggletoothAluminum/Steel10500 g$200-220
    Grivel Air Tech New MaticAluminum10520 g$190-220

    Mixed Climbing Crampons (Rock + Ice + Snow)

    ModelConfigurationPrice (2026)Best For
    Grivel G14 New MaticModular dual-point$260-300Versatile mixed climbing; M-grade routes
    Black Diamond StingerMono-point$340-380Hard mixed climbing; competition
    Petzl LynxModular$290-330Versatile alpinism; route variety
    Grivel Tech MachineDual-point fixed$250-290Classic alpine mixed climbing

    Why steel beats aluminum for serious mountaineering. Aluminum crampons weigh 30-40% less than steel equivalents (typical pair: steel 800-1000g vs aluminum 350-500g) but have fundamental durability limitations that make them inappropriate for most serious mountaineering: (1) Rock contact destroys aluminum quickly — even brief contact with rock on mixed terrain rounds aluminum points and creates substantial wear; (2) Aluminum points don’t penetrate hard ice effectively — water ice climbing with aluminum is genuinely unsafe; (3) Aluminum points bend under significant load — a slip-arrest with aluminum crampons can permanently deform the spikes. Aluminum is appropriate for: ski mountaineering on snow only, summer glacier travel with minimal rock exposure, lightweight alpine traverses where weight matters substantially more than security. Steel is required for: any technical ice climbing, mixed terrain, water ice, sustained mountaineering, expedition mountaineering. Most experienced mountaineers own both — aluminum for ski touring and quick traverses, steel for serious objectives.

    The Crampon-Boot Compatibility Decision: Critical for Safety

    Crampon-boot compatibility is the single most important safety consideration when buying mountaineering crampons. A mismatched system creates fall risk that has caused fatalities. Below is the comprehensive compatibility framework.

    Boot RatingBoot TypeCompatible CramponsUse Cases
    B0Flexible hiking boots; light hikingStrap-on only (C0)Glacier walking; not for serious mountaineering
    B1Light mountaineering (semi-flexible)Strap-on (C0) or semi-automatic (C1)Entry-level glacier travel; non-technical objectives
    B2Full mountaineering (rigid)Semi-automatic (C1/C2) or automatic (C3)Standard mountaineering; intermediate ice; technical glaciers
    B3Rigid technical (full plastic or carbon)Any system; automatic (C3) recommendedTechnical ice climbing; mixed climbing; expedition

    Popular Boot-Crampon Combinations

    BootBoot RatingRecommended CramponUse Case
    La Sportiva Trango Tower ExtremeB2/B3Petzl Vasak or LynxTechnical mountaineering
    Scarpa Phantom Tech HDB3Petzl Lynx or Black Diamond StingerIce climbing / technical
    La Sportiva Nepal Cube GTXB2Petzl Vasak or SabretoothGeneral mountaineering
    Lowa Mountain Expert GTX EvoB2Black Diamond SabretoothGeneral mountaineering
    Scarpa Mont Blanc Pro GTXB2/B3Petzl LynxAlpine mountaineering
    La Sportiva Trango Cube GTXB1Petzl Leopard or Black Diamond ContactLight mountaineering
    La Sportiva G2 EvoB3Petzl Lynx (high-altitude expedition)Himalayan expedition
    Salewa Rapace GTXB2Black Diamond Sabretooth or Grivel G12Alpine mountaineering

    The most common crampon mistake — buying technical ice crampons for general mountaineering. Beginning mountaineers frequently purchase technical ice climbing crampons (Petzl Lynx, Black Diamond Stinger) under the assumption that “more aggressive” equals “safer” or “more capable.” For general mountaineering (Mont Blanc, Mount Rainier, Cascade volcanoes), technical ice crampons are: (1) Substantially heavier than needed; (2) More expensive; (3) More fragile on rock-mixed terrain; (4) Less stable on broad-stride glacier travel. The standard 12-point steel mountaineering crampon (Petzl Vasak, Black Diamond Sabretooth) is the correct choice for 90% of serious mountaineering. Technical ice crampons are only required when the objective genuinely involves vertical ice or hard mixed climbing — meaning ice gullies steeper than ~70 degrees or rock-mixed climbing with substantial rock contact.

    Crampon Care and Maintenance

    Proper crampon maintenance substantially extends gear life and improves climbing safety. Below is the comprehensive care framework.

    After Every Use

    • Rinse with fresh water to remove salt, dirt, and snow chemicals
    • Dry thoroughly before storage — moisture causes corrosion
    • Check for damage — bent points, cracked frames, worn straps
    • Apply light oil to hinges and screws if used in salty conditions

    Annually

    • Sharpen the points with a metal file — dull points reduce penetration substantially
    • Replace worn straps — strap failure can cause crampon detachment
    • Replace anti-balling plates annually if used heavily
    • Inspect frame integrity — hairline cracks indicate replacement needed

    End of Useful Life

    Steel crampons typically last 5-10 years of moderate use before requiring replacement. Aluminum crampons typically last 2-5 years before substantial wear. Signs that crampons need replacement: (1) Points worn below ~60% of original length; (2) Frame cracks or visible deformation; (3) Loose hinge mechanisms that cannot be tightened; (4) Strap connection points showing structural damage. Crampons that have been involved in significant falls should be retired regardless of visible condition.

    Frequently Asked Questions

    What are the best mountaineering crampons in 2026?

    The best choice depends on use: (1) General mountaineering: Petzl Vasak ($200-240) or Black Diamond Sabretooth ($200-220); (2) Technical ice climbing: Petzl Lynx ($290-330) or Black Diamond Cyborg Pro ($280-320); (3) Ski mountaineering: Petzl Leopard ($200) or CAMP USA XLC 490 ($220); (4) Mixed climbing: Grivel G14 New Matic ($260-300) or Black Diamond Stinger ($340-380); (5) Budget glacier travel: Grivel G12 New-Classic ($150-180). The choice depends primarily on boot compatibility and intended use.

    What is the difference between crampons and microspikes?

    Microspikes are small chain-and-spike systems with 12-20 short spikes (8-12mm) for hard-packed snow and icy trails — cost $50-90, weigh 300-400g, work with any hiking boot. Mountaineering crampons have 10-14 long steel spikes (25-50mm) on rigid steel frames for glacier travel, steep snow, water ice, and mixed terrain — cost $150-400, weigh 700-1000g, require crampon-compatible mountaineering boots. The general rule: front-pointing into ice or snow requires crampons; extra grip on icy trails only requires microspikes.

    How do you choose crampons for your boots?

    Boot-crampon compatibility is determined by the boot’s welt rating (B0-B3). Three attachment systems: (1) Strap-on / C0 — universal; for B0+ boots; least secure; (2) Semi-automatic / C1-C2 — require heel welt; for B1/B2+ boots; standard mountaineering choice; (3) Automatic / C3 — require both toe and heel welts; for B3 boots; most secure; required for technical climbing. Always verify boot-crampon compatibility before purchase; mismatched systems are unsafe. Most boot manufacturers provide rating information; most crampon brands provide compatibility charts.

    Are aluminum crampons good for mountaineering?

    Aluminum crampons are appropriate only for specific use cases: ski mountaineering on snow only, summer glacier travel with minimal rock exposure, and lightweight alpine traverses where weight matters substantially more than security. Aluminum is NOT appropriate for: technical ice climbing, mixed terrain, water ice climbing, sustained mountaineering, or expedition mountaineering — rock contact destroys aluminum quickly, the points don’t penetrate hard ice effectively, and aluminum points bend under significant load. Most experienced mountaineers own both aluminum (for ski touring) and steel (for serious objectives).

    How long do crampons last?

    Steel crampons typically last 5-10 years of moderate mountaineering use. Aluminum crampons last 2-5 years. Signs of needing replacement: (1) Points worn below ~60% of original length; (2) Frame cracks or visible deformation; (3) Loose hinge mechanisms that cannot be tightened; (4) Strap connection damage. Crampons involved in significant falls should be retired regardless of visible condition. Annual maintenance — sharpening, strap replacement, anti-balling plate replacement — substantially extends gear life.

    Can you use one crampon for both mountaineering and ice climbing?

    Yes — modular technical crampons like the Petzl Lynx and Black Diamond Cyborg Pro can be configured as dual-point for general mountaineering or as mono-point for technical ice climbing by swapping front points. This is the versatile choice for climbers progressing from general mountaineering into technical ice. The trade-off vs dedicated mountaineering crampons: slightly heavier (~100g per pair), more expensive ($280-330 vs $200-240), and slightly more complex setup. For climbers who do both general mountaineering and ice climbing, modular crampons substantially reduce gear costs vs owning two separate pairs.

    Continue Reading — Mountaineering Gear Guides

  • Mont Blanc Climbing Guide: Summit Europe’s Highest Peak

    Mont Blanc Climbing Guide: Summit Europe’s Highest Peak

    Mont Blanc Climbing Guide: How to Safely Summit Europe’s Highest Peak

    Climbing Mont Blanc, the highest peak in Western Europe, is a thrilling adventure that attracts mountaineers from around the globe. This comprehensive guide will equip you with essential knowledge about the various climbing routes, preparation strategies, and safety protocols necessary for a successful ascent. Many climbers face challenges such as altitude sickness and unpredictable weather, but with the right preparation and understanding, these obstacles can be effectively managed. In this article, we will explore the main climbing routes, essential gear, weather conditions, acclimatization strategies, guided tour options, and the latest safety technologies. By the end, you will be well-prepared to tackle the majestic Mont Blanc.

    What Are the Main Mont Blanc Climbing Routes and Their Difficulty Levels?

    Mont Blanc offers several climbing routes, each with unique challenges and varying difficulty levels. The two most popular routes are the Gouter Route and the Trois Monts Route. Understanding these routes is crucial for climbers to choose the one that best fits their skill level and experience.

    How Does the Gouter Route Compare in Difficulty and Duration?

    Climbers on the Gouter Route of Mont Blanc, showcasing the path and mountain huts, emphasizing the accessibility of this climbing route

    The Gouter Route is often considered the most accessible path to the summit of Mont Blanc. It has a moderate difficulty rating, making it suitable for climbers with basic mountaineering skills. The average duration for this route is approximately 2 days, allowing climbers to acclimatize properly. Key features of the Gouter Route include its well-marked path and the availability of mountain huts for overnight stays, which provide essential rest and recovery.

    However, even on more accessible routes like the Gouter, specific hazards like rockfall in the Grand Couloir du Goûter demand careful attention and preparation.

    Mont Blanc Rockfall Hazard: Grand Couloir du Goûter Safety

    There are on average 35 fatal mountaineering accidents per summer in France. On average, since 1990, 3.7 of them have occurred every summer in the Grand Couloir du Goûter, on the classic route up Mont Blanc (4809 m a.s.l.). Rockfall is one of the main factors that explain this high accident rate and contribute to making it one of the most accident-prone areas in the Alps for mountaineers. In this particular context, the objective of this study is to document the rockfall activity and its triggering factors in the Grand Couloir du Goûter in order to disseminate the results to mountaineers and favour their adaptation to the local rockfall hazard.

    Rockfall and vulnerability of mountaineers on the west face of the Aiguille du Goûter (classic route up Mont Blanc, France), an interdisciplinary study, P Lacroix, 2021

    What Are the Features of the Trois Monts Route for Experienced Climbers?

    The Trois Monts Route is designed for more experienced climbers, featuring technical sections that require advanced skills. This route demands proficiency in glacier travel and the use of technical climbing gear. Climbers can expect to encounter challenging conditions, including steep ascents and potential crevasses. Safety considerations are paramount, as the route’s complexity increases the risk of accidents, making it essential for climbers to be well-prepared and experienced.

    How Should You Prepare and What Gear Is Essential for Mont Blanc?

    Preparation is key to a successful climb of Mont Blanc. Essential gear includes appropriate clothing layers, navigation tools, and emergency equipment. Climbers should invest in high-quality gear to ensure safety and comfort during their ascent.

    Gear TypeDescriptionImportance
    Clothing LayersInsulated and waterproof layers to protect against cold and wet conditionsEssential for maintaining body temperature
    Navigation ToolsGPS devices and maps for route planningCrucial for safe navigation in challenging terrain
    Emergency GearFirst aid kits, communication devices, and extra foodVital for handling emergencies and unexpected situations

    For those looking to enhance their climbing experience, Information Hub offers a range of climbing gear tailored for Mont Blanc expeditions.

    What Are the Typical Weather Conditions and Best Seasons to Climb Mont Blanc?

    Weather conditions on Mont Blanc can be unpredictable, making it essential for climbers to be aware of seasonal patterns. The best months to climb are typically June to September, when the weather is more stable and temperatures are milder, generally ranging from -10°C to 5°C (14°F to 41°F).

    How Do Seasonal Weather Patterns Affect Climbing Safety?

    Seasonal weather patterns significantly impact climbing safety. Climbers should monitor weather forecasts closely and be prepared to adjust their plans based on changing conditions. Understanding the importance of weather tracking can help climbers make informed decisions about when to proceed or retreat.

    What Are the Latest Weather Advisories and Forecast Resources?

    Reliable weather resources are crucial for climbers. Recommended websites and apps provide up-to-date weather advisories, helping climbers stay informed about potential storms or temperature drops. Utilizing these resources can enhance safety and improve the chances of a successful summit.

    How Can Acclimatization and Safety Protocols Improve Your Summit Success?

    Acclimatization is vital for preventing altitude sickness, which can severely impact climbers’ performance and safety. Implementing effective acclimatization strategies and safety protocols can significantly enhance summit success.

    What Are Effective Acclimatization Strategies for Altitude Sickness Prevention?

    To prevent altitude sickness, climbers should incorporate rest days into their itinerary, allowing their bodies to adjust to higher elevations. The “climb high, sleep low” principle is also effective, as it encourages climbers to ascend to higher altitudes during the day and return to lower elevations for sleep.

    Studies emphasize the critical importance of these acclimatization strategies, as a rapid ascent significantly increases the risk of acute mountain sickness.

    Mont Blanc Altitude Sickness Risk & Prevention

    Despite a large variability in the scores of the participants, this study showed that a rapid ascent of Mount Blanc induces a high risk of acute mountain sickness since the prevalence

    Prevention of acute mountain sickness by low positive end-expiratory pressure in field conditions, 2004

    Which Safety Measures and Emergency Procedures Should Climbers Know?

    Essential climbing safety gear including first aid kit and communication devices, emphasizing the importance of safety measures for Mont Blanc climbers

    Climbers should be familiar with essential safety measures, including navigation and communication tools. Emergency readiness is crucial, as it prepares climbers to respond effectively to unexpected situations, such as injuries or severe weather changes.

    What Guided Tour Options and Permits Are Available for Mont Blanc Climbers?

    For those who prefer a guided experience, various tour options are available. Guided tours provide expert knowledge and support, enhancing the overall climbing experience.

    How to Select a Qualified Mont Blanc Guided Tour Service?

    When selecting a guided tour service, consider factors such as the guide’s experience, safety protocols, and group size. A qualified guide can significantly improve your chances of a successful summit while ensuring safety throughout the journey.

    Further research into guided mountaineering preparation highlights the comprehensive strategies professionals employ to mitigate risks and enhance overall safety for climbers. K2 Climb Guide

    Mountaineering Safety Strategies: Guide Preparation Model

    This paper examines an issue that has been little explored in ergonomics: safety in outdoor activities. Drawing on an analysis of guided mountaineering preparation, the paper focuses on studying and modelling feedback from professionals. Our premise is that preparation can be analyzed as a process of constraint satisfaction aimed at constructing manageable situations. This proposal is explored through a qualitative study conducted with mountain guides. Data were collected from 17 semi-structured interviews and 10 full days of filmed field observations, followed by individual and collective confrontation. The analysis focuses mainly on identifying the constraints of the preparation and the types of variables related to them. Five main types of variables which can be generalized were defined. A descriptive model was then produced, and safety issues were identified, along with corresponding strategies to improve safety.

    Safety Issues and Strategies for Outdoor Activities: A General Model Based on Guided Mountaineering Preparation, A Girard, 2024

    What Are the Permit Requirements and How to Obtain Them?

    Climbers must obtain the necessary permits to access certain routes on Mont Blanc. The application process typically involves submitting forms and paying fees. It’s essential to plan ahead to ensure all permits are secured before the climb.

    Where Can You Find Mountain Huts and Accommodation Along Mont Blanc Routes?

    Mountain huts provide essential accommodation for climbers along the Mont Blanc routes. Knowing where to find these huts can enhance the climbing experience by offering rest and recovery opportunities.

    What Are the Key Mountain Huts on the Gouter and Trois Monts Routes?

    Key mountain huts along the Gouter and Trois Monts Routes include the Tête Rousse Hut and the Cosmiques Hut. These huts offer basic amenities and shelter, making them ideal stopping points for climbers.

    How to Book Accommodation and What Facilities Are Provided?

    Booking accommodation in advance is recommended, especially during peak climbing seasons. Facilities typically include dormitory-style sleeping arrangements, meals, and access to essential services, ensuring climbers are well-prepared for their ascent. About

    What Are the Latest Safety Technologies and Climbing Statistics for Mont Blanc?

    Recent advancements in safety technologies have significantly improved climber safety on Mont Blanc. Understanding these technologies can help climbers make informed decisions about their gear and safety measures.

    How Have Recent Advances Improved Climber Safety on Mont Blanc?

    Recent safety technologies include improved communication devices and advanced weather tracking systems. These innovations enhance climbers’ ability to stay connected and informed, reducing risks associated with climbing in challenging conditions.

    What Do 2024-2026 Climbing Success and Incident Rates Indicate?

    Climbing statistics from recent years indicate a steady increase in summit success rates, attributed to better preparation and safety measures. However, incident rates also highlight the importance of adhering to safety protocols and being aware of environmental conditions.

    How to Use Interactive Maps and Multimedia Resources for Mont Blanc Planning?

    Interactive maps and multimedia resources can greatly enhance your planning process for climbing Mont Blanc. Utilizing these tools allows climbers to visualize routes and understand the terrain better.

    Where to Access Detailed Route Maps and Elevation Profiles?

    Detailed route maps and elevation profiles are available through various online platforms. These resources provide climbers with essential information about the terrain, helping them prepare for the challenges ahead. For more information, visit Globalsummitguide.

    How Can Videos and Gear Diagrams Enhance Climbing Preparation?

    Videos and gear diagrams offer valuable insights into climbing techniques and gear usage. These visual resources can enhance understanding and preparation, ensuring climbers are well-equipped for their journey.

    Conclusion

    Successfully summiting Mont Blanc requires thorough preparation, understanding of routes, and adherence to safety protocols. By equipping yourself with the right gear and knowledge, you can enhance your climbing experience and increase your chances of reaching the peak. Explore our comprehensive resources and expert-guided tours to ensure a safe and memorable adventure. Start planning your Mont Blanc expedition today!

  • Best Trekking Poles in 2026: Ranked for Every Hiker

    Best Trekking Poles in 2026: Ranked for Every Hiker

    Best Trekking Poles in 2026: Tested, Ranked, and Expert-Recommended for Every Hiker

    As outdoor enthusiasts gear up for their adventures in 2026, the importance of choosing the right trekking poles cannot be overstated. These essential tools not only enhance stability and balance on uneven terrain but also help reduce strain on joints, making hikes more enjoyable. This comprehensive guide will delve into the best trekking poles available this year, highlighting their features, materials, and innovations. Readers will learn about the latest advancements in trekking pole technology, how to select the right length and adjustability, and the top brands leading the market. By addressing common concerns and providing expert recommendations, this article aims to equip hikers with the knowledge they need to make informed decisions.

    Which Trekking Pole Materials and Technologies Lead in 2026?

    The materials and technologies used in trekking poles have evolved significantly, impacting their performance and user experience. In 2026, the most common materials are carbon fiber and aluminum, each offering distinct advantages. Carbon fiber poles are known for their lightweight and high strength-to-weight ratio, making them ideal for long-distance hikers. Conversely, aluminum poles are typically more durable and cost-effective, appealing to budget-conscious adventurers.

    What Are the Benefits of Carbon Fiber vs. Aluminum Poles?

    Carbon fiber trekking poles provide several benefits, including reduced weight, which can enhance endurance during long hikes. They also offer excellent shock absorption, minimizing the impact on joints. However, they tend to be more expensive and can be less durable than aluminum poles, which are known for their robustness and resistance to bending. Aluminum poles are often favored for rugged terrains due to their durability, making them a reliable choice for heavy use. Ultimately, the choice between carbon fiber and aluminum poles depends on the hiker’s specific needs and budget.

    Further research underscores the exceptional properties that make carbon fiber a superior material for high-performance sports equipment, including trekking poles.

    Carbon Fiber Advantages for Trekking Poles

    Carbon fiber-reinforced composite materials by virtue of its high temperature resistance, corrosion resistance, light weight, high mechanical strength outstanding advantages emerge in the new material, in the sport of rowing or sailing, bike, badminton, skiing, golf, sleigh, archery, everywhere this black fiber figure.

    Study on carbon fiber composite materials in sports equipment, 2013

    How Do Shock Absorbing Features Improve Hiking Safety and Comfort?

    Shock absorbing features in trekking poles significantly enhance hiking safety and comfort by reducing the impact on joints during descents. These mechanisms work by dampening the force exerted on the poles, which can alleviate stress on the knees and ankles. Various technologies, such as internal springs or flexible shafts, are employed to provide this cushioning effect. Hikers using shock absorbing poles often report less fatigue and discomfort, allowing them to enjoy longer treks with greater ease.

    How to Choose the Right Trekking Pole Length and Adjustability for Your Needs?

    Selecting the appropriate trekking pole length is crucial for maintaining proper posture and balance while hiking. The right length allows for efficient energy transfer and reduces strain on the upper body. Adjustable poles offer versatility, accommodating different terrains and user preferences.

    What Are the Best Practices for Measuring and Adjusting Pole Length?

    To measure the correct pole length, hikers should stand upright and bend their elbows at a 90-degree angle. The grip of the pole should align with the wrist when the arm is at this angle. For adjustable poles, familiarizing oneself with the locking mechanisms is essential to ensure stability during use. Common mistakes include using poles that are too long or too short, which can lead to discomfort and inefficient hiking techniques.

    Which Adjustable Pole Mechanisms Offer Durability and Ease of Use?

    Several adjustable mechanisms are available in trekking poles, including twist-lock, lever-lock, and push-button systems. Twist-lock mechanisms are lightweight and easy to use but may require more frequent adjustments. Lever-lock systems provide a secure hold and are generally more durable, making them suitable for rugged conditions. Push-button mechanisms offer quick adjustments but may be less reliable over time. Choosing a mechanism that balances durability and ease of use is essential for a satisfying hiking experience.

    What Are the Top Trekking Pole Brands and Their Innovations in 2026?

    In 2026, several brands stand out for their innovative designs and commitment to quality in trekking poles. These brands are continuously pushing the boundaries of technology to enhance user experience and performance.

    Which Brands Lead in Lightweight and Durable Pole Designs?

    Brands like Black Diamond and Leki are renowned for their lightweight and durable trekking poles. Black Diamond’s Carbon Z poles are particularly popular among ultralight hikers, offering a compact design without sacrificing strength. Leki’s Micro Vario series combines lightweight materials with robust construction, making them a favorite for both casual and serious trekkers. User reviews often highlight the balance of weight and durability as key factors in their purchasing decisions.

    How Are Brands Integrating Eco-Friendly Materials and Technology?

    Sustainability is becoming increasingly important in the outdoor industry, and many trekking pole brands are responding by integrating eco-friendly materials. Companies like REI and MSR are leading the charge by using recycled materials in their pole designs and adopting sustainable manufacturing practices. This shift not only reduces environmental impact but also appeals to environmentally conscious consumers who prioritize sustainability in their purchasing decisions.

    How Do Shock Absorbing Trekking Poles Reduce Impact and Enhance Performance?

    Shock absorbing trekking poles are designed to minimize the impact on joints, enhancing overall performance during hikes. By absorbing shock, these poles help reduce fatigue and discomfort, allowing hikers to maintain their energy levels over longer distances.

    What Types of Shock Absorbing Systems Are Available?

    Various shock absorbing systems are available in trekking poles, including internal springs and flexible shafts. Internal springs compress upon impact, providing immediate cushioning, while flexible shafts allow for a slight bend during use, distributing force more evenly. Each system has its advantages, and the choice often depends on personal preference and hiking style.

    When Should Hikers Opt for Shock Absorbing Poles?

    Hikers should consider using shock absorbing poles when traversing steep descents or uneven terrain, where the impact on joints is more pronounced. These poles are particularly beneficial for individuals with pre-existing joint issues or those looking to enhance comfort during long hikes. Expert recommendations suggest that shock absorbing poles can significantly improve the hiking experience, especially on challenging trails.

    What Are the Essential Maintenance Tips and Accessories for Trekking Poles?

    Proper maintenance of trekking poles is essential for ensuring their longevity and performance. Regular care can prevent wear and tear, allowing hikers to enjoy their poles for many seasons.

    How to Properly Clean and Store Your Trekking Poles?

    Cleaning trekking poles involves wiping down the shafts and grips with a damp cloth after each use to remove dirt and moisture. For storage, poles should be kept in a dry place, preferably disassembled if they are collapsible. Avoid leaving them in direct sunlight or extreme temperatures, as this can degrade materials over time.

    Which Accessories Enhance Pole Functionality and Longevity?

    Several accessories can enhance the functionality and longevity of trekking poles. Rubber tips provide better traction on hard surfaces, while baskets prevent sinking into soft ground. Additionally, wrist straps can improve grip and control, making them a valuable addition for serious hikers. Investing in these accessories can significantly enhance the overall hiking experience.

    How Do Lightweight and Collapsible Trekking Poles Improve Travel Convenience?

    Lightweight and collapsible trekking poles are designed for convenience, making them ideal for travelers and backpackers. Their compact design allows for easy packing and transport, ensuring that hikers can take them on any adventure.

    What Are the Advantages of Collapsible Poles for Backpackers?

    Collapsible poles offer several advantages for backpackers, including reduced weight and space-saving capabilities. They can be easily stowed in a backpack or attached externally without adding significant bulk. This feature is particularly beneficial for long-distance hikers who need to minimize their pack weight while maintaining essential gear.

    How to Balance Weight and Durability in Lightweight Pole Selection?

    When selecting lightweight trekking poles, hikers should consider the balance between weight and durability. While lighter materials like carbon fiber are appealing for their weight savings, they may sacrifice some durability. Conversely, heavier aluminum poles offer robustness but can add unnecessary weight. Hikers should assess their specific needs and choose poles that provide the best combination of both attributes for their hiking style.

    What Are Common FAQs About Trekking Poles Answered by Experts?

    As trekking poles gain popularity, many common questions arise regarding their use and benefits. Addressing these FAQs can help new hikers make informed decisions.

    How Long Should Trekking Poles Be for Different Terrains?

    The ideal length of trekking poles varies based on terrain. For flat surfaces, poles should be adjusted to a height that allows for a 90-degree elbow angle. On steep inclines, shorter poles can provide better stability, while longer poles may be beneficial on descents. Adjusting the length according to the terrain can enhance comfort and efficiency.

    Can Trekking Poles Help Reduce Knee Pain and Fatigue?

    Yes, trekking poles can significantly reduce knee pain and fatigue by distributing weight more evenly and providing additional support. Studies have shown that using poles can decrease the load on the knees by up to 25%, making them a valuable tool for hikers, especially those with joint concerns. Many users report a noticeable reduction in fatigue during long hikes when using poles.

    Indeed, scientific studies confirm that the use of trekking poles actively contributes to mitigating physical strain and muscle damage during strenuous activities.

    Trekking Poles Reduce Muscle Soreness & Damage

    poles reduces muscle damage after a day of hiking [18]. The authors measured less delayed-onset muscle soreness in the trekking pole.

    A review of biomechanical and physiological effects of using poles in sports, N Nagengast, 2023

    Where to Find Trusted Reviews and How to Interpret Trekking Pole Ratings?

    Finding reliable reviews and understanding trekking pole ratings is crucial for making informed purchasing decisions. With numerous options available, knowing where to look can save time and money.

    What Criteria Are Used in Expert Pole Performance Testing?

    Expert performance testing typically evaluates several criteria, including weight, durability, adjustability, and shock absorption. These tests often involve real-world hiking scenarios to assess how poles perform under various conditions. Understanding these criteria can help consumers identify which poles best meet their needs.

    How to Use Comparison Tables and User Feedback Effectively?

    When researching trekking poles, utilizing comparison tables can provide a clear overview of features and specifications. Additionally, reading user feedback can offer insights into real-world performance and durability. Combining these resources allows hikers to make well-rounded decisions based on both expert evaluations and user experiences.

    Conclusion

    Choosing the right trekking poles can significantly enhance your hiking experience by providing stability, reducing joint strain, and improving overall comfort. With advancements in materials and technology, options like carbon fiber and shock-absorbing features cater to various hiking needs and preferences. By understanding the benefits and selecting the right poles, you can enjoy longer, more enjoyable treks. Explore our curated selection of top-rated trekking poles to find the perfect fit for your next adventure.

  • Hiking vs Trekking vs Mountaineering: What’s the Difference?

    Hiking vs Trekking vs Mountaineering: What’s the Difference?

    Hiking vs Trekking vs Mountaineering: What’s the Difference? (2026) | Global Summit Guide
    Cluster 02 · Beginner Progression · Updated April 2026

    Hiking vs Trekking vs Mountaineering: What’s the Difference?

    The three outdoor disciplines look similar from outside but demand radically different skills, gear, and commitment. This guide distinguishes them clearly — what each is, what each requires, the equipment boundaries between them, and how climbers naturally progress from one to the next.

    3
    Distinct
    disciplines
    1–30+
    Days per
    typical trip
    $200–15K
    Complete kit
    cost range
    2–5 yrs
    Typical
    progression
    Global Summit Guide A guide in Cluster 02 · Beginner Progression View master hub →

    Hiking, trekking, and mountaineering all involve walking uphill in scenic places, which is why people treat them as interchangeable. They aren’t. The equipment, skills, and risk profiles differ enough that confusing them leads to genuinely consequential mistakes — climbers booking “a trekking trip” that turns out to be a mountaineering expedition, or hikers attempting peaks that require technical training they haven’t received. This guide draws the lines cleanly and shows how climbers naturally progress between them over years of building experience.

    Why these definitions matter

    Definitions reflect usage by AMGA-certified guide services, the American Alpine Club, the Nepal Mountaineering Association, and long-established international outdoor associations. “Mountaineering” in particular has a specific technical meaning that tour operators sometimes blur for marketing reasons — our goal is the working definitions used by the people who actually teach these skills. Fact-check date: April 19, 2026.

    01 · The Three Disciplines at a Glance

    Each discipline has a defining characteristic, a typical trip structure, and a specific equipment baseline. Most outdoor activities map cleanly to one of the three, though scrambling and high-altitude trekking occupy genuine edge cases.

    Discipline 01

    Hiking

    Single day or weekend, established trails
    Walking on established trails with minimal technical demands. Return home or to a single base each night.
    5–20 km per day, 1–3 days total
    Hiking boots, daypack, water, weather layer. Total kit: $200–$600.
    Basic fitness, trail-reading, outdoor awareness.
    Discipline 02

    Trekking

    Multi-day, remote or extended terrain
    Multi-day walking in remote or extended terrain. Often 4 days to several weeks. Self-sufficient or with support staff.
    80–300 km, 4–30 days total
    All hiking gear plus larger pack, sleeping system, stove, shelter if not using huts. Total kit: $800–$2,500.
    Multi-day stamina, navigation, camp-craft, weather assessment.
    Discipline 03

    Mountaineering

    Technical ascent of peaks
    Ascending peaks using technical equipment — crampons, ice axe, rope, harness — on snow, ice, or steep terrain.
    2 days to 2+ months per objective
    All trekking gear plus boots, crampons, axe, harness, helmet, ropes, hardware. Total kit: $3,000–$15,000.
    Formal course training, rope work, glacier travel, self-arrest, weather judgment.

    02 · Detailed Comparison Across Every Factor

    Quick reference for the practical differences across the dimensions that matter when choosing which discipline fits your current situation.

    FactorHikingTrekkingMountaineering
    DurationHours to 1 day4 days to 30+ days1 day to 2+ months
    TerrainEstablished trailsTrails + rough pathsSnow, ice, rock, glacier
    ElevationUnder 4,000 m typicalUp to 5,500 m (EBC, Annapurna)Up to 8,849 m (Everest)
    Technical gearNoneNoneCrampons, axe, rope, harness
    Formal trainingOptionalStrongly recommended for remote routesRequired
    Self-sufficiencyLow (day return)Medium to highHigh (remote camps)
    Weather exposureLimitedMulti-day sustainedExtreme (summit windows)
    Physical demandModerateSustained enduranceEndurance + technical
    Risk of serious injuryLowModerate (remoteness)Real (every season)
    Typical cost per trip$0–$200$500–$5,000$1,500–$100,000+
    ExampleYosemite day hikeEverest Base Camp TrekClimbing Mount Everest

    03 · What Counts as Hiking?

    Hiking is the broadest and most accessible outdoor discipline. Any walk on established terrain, returning to a trailhead or base each evening, fits the category. The trail may be flat or steep, dry or muddy, short or long — what matters is that it’s established, signed, and single-day.

    What hiking looks like in practice

    • Day hikes in national or state parks — Angel’s Landing in Zion, the Half Dome cable route in Yosemite, Cactus to Clouds in California
    • Summit day hikes on non-technical peaks — Mount Washington in summer, Ben Nevis via the Mountain Track, most Colorado Class 1-2 14ers
    • Weekend trail loops that cover 20–40 km across 2–3 days, returning to a campground or trailhead — typically considered “backpacking” when overnighting but essentially hiking extended
    • Urban-adjacent trail systems like the Welsh coast path or Pacific Crest Trail day sections

    Where hiking ends

    Hiking stops being hiking when the terrain requires equipment beyond boots and a daypack — when you need crampons for persistent snow, a rope for exposure, or technical scrambling that requires using hands for balance and progress. A trail in summer may be hiking; the same trail in winter with ice may require mountaineering gear. The terrain determines the category, not the trail’s name.


    04 · What Counts as Trekking?

    Trekking is hiking extended across multiple days in remote or consequential terrain. The word entered English from the Dutch/Afrikaans “trek” (to journey) and retains the sense of a journey rather than a day out. Most treks are at least 4 days long; the classic ones are 10–20 days.

    Classic trek examples

    • Everest Base Camp Trek — 12-day round trip from Lukla through Namche to 5,364 m EBC. Non-technical throughout. See our EBC trek guide.
    • Tour du Mont Blanc — 10–11-day circuit around the Mont Blanc massif crossing France, Italy, and Switzerland. See our TMB guide.
    • Annapurna Circuit — 10–15-day Nepali trek reaching 5,416 m Thorong La Pass without technical equipment
    • Torres del Paine W or O Circuit — 4–8 days in Patagonia’s granite-tower country. See our TdP comparison.
    • K2 Base Camp Trek — 15–18 days across the Baltoro Glacier and Concordia. See our K2 BC guide.

    High-altitude trekking: the tricky category

    Treks above 5,000 m (EBC, Annapurna Circuit, K2 Base Camp) look like mountaineering to outsiders but don’t use technical gear — no crampons, no roped glacier travel, no fixed lines. They’re trekking, even at extreme elevation. The discipline is still walking on paths, just paths that happen to be very high and very remote. What trekking at altitude shares with mountaineering is the altitude physiology — AMS, HACE, HAPE — which is why our altitude acclimatization guide applies equally to both disciplines.


    05 · What Counts as Mountaineering?

    Mountaineering is defined by the technical tools required to move safely: crampons, ice axe, harness, rope, carabiners. These aren’t optional accessories — they’re the minimum equipment that makes the terrain climbable at all. When a route requires any of them, you’ve crossed into mountaineering.

    Mountaineering’s terrain signatures

    • Glaciers — Any route crossing crevassed glacier requires roped team movement, crampons, and crevasse rescue capability
    • Steep snow or ice — Slopes where you cannot walk without slipping require crampons and ice axe for self-arrest
    • Technical rock sections — Class 4 or higher (YDS) often requires roped protection even when not strictly climbing moves
    • Exposed ridges — Knife-edge terrain where a fall is unrecoverable without belay protection
    • High-altitude camps — Multi-week expeditions above 5,500 m where supplemental oxygen, expedition-grade shelters, and coordinated team logistics define the trip

    Mountaineering’s skill requirements

    Unlike hiking and trekking, mountaineering requires formal training. Self-taught mountaineers exist but consistently show higher accident and fatality rates than climbers who started with certified courses. Our Mountaineering for Beginners guide covers the skill acquisition path in detail — the short version is: take an AMGA- or IFMGA-certified 5–7 day introductory course before any technical climb.

    The “scrambling” edge case

    Scrambling is the genuine gray area between hiking and mountaineering. YDS Class 2–3 scrambling (using hands for balance, no rope) generally counts as advanced hiking in dry conditions. YDS Class 4 (real exposure, fall consequences) is often roped by competent parties and should be treated as mountaineering. In winter snow or ice conditions, any scrambling of any grade needs mountaineering gear. Examples: Longs Peak’s Keyhole Route is Class 3 scrambling in summer (hiking); Mount Cook’s Linda Glacier route is technically scrambling-grade on rock but mountaineering throughout because of the glacier.


    06 · How Climbers Progress Between Disciplines

    Most climbers move through the three disciplines over 2–5 years, picking up trekking and mountaineering as skills accumulate. The progression isn’t mandatory but reflects how the skills actually build.

    01
    Hiking
    Outdoor base, fitness, weather comfort
    02
    Trekking
    Multi-day stamina, altitude response
    03
    Mountaineering
    Formal course, technical skills

    Hiking → Trekking (typically 6 months to 2 years)

    Transitioning from day hiking to trekking mostly requires building multi-day stamina and learning basic camping/lodging systems. The technique is the same — walking on trails — but extended across days. Good first treks: TMB, the Icelandic Laugavegur trail, the Inca Trail, or a North American backpacking loop like the Teton Crest Trail.

    Trekking → Mountaineering (typically 1–3 years additional)

    This is the bigger leap because it requires formal skills training. A trekker with strong high-altitude experience has the fitness and altitude base for mountaineering, but still needs the technical foundation — crampon technique, rope work, glacier travel, self-arrest. A 5–7 day certified introductory course on Mount Baker, Mount Hood, or an equivalent European alpine peak provides this. See our 10 best mountains for beginners guide for specific course peaks.

    Skipping steps

    You can technically skip straight from hiking to mountaineering via a formal course, and plenty of climbers do. What you lose is the multi-day endurance calibration that trekking builds. Climbers who’ve done major treks tend to handle expedition rhythm (carrying loads for days, camping in weather, eating on schedule) better than climbers who’ve only done day hikes. It’s not required, but the progression exists for sound reasons.


    07 · Choosing What Fits Your Situation

    The right discipline depends on what you want from your outdoor time — and climbers often switch between all three across a year rather than committing to just one.

    Choose hiking if

    You want accessible outdoor time with limited training or equipment investment, you have limited vacation time (weekend blocks only), you’re not yet sure whether extended outdoor commitment fits your life, or you’re just building the fitness base for later disciplines. Hiking has the lowest cost of entry and the widest range of terrain availability.

    Choose trekking if

    You want multi-day outdoor immersion without technical skill requirements, you have 1–4 weeks of annual vacation for major trips, you’re drawn to remote locations (Nepal, Patagonia, Karakoram), or you want altitude experience without the gear and training commitment of mountaineering. Trekking is the richest outdoor experience available without technical training.

    Choose mountaineering if

    You’re attracted specifically to summiting peaks, you’re willing to invest in formal skills training ($1,500–$3,000 for the first course), you can commit to ongoing training and gear accumulation, and you accept higher objective risk than the other disciplines. Mountaineering offers objectives no other discipline can reach — glaciated peaks, technical routes, and the famous summits (Kilimanjaro, Denali, Everest, Mont Blanc, Matterhorn).

    Many climbers find they genuinely enjoy all three, using them for different purposes: weekend hiking near home for fitness, an annual trek to a remote region, and one or two mountaineering objectives per year for the specific satisfaction of summits. For starter mountaineering peaks, see our 10 best mountains for beginners; for starter treks, see our top 50 non-technical peaks guide.


    Frequently Asked Questions

    What’s the difference between hiking and trekking?

    Hiking is a single-day or weekend activity on established trails, typically covering 5–20 km per day and returning home or to a single base. Trekking is a multi-day journey across extended terrain — typically 4 days to several weeks — often in remote areas, carrying more equipment, sometimes covering 100+ km total. The Appalachian Trail, Everest Base Camp Trek, and Tour du Mont Blanc are classic treks; a weekend hike in a state park is hiking. The boundary is duration and self-sufficiency: hiking returns to civilization each night, trekking doesn’t always.

    What’s the difference between trekking and mountaineering?

    Trekking is hiking-style walking on trails over multi-day distances, with no specialized technical equipment required. Mountaineering is ascending peaks using technical techniques: crampons, ice axe, rope, harness, and glacier travel skills. The Everest Base Camp Trek reaches 5,364 m without a single piece of mountaineering equipment — it’s still trekking. Climbing Island Peak (6,189 m) from the same region requires roping up, crampons, fixed lines, and summit-day technical skills — that’s mountaineering. The distinction isn’t elevation or difficulty; it’s whether specialized gear and skills are required to move safely.

    Is mountaineering harder than hiking?

    Mountaineering is categorically more demanding than hiking because it requires specialized skills, equipment, and risk management that hiking doesn’t. A 10-hour hike can be physically exhausting; a 10-hour mountaineering climb is physically exhausting AND requires competence with crampons, self-arrest, rope team travel, and weather assessment — any of which, if neglected, can be fatal. That said, mountaineering difficulty varies enormously: an easy alpine scramble in dry summer conditions may be less demanding than a long winter trek in severe cold. The defining difference isn’t the absolute difficulty but the consequence of mistakes.

    Do I need to hike before I can trek or mountaineer?

    Hiking experience is the natural foundation for both trekking and mountaineering, though the skills transfer imperfectly. Regular hiking builds the aerobic base, foot and leg conditioning, and outdoor comfort that both advanced disciplines require. However, a serious hiker can progress directly to trekking with minimal additional training (the techniques are similar), while moving to mountaineering requires formal instruction regardless of hiking background. Most committed climbers spend 2–5 years hiking before adding trekking, then another year or two before adding technical mountaineering. This progression isn’t mandatory but is strongly recommended.

    What equipment do I need for each discipline?

    Hiking requires basic outdoor equipment: sturdy footwear, weather-appropriate clothing, water, food, and a light daypack. Total cost $200–$600 for a complete kit. Trekking requires all of the above plus multi-day equipment: larger pack (50–65 L), sleeping bag and pad, stove, shelter if not using huts, navigation gear, and more rigorous layering for multi-day weather exposure. Total cost $800–$2,500. Mountaineering adds technical equipment on top: mountaineering boots, crampons, ice axe, harness, helmet, ropes, carabiners, belay device, and more specialized clothing systems. Total mountaineering kit cost is $3,000–$6,000 for entry-level, $8,000–$15,000 for expedition-capable.

    Is scrambling hiking or mountaineering?

    Scrambling is the intermediate category between hiking and mountaineering — typically off-trail movement on steep rocky terrain that requires using hands for balance but doesn’t require ropes or technical gear. Scrambling is commonly graded Class 2, 3, or 4 in the Yosemite Decimal System (YDS), with Class 5 and above counted as technical rock climbing. Longs Peak’s Keyhole Route (Class 3), the approach to Denali’s Kahiltna Base Camp, or the summit ridge of Mount Cook are all scrambling. Scrambling counts as advanced hiking when dry and straightforward; it counts as mountaineering when it involves snow, ice, or objective hazards that require gear to manage.


    Authoritative Sources & Further Reading

    Definitions and terminology reflect usage by certification bodies, alpine clubs, and long-established outdoor publications:

    • American Mountain Guides Association (AMGA) — US certification standards distinguishing hiking, trekking, and mountaineering terrain
    • IFMGA/UIAGM — International Federation of Mountain Guides Associations, standard terminology
    • American Alpine Club / American Alpine Journal — Annual accident reports categorized by discipline
    • Nepal Mountaineering Association (NMA) — Official distinction between trekking peaks and expedition peaks
    • Yosemite Decimal System (YDS) — Standard grading for hiking (Class 1–2), scrambling (Class 3–4), and technical climbing (Class 5)
    • Mountaineering: The Freedom of the Hills (The Mountaineers, current edition) — The foundational text’s definition and scope of mountaineering
    • Wilderness Medical Society — Practice guidelines by wilderness category
    • Operator curricula from Alpine Ascents International, RMI Expeditions, American Alpine Institute, Mountain Madness, and international IFMGA guide services
    Published: February 15, 2026
    Last updated: April 19, 2026
    Next review: July 2026
    Part of the Global Summit Guide

    Back to the Master Hub

    This guide is one of 71 across 12 thematic clusters on Global Summit Guide. The master hub organizes every guide by experience tier, specific peak, skill area, and region — return anytime to navigate to your next topic.

    View the Hub →
  • 10 Best Mountains to Climb for Beginners

    10 Best Mountains to Climb for Beginners

    Mountaineering for Beginners: Complete Getting Started Guide (2026) | Global Summit Guide
    Anchor Guide · Cluster 02 · Updated April 2026

    Mountaineering for Beginners: Complete Getting Started Guide

    The honest starter guide to mountaineering — what it actually is, whether it’s right for you, the core skills you’ll need to build, a realistic first-year progression, how to buy gear without wasting money, and where to find reputable instruction. Written for someone who hikes confidently but has never roped up or used crampons.

    8
    Core
    sections
    6–9
    Core skills
    to master
    $3.5–6.5K
    Realistic
    year-1 budget
    12 mo
    To your first
    major peak
    Global Summit Guide A guide in Cluster 02 · Beginner Progression View master hub →

    Most beginner mountaineering content tries to excite you. This guide tries to calibrate you. If you’ve spent a decade hiking and are now drawn to something harder — the high alpine, peaks that require equipment and skills — the honest question isn’t whether you can start mountaineering (you probably can). The question is whether the commitment the sport actually requires — skills, time, money, risk tolerance — fits your life. If it does, here’s the framework for starting well. If it doesn’t, better to know now than five thousand dollars into an expedition that goes wrong.

    How this guide was built

    Skills progression and course recommendations reflect AMGA (American Mountain Guides Association) certification standards, IFMGA/UIAGM international guide curricula, and pre-course briefings from major US mountaineering schools — Alpine Ascents, RMI Expeditions, American Alpine Institute, Mountain Madness, and Mountain Trip. Training guidance is drawn from peer-reviewed altitude physiology research and the American Alpine Club‘s educational materials. Fact-check date: April 19, 2026.

    01 · What Mountaineering Actually Is

    Mountaineering is ascending peaks using technical techniques and equipment — rope work, crampons, ice axes, harnesses, and route-finding on snow, ice, or steep rock. The boundary that separates mountaineering from hiking isn’t elevation or distance. It’s whether the terrain requires specialized gear and skills to move safely.

    A Colorado 14er on a non-technical trail — even at 14,000 ft — is hiking. A 3,000 m Cascade volcano via a glaciated route is mountaineering. The difference is that the glaciated route crosses crevasses, demands crampons for icy sections, and requires roped team movement to protect against a fall into a hidden crevasse. Those demands are what define the sport.

    The continuum of outdoor objectives

    Most climbers progress through a rough sequence: hiking (established trails) → trekking (multi-day hiking, sometimes at altitude) → scrambling (off-trail but hands-free, no gear) → mountaineering (technical equipment and skills required). Our dedicated hiking vs trekking vs mountaineering guide covers these distinctions in detail. You don’t have to move through every stage — some climbers transition straight from hiking to mountaineering through a formal course — but understanding where you are on that continuum clarifies what you need to learn next.

    Why the distinction matters

    Mountaineering’s technical requirements exist because the terrain is genuinely more consequential than hiking. A fall on a steep snow slope without an ice axe can accelerate into an uncontrolled slide; a fall into a crevasse without rope protection can be fatal; a summit-day storm without weather-reading skills can trap you above the safe descent window. Every piece of gear and every skill in mountaineering exists to manage a specific category of risk that hiking doesn’t produce. Understanding this from day one shapes how seriously you’ll take the skills-learning phase.


    02 · Is Mountaineering Right for You?

    Before committing to courses or gear, the honest self-assessment matters. Mountaineering asks for specific things — not all of them physical — and climbers who don’t have them tend to wash out quickly.

    The commitments the sport actually requires

    • Physical base. Can you hike 6–8 hours with a 10–15 kg pack over 2,000+ ft of gain without needing a recovery day? If not, that’s the first milestone — and it’s achievable in 3–6 months of consistent training, not a lifetime.
    • Financial flexibility. $3,500–$6,500 for your first year, primarily in a skills course and essential gear. $2,000–$5,000 per year for subsequent years depending on goals. Not trivial, but nowhere near the Seven Summits tier.
    • Time commitment. 4–8 hours per week of training during active prep periods, plus 1–2 weeks per year for actual climbing objectives. Weekend training is the baseline for most committed beginners.
    • Risk tolerance. Mountaineering produces consequential injuries and occasional fatalities every season, even among well-trained climbers. If any level of real risk is unacceptable, mountaineering may not be the right sport.
    • Comfort with discomfort. Cold, wet, tired, hungry, slightly scared, above your comfort zone — this is most of what mountaineering feels like most of the time. The summit moments are brief; the discomfort is the medium.
    • Judgment and humility. The mountaineering skill that matters most isn’t physical or technical — it’s knowing when to turn around. Climbers who summit at all costs don’t last long in the sport.
    The simplest fit test

    Spend one long weekend hiking in adverse conditions — cold, wind, rain, heavier pack than usual — and see if you enjoyed the hard parts afterward. Mountaineers who thrive in the sport come back from Type 2 fun days energized; mountaineers who wash out remember only the discomfort. That internal reaction is the best predictor of whether the sport will stick, regardless of your current fitness level.


    03 · The Core Skills You’ll Build First

    Beginner mountaineering rests on a defined set of foundational skills. A competent introductory course will teach most of them in 5–7 days. These are the skills that make every subsequent climb safer, and the skills gaps that cause most beginner incidents.

    01
    Snow travel technique

    Kick-stepping efficiently on firm snow, French technique (flat-footing) on moderate slopes, plunge-stepping on descent, and controlled glissading when appropriate. Foundation for every glaciated climb.

    02
    Ice axe & self-arrest

    Proper grip orientations (cane, piolet, dagger), self-arrest from four body positions, self-belay on moderate slopes. This is the skill that prevents a slip from becoming a slide.

    03
    Crampon technique

    Fitting crampons correctly, French technique on moderate slopes, front-pointing on steeper ground, the critical transitions between techniques. Catching a crampon on your pants is how most beginners fall.

    04
    Basic rope skills

    Figure-eight knot, clove hitch, rewoven figure-eight, tying into a harness, basic belaying with a device, rappelling. The foundation for every roped climb and crevasse rescue.

    05
    Glacier travel

    Roped team spacing, short-roping on easy ground, reading crevasse patterns, basic crevasse rescue systems (Z-pulley or drop-loop). Non-negotiable before any glaciated climb.

    06
    Navigation

    Map and compass, altimeter use, GPS as backup not primary, maintaining orientation in whiteout conditions. You’ll navigate back down in weather you didn’t expect when you started up.

    07
    Weather reading

    Pressure trends, cloud formations that predict deterioration, mountain-specific forecasts (vs valley forecasts), recognizing the signs a summit window is closing. See our mountain weather guide for deeper coverage.

    08
    Decision-making

    Setting turnaround times and actually honoring them, assessing risk honestly when tired, recognizing summit fever in yourself and teammates. The most consequential skill in the sport, and the hardest to teach.

    Avalanche awareness is a ninth skill that becomes essential as soon as you climb outside formal course environments on winter or snow-covered objectives. Our avalanche safety guide covers terrain evaluation, conditions assessment, rescue fundamentals, and the specific avalanche training courses (Level 1/AIARE) every climber should take before backcountry snow travel.


    04 · Your First Year: A Realistic Progression

    A committed first-year beginner, training consistently and climbing with appropriate guides, can go from zero to a non-technical 5,000 m peak in about 12 months. Here’s what that looks like month by month.

    Months 1–3 · Foundation
    Physical base & research

    Build hiking fitness with weighted pack work 2–3× per week. Start reading broadly — trip reports, skills manuals (Mountaineering: The Freedom of the Hills is the classic text), this site’s altitude and gear guides. No climbs yet; you’re calibrating your body and your knowledge base.

    Months 4–5 · Skills course
    Formal introductory course

    5–7 day introductory course on a peak like Mount Baker or Mount Rainier. Covers all eight foundational skills in an actual alpine environment with certified instruction. Cost: $1,500–$3,000 including gear rental. This is the most important investment of your first year.

    Months 6–8 · First objectives
    Your first moderate peaks

    Guided or semi-guided attempts on accessible peaks — Mount Adams, Mount Hood, Glacier Peak, Mount Saint Helens. These are 2–3 day climbs that let you apply course skills on real objectives. Build a portfolio of 2–4 moderate summits over this period.

    Months 9–12 · First big peak
    Your first 5,000 m+ objective

    By month 12, you’re ready for a first major altitude objective — Kilimanjaro (5,895 m, non-technical), Mexico’s Pico de Orizaba (5,636 m), or Mount Rainier (4,392 m) if you want a technically demanding cap to the year. This is the peak that demonstrates you’ve completed the beginner progression.

    See our 10 Best Mountains to Climb for Beginners guide for specific first-peak recommendations with routes and logistics. If you’re curious about where a structured progression leads, the Seven Summits for Beginners guide covers the next major objective most committed beginners set their sights on.


    05 · Gear: Buy in Phases, Not All at Once

    The most expensive beginner mistake is buying $5,000 of gear before you know what you need. Introductory courses rent boots, crampons, ice axes, and harnesses — letting you try equipment before committing. Build your kit in phases, keyed to when you’ll actually use each item.

    Phase 1 · Year 1
    Buy now
    • Hiking boots (day hikes + training)
    • Waterproof shell jacket
    • Waterproof shell pants
    • Mid-weight layering system
    • Down jacket
    • Headlamp + backup
    • Sunglasses (Cat 3 or 4)
    • Trekking poles
    • Sun hat + warm hat
    • Daypack (30–40 L)
    • Water bottles + hydration
    • First-aid kit
    Phase 2 · First climb
    Rent first, buy if committed
    • Mountaineering boots (single)
    • Crampons (12-point)
    • Ice axe (general mountaineering)
    • Climbing harness
    • Helmet
    • Larger pack (50–65 L)
    • Expedition-rated sleeping bag
    • Sleeping pad (R-4+)
    • Locking carabiners (2–3)
    • Belay device
    • Climbing rope (50 m half)
    • Gaiters
    Phase 3 · Year 2+
    Add as goals expand
    • Double boots (for 5,000 m+)
    • Down suit (for 7,000 m+)
    • Expedition bag (−29 °C)
    • Satellite communicator
    • Crevasse rescue kit
    • Ice screws (if alpine ice)
    • Technical ice tools (if ice climbing)
    • Skis or snowshoes (approach)
    • Specialized harness (alpine)
    • Expedition tent
    • Bigger pack (75 L+)
    • Vapor barrier liner

    For detailed buyer’s guides on specific gear, see our master mountain climbing gear list, the mountaineering boots guide, the crampons buyer’s guide, and the sleeping bags guide. For budgeting, the mountain climbing costs guide breaks down spending by level.


    06 · Finding Reputable Instruction

    Your first mountaineering course matters more than any gear decision. Good instruction compresses months of trial-and-error into a week; bad instruction teaches habits you’ll spend years unlearning. Use certification standards and reputable schools to find the right fit.

    Certification matters

    In the United States, look for guides certified by the American Mountain Guides Association (AMGA). Internationally, the IFMGA/UIAGM designation (International Federation of Mountain Guides Associations) is the gold standard — a fully-certified IFMGA guide has passed rigorous alpine, rock, and ski assessments. Not every good guide is IFMGA-certified, but the credential reliably filters for quality. AMGA-certified guides meet a similar standard for North American terrain.

    Major US mountaineering schools

    What to ask before signing up

    The course instructor’s specific experience on your objective (not just mountaineering broadly), the student-to-instructor ratio (1:4 is typical, 1:6 is pushing it), what’s included vs what you pay extra for, the cancellation and weather policies, and references from recent clients in your experience bracket. A good school will answer all of these clearly; a sketchy one will evade them.

    Our How to Use Global Summit Guides Effectively walks through operator research in more detail.


    07 · Training for a Beginner Climb

    Mountaineering fitness is specific. Pure runners get crushed by weighted pack hikes; pure lifters run out of endurance at hour 4; pure rock climbers don’t have the leg-endurance base. The right training builds the exact profile the sport rewards: long-duration aerobic capacity, leg strength under load, and the ability to keep moving when tired.

    The four training pillars

    1. Aerobic base (3–4 sessions/week). Long, slow efforts — 60–120 minutes of moderate-effort hiking, cycling, or running. This builds the mitochondrial density and cardiovascular base that lets you sustain 8-hour summit days.
    2. Weighted pack hikes (1–2 sessions/week). Steep trails with a pack gradually increasing from 10 kg to 20+ kg. Simulates actual climbing loads. The single most specific training for mountaineering.
    3. Leg strength (2 sessions/week). Squats, lunges, step-ups, single-leg deadlifts, and calf raises. Not bodybuilding — endurance-strength work in moderate-rep ranges (8–15 reps).
    4. Stairs and hill repeats (1 session/week). Sustained vertical effort, ideally with a pack. Simulates the continuous uphill work of summit days when you can’t hike hills outdoors.

    A beginner climber training 4–5 hours per week across these four pillars for 4–6 months will arrive at a beginner mountaineering course physically prepared. More ambitious objectives require more training — our complete high-altitude training program covers structured schedules for specific peaks. The altitude acclimatization guide covers the physiology that fitness alone can’t solve.


    08 · Common Beginner Mistakes

    Patterns in how beginners get into trouble are remarkably consistent. Knowing them in advance doesn’t make you immune — but it helps you recognize when you’re making one.

    Buying gear before taking a course
    Fix: Rent or borrow for your first course. Let the course itself reveal what fits your body and style before spending $2,000+ on boots and hardware you might regret.
    Skipping the formal skills course
    Fix: YouTube is not a mountaineering school. Book a 5–7 day AMGA-certified course. Self-taught beginners consistently miss foundational skills that cause later incidents.
    Jumping to altitude too fast
    Fix: Respect the progression. Your body’s altitude response is only partially predictable from fitness. Climb something at 5,000 m before committing to a 6,000 m peak.
    Climbing solo too early
    Fix: Stay with guides, courses, or experienced partners for your first 5–10 climbs. Solo mountaineering requires judgment that only comes from accumulated partnered experience.
    Ignoring weather forecasts
    Fix: Check mountain-specific forecasts (not valley forecasts) for 5–7 days before every climb. Be willing to cancel. Most climbing incidents correlate with climbers pushing into bad weather they had warning about.
    Refusing to turn around
    Fix: Set a hard turnaround time before you leave high camp. Honor it even if the summit looks close. The mountain will still be there next season; injuries may not heal fully.

    09 · Your Next Steps

    If you’ve read this far and the sport still fits, here’s the concrete next action. Not someday — this week.

    1. This week: Start the baseline fitness test. Plan a weighted pack hike on the steepest local terrain you have access to. 10 kg pack, 2,000 ft gain, measure your time and how you feel at the top.
    2. This month: Book a reputable introductory course 3–6 months out. Having the date on the calendar focuses training in a way that vague intention doesn’t.
    3. This quarter: Start the 4-pillar training routine above. Consistency matters more than peak intensity — 4 hours a week every week beats 10 hours a week once a month.
    4. Across the year: Use this hub’s other clusters. Altitude physiology, gear strategy, weather, and avalanche safety each deserve focused reading.
    5. Year-end: Book your first 5,000 m peak. Kilimanjaro is the default choice; our first-peak decision guide walks through alternatives.

    The climbers who make it in mountaineering aren’t the strongest or the bravest. They’re the ones who start slow, learn properly, build consistently, and stay humble about what the sport asks of them. That’s entirely a choice, and it’s the choice that opens the whole pipeline of what’s possible.


    Frequently Asked Questions

    What’s the difference between hiking and mountaineering?

    Hiking happens on established trails with minimal technical demands — sturdy shoes and basic fitness are enough. Mountaineering involves ascending peaks using technical techniques: rope work, crampons, ice axes, glacier travel, and route-finding on snow, ice, or steep terrain. The distinction isn’t about elevation or difficulty — it’s about whether the terrain requires specialized equipment and skills to move safely. A Colorado 14er via a non-technical trail is hiking (even at 14,000 ft); a 3,000 m alpine peak via a glaciated route is mountaineering. Most climbers progress from hiking to scrambling (off-trail but non-technical) to mountaineering over 1–3 years as skills develop.

    How do I start mountaineering as a complete beginner?

    Start with a formal skills course before attempting any technical climb. Reputable mountaineering schools (AMGA-certified in the US, IFMGA/UIAGM internationally) run week-long introductory courses on peaks like Mount Baker, Mount Rainier, or the Cascade volcanoes that teach the foundational skills: crampon use, ice axe technique, self-arrest, roped glacier travel, and crevasse rescue. These courses typically cost $1,500–$3,000. Starting with a course rather than trying to self-teach dramatically shortens the learning curve and builds the safety foundations you’ll need for every future climb. Most successful mountaineers can trace their start to a specific introductory course.

    What mountaineering skills do beginners need first?

    The foundational mountaineering skill set covers six areas, typically learned in order: snow travel (kick-stepping, French technique, glissading), ice axe use (proper grip, self-arrest, self-belay), crampon technique (front-pointing vs French technique, transitions), basic rope skills (figure-eight, clove hitch, basic knots, belaying), glacier travel (roped team movement, crevasse detection, basic crevasse rescue), and decision-making (weather assessment, turnaround calls, risk evaluation). Most formal courses teach these in 5–7 days. Additional skills like technical rock climbing, ice climbing, and avalanche assessment come later based on your specific climbing goals.

    How fit do I need to be to start mountaineering?

    Baseline fitness for beginner mountaineering is the ability to hike 6–8 hours carrying a 10–15 kg pack over significant elevation gain (2,000+ ft) without exhaustion — a level most committed recreational hikers can reach in 3–6 months of structured training. More demanding objectives require more fitness, but you don’t need to be an elite athlete to start. The fitness most mountaineering rewards is endurance-based: sustained aerobic capacity, leg strength under load, and the ability to keep moving when tired. Pure runners and pure lifters both struggle initially; the balanced profile develops with practice. Our complete altitude training program guide covers structured training schedules.

    How much does it cost to start mountaineering?

    Total first-year cost for a committed beginner is approximately $3,500–$6,500 including a formal skills course ($1,500–$3,000), essential gear you’ll actually need ($1,500–$2,500), and one or two guided peak attempts ($500–$1,500 depending on peak). You do NOT need $5,000 of gear on day one — most introductory courses rent boots, crampons, ice axes, and harnesses, letting you experience these items before buying. Year 1 gear purchases should focus on layering, a quality pack, headlamp, and basic safety items. Boots and hardware can wait until you know you’re committing to the sport. Our mountain climbing costs guide has full budget frameworks by level.

    How long before I can climb a major peak?

    Realistic timelines: 6–12 months of training and 2–3 guided day-climbs before attempting a peak like Mount Baker (3,286 m) or Mount Hood (3,429 m). 1–2 years before Kilimanjaro (5,895 m) or Elbrus (5,642 m). 2–4 years before Aconcagua (6,961 m) or Denali (6,190 m). 5–10 years before an 8,000 m peak or Everest. These are average paths — motivated climbers with strong fitness bases and good instruction can move faster; climbers balancing limited training time move slower. The timeline matters less than the progression logic: each peak builds skills needed for the next. Skipping steps dramatically increases risk and often failure rates.


    Authoritative Sources & Further Reading

    This beginner’s guide reflects the curricula and standards established by North American and international mountaineering certification bodies:

    • American Mountain Guides Association (AMGA) — US certification standards and instructor curricula
    • IFMGA/UIAGM — International Federation of Mountain Guides Associations, gold-standard international certification
    • American Alpine Club — Educational materials, Climbing magazine, annual accident reports
    • Mountaineering: The Freedom of the Hills (The Mountaineers, current edition) — The foundational instructional text for the sport
    • Wilderness Medical Society — Practice guidelines for altitude illness, cold injury, and wilderness first aid
    • AIARE (American Institute for Avalanche Research and Education) — Level 1/2 avalanche certification standards
    • Course curricula and pre-course briefings: Alpine Ascents International, RMI Expeditions, American Alpine Institute, Mountain Madness, Mountain Trip, International Mountain Guides
    • Peer-reviewed sports physiology research on mountaineering-specific training programming
    • Outdoor Industry Association — Participation and safety statistics
    Published: February 15, 2026
    Last updated: April 19, 2026
    Next review: July 2026
    Part of the Global Summit Guide

    Back to the Master Hub

    This guide is one of 71 across 12 thematic clusters on Global Summit Guide. The master hub organizes every guide by experience tier, specific peak, skill area, and region — return anytime to navigate to your next topic.

    View the Hub →

Language »