web analytics

Author: Travis Ludlow

  • Mont Blanc Conditions This Week: GoĆ»ter Route Update

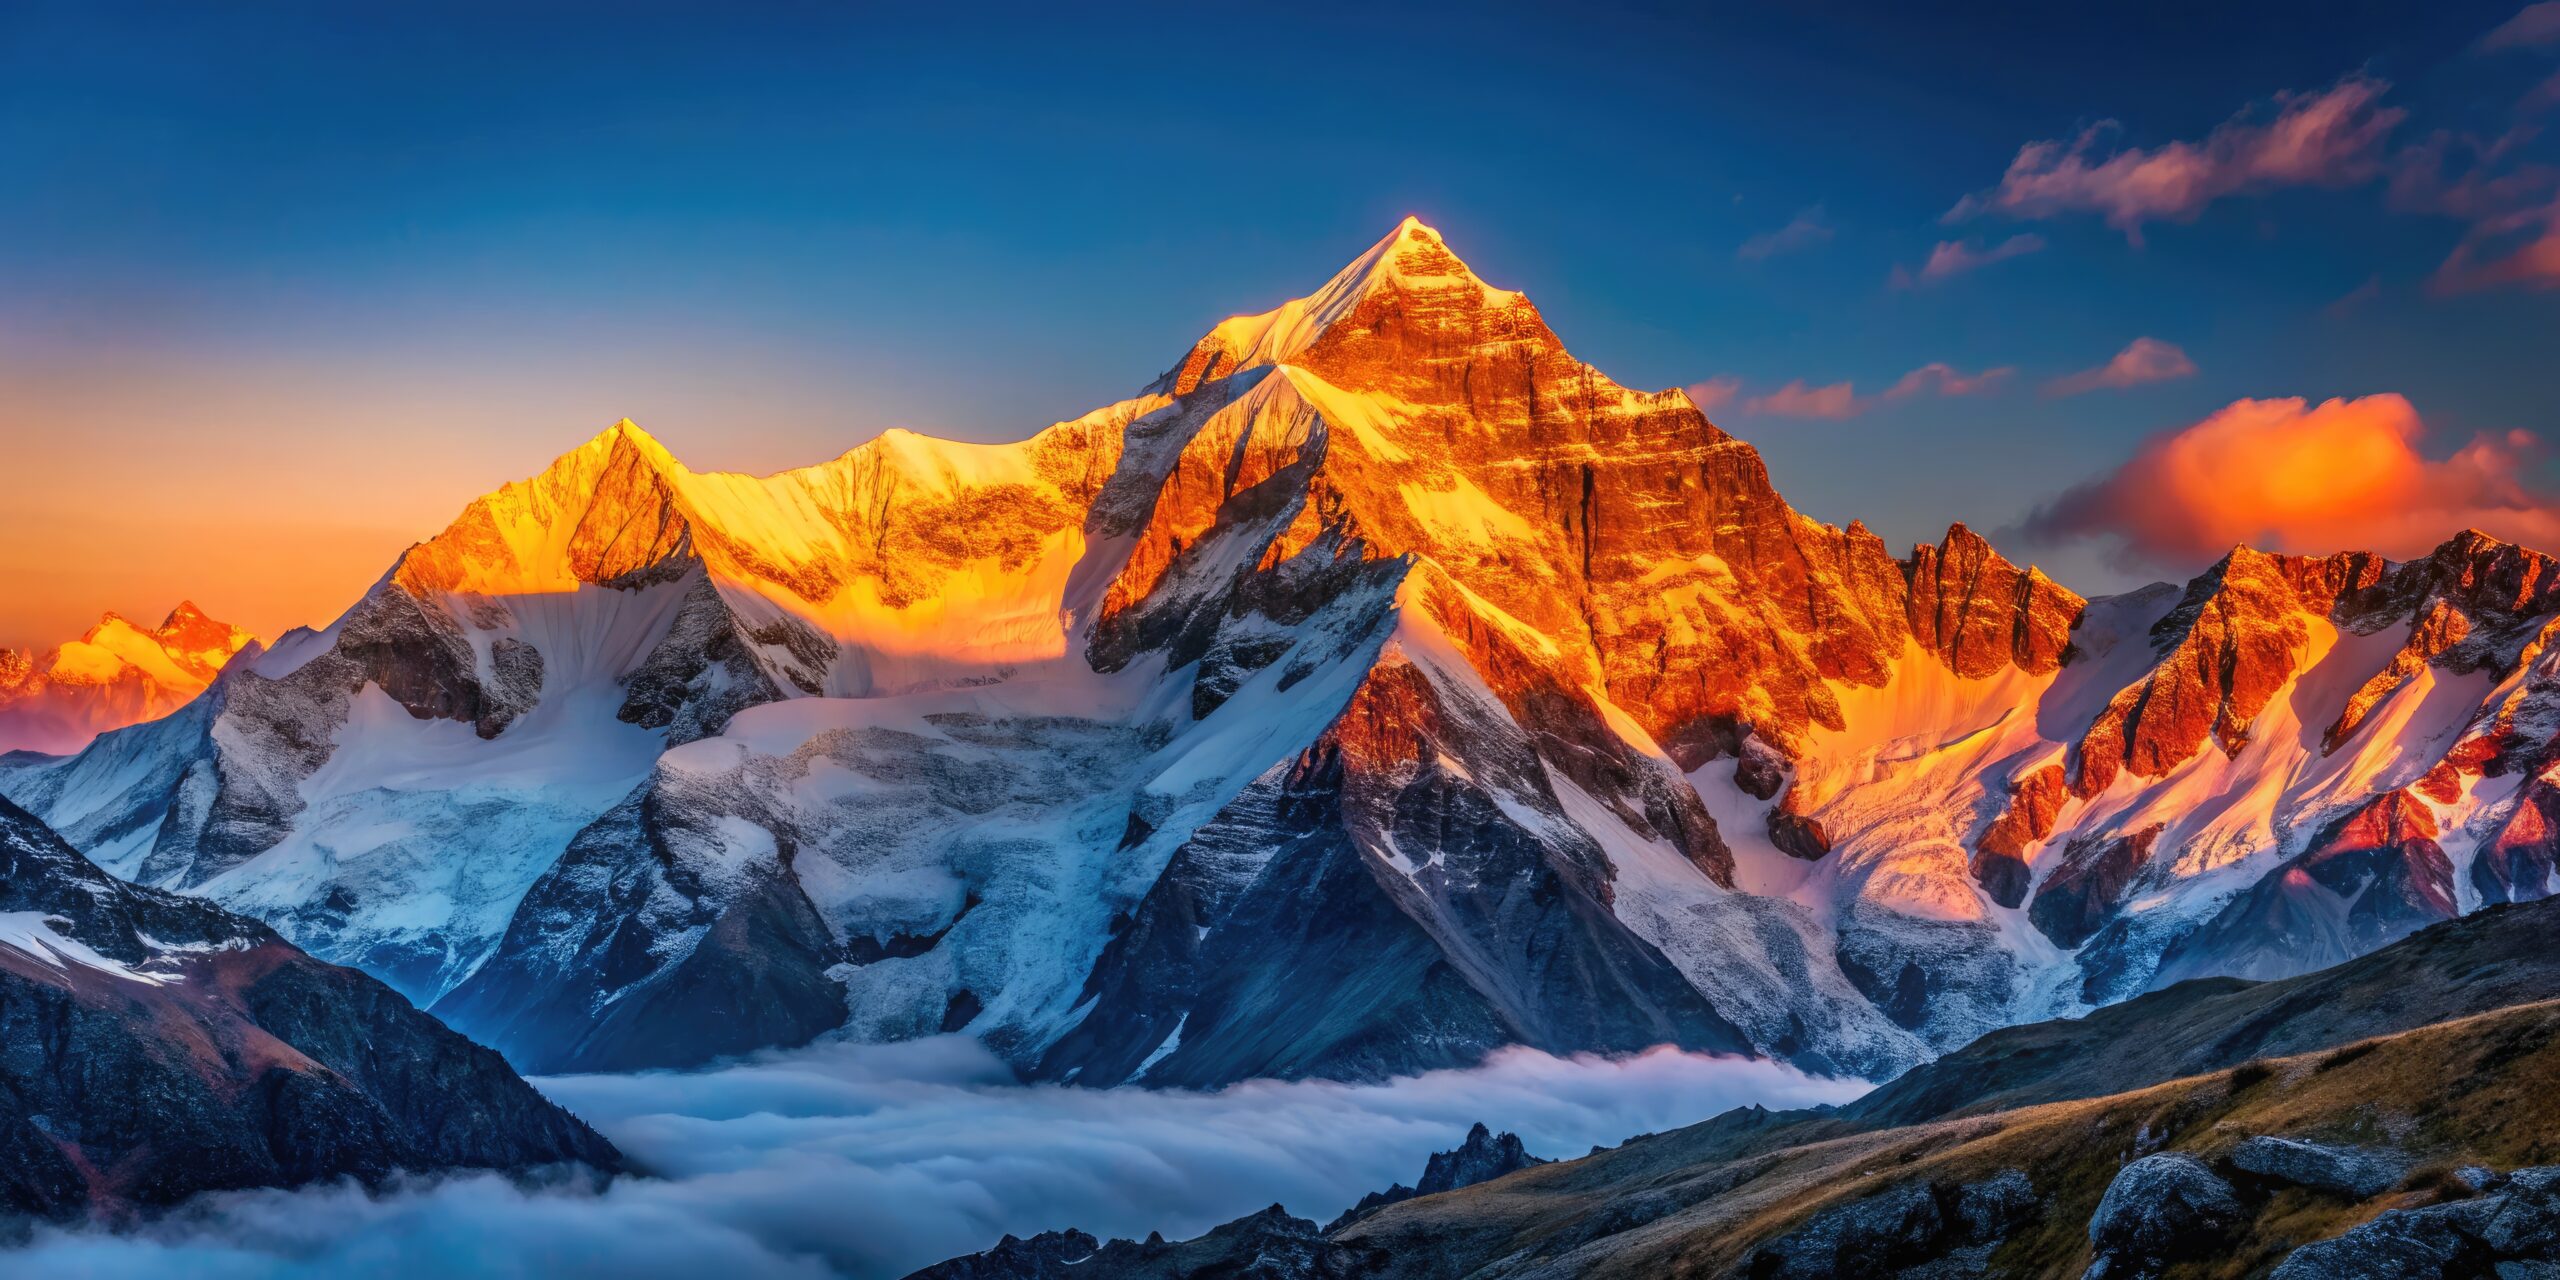
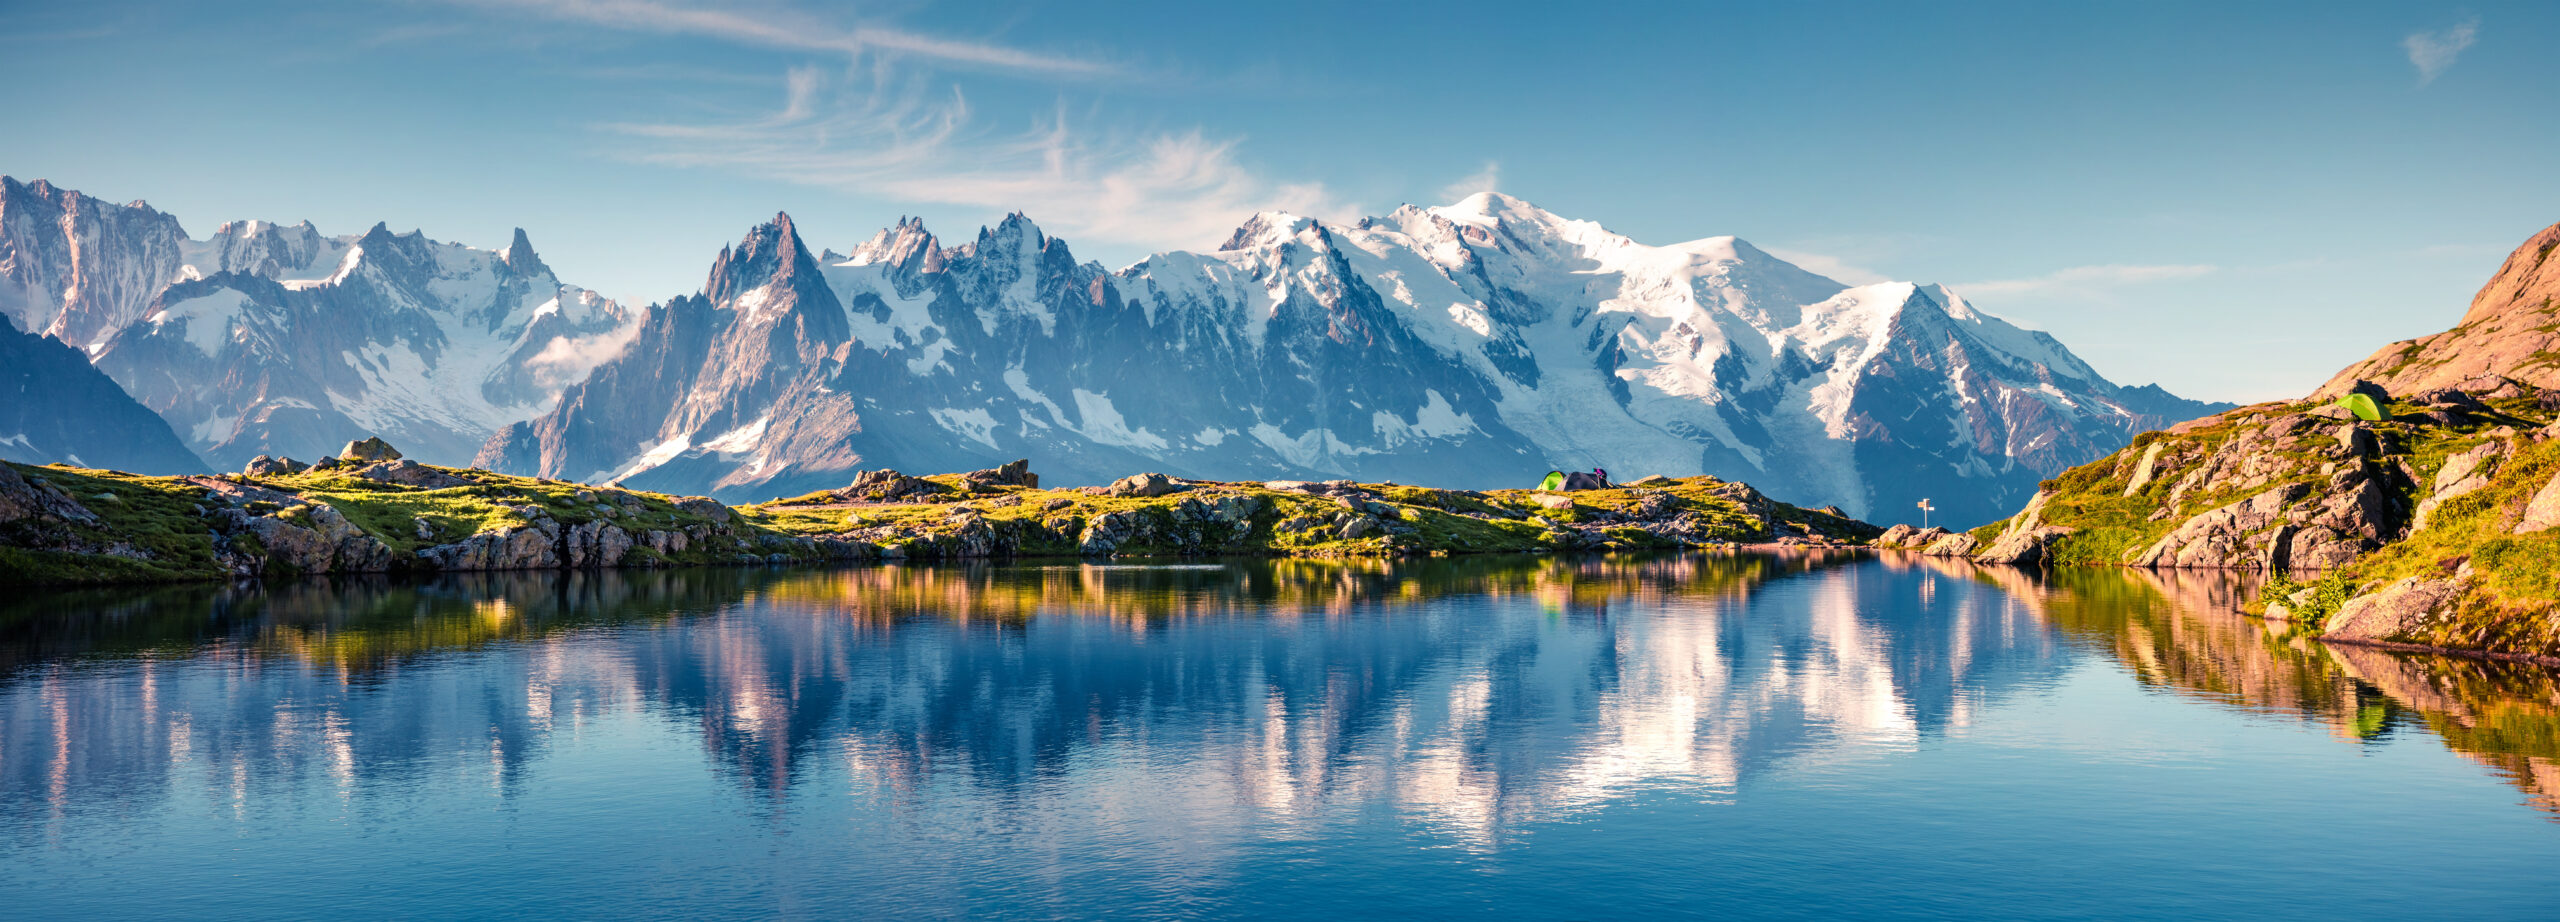
    Mont Blanc massif above the French Alps
    Mont Blanc · Goûter Route · Conditions watch · Checked September 17, 2026

    Mont Blanc Conditions This Week: Goƻter Route Update

    The GoĆ»ter normal-route huts are open and staffed, but the Grand Couloir is not ā€œcleared.ā€ After the extreme 2026 summer, Saint-Gervais and FFCAM continue to stress that rockfall can still occur. Mid-September also shifts the problem toward shorter daylight, colder conditions, fresh snow and icing.

    Sep 17Last source check
    OpenTĆŖte Rousse
    OpenGoƻter Refuge
    Oct 3TĆŖte Rousse guarded to
    Oct 4Goƻter guarded to
    The direct answer

    Open Does Not Mean Low-Risk.

    FFCAM lists the Tête Rousse and Goûter refuges as open in the guarded season after their August 26 reopening. The reopening ended the administrative closure, but the official notices explicitly say it does not guarantee the absence of rockfall.

    For this week, treat the Goƻter Route as a late-season high-mountain objective with an unresolved objective-hazard problem in the Grand Couloir. The decision to climb should be based on fresh local observations, overnight freeze, recent rockfall, upper-mountain snow/ice, wind and the advice of the Office de Haute Montagne, hut staff or your guide.

    Normal-route hutsOPEN / GUARDEDCurrent FFCAM season
    Grand CouloirROCKFALL RISK REMAINSNo safety clearance implied
    TĆŖte RousseTO OCT 3 Ā· 07:00FFCAM guarded period
    Goûter RefugeTO OCT 4 · 07:00FFCAM guarded period
    September factorSHORTER / COLDERFresh snow or icing possible
    Final decisionLOCAL CHECK REQUIREDConditions change rapidly
    Current caution: Saint-Gervais says the mountain absorbed exceptional heat during five heatwaves and that reopening the refuges does not guarantee an absence of renewed rockfall or collapse. Their reopening notice says attempting the route in a cooler period would be more reasonable.
    Today’s regional high-altitude observation: Mont-Blanc Natural Resort reported around -1°C in the morning and 0°C in the afternoon at Aiguille du Midi (3,842 m) on September 17, with west wind around 23 km/h and generally sunny conditions with high cloud. This is a useful massif snapshot—not a summit or Grand Couloir forecast.
    The 2026 normal-route story

    Why This September Is Not a Normal ā€œOpen = Goodā€ Season.

    The current route status makes more sense when you understand how the summer evolved.

    Early summer

    Repeated Heat

    Drought and successive heatwaves degraded high-mountain conditions across the massif and increased rockfall concern.

    Aug 7–11

    Major Rockfall Period

    Saint-Gervais reported significant rockfall on the Aiguille du Goƻter / Grand Couloir sector.

    Aug 11

    Refuges Closed

    Tête Rousse and Goûter were closed while authorities, guides and hut staff responded to the objective hazard.

    Aug 26 onward

    Administrative Reopening

    The huts reopened after calmer conditions, but the official warning about renewed rockfall remained.

    Normal-route orientation

    Where the Grand Couloir Sits in the Goƻter Route

    The route approaches from Saint-Gervais / Les Houches, reaches Tête Rousse, crosses the Grand Couloir, climbs to Goûter, then continues over the DÓme du Goûter and Bosses Ridge.

    Orientation only—not route navigation. The marker identifies Mont Blanc. Use an appropriate alpine topo, current local route information and professional guidance for actual movement. Open larger map →
    Nid d’Aigle Ā· ~2,372 mClassic normal-route approach access point when transport is operating.
    TĆŖte Rousse Ā· 3,165 mGuarded through October 3, 2026 at 07:00.
    Grand Couloir Ā· ~3,300–3,400 m sectorThe defining rockfall exposure between TĆŖte Rousse and the Aiguille du GoĆ»ter.
    Goûter Refuge · 3,815 mGuarded through October 4, 2026 at 07:00.
    Upper mountainDƓme du Goƻter, Vallot area and Bosses Ridge; wind, visibility, fresh snow and hard ice matter here.
    Mont Blanc massif and high alpine terrain
    Grand Couloir

    There Is No Clock Time That Makes the Couloir Safe.

    Cooler overnight conditions can reduce some heat-driven activity, but the correct crossing decision depends on recent rockfall, freeze–thaw, traffic, weather and what local professionals are seeing. A fixed ā€œbefore 06:00ā€ rule is not a substitute for current evidence.

    Mid-September transition

    Less Summer Heat Does Not Mean Fewer Mountain Problems.

    By mid-September, the hazard mix begins to change. Cooler conditions may help heat-driven rockfall while creating more alpine winter-like problems higher up.

    Fresh Snow & Verglas

    Early-autumn precipitation can rapidly coat rock or create hard snow on the upper route. Recheck conditions after every meaningful weather change.

    Shorter Daylight

    September reduces daylight margin. A slow team can reach technical descent terrain later and colder than it would in July.

    Wind & Visibility

    Bosses Ridge and the upper glacier terrain become much more serious in wind, whiteout or blowing snow. Valley weather is not enough.

    Harder Snow Surface

    Cooler nights can create firmer surfaces and better cramponing—or difficult hard ice. Movement skill must match the actual surface.

    Season Logistics

    Hut and transport schedules tighten as autumn approaches. Confirm the full ascent and descent chain, not just the summit window.

    Fewer Parties

    Reduced traffic can feel calmer, but it also means less informal information and less reliance on following other teams for route-finding.

    Route status must stay route-specific

    Do Not Transfer the Goƻter Reopening to Other Mont Blanc Routes.

    One route reopening does not establish conditions on the Trois Monts traverse or the Italian normal route.

    RouteWhat is verifiedWhat still needs a fresh checkBest source
    Goûter RouteTête Rousse and Goûter huts reopened Aug. 26 and remain in their guarded season.Grand Couloir rockfall, upper snow/ice, wind, track and current operating access.FFCAM + La Chamoniarde + Saint-Gervais
    Trois MontsLa Chamoniarde reported it out of condition in the late-August reopening notice.Do not assume that late-August assessment still applies; glacier/serac and route condition require a new local check.OHM / La Chamoniarde + current guides
    Italian RouteLa Chamoniarde also reported it out of condition in late August.Verify current glacier, snow, hut and route access separately.Italian/local route sources + guides
    Before committing to the route

    Make These Checks in the Final 24 Hours.

    For a page called ā€œconditions this week,ā€ the most useful answer is knowing what must be rechecked after you close the browser.

    Goƻter corridor

    • Any fresh Saint-Gervais closure or restriction.
    • Recent Grand Couloir rockfall observations.
    • Overnight freeze and freezing-level trend.
    • Current hut operation and your named reservation.
    • Actual access / transport schedule for ascent and descent.

    Upper mountain

    • Fresh snow or hard ice above GoĆ»ter.
    • Wind speed and visibility near summit elevation.
    • Bosses Ridge track and cornice condition.
    • Team pace and turnaround margin.
    • Current advice from OHM, hut staff or your guide.
    Freshness rule: a route report can become obsolete after one warm afternoon, cold front, snowfall or rockfall event. Record the date of every condition claim you rely on.
    Official and local checks

    Where to Verify Mont Blanc Before You Leave.

    Use primary/local sources for closure, hut and route information. A static article should never be the final authority for a same-day alpine decision.

    Confidence by topic

    • High: Aug. 26 administrative reopening.
    • High: TĆŖte Rousse and GoĆ»ter guarded-season dates.
    • High: official warning that reopening does not remove rockfall risk.
    • Dynamic: Grand Couloir activity today.
    • Dynamic: upper-mountain snow, ice, wind and visibility.
    • Route-specific: Trois Monts and Italian route conditions.
    Last substantive source check: September 17, 2026. Verify again immediately before climbing.
    Direct answers

    Mont Blanc Conditions This Week FAQ

    Current-status answers are date-sensitive; the route can change faster than the page.

    What are the Mont Blanc conditions this week?

    As of September 17, the Goƻter normal-route huts are open and staffed, but reopening is not a safety clearance. Local authorities continue to warn that Grand Couloir rockfall remains possible after the extreme summer heat. Late-season weather, shorter daylight, fresh snow and icing must also be checked immediately before climbing.

    Is the Goƻter Route open right now?

    The administrative closure of the Tête Rousse and Goûter huts ended on August 26. FFCAM currently lists both huts as operating in their guarded season. Climbers still need to evaluate actual route conditions before committing.

    Are Tête Rousse and Refuge du Goûter open?

    Yes. FFCAM lists Tête Rousse as guarded through October 3, 2026 at 07:00 and Refuge du Goûter through October 4, 2026 at 07:00. Reservations are required.

    Is the Grand Couloir safe now that the huts reopened?

    No source can guarantee that. Saint-Gervais explicitly states that reopening the huts does not guarantee the absence of rockfall and that further rockfall or slope collapse can still occur.

    What time should I cross the Grand Couloir?

    Cooler hours can reduce some heat-driven exposure, but there is no universally safe clock time. Current overnight freeze, observed rockfall, weather, traffic and local professional advice matter more than a fixed time printed online.

    Is September a good time to climb Mont Blanc?

    September can bring cooler rock and fewer climbers, but it also brings shorter daylight and a greater chance of early-autumn snow, hard ice, wind and changing schedules. The actual condition window matters more than the month.

    Are the Trois Monts and Italian routes in condition?

    La Chamoniarde reported in late August that both were not in condition at that time. Glacier and snow conditions can change quickly, so verify those routes separately rather than carrying the August assessment forward.

    Where should I check conditions before climbing?

    Check La Chamoniarde and the Office de Haute Montagne, FFCAM for hut and normal-route status, Saint-Gervais for official restrictions, current high-mountain weather and webcams, and your guide or guide company for the final route decision.
    Travis Ludlow, Global Summit Guide
    Conditions research

    Travis Ludlow Ā· Global Summit Guide

    This conditions watch is research-based and uses current local authority, hut and high-mountain information. It does not claim first-hand observation of the Grand Couloir today. Route status, rockfall, snow, wind and visibility must be rechecked locally before climbing.

    Mont Blanc massif above Chamonix
    The final rule

    Use the Date, Then Verify the Mountain Again.

    A ā€œthis weekā€ conditions report is only useful while its evidence is fresh. Check the local feed, hut status, weather and actual route observations again before leaving for the climb.

    Alps Classics · Current conditions

    Mont Blanc Conditions & the Alpine Cluster

    This week’s conditions are one input. See the climb guide, the trek and the wider Mont Blanc / Alps content below.
    Was this helpful?

    Yes
    No
    Thanks for your feedback!
  • Broad Peak & Gasherbrum 2026: First Summits & Final Results

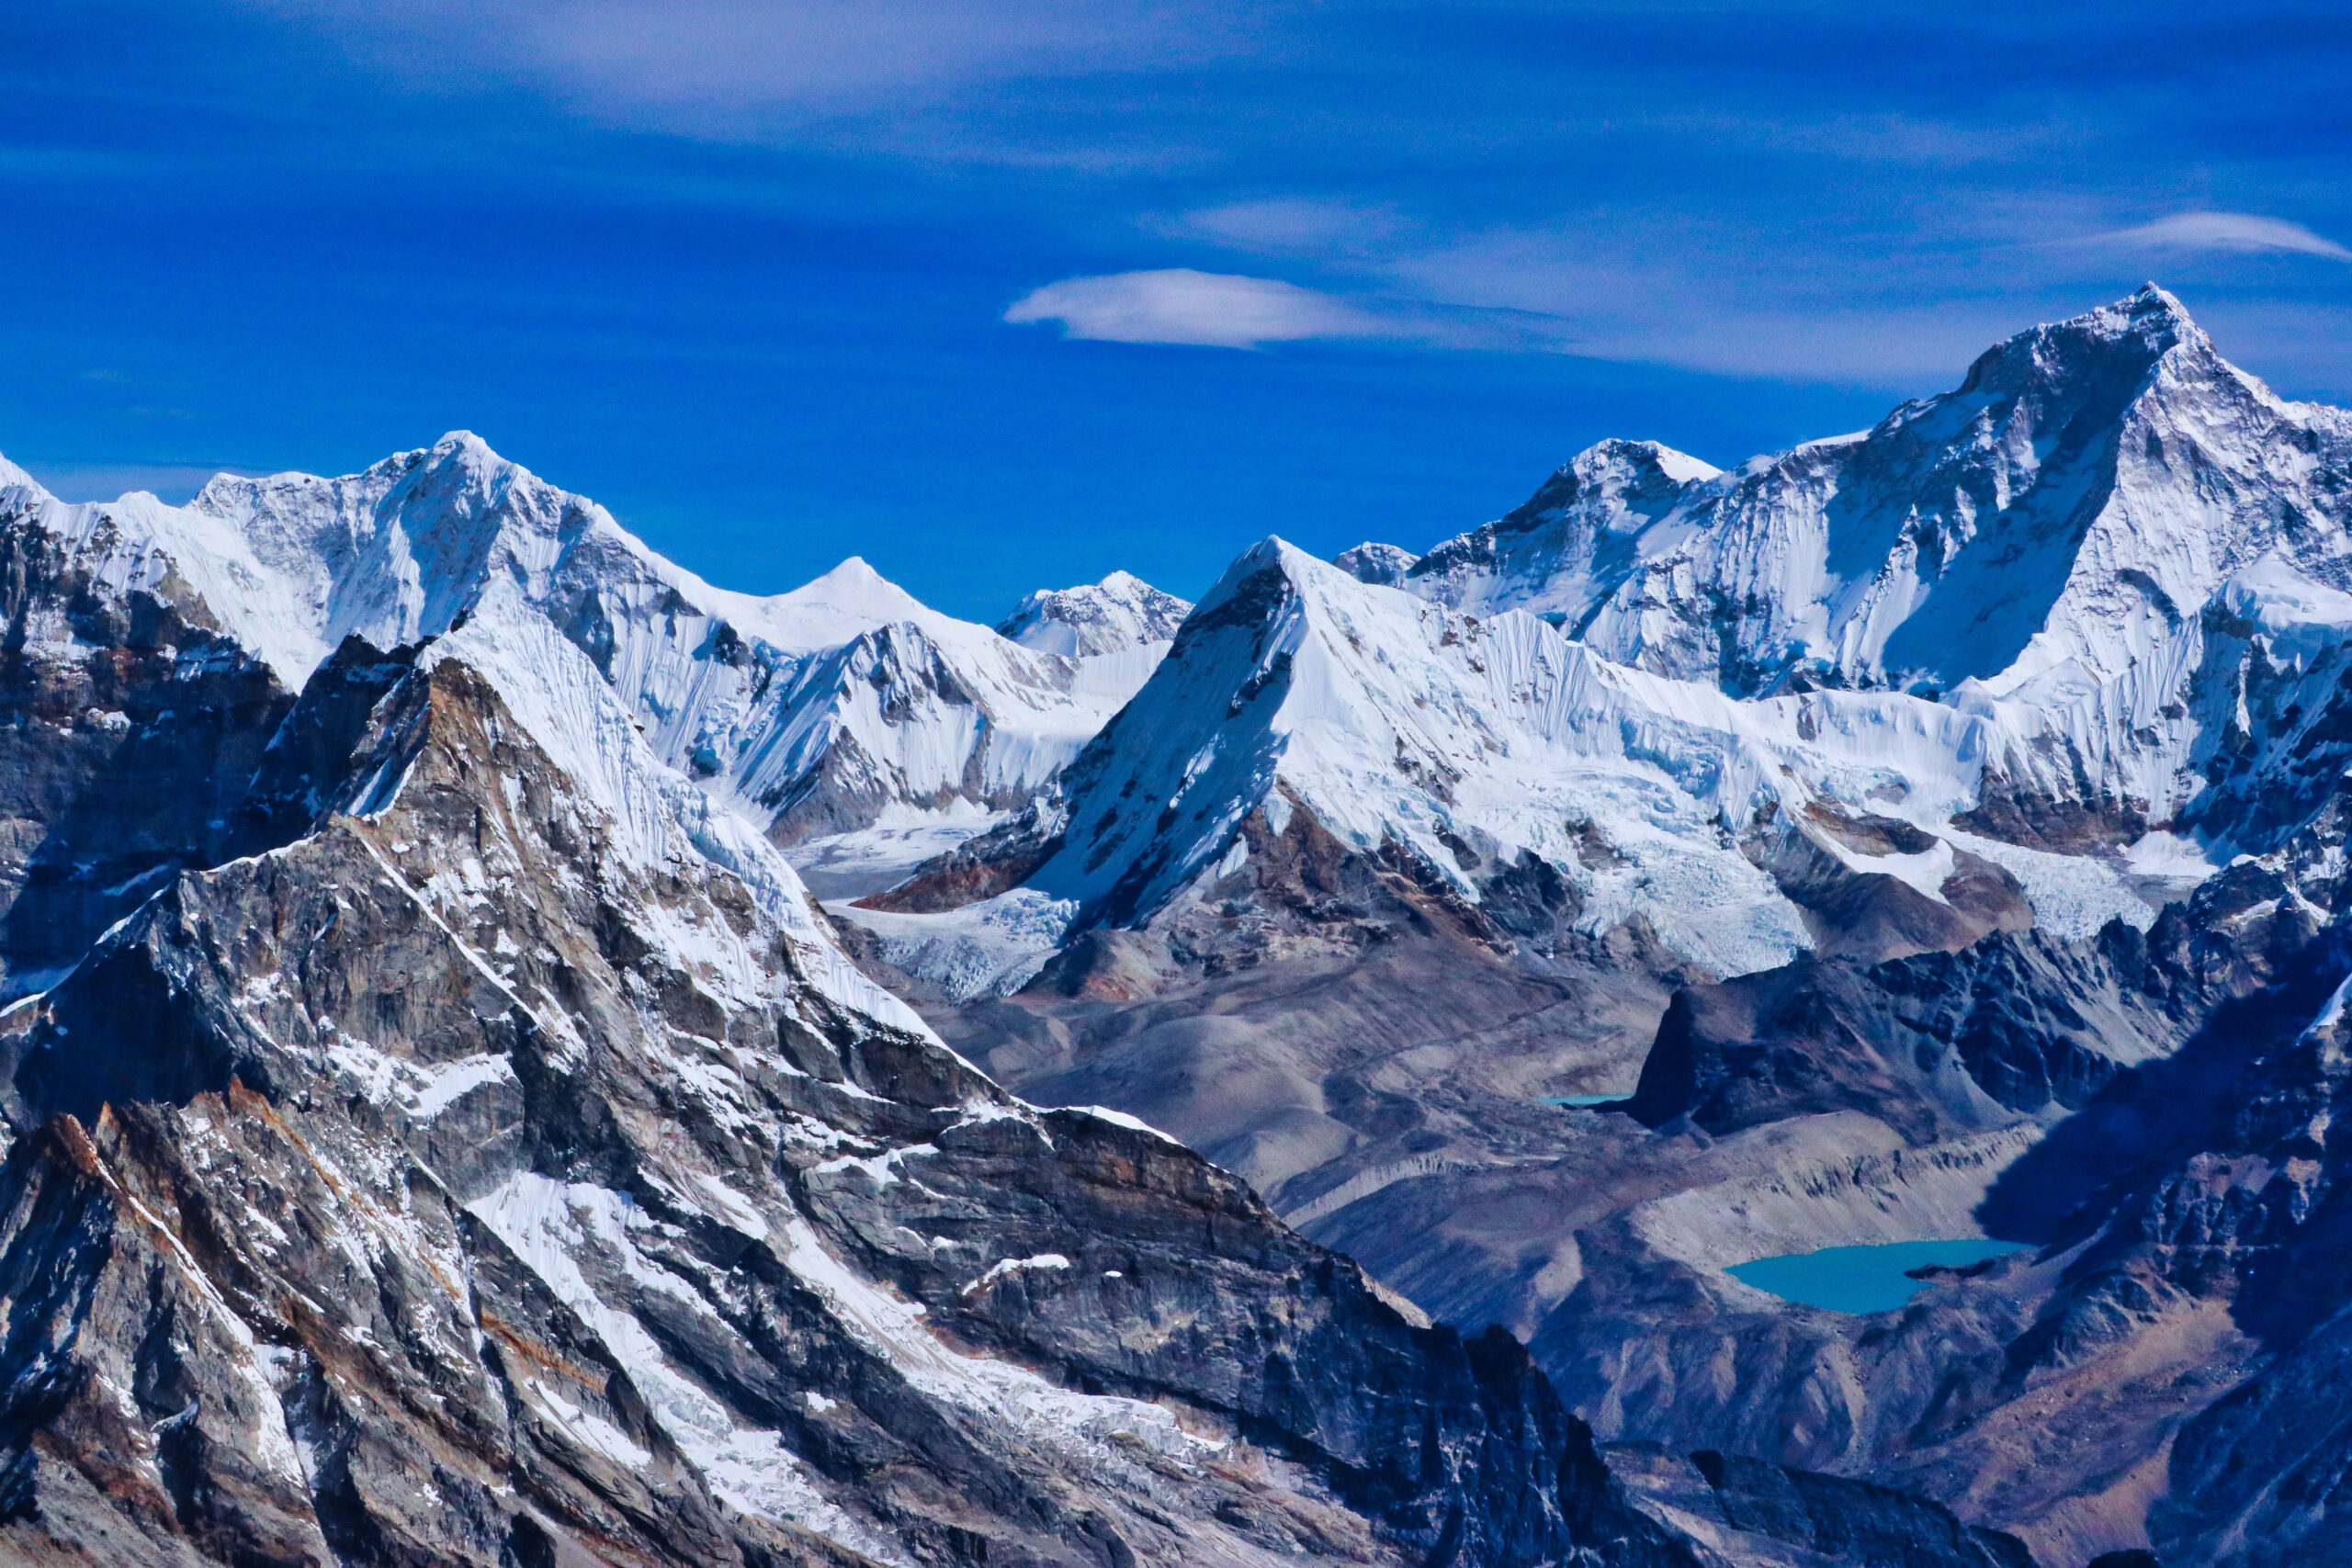
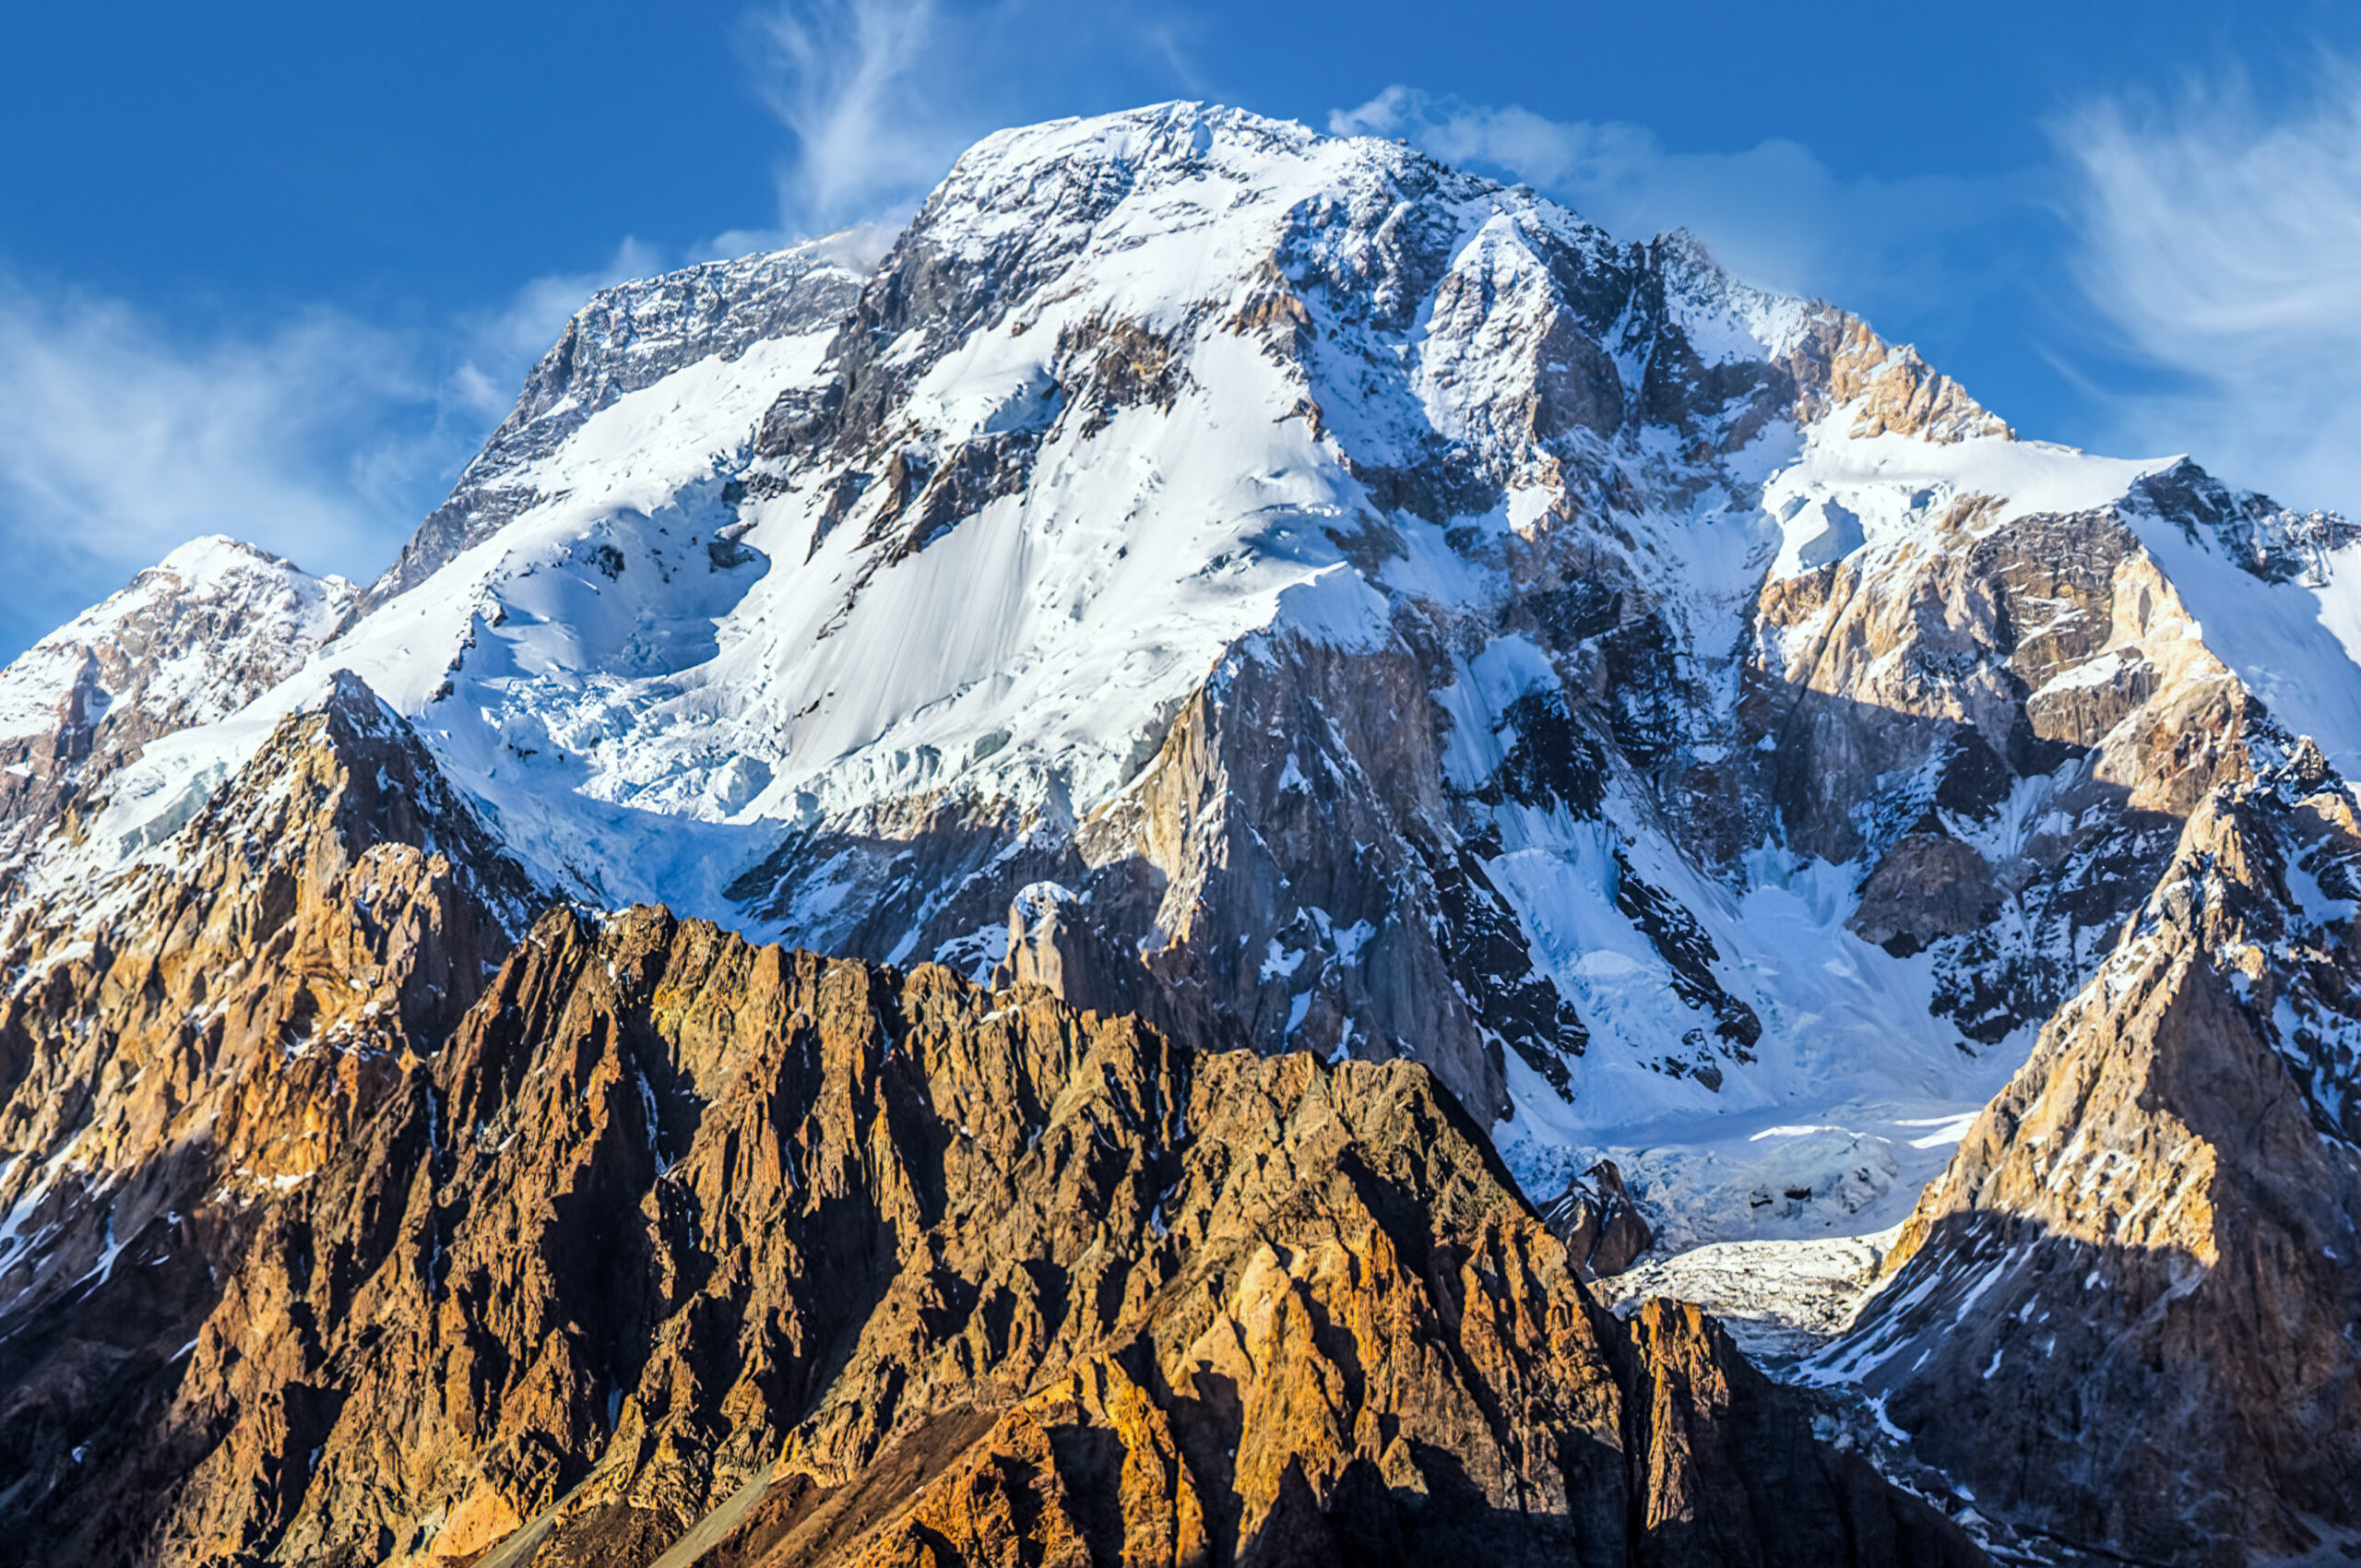
    Broad Peak in Pakistan's Karakoram
    Karakoram Ā· Pakistan Ā· Final 2026 Season Archive

    Broad Peak & Gasherbrum 2026: Final Summit Results

    Broad Peak produced successful summits before a devastating late-July avalanche. Gasherbrum II delivered one of the clearest summit successes of the Karakoram summer. Gasherbrum I finished without a confirmed summit. This is the final record of how the three neighboring 8,000ers moved from early route fixing to a season that ended very differently on each mountain.

    season closed dated summit reporting Broad Peak + G1 + G2 K2 context kept separate historical archive
    The final answer

    What Happened on Broad Peak and the Gasherbrums in 2026?

    Broad Peak was summited on July 19. A Pakistani rope-fixing team climbing with Juan Pablo Toro reached the true summit after a very long summit day.

    Gasherbrum II was summited on July 21. Imagine Nepal reported six climbers reaching the 8,035-meter summit after deep snow and insufficient fixed rope had stopped their first push.

    Gasherbrum I finished the summer without a successful summit. The late-July push never converted into a summit before the season closed.

    The season’s defining event came on July 30, when an avalanche on Broad Peak killed all ten members of an international climbing team. The disaster also redirected climbers and resources across the Baltoro toward search, rescue and recovery.

    Archive status: this is no longer a live summit-push tracker. It is the completed historical record of the 2026 Broad Peak and Gasherbrum season.
    Jul 19 Broad Peak successful summit party
    Jul 21 Gasherbrum II six-person summit team
    0 Gasherbrum I successful summer summits
    Jul 30 Broad Peak avalanche killed ten climbers
    Final season ledger

    Three Neighboring 8,000ers. Three Different Outcomes.

    A single label like ā€œbad Karakoram seasonā€ hides too much. Broad Peak, Gasherbrum I and Gasherbrum II shared weather systems and logistics but did not produce the same result.

    PeakElevation2026 outcomeKey dateSeason context
    Broad Peak8,051 mSuccessful summit(s)July 19 Pakistani rope fixers and Juan Pablo Toro reached the summit. A second late push ended in the July 30 avalanche that killed ten climbers.
    Gasherbrum II8,035 mSuccessful summitJuly 21 Imagine Nepal’s six-person summit team succeeded on a second push after the first attempt was stopped by deep snow and insufficient rope.
    Gasherbrum I8,080 mNo successful summitSeason close Teams prepared for a late-July attempt, but the summit window never produced a successful ascent before the season ended.
    K28,611 mNo successful summitSeason close Included only as neighboring context. K2 has its own dedicated 2026 archive.
    Keep the mountain records separate. Broad Peak’s July 30 deaths belong to Broad Peak—not to K2 or Gasherbrum statistics, even though the emergency directly affected neighboring expeditions.
    Map and mountain context for Broad Peak and K2 in the Karakoram
    One mountain cluster

    Broad Peak, K2 and the Gasherbrums Run on the Same Karakoram Clock.

    They are close enough to share the major Baltoro weather story, expedition logistics and a small community of high-altitude climbers. But route readiness, snow conditions and technical demands still make each peak’s outcome independent.

    Season in sequence

    How the 2026 Karakoram Season Changed in Three Weeks.

    The original version of this page stopped on July 11. The meaningful story came afterward.

    Early July

    Teams Establish on Broad Peak and the Gasherbrums

    Commercial and independent climbers completed the Baltoro approach, began rotations and pushed fixed-line systems higher.

    July 18

    Gasherbrum II’s First Major Push Stops Short

    Deep snow and insufficient fixed rope prevented safe progress high on GII. The team descended, reorganized and prepared to try again.

    July 19

    Broad Peak Produces Its First Major 2026 Summit Success

    Karakorum Expeditions’ rope-fixing team and Juan Pablo Toro climbed to the true summit after roughly twenty hours from Camp 3.

    July 21

    Gasherbrum II Summit Team Reaches 8,035 m

    Phur Galjen Sherpa, Aangdu Sherpa, Lhakpa Nuru Sherpa, Wang Zhong, Sim Phei Sunn and Valentyn Sypavin reached the summit.

    July 27

    A Late Window Sends Teams Back Up

    Climbers on K2, Broad Peak and Gasherbrum I began moving with hopes of using a narrow late-July weather break.

    July 30

    Broad Peak Avalanche Changes the Season

    An avalanche struck a ten-person summit-bound team. All ten climbers ultimately died. Search, rescue and recovery became the priority across the Baltoro.

    August

    Gasherbrum I and K2 Close Without Summits

    Final reporting recorded no successful summer summit on either mountain. The Karakoram season ended with a sharply uneven result across the neighboring peaks.

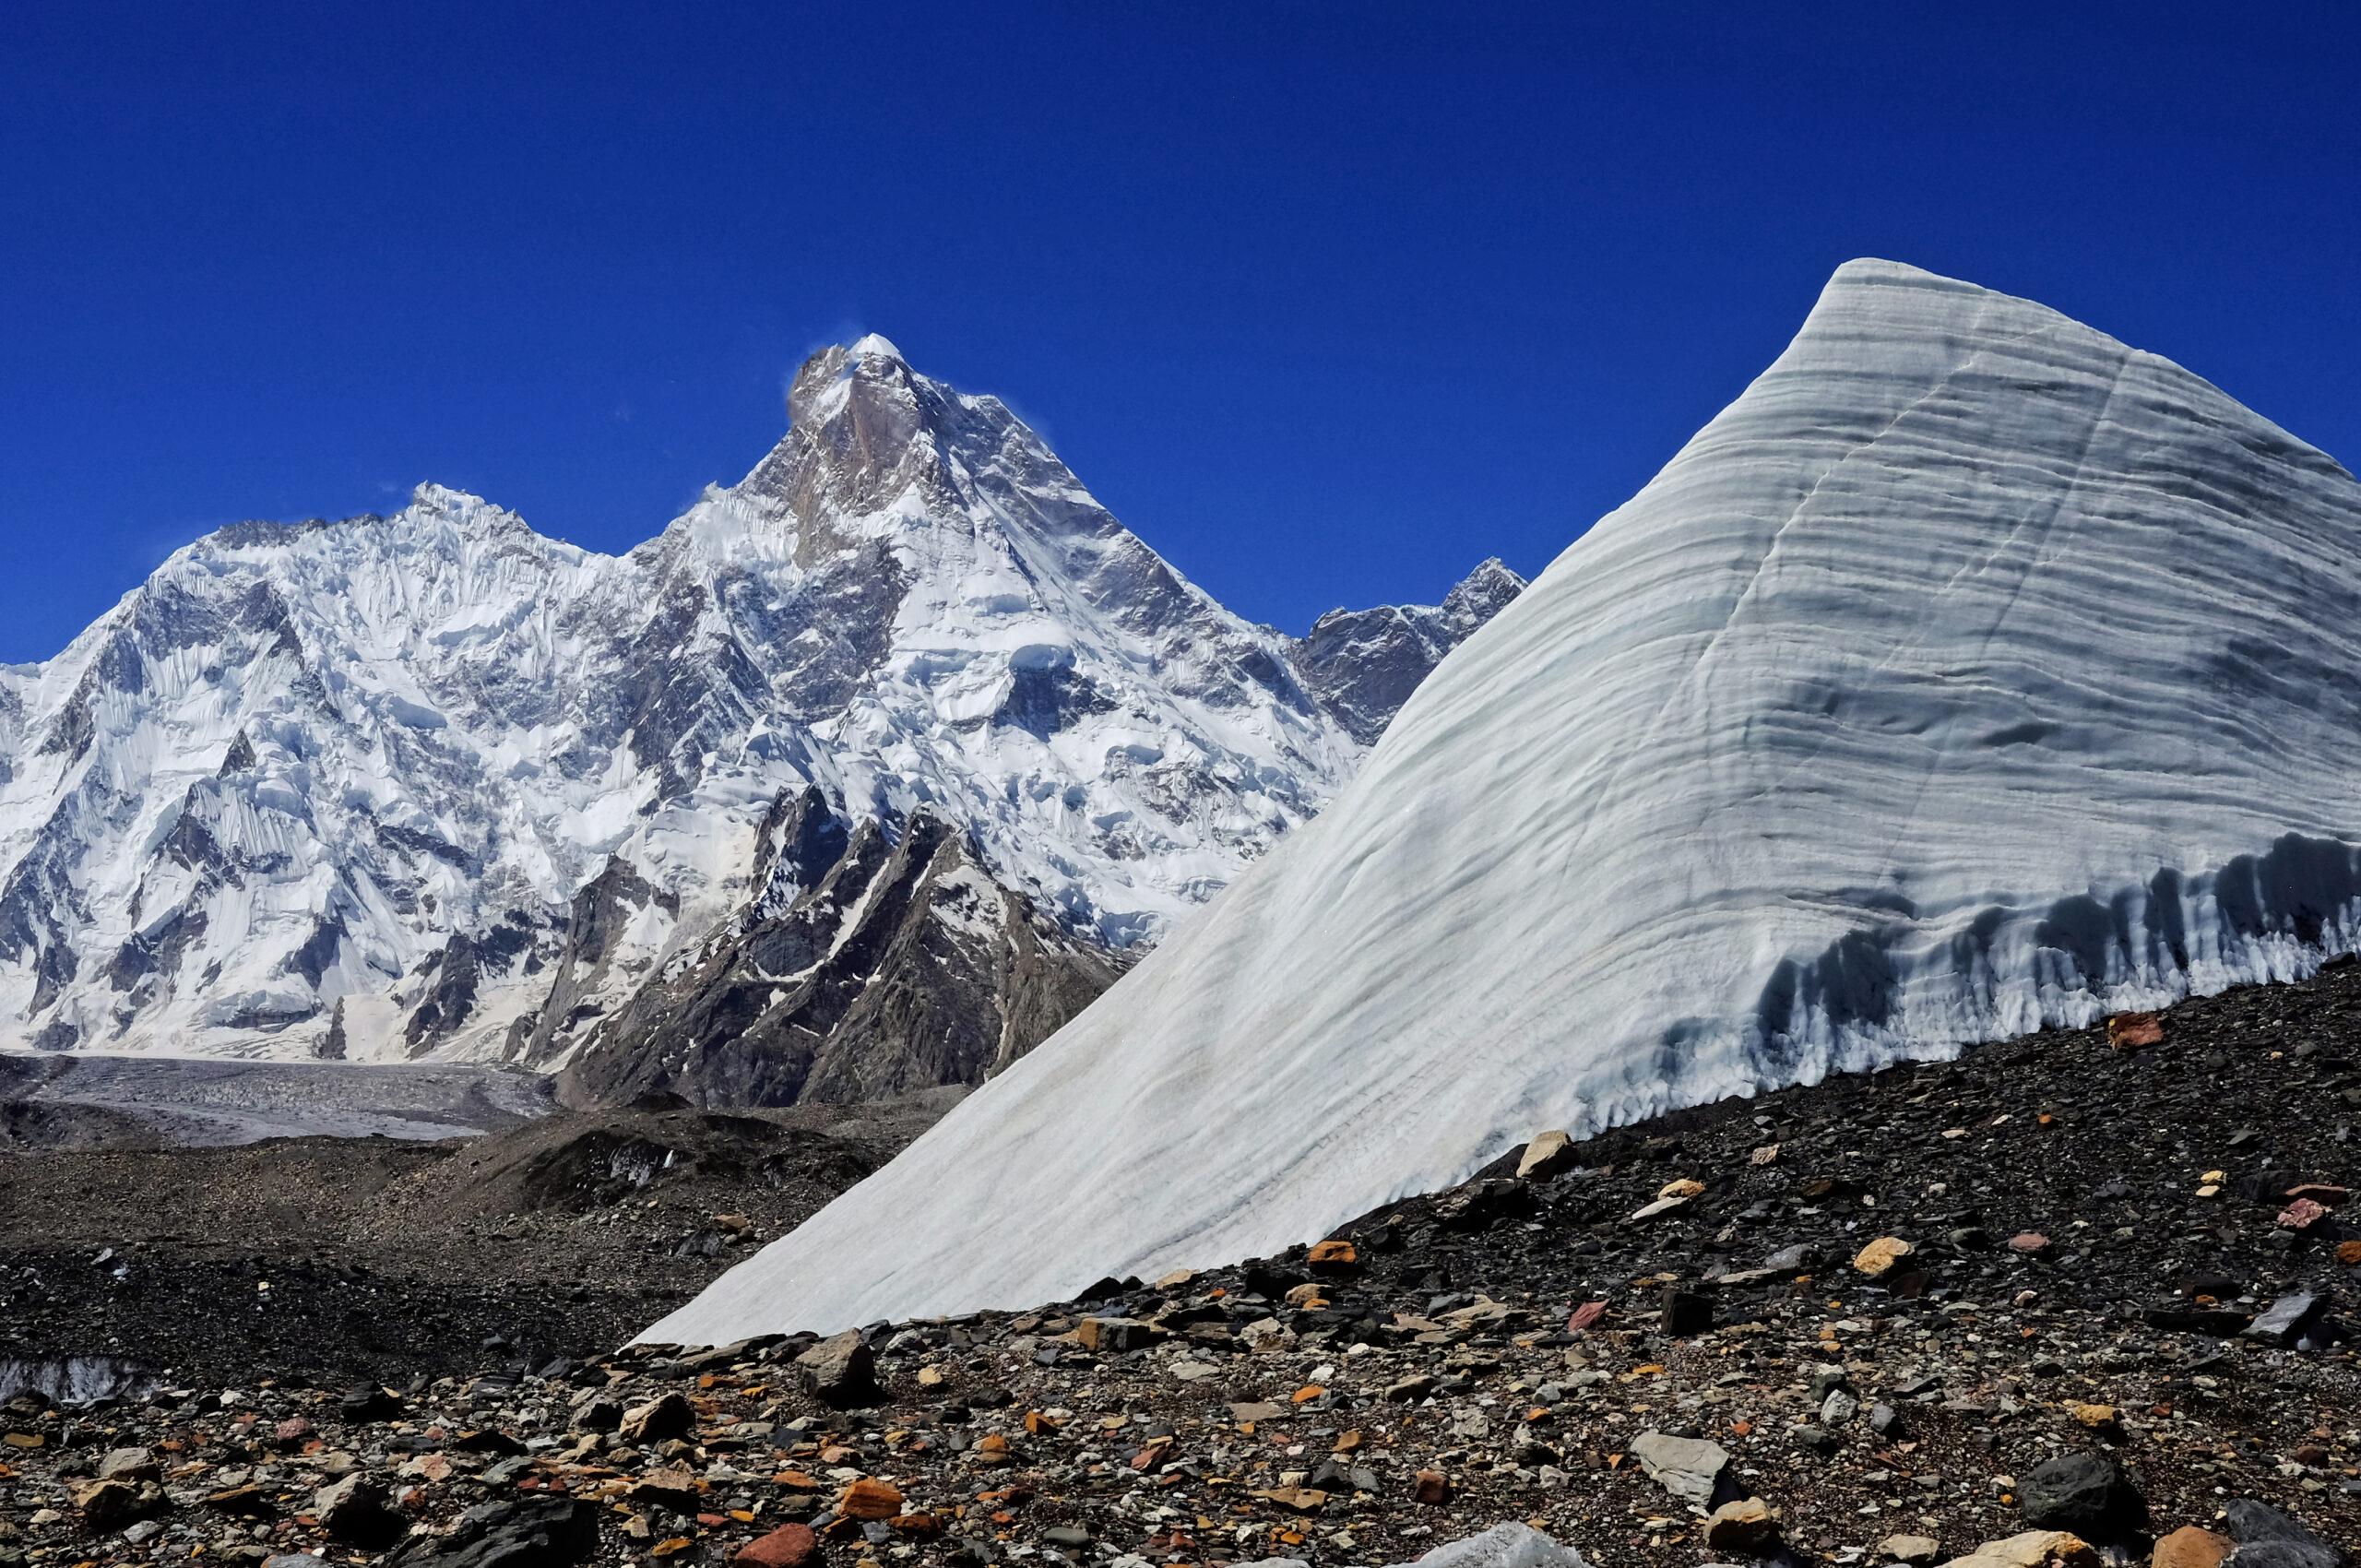
    Gasherbrum massif in Pakistan's Karakoram
    Gasherbrum massif

    Shared Base Camp Does Not Mean Shared Difficulty—or Shared Results.

    Gasherbrum I and II rise from the same mountain group and can be combined logistically, but G1’s steeper technical demands and GII’s more approachable southwest ridge create very different summit probabilities.

    Broad Peak Ā· 8,051 m

    Broad Peak Went From Summit Success to the Season’s Defining Tragedy.

    Both facts belong in the record. The successful July 19 climb should not be erased by what happened eleven days later, and the later avalanche should not be sensationalized as if the entire season consisted of one event.

    July 19

    The Summit

    A Pakistani rope-fixing group climbing with Juan Pablo Toro reached Broad Peak’s Main Summit late in the day after a long push from Camp 3.

    Late July

    Fresh Snow Returns

    Heavy snowfall and unstable conditions complicated the next summit cycle. Some climbers who had been on the mountain earlier chose not to make another attempt.

    July 30

    Avalanche

    Ten climbers on a later summit push were caught by a large avalanche. Subsequent reporting confirmed that all ten died.

    Broad Peak above the Baltoro region
    Broad Peak’s deceptive reputation

    ā€œOne of the Easier 8,000ersā€ Never Meant Low Risk.

    Broad Peak’s normal route is less technically sustained than K2, but the 2026 season showed how avalanche exposure, extreme altitude, unstable snow and weather can dominate a route regardless of its comparative grade.

    Gasherbrum I & II

    GII Converted the Window. GI Did Not.

    This is perhaps the clearest comparison of the season: two 8,000ers sharing the same massif and much of the same weather, yet only one produced a successful 2026 summit.

    Gasherbrum II Ā· 8,035 m

    Successful on the Second Push

    The July 18 attempt stopped when deep snow and insufficient rope blocked safe progress. The team descended, reorganized and returned. On July 21, six climbers reached the summit.

    Gasherbrum I Ā· 8,080 m

    No Successful Summit

    G1 remained the more difficult Gasherbrum objective. A late-July push developed alongside activity on K2 and Broad Peak, but final season reporting recorded no successful summit.

    Gasherbrum peaks and Baltoro terrain
    Gasherbrum II

    The July 21 Success Came After the Team Had Already Turned Back Once.

    The first attempt failing was not the failure of the expedition. Retreat, recovery and a second attempt inside a better tactical window produced one of the clearest summit results of the 2026 Karakoram season.

    July 30 Ā· Broad Peak

    The Avalanche Must Be Recorded With Accuracy and Restraint.

    Ten climbers were caught by a major avalanche while ascending Broad Peak. Subsequent reporting confirmed that all ten died. The scale of the event made Summer 2026 Broad Peak’s deadliest recorded climbing season.

    This page does not attempt to assign individual fault or reconstruct decisions beyond what established reporting supports. Its purpose is to preserve the season record and explain how the event affected the wider Baltoro climbing community.

    10 climbers All members of the affected climbing team died.
    Broad Peak The deaths belong to Broad Peak’s mountain record.
    Search & recovery Teams elsewhere in the Baltoro redirected people and resources.
    Season impact The remaining K2 and neighboring summit plans were disrupted or abandoned.
    Baltoro and K2 base camp region near Broad Peak
    A connected climbing community

    An Emergency on One Baltoro Mountain Can Change Plans on Another.

    K2, Broad Peak and the Gasherbrums are separate mountains, but their expeditions share a remote logistics corridor and a relatively small high-altitude community. In late July 2026, that connection became operationally important.

    Why the outcomes differed

    Weather Was Shared. Route Readiness Was Not.

    Neighboring mountains can receive the same regional forecast but still have very different summit outcomes.

    01

    Fixed-Line Progress

    Teams can only exploit a short window if enough of the route is established before the window arrives.

    02

    Snow Loading

    Fresh snow affects trail-breaking, avalanche exposure and the time needed to secure the route.

    03

    Technical Character

    GII’s normal route and G1’s more demanding terrain do not convert the same weather break into the same summit opportunity.

    04

    Remaining Calendar

    Every failed window consumes acclimatization, supplies, recovery time and the number of realistic attempts left in the season.

    K2 rising above the central Karakoram near Broad Peak and the Gasherbrums
    The wider 2026 context

    K2 and Gasherbrum I Both Finished Without a Summit.

    That contrast matters. GII and Broad Peak showed that summit windows did exist, but those windows did not align with route readiness and acceptable conditions across every mountain in the central Karakoram.

    Orientation

    Why Broad Peak, K2 and the Gasherbrums Share One Seasonal Story.

    Concordia and the upper Baltoro form the geographic center of the climbing season. Broad Peak and K2 lie up the Godwin-Austen corridor, while the Gasherbrums sit farther east around the South Gasherbrum Glacier.

    Concordia Baltoro junction and geographic center of the major central Karakoram expeditions.
    Broad Peak Ā· 8,051 m Near K2 on the Godwin-Austen Glacier corridor.
    K2 Ā· 8,611 m Neighboring peak with its own separate 2026 zero-summit season record.
    Gasherbrum I Ā· 8,080 m The harder Gasherbrum twin; no successful summit in summer 2026.
    Gasherbrum II Ā· 8,035 m Six climbers reached the summit on July 21.
    Direct search answers

    Broad Peak & Gasherbrum 2026 FAQ.

    Final answers now that the Karakoram summer season is complete.

    Was Broad Peak summited in 2026?

    Yes. A Karakorum Expeditions rope-fixing team climbing with Juan Pablo Toro reached Broad Peak’s Main Summit on July 19, 2026.

    Was Gasherbrum II summited in 2026?

    Yes. Six members and guides from Imagine Nepal reached the 8,035-meter summit on July 21 after an earlier attempt had been stopped by deep snow and insufficient fixed rope.

    Was Gasherbrum I summited in 2026?

    No successful Gasherbrum I summer summit was recorded in final 2026 season reporting. G1 and K2 both ended the Karakoram summer without a successful summit.

    What happened on Broad Peak on July 30, 2026?

    An avalanche struck a ten-person international climbing team during a summit push. Subsequent reporting confirmed that all ten climbers died.

    How many people died on Broad Peak in 2026?

    Ten climbers died in the July 30 avalanche. Under Global Summit Guide’s season-by-season dataset, Summer 2026 became Broad Peak’s deadliest recorded climbing season.

    Did the Broad Peak avalanche affect K2?

    Yes operationally, but the fatalities remain Broad Peak fatalities. K2 teams abandoned remaining summit plans and assisted with the response.

    Which of Broad Peak, Gasherbrum I and Gasherbrum II is easiest?

    Gasherbrum II is generally considered the most approachable standard-route objective of the three. Broad Peak follows, while Gasherbrum I is more technical and demanding. All three remain extreme-altitude expeditions.

    When is the Broad Peak and Gasherbrum climbing season?

    The normal Karakoram expedition season runs from roughly June through August, with the main summit activity usually concentrated in July and early August.

    Source record

    How the 2026 Record Was Closed.

    Contemporary expedition reporting can be incomplete while climbers are still on the mountain. This archive therefore separates dated first reports from later final-season confirmation.

    Archive boundary: future climbing conditions should not be inferred from the 2026 season. This page remains indexed as the historical owner of the Broad Peak–Gasherbrum 2026 season record and should only be revised if stronger reporting materially changes the established result.

    Final 2026 record

    Broad Peak and Gasherbrum II Summited. Gasherbrum I Did Not.

    The 2026 central Karakoram season cannot be reduced to either success or failure. It contained successful 8,000-meter summits, repeated weather setbacks, a zero-summit result on Gasherbrum I and K2, and a Broad Peak avalanche that took ten lives and changed the closing weeks of the season.

    The 14 Eight-Thousanders · Karakoram

    Broad Peak & Gasherbrum: The 2026 Karakoram Season

    This season update is one snapshot. See the full guides and how the Karakoram 8000ers fit the wider set below.

    Was this helpful?

    Yes
    No
    Thanks for your feedback!
  • How Much Do Sherpas Get Paid in 2026? What Everest Guides Actually Earn This Season

    { “@context”: “https://schema.org”, “@type”: “Article”, “headline”: “How Much Do Sherpas Get Paid in 2026? What Everest Guides Actually Earn This Season”, “description”: “A 2026 snapshot of Sherpa pay: this season’s base wages, summit bonuses, tips, insurance minimums, and the $15,000 Everest permit – plus where every dollar of an expedition fee actually goes.”, “author”: { “@type”: “Person”, “name”: “Travis Ludlow”, “jobTitle”: “Founder & Head of Research, Global Summit Guide”, “url”: “https://globalsummitguide.com/about/” }, “publisher”: { “@type”: “Organization”, “name”: “Global Summit Guide”, “url”: “https://globalsummitguide.com/”, “logo”: { “@type”: “ImageObject”, “url”: “https://globalsummitguide.com/wp-content/uploads/2026/02/global-logo-new-2.png” } }, “datePublished”: “2026-07-11”, “dateModified”: “2026-07-11”, “mainEntityOfPage”: “https://globalsummitguide.com/sherpa-pay-2026/”, “articleSection”: “Climbing News” } { “@context”: “https://schema.org”, “@type”: “ItemList”, “name”: “Sherpa Pay 2026 at a Glance”, “itemListElement”: [ { “@type”: “ListItem”, “position”: 1, “name”: “A personal climbing Sherpa’s base is roughly $2,500-$4,500 per expedition in 2026” }, { “@type”: “ListItem”, “position”: 2, “name”: “Summit bonuses run about $1,500-$3,500, with tips adding more” }, { “@type”: “ListItem”, “position”: 3, “name”: “An elite Khumbu Sherpa can clear $10,000+ in a single season, far more across a full year” } ] } { “@context”: “https://schema.org”, “@type”: “FAQPage”, “mainEntity”: [ { “@type”: “Question”, “name”: “How much do Sherpas get paid in 2026?”, “acceptedAnswer”: { “@type”: “Answer”, “text”: “In 2026, a personal climbing Sherpa on Everest typically earns a base of roughly $2,500-$4,500 for the expedition, plus a summit bonus of about $1,500-$3,500 and a share of client tips. An experienced Khumbu Sherpa can clear $10,000 or more in a single season, and considerably more across a full year of expeditions once tips are counted. Support roles – base-camp crew and porters – earn less. For the full breakdown of where every dollar of an expedition fee goes, see our Sherpa Wage Economy analysis.” } }, { “@type”: “Question”, “name”: “What is the difference between base salary and total season pay?”, “acceptedAnswer”: { “@type”: “Answer”, “text”: “Base salary is the guaranteed wage for the expedition, roughly $2,500-$4,500 for a veteran climbing Sherpa in 2026. Total season pay adds summit bonuses, load or performance bonuses, and tips, which together can double or more the take-home figure. Because tips and summit bonuses are conditional, actual earnings vary a lot by year, client, and how the season goes.” } }, { “@type”: “Question”, “name”: “How big is the summit bonus in 2026?”, “acceptedAnswer”: { “@type”: “Answer”, “text”: “The standard Everest summit bonus in 2026 is roughly $1,500-$3,500 when a Sherpa’s client reaches the top. Elite lead Sherpas who fix ropes and manage the route command the higher end. Bonuses are a major part of why the summit-day incentive is so strong – and part of why turnaround discipline matters so much.” } }, { “@type”: “Question”, “name”: “Do tips really make a difference to Sherpa pay?”, “acceptedAnswer”: { “@type”: “Answer”, “text”: “Yes. Tips are the part of compensation climbers control directly, and they are real income, not a courtesy. Standard practice adds several thousand dollars per climber to the Sherpa team at the base-camp tipping ceremony. Across a full year of expeditions, tip income alone can reach $25,000-$40,000 for a busy senior Sherpa. Our Sherpa Wage Economy breakdown covers how tipping fits the wider pay structure.” } }, { “@type”: “Question”, “name”: “How does Sherpa pay compare to Western guides?”, “acceptedAnswer”: { “@type”: “Answer”, “text”: “There is a large gap. While an elite Sherpa might earn around $10,000 in a season, a Western lead guide from a US or European operator can earn $30,000-$50,000 for the same roughly two months – despite the Sherpas doing more trips through the most dangerous terrain. The gap has narrowed since 2014 as Sherpa labor has grown to 32-38 percent of the operator fee, but it remains substantial.” } }, { “@type”: “Question”, “name”: “Is Sherpa pay enough, given the risk?”, “acceptedAnswer”: { “@type”: “Answer”, “text”: “It is high pay by Nepali standards and a vital source of household income in the Khumbu, but low for the risk involved – Sherpa climbing is among the most dangerous jobs in the world. Post-2014 reforms raised wages and insurance minimums (now $15,000-$20,000 of mandatory cover, with many operators paying more), but the debate over fair compensation is ongoing. See our death rates by mountain analysis for the risk context.” } } ] } { “@context”: “https://schema.org”, “@type”: “BreadcrumbList”, “itemListElement”: [ { “@type”: “ListItem”, “position”: 1, “name”: “Home”, “item”: “https://globalsummitguide.com/” }, { “@type”: “ListItem”, “position”: 2, “name”: “Climbing News” }, { “@type”: “ListItem”, “position”: 3, “name”: “Sherpa Pay 2026” } ] } @import url(‘https://fonts.googleapis.com/css2?family=Outfit:wght@300;400;500;600;700&family=DM+Serif+Display:ital@0;1&display=swap’); .shpa-page { font-family: ‘Outfit’, sans-serif; color: #122a44; line-height: 1.65; margin: 0 auto; padding: 0; } .shpa-page h1, .shpa-page h2, .shpa-page h3, .shpa-page h4 { font-family: ‘DM Serif Display’, serif; font-weight: 400; color: #0a1929; line-height: 1.15; } .shpa-page p { font-size: 1.02rem; margin-bottom: 1.1em; } .shpa-page a { color: #2e5986; text-decoration: none; border-bottom: 1px solid #c8d4e0; } .shpa-page a:hover { color: #d4913a; border-bottom-color: #d4913a; } .shpa-hero { position: relative; padding: 0; color: #f5e4c8; overflow: hidden; background: #0a1929; border-radius: 12px; margin-bottom: 0; } .shpa-hero-image { width: 100%; height: auto; display: block; max-width: 100%; } .shpa-hero-text { padding: 40px 36px; background: linear-gradient(135deg, rgba(10,25,41,0.90), rgba(46,89,134,0.80)); } .shpa-hero-tag { font-size: 0.84rem; color: #d4913a; text-transform: uppercase; letter-spacing: 2px; font-weight: 700; margin-bottom: 14px; } .shpa-hero h1 { color: #f5e4c8 !important; font-size: 2.05rem; line-height: 1.1; margin: 0 0 16px; } .shpa-hero h1 em { color: #d4913a; font-style: italic; } .shpa-hero p { color: #f5e4c8; font-size: 1.06rem; line-height: 1.5; margin: 0; } .shpa-byline { background: #f8f4ec; padding: 14px 22px; font-size: 0.85rem; color: #5a4f30; border: 1px solid #e8d8ad; border-radius: 8px; margin: 18px 0; } .shpa-byline-top { display: flex; justify-content: space-between; flex-wrap: wrap; gap: 10px; align-items: center; margin-bottom: 8px; } .shpa-byline-author { font-weight: 600; color: #0a1929; font-size: 0.94rem; } .shpa-byline-author a { color: #2e5986; border-bottom: none; } .shpa-byline-meta { color: #7a6f50; font-size: 0.82rem; } .shpa-byline-credentials { font-size: 0.82rem; color: #5a4f30; line-height: 1.45; padding-top: 6px; border-top: 1px solid #e8d8ad; font-style: italic; } .shpa-byline-credentials strong { color: #0a1929; font-style: normal; } /* Quick answer (blue) */ .shpa-answer { background: linear-gradient(135deg, #14395e 0%, #2e5986 100%); color: #fff; padding: 30px 36px; margin: 26px 0; border-radius: 14px; box-shadow: 0 8px 24px rgba(20,57,94,0.35); border: 4px solid #d4913a; } .shpa-answer h2 { margin: 0 0 14px !important; font-size: 1.5rem !important; color: #fff !important; padding-bottom: 0 !important; border-bottom: none !important; } .shpa-answer p { margin: 0 0 12px; font-size: 1.06rem; color: #fff; line-height: 1.55; } .shpa-answer p:last-child { margin-bottom: 0; } .shpa-answer strong { color: #ffe6a3; font-weight: 700; } .shpa-answer em { color: #ffe6a3; font-style: italic; } .shpa-answer .shpa-answer-tag { display: inline-block; background: #d4913a; color: #0a1929; padding: 4px 12px; border-radius: 4px; font-size: 0.78rem; font-weight: 700; text-transform: uppercase; letter-spacing: 0.6px; margin-bottom: 12px; } .shpa-answer a { color: #ffe6a3; border-bottom: 1px solid rgba(255,230,163,0.5); } .shpa-answer a:hover { color: #fff; border-bottom-color: #fff; } .shpa-stat-grid { display: grid; grid-template-columns: repeat(4, 1fr); gap: 12px; padding: 22px; background: linear-gradient(135deg, #0a1929 0%, #122a44 100%); color: #f5e4c8; border-radius: 10px; margin: 22px 0; } .shpa-stat { background: #1a3354; border: 1px solid #d4913a; border-radius: 8px; padding: 14px 12px; text-align: center; } .shpa-stat-num { font-family: ‘DM Serif Display’, serif; font-size: 1.3rem; color: #d4913a; line-height: 1; margin-bottom: 4px; } .shpa-stat-label { font-size: 0.7rem; color: #f5e4c8; text-transform: uppercase; letter-spacing: 0.5px; } .shpa-toc { background: #f8f4ec; border: 1px solid #e8d8ad; border-radius: 10px; padding: 18px 24px; margin: 22px 0; } .shpa-toc .shpa-toc-label { margin: 0 0 12px; font-size: 1.08rem; font-weight: 700; color: #0a1929; font-family: ‘DM Serif Display’, serif; } .shpa-toc ol { margin: 0; padding-left: 22px; columns: 2; column-gap: 28px; font-size: 0.92rem; } .shpa-toc li { margin-bottom: 5px; line-height: 1.4; } .shpa-inline-image { margin: 32px 0; border-radius: 10px; overflow: hidden; box-shadow: 0 4px 14px rgba(212,200,168,0.5); } .shpa-inline-image img { width: 100%; height: auto; display: block; max-width: 100%; } .shpa-inline-image figcaption { padding: 14px 22px; background: #f8f4ec; font-size: 0.88rem; color: #5a4f30; font-style: italic; line-height: 1.5; } .shpa-inline-image figcaption strong { color: #0a1929; font-style: normal; } .shpa-section-header { background: linear-gradient(135deg, #122a44 0%, #2e5986 100%); color: #f5e4c8; padding: 28px 34px; margin: 40px 0 24px; border-radius: 12px; border-left: 8px solid #d4913a; box-shadow: 0 6px 18px rgba(18,42,68,0.4); } .shpa-section-header h2 { color: #d4913a !important; font-size: 1.8rem !important; margin: 0 0 6px !important; padding: 0 !important; border: none !important; } .shpa-section-header h2 em { color: #fdd47a; font-style: italic; } .shpa-section-header p { color: #f5e4c8; font-size: 0.96rem; margin: 0; line-height: 1.5; } .shpa-content { padding: 24px 0 0; } .shpa-content h2 { font-size: 1.9rem; margin-top: 48px; margin-bottom: 18px; padding-bottom: 11px; border-bottom: 2px solid #d4913a; } .shpa-content h2:first-of-type { margin-top: 0; } .shpa-content h2 em { color: #d4913a; font-style: italic; } .shpa-content h3 { font-size: 1.34rem; margin-top: 28px; margin-bottom: 12px; color: #0a1929; } .shpa-callout-info { background: #e8f0f7; border-left: 5px solid #2e5986; padding: 16px 22px; border-radius: 6px; margin: 20px 0; font-size: 0.95rem; color: #0a1929; } .shpa-callout-info .shpa-callout-title { font-weight: 700; color: #2e5986; font-size: 0.98rem; margin-bottom: 6px; display: block; } .shpa-callout-warning { background: #fdf3e8; border-left: 5px solid #b86a15; padding: 16px 22px; border-radius: 6px; margin: 20px 0; font-size: 0.95rem; color: #0a1929; } .shpa-callout-warning .shpa-callout-warning-title { font-weight: 700; color: #b86a15; font-size: 0.98rem; margin-bottom: 6px; display: block; } .shpa-callout-danger { background: #fbe5e2; border-left: 5px solid #a83a2b; padding: 16px 22px; border-radius: 6px; margin: 20px 0; font-size: 0.95rem; color: #0a1929; } .shpa-callout-danger .shpa-callout-danger-title { font-weight: 700; color: #a83a2b; font-size: 0.98rem; margin-bottom: 6px; display: block; } .shpa-pillar { background: #e8f0d8; border-left: 5px solid #5a8a2e; padding: 18px 22px; border-radius: 6px; margin: 22px 0; font-size: 0.95rem; color: #0a1929; } .shpa-pillar .shpa-pillar-title { font-weight: 700; color: #4a7a1e; font-size: 0.98rem; margin-bottom: 6px; display: block; } .shpa-pillar ul { margin: 8px 0 0; padding-left: 20px; } .shpa-pillar li { margin-bottom: 5px; } .shpa-table-wrap { overflow-x: auto; margin: 18px 0; } .shpa-cmp { width: 100%; border-collapse: collapse; font-size: .86rem; background: #fff; border: 1px solid #e5d9bd; border-radius: 12px; overflow: hidden; min-width: 640px; } .shpa-cmp th { background: #0a1929; color: #f5e4c8; text-align: left; padding: 11px 12px; font-family: ‘Outfit’, sans-serif; font-weight: 700; font-size: .75rem; } .shpa-cmp td { padding: 10px 12px; border-top: 1px solid #efe6cf; color: #3a4a5a; line-height: 1.4; vertical-align: top; } .shpa-cmp td.shpa-role { font-weight: 700; color: #0a1929; background: #faf6ec; white-space: nowrap; } .shpa-cmp td.shpa-h { color: #b86a15; font-weight: 600; white-space: nowrap; } .shpa-cmp tr:nth-child(even) td { background: #fbf8f0; } .shpa-cmp tr:nth-child(even) td.shpa-role { background: #f5efe1; } .shpa-mini { width: 100%; border-collapse: collapse; font-size: .85rem; background: #fff; border: 1px solid #e5d9bd; border-radius: 10px; overflow: hidden; margin: 12px 0; } .shpa-mini td { padding: 8px 12px; border-top: 1px solid #efe6cf; color: #3a4a5a; line-height: 1.35; } .shpa-mini td:first-child { font-weight: 700; color: #0a1929; background: #faf6ec; white-space: nowrap; } .shpa-mini tr:first-child td { border-top: none; } .shpa-faq-item { background: #f8f4ec; border-radius: 8px; margin-bottom: 11px; } .shpa-faq-item summary { padding: 14px 20px; cursor: pointer; font-family: ‘DM Serif Display’, serif; font-size: 1.04rem; color: #0a1929; list-style: none; } .shpa-faq-item summary::-webkit-details-marker { display: none; } .shpa-faq-item summary::after { content: ‘+’; float: right; color: #d4913a; font-size: 1.4rem; line-height: 0.8; } .shpa-faq-item[open] summary::after { content: ‘-‘; } .shpa-faq-item div { padding: 0 20px 16px; font-size: 0.93rem; color: #0a1929; } .shpa-methodology { background: #f8f4ec; border: 2px solid #2e5986; padding: 22px 26px; border-radius: 10px; margin: 26px 0; } .shpa-methodology h3 { margin: 0 0 12px; font-size: 1.18rem; color: #2e5986; } .shpa-methodology p { font-size: 0.92rem; line-height: 1.55; margin: 0 0 8px; color: #0a1929; } .shpa-author-bio { background: linear-gradient(135deg, #f8f4ec 0%, #fbf7ef 100%); border: 2px solid #d4913a; padding: 26px 30px; border-radius: 12px; margin: 32px 0 18px; display: flex; gap: 22px; align-items: flex-start; } .shpa-author-bio-image { flex-shrink: 0; width: 100px; height: 100px; border-radius: 50%; background: #d4913a url(‘https://globalsummitguide.com/wp-content/uploads/2026/03/561db5f8-15bb-43d8-9eba-251a8c35f89f.jpg’) center/cover; border: 3px solid #d4913a; } .shpa-author-bio-content { flex: 1; } .shpa-author-bio h3 { margin: 0 0 4px; font-size: 1.26rem; color: #0a1929; } .shpa-author-bio .shpa-author-title { font-size: 0.9rem; color: #b86a15; font-weight: 700; margin-bottom: 11px; font-style: italic; } .shpa-author-bio p { margin: 0 0 9px; font-size: 0.92rem; line-height: 1.55; color: #0a1929; } .shpa-related { background: #f8f4ec; padding: 22px; border-radius: 10px; margin: 22px 0; } .shpa-related h3 { margin-top: 0; margin-bottom: 13px; color: #0a1929; font-size: 1.1rem; } .shpa-related h3.shpa-related-sub { margin-top: 18px; } .shpa-final-cta { background: linear-gradient(135deg, #122a44 0%, #1e3a5f 100%); color: #f5e4c8; padding: 36px 30px; border-radius: 14px; margin: 32px 0 0; text-align: center; border: 3px solid #d4913a; box-shadow: 0 8px 22px rgba(18,42,68,0.4); } .shpa-final-cta h3 { color: #d4913a; margin: 0 0 12px; font-size: 1.6rem; } .shpa-final-cta > p { color: #f5e4c8; font-size: 1.02rem; margin: 0 auto 22px; max-width: 620px; line-height: 1.55; } .shpa-cta-button { display: inline-block; background: transparent; color: #f5e4c8 !important; padding: 13px 24px; border-radius: 6px; font-weight: 600; border: 2px solid #d4913a !important; margin: 0 5px 8px; text-decoration: none !important; transition: all 0.15s; } .shpa-cta-button:hover { background: #d4913a; color: #0a1929 !important; } @media (max-width: 768px) { .shpa-page { padding: 0 4px; } .shpa-stat-grid { grid-template-columns: repeat(2, 1fr); } .shpa-toc ol { columns: 1; } .shpa-hero-text { padding: 28px 18px; } .shpa-hero h1 { font-size: 1.5rem; } .shpa-hero p { font-size: 0.96rem; } .shpa-byline, .shpa-answer, .shpa-section-header { padding: 18px 20px; } .shpa-answer h2 { font-size: 1.3rem !important; } .shpa-section-header h2 { font-size: 1.5rem !important; } .shpa-final-cta { padding: 26px 20px; } .shpa-final-cta h3 { font-size: 1.35rem; } .shpa-author-bio { flex-direction: column; align-items: center; text-align: center; } .shpa-content h2 { font-size: 1.55rem; } .shpa-content h3 { font-size: 1.2rem; } .shpa-cmp { font-size: 0.78rem; } }
    Sherpa climbers and high-altitude workers on a Himalayan expedition
    šŸ‡³šŸ‡µ Everest Ā· Sherpa Economy Ā· 2026 Snapshot

    How Much Do Sherpas Get Paid in 2026? What Everest Guides Actually Earn This Season

    The people who fix the ropes, carry the loads, and cross the Khumbu Icefall dozens of times a season are the engine of every Everest expedition. Here’s what they earn in 2026 — base wages, summit bonuses, tips, and what changed this year — with the full economics linked throughout.

    šŸ’° The 2026 answer, fast

    In 2026, a personal climbing Sherpa on Everest earns a base of roughly $2,500–$4,500 for the expedition, plus a summit bonus of about $1,500–$3,500 and a share of client tips. Put together, an experienced Khumbu Sherpa can clear $10,000 or more in a single season, and considerably more across a full year once tips are counted. Base-camp crew and porters earn less; elite rope-fixing sirdars earn the top of the range.

    That’s the headline. Where every dollar of a $90,000 expedition actually goes — and why Sherpa labour has grown to 32–38% of the operator fee — is mapped in our Sherpa Wage Economy breakdown.

    šŸ“Œ This is the 2026 snapshot — the pillar is the deep diveThis page answers “what do Sherpas earn this year” and covers what changed in 2026. For the full economics — the ten payment categories, the post-2014 reform, the operator-margin shift, and the year-round income picture — our Sherpa Wage Economy analysis is the definitive reference, and everything below links back to it.
    $2.5–4.5K
    Base per expedition
    $1.5–3.5K
    Summit bonus
    $10K+
    Elite season total
    $15,000
    Nepal Everest permit

    What changed in 2026

    New this season: a higher permit, tighter rules, and a labour share that keeps climbing.

    The single biggest recent shift reached the government line, not the Sherpa line: Nepal raised the standard spring Everest permit to $15,000 per foreign climber (up from $11,000), the first increase in roughly a decade. That doesn’t go to Sherpas directly, but it reshapes the total cost climbers budget — the wider picture is in our Everest permits and fees guide.

    On the labour side, the 2026 season continues a decade-long trend: Sherpa-related pay has grown to roughly 32–38% of the operator fee, up from about 22% before 2014. Alongside that, Nepal has been tightening the rules around high-altitude workers — moves toward stricter guide-to-climber ratios, mandatory medical certificates for staff, and a push for lead guides to be Nepali nationals. Insurance minimums, raised sharply after the 2014 disaster, now sit at $15,000–$20,000 of mandatory life cover per climbing Sherpa, with many operators voluntarily providing more.

    The number that matters when you bookWages and insurance are one of the clearest signals of an ethical operator. Climbing Sherpas should earn several thousand dollars for the season plus bonuses, and carry at least $15,000–$20,000 of life insurance. Our operator comparison walks through exactly how to check an operator’s staffing model, wages, and cover before you pay a deposit.

    The 2026 pay snapshot

    Representative ranges by role — a summary, not the full methodology.

    Pay varies widely by role, experience, summit count, and certification. These are representative 2026 ranges for the Nepal side; the detailed derivation lives on the wage-economy pillar.

    RoleBase (per expedition)BonusesTypical 2026 season take
    Base-camp crew / porters$500–$1,000MinimalLower; seasonal support work
    High-altitude porter (load carrier)$1,500–$3,000Per-load / carry bonusesVaries with number of carries
    Personal climbing Sherpa$2,500–$4,500$1,500–$3,500 summit + tipsSeveral thousand up to ~$10K
    Elite / sirdar / rope-fixer (IFMGA, 10+ summits)Top of rangeHighest bonuses + largest tips$10,000+ in a season

    For the most experienced Sherpas, the full-year figure is what really matters. A senior climber working multiple expeditions across the year — Everest in spring, plus other Nepalese peaks — can see tip income alone of $25,000–$40,000, on top of wages and bonuses. That’s high by Nepali standards and is a major reason competition for the best Sherpas has driven base wages up so quickly since 2014.

    High-altitude expedition work in the Everest region
    Paid by the season, not the year. A Sherpa’s earning window is a short, intense sprint — roughly eight to ten weeks in spring to make what has to support a family for twelve months. It’s why summit bonuses and tips matter so much, and why the incentive to push on summit day is so strong.

    How the pay is built

    Three moving parts: base, bonus, and the tip climbers control.

    Sherpa compensation isn’t a single flat rate — it stacks up from three pieces:

    Base wageThe guaranteed pay for the expedition. Steady, but the smaller part of a good season.
    BonusesSummit bonuses (~$1,500–$3,500) plus load or performance bonuses. Conditional — they depend on the season going well.
    TipsThe part climbers control directly, paid at the base-camp tipping ceremony. Real income, often several thousand per climber to the team.

    Because two of the three pieces are conditional, take-home pay swings hard from year to year. That’s exactly why the “how much do Sherpas make” question has no single answer — and why our pillar maps the full cash path of a representative expedition rather than quoting one figure. If you’re budgeting your own climb, the tipping line is covered in our full Everest cost breakdown.

    The most dangerous job on the mountain

    High pay for Nepal — low pay for the risk.

    Here’s the context the salary numbers can’t show on their own. While a Western climber crosses the Khumbu Icefall a handful of times, the Sherpas supporting them cross it again and again — fixing ropes, stocking camps, ferrying oxygen. Sherpa climbing is consistently ranked among the most dangerous jobs in the world, and the 2014 Icefall avalanche that killed sixteen Nepali workers is what triggered the wage and insurance reforms still shaping pay today.

    So the honest read on 2026 pay is two-sided: it’s genuinely high income by Nepali standards and a pillar of the Khumbu economy, yet low for the risk carried. For the hard numbers behind the risk, see our death rates by mountain analysis and the Everest death map.

    The pay gap in one lineAn elite Sherpa might earn around $10,000 in a season. A Western lead guide from a US or European operator can earn $30,000–$50,000 for the same two months — while doing fewer trips through the most dangerous terrain. The gap has narrowed since 2014, but it hasn’t closed.

    Sherpa pay beyond Everest

    The same labour, different mountains and different rules.

    “Sherpa pay” is really shorthand for high-altitude expedition labour, and it looks different from range to range. Right now, during the live Karakoram season, Pakistani high-altitude porters are doing the same brutal work on K2 and Broad Peak — often for less than Nepali Sherpas, and with porter welfare a recurring issue. You can follow that season in our K2 2026 tracker, with the labour and operator detail in the full K2 climb guide.

    Elsewhere the frameworks differ: on Kilimanjaro, the Kilimanjaro Porters Assistance Project sets minimum wage and tipping standards; on Denali, the US National Park Service concessionaire system standardises guide wages. The common thread — and the thing worth checking before you book any peak — is how the operator treats its local staff. That’s the fourth of the eight criteria in our operator comparison.

    K2, Everest, Denali and the rest are all in our database of 500+ mountains — compare the peaks and the expeditions that run on them.

    Frequently asked questions

    How much do Sherpas get paid in 2026?

    A personal climbing Sherpa on Everest earns roughly $2,500–$4,500 base for the expedition, plus a $1,500–$3,500 summit bonus and a share of tips. An experienced Khumbu Sherpa can clear $10,000+ in a season, and more across a full year. The full breakdown is in our Sherpa Wage Economy analysis.

    Base salary vs total season pay — what’s the difference?

    Base is the guaranteed wage (~$2,500–$4,500 for a veteran). Total season pay adds bonuses and tips, which can double the take-home. Because bonuses and tips are conditional, actual earnings vary a lot year to year.

    How big is the summit bonus in 2026?

    Around $1,500–$3,500 when a Sherpa’s client summits, with elite rope-fixers at the higher end. It’s a major part of the total and a strong summit-day incentive.

    Do tips really matter?

    Yes — tips are real income, not a courtesy, paid at the base-camp tipping ceremony. Across a full year, tip income alone can reach $25,000–$40,000 for a busy senior Sherpa. See how it fits the wider structure in our wage-economy breakdown.

    How does it compare to Western guides?

    There’s a large gap: ~$10,000 for an elite Sherpa vs $30,000–$50,000 for a Western lead guide in the same season. It has narrowed since 2014 as Sherpa labour grew to 32–38% of the operator fee, but remains substantial.

    Is it enough, given the risk?

    It’s high pay for Nepal but low for the danger — Sherpa climbing is among the world’s most hazardous jobs. Post-2014 reforms raised wages and insurance ($15,000–$20,000 minimum), but the fair-pay debate continues. See our death rates by mountain for context.

    How we compiled this

    This 2026 snapshot draws on operator disclosures, Nepal Department of Tourism data, and published Sherpa-community wage benchmarks, cross-checked against our own Sherpa Wage Economy analysis. Figures are representative ranges, not fixed rates — real pay depends on role, experience, operator, summit success, and tips, all of which vary by season.

    Permit fees, insurance minimums, and staffing rules change from year to year. For the current requirements, consult the Nepal Department of Tourism and your operator; for the full economics, our pillar is the definitive reference.

    Travis Ludlow

    Founder & Head of Research, Global Summit Guide

    Travis leads research at Global Summit Guide, where the team tracks the economics and logistics of the world’s major expeditions and maintains guides to more than 500 peaks. This is a current-season snapshot of Sherpa pay; for the full cash path of an Everest expedition, it defers to our in-depth Sherpa Wage Economy analysis.

    Where does the rest of the money go?

    Sherpa pay is one line in a much bigger ledger. See exactly how a $90,000 Everest expedition splits into ten payment categories — and how much reaches the people doing the most dangerous work.

    The full Sherpa wage economy → What Everest really costs →

    Was this helpful?

    Yes
    No
    Thanks for your feedback!
  • K2 2026 Season Tracker: No Summits as Season Ends

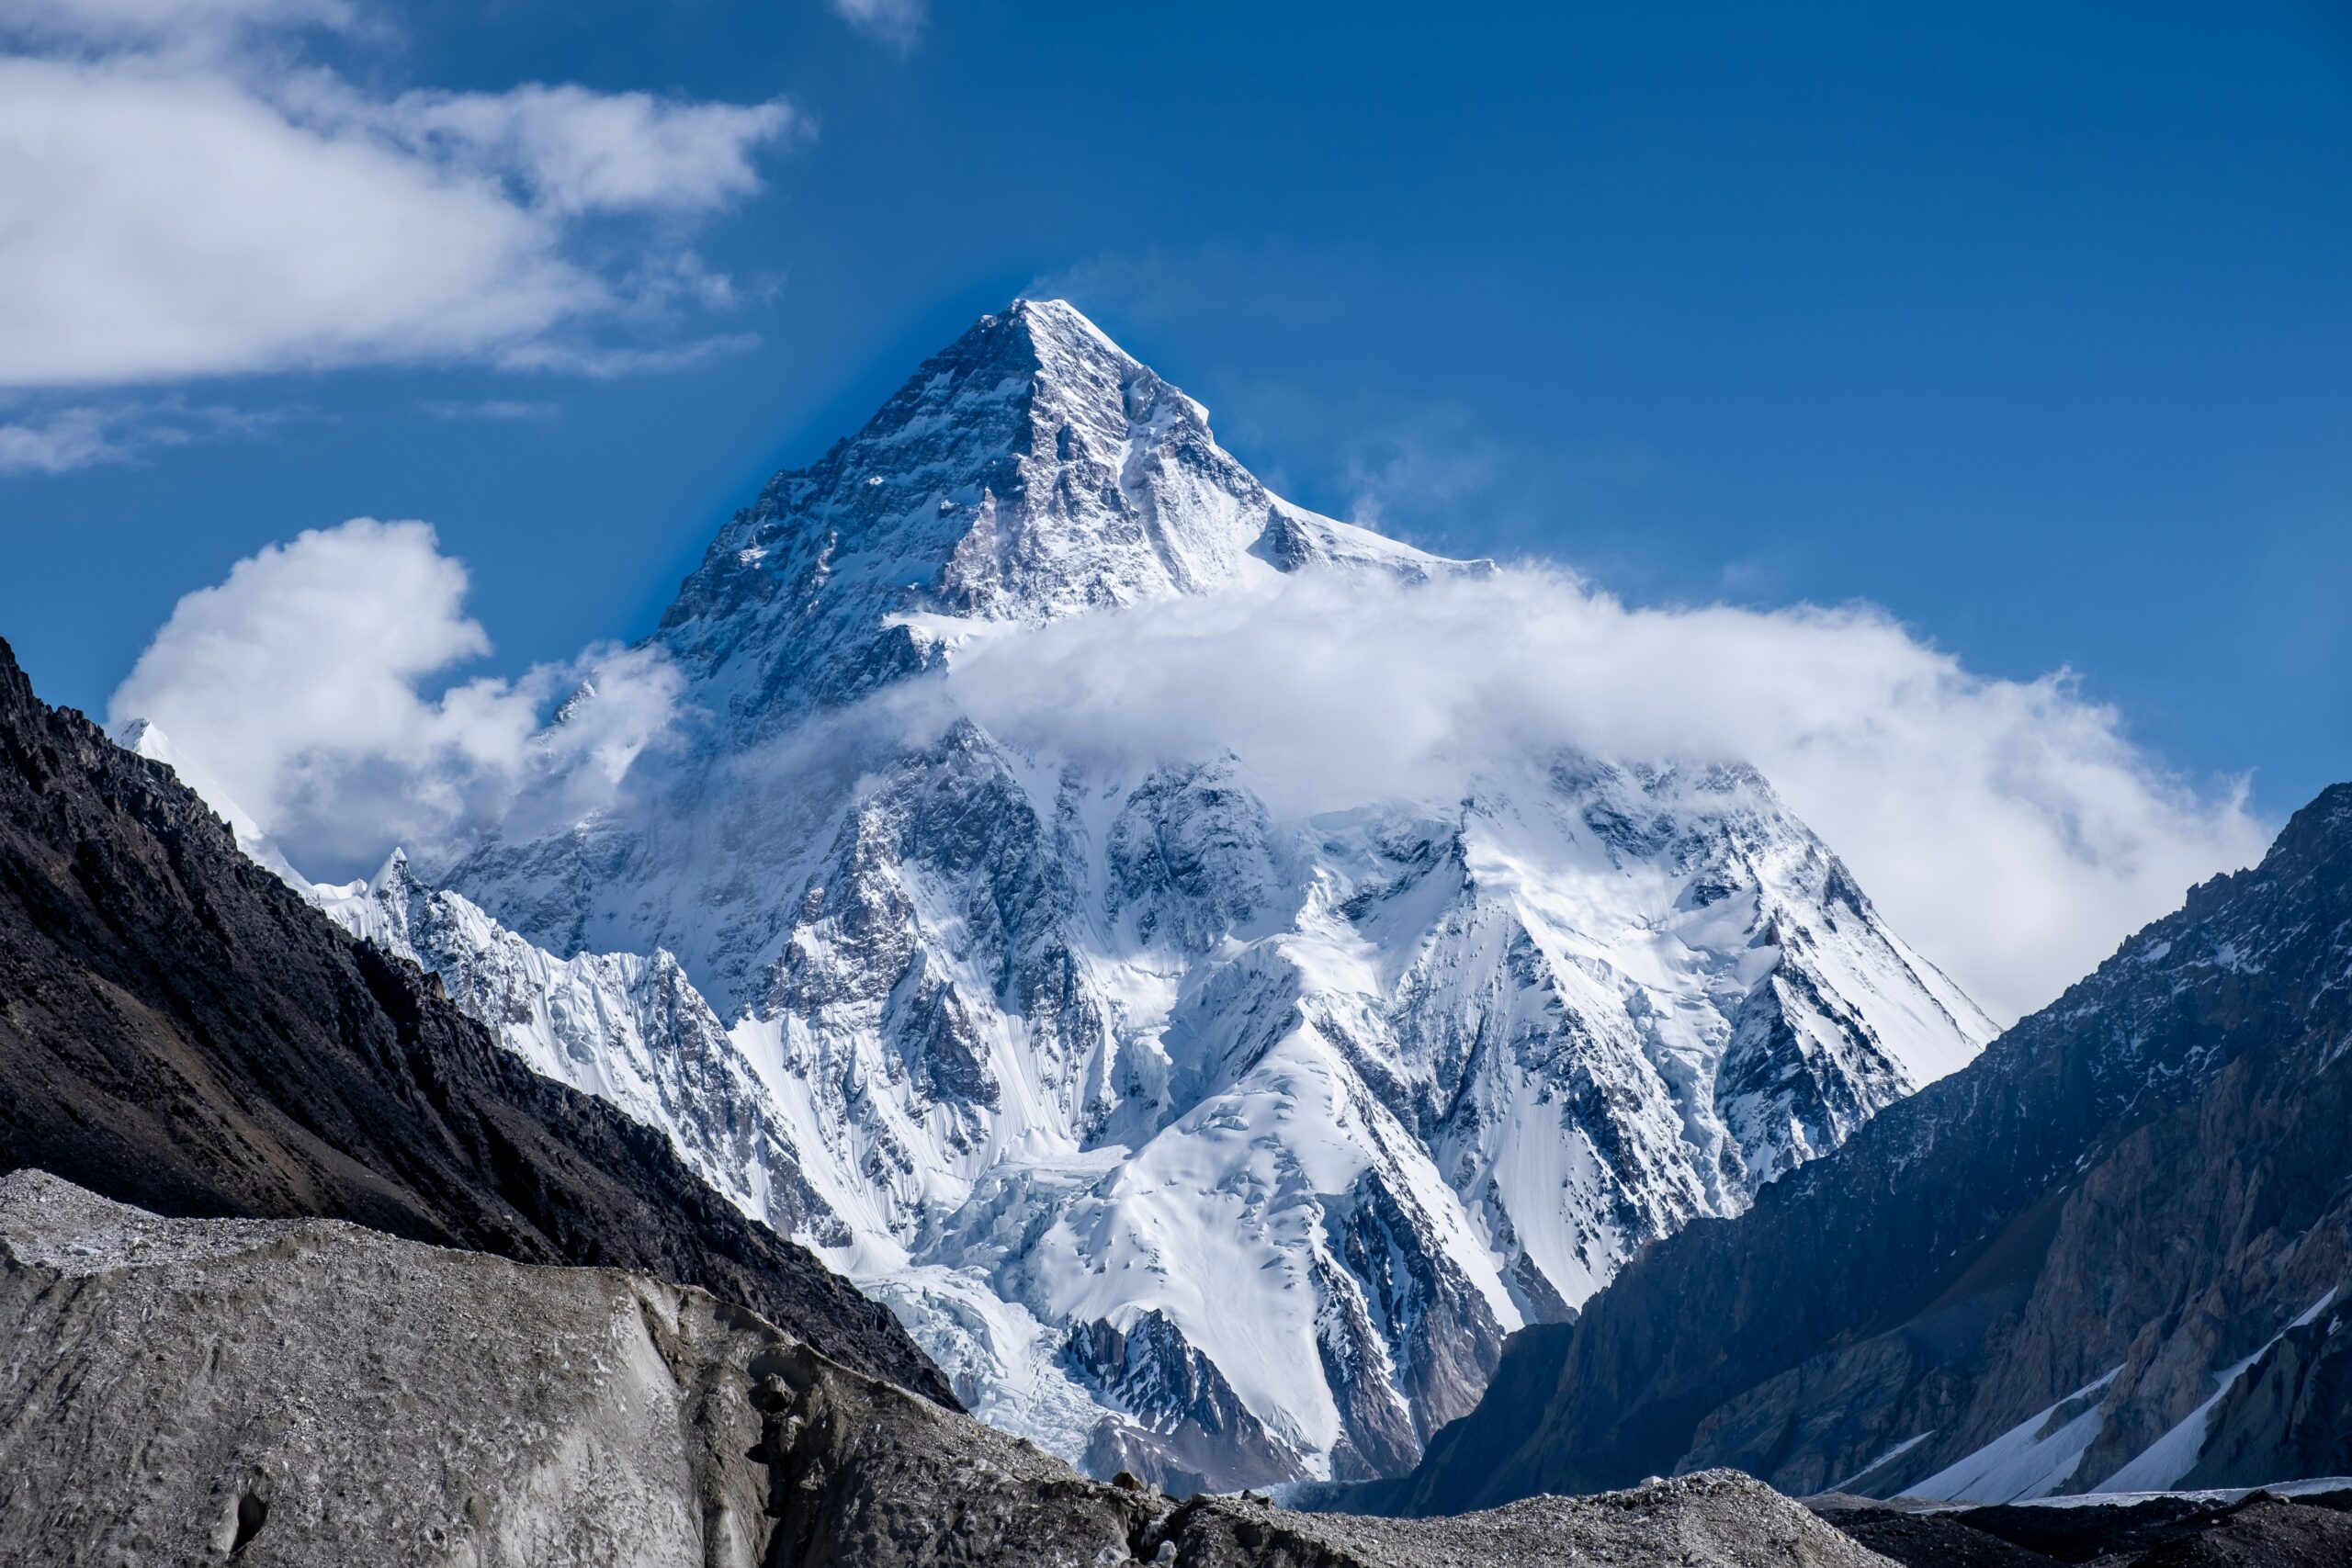
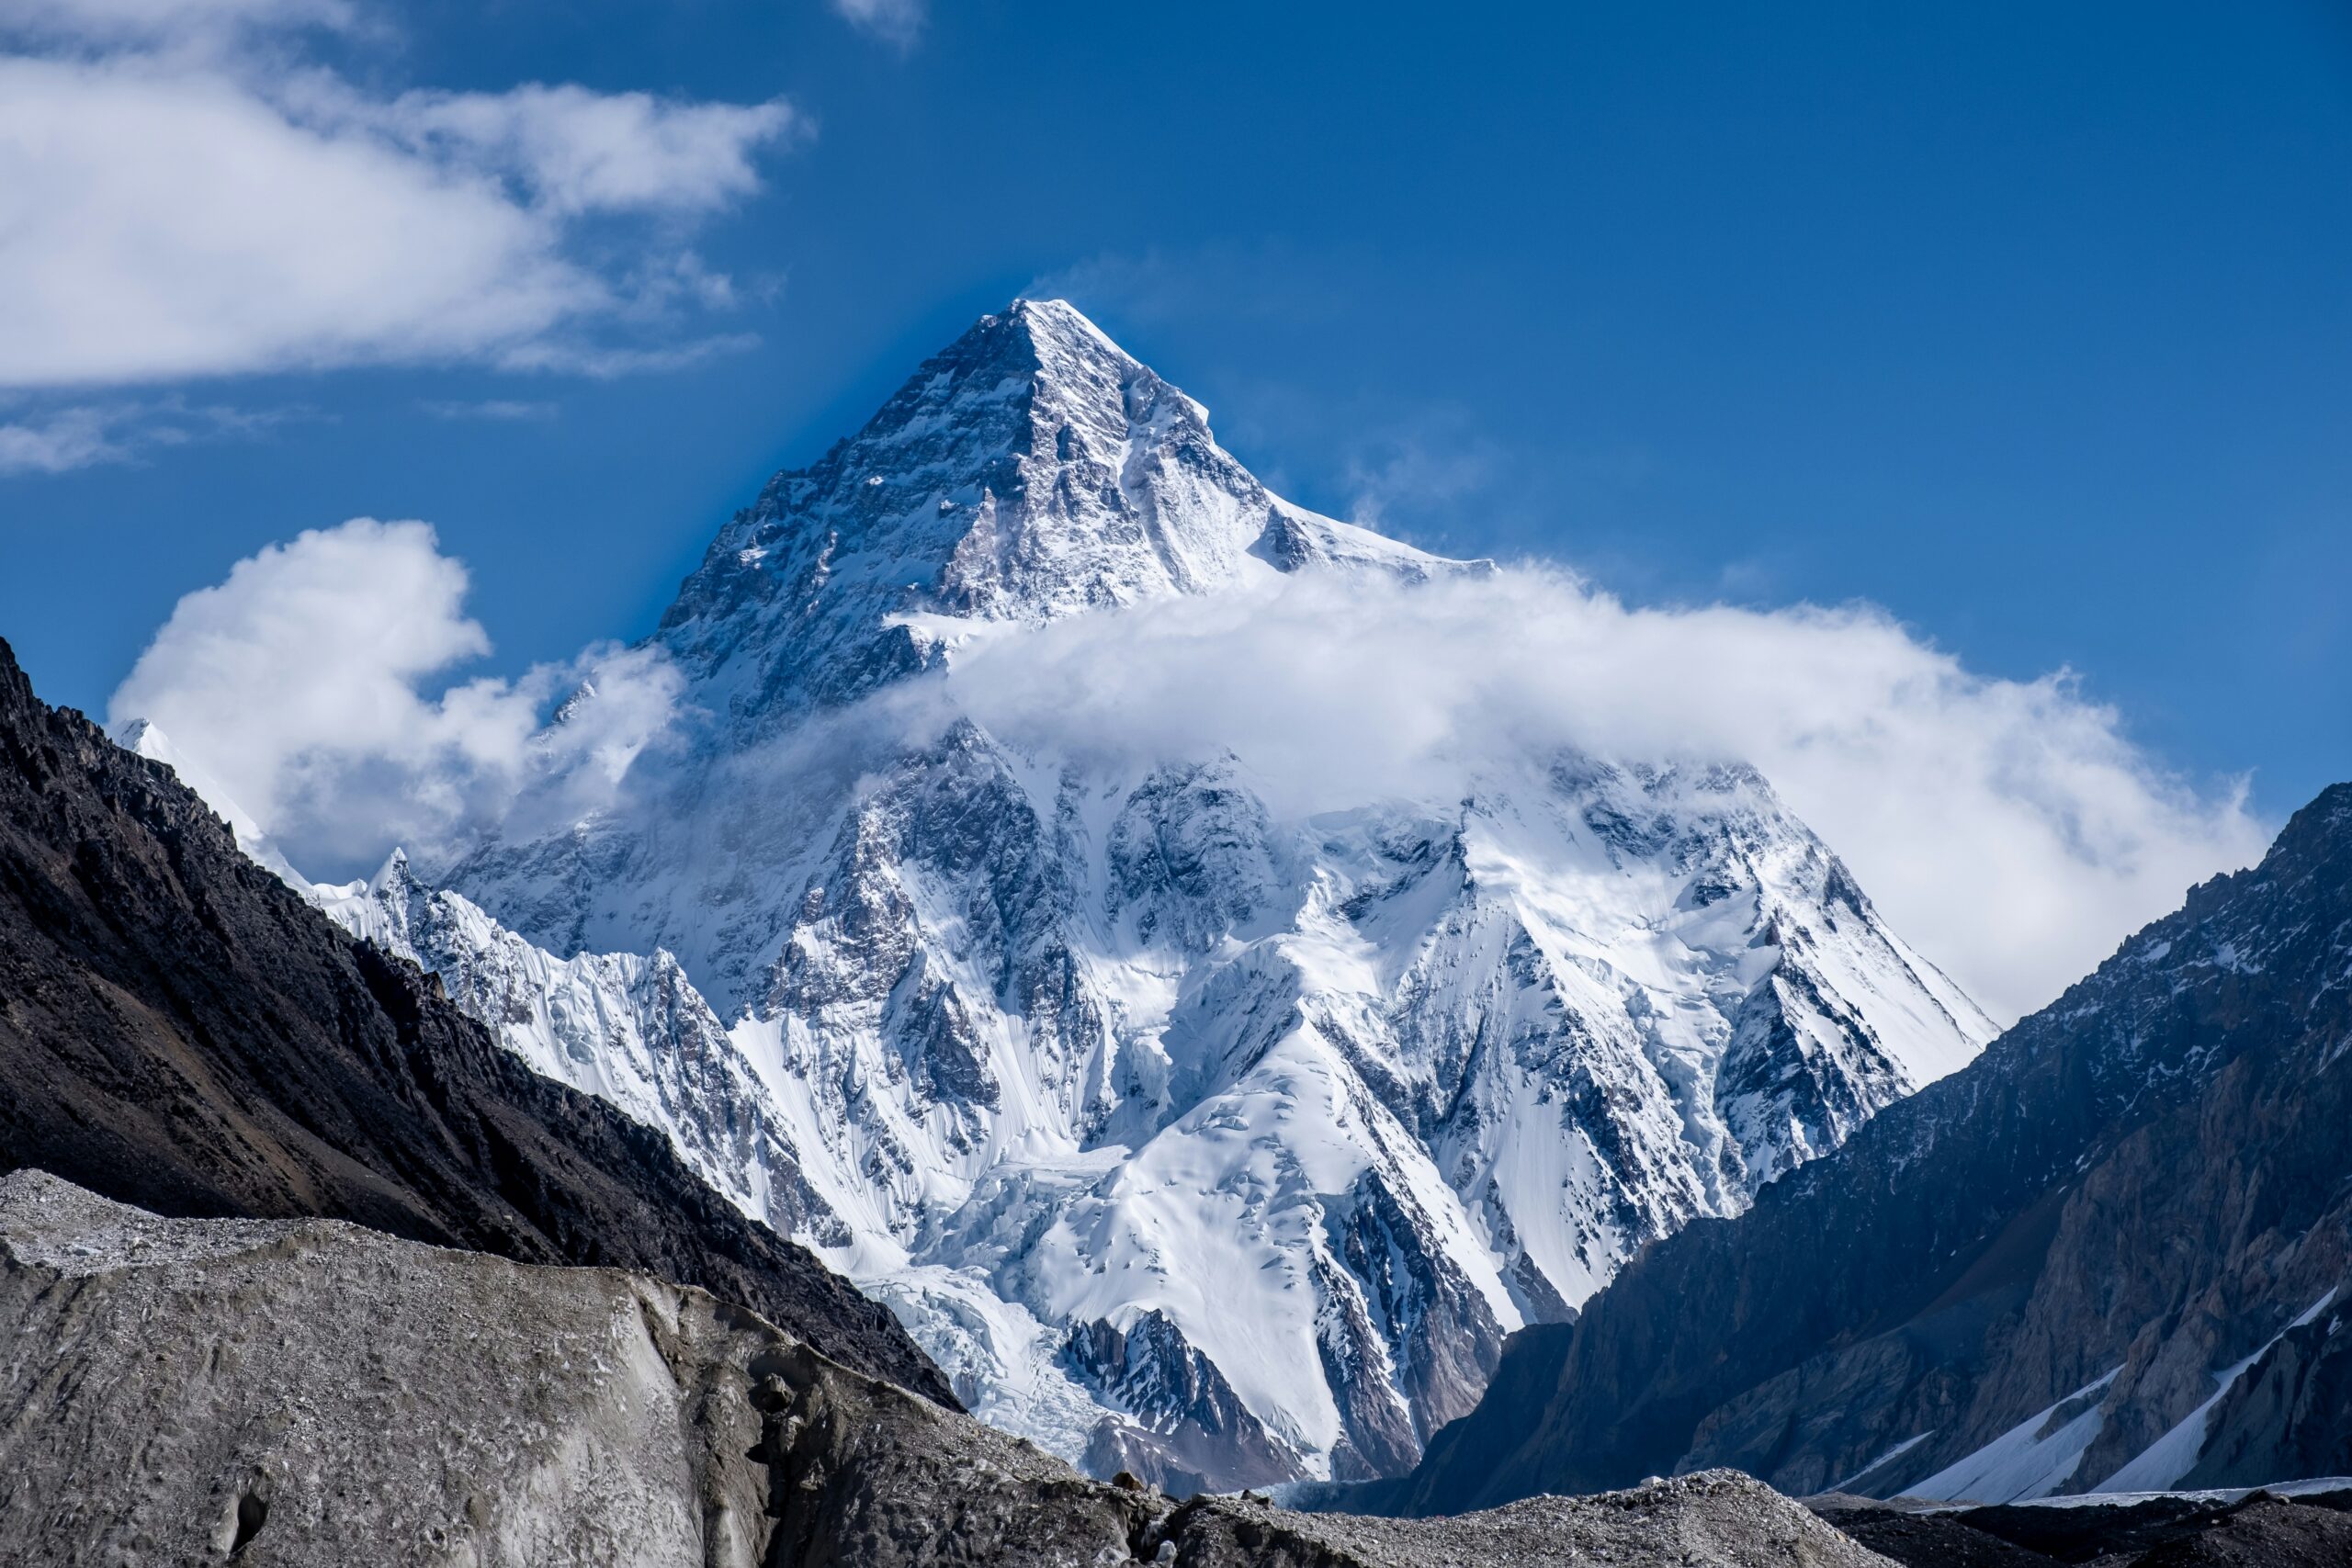
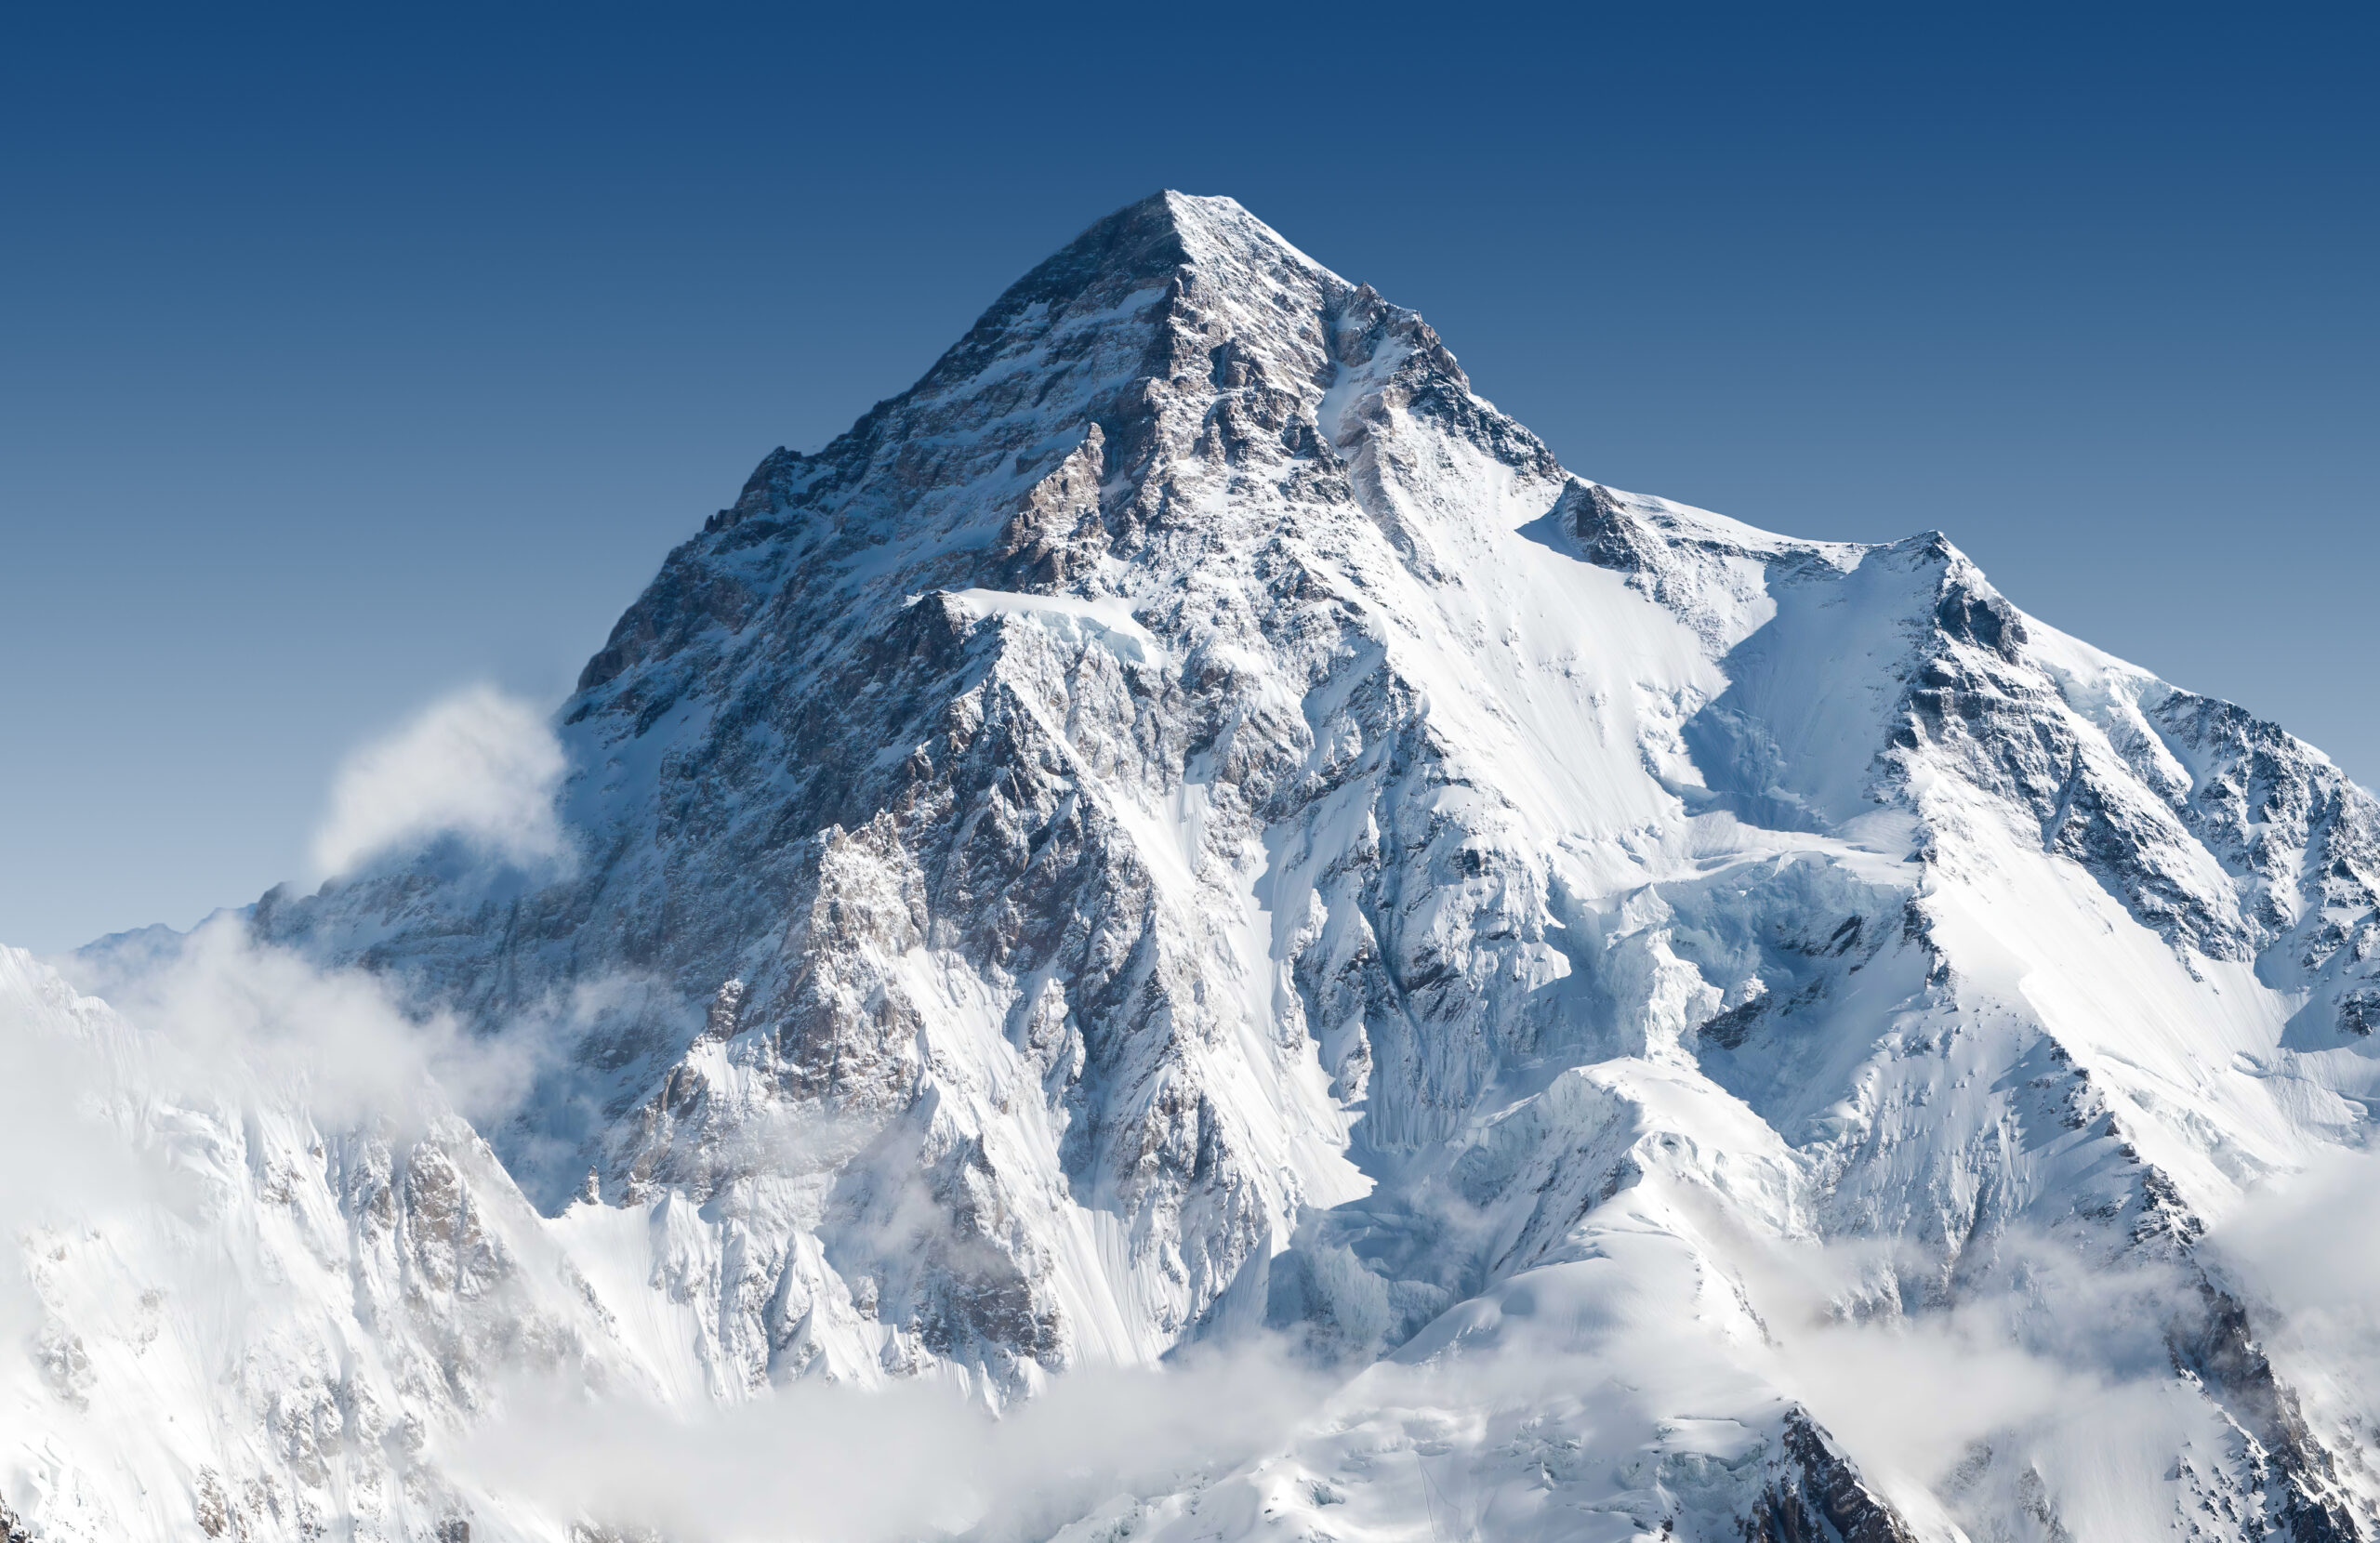
    K2 rising above the Karakoram in Pakistan
    Season final Ā· Karakoram summer 2026 Ā· historical archive

    K2 2026 Season Tracker: No Summits as Karakoram Season Ends

    K2’s 2026 summer season closed without a successful summit. High winds, fresh snow, unstable conditions, rockfall and slow upper-route progress repeatedly narrowed the usable window. A final late-July push was underway when the July 30 Broad Peak avalanche killed 10 climbers; K2 teams abandoned their summit plans and redirected people and resources toward the response.

    Final season outcome confirmedRoute progress dated by sourceBroad Peak deaths kept separate from K2Historical archive, not a live forecast

    Published July 11, 2026 Ā· Final record reviewed September 4, 2026

    0Successful K2 summer summits
    ~50Attempt estimate*
    ~7,000 mRopes reported Jul 24
    Jul 30Broad Peak turning point
    Closed2026 summer season
    By Travis Ludlow Ā· Global Summit Guide Research
    *~50 climbers is Alan Arnette’s season estimate, not an official permit count
    The final answer

    K2 went unsummited in summer 2026.

    By August 16, Gilgit-Baltistan reporting said the Karakoram summer climbing season had closed and that no climber had summited K2 or Gasherbrum I. Alan Arnette’s August 22 season wrap reached the same conclusion and estimated roughly 50 K2 attempts during an unusually quiet commercial season.

    The zero does not describe one failed day. K2’s summit chance was progressively compressed by upper-mountain wind, repeated weather delays, fresh snow, unstable conditions, rockfall and slow route development. When a late push finally formed near the end of July, the Broad Peak disaster changed the priorities of the climbers still high in the Baltoro.

    • Final outcome: no successful K2 summer summit.
    • Primary line: Abruzzi Spur on the Pakistan side.
    • Late route progress: ropes around 7,000 m by July 24.
    • Summit plan: late-July push, then delayed toward Aug. 1.
    • Decisive human event: July 30 Broad Peak avalanche and rescue/recovery response.
    • Page status: final 2026 season archive.
    Broad Peak context: the July 30 avalanche happened on Broad Peak, not K2. Ten climbers died. Their deaths must not be added to K2 fatality statistics. The event belongs in this K2 season record only because teams on K2 abandoned summit efforts and assisted the response.
    The season in sequence

    How K2 2026 moved from rotations to a closed season

    Filter the timeline to isolate route development, weather delays or the emergency response. Dates reflect contemporary reports rather than reconstructed hindsight.

    Early July

    A small K2 season settles into Base Camp

    Commercial groups and Pakistani guides established themselves on the Abruzzi Spur in a quieter-than-normal season. Specialist reporting described far fewer large international teams than in recent years, with much of the commercial presence led by Nepali and Pakistani operators.

    Route
    Jul 11–16

    Lower rotations continue; fixed lines reach Camp 2

    Teams continued acclimatization while weather held back faster progress. By July 16, reporting placed the fixed line at Camp 2 and described plans to extend toward Camp 3 when conditions allowed.

    Route + weather
    Jul 17

    Fixing moves above Camp 2

    Imagine Nepal reported a rope-fixing team moving from Camp 2 toward the ice section below Camp 3. That was progress, but it still left the upper mountain to be completed before a commercial summit cycle could function.

    Route
    Jul 24

    High winds stall the mountain near 7,000 metres

    Alan Arnette reported ropes fixed to roughly 7,000 m, with another 2,000 m of rope cached at Camp 3. Around 50 climbers were estimated to be waiting for wind to ease. The season was approaching its normal summit period without a finished upper route.

    Weather + route
    Jul 27

    A better forecast triggers the late summit push

    ExplorersWeb reported a surprise move upward after a more optimistic forecast. July 31 was identified as the hoped-for summit date across K2, Broad Peak and Gasherbrum I.

    Weather + route
    Jul 29–30

    The forecast deteriorates again

    Strong wind and poor weather forced another delay. ExplorersWeb shifted the earliest expected K2 summit to August 1, while Everest Chronicle reported the K2 team held at Camp 2 because of wind.

    Weather
    Jul 30

    The Broad Peak avalanche changes the entire Baltoro

    An avalanche struck a 10-person team on neighboring Broad Peak. Search and rescue began, then transitioned toward recovery as the scale of the disaster became clear.

    Response
    Jul 31

    K2 summit pushes are abandoned

    ExplorersWeb reported that most K2 teams had called off their summit efforts to help on Broad Peak. Later reporting said the remaining K2 team had been at Camp 3 when it learned of the avalanche and descended to assist.

    Response + route
    Aug 16

    Gilgit-Baltistan’s summer season is reported closed

    Dawn reported that climbers had returned from the eight-thousanders and that no one had summited K2 or Gasherbrum I during the summer.

    Final status
    Aug 22

    The season wrap confirms the zero-summit result

    Alan Arnette’s final Karakoram review recorded K2 as unsummited, described the season as unusually quiet and again highlighted rockfall, high winds and heavy snow.

    Final status
    Final season ledger

    The numbers that can be stated cleanly

    The best season archive separates confirmed results from estimates and avoids turning incomplete expedition reporting into fake precision.

    0

    Successful summits

    Confirmed final summer result for K2 in 2026.

    ~50

    People attempting

    Specialist estimate from Alan Arnette’s reporting, not an official government permit count.

    ~7,000 m

    Rope progress

    Reported July 24, with additional rope cached at Camp 3 for the upper route.

    10

    Broad Peak deaths

    Separate neighboring-mountain tragedy that directly ended remaining K2 summit plans; not K2 fatalities.

    K2 and the surrounding Karakoram terrain
    K2 can have teams on the mountain, fixed ropes moving upward and a forecast window forming—and still finish without a summit. The 2026 season is a useful example of how many conditions must align at once.
    Why no K2 summit?

    There was no single failure point

    The more accurate explanation is cumulative. Each delay reduced the remaining margin until the final summit push was overtaken by a larger emergency.

    1

    Upper-mountain wind

    High winds repeatedly stalled progress in July. A tolerable Base Camp day can still be unusable on the Black Pyramid, Shoulder, Bottleneck and summit ridge.

    2

    Fresh and unstable snow

    Heavy snowfall and unstable snow were part of the wider Karakoram story. New loading does more than slow trail-breaking; it can change the acceptable hazard level on steep terrain.

    3

    Rockfall

    Season reporting repeatedly mentioned rockfall. On K2, a prolonged wait can expose teams to objective hazards even before a summit push is underway.

    4

    Slow upper-route development

    With ropes only around 7,000 m on July 24, the upper route still needed work as the calendar moved into K2’s central summit period.

    5

    A late summit commitment

    The serious summit push did not begin until July 27. When the forecast deteriorated again, the hoped-for July 31 summit was pushed toward August 1.

    6

    The Broad Peak emergency

    The July 30 avalanche changed the purpose of the climbers still in the area. K2 teams abandoned summit efforts and shifted toward the response on Broad Peak.

    Zero summits does not mean zero climbing

    The mountain was active for weeks before the result became final

    A season result compresses dozens of days into one number. K2 had real route work, rotations, high-camp movement and a late summit push even though no one reached 8,611 metres.

    Rotations

    Teams spent July building acclimatization

    Climbers moved between Base Camp and the lower Abruzzi Spur while the fixed-line system developed. That work matters because a summit bid cannot simply begin when a favorable forecast appears; the climber has to be physiologically and logistically ready before the window opens.

    Fixing

    The route kept advancing despite delays

    Camp 2 was established by mid-July, fixing moved toward Camp 3, and by July 24 ropes were reported around 7,000 m. The absence of a summit was therefore not an absence of effort. The problem was that route readiness and weather never aligned with enough remaining calendar.

    Final push

    Teams did commit upward

    The July 27 forecast change triggered a genuine summit push. When the weather worsened, the target shifted from July 31 toward August 1. The push then ended for a different reason: the Broad Peak emergency required the same small high-altitude community to turn its attention elsewhere.

    About ā€œattemptsā€: the roughly 50-person figure used in season reporting is an estimate of people attempting K2, not a standardized government denominator. Some climbers may have been on different rotations or may never have reached the same high point. That is why this archive does not calculate a 2026 ā€œsuccess rateā€ as though the denominator were exact.
    The summit-window chain

    Seven things had to align. In 2026, they never all aligned at once.

    K2 is often discussed as though the forecast alone decides the season. The actual summit system is a chain: a failure in any one link can consume the window.

    1 Ā· Route

    Fixed lines

    The upper route has to be established far enough for teams to move efficiently and descend on the same system.

    2 Ā· People

    Acclimatization

    Climbers need enough prior rotations and recovery to use a short forecast break rather than beginning their preparation after it appears.

    3 Ā· Atmosphere

    Wind

    Upper-mountain wind can block progress even when lower camps are sunny and the forecast looks superficially favorable.

    4 Ā· Surface

    Snow stability

    Fresh loading, deep snow and avalanche conditions can make a nominal weather window unusable or slow movement enough to erase it.

    5 Ā· Camps

    High-camp system

    Tents, caches, oxygen and staff positions have to be intact and placed for the summit cycle being attempted.

    6 Ā· Time

    Descent margin

    A summit-day forecast is not enough. Teams need a complete ascent-and-descent window with enough reserve for delays above 8,000 m.

    7 Ā· Human priorities

    Emergency response

    Mountaineering plans can be superseded by a rescue or recovery need. That is exactly what happened after the Broad Peak avalanche.

    2026 result

    The chain never closed

    By the time route, acclimatization and a possible forecast began to converge, weather remained marginal and the season was late. Then the Broad Peak disaster ended the remaining summit logic.

    What modern support can—and cannot—solve

    Commercial infrastructure helped K2 teams operate. It could not manufacture the missing margin.

    The 2026 season is particularly useful because it shows the limits of systems that are sometimes mistaken for guarantees.

    Expedition systemWhat it can improveWhat it cannot guarantee
    Fixed ropesMovement efficiency, route standardization and protection on known sections.Stable snow, acceptable rockfall exposure or a complete upper route before the weather window closes.
    Supplemental oxygenPhysiological margin for climbers using it and potentially faster movement at extreme altitude.A safe route, low wind, viable snow or an acceptable descent window.
    ForecastingBetter timing and recognition of broad atmospheric patterns.Exact summit conditions, local snow stability or perfect agreement between forecast models and the mountain.
    High-altitude staffRoute work, load carries, camp establishment and critical experience.Removal of objective hazards or unlimited capacity when the same staff are needed for rescue elsewhere.
    Satellite communicationsWeather updates, team coordination and emergency contact when systems work.Continuous connectivity. Pakistan’s mountain communications are less consistent than on Everest, and field updates can arrive late.
    Long expedition scheduleMore acclimatization and more chances to wait for a usable period.An unlimited season. Route work, permits, staff commitments, weather and the calendar eventually create a hard end.

    The point is not that commercial support ā€œfailedā€ in 2026. The point is that support reduces some problems while leaving the mountain’s atmosphere, snowpack, rockfall and human emergencies outside anyone’s control.

    K2 in Pakistan's Karakoram
    The 2026 lesson

    A weather window is not automatically a summit window.

    A usable K2 summit window exists only when forecast, fixed lines, snow stability, team acclimatization, high camps, support, descent margin and human priorities all line up at once. In 2026, that complete combination never arrived.

    Route progress

    How far did the 2026 K2 route develop?

    This is route chronology, not a climbing tutorial. Elevations are approximate season reports and should not be treated as permanent route coordinates.

    Season pointReported progressWhy it mattered
    Early JulyTeams established Base Camp and began Abruzzi Spur rotations.The season was still in normal lower-mountain acclimatization.
    July 11–16Fixed line reported around Camp 2.Upper-route preparation remained behind the eventual summit phase.
    July 17Fixing teams moved from Camp 2 toward the ice section below Camp 3.Progress continued, but the upper mountain was not yet ready for a full commercial summit cycle.
    July 24Ropes reported around 7,000 m; roughly 2,000 m of rope cached at Camp 3.Teams had the material to continue once wind eased, but substantial upper work remained.
    July 27–30Summit push began; weather forced delays. Some teams reached high camps.The season finally entered its decisive summit cycle.
    July 31 onwardK2 summit efforts abandoned as climbers assisted the Broad Peak response.No second complete summit cycle followed before the summer season closed.
    Need the actual route? Use the Abruzzi Spur vs Cesen comparison for route choice and the complete K2 guide for the full expedition system.
    The decisive human event

    How the Broad Peak tragedy affected K2

    Broad Peak and K2 are separate mountains, but the expedition communities share the Baltoro, guides, workers, communications, rescue capacity and personal relationships.

    July 30

    The avalanche

    An avalanche struck a 10-person international team on Broad Peak during its summit push. Later reporting confirmed that all 10 climbers died. Searchers faced difficult terrain, weather and recovery logistics.

    This article does not reconstruct the avalanche or assign fault. That would require a separate evidence base and is not necessary to explain K2’s season.

    July 31

    The K2 response

    ExplorersWeb reported that most K2 teams aborted summit pushes to help. Later accounts from climbers and season summaries described K2 guides descending and joining the Broad Peak search and recovery effort.

    At that point, the K2 story changed from ā€œWill the forecast produce a summit?ā€ to ā€œHow can the climbing community respond to the disaster next door?ā€

    High mountain terrain in the Karakoram
    The Broad Peak disaster belongs in the K2 season timeline because it changed the actions of K2 teams—not because the mountains or their fatality records should be combined.
    Beyond K2

    2026 was a difficult Karakoram season, but not every 8,000er had the same outcome

    Placing K2 beside the other Pakistan eight-thousanders helps show why ā€œbad Karakoram yearā€ is too vague. Some peaks did see successful summits.

    Peak2026 summer resultContext
    Nanga ParbatSuccessful summitsTeams reached the summit earlier in the summer before the Baltoro season reached its late-July crisis.
    Broad PeakSuccessful summits before the later tragedyThe July 30 avalanche then killed 10 climbers and reshaped the closing weeks of the Karakoram season.
    Gasherbrum IISuccessful summitsTeams succeeded despite deep snow and repeated route work.
    Gasherbrum INo successful summit in final season reportingDawn and later season summaries grouped GI with K2 among the unsummited eight-thousanders.
    K2No successful summitWind, snow, rockfall, slow route progress and the Broad Peak response closed the remaining opportunity.

    This table records whether successful summits were reported; it does not attempt to provide complete summit counts for every peak.

    Interpreting the zero

    What K2 2026 shows—and what it does not

    A zero-summit year is striking, but it should not be stretched into conclusions the season cannot support.

    What 2026 does show

    • Commercial infrastructure cannot manufacture a summit window.
    • Slow rope fixing can compress the calendar even when teams are acclimatized.
    • Wind, snow and rockfall can remain decisive despite modern forecasting and equipment.
    • A late summit cycle leaves little room for a second complete attempt.
    • Emergency response can correctly take priority over a summit objective.
    • K2 season planning needs margin for descent, not merely a forecasted summit day.

    What 2026 does not prove

    • It does not prove K2 has become permanently unsummitable.
    • It does not establish a new personal summit-success probability.
    • It does not justify a new fatality rate using zero summits as a denominator.
    • It does not mean every future late-July season will behave similarly.
    • It does not make the 2026 snow or wind pattern a forecast for 2027.
    • It does not turn Broad Peak fatalities into K2 fatalities.
    Current sources

    Sources used to close the 2026 record

    The final outcome is anchored to dated reporting published during and immediately after the Karakoram season.

    Record boundary: the page reports the completed 2026 season. It does not use 2026 conditions as a forecast for a future K2 expedition, and it does not merge the Broad Peak avalanche into K2’s fatality record.
    Direct answers

    K2 2026 Season FAQ

    Did anyone summit K2 in 2026?

    No. The 2026 Karakoram summer climbing season closed without a successful K2 summit. Dawn reported the season closed with no K2 summit, and later season summaries recorded the same final outcome.

    Why was K2 not summited in 2026?

    There was no single cause. High winds repeatedly delayed upper-mountain progress, fresh and unstable snow reduced the usable margin, rockfall remained a concern, and the late summit push was abandoned after the July 30 Broad Peak avalanche as K2 climbers redirected effort toward the response.

    How far did climbers get on K2 in 2026?

    By July 24, contemporary reporting placed fixed ropes around 7,000 metres with additional rope cached around Camp 3. During the final push, climbers reached high camps, including Camp 3, before the summit effort was abandoned.

    How many people attempted K2 in 2026?

    There is no single official public attempt count used here. Alan Arnette estimated roughly 50 people attempted K2 during the 2026 season. Treat that as a specialist estimate, not an official permit total.

    What happened on Broad Peak and why did it affect K2?

    On July 30, an avalanche on neighboring Broad Peak killed 10 climbers. K2 teams abandoned their summit pushes and joined or supported search and recovery efforts. The Broad Peak deaths are not K2 fatalities, but the disaster directly changed the final K2 summit push.

    Was bad weather the only reason K2 had no summits?

    No. Weather and mountain conditions compressed the season, but the decisive end to the remaining summit push came after the Broad Peak avalanche. The final result reflects a sequence of delays, route development, wind, snow, rockfall and the emergency response.

    What route were teams climbing?

    The supported commercial effort centered on the Abruzzi Spur on the Pakistan side. This archive summarizes route progress only; use the separate K2 route pages for climbing geography and alternatives.

    Is this still a live K2 tracker?

    No. The summer climbing season is closed, so this page is now a final historical archive of the 2026 K2 season rather than a live forecast or current conditions page.

    Does zero summits mean K2 is becoming impossible?

    No. One unsummited season is important evidence about how weather, route progress and timing can align badly, but it does not establish a permanent trend or predict the outcome of a future K2 season.

    Where should I look for current K2 planning information?

    Use the current K2 climbing guide for broad expedition planning, the K2 climbing-season page for the normal calendar and access, and the K2 weather guide for climatology. Keep this page as the dated record of 2026.

    The 2026 verdict

    No summit. A season still worth studying.

    K2’s 2026 summer ended without a successful summit. The useful lesson is not simply the zero: route progress, weather, snow, time, emergency response and judgment all have to line up on a mountain where weeks of investment can still end in a correct descent.

    Was this helpful?

    Yes
    No
    Thanks for your feedback!
  • Mount Kazbek Fixed Ropes: Gergeti Glacier & Summit Slope

    Mount Kazbek (5,033 m) above the Gergeti Glacier in the Caucasus, Georgia
    šŸ§— Mount Kazbek Ā· Gergeti Glacier & Bergschrund Ā· Route Detail Ā· Updated July 2026

    Are There Fixed Ropes on Mount Kazbek?

    It’s one of the most common questions climbers ask before Kazbek — and the answer isn’t a simple yes or no. Kazbek is not a fixed-rope mountain the way Everest is, but a fixed rope does sometimes appear in one specific place. Here’s exactly where, when, and what it means for your climb.

    ⚔ The short answer

    No — not as a fixed system. The standard Gergeti Glacier route is never permanently fixed; the glacier shifts daily, so guides re-read the line on every climb. You travel roped as a team for crevasse protection, which is not the same as clipping fixed lines. The one exception: on the steep 35–45° final summit slope and the bergschrund below it, a guide will often fix a short rope if the snow or ice is hard — but it is situational, not guaranteed. Build the skills to climb that slope without one.

    “Fixed rope” means different things to different climbers, and that’s the root of the confusion around Kazbek. Before you plan, it helps to separate three very different things — because Kazbek involves two of them, and specifically does not involve the third.

    Three kinds of “rope” on a mountain

    • A fixed-line system (Everest-style): continuous ropes pre-installed up the route that you clip and ascend with a jumar. Kazbek does not have this.
    • Rope-team / glacier travel: your own party roped together so a crevasse fall can be arrested and the climber rescued. Kazbek requires this across the Gergeti Glacier.
    • A situational fixed rope: a short line a guide anchors on one steep section when conditions demand it. Kazbek sometimes has this on the summit slope and bergschrund.

    The Gergeti Glacier: roped, but never fixed

    The heart of the standard route is the crossing of the Gergeti Glacier from the Betlemi (Meteo Station) hut up onto the plateau at around 4,400 metres. This is glaciated terrain with real crevasse exposure, and there is no fixed rope and no reliable fixed path across it. The reason is simple: the glacier is alive. New crevasses open daily and snow bridges collapse without warning, so even experienced guides don’t trust a previous track — they route-find fresh each time based on the day’s conditions.

    What protects you here is rope-team travel. Your group ropes together at correct spacing so that if one climber breaks through a snow bridge, the others can arrest the fall and haul them out. That’s why competence with roped glacier travel and crevasse rescue is non-negotiable for Kazbek — it’s the protection system the mountain actually uses, and it’s entirely different from clipping a fixed line.

    The bergschrund and the steep summit slope

    This is where fixed ropes actually enter the picture. Above the plateau and the saddle (around 4,900 m), the route steepens into the final summit slope — roughly 35–45° of snow and ice — and at its base you cross the bergschrund, the crevasse where the moving glacier pulls away from the steeper headwall. This crossing and the slope above it are the technical crux of the standard route.

    When the snow here is soft and stable, a strong roped team simply climbs it. But when it’s icy or hard — which is common early in the season, late in the day, or in a cold year — a guide will commonly fix a short rope across the bergschrund and up the steep slope to secure the crossing. So the honest answer to “is there a fixed rope at the Kazbek bergschrund?” is: sometimes, when conditions call for it. It is a judgement the guide makes on the day, not a permanent installation you can count on.

    What this means for your climb

    The practical takeaway is straightforward: prepare as if there will be no fixed rope, and treat any fixed rope as a bonus. The skills that actually get you up Kazbek are roped glacier travel, crevasse rescue, confident cramponing, ice-axe self-arrest, and the ability to climb a 35–45° snow-and-ice slope. If your guide fixes a rope at the bergschrund, you should be comfortable using it — but your safety cannot depend on one being there, because on any given day it may not be.

    If fixed-rope security on the steep ground matters to you, ask your operator directly how they handle the summit slope and bergschrund in the conditions expected for your dates. And before you commit, read the full picture of the route, seasons, and skill requirements in our complete Mount Kazbek climbing guide.

    Frequently asked questions

    Are there fixed ropes on Mount Kazbek?

    Not as a permanent system. The Gergeti Glacier route is never fixed — the glacier changes constantly, so guides re-assess the line every climb. You travel roped as a team for crevasse protection. The one place a fixed rope may appear is the steep final summit slope (about 35–45°) and the bergschrund below it, where a guide will sometimes fix a short rope if the snow or ice is hard — but it’s situational, not guaranteed.

    Is there a fixed rope on the Gergeti Glacier?

    No. The Gergeti Glacier is crossed using rope-team travel, not fixed ropes. Your party ropes together so a crevasse fall can be arrested and the climber rescued. Because the crevasses shift daily, there’s no fixed line and no reliable fixed path — route-finding is done fresh each time.

    Is there a fixed rope at the Kazbek bergschrund?

    Sometimes. The bergschrund sits at the base of the 35–45° summit slope, the crux of the standard route. When conditions there are icy or hard, guides commonly fix a short rope across the bergschrund and up the slope. In good soft snow it may not be fixed at all — never assume one will be in place.

    Do you need fixed-rope skills for Mount Kazbek?

    You need glacier and steep-snow skills more than fixed-rope skills: roped glacier travel, crevasse rescue, crampons, ice axe, self-arrest, and the ability to climb a 35–45° slope. If a guide fixes a rope you should be comfortable using it, but you can’t rely on one being there.

    Is Mount Kazbek technical like Everest with fixed lines?

    No. Kazbek has no continuous fixed-line system like Everest’s commercial routes. It’s a glaciated alpine ascent where you travel roped as a team, with at most a short situational fixed rope on the summit slope. “Non-technical” only means no rock or ice pitches — it still demands real glacier travel and steep-snow competence.

    How we built this

    This is a research-based detail page — our team has not climbed Kazbek. It synthesizes current operator route documentation and established descriptions of the standard Gergeti Glacier route, focusing on how rope protection is actually used on the mountain. Safety content is reviewed by Dawson Ludlow. Glacier conditions, the bergschrund, and the summit slope change constantly and year to year — always confirm the current situation with your guide before you climb.

    Planning a Kazbek climb?

    Get the full route, season, gear, and safety picture — and go prepared to climb that summit slope with or without a fixed rope.

    Read the full Mount Kazbek guide →
    The Caucasus · Georgia

    Kazbek, the Gergeti Glacier & the Caucasus

    Kazbek is one of the great accessible Caucasus objectives. See the full guide, the region and its neighbours below.

    Was this helpful?

    Yes
    No
    Thanks for your feedback!
  • 5 Mountains That Are Actually Harder Than They Look

    Mount Fuji rising above the clouds, the deceptively gentle-looking peak climbers most often underestimate
    ā›° Difficulty Ratings Ā· The Mountains People Underestimate

    5 Mountains That Are Actually Harder Than They Look

    The most dangerous mountains aren’t always the ones that look hardest. Some of the deadliest peaks on Earth are famous, photogenic, or sold as “walk-ups” — and that gentle reputation is exactly what gets people into trouble. Here are five mountains climbers routinely underestimate, and the hidden reasons each is tougher than it seems.

    ⚔ The Thesis

    Reputation is not difficulty. A mountain can be famous, beautiful, or technically “easy” and still be lethal — because of altitude, weather, objective hazard, or sheer endurance. The five below all hide a hard mountain behind a gentle face, and underestimating them is the single biggest mistake climbers make on each.

    5
    Underrated peaks
    3,776→6,961 m
    The altitude range
    “Easy”
    The dangerous myth
    Altitude
    The hidden killer

    Why “Easy-Looking” Mountains Catch People Out

    Climbers and hikers tend to judge a mountain by two things: how steep and technical it looks, and how famous it is. Both are misleading. A peak with no ropework can still sit at an altitude where the body fails; a gentle-looking glacier can hide crevasses; a postcard volcano can be raked by rockfall; a “bucket-list” tourist mountain can be brutally cold and crowded. The danger isn’t just the terrain — it’s the gap between what people expect and what the mountain actually delivers.

    That gap is where accidents happen. Underestimation leads to the wrong gear, too few acclimatisation days, a forecast ignored, a turnaround time blown. None of the five mountains below is the “hardest” in the world — and that’s the point. They are dangerous precisely because they don’t look it. Read each alongside our mountain difficulty ratings guide, which exists to replace reputation with something measurable.

    1. Mount Fuji — The Tourist Trap

    Mount Fuji's symmetrical cone, the world's most-climbed mountain
    Mount Fuji, 3,776 m. The world’s most-climbed mountain looks like a gentle bucket-list hike — which is exactly the problem.

    The reputation: Japan’s sacred icon, the most-climbed mountain on the planet, and a near-mandatory photo for visitors. Hundreds of thousands walk up it each summer, many with no mountain experience at all — it’s widely treated as a long but casual hike in trainers.

    Why it’s actually harder: Fuji is non-technical, but at 3,776 m the altitude is high enough to make a meaningful share of climbers ill, and the summit is genuinely cold — below freezing with wind, even at the height of summer. The classic ascent is done overnight, to catch sunrise from the top, so people climb tired, in the dark, in the cold, on crowded trails where a slow queue can leave you stationary and chilling for hours. Every season brings altitude sickness, hypothermia, and exhaustion cases among the unprepared.

    The reality check: the crowds and casualties got serious enough that Japan introduced a climbing fee and daily caps for 2026, along with gate hours to stop reckless overnight “bullet climbing.” Fuji rewards the same respect as any high mountain: warm layers, a head torch, a sensible pace, and ideally a night in a mountain hut to break the altitude gain. Treat it as a hike and it bites; treat it as a small mountain and it’s a wonderful climb. See our Fuji routes guide and best-time-to-climb guide, or the head-to-head in Fuji vs Kilimanjaro.

    2. Mount Rainier — The Pretty Volcano

    The reputation: a glorious, glaciated cone looming over Seattle — the kind of mountain that looks like a scenic weekend objective for any fit hiker, and draws huge numbers of day visitors to its meadows and viewpoints.

    Why it’s actually harder: Rainier is a serious, heavily glaciated mountaineering climb, not a hike. Its standard routes cross crevassed glaciers that demand rope teams, crampons, and ice-axe skills; they’re exposed to rockfall and serac danger; and the weather can swing from sunshine to whiteout in an hour. The altitude (4,392 m) and the sheer vertical gain — over 2,700 m from the usual trailhead — wear climbers down. Tellingly, only around half of those who set out for the summit actually make it.

    The reality check: Rainier is so genuinely demanding that it’s a recognised training ground for Denali and Everest — climbers use it to rehearse glacier travel and altitude before the world’s biggest peaks. That should tell you everything: a mountain elite expeditions use as practice is not a casual outing. Compare it honestly in Rainier vs Denali and check the odds in our Rainier summit success rate breakdown.

    3. Mont Blanc — The Deadly “Walk-Up”

    The reputation: the highest mountain in the Alps, and one routinely marketed as an accessible “walk-up” — a fit hiker’s trophy that can be bagged in a long weekend with a guide. Thousands attempt it every summer.

    Why it’s actually harder: the popular GoĆ»ter route crosses the notorious Grand Couloir, a gully so frequently swept by rockfall that it has earned the grim nickname the “Couloir of Death.” Beyond it, the climb is a true high-alpine undertaking: glaciated terrain with hidden crevasses, altitude nearing 4,808 m, fast-moving storms that strand climbers, and heavy crowds that slow everything down at exactly the wrong moments. None of this is “technical” in the extreme sense — and yet people die here regularly.

    The reality check: Mont Blanc has one of the highest death tolls of any mountain in the Alps, the accumulated price of so many under-prepared parties on an objectively hazardous route. The word “walk-up” does it a dangerous disservice. Anyone heading up should treat it as the serious glaciated climb it is — see our GoĆ»ter route conditions and the full expedition breakdown, and weigh it against its sharper neighbour in Mont Blanc vs Matterhorn.

    4. Mount Kilimanjaro — The Altitude Trap

    On the summit of Mount Kilimanjaro at Uhuru Peak
    Uhuru Peak, 5,895 m — the roof of Africa. No ropes required, but the altitude turns back a large share of those who try.
    First-hand: a member of our team has summited Kilimanjaro via the Lemosho route, so the notes here come from the mountain itself, not just the data — and the single biggest factor in summiting was acclimatisation days, not fitness.

    The reputation: the highest mountain in Africa and the world’s most famous “walk-up” — the big peak that, the story goes, anyone reasonably fit can climb because it needs no ropes, crampons, or technical skill. That reputation pulls in tens of thousands of trekkers a year.

    Why it’s actually harder: the lack of technical difficulty is real — and almost beside the point. At 5,895 m, Kilimanjaro is high enough that altitude is the great equaliser, and it humbles the fit and unfit alike. A large share of climbers never reach the summit, plenty are evacuated with altitude sickness, and people genuinely die here each year from HACE and HAPE — the high-altitude brain and lung emergencies. The cruel twist is that strong, fit people sometimes fare worse, because they push too fast for their bodies to adapt.

    The reality check: on Kilimanjaro, the variable that most predicts success isn’t fitness — it’s how many days you take to go up. Rushed five-day itineraries have far lower summit and safety rates than seven- or eight-day routes that build in acclimatisation. The mountain is absolutely climbable by ordinary people; it just demands respect for altitude that its “anyone can do it” billing actively discourages. Start with our Kilimanjaro climbing guide and understand the physiology in acclimatisation explained.

    5. Aconcagua — “Non-Technical” ≠ Easy

    Aconcagua, the highest peak outside Asia, with climbers on its slopes
    Aconcagua, 6,961 m — the highest “non-technical” mountain on Earth, and one of the most dangerously underestimated.

    The reputation: at 6,961 m, Aconcagua is the highest peak outside the Himalaya and Karakoram, and it’s famous as the highest non-technical mountain in the world — a summit you can reach, by the normal route, without ever roping up. To many that reads as “the easiest way to climb really high,” and the mountain draws crowds of climbers chasing their first big altitude.

    Why it’s actually harder: “non-technical” describes the climbing, not the difficulty. Aconcagua is nearly 7,000 m — deep into serious altitude — and it sits in the path of brutal, sustained wind and cold, including the infamous Viento Blanco, a white-out storm that can pin or kill a team. Summit day is enormously long and punishing, and the summit success rate is often only around a third. People die on Aconcagua most years, frequently from altitude illness, cold, or exhaustion brought on by treating a near-7,000 m peak as a walk.

    The reality check: Aconcagua may be the most dangerously underestimated mountain on this list, precisely because “non-technical” gets mistaken for “safe.” It demands genuine acclimatisation, real cold-weather kit, and the judgement to turn around in the wind. Get the full picture in our Aconcagua climbing guide, the odds in our success-rate analysis, and the conditions in normal route conditions.

    The Common Thread

    Line these five up and the pattern is impossible to miss. Three of them — Fuji, Kilimanjaro, Aconcagua — are non-technical, and it’s the altitude that does the damage. Two — Rainier and Mont Blanc — look like scenic outings but are real glaciated climbs with hidden, lethal hazards. In every case, the danger lives in the gap between a gentle reputation and a serious reality.

    🟠 The lesson for your own plans
    • Judge the mountain, not its fame. “Walk-up,” “non-technical,” and “bucket-list” tell you nothing about altitude, weather, or hazard.
    • Respect altitude above all. On the non-technical giants, acclimatisation days beat fitness every time.
    • Read the hidden hazards. Rockfall couloirs, crevasses, and storms kill more people on these peaks than hard climbing does.
    • Use a real difficulty rating. Replace reputation with something measurable before you commit.

    That last point is the whole reason difficulty ratings exist. Our Mountain Difficulty Ratings Guide breaks down how the grading systems actually work — technical grade, altitude, hazard, and commitment — so you can size up any peak honestly instead of trusting its reputation. If you take one link from this article, take that one.

    How We Picked Them

    Our method.

    • Selection favoured mountains with a wide gap between public reputation and real difficulty – famous “walk-ups” and photogenic peaks that data and experience show to be seriously demanding.
    • Informed by real search behaviour: these are peaks people actively compare and question (“is X harder than Y,” “non-technical mountain climbs”), confirming the reputation-versus-reality gap is real.
    • Figures are approximate – summit success rates, fatality counts, and altitudes vary by source, route, and season; treat them as honest ballparks, not precise statistics.
    • Research-based, with first-hand Kilimanjaro experience on the team. Last verified July 3, 2026.

    Underrated Mountains FAQ

    What is the most underrated difficult mountain?

    Aconcagua. Billed as the highest non-technical peak on Earth, it’s widely read as ‘easy’ – but at nearly 7,000 m, with ferocious wind and a summit success rate often around a third, it kills several climbers a year. ‘Non-technical’ means no ropework, not low difficulty.

    Is Kilimanjaro actually hard to climb?

    Yes – harder than its ‘anyone can do it’ billing. It needs no technical skill, but at 5,895 m the altitude is the real test: many climbers don’t summit, evacuations are common, and deaths from HACE and HAPE happen yearly. Acclimatisation days matter more than fitness.

    Why is Mont Blanc dangerous if it’s not technical?

    Its standard Gouter route crosses the rockfall-raked Grand Couloir – the ‘Couloir of Death’ – and adds altitude near 4,800 m, crevasses, storms, and crowds. It has one of the highest death tolls of any Alpine mountain despite its accessible reputation.

    Is Mount Fuji a hard climb?

    Harder than tourists expect. It’s a non-technical walk, but at 3,776 m altitude affects many, the summit is freezing even in summer, the classic climb is overnight, and trails are crowded – which is why Japan added fees and caps for 2026.

    What makes a mountain ‘harder than it looks’?

    A gap between reputation and reality. A peak can look gentle, be a famous ‘walk-up,’ or carry no technical grade and still be deadly through altitude, weather, rockfall, crevasses, or endurance. Underestimating a mountain is itself a major hazard.

    How do mountain difficulty ratings work?

    They combine technical grade, altitude, objective hazard, and commitment into a comparable scale so you can judge a peak against your experience. Our Mountain Difficulty Ratings Guide explains the systems and compares the major peaks.

    About the Author

    Travis Ludlow — Editor, Global Summit Guide

    Travis edits Global Summit Guide from Nephi, Utah, with first-hand high-altitude experience on glaciated 5,000 m volcanoes, and draws on the team’s Kilimanjaro summit experience. This article is research-based, informed by summit-success and safety data and the site’s own mountain difficulty ratings; figures are given as approximate ranges.

    Don’t Let a Mountain’s Reputation Fool You

    The peaks that catch people out are rarely the scary-looking ones — they’re the friendly-sounding ones. Before you pick your next objective, judge it on the facts, not the postcard.

    Read the Difficulty Ratings Guide → Which mountain should you climb? →
    At a glance Ā· verified September 12, 2026

    Five Mountains That Look Easier Than They Really Are

    None of these five is difficult for the same reason. Fuji compresses altitude into a short trip. Rainier hides glacier systems behind a scenic volcano. Mont Blanc combines an accessible grade with objective hazard. Kilimanjaro is an acclimatization problem. Aconcagua is an expedition problem.

    MountainNormal routeGrade / styleTypical durationElevation / gainKey hidden hazardNormal seasonPermit / access realityGuide needReadiness standard
    Mount Fuji
    High-altitude hike
    Yoshida Trail is the infrastructure-heavy default for many first-time climbers. Non-technical mountain trail. No rope or glacier skills in the official summer season. Roughly 10–11 hours of ascent + descent movement for a one-day effort.

    Better first plan: 2 days with a mountain-hut night.
    Summit: 3,776 m.

    Yoshida 5th Station: ~2,305 m.

    About 1,450 m net ascent.
    Rapid altitude gain, summit cold/wind, fatigue and upper-mountain congestion. Yoshida: July 1–September 10.

    Fujinomiya/Gotemba: July 10–September 10.
    2026 hiking fee: „4,000.

    Yoshida had a 4,000 climber/day cap and 2 PM–3 AM gate restriction unless staying in a hut.

    The three Shizuoka routes used the fee/time system but not the Yoshida 4,000-person cap.
    Not universally required.

    Official Yoshida guidance recommends a guide for people without sufficient mountain knowledge or experience.
    Comfortable with a long 8–12 hour mountain day, cold/wind layers, darkness, steep descent and sensible altitude pacing.
    Mount Rainier
    Technical glacier climb
    Disappointment Cleaver / Ingraham Direct system from Paradise via Camp Muir. Technical glacier mountaineering.

    Rope-team travel, crampons and ice-axe systems are required.
    Common first-attempt format: 3–4 days.

    High-camp summit round trip often takes roughly 8–12 hours.
    Summit: 14,410 ft / 4,392 m.

    NPS states every summit route involves more than 9,000 ft / 2,740 m of gain and more than 10 miles of travel.
    Crevasses, changing glacier route, rock/icefall, whiteout weather, altitude and descent fatigue. Broadly spring through early summer for normal summit climbing.

    Route conditions determine the actual window.
    2026 climbing fee: $82 per person.

    Climbing permit required above 10,000 ft or on glaciers.

    Overnight climbs also require a wilderness permit.

    No timed-entry system anywhere in the park in 2026.
    Guide not legally required.

    Independent teams need functional glacier rope travel, crevasse-rescue competence and route judgment.
    Excellent fitness plus current crampon, axe, rope-team, glacier-navigation and crevasse-rescue skills.
    Mont Blanc
    Alpine glacier climb
    Goûter / Voie Normale via Tête Rousse and Goûter Refuge. PD / PD+ normal-route reference.

    Moderate Alpine grade; serious objective hazard.
    Normal summit phase: 2–3 days once prepared.

    Strong first-attempt program: 5–9 days including acclimatization and preparation.
    Summit: about 4,806 m.

    Nid d’Aigle: 2,372 m.

    Roughly 2,430 m vertical from normal walking start to summit.
    Grand Couloir rockfall, glacier terrain, crevasses, altitude, fast weather changes and exposed Bosses Ridge. Broadly June–September.

    Heat-driven rockfall can materially change whether the Goƻter is appropriate.
    No universal summit royalty.

    Normal-route hut access is regulated with compulsory identity-linked reservations; reservation proof and ID should be carried.
    Not universally mandatory.

    Independent ascent only makes sense for climbers already competent in glacier travel, crampons, navigation, self-arrest and alpine judgment.
    Current glacier competence, long-day fitness, acclimatization, safe crampon movement and ability to make a conservative go/no-go decision.
    Kilimanjaro
    High-altitude trek
    Lemosho is the strongest default here because its longer schedule gives better acclimatization. Non-technical trekking.

    No normal rope, glacier or rock-climbing requirement.
    7–8 days is the strong Lemosho planning range.

    Summit + descent day can become a 12–14 hour effort.
    Uhuru Peak: 5,895 m.

    Lemosho western approach starts around 2,100 m, creating roughly 3,800 m of net altitude gain.
    Altitude illness, poor recovery, cold and accumulated fatigue before a long summit night. Most favorable broad windows: January–March and June–October. Tanzania park/operator system applies.

    Kilimanjaro is not an independent solo trek; climbs use licensed operator/guide support.
    Required guided operator structure. Strong multi-day hiking fitness, disciplined pacing, ability to eat/sleep at altitude and willingness to use a conservative 7–8 day itinerary.
    Aconcagua
    High-altitude expedition
    Normal Route via Horcones and Plaza de Mulas. Non-technical under normal summer conditions.

    That means no normal technical rope climbing; it does not mean easy.
    Responsible expedition: roughly 18–21 days including acclimatization. Summit: 6,961–6,962 m.

    Roughly 4,000 m net rise from the Horcones access area.
    Extreme altitude, Viento Blanco, dry cold, exhaustion and a long descent after summit effort. Core climbing window: December–February. Climbing permit required.

    Current 2026/27 foreign Normal Route reference: $950 presale through September 15, 2026; $1,285 season price.
    Strongly recommended for first attempts.

    Experienced independent teams should verify current park, service and permit rules before planning without a guide.
    Prior evidence of functioning around 5,000–6,000 m, multi-week expedition fitness, cold/wind systems, load carrying and conservative altitude judgment.
    Current-access check Ā· September 12, 2026

    Three Details Matter Right Now

    Difficulty is not static. Access rules, glacier routes and rockfall conditions can change the practical seriousness of even a familiar mountain.

    Mount Fuji The 2026 summit season is over.

    The official climbing season ended September 10. The summit trails are now closed outside the designated season. The 4,000-person daily cap applied specifically to Yoshida; the Shizuoka trails did not use that same cap.

    Mount Rainier $82 climbing fee — but no timed entry in 2026.

    Glacier travel or climbing above 10,000 feet requires the climbing permit system, and overnight teams also need a wilderness permit. The park did not implement timed-entry reservations in 2026.

    Mont Blanc GoĆ»ter huts reopened August 26 — risk did not disappear.

    Tête Rousse and Goûter reopened after an August closure related to rockfall danger. FFCAM explicitly warns that administrative reopening does not mean the route is free of risk. Current conditions still control the decision.

    Fuji ā€œTourist mountainā€

    Hides rapid altitude gain, freezing summit conditions and a very long mountain day.

    Rainier ā€œPretty volcanoā€

    Hides crevasses, rope-team systems and more than 9,000 feet of climbing.

    Mont Blanc ā€œEasy Alpine gradeā€

    Hides objective rockfall and glacier danger that fitness cannot remove.

    Kilimanjaro ā€œAnyone fit can do itā€

    Hides a 5,895-meter physiological problem that fitness alone cannot solve.

    Aconcagua ā€œNon-technicalā€

    Hides expedition altitude, wind, cold and almost three weeks of cumulative stress.

    From surprise to preparation

    If One of These Is Your Mountain, Go One Level Deeper

    Do not stop at ā€œharder than expected.ā€ Open the route, condition or progression page that explains the exact variable you need to solve before booking.

    Before committing

    Four Checks That Matter More Than the Mountain’s Reputation

    The five examples use different terrain, but the planning sequence is the same: understand the actual grade, confirm weather, match equipment to that terrain and model the complete trip rather than the summit photo.

    Compare difficulty before committing

    Reputation Is a Starting Point — Not a Difficulty Rating

    Use these comparisons to move from ā€œthat mountain looks doableā€ to an evidence-based decision about altitude, technical skills, objective hazard and progression.

    Was this helpful?

    Yes
    No
    Thanks for your feedback!
  • Ice AxeĀ Self-Arrest: The Most Critical Mountaineering Skill

    Mountaineering ice axe and crampons on snow representing self-arrest training equipment
    ā› Skills Cluster Ā· Mountaineering Safety Ā· 2026 Field Guide

    Ice Axe Self-Arrest: The Most Critical Mountaineering Skill

    The complete 2026 guide to stopping a slide on snow. Step-by-step technique for all four falling positions, equipment selection, training progression, and field-tested guidance from Dawson Ludlow’s Mount Hood May 2026 training with Timberline Mountain Guides plus Kilimanjaro Lemosho 2024 experience.

    šŸ“‹ Editorial Standards & Source Verification

    This skills guide cross-references five primary source categories: (1) Dawson Ludlow’s first-hand Mount Hood training (May 2026, Timberline Mountain Guides) and Mount Kilimanjaro experience (2024); (2) Established mountaineering instruction programs including American Alpine Institute, NOLS Wilderness Medicine, RMI Expeditions, and Mountain Madness curricula; (3) Published mountaineering reference texts including “Mountaineering: The Freedom of the Hills” (9th edition) and “Glacier Travel and Crevasse Rescue” by Andy Selters; (4) AMGA (American Mountain Guides Association) technical standards for snow climbing skills; (5) Internal Global Summit Guide research cross-referenced with our mountaineering and skills content.

    Critical safety note: Self-arrest cannot be learned safely from text alone. This guide explains the technique and informs decision-making but is not a substitute for hands-on instruction from a qualified mountaineering guide or course.

    ā—† FIRST-HAND Editorial Framing

    Dawson Ludlow completed self-arrest training as part of two mountaineering expeditions: Mount Kilimanjaro via the Lemosho Route (2024) which included basic snow technique briefings, and Mount Hood South Side Hogsback (May 2026) which included one full day of intensive self-arrest drills with Timberline Mountain Guides on the Palmer Snowfield. The technique sequences below reflect the specific instruction received from AMGA-certified guides during that training, not generic online content.

    For climbers planning to learn self-arrest, the recommendation is unambiguous: take a formal course before attempting unsupervised practice. Cost is $300-1,200 depending on location and duration — substantially less than a single mountaineering injury or rescue cost.

    ⚔ Quick Verdict — Featured Snippet Target

    What Is an Ice Axe Self-Arrest?

    An ice axe self-arrest is the technique used to stop an uncontrolled slide on a snow slope using an ice axe. The mountaineer rotates into a face-down position with the axe head near the shoulder, drives the pick into the snow surface, and applies maximum body weight pressure on the axe until the slide stops. Self-arrest is considered the single most important mountaineering safety skill because uncontrolled slides on snow are among the most common causes of mountaineering injury and death. Proper technique requires 1-2 days of supervised practice and cannot be safely learned from videos or text alone.

    ⚠ Critical Safety Warning

    This article is educational content — not a substitute for hands-on instruction. Attempting self-arrest practice without proper supervision risks serious injury including broken bones, lacerations from the ice axe pick, and crampon punctures. Self-arrest training requires a safe practice environment with appropriate slope angle, snow consistency, and runout — conditions that vary substantially across terrain.

    The Mountaineers, American Alpine Institute, NOLS, and other established programs offer 1-2 day snow skills courses that include supervised self-arrest practice. This is the only safe path to learning the skill. Use this guide to inform your decision to take a course, prepare for the curriculum, and reinforce learning afterward — not as a primary instruction source.

    4
    Falling positions
    6
    Technique steps
    45°
    Reliability threshold
    $300+
    Course cost (avg)

    Why Self-Arrest Matters

    Self-arrest is the most important safety skill in mountaineering because uncontrolled slides on snow are among the most common causes of injury and death in alpine environments. Unlike technical rock or ice climbing where protection systems prevent falls, snow travel often involves moderate slopes where mountaineers move unroped — and a single slip can develop into a sliding fall that accelerates rapidly.

    The statistics are sobering. American Alpine Club accident data shows uncontrolled slides as a leading cause of mountaineering fatalities in North America, particularly on Mount Hood, Mount Rainier, Mount Shasta, and similar moderate-snow objectives. Most of these incidents involve climbers who either lacked self-arrest training or were unable to execute the technique fast enough when the slide began.

    The technique itself is straightforward. The challenge is reaction time. On a 30-40 degree snow slope, a falling body can reach 30+ mph within 3-4 seconds. Self-arrest must be initiated within the first 1-2 seconds of a fall to be reliable — which is why repetitive practice to build muscle memory matters more than understanding the theory.

    ā—† Why Practice Matters More Than Theory

    A mountaineer who has practiced self-arrest 100 times over 2-3 days reacts in 1-2 seconds. A mountaineer who has only read about the technique reacts in 4-6 seconds — typically too slow to arrest before reaching dangerous speeds. The difference is muscle memory built through repetition, not knowledge. This is why no amount of reading replaces a formal course.

    Equipment You Need

    Self-arrest requires specific equipment. The ice axe is the primary tool, but secondary equipment affects both training safety and real-world effectiveness.

    The Ice Axe

    You need a mountaineering walking axe — not an ice climbing tool. The distinction matters. Walking axes have straight or slightly curved shafts 50-70cm long with a relatively flat pick angle suitable for dragging across snow during arrest. Ice climbing tools (45-55cm with aggressively curved shafts and steep pick angles) are designed for swinging into vertical ice and perform poorly in self-arrest. Confirm you’re buying a “general mountaineering axe” or “walking axe” rather than an “ice tool” or “technical climbing axe.”

    Axe length depends on your height. The traditional method is to hold the axe head with arm hanging at your side — the spike should reach the ankle bone. Modern mountaineering tends toward slightly shorter axes (60-65cm for most adults) than the traditional sizing suggested.

    The Head Components

    The head of the axe contains four functional parts: the pick (the pointed end, used for arrest and traction), the adze (the flat shovel-like end, used for chopping steps and platforms), the shaft (the long handle), and the spike (the metal point at the bottom of the shaft, used for walking and self-belay). Understanding which part does what is essential for proper grip during arrest.

    Boots and Crampons

    Mountaineering boots with stiff soles are required for crampon use and provide secondary friction during arrest via boot toes pressed into snow. Crampons should be removed for self-arrest practice on training slopes — the points can catch and cause violent rotation. For real-world arrest with crampons on, technique requires raising your knees to keep crampons off the snow during the arrest.

    Helmet

    A helmet is mandatory for self-arrest practice. Falls during training are common, and the ice axe pick is a sharp implement that can cause head injuries if it strikes you during a botched arrest attempt.

    Clothing

    Long-sleeved layers protect against snow burn during practice. Waterproof pants prevent getting soaked during repetitive falls. Gloves with reasonable grip on the axe head are important — bare hands stick to cold metal and can be injured during practice.

    Alpine mountain landscape representing the snow terrain where self-arrest skills become essential
    Self-arrest becomes essential on moderate snow slopes (20-45 degrees) where mountaineers travel unroped. These are the conditions where most slip-and-slide incidents occur — gentle enough to feel safe, steep enough that an uncontrolled slide develops dangerous speed within seconds.

    The 6-Step Technique

    The standard self-arrest sequence works from any falling position. The fundamental steps are the same; what varies is the starting position and the rotation required to reach the standard arrest position.

    Step 1 of 6

    Grip the Ice Axe Correctly

    Foundation: Wrong grip = no arrest possible

    Hold the ice axe with your dominant hand wrapping around the head. The adze (flat side) faces forward (away from you); the pick faces backward (toward you); the spike points down toward your feet. Your thumb wraps under the adze; fingers grip the pick side. This is sometimes called the “self-arrest grip” — distinct from the “walking grip” used for general travel.

    The grip enables the pick to engage the snow when you roll over for arrest. With a reversed grip (adze facing back, pick facing forward), the arrest is impossible — the pick can’t engage. Practice the grip until it’s automatic. The transition from walking grip to arrest grip must happen reflexively during a fall.

    Many mountaineers carry the axe in the walking grip during normal travel and switch to the arrest grip only when entering steep terrain. This transition itself is a skill — practice it on flat ground before applying on slopes.

    Step 2 of 6

    Identify Your Fall Position

    Sequence: Recognition determines what comes next

    The moment you start sliding, identify which of four positions you’re in: head-first on stomach, head-first on back, feet-first on back, or feet-first on stomach. Each position requires a slightly different sequence to reach the standard arrest position (face-down, feet-down, axe across chest with pick engaged).

    The “feet-first on stomach” position is the easiest — you’re already partially in arrest position and only need to drive the pick into the snow. The “head-first on back” position is the hardest — you must rotate 180 degrees to reach standard arrest while gaining speed throughout the rotation.

    Recognition happens in milliseconds. This is why practice matters: trained mountaineers move directly to the appropriate recovery sequence based on muscle memory, while untrained climbers waste 2-3 critical seconds processing what’s happening.

    Step 3 of 6

    Roll Toward the Pick

    Direction: Wrong roll causes injury, not arrest

    If you’re on your back, roll toward the side where you hold the axe — never the opposite direction. Rolling away from the pick would drag it across your arm or face, potentially causing serious injury. The roll is initiated with hip drive and arm position; your dominant arm (holding the axe head) pulls toward your chest while your hips rotate.

    For head-first falls, the rolling motion is the foundation of getting into position. A head-first slide must be rotated to feet-first before arrest is reliable — attempting to arrest head-first risks face injury and provides much less stopping power. The rotation uses arm position and body twist combined with the friction created by the partially-engaged pick.

    The roll direction depends on which hand holds the axe. Right-handed mountaineers typically hold the axe in the right hand and roll right. Left-handed mountaineers do the opposite. Confirm which hand you’ll hold the axe in during the planning stage of any climb — this isn’t a decision to make mid-fall.

    Step 4 of 6

    Drive the Pick into the Snow

    Power: Shoulder pressure, not hand pressure

    Position the axe diagonally across your chest with the head near your shoulder and the spike near your hip. Drive the pick into the snow surface using shoulder and chest pressure — not just hand force. The point of contact should be your shoulder pressing down on the axe head, with your full body weight transferring through the shoulder into the pick.

    Hand grip alone provides nowhere near enough force to arrest a fall at speed. Your hand stabilizes the axe; your shoulder and chest provide the pressure. This is counterintuitive — beginners often try to “push” the axe down with their hands, which gives them about 10% of the force they could apply with proper body positioning.

    The pick enters the snow at approximately a 60-70 degree angle relative to the slope surface. Too shallow and the pick skips across the snow without biting. Too steep and the pick digs straight down without creating the friction needed to slow you.

    Step 5 of 6

    Raise Your Knees and Dig In

    Stability: Boots and knees create secondary friction

    Bend your knees and press the front of your boots into the snow. The boot toes provide secondary friction — supplementing but not replacing the pick. With knees bent and toes pressed in, you create three points of contact with the slope: the axe pick (primary), and two boot toes (secondary).

    If you’re wearing crampons, raise your knees enough to keep the crampon points off the snow during the arrest. Crampon points catching during a slide cause violent cartwheeling — the climber’s body rotates around the catch point, often resulting in serious injury or loss of axe control. This is the single most dangerous mistake during self-arrest with crampons.

    Practice both with and without crampons. The knee-raise required to keep crampons off is significant and counterintuitive — many trained mountaineers fail this on first crampon attempts because the muscle memory is for “press toes in” rather than “raise knees and press boot front in.”

    Step 6 of 6

    Maintain the Arrest Position

    Discipline: Premature release causes continued slide

    Hold the arrest position with full body pressure on the axe head until you stop completely. Even after slowing, maintain pressure — the slope may have variable hardness, and partial release can cause continued sliding. The classic mistake is feeling the deceleration and prematurely lifting body weight off the axe before friction has fully stopped you.

    Once stopped, secure the axe with both hands before attempting to stand. Many secondary falls occur immediately after a successful arrest because the climber attempts to stand or move before fully stabilizing. From a stopped self-arrest position, you must: (1) Confirm you’ve stopped; (2) Both hands on axe; (3) Test the snow surface for stability; (4) Slowly move to a controlled stance.

    If you’ve slid into terrain different from where you fell (different slope angle, different snow consistency, nearby crevasse or rock), reassess the entire situation before moving. The arrest stopped you; the next decision determines whether you stay safe.

    Mountain ranges at sunset representing the alpine terrain where self-arrest training applies
    Self-arrest training conditions matter as much as the technique itself. Practice slopes need to be steep enough to generate real sliding, soft enough that the pick engages well, and have safe runouts (no rocks, cliffs, or crevasses). Find a qualified course at a suitable venue — Mount Hood’s Palmer Snowfield is one of the most popular training locations in North America.

    The Four Falling Positions

    Self-arrest must work from any starting position because real falls happen unpredictably. The four positions are defined by two variables: head-first vs feet-first, and stomach-down vs back-down. Each requires a different recovery sequence.

    PositionDifficultyRecovery SequenceWhy It’s Hard
    Feet-first on stomachā˜… EasiestDrive pick → bend knees → holdAlready in arrest orientation
    Feet-first on backā˜…ā˜… ModerateRoll toward axe → drive pick → bend knees → holdRequires 180° roll mid-slide
    Head-first on stomachā˜…ā˜…ā˜… HardPick out perpendicular to slope → rotate body 180° around pick → drive pick → bend kneesRequires rotation while accelerating
    Head-first on backā˜…ā˜…ā˜…ā˜… HardestRoll to head-first stomach → rotate 180° around pick → drive pick → bend kneesTwo-step rotation while accelerating

    The Head-First Rotation

    Head-first falls are the hardest scenarios. The recovery uses a technique called the “pivot arrest” — instead of trying to drag the pick from a head-first orientation, you reach the axe out to the side perpendicular to the slope, plant the pick firmly, and use it as a pivot point to rotate your body 180 degrees so your feet point downhill. After the rotation completes, drive the pick fully and complete the standard arrest sequence.

    This rotation technique is the most counterintuitive part of self-arrest training. The instinct is to put the axe straight ahead (in the direction of slide), but that doesn’t create the leverage needed to rotate. Reaching out perpendicular creates a fixed point that the body rotates around.

    ⚠ Practice in This Order

    Standard course curriculum practices the four positions in difficulty order: feet-first stomach → feet-first back → head-first stomach → head-first back. Skipping ahead before mastering each level builds bad muscle memory. The head-first techniques specifically should not be practiced unsupervised — falls from a head-first orientation can cause neck injuries even on training slopes.

    How to Learn Self-Arrest

    Self-arrest cannot be safely learned from text, videos, or unsupervised practice. The progression below outlines the standard learning path used by reputable mountaineering programs.

    Step 1: Take a Formal Course

    The starting point is a 1-3 day mountaineering skills course that includes supervised self-arrest practice. Reputable providers include American Alpine Institute (Washington, Colorado, Alaska), NOLS (multiple locations), RMI Expeditions (Mount Rainier), Mountain Madness (Pacific Northwest), Northwest Alpine Guides (Cascades), and similar programs at glacier-accessible mountains worldwide.

    Course costs range from $300 (1-day Mount Hood basic course) to $1,200+ (3-day comprehensive snow skills). Look for AMGA-certified instructors and venues with appropriate practice terrain — gradual snow slopes with safe runouts.

    Step 2: Repetitive Practice in the Course

    During the course, expect to practice each falling position 15-30 times. Yes, that’s a lot of falls. The repetition builds the reflexive muscle memory that distinguishes trained mountaineers from beginners during real falls. Don’t shortcut this — the value of the course is in the volume of practice, not just the information delivered.

    Step 3: Refresher Before Each Season

    Self-arrest is a perishable skill. Mountaineers who practiced in spring 2024 are not fully proficient by spring 2026 without practice in between. A half-day refresher before each climbing season — typically conducted on a local snowfield with a partner — maintains the skill at deployable level. The refresher can be self-directed once initial proficiency is established.

    Step 4: Practice on Each Trip

    On any mountaineering trip with snow travel, conduct a brief self-arrest practice session in the first day’s snow contact. Five to ten falls on local snow conditions calibrates your reactions to the specific snow consistency of that trip — firn snow, neve, wet spring snow, and packed powder all require slightly different technique.

    Common Mistakes

    Most self-arrest failures result from a small number of recurring mistakes. Awareness of these reduces the chance of repeating them.

    MistakeWhat HappensThe Fix
    Wrong grip on axePick can’t engage snow when neededPractice arrest grip until automatic
    Hand pressure instead of shoulder pressureInsufficient force to slow slideDrive with shoulder; hand stabilizes only
    Rolling wrong directionPick drags across arm/faceAlways roll toward your axe-hand side
    Crampon points engaged during arrestCatches and cartwheels climberRaise knees; keep crampons off snow
    Attempting arrest head-firstFace injury, weak arrest forceRotate to feet-first first using pivot
    Premature release after slowingSlide continues; secondary fallHold pressure until fully stopped
    Pick angle too shallowPick skips across snow surface60-70° angle to slope; check during practice
    Standing up before stableSecondary fall after successful arrestConfirm stop, both hands on axe, test snow
    Snow-covered mountain range at dawn representing winter alpine conditions where self-arrest matters most
    Snow conditions vary enormously across alpine terrain. Firn snow (hard, granular, compressed) accepts pick engagement well. Wet spring corn snow grips easily. Powder is harder to arrest in. Hard ice resists pick penetration substantially. Calibrate your technique to the snow you’re actually traveling on.

    When Self-Arrest Won’t Work

    Self-arrest has limits. Understanding when the technique becomes unreliable is as important as knowing how to execute it.

    Above 45 Degree Slopes

    Self-arrest reliability degrades rapidly above approximately 45 degrees of slope angle. On gentle slopes (20-30 degrees), self-arrest from any falling position is highly reliable for trained mountaineers. On moderate slopes (30-45 degrees), self-arrest remains feasible but requires faster reactions. Above 45 degrees, self-arrest becomes unreliable and mountaineers should be using protection systems (belays, fixed lines, running protection) rather than depending on arrest as primary safety.

    On Hard Ice

    The pick of a standard mountaineering walking axe penetrates softer firn snow well but skips on water ice. Hard ice surfaces and refrozen snow that has lost surface texture (sometimes called “boilerplate”) resist pick engagement. Self-arrest on these surfaces is unreliable even on moderate slopes. Mountaineers traveling icy terrain should use crampons aggressively and either rope up or use protection systems.

    At High Speeds

    Self-arrest must be initiated within the first 1-2 seconds of a fall. After 3-5 seconds of acceleration on moderate slopes, the body reaches speeds (25-35 mph) where pick engagement may not generate enough friction to overcome momentum. Once you’re moving fast, the arrest becomes less about technique and more about luck.

    With Heavy Pack Loads

    Heavy packs (50+ lbs) significantly change the body mechanics of self-arrest. The center of mass shifts, the rotation required for head-first recovery becomes harder, and the pack may bunch into the back of the head during arrest. Mountaineers carrying heavy loads should treat self-arrest as marginal protection and use rope systems on any terrain where falls are possible.

    On Exposed Terrain Above Cliffs

    Self-arrest stops a slide, but it doesn’t reverse the slide that already happened. On terrain where the runout below contains cliffs, crevasses, or rocks, even successful self-arrest may not prevent serious consequences if you slide far enough before stopping. On exposed terrain, mountaineers should either avoid the route entirely or use protection systems that prevent the initial fall.

    ⚠ The Safety Hierarchy

    Self-arrest is the third line of defense, not the first. The mountaineering safety hierarchy is: (1) Don’t fall (good technique, conservative decisions); (2) If you fall, have protection (rope, anchors, running protection); (3) If protection fails, self-arrest. Climbers who treat self-arrest as primary safety are operating below standard mountaineering practice.

    Frequently Asked Questions

    What is an ice axe self-arrest?

    An ice axe self-arrest is the technique used to stop an uncontrolled slide on a snow slope using an ice axe. The technique involves rotating into a face-down position with the axe head near the shoulder, driving the pick into the snow surface, and using body weight to apply maximum pressure on the axe until the slide stops. Self-arrest is considered the single most important mountaineering safety skill because uncontrolled slides on snow are among the most common causes of mountaineering injury and death.

    How long does it take to learn self-arrest?

    Basic self-arrest from the standard feet-first-on-back position can be learned in 2-3 hours of focused practice. Full proficiency across all four falling positions requires 1-2 full days of repetitive practice with a qualified instructor. Most mountaineering training programs include 1-2 days of self-arrest drills as a core part of their curriculum. Practice should occur on slopes with safe runouts that allow falls without serious consequences.

    Can you self-arrest on hard ice?

    Self-arrest is substantially more difficult on hard ice than on snow and may not be possible above certain steepness thresholds. The pick of a standard mountaineering walking axe penetrates softer firn snow well but skips on water ice. On hard ice or steep snow above about 45 degrees, self-arrest reliability drops dramatically. Mountaineers traveling on icy terrain typically rope up and use running protection rather than depending solely on self-arrest.

    Do you need crampons to self-arrest?

    Crampons are not used in the self-arrest technique itself — pressing crampon points into snow during a slide can cause the crampons to catch and cartwheel you violently. Standard self-arrest technique uses the axe pick as primary arrest force, with bent knees and boot toes providing secondary friction. Crampons remain on for general travel but should not be actively used during the arrest. Practice self-arrest both with and without crampons to develop the muscle memory for real-world scenarios.

    What is the difference between an ice axe and an ice tool?

    An ice axe (walking axe, mountaineering axe) is the 50-70cm long-handled tool used for general mountaineering, glacier travel, and snow climbing. Ice tools (or ice climbing axes) are shorter (45-55cm) with aggressively curved shafts designed specifically for vertical ice climbing. For self-arrest training and general mountaineering, you need an ice axe — not an ice tool. Ice tools do not perform self-arrest reliably because their curved shafts and aggressive pick angles are optimized for swinging into ice rather than dragging across snow.

    When should you wear a leash on an ice axe?

    Most modern mountaineering training discourages leashes on the ice axe because they create entanglement risk during a fall and can pull the axe across your face during arrest. Some traditional climbers still use wrist leashes for security. The current consensus from American Alpine Institute, AMGA, and major mountaineering programs is that leashless travel is preferred for general mountaineering, with the axe held loosely and dropped if needed during a fall. Practice both leashed and leashless to understand the tradeoffs.

    How steep can you self-arrest on?

    Self-arrest reliability degrades rapidly above approximately 45 degrees of slope angle. On gentle slopes (20-30 degrees), self-arrest from any falling position is highly reliable for trained mountaineers. On moderate slopes (30-45 degrees), self-arrest remains feasible but requires faster reactions. Above 45 degrees, self-arrest becomes unreliable and mountaineers should be using protection systems (belays, fixed lines, running protection). On 50-degree-plus terrain, self-arrest should be considered a backup rather than a primary safety system.

    Should I take a mountaineering course before attempting self-arrest?

    Yes. Self-arrest cannot be learned safely from videos or text alone. Without proper instruction, common mistakes including improper grip, wrong roll direction, and crampon catches can cause serious injury during practice. American Alpine Institute, NOLS, Mountain Madness, RMI Expeditions, and most regional mountaineering programs offer dedicated snow skills courses that include 1-2 days of supervised self-arrest practice. Course costs range from $300-1,200 depending on duration and location. This investment is the single most cost-effective safety expenditure in mountaineering.

    Methodology + Editorial Standards

    How This Guide Was Built

    Author Credentials

    Dawson Ludlow is Wilderness First Aid certified with first-hand mountaineering experience on Mount Kilimanjaro via the Lemosho Route (2024, African Walking Company) and Mount Hood via the South Side Hogsback route (May 2026, Timberline Mountain Guides). Self-arrest training was conducted as part of the Mount Hood expedition specifically — one full day on the Palmer Snowfield with AMGA-certified instructors.

    Source Categories

    This guide cross-references five primary source categories: (1) Dawson Ludlow’s first-hand training at Mount Hood (May 2026) and basic snow technique briefings at Kilimanjaro (2024); (2) Established mountaineering instruction programs including American Alpine Institute, NOLS Wilderness Medicine, RMI Expeditions, and Mountain Madness curricula; (3) Published mountaineering reference texts including “Mountaineering: The Freedom of the Hills” (9th edition, The Mountaineers Books) and “Glacier Travel and Crevasse Rescue” by Andy Selters; (4) AMGA (American Mountain Guides Association) technical standards for snow climbing skills; (5) Internal Global Summit Guide research cross-referenced with our existing mountaineering content.

    Editorial Approach

    This guide focuses on technique fundamentals rather than advanced edge cases. The goal is to inform climbers preparing for or supplementing formal courses — not to replace courses. Where technique varies between teaching programs (leash use, specific grip variations), we describe the modern consensus position while noting alternatives where relevant.

    Update Cycle

    This guide is reviewed annually. The next scheduled review is June 2027. Self-arrest technique itself is stable, but equipment recommendations and course availability change. Confirm current course options and equipment models within weeks of training.

    About The Author

    DL

    Dawson Ludlow

    Safety & Mountaineering Contributor Ā· Wilderness First Aid Certified Ā· Edited by Travis Ludlow

    Dawson Ludlow covers mountaineering safety and technical skills for Global Summit Guide. First-hand experience includes Mount Kilimanjaro via the Lemosho Route (2024) with African Walking Company and Mount Hood via the South Side Hogsback route (May 2026) with Timberline Mountain Guides. Self-arrest training was conducted as part of the Mount Hood expedition with AMGA-certified instructors.

    Wilderness First Aid certified. The Global Summit Guide editorial team includes Travis Ludlow (Editor, first-hand experience on Pico de Orizaba, IztaccĆ­huatl, Mount Fuji, and Ludlow family Patagonia January 2025) and Walker Ludlow (gear coverage).

    Ready to Build Your Skills?

    The next steps after reading this guide: book a 1-3 day mountaineering skills course with a reputable provider, practice the falling positions in the order outlined, and complete a refresher before each climbing season. Self-arrest is one skill in a broader mountaineering safety toolkit — explore our growing skills cluster for more.

    Crampons Buyer’s Guide 8000m Peaks Ranked Meet the Team

    Ice Axe Self-Arrest: The Most Critical Mountaineering Skill Ā· Skills Cluster Build #1 Ā· v4.0 build Ā· Last verified June 24, 2026 Ā· Dawson Ludlow Author Ā· Travis Ludlow Editor Ā· 4 schemas + 4 images Ā· FIRST-HAND framing (Mount Hood May 2026 + Kilimanjaro 2024)

    Was this helpful?

    Yes
    No
    Thanks for your feedback!
  • What Mountain Was YourĀ Biggest Mistake?

    Snow-covered mountain ridge at dawn — pre-dawn starts are the answer to most summer mountain mistakes
    šŸ’¬ Reader Stories Ā· Tier A Engagement Ā· Wasatch Wisdom

    What Mountain Was Your Biggest Mistake?

    I made a serious mistake on a Wasatch peak a few years back. Here’s what happened, what I learned, and the question I want you to answer in the comments.

    It was 1:47pm when I realized I had made a serious mistake.

    The sky over the Wasatch had been clear blue all morning — and then, in the span of about twenty minutes, it wasn’t anymore. Cumulus clouds piled up over the summit ridge while I was still a quarter mile below it, and I could already feel the static in the air. The kind of static that means lightning is building somewhere I couldn’t yet see.

    I had three choices. Turn around and descend. Push hard for the summit and gamble on outrunning the storm. Find shelter and wait it out.

    I made the wrong choice.

    The Mistake

    I started Mount Timpanogos from the Aspen Grove trailhead that morning at 7am. The standard advice for Timp in summer is a 4am or 5am start — get to the summit by 10am, off the ridge by noon. I knew this rule. Every Utah hiker knows this rule. But the weather forecast looked clean, my friend and I had been talking about climbing Timp for months, and we figured a 7am start would still get us to the top by 11am or noon.

    We were wrong about the time. The Aspen Grove route is about 15 miles round trip with nearly 5,000 feet of gain — and we were both more tired than we expected. By 1pm we were still half a mile below the summit ridge.

    That’s when the clouds started building.

    Alpine landscape with clouds building over a summit ridge — the visual signal of an approaching storm
    Cumulus clouds over a Wasatch summit ridge are not “maybe” thunderstorms. They are “definitely, within the next hour” thunderstorms. The discipline most Utah climbers eventually learn is to treat a single cumulus cloud over the ridge as a turnaround signal — not a “let me push another 15 minutes and see” signal.

    What Summit Fever Sounds Like in Your Head

    Here’s the part I want to be honest about. When you’re 500 feet below the summit of a peak you’ve been planning for months, your brain stops thinking clearly. It starts running internal arguments that sound reasonable but aren’t:

    “We’re so close — just push to the top.”

    “The storm might not actually break here.”

    “We can outrun it on the descent.”

    “This far up, turning around feels worse than the risk.”

    None of these arguments are real arguments. They are summit fever — the cognitive bias that makes climbers throw away good judgment because they’ve invested time and effort and want the reward. Summit fever has killed more people than any other psychological factor in mountaineering. It killed climbers on Everest in 1996. It kills hikers in the Wasatch every summer. And it almost cost me that day.

    We pushed on. We made the summit at 1:30pm. By 1:47pm we were on the descent and the first real thunder cracked maybe two ridges to our north.

    ⚠ The Storm — What Happened Next

    We got caught above treeline on the exposed ridge for about 25 minutes. The storm itself was brief but intense — hail, wind, lightning striking somewhere I couldn’t see but could feel in the static and hear in the thunder cracks 4-7 seconds away. We hunkered down behind a cluster of boulders, crouched low with feet together, kept distance from each other. The storm moved through. We descended fast. We got down safely.

    It could have ended very differently. The standard fatality scenario in the Wasatch is one I narrowly avoided. People die on these peaks every summer doing exactly what I did.

    What I Should Have Done

    Lesson 1

    Started Three Hours Earlier

    A 4am start with headlamps for the first hour would have put us on the summit at 9am — well before the cloud buildup began. Headlamps are uncomfortable. Storms are dangerous. The trade is obvious in retrospect.

    Lesson 2

    Turned Around at the First Cloud

    The Wasatch summer thunderstorm cycle is one of the most predictable weather patterns in North American mountaineering. When cumulus clouds appear over the ridge, you have maybe 60-90 minutes before the storm breaks. Treat the first cloud as a hard turnaround signal — not a “let me see how the next 20 minutes goes” signal.

    Lesson 3

    Recognized Summit Fever as a Bias

    The “we’re so close” argument is the most dangerous sentence in mountaineering. The mountain will be there next weekend. The mountain will be there next year. There is no mountain worth dying for, and there is no summit worth crossing the line where a 25-minute thunderstorm above treeline could end the climb permanently.

    Lesson 4

    Built in a Hard Turnaround Time

    The discipline I now apply is to set a turnaround time before the climb starts. If we haven’t summited by 11am on a Wasatch peak, we turn around no matter how close we are. Hard rule. No exceptions for “I feel fine” or “the weather looks ok.” Turnaround times work because they remove the decision from the moment when summit fever is loudest. The decision was made hours earlier when you were thinking clearly.

    Mountain ranges at sunset where time discipline determines whether the climb ended safely or did not
    Pre-dawn starts mean watching the sunrise from a high vantage instead of from below. The discipline trade-off in Wasatch climbing is a few hours of sleep against the lightning that builds three to four hours later. The trade favors the early starters every single time.
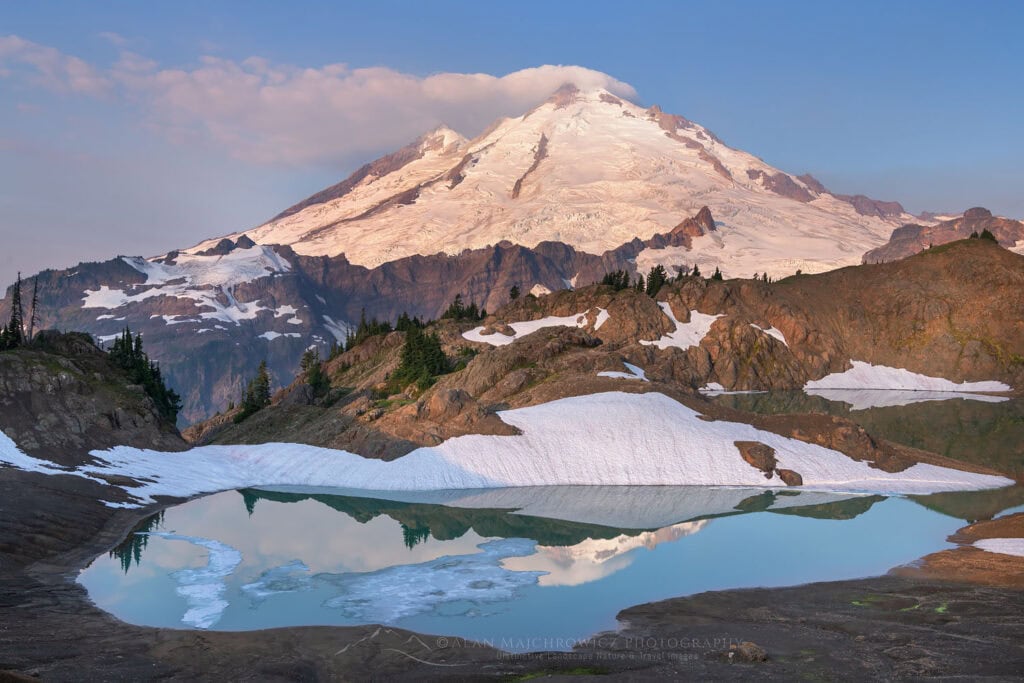
    Five Common Mountain Mistakes I See Other Climbers Making

    My Timpanogos mistake fits a pattern. Talk to enough climbers and you start hearing the same handful of mistakes repeated across different mountains, different conditions, and different experience levels. Here are five I’ve seen most often:

    1. Starting Too Late

    The universal beginner mistake. Especially in the Wasatch, the Colorado Rockies, and any peak with predictable afternoon weather. The fix is the cheapest one in mountaineering: set the alarm earlier.

    2. Ignoring the First Weather Signal

    The first cumulus cloud. The first wind shift. The first temperature drop. Experienced climbers treat early signals as hard data. Newer climbers treat them as “we’ll see how this develops.” The data wins more often than the wait-and-see approach.

    3. Underestimating Water and Food

    Most people carry about 30% less water than they actually need. Bonking at 12,000 feet on a Wasatch peak turns a manageable climb into a desperate descent. Carry more than you think you need. Drink more than you think you should.

    4. Going Without a Map and Compass

    Phones run out of battery. GPS apps lose signal in canyon shadows. Smartwatch trails disappear behind a cracked screen. A paper map and a compass weigh almost nothing and don’t fail. Carry both. Know how to use them.

    5. Climbing With the Wrong Partner

    The partner who pushes when you should turn around. The partner whose ego won’t accept a retreat. The partner whose fitness level is so different from yours that one of you suffers the whole way up. Climbing partners matter more than gear, more than fitness, sometimes more than experience. Choose carefully.

    Climber with crampons and ice axe in alpine terrain where preparation and discipline determine the outcome
    Most mountain mistakes are not gear mistakes — they are judgment mistakes. The five common patterns above repeat across every range, every difficulty level, and every experience tier. Climbers who learn to recognize their own patterns improve faster than climbers who blame their equipment.

    A Word From Dawson

    I asked my brother Dawson (the Wilderness First Aid certified one in our family, with first-hand Kilimanjaro Lemosho 2024 and Mount Hood 2026) what his biggest mountain mistake was. His answer:

    — Dawson Ludlow, on Kilimanjaro

    “My mistake on Kilimanjaro was pushing through mild AMS symptoms on Day 4 instead of telling the guides. I had a headache and some nausea but figured I could tough it out. I summited, but I felt worse than I had to for the next two days. The smarter move would have been a quick word to the guide, an extra dose of Diamox earlier in the day, and slower pacing on the next climb segment. AMS is a system you negotiate with, not a system you tough out.”

    Two very different mistakes — mine was time and judgment, his was communication and ego. Both classic. Both fixable. Both stories thousands of other climbers will recognize from their own climbs.

    Now — What’s Your Story?

    What was your biggest mountain mistake? The peak that nearly broke you. The bad call you got away with. The lesson you learned the hard way.

    Drop it in the comments below. Specific is better than general. Honest is better than polished. The best comments here will become an entire follow-up post in two weeks — and we want yours in it.

    šŸ“ Tell us: the mountain, what happened, what you should have done, and what you learned. Two paragraphs is plenty.

    Common Questions

    What is the biggest mistake beginners make on mountains?

    The single biggest mistake beginners make is starting too late. Afternoon weather windows close fast on alpine peaks — Wasatch summer thunderstorms typically build between noon and 2pm, and getting caught above treeline with lightning building is the most dangerous situation a Utah hiker can be in. Pre-dawn starts solve most of this. The second biggest mistake is summit fever: continuing toward the summit when conditions clearly say turn around. Mountains will be there next weekend. Climbers who develop the discipline to turn around live longer than climbers who do not.

    Why are Utah Wasatch peaks dangerous in summer afternoons?

    Utah Wasatch peaks are dangerous in summer afternoons because of the predictable thunderstorm cycle. Warm air rises from the valley floor through the morning hours. By late morning, cumulus clouds start building over the Wasatch crest. Between noon and 2pm those cumulus clouds become thunderstorms with lightning, hail, and sometimes brief but intense rainfall. Hikers caught above treeline (around 10,000 feet in the Wasatch) face direct lightning exposure with limited shelter. The standard discipline is summit by 10am, off the ridge by noon. Climbers who ignore this rule sometimes get away with it. Sometimes they do not.

    How early should I start a Wasatch peak in summer?

    Start a Wasatch peak between 4am and 6am in summer depending on the route length. Mount Timpanogos via Aspen Grove (about 15 miles round trip with 4,900 feet of gain) demands a 4am-5am start to summit by 10am. Mount Nebo (about 8 miles with 3,500 feet of gain via North Peak) can start at 5am-6am. Pfeifferhorn from White Pine trailhead (about 10 miles with 4,000 feet of gain) needs a 5am start. The principle is consistent: be off the exposed ridge before noon. Headlamps for the first hour of the climb are a small inconvenience compared to the alternative.

    What should I do if I get caught in a thunderstorm on a mountain?

    If you get caught in a thunderstorm above treeline, immediately descend below ridgelines and summits. Lightning strikes the highest point in the area — your job is to no longer be that point. Find a low spot if possible. Crouch low with feet together to minimize ground contact in case of a nearby strike. Stay away from metal objects (trekking poles, ice axes, climbing gear). Do not shelter under isolated trees, in shallow caves, or against rock walls. Spread out from your group so that a single strike cannot incapacitate everyone. Wait for the storm to pass — most Wasatch summer thunderstorms move through in 20-40 minutes — then descend immediately. Do not attempt to resume the climb.

    About The Author

    Travis Ludlow

    Editor, Global Summit Guide Ā· Nephi, Utah Ā· First-hand: Pico de Orizaba 5,636m + IztaccĆ­huatl 5,230m + Utah-Wasatch alpine

    Travis Ludlow edits Global Summit Guide from Nephi, Utah, where the Wasatch and surrounding ranges have provided most of his first-hand climbing education — including the mistake described in this post. He has first-hand mountaineering experience on Pico de Orizaba (Mexico’s highest peak, 5,636m), IztaccĆ­huatl (5,230m), and Utah-Wasatch alpine rock and snow climbing. The editorial team includes Dawson Ludlow (Wilderness First Aid certified, Kilimanjaro Lemosho 2024 first-hand, Mount Hood South Side 2026 first-hand) and Walker Ludlow (gear reviewer), plus the Ludlow family Torres del Paine W Trek east-to-west 2025 first-hand Patagonia coverage.

    Related Reading

    What Mountain Was Your Biggest Mistake? Ā· Tier A engagement post Ā· v4.0 build Ā· Published July 1, 2026 Ā· Travis Ludlow, Editor Ā· First-person voice with reader comment invitation Ā· Plan a follow-up post in 2 weeks featuring the best reader stories from this comment thread

    Was this helpful?

    Yes
    No
    Thanks for your feedback!
  • How to Use Crampons: Fit, Walk & Climb Safely

    Mountaineering crampons fitted to boots on a glacier
    Mountaineering skills Ā· Snow & ice travel Ā· 2026

    How to Use Crampons: Fit, Walk & Climb Safely

    Crampons add traction on firm snow and ice, but they also add sharp points that can catch, trip or injure you. Learn how to decide when they are appropriate, verify boot compatibility, fit them correctly, move with flat-footing and front-pointing techniques, and recognize when terrain calls for formal instruction rather than self-teaching.

    First-hand: Orizaba & IztaccĆ­huatl First-hand: Mount Hood BMC + Petzl cross-check AAC accident context
    Fit firstBoot and binding compatibility comes before technique
    Flat-footUse all downward points when terrain permits
    HybridBlend flat-footing and front points during transitions
    Front-pointFor steeper terrain that demands it
    PracticeLearn on low-consequence terrain before serious slopes
    The direct answer

    How do you use crampons correctly?

    Start by fitting a crampon model that is genuinely compatible with your exact boot. Put crampons on before you are committed to slippery terrain, secure every binding and strap exactly as the manufacturer specifies, then walk with a slightly wider stance so the points clear your opposite leg and clothing.

    On moderate snow and ice, the efficient goal is usually to place as many downward points as possible in contact with the surface. As terrain steepens, climbers may transition through hybrid movement toward front-pointing. The exact transition is determined by snow or ice condition, boot/crampon design, slope shape, balance and consequences of a fall—not by one universal angle chart.

    01 Ā· Decision first

    Do You Need Crampons Yet?

    The best trigger is not a fixed slope angle. It is the combination of surface hardness, boot traction, terrain, runout and the consequences of a slip.

    Use a consequence-based test.

    Ask: Is the surface frozen, compacted or icy? Is normal boot edging becoming unreliable? If I slip here, could I accelerate into rocks, cliffs, crevasses or a long uncontrolled slide? If the answer is yes, stop in a secure place and add the traction system appropriate to the terrain before you become committed.

    Microspikes can be useful on low-angle icy trails, but they are not a substitute for mountaineering crampons on consequential snow or glacier terrain. Conversely, wearing full crampons on benign dirt or rock can create a new trip hazard.

    02 Ā· Compatibility

    Your Boots Determine the Binding System

    The traditional B0–B3 / C1–C3 shorthand is still useful in some markets, but modern manufacturers increasingly describe compatibility through sole stiffness, heel/toe welts and specific binding systems. Always confirm the actual boot and crampon model together.

    Boot / binding featureWhat it usually supportsWhat to verify
    No heel or toe weltFlexible basket / strap-style bindings on compatible stiff-enough footwear.Manufacturer-approved sole stiffness, boot shape, heel retention and binding fit.
    Heel welt onlyHybrid systems with a front basket and rear lever.Heel lever engagement, toe-basket shape, sole stiffness and center-bar setup.
    Toe + heel weltsAutomatic / step-in systems using front and rear bails or levers.Exact welt geometry, bail contact, lever tension and manufacturer compatibility.
    Very flexible hiking shoeOften unsuitable for traditional mountaineering crampons.Do not assume a strap makes every shoe compatible; flex can cause poor retention.
    Ski / specialty bootModel-specific systems exist.Use the crampon maker’s approved binding and technical notice for that boot type.

    Why the old B/C chart is not enough by itself

    The British Mountaineering Council still uses B1/B2/B3 and C1/C2/C3 as a practical compatibility framework, but Petzl’s current system is organized around actual toe and heel interfaces such as FLEXLOCK and LEVERLOCK variants. The safe rule is simple: verify the exact boot–crampon combination, not just the label.

    Crampons attached to mountaineering boots while walking on ice
    The crampon and boot are one system

    A Perfectly Good Crampon Can Be Unsafe on the Wrong Boot.

    Retention depends on boot stiffness, boot shape, welts, binding geometry and correct adjustment. Fit the pair at home and verify the manufacturer’s technical notice before you trust it on consequential terrain.

    03 Ā· Anatomy

    Know Which Parts Are Holding You to the Mountain

    Different designs vary, but most general mountaineering crampons share a front section, rear section, linking system, attachment system, points and anti-snow plates.

    Traction

    Downward Points

    These are the workhorses of flat-foot movement. Good technique keeps multiple points engaged instead of balancing on an edge.

    Steep terrain

    Front Points

    Horizontal or vertical front points bite into steeper snow and ice when flat-footing is no longer practical.

    Adjustment

    Linking Bar / Cord

    Sets length and may influence flex. Modern lightweight systems can use cords rather than traditional steel bars.

    Retention

    Toe Interface

    May be a flexible basket or metal bail depending on the boot and crampon system.

    Retention

    Heel Interface

    May be a basket or lever. Lever tension should be secure without forcing an incompatible fit.

    Snow management

    Anti-Snow Plates

    Help reduce snow balling beneath the frame. Inspect them before use and keep them installed when the manufacturer supplies them.

    Strap-on mountaineering crampon showing frame, points and binding
    Example strap-on crampon. Image via Wikimedia Commons; see the source file page for licensing and attribution.
    04 Ā· Fit before the mountain

    How to Fit Crampons to Your Boots

    Do the initial setup in a warm, controlled place with the exact boots you will climb in. Manufacturer instructions take priority because adjustment hardware differs by model.

    1 Ā· Confirm compatibility

    Check the crampon technical notice and boot specifications. Verify whether the binding requires heel or toe welts and whether the boot has enough rigidity for the system.

    2 Ā· Set overall length

    Adjust the linking bar, cord or length mechanism so the boot seats naturally into the front and rear sections without large gaps or excessive overhang.

    3 Ā· Seat the toe

    Make sure the front basket or bail matches the shape of the boot and sits where the manufacturer intends. A wire bail should engage a compatible welt—not simply rest against rubber.

    4 Ā· Set heel retention

    Adjust the heel basket or lever for secure engagement. A lever should close with firm, controlled resistance; forcing it can indicate a poor setting or incompatible boot.

    5 Ā· Route the strap

    Follow the manufacturer’s routing diagram. The safety strap should retain the crampon without creating a pressure point or loose tail that can snag.

    6 Ā· Perform a ground test

    Walk, edge, flex and twist the boot on flat ground. There should be no obvious shifting, rotation or disengagement. Recheck after the first few minutes of use.

    If the crampon moves independently of the boot, stop.

    Do not solve a poor fit by simply tightening everything harder. Recheck compatibility, length and binding setup. If you are unsure, have a qualified shop or guide fit the exact boot/crampon pair.

    05 Ā· Transition safely

    How to Put Crampons On in the Field

    Choose a secure platform before you need the traction. Avoid making the transition while balanced on one foot on a slope where a slip already has consequences.

    Step 1

    Stop in a Safe Place

    Move to a flat or protected stance. Sit, kneel or use a stable position rather than balancing casually on exposed terrain.

    Step 2

    Clear the Boot Sole

    Remove packed snow, gravel and ice from the sole, welts and binding surfaces so the crampon seats against the boot correctly.

    Step 3

    Orient Left and Right

    Many models are shaped or strapped specifically for each foot. Keep buckles and loose strap tails away from the opposite leg.

    Step 4

    Engage the Binding

    Seat the toe and heel in the sequence specified by the manufacturer. Do not improvise a different attachment method.

    Step 5

    Secure the Strap

    Thread and tighten the retention strap exactly as intended. Tuck or control the remaining tail so it cannot catch a point.

    Step 6

    Recheck After Moving

    After several minutes, stop somewhere safe and inspect the fit again. Snow, boot compression and lever settling can change tension.

    Close view of crampons being used for glacier walking
    Technique starts with clearance

    Walk Wide Enough That One Crampon Cannot Catch the Other Leg.

    Many crampon trips happen because a point catches a gaiter, pant cuff, boot or the opposite crampon. Deliberate foot placement matters before slope angle ever becomes the main problem.

    06 Ā· Movement techniques

    Flat-Footing, Hybrid Movement & Front-Pointing

    Technique changes continuously with terrain and snow/ice quality. The goal is secure point engagement with efficient posture—not hitting a memorized angle threshold.

    TechniqueHow it worksBest contextCommon error
    Flat-footing / French techniqueKeep the sole broadly parallel to the surface so multiple downward points engage.Low to moderate firm snow or ice where ankle mobility allows a stable platform.Rolling onto the boot edge and losing several points at once.
    Duck-foot / diagonal variationsTurn feet outward or traverse diagonally while still maximizing downward-point contact.Moderate slopes where straight-up flat-footing becomes awkward.Crossing feet or letting the uphill foot catch the downhill leg.
    Hybrid / American techniqueOne foot uses more downward points while the other begins using front points.Transitions, traverses and terrain between comfortable flat-footing and full front-pointing.Switching inconsistently without stable hips or deliberate weight transfer.
    Front-pointing / German techniqueDrive the front points into steeper snow or ice while keeping heels appropriately positioned for the surface.Steeper terrain where flat-footing is no longer efficient or secure.Standing too high on the points, over-fatiguing calves, or repeatedly kicking without solid purchase.

    Do not memorize ā€œ30° / 45° / 60Ā°ā€ as safety cutoffs.

    Slope angle is only one variable. Firm alpine ice, soft snow, a traverse, a convex roll, boot stiffness and consequences of a slip can all change the right technique. Learn transitions on low-consequence terrain with qualified instruction before relying on them high on a mountain.

    07 Ā· Descending

    Descending in Crampons Is Where Tired Technique Gets Exposed

    Fatigue, downhill momentum and reduced visibility of your feet make the descent especially prone to snagging and poor point placement.

    Keep steps deliberate

    Place the foot rather than swinging it. Avoid letting points scrape the opposite gaiter or pant leg.

    Use the terrain

    Face downhill, traverse or turn more squarely toward the slope depending on steepness and surface. There is no single descent posture for every slope.

    Keep knees soft

    A rigid-legged descent magnifies small slips. Balanced, slightly flexed posture helps absorb irregularities.

    Manage the rope

    On a rope team, avoid stepping on the rope or allowing slack loops to drift near the points. Rope management becomes harder when climbers are tired.

    Slow transitions

    Many incidents happen when moving from snow to rock, ice to softer snow, or crampon terrain to bare trail. Reassess traction rather than carrying one technique blindly through the transition.

    08 Ā· Falls & self-arrest

    Crampons Make a Sliding Fall More Complicated

    Sharp points can catch during a slide and violently load the ankle, knee or hip. This is why self-arrest should be practiced under qualified supervision rather than learned from a text description alone.

    Prevention first

    Good Footwork Beats a Rescue Move

    The primary objective is not to fall: secure points, balanced movement, correct traction choice and conservative terrain decisions are more important than confidence in self-arrest.

    Training

    Practice With an Instructor

    Self-arrest body position, crampon management and axe use are dynamic skills. Practice them on a controlled snow slope where mistakes have low consequences.

    Do not practice uncontrolled glissading while wearing crampons.

    A point can catch suddenly and create severe lower-leg injury. If a route includes intentional glissading, remove crampons only where a qualified leader judges the transition and runout appropriate.

    Climber front-pointing on steep ice with crampons
    Steep ice is not a tutorial environment

    Front-Pointing Is Easy to Describe and Much Harder to Do Well.

    Body position, kick quality, heel position, tool placement and fatigue management become increasingly important as terrain steepens. Technical ice belongs in a formal instructional progression.

    09 Ā· Common mistakes

    Most Crampon Problems Start Before the Hardest Terrain

    AAC historical accident data includes both slips on snow/ice and incidents involving faulty crampon use. The lesson is not that one mistake dominates; it is that traction equipment requires disciplined setup and movement.

    Fit

    Wrong Boot–Crampon Pair

    Using a binding that does not match the boot’s rigidity or welt system can allow movement or detachment.

    Timing

    Putting Them On Too Late

    Waiting until you are already insecure forces a delicate gear transition exactly where balance is worst.

    Footwork

    Walking Too Narrow

    Sharp points can catch gaiters, pants or the opposite boot. Slightly wider, deliberate steps reduce that risk.

    Snow

    Ignoring Balling

    Snow packed under the frame can reduce effective point penetration. Use manufacturer anti-snow plates and monitor buildup.

    Rock

    Keeping Crampons On Too Long

    Short mixed sections may be unavoidable, but long dry-rock walking dulls points and can make movement clumsy.

    Training

    Learning on the Objective

    Your summit climb should not be the first time you fit, walk, descend and transition techniques in crampons.

    10 Ā· Take them off at the right time

    Crampons Are a Tool, Not a Uniform

    Remove them when the terrain no longer benefits from the points and a safe transition location exists. The decision should again be based on surface and consequence—not pride or convenience.

    TerrainTypical decisionReason
    Firm snow / ice with consequential runoutUsually keep appropriate crampons on.Point engagement adds meaningful security.
    Short mixed rock stepMay remain in crampons if the route requires it.Repeated transitions can be inefficient; mixed technique is a real alpine skill.
    Extended dry rockOften remove when a safe platform is available.Points dull and snag; walking becomes less natural.
    Soft, low-consequence trail snowReassess whether full crampons are still the best tool.Extra points may add trip risk without adding useful traction.
    Glissade terrainNever assume crampons stay on.Catching a point during a slide can cause major leg injury; use trained judgment.
    11 Ā· Inspection & care

    Inspect Crampons Like Safety Equipment

    Crampons are simple, but they combine sharp load-bearing metal with straps, levers and adjustment hardware that can wear or loosen.

    Before every trip

    Inspect points, frame, linking system, straps, bails, heel levers and anti-snow plates. Look for cracks, deformation, corrosion, loose hardware or damaged webbing.

    After use

    Rinse salt or grit when needed, dry the crampons fully and store them where wet steel will not sit against fabric or other equipment.

    Sharpening

    Follow manufacturer guidance. Maintain useful point geometry rather than aggressively grinding away metal or overheating it with power tools.

    Fit changes

    Recheck adjustment whenever you change boots—even if the nominal boot size is the same. Different sole shapes and welt positions can alter fit.

    Retirement

    Replace damaged components only with manufacturer-approved parts. Retire a system if structural damage or excessive wear cannot be corrected safely.

    12 Ā· Frequently asked questions

    Crampon Technique FAQ

    Short answers to the questions beginners most often ask before practicing snow and glacier movement.

    When should I put crampons on?

    Put them on before terrain becomes consequential when the surface is hard or icy enough that normal boot traction is unreliable, especially when a slip could lead to a long slide, rocks, cliffs or crevasses. Do not rely on one universal slope-angle threshold.

    Can I put crampons on hiking boots?

    Only if the specific crampon and boot are compatible. Many flexible hiking boots are not appropriate for traditional mountaineering crampons. Check the crampon manufacturer’s technical notice and the boot’s intended compatibility.

    What is French technique?

    French technique, or flat-footing, aims to keep multiple downward crampon points engaged with the snow or ice. It is efficient on moderate terrain where ankle mobility permits stable full-foot contact.

    What is front-pointing?

    Front-pointing uses the forward-facing points on steeper snow or ice where flat-footing becomes inefficient or insecure. It requires more calf endurance and should be practiced in a controlled instructional setting before serious terrain.

    Do I need anti-balling plates?

    Use the anti-snow or anti-balling system supplied or specified by the manufacturer. Snow buildup under a crampon can reduce effective point contact and create a slip hazard.

    Should I self-arrest with crampons on?

    A real fall may happen while you are wearing crampons, but the points complicate a sliding arrest because they can catch violently. Self-arrest with crampons is a dynamic skill best practiced with qualified instruction on controlled snow.

    Can I walk on rock in crampons?

    Short mixed rock sections are part of mountaineering, and skilled climbers learn to move on them. Extended dry-rock walking dulls points and increases snagging, so remove crampons when the route and a safe transition point make that practical.

    How tight should crampons be?

    They should be secure enough that the frame does not shift or rotate independently of the boot, while levers and straps operate within the manufacturer’s intended adjustment range. Excessive force is not a substitute for compatibility.

    13 Ā· First-hand field context

    Where Global Summit Guide’s Crampon Notes Come From

    The editorial team’s direct experience is strongest on moderate-angle snow and glacier objectives rather than technical vertical ice. We keep that boundary visible.

    Field context map

    Pico de Orizaba Ā· Central Mexico

    One of the main first-hand reference environments for this guide: high-altitude crampon travel on the north-side glacier route.

    Open Larger Map
    Editorial first-hand context also includes IztaccĆ­huatl in Mexico and Mount Hood’s South Side / Hogsback in Oregon. The map is context, not route navigation.
    Travis Ludlow

    Pico de Orizaba

    First-hand use of crampons on high-altitude snow and glacier terrain on Mexico’s highest mountain.

    Travis Ludlow

    IztaccĆ­huatl

    First-hand crampon experience on high Mexican volcano terrain where surface condition changes traction decisions.

    Dawson Ludlow

    Mount Hood

    First-hand use on the South Side / Hogsback route with guided instruction in 2026.

    Experience boundary

    Advanced steep ice, mixed climbing and technical front-pointing are research-supported sections rather than claimed first-hand expertise. Those skills belong in professional instruction and route-specific training.

    14 Ā· Sources & methodology

    Technique Guidance Should Follow the Equipment You Actually Own

    This rebuild prioritizes current manufacturer compatibility information, current BMC winter-skills guidance and accident context over rigid one-size-fits-all rules.

    Instructional limit

    This guide is preparation material, not a substitute for in-person snow, glacier or ice instruction. Practice crampon movement, axe use, self-arrest and rope-team systems with a qualified instructor on low-consequence terrain before relying on them on a serious climb.

    Travis Ludlow, Global Summit Guide
    About this guide

    Global Summit Guide Editorial Team

    This page combines first-hand moderate-angle crampon use from Pico de Orizaba, IztaccĆ­huatl and Mount Hood with current BMC, manufacturer and accident-report sources. Technical ice sections are intentionally framed as skills to learn through formal instruction.

    Walking crampons used on snow and ice
    Fit first. Practice second. Objective third.

    Crampons Work Best When the Technique Is Already Familiar.

    Set them up at home, learn the movements on low-consequence snow, practice transitions with qualified instruction, and only then take the skill onto a mountain where a mistake matters.

    Was this helpful?

    Yes
    No
    Thanks for your feedback!
  • Mount Baker vs Mount Rainier: Which Should You Climb First?

    { “@context”:”https://schema.org”, “@graph”:[ { “@type”:[“WebPage”,”Article”], “@id”:”https://globalsummitguide.com/mount-baker-vs-mount-rainier/#article”, “url”:”https://globalsummitguide.com/mount-baker-vs-mount-rainier/”, “headline”:”Mount Baker vs Mount Rainier: Which Should You Climb First?”, “description”:”Compare Mount Baker vs Mount Rainier by difficulty, glacier skills, altitude, permits, guided cost and season—and see which mountain fits your progression.”, “dateModified”:”2026-09-17″, “inLanguage”:”en-US”, “articleSection”:”Mountain Comparisons”, “author”:{“@type”:”Person”,”name”:”Travis Ludlow”,”url”:”https://globalsummitguide.com/about/”}, “publisher”:{“@type”:”Organization”,”name”:”Global Summit Guide”,”url”:”https://globalsummitguide.com/”}, “mainEntityOfPage”:”https://globalsummitguide.com/mount-baker-vs-mount-rainier/”, “about”:[ { “@type”:”Mountain”, “name”:”Mount Baker”, “elevation”:{“@type”:”QuantitativeValue”,”value”:3286,”unitCode”:”MTR”}, “geo”:{“@type”:”GeoCoordinates”,”latitude”:48.7768,”longitude”:-121.8144} }, { “@type”:”Mountain”, “name”:”Mount Rainier”, “elevation”:{“@type”:”QuantitativeValue”,”value”:4392.2,”unitCode”:”MTR”}, “geo”:{“@type”:”GeoCoordinates”,”latitude”:46.8523,”longitude”:-121.7603} } ] }, { “@type”:”BreadcrumbList”, “itemListElement”:[ {“@type”:”ListItem”,”position”:1,”name”:”Home”,”item”:”https://globalsummitguide.com/”}, {“@type”:”ListItem”,”position”:2,”name”:”Comparisons”,”item”:”https://globalsummitguide.com/category/comparisons/”}, {“@type”:”ListItem”,”position”:3,”name”:”Mount Baker vs Mount Rainier”,”item”:”https://globalsummitguide.com/mount-baker-vs-mount-rainier/”} ] }, { “@type”:”FAQPage”, “mainEntity”:[ { “@type”:”Question”, “name”:”Should I climb Mount Baker or Mount Rainier first?”, “acceptedAnswer”:{“@type”:”Answer”,”text”:”For most climbers building independent glacier competence, Mount Baker is the cleaner first step because its standard routes teach real rope-team glacier travel at lower altitude and smaller overall scale. A fit beginner can also climb Rainier first inside a legitimate instructional guided program, so Baker is not an absolute prerequisite.”} }, { “@type”:”Question”, “name”:”Which is harder, Mount Baker or Mount Rainier?”, “acceptedAnswer”:{“@type”:”Answer”,”text”:”Mount Rainier is the larger overall objective on the standard routes because it is 3,629 feet higher, requires roughly 9,000 vertical feet from Paradise, operates at substantially higher altitude and crosses a larger active glacier system. Baker still requires real glacier skills and can become highly technical on advanced routes.”} }, { “@type”:”Question”, “name”:”Is Mount Baker a good training climb for Mount Rainier?”, “acceptedAnswer”:{“@type”:”Answer”,”text”:”Yes. Mount Baker’s Easton and Coleman-Deming routes are commonly used for glacier instruction, rope-team travel, cramponing and crevasse-rescue practice. International Mountain Guides even operates a combined Baker-Rainier seminar that uses Baker as the training and warm-up phase before Rainier.”} }, { “@type”:”Question”, “name”:”Can a beginner climb Mount Rainier?”, “acceptedAnswer”:{“@type”:”Answer”,”text”:”A very fit beginner can climb Rainier through a legitimate instructional guided program that teaches the necessary glacier and mountaineering systems. An independent Rainier team should already be competent in glacier travel, crevasse rescue, crampon and ice-axe use, navigation, weather decisions and expedition camping.”} }, { “@type”:”Question”, “name”:”How much does it cost to climb Mount Baker versus Mount Rainier?”, “acceptedAnswer”:{“@type”:”Answer”,”text”:”As a dated 2026 example, International Mountain Guides lists a three-day Mount Baker Easton Glacier climb at $1,200. Its three-and-a-half-day Rainier Disappointment Cleaver program is $2,995 in peak season and $2,595 outside peak season. Rainier also has a 2026 National Park Service climbing fee of $82 per climber plus wilderness permit fees for overnight camping.”} }, { “@type”:”Question”, “name”:”What permits are required for Mount Rainier?”, “acceptedAnswer”:{“@type”:”Answer”,”text”:”In 2026, Mount Rainier requires an $82 climbing fee for qualifying climbs and in-person climbing registration. During the summer climbing season, a wilderness permit is also required; the current fee is $12 per person per night plus a $6 Recreation.gov reservation fee where applicable.”} }, { “@type”:”Question”, “name”:”Does Mount Baker require a climbing permit?”, “acceptedAnswer”:{“@type”:”Answer”,”text”:”Mount Baker does not use the same separate summit climbing-fee system as Mount Rainier. Climbers should verify the current U.S. Forest Service trailhead recreation-pass, road, camping and Mount Baker Wilderness rules for the exact route and date before departure.”} }, { “@type”:”Question”, “name”:”Which routes should first-time glacier climbers choose?”, “acceptedAnswer”:{“@type”:”Answer”,”text”:”On Mount Baker, the Easton Glacier is the cleanest instructional choice and the Coleman-Deming is another common novice route. On Mount Rainier, the Disappointment Cleaver through Camp Muir is the standard guided route, but it is a much larger and higher-altitude glacier objective.”} } ] } ] } @import url(‘https://fonts.googleapis.com/css2?family=DM+Serif+Display:ital@0;1&family=Outfit:wght@300;400;500;600;700;800&display=swap’); .gsg-br80{ –navy:#071a2b;–navy2:#0d263d;–blue:#214f75;–gold:#d4913a;–gold2:#f0b45d; –cream:#f7f2e8;–paper:#fffdfa;–ink:#122a44;–muted:#657482;–line:#e4d7bd; –soft:#eef5f8;–green:#356b57;–red:#934a3d;–amber:#95651f; background:var(–paper);color:var(–ink);font:400 16px/1.66 ‘Outfit’,Arial,sans-serif;overflow-x:clip } .gsg-br80,.gsg-br80 *{box-sizing:border-box} .gsg-br80 a{color:var(–blue);text-decoration:none} .gsg-br80 a:hover{color:var(–navy)} .gsg-br80 img{display:block;max-width:100%} .gsg-br80 h1,.gsg-br80 h2,.gsg-br80 h3,.gsg-br80 h4{font-family:’DM Serif Display’,Georgia,serif;font-weight:400;line-height:1.08;margin-top:0} .gsg-br80 p{margin-top:0} .gsg-br80-container{width:min(1120px,calc(100% – 44px));margin:auto} .gsg-br80-section{padding:74px 0} .gsg-br80-band{background:#f8f4ec} .gsg-br80-soft{background:var(–soft)} .gsg-br80-kicker{display:block;color:#98611c;font-size:.71rem;font-weight:800;letter-spacing:1.2px;text-transform:uppercase;margin-bottom:9px} .gsg-br80-section-head{display:grid;grid-template-columns:1fr minmax(280px,430px);gap:34px;align-items:end;margin-bottom:30px} .gsg-br80-section-head h2{font-size:clamp(2.25rem,4vw,3.8rem);color:var(–navy);margin:0} .gsg-br80-section-head p{color:var(–muted);font-size:.92rem;margin:0} .gsg-br80-note{font-size:.74rem;color:var(–muted)} /* HERO */ .gsg-br80-hero{position:relative;min-height:72svh;display:flex;align-items:center;overflow:hidden;background:#ddd8cf} .gsg-br80-hero-media{position:absolute;inset:0;display:grid;grid-template-columns:1fr 1fr} .gsg-br80-hero-media img{width:100%;height:100%;object-fit:cover} .gsg-br80-hero-media img:first-child{object-position:center 45%} .gsg-br80-hero-media img:last-child{object-position:center 48%} .gsg-br80-hero:after{content:””;position:absolute;inset:0;background:linear-gradient(90deg,rgba(248,244,236,.998),rgba(248,244,236,.97) 42%,rgba(248,244,236,.72) 62%,rgba(248,244,236,.16) 88%,rgba(248,244,236,.06));z-index:1} .gsg-br80-hero-inner{position:relative;z-index:2;width:min(1120px,calc(100% – 44px));margin:auto;padding:62px 0} .gsg-br80-breadcrumb{display:flex;flex-wrap:wrap;gap:7px;font-size:.74rem;color:#536b7a;margin-bottom:18px} .gsg-br80-hero h1{max-width:1040px;font-size:clamp(3rem,5.7vw,5.72rem);letter-spacing:-.04em;color:var(–navy);margin:0 0 18px} .gsg-br80-hero h1 em{color:#98611c;font-style:normal} .gsg-br80-lead{max-width:945px;color:#405a6b;font-size:clamp(1rem,1.5vw,1.18rem);margin-bottom:23px} .gsg-br80-actions{display:flex;flex-wrap:wrap;gap:10px} .gsg-br80-btn{display:inline-flex;align-items:center;justify-content:center;min-height:48px;padding:11px 19px;font-size:.82rem;font-weight:800;border:1px solid transparent} .gsg-br80-btn-primary{background:var(–navy);color:#fff!important} .gsg-br80-btn-secondary{background:#fff;color:var(–navy)!important;border-color:rgba(7,26,43,.22)} .gsg-br80-trust{display:flex;flex-wrap:wrap;gap:9px 18px;margin-top:18px;color:#445d6c;font-size:.74rem} .gsg-br80-trust span:before{content:”āœ“”;color:#98611c;margin-right:6px} .gsg-br80-hero-credits{position:absolute;right:14px;bottom:11px;z-index:3;background:rgba(7,26,43,.82);color:#e7eef2;padding:6px 9px;font-size:.58rem} .gsg-br80-hero-credits a{color:#f0c27d} /* STATS */ .gsg-br80-stats{display:grid;grid-template-columns:repeat(6,1fr);width:min(1120px,calc(100% – 44px));margin:-30px auto 0;position:relative;z-index:4;background:var(–cream);border:1px solid var(–line)} .gsg-br80-stats div{padding:20px 8px;text-align:center;border-right:1px solid var(–line)} .gsg-br80-stats div:last-child{border-right:0} .gsg-br80-stats strong{display:block;color:var(–navy);font:400 1.43rem ‘DM Serif Display’,serif} .gsg-br80-stats span{display:block;color:var(–muted);font-size:.58rem;text-transform:uppercase} .gsg-br80-byline{display:flex;flex-wrap:wrap;justify-content:space-between;gap:10px;padding:16px 0;border-bottom:1px solid var(–line);font-size:.75rem;color:var(–muted)} /* ANSWER */ .gsg-br80-answer{display:grid;grid-template-columns:1.16fr .84fr;gap:28px;background:#fff;border:1px solid var(–line);border-top:5px solid var(–gold);padding:32px;margin-top:28px} .gsg-br80-answer h2{font-size:2.45rem;color:var(–navy);margin-bottom:12px} .gsg-br80-answer p{color:#526a7a} .gsg-br80-answer-grid{display:grid;grid-template-columns:1fr;gap:8px;align-content:start} .gsg-br80-answer-card{background:var(–cream);border:1px solid var(–line);padding:14px} .gsg-br80-answer-card span{display:block;color:#98611c;font-size:.59rem;font-weight:800;text-transform:uppercase} .gsg-br80-answer-card b{font-size:.84rem;color:var(–navy)} .gsg-br80-alert{margin-top:20px;padding:20px;background:#fff8ef;border:1px solid #e8cda6;border-left:5px solid var(–gold);font-size:.84rem;color:#645b50} .gsg-br80-alert strong{color:var(–navy)} .gsg-br80-toc{margin-top:24px;background:#fff;border:1px solid var(–line);padding:22px} .gsg-br80-toc h2{font-size:1.55rem;color:var(–navy)} .gsg-br80-toc-grid{display:grid;grid-template-columns:repeat(4,1fr);gap:7px} .gsg-br80-toc-grid a{padding:9px 10px;border:1px solid #edf0f1;font-size:.73rem;font-weight:800} /* TABLES */ .gsg-br80-tablewrap{overflow:auto;background:#fff;border:1px solid var(–line)} .gsg-br80 table{width:100%;border-collapse:collapse;min-width:920px} .gsg-br80 th{padding:13px;background:var(–navy);color:#fff;text-align:left;font-size:.65rem;text-transform:uppercase;letter-spacing:.55px} .gsg-br80 td{padding:13px;border-bottom:1px solid #edf0f1;color:var(–muted);font-size:.79rem;vertical-align:top} .gsg-br80 td strong{color:var(–navy)} .gsg-br80-baker{background:#f4f8fb} .gsg-br80-rainier{background:#fff8ef} .gsg-br80-pill{display:inline-block;padding:4px 8px;background:var(–cream);font-size:.59rem;color:#765d34;font-weight:800;text-transform:uppercase} .gsg-br80-pill.green{background:#edf5f0;color:var(–green)} .gsg-br80-pill.amber{background:#fff3df;color:var(–amber)} /* MAP */ .gsg-br80-mapgrid{display:grid;grid-template-columns:1.35fr .65fr;gap:14px} .gsg-br80-map{position:relative;background:#fff;border:1px solid var(–line);overflow:hidden} .gsg-br80-map iframe{display:block;width:100%;height:560px;border:0} .gsg-br80-pin{position:absolute;transform:translate(-50%,-50%);z-index:3} .gsg-br80-pin-dot{width:18px;height:18px;border-radius:50%;background:var(–gold);border:4px solid #fff;box-shadow:0 0 0 2px var(–navy)} .gsg-br80-pin-label{position:absolute;left:14px;top:-8px;white-space:nowrap;background:var(–navy);color:#fff;padding:6px 8px;font-size:.63rem;font-weight:800} .gsg-br80-pin.baker{left:48.8%;top:8.6%} .gsg-br80-pin.rainier{left:53.3%;top:82.6%} .gsg-br80-mapfoot{padding:12px 15px;font-size:.68rem;color:var(–muted)} .gsg-br80-mapfacts{display:grid;gap:10px} .gsg-br80-mapfact{background:#fff;border:1px solid var(–line);padding:16px} .gsg-br80-mapfact span{display:block;color:#98611c;font-size:.58rem;font-weight:800;text-transform:uppercase} .gsg-br80-mapfact strong{display:block;color:var(–navy);margin:4px 0} .gsg-br80-mapfact small{color:var(–muted);font-size:.69rem} /* DECISION CARDS */ .gsg-br80-grid{display:grid;grid-template-columns:repeat(2,1fr);gap:14px} .gsg-br80-grid3{display:grid;grid-template-columns:repeat(3,1fr);gap:14px} .gsg-br80-card{background:#fff;border:1px solid var(–line);padding:23px;display:flex;flex-direction:column} .gsg-br80-card>span{color:#98611c;font-size:.62rem;font-weight:800;text-transform:uppercase} .gsg-br80-card h3{font-size:1.52rem;color:var(–navy);margin:13px 0 8px} .gsg-br80-card p,.gsg-br80-card li{font-size:.82rem;color:var(–muted)} .gsg-br80-card ul{padding-left:18px;margin-bottom:0} .gsg-br80-choice{border-top:5px solid var(–gold)} .gsg-br80-choice .route{font:400 2.1rem ‘DM Serif Display’,serif;color:var(–navy);margin:4px 0 8px} /* PHOTO */ .gsg-br80-photo{position:relative;min-height:535px;display:flex;align-items:end;overflow:hidden} .gsg-br80-photo>img{position:absolute;inset:0;width:100%;height:100%;object-fit:cover} .gsg-br80-photo:after{content:””;position:absolute;inset:0;background:linear-gradient(0deg,rgba(7,26,43,.93),rgba(7,26,43,.05) 72%)} .gsg-br80-photo-copy{position:relative;z-index:2;width:min(1120px,calc(100% – 44px));margin:auto;padding:50px 0} .gsg-br80-photo-panel{max-width:920px;background:rgba(7,26,43,.84);border-left:5px solid var(–gold);padding:27px} .gsg-br80-photo-panel h2{font-size:clamp(2.3rem,4.6vw,4rem);color:#fff} .gsg-br80-photo-panel p{color:#e4edf1} .gsg-br80-caption{font-size:.67rem;color:#d9e3e7;margin-top:8px} .gsg-br80-caption a{color:#f0c27d} .gsg-br80-media-grid{display:grid;grid-template-columns:1fr 1fr;gap:14px;margin-top:26px} .gsg-br80-media{background:#fff;border:1px solid var(–line);overflow:hidden} .gsg-br80-media img{width:100%;height:350px;object-fit:cover} .gsg-br80-media div{padding:17px 19px} .gsg-br80-media h3{font-size:1.38rem;color:var(–navy);margin-bottom:7px} .gsg-br80-media p{font-size:.77rem;color:var(–muted);margin:0} /* PROGRESSION */ .gsg-br80-progress{display:grid;grid-template-columns:repeat(4,1fr);gap:0;border:1px solid var(–line);background:#fff} .gsg-br80-progress-step{padding:22px;border-right:1px solid var(–line);position:relative} .gsg-br80-progress-step:last-child{border-right:0} .gsg-br80-progress-step span{display:block;color:#98611c;font-size:.58rem;font-weight:800;text-transform:uppercase} .gsg-br80-progress-step h3{font-size:1.35rem;color:var(–navy);margin:8px 0 7px} .gsg-br80-progress-step p{font-size:.76rem;color:var(–muted);margin:0} /* SOURCES FAQ */ .gsg-br80-sources{display:grid;grid-template-columns:1fr 1fr;gap:14px} .gsg-br80-source{background:#fff;border:1px solid var(–line);padding:23px} .gsg-br80-source h3{font-size:1.45rem;color:var(–navy)} .gsg-br80-source p,.gsg-br80-source li{font-size:.79rem;color:var(–muted)} .gsg-br80-source ul{padding-left:18px} .gsg-br80-faq{display:grid;gap:8px} .gsg-br80-faq details{background:#fff;border:1px solid var(–line)} .gsg-br80-faq summary{padding:17px 19px;font-weight:800;color:var(–navy);cursor:pointer} .gsg-br80-faq p{padding:0 19px 18px;color:var(–muted);font-size:.82rem} .gsg-br80-final{padding:77px 22px;text-align:center;background:var(–cream)} .gsg-br80-final h2{font-size:clamp(2.4rem,5vw,4.15rem);color:var(–navy)} .gsg-br80-final p{max-width:850px;margin:0 auto 21px;color:var(–muted)} /* DRMESH */ .gsg-br80 .gsg-drmesh{background:var(–paper);border-top:5px solid var(–gold);padding:35px 0 16px} .gsg-br80 .gsg-drmesh-inner{width:min(1120px,calc(100% – 44px));margin:auto} .gsg-br80 .gsg-drmesh-kicker{font-size:.67rem;font-weight:800;letter-spacing:1.2px;text-transform:uppercase;color:#98611c} .gsg-br80 .gsg-drmesh h2{font-size:2.05rem;color:var(–navy);margin:7px 0 8px} .gsg-br80 .gsg-drmesh-intro{max-width:820px;color:var(–muted);font-size:.83rem} .gsg-br80 .gsg-drmesh-grid{display:grid;grid-template-columns:repeat(3,1fr);gap:11px;margin-top:20px} .gsg-br80 .gsg-drmesh-card{display:block!important;background:#fff;border:1px solid var(–line);border-bottom:3px solid var(–gold);padding:16px!important;color:var(–ink)!important;text-decoration:none!important;min-height:135px} .gsg-br80 .gsg-drmesh-card:hover{transform:translateY(-2px);box-shadow:0 8px 20px rgba(7,26,43,.08)} .gsg-br80 .gsg-drmesh-card span{display:block;color:#98611c;font-size:.58rem;text-transform:uppercase;font-weight:800;letter-spacing:.6px;margin-bottom:6px} .gsg-br80 .gsg-drmesh-card strong{display:block;color:var(–navy);font-size:.91rem;margin-bottom:5px} .gsg-br80 .gsg-drmesh-card small{display:block;color:var(–muted);font-size:.71rem;line-height:1.45} @media(max-width:900px){ .gsg-br80-section-head,.gsg-br80-answer,.gsg-br80-mapgrid{grid-template-columns:1fr} .gsg-br80-stats{grid-template-columns:repeat(3,1fr)} .gsg-br80-stats div:nth-child(3){border-right:0} .gsg-br80-stats div:nth-child(-n+3){border-bottom:1px solid var(–line)} .gsg-br80-toc-grid{grid-template-columns:repeat(2,1fr)} .gsg-br80-grid3,.gsg-br80 .gsg-drmesh-grid{grid-template-columns:1fr 1fr} .gsg-br80-progress{grid-template-columns:1fr 1fr} .gsg-br80-progress-step:nth-child(2){border-right:0} .gsg-br80-progress-step:nth-child(-n+2){border-bottom:1px solid var(–line)} } @media(max-width:620px){ .gsg-br80-container,.gsg-br80-hero-inner,.gsg-br80-photo-copy,.gsg-br80 .gsg-drmesh-inner{width:min(100% – 28px,1120px)} .gsg-br80-section{padding:54px 0} .gsg-br80-hero{min-height:720px} .gsg-br80-hero-media{grid-template-columns:1fr} .gsg-br80-hero-media img:first-child{display:none} .gsg-br80-hero:after{background:linear-gradient(90deg,rgba(248,244,236,.985),rgba(248,244,236,.9) 74%,rgba(248,244,236,.48))} .gsg-br80-stats{grid-template-columns:repeat(2,1fr);width:min(100% – 28px,1120px)} .gsg-br80-stats div{border-right:1px solid var(–line)!important;border-bottom:1px solid var(–line)} .gsg-br80-stats div:nth-child(even){border-right:0!important} .gsg-br80-stats div:nth-last-child(-n+2){border-bottom:0} .gsg-br80-grid,.gsg-br80-grid3,.gsg-br80-media-grid,.gsg-br80-sources,.gsg-br80 .gsg-drmesh-grid,.gsg-br80-progress{grid-template-columns:1fr} .gsg-br80-answer-grid,.gsg-br80-toc-grid{grid-template-columns:1fr} .gsg-br80-progress-step{border-right:0;border-bottom:1px solid var(–line)!important} .gsg-br80-progress-step:last-child{border-bottom:0!important} .gsg-br80-map iframe{height:520px} .gsg-br80-media img{height:260px} .gsg-br80-pin-label{font-size:.56rem} }
    Snow-covered Mount Baker in Washington Glaciated Mount Rainier in Washington
    Home› Comparisons› Mount Baker vs Mount Rainier
    Washington glacier progression Ā· current 2026 permits & pricing

    Mount Baker vs Mount Rainier: Which Should You Climb First?

    Mount Baker and Mount Rainier are both serious glaciated volcanoes, but they play different roles in a climber’s progression. Baker is usually the cleaner first glacier classroom. Rainier adds more altitude, more vertical gain, larger glacier systems, higher permit complexity and a substantially bigger summit day. A guided beginner can start on either—but an independent climber should not use Rainier as the place to learn glacier systems for the first time.

    NPS 2026 Rainier fees verified Current Baker route data checked No invented summit-success odds
    Baker: Anabmap Ā· CC BY-SA 4.0 Ā· Rainier: Stan Shebs Ā· CC BY-SA 3.0
    10,781 ftMount Baker
    14,410 ftMount Rainier
    ~7,200–7,500 ftBaker gain
    ~9,000 ftRainier gain
    $1,200Baker guide example
    $82Rainier climbing fee
    The direct answer

    For most climbers, Baker first. For a fit guided beginner, either can be appropriate.

    Mount Baker is usually the better first independent glacier objective. The Easton Glacier and Coleman-Deming routes teach rope-team movement, crampon use, crevasse awareness, snow camping and glacier pacing at 10,781 feet rather than 14,410 feet. That leaves more mental and physical margin for learning.

    Mount Rainier is the bigger total objective. The standard Disappointment Cleaver climb starts near 5,400 feet at Paradise and gains roughly 9,000 vertical feet to Columbia Crest. It adds higher altitude, larger crevasses, more complex route changes, steeper upper-mountain terrain and a formal National Park Service climbing-registration system.

    But ā€œBaker must come firstā€ is too absolute. International Mountain Guides explicitly describes both Baker’s Easton Glacier and Rainier’s Disappointment Cleaver as novice routes within its instructional guided programs. A highly fit beginner who chooses a legitimate guide service can therefore make Rainier a first glacier climb. The distinction is guided instruction versus independent competence.

    Best first independent glacier climbMount Baker
    Bigger altitude objectiveMount Rainier
    Guided novice pathwayEither can work
    Build toward DenaliBaker → Rainier is a strong sequence
    Do not convert this progression into a fake probability. Climbing Baker first does not convert Rainier into a reliable personalized summit probability. Baker can improve glacier skills, systems familiarity and pacing, but Rainier outcomes still depend on weather, current glacier conditions, fitness, altitude response, team performance and turnaround decisions.
    Side-by-side answer

    Mount Baker vs Mount Rainier at a glance

    The standard-route comparison matters most. Advanced routes on both mountains can be dramatically harder than the routes described here.

    FactorMount BakerMount RainierPlanning meaning
    Elevation10,781 ft / 3,286 m14,410 ft / 4,392 mRainier adds a major altitude variable.
    Standard beginner routesEaston Glacier; Coleman-DemingDisappointment Cleaver via Camp MuirAll require real glacier systems.
    Approx. route distanceEaston ~15 mi; Coleman-Deming ~11 miMore than 10 mi on standard summit routes; exact glacier line changesMileage alone understates Rainier’s scale.
    Total ascent~7,500 ft Easton; ~7,175 ft Coleman-Deming~9,000 ft from ParadiseRainier requires more vertical and higher-altitude work.
    Typical guided duration3 days on IMG Easton example3½ days on IMG DC exampleSimilar calendar length; different physical scale.
    Glacier characterExcellent instructional glacier terrainLarger, more complex active glacier systemBaker gives more learning margin.
    Upper-route cruxRoman Wall on Easton/Coleman-Deming finishChanging DC / upper glacier route above ~11,500 ftBoth change by season; Rainier is more committing.
    Climbing feeNo Rainier-style summit fee; verify USFS trailhead/pass rules$82 per climber in 2026Rainier has a formal climbing fee and registration system.
    Overnight permitVerify route-specific Mount Baker Wilderness/camping rules$12 pp/night wilderness permit + applicable $6 reservation feeRainier logistics are more structured.
    Current guided price example$1,200 IMG Easton, 3 days$2,995 peak / $2,595 non-peak IMG DC, 3½ daysRainier generally costs materially more.
    Best progression roleFirst true glacier classroomMajor glacier expeditionBaker → Rainier is the cleaner independent progression.
    Location & geographic context

    Where are Mount Baker and Mount Rainier?

    Both are Washington Cascade volcanoes, but they occupy very different parts of the state. Baker is near the Canadian border; Rainier rises south of the Seattle–Tacoma region.

    Regional orientation only—not route navigation. Pin positions are approximate geographic overlays. Map data Ā© OpenStreetMap contributors.
    Mount BakerNorth Cascades volcanoNear the Canadian border; standard access varies between south-side Easton and north-side Coleman-Deming trailheads.
    Mount RainierSouth-central WashingtonAbout 65 miles southeast of the Seattle–Tacoma metropolitan area according to NPS.
    Same state, different logisticsTwo separate tripsBaker uses U.S. Forest Service access; Rainier is inside Mount Rainier National Park.
    Training sequenceEasy to combine in one seasonCommercial seven-day Baker–Rainier seminars demonstrate the geographic and training logic of the pairing.
    Mount Baker summit seen through a glacier crevasse
    Why Baker is such a useful first glacier mountain

    The glacier is not scenery—it is the skill system.

    Easton and Coleman-Deming are genuine roped glacier climbs. Climbers still need to understand spacing, crevasse awareness, crampon movement, ice-axe use, rope-team communication and rescue systems. The advantage is not that Baker removes glacier hazard. It is that the standard routes provide those lessons at lower altitude and smaller overall scale than Rainier.

    Mount Baker from a crevasse Ā· Muddymorn Ā· CC BY-SA 3.0.
    Difficulty comparison

    Rainier is the larger standard-route objective—but Baker is not a walk-up

    Both mountains require glacier judgment. Rainier adds more altitude, vertical gain and upper-mountain complexity.

    Mount Baker
    Easton / Coleman-Deming

    American Alpine Institute lists Easton at roughly 15 miles round trip with 7,500 feet of gain and Coleman-Deming at roughly 11 miles with 7,175 feet of gain. Easton is especially well suited to first-time glacier travelers; Coleman-Deming offers more crevasse and serac character.

    • Lower summit altitude reduces one major variable.
    • Real crevasse navigation and rope-team travel.
    • Roman Wall adds a steeper upper-mountain finish.
    • Excellent environment for learning systems deliberately.
    Mount Rainier
    Disappointment Cleaver

    Rainier rises 14,410 feet and requires roughly 9,000 vertical feet from Paradise to the summit. NPS route briefs emphasize that the glacier line changes as crevasses open and can push climbers near icefall or rockfall exposure. The upper mountain is not a static trail.

    • Substantially higher altitude.
    • Larger active glacier environment.
    • Longer exposure to objective hazards.
    • High-camp logistics and a consequential descent.
    Important route distinction: this comparison uses Baker’s standard Easton/Coleman-Deming routes and Rainier’s standard Disappointment Cleaver route. Baker’s North Ridge or Coleman Headwall can be more technically difficult than the DC. Mountain difficulty belongs to a route—not just a summit name.
    Standard-route anatomy

    What the climbing actually feels like

    Both routes start with hiking and camping, then change into roped glacier movement before the final summit terrain.

    StageMount Baker — EastonMount Rainier — Disappointment Cleaver
    ApproachSchreiber’s Meadow → Park Butte / Railroad Grade → Sandy Camp areaParadise → Muir Snowfield → Camp Muir
    Glacier entryRoped Easton Glacier travel from campCowlitz Glacier, Cathedral Gap and Ingraham / DC system
    Route findingCrevasses dictate the line; broad glacier generally supports instructionUpper route is actively reconstructed around crevasses and objective hazards
    Steep finishRoman Wall can approach steep snow/ice angles and may be firmCleaver and upper glacier terrain; exact line varies by season
    Summit environmentBroad summit plateau at 10,781 ftCrater rim and Columbia Crest at 14,410 ft
    Descent problemReverse long glacier route as surfaces softenReverse complex glacier terrain while more hypoxic and fatigued
    South side of Mount Baker showing its glaciers and upper mountain

    Baker’s glacier classroom

    The mountain carries large active glaciers despite its lower elevation. That is exactly why it works so well as a skill-building objective. Walter Siegmund Ā· CC BY-SA 3.0.

    Nisqually Glacier on Mount Rainier

    Rainier’s scale is visible from below

    Rainier is the most glaciated peak in the contiguous United States. The standard DC route uses different glaciers, but Nisqually illustrates the mountain’s overall ice scale. Walter Siegmund Ā· CC BY-SA 3.0.

    Skills comparison

    What Baker teaches—and what Rainier assumes or intensifies

    A guide service can teach beginner systems on either mountain. Independent teams need a very different baseline.

    Rope-team travel

    Core skill on both mountains

    Spacing, communication, pace and arrest response belong to both objectives. Baker provides a lower-altitude environment for learning how a glacier team functions before adding Rainier’s bigger scale.

    Crevasse rescue

    Knowledge is not competence

    Independent climbers should have practiced arrest, anchors, load transfer and haul systems hands-on. Reading a rescue article or watching a video does not prepare a rope team to improvise under stress.

    Crampons & axe

    Basic technique must become automatic

    Both standard routes require efficient crampon movement and ice-axe handling. Rainier gives less margin for clumsy transitions once fatigue and altitude accumulate.

    Navigation

    Tracks are not a route plan

    Cloud, snow, darkness and moving crevasses can erase the visual cues used on ascent. Rainier’s NPS route briefs specifically emphasize route-finding problems in heavily crevassed terrain.

    Camp systems

    Comfort affects summit-day performance

    Wind, cold, hydration, food and sleep management matter on both. Rainier often asks climbers to make a very large summit push after limited high-camp recovery.

    Turnaround judgment

    The transferable skill that matters most

    Baker is useful training only if the climber learns to evaluate pace, weather, route condition and team function—not merely collects a summit before attempting Rainier.

    Guided beginner nuance: IMG currently describes both Easton Glacier and Disappointment Cleaver as novice routes within instructional programs. That does not mean an unguided beginner should step onto either glacier without training. Guided instruction changes the support system, supervision and decision ownership.
    Climbers practicing ice climbing on Mount Rainier
    Training is part of the objective

    A Rainier summit is not evidence that every glacier skill was learned.

    A guided climber can safely participate while the guides own many route-finding and rescue decisions. Climbers who want to become independent should judge progression by the systems they can perform reliably—not simply by whether they stood on a summit.

    Ice climbing on Rainier Ā· Erik Charlton Ā· CC BY 2.0.
    Fitness & altitude

    Rainier adds a different kind of fatigue

    Baker is strenuous. Rainier combines strenuous movement with substantially greater hypoxic stress.

    Mount Baker

    Long summit day, lower altitude ceiling

    IMG describes Easton summit day as roughly 10 hours round trip from camp. AAI places the route around 7,500 total vertical feet from trailhead to summit. Climbers still need strong uphill endurance, pack-carrying capacity and enough reserve to descend safely.

    At 10,781 feet, Baker can still produce altitude symptoms, but it does not expose the climber to the same 12,000–14,000-foot work zone that dominates Rainier’s upper mountain.

    Mount Rainier

    More vertical at substantially higher altitude

    NPS describes summit routes as more than 9,000 vertical feet and more than 10 miles. The standard climb divides that work across approach and summit days, but summit morning occurs after sleeping high and then moving for hours in thin air.

    Fitness therefore has to be durable rather than explosive: climb efficiently with a pack, recover at camp, move through the night and preserve enough concentration for a long technical descent.

    Use Baker as an assessment, not a certificate. If Baker exposes weak pack fitness, poor foot care, slow rope transitions, anxiety around crevasses or inadequate recovery, fix those problems before Rainier. A summit does not cancel the lessons the climb revealed.
    2026 permit systems

    Rainier is much more administratively structured

    The two peaks sit under different land managers. Do not transfer Rainier rules to Baker—or vice versa.

    RequirementMount BakerMount Rainier
    Land managerMount Baker-Snoqualmie National Forest / Mount Baker WildernessMount Rainier National Park
    Separate climbing feeNo Rainier-style federal summit fee on standard Baker climbs$82 per person per climb in 2026
    Climbing registrationVerify current USFS route/trailhead requirementsRequired; NPS says registration remains required after fee payment
    Overnight campingFollow current Mount Baker Wilderness and site-specific camping rulesWilderness permit required
    2026 overnight feeVerify current trailhead/pass/camping requirements$12 per person per night + applicable $6 reservation fee
    Commercial guidingGuide company must hold applicable USFS authorizationOnly NPS-authorized concession/CUA guide services may operate
    Before departure: check the specific Baker trailhead, road and recreation-pass status with the Forest Service. For Rainier, verify the climbing fee, wilderness reservation, ranger-station registration procedure and current route/camp status with NPS. Permit rules can change after publication.
    Current guided-price examples

    Baker is also the lower-cost training investment

    These are dated examples from one guide company, not universal market prices. Compare inclusions and instruction—not just the headline number.

    ProgramPublished 2026 priceLengthClient : guideWhat it shows
    IMG Mount Baker Easton Glacier$1,2003 days3:1Lower-cost entry to guided glacier instruction and summit experience.
    IMG Mount Rainier DC$2,995 peak / $2,595 non-peak3½ days2:1Higher guide ratio and larger objective substantially increase cost.
    IMG Baker + Rainier Seminar$3,7957 days3:1 Baker / 2:1 RainierPurpose-built progression: train on Baker, then apply systems on Rainier.

    Guide prices checked September 2026 and are subject to change. Rainier park fees, personal equipment, travel, lodging before/after the climb and insurance may be separate depending on the program.

    Season & route evolution

    Both are summer glacier mountains—but ā€œsummerā€ is not one condition

    Glacier routes change as snow bridges thin, crevasses widen and exposed ice or rock increases.

    Late spring

    More snow coverage

    Routes may be more direct, but weather can be less settled and avalanche or new-snow concerns can remain. Snow bridges may hide crevasses rather than eliminate them.

    Early to mid-summer

    Primary standard-route window

    Most guided Baker and Rainier standard-route schedules cluster here. Route infrastructure and bootpack traffic may be well established, but objective hazards remain.

    Late summer

    Crevasse complexity increases

    Glaciers open, bridges weaken and routes can become longer or more circuitous. Baker and Rainier both require current route reports rather than reliance on an old GPX track.

    Route condition outranks calendar. NPS explicitly notes that Rainier’s upper route changes as crevasses evolve. Baker’s Easton and Coleman-Deming lines also change through the season. Choose dates with an operator or experienced team based on the current route—not merely historical averages.
    Decision framework

    Which should you climb first?

    The useful answer depends on support model and what you want to learn—not a universal ā€œwinner.ā€

    Choose Baker first when

    You want to build glacier competence.

    • You plan to climb Rainier independently later.
    • You want hands-on time with rope teams and crevasse systems.
    • You prefer learning below 11,000 feet before adding major altitude.
    • You want a lower-cost first guided glacier program.
    • You are building toward a larger progression such as Rainier → Denali.
    Choose Rainier first when

    You have the fitness and a legitimate instructional support system.

    • You are joining a guide program designed for first-time glacier climbers.
    • Your mountain fitness is already strong and tested.
    • You understand that the guide team will own many technical decisions.
    • Your immediate goal is the Rainier experience rather than independent glacier leadership.
    • You are comfortable paying more for a larger guided objective.
    Step 1

    Snow mountain

    Adams, St. Helens or equivalent: pacing, snow movement, early starts and weather discipline.

    Step 2

    Glacier instruction

    Hands-on rope travel, crampons, ice axe, anchors and crevasse rescue with a qualified instructor.

    Step 3

    Mount Baker

    Apply the systems on Easton or Coleman-Deming and learn what still breaks down when tired.

    Step 4

    Mount Rainier

    Add altitude, larger glacier systems, heavier logistics and a more consequential summit day.

    This is a progression framework, not a gatekeeping rule. Guided climbers can compress the sequence because professional instruction and route leadership change the support model. Independent teams should be much more conservative about what skills are already functional before stepping onto Rainier.
    Mount Rainier's heavily glaciated upper mountain from the west
    Why Rainier belongs later in an independent progression

    The mountain combines systems that Baker lets you learn separately.

    Rainier is not simply ā€œBaker but taller.ā€ The higher altitude, bigger vertical gain, denser glacier system, formal high-camp structure and changing upper route all interact. That combination is what makes Baker such useful preparation: it reduces one layer of complexity while the climber learns the glacier fundamentals.

    Mount Rainier from west Ā· Stan Shebs Ā· CC BY-SA 3.0.
    Summit odds & misleading percentages

    Why this page does not publish a Baker-vs-Rainier ā€œsuccess rateā€

    A percentage is useful only when its population, dates, support model and counting rules are explicit.

    Different populations

    Guided clients are not all climbers.

    A guide-company summit percentage may describe screened clients on selected dates. It cannot automatically be compared with a park-wide number that includes independent parties.

    Different years

    Glacier seasons are not interchangeable.

    Route construction, weather, wildfire smoke, snowpack and crevasse geometry can make one season unusually favorable or unusually difficult.

    Different definitions

    ā€œAttemptā€ can begin in different places.

    Some datasets count registered climbers, others summit-day departures, booked clients or people who reached high camp. Without one denominator, ranking the mountains by success rate creates false precision.

    Better question: does your team have enough fitness, glacier competence, weather margin and route-condition margin for the mountain in front of you? Baker experience can improve those inputs. It cannot convert them into a reliable personal Rainier percentage.
    Sources & verification

    What owns the current facts

    Official NPS pages own Rainier fee and permit rules. Current guide and route sources provide standard-route dimensions and dated program examples.

    NPS Disappointment Cleaver route brief

    Used for the route-change, crevasse, icefall, rockfall and upper-glacier context. The exact climbing line changes each season and current ranger/guide observations outrank a static route description.

    Disappointment Cleaver route brief

    American Alpine Institute — Mount Baker

    Current route summary used for Easton and Coleman-Deming distance, elevation gain, typical duration and beginner-route context.

    AAI Baker route comparison

    International Mountain Guides — Baker

    Current 2026 Easton Glacier program lists $1,200, three days and 3:1 client-guide ratio. IMG describes Easton and Coleman-Deming as novice routes suitable for beginners within its guided programs.

    International Mountain Guides — Rainier

    Current 2026 Disappointment Cleaver example lists $2,995 peak season / $2,595 non-peak, 3½ days and 2:1 client-guide ratio.

    IMG Rainier DC program

    IMG Baker–Rainier seminar

    The current seven-day $3,795 program is evidence for the progression logic—not for a summit guarantee. It teaches glacier travel and rescue on Baker before applying the systems on Rainier.

    IMG Baker–Rainier seminar

    Search-intent answers

    Mount Baker vs Mount Rainier FAQ

    The visible answers below match the FAQ schema.

    Should I climb Mount Baker or Mount Rainier first?

    For most climbers building independent glacier competence, Mount Baker is the cleaner first step. Its standard routes teach real rope-team glacier travel at lower altitude and smaller scale. A very fit beginner can also climb Rainier first inside a legitimate instructional guided program, so Baker is not an absolute prerequisite.

    Which is harder, Mount Baker or Mount Rainier?

    Rainier is the larger standard-route objective. It is 3,629 feet higher, requires roughly 9,000 vertical feet from Paradise and operates in a larger, more complex glacier environment. Baker still requires genuine glacier skills, and advanced Baker routes such as the North Ridge can be technically harder than Rainier’s DC.

    Is Mount Baker good training for Mount Rainier?

    Yes. Easton and Coleman-Deming are widely used to teach glacier travel, cramponing, rope-team systems and crevasse rescue. IMG’s current Baker–Rainier seminar explicitly uses Baker as the training and warm-up phase before moving to Rainier.

    Can a beginner climb Mount Rainier?

    A very fit beginner can climb Rainier through a legitimate instructional guided program. An independent Rainier team should already be competent in glacier travel, crevasse rescue, crampon and ice-axe use, navigation, weather decisions and expedition camping.

    How much does it cost to climb Baker versus Rainier?

    As current 2026 IMG examples, a three-day Baker Easton Glacier climb is $1,200. A 3½-day Rainier Disappointment Cleaver climb is $2,995 in peak season and $2,595 outside peak season. Rainier also carries the NPS climbing fee and wilderness permit costs.

    What permits are required for Mount Rainier?

    In 2026 the NPS climbing fee is $82 per climber. Climbers must also register. During the summer climbing season a wilderness permit is required; the current fee is $12 per person per night plus the applicable $6 Recreation.gov reservation fee.

    Does Mount Baker require a climbing permit?

    Baker does not use Rainier’s separate federal summit-fee system. Verify current Mount Baker-Snoqualmie National Forest trailhead recreation-pass, road, camping and Mount Baker Wilderness rules for the specific route and date before departure.

    Which Baker route is best before Rainier?

    The Easton Glacier is the cleanest first instructional route because it offers broad moderate glacier terrain before the Roman Wall finish. Coleman-Deming is also a classic novice glacier route and exposes climbers to more crevasse and serac scenery. Either can build useful Rainier skills when paired with real instruction.

    The progression in one sentence

    Baker is where most independent climbers should learn the system; Rainier is where they combine it at larger scale.

    If your goal is glacier competence, choose Baker first and treat the summit as secondary to the skills. If your goal is a guided Rainier experience and your fitness is already strong, a legitimate instructional guide program can make Rainier an appropriate first glacier climb. The right choice depends on what you want to be able to do after the trip—not simply which summit is higher.

    Build Your Washington Climbing Progression
    Continue the Washington glacier progression

    Baker, Rainier, glacier skills & next-step comparisons

    This page owns the Baker-vs-Rainier decision. Use the pages below for each mountain’s complete plan, current permits, glacier systems and the larger Cascade progression.

    Mount Baker parentMount Baker Climbing GuideRoutes, season, access, skills and complete planning for Washington’s best first major glacier classroom. Mount Rainier parentMount Rainier Climbing GuideComplete route, altitude, camp, permit, weather and expedition planning for Washington’s highest peak. Washington parentBest Mountains to Climb in WashingtonBuild the full state progression from St. Helens and Adams through Baker, Shuksan, Rainier and advanced alpine objectives. Rainier routesMount Rainier Routes GuideCompare Disappointment Cleaver, Emmons-Winthrop, Kautz, Liberty Ridge and the skill jump between them. Guide comparisonMount Rainier Guide CompaniesCompare current NPS concession guide services, prices, ratios, programs and support models. Core glacier skillGlacier Travel BasicsUnderstand crevasses, rope teams, spacing, terrain and why hands-on instruction must come before independent glacier travel. Core glacier skillCrevasse Rescue BasicsLearn the arrest → stabilize → anchor → transfer → rescue framework, then practice it with qualified instruction. Readiness toolMountain Readiness AssessmentCheck physical, technical, altitude, mental and logistics gaps against the route you actually plan to climb. Weather planningMountain Weather for ClimbersTurn wind, cloud, precipitation, freezing level and route condition into a go / hold / descend decision. ComparisonMount Whitney vs Mount RainierSee why similar summit elevation can hide completely different endurance, glacier and technical requirements. Cascade progressionMount Hood vs Mount AdamsCompare the snow-climbing steps that commonly come before Baker and Rainier glacier objectives. Cascade comparisonMount Shasta vs Mount HoodCompare expedition-style snow climbing with steeper, more compressed technical volcano climbing.
    .gsg-drmesh{–navy:#071a2b;–blue:#214f75;–gold:#d4913a;–cream:#f7f2e8;–paper:#fffdfa;–ink:#122a44;–muted:#657482;–line:#e4d7bd;font:400 16px/1.6 ‘Outfit’,Arial,sans-serif;color:var(–ink);background:var(–paper)}.gsg-drmesh *{box-sizing:border-box}.gsg-drmesh h2{font-family:’DM Serif Display’,Georgia,serif;font-weight:400;color:var(–navy);font-size:clamp(1.6rem,3vw,2.2rem);line-height:1.1;margin:0 0 8px}.gsg-drmesh p{margin:0 0 16px;color:#526a7a;font-size:.92rem}.gsg-drmesh a{text-decoration:none;color:var(–blue)}.gsg-drmesh-wrap{width:min(1000px,calc(100% – 28px));margin:0 auto;padding:26px 0;border-top:3px solid var(–gold)}.gsg-drmesh-k{display:block;color:#98611c;font-size:.7rem;font-weight:800;letter-spacing:1.1px;text-transform:uppercase;margin-bottom:8px}.gsg-drmesh-up{display:flex;flex-wrap:wrap;gap:10px;margin-bottom:16px}.gsg-drmesh-up a{flex:1 1 240px;background:var(–navy);color:#fff;padding:13px 16px;font-weight:700;font-size:.86rem;display:flex;align-items:center;justify-content:space-between}.gsg-drmesh-up a.hub{background:#fff;color:var(–navy)!important;border:1px solid var(–line)}.gsg-drmesh-up a b{font-family:’DM Serif Display’,serif;font-weight:400}.gsg-drmesh-grid{display:grid;grid-template-columns:repeat(3,1fr);gap:9px}.gsg-drmesh-grid a{background:var(–cream);border:1px solid var(–line);padding:12px 13px;display:block}.gsg-drmesh-grid a strong{display:block;color:var(–navy);font-size:.92rem}.gsg-drmesh-grid a span{display:block;color:var(–muted);font-size:.72rem;margin-top:2px}.gsg-drmesh-grid a:hover{border-color:var(–gold)}@media(max-width:700px){.gsg-drmesh-grid{grid-template-columns:1fr 1fr}}@media(max-width:460px){.gsg-drmesh-grid{grid-template-columns:1fr}}
    .gsg2{font-family:’Outfit’,system-ui,sans-serif;background:#fafaf7;color:#0f1a26;line-height:1.75;font-size:17px;max-width:920px;margin:0 auto;padding:32px 24px;-webkit-font-smoothing:antialiased} .gsg2 h2,.gsg2 h3,.gsg2 h4{font-family:’DM Serif Display’,Georgia,serif;font-weight:400;line-height:1.2;color:#0a1929} .gsg2 h2{font-size:clamp(26px,3.4vw,36px);margin-top:64px;margin-bottom:18px} .gsg2 h2:first-child{margin-top:0} .gsg2 h3{font-size:21px;color:#0a1929;margin-top:32px;margin-bottom:12px} .gsg2 h4{font-size:17px;color:#0a1929;margin-top:24px;margin-bottom:10px} .gsg2 p{color:#485460;margin-bottom:18px;font-weight:400} .gsg2 p strong{color:#0f1a26;font-weight:600} .gsg2 p em{color:#0a1929;font-style:italic;font-weight:500} .gsg2 a{color:#1a4970;text-decoration:underline;text-underline-offset:3px;text-decoration-thickness:1.5px;font-weight:500;transition:color .15s} .gsg2 a:hover{color:#b8701f} .gsg2 ul,.gsg2 ol{color:#485460;font-weight:400;margin:0 0 20px 22px} .gsg2 li{margin-bottom:8px;line-height:1.7} .gsg2 li strong{color:#0f1a26;font-weight:600} .gsg2-stat-grid{display:grid;grid-template-columns:repeat(auto-fit,minmax(220px,1fr));gap:14px;margin:28px 0} .gsg2-stat{background:#fff;border:1px solid #dde5ee;border-radius:10px;padding:22px 22px;border-left:4px solid #d4913a;box-shadow:0 1px 3px rgba(11,31,53,.04)} .gsg2-stat .s-num{font-family:’DM Serif Display’,serif;font-size:34px;color:#0a1929;line-height:1;margin-bottom:10px;letter-spacing:-.01em} .gsg2-stat .s-label{font-size:13.5px;color:#0f1a26;line-height:1.55;font-weight:500;margin-bottom:4px} .gsg2-stat .s-context{font-size:13px;color:#485460;line-height:1.55;font-weight:400} .gsg2-stat .s-src{font-size:11px;color:#8a95a3;font-style:italic;margin-top:8px;display:block} .gsg2-callout{border-radius:10px;padding:24px 26px;margin:32px 0;display:flex;gap:18px;align-items:flex-start} .gsg2-callout.warning{background:#f7ece0;border:1px solid rgba(184,106,21,.25)} .gsg2-callout.danger{background:#f5e8e5;border:1px solid rgba(168,58,43,.25)} .gsg2-callout .c-icon{flex-shrink:0;font-size:22px;line-height:1;color:#b86a15} .gsg2-callout.danger .c-icon{color:#a83a2b} .gsg2-callout .c-body{flex:1} .gsg2-callout .c-title{font-family:’DM Serif Display’,serif;font-size:18px;margin:0 0 8px;color:#b86a15} .gsg2-callout.danger .c-title{color:#a83a2b} .gsg2-callout .c-text{font-size:15px;color:#485460;font-weight:400;line-height:1.7;margin:0 0 10px} .gsg2-callout .c-text:last-child{margin-bottom:0} .gsg2-callout .c-text strong{color:#0f1a26;font-weight:600} .gsg2-callout .c-text em{color:#0a1929;font-style:italic;font-weight:500} .gsg2-pull{background:#f5e4c8;border:1px solid rgba(212,145,58,.3);border-left:4px solid #d4913a;padding:28px 34px;margin:36px 0;border-radius:0 12px 12px 0;position:relative} .gsg2-pull::before{content:’”‘;font-family:’DM Serif Display’,serif;font-size:80px;color:#d4913a;line-height:1;position:absolute;top:8px;left:18px;opacity:.4} .gsg2-pull p{font-family:’DM Serif Display’,serif;font-style:italic;font-size:22px;line-height:1.5;color:#0a1929;margin:0;padding-left:8px;position:relative;z-index:1} .gsg2-pull cite{display:block;margin-top:16px;font-family:’Outfit’,sans-serif;font-style:normal;font-size:13px;color:#485460;letter-spacing:.04em;padding-left:8px;font-weight:500} .gsg2-pull cite strong{color:#0f1a26;font-weight:700}

    The data: success rates, climbers, and what they reveal

    ~75%
    Baker guided success rate
    Baker guided programs typically report 70-85% summit success depending on season and weather window
    Source: Northwest Alpine Guides, American Alpine Institute
    ~48%
    Rainier summit success
    10,762 attempts, 5,135 summits in 2018 — the most recent fully published NPS data
    Source: National Park Service climbing statistics
    ~$1,300
    Baker guided 2-day cost
    Northwest Alpine Guides 2026 pricing for Coleman-Deming or Easton Glacier 2-day program
    Source: Northwest Alpine Guides 2026 schedule
    ~$2,500
    Rainier guided 3-day cost
    Major operators (RMI, IMG, Alpine Ascents) charge $2,250-$2,995 for standard Disappointment Cleaver programs
    Source: 2026 guide service pricing

    The gap in success rates tells the story. Baker’s 75% success rate is roughly 50% better than Rainier’s 48% rate. That difference isn’t because Baker is “easy” — it’s because Baker’s lower altitude, shorter summit day, and more forgiving terrain make weather windows wider and turnaround pressure lower. Climbers who get pinned down by a storm on Rainier often fail to summit at all; climbers in the same conditions on Baker can often still complete the climb.

    This is the structural insight that makes Baker the right first-glaciated-peak choice: you learn the skills you’d need on Rainier, but you summit more reliably while you learn them.

    Mount Baker deep-dive: the Coleman-Deming route in detail

    The route in stages

    The Coleman-Deming route from Heliotrope Ridge to the summit moves through four distinct terrain bands:

    1. Heliotrope Ridge trailhead to Hogsback Camp (3,700–6,200 ft). A well-maintained trail climbs through old-growth Pacific Northwest forest, crosses Kulshan Creek at around 2 miles, breaks out of the trees at roughly 5,400 feet, and ascends a final moraine into Hogsback Camp at the edge of the Coleman Glacier. Most climbers reach Hogsback Camp in 3-4 hours with a 35-45 lb pack. Campsites are scattered between 6,000 and 6,200 feet along the glacier’s edge.
    2. Hogsback Camp onto the Coleman Glacier (6,200–8,500 ft). Above the moraine, the route ropes up and enters real glacier terrain. The Coleman Glacier has substantial crevasse fields, and rope team travel is mandatory from this point. The route winds northeast across the glacier, climbing moderately on 20-30 degree snow. Most climbers practice rope team movement, crevasse rescue setup, and pacing on the Coleman Glacier the afternoon before summit day.
    3. Colfax Col and the Black Buttes traverse (8,500–10,000 ft). The route climbs to Colfax Col — the saddle between the Black Buttes formation and Mount Baker’s main summit cone. Climbers skirt the Black Buttes (a complex of volcanic spires) at safe distance to avoid rockfall and avalanche risk from the Buttes themselves. From Colfax Col the route turns east-northeast and crosses onto the upper Deming Glacier.
    4. The Roman Wall and summit plateau (10,000–10,781 ft). The technical crux: a sustained 30-35 degree snow slope known as the Roman Wall climbs roughly 700-800 vertical feet to the summit plateau. Conditions vary year to year — some seasons offer firm consolidated snow ideal for crampon technique; other seasons present icy or rotten sections requiring more care. Above the Roman Wall, the broad summit plateau leads to the true summit at Grant Peak. The summit is actually the rim of an ice-filled volcanic crater roughly 1,300 feet deep.

    Mount Baker permits and access (2026)

    Baker’s permit system is among the simplest in the Cascades — there is no climbing-specific permit:

    • Northwest Forest Pass: Required for parking at the Heliotrope Ridge trailhead. $5 per day or $30 annual. Available at the Glacier Public Service Center, REI, or online.
    • Wilderness Permit: Free, self-issued at the trailhead. Required for all entries into the Mount Baker Wilderness.
    • Pack-out human waste: Required. Most climbers use blue bags or WAG bags. No bags provided at the trailhead — bring your own.
    • Group size limit: 12 climbers maximum in the wilderness.

    Access to the Heliotrope Ridge trailhead is via State Highway 542 east from Bellingham. Forest Road 39 (Glacier Creek Road) is the access route from SR-542. The road is susceptible to washouts and may not fully clear of snow until mid-June in heavy snow years. Climbers attempting Baker in May or early June should check current road conditions via the Mount Baker Snoqualmie National Forest website.

    ā–²
    Baker is still a real glaciated mountain

    “Beginner-friendly” doesn’t mean “safe to take lightly.” Mount Baker has substantial crevasse fields on both the Coleman and Easton Glaciers. The Mountaineers note that “there are many crevasses on this climb” and that the start of the Coleman Glacier can be tricky to discern — many parties have inadvertently roped up too late, only to encounter the first crevasse minutes later.

    The Black Buttes section presents avalanche and rockfall hazard. Climbers must keep enough distance from the Buttes to avoid debris coming down from above. The Roman Wall itself is steep enough that a slide-arrest scenario is non-trivial. Baker is the easier of the two mountains compared in this article — but it is not, in any way, a casual hike. Real glacier travel skills are required.

    Mount Baker guide services

    Mount Baker is one of the most-guided peaks in the lower 48, with multiple established services offering programs from 2 to 6 days:

    • American Alpine Institute (AAI) — Bellingham-based, runs both Coleman-Deming and Easton Glacier programs. The 3-day instructional climb is the canonical first glaciated mountaineering experience for many Pacific Northwest climbers.
    • Northwest Alpine Guides — 2-day Coleman-Deming or Easton Glacier programs at $1,300. Adapts route choice based on conditions. Intermediate pace requires prior mountaineering experience (5,000+ ft single-day gain).
    • Mountain Madness — Multi-day Baker programs including skills instruction and summit attempts.
    • Northwest Mountain School — IFMGA-licensed guides, custom and scheduled programs.
    • Blackbird Mountain Guides — North Cascades-based, runs Coleman-Deming and Easton programs.
    • Skyline Mountain Guides — 3-day Coleman-Deming program with built-in skills instruction.
    • Edgeworks Outdoor — 3-day programs on Coleman-Deming, Easton, and North Ridge variants.

    Typical 3-day program cost: $700-$1,500 per person depending on group size and program structure. Most 3-day programs explicitly target first-time mountaineers and include instruction in crampons, ice axe self-arrest, rope team travel, and crevasse rescue setup. The 3-day programs report meaningfully higher success rates than 2-day programs because they build in skill instruction and acclimatization time.

    The Coleman–Deming Route is a perfect first big mountain climb for climbers looking to elevate their mountaineering experience! The route involves glacier travel, rope team movement, and use of crampons and ice axe—all taught and reinforced by our Skyline Team.

    Skyline Mountain Guides — 2026 Mount Baker Coleman-Deming program

    Mount Rainier deep-dive: the Disappointment Cleaver route in detail

    The route in stages

    The Disappointment Cleaver route is structurally different from Baker — longer, higher, with technical sections that demand more of climbers:

    1. Paradise to Camp Muir (5,400–10,080 ft). The 4-6 hour ascent from Paradise to Camp Muir via the Muir Snowfield. The route gains 4,680 feet in 4.5 miles — a sustained but moderate slope. Camp Muir is a permanent high camp with stone shelters, guide-service tents, and ranger station. Most climbers arrive in early afternoon, prepare gear, eat, and try to sleep by 6 p.m. for a midnight summit start.
    2. Camp Muir to Ingraham Flats (10,080–11,000 ft). The summit attempt begins between midnight and 1 a.m. Climbers cross the Cowlitz Glacier to Cathedral Gap, traverse along the Ingraham Glacier, and reach Ingraham Flats at roughly 11,000 ft. This section involves the first real exposure to active crevasse terrain and serac fall potential from the Ingraham Icefall above.
    3. The Disappointment Cleaver proper (11,000–12,300 ft). The Cleaver is a rocky ridge that climbers ascend to bypass the most heavily crevassed section of the Ingraham Glacier. The Cleaver presents real rockfall hazard — climbers wear helmets and move efficiently. The Cleaver itself is exposed scrambling on rock, often with rope team protection. The name comes from early climbers who reached the top of the Cleaver and felt “disappointed” to realize how much climbing remained above.
    4. Upper mountain to summit (12,300–14,410 ft). Above the Cleaver, the route returns to the Ingraham Glacier and ascends 2,100 feet of moderate glacier on the upper mountain. Crevasses become more frequent and route-finding becomes critical. In some seasons fixed ladders are placed across larger crevasses by guide services. The summit crater rim is reached at Columbia Crest — Rainier’s true high point at 14,410 ft.

    Mount Rainier permits and access (2026)

    Rainier’s permit system is the most regulated of any peak in this comparison cluster:

    • Climbing Cost Recovery Fee: $63 per climber per calendar year. Required for all travel above 10,000 ft or onto any glacier. Funds high-camp rangers and waste management.
    • Wilderness Permit: Required for overnight stays. Managed through Recreation.gov with roughly two-thirds available for advance reservation (May 1 to the first federal holiday in October) and one-third walk-up only.
    • Park Entrance Fee: $30 per vehicle (or America the Beautiful annual pass).
    • Pack out human waste: Required above Camp Muir. Blue bags provided.

    Most climbers access via the Paradise trailhead, accessible year-round from the Nisqually entrance on the south side of Mount Rainier National Park. See our Mount Whitney vs Mount Rainier comparison for full Rainier route and permit detail.

    Mount Rainier guide services

    Four major operators hold Mount Rainier concession permits:

    • RMI Expeditions (Rainier Mountaineering, Inc.) — The largest Rainier operator. Multiple program lengths. 3-day Disappointment Cleaver: $2,250-$2,995.
    • International Mountain Guides (IMG) — Park-concession holder with multi-day instructional programs.
    • Alpine Ascents International (AAI Seattle) — Premier guided programs. Includes the Rainier Seminar (training-and-climb) for first-time mountaineers.
    • Mount Rainier Alpine Guides — Smaller operator with personalized programs.

    All four require either prior glacier mountaineering experience (often Baker is the cited example) or completion of a pre-climb seminar. This is the structural reason Baker fits so naturally as the prerequisite climb — it directly satisfies the experience requirement that Rainier operators look for.

    Glacier recession and what it means for both peaks

    Both Mount Baker and Mount Rainier are heavily affected by climate-driven glacier recession. See Investigation 12: Glacier recession and the future of mountaineering routes for the broader picture across Cascade volcanoes.

    On Mount Baker, the Coleman Glacier has receded measurably over the past three decades, with new crevasse fields opening and the lower glacier toe retreating further uphill each season. The route’s standard line through the Coleman has shifted multiple times as new crevasses opened. The bergschrund at the base of the Roman Wall is now wider and more challenging in late season than it was historically.

    On Mount Rainier, the impact is more severe. Multiple Rainier glaciers (Nisqually, Cowlitz, Emmons-Winthrop) have receded substantially, with documented changes in crevasse patterns season over season. The Ingraham Icefall has become increasingly active. Some routes that were once climbable are now considered too dangerous in most seasons. Recent years have seen success rates vary wildly month-to-month — Alpine Ascents International reports a range from 45% to 90% across different months in 2024-2025 based on conditions.

    The practical effect for both peaks: route conditions matter more than they used to. Guide services adapt their route choice based on current conditions. Independent climbers must research recent trip reports and current conditions before committing. The “standard route” is increasingly a moving target rather than a fixed line up the mountain.

    Mount Baker seen from Goat Lake on Ptarmigan Ridge, Mount Baker Wilderness. North Cascades Washington
    .gsg3{font-family:’Outfit’,system-ui,sans-serif;background:#fafaf7;color:#0f1a26;line-height:1.75;font-size:17px;max-width:920px;margin:0 auto;padding:32px 24px;-webkit-font-smoothing:antialiased} .gsg3 h2,.gsg3 h3,.gsg3 h4{font-family:’DM Serif Display’,Georgia,serif;font-weight:400;line-height:1.2;color:#0a1929} .gsg3 h2{font-size:clamp(26px,3.4vw,36px);margin-top:64px;margin-bottom:18px} .gsg3 h2:first-child{margin-top:0} .gsg3 h3{font-size:21px;color:#0a1929;margin-top:32px;margin-bottom:12px} .gsg3 h4{font-size:17px;color:#0a1929;margin-top:24px;margin-bottom:10px} .gsg3 p{color:#485460;margin-bottom:18px;font-weight:400} .gsg3 p strong{color:#0f1a26;font-weight:600} .gsg3 p em{color:#0a1929;font-style:italic;font-weight:500} .gsg3 a{color:#1a4970;text-decoration:underline;text-underline-offset:3px;text-decoration-thickness:1.5px;font-weight:500;transition:color .15s} .gsg3 a:hover{color:#b8701f} .gsg3 ul,.gsg3 ol{color:#485460;font-weight:400;margin:0 0 20px 22px} .gsg3 li{margin-bottom:8px;line-height:1.7} .gsg3 li strong{color:#0f1a26;font-weight:600} .gsg3-decision{background:#fff;border:1px solid #dde5ee;border-radius:12px;padding:6px 30px 26px;margin:32px 0;box-shadow:0 1px 3px rgba(11,31,53,.04)} .gsg3-decision h3{margin:24px 0 16px} .gsg3-decision .d-row{display:flex;align-items:flex-start;gap:16px;padding:14px 0;border-bottom:1px solid #dde5ee} .gsg3-decision .d-row:last-child{border-bottom:none;padding-bottom:0} .gsg3-decision .d-if{font-family:’DM Serif Display’,serif;font-size:15px;color:#485460;font-style:italic;flex:1;line-height:1.55} .gsg3-decision .d-if strong{color:#0f1a26;font-style:normal;font-weight:700} .gsg3-decision .d-then{font-family:’DM Serif Display’,serif;font-size:18px;color:#d4913a;font-weight:400;flex-shrink:0;text-align:right;min-width:140px} .gsg3-callout{border-radius:10px;padding:24px 26px;margin:32px 0;display:flex;gap:18px;align-items:flex-start} .gsg3-callout.warning{background:#f7ece0;border:1px solid rgba(184,106,21,.25)} .gsg3-callout .c-icon{flex-shrink:0;font-size:22px;line-height:1;color:#b86a15} .gsg3-callout .c-body{flex:1} .gsg3-callout .c-title{font-family:’DM Serif Display’,serif;font-size:18px;margin:0 0 8px;color:#b86a15} .gsg3-callout .c-text{font-size:15px;color:#485460;font-weight:400;line-height:1.7;margin:0} .gsg3-callout .c-text strong{color:#0f1a26;font-weight:600} .gsg3-callout .c-text em{color:#0a1929;font-style:italic;font-weight:500} .gsg3-table{width:100%;border-collapse:collapse;font-size:14px;background:#fff;border:1px solid #dde5ee;border-radius:10px;overflow:hidden;margin:28px 0;box-shadow:0 1px 3px rgba(11,31,53,.04)} .gsg3-table th{background:#0a1929;color:#fff;padding:14px 16px;text-align:left;font-size:12px;letter-spacing:.06em;text-transform:uppercase;font-weight:600;vertical-align:top} .gsg3-table td{padding:13px 16px;border-bottom:1px solid #dde5ee;color:#485460;font-weight:400;vertical-align:top;line-height:1.55} .gsg3-table tr:hover td{background:#f4f6f9} .gsg3-table tr:last-child td{border-bottom:none} .gsg3-table td:first-child{font-weight:600;color:#0a1929;background:#f4f6f9;font-size:13.5px} .gsg3-table td strong{color:#0f1a26;font-weight:700} .gsg3-faq{margin:28px 0} .gsg3-faq details{background:#fff;border:1px solid #dde5ee;border-radius:10px;margin-bottom:12px;overflow:hidden;transition:border-color .15s} .gsg3-faq details[open]{border-color:#2e5986;box-shadow:0 4px 20px rgba(11,31,53,.06)} .gsg3-faq summary{padding:20px 24px;cursor:pointer;font-family:’DM Serif Display’,serif;font-size:18px;color:#0a1929;display:flex;justify-content:space-between;align-items:center;gap:16px;list-style:none} .gsg3-faq summary::-webkit-details-marker{display:none} .gsg3-faq summary::after{content:’+’;font-family:’Outfit’,sans-serif;font-size:24px;color:#2e5986;font-weight:300;line-height:1} .gsg3-faq details[open] summary::after{content:’āˆ’’} .gsg3-faq details p{padding:0 24px 14px;font-size:15px;color:#485460;line-height:1.75;margin:0 0 8px} .gsg3-faq details p:last-child{padding-bottom:22px;margin-bottom:0} .gsg3-faq details p strong{color:#0f1a26;font-weight:600} .gsg3-next{background:#f4f6f9;border:1px solid #dde5ee;border-radius:12px;padding:28px 32px;margin:36px 0} .gsg3-next h2{margin-top:0;font-size:24px;margin-bottom:14px} .gsg3-next ul{margin:0 0 0 20px} .gsg3-next li{margin-bottom:10px;font-size:15px} .gsg3-sources{background:#fff;border:1px solid #dde5ee;border-radius:12px;padding:28px 32px;margin:36px 0} .gsg3-sources h3{margin-top:0;font-size:20px;margin-bottom:14px} .gsg3-sources p{font-size:14.5px;line-height:1.7;margin-bottom:14px} .gsg3-sources ul{font-size:13.5px;line-height:1.7;margin:0 0 14px 22px;color:#485460} .gsg3-sources li{margin-bottom:5px} .gsg3-sources .s-meta{font-size:12.5px;color:#8a95a3;margin:0} .gsg3-cta{background:linear-gradient(135deg,#0a1929,#2e5986);border-radius:14px;padding:40px 36px;margin:44px 0;color:#fff;text-align:center} .gsg3-cta h3{color:#fff;font-size:26px;margin:0 0 12px;font-family:’DM Serif Display’,serif;font-weight:400} .gsg3-cta p{color:rgba(255,255,255,.92);font-size:15px;margin:0 0 20px;line-height:1.7} .gsg3-cta a.btn{display:inline-block;padding:13px 30px;background:#d4913a;color:#0a1929;text-decoration:none;border-radius:8px;font-weight:600;font-size:14px;letter-spacing:.02em;transition:background .15s} .gsg3-cta a.btn:hover{background:#bd8030;text-decoration:none}

    The skills gap: what each mountain actually demands

    Mount Baker’s skill demands

    • Multi-day camping commitment: Carrying a 35-45 lb pack to high camp at 6,000-7,000 ft. Setting up tents, melting snow for water, cooking meals at altitude
    • Aerobic endurance: 7,400 feet of elevation gain across roughly 12.5 miles round trip. The summit day itself involves 4,500-5,000 ft of climbing with a light pack from high camp
    • Basic to intermediate crampon technique: French technique, flat-footing, and front-pointing on the Roman Wall’s 30-35 degree snow
    • Self-arrest reflexes: Important particularly on the Roman Wall where a slide could run out
    • Rope team movement: 3-person rope teams are standard. Climbers must maintain proper spacing, manage the rope, and stop progress immediately when a teammate has issues
    • Crevasse rescue setup: Z-pulley system, prusik ascending, partner extraction — taught in 3-day programs, expected from independent climbers
    • Mild altitude tolerance: 10,781 ft is high enough that some climbers feel mild altitude effects (shortness of breath, fatigue), but rarely causes serious AMS

    Mount Rainier’s skill demands

    • Everything Baker requires, plus:
    • Advanced glacier travel: Reading more complex crevasse patterns, navigating around or across crevasses that change daily, recognizing weakening snow bridges
    • Confident crevasse rescue under pressure: Practiced repeatedly until reflexive — the consequences of a fall into a crevasse on Rainier are more severe than on Baker
    • Faster alpine pacing: Maintaining 1,000 ft/hour on the upper mountain at 12,000+ feet — a meaningfully harder pace than Baker’s summit day
    • Significant altitude tolerance: 14,410 ft causes real altitude effects in most climbers. AMS symptoms must be managed without compromising pace
    • Heavier pack carrying: 45-55 lb packs to Camp Muir on Day 1; 10-15 lb summit packs on Day 2
    • Rockfall awareness on the Cleaver: Helmet protocol, moving efficiently through exposed sections, recognizing daily/seasonal rockfall patterns
    • Weather decision-making at higher consequence: Turning around at 13,000 feet is harder than turning around at 9,000 feet — both because of physical investment and because the weather window that opened the climb may not return

    The fundamental insight: Baker teaches all the foundational skills. Rainier demands those same skills, applied faster, at higher altitude, with less margin for error. Climbing Baker first lets you build the skills in a lower-consequence environment, then bring them to Rainier already absorbed into muscle memory. This is why every major guide service explicitly recommends Baker before Rainier — it’s not a marketing structure, it’s a curriculum.

    Cost comparison: Baker is meaningfully cheaper

    Mount Baker costs

    • Northwest Forest Pass: $5/day or $30/year
    • Wilderness permit: free
    • Pre-climb lodging in Bellingham or Glacier: $80-$200
    • Camping gear (if not owned): variable; can rent locally
    • Food, gas, transit: $80-$150
    • Total unguided per person: $150-$400
    • Guided 2-day climb: $1,300 (Northwest Alpine Guides)
    • Guided 3-day climb: $700-$1,500 (AAI, Mountain Madness, Blackbird, Skyline)

    Mount Rainier costs

    • NPS climbing cost recovery fee: $63 per year
    • Wilderness permit: included with guide programs
    • Park entrance fee: $30
    • Pre/post-climb lodging in Ashford or Seattle: $200-$400
    • Food/gas/transit: $100-$200
    • Tip for guides (~10% of program): $225-$300
    • Total unguided per person: $300-$600 plus gear
    • Guided 3-day climb: $2,250-$2,995 (RMI, IMG, Alpine Ascents)
    • Guided 4+ day seminar climb: $3,200-$4,500 (Alpine Ascents Rainier Seminar)

    The cost gap is substantial: Rainier guided is roughly 2x the cost of Baker guided. For climbers building a multi-year progression, this matters — climbing Baker first lets you invest a smaller amount to test your interest, build skills, and assess your fitness before committing to the higher-cost Rainier program. For full Rainier cost breakdown, see our Mount Whitney vs Mount Rainier comparison. See Investigation 18: What’s in a mountain guide’s pack for the gear list that covers both peaks.

    The honest verdict: when each is the right choice

    For 90% of climbers, the answer is clear: Baker first, Rainier second. But there are specific scenarios where the order varies.

    Pick Mount Baker first if

    You’re new to glaciated mountaineering and want a real first experience
    Baker
    You’re building toward Rainier or Denali as your major objective
    Baker
    You want to test your fitness and altitude tolerance before committing $2,500+ to Rainier
    Baker
    You have a budget under $1,500 for a guided experience
    Baker
    You want to maximize summit probability — Baker’s 70-85% rate is meaningfully higher than Rainier’s 48%
    Baker

    Pick Mount Rainier first if

    You have prior glacier mountaineering experience from Alaska, the Alps, or another major range
    Rainier
    You’re preparing for Denali or 7,000m+ peaks on a compressed timeline
    Rainier
    You have $2,500-$4,000 budgeted and accept the lower summit probability
    Rainier
    You’re committed to a 4+ day Rainier seminar climb that builds in skills instruction
    Rainier
    You specifically want the 14,000-foot benchmark over the glacier-skills benchmark
    Rainier

    The recommended sequence (Year 1 to Year 3)

    For climbers building a multi-year glaciated mountaineering progression, the canonical sequence is:

    1. Year 1, summer: Mount Baker via Coleman-Deming Glacier (3-day guided program). Build foundational glacier skills, rope team experience, crampon technique.
    2. Year 2, June-July: Mount Rainier via Disappointment Cleaver (3-4 day guided program). Apply Baker skills on bigger, more committing terrain.
    3. Year 2 or 3, winter: Glacier skills clinic, ice climbing course, or rescue practice to deepen the technical base.
    4. Year 3+: Independent Rainier climbs, then progression to international objectives — Aconcagua, Denali, 6,000m peaks (see Investigation 06: Your first big mountain for the next-step progression).
    ā–²
    The “I’ll skip Baker and just climb Rainier” trap

    Each year, hundreds of climbers attempt Rainier without prior glacier experience, betting that the guide service will teach them what they need to know on the climb itself. This is the largest single contributor to Rainier’s 48% summit success rate. Climbers without prior glacier skills consistently underperform on Rainier compared to those who built skills on Baker first.

    The independent-climber success rate on Rainier is ~44% — meaningfully lower than guided. The guided rate of ~60% reflects climbers who arrived with some prior experience plus the structured instruction of the guided program. If you want to maximize your odds of summiting Rainier, climb Baker first. This isn’t gatekeeping — it’s the structural advice from every major guide service in the region.

    Best month to climb each: side-by-side

    For the full framework, see Investigation 19: Best month to climb each mountain.

    MonthMount BakerMount Rainier
    JanuaryWinter ski mountaineering onlyWinter mountaineering only
    FebruaryWinter ski mountaineering onlyWinter mountaineering only
    MarchAdvanced ski mountaineeringAdvanced winter conditions
    AprilRoad still closed in many yearsSpring conditions; advanced only
    MayGood — depending on road opening; deep snowMarginal — spring conditions
    JuneExcellent — peak season beginsGood — early season conditions
    JulyExcellent — peak conditionsExcellent — peak season
    AugustGood — exposed crevasses; route-finding harderExcellent — stable conditions
    SeptemberFair — variable conditions; weather windows shorterGood — early month; deteriorating late
    OctoberMarginal — fall storms beginningMarginal — winter conditions returning
    NovemberWinter conditionsWinter mountaineering only
    DecemberWinter ski mountaineering onlyWinter mountaineering only

    Quick-reference comparison

    FactorMount BakerMount Rainier
    Elevation10,781 ft14,410 ft
    LocationNorth Cascades, WashingtonCentral Cascades, Washington
    Standard routeColeman-Deming GlacierDisappointment Cleaver
    Route gradeBeginner-intermediate glaciatedIntermediate-advanced glaciated
    Round trip distance~12.5 miles~14.5 miles
    Elevation gain~7,400 ft~9,000 ft
    Days required2-3 days2-4 days
    Technical demandsGlacier travel, rope team, basic crampon/axeAdvanced glacier travel, complex crevasse rescue, fast pacing at altitude
    Annual climbers~5,000-7,000~10,000 attempts
    Summit success rate~70-85% (guided)~48% overall
    Permit cost$5 parking (no climbing fee)$63 climbing fee + wilderness
    Cost (unguided)$150-$400 per person$300-$600 per person plus gear
    Cost (guided)$700-$1,500 (3-day)$2,250-$2,995 (3-day)
    Best seasonJune-JulyLate June-early September
    Best forFirst glaciated climb / Rainier prepIntermediate-advanced glaciated objective

    Frequently Asked Questions

    Is Mount Baker harder than Mount Rainier?

    No. Mount Rainier is meaningfully harder than Mount Baker. Rainier is 3,629 feet taller, has more crevasses, more objective hazard, longer summit-day distance, and demands more advanced glacier travel skills.

    Baker is widely considered the premier Rainier training peak precisely because it offers real glaciated mountaineering on more forgiving terrain. Most major guide services explicitly recommend climbing Baker before Rainier.

    Should I climb Baker before Rainier?

    Yes, in almost all cases. Baker is the canonical Rainier preparation climb. It teaches the same fundamental skills — rope team travel, crevasse rescue, crampon and ice axe technique, altitude exposure, glacier reading — on shorter, less consequential terrain.

    The Mount Baker Coleman-Deming route is rated as a beginner-friendly glacier climb; Rainier’s Disappointment Cleaver is intermediate-to-advanced. Building Baker into your progression substantially increases Rainier success rates.

    How much does it cost to climb Mount Baker vs Mount Rainier?

    Baker unguided: $5 Northwest Forest Pass for parking, plus food, gas, and lodging. Total under $400 typically.

    Baker guided: $700-$1,500 for a 2-3 day program with American Alpine Institute, Northwest Alpine Guides, Mountain Madness, or others.

    Rainier unguided: $63 NPS climbing fee plus wilderness permit. Total under $600 plus gear.

    Rainier guided: $2,250-$2,995 for a 3-day program with RMI, IMG, or Alpine Ascents.

    Rainier guided is roughly 2x the cost of Baker guided.

    How long does each climb take?

    Mount Baker: 2-3 days for most climbers via the Coleman-Deming route, with high camp at 6,000-7,000 feet. The 2-day program is intermediate-pace and requires prior mountaineering experience. The 3-day program builds in skills instruction.

    Mount Rainier: 2-3 days minimum on the Disappointment Cleaver route, with high camp at Camp Muir (10,080 ft). Many programs run 4 days to include skills instruction and weather contingency.

    Is Mount Baker a beginner-friendly climb?

    Yes, when guided. Mount Baker’s Coleman-Deming and Easton Glacier routes are widely considered the most beginner-friendly true glaciated climbs in the lower 48.

    Major guide services run multi-day programs for first-time mountaineers with built-in instruction in glacier travel, crevasse rescue, and rope team movement. Mount Baker is genuinely accessible to fit beginners with no prior mountaineering experience, provided they go guided.

    What is Mount Baker’s success rate?

    Mount Baker guided programs typically report 70-85% summit success rates, varying by season and weather window. This is meaningfully higher than Mount Rainier’s 48% historical average.

    The higher Baker success rate reflects both lower technical demands and shorter overall commitment — bad weather windows close out Rainier climbs more often than they shut down Baker attempts.

    When is the best time to climb Mount Baker?

    May through September, with peak conditions typically in June and July. Earlier in the season the routes are fully snow-covered with stable crevasse bridges. By late summer, crevasses become more exposed and route-finding gets more complex.

    The road to the Heliotrope Ridge trailhead may not fully open until mid-June in heavy snow years. Most guided programs run June through August.

    What gear do I need for both climbs?

    The technical gear list is nearly identical: mountaineering boots, crampons, ice axe, climbing harness, helmet, rope (provided by guide services), prusiks and rescue gear, glacier glasses, multi-layer clothing system.

    For both peaks: tent, 0-20°F sleeping bag, sleeping pad, stove and fuel, food for 2-3 days, and a 60-70L pack. Mount Rainier additionally requires more cold-weather layering due to higher altitude and longer summit day exposure.

    Most guide services rent the technical gear (crampons, ice axe, harness, helmet) for both peaks at similar prices. See Investigation 18: What’s in a mountain guide’s pack for the detailed gear list both guides carry.

    What to read next

    Sources and Verification

    This comparison was built from primary sources including:

    • U.S. Forest Service, Mt. Baker-Snoqualmie National Forest — Baker access and wilderness regulations
    • U.S. National Park Service, Mount Rainier — climbing statistics and permit framework
    • Recreation.gov — 2026 permit pricing for both peaks
    • American Alpine Institute (AAI) — Mount Baker route descriptions and guided program details
    • Northwest Alpine Guides — 2026 Baker program pricing and guidance
    • The Mountaineers — Mount Baker Coleman-Deming route trip reports and route grades
    • SummitPost — Mount Baker route descriptions and historical climbing data
    • Skyline Mountain Guides — 2026 Coleman-Deming program structure
    • Blackbird Mountain Guides — How to Climb Mt. Baker analysis (August 2025)
    • Edgeworks Outdoor — Mount Baker route difficulty grading
    • RMI Expeditions — Mount Rainier climbing program information
    • International Mountain Guides (IMG) — Rainier program pricing and structure
    • Alpine Ascents International — 2026 Rainier program and success rate analysis
    • AllTrails — Mount Baker Coleman-Deming and Mount Rainier route details

    Published June 8, 2026 Ā· Next scheduled review: November 2026 after the 2026 climbing season

    Subscribe to the Mountain Planning Brief

    Get notified when each new mountain comparison publishes. One email per release. No marketing.

    Subscribe →

    Was this helpful?

    Yes
    No
    Thanks for your feedback!
Language Ā»