
Mountaineering Boots Guide: How to Choose the Right Boot
The deep-dive fit and selection guide — UIAA B-rating decoded, brand-by-brand fit personality (La Sportiva runs narrow, Scarpa runs wide), fit diagnosis for common problems, break-in protocols with mileage targets, and specific model picks from B1 day boots to 8,000 m Olympus Mons. Boot selection is the single most important gear decision in mountaineering.
B-ratings
brands
protocol
range
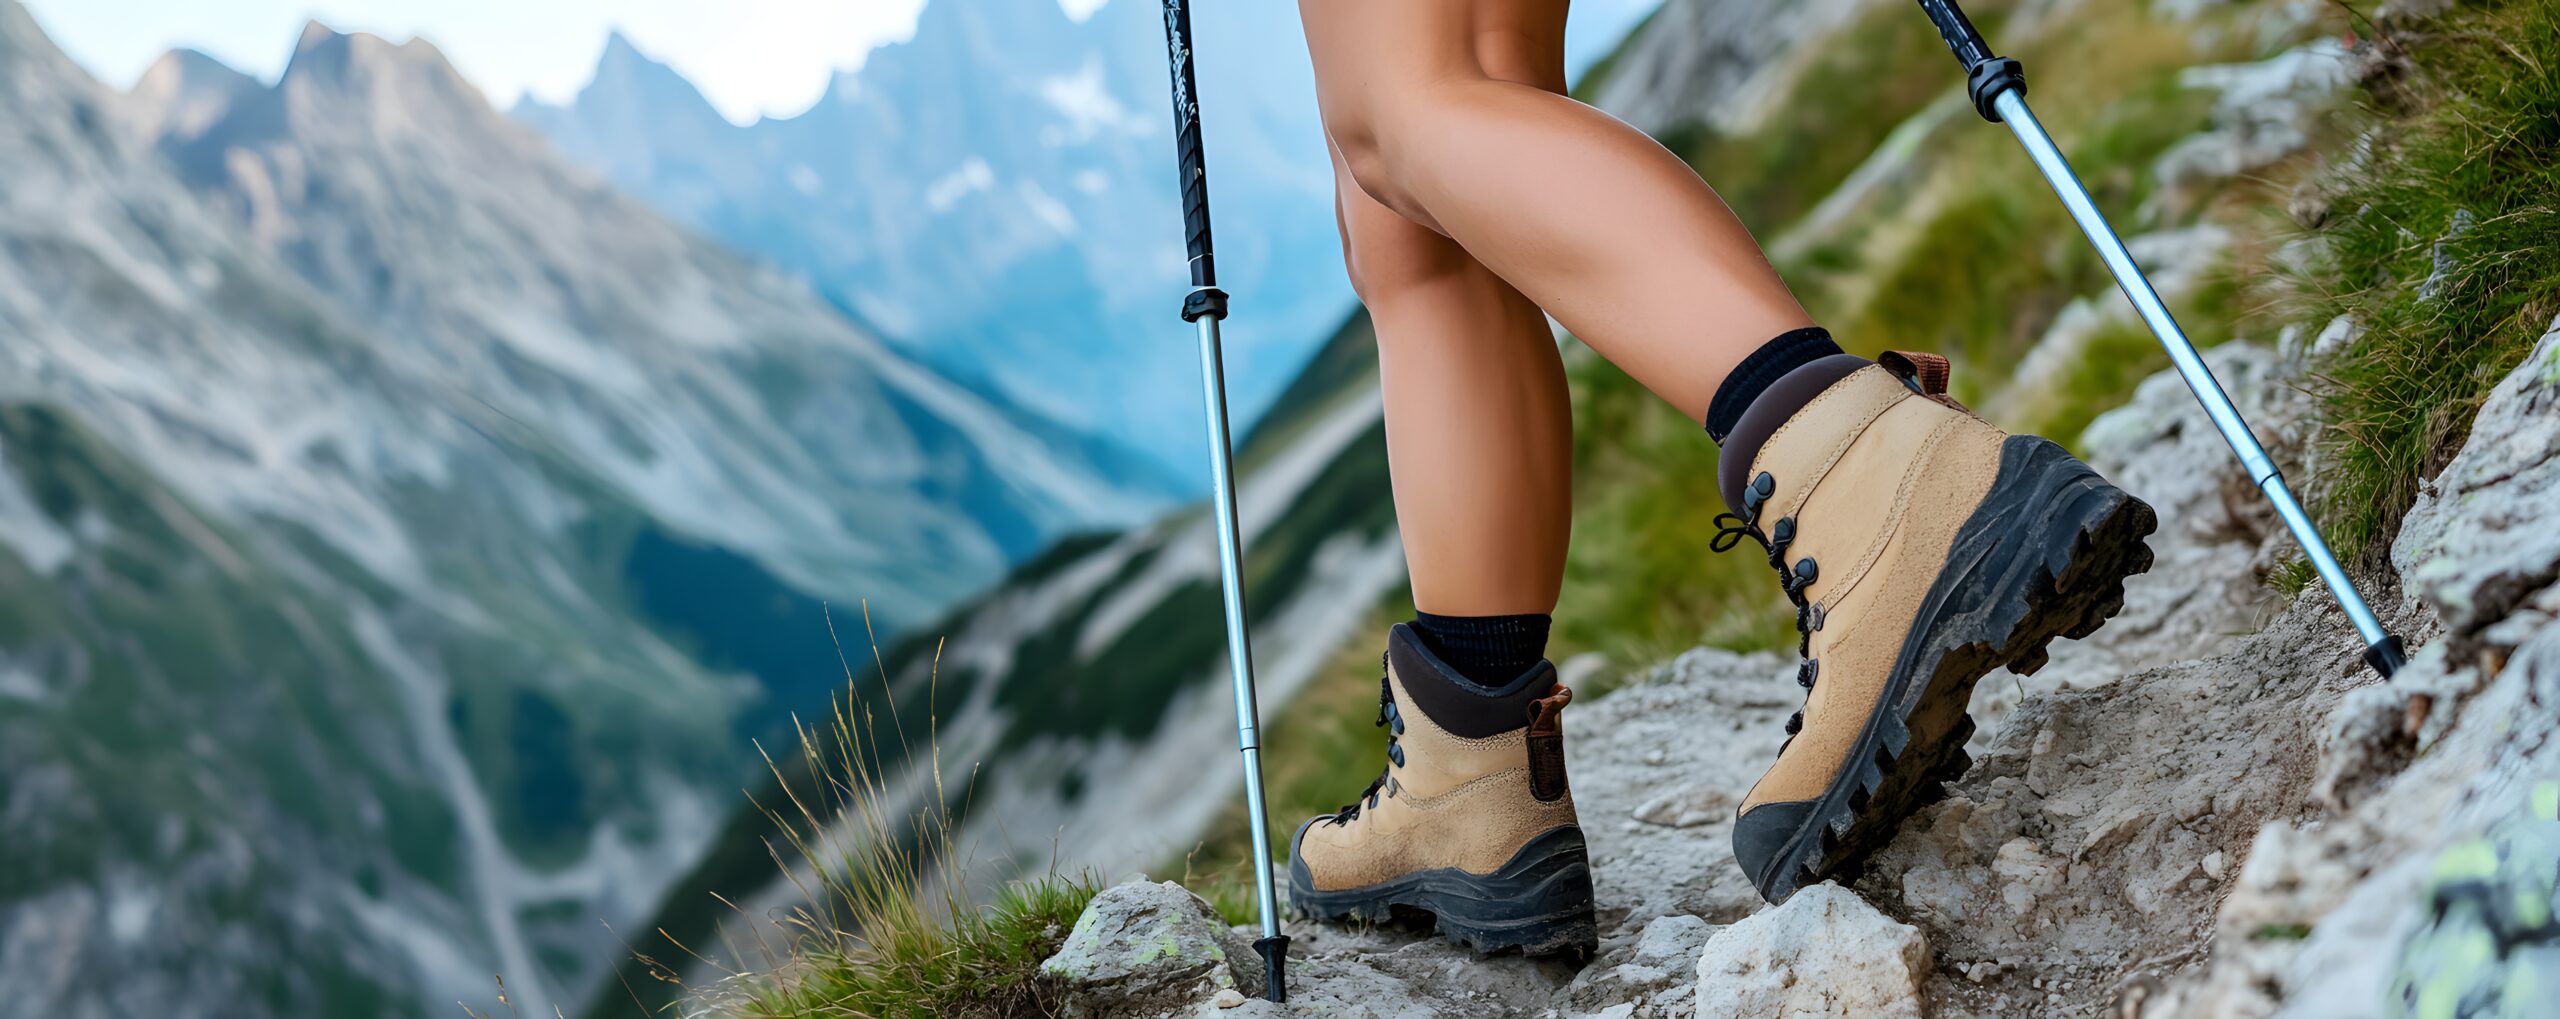
A mountaineering boot is not a boot. It’s a precision-engineered climbing platform that must flex like a hiker on approach, support a crampon like a wall on steep ice, and insulate like a sleeping bag at −40°F — often all on the same summit day. Getting this decision right is the single most important gear choice in mountaineering. Get it wrong, and blisters, black toes, frostbite, or equipment failure end the climb. This guide goes beyond the anchor gear overview: we’ll decode the UIAA B-rating system, profile each major brand’s fit personality, diagnose the four most common fit problems, walk through a proven 4-6 week break-in protocol, and recommend specific models by expedition tier.
Fit personality profiles compiled from hundreds of expedition reviews across La Sportiva, Scarpa, Asolo, Lowa, Millet, and Mammut model lines. UIAA B-rating system referenced against the official UIAA-149 standard. Break-in protocols derived from IFMGA guide practice and boot fitter recommendations. Model specifications verified against current manufacturer technical sheets (2025-2026 season). Price data from REI, Backcountry.com, Moosejaw, and specialty alpine retailers. Reviewed by certified boot fitters at multiple specialty retailers and IFMGA guides with extensive experience across all four B-rating categories. Fact-check date: April 19, 2026.
The UIAA B-Rating System Decoded
Every mountaineering boot carries a UIAA rating from B0 through B3 that defines its stiffness and crampon compatibility. This rating matters more than brand, weight, or price. A B1 boot with a C3 technical crampon is unsafe. A B3 boot on a day hike is overkill and exhausting. Match the rating to the climb:
Single vs. Double: The Big Decision
Within the B3 category, the next fork in the road is single boot vs. double boot. This isn’t a quality difference — it’s a design philosophy difference:
Single boots — integrated insulation
One-piece construction with insulation built into the boot wall. Lighter (2-3 lbs/pair), more precise climbing feel, faster to lace. Limited to about −10°F comfort. Best for technical alpine climbing where climbing sensitivity matters more than extreme warmth. Examples: La Sportiva Trango Tower, Scarpa Phantom Tech HD, Mammut Nordwand Pro.
Double boots — removable inner
Rigid outer shell with a separate removable inner liner boot. Heavier (3-5 lbs/pair), warmer (−20 to −60°F), bulkier to climb in. The critical advantage: the inner boot can be removed at night and brought into your sleeping bag to dry — which is non-negotiable for multi-day expeditions where frozen boot liners end summit attempts. Examples: La Sportiva G2 Evo, Scarpa Phantom 6000, Millet Expert 6000 ITR.
Below this threshold, single boots handle most situations and reward you with better climbing performance and less expedition weight. Above this threshold, double boots become non-negotiable. The removable inner liner isn’t a luxury — it’s a safety feature. A wet single boot at 6,500 m that freezes overnight can’t be rewarmed. A wet double boot inner can be dried in your sleeping bag. This is why Aconcagua (6,961 m), Denali (6,190 m), and all 7,000 m+ expeditions use doubles, while most Alps routes and summer 4,000 m peaks use singles.
Brand Fit Personality: Why It Matters More Than Brand Prestige
Every major mountaineering boot brand has a fit personality — a characteristic last shape that suits certain foot shapes and frustrates others. Brand loyalty is actually foot-shape loyalty. If La Sportiva fits your foot, most La Sportiva models will fit. If they don’t, no single La Sportiva model will save you. Here’s what each major brand is known for:
La Sportiva
ItalyThe technical innovation leader — lightweight construction, strong climbing feel, widest model range in mountaineering. Runs narrow, particularly in the forefoot, with relatively low instep volume. Best for narrow feet with average-to-low volume. Wide-footed climbers should size up or look elsewhere.
Scarpa
ItalyTechnical excellence with broader fit than La Sportiva. Classical Italian craftsmanship, premium materials, strong double-boot lineup. Fits medium to wide forefeet with medium instep. The Phantom series is widely considered the standard for modern expedition double boots.
Asolo
ItalyThe American foot’s friend — widest lasts in mountaineering, high volume accommodations, conservative traditional designs. Runs wide and tall, excellent for high-instep or wide feet that don’t fit Italian technical brands. Reliable, durable, less innovation-focused.
Lowa
GermanyGerman engineering precision — exacting construction, conservative innovation, long product cycles. Runs narrow with precise heel cup, excellent for secure heel hold on steep terrain. Less common in North America but has a devoted following.
Millet
FranceFrench alpine heritage with modern innovation — expedition double boots are particularly strong. Fits medium width with alpine-oriented volume (not too roomy). The Expert 6000 ITR is a classic Denali/Aconcagua choice; Everest Summit is their 8,000 m offering.
Mammut
SwitzerlandSwiss precision with integration into broader mountaineering gear system. Fits medium width with Swiss craftsmanship attention. Safety-focused designs, premium materials. Less selection than La Sportiva or Scarpa but strong quality.
Climbers who buy their second boot from the same brand as their first are often unconsciously choosing by foot shape, not brand quality. If Scarpa fit you well on a general-mountaineering boot, their expedition double will probably fit you too — not because Scarpa is better, but because their last shape matches your foot. Start every boot purchase by trying on three brands across your foot size, not by defaulting to the brand that worked before. Feet change over years (they tend to widen and flatten with age), and models change too.
Fit Diagnosis: The Four Common Problems
When a boot doesn’t fit right, the symptoms fall into four diagnostic categories. Knowing which one you have points directly at the solution:
Heel Slip / Heel Lift
Toe Bang on Descent
Instep Pressure / Top-of-Foot Pain
Localized Hot Spots / Blisters
The 4-6 Week Break-In Protocol
Mountaineering boots require genuine break-in time before any expedition. Manufacturer claims of “no break-in needed” are marketing. New boots need at least 20-30 miles of progressive wear (expedition double boots: 30+ miles) before an expedition. Here’s the proven protocol:
Week 1 — Foundation (1-2 miles total)
Wear boots around the house, to the store, on short neighborhood walks. Full expedition sock system from day one — the same liner + outer sock you’ll use on the mountain. Watch for immediate pressure points; if something hurts in week 1, it will be worse at altitude.
Week 2 — Terrain introduction (3-5 miles per outing)
Move onto trails. Include uphill, downhill, and traversing terrain. Test different lacing patterns. Pressure points may start appearing now — this is useful data, not failure.
Week 3 — Load and distance (5-8 miles per outing)
Add a weighted pack (15-20 kg) to simulate expedition loads. Walk longer days with varied terrain. Practice crampon attachment if your boots support it (B2 or B3).
Week 4 — Expedition simulation (8-15 miles)
Full multi-day backpacking with expedition pack weight and varied weather. If you’re going to a high-altitude objective, include some elevation gain. Any serious problems at this stage require resolution (return, exchange, or professional modification) before the expedition.
Week 5-6 — Final preparation
Long days (15+ miles), full pack, full climbing simulation. At this point boots should feel like an extension of your feet. If they don’t — don’t take them on expedition. Rent or postpone.
Some old-school advice recommends soaking new leather boots and wearing them until dry to speed fit-molding. This works briefly but causes long-term damage — shortens boot life by 30-50%, voids most warranties, and creates inconsistent fit. Modern synthetic boots should never be wet-broken-in (different construction principles). The right break-in is patient and progressive, measured in weeks and miles, not shortcuts. Plan boot purchase at least 6-8 weeks before any expedition.
Specific Model Recommendations by Tier
Tying everything together — specific model picks for each expedition tier. For context on tiers, see the complete gear list.
| Expedition Tier | Rating | Recommended Models | Temp Rating | Price |
|---|---|---|---|---|
| Tier II · Trekking | B1 | La Sportiva Trango TRK, Salewa Mountain Trainer, Scarpa Zodiac GTX | To 20°F | $250-500 |
| Tier III · 5-6,000 m | B2 | La Sportiva Nepal Cube, Scarpa Mont Blanc Pro, Mammut Taiss Pro, Asolo Rainier | To 0°F | $400-800 |
| Tier IV · Technical Alpine | B3 single | Scarpa Phantom Tech HD, La Sportiva Trango Tower, Mammut Nordwand Pro | To −10°F | $500-900 |
| Tier IV · Aconcagua, Denali | B3 double | La Sportiva G2 Evo, Scarpa Phantom 6000, Millet Expert 6000 ITR | To −30°F | $700-1,100 |
| Tier V · 7,000 m | B3 double | Scarpa Phantom 8000, Millet Everest Summit, La Sportiva G2 Evo (margin) | To −40°F | $900-1,300 |
| Tier VI · 8,000 m | B3 double | La Sportiva Olympus Mons Cube, Millet Everest Summit, Scarpa Phantom 8000 | To −60°F | $1,000-1,500 |
Lifespan, Resoling & When to Replace
Mountaineering boots last 5-8 years with regular use, with specific timelines dependent on expedition frequency, care, and construction. What to expect:
- Sole tread: Vibram soles last 200-400 miles of moderate use. Resoleable for $80-150 — extends life significantly. Get this done before tread wear exposes lower sole structure.
- Leather uppers: Full-grain leather conditioned annually lasts 7-10 years. Synthetic uppers typically 5-7 years before showing wear.
- Waterproofing membranes: Gore-Tex and similar membranes fail after 4-6 years of regular use. Boots may look fine but stop being waterproof.
- Insulation in double boots: Inner liner loft degrades 20-30% after 5 years. At that point, warmth rating drops meaningfully — still useable for lower-tier climbs but not the original expedition tier.
- Rands (rubber boot edges): Often fail first in heavy use. Delamination from the upper signals replacement time.
Replace immediately when: sole has cracked, waterproofing has failed on a boot rated for wet conditions, rand has delaminated significantly, or insulation no longer provides expected warmth at altitude. Do not “one more trip” a boot with critical failures — the cost of equipment failure at 6,000 m dwarfs the cost of a new boot.
Boots FAQ: Your Common Questions Answered
What is the UIAA B-rating system for mountaineering boots?
The UIAA B-rating system classifies mountaineering boots by stiffness and crampon compatibility on a B0-B3 scale. B0 rating: fully flexible sole, normal hiking/walking use, no crampon compatibility, standard hiking boots. B1 rating: semi-rigid sole, light mountaineering use, compatible with C1 strap-on crampons only, summer alpine climbing, examples Salewa Mountain Trainer La Sportiva Trango TRK. B2 rating: mostly rigid sole with some flex at toe, general mountaineering, compatible with C1 and C2 semi-automatic crampons, year-round glacier travel, examples La Sportiva Nepal Cube Scarpa Mont Blanc Pro. B3 rating: fully rigid sole, technical mountaineering and ice climbing, compatible with all crampon types (C1 C2 C3) including step-in, steep ice and mixed climbing, examples La Sportiva G2 Scarpa Phantom 6000 La Sportiva Olympus Mons. Crampon compatibility details — C1 crampons (strap-on): work with B1 B2 B3 boots, universal fit via straps, less precise fit, suitable for walking and moderate terrain. C2 crampons (semi-automatic): require B2 or B3 boots with rear welt, heel clip plus toe strap, better fit than strap-on, general mountaineering and ice climbing, most common for experienced mountaineers. C3 crampons (fully automatic step-in): require B3 boots with toe and heel welts, most secure attachment, technical climbing performance, precise front-point work. The UIAA B-rating system is essential for matching boots to climbing objectives. For most mountaineers B2 boots offer the best versatility, while B3 is required for technical ice climbing and expedition use. See our crampons and ice axes guide.
What’s the difference between single and double mountaineering boots?
Single mountaineering boots have integrated insulation in one piece, while double boots feature a removable inner boot inside an outer shell — double boots provide dramatically more warmth for cold expeditions but add weight and complexity. Single boot characteristics: one-piece construction, integrated insulation throughout, lighter weight (typically 2-3 lbs/pair), more technical climbing precision, faster lacing and easier fit, better sensitivity for climbing, limited temperature range (-10°F to 20°F typical). Double boot characteristics: removable inner liner boot, shell plus separate inner, heavier weight (typically 3-5 lbs/pair), dramatically warmer insulation, inner can be removed for drying, temperature tolerance down to -40°F, more complex system to use. When to use single boots: summer alpine climbing, technical glacier travel, short expeditions below 6,000m, rock climbing emphasis, mixed alpine with lower altitudes, weight-conscious climbing, performance-focused climbing. Specific single boot examples: La Sportiva Nepal Cube (mid-range), Scarpa Mont Blanc Pro (premium), Mammut Taiss Pro (all-mountain), Asolo Rainier (reliability). When to use double boots: cold weather expeditions, peaks above 6,000m, Denali and Alaska climbing, winter mountaineering, 8,000m peak attempts, long expeditions with variable conditions, maximum warmth required. Specific double boot examples: La Sportiva G2 (expedition standard), Scarpa Phantom 6000 (premium), Millet Expert 6000 ITR (proven), Lowa Expedition Pro (reliability), La Sportiva Olympus Mons (8,000m), Scarpa Phantom 8000 (technical 8,000m). Inner boot advantages: removed for overnight drying, multiple inners can rotate, vapor barriers prevent moisture, sleeping bag drying possible, heat source available for drying. Temperature rating comparisons: single boots +20°F to -10°F typical, double boots 0°F to -40°F typical, expedition doubles -20°F to -50°F, 8,000m specialized -40°F to -60°F. Cost comparison: single mountaineering $300-800, double mountaineering $600-1,200, expedition doubles $800-1,200, 8,000m specialized $800-1,500. The choice between single and double boots depends primarily on expected temperatures and expedition length. Most serious mountaineers eventually own examples of both types for different purposes.
How do I get the right fit for mountaineering boots?
Getting mountaineering boot fit right requires systematic evaluation of heel hold, toe room, instep height, width, and volume — with attention to the specific sock system you’ll use climbing. Mountaineering boots run differently than regular hiking boots. Sizing fundamentals: usually 1/2 to full size larger than street shoes, accommodate thick socks, allow for foot swelling, downhill toe space required, ankle swelling consideration. Proper fitting steps: try boots late in day, wear expedition socks, include liner socks if using, walk and climb test, flex patterns check, pressure point evaluation, heel lift inspection. Heel hold assessment: heel should not lift, no slipping up during climb, ankle support adequate, rolling motion prevention, long-term comfort, boot lacing importance. Toe room requirements: 1/2 inch minimum downhill space, no pressure on descents, black toe prevention, boot break-in affects toe room, size up if in doubt. Instep height variables: different boots for different feet, low instep narrow low volume, high instep wide high volume, mismatched equals pressure points, lacing compensation only partial, professional fitting essential. Width considerations: different lasts available, wide feet need wide lasts, narrow feet need narrow fits, volume affects comfort, brand-specific variations. Common fit problems — Pressure points: top of foot pressure, side of foot pressure, heel pressure points, ankle bone pressure, toe pressure, solution different boot or modifications. Hot spots: friction area identification, break-in extension needed, sock system adjustment, pre-treatment applications, professional fitting solutions. Professional fitting services — Specialized outdoor retailers: trained fitters available, fit guarantee policies, return/exchange options, multiple boot testing, custom modifications. Break-in procedures — Minimum break-in mileage 15-20 miles before expedition, gradual increase process, pressure point identification, sock system testing, real-world simulation. Sock system integration: sock thickness considerations summer use thinner, winter expeditions thicker, variable conditions layered, moisture management, temperature regulation. Vapor barrier integration: VBL (vapor barrier liner) socks, moisture control essential, frostbite prevention, double boot compatibility, drying requirements. Getting the right boot fit is perhaps the most important gear decision for mountaineering. Poor fit causes blisters, black toenails, fatigue, and safety issues at altitude. Professional fitting is recommended for first-time buyers.
How do you break in new mountaineering boots?
Breaking in new mountaineering boots requires a progressive 4-6 week program starting with short walks and building to full expedition-like conditions — rushing this process causes debilitating blisters and hot spots that can end expeditions. Week 1 — Initial wear (1-2 miles): short walks around house, gradual increase to 1-2 miles, flat terrain only, full sock system testing, identify immediate fit issues, return if major problems, pressure point notation, break-in pace light and progressive. Week 2 — Foundation building (3-5 miles): moderate terrain introduction, hills and uneven ground, different terrain types, multiple sock combinations, break-in boot ritual, flex patterns developing, lacing adjustments, comfort baseline establishment. Week 3 — Intensity increase (5-8 miles): longer hiking days, backpack weight addition, technical terrain testing, steep climbing practice, descents and rough ground, extended wear time, heat and cold exposure, weather variability testing. Week 4 — Expedition simulation (8-15 miles): multi-day trips, full expedition conditions, technical climbing practice, crampon attachment/removal, various altitudes if possible, complete sock system, performance verification, long-wear comfort assessment. Week 5-6 — Final preparation (15+ miles): expedition-length days, full pack loads, technical terrain mastery, climbing-specific movements, repeated long wear, fine-tuning completed, confidence building, readiness verification. Leather boot specifics — Conditioning treatments: pre-break-in conditioning, regular application, moisture protection, leather preservation, flexibility maintenance, long-term care. Break-in characteristics: gradual softening, mold to foot shape, flex pattern development, long-term comfort growth, multi-season improvement. Synthetic boot specifics — Minimal conditioning needed: fabric doesn’t need conditioning, UV protection considerations, abrasion resistance, minimal maintenance, quick drying advantage. Break-in differences: faster break-in typically, less flex pattern change, immediate comfort possible, less long-term mold, more consistent fit. Specific break-in protocols: standard hiking boots 2-week minimum 15-20 miles, mountaineering single boots 3-4 week program 20-30 miles break-in, mountaineering double boots 4-6 week program 30+ miles break-in, expedition boots 6+ week program extensive break-in needed. Common break-in problems: hot spots friction area development address immediately lacing adjustments sock changes professional consultation. A proper boot break-in is non-negotiable for serious mountaineering.
Which mountaineering boot brands are best?
The best mountaineering boot brands vary by personal foot shape, expedition requirements, and climbing style. La Sportiva: technical innovation leader, lightweight designs, strong climbing performance, wide range of models, Italian precision, alpine specialization, fit characteristic narrower lasts. Popular models: Nepal Cube general mountaineering, Trango series technical alpine, G2 Evo expedition doubles, Olympus Mons 8,000m peaks. Price $300-1,500. Scarpa: technical excellence focus, Italian craftsmanship, innovation-driven, premium quality, classical alpine heritage, fit characteristic medium-to-wide. Popular models: Mont Blanc Pro classic technical, Phantom 6000 modern expedition, Phantom 8000 8,000m specialist, Rebel Force technical alpine. Price $400-1,500. Asolo: Italian tradition, reliability focus, classic designs, good value ratios, long-term durability, conservative styling. Popular models: Rainier reliable mountaineering, Freney expedition ready, Charmoz classic mountaineering. Price $250-1,000. Lowa: German engineering, reliability and durability, precise craftsmanship, conservative innovation, long product lifecycle, fit characteristic typically narrow. Popular models: Expedition Pro classic expedition, Mountain Expert technical ability, Tibet series traditional design, Cevedale versatile mountaineering. Price $350-1,300. Millet: French alpine heritage, technical innovation, lightweight focus, modern design, specialized alpine products. Popular models: Expert 6000 ITR expedition standard, Everest Summit 8,000m specialist. Price $300-1,500. Mammut: Swiss precision, safety-focused design, premium materials, integration with gear line, alpine expertise, fit characteristic medium width. Fit personality summary — Narrow lasts: Lowa La Sportiva performance focus technical climbing advantage limited foot accommodation. Medium lasts: Scarpa Mammut balanced fit versatile performance mass market appeal. Wide lasts: Asolo some Scarpa comfort emphasis accommodating fit good for American feet. The best brand depends primarily on personal foot shape and specific climbing objectives rather than overall brand reputation.
Can I use hiking boots for mountaineering?
Hiking boots are generally inadequate for serious mountaineering because they lack the rigid sole structure, insulation, and crampon compatibility required for technical terrain and cold conditions. Why hiking boots fall short — Stiffness limitations: too flexible for crampon use, poor front-pointing stability, torsional weakness on steep ice, inadequate ankle support for heavy packs, limited durability for expedition use, no rigid platform for kicking steps. Temperature limitations: insufficient insulation for altitude, non-insulated construction, limited cold weather performance, freezing potential at altitude, frostbite risks in expedition conditions, no vapor barrier systems. Crampon compatibility: most hiking boots are B0 rated, cannot use automatic crampons, limited strap-on crampon security, inconsistent crampon fit, dangerous on steep terrain, reduced climbing performance. Technical performance: inadequate front-pointing, poor rock performance, limited mixed climbing ability, reduced precision, fatigue issues, safety concerns. When hiking boots might work — Low-altitude glacier travel: summer conditions only, non-technical objectives, strap-on crampons, experienced guide support, short duration activities, mild weather conditions. Beginner mountaineering: brief introduction to mountaineering, local peaks with minimal technical, good weather windows, short day trips, guide service support, educational purposes. Progressive climbing progression — Starting point: hiking boots for day hikes, build outdoor experience, develop fitness and skills, learn mountain techniques, save for proper boots, commitment demonstration. Transition phase: light mountaineering boots, crampon introduction, basic mountaineering skills, guided instruction, equipment familiarity. Technical progression: technical mountaineering boots, advanced techniques, longer expeditions, skill development, performance optimization. Boot category comparisons: hiking boot capabilities day hikes and backpacking moderate elevation gains dry conditions trail conditions casual use. Mountaineering boot capabilities: glacier travel safely altitude endurance cold weather performance technical climbing long expeditions crampon compatibility. Cost considerations: hiking boots $100-300, entry mountaineering $300-600, technical mountaineering $500-1,000, expedition boots $800-1,500. The investment in proper mountaineering boots is essential for safety, performance, and success in serious climbing objectives.
How long do mountaineering boots last?
Mountaineering boots typically last 5-8 years with regular use, though specific lifespan depends on expedition frequency, care, storage conditions, and construction quality. Boot lifespan factors — Usage intensity: weekend hiker 8-10 years typical, active mountaineer 5-7 years typical, commercial guide 2-4 years, professional athlete 1-2 years, daily use 6 months to 2 years. Construction quality: premium brands longer life, budget options shorter life, traditional construction often longer, modern synthetics variable, materials impact significant. Component lifespans — Upper construction leather boots: full-grain 7-10 years typical, split leather 4-6 years, suede 3-5 years, oiled leather 5-8 years, nubuck 4-6 years. Synthetic construction: ballistic nylon 5-8 years, Gore-Tex 5-7 years, polyester 4-6 years, modern synthetics variable, integrated materials 5-7 years. Sole systems: Vibram soles resoleable, resole cycle 200-400 miles, complete sole replacement $80-150, professional cobbler service, quality after resoling good. Insulation performance: down insulation 5-7 years, synthetic insulation 4-6 years, integrated warmth variable, performance degradation gradual, replacement planning needed. Waterproofing: Gore-Tex linings 4-6 years, waterproof membranes variable, waterproof treatments annual refresh, reapplication importance, performance degradation. Maintenance routines — Post-expedition care: immediate cleaning, thorough drying, leather conditioning, storage preparation, inspection for damage, professional evaluation. Regular maintenance: weekly cleaning during use, monthly conditioning, seasonal deep cleaning, annual professional service, repair as needed. Proper storage: cool dry location, ventilated storage, upright position, away from direct sunlight, away from heat sources, regular rotation. Failure modes — Sole failures: delamination (sole separating), cracking in critical areas, tread wear beyond service, rand damage, waterproof seam failure. Replacement timing indicators — Safety concerns: tread wear beyond limits, sole integrity issues, upper damage beyond repair, waterproofing failure critical, performance compromises. Performance degradation: cold feet in previously warm boots, wet feet in previous dry conditions, reduced climbing performance, comfort issues persistent, fatigue during expeditions. Understanding boot lifespan helps in budget planning and equipment replacement decisions.
Should I rent or buy mountaineering boots?
Whether to rent or buy mountaineering boots depends on expedition frequency, boot type needed, fit specifics, and budget — with rental making more sense for first-time climbers, specialized boots, and uncertain progression, while purchase is better for frequent use, specific fit requirements, and long-term investment. When to rent mountaineering boots — First-time mountaineer: uncertainty about progression, testing different types, learning what works, budget constraints, avoiding premature commitment, building experience first, trying various fits. First expedition in category: testing specific needs, avoiding wrong purchases, learning expedition-specific needs, gaining experience, determining progression, cost-effective testing. Specialized short-term use: single expedition objectives, specific climbing conditions, temporary altitude needs, warmth requirements for 1-2 trips, technical needs for specific routes, variable conditions testing. Rental options — Commercial expedition services: included in guided packages, quality equipment guaranteed, professional fitting assistance, tested equipment reliability, integrated system approach, emergency support available, cost typically included. Outdoor specialty stores: local retailers with rental programs, try-before-buy options, short-term rentals (1-2 weeks), quality maintenance, fit adjustment services, professional advice, cost $20-50/day typical. Specialized outdoor rental companies: Mountain Gear Rentals, Alpine Trekking, equipment sharing services, online rental platforms, shipping options available, insurance coverage, cost $30-80/day typical. When to buy mountaineering boots — Regular mountaineer: multiple expeditions yearly, consistent fit requirements, investment amortization, performance familiarity, backup equipment, long-term commitment. Specific fit requirements: unique foot shape, custom fitting needed, specialized needs, brand loyalty, professional fitting, comfort priorities. Rental vs purchase decision matrix: new to mountaineering rent first, testing equipment rent for testing, regular use planned buy for quality, specific expedition often included, technical specialization buy for consistency. Many mountaineers rent for first expeditions to learn their preferences, then invest in quality boots once they understand their specific needs. See our mountain climbing costs guide for budget planning.
Authoritative Sources & Further Reading
Boot recommendations and fit guidance reflect published standards and professional practice:
- UIAA-149 Standard — International Climbing and Mountaineering Federation boot stiffness classification
- EN 12492 — European crampon and crampon-compatibility standards
- American Alpine Club — Equipment reviews and expedition reports
- IFMGA guides — Professional packing lists and equipment protocols
- Manufacturer technical specifications: La Sportiva, Scarpa, Asolo, Lowa, Millet, Mammut, Salewa (2025-2026 product lines)
- Commercial expedition operators with published gear lists: Alpine Ascents International, Mountain Madness, Madison Mountaineering, RMI Expeditions
- Moosejaw, REI, Backcountry.com — Current retail pricing and customer review data
- Specialty boot fitters consulted: Larry’s Boots (Seattle), The Mountaineer (Keene Valley), and others
- Reference text: Mountaineering: The Freedom of the Hills (The Mountaineers Books)
Related Guides Across the Hub
Companion guides across gear, training, and expedition planning.
Back to the Master Hub
This guide is part of Cluster 09 · Gear & Equipment — one of 12 thematic clusters on Global Summit Guide. The master hub organizes every guide by experience tier, peak, skill area, and region.
Related posts:
 Conquer Peaks: Global Summit Guide for Mountain Climbing
 Altitude Sickness Treatment: How to Recover Safely
 Best Trekking Poles in 2026: Ranked for Every Hiker
 Mountain Climbing Gear List: Everything You Need
 Best Mountaineering Boots: Complete Guide and Reviews 2025
 Best Mountaineering Crampons: Buyer’s Guide
Leave a Reply