web analytics

Tag: Kilimanjaro preparation

  • Mount Meru as Kilimanjaro acclimatization

    Mount Meru as Kilimanjaro Acclimatization: Why the Meru Mountains Are Tanzania’s Best Pre-Kilimanjaro Climb | Global Summit Guide
    Mountain Climbing Guides / Tanzania

    Mount Meru as Kilimanjaro acclimatization: why the Meru mountains are Tanzania’s best pre-Kilimanjaro climb

    4,562 m
    Meru summit
    3-4 days
    Meru climb duration
    +15-25%
    Kili success boost
    $800-$1.8K
    Meru cost range
    ★ Part of the Tanzania peaks series This acclimatization guide supports our Mount Meru master page and our Kilimanjaro climbing guide. Master guide →

    Most Kilimanjaro climbers arrive at the mountain and start climbing immediately. Approximately 60-65% of them summit successfully. The remaining 35-40% turn back due to altitude sickness, exhaustion, or weather. There’s a simple intervention that dramatically improves these odds: climb Mount Meru first. The Meru mountains at 4,562 meters provide ideal altitude acclimatization for Kilimanjaro, and climbers who do Meru before Kili typically have summit success rates 15-25 percentage points higher than those who skip it. Mount Meru is also a legitimate mountaineering objective in its own right — Tanzania’s second-highest peak, a dramatic dormant volcano in Arusha National Park, and one of the most underrated African mountain experiences. This guide explains why the Meru-then-Kili sequence works and how to plan it. For broader context see our Mount Meru master page.

    Mount Meru in context Tanzania’s overlooked second peak

    Mount Meru is the fifth-highest mountain in Africa, the second-highest peak in Tanzania, and a dormant stratovolcano located approximately 70 kilometers west of Mount Kilimanjaro. The mountain dominates the Arusha skyline and sits at the heart of Arusha National Park — one of Tanzania’s smaller but most ecologically diverse national parks.

    Despite its proximity to Kilimanjaro and its impressive 4,562-meter elevation, Mount Meru receives a fraction of the climber traffic. Kilimanjaro sees 35,000-50,000 climbers per year; Mount Meru sees approximately 3,000-5,000. This dramatic disparity exists for a simple reason: most international visitors come to Tanzania specifically for Kilimanjaro and don’t know that adding Meru to their itinerary dramatically improves the chances of summiting their main target.

    DetailMount Meru
    Elevation4,562 m (14,968 ft)
    Tanzania ranking2nd highest peak
    Africa ranking5th highest peak
    Distance from Kilimanjaro~70 km west
    LocationArusha National Park
    Geological typeDormant stratovolcano
    Last significant eruption~100 years ago
    Annual climbers~3,000-5,000
    Standard routeMomela Route
    Climbing duration3-4 days
    Park accessMomela Gate (45 min from Arusha)

    Why acclimatization is the difference between summiting and turning back

    Approximately 30-40% of Kilimanjaro climbers fail to summit. The single biggest reason isn’t lack of fitness or technical skill — it’s altitude sickness. Kilimanjaro’s 5,895-meter summit elevation is high enough that nearly everyone experiences some degree of altitude effects. Without proper acclimatization, those effects compound into Acute Mountain Sickness (AMS), High Altitude Pulmonary Edema (HAPE), or High Altitude Cerebral Edema (HACE) — conditions that force descent and end summit attempts.

    The standard Kilimanjaro climb structure compounds this problem. Most routes deliver climbers to summit elevation in 5-7 days, which is faster than most bodies can adapt. Even the longer Lemosho and Northern Circuit routes (8-9 days) provide marginal acclimatization compared to a proper altitude progression.

    The math that matters

    Kilimanjaro summit success rates by route duration: 5-day Marangu route ~50%, 6-day Marangu/Machame ~55-65%, 7-day Lemosho/Machame ~80%, 8-day Lemosho ~85%, 9-day Northern Circuit ~90%. The single biggest factor in these success rates is acclimatization time. Climbers who do Mount Meru first add the equivalent of 3-4 acclimatization days before Kili even begins, which is why their success rates on shorter Kili routes match the success rates of much longer Kili routes.

    Why Mount Meru works as acclimatization the four key reasons

    1.

    Ideal altitude profile

    Mount Meru’s 4,562m summit puts climbers above 4,500m for several hours, triggering the physiological adaptations needed for higher altitude success — increased red blood cell production, improved oxygen efficiency, and enhanced lung capacity.

    2.

    Sustained exposure

    The 3-4 day climb provides sustained altitude exposure rather than rapid summit-and-descent. Two nights above 2,500m and one above 3,500m create the gradient needed for meaningful acclimatization rather than just brief altitude touch.

    3.

    Perfect proximity

    The 70km distance from Kilimanjaro means climbers transition directly from Meru summit to Kilimanjaro within 1-3 days, preserving acclimatization benefits. The window for retained adaptation is roughly 1-2 weeks, which fits perfectly with the combined trip structure.

    4.

    Meaningful summit experience

    Unlike altitude tents or pre-climb hikes, Mount Meru is a real summit objective. The 4,562m peak is genuinely rewarding — climbers get a meaningful African mountain experience plus dramatic Kilimanjaro improvement. The “acclimatization” benefit is bonus value on top of an excellent climb in its own right.

    The combination of these four factors makes Mount Meru one of the best acclimatization climbs anywhere in the world. Most major mountains lack a similar “training peak” with this combination of accessibility, sustained altitude exposure, and proximity to the target summit. For comparison, Cotopaxi acclimatization for Andes climbing and the Mexican volcanoes for Aconcagua preparation are the closest analogs.
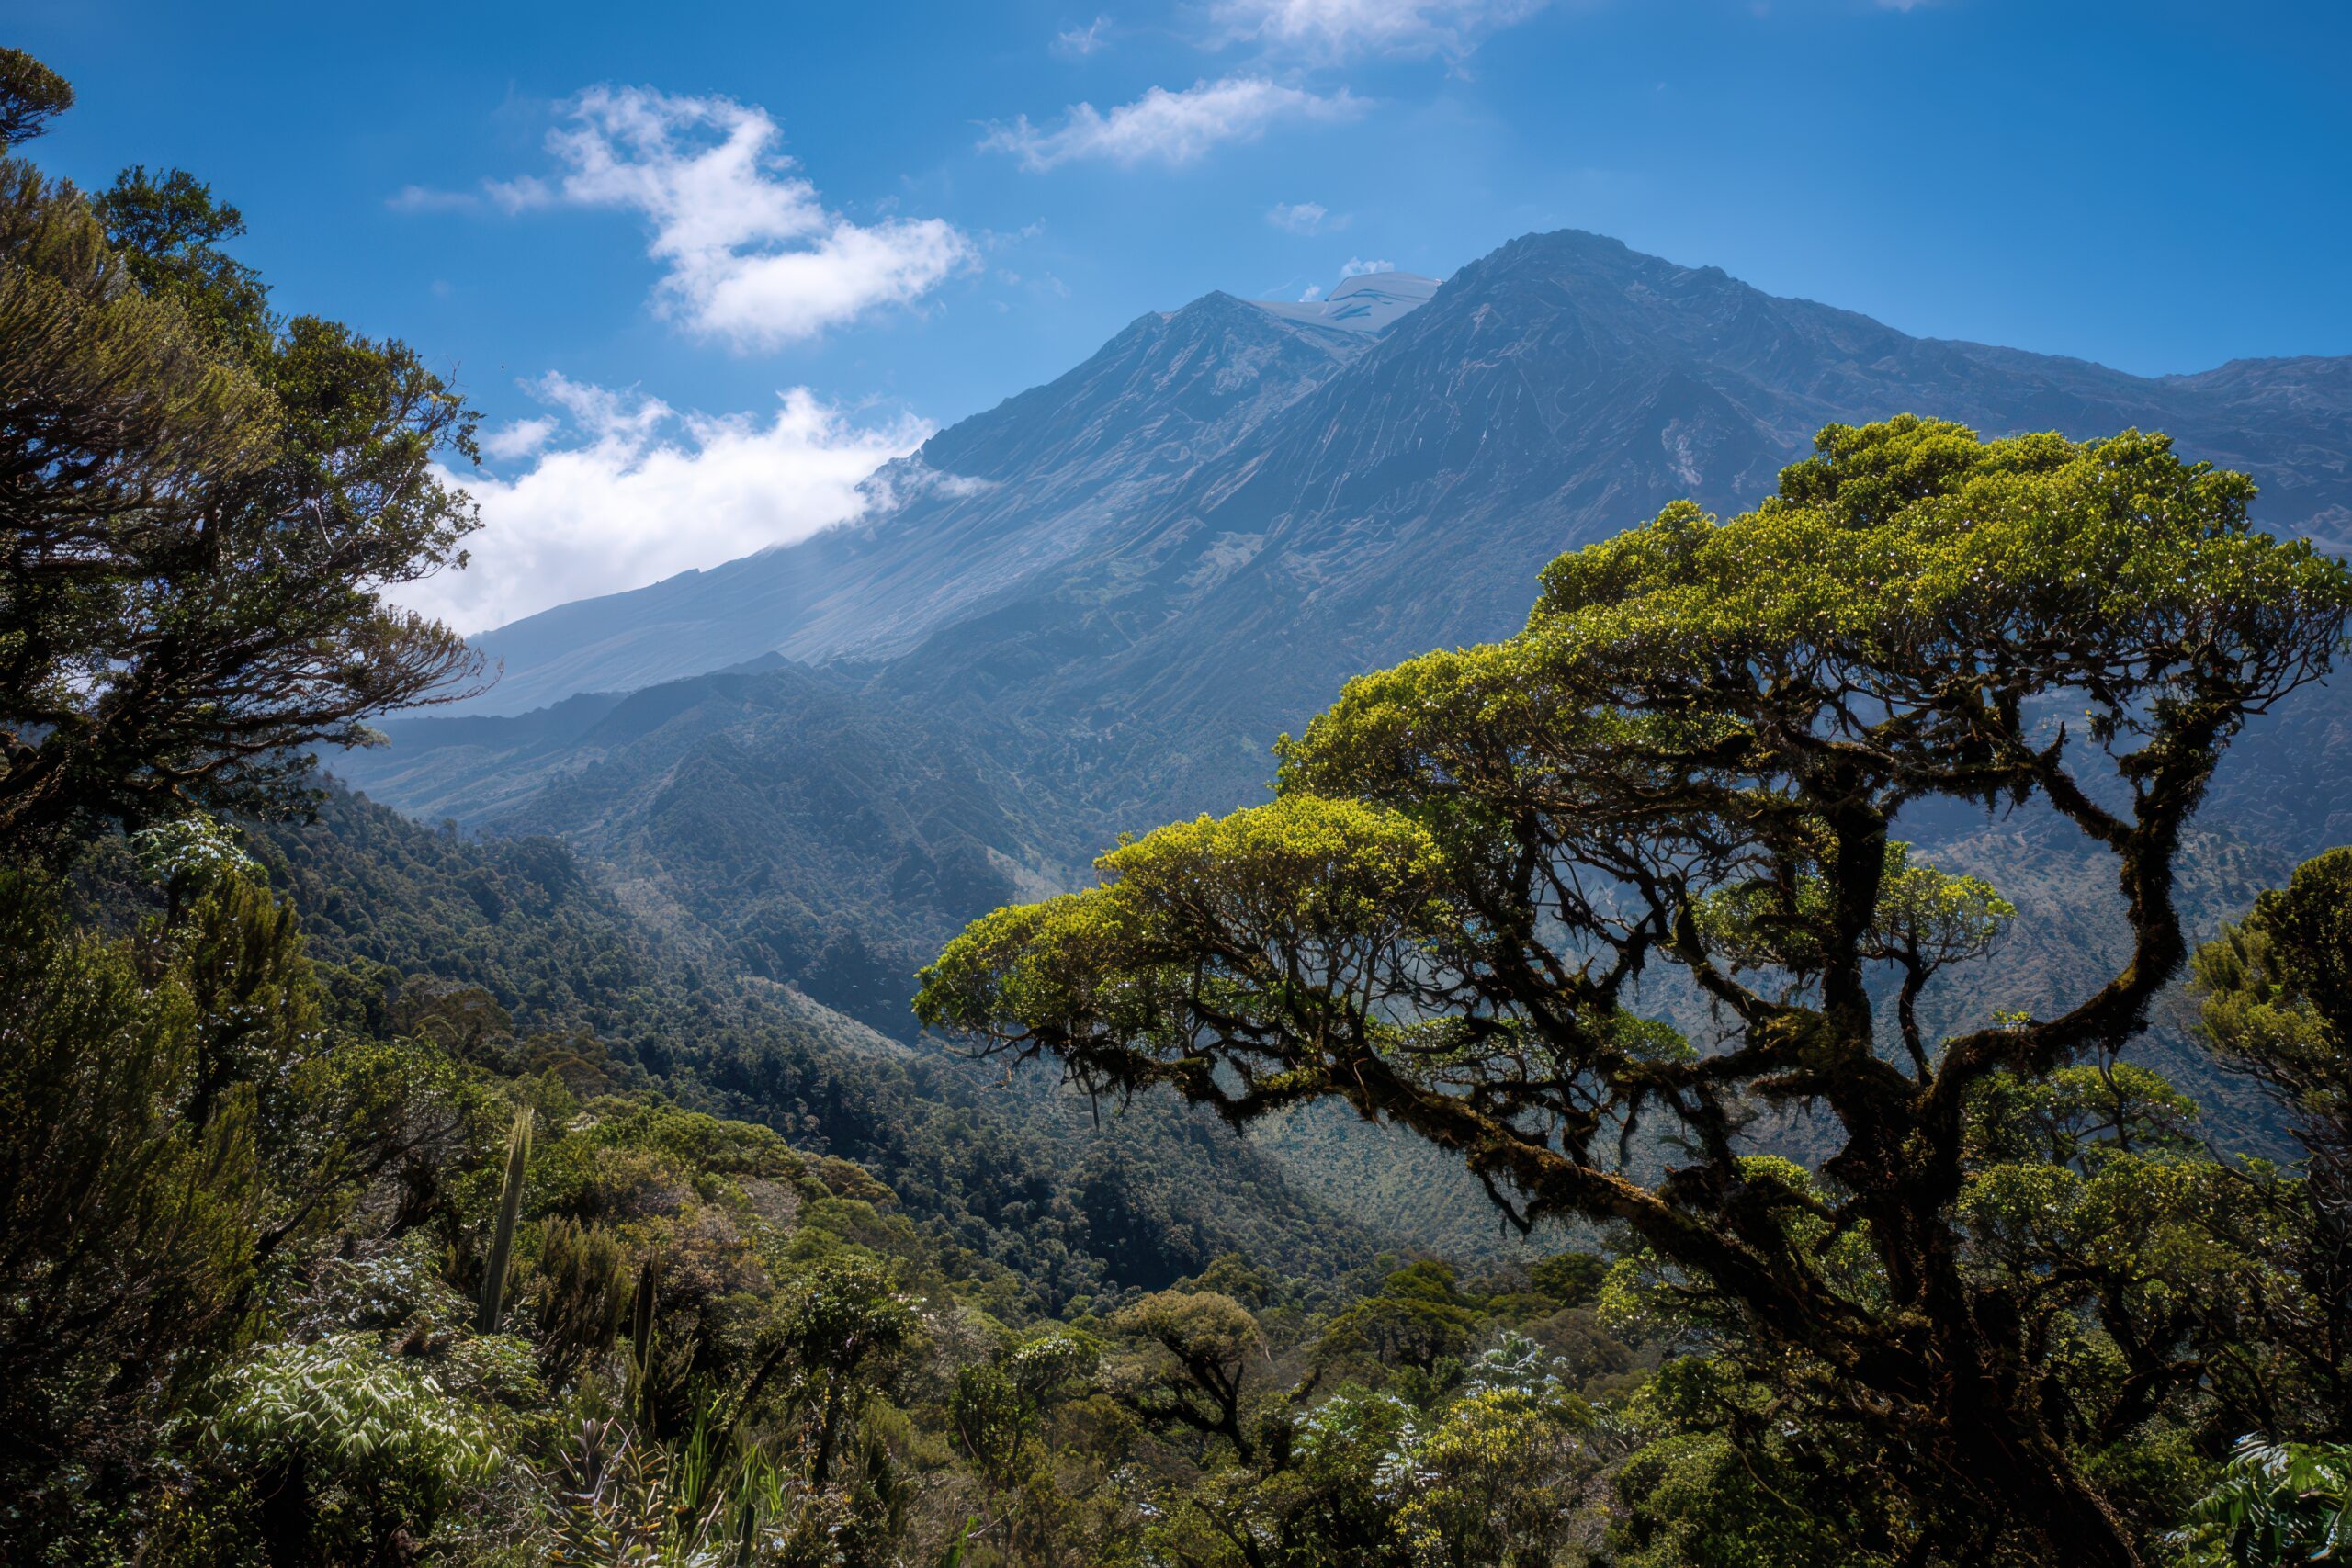
    Mount Meru in Tanzania at 4562 meters showing the dramatic dormant volcano cone in Arusha National Park where climbers acclimatize before attempting Mount Kilimanjaro the higher 5895 meter peak located 70 kilometers to the east
    Mount Meru in Arusha National Park, Tanzania — the dramatic 4,562-meter dormant volcano that provides ideal altitude acclimatization 70 kilometers west of Mount Kilimanjaro.

    The 4-day Mount Meru itinerary what each day looks like

    The standard Momela route takes 4 days from park gate to park gate. Some climbers shorten this to 3 days by skipping the second night at Miriakamba on descent, but the 4-day itinerary provides better acclimatization value and is the standard for combined Meru-Kili trips.

    1Day
    Momela Gate to Miriakamba Hut
    10 km · 4-6 hours · Wildlife-rich savanna and montane forest
    1,500m → 2,500m
    +1,000m gain

    The climb starts at Momela Gate on the eastern side of Arusha National Park. A park ranger accompanies the group due to wildlife presence — buffalo, giraffes, zebras, and occasionally elephants share the lower trail. The first day moves through dramatic savanna and into the montane forest zone. The trail is gentle and well-graded, designed to allow climbers to fully appreciate the wildlife and changing vegetation zones. Arrival at Miriakamba Hut (2,500m) in late afternoon.

    2Day
    Miriakamba to Saddle Hut
    5 km · 3-5 hours · Forest to alpine moorland transition
    2,500m → 3,570m
    +1,070m gain

    Day 2 climbs steeply through the upper forest zone and into the open alpine moorland. The vegetation changes dramatically — giant heathers, lobelias, and senecios appear above the tree line. Views of Kilimanjaro begin to emerge as the trail climbs above the forest canopy. Saddle Hut sits in a dramatic position on the saddle between Mount Meru and the smaller Little Meru. Most climbers do an acclimatization hike up Little Meru (3,820m) in the afternoon for additional altitude exposure before the summit night.

    3Summit
    Saddle Hut to Socialist Peak summit, descend to Miriakamba
    12 km · 10-14 hours · Pre-dawn summit attempt
    3,570m → 4,562m → 2,500m
    +1,000m up, -2,000m down

    The summit day starts around 2:00 AM with a long traverse along the dramatic crescent-shaped ridge that defines Mount Meru’s geometry. The ridge is the remaining rim of the volcano after an ancient massive landslide collapsed the eastern flank. Walking along this knife-edge ridge before dawn, with Kilimanjaro silhouetted to the east and the crater dropping away thousands of meters below, is one of the most dramatic mountain experiences in Africa. Sunrise at Socialist Peak (4,562m). After the summit, the long descent retraces back to Saddle Hut and continues all the way to Miriakamba for the third night.

    4Day
    Miriakamba to Momela Gate, transfer to Kilimanjaro
    10 km · 3-4 hours descent · Then road transfer
    2,500m → 1,500m
    -1,000m down

    Final descent through forest and savanna back to the Momela Gate. Most climbers reach the gate by midday, allowing time for a celebratory lunch in Arusha and transfer to their Kilimanjaro accommodation. The acclimatization benefit transfers directly — climbers typically start their Kilimanjaro attempt within 24-48 hours of completing Meru, while red blood cell adaptation is at peak levels.

    The combined Meru + Kilimanjaro trip how the full expedition flows

    Most international climbers combining Meru with Kilimanjaro use one of two standard structures: the 10-day “compact” itinerary or the 13-day “premium” itinerary. Both produce excellent results compared to Kilimanjaro alone.

    Days10-day compact itinerary13-day premium itinerary
    1Arrive Kilimanjaro Airport, overnight ArushaArrive Kilimanjaro Airport, overnight Arusha
    2-5Mount Meru (4-day Momela route)Mount Meru (4-day Momela route)
    6Rest day in Moshi or ArushaRest day in Moshi or Arusha
    7-12Kilimanjaro (6-day Machame route)—
    7-13—Kilimanjaro (7-8 day Lemosho route)
    13/14DepartureOptional safari + departure
    The combination that actually works

    Meru + 6-day Machame Kilimanjaro produces approximately the same summit success rate as the standalone 9-day Northern Circuit Kilimanjaro — both around 85-90%. But the combination costs slightly less and provides two summit experiences instead of one. For climbers traveling internationally to Tanzania, this is dramatically better value than doing only Kilimanjaro on a longer route.

    Cost framework honest budgeting for combined trips

    Cost itemMount Meru onlyMeru + Kilimanjaro combined
    Park fees (Meru)$400-$600$400-$600
    Guide and porter services (Meru)$300-$600$300-$600
    Hut accommodations (Meru)Included in packageIncluded in package
    Park fees (Kilimanjaro)—$800-$1,200
    Guide and porter services (Kilimanjaro)—$1,000-$2,500
    Transport between mountains—$50-$150
    Arusha/Moshi hotel nights$60-$200$200-$600 (multiple nights)
    Meals not on mountains$50-$100$100-$200
    International flights to JRO$800-$2,000$800-$2,000
    Tips for guides/porters$80-$150$300-$500
    TOTAL TRIP COST$1,700-$3,650$4,000-$8,300

    The math favors the combined trip: adding Mount Meru to a Kilimanjaro expedition costs an additional $800-$1,800 but increases the probability of successfully summiting Kilimanjaro by 15-25 percentage points. For a climber who has already invested $1,500+ in international flights and is paying $3,000+ for the Kilimanjaro climb itself, spending an additional 25-30% to dramatically improve summit success is excellent value. The full Kilimanjaro 2026 cost framework is in our Kilimanjaro cost guide.

    When to climb Mount Meru seasonal patterns

    PeriodConditionsRecommendation
    January-FebruaryDry season, warm tempsExcellent — popular window
    March-MayLong rainy seasonAvoid — trails muddy, summit views obscured
    JuneDry season returns, coolExcellent
    July-SeptemberPeak dry seasonOptimal — most stable conditions
    OctoberEnd of dry seasonVery good
    NovemberShort rainsVariable — some climbers proceed
    DecemberDrier window, holiday seasonGood but more crowded

    Mount Meru follows the same seasonal pattern as Kilimanjaro — the two dry seasons (January-February and June-October) are optimal, while the long rains in March-May should be avoided. Climbers planning a Meru + Kili combination should book during the dry windows. The full Kilimanjaro seasonal framework is in our Kilimanjaro climbing guide with detailed route comparison in our Kilimanjaro routes comparison.

    Logistics and access getting to Mount Meru

    Getting there

    International climbers fly into Kilimanjaro International Airport (JRO) which serves both Mount Meru and Mount Kilimanjaro. The airport sits between Arusha and Moshi, approximately 45 minutes from each city. Most operators include airport transfers. The drive from Arusha to the Momela Gate trailhead takes approximately 45 minutes through the eastern edge of Arusha National Park.

    Wildlife encounters

    One of Mount Meru’s distinctive features is the wildlife on the lower mountain. Day 1 of the climb passes through Arusha National Park where climbers regularly see:

    • Cape buffalo — frequently encountered on the lower trail. Generally peaceful but unpredictable.
    • Giraffes — common in the savanna sections.
    • Zebras — abundant on the lower mountain.
    • Warthogs — frequent in the savanna.
    • Black-and-white colobus monkeys — in the montane forest sections.
    • Elephants — present in the park; occasional encounters with proper guidance.

    The mandatory armed park ranger who accompanies all climbing parties exists specifically for this wildlife. The ranger is armed and trained but uses force only as a last resort — the protocol is normally to give wildlife wide berth and wait for natural movement. This is an unusual feature of African mountaineering that gives Mount Meru a distinct character from Kilimanjaro (which doesn’t have similar wildlife on its climbing routes).

    What to bring

    Mount Meru gear requirements are similar to Kilimanjaro at lower altitudes — the climb tops out at 4,562m so extreme cold-weather gear isn’t needed. The basics:

    • Layered clothing system for cool nights and warm days
    • Down jacket for summit night (cold temps at 4,562m at 4 AM)
    • Mid-weight hiking boots (no mountaineering boots needed)
    • Trekking poles (helpful for steep summit ridge)
    • Headlamp with extra batteries (essential for summit attempt)
    • Standard hiking gear (rain shell, fleece, base layers, gloves, hat)
    • 4-season sleeping bag rated to about 20°F / -7°C

    The full equivalent Kilimanjaro gear list is in our Kilimanjaro gear list — Mount Meru requires approximately the same equipment minus the very-cold-weather items for the higher Kili summit.

    Mount Meru vs other acclimatization approaches honest comparison

    Acclimatization approachEffectivenessCostNotes
    Mount Meru (4-day climb)★★★★★ Excellent$800-$1,800Best option — real climb, ideal altitude, perfect proximity
    Longer Kilimanjaro route (8-9 days)★★★★ Very good+$500-$1,200 vs shorter KiliEffective but adds significant cost and time to one climb
    Mount Kenya Lenana trekking peak★★★ Good$1,500-$2,5004,985m, but logistics complex from Tanzania
    Pre-trip altitude tent (8 weeks)★★ Moderate$1,000-$2,000Time-consuming, less proven effect, complex to use
    Diamox (acetazolamide) only★★ Pharmacological aid$30-$80Helps prevent AMS but doesn’t replace physical acclimatization
    Multiple high-altitude day hikes at home★★ VariableFree-$200Helps but depends entirely on local altitude availability
    No acclimatization preparation★ RiskyFree~50-65% Kili summit success rate

    Mount Meru is the clear best-value acclimatization option for international climbers attempting Kilimanjaro. The combination of real-summit experience, ideal altitude exposure, perfect proximity to Kili, and reasonable cost makes it dramatically better than alternatives.

    Who should do Mount Meru before Kilimanjaro honest fit assessment

    Mount Meru is essential for you if…

    • You’re climbing Kilimanjaro on a shorter route (5-7 days)
    • You’re from a low-altitude home environment (sea level to 1,500m)
    • You have no prior high-altitude experience above 3,000m
    • You want the highest possible Kilimanjaro summit success rate
    • You have time for 10-14 days in Tanzania rather than just 7-8
    • You’re traveling internationally and want to maximize value per trip
    • You like wildlife — Meru’s lower mountain offers wildlife experiences Kilimanjaro doesn’t

    Mount Meru is less critical if…

    • You’re climbing Kilimanjaro on the longer 8-9 day Northern Circuit or full Lemosho
    • You live at altitude (3,000m+) — you’re already acclimatized to a meaningful degree
    • You have recent (within 6 months) high-altitude experience above 4,000m
    • You’re severely time-constrained to a single mountain in Tanzania
    • You have specific medical reasons to avoid extended high-altitude exposure
    The honest recommendation

    For first-time international climbers attempting Kilimanjaro from sea-level environments, adding Mount Meru is one of the highest-value decisions you can make. The combination of dramatically improved summit success rate (15-25 percentage points), a meaningful additional summit experience, and the reasonable cost (~$1,000 extra) makes it consistently the right choice. The only reason to skip Meru is severe time constraint — if you have 14 days in Tanzania, do both mountains.

    ★ Tanzania Climbing Resources

    The complete Meru + Kilimanjaro framework

    Detailed mountain coverage including routes, gear, training, and the broader Tanzanian climbing context.

    Mount Meru master →

    The bottom line on Mount Meru as Kilimanjaro acclimatization

    Mount Meru at 4,562 meters is Tanzania’s second-highest peak and one of the best acclimatization climbs anywhere in the world for Kilimanjaro preparation. The mountain’s combination of ideal altitude profile, sustained 3-4 day exposure, perfect 70-kilometer proximity to Kilimanjaro, and meaningful summit experience makes it the optimal pre-Kilimanjaro climb for international visitors. Climbers who do Meru before Kilimanjaro typically achieve summit success rates 15-25 percentage points higher than those who skip it — turning a 60-65% standalone Kilimanjaro success rate into an 85-90% rate. The standard 4-day Momela route adds approximately $800-$1,800 USD to the total Tanzania trip cost — exceptional value given the dramatic improvement in summit probability. Beyond the acclimatization function, Mount Meru is a legitimate African mountaineering objective in its own right. The dramatic crescent-shaped summit ridge formed by an ancient volcanic landslide produces one of the most distinctive mountain experiences in Africa, the wildlife encounters on the lower mountain (buffalo, giraffes, occasionally elephants) add a uniquely African dimension absent from Kilimanjaro, and the smaller crowds compared to Kilimanjaro produce a more wild experience. Best season is the same as Kilimanjaro — January-February and June-October dry seasons. Most international climbers fly into Kilimanjaro International Airport (JRO) and use Arusha as the base city for both climbs. For climbers arriving from sea-level environments without prior high-altitude experience, doing Mount Meru before Kilimanjaro is one of the highest-value decisions in trip planning. The full Mount Meru framework is in our Mount Meru master page, with detailed Kilimanjaro coverage in our Kilimanjaro climbing guide, routes comparison, 8-week training plan, gear list, and 2026 cost framework. Broader African mountains context is in our highest mountains in Africa ranking.

    Frequently asked questions

    Should I climb Mount Meru before Kilimanjaro?

    Yes, climbing Mount Meru before Kilimanjaro is one of the most effective things you can do to improve your Kilimanjaro summit success rate. Mount Meru at 4,562 meters provides ideal altitude acclimatization that prepares your body for the higher Kilimanjaro summit at 5,895 meters. Climbers who do Meru before Kilimanjaro typically have summit success rates 15 to 25 percentage points higher than those climbing Kilimanjaro without prior acclimatization. The combined Meru-Kilimanjaro trip typically takes 10 to 14 days total and adds approximately $800 to $1,500 USD to the trip cost — exceptional value given the dramatic improvement in success probability.

    What is Mount Meru’s elevation?

    Mount Meru in Tanzania is 4,562 meters (14,968 feet) high. It is the fifth-highest mountain in Africa and the second-highest peak in Tanzania after Kilimanjaro. The mountain is located in Arusha National Park, approximately 70 kilometers west of Mount Kilimanjaro. Mount Meru is a dormant stratovolcano with its last significant eruption occurring approximately 100 years ago. The summit, known as Socialist Peak, sits on the dramatic crescent-shaped ridge that remains after a massive ancient landslide collapsed the original eastern flank of the volcano.

    How long does it take to climb Mount Meru?

    Mount Meru takes 3 to 4 days to climb via the standard Momela route. Most expeditions follow a 4-day itinerary: Day 1 from the Momela Gate at 1,500m to Miriakamba Hut at 2,500m through wildlife-rich savanna and montane forest. Day 2 from Miriakamba to Saddle Hut at 3,570m. Day 3 is the summit attempt starting around 2 AM and reaching Socialist Peak at 4,562m around sunrise, then descending all the way back to Miriakamba or out. Day 4 completes the descent to the park gate. The 3-day variant skips the second night at Miriakamba on descent. Some climbers add an extra acclimatization day at Saddle Hut for additional altitude preparation.

    Where is Mount Meru located?

    Mount Meru is located in Arusha National Park in northern Tanzania, approximately 70 kilometers west of Mount Kilimanjaro and 25 kilometers north of the city of Arusha. The mountain dominates the Arusha skyline and is the centerpiece of Arusha National Park, one of Tanzania’s smaller but most diverse national parks. The park includes savanna, montane forest, alpine moorland, and the dramatic volcanic crater landscape on the upper mountain. Climbers approach Mount Meru from the Momela Gate on the eastern side of the park, accessible by road from Arusha in approximately 45 minutes.

    How difficult is Mount Meru?

    Mount Meru is technically straightforward but physically demanding. The standard route involves no technical climbing – it is a long hike on well-defined trails with one section of moderate scrambling near the summit. The main difficulty is the altitude (4,562m at summit) and the long summit day distance and elevation. The final summit ridge has exposed sections that require careful footing but no rope or technical equipment. Most fit hikers without prior altitude experience can complete the climb successfully, though summit success rates improve dramatically with proper acclimatization. The climb is significantly easier than Kilimanjaro overall but the summit day is comparable in physical demand.

    Why is Mount Meru good acclimatization for Kilimanjaro?

    Mount Meru is excellent Kilimanjaro acclimatization for four key reasons. First, the 4,562m summit elevation puts climbers above 4,500m for several hours, triggering the physiological adaptations needed for higher altitude success. Second, the 3-4 day climb structure provides sustained altitude exposure rather than rapid summit-and-descent. Third, the proximity to Kilimanjaro means climbers can transition directly from Meru to Kilimanjaro within 1-3 days, preserving acclimatization benefits. Fourth, Meru itself is a meaningful summit experience rather than just a training peak. The combined Meru-Kilimanjaro itinerary has been shown to improve Kilimanjaro summit success rates by 15-25 percentage points compared to direct Kilimanjaro attempts.

    How much does Mount Meru cost?

    Mount Meru typically costs $800 to $1,800 USD for a 3-4 day guided climb. The cost includes park fees (approximately $100/day plus a ranger fee), guide and porter services, hut accommodations, meals on the mountain, and transport from Arusha. The price is similar to Kilimanjaro per day but the climb itself is shorter. A combined Meru-Kilimanjaro package typically costs $2,500 to $5,500 USD total for the full 10-14 day expedition including both mountains. International flights to Kilimanjaro International Airport (JRO) add $800-$2,000 USD depending on origin. Mount Meru offers excellent value for the altitude preparation it provides.

    Was this helpful?

    Yes
    No
    Thanks for your feedback!
  • Kilimanjaro mistakes that cost you the summit

    Kilimanjaro Mistakes That Cost You the Summit (2026) | Global Summit Guide
    Mistakes & Hard Truths / Kilimanjaro

    Kilimanjaro mistakes that cost you the summit

    12
    Summit-Killing Mistakes
    35-50%
    Marangu Success Rate
    90%+
    Lemosho 8-day Success
    3
    Top Failure Causes
    ★ Part of the Master Guide This mistakes guide is part of our comprehensive mountaineering reference — browse all guides from one hub. Visit the Hub →

    Kilimanjaro success rates aren’t a function of luck or fitness alone — they’re driven by a small set of preventable mistakes that climbers make over and over. The honest math: climbers on the 5-day Marangu route summit at 35-50%, while climbers on the 8-day Lemosho route summit at 90%+. The mountain hasn’t changed. The difference is the mistakes the first group made before they even left their home gym. This guide walks through the 12 mistakes that account for the overwhelming majority of failed Kilimanjaro attempts, ranks them by severity, and gives you the specific fix for each. For broader context, see our Kilimanjaro climbing guide and our master mountaineering hub.

    The severity scale: how mistakes compound

    Not all mistakes are equal. Some single-handedly cost climbers the summit; others are recoverable with the right response on the mountain. The severity scale below classifies each mistake by its real-world impact on summit probability.

    High Severity

    Single-handedly causes summit failure or serious safety risk. Cannot be recovered from on the mountain.

    Mid Severity

    Significantly reduces summit odds and physical reserves. Partially recoverable with the right adjustment.

    Low Severity

    Affects comfort and resilience. Doesn’t prevent the summit but compounds with other mistakes.

    The twelve summit-killing mistakes

    I

    Choosing a route that’s too short

    Mistake 01 · The most preventable failure
    High severity

    The Marangu 5-day and Machame 6-day routes have summit success rates of 35-50% and 60-65% respectively, while the Lemosho 8-day route runs 90%+. The reason isn’t terrain difficulty — it’s acclimatization compression. A 5-day climb gives the body roughly 60 hours above 3,500m before summit night. That’s not enough for most people.

    The decision usually comes down to cost (shorter route = lower fee) or work schedule (shorter route = less time off). Both rationales fail the math: the savings of a $400 cheaper route are lost when you don’t summit and have to either return to Tanzania or live with the failure. The 1-2 extra days on a longer route are the highest-ROI dollars in the entire trip budget. We covered route selection and timing decisions in our Kilimanjaro route timing guide.

    The Fix

    Book the 8-day Lemosho. Or if cost is a hard constraint, the 7-day Lemosho. The Northern Circuit (9 days) is the highest success-rate option and the right answer for climbers with sensitive altitude tolerance. Avoid Marangu and 6-day Machame except in very specific circumstances (athletes with proven 5,000m+ acclimatization data).

    II

    Walking too fast (ignoring pole pole)

    Mistake 02 · The pace problem
    High severity

    Pole pole means slowly, slowly in Swahili, and you’ll hear it from your guide team a hundred times across the climb. They’re not being conservative — they’re enforcing the single most important variable in summit success. Walking 30-40% slower than your natural pace keeps your heart rate in an aerobic zone, allows your body to adapt to thinning air, and prevents the oxygen debt that triggers AMS.

    The trap: climbers feel strong on days 1-2 (still at 2,800-3,800m) and walk faster than their guide. They feel like they’re being held back. By day 4 at 4,600m, the same climbers are wrecked — not from the day-4 climbing, but from the cumulative oxygen debt they built across days 1-3.

    The Fix

    Walk slower than feels right, every single day, regardless of how strong you feel. The rule of thumb: if you can talk in full sentences without breath strain, you’re at the right pace. If you have to pause mid-sentence, slow down. Stay behind your guide on day 1 to set the tempo correctly.

    III

    Showing up undertrained

    Mistake 03 · The fitness gap
    High severity

    Kilimanjaro doesn’t require elite fitness, but it does require sustained cardiovascular base. The standard test: can you hike 12 miles with 3,000 feet of elevation gain carrying a 20 lb pack without crushing fatigue? If you can, you’re fit enough. If you can’t, you need 12-16 more weeks of training before booking flights.

    Undertrained climbers fail not on summit night but on the cumulative load of 7 consecutive days of hiking. The body breaks down — joints ache, sleep deteriorates, appetite collapses, and altitude symptoms hit harder because there’s no physical reserve to fight them. The summit becomes physically impossible by day 5, regardless of what altitude does.

    The Fix

    Run a 12-16 week training program before the climb. Three cardio sessions per week, 2 strength sessions per week, weekend back-to-back hikes with elevation gain. Specific programs for Kilimanjaro are detailed in our Kilimanjaro training plan and our broader high-altitude training program.

    IV

    Underhydrating

    Mistake 04 · The silent killer
    High severity

    Climbers commonly need 4-5 liters of water per day on Kilimanjaro — roughly double their normal daily intake. Cold, dry, fast breathing pulls water out faster. Acclimatization triggers diuresis, which pulls more water out. Mild dehydration amplifies AMS symptoms — headache, nausea, fatigue — and is mistaken for altitude sickness when it’s actually a fluid problem.

    The mistake is using thirst as the indicator. At altitude, thirst response lags 1-2 liters behind actual dehydration. By the time you feel thirsty, you’re already significantly behind. Many climbers who turn around at high camp would have summited if they’d been drinking 1-2 extra liters per day across the climb.

    The Fix

    Drink on a schedule, not in response to thirst. Target 4-5 liters per day. Use a hydration bladder for sipping consistency, plus electrolyte mixes (Liquid IV, Nuun) once per day. Urine should be pale yellow throughout the climb — dark yellow is a flag.

    V

    Bringing inadequate summit-night gear

    Mistake 05 · The cold-weather failure
    High severity

    Summit night runs from -10°C to -20°C with wind chill. Climbers who arrive without proper insulation — adequate down jacket, mittens (not just gloves), warm base layers, balaclava or buff — physically cannot stay warm enough to keep moving for the 6-8 hour climb to Uhuru. The body shifts blood from extremities to core, hands and feet go numb, and the climber turns around or worse.

    This isn’t about expensive premium gear. It’s about meeting the cold-weather requirement. A $200 down jacket and $40 mittens layered correctly will work; a $30 fleece and bare hands will not. Detailed in our layering systems guide.

    The Fix

    Test your full summit-night kit at home in cold weather before the trip. Wear all the layers you plan to summit in, stand outside for 60 minutes in cold conditions, and verify you can stay warm. If hands or feet go cold, fix the gap before flying. Detailed gear breakdown in our complete gear list.

    VI

    Wearing un-broken-in boots

    Mistake 06 · The blister cascade
    Mid severity

    New boots cause blisters. Blisters across day 1-2 turn into raw wounds across day 3-4. Raw wounds across day 5-6 force a turn-around. The cascade is brutal and entirely preventable. Climbers who bought their boots within 4 weeks of the trip and haven’t put serious miles on them are creating an injury timeline.

    The standard prep: 50+ miles of hiking in the boots before the climb, ideally with the same socks and the same pack weight you’ll use on Kilimanjaro. The full boot selection framework is in our mountaineering boots guide.

    The Fix

    Buy boots at least 8-12 weeks before departure and put 50+ miles on them in your sock system. Address any hot spots early with moleskin and lace adjustments. Bring blister tape, Compeed pads, and at least 4 pairs of merino wool socks for the climb itself.

    VII

    Not taking Diamox when recommended

    Mistake 07 · Acclimatization assist
    Mid severity

    Diamox (acetazolamide) is a proven prophylactic for AMS and is widely prescribed for Kilimanjaro climbers. The 125mg twice-daily protocol, started 1-2 days before reaching 3,000m, measurably improves acclimatization and reduces AMS rates. It’s not a replacement for slow ascent or proper route selection, but it’s a meaningful additional layer of protection.

    Climbers who skip Diamox out of a vague preference for “natural acclimatization” are leaving meaningful summit probability on the table. Side effects (tingling fingers, increased urination, altered carbonated drink taste) are mild and resolve when you stop taking it. The full altitude medicine framework is in our acclimatization guide.

    The Fix

    Discuss Diamox with your travel doctor and start it 1-2 days before reaching 3,000m. Standard dose: 125mg twice daily through the climb, taper after summit. Always inform your guide team that you’re taking it.

    VIII

    Ignoring early AMS symptoms

    Mistake 08 · The stoic trap
    Mid severity

    Mild AMS symptoms — headache, mild nausea, slight loss of appetite, fatigue beyond what the day’s effort explains — are warning signs the body is struggling to acclimatize. Climbers who ignore these symptoms and push hard the next day frequently develop severe AMS, which forces evacuation. Climbers who slow down, hydrate aggressively, take ibuprofen, and tell their guide almost always recover and continue.

    The deeper problem: many climbers think reporting symptoms makes them look weak. The opposite is true. Experienced guides have seen the failure pattern and want early information. The full symptom-progression framework is in our altitude sickness guide.

    The Fix

    Tell your guide about every symptom, even mild ones, immediately. Drink an extra liter of water, take 400mg ibuprofen for headache, and slow your pace for the next 1-2 hours. Almost all early AMS responds to this protocol within hours.

    IX

    Sleeping poorly because of bag and pad failures

    Mistake 09 · The recovery gap
    Mid severity

    Sleep is when the body acclimatizes. Climbers who shiver through nights in inadequate sleeping bags or on thin pads don’t recover, and the cumulative deficit compounds altitude fatigue. By day 5, sleep-deprived climbers are operating with zero physical reserve.

    The standard requirement: a sleeping bag rated to 0°F (-18°C) or colder, plus an insulated sleeping pad with R-value 4 or higher. Climbers who borrow a friend’s 30°F bag are setting themselves up for a brutal week. Detailed in our sleeping bags for altitude guide.

    The Fix

    Use a 0°F or colder bag and an R4+ pad. Rent in Moshi if buying isn’t an option ($5-10/day). Wear dry base layers to bed, bring a beanie for sleep, and put a hot water bottle (Nalgene wrapped in a sock) at your feet on cold nights.

    X

    Not eating enough on the mountain

    Mistake 10 · The appetite crash
    Mid severity

    Appetite crashes at altitude. Climbers who don’t actively force food consumption end up calorie-deficient by day 4-5, and the body breaks down. The brain stops working as well, decision-making degrades, physical reserves vanish.

    Real Kilimanjaro caloric demand: 4,000-5,500 calories per day on hiking days, more on summit night. Operators provide adequate food at meals, but climbers need to force themselves to eat even when they don’t feel hungry. Snacks between meals are essential — protein bars, nuts, dried fruit, candy. Anything that delivers calories in a small package.

    The Fix

    Eat on a schedule, not on appetite. Bring 8-10 days of high-calorie snacks (Snickers, peanut M&Ms, salted nuts, jerky, dried mango). Force a snack every 90 minutes during hiking days. Eat full portions at every meal even when food doesn’t sound appealing.

    XI

    Picking the wrong season

    Mistake 11 · Weather window risk
    Low severity

    Kilimanjaro has two dry seasons (January-February and July-October) and two wet seasons (March-May long rains, November short rains). Climbing in the wet seasons is possible but dramatically harder — wet trails, wet gear, lower visibility, and uncomfortable camping conditions that affect sleep quality.

    Climbers who book during the wet seasons usually do it for cost (cheaper operator fees, cheaper flights) or schedule flexibility. The cost savings are real but come with success-rate degradation. Detailed in our month-by-month Kilimanjaro timing guide.

    The Fix

    Book July-October or January-February if possible. Best summit conditions. If you must climb in shoulder seasons, prepare for rain and be flexible on summit-night dates.

    XII

    Choosing the cheapest operator regardless of KPAP status

    Mistake 12 · Ethics and safety
    Low severity

    Non-KPAP-certified operators undercut market prices by paying porters poorly, providing inadequate group gear, and skimping on guide-to-climber ratios. The savings to the climber are real ($300-600 vs KPAP-certified peers), but the climber bears safety risk and the porters bear the wage cut.

    This is a low-severity summit-success mistake (you can summit with a budget operator) but a high-severity ethics mistake. Quality operators improve summit success rates by 5-15% and dramatically improve the climbing experience.

    The Fix

    Book only KPAP-certified operators. Verify KPAP membership directly on the KPAP Partners list. Budget KPAP-certified operators exist in the $1,800-2,200 range — pick one of those rather than a non-KPAP operator at the same price. Hidden costs context lives in our Kilimanjaro hidden costs guide.

    How these mistakes compound on summit night

    Most mistakes don’t cause failure individually. They compound. The specific failure pattern that ends most Kilimanjaro climbs looks like this:

    The cascade dynamic is why Kilimanjaro’s failure rate isn’t about fitness alone — it’s about decision-stacking. The full mountaineering decision framework is laid out in our master mountaineering hub, with peak-specific decision trees in our Seven Summits guide.

    Anatomy of a Failed Summit Attempt

    The cascade pattern

    Day 1-2. Climber is on a 6-day Machame route (Mistake 01: too short). Feels great, walks fast (Mistake 02: pace). Drinks water but not aggressively (Mistake 04: hydration).

    Day 3. First mild headache appears at Shira Camp. Climber attributes it to dehydration but doesn’t tell the guide (Mistake 08: ignoring symptoms). Sleeps poorly because their bag is rated 30°F and Shira camp is 25°F (Mistake 09: bag).

    Day 4. Loses appetite, eats half a normal portion (Mistake 10: food). Headache persists. Walks at the same pace as before because guide hasn’t been told.

    Day 5. Arrives at Barafu (4,673m) exhausted, dehydrated, calorie-deficient. Tries to sleep before midnight summit push — can’t. Stomach unsettled.

    Summit night. Two hours in, hands and feet are cold (Mistake 05: gear gap). Three hours in, severe headache and nausea hit. Climber turns around at 5,400m — 500m short of Uhuru.

    None of the individual mistakes was fatal. The combination was.

    The summit-success protocol: do these things and odds jump to 90%+

    Reverse-engineering the mistakes above gives you the protocol that actually moves the needle. None of this is exotic — it’s just disciplined execution of basics most climbers skip. The full peak-specific protocol framework lives in the master mountaineering hub, and the breathing technique drills that support pole pole pacing are in our breathing techniques guide.

    ★ The 90%+ Summit Protocol

    What climbers who summit consistently do differently

    • Book the 8-day Lemosho or Northern Circuit. Acclimatization length is the highest-impact decision in the entire trip.
    • Train 12-16 weeks minimum. Cardio base + back-to-back hikes + strength training. Show up able to hike 12 miles with 3,000 ft of gain carrying 20 lb without crushing.
    • Walk pole pole every day, day 1 included. 30-40% slower than your natural pace. Talk-test for tempo.
    • Drink 4-5 liters per day on a schedule. Hydration bladder for consistency, electrolyte mix once per day.
    • Take Diamox 125mg twice daily, starting 2 days before reaching 3,000m. Discussed with your travel doctor in advance.
    • Test your full summit-night gear in cold weather before the trip. 60 minutes outside in 0°F, all layers on, verify warmth.
    • Tell your guide about every symptom, even mild ones, immediately. Don’t be stoic. Information is the guide’s job.
    • Use a 0°F sleeping bag and R4+ pad. Rent in Moshi if you don’t own one.
    • Eat on a schedule, not on appetite. 4,000-5,500 cal/day. Snack every 90 minutes on hiking days.
    • Climb in the dry season (Jul-Oct or Jan-Feb). Better summit windows, drier camps, better sleep.
    • Choose only KPAP-certified operators. Better guide-to-climber ratios, better safety culture, ethical porter wages.
    • Break in your boots with 50+ miles before departure. No surprises, no blister cascade.

    Continue your preparation research

    This mistakes guide pairs with the rest of our Kilimanjaro and high-altitude reference. Recommended next reads:

    ★ Master Resource

    Every guide, one navigation point

    This mistakes guide is part of a comprehensive mountaineering reference covering gear, training, altitude, routes, peak-specific planning, and decision frameworks. Our master hub indexes every guide in one place.

    Browse the Complete Guide →

    Frequently asked questions about Kilimanjaro mistakes

    What’s the most common reason climbers fail Kilimanjaro?

    The single most common cause of summit failure is altitude sickness, which is itself almost always the result of three deeper mistakes: choosing too short a route, walking too fast in lower-altitude days, or arriving in poor cardiovascular condition. AMS turns into HACE when these factors compound. The fix is structural — choosing 8-day Lemosho, walking pole pole consistently, and arriving with 12+ weeks of cardio training already done.

    Why do so many people fail on the Marangu route?

    The Marangu 5-day route has summit success rates of 35-50%, dramatically lower than longer routes. The cause is acclimatization compression: 5 days isn’t enough for most climbers’ bodies to adapt to 5,895m. Climbers who choose Marangu trade 2-3 days of trip length for a 40-50% reduction in summit probability. The 7-day or 8-day Lemosho is the right answer for nearly every climber.

    How important is pace on Kilimanjaro?

    Pace is one of the top three factors in Kilimanjaro summit success. Pole pole (slowly, slowly) is repeated by guides constantly because it’s the single most actionable thing climbers can do. Walking 30-40% slower than your natural pace allows the body to adapt, keeps heart rate aerobic, and prevents the oxygen debt that triggers AMS. Climbers who feel strong on day 1 and walk fast almost always pay for it on day 4 or 5.

    What’s a realistic Kilimanjaro training plan?

    A realistic Kilimanjaro training plan runs 12-16 weeks and combines cardiovascular base (3-4 sessions per week of 45-60 minute zone-2 work), back-to-back hiking with weighted pack, strength training (lower body and core, 2 sessions per week), and altitude exposure when possible. Climbers who can hike 12 miles with 3,000 feet of gain carrying a 20 lb pack without crushing fatigue have done enough physical preparation.

    Why does hydration matter so much at altitude?

    Dehydration triggers and amplifies AMS symptoms because the body loses water faster at altitude through respiration and through urination. Climbers commonly need 4-5 liters per day on Kilimanjaro, double their typical intake. Mild AMS often improves dramatically with simple rehydration. The mistake is treating thirst as an indicator — at altitude, thirst lags far behind actual dehydration, so climbers must drink on a schedule.

    What gear mistakes most often cause Kilimanjaro failure?

    Three gear mistakes dominate: inadequate insulation for summit night (no proper down jacket, mittens, base layers), poorly broken-in boots (blisters worsening across 7 days), and inappropriate sleeping bags (using 30°F bags causes shivering through nights and never recovering). The summit-night system needs to handle -10°C with wind, and the sleeping bag needs to be rated 0°F or colder.

    Should I take Diamox on Kilimanjaro?

    Diamox (acetazolamide) is widely recommended by altitude medicine specialists, particularly on faster routes like Machame 6-day or Marangu 5-day. The standard dose is 125mg twice daily, started 1-2 days before reaching 3,000m. Side effects are mild and reversible. Diamox is not a replacement for acclimatization, but it’s a meaningful additional layer of protection. Discuss with your travel doctor.

    What should I do if I start feeling AMS symptoms?

    Mild AMS typically responds to rest, hydration (drink an extra liter), and ibuprofen for headache. Tell your guide. If symptoms persist or worsen overnight, do not ascend further — descent is the only definitive treatment for serious altitude sickness. Severe AMS (severe headache unresponsive to medication, vomiting, ataxia, confusion, shortness of breath at rest) requires immediate descent regardless of how close to the summit.

    Was this helpful?

    Yes
    No
    Thanks for your feedback!
  • How to Train for Kilimanjaro: A 12-Week Fitness Plan for Beginners

    How to Train for Kilimanjaro: 12-Week Plan for Beginners (2026) | Global Summit Guide
    Cluster 06 · Kilimanjaro · Updated April 2026

    How to Train for Kilimanjaro: 12-Week Plan for Beginners

    The complete periodized training program — four phases, weekly schedules, key exercises, readiness benchmarks. From Week 1 base building through Week 12 taper, the exact plan that prepares moderately fit adults for Africa’s highest peak.

    12
    Weeks of
    training
    4
    Periodized
    phases
    20–25 lb
    Peak pack
    weight
    5–6 hrs
    Peak weekly
    training
    Global Summit Guide A guide in Cluster 06 · Kilimanjaro View master hub →

    Kilimanjaro is a fitness test disguised as a trek. 5-8 hours of hiking daily for 7-9 consecutive days, a 10-14 hour summit day with 1,255m of elevation gain in darkness, and a punishing 2,730m descent all at altitudes where your body runs on 50-70% of sea-level oxygen. The good news: you don’t need to be elite. You need to be specifically prepared. This 12-week periodized plan transforms moderately active adults into Kilimanjaro-capable climbers using four distinct training phases — base building, capacity building, peak-specific work, and taper. No gym membership required, no exotic equipment — just consistent weekly training that builds the exact fitness the mountain demands.

    ⊛
    How this plan was built

    Training principles follow established periodization models from Uphill Athlete, Training for the New Alpinism (Steve House & Scott Johnston), and mountain-specific coaching standards. Weekly structures reviewed by AMGA-certified guides and NSCA certified strength coaches with mountaineering specialty. Progression matches physiological adaptation timelines — cardiovascular (6-8 weeks), muscular endurance (8-12 weeks), neuromuscular patterns (10-12 weeks). Assumes starting point of recreationally active (able to hike 4-5 miles without distress). Sedentary beginners should complete 6-8 weeks of baseline conditioning before starting this plan. Fact-check date: April 19, 2026.

    The Four Phases of Training

    The 12-week plan follows classic periodization: start with volume to build capacity, add intensity to sharpen fitness, taper to arrive fresh. Each phase has distinct goals and workout structures.

    12-Week Kilimanjaro Training Timeline

    Periodized phases from base building through mountain-ready taper
    Phase 1 · BaseWeeks 1–4
    Phase 2 · BuildWeeks 5–8
    Phase 3 · PeakWeeks 9–11
    TaperW12
    Aerobic foundation
    Capacity + intensity
    Mountain-specific
    Recovery

    This is not a random workout collection — it’s a physiological sequence. Base building develops the aerobic system and connective tissue. Build phase adds volume and introduces intensity. Peak phase delivers Kilimanjaro-specific demands (long hikes with heavy pack). Taper reduces fatigue while maintaining fitness. Each phase prepares you for the next.


    Phase 1: Base Building (Weeks 1–4)

    01
    Phase 1 of 4 · Weeks 1-4

    Base Building

    Establish aerobic fitness and movement patterns

    The base phase is about consistency, not intensity. You’re building aerobic capacity, strengthening connective tissues, and establishing the habit of regular training. Zone 2 cardio (conversational pace — you can speak full sentences) dominates these weeks. Hiking begins modestly with 10-12 lb pack weight.

    Common mistake: doing too much too soon. Your cardiovascular system adapts within 2-3 weeks, but tendons and ligaments take 6-8 weeks. Ramp up gradually or risk injury that derails the entire plan. Skip a workout rather than push through pain.

    Typical Week 3 Schedule

    Mon
    Rest or 20 min easy walk
    Tue
    Zone 2 cardio — 45 min easy run/bike/swim
    Wed
    Strength — full body, 45 min (see exercises below)
    Thu
    Zone 2 cardio — 45 min
    Fri
    Rest or yoga/mobility
    Sat
    Long hike — 3-4 hours with 10-12 lb pack
    Sun
    Easy 30 min walk + mobility work

    Phase 1 goals by Week 4

    • Complete 45-minute Zone 2 cardio without distress
    • Hike 4 hours with 12 lb pack on varied terrain
    • Finish strength workout with 3 full sets of each exercise
    • Consistent 4-5 training days per week
    • No nagging injuries — tendons/muscles feeling stronger

    If struggling with these goals by Week 4, extend base phase by 2-4 additional weeks. There’s no prize for compressed training. Rushing into build phase with inadequate base leads to injury or plateaued progress.


    Phase 2: Capacity Building (Weeks 5–8)

    02
    Phase 2 of 4 · Weeks 5-8

    Capacity Building

    Add volume, introduce intensity, extend long days

    Build phase increases both volume and intensity. Cardio duration extends to 60-75 minutes. Strength sessions get heavier. Most critically, long hikes extend to 4-6 hours with 15-18 lb packs — approaching actual Kilimanjaro daypack weight. This is where your mountain-specific fitness starts developing.

    New addition in this phase: hill repeats. One weekly cardio session becomes 30-45 minutes of 2-3 minute uphill efforts with easy descents. Builds the specific power for sustained climbing. Also introduces back-to-back weekend days — Saturday long hike, Sunday moderate hike. Simulates Kilimanjaro’s consecutive-days demand.

    Typical Week 7 Schedule

    Mon
    Rest or active recovery walk
    Tue
    Zone 2 cardio — 60 min
    Wed
    Strength A — lower body focus, 60 min
    Thu
    Hill repeats — 45 min (warmup, 6x 2-min hills, cooldown)
    Fri
    Strength B — upper body + core, 45 min
    Sat
    Long hike — 5-6 hours with 15-18 lb pack
    Sun
    Recovery hike — 2 hours easy with 10 lb pack

    Phase 2 goals by Week 8

    • Complete 6-hour hike with 18 lb pack on 2,000 ft elevation gain
    • Complete back-to-back weekend hikes without excessive soreness
    • 60-minute Zone 2 cardio feels manageable
    • Strength reps have progressed with added weight or reps
    • Hill repeats completed without form breakdown

    Phase 3: Mountain-Specific Peak (Weeks 9–11)

    03
    Phase 3 of 4 · Weeks 9-11

    Peak Phase

    Simulate Kilimanjaro demands — the readiness test

    Peak phase is deliberate over-preparation. Pack weights reach 20-25 lb (above Kilimanjaro’s 15-18 lb reality). Long hikes extend to 7-8 hours. You add stair climber sessions with pack to build sustained elevation-gain fitness. This is where benchmarks are tested.

    Training feels demanding — expect fatigue, minor soreness, and the occasional urge to skip workouts. Push through while listening to injury signals. If something hurts sharply, back off. If it’s just fatigue, continue. The distinction matters. This phase also introduces pole pole pace training — deliberately slow hikes that build the mental and physical discipline of patient climbing.

    Typical Week 10 Schedule

    Mon
    Rest or mobility
    Tue
    Stair climber with 20 lb pack — 45 min at steady pace
    Wed
    Strength A — heavier loads, lower reps
    Thu
    Zone 2 cardio — 75 min
    Fri
    Strength B + core work, 45 min
    Sat
    Benchmark hike — 7-8 hours, 22 lb pack, 3,500 ft gain
    Sun
    Recovery hike — 3 hours moderate, 15 lb pack

    Key Phase 3 benchmarks

    1
    Benchmark 1

    Back-to-Back Day Test

    Complete two consecutive days of 10-mile hikes with 2,000 ft elevation gain each day, carrying 20 lb pack. Day 2 should feel demanding but completable. Tests overnight recovery — the exact demand of Kilimanjaro’s consecutive climbing days.

    2
    Benchmark 2

    Summit Day Simulation

    Complete one 15-18 mile hike with 3,500-4,000 ft elevation gain in 8-10 hours, carrying 22 lb pack. Approximates Kilimanjaro summit day (1,255m up + 2,730m down). Finishing exhausted but capable indicates readiness.

    3
    Benchmark 3

    Pole Pole Pace Test

    Complete 2 hours of deliberately slow pace hiking without speeding up, getting bored, or losing focus. Tests the mental discipline of patient summit-day pace. See our How Long to Climb Kilimanjaro guide for why pace matters so much.

    Passing all three benchmarks by Week 11 confirms readiness. Failing any benchmark signals need for additional training — consider delaying your Kilimanjaro climb rather than attempting undertrained.


    Phase 4: Taper (Week 12)

    04
    Phase 4 of 4 · Week 12

    Taper Week

    Maintain fitness, eliminate fatigue, arrive fresh

    Taper is counter-intuitive. After 11 weeks of progressive overload, your instinct may be to keep pushing. Resist this — training fatigue is still present and will degrade summit performance. Volume drops by 40-50%, intensity drops slightly, pack weight returns to moderate.

    Taper week eliminates accumulated fatigue while maintaining cardiovascular and muscular fitness. You arrive at Kilimanjaro fresh, not worn down. Additional benefit: this week coincides with travel preparation, gear organization, mental readiness. Reduced training load creates space for planning.

    Week 12 Schedule (final week before climb)

    Mon
    Rest or gentle 20 min walk
    Tue
    Zone 2 cardio — 30 min (reduced from 60-75)
    Wed
    Strength maintenance — lighter loads, 30 min
    Thu
    Easy cardio — 30 min at conversational pace
    Fri
    Complete rest — gear packing
    Sat
    Short hike — 2 hours with 12 lb pack (moderate)
    Sun
    Travel day or complete rest

    Key taper principles: (1) Reduce volume, maintain some intensity. (2) No new stimuli — stick to familiar workouts. (3) Prioritize sleep (8-9 hours nightly). (4) Focus on nutrition quality. (5) Avoid alcohol for 5-7 days pre-climb. (6) Stay hydrated. (7) Mental rehearsal of summit day and climbing routine. Arrive in Moshi with fresh legs and strong fitness — your body will thank you on summit night.


    The Essential Kilimanjaro Exercises

    These exercises form the core of the strength and cardio work throughout all four phases. Progression happens through added weight, reps, or duration rather than changing exercises.

    Strength · Single-Leg

    Bulgarian Split Squats

    3 sets × 10-12 reps per leg

    Back foot elevated on bench, front leg loaded. Builds unilateral leg strength for steep uphill stepping. Add dumbbells as you progress.

    Strength · Climbing-Specific

    Step-Ups with Pack

    3 sets × 15-20 per leg

    Step onto 18-inch box or bench wearing training pack. Directly simulates sustained uphill stepping — the primary Kilimanjaro movement pattern.

    Strength · Descent Prep

    Reverse Lunges

    3 sets × 12-15 per leg

    Step backward into lunge, controlled descent. Targets eccentric quad strength — critical for Kilimanjaro’s 2,730m descent where most knee injuries occur.

    Strength · Upper Back

    Bent-Over Rows

    3 sets × 10-12 reps

    Barbell or dumbbell rows for pack-carrying back strength. Prevents shoulder and upper-back fatigue on long mountain days.

    Strength · Core

    Plank Variations

    3 sets × 60 seconds

    Standard, side, and weighted planks. Builds core stability on uneven terrain. Essential for trekking pole efficiency and injury prevention.

    Strength · Calves

    Weighted Calf Raises

    3 sets × 20-25 reps

    Standing calf raises with dumbbells or pack. Often overlooked but essential — calves fatigue first on long descents and cause calf strains on scree.

    Cardio · Aerobic Base

    Zone 2 Running/Cycling

    45-75 min, 2-3x weekly

    Conversational pace — you should be able to speak full sentences. Builds aerobic foundation. Run, cycle, or swim. Mix modes to reduce injury risk.

    Cardio · Intensity

    Hill Repeats

    4-8 × 2 min, 1x weekly

    Find a hill taking 2 minutes of hard effort. Climb hard, recover on descent. Builds sustained climbing power for summit night’s 5-6 hour ascent.

    Specific · Mountain Prep

    Stair Climber with Pack

    30-45 min, 1-2x weekly

    Stair mill or stadium stairs wearing 15-20 lb pack. Most specific Kilimanjaro training short of actual mountain hiking. Builds sustained elevation-gain endurance.

    Specific · Most Important

    Long Weekend Hikes

    3-8 hours, 1x weekly

    The single most important Kilimanjaro workout. Build from 3 hours with 10 lb pack (Week 1) to 8 hours with 22 lb pack (Week 11). Actual hiking on varied terrain preferred.


    Pack Weight Progression

    PhaseWeeksPack WeightLong Hike DurationElevation Gain Target
    BaseWeeks 1-410-12 lb3-4 hours1,000-1,500 ft
    BuildWeeks 5-815-18 lb5-6 hours2,000-2,500 ft
    PeakWeeks 9-1120-25 lb7-8 hours3,500-4,000 ft
    TaperWeek 1210-15 lb2 hours1,000 ft
    Kilimanjaro actualOn mountain15-18 lb daypack5-8 hrs typical; 10-14 summitVaries daily

    The logic: train heavier than your actual climb. Your Kilimanjaro daypack will feel light compared to Week 10-11 training weight. This builds confidence and physical reserves for unexpected demands on the mountain. See our Mountain Climbing Gear List for exactly what your Kilimanjaro daypack should contain.


    Training Mistakes That Derail Kilimanjaro Prep

    • Too much too soon: Starting Week 1 with Week 6 volume. Leads to injury in Weeks 3-5, disrupting the entire plan.
    • Only cardio: Running marathons doesn’t prepare you for sustained hiking with a pack. Strength and specific hiking matter equally.
    • Only gym work: Cannot replicate the complex demands of real hiking on uneven terrain. Get outside at least weekly.
    • Skipping long hikes: The single most important workout. No amount of gym work replaces 6-hour hikes with pack.
    • New boots close to trip: Boots need 50+ miles to break in. Start in Week 1-2 minimum, ideally earlier.
    • Overtraining peak phase: Some people push through fatigue signals, arrive at Kilimanjaro worn down, and fail on summit day.
    • Skipping taper: “I feel fine, I’ll keep training.” No — taper is essential physiological recovery. Trust the plan.
    • Ignoring nutrition: Training demands 500+ additional calories. Undereating causes muscle loss and poor recovery.
    • Insufficient sleep: 7-9 hours nightly is required for training adaptation. Less sleep = slower progress + injury risk.
    • Neglecting hiking pace: Fast hikers must practice deliberate slow pace. Summit day requires pole pole discipline.
    â–²
    When to delay your climb

    If by Week 10 you cannot complete Benchmark 1 (back-to-back 10-mile hikes with 20 lb pack), consider postponing Kilimanjaro by 3-6 months to complete adequate training. The mountain will still be there. Attempting Kilimanjaro undertrained means: (1) Much higher failure probability (dropping to 50-60% on ideal routes). (2) Injury risk on descent. (3) Slow, miserable experience that doesn’t match expectations. (4) Wasted $3,500-$10,000 if you don’t summit. A rescheduled climb at peak fitness is worth far more than a rushed attempt. Don’t confuse enthusiasm with readiness.


    Kilimanjaro Training FAQ: Your Common Questions Answered

    How long should I train for Kilimanjaro?

    A minimum of 12 weeks of structured training is recommended for Kilimanjaro. This timeline reflects the physiological reality that endurance and strength adaptations require consistent progressive loading over months. Training timeline breakdown by current fitness level: (1) Sedentary starting point: 16-24 weeks recommended — build base fitness first, then follow the 12-week Kilimanjaro-specific plan. (2) Recreationally active (hiking, gym): 12-16 weeks — follow standard 12-week plan with extra base weeks if needed. (3) Endurance athletes (runners, cyclists): 10-12 weeks — existing fitness transfers well but add specific hiking/weighted pack work. (4) Former climbers returning after break: 8-12 weeks — muscle memory speeds adaptation. Why 12 weeks works: cardiovascular fitness adapts over 6-8 weeks, muscular endurance develops 8-12 weeks, neuromuscular patterns for hiking with weighted pack need 10-12 weeks practice. The plan structure: 4 weeks base building (establishing aerobic fitness), 4 weeks building volume and intensity, 3 weeks peak training with mountain-specific work, 1 week taper before climb. Starting earlier than 12 weeks is fine — maintain higher volume but avoid peaking too early. Starting later than 12 weeks risks inadequate preparation; consider delaying Kilimanjaro by 3-6 months if needed.

    How fit do you need to be to climb Kilimanjaro?

    You need moderate fitness to climb Kilimanjaro — comparable to being able to complete a half-marathon or hike 10 miles with elevation gain. Specific fitness benchmarks: (1) Cardiovascular: able to sustain moderate aerobic effort (Zone 2-3) for 4+ hours continuously. (2) Muscular endurance: capable of hiking 8+ hours per day on consecutive days. (3) Strength: carry 15-20 lb daypack comfortably all day; leg strength for sustained uphill hiking. (4) Flexibility: basic mobility for uneven terrain and occasional scrambling (Barranco Wall). Kilimanjaro is NOT extreme fitness required — you don’t need to be an elite athlete. What you DO need: (1) Consistency in training (12+ weeks of regular work). (2) Specificity (actual hiking, not just gym cardio). (3) Mental preparation for sustained exertion. (4) Weight management (excess weight makes altitude harder). Concrete fitness tests: Can you hike 10 miles with 2,000 ft elevation gain in 5-6 hours? Can you do this on back-to-back days without injury? Can you climb stairs for 30 minutes with a 20 lb pack? If yes to all three, you have adequate fitness for Kilimanjaro. If not, prioritize training before booking. Success rate is more determined by route duration (acclimatization) than fitness level — but inadequate fitness compounds altitude challenges and raises failure risk significantly.

    What type of training is best for Kilimanjaro?

    The best training for Kilimanjaro combines four key modalities: hiking with weighted pack (50% of training), cardiovascular endurance (30%), strength training (15%), and flexibility/recovery (5%). Training breakdown: (1) Hiking with weighted pack — The most transferable training. Build to 3-4 hour hikes with 15-20 lb pack on varied terrain. Simulates Kilimanjaro’s sustained exertion demands better than any other workout. Ideally outdoors on actual trails. (2) Cardiovascular endurance — Zone 2 (conversational pace) running, cycling, or swimming 3-4 times weekly. Builds aerobic base, improves mitochondrial function, enhances recovery. Target 30-60 minutes per session. (3) Strength training — 2 sessions weekly focused on single-leg exercises (lunges, step-ups), back (rows, pull-ups for pack carrying), core (planks, dead-bugs for stability on uneven terrain), and calves (for descents). Not bodybuilding — functional strength for multi-day endurance. (4) Flexibility/mobility — 10-15 minutes daily stretching, especially hip flexors, hamstrings, calves. Reduces injury risk on uneven Kilimanjaro terrain. Less effective training: (5) Pure bodybuilding — adds weight without endurance benefits. (6) CrossFit-style — too intense for altitude, doesn’t build specific endurance. (7) Only treadmill — lacks terrain variability and outdoor conditions. (8) Only cycling — doesn’t develop hiking-specific muscle patterns. Mix modalities but prioritize weighted pack hiking as your single most important training activity.

    Do I need to train at altitude for Kilimanjaro?

    No, you do not need to train at altitude for Kilimanjaro — but any altitude exposure in the months before helps. Why altitude training isn’t required: (1) Sea-level training improves cardiovascular fitness and muscular endurance, which transfer directly to altitude performance. (2) Altitude tolerance is primarily genetic and reveals itself during the acclimatization process on the mountain itself. (3) Sleeping at 3,000+ meters for weeks before climbing would help but is impractical for most people. (4) Acclimatization must happen on Kilimanjaro regardless of prior altitude exposure — your body resets after returning to sea level. Strategies that do help: (1) Multi-day hiking with weighted pack — simulates mountain demands even at sea level. (2) Stair climbing with pack — builds leg endurance for sustained ascent. (3) Any altitude hiking 2-4 weeks before Kilimanjaro — Colorado 14ers, Alps, high-altitude races — provides some residual red blood cell elevation. (4) Hypoxic tents or altitude masks — limited effectiveness, expensive, primarily psychological. (5) Mount Meru pre-Kilimanjaro — climbing this 4,566m peak immediately before Kilimanjaro provides the best real acclimatization boost. Bottom line: train at sea level with appropriate volume and specificity. If you live at altitude or have access to mountains, use them for additional hiking practice — but the plan below works equally well for flatlanders.

    How much weight should I carry when training?

    Build training pack weight gradually from 10 lb in Week 1 to 20-25 lb by Week 10. Progression guidelines: (1) Weeks 1-4 (Base): 10-15 lb pack on training hikes. Builds neuromuscular patterns without overloading. (2) Weeks 5-8 (Build): 15-20 lb pack. Approaches Kilimanjaro daypack weight. (3) Weeks 9-11 (Peak): 20-25 lb pack on long training hikes. Deliberately over-training above Kilimanjaro’s 15-18 lb real daypack weight. (4) Week 12 (Taper): 10-15 lb pack for shorter maintenance hikes. Actual Kilimanjaro daypack weight: 15-18 lb typical (water, snacks, layers, camera, sunscreen). Porters carry main gear up to 15 kg (33 lb) limit. Training with heavier pack than real climb means actual summit day feels lighter. What to carry in training pack: Water bottles (flexible weight adjustment), rice or sand bags, actual hiking gear, books, anything distributing weight evenly. Avoid single heavy items in one pocket — simulate Kilimanjaro distribution. Pack fit matters: Use the same pack you’ll take to Kilimanjaro during late-phase training (Weeks 8-12). Breaking in both pack and your shoulders/hips prevents chafing and hot spots on the mountain. Rental packs in Moshi work but training with your own pack is ideal. Safety: Never carry heavy pack with poor form or while injured. Pack weight should challenge but never cause pain. Build gradually and reduce if knee/back issues appear.

    What are the key training benchmarks before Kilimanjaro?

    Three critical training benchmarks indicate readiness for Kilimanjaro, ideally completed by Week 10 of a 12-week plan. Benchmark 1 — Back-to-back hiking: Complete two consecutive days of 10-mile hikes with 2,000 ft elevation gain each day, carrying 20 lb pack. This tests your ability to recover overnight and return to demanding work the next day — exactly what Kilimanjaro demands. If you complete Day 1 but can’t continue Day 2, you need more endurance base. Benchmark 2 — Single long hike: Complete one 15-18 mile hike with 3,500-4,000 ft elevation gain carrying 20-25 lb pack in 8-10 hours. This approximates the physical demand of Kilimanjaro summit day. If you finish this feeling exhausted but capable, you’re ready. If you finish injured or couldn’t complete, add 4 weeks of additional training before Kilimanjaro. Benchmark 3 — Pace discipline: Complete a 2-hour hike at deliberately slow ‘pole pole’ pace without getting bored or speeding up. This mental training is as important as physical — summit day requires 5-6 hours of slow, deliberate pace. Fit climbers often fail this test psychologically. Additional indicators: (1) Can you complete stair climber workout with 20 lb pack for 45 minutes? (2) Can you do 5 single-leg squats on each side with 20 lb in hand? (3) Have you slept on a camping pad for 3+ consecutive nights comfortably? (4) Does your boot feel broken in and blister-free over 15+ miles? If yes to all, you’re prepared. Failing any benchmark is a signal to extend training, not rush the mountain.

    What exercises should I do for Kilimanjaro?

    The most effective Kilimanjaro-specific exercises target single-leg strength, core stability, and sustained cardiovascular endurance. Essential strength exercises: (1) Single-leg squats (pistol squat progressions) — builds the specific strength needed for steep uphill single-leg loading. 3 sets of 8-12 per leg. (2) Bulgarian split squats — unilateral leg strength with stability. 3 sets of 10-12 per leg. (3) Step-ups with weighted pack — simulates stair climbing with pack. 3 sets of 15-20 per leg. (4) Reverse lunges — descent-specific training; Kilimanjaro descent is 2,730m and causes most injuries. 3 sets of 12-15 per leg. (5) Bent-over rows — builds back strength for carrying pack all day. 3 sets of 10-12. (6) Planks (various) — core stability on uneven terrain. 2-3 sets of 60 seconds each. (7) Dead bugs — rotational core stability. 3 sets of 8-10 per side. (8) Calf raises — frequently overlooked but essential for scree descents. 3 sets of 20-25. Cardio workouts: (1) Zone 2 running/cycling for 45-60 minutes 2-3x weekly. (2) Stair climber with pack 20-30 minutes 1-2x weekly. (3) Hill repeats (4-8x 2-minute hill climbs) 1x weekly. (4) Long weekend hikes (3-6 hours with pack) 1x weekly — the most important workout. Equipment needed: hiking boots (break in over months), day pack you’ll actually use, water bottles, dumbbells or gym access, trekking poles for later training. Nothing exotic required — this is entirely accessible training that transforms any moderately fit person into a Kilimanjaro-capable climber.

    Can I climb Kilimanjaro without training?

    Climbing Kilimanjaro without training is technically possible but significantly reduces your summit chances and increases injury and altitude sickness risk. Why training matters: (1) Physical endurance — Kilimanjaro demands 5-8 hours of hiking daily for 7-9 consecutive days. Untrained bodies break down with injury, blisters, exhaustion. (2) Altitude compounds fatigue — normal hiking fatigue becomes dangerous at altitude. Well-trained body maintains reserve capacity; untrained body runs on empty. (3) Summit day reality — 10-14 hour summit day with 1,255m elevation gain requires baseline endurance most sedentary people don’t possess. (4) Descent injury risk — 2,730m descent on summit day is where most injuries occur; untrained knees and quads fail under load. (5) AMS risk increases — exhausted bodies acclimatize worse. Success rates by training preparation: (a) 12+ weeks structured training: Success rate reaches route potential (85-95% on proper duration routes). (b) 4-8 weeks training: Success rate drops 10-20 percentage points. (c) Minimal training: Success rate drops 25-40 percentage points even on 8-day routes. (d) No training: Often fail before reaching high camp due to cumulative fatigue. What the untrained can do: If you must attempt Kilimanjaro without adequate training time, minimize risk by: (1) Choose 9-day Northern Circuit for maximum acclimatization. (2) Climb during optimal season. (3) Hire top-tier operator. (4) Build fitness as much as possible in available weeks. (5) Accept higher risk of failure or injury. Better approach: delay Kilimanjaro 3-6 months to properly train. The mountain will still be there; you’ll significantly increase enjoyment and success probability.


    Authoritative Sources & Further Reading

    Training methodology reflects established periodization and mountaineering standards:

    • Training for the New Alpinism (Steve House & Scott Johnston) — Foundational mountain training text
    • Uphill Athlete — uphillathlete.com — Periodization and mountain-specific training resources
    • AMGA (American Mountain Guides Association) — amga.com — Guide training standards
    • NSCA (National Strength and Conditioning Association) — nsca.com — Strength training research
    • ACSM (American College of Sports Medicine) — acsm.org — Training guidelines for endurance
    • Research on altitude performance and training from Journal of Applied Physiology, High Altitude Medicine & Biology
    • Coaching insights: Steve House training principles, Alison Levine mental preparation, Mark Twight training philosophy
    • Reference texts: The Mountain (Ed Viesturs), Extreme Alpinism (Mark Twight), Mountaineering: Freedom of the Hills (Mountaineers Books)
    Published: March 30, 2026
    Last updated: April 19, 2026
    Next review: July 2026
    Part of the Global Summit Guide

    Back to the Master Hub

    This guide is one of 71 across 12 thematic clusters on Global Summit Guide. The master hub organizes every guide by experience tier, specific peak, skill area, and region.

    View the Hub →

    Was this helpful?

    Yes
    No
    Thanks for your feedback!
Language »