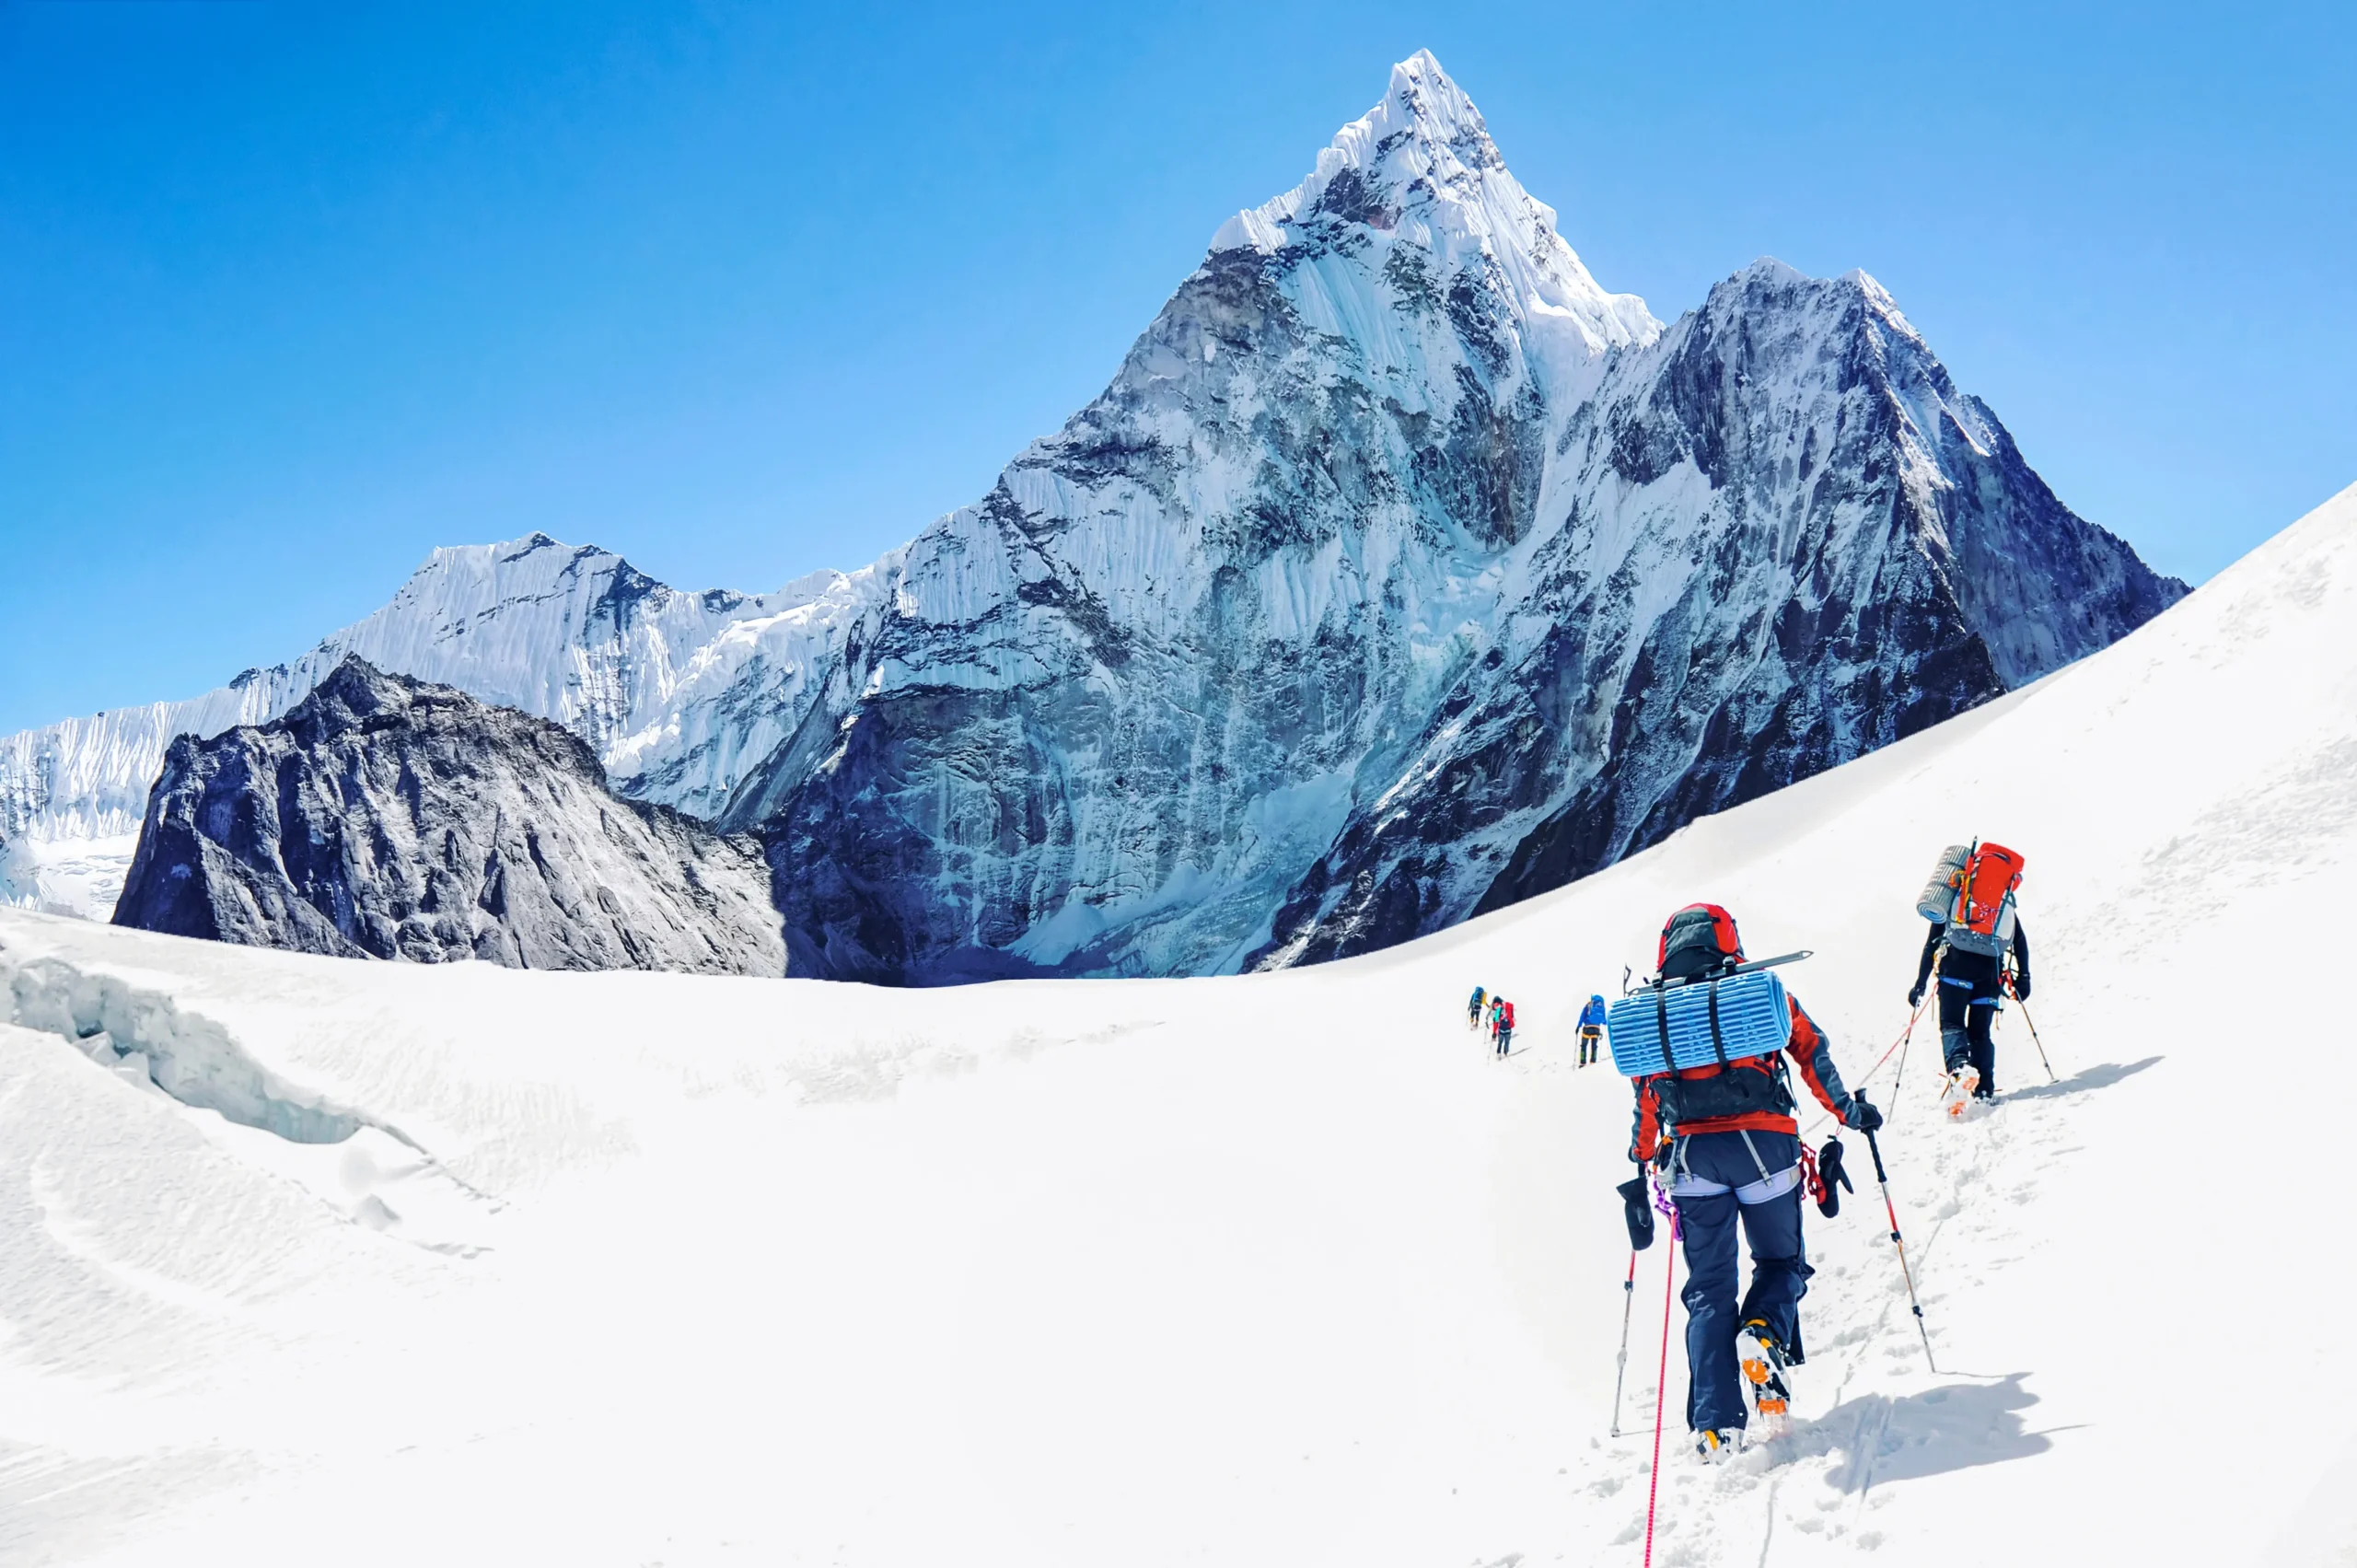
Embarking on a mountaineering journey can be both exhilarating and daunting. This comprehensive guide aims to equip aspiring climbers with essential knowledge about mountaineering education, beginner techniques, and safety training. Understanding the fundamentals of climbing not only enhances your skills but also ensures your safety in challenging environments. Many newcomers face uncertainty regarding where to start and how to prepare for their first climbing adventure. This article will explore various educational resources, essential techniques for beginners, and critical safety training necessary for a successful climbing experience. We will also cover planning your first climbing trip, the necessary safety equipment, and common risks associated with mountaineering.
Indeed, the importance of thorough preparation cannot be overstated, as many aspiring climbers underestimate the challenges and risks involved in mountain expeditions. Beginner climbing guide
Mountaineering Readiness: Skills, Safety & Training for Beginners
A key “watch item” was identified by McDonald et al. (2015) in a study conducted in Nepal that a growing number of tourists arrive largely unprepared for mountain expedition thinking it is simply “a holiday.” They lack awareness and understanding of altitude risks, hypothermia, wind-chill, weather conditions and exposure. At high altitude, mountaineering risk due to lack of skillsets, experience and preparedness can result in tragedy (e.g., accidents, injuries and death). This review aims to move this idea forward by identifying readiness strategies and competencies of high-altitude mountaineers. Climbing-specific challenges are summarized and individual competencies for physical, technical and mental readiness
Preparedness and Peak Performance for Mountaineering Tourists, 2023
Mountaineering Education & Courses
Mountaineering education is vital for anyone looking to explore the mountains safely and effectively. Various courses are available, ranging from basic climbing skills to advanced mountaineering techniques. These courses often cover essential topics such as navigation, weather assessment, and emergency preparedness. Choosing the right course can significantly impact your climbing journey, as it provides the foundational knowledge needed to tackle different terrains and conditions.
The comprehensive nature of these courses is further emphasized by the detailed curricula developed for instructors, ensuring a high standard of education.
Mountaineering & Climbing Instructor Training Curriculum
Training & performance (climbing), Methodology and didactics (in mountaineering and climbing specialities), Professional development (all specialities) and Mountain environment (all specialities) are key areas within the curriculum for mountaineering, climbing and winter sports instructors.
Curriculum for mountaineering, climbing and winter sports instructors in Spain. A critical approach according to key stakeholders, J Sans-Osanz, 2024
Beginner Techniques
Mastering beginner techniques is crucial for new climbers to build confidence and competence in the mountains. These techniques include proper foot placement, body positioning, and the effective use of climbing equipment. Understanding these fundamentals will help you navigate various climbing scenarios safely and efficiently.
How to Master Basic Alpine Climbing Skills Safely
To master basic alpine climbing skills, focus on the following key areas:
Safety Awareness: Always prioritize safety by understanding the risks involved in climbing and how to mitigate them.
Basic Climbing Techniques: Learn essential techniques such as the proper way to ascend and descend, as well as how to use climbing gear effectively.
Emergency Preparedness: Familiarize yourself with emergency protocols and how to respond to unexpected situations while climbing.
These foundational skills will prepare you for more advanced climbing challenges and ensure a safer experience in the mountains.
Essential Safety Training
Safety training is a critical component of mountaineering education. It encompasses various aspects, including weather awareness, emergency preparedness, and risk management. Understanding how to assess weather conditions and prepare for emergencies can make a significant difference in your climbing experience.
Ultimately, a climber’s safety is intrinsically linked to their knowledge, skills, and proactive engagement in specialized safety and first aid training.
Essential Climbing Safety & First Aid Training
For example, a climber’s safety is dependent on his or her knowledge, skills, and abilities. Safe climbing requires risk awareness, and individual responsibility. Motivated climbers can seek specialized instruction in climbing safety and first aid programs to enhance their knowledge and skills.
Rock climbers’ self-perceptions of first aid, safety, and rescue skills, 2002
Foundational Skills for New Climbers
New climbers should focus on developing several foundational skills to enhance their climbing capabilities. These skills include:
Physical Conditioning: Building strength and endurance is essential for tackling challenging climbs.
Mental Resilience: Developing mental toughness helps climbers cope with the psychological demands of mountaineering.
Decision-Making Skills: Learning to make quick and informed decisions is crucial in high-pressure situations.
These skills will not only improve your climbing performance but also contribute to your overall safety in the mountains.
Planning Your First Climbing Trip
Planning your first climbing trip involves several key considerations to ensure a successful and enjoyable experience. Start by choosing the right climbing objective that matches your skill level and physical condition. Next, develop a detailed itinerary that includes logistics such as transportation, accommodation, and food supplies. Additionally, consider acclimatization strategies to help your body adjust to higher altitudes, which is crucial for safety and performance.
For those looking for guidance, Information Hub offers a range of certified mountaineering courses that provide comprehensive climbing education tailored to various skill levels. These courses can help you gain the necessary knowledge and confidence to embark on your climbing journey.
Safety Equipment
Having the right safety equipment is essential for any climbing expedition. Key items include:
Helmet: Protects your head from falling debris and impacts.
Harness: Ensures safety while climbing and rappelling.
Navigation Tools: Essential for route finding and ensuring you stay on track.
Investing in high-quality safety equipment can significantly enhance your climbing experience and reduce the risk of accidents.
Common Risks and Mitigation
Mountaineering comes with inherent risks that every climber should be aware of. Common risks include unpredictable weather, altitude sickness, and equipment failure. To mitigate these risks, climbers should:
Monitor Weather Conditions: Stay informed about changing weather patterns and be prepared to adjust your plans accordingly.
Plan for Altitude: Gradually acclimatize to higher altitudes to minimize the risk of altitude sickness.
Know Your Limits: Understand your physical and mental limits to avoid overexertion and potential accidents.
By being proactive about these risks, climbers can enjoy a safer and more rewarding mountaineering experience.
Resources for Beginners
Numerous resources are available for new climbers looking to enhance their skills and knowledge. These include:
Online Climbing Websites: Offer valuable information on techniques, gear, and safety.
Local Outdoor Stores: Provide expert advice and equipment tailored to your climbing needs.
Climbing Apps: Help track your progress and connect with other climbers.
Utilizing these resources can significantly improve your climbing journey and help you stay informed about best practices and safety measures.
For those interested in guided experiences, Global Summit Guide offers a variety of options.
When planning your trip, consider using trip planning resources to ensure a smooth and safe adventure.
Understanding gear safety is paramount for any mountaineering endeavor.
Mountain climbing insurance: what you actually need
Insurance is the line item climbers most often get wrong – either buying cheap travel cover that excludes mountaineering, or skipping it and gambling on never needing a rescue. Both cost more than doing it right. This guide breaks down the four coverage types every climber needs, compares the main 2026 providers with real pricing, and explains the claim rules that decide whether your policy actually pays.
By Travis Ludlow, Founder & Head of Research · Safety review: Dawson Ludlow
How this guide was built. Provider pricing and coverage limits reflect current 2026 wordings from the American Alpine Club, Global Rescue, Ripcord by Redpoint, Garmin InReach SAR, Overwatch x Rescue, and SafetyWing, including the 2025 Garmin altitude-cap change and SafetyWing’s Adventure Sports add-on. Helicopter-rescue cost ranges are drawn from operator post-incident reports, CDC published figures, and climber testimonials. This is the foundational companion to our above-6,000 m insurance comparison.
The quick answer
Rescue first. Medical second. Buy before you go.
You need climbing-specific cover for any climb above ~4,000 m, any remote objective, or anything using ropes, crampons, or ice axes – standard travel insurance almost always excludes these. Match the policy to the climb: AAC Rescue Benefit (~$80/yr) below 5,000 m; Ripcord by Redpoint (~$375/yr) for trekking peaks; Global Rescue ($749/yr, unlimited altitude) for serious expeditions; Garmin InReach SAR for device owners below 5,000 m; Overwatch x Rescue ($80/yr, no altitude exclusions) as a newer budget option.
The rule that decides claims: contact your provider FIRST, before any rescue is launched – arranging it independently can void coverage. Heading above 6,000 m? This page is the foundation; the altitude-specific details live in our above-6,000 m deep-dive.
$7,500AAC cover at ~$80/yr
$749/yrGlobal Rescue unlimited
$200K+Everest rescue real cost
~5,000 mCommon altitude cap
Informational, not insurance advice. This guide explains how climbing insurance works and what different 2026 providers offer so you can make your own informed decision. Global Summit Guide is not an insurance broker or advisor, coverage terms and prices change, and only the policy wording you buy is binding. Read the exact document, confirm your altitude, equipment, and destination are named as covered, and contact the provider with questions before you rely on any policy.
Mountain climbing insurance is not one product – it is a bundle of four distinct coverages. Gaps happen where you assumed you had one but didn’t.
Priority 1
Search & rescue (SAR)
Helicopter and ground extraction from remote terrain – the single most expensive risk you face. This is the coverage that pulls you off the mountain, and the one standard policies most often lack.
Priority 2
Emergency medical & evacuation
The hospital bill plus medical transport – stabilisation abroad and, if needed, a medical flight home (repatriation). Rescue gets you down; this covers the treatment after.
Priority 3
Trip cancellation & interruption
Protects the non-refundable expedition cost if illness, injury, or a covered event stops you climbing. It matters most on high-cost expeditions where the deposit alone runs into thousands.
Priority 4
Baggage & gear
Lost, stolen, or delayed gear. The lowest-stakes coverage for most climbers – useful, but never the reason you buy a policy.
If budget forces a priority order. Buy search and rescue first, emergency medical second, trip cancellation third, and baggage last. A single uninsured rescue can exceed the cost of two decades of premiums, which is why rescue and medical evacuation are non-negotiable above 4,000 m and trip protection is the first thing to trim on a tight budget.
Why standard travel insurance fails climbers
Most generic policies quietly exclude the exact things a climb involves – and the gap only surfaces at claim time.
Read almost any standard travel policy closely and you will find a set of exclusions that rule out mountaineering: altitude above 4,000-6,000 m (the threshold varies by provider), any activity using ropes, crampons, or ice axes, anything the policy defines as an expedition, and adventure sports such as backcountry skiing. Climbers who buy generic cover often discover they have no protection during precisely their highest-risk activities. The most popular trekker brands are not exempt – several carry a search-and-rescue exclusion that climbers only find when they try to file. Before you rely on any policy, confirm in writing that your specific altitude, equipment, route grade, duration, and destination are named as covered.
The six providers compared
2026 pricing and coverage for the providers most climbers actually use – from an $80 rescue benefit to full expedition cover.
Provider
Annual cost
Altitude
What it covers
Best for
AAC Rescue Benefit
~$80
Below 5,000 m
$7,500 transport + $5,000 medical
Rock, scrambling, moderate alpine
Global Rescue
$749
Unlimited
Worldwide rescue + medical evac
Serious & 7,000 m+ expeditions
Ripcord by Redpoint
~$375
No standard cap
Combined travel + rescue + trip protection
Trekking peaks, mid-range
Garmin InReach SAR
$39.95-$999.95
5,000 m cap (std)
Device-linked rescue coordination
InReach owners below 5,000 m
Overwatch x Rescue
$80
No exclusions
Rescue + evac, any sat communicator
Budget unlimited altitude
SafetyWing Adventure
Add-on
Up to 6,000 m
Health + sports (nomadic style)
Long-term travelers
1. American Alpine Club Rescue Benefit
~$80/yr (AAC membership) · $7,500 transport + $5,000 medical
The strongest value for climbers who stay below 5,000 m or do moderate objectives. Included with AAC membership, coordinated through Redpoint (Ripcord’s provider), and it covers all outdoor activities away from home (Arctic Circle excluded). Members can upgrade to $250/yr for $300,000 transport, or step up to full Ripcord. The $7,500 limit is thin for a major expedition, and Redpoint must coordinate the rescue for full cover.
2. Global Rescue
$749/yr standard · unlimited altitude · worldwide
The established choice for serious mountaineering, built on a long record of rescues on the highest peaks. The standard plan carries no altitude exclusions – the most comprehensive single-provider cover for most objectives without expedition-specific riders (those run $300-1,200 for multi-week trips). Highest baseline cost, and premiums rise past age 60, but the high-altitude reputation is why many expedition operators expect it.
3. Ripcord by Redpoint Travel Protection
~$375/yr · AAC partner · no standard altitude exclusions
The strongest mid-range option, and the same company behind the AAC Rescue Benefit. Ripcord bundles travel protection (trip cancellation, interruption, baggage) with rescue and medical evacuation, all designed for climbers and adventure travelers. AAC members get a discount. Limits sit below Global Rescue’s maximums, but for trekking peaks and alpine 4000ers it hits the sweet spot of price and breadth.
4. Garmin InReach SAR Plans
$39.95 Basic / $299.95 High Risk / $999.95 High Altitude
Rescue coverage for owners of a Garmin InReach device, triggered by the device’s SOS. Cheapest option below 5,000 m at $39.95. The catch is the 2025 change: the previously unlimited High Risk plan is now capped at 5,000 m, and the new High Altitude plan ($999.95) that restores unlimited altitude costs more than Global Rescue’s $749 – so above 5,000 m the value case weakens unless you want the InReach integration.
5. Overwatch x Rescue (OXR)
$80/yr · no altitude or sports exclusions · any sat communicator
The newest entrant and, for the price, the broadest baseline: 24/7 worldwide rescue coordination with no altitude and no risky-sports exclusions, working with any satellite device. Active since 2021, backed by Focus Point (emergency response since 2011). The trade-off is track record – a shorter claims history than Global Rescue or Ripcord, which some climbers weigh against the price.
6. SafetyWing Adventure Sports Add-On
Add-on fee · up to 6,000 m · health + sports
A 2025 add-on that extends SafetyWing’s nomad health insurance to climbing up to 6,000 m. Best for long-term travelers whose main need is general health cover with mountaineering as a secondary activity – it is a broader travel-health product rather than dedicated rescue coordination, so serious climbers usually pair it with a rescue policy.
Helicopter rescue is the scenario your coverage exists for. Documented 2026 costs run from around $5,000 on Kilimanjaro to over $200,000 from Everest above 7,500 m – and standard travel insurance typically excludes these evacuations entirely.
Real helicopter rescue costs by destination
Documented 2026 ranges – the real numbers that tell you how much coverage you actually need.
Destination
Rescue cost (USD)
Notes
Kilimanjaro
$5,000-15,000
Varies by altitude and complexity
Aconcagua
$10,000-30,000
Military heli often free; private medical evac adds cost
Denali
$20,000-50,000+
NPS operations; extreme high-altitude flying
Mont Blanc / Matterhorn
$10,000-40,000
Air Zermatt private; PGHM government
Pakistan (K2 / Broad Peak)
$10,000-50,000
Army helicopters; very limited availability
Nepal trekking
$5,000-15,000
Standard EBC-trek rescue
Nepal high-altitude climbing
$15,000-50,000
Above Camp 1 on Everest / 8000ers
Everest above 7,500 m
$50,000-200,000+
Limited certified pilots; oxygen requirements
Indian Himalaya
$8,000-25,000
IMF-coordinated rescues
Patagonia
$10,000-30,000
Weather dependency is the major factor
European Alps (general)
$5,000-25,000
Many Alpine clubs include partial cover
Why the limits matter – a real scenario. A climber develops pulmonary edema at 6,200 m in Nepal. The team reaches the insurer by satellite phone; the insurer coordinates a helicopter from Camp 2 to Kathmandu ($18,000), hospital stabilisation runs $3,500, and a medical flight home adds $25,000-50,000 – a total of roughly $46,500-71,500. The AAC Rescue Benefit’s $7,500 covers only a fraction; Global Rescue would coordinate and cover the full rescue and evacuation directly. Matching your coverage limit to the real cost of your destination is the whole game.
Which policy for your climb
The right choice depends entirely on your climbing profile. Match the objective to the coverage – what fits one climber is inadequate or overkill for another.
Your climbing
Typical fit
Why
Rock climbing only
AAC Rescue Benefit (~$80)
Rarely remote or high enough to need unlimited cover; $7,500 handles most scenarios
Hiking + scrambling below 4,000 m
AAC (~$80) or Garmin SAR Basic ($39.95)
Low-altitude rescue is rarely expensive; minimal cost suffices
Alpine 4000ers (Alps, Pacific NW)
AAC + Ripcord upgrade ($250) or Ripcord (~$375)
More remote terrain and heli scenarios; upgrade adds $300K transport
Himalayan trekking peaks (5,000-6,500 m)
Ripcord (~$375) or Global Rescue ($749)
Above standard altitude caps; choose trip protection vs pure rescue
7,000 m+ expeditions
Global Rescue ($749) + expedition rider
Needs unlimited altitude and proven high-altitude coordination
$85,000+ expedition cost justifies full stack; budget $1,500-3,000
Garmin InReach owner below 5,000 m
Garmin SAR Basic ($39.95) or High Risk ($299.95)
Cheapest device-linked option; not for higher mountaineering post-2025
Budget adventure climber
Overwatch x Rescue ($80) or AAC + InReach Basic
Unlimited altitude at $80 if you trust the newer provider
Typical insurance budgets by peak
What the whole insurance line item tends to run, annual plus expedition-specific premiums combined.
Objective
Total insurance budget
Typical build
Kilimanjaro
$150-500
AAC or Ripcord annual; heli-evac rider
Aconcagua
$400-1,000
Ripcord or Global Rescue annual
Everest / 8000ers
$1,500-3,000
Global Rescue $749 + rider $300-1,200 + trip cancellation $500-1,500
The claim rules that decide payouts
Choosing the right policy is only half the job – these procedures determine whether it actually pays when you need it.
⚠ Rule 1: Contact your provider FIRST.
The single most important – and most misunderstood – rule, flagged by climber-attorney Maury Birdwell. Most rescue policies (Global Rescue, Ripcord, AAC, and others) require you to reach the provider before a rescue is launched: you contact them by satellite phone or messenger, they coordinate with local authorities, and they pay the rescue agencies directly. Call local rescue yourself, or let guides arrange it independently, and the provider may decline to pay even when you would otherwise have been covered. Program provider numbers into your satellite device and brief your team before the climb.
Rule 2: Document everything
Claims need more evidence than most climbers expect: medical records and treatment notes, rescue-authorisation records, every receipt for medical and transport costs, expedition operator records and itineraries, witness statements where relevant, and a timeline with times and locations. Save it as you go, not afterward.
Rule 3: Disclose pre-existing conditions
Most policies require disclosure on application, and an undisclosed condition can void the whole claim. Disclose your full relevant history, get written confirmation of what is covered, understand the look-back period (often 60-180 days), and confirm altitude-related conditions are named as covered.
Rule 4: Verify activity-specific coverage
Many policies exclude specific activities. Confirm in writing that your altitude, technical equipment (ropes, crampons, ice axes), route grade, expedition duration, location, and team setup (solo, guided, expedition) are all named as covered. Insurers operate on strict definitions, not your sense of how serious the climb is.
Rule 5: Buy before you go
Cover will not usually apply to incidents after travel has started, so buy during planning – ideally 2-4 weeks out. Trip cancellation often has to be purchased within 14-21 days of your first deposit, and many operators verify insurance before accepting a booking.
Heading above 6,000 m?
High-altitude rescue is a different problem: at Himalayan altitude you effectively need two products (medical cover for the hospital bill and evacuation cover for the physical extraction), the providers who sell each differ, and operator and permit requirements come into play. This page is the foundation for every climber; the altitude-specific providers, the two-product structure, and the eight-step pre-purchase checklist are in the companion guide.
Disclosure: the Expedia link is an affiliate link; we may earn a small commission at no extra cost to you, and it never affects our recommendations. We earn nothing from the insurance providers named on this page.
Climbing insurance FAQ
The questions climbers search most.
Do I really need mountain climbing insurance?
For any climb above ~4,000 m, any remote objective, or anything needing technical equipment, yes – the question is which kind, not whether. Standard travel policies exclude altitude, ropes/crampons/ice axes, expeditions, and adventure sports. A Denali, Aconcagua, or Kilimanjaro evacuation can run tens of thousands; Everest can exceed $200,000.
What are the four types of coverage a climber needs?
Search and rescue (the most expensive risk), emergency medical and evacuation (hospital plus transport home), trip cancellation and interruption (protects the non-refundable cost), and baggage or gear. On a tight budget, prioritise them in that order.
What is the best mountain climbing insurance for 2026?
It depends on your profile: AAC Rescue Benefit (~$80) below 5,000 m; Ripcord (~$375) for trekking peaks; Global Rescue ($749, unlimited) for 7,000 m+ expeditions; Garmin InReach SAR for device owners below 5,000 m; Overwatch x Rescue ($80, no altitude exclusions) as a newer budget pick. This is general information, not a recommendation of a specific policy.
Does standard travel insurance cover mountaineering?
Usually not – most exclude altitude above 4,000-6,000 m, rope/crampon/ice-axe activities, expeditions, and adventure sports. Confirm your exact altitude, equipment, and destination are named as covered before relying on any policy.
How much does a helicopter rescue cost?
Documented 2026 ranges: Kilimanjaro $5,000-15,000; Aconcagua $10,000-30,000; Denali $20,000-50,000+; Nepal high-altitude climbing $15,000-50,000; Everest above 7,500 m from $50,000 to over $200,000. Ground rescue alone can still run $5,000-20,000.
What is the “contact first” rule?
Most rescue policies require you to reach the provider before a rescue is launched; they then coordinate and pay the rescue agencies directly. Arranging a rescue independently first can void coverage. Program provider numbers into your satellite device beforehand.
What changed with Garmin InReach SAR in 2025?
Garmin added altitude caps: the High Risk plan ($299.95) is now capped at 5,000 m, and a new High Altitude plan ($999.95) restores unlimited altitude – but costs more than Global Rescue’s $749, so compare carefully above 5,000 m.
Will my regular health insurance cover climbing abroad?
Rarely – US plans usually cover in-network US care only, and international plans often exclude high-risk activities. Most climbers keep health insurance for care back home and add a climbing-specific rescue and evacuation policy for the mountain.
Methodology & sources
Provider pricing and coverage reflect current 2026 wordings from the American Alpine Club, Global Rescue, Redpoint/Ripcord, Garmin InReach SAR, Overwatch x Rescue, and SafetyWing, including the 2025 Garmin altitude-cap change and SafetyWing’s Adventure Sports add-on.
Helicopter-rescue cost ranges come from operator post-incident reports, CDC published figures, and documented climber testimonials across Himalayan, Aconcagua, and Denali rescues.
Procedural guidance draws on Climbing magazine’s coverage of how rescue insurance works and climber-attorney Maury Birdwell’s commentary on the “contact first” rule.
This is information, not insurance advice; only the policy wording you purchase is binding. Safety framing reviewed by Dawson Ludlow.
Last updated: July 18, 2026 · next pricing review November 2026 · Travis Ludlow, Global Summit Guide.
Confidence: High on coverage structure and the four-type framework; Medium on exact premiums, which vary by age, plan tier, and season and change between review cycles.
Travis Ludlow
Founder & Head of Research, Global Summit Guide
Travis researches expedition planning and cost for Global Summit Guide from Nephi, Utah, with first-hand high-altitude experience on glaciated 5,000 m volcanoes. This guide is a research-based comparison of published 2026 provider terms, not insurance advice – it exists to help climbers ask the right questions before they buy. Safety framing is reviewed by Dawson Ludlow.
Match rescue and medical evacuation cover to your real destination cost, buy it before you leave, program your provider’s number into your satellite device, and brief your team on the contact-first rule. Then the insurance does its job in the background while you do yours on the mountain.
Gasherbrum I Acclimatization Strategy: Comprehensive High Altitude Climbing Preparation
Climbing Gasherbrum I, one of the highest peaks in the Karakoram range, requires meticulous preparation, particularly regarding acclimatization. This process is crucial for climbers to adapt to the reduced oxygen levels at high altitudes, which can significantly impact their performance and safety. In this article, we will explore the physiological effects of high altitude on climbers, the recommended acclimatization timeline, prevention strategies for altitude sickness, essential gear, and effective expedition planning. By understanding these elements, climbers can enhance their chances of a successful ascent while minimizing risks associated with altitude sickness.
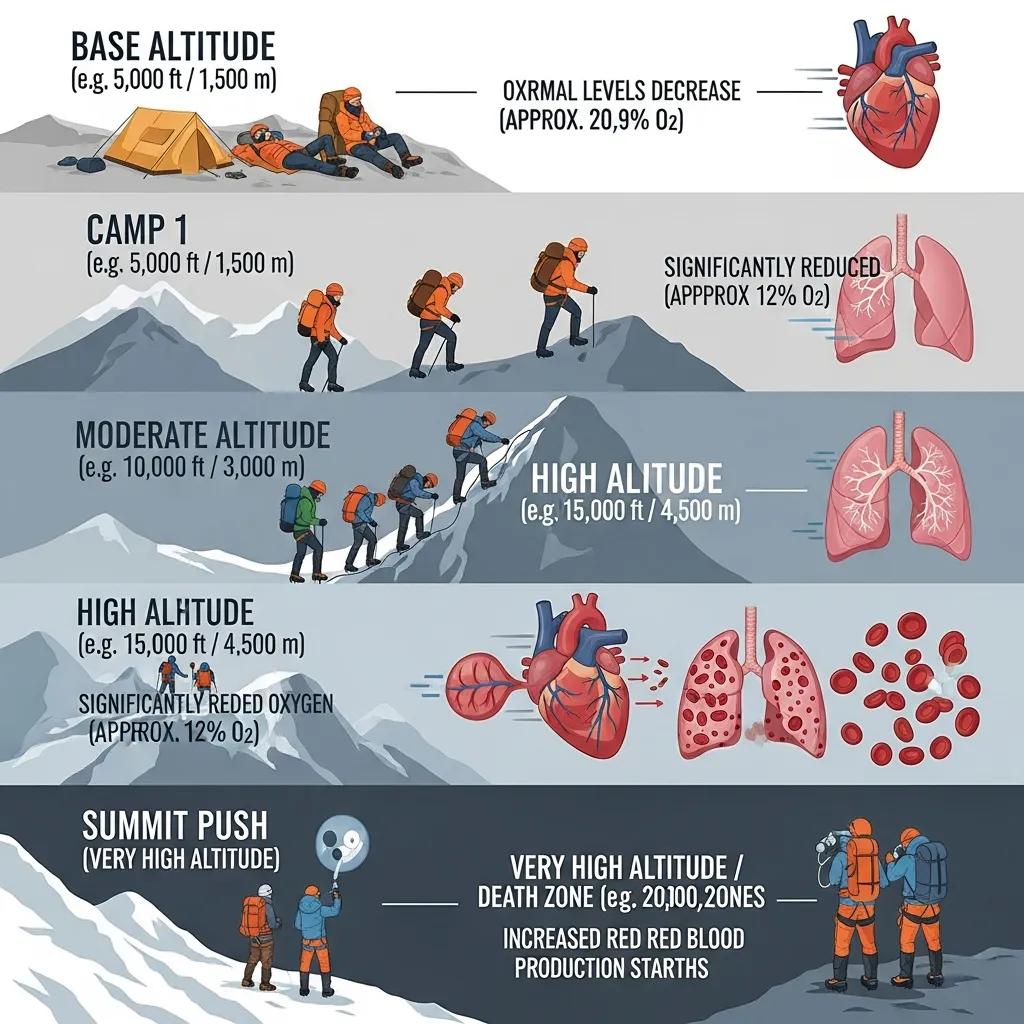
What Are the Physiological Effects of High Altitude on Climbers?
High altitude significantly affects climbers’ physiology, primarily due to the reduced availability of oxygen. As altitude increases, the atmospheric pressure decreases, leading to lower oxygen levels in the air. This reduction can result in various physiological responses, including increased heart rate, elevated breathing rates, and changes in blood chemistry. The body attempts to compensate for the lack of oxygen by producing more red blood cells, a process known as erythropoiesis. However, this adaptation takes time, which is why acclimatization is essential for climbers aiming to reach the summit of Gasherbrum I.
Further research into high-altitude physiology, such as studies on Gasherbrum II, provides additional context on how the body adapts to hypoxic conditions.
Gasherbrum II Acclimatization Adaptations & Hypoxia Performance
Additionally, the ¦E data from the same testing protocol were used for estimating Ventilatory. More precisely, the acclimatization adaptations were more enhanced during Gasherbrum II.
…
EFFECTS OF HIGH–ALTITUDE ALPINISTIC EXPEDITION MAY BE LESS STRONG STIMULUS FOR PERFORMANCE IN HYPOXIA, THAN ACCLIMATIZATION, 2012
The symptoms of altitude sickness can manifest as headaches, nausea, dizziness, and fatigue. These symptoms can escalate to more severe conditions, such as High Altitude Pulmonary Edema (HAPE) or High Altitude Cerebral Edema (HACE), which can be life-threatening. Understanding these physiological effects underscores the importance of a well-structured acclimatization strategy to ensure climbers can safely navigate the challenges posed by high altitudes.
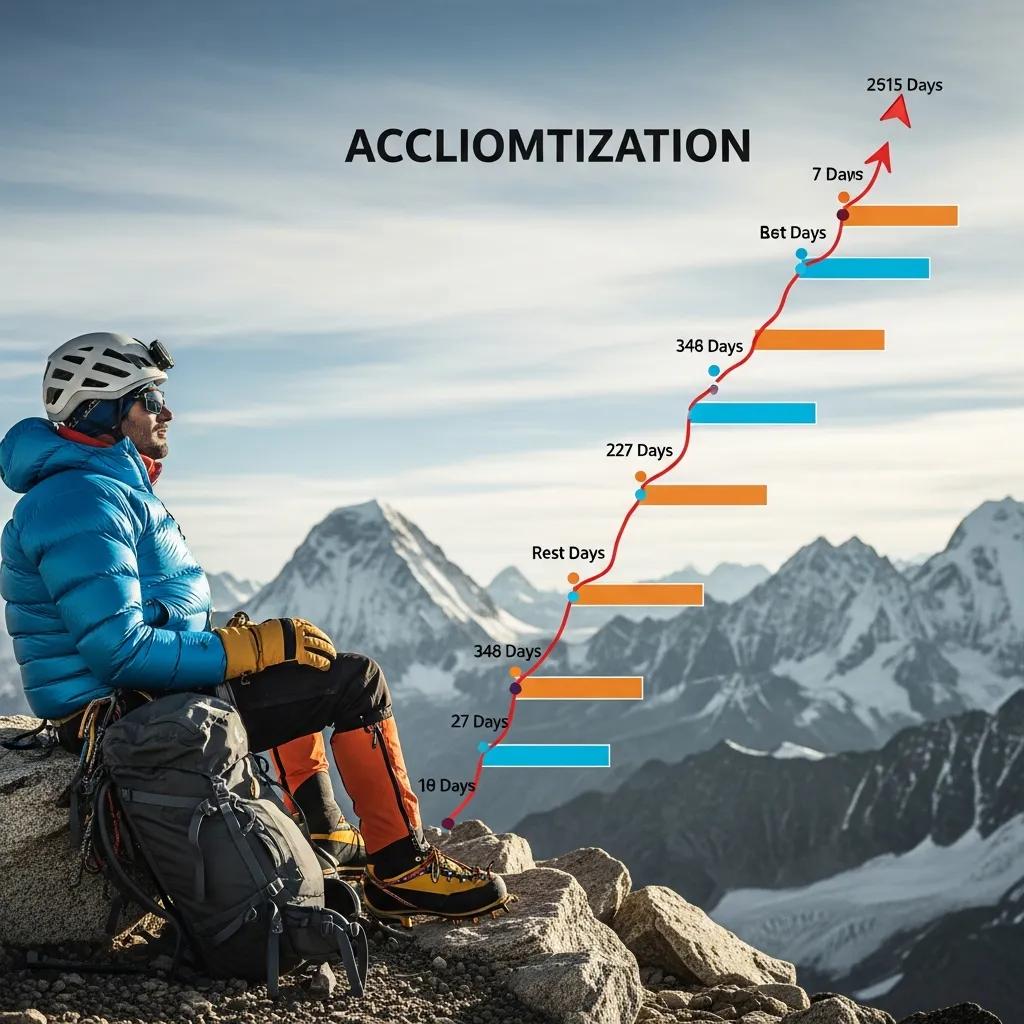
What Is the Recommended Acclimatization Timeline for Gasherbrum I?
A well-planned acclimatization timeline is crucial for climbers preparing for Gasherbrum I. Typically, a 4-6 week acclimatization schedule is recommended to allow the body to adapt adequately to high altitude. This timeline should include gradual ascent techniques, where climbers increase their altitude slowly, allowing their bodies to adjust to the decreasing oxygen levels.
How to Structure a 4-6 Week Acclimatization Schedule for Optimal Adaptation?
To optimize acclimatization, climbers should follow a structured weekly plan that includes specific activities aimed at enhancing their adaptation to high altitudes. Here’s a suggested breakdown:
Weeks 1-2: Begin with moderate ascents to base camp, focusing on hydration and nutrition. Incorporate light physical activities to stimulate cardiovascular adaptation.
Weeks 3-4: Gradually increase altitude by ascending to higher camps, ensuring to include rest days to allow for recovery. Monitor symptoms of altitude sickness closely.
Weeks 5-6: Conduct acclimatization climbs to higher altitudes, utilizing supplemental oxygen if necessary. This phase is critical for preparing for the summit push.
This gradual approach helps climbers build endurance and reduces the risk of altitude sickness, making it a vital component of any successful expedition.
When and How Should Supplemental Oxygen Be Integrated?
Supplemental oxygen can be a crucial tool for climbers on Gasherbrum I, especially during the final ascent. It is generally recommended to integrate supplemental oxygen when reaching altitudes above 7,000 meters, where the oxygen levels are significantly lower. Climbers should discuss their oxygen strategy with expedition operators, considering factors such as individual acclimatization rates and overall health.
Using supplemental oxygen can help alleviate the symptoms of altitude sickness and improve performance during critical phases of the climb. However, it is essential to use it judiciously, as reliance on supplemental oxygen can hinder the body’s natural acclimatization process.
How Can Altitude Sickness Be Prevented During Gasherbrum I Expeditions?
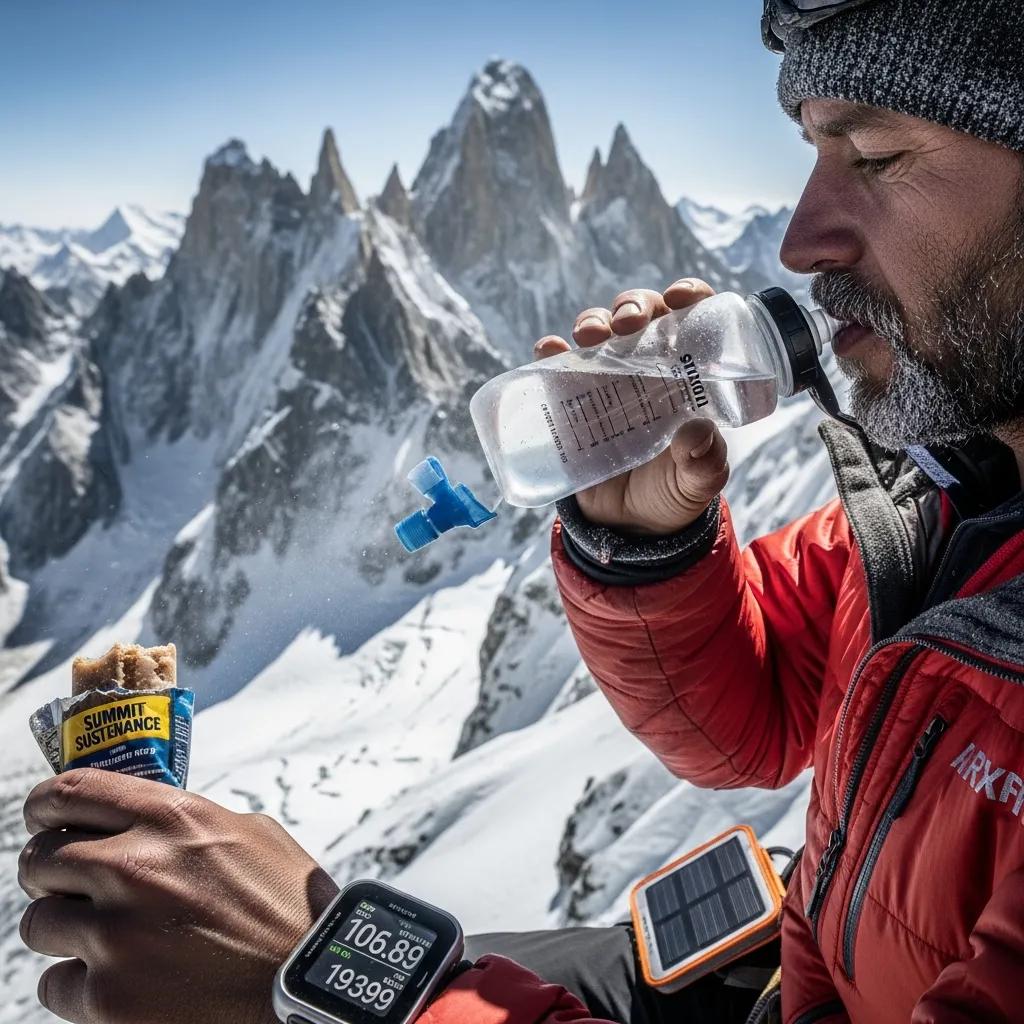
Preventing altitude sickness is paramount for climbers on Gasherbrum I. The key strategies include gradual ascent, maintaining proper hydration, and monitoring symptoms closely. Climbers should be aware of their bodies and recognize early signs of altitude sickness to take appropriate action.
What Safety Protocols and Monitoring Techniques Are Essential?
Implementing safety protocols is essential for managing the risks associated with altitude sickness. Climbers should:
Monitor Symptoms: Regularly assess for symptoms of altitude sickness, such as headaches, nausea, and fatigue.
Emergency Preparedness: Have a clear plan for descending to lower altitudes if symptoms worsen.
Hydration and Nutrition: Maintain adequate hydration and consume high-calorie foods to support energy levels.
These protocols can significantly enhance safety during the expedition, ensuring that climbers are prepared to respond to altitude-related challenges.
Which Medications and Natural Remedies Support Prevention?
Several medications and natural remedies can support the prevention of altitude sickness. Commonly used medications include Acetazolamide, which helps speed up acclimatization by promoting respiratory alkalosis. Additionally, natural remedies such as ginger and ginseng may help alleviate nausea and improve overall well-being. Staying hydrated is also crucial, as dehydration can exacerbate symptoms of altitude sickness.
The effectiveness of medications like Acetazolamide in preventing acute mountain sickness and aiding acclimatization has been a subject of detailed study.
Acetazolamide Efficacy for AMS Prophylaxis & Acclimatization
efficacy of acetazolamide for the prophylaxis of AMS and disclose potential factors that affect the treatment effect of acetazolamide and body mass, height, degree of prior acclimatization.
Efficacy of acetazolamide for the prophylaxis of acute mountain sickness: A systematic review, meta-analysis and trial sequential analysis of randomized clinical trials, 2021
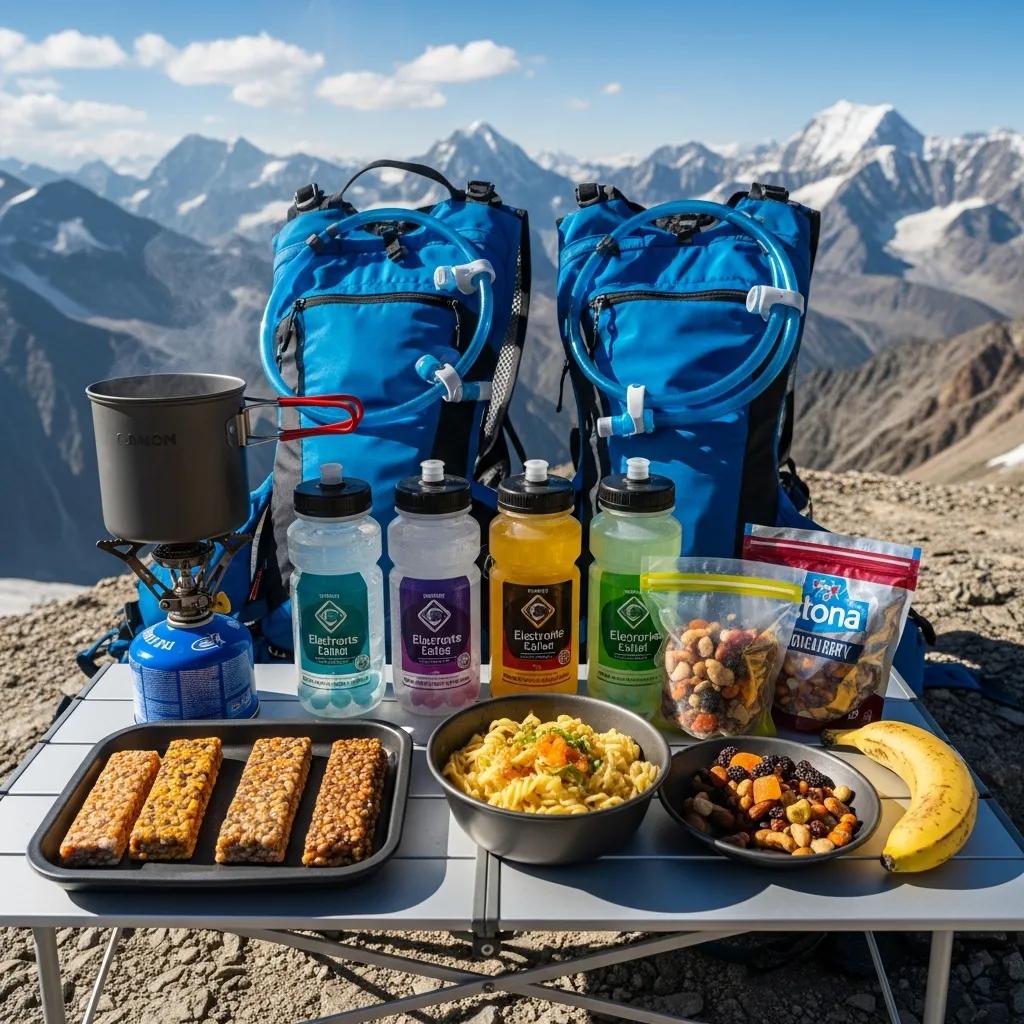
What Gear Is Essential for Effective Acclimatization on Gasherbrum I?
Having the right gear is vital for climbers preparing for Gasherbrum I. Essential gear includes high-quality climbing equipment, appropriate clothing layers, and safety equipment designed for extreme conditions.
To ensure you have all the necessary equipment for your climb, consider consulting gear and safety guidelines. Proper preparation is key to a successful and safe expedition.
How to Choose and Use Acclimatization-Specific Gear?
When selecting gear for acclimatization, climbers should consider the following:
Climbing Gear Essentials: Invest in high-altitude boots, crampons, and ice axes that are reliable and suited for the terrain.
Clothing Layers: Use a layering system that allows for temperature regulation, including moisture-wicking base layers, insulating mid-layers, and waterproof outer layers.
Safety Equipment: Ensure that safety gear, such as helmets and harnesses, is in good condition and suitable for high-altitude climbing.
Proper gear selection and usage can significantly enhance climbers’ comfort and safety during their acclimatization process.
How Should Climbers Plan Their Gasherbrum I Expedition for Successful Acclimatization?
Effective expedition planning is crucial for successful acclimatization on Gasherbrum I. Climbers must consider various factors, including itinerary planning, logistical support, and risk management.
For those looking to plan their next adventure, trip planning is essential. A well-thought-out plan can make all the difference in ensuring a safe and enjoyable experience.
What Are Key Considerations in Trip Planning and Logistics?
When planning an expedition, climbers should focus on:
Acclimatization Strategy: Develop a clear acclimatization plan that includes gradual ascents and rest days.
Training Regimen: Prepare physically through a structured training program that enhances endurance and strength.
Emergency Preparedness: Have contingency plans in place for emergencies, including evacuation routes and communication strategies.
These considerations are essential for ensuring a well-organized and safe climbing experience.
How to Integrate Acclimatization Strategy into Overall Climbing Plan?
Integrating acclimatization strategies into the overall climbing plan involves:
Structured Acclimatization Plan: Ensure that the acclimatization schedule is aligned with the climbing itinerary.
Rest Days Importance: Schedule adequate rest days to allow for recovery and adaptation.
Monitoring Physical Conditions: Regularly assess climbers’ physical conditions to adjust the plan as needed.
This integration is vital for maximizing the chances of a successful summit while minimizing the risks associated with altitude sickness.
What Can Be Learned from Recent Gasherbrum I Expedition Case Studies?
Recent expeditions to Gasherbrum I have provided valuable insights into effective acclimatization strategies and the challenges climbers face at high altitudes. Analyzing these case studies can inform best practices for future climbers.
How Have 2023-2026 Expeditions Informed Acclimatization Best Practices?
Expeditions conducted between 2023 and 2026 have highlighted the importance of staged acclimatization and the use of supplemental oxygen. Climbers have reported that gradual ascents, combined with strategic rest days, significantly reduce the incidence of altitude sickness. Additionally, the integration of technology, such as wearable devices for monitoring vital signs, has emerged as a valuable tool for enhancing safety during climbs.
What Innovations in Acclimatization and Safety Have Emerged?
Innovations in climbing safety and acclimatization strategies have also emerged from recent expeditions. New safety protocols, including enhanced communication systems and real-time health monitoring, have been developed to improve climber safety. Furthermore, advancements in climbing gear, such as lightweight and insulated equipment, have made high-altitude climbing more accessible and safer.
How Does Gasherbrum I Acclimatization Compare to K2 and Other Himalayan Peaks?
Understanding how acclimatization strategies for Gasherbrum I compare to those for K2 and other Himalayan peaks can provide valuable insights for climbers.
What Are Similarities and Differences in Acclimatization Strategies?
Both Gasherbrum I and K2 require similar acclimatization strategies, emphasizing gradual ascent and the importance of rest days. However, K2 presents unique challenges due to its technical climbing routes and higher altitude, necessitating a more rigorous acclimatization schedule. Climbers on K2 often face harsher weather conditions, which can further complicate the acclimatization process.
How Can Lessons from K2 Enhance Gasherbrum I Preparation?
Lessons learned from K2 expeditions can enhance preparation for Gasherbrum I by emphasizing the need for thorough training and preparation. Climbers can benefit from adopting K2’s rigorous acclimatization protocols, including the use of supplemental oxygen and advanced safety measures. By applying these lessons, climbers can improve their chances of success on Gasherbrum I.
What Frequently Asked Questions Do Climbers Have About Gasherbrum I Acclimatization?
Climbers often have questions regarding the best practices for acclimatization on Gasherbrum I, particularly concerning altitude sickness prevention and the acclimatization timeline.
What Is the Best Way to Prevent Altitude Sickness on Gasherbrum I?
The best way to prevent altitude sickness on Gasherbrum I is through gradual ascent, proper hydration, and monitoring for symptoms. Climbers should ascend slowly, allowing their bodies to adapt to the changing altitude, and stay hydrated to support overall health.
How Long Does Acclimatization Typically Take for Gasherbrum I Climbers?
Acclimatization for climbers on Gasherbrum I typically takes 4-6 weeks, depending on individual responses to altitude and the specific acclimatization strategies employed. Factors such as fitness level, previous high-altitude experience, and overall health can influence the duration of acclimatization.
For more information on planning your next climb, visit Global Summit Guide.
Breathing Techniques for High-Altitude Climbing That Actually Work (2026) | Global Summit Guide
Cluster 08 · Altitude, Training & Physiology · Updated April 2026
Breathing Techniques for High-Altitude Climbing That Actually Work
The specific respiratory techniques climbers use to improve oxygen delivery at altitude — pressure breathing, rest-step coordination, rhythmic patterns, diaphragmatic breathing, and night-time protocols. Practical, learnable skills you can practice at sea level and deploy when it matters on the mountain.
Global Summit GuideA guide in Cluster 08 · Altitude, Training & PhysiologyView master hub →
At altitude, how you breathe matters as much as how fit you are. Two climbers with identical fitness can perform dramatically differently at 5,500 m based purely on breathing technique. This guide teaches the five core breathing techniques that experienced high-altitude climbers use to maximize oxygen delivery, maintain sustainable pace, and sleep well at altitude: pressure breathing, rest-step breathing, diaphragmatic breathing, rhythmic breathing, and night-time breathing protocols. Each is a learnable skill you can practice at sea level and deploy when it matters on the mountain. For the acclimatization physiology these techniques support, see our altitude acclimatization guide. For symptoms that these techniques can help prevent, see our altitude sickness guide.
⊛
How this guide was built
Breathing techniques drawn from expedition practice documented by IFMGA-certified guides, the American Alpine Club, Uphill Athlete training resources, and the Himalayan Rescue Association. Physiological mechanisms verified against respiratory medicine literature and altitude physiology research from High Altitude Medicine & Biology journal. Pressure breathing technique specifically documented in mountaineering literature since the 1960s (Ed Viesturs, Reinhold Messner, Conrad Anker all trained in these methods). Sleep breathing protocols cross-referenced with Peter Hackett’s altitude medicine research. Reviewed by practicing mountain guides with expedition experience from Denali to Everest. Fact-check date: April 19, 2026.
Why Breathing Technique Matters at Altitude
At sea level, breathing is mostly automatic — a background process that requires no thought. At altitude, the same automatic breathing becomes profoundly inefficient. Each breath delivers fewer oxygen molecules. The body’s default response (faster, shallower breathing) actually makes the problem worse, wasting energy without improving oxygen delivery.
The solution is conscious, trained breathing technique. Climbers who have mastered these techniques report:
Reduced breathlessness at the same pace and altitude.
Higher oxygen saturation (SpO2) on pulse oximeters.
Less fatigue at the end of climbing days.
Fewer altitude sickness episodes.
Better sleep at altitude.
Higher summit success rates on demanding peaks.
The techniques are not mystical or difficult. They’re muscle memory and conscious habit — skills that require practice at sea level to become automatic at altitude when conscious thought is harder.
◆
The altitude breathing problem
At 5,500 m (Everest Base Camp), atmospheric pressure is roughly half of sea level — each lungful delivers about half the oxygen molecules. The body responds with hyperventilation, which helps but also creates respiratory alkalosis (blood too alkaline) that the kidneys need days to compensate for. In the meantime, breathing can feel panicky and uncontrolled. Trained technique replaces panicked, automatic breathing with controlled, efficient breathing — same breath volume, better oxygen transfer, less wasted effort. This is why experienced high-altitude climbers appear almost supernaturally calm at elevations where novices are gasping.
Technique 1: Pressure Breathing
PB
Core Technique
Pressure Breathing
The single most valuable altitude breathing technique
Pressure breathing is a forced exhalation through pursed lips that creates back-pressure in the airways, keeping lung alveoli expanded longer and dramatically improving oxygen transfer. It’s taught on every major commercial expedition and used by virtually every Himalayan climber. The sound is distinctive — a low “pssss” — and experienced climbers do it instinctively above 4,000 m.
The physiology: pursed lips create a small positive end-expiratory pressure (PEEP) effect that prevents alveolar collapse during exhalation. This maintains surface area for gas exchange and extends the time oxygen can transfer into the bloodstream. Functionally, you’re getting more oxygen from the same breath.
1
Inhale normally and deeply through nose or mouth — take a full breath
2
Purse your lips as if whistling or blowing out candles
3
Exhale forcefully but controlled — make a sustained “psssss” sound
4
Exhalation should last 4-6 seconds, longer than inhalation
5
Maintain technique for 3-5 breaths, then return to normal breathing
6
Repeat every 10-15 minutes during hard efforts, or continuously at extreme altitude
When to use
During uphill exertion above 3,500 m, when breathless while climbing, when SpO2 drops on pulse oximeter, during summit day pushes, at rest steps above 5,000 m, preventively when starting any climb at altitude — don’t wait until you’re struggling.
Technique 2: Rest-Step Breathing
RS
Pacing Technique
Rest-Step Breathing
Coordinated step-breath rhythm for sustainable altitude pace
Rest-step is the coordinated synchronization of breathing with footstep timing, with a brief pause on the rear leg between steps. One step, one breath, brief rest on the locked rear leg. It’s the foundational altitude pace — unconsciously employed by every Sherpa on the Khumbu and every experienced alpinist above 5,000 m.
The key detail is the pause on the rear leg. As you step forward with the left leg and transfer weight, your right (rear) leg locks straight for a fractional rest moment. This mini-rest allows brief muscle recovery, ensures adequate oxygen delivery between steps, and — crucially — creates a sustainable pace that can be maintained for 8+ hours.
1
Step forward with left leg, transfer weight forward
2
Pause briefly with rear (right) leg locked straight — the “rest”
3
Take one full breath during the pause moment
4
Step forward with right leg, transfer weight
5
Pause on new rear (left) leg, take another breath
6
Continue rhythmic cycle — becomes automatic after hours of practice
Altitude-specific variations
Below 4,500 m: Light rest-step, one breath per step. 4,500-5,500 m: Full rest-step, focused breathing per step. 5,500-6,500 m: Slower rest-step, sometimes 2 breaths per step. Above 6,500 m: Very slow rest-step, 3+ breaths per step — the Messner/Habeler pace.
Technique 3: Diaphragmatic Breathing
DB
Foundational Technique
Diaphragmatic Breathing
Using your most efficient breathing muscle — the base for all other techniques
Diaphragmatic breathing (also called belly breathing) uses the diaphragm muscle — the dome-shaped muscle beneath the lungs — rather than the accessory chest muscles most people use. The diaphragm is the body’s most efficient breathing muscle, capable of moving far more air per contraction than chest muscles. At altitude, efficient breathing is everything.
When you watch a sleeping baby or a yoga practitioner in meditation, you see diaphragmatic breathing: the belly rises on inhale, falls on exhale, and the chest barely moves. Most adults have lost this pattern, defaulting to shallow chest breathing under stress. Retraining diaphragmatic breathing is foundational — it becomes the “default” you return to between pressure breathing and rest-step sequences.
1
Lie on your back with one hand on chest, one hand on belly
2
Breathe so the belly hand rises on inhale, chest hand stays relatively still
3
Exhale so the belly falls back down
4
Practice 5-10 minutes daily to retrain the pattern
5
Progress to seated, then standing, then walking diaphragmatic breathing
6
Eventually apply during exercise, stress, and altitude climbing
When to use
As your default breathing pattern — all day, every day, at sea level and altitude. Particularly important during rest stops at altitude, between pressure breathing sequences, for sleep breathing, and any time you notice shallow chest breathing taking over. Practice at sea level until it becomes automatic.
Technique 4: Rhythmic Breathing
R
Pacing Pattern
Rhythmic Breathing Patterns
Matching breath rate to step cadence for sustainable pace
Rhythmic breathing is the practice of matching breathing rate to step cadence in predictable patterns. Instead of breathing “whenever”, you use a consistent pattern like 2:2 (two steps per inhale, two steps per exhale) or 3:3. The predictability automates the breathing decision, freeing mental capacity for terrain, navigation, and awareness.
Different altitudes and intensities call for different patterns. Match the pattern to the effort level — tighter ratios for harder efforts, looser for easier pace:
Normal altitude climbing pace at 4,000-5,500 m, most versatile
Hard
2:2
2 steps in, 2 out
Steep terrain, lower altitude high intensity, summit pushes
Extreme
1:1
1 step per breath
Very high altitude (6,500+ m), summit day final pushes
How to develop
Start on flat ground: walk at comfortable pace and count natural breath-step patterns to identify your default. Practice conscious counting during training hikes. Use a metronome app set to 90-120 BPM to establish rhythm. Progress from flat to gentle hills to steep training, always counting. By Month 3 of dedicated practice, patterns become automatic.
Technique 5: Night-Time Breathing for Altitude Sleep
SB
Sleep Protocol
Sleep Breathing Techniques
Countering periodic breathing and improving sleep quality at altitude
Sleep at altitude is notoriously poor — periodic breathing (Cheyne-Stokes pattern) causes cycles of hyperventilation followed by breath-holding pauses, with 5-10% oxygen saturation drops during sleep. This fragments sleep and slows acclimatization. Dedicated pre-sleep breathing techniques counter these effects and dramatically improve sleep quality at altitude.
The two most effective pre-sleep techniques are 4-7-8 breathing and box breathing. Both activate the parasympathetic nervous system, lower heart rate, and prime the body for sleep. Combined with altitude-specific practices (head elevation, Diamox at bedtime, no alcohol), they make a measurable difference in sleep quality above 3,500 m.
Pre-sleep: diaphragmatic breathing 5-10 minutes, then 4-7-8 or box breathing to initiate sleep. If you wake from breath-holding: return to slow diaphragmatic breathing, don’t fight the periodic pattern, check for real symptoms (headache, severe breathlessness). Medications to help: Diamox 125 mg at bedtime reduces periodic breathing. Medications to avoid: sleeping pills (suppress HVR), alcohol (worst altitude mistake).
Combining Techniques in Practice
The five techniques aren’t used in isolation — they layer together during actual altitude climbing. Here’s how experienced climbers integrate them:
Situation
Primary Technique
Supporting Techniques
Base camp rest day
Diaphragmatic
Extended meditation-style breathing
Easy trek walking
Rhythmic 3:3 or 4:4
Diaphragmatic as foundation
Moderate uphill
Rest-step
Rhythmic 2:2 or 3:3 breathing, diaphragmatic
Steep climbing
Rest-step with pressure breath
Pressure breathing every few steps
Summit push (high altitude)
Rest-step with 2-3 breaths
Pressure breathing constant, 1:1 rhythmic
Feeling bad / AMS symptoms
Pressure breathing
Slow rest-step, consider descent
Rest at altitude
Diaphragmatic
4-7-8 if anxious
Sleep at altitude
4-7-8 or box breathing
Diaphragmatic as base, Diamox support
Oxygen use (>7,500 m)
Calm diaphragmatic breathing
Don’t hyperventilate, steady rhythm
★
The most important insight
These techniques only work if they’re automatic — muscle memory developed through practice. At 5,500 m with AMS symptoms developing, you won’t be in any state to consciously remember a 4-step pressure breathing sequence. The techniques must already be habit. That’s why sea-level practice matters so much: you’re not learning something new for altitude, you’re reinforcing something that’s already natural. Every experienced high-altitude climber practices breathing techniques at sea level — on training hikes, during workouts, even during normal daily activities. By the time they arrive at altitude, the techniques deploy without thought. For how to integrate this practice into your training, see our training program guide.
Common Breathing Mistakes at Altitude
Mistake 1 — Not practicing at sea level
By far the most common error. Climbers learn about pressure breathing from a guidebook, plan to “use it at altitude”, and then — predictably — can’t remember or execute it when they actually need it. The techniques must be habitual before you need them.
Mistake 2 — Using techniques only when struggling
Waiting until you’re already breathless and suffering before deploying pressure breathing or switching to rest-step. These techniques are preventive, not rescue. Deploy them proactively from the start of any altitude climbing.
Mistake 3 — Shallow chest breathing as default
Most adults default to shallow chest breathing under any stress. At altitude, this is catastrophically inefficient. Retraining diaphragmatic breathing as your sea-level default pays huge dividends at altitude.
Mistake 4 — Holding breath during effort
The instinct when lifting or exerting is to hold the breath (Valsalva maneuver). At altitude, this is disastrous — even brief breath-holding drops oxygen saturation dangerously. Breathe through every moment of effort.
Mistake 5 — Ignoring sleep breathing
Many climbers focus on daytime technique but neglect sleep breathing. Yet sleep quality is often THE limiting factor for acclimatization. Poor sleep → worse acclimatization → worse climbing → worse sleep. Break the cycle with sleep breathing protocols.
Mistake 6 — Hyperventilating
Panic breathing at altitude — rapid shallow breaths — creates hyperventilation that feels like it’s helping but actually reduces CO2 below levels needed for proper oxygen delivery (Bohr effect). Conscious slow breathing beats instinctive fast breathing every time.
Breathing Techniques FAQ: Your Common Questions Answered
What is pressure breathing?
Pressure breathing is a forced exhalation technique that creates back-pressure in the lungs, keeping alveoli open longer and improving oxygen transfer — it’s the single most valuable breathing technique for high-altitude climbing. How it works: take a normal deep inhale through mouth or nose, exhale forcefully through pursed lips (as if whistling or blowing out candles), pursed lips create back-pressure in airways, this keeps alveoli (tiny air sacs in lungs) open longer, more oxygen transfers from air into bloodstream, more carbon dioxide gets expelled. The physiology: at altitude oxygen partial pressure drops dramatically, regular breathing becomes less efficient, pressure breathing keeps lung alveoli expanded during exhalation, prevents alveolar collapse that reduces surface area, increases effective time for gas exchange, creates small positive end-expiratory pressure (PEEP) effect. When to use: during uphill exertion above 3,500 m, feeling breathless while climbing, SpO2 dropping on pulse oximeter, headache developing from exertion, during summit day pushes, rest steps above 5,000 m, when starting a climb at altitude. How to perform: inhale normally through nose or mouth, purse lips as if whistling, exhale forcefully but controlled making ‘PSSSS’ sound, exhalation should last 4-6 seconds, maintain for 3-5 breaths then return to normal, repeat every 10-15 minutes during hard efforts. Signs it’s working: improved oxygen saturation, reduced breathlessness, mental clarity returning, headache subsiding, ability to maintain pace. Practice before altitude: train during regular workouts, use during uphill training, practice while hiking with pack, build the habit at sea level, integrate with rest-step technique. Pressure breathing is the most important altitude breathing technique. Climbers who master it often report being able to go 2-3 times as long between breaks at altitude.
What is rest step breathing?
Rest-step breathing is the coordinated technique of synchronizing breathing with footstep timing to maintain sustainable pace at altitude — taking one breath per step, with a brief pause on the rear leg between steps. How it works: step forward with one leg (left), transfer weight forward, PAUSE briefly with rear leg (right) locked straight, take one full breath during pause, step forward with the rear leg (right), pause on the new rear leg (left), take another full breath, continue rhythmic cycle. Coordination principle: one step equals one breath (typically), pause moment aligns with exhalation, step forward on inhale, full breath cycle per step at altitude, rhythm becomes automatic with practice. Why works at altitude: allows brief leg muscle rest during pause, ensures adequate oxygen delivery between steps, prevents over-exertion syndrome, maintains sustainable pace, reduces leg lactate buildup, preserves energy for long climbs. Variations by altitude: below 3,000 m traditional hiking pace minimal rest step, 3,000-4,500 m light rest-step one breath per step, 4,500-5,500 m full rest-step focused breathing per step, 5,500-6,500 m slower rest-step sometimes 2 breaths per step, above 6,500 m very slow rest-step 3+ breaths per step. Combining with pressure breathing: take pressure breath during step pause, forceful exhale as weight transfers forward, regular breath during step forward, alternate pressure and regular breaths. How to learn: practice on flat ground first, use metronome app to set rhythm, focus on pause moment on rear leg, practice during training hikes, start with counting ‘left-breathe right-breathe’, gradually increase to full technique. Real-world applications: steep uphill sections, snow and ice climbing, high altitude traverses, summit day attempts, whenever breathing becomes labored. Rest-step becomes unconscious after days of practice. Experienced climbers do it automatically at altitude without thinking.
What is diaphragmatic breathing and why does it matter at altitude?
Diaphragmatic breathing (belly breathing) uses the diaphragm muscle rather than chest muscles to breathe, dramatically improving oxygen delivery and breathing efficiency. How it works: the diaphragm is a dome-shaped muscle below the lungs, contracting it pulls down expanding lung volume, chest cavity pressure decreases, air rushes in efficiently, relaxation pushes diaphragm back up exhaling air, belly visibly expands on inhale contracts on exhale. Why matters at altitude: uses body’s most efficient breathing muscle, maximizes lung volume per breath, improves oxygen-CO2 exchange, reduces respiratory muscle fatigue, activates parasympathetic nervous system, lowers heart rate and stress, better oxygen saturation per breath, reduces altitude-related anxiety. Chest vs diaphragmatic: chest breathing shallow rapid inefficient uses accessory muscles that tire quickly lower portion of lungs poorly ventilated stress response activated. Diaphragmatic deep slow efficient full lung capacity utilized relaxation response activated better gas exchange. How to learn: lie on back with book on belly, breathe so book rises on inhale, book falls on exhale, practice 5-10 minutes daily, chest should remain relatively still, belly does most of the movement, progress to seated standing moving. Advanced techniques: belt around ribs for feedback, hand on belly hand on chest comparison, slow counting during inhale (4 counts), even slower counting during exhale (6 counts), practice during exercise, use during hiking, apply during climbing. Application at altitude: lower rested base breathing rate, deeper more efficient breaths, conscious breathing during exertion, recovery breathing at rest stops, sleep breathing patterns, summit day stress management. Physical benefits: increased oxygen uptake per breath, reduced hyperventilation, better CO2 balance, decreased respiratory rate needed, improved cardiovascular function, reduced muscle tension. Mental benefits: activated parasympathetic response, reduced anxiety at altitude, better focus on climbing, improved decision-making, enhanced recovery. Many expert climbers use diaphragmatic breathing as foundation for all altitude breathing techniques.
How should you breathe to sleep better at altitude?
Sleep breathing at altitude requires specific techniques to counter periodic breathing (Cheyne-Stokes pattern), improve oxygen saturation during sleep, and ensure restorative rest. The sleep challenge: periodic breathing common above 3,500 m, cycles of hyperventilation followed by pauses, oxygen saturation drops 5-10% during sleep, wake from breath-holding events, REM sleep reduced, fragmented sleep overall. Pre-sleep routine: diaphragmatic breathing 5-10 minutes before bed, 4-7-8 technique (inhale 4 hold 7 exhale 8), box breathing (4-4-4-4 rhythm), alternate nostril breathing, gradual heart rate reduction, mental relaxation. 4-7-8 technique: exhale completely through mouth, close mouth inhale through nose for 4 counts, hold breath for 7 counts, exhale forcefully through mouth for 8 counts, make whoosh sound on exhale, repeat cycle 4 times before sleep. Box breathing: inhale through nose for 4 counts, hold for 4 counts, exhale through mouth for 4 counts, hold empty for 4 counts, repeat 10-20 cycles. Night waking protocols: if wake from breath-holding use diaphragmatic breathing, slow breathing to normalize, check for real physical issues (headache, breathlessness), return to sleep breathing routine, consider Diamox if recurrent. Medication interactions: Acetazolamide (Diamox) 125 mg at bedtime reduces periodic breathing, primary altitude medication that helps sleep, AVOID sleeping pills (suppress breathing response), AVOID alcohol (worst for altitude sleep), melatonin 3-5 mg safer option, CPAP can be used at altitude for sleep apnea. Sleep positioning: head elevated slightly (backpack under mattress), side sleeping often better than back, avoid flat on back position, warm enough but not overheated, quiet dark environment. Environment optimization: warm sleeping bag, sleep pad insulation, tent ventilation adequate, no cooking fumes inside, earplugs if needed. Tracking: pulse oximeter monitoring, target SpO2 above 75-80% at 4,000+ m, morning alertness assessment, AMS symptom monitoring, recovery rate evaluation. Many climbers who struggle at altitude improve significantly once they address sleep breathing quality.
Can you practice altitude breathing at sea level?
Yes, all altitude breathing techniques can and should be practiced at sea level — both to build muscle memory and to develop the mental control needed to apply them when struggling at altitude. Why matters: techniques become automatic through repetition, muscle memory develops, can focus on technique without altitude stress, build breathing capacity, integrate with daily life, improve general cardiovascular health, mental discipline development, stress reduction benefits. Practice techniques: morning routine — 5 minutes diaphragmatic breathing upon waking, box breathing during coffee preparation, focus on deep slow breathing. During exercise — use pressure breathing during hill work, rest-step breathing on stair climbs, rhythmic breathing during runs, diaphragmatic focus during weightlifting, test techniques under physical stress. Commute and work — box breathing in traffic, diaphragmatic breathing in meetings, pressure breathing during stairs, stress response management, focus enhancement. Evening sleep preparation — 4-7-8 breathing before bed, sleep breathing routine establishment, habit development. Structured daily 10-minute sessions: 2 minutes diaphragmatic breathing, 2 minutes box breathing, 2 minutes pressure breathing, 2 minutes rhythmic breathing, 2 minutes meditation breathing. Weekly progression: Week 1 learn each technique, Week 2 combine techniques, Week 3 apply during exercise, Week 4 use during stress, Month 2+ automatic application. Apps and tools: Calm Headspace for guided practice, Breathwrk for technique-specific training, Wim Hof method apps, altitude simulation masks (elevation training), pulse oximeter for biofeedback. Exercise-specific: running 2:2 or 3:3 breathing rhythm, cycling diaphragmatic focus, swimming bilateral breathing technique, hiking pressure breathing on climbs, weightlifting power breathing on lifts. Common mistakes: practicing only during calm times, not applying during exercise, skipping techniques seems ‘unnecessary’, insufficient repetition, not transferring to altitude. The goal is automaticity — breathing techniques should happen without conscious thought when needed at altitude. This requires months of sea-level practice.
What is rhythmic breathing for climbing?
Rhythmic breathing is the coordination of breathing rate with climbing movement to create sustainable efficient pace at altitude — typically matching breaths to steps in predictable patterns like 2:2 (2 steps per inhale, 2 per exhale) or 3:3 depending on effort level. How works: match breathing rate to step cadence, establish predictable pattern, reduce mental load of breathing decisions, improve efficiency through automation, prevent over-exertion, maintain cardiovascular steady state. Common patterns: 2:2 2 steps per inhale 2 per exhale (higher intensity), 3:3 3 steps per inhale 3 per exhale (moderate intensity), 4:4 4 steps per inhale 4 per exhale (easy pace), 3:2 3 steps inhale 2 exhale (faster exhale), custom patterns based on individual preference. When to use each: 2:2 flat or gentle terrain below 4,000 m altitude well-acclimatized fitness training recovery from hard efforts. 3:3 moderate uphill terrain 4,000-5,500 m altitude normal climbing pace sustained effort most versatile. 4:4 easy flat terrain rest day walking recovery breathing pre-climb warming up post-climb cool-down. Variable patterns: adjust based on immediate conditions, steep sections may need 2:2, flat sections may use 3:3, summit pushes may be 1:1, descent may return to 3:3. Learning: walk at comfortable pace count steps during natural breathing identify your natural pattern practice conscious counting build breathing-step connection. Progressive application: Week 1 flat terrain practice, Week 2 gentle hills, Week 3 steep hiking, Week 4 multi-pitch conditions, Month 2+ automatic integration. Benefits at altitude: consistent oxygen delivery, prevented over-breathing, sustainable pacing, reduced fatigue, better performance, mental focus improvement. Combining: integrate with pressure breathing every 10-15 steps, incorporate rest-step on steep terrain, switch to deeper diaphragmatic breathing during breaks, maintain rhythm through pressure breath sequences. Common errors: pattern too fast causes hyperventilation, pattern too slow causes under-breathing, inconsistent rhythm defeats purpose, ignoring terrain changes, forgetting to adjust for altitude. Climbers who master rhythmic breathing report significantly better endurance and summit success rates.
What is the Wim Hof method and does it help at altitude?
The Wim Hof Method combines specific breathing techniques, cold exposure, and meditation — some aspects may benefit altitude climbers, but it’s not a replacement for proper altitude preparation and should be approached carefully. What involves: controlled hyperventilation breathing cycles, 30-40 deep breaths followed by breath retention, cold exposure protocols, meditation and mindset components, combined in specific sequences. Breathing portion: deep full inhales through nose or mouth, natural exhales, 30-40 deep breaths (1-2 minutes), hold breath after final exhale, breath-hold until urge to breathe, deep inhale and hold 15 seconds, repeat 3-4 rounds. Potential altitude benefits: improved CO2 tolerance, better breath control, stress response management, mental discipline, parasympathetic nervous system activation, possible HIF gene expression effects, enhanced oxygen utilization. Scientific evidence at altitude: limited specific altitude research, general breathing benefits demonstrated, individual responses vary significantly, some elite climbers use variations, not widely adopted in mainstream mountaineering, more research needed. Safety considerations: hyperventilation can cause issues at altitude, breath-holding during hypoxia risky, combined with altitude could worsen AMS, individual medical clearance recommended, experience with method before altitude essential. Appropriate applications: pre-climb training (not during), recovery day practice, stress management between climbs, mental preparation, sleep quality improvement. When NOT to use at altitude: during active climbing, when feeling unwell, with AMS symptoms, above 5,000 m without experience, during acclimatization challenges, in extreme conditions. Alternative methods: Buteyko method (reduced breathing technique less extreme), pranayama yoga breathing (various traditional techniques well-established safety), box breathing (military/tactical origins stress management focused safe and effective). Individual considerations: heart conditions consult doctor, high blood pressure caution, anxiety disorders supervision, previous altitude illness avoid complex methods, inexperienced climbers stick to basics. Recommended approach: master basic altitude breathing first (pressure, rest-step, diaphragmatic), if interested in Wim Hof practice at sea level extensively, use for training enhancement not altitude performance, don’t rely on it at altitude, consider simpler alternatives. The Wim Hof Method has enthusiastic advocates but limited scientific support specifically for altitude climbing.
Are there breathing techniques for oxygen use at extreme altitude?
Yes, specific breathing techniques are used when climbing with supplemental oxygen at extreme altitudes (above 7,000 m) — including oxygen flow regulation, mask breathing patterns, and transitions between oxygen and atmospheric breathing. Oxygen use: typically required above 7,500 m, standard flow rates 2-4 liters per minute, emergency flows up to 6+ L/min, masks cover nose and mouth, breathing patterns must adapt. Mask breathing techniques: normal rhythm still applies, slightly deeper breaths to use oxygen effectively, don’t breathe faster (wasteful), pressure breathing less needed but still useful, rest-step breathing continues, coordinate with mask positioning. Flow rate management: 2 L/min base flow for resting/light activity, 3 L/min climbing moderate terrain, 4 L/min steep climbing or extreme cold, 6+ L/min emergency use only, matched to exertion level, conservation for long climbs, emergency supply awareness. Mask breathing patterns: calm steady breathing most efficient, avoid hyperventilation, use diaphragmatic breathing, don’t fight the mask fit, maintain mask seal, check for ice buildup. Transitions: tank changes require coordination, brief atmospheric breathing possible, altitude determines safety, team coordination essential, emergency protocols needed, practice these transitions. Without oxygen scenarios: tank empty or failure, pressure breathing becomes critical, rest-step absolutely essential, conservative pacing required, immediate descent planning, team support crucial. Equipment considerations: mask must seal against face, regulator controls flow, tank pressure monitoring, valve operation practice, cleaning and maintenance, cold weather effects. By altitude: 7,000-7,500 m oxygen optional breathing technique critical. 7,500-8,000 m oxygen typically used 2-3 L/min standard modified breathing rhythms. Above 8,000 m (death zone) oxygen essential 3-4 L/min common emergency flows available backup oxygen critical. Emergency scenarios: quick deployment of backup, immediate flow rate increase, position change (sitting if possible), pressure breathing between breaths, call for team assistance, descent initiation. Training with equipment: practice mask fitting at low altitude, familiarize with regulator operation, test in training environments, emergency deployment drills, tank change procedures, cold weather testing. Most climbers using oxygen at extreme altitude are on guided expeditions where these techniques are taught. See our Everest climbing guide.
Authoritative Sources & Further Reading
Content reflects expedition practice and respiratory medicine research:
American Alpine Club — Climbing education and breathing technique resources
Uphill Athlete (Steve House & Scott Johnston) — Training and breathing protocols
Himalayan Rescue Association (HRA) — Altitude medicine and breathing protocols
High Altitude Medicine & Biology (journal) — Peer-reviewed respiratory research at altitude
Peter Hackett, MD — Institute for Altitude Medicine, sleep breathing research
International Society for Mountain Medicine (ISMM) — Respiratory protocols
Ed Viesturs, Reinhold Messner, Conrad Anker — Expedition literature on altitude breathing practice
IFMGA-certified guides on pressure breathing and rest-step technique
Reference texts: High Altitude Medicine and Physiology (Ward, Milledge & West); Training for the New Alpinism (House, Johnston)
This guide is one of 70 across 12 thematic clusters on Global Summit Guide. The master hub organizes every guide by experience tier, specific peak, skill area, and region.
How to Acclimatize for High Altitude Climbing: Complete Guide
Acclimatization is a critical process for climbers aiming to conquer high altitudes, where the air is thinner and oxygen levels are significantly reduced. This comprehensive guide will delve into the physiological effects of high altitude on the body, the stages of acclimatization, and effective strategies to prevent altitude sickness. Many climbers face challenges such as decreased performance and increased risk of altitude-related illnesses when ascending rapidly. Understanding how to acclimatize effectively can enhance safety and performance during high-altitude climbs. This article will cover the physiological effects of high altitude, the common symptoms of altitude sickness, prevention strategies, and best practices for acclimatization.
What Are the Physiological Effects of High Altitude on the Body?
High altitude significantly impacts the human body due to reduced oxygen availability, leading to various physiological adaptations. As altitude increases, the body experiences a decrease in oxygen saturation, which can result in hypoxia—a condition where the body or a region of the body is deprived of adequate oxygen supply. This lack of oxygen can lead to decreased physical performance, as the body struggles to meet its energy demands. To cope with these changes, the body initiates several adaptations, including increased breathing rate, elevated heart rate, and enhanced red blood cell production. These adaptations are crucial for maintaining performance and health during high-altitude activities.
Further research highlights the complex physiological and metabolic adjustments the body undergoes in response to high-altitude exposure.
High Altitude Physiological & Metabolic Adjustments
Studies have yielded new information related to the physiological and metabolic adjustments made in response to both short- and long-term high-altitude exposure. These investigations have examined the potential mechanisms responsible for alterations observed in key variables such as heart rate, cardiac output, muscle blood flow, and substrate utilization. Exposure to high altitude is an environmental stressor that elicits a robust sympathoadrenal response, contributing to critical adjustments and adaptations. Factors influencing adaptation include the degree and duration of hypoxia, exercise intensity, and inter-individual variability.
Physiological responses to exercise at altitude: an update, 2008
How Does Hypoxia Affect Oxygen Saturation and Climber Performance?
Hypoxia, characterized by insufficient oxygen levels, directly affects oxygen saturation in the blood, which is vital for sustaining physical performance. When climbers ascend to high altitudes, the partial pressure of oxygen decreases, leading to lower oxygen saturation levels. This reduction can impair cognitive function and physical capabilities, making it challenging to perform tasks that require concentration and strength. As a result, climbers may experience fatigue, decreased coordination, and slower reaction times. Understanding the effects of hypoxia is essential for climbers to prepare adequately and implement strategies to mitigate its impact on performance.
Indeed, the cardiovascular system undergoes significant changes under hypoxic conditions, influencing overall physiological function.
Cardiovascular Responses & Altitude Sickness
The hypoxic conditions encountered at high altitude affect all physiological functions. Acute hypoxia activates the adrenergic system, inducing tachycardia and increasing pulmonary artery pressure. After a few days, the autonomic nervous system adapts, and tachycardia decreases. Permanent exposure induces erythropoiesis, which if excessive can lead to chronic mountain sickness, often associated with pulmonary hypertension and heart failure. Cardiovascular adaptations to hypoxia provide a remarkable model of oxygen availability regulation.
Cardiovascular physiology and pathophysiology at high altitude, JP Richalet, 2024
What Are the Stages and Processes of Acclimatization?
Acclimatization involves a series of physiological changes that occur as the body adapts to high altitude. The process typically unfolds in several stages: mountains
Initial Response: Upon arrival at high altitude, the body begins to increase breathing and heart rates to enhance oxygen intake.
Adaptation Phase: Over days to weeks, the body produces more red blood cells to improve oxygen transport, and the muscles become more efficient at utilizing oxygen.
Long-term Adaptation: With prolonged exposure, climbers may experience increased capillary density and mitochondrial function, further enhancing endurance and performance.
Gradual ascent is crucial during this process, as it allows the body to adjust without overwhelming stress, reducing the risk of altitude sickness.
What Are the Common Symptoms and Risks of Altitude Sickness?
Altitude sickness, or acute mountain sickness (AMS), can manifest through various symptoms as climbers ascend to higher elevations. Common symptoms include:
Headache: Often the first sign, resulting from increased intracranial pressure.
Nausea and Vomiting: Gastrointestinal distress can occur due to reduced oxygen levels.
Fatigue: A general sense of tiredness and decreased energy levels.
Dizziness: Impaired balance and coordination can arise from hypoxia.
If left unaddressed, altitude sickness can escalate to more severe conditions, such as high altitude pulmonary edema (HAPE) or high altitude cerebral edema (HACE), which can be life-threatening. Recognizing these symptoms early is vital for effective management and prevention.
How to Recognize Acute Mountain Sickness and Other Altitude Illnesses?
Recognizing the signs of acute mountain sickness and other altitude-related illnesses is essential for climbers. Key indicators of AMS include:
Persistent Headache: A headache that does not improve with rest or hydration.
Loss of Appetite: A significant decrease in the desire to eat.
Sleep Disturbances: Difficulty sleeping or frequent awakenings at night.
Swelling: Noticeable swelling of the hands, feet, or face.
Other altitude illnesses, such as HAPE and HACE, present more severe symptoms, including shortness of breath at rest, confusion, and loss of coordination. Immediate descent and medical attention are critical for anyone exhibiting these symptoms.
What Are the Best Prevention and Treatment Strategies for Altitude Sickness?
Preventing altitude sickness involves a combination of acclimatization strategies and awareness of symptoms. Effective prevention methods include:
Gradual Ascent: Ascend slowly, allowing the body time to adjust to changes in altitude.
Hydration: Maintain adequate fluid intake to prevent dehydration, which can exacerbate symptoms.
Nutrition: Consume a balanced diet rich in carbohydrates to provide energy and support acclimatization.
Rest Days: Incorporate rest days during the ascent to facilitate recovery and adaptation.
In case symptoms arise, immediate descent to a lower altitude is the most effective treatment. Over-the-counter medications, such as ibuprofen for headaches, can provide temporary relief, but they do not replace the need for descent.
For those seeking comprehensive resources on global mountains and peaks, Information Hub offers valuable insights and guides tailored for mountain climbing enthusiasts. Their platform provides extensive information on trip planning, gear safety, and acclimatization strategies, ensuring climbers are well-prepared for their adventures.
What Are the Best Practices and Schedules for Effective Acclimatization?
Implementing best practices for acclimatization can significantly enhance a climber’s ability to adapt to high altitudes. Key practices include: mountain collections
Climb High, Sleep Low: Ascend to higher altitudes during the day but return to lower elevations to sleep, allowing the body to recover.
Monitor Symptoms: Regularly assess for signs of altitude sickness and adjust plans accordingly.
Incorporate Rest Days: Schedule rest days every few days to facilitate acclimatization.
Best Practices for Acclimatization
Practice
Description
Benefit
Climb High, Sleep Low
Ascend during the day, descend to sleep
Enhances recovery and adaptation
Regular Monitoring
Check for symptoms daily
Early detection of altitude sickness
Scheduled Rest Days
Plan rest days into the itinerary
Allows for physiological adaptation
These practices are essential for ensuring a safe and successful high-altitude climbing experience.
How Long Does Acclimatization Take and What Are Recommended Ascent Rates?
The duration of acclimatization varies among individuals and depends on several factors, including altitude, fitness level, and ascent rate. Generally, climbers should allow:
24-48 hours at altitudes above 8,000 feet (2,400 meters) for initial acclimatization.
1-2 days for every additional 1,000 feet (300 meters) gained above 10,000 feet (3,000 meters).
Recommended ascent rates suggest not exceeding an increase of 1,000 feet (300 meters) per day above 10,000 feet to minimize the risk of altitude sickness. Adhering to these guidelines can significantly enhance safety and performance during climbs.
These recommendations are further supported by expert advice on managing ascent rates and the strategic use of supplemental oxygen.
High Altitude Climbing Strategies & Oxygen Use
At altitudes above 3000 m individuals should climb no more than 300-500 m a day and have a rest day every 3-4 days. At extreme altitude (5500-8848 m) supplementary oxygen can be used to increase the partial pressure of inspired oxygen. Although Everest has been climbed without oxygen, most climbers use supplementary oxygen above 7500 m.
Oxygen at high altitude, 1998
Can You Acclimatize Faster? Pre-Acclimatization and Training Techniques Explained
While acclimatization is a gradual process, certain pre-acclimatization techniques can help climbers adapt more quickly. These techniques include:
Hypoxic Training: Engaging in training at lower oxygen levels can stimulate physiological adaptations before the actual climb.
Gradual Exposure: Spending time at moderate altitudes before a high-altitude expedition can enhance acclimatization.
Use of Supplemental Oxygen: In some cases, climbers may use supplemental oxygen during ascent to alleviate hypoxia effects.
These methods can help climbers prepare more effectively for high-altitude challenges, although they should be used in conjunction with traditional acclimatization practices.
Which Gear and Safety Equipment Are Essential for High Altitude Climbing?
Proper gear and safety equipment are crucial for successful high-altitude climbing. Essential items include:
Layered Clothing: Insulating and moisture-wicking layers to regulate body temperature.
High-Altitude Boots: Sturdy footwear designed for extreme conditions.
Emergency Gear: Items such as a first aid kit, oxygen supply, and communication devices.
Recommended Gear Types and Safety Ratings for Altitude Expeditions
Gear Type
Description
Safety Rating
High-Altitude Boots
Insulated and waterproof footwear
Must meet ISO 20345 standards
Climbing Harness
Essential for safety during climbs
UIAA certified
Oxygen Systems
Supplemental oxygen for high altitudes
CE marked for safety
Investing in high-quality gear ensures climbers are well-equipped to handle the challenges of high-altitude environments.
How Does Supplemental Oxygen Improve Safety and Acclimatization?
Supplemental oxygen plays a vital role in enhancing safety and acclimatization during high-altitude climbs. By providing additional oxygen, climbers can maintain higher oxygen saturation levels, which helps mitigate the effects of hypoxia. This can lead to improved cognitive function, reduced fatigue, and enhanced physical performance. Supplemental oxygen is particularly beneficial for climbers ascending to extreme altitudes, where the risk of altitude sickness is significantly heightened.
How Should Nutrition and Hydration Be Managed at High Altitude?
Nutrition and hydration are critical components of successful high-altitude climbing. Climbers should focus on:
Hydration: Drinking plenty of fluids to prevent dehydration, which can exacerbate altitude sickness.
Carbohydrate-Rich Diet: Consuming a diet high in carbohydrates to provide energy and support acclimatization.
Monitoring Intake: Keeping track of food and fluid intake to ensure adequate nutrition and hydration levels.
Foods and Hydration Levels That Support Acclimatization and Performance
Food Type
Description
Hydration Level
Complex Carbohydrates
Foods like whole grains and fruits
High
Electrolyte Drinks
Replenish lost minerals
Essential for hydration
Protein Sources
Lean meats and legumes
Supports muscle recovery
These dietary strategies can significantly enhance a climber’s ability to acclimatize and perform at high altitudes.
How to Adjust Nutrition Plans for Different Altitude Stages?
Adjusting nutrition plans according to altitude stages is essential for optimizing performance. At lower altitudes, a balanced diet with a focus on carbohydrates and proteins is sufficient. As climbers ascend, they should increase their carbohydrate intake to meet higher energy demands and ensure adequate hydration. Monitoring individual responses to altitude and adjusting food choices accordingly can help maintain energy levels and support acclimatization.
What Training and Pre-Acclimatization Methods Enhance Climbing Preparation?
Training and pre-acclimatization methods are vital for climbers preparing for high-altitude expeditions. Effective strategies include:
Endurance Training: Building cardiovascular fitness through activities like running, cycling, or hiking.
Strength Training: Focusing on core and leg strength to improve climbing performance.
Altitude Simulation: Using altitude training masks or chambers to simulate high-altitude conditions.
Effective Altitude Training Protocols
Protocol
Description
Expected Outcome
Endurance Training
Long-distance activities to build stamina
Improved cardiovascular fitness
Strength Training
Resistance exercises targeting major muscle groups
Enhanced climbing power
Altitude Simulation
Training in low-oxygen environments
Faster acclimatization
These training methods can significantly enhance a climber’s readiness for high-altitude challenges.
How to Incorporate Pre-Acclimatization Techniques Before the Expedition?
Incorporating pre-acclimatization techniques can help climbers adapt more effectively before their expedition. Strategies include:
Gradual Elevation Increase: Spending time at moderate altitudes before the main ascent.
Rest Days: Allowing for recovery and adaptation during training.
Monitoring Symptoms: Keeping track of any signs of altitude sickness during training.
These techniques can help climbers prepare their bodies for the demands of high-altitude climbing.
What Can Be Learned from Case Studies of Successful High Altitude Climbs?
Analyzing case studies of successful high-altitude climbs provides valuable insights into effective acclimatization strategies. Many climbers have reported that gradual ascent, proper nutrition, and hydration were key factors in their success. Additionally, the use of supplemental oxygen and adherence to safety protocols significantly contributed to their ability to reach summits without experiencing severe altitude sickness.
Which Climbs Demonstrate Effective Acclimatization Strategies?
Several notable climbs exemplify effective acclimatization strategies. For instance, climbers on Mount Everest often utilize the “climb high, sleep low” method, allowing their bodies to adjust while minimizing the risk of altitude sickness. Other successful expeditions have emphasized the importance of gradual ascent and regular monitoring of symptoms, showcasing the effectiveness of these strategies in high-altitude environments.
What Safety Protocols and Lessons Were Applied in These Expeditions?
Safety protocols are paramount in high-altitude climbing to ensure the well-being of climbers. Key protocols include:
Thorough Planning: Detailed itineraries that account for acclimatization schedules and rest days.
Emergency Preparedness: Carrying essential safety equipment and having contingency plans in place.
Team Communication: Maintaining open lines of communication among team members to monitor health and safety.
These protocols are essential for minimizing risks and enhancing the overall safety of high-altitude expeditions.
To further enhance your understanding of mountain environments and climbing techniques, consider exploring Global Summit Guide’s resources on various mountains. This can provide valuable context for your acclimatization strategies.
For personalized guidance and support, reach out to Global Summit Guide. Their team can offer expert advice tailored to your specific climbing goals.
The 8-Month Training Plan for Everest Base Camp and Beyond (2026) | Global Summit Guide
Cluster 08 · Altitude, Training & Physiology · Updated April 2026
The 8-Month Training Plan for Everest Base Camp and Beyond
A specific 32-week month-by-month training calendar for EBC and similar 5,000-5,900 m objectives — not principles, but a concrete schedule with weekly training hours, pack weight progressions, test workouts, and milestone benchmarks. Companion piece to our general training framework: same principles, now translated into an actionable calendar.
Global Summit GuideA guide in Cluster 08 · Altitude, Training & PhysiologyView master hub →
This is the concrete calendar — a week-by-week, month-by-month 32-week program built for the trekker heading to Everest Base Camp (5,364 m) or similar 5,000-5,900 m objectives. Where our general training framework explained the principles, this plan specifies the execution: how many hours per week, what pack weight on which day, which test workouts at which milestones, and how to adjust when life gets in the way. It’s built around the four-pillar + four-phase model (base → build → peak → taper) and tuned specifically for trek-level high-altitude objectives rather than technical mountaineering. For understanding the altitude physiology your training prepares you for, see our acclimatization science guide.
⊛
How this plan was built
Monthly structure reflects periodization principles from Uphill Athlete (Steve House & Scott Johnston) and Mountain Tactical Institute. Weekly volume targets validated against American Alpine Club training guidance and coaching programs used by commercial EBC operators including Peak Freaks, Himalayan Guides, and International Mountain Guides. Pack weight progression calibrated to actual EBC trekker daily pack weights (15-25 lb with porter support) plus 50% reserve. Test workouts cross-referenced with Uphill Athlete readiness assessments. Reviewed by practicing EBC guides and mountaineering coaches. Fact-check date: April 19, 2026.
The 8-Month Plan at a Glance
The full 32-week program spans four periodization phases across eight months. Each month builds on the last:
1Base
Establish the habit
4-6 hrs/wk Zone 2 cardio foundation
Pack: 0-15 lb
2Base
Build aerobic base
5-7 hrs/wk Add weighted hiking
Pack: 15-20 lb
3Build
Progressive loading
7-9 hrs/wk Longer sessions, tempo work
Pack: 20-25 lb
4Build
Elevation & endurance
8-10 hrs/wk 600 m elev gain hikes
Pack: 25-30 lb
5Peak
Mountain-specific
9-11 hrs/wk Match EBC demands
Pack: 30-35 lb
6Peak
Expedition simulation
10-12 hrs/wk Back-to-back days
Pack: 30-35 lb
7Peak
Altitude preparation
11-13 hrs/wk Hypoxic training, pre-trip
Pack: 30-35 lb
8Taper
Rest & depart
5-7 hrs/wk Maintain, don’t build
Pack: 20-25 lb
★
Before you start: the fitness baseline check
This plan assumes a moderate starting fitness baseline: you can walk 3 miles comfortably, have no current injuries requiring therapy, and have basic cardiovascular fitness. If you can’t currently hike 45 minutes at a brisk pace without stopping, spend 4-6 weeks building basic fitness before starting Month 1. If you’re already a regular runner, cyclist, or hiker, you may be able to compress Months 1-2 or start at Month 3. Honest self-assessment here matters — starting the plan too advanced leads to injury; starting too easy wastes time.
Month-by-Month Detailed Schedule
Month
1
Weeks 1-4
Base Phase
Establish the Habit, Build the Foundation
Month 1 is about consistency, not intensity. Establish the training schedule. Build baseline aerobic fitness. Start introducing light pack work. Everything should feel sustainable — no heroic efforts, no chasing PRs. If workouts feel easy, you’re doing it right.
Weekly Hours4-6
Pack Weight0-15 lb
Long Hike60-90 min
Strength2×/week
Typical Week
Mon: Rest or gentle yoga (30 min)
Tue: Easy cardio — hike, walk, or bike (45 min, Zone 2)
Wed: Strength session — bodyweight focus (30 min)
Thu: Rest
Fri: Easy cardio (45 min, Zone 2)
Sat: Long hike — light pack (60-90 min, 10-15 lb)
Sun: Strength or rest (30 min if strength)
Month
2
Weeks 5-8
Base Phase
Build Aerobic Base, Habituate to Pack
Month 2 extends session durations and establishes weighted hiking as a regular weekly practice. Two short cardio sessions per week, two strength sessions, and two weighted hikes — one shorter midweek, one longer on weekend. Pack weight creeps up to 20 lb.
Sat: Long weighted hike (2 hours, 20 lb, rolling terrain)
Sun: Strength session (45 min)
Month
3
Weeks 9-12
Build Phase
Progressive Loading, Introduce Tempo Work
Month 3 begins the build phase — increasing weekly volume, adding your first tempo sessions, stretching long hike duration to 2-3 hours, and introducing moderate elevation gain (300-500 m). Start using your actual expedition pack for weighted sessions.
Weekly Hours7-9
Pack Weight20-25 lb
Long Hike2-3 hrs
Elevation300-500 m
Typical Week
Mon: Rest or mobility work
Tue: Cardio — tempo run or hill repeats (45-60 min, Zone 3)
Thu: Weighted hike (90 min, 20-25 lb, some elevation)
Fri: Easy cardio (45 min, Zone 2)
Sat: Long weighted hike (2.5-3 hours, 25 lb, 400 m gain)
Sun: Strength or easy cardio (45 min)
Month
4
Weeks 13-16
Build Phase
Elevation and Endurance Development
Month 4 ramps up elevation gain and session duration. Weekend hikes stretch to 4 hours with 600-700 m of elevation. Back-to-back weighted sessions start appearing — a 3-hour Saturday hike followed by a 2-hour Sunday hike. This is where the program starts to feel like serious preparation.
Sat: Long weighted hike (3-4 hours, 30 lb, 600 m gain)
Sun: Shorter weighted hike (2 hours, 20 lb)
Month
5
Weeks 17-20
Peak Phase
Mountain-Specific Conditioning Begins
Peak phase begins. Weekly volume rises toward 11 hours. Three weighted sessions per week. Pack weight hits 30-35 lb (above your actual expedition daypack weight — building reserve). Saturday hikes stretch to 5 hours with significant elevation. Strength training shifts to maintenance mode, with emphasis migrating to weighted carries.
Weekly Hours9-11
Pack Weight30-35 lb
Long Hike4-5 hrs
Elevation700-900 m
Typical Week
Mon: Rest or active recovery (30 min easy walk)
Tue: Tempo or interval cardio (60-75 min, Zone 3-4)
Sat: Long weighted hike (4-5 hours, 30-35 lb, 800 m gain)
Sun: Back-to-back hike (2-3 hours, 25 lb)
Month
6
Weeks 21-24
Peak Phase
Expedition Simulation and Back-to-Back Days
The hardest training month. Simulate expedition fatigue with consecutive heavy hiking days. Saturday 5-7 hours, Sunday 3-4 hours, both weighted. Daily distances start matching EBC route (8-15 km). This is where you test your gear, nutrition, and pacing under actual expedition-like conditions.
Sat: BIG weighted hike (5-7 hours, 35 lb, 1,000+ m gain)
Sun: Back-to-back (3-4 hours, 25-30 lb)
Month
7
Weeks 25-28
Peak Phase
Altitude Preparation and Peak Training Load
The final peak month. Maximum weekly volume (11-13 hours). If using an altitude tent, now is prime time — 4-8 hours/night for the full month. Consider a pre-trip altitude trip to 3,000+ m. All gear testing complete. Stamina hits its absolute peak here.
Weekly Hours11-13
Pack Weight30-35 lb
Long Hike6-8 hrs
Altitude PrepTent + trip
Typical Week
Mon: Active recovery (30-45 min)
Tue: Intervals or hill repeats (60-75 min, Zone 4)
Sat: Longest weighted hike of program (6-8 hours, 35 lb, 1,200+ m)
Sun: Back-to-back (3-4 hours, 30 lb)
Month
8
Weeks 29-32
Taper Phase
Rest, Recover, Depart Fresh
The taper. Counter-intuitive but physiologically essential: training volume drops 40-60%, giving your body full glycogen storage, muscle repair, and nervous system recovery. No PRs, no new exercises, no long weighted hikes. Maintain the habit, preserve fitness, arrive fresh. This is where you trust the work already done.
Weekly Hours5-7
Pack Weight20-25 lb
Long Hike2-3 hrs
FocusRecovery
Typical Week (weeks 29-30)
Mon: Rest
Tue: Easy cardio (45 min, Zone 2)
Wed: Light strength maintenance (30 min)
Thu: Short weighted hike (60-90 min, 20 lb)
Fri: Rest
Sat: Moderate weighted hike (2-3 hours, 25 lb)
Sun: Easy cardio or rest (30-45 min)
Final week (week 32 — departure)
3-4 short easy sessions only (30-45 min each)
Focus: sleep, nutrition, hydration, gear packing
No workouts in final 48 hours before flight
Milestone Test Workouts
At the end of each month, a test workout confirms you’re ready to progress. Failing a test isn’t failure — it’s a signal to repeat the month or reduce volume:
M1 End
Baseline Assessment
3-mile hike at Zone 2 pace comfortably
10 push-ups with strict form
30-second plank hold
15 bodyweight squats
No joint pain during or after training
M2 End
Adaptation Check
4-5 mile hike with 20 lb pack
15 push-ups, 45-second plank
20 squats with good form
10-minute incline walk at 6-8% grade
M3 End
Progression Test
6-7 mile hike with 25 lb pack
500 m elevation gain, average pace under 3 mph
Completed without fatigue
20 push-ups, 60-second plank
M4 End
Build Phase Assessment
8-mile hike with 30 lb pack
700 m elevation gain in under 4 hours
Back-to-back 4-hour hiking days possible
Single-leg step-ups: 20 each leg
M5 End
Mountain-Specific Test
10-mile hike with 30-35 lb pack
900 m elevation gain in under 5 hours
25 push-ups, 90-second plank
Rest day recovery complete
M6 End
Peak Phase Test
12-mile hike with 35 lb pack
1,200 m elevation gain in under 7 hours
Good energy remaining at end
Recovery adequate for next-day hiking
M7 End
Expedition Readiness
14-15 mile hike with 30-35 lb pack
1,400 m elevation gain, 8-10 hours manageable
Back-to-back 10+ mile weighted days possible
Confident about EBC demands
M8 End
Final Readiness Check
Light 3-hour weighted hike (20-25 lb) without fatigue
Easy pace, good form maintained
Fresh legs, clear mind, high motivation
Gear tested, packed, ready to depart
Adjusting the Plan for Your Situation
If you’re already fit
Regular runners, cyclists, or hikers can often compress the first two months or start at Month 3. If you can already hike 6 miles with a 25 lb pack comfortably, consider entering the program at the Month 3 or even Month 4 level. Don’t skip the strength or weighted hiking — those are specific to mountaineering even if your general fitness is strong.
If you’re starting from sedentary
Add 4-6 weeks of basic fitness building before Month 1. Focus on walking 30 minutes daily, building to 45 minutes, and doing bodyweight strength work. Only begin the plan once basic fitness habits are established — otherwise the Month 1 volume will feel overwhelming.
If you miss weeks
1-2 weeks missed: Resume where you left off, reduce intensity 20% for first week back.
3-5 weeks missed: Drop back 2-3 weeks in program, possibly extend plan by 2-4 weeks.
6+ weeks missed: Restart the current phase, consider shorter objective if trip is imminent.
If you’re using this plan for other objectives
Objective
Plan Duration
Peak Pack Weight
Key Modifications
Annapurna Base Camp
6 months (compressed)
25-30 lb
Less elevation emphasis
Everest Base Camp
8 months (standard)
30-35 lb
Use as-is
Kilimanjaro
6-8 months
25-30 lb
Similar demands, slight pack reduction
Mera Peak
8-10 months
35-40 lb
Add crampon practice
Island Peak
8-10 months
35-40 lb
Add technical skills training
Aconcagua
12 months
45-55 lb
Cold weather training, winter hiking
Denali
12-18 months
60-75 lb
Sled pulling, expedition skills
EBC Training Plan FAQ: Your Common Questions Answered
Why an 8-month training plan for Everest Base Camp?
An 8-month (32-week) training plan provides the optimal balance between adequate preparation and manageable commitment. Shorter plans risk under-preparation; longer plans risk burnout. Why 8 months is the sweet spot: allows complete periodization cycle (base, build, peak, taper phases), provides time for injury recovery, enables gradual pack weight progression without overload, builds aerobic base properly (minimum 3-4 months), permits 2-3 altitude trips before main expedition, accommodates life disruptions (illness, travel, work), allows gear testing time, builds mental preparation gradually. Who benefits most: moderately fit trekkers (some hiking background), first-time EBC trekkers, age 40+ trekkers, post-injury or comeback situations, time-constrained professionals. Who might need shorter (4-6 months): elite endurance athletes, experienced high-altitude trekkers (Kilimanjaro summited), regular long-distance hikers, current marathon runners or cyclists. Who might need longer (10-12 months): sedentary starting points, significant weight loss needed, previous altitude illness history, complex medical history, age 60+ trekkers. The 32-week structure: Weeks 1-8 (Month 1-2) base building, Weeks 9-16 (Month 3-4) aerobic and strength development, Weeks 17-24 (Month 5-6) peak mountain-specific conditioning, Weeks 25-28 (Month 7) altitude preparation and expedition simulation, Weeks 29-32 (Month 8) taper and final preparation. Time commitment: Months 1-2 4-6 hours per week, Months 3-4 6-9 hours, Months 5-6 9-12 hours, Month 7 10-13 hours (peak), Month 8 5-7 hours (taper). Most EBC trekkers who follow an 8-month program successfully complete the trek, whereas rushed training (under 12 weeks) has significantly lower success rates. See our general training principles guide.
What does Month 1 of EBC training look like?
Month 1 focuses on establishing your training habit, building base aerobic fitness, and preparing for progressive loading — not maximal effort. Goals: establish consistent training schedule, build aerobic base, develop basic strength foundation, begin pack adaptation, assess current fitness baseline, prevent early injuries. Weekly structure — Week 1 (assessment and adaptation): Day 1 45-minute easy hike, Day 2 30-minute walking or easy cardio, Day 3 strength session (bodyweight) 30 minutes, Day 4 rest or yoga, Day 5 45-minute hiking, Day 6 60-minute easy hike (longest of week), Day 7 rest. Weekly total 4-5 hours. Week 2 (base building): increase session durations by 10-15%, add second strength session, introduce 10-15 lb pack on one hike. Week 3 (consistency): maintain volume from Week 2, focus on quality over quantity, track workouts consistently. Week 4 (evaluation): reduced volume week, performance assessment, plan adjustments for Month 2. Intensities: Cardio Zone 2 only (conversational pace), Strength bodyweight or light weights, Hikes flat to gently rolling terrain, Pack weight 0-15 lb maximum. Specific workouts — Hiking: easy 45-60 minute hikes on varied terrain, one longer 60-90 minute hike per week, optional weighted hike (10-15 lb). Cardio: easy 30-45 minute runs or bike rides, Zone 2 heart rate throughout, no intervals or tempo work. Strength (30-45 minutes): bodyweight squats 3×15, push-ups 3×8-12, plank 3×30 seconds, walking lunges 3×10 per leg, bent-over rows 3×12, glute bridges 3×15. Assessment at end of Month 1: hike 3-4 miles comfortably at Zone 2 pace, 10 good form push-ups, 30-second plank hold, 15 air squats, no joint pain. Month 1 is the foundation — don’t rush it. See our complete EBC trek guide.
How does pack weight progress through 8 months?
Pack weight progression is the single most important EBC training variable — progressing from 10-15 lb in Month 1 to 30-35 lb in peak training, matching what you’ll carry as a trekker on the actual EBC route with porter support plus reserve capacity. Month-by-month: Month 1 adaptation (0-15 lb) — Week 1 no pack, Week 2 10 lb on one hike, Week 3 10-15 lb on two hikes, Week 4 15 lb progression check. Month 2 habituation (15-20 lb) — two weighted hikes per week, 1.5-2 hours, rolling to moderate terrain. Month 3 base progression (20-25 lb) — maintain two hikes per week, 2-3 hours, 300-500 m elevation, begin using actual expedition pack. Month 4 building strength (25-30 lb) — two to three weighted hikes per week, 2.5-4 hours, 500-700 m elevation gain. Month 5 mountain-specific (30-35 lb) — three weighted sessions per week, longest hikes 4-5 hours, 700-900 m elevation, back-to-back weighted days. Month 6 expedition simulation (30-35 lb) — peak weighted training, longest hikes 5-7 hours, match EBC daily distances (8-15 km), multiple days back-to-back. Month 7 altitude prep (maintained 30-35 lb) — reduced volume but maintained weight, altitude-specific training, emphasis on sustained efforts. Month 8 taper (reduced 15-25 lb) — one short weighted hike per week, 2-3 hour duration maximum, focus on fresh legs not fitness building. Why works: gradual adaptation prevents injury, matches actual EBC trekker pack weight (most trekkers carry 15-25 lb daily with porter support), excess training weight (30-35 lb) builds reserve capacity, downhill training critical at these weights, joint adaptation takes weeks to months. Modifications: porter-supported trek (typical) 20-30 lb peak weight, teahouse trek with daypack 15-25 lb, self-supported 35-45 lb, Base Camp + Island Peak 35-45 lb. Warning signs during progression: lower back pain, shoulder numbness, hip bruising, knee pain, cumulative fatigue — back off and reassess. See our EBC trek guide.
What are the test workouts for EBC training?
Test workouts measure training progress at key milestones — typically end of each month with major assessments at Months 2, 4, 6, and 8. End of Month 1 baseline: 3-mile hike at Zone 2 pace, 10 push-ups strict form, 30-second plank, 15 bodyweight squats, 1 mile easy run or walk. End of Month 2 adaptation check: 4-5 mile hike with 20 lb pack, 15 push-ups, 45-second plank, 20 squats, 10-minute incline walk at 6-8% grade. End of Month 3 progression test: 6-7 mile hike with 25 lb pack, 500 m elevation gain, average pace under 3 mph, 20 push-ups, 60-second plank. End of Month 4 building phase: 8-mile hike with 30 lb pack, 700 m elevation gain in under 4 hours, back-to-back 4-hour hiking days possible, single-leg step-ups 20 each leg. End of Month 5 mountain-specific test: 10-mile hike with 30-35 lb pack, 900 m elevation gain in under 5 hours, 25 push-ups, 90-second plank. End of Month 6 peak phase: 12-mile hike with 35 lb pack, 1,200 m elevation gain in under 7 hours, good energy remaining. End of Month 7 expedition readiness: 14-15 mile hike with 30-35 lb pack, 1,400 m elevation gain, 8-10 hours manageable, back-to-back 10+ mile weighted days possible. End of Month 8 final readiness: light 3-hour weighted hike (20-25 lb), easy pace good form, no fatigue, fresh legs clear mind. Supplementary ongoing tests: heart rate recovery (track resting HR changes), Zone 2 pace (track improvement at same heart rate), training log (duration and intensity trends). Strength benchmarks: Month 2 20 push-ups 45-second plank 20 squats, Month 4 25 push-ups 60-second plank 30 squats, Month 6 30 push-ups 90-second plank 40 squats, Month 8 maintain peak levels. Failing test workouts indicates insufficient training volume, possibly overtrained (rest week), may need plan adjustment. Don’t proceed to next phase until passing. Use tests honestly — self-deception in training causes expedition failure.
How many hours per week should I train for EBC?
Training hours progress from 4-5 hours per week in Month 1 to peak of 12-13 hours in Month 7, with taper to 5-7 hours in final month. Monthly breakdown: Month 1 weeks 1-4 4-6 hours/week (establishing schedule, recovery week at end). Month 2 weeks 5-8 5-7 hours/week. Month 3 weeks 9-12 7-9 hours/week. Month 4 weeks 13-16 8-10 hours/week. Month 5 weeks 17-20 9-11 hours/week. Month 6 weeks 21-24 10-12 hours/week. Month 7 weeks 25-28 PEAK 11-13 hours/week. Month 8 weeks 29-32 TAPER 5-8 hours/week. Hour distribution within weeks: Month 1-2 2-3 sessions of 1-1.5 hours, Month 3-4 3-4 sessions of 1.5-2 hours plus longer weekend hike, Month 5-6 4-5 sessions of 1.5-2 hours plus 4-6 hour weekend hike, Month 7 5 sessions of 1.5-2 hours plus 5-8 hour weekend hike, Month 8 3-4 sessions of 1-2 hours. Quality vs quantity: consistent 8 hours beats inconsistent 12 hours, rest days matter as much as training, recovery weeks prevent burnout, signs of overtraining adjust down immediately. Life integration: early morning workouts most sustainable, weekend long sessions key, lunch break strength training possible, combine workouts with commuting, schedule workouts like meetings, family support important. Adjustments: busy professionals shorter more frequent sessions, shift workers adapt to sleep schedule, parents weekend long sessions and weekday efficiency, travel-heavy jobs hotel gyms bodyweight work stair climbing. Minimum viable: 5-6 hours per week for 8 months beats 10 hours for 4 months, sustainability over intensity, missing weeks reduces effectiveness. Maximum sustainable: elite athletes can handle 15+ hours, most recreational trekkers top out at 13-14 hours, more than 14 hours typically counterproductive, recovery capacity limits volume. Signs you need to reduce: persistent fatigue, performance plateau, sleep problems, frequent illness, loss of motivation, chronic soreness. Hours are a guide, not a goal.
Can I use this plan for other treks or peaks?
Yes, the 8-month EBC plan adapts well to other treks and peaks at similar altitude ranges (5,000-6,000 m), though modifications are needed for different objectives. Direct applicability minimal modifications: Annapurna Base Camp (4,130 m) could shorten to 6 months, Everest Base Camp (5,364 m) primary target, Kilimanjaro (5,895 m) similar demands minor pack reduction, Mount Kinabalu (4,095 m) shorter plan adequate, Mera Peak (6,476 m) moderate modifications. Moderate modifications: Island Peak (6,189 m) add technical skills training, Aconcagua (6,961 m) extend to 12 months increase pack weight to 45-55 lb, Kilimanjaro + Meru combo use as-is, Gokyo Ri (5,357 m) very similar demands, Manaslu Circuit (5,213 m) standard application. Significant modifications: Denali (6,190 m) add sled pulling cold weather training 12-18 months, Cho Oyu (8,188 m) extend to 16-24 months altitude experience essential, technical alpine peaks add alpine skills weeks, Ama Dablam (6,812 m) add technical climbing preparation. Pack weight scaling: shorter treks (ABC) reduce to 20-25 lb peak, EBC equivalent use as-is 30-35 lb peak, more strenuous (Aconcagua) increase to 45-55 lb, self-supported increase significantly, expedition-style 60-75+ lb needed. Duration scaling: 12-week shorter plans remove base phase weeks, 6-month plans compress Months 1-3 into 2, 12-month plans extend build phase, 18-month plans add intermediate objectives. Altitude-specific additions: 8,000 m peaks add altitude tent use 2-3 months pre-trip, remote/self-supported add navigation and survival skills, winter objectives add cold-weather training, technical peaks add rope/crampon/ice axe practice. Terrain modifications: snow and ice add winter hiking, scrambling add class 2-3 sessions, long approach treks add multi-day practice trips, glaciated peaks add crevasse rescue. Common adaptation mistakes: using full EBC plan for easier trek (overtrains), using EBC plan for harder objectives (under-prepares), not modifying pack weight for objective, ignoring technical skill requirements, missing altitude-specific preparation. See our training framework guide.
What if I miss weeks of training?
Missing training weeks is common and the 8-month plan accommodates reasonable disruptions. Minor disruptions (1-2 weeks): resume where you left off, reduce intensity 20% for first week back, no major plan modifications, catch up within 2-3 weeks. Common examples business travel, minor illness, family obligations. Moderate disruptions (3-5 weeks): assess current fitness level, drop back 2-3 weeks in program, gradual return to full volume, possibly extend plan by 2-4 weeks. Common examples flu, minor injury, extended travel. Major disruptions (6+ weeks): restart training phase, consider shorter objective if trip imminent, evaluate realistic preparation possible, add 4-8 weeks to plan. Common examples surgery recovery, major life event, significant injury. Injury-specific modifications: muscle strains (lower body) rest 1-2 weeks then gradual return, cross-training if cleared, maintain upper body work, return pack weight gradually. Joint injuries professional evaluation essential, physical therapy if indicated, alternative training during recovery, modified exercises as cleared. Illness timeline: cold/flu 1-2 weeks easy return, bronchitis 2-4 weeks careful return, serious illness medical clearance required, COVID current guidelines for safe return. Life circumstances: travel for work use hotel gyms hiking in destinations, new job adjust training schedule, new baby short frequent sessions, caregiving flexibility essential, relocations use move as training opportunity. Mental health breaks: severe stress reduce don’t eliminate, burnout signs active recovery weeks, life priorities accept temporary plan changes. Catch-up strategies: week-by-week catch-up add 1 hour per week gradually don’t compress multiple weeks into one, quality over quantity, use recovery weeks if available. Modified acceleration: skip less critical sessions, prioritize long weighted hikes, maintain intensity variety, focus on weak areas. Plan extension add weeks to most needed phases, extend peak training if possible, reduce taper if departure fixed, keep minimum 2-week taper. When to postpone the trip: extended major injury, unable to complete key test workouts, medical conditions requiring treatment, cannot safely attempt objective. Better to postpone than fail. Setbacks are normal, not failures.
What gear do I need to train for EBC?
Training gear should progressively match your expedition gear, allowing you to test and break in everything before the trek — avoid buying new items specifically for training only. Essential training gear: Footwear — primary training boot same or similar to expedition boots, trail running shoes for easier hikes and running, gym shoes for strength work, worn-in expedition boots critical never use new boots on trek, multiple sock pairs. Backpack — expedition pack use for final 2-3 months of training, training pack alternative can use during adaptation phase, pack organization testing, weight distribution match expedition loading, minimum 40L ideal 50-55L for EBC daypack. Clothing layers — base layers (merino or synthetic), mid layers (fleece or light insulation), outer shell (waterproof breathable), insulating layer (down or synthetic puffy), hat gloves buff. Hiking essentials — trekking poles (highly recommended), water bottles or hydration bladder, day pack for shorter hikes, hiking pants (quick-dry not cotton), moisture-wicking shirts. Training-specific equipment — heart rate monitor or fitness watch, weight for pack (sandbags water bottles or actual gear), strength training equipment access, treadmill access (optional), indoor cycling option. Home gym essentials — dumbbells (15-40 lb pairs), kettlebell (20-35 lb), resistance bands, pull-up bar, stability ball, foam roller. Outdoor training gear — trail maps and navigation, emergency gear for longer hikes, weather-appropriate layers, headlamp for early starts, first aid basics. Expedition gear to test — sleeping bag (comfortable at expected temps), ground pad (match expedition use), water purification method, cook system (if self-supported), crampons (if using technical routes). Gear testing schedule: Month 1-2 focus on footwear and pack fit, test different sock combinations, evaluate clothing layers. Month 3-4 full gear integration, practice pack organization, test weather-specific gear. Month 5-6 cold weather testing, multi-day camping practice, technical gear familiarization. Month 7-8 final gear decisions made, backup systems established, pre-expedition gear checklist. Common gear mistakes: buying new gear for trip without testing, not breaking in boots properly, pack size wrong for expedition needs, ignoring layering system, insufficient trekking pole use. Money-saving tips: buy quality essentials rent specialty items, test gear before buying, sales timing end of season. See our complete gear list.
Authoritative Sources & Further Reading
Plan reflects evidence-based mountaineering coaching programs:
Steve House & Scott Johnston, Training for the New Alpinism — Uphill Athlete methodology
Uphill Athlete — Programs and education for mountain endurance athletes
Mountain Tactical Institute — Mountain athlete training research
American Alpine Club — Training and education resources
Peak Freaks, Himalayan Guides, International Mountain Guides — Commercial EBC operator training recommendations
Wilderness Medical Society — Altitude illness prevention guidelines
Stephen Seiler, PhD — Polarized training research for endurance athletes
IFMGA-certified EBC guides on training verification
Reference texts: Mountaineering: The Freedom of the Hills (The Mountaineers); Training for the Uphill Athlete (House, Johnston, Jornet)
This guide is one of 70 across 12 thematic clusters on Global Summit Guide. The master hub organizes every guide by experience tier, specific peak, skill area, and region.
Altitude Acclimatization Explained: The Science of Climb High, Sleep Low (2026) | Global Summit Guide
Cluster 08 · Altitude, Training & Physiology · Updated April 2026
Altitude Acclimatization Explained: The Science of Climb High, Sleep Low
How your body actually adapts to high altitude — the three-phase physiology of acclimatization, ascent rate rules that work, and the climb-high-sleep-low protocol every serious climber lives by. This is the science companion to our altitude sickness guide: less about symptoms, more about the adaptation process itself and how to optimize it.
Global Summit GuideA guide in Cluster 08 · Altitude, Training & PhysiologyView master hub →
Acclimatization is the single most important concept in high-altitude mountaineering — and the single most misunderstood. Most climbers know they’re supposed to “go slow” at altitude, but few understand why a gradual ascent works while rapid ascent fails, what their bodies are actually doing during a rest day, or why fitness and willpower can’t compensate for skipping acclimatization. This guide breaks down the three physiological phases of altitude adaptation, the evidence behind the climb-high-sleep-low protocol, the ascent rate rules endorsed by the Wilderness Medical Society, and why individual response to altitude varies by factors of 10 between people. For altitude illness symptoms and treatment, see our altitude sickness guide. This post focuses on adaptation itself.
⊛
How this guide was built
Content reflects peer-reviewed altitude medicine research from the Wilderness Medical Society, International Society for Mountain Medicine, and High Altitude Medicine & Biology journal. Ventilatory and hematologic acclimatization data sourced from Hackett & Roach’s foundational altitude medicine research. Ascent rate protocols verified against WMS 2019 Practice Guidelines for Acute Altitude Illness. Pre-acclimatization strategies cross-referenced with Hypoxico and Altitude Tech clinical studies. Reviewed by practicing altitude medicine physicians with expedition experience on Everest, Denali, and Aconcagua. Fact-check date: April 19, 2026.
What Acclimatization Actually Is
Altitude acclimatization is not a single change but a cascade of physiological adaptations that occur over hours, days, and weeks. Your body responds to reduced oxygen availability through coordinated changes in breathing, circulation, blood chemistry, and cellular function. Understanding this cascade explains why acclimatization can’t be rushed and why proper protocols produce predictable results.
Why altitude challenges the body
At sea level, air pressure pushes oxygen into your lungs efficiently. At altitude, atmospheric pressure drops — the oxygen percentage in air stays the same (~21%), but each breath delivers fewer molecules. At 5,500 m (18,000 ft), atmospheric pressure is roughly half of sea level, so each breath contains about half the oxygen molecules. Your body must compensate through multiple adaptations — that’s acclimatization.
What acclimatization accomplishes
Reduces altitude sickness risk dramatically by improving oxygen delivery.
Enables sustained effort at altitudes otherwise impossible.
Improves sleep quality — critical for recovery at altitude.
Maintains cognitive function at elevations that would otherwise impair judgment.
Prevents life-threatening HACE and HAPE in most climbers who acclimatize properly.
What acclimatization does NOT do
Cannot compensate for ascent rates too rapid for your physiology.
Does not eliminate the need for rest days.
Does not work equally for all individuals.
Does not persist long after return to sea level (1-2 weeks typical).
Cannot make 8,000 m peaks safe for sustained human habitation — above ~5,800 m, the body slowly deteriorates regardless of adaptation.
◆
The acclimatization ceiling
Human physiology has a natural acclimatization ceiling around 5,800 m (19,000 ft). Above this altitude, even fully-acclimatized climbers gradually lose weight, muscle mass, and function. At 8,000+ m (“the death zone”), physiological deterioration is rapid enough that climbers can survive only days before serious consequences. This is why Everest and K2 climbers spend months below 5,800 m acclimatizing, then push through the death zone in brief summit bids. Understanding this ceiling explains why Everest expeditions last 2 months even though actual summit day is less than 24 hours.
The Three Phases of Acclimatization
Acclimatization unfolds in a predictable sequence. Each phase has distinct physiological changes, takes a specific amount of time, and provides specific benefits. Understanding each phase helps explain why certain protocols work:
Phase
1
Minutes–Hours
Immediate Response
Respiratory & Cardiovascular
Onset: 0-2 hours at altitude · Full effect: 24 hours
Your body’s immediate response to reduced oxygen is driven by chemoreceptors in the carotid bodies detecting falling arterial oxygen levels. Within minutes of arriving at altitude, breathing rate and depth increase (hyperventilation), heart rate rises, and pulmonary artery pressure elevates. This is the fast, automatic layer of acclimatization.
This phase can feel uncomfortable — breathless on mild exertion, racing heart at rest, headache beginning. These sensations are normal adaptive responses, not necessarily warning signs. They indicate your body is trying to compensate for the hypoxic environment.
Over the first week at altitude, the kidneys respond to the respiratory alkalosis caused by Phase 1 hyperventilation. By excreting bicarbonate in urine, the kidneys allow blood pH to normalize while ventilation remains elevated. This removes the brainstem “brake” that was slowing breathing to preserve pH, enabling sustained higher ventilation.
Plasma volume reduction continues, which concentrates red blood cells (hemoconcentration). This provides an immediate boost to oxygen-carrying capacity per unit of blood, though total red blood cell count hasn’t yet increased. Most AMS symptoms resolve during this phase if initial ascent was appropriate.
Kidneys excrete bicarbonate to normalize blood pH
Sustained elevated breathing rate
Plasma volume decreases ~10%
Hemoconcentration increases oxygen carrying per unit blood
Enhanced oxygen delivery begins
Sleep patterns partially normalize
Exercise tolerance gradually improves
Most AMS symptoms resolve if ascent appropriate
Phase
3
1–4 Weeks
Hematologic Acclimatization
Blood Cell Production
Onset: Day 3-5 · Plateau: Weeks 3-6
The kidneys detect the ongoing hypoxia and release erythropoietin (EPO), the hormone that stimulates red blood cell production in bone marrow. Over 2-4 weeks, red blood cell count rises 10-20%, substantially increasing the blood’s oxygen-carrying capacity. Hemoglobin levels increase proportionally.
Beyond 2-3 weeks, cellular and tissue-level adaptations continue. Muscle capillary density increases, allowing better oxygen delivery to working tissue. Mitochondrial efficiency improves, extracting more energy from available oxygen. These changes plateau at 4-6 weeks — beyond that point, there’s diminishing return. This phase is why elite expeditions allow 6-8 weeks of acclimatization before major summit attempts.
Erythropoietin (EPO) production accelerates
Red blood cell count increases 10-20%
Hemoglobin levels rise
Oxygen carrying capacity substantially enhanced
Muscle capillary density increases (weeks 3+)
Mitochondrial efficiency improves
Peak acclimatization reached at 4-6 weeks
Significant performance improvements noticeable
Altitude Zones & Acclimatization Requirements
Different altitude zones impose different physiological demands. The acclimatization requirements scale dramatically with elevation:
Low
<1,500 m
<4,900 ft
No acclimatization required. Normal function maintained.
Moderate
1,500–2,500 m
4,900–8,200 ft
Minor effects possible. Most people unaffected. No formal acclimatization.
High
2,500–3,500 m
8,200–11,500 ft
AMS possible 10-25% of ascents. Rest day protocols begin.
Acclimatization ceiling. Body deteriorates over time even with adaptation.
Acclimatization requirements by zone
Altitude Zone
Ascent Rate
Rest Days
Medications
Monitoring
Low (<1,500 m)
No restriction
None needed
Not indicated
None required
Moderate (1,500–2,500 m)
No restriction
None typically
Not indicated
Self-awareness
High (2,500–3,500 m)
Gradual preferred
Every 3 days if rapid
Optional Diamox
Daily self-check
Very High (3,500–5,500 m)
300–500 m/day sleep
Every 1,000 m gain
Diamox recommended
Lake Louise score daily
Extreme (>5,500 m)
200–300 m/day sleep
Essential
Diamox standard
Multiple daily checks
Climb High, Sleep Low: The Foundational Protocol
Climb high, sleep low is the single most important tactical rule in altitude acclimatization after gradual ascent rate. The principle is straightforward: ascend to a higher altitude during the day for training stimulus and exposure, then descend to a lower altitude for sleeping to allow recovery without sustained hypoxic stress.
The science behind why it works
Daytime altitude exposure triggers acclimatization responses — increased breathing, heart rate, EPO release from the kidneys.
Activity at higher altitude provides hypoxic training stimulus without the penalty of extended exposure.
Sleeping at lower altitude allows better oxygen saturation during critical recovery hours — often 88-95% SpO2 at sleep altitude vs 75-85% at the higher elevation.
Sleep quality at altitude is dramatically worse than at moderate elevation — periodic breathing (Cheyne-Stokes), frequent wake-ups, reduced REM sleep.
Poor sleep compounds altitude illness risk, so protecting sleep quality is critical.
Practical applications in real treks
Everest Base Camp trek: Hike to Nangkartshang Peak (5,090 m) during day, sleep at Dingboche (4,410 m). Net gain: 0 m sleeping altitude. Acclimatization benefit: significant.
Kilimanjaro Lemosho: Hike to Lava Tower (4,600 m) during day, sleep at Barranco (3,900 m). Net gain: negative 200 m. Acclimatization benefit: dramatic.
Aconcagua: Carry loads to Camp 2 (5,500 m), return to Camp 1 (5,000 m) to sleep. Classic expedition tactic.
Research studies comparing direct ascent to climb-high-sleep-low protocols at equivalent maximum altitudes show approximately 40% better acclimatization outcomes when climb-high-sleep-low is applied. Lake Louise AMS scores at matched altitudes are consistently lower. Summit success rates on commercial expeditions correlate strongly with protocol adherence.
★
When climb-high-sleep-low applies
Apply the principle any time sleeping altitude would gain more than 500 m in a single day, during acclimatization rest days at intermediate altitudes, before summit attempts (acclimatization rotations), and when incorporating load carries on expeditions. If terrain forbids descent — for example, at high camps with no lower option — substitute rest days at the same altitude with short higher-altitude hikes. The principle is about preserving sleep oxygen saturation, which can be approximated even without actual descent.
The Ascent Rate Rules That Work
The Wilderness Medical Society’s 2019 Practice Guidelines provide the gold standard ascent rate rules. These aren’t arbitrary — they reflect decades of research on hypoxic tolerance and altitude illness rates:
Standard ascent rate rules
Below 2,500 m: No restriction.
2,500–3,000 m: Ascend to sleep at less than 500 m/day gain.
3,000–5,000 m: Ascend to sleep at 300–500 m/day.
Above 5,000 m: 200–300 m/day sleeping gain maximum.
Rest day rule: Every 1,000 m of cumulative sleeping gain.
The simplified 2-3-1 rule
2 rest days after 2 days of significant ascent.
3 rest days when ascending above 4,000 m.
1 rest day for every 1,000 m gained above 3,000 m.
Why the rate varies by altitude
Physiological burden increases exponentially with altitude — each 1,000 m above 4,000 m is harder than the last.
Available oxygen drops dramatically above 4,000 m.
Acclimatization ceiling approached at 5,500 m — body can’t adapt further.
Individual variability increases at higher altitudes.
Flexibility within the rules
Climbers with prior altitude experience (within 30-60 days) can sometimes ascend faster. Previous AMS history requires stricter adherence. Very fit individuals are not exempt — fitness doesn’t predict altitude tolerance. Listen to your body and adjust pace downward if symptoms develop.
▲
The consequences of rule violations
Expedition statistics are brutally clear about ascent rate violations. Climbers who violate ascent rate rules see 25-50% AMS rates, compared to 5-15% for rule-followers. Above 5,000 m, rate violations cause most HACE/HAPE cases. Rescue statistics show most altitude-related fatalities result from ignored ascent rates or inadequate rest days. The rules exist because they work. They’re not arbitrary conservatism — they reflect hard-learned physiology. Following them is not optional for safety at high altitude. See our altitude sickness guide for symptom recognition.
Pre-Acclimatization Strategies
For climbers with short trip windows or challenging objectives, pre-acclimatization at home can accelerate in-country adaptation. Four main strategies, each with trade-offs:
Strategy 1 — Altitude tents and masks
Hypoxic tent systems simulate altitude while sleeping at home. Users sleep “at” 2,500-4,000 m equivalent, typically 4-8 hours nightly for 3-4 weeks before the trip. Brands include Hypoxico, Altitude Tech, and Higher Peak. Cost: $3,000-$8,000 to purchase, or $200-$400/month to rent. Used by elite endurance athletes and expedition climbers.
Strategy 2 — Pre-trip altitude trips
Travel to moderate altitude (2,500-3,500 m) 2-4 weeks before main trip, sleep at altitude for 5-10 days. Good examples: Denver/Aspen trip before Andean or Himalayan expedition. Maintains acclimatization benefit if within 30 days of main trip.
Strategy 3 — Altitude-specific training
Intermittent hypoxic training (IHT) with masks. Breath-holding protocols. Exercise at altitude simulator equipment. Altitude training camps in Colorado, Utah, or Ecuador. Often combined with general fitness preparation — see our high-altitude training guide.
Strategy 4 — Extended in-country itinerary
Arrive in destination country 7-10 days early. Start at moderate altitude, hike at progressively higher altitudes. Build in acclimatization time before main objective. For example, 1 week trekking to 3,500 m before an Everest or Kilimanjaro attempt.
What pre-acclimatization achieves
Reduces AMS incidence by 30-50%.
Accelerates in-country adaptation by 2-5 days.
Better sleep quality on arrival at altitude.
Potentially faster summit success.
Reduced Diamox requirements for some individuals.
What pre-acclimatization doesn’t replace
Proper in-country acclimatization protocols.
Ascent rate rules.
Rest days.
Medications if indicated.
Why Individuals Respond So Differently
Individual altitude response varies dramatically — up to 10x difference between people — due to genetic factors and physiological variations that fitness training cannot overcome. This is one of the most important and misunderstood facts about altitude.
Genetic factors at work
HIF gene variants affect hypoxia response at the cellular level.
EPO receptor sensitivity varies between individuals.
Tibetan populations developed altitude tolerance over thousands of years — very efficient oxygen use with moderate hemoglobin. Andean populations took a different evolutionary path — higher red blood cell count. Ethiopian highlanders show intermediate adaptation. Sherpa genetic advantage for extreme altitude performance has been well-documented. These adaptations took thousands of generations — they’re not available through individual training.
Elite athletes commonly get AMS — Olympic marathoners have died of HAPE.
Untrained individuals sometimes excel at altitude.
VO2 max at sea level doesn’t transfer to altitude performance.
Altitude-specific experience matters more than general fitness.
Your individual pattern is consistent
The good news: while altitude response varies between people, your own altitude pattern is relatively consistent. Past altitude success predicts future success. Past AMS predicts higher risk. Rate of acclimatization is typically consistent per individual. Keep an altitude journal — track altitudes, symptoms, ascent rates. Over 2-3 trips you’ll know your pattern and can plan accordingly.
◆
The Sherpa genetic advantage
Sherpa populations in the Khumbu region have evolved specific genetic adaptations for extreme altitude performance over roughly 10,000 years of high-altitude habitation. Adaptations include more efficient oxygen extraction, different mitochondrial function, and enhanced blood flow patterns. This is why Sherpa guides can often operate at altitudes where Western climbers struggle — it’s not just experience or fitness, it’s physiological inheritance. The lesson: if your genetics don’t grant you Sherpa-level altitude tolerance, respect that limitation. Build climbing progressions that account for your own altitude ceiling, not the guide’s. See our Everest climbing guide for more on Sherpa expedition partnerships.
Altitude Acclimatization FAQ: Your Common Questions Answered
What is altitude acclimatization?
Altitude acclimatization is the physiological process by which your body adapts to reduced oxygen availability at high elevations through a coordinated sequence of respiratory, cardiovascular, and hematologic changes occurring over hours to weeks. Not a single change but a cascade of adaptations beginning within minutes of altitude exposure and continuing to refine for weeks. Partially reversible upon return to sea level. Three phases: Phase 1 immediate response (minutes-hours) — breathing rate increases, heart rate elevates, blood pH shifts, diuresis begins. Phase 2 ventilatory acclimatization (days 1-7) — sustained increased breathing, kidney compensation for alkalosis, plasma volume reduces, oxygen carrying capacity per unit blood increases. Phase 3 hematologic acclimatization (weeks) — erythropoietin stimulates red blood cell production, RBC count increases 10-20% in 2-3 weeks, hemoglobin levels rise, muscle capillary density increases. Why acclimatization matters: reduces altitude sickness risk dramatically, enables sustained effort at otherwise impossible altitudes, improves sleep quality, maintains cognitive function, prevents life-threatening HACE and HAPE. What it does NOT do: cannot compensate for ascent rates too rapid, does not eliminate need for rest days, cannot prevent altitude sickness in all individuals, does not persist long after return to sea level (1-2 weeks), cannot make 8,000 m peaks safe for sustained habitation. Benefit persists 7-14 days after return to sea level, significant loss after 30 days, near-complete loss after 60-90 days. Acclimatization is a SLOW process that cannot be rushed through fitness, willpower, or medication alone. See our altitude sickness guide.
What does climb high sleep low mean?
Climb high, sleep low is the foundational altitude acclimatization protocol: ascend to a higher altitude during day for exposure and training stimulus, then descend to a lower altitude for sleeping to allow recovery without sustained hypoxia stress. The science: daytime altitude exposure triggers acclimatization responses (increased breathing, heart rate, EPO release), activity at higher altitude provides hypoxic training stimulus, sleeping at lower altitude allows better oxygen saturation during critical sleep hours, sleep quality at altitude is dramatically worse than at moderate elevation, poor sleep compounds altitude illness risk. Practical application: ascend 800-1,000 m during day hike, return 300-500 m for overnight camp, net sleeping altitude gain of 300-500 m per day, net acclimatization gain greater than direct ascent. Classic examples: Everest Base Camp trek hike to Nangkartshang Peak (5,090 m) during day, sleep at Dingboche (4,410 m). Kilimanjaro hike to Lava Tower (4,600 m), sleep at Barranco (3,900 m). Aconcagua carry loads to Camp 2, return to Camp 1. Denali triple carry strategy uses climb high sleep low inherently. Why works physiologically: hypoxic exposure stimulates red blood cell production without penalty, lower sleeping altitude allows 88-95% oxygen saturation vs 75-85% at higher altitude, cortisol levels lower with better sleep, immune function maintains better, mental acuity preserved, recovery accelerates. Quantified benefit: studies show ~40% better acclimatization than direct ascent. Every high-altitude expedition protocol incorporates it explicitly. Climb high sleep low is the single most important altitude acclimatization principle after gradual ascent rate.
What is the ascent rate rule for altitude?
The standard ascent rate rule: above 3,000 m, do not increase sleeping altitude by more than 300-500 m per day, with a rest day for every 1,000 m of sleeping altitude gained. WMS (Wilderness Medical Society) guidelines: below 2,500 m no restriction, 2,500-3,000 m ascend to sleep at less than 500 m/day, 3,000-5,000 m 300-500 m/day, above 5,000 m 200-300 m/day, rest day every 1,000 m of cumulative sleeping gain. Simplified 2-3-1 rule: 2 rest days after 2 days of significant ascent, 3 rest days when ascending above 4,000 m, 1 rest day for every 1,000 m gained above 3,000 m. Practical applications: Everest Base Camp trek Day 1-2 Lukla to Phakding, Day 3 Phakding to Namche Bazaar (830 m gain first time at altitude), Day 4 acclimatization rest day at Namche, Day 5 Namche to Tengboche, Day 6 Tengboche to Dingboche, Day 7 acclimatization day at Dingboche, Day 8 Dingboche to Lobuche with climb-high-sleep-low options, Day 9 Lobuche to Gorak Shep to EBC. Kilimanjaro 7-day Lemosho Days 1-2 below 3,000 m rapid ascent acceptable, Day 3 Crater to Shira Plateau 4,000 m+, Day 4 Barranco via climb-high-sleep-low, Days 5-6 Karanga and Barafu with proper pacing. Why rule varies: physiological burden increases exponentially with altitude, oxygen drops dramatically above 4,000 m, acclimatization ceiling approached at 5,500 m, individual variability increases. Rapid ascent violators see 25-50% AMS rates. Above 5,000 m rate violations cause most HACE/HAPE. Rules exist because they work. See our altitude sickness guide.
How long does it take to acclimatize to altitude?
Initial altitude acclimatization takes 7-10 days, with partial acclimatization occurring within 3-5 days at each new altitude and full adaptation to specific altitudes requiring 2-3 weeks. Immediate response (0-2 hours): breathing rate increases within minutes, heart rate elevates immediately, pulmonary artery pressure rises. Rapid phase (2-24 hours): continued hyperventilation, blood pH shifts, diuresis begins, plasma volume decreases. First week (days 1-7): kidney compensation for blood pH, sustained increased ventilation, enhanced oxygen delivery, sleep patterns normalize, exercise tolerance improves, most AMS resolves. Second and third weeks (days 8-21): red blood cell production accelerates, hemoglobin rising, oxygen carrying capacity increases 10-20%, muscular adaptations beginning. Months at altitude (weeks 3+): red blood cell count plateaus, muscle capillary density increases, mitochondrial efficiency improves, maximum achievable acclimatization reached in 4-6 weeks. By destination: moderate altitude (2,500-3,500 m) 2-3 days for most acclimatization, high altitude (3,500-5,500 m) 7-14 days, very high altitude (5,500-8,000 m) 2-4 weeks, extreme altitude (above 8,000 m) no sustainable acclimatization possible. Factors affecting speed: individual genetics (huge variation), prior altitude exposure within 30-60 days, age, fitness level (minimal effect), altitude reached, rate of ascent, hydration, medications (Diamox accelerates), sleep quality. Persistence after descent: benefits persist 7-14 days, significant loss after 30 days, near-complete after 60-90 days. Commercial trekking requires days. Expedition-grade acclimatization requires weeks. Both require respect for the timeline.
Can you pre-acclimatize before a trip?
Yes, pre-acclimatization is a legitimate strategy using hypoxic exposure at home to initiate altitude adaptation before traveling. Four strategies: Strategy 1 altitude tents — simulate altitude while sleeping, sea-level users sleep at 2,500-4,000 m equivalent, 4-8 hours nightly for 3-4 weeks before trip, cost $3,000-$8,000 system or $200-$400/month rental, brands Hypoxico, Altitude Tech, Higher Peak. Strategy 2 pre-trip altitude trips — travel to moderate altitude 2-4 weeks before, sleep at 2,500-3,500 m for 5-10 days, Denver/Aspen before Andean or Himalayan expedition, maintains benefit if within 30 days. Strategy 3 altitude-specific training — intermittent hypoxic training with masks, breath-holding protocols, exercise at altitude simulator, altitude training camps Colorado/Utah/Ecuador. Strategy 4 extended in-country itinerary — arrive 7-10 days early, progressive altitude hiking, build acclimatization before main objective, 1 week trekking to 3,500 m before Everest/Kilimanjaro attempt. What it achieves: reduces AMS incidence 30-50%, accelerates adaptation in country by 2-5 days, better sleep quality on arrival, potentially faster summit success. What it doesn’t replace: proper in-country acclimatization, ascent rate rules, rest days, medications. Medical considerations: baseline health check recommended, some conditions contraindicate tents, hemoglobin may increase requiring monitoring, pregnancy precludes tent use. Cost-benefit: budget trek usually unnecessary, moderate expedition (Kilimanjaro, EBC) optional helpful for time-constrained, serious expeditions (Denali, Aconcagua) strongly recommended, 8,000 m peaks essential, commercial Everest standard practice now. Pre-acclimatization is a useful tool but not a shortcut.
What is the hypoxic ventilatory response?
Hypoxic Ventilatory Response (HVR) is the automatic increase in breathing rate triggered by low oxygen levels — a critical physiological mechanism that varies significantly between individuals and largely determines acclimatization success. How HVR works: peripheral chemoreceptors in carotid bodies detect falling arterial oxygen levels, brainstem respiratory center receives signal, breathing rate and depth increase automatically, CO2 expelled faster with increased breathing, blood pH shifts toward alkalinity, arterial oxygen saturation improves. Individual variability: HVR varies 5-10x between individuals, largely genetic cannot be changed through training, some individuals have blunted HVR (higher AMS risk), others have robust HVR (better altitude tolerance), measurable in hypoxic chamber testing. Why HVR matters: primary physiological defense against hypoxia, strong HVR means better oxygen delivery at altitude, weak HVR means faster AMS onset, determines initial altitude ceiling, partially correlates with prior altitude success. HVR and altitude performance: elite high-altitude climbers typically have strong HVR, Sherpas have genetically enhanced HVR, Tibetan populations adapted HVR over millennia, individual HVR testing can predict altitude tolerance. HVR blunting factors: sleep (HVR decreases during sleep), alcohol, sedative medications, some sleep aids, aging (modest decline). Practical implications: avoid HVR suppressants before and during altitude trips, sleep apnea treatment critical, don’t take sleeping pills at altitude, minimize alcohol especially before sleep, consider acetazolamide to counter HVR blunting during sleep. Testing: hypoxic chamber testing at altitude medicine clinics, provides quantitative HVR measurement, useful for pre-expedition evaluation, not routinely needed for recreational climbers. HVR is fundamentally genetic but can be supported through good practices.
How does sleep affect altitude acclimatization?
Sleep quality at altitude is critical for acclimatization — poor sleep dramatically worsens altitude sickness risk, slows adaptation, and impairs cognitive function. Sleep at altitude challenges: oxygen saturation drops 5-10% lower during sleep vs awake, breathing becomes irregular (Cheyne-Stokes periodic breathing), waking from breath-holding events common, REM sleep reduced, total sleep time decreased, multiple night wake-ups. Physiological issues: periodic breathing 20-40 second cycles of hyperventilation then pauses, oxygen desaturation during apneic pauses, night-time hypoxemia more severe than daytime, cortisol elevated, growth hormone release disrupted, immune function impaired. Impact on climbers: cumulative sleep debt adds to altitude stress, decision-making decreases, physical recovery slowed, summit day compromised by prior nights’ poor sleep, AMS symptoms worsen with sleep deprivation. Improving sleep — acclimatization: follow gradual ascent rules strictly, sleep at lower altitude after climb-high days, allow 2-3 nights at new altitude before continuing, build in acclimatization days. Lifestyle: hydrate throughout day (empty bladder before bed), eat adequate calories (high carbs), exercise during day, sleep with head elevated, use warm sleeping bag, minimize caffeine after noon, avoid alcohol entirely, earplugs if needed. Medications: acetazolamide (Diamox) 125 mg at bedtime reduces periodic breathing, 2x daily benefits sleep, Ambien and benzodiazepines generally AVOIDED (suppress HVR), melatonin safer 3-5 mg before bed. Track: pulse oximeter during sleep, target SpO2 above 75-80% at 4,000+ m, subjective sleep quality, morning AMS symptoms. Good sleep equals faster acclimatization, poor sleep delayed acclimatization. See our altitude sickness guide.
Why do individuals respond so differently to altitude?
Individual altitude response varies up to 10x between people — due to genetic factors, prior altitude exposure, and physiological variations that fitness cannot overcome. Genetic factors: HIF gene variants affect hypoxia response, EPO receptor sensitivity varies, hemoglobin response differs, HVR genetics, vascular response to hypoxia, mitochondrial genetic variations. Population adaptations: Tibetan populations thousands of years adaptation very efficient oxygen use, Andean populations different genetic adaptations (higher red blood cell count), Ethiopian highlanders intermediate pattern, Sherpa elite altitude performance linked to genetics, adaptations took thousands of generations not available through training. Non-genetic factors: age (younger typically better but variable), recent altitude exposure (within 60 days), prior AMS history (strong predictor), current health, hydration, fatigue, stress, recent respiratory illness. Fitness fallacy: cardiovascular fitness poorly predicts altitude tolerance, elite athletes commonly get AMS, untrained individuals sometimes excel, VO2 max at sea level doesn’t transfer, altitude-specific fitness matters more. Predictable patterns: past altitude success predicts future, past AMS predicts higher risk, rate of acclimatization typically consistent per individual, altitude ceiling relatively stable per person. Unpredictable factors: different mountains may affect same person differently, year-to-year variations possible, minor illnesses dramatically affect response, stress events impact adaptation. Implications: don’t assume partner’s altitude tolerance is yours, don’t assume past success guarantees future, start conservative on first trip to specific altitude, build in buffer days, listen to YOUR body. High-risk profiles: first-time high altitude traveler, previous severe AMS or HACE/HAPE, cardiopulmonary conditions, medication-dependent conditions, age extremes. Strong performers: regular altitude experience, genetic predisposition, good sleep habits, conservative approach, attentive to body signals. Mountains accept all fitness levels — altitude doesn’t.
Authoritative Sources & Further Reading
Content reflects peer-reviewed altitude medicine research:
Wilderness Medical Society — WMS 2019 Practice Guidelines for Acute Altitude Illness
International Society for Mountain Medicine (ISMM) — Consensus statements on altitude acclimatization
High Altitude Medicine & Biology (journal) — Peer-reviewed altitude research
Peter Hackett, MD, & Robert Roach, PhD — Foundational altitude medicine research, Institute for Altitude Medicine
Himalayan Rescue Association (HRA) — Altitude medicine protocols, aid post data
American Alpine Club — Altitude illness reporting
Hypoxico, Altitude Tech — Pre-acclimatization technology and clinical studies
Reference texts: High Altitude Medicine and Physiology by Ward, Milledge & West; Going Higher by Charles Houston
This guide is one of 70 across 12 thematic clusters on Global Summit Guide. The master hub organizes every guide by experience tier, specific peak, skill area, and region.