<

Category: Gear & Equipment

Gear guides, affiliate checklists, layering systems, reviews

  • Best Trekking Poles in 2026: Ranked for Every Hiker

    Best Trekking Poles in 2026: Ranked for Every Hiker

    Best Trekking Poles in 2026: Tested, Ranked, and Expert-Recommended for Every Hiker

    As outdoor enthusiasts gear up for their adventures in 2026, the importance of choosing the right trekking poles cannot be overstated. These essential tools not only enhance stability and balance on uneven terrain but also help reduce strain on joints, making hikes more enjoyable. This comprehensive guide will delve into the best trekking poles available this year, highlighting their features, materials, and innovations. Readers will learn about the latest advancements in trekking pole technology, how to select the right length and adjustability, and the top brands leading the market. By addressing common concerns and providing expert recommendations, this article aims to equip hikers with the knowledge they need to make informed decisions.

    Which Trekking Pole Materials and Technologies Lead in 2026?

    The materials and technologies used in trekking poles have evolved significantly, impacting their performance and user experience. In 2026, the most common materials are carbon fiber and aluminum, each offering distinct advantages. Carbon fiber poles are known for their lightweight and high strength-to-weight ratio, making them ideal for long-distance hikers. Conversely, aluminum poles are typically more durable and cost-effective, appealing to budget-conscious adventurers.

    What Are the Benefits of Carbon Fiber vs. Aluminum Poles?

    Carbon fiber trekking poles provide several benefits, including reduced weight, which can enhance endurance during long hikes. They also offer excellent shock absorption, minimizing the impact on joints. However, they tend to be more expensive and can be less durable than aluminum poles, which are known for their robustness and resistance to bending. Aluminum poles are often favored for rugged terrains due to their durability, making them a reliable choice for heavy use. Ultimately, the choice between carbon fiber and aluminum poles depends on the hiker’s specific needs and budget.

    Further research underscores the exceptional properties that make carbon fiber a superior material for high-performance sports equipment, including trekking poles.

    Carbon Fiber Advantages for Trekking Poles

    Carbon fiber-reinforced composite materials by virtue of its high temperature resistance, corrosion resistance, light weight, high mechanical strength outstanding advantages emerge in the new material, in the sport of rowing or sailing, bike, badminton, skiing, golf, sleigh, archery, everywhere this black fiber figure.

    Study on carbon fiber composite materials in sports equipment, 2013

    How Do Shock Absorbing Features Improve Hiking Safety and Comfort?

    Shock absorbing features in trekking poles significantly enhance hiking safety and comfort by reducing the impact on joints during descents. These mechanisms work by dampening the force exerted on the poles, which can alleviate stress on the knees and ankles. Various technologies, such as internal springs or flexible shafts, are employed to provide this cushioning effect. Hikers using shock absorbing poles often report less fatigue and discomfort, allowing them to enjoy longer treks with greater ease.

    How to Choose the Right Trekking Pole Length and Adjustability for Your Needs?

    Selecting the appropriate trekking pole length is crucial for maintaining proper posture and balance while hiking. The right length allows for efficient energy transfer and reduces strain on the upper body. Adjustable poles offer versatility, accommodating different terrains and user preferences.

    What Are the Best Practices for Measuring and Adjusting Pole Length?

    To measure the correct pole length, hikers should stand upright and bend their elbows at a 90-degree angle. The grip of the pole should align with the wrist when the arm is at this angle. For adjustable poles, familiarizing oneself with the locking mechanisms is essential to ensure stability during use. Common mistakes include using poles that are too long or too short, which can lead to discomfort and inefficient hiking techniques.

    Which Adjustable Pole Mechanisms Offer Durability and Ease of Use?

    Several adjustable mechanisms are available in trekking poles, including twist-lock, lever-lock, and push-button systems. Twist-lock mechanisms are lightweight and easy to use but may require more frequent adjustments. Lever-lock systems provide a secure hold and are generally more durable, making them suitable for rugged conditions. Push-button mechanisms offer quick adjustments but may be less reliable over time. Choosing a mechanism that balances durability and ease of use is essential for a satisfying hiking experience.

    What Are the Top Trekking Pole Brands and Their Innovations in 2026?

    In 2026, several brands stand out for their innovative designs and commitment to quality in trekking poles. These brands are continuously pushing the boundaries of technology to enhance user experience and performance.

    Which Brands Lead in Lightweight and Durable Pole Designs?

    Brands like Black Diamond and Leki are renowned for their lightweight and durable trekking poles. Black Diamond’s Carbon Z poles are particularly popular among ultralight hikers, offering a compact design without sacrificing strength. Leki’s Micro Vario series combines lightweight materials with robust construction, making them a favorite for both casual and serious trekkers. User reviews often highlight the balance of weight and durability as key factors in their purchasing decisions.

    How Are Brands Integrating Eco-Friendly Materials and Technology?

    Sustainability is becoming increasingly important in the outdoor industry, and many trekking pole brands are responding by integrating eco-friendly materials. Companies like REI and MSR are leading the charge by using recycled materials in their pole designs and adopting sustainable manufacturing practices. This shift not only reduces environmental impact but also appeals to environmentally conscious consumers who prioritize sustainability in their purchasing decisions.

    How Do Shock Absorbing Trekking Poles Reduce Impact and Enhance Performance?

    Shock absorbing trekking poles are designed to minimize the impact on joints, enhancing overall performance during hikes. By absorbing shock, these poles help reduce fatigue and discomfort, allowing hikers to maintain their energy levels over longer distances.

    What Types of Shock Absorbing Systems Are Available?

    Various shock absorbing systems are available in trekking poles, including internal springs and flexible shafts. Internal springs compress upon impact, providing immediate cushioning, while flexible shafts allow for a slight bend during use, distributing force more evenly. Each system has its advantages, and the choice often depends on personal preference and hiking style.

    When Should Hikers Opt for Shock Absorbing Poles?

    Hikers should consider using shock absorbing poles when traversing steep descents or uneven terrain, where the impact on joints is more pronounced. These poles are particularly beneficial for individuals with pre-existing joint issues or those looking to enhance comfort during long hikes. Expert recommendations suggest that shock absorbing poles can significantly improve the hiking experience, especially on challenging trails.

    What Are the Essential Maintenance Tips and Accessories for Trekking Poles?

    Proper maintenance of trekking poles is essential for ensuring their longevity and performance. Regular care can prevent wear and tear, allowing hikers to enjoy their poles for many seasons.

    How to Properly Clean and Store Your Trekking Poles?

    Cleaning trekking poles involves wiping down the shafts and grips with a damp cloth after each use to remove dirt and moisture. For storage, poles should be kept in a dry place, preferably disassembled if they are collapsible. Avoid leaving them in direct sunlight or extreme temperatures, as this can degrade materials over time.

    Which Accessories Enhance Pole Functionality and Longevity?

    Several accessories can enhance the functionality and longevity of trekking poles. Rubber tips provide better traction on hard surfaces, while baskets prevent sinking into soft ground. Additionally, wrist straps can improve grip and control, making them a valuable addition for serious hikers. Investing in these accessories can significantly enhance the overall hiking experience.

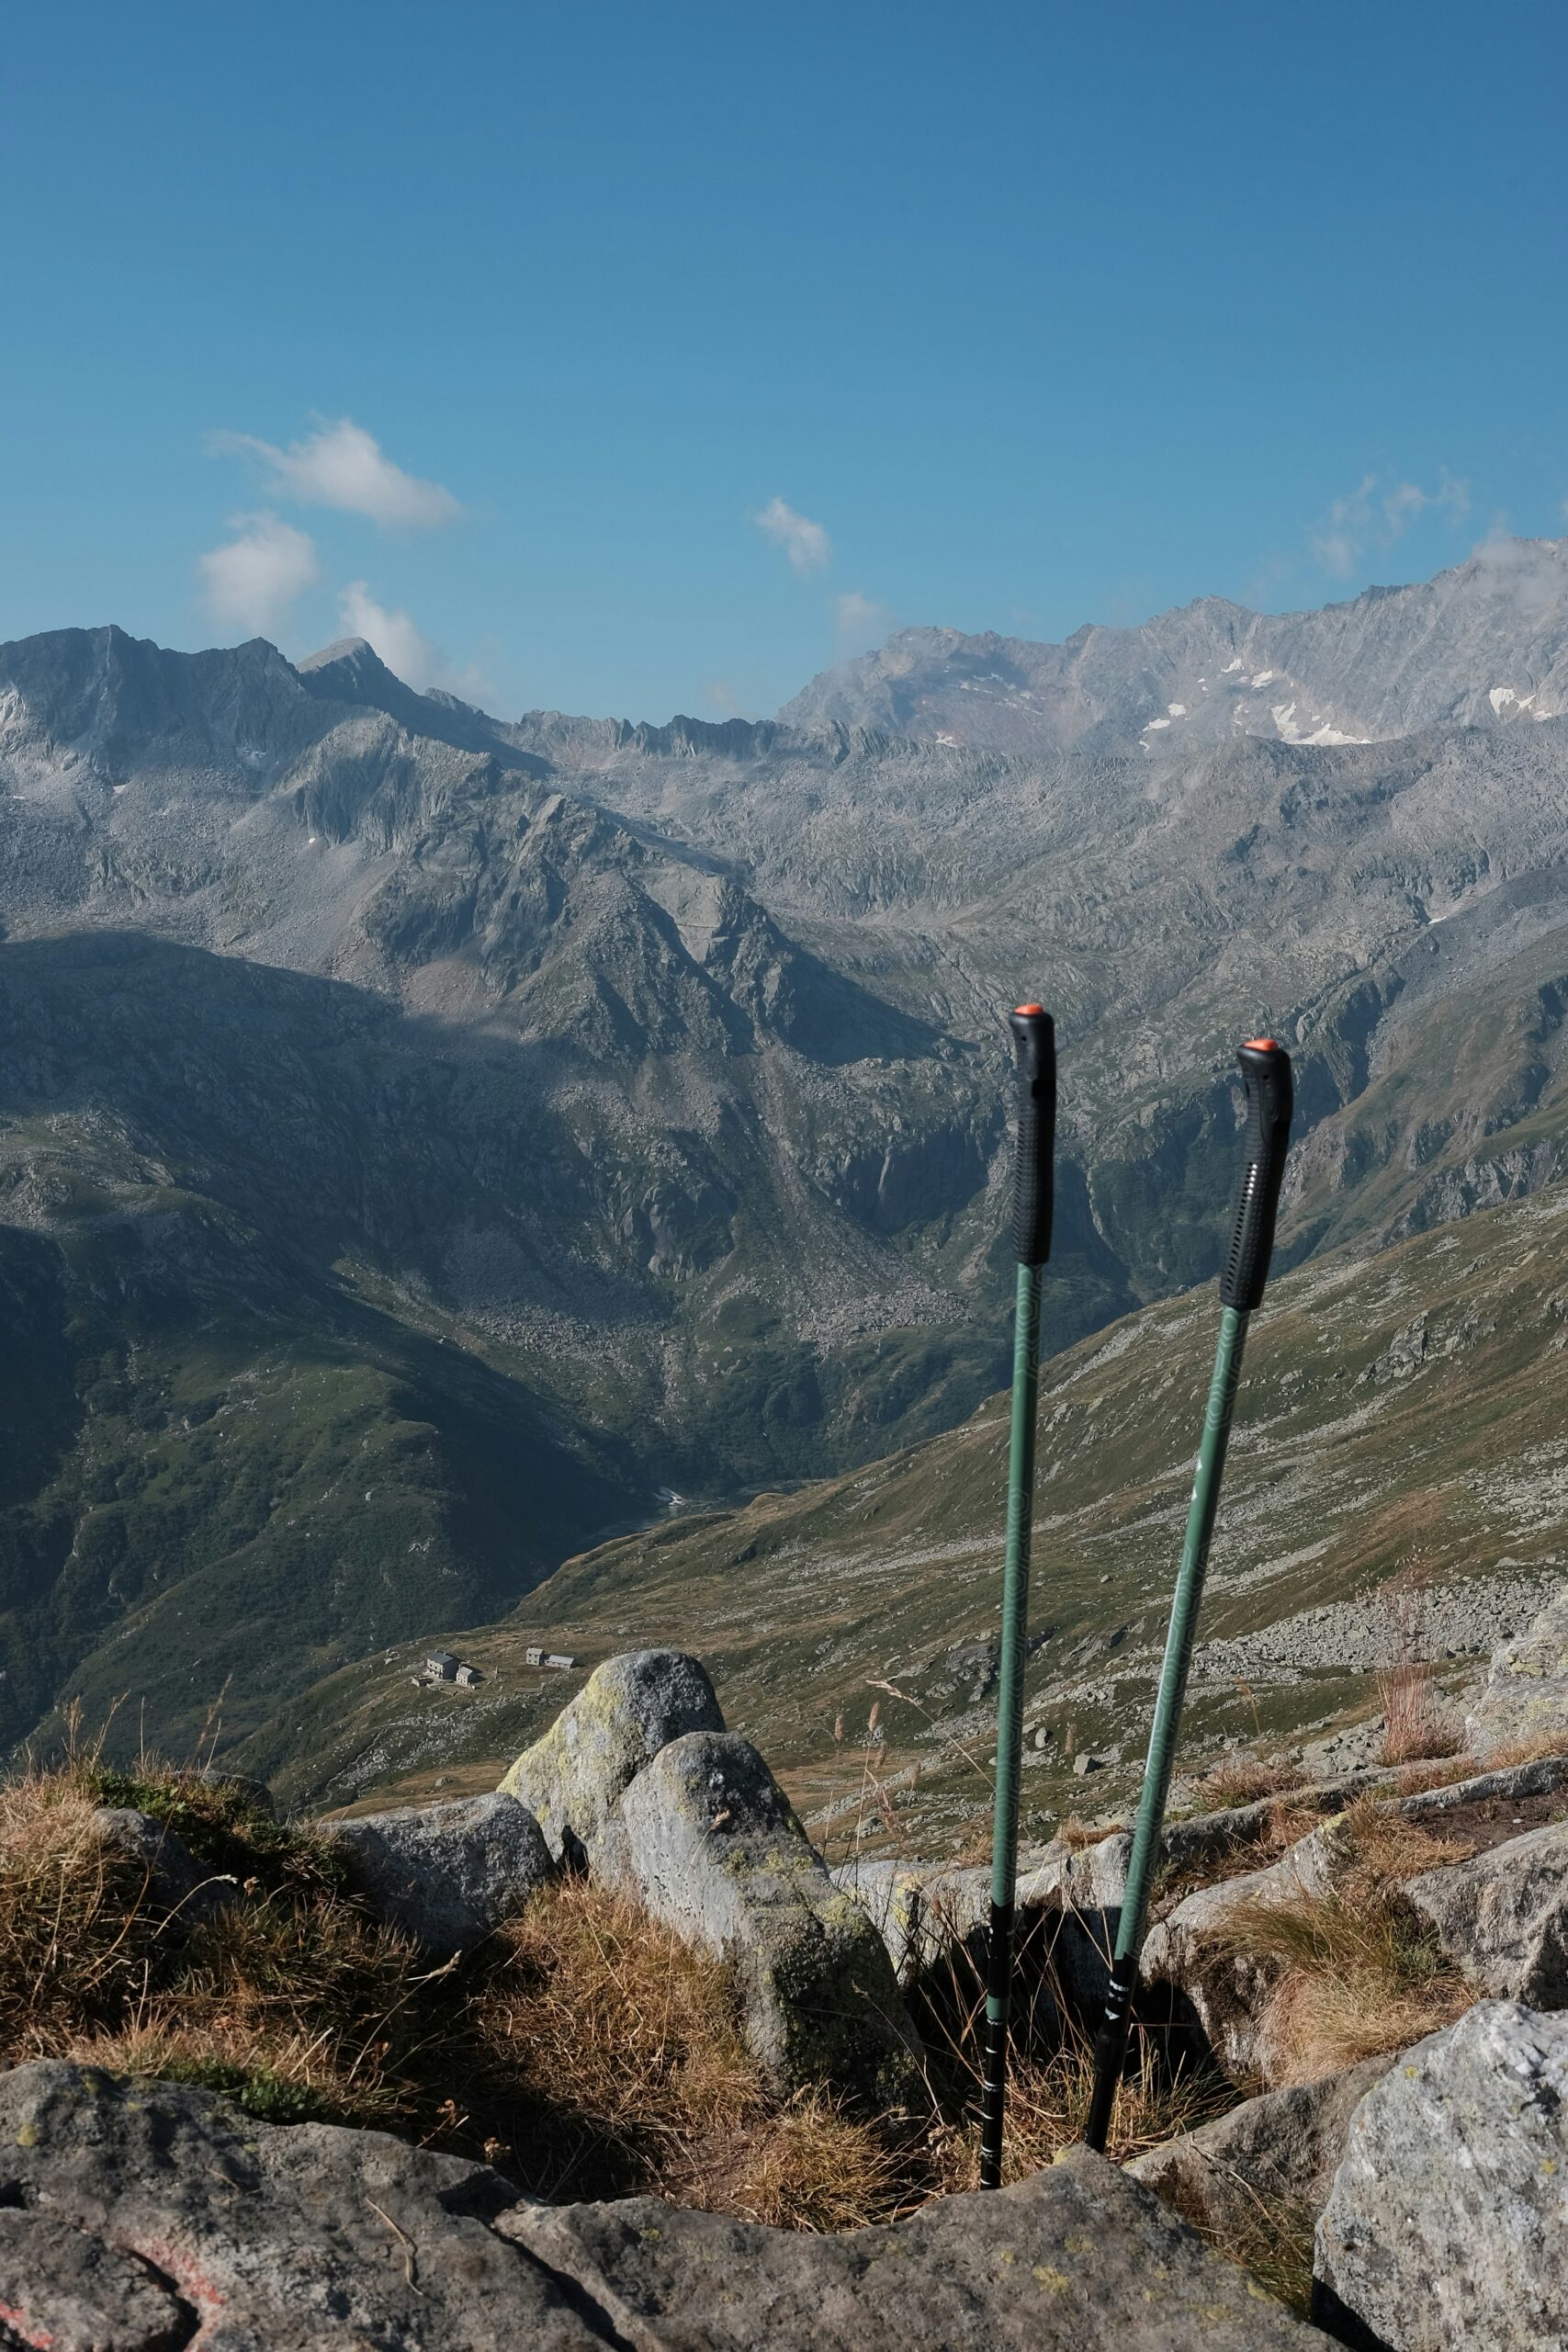
    How Do Lightweight and Collapsible Trekking Poles Improve Travel Convenience?

    Lightweight and collapsible trekking poles are designed for convenience, making them ideal for travelers and backpackers. Their compact design allows for easy packing and transport, ensuring that hikers can take them on any adventure.

    What Are the Advantages of Collapsible Poles for Backpackers?

    Collapsible poles offer several advantages for backpackers, including reduced weight and space-saving capabilities. They can be easily stowed in a backpack or attached externally without adding significant bulk. This feature is particularly beneficial for long-distance hikers who need to minimize their pack weight while maintaining essential gear.

    How to Balance Weight and Durability in Lightweight Pole Selection?

    When selecting lightweight trekking poles, hikers should consider the balance between weight and durability. While lighter materials like carbon fiber are appealing for their weight savings, they may sacrifice some durability. Conversely, heavier aluminum poles offer robustness but can add unnecessary weight. Hikers should assess their specific needs and choose poles that provide the best combination of both attributes for their hiking style.

    What Are Common FAQs About Trekking Poles Answered by Experts?

    As trekking poles gain popularity, many common questions arise regarding their use and benefits. Addressing these FAQs can help new hikers make informed decisions.

    How Long Should Trekking Poles Be for Different Terrains?

    The ideal length of trekking poles varies based on terrain. For flat surfaces, poles should be adjusted to a height that allows for a 90-degree elbow angle. On steep inclines, shorter poles can provide better stability, while longer poles may be beneficial on descents. Adjusting the length according to the terrain can enhance comfort and efficiency.

    Can Trekking Poles Help Reduce Knee Pain and Fatigue?

    Yes, trekking poles can significantly reduce knee pain and fatigue by distributing weight more evenly and providing additional support. Studies have shown that using poles can decrease the load on the knees by up to 25%, making them a valuable tool for hikers, especially those with joint concerns. Many users report a noticeable reduction in fatigue during long hikes when using poles.

    Indeed, scientific studies confirm that the use of trekking poles actively contributes to mitigating physical strain and muscle damage during strenuous activities.

    Trekking Poles Reduce Muscle Soreness & Damage

    poles reduces muscle damage after a day of hiking [18]. The authors measured less delayed-onset muscle soreness in the trekking pole.

    A review of biomechanical and physiological effects of using poles in sports, N Nagengast, 2023

    Where to Find Trusted Reviews and How to Interpret Trekking Pole Ratings?

    Finding reliable reviews and understanding trekking pole ratings is crucial for making informed purchasing decisions. With numerous options available, knowing where to look can save time and money.

    What Criteria Are Used in Expert Pole Performance Testing?

    Expert performance testing typically evaluates several criteria, including weight, durability, adjustability, and shock absorption. These tests often involve real-world hiking scenarios to assess how poles perform under various conditions. Understanding these criteria can help consumers identify which poles best meet their needs.

    How to Use Comparison Tables and User Feedback Effectively?

    When researching trekking poles, utilizing comparison tables can provide a clear overview of features and specifications. Additionally, reading user feedback can offer insights into real-world performance and durability. Combining these resources allows hikers to make well-rounded decisions based on both expert evaluations and user experiences.

    Conclusion

    Choosing the right trekking poles can significantly enhance your hiking experience by providing stability, reducing joint strain, and improving overall comfort. With advancements in materials and technology, options like carbon fiber and shock-absorbing features cater to various hiking needs and preferences. By understanding the benefits and selecting the right poles, you can enjoy longer, more enjoyable treks. Explore our curated selection of top-rated trekking poles to find the perfect fit for your next adventure.

  • Altitude Sickness Treatment: How to Recover Safely

    Altitude Sickness Treatment: How to Recover Safely

    Mountain landscape with hiker at high elevation, representing altitude sickness treatment

    Altitude Sickness Treatment: How to Recover Safely at High Elevation

    Altitude sickness, also known as acute mountain sickness (AMS), occurs when individuals ascend to high elevations too quickly, leading to a range of symptoms that can affect their health and well-being. This comprehensive guide will explore effective treatments and recovery strategies for altitude sickness, ensuring that adventurers can enjoy their high-altitude experiences safely. Readers will learn about the symptoms of altitude sickness, the role of medications like Diamox, and various remedies and acclimatization techniques. Understanding these aspects is crucial for anyone planning to travel to high elevations, as it can significantly impact their safety and enjoyment. This article will cover the symptoms and early warning signs, the use of Diamox, effective remedies, acclimatization techniques, emergency treatments, and mountain-specific risks.

    What Are the Symptoms and Early Warning Signs of Altitude Sickness?

    Altitude sickness manifests through various symptoms that can escalate if not addressed promptly. Recognizing these early warning signs is essential for effective treatment and recovery. Common symptoms include headaches, nausea, dizziness, and fatigue, which can significantly hinder one’s ability to enjoy high-altitude activities.

    Which Symptoms Indicate Acute Mountain Sickness?

    Acute mountain sickness (AMS) is characterized by specific symptoms that can vary in severity. Key indicators include:

    • Severe Headache: Often described as a throbbing pain, this is one of the most common symptoms.
    • Confusion: Cognitive impairment can occur, making it difficult to think clearly.
    • Loss of Coordination: Difficulty in maintaining balance or performing physical tasks can signal worsening conditions.

    Recognizing these symptoms early can prompt timely intervention, preventing the progression to more severe forms of altitude sickness.

    Indeed, understanding the prevalence and severity of acute mountain sickness is crucial for effective intervention.

    Acute Mountain Sickness: Prevention & Treatment Interventions

    Up to half of people who ascend to heights above 2500 m may develop acute mountain sickness, pulmonary oedema, or cerebral oedema, with the risk being greater at higher altitudes, and with faster rates of ascent. We conducted a systematic review and aimed to answer the following clinical questions: What are the effects of interventions to prevent, and to treat, acute mountain sickness?

    Altitude sickness, 2010

    How to Recognize Severe Conditions: HAPE and HACE?

    High altitude pulmonary edema (HAPE) and high altitude cerebral edema (HACE) are severe forms of altitude sickness that require immediate attention.

    • Symptoms of HAPE: This condition is marked by shortness of breath, a persistent cough, and fluid retention, which can lead to respiratory failure if untreated.
    • Symptoms of HACE: Key signs include severe headaches, confusion, and loss of consciousness, indicating swelling in the brain.
    • Importance of Immediate Descent: Both HAPE and HACE are life-threatening and necessitate immediate descent to lower altitudes for recovery.

    Understanding these severe conditions is vital for anyone venturing into high-altitude environments, as early recognition can save lives.

    How Does Diamox Dosage Aid in Altitude Sickness Treatment?

    Close-up of Diamox tablets with mountain trail background, highlighting altitude sickness treatment

    Diamox, or acetazolamide, is a medication commonly used to prevent and treat altitude sickness. It works by accelerating the acclimatization process, allowing the body to adjust to lower oxygen levels more effectively.

    What Is the Recommended Diamox Dosage for Prevention and Recovery?

    For effective altitude sickness management, the recommended Diamox dosage varies based on individual needs:

    • Dosage for Prevention: Typically, a dose of 125-250 mg taken twice daily is advised for those ascending to high altitudes.
    • Dosage for Recovery: If symptoms develop, increasing the dosage to 250 mg twice daily can help alleviate symptoms.
    • Timing of Administration: It is best to start taking Diamox at least 24 hours before ascending to high altitudes for optimal effectiveness.

    Following these guidelines can significantly enhance the body’s ability to cope with altitude changes.

    What Are the Side Effects and Contraindications of Diamox?

    While Diamox is effective, it is essential to be aware of its potential side effects and contraindications:

    • Common Side Effects: These may include tingling in the fingers and toes, increased urination, and gastrointestinal disturbances.
    • Severe Reactions: Allergic reactions, though rare, can occur and may require immediate medical attention.
    • Who Should Avoid Diamox: Individuals with a known allergy to sulfa drugs or those with certain medical conditions should consult a healthcare provider before use.

    Understanding these factors can help individuals make informed decisions about using Diamox for altitude sickness.

    What Are Effective High Altitude Sickness Remedies and Medical Treatments?

    In addition to medications like Diamox, several remedies and medical treatments can aid in the recovery from altitude sickness.

    How Does Oxygen Therapy Support Recovery from Altitude Sickness?

    • Mechanism of Oxygen Therapy: By providing supplemental oxygen, it helps alleviate symptoms by increasing the amount of oxygen available to the body.
    • When to Use Oxygen Therapy: It is particularly beneficial for individuals experiencing severe symptoms or those with pre-existing respiratory conditions.
    • Benefits of Oxygen Therapy: This treatment can lead to rapid symptom relief and improved overall well-being, allowing individuals to acclimatize more effectively.

    Utilizing oxygen therapy can be a game-changer for those struggling with altitude sickness.

    Further research underscores the efficacy of oxygen therapy, comparing it favorably with other advanced treatments.

    Hyperbaric & Oxygen Therapy for AMS Treatment

    This study demonstrated that hyperbaric therapy was as effective as oxygen therapy for the immediate treatment of AMS. Both methods were successful in resolving or improving the symptoms of AMS.

    Treatment of acute mountain sickness: hyperbaric versus oxygen therapy, 1991

    What Alternative Medications and Natural Remedies Are Available?

    Several alternative treatments and natural remedies can complement traditional medical approaches to altitude sickness:

    • Ginger: Known for its anti-nausea properties, ginger can help alleviate gastrointestinal symptoms associated with altitude sickness.
    • Ginkgo Biloba: This herb may improve blood circulation and oxygen delivery, potentially reducing the risk of altitude sickness.
    • Hydration: Staying well-hydrated is crucial, as dehydration can exacerbate symptoms.

    These remedies can provide additional support for individuals seeking to manage altitude sickness effectively.

    How to Acclimatize to High Altitude: Prevention Tips and Techniques

    Climbers resting at high altitude, emphasizing acclimatization techniques for altitude sickness prevention

    Acclimatization is a vital process for preventing altitude sickness. Gradual ascent and proper preparation can significantly reduce the risk of developing symptoms.

    Effective prevention strategies often combine environmental adjustments with pharmacological support to enhance the body’s adaptation.

    Altitude Sickness Prevention: Acclimatization & Medications

    Acute exposure to high altitude can cause acute altitude illnesses and is associated with impaired cognitive and physical performance. The most effective preventive strategies currently recommended include environmental acclimatization (slow ascent and/or pre-acclimatization) or pharmacological support of acclimatization using acetazolamide.

    Dexamethasone for prevention of AMS, HACE, and

    HAPE and for limiting impairment of performance after rapid ascent to high altitude: a narrative review, H Gatterer, 2025

    What Are Best Practices for Gradual Acclimatization?

    To acclimatize effectively, consider the following best practices:

    • Adding Rest Days: Incorporate rest days into your itinerary to allow your body to adjust to higher elevations.
    • Climb High, Sleep Low: Ascend to higher altitudes during the day but return to lower elevations to sleep, promoting acclimatization.
    • Monitoring Symptoms: Pay close attention to how your body responds to altitude changes and be prepared to descend if symptoms arise.

    Implementing these strategies can enhance your body’s ability to adapt to high altitudes.

    How Do Hydration, Nutrition, and Rest Prevent Altitude Sickness?

    Proper hydration, nutrition, and rest are essential components of altitude sickness prevention:

    • Hydration Strategies: Drink plenty of fluids to maintain hydration levels, as dehydration can worsen symptoms.
    • Nutritional Needs: Consuming a balanced diet rich in carbohydrates can provide the energy needed for physical exertion at high altitudes.
    • Importance of Rest: Adequate rest is crucial for recovery and acclimatization, allowing the body to adapt to lower oxygen levels.

    By prioritizing these factors, individuals can significantly reduce their risk of altitude sickness.

    What Emergency Treatments and Descent Protocols Ensure Safe Recovery?

    In the event of altitude sickness, knowing the appropriate emergency treatments and descent protocols is critical for ensuring safety.

    When and How Should Descent Be Initiated?

    Descent should be initiated as soon as severe symptoms are recognized.

    • Setting Objective Cutoffs: Establish clear criteria for when to descend, such as the onset of severe headaches or confusion.
    • Turnaround Time: Implement a turnaround time to ensure that individuals do not push themselves beyond safe limits.
    • Safety Measures: Always prioritize safety by descending to lower altitudes where symptoms can be managed more effectively.

    Understanding when and how to descend can prevent complications associated with altitude sickness.

    What Are the Guidelines for Using Portable Oxygen and Medical Support?

    Using portable oxygen and seeking medical support can be lifesaving in severe cases of altitude sickness.

    • When to Use Portable Oxygen: If symptoms persist despite descent, using portable oxygen can provide immediate relief.
    • Benefits of Portable Oxygen: It helps restore oxygen levels in the body, alleviating symptoms and improving overall function.
    • Medical Support Considerations: Always have a plan for accessing medical support in remote areas, as timely intervention can be crucial.

    These guidelines can enhance safety and recovery for those affected by altitude sickness.

    How Do Mountain-Specific Risks Affect Altitude Sickness Treatment and Recovery?

    Different mountains present unique risks that can influence altitude sickness treatment and recovery strategies.

    What Are the Unique Altitude Sickness Risks on Everest, Kilimanjaro, and Denali?

    • Risks on Everest: Extreme altitude and harsh weather conditions increase the likelihood of severe altitude sickness.
    • Risks on Kilimanjaro: Rapid ascent without proper acclimatization can lead to AMS, HAPE, or HACE.
    • Risks on Denali: The combination of extreme cold and high altitude can exacerbate symptoms and complicate recovery.

    Understanding these risks is essential for developing effective treatment plans.

    How Should Treatment and Recovery Plans Be Tailored to Specific Mountains?

    Tailoring treatment and recovery plans to specific mountains involves considering various factors:

    • Acclimatization Strategies: Adjust ascent rates and rest days based on the mountain’s elevation and conditions.
    • Weather Considerations: Monitor weather patterns that may impact safety and recovery.
    • Logistical Planning: Ensure access to medical support and resources during the climb.

    By customizing plans to the specific challenges of each mountain, climbers can enhance their safety and recovery outcomes.

    Frequently Asked Questions

    What is the difference between Acute Mountain Sickness (AMS) and High Altitude Pulmonary Edema (HAPE)?

    Acute Mountain Sickness (AMS) is a common condition that occurs when individuals ascend to high altitudes too quickly, leading to symptoms like headaches, nausea, and fatigue. In contrast, High Altitude Pulmonary Edema (HAPE) is a more severe condition characterized by fluid accumulation in the lungs, resulting in symptoms such as shortness of breath and a persistent cough. While AMS can often be managed with acclimatization and hydration, HAPE requires immediate medical attention and descent to lower altitudes.

    How can I prepare for a high-altitude trek to minimize the risk of altitude sickness?

    Preparation for a high-altitude trek involves several key strategies. First, ensure you are physically fit and accustomed to hiking. Gradual ascent is crucial; plan your itinerary to include rest days and avoid rapid elevation changes. Staying well-hydrated and consuming a diet rich in carbohydrates can also help. Additionally, consider pre-acclimatization techniques, such as spending time at intermediate altitudes before your trek, and consult a healthcare provider about medications like Diamox for preventive measures.

    What should I do if I experience symptoms of altitude sickness while hiking?

    If you experience symptoms of altitude sickness while hiking, the first step is to stop ascending and rest. Monitor your symptoms closely; if they worsen, initiate a descent to lower altitudes immediately. Hydration is essential, so drink plenty of fluids. If symptoms persist or become severe, such as confusion or difficulty breathing, seek medical assistance as soon as possible. Always prioritize safety and do not push through severe symptoms.

    Are there specific foods or drinks that can help prevent altitude sickness?

    Yes, certain foods and drinks can aid in preventing altitude sickness. Staying well-hydrated is crucial, so drink plenty of water and consider electrolyte-rich beverages. Foods high in carbohydrates, such as pasta, rice, and fruits, can provide the necessary energy for physical exertion at high altitudes. Additionally, ginger tea may help alleviate nausea, while foods rich in antioxidants, like berries, can support overall health during your trek.

    What role does physical fitness play in preventing altitude sickness?

    Physical fitness plays a significant role in preventing altitude sickness. Individuals who are physically fit tend to have better cardiovascular health, which can enhance oxygen delivery to tissues during high-altitude activities. Regular aerobic exercise can improve your body’s ability to acclimatize to lower oxygen levels. However, even fit individuals can experience altitude sickness, so it’s essential to combine fitness with proper acclimatization strategies and hydration to minimize risks.

    How can I recognize when to seek medical help for altitude sickness?

    Recognizing when to seek medical help for altitude sickness is crucial for safety. If you experience severe symptoms such as persistent headaches, confusion, loss of coordination, or difficulty breathing, it’s essential to descend immediately and seek medical assistance. Additionally, if symptoms do not improve with rest and hydration, or if they worsen, do not hesitate to contact a healthcare professional. Early intervention can prevent serious complications associated with altitude sickness.

    Conclusion

    Effectively managing altitude sickness is essential for ensuring a safe and enjoyable high-altitude experience. By understanding symptoms, utilizing medications like Diamox, and implementing acclimatization strategies, adventurers can significantly reduce their risk of severe complications. Prioritizing preparation and awareness can enhance overall well-being during mountain treks. For more insights and resources on altitude sickness prevention and treatment, explore our comprehensive guides today.

  • Conquer Peaks: Global Summit Guide for Mountain Climbing

    Conquer Peaks: Global Summit Guide for Mountain Climbing

    Positive femele mountain climbers having a break on Aiguille d’Entreves mountain ridge

    Conquer Peaks: Your Global Summit Guide for Mountain Climbing — The Complete Hub
    Master Hub · Updated April 2026

    Conquer Peaks: Your Global Summit Guide for Mountain Climbing

    The master index for every guide on Global Summit Guide — 71 in-depth guides organized into 12 thematic clusters covering beginner progression, the Seven Summits, Everest, Kilimanjaro, altitude physiology, gear, technical mountaineering, and regional expeditions. Whether you’re researching your first 5,000 m peak or planning an 8,000 m project, this is the starting point.

    71
    In-depth
    guides
    12
    Thematic
    clusters
    24+
    Major peaks
    covered
    4
    Progression
    tiers

    Mountain climbing rewards careful preparation more than almost any other adventure pursuit. The peaks are demanding, the conditions unpredictable, and the difference between a memorable summit and a serious incident usually comes down to decisions made weeks — sometimes months — before you ever set foot on the mountain. This hub is the orientation document we wish every climber had before their first major objective: a complete index of every guide on Global Summit Guide, organized so you can find what you need without wading through a 200-post blog archive.

    How the hub is organized

    Every guide on Global Summit Guide is built from primary climbing databases — the Himalayan Database, American Alpine Club / American Alpine Journal, UIAA standards, regional park authorities (NPS, TANAPA, Argentine Provincial Parks), and current operator publications. Guides are grouped into 12 thematic clusters matching how climbers actually research: by experience tier, by specific peak, by skill area, and by region. Every cluster has an anchor guide (marked ★) that serves as the natural entry point if you’re new to that cluster’s topic. Fact-check date: April 19, 2026.

    What This Hub Actually Is

    Most mountaineering sites are organized chronologically — latest blog post at the top, older posts buried below. That works for news. It doesn’t work for climbers researching a specific peak or skill.

    Global Summit Guide is built differently. The 71 guides indexed below are organized by how climbers actually use them: by current experience level, by the peak you’re targeting, by the skill you’re trying to build. If you’re planning Kilimanjaro, you don’t need to wade through Everest content to find what you need. If you’re training for altitude, the physiology guides live together. If you’re debating which 6,000 m peak should be your first, the Seven Summits and Beginner Progression clusters sit next to each other.

    Three design principles shape the hub:

    • Every guide stands alone — you can land on any one of the 71 guides without reading anything else and still get a complete answer.
    • Every guide links back here — no orphan pages, no dead ends. Wherever you land, you can navigate up to this hub and laterally to sibling guides.
    • Clusters reflect real use cases — not arbitrary categories. A climber planning Everest reads differently than a beginner choosing their first climb; the hub reflects that.

    If you’re brand new to the site, scroll to the Progression Ladder below — it maps the natural reading sequence from complete beginner to expedition-level climber. If you’re researching a specific topic, use the sidebar Table of Contents or jump directly to the relevant cluster in Section 03.


    The 12 Clusters at a Glance

    Each cluster is a coherent research area — a set of guides that belong together because climbers use them together. The table below summarizes all 12; the detailed cluster sections follow.

    #ClusterGuidesPrimary tierAnchor guide
    01Seven Summits & Flagship3Intermediate → ExpertSeven Summits Guide
    02Beginner Progression5BeginnerMountaineering for Beginners
    03Technical & Expert5ExpertTop 50 Technical Objectives
    04Non-Technical Treks8All levelsTop 50 Non-Technical Peaks
    05Everest3ExpertHow to Climb Everest
    06Kilimanjaro7Beginner → IntermediateKilimanjaro Climbing Guide
    07Other Seven Summits Peaks7Intermediate → AdvancedDenali / Mont Blanc / Aconcagua
    08Altitude, Training & Physiology10All levelsAltitude Acclimatization Explained
    09Gear & Equipment7All levelsMountain Climbing Gear List
    10Regional Guides6VariesGreatest Alps Compared
    11Japan & Local (Fuji, Utah)6BeginnerMount Fuji Climb Guide
    12Planning, Safety & Weather4All levelsMountain Climbing Costs

    Total: 71 guides across 12 clusters. Every guide appears in exactly one cluster.


    Every Guide, Organized by Cluster

    The anchor guide for each cluster (marked ★) is the best starting point if you’re new to the cluster’s topic. All other guides can be read in any order.

    02
    Beginner · 5 guides

    Beginner Progression

    Starting from zero — terminology, first peaks, and how to use this site.

    For climbers just entering the sport. These guides answer the foundational questions: what’s the difference between hiking and mountaineering, which peak should I attempt first, and how do I actually use a guide to plan a climb. Start here if you haven’t yet completed a 4,000 m+ objective.

    05
    Peak-specific · 3 guides

    Everest

    The world’s highest mountain — permits, costs, routes, and current-season updates.

    Mount Everest (8,849 m) is the most consequential climb on Earth. These guides cover everything from current 2026 season changes through complete cost breakdowns to route-by-route selection. For training and EBC trekking, see Clusters 04 and 08.

    08
    Skill area · 10 guides

    Altitude, Training & Physiology

    The biggest single factor in high-altitude success — managing your body above 3,000 m.

    Every 6,000 m+ climber needs to master altitude. These guides cover the physiology of acclimatization, the full spectrum of altitude illness (AMS, HACE, HAPE), structured training programs, frostbite and breathing techniques — the skills that separate people who make it to the summit from those who turn around sick.

    11
    Local & accessible · 6 guides

    Japan & Local Peaks (Fuji, Utah)

    High-quality peaks close to home — Japan’s iconic volcano and Utah’s Wasatch range.

    Not every great climb requires international travel. Japan’s Mount Fuji is a classic cultural summit accessible to fit hikers; Utah’s Wasatch and Timpanogos ranges offer genuine alpine experience within two hours of Salt Lake City. These guides cover the peaks that let you build skills close to home.

    12
    Planning · 4 guides

    Planning, Safety & Weather

    The cross-cutting skills: budgeting, avalanche awareness, forecasting, industry trends.

    These guides don’t belong to a single peak or region — they’re the cross-cutting decisions every climber faces. How to budget a multi-year project, how to read a mountain forecast, how to stay out of avalanche terrain, and what’s changed in the broader mountaineering landscape this season.


    Progression: From Beginner to Expert

    Most climbers work through these tiers sequentially, though some skip ahead with proven prior experience. Each tier lists the handful of guides we’d read first if we were starting at that level today.

    Tier 1 · Beginner
    01
    First Peaks

    Hiking experience, no technical skills. Looking for first 4,000–5,000 m objectives.

    Tier 2 · Intermediate
    02
    Altitude & Glacier

    2–4 prior trips. Comfortable with crampons. Targeting 5,000–6,000 m peaks like Kilimanjaro or Aconcagua.

    Tier 3 · Advanced
    03
    Expedition Level

    Proven 6,000 m+ experience. Pursuing Denali, Aconcagua, Mont Blanc, and the Seven Summits project.

    Tier 4 · Expert
    04
    Extreme & Technical

    7,000 m+ summits and technical climbing. 8,000 m expeditions, Nepal’s technical peaks, polar objectives.

    Match your goals to your timeline

    Progression is measured in years, not months. Most climbers spend 1–2 years at Tier 1, 2–3 years at Tier 2 before their first major 6,000 m peak, 3–5 years at Tier 3 completing progressively harder Seven Summits, and ongoing years at Tier 4 for technical or 8,000 m objectives. Skipping tiers dramatically elevates risk — the progressions exist for sound physiological and skills-building reasons.


    Frequently Asked Questions

    What is the Global Summit Guide hub?

    The Global Summit Guide hub is the master index page that organizes every guide on the site — 71 in total — into 12 thematic clusters. It serves as the starting point for climbers researching a specific peak, planning their first major climb, or progressing through a multi-year mountaineering project. Every other guide on the site links back to this hub, and the hub links forward to every guide.

    Which guide should I start with?

    Start with the cluster that matches your current goal. Complete beginners should start with the Beginner Progression cluster — specifically Mountaineering for Beginners and 10 Best Mountains to Climb for Beginners. Climbers planning a first major peak should look at the Seven Summits & Flagship cluster, then drill into the relevant peak-specific cluster (Kilimanjaro, Everest, or Other Seven Summits Peaks). Climbers building skills should read the Altitude & Physiology cluster alongside the Gear cluster.

    How are the 12 clusters organized?

    Clusters are organized by the way climbers actually use guides: by experience level (Beginner Progression, Technical & Expert), by specific peak (Everest, Kilimanjaro, Other Seven Summits Peaks), by skill area (Altitude & Physiology, Gear), by objective type (Non-Technical Treks, Seven Summits & Flagship), and by region (Regional Guides, Japan & Local). A single guide may naturally touch multiple clusters but is listed once, in its primary cluster.

    Do I need to read the guides in any particular order?

    No. Each guide is written to stand alone. That said, most climbers benefit from working broad-to-narrow: start with a flagship overview (Seven Summits Guide or Mountaineering for Beginners), then read the peak-specific guide for your target climb, then drill into the skill-specific guides (Altitude Acclimatization, Gear List, Training for High Altitude). The Progression Ladder section above maps a typical reading sequence by experience tier.

    How often are the guides updated?

    Every guide is reviewed at least twice per year. Peak-specific guides (Everest, Kilimanjaro, Aconcagua, Denali) are updated each climbing season to reflect current permit fees, operator pricing, route changes, and season-specific trends. Gear guides are refreshed annually. The most recent update date for each guide is shown on the guide itself, and every guide cites its source databases (Himalayan Database, AAJ, UIAA, national park authorities) for fact-checking.

    Where can I find information about a specific peak not listed?

    The 71 guides in this hub cover the most-climbed and most-searched peaks. If you’re researching a lesser-known peak, check the Regional Guides cluster first — it covers the Alps, Andes, Atlas, Nepal’s technical peaks, Oceania, and culturally significant summits. The Peak Profile Template in the Technical & Expert cluster is also useful for structuring your own research on any peak not covered.


    Authoritative Sources & Further Reading

    Every guide in this hub is researched and fact-checked against the primary databases and authorities that document mountaineering activity, route information, and expedition statistics:

    • The Himalayan Database — Authoritative source for 8,000 m peak statistics, originally compiled by Elizabeth Hawley
    • American Alpine Club & American Alpine Journal — Annual record of North American and international climbing expeditions
    • UIAA (International Mountaineering and Climbing Federation) — Global climbing standards, route grading, and stewardship
    • NPS Denali National Park — Official Denali permits, route data, and seasonal statistics
    • TANAPA (Tanzania National Parks Authority) — Kilimanjaro regulations and fee structure
    • Argentine Provincial Park Authority — Aconcagua permitting and seasonal summit data
    • Wilderness Medical Society — Practice guidelines for altitude illness diagnosis and treatment
    • Leave No Trace Center for Outdoor Ethics — Backcountry stewardship principles for alpine environments
    • Peer-reviewed altitude physiology research (acclimatization, hydration, supplemental oxygen)
    • Operator pre-trip briefings: International Mountain Guides, RMI Expeditions, Mountain Madness, Alpine Ascents
    Published: February 15, 2026
    Last updated: April 19, 2026
    Next review: July 2026
    Start Your Climbing Journey

    Choose Your Mountain — Plan Your Next Climb

    This hub is the navigation layer. When you’re ready to commit to a specific objective, start with the Beginner Progression cluster if you’re new, the Seven Summits cluster if you’re planning a multi-year project, or the peak-specific clusters (Everest, Kilimanjaro, Other Seven Summits Peaks) for your target climb.

    Browse the 12 Clusters →
Language »