Global Summit Guide logo featuring mountain imagery, symbolizing hiking and mountaineering resources for trip planning and safety.

Tag: Utah peakbagging

  • Cascade Mountain Utah Hike: A Long Wasatch Summit Climb

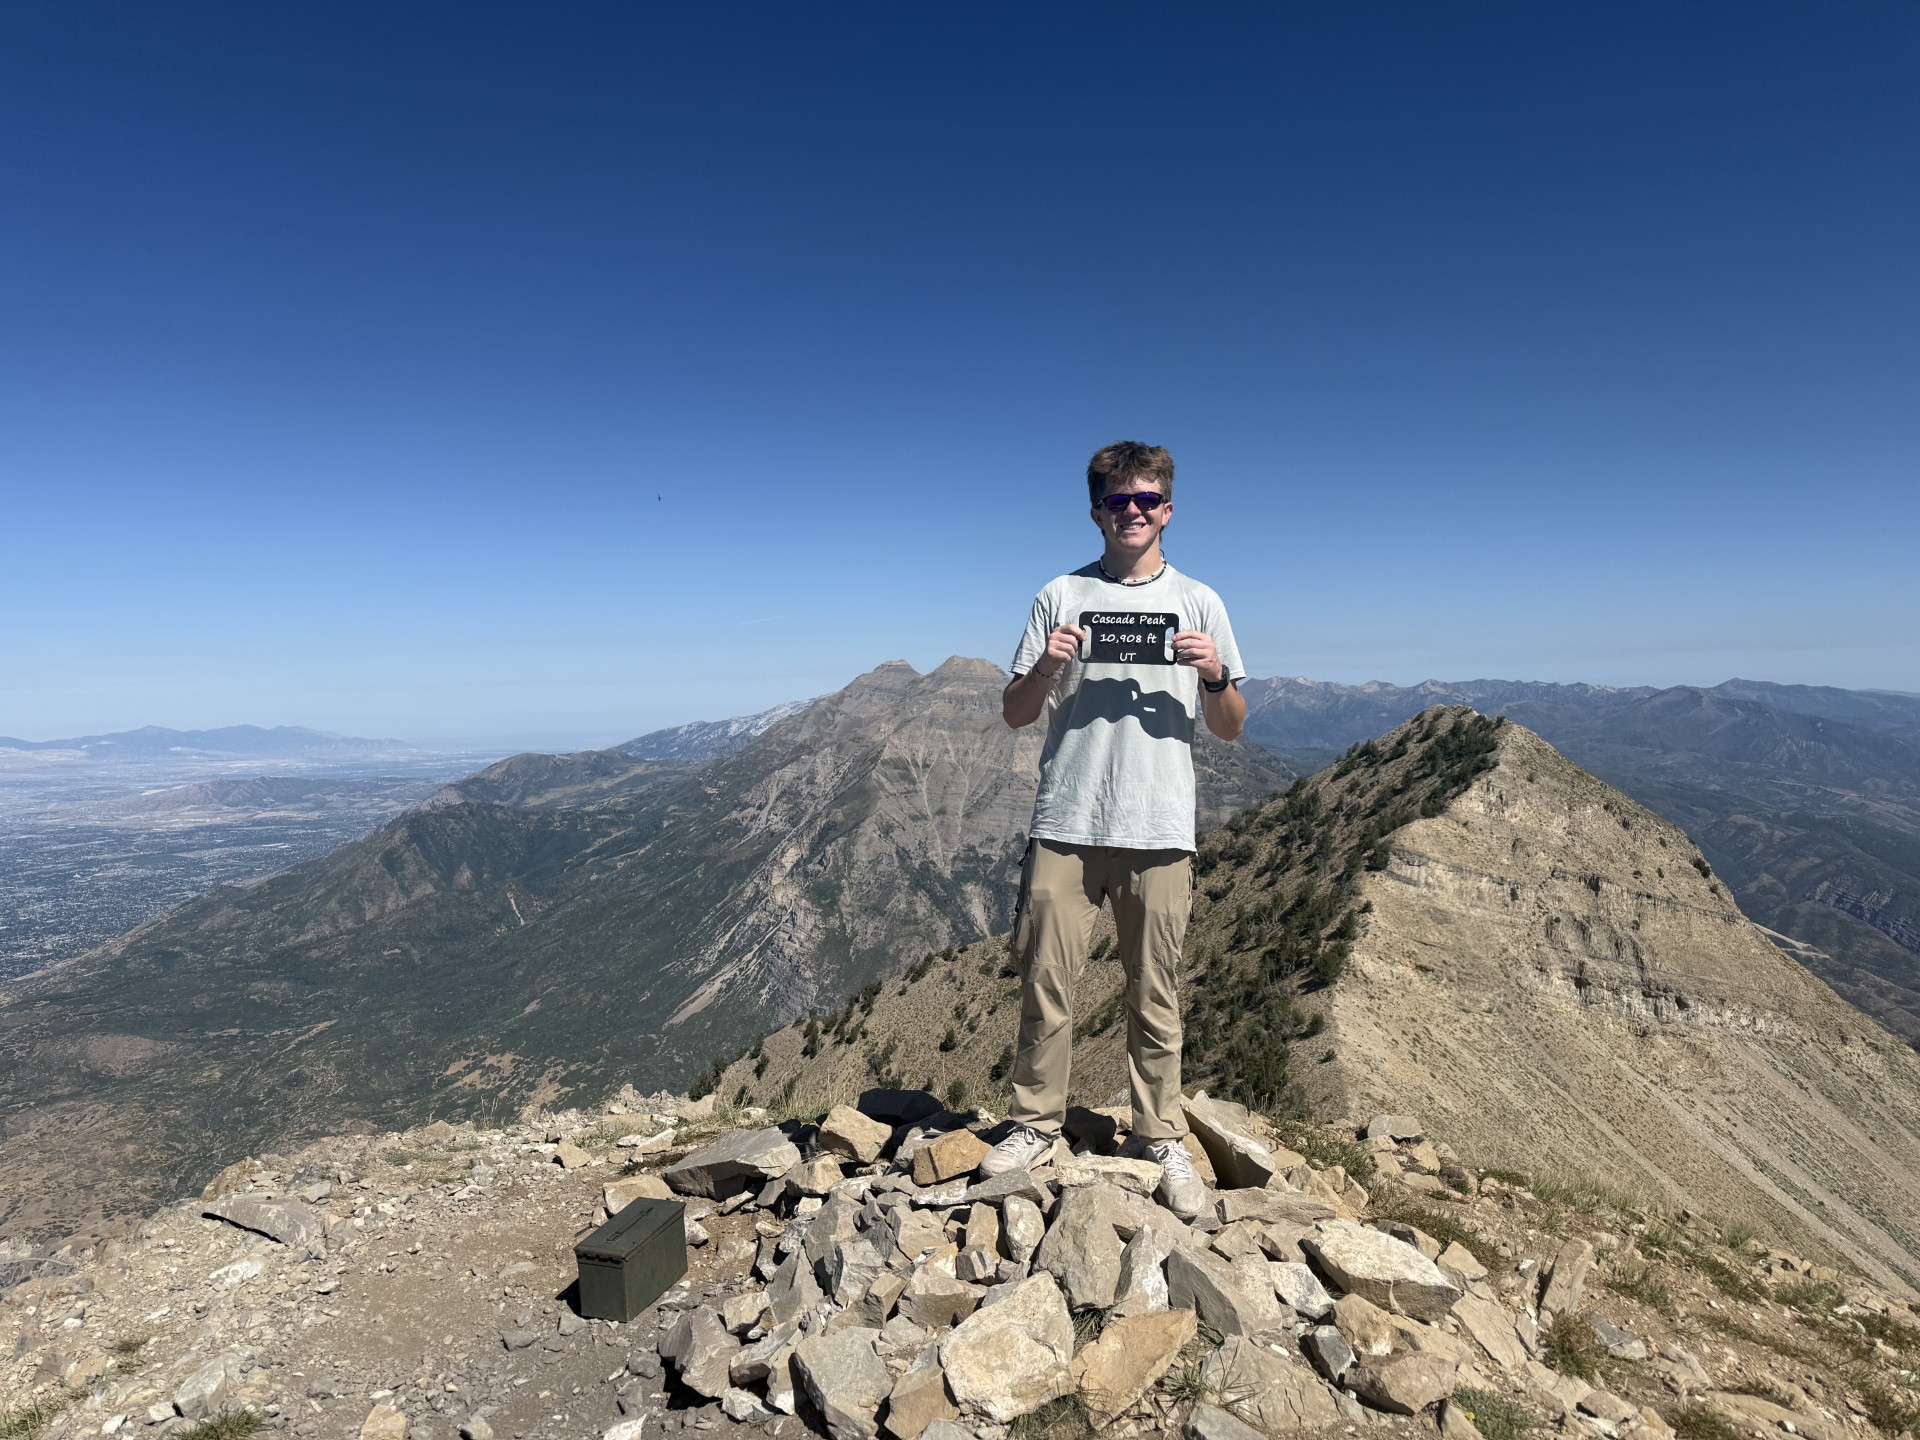
    Cascade Mountain Utah summit at 10,908 feet with the rugged Wasatch ridge behind
    First-Hand Field Post · Utah County · Wasatch Seven · 10,908 Feet

    Cascade Mountain Utah: Dawson & Chandler’s Long Climb Above Provo Canyon

    Mount Timpanogos gets the crowds. Cascade Mountain gets the long ridge, route-finding and the feeling that the summit keeps moving away from you. Dawson Ludlow and Chandler recently climbed Cascade’s 10,908-foot summit, adding a first-hand ascent to Global Summit Guide’s Utah County coverage—and reinforcing why this peak should never be treated as simply a lower version of Timpanogos.

    First-hand summit photosWasatch Seven objectiveExact track not inventedUtah County architecture linked
    10,908 ftCascade summit
    Wasatch 7Utah Valley challenge
    Long dayRoute-dependent mileage
    Near TimpSouth of Provo Canyon
    The direct answer

    Is Cascade Mountain Worth Climbing?

    Yes—if you already like long Wasatch days and want something quieter and less straightforward than Mount Timpanogos. Cascade is a serious Utah County peak whose difficulty comes from more than its 10,908-foot elevation.

    The mountain rises immediately south of Provo Canyon and forms one of the dominant walls above Orem and Provo. Its summit sits lower than Timpanogos, Provo Peak and several other Wasatch giants, but the most common routes require a long approach, substantial vertical, repeated ridge gains and losses, navigation and sections of scrambling.

    Dawson and Chandler described the climb as a super-long day. That matches the mountain’s reputation. Published South Ridge/Dry Fork route estimates vary from roughly 12 to 15 miles depending on the start, road access, exact line and tracking method, while total gain varies substantially because the ridge repeatedly gives elevation back.

    Until their GPX is logged, this field post does not assign an exact mileage or elevation-gain number to their climb. The summit is firsthand. The route statistics below are reference ranges.

    Summit10,908 ft
    CharacterLong + rugged
    Common routeDry Fork / South Ridge
    TerrainTrail + ridge + scramble
    NeighborMount Timpanogos
    Best forExperienced Wasatch hikers
    Why the numbers vary: older Dry Fork/South Ridge reports range from roughly 12 to 15 miles and approximately 3,700 to 5,500 feet of accumulated gain. Starting lower, road accessibility and the repeated ridge undulations can materially change the track. This is exactly why we are not assigning a fake precision to Dawson and Chandler’s climb before their GPS track is available.
    The first-hand story

    A Summit That Does Not Come Cheap

    Cascade looks close from Utah Valley. Once you are on the mountain, the geometry feels completely different.

    From the valley

    The Mountain Looks Almost Too Accessible

    Cascade dominates the east side of Orem and Provo. From below, it is easy to see the summit ridge and mentally compress the mountain into one continuous climb. The reality is more complicated: access starts behind the obvious front face, and the ridge system stretches much farther than it appears from town.

    On the route

    Distance Becomes the Story

    Dawson and Chandler’s description was simple: super long. That matters because Cascade does not give the psychological rhythm of a highly developed trail such as Timpanogos. You make progress, lose elevation, climb again, traverse, negotiate rougher terrain—and still have another piece of ridge ahead.

    High on Cascade

    The Terrain Opens Up

    The upper mountain is broad, pale and exposed. The summit photographs show the open limestone ridge, Utah Valley dropping away to the west and a long line of Wasatch terrain extending behind the climbers. There is very little visual shelter on the final mountain.

    At 10,908 feet

    The Summit Makes the Day Make Sense

    The reward is the perspective. Cascade sits between the urban Wasatch Front and the high country around Timpanogos, giving a summit view that feels much more isolated than the cities visible below would suggest.
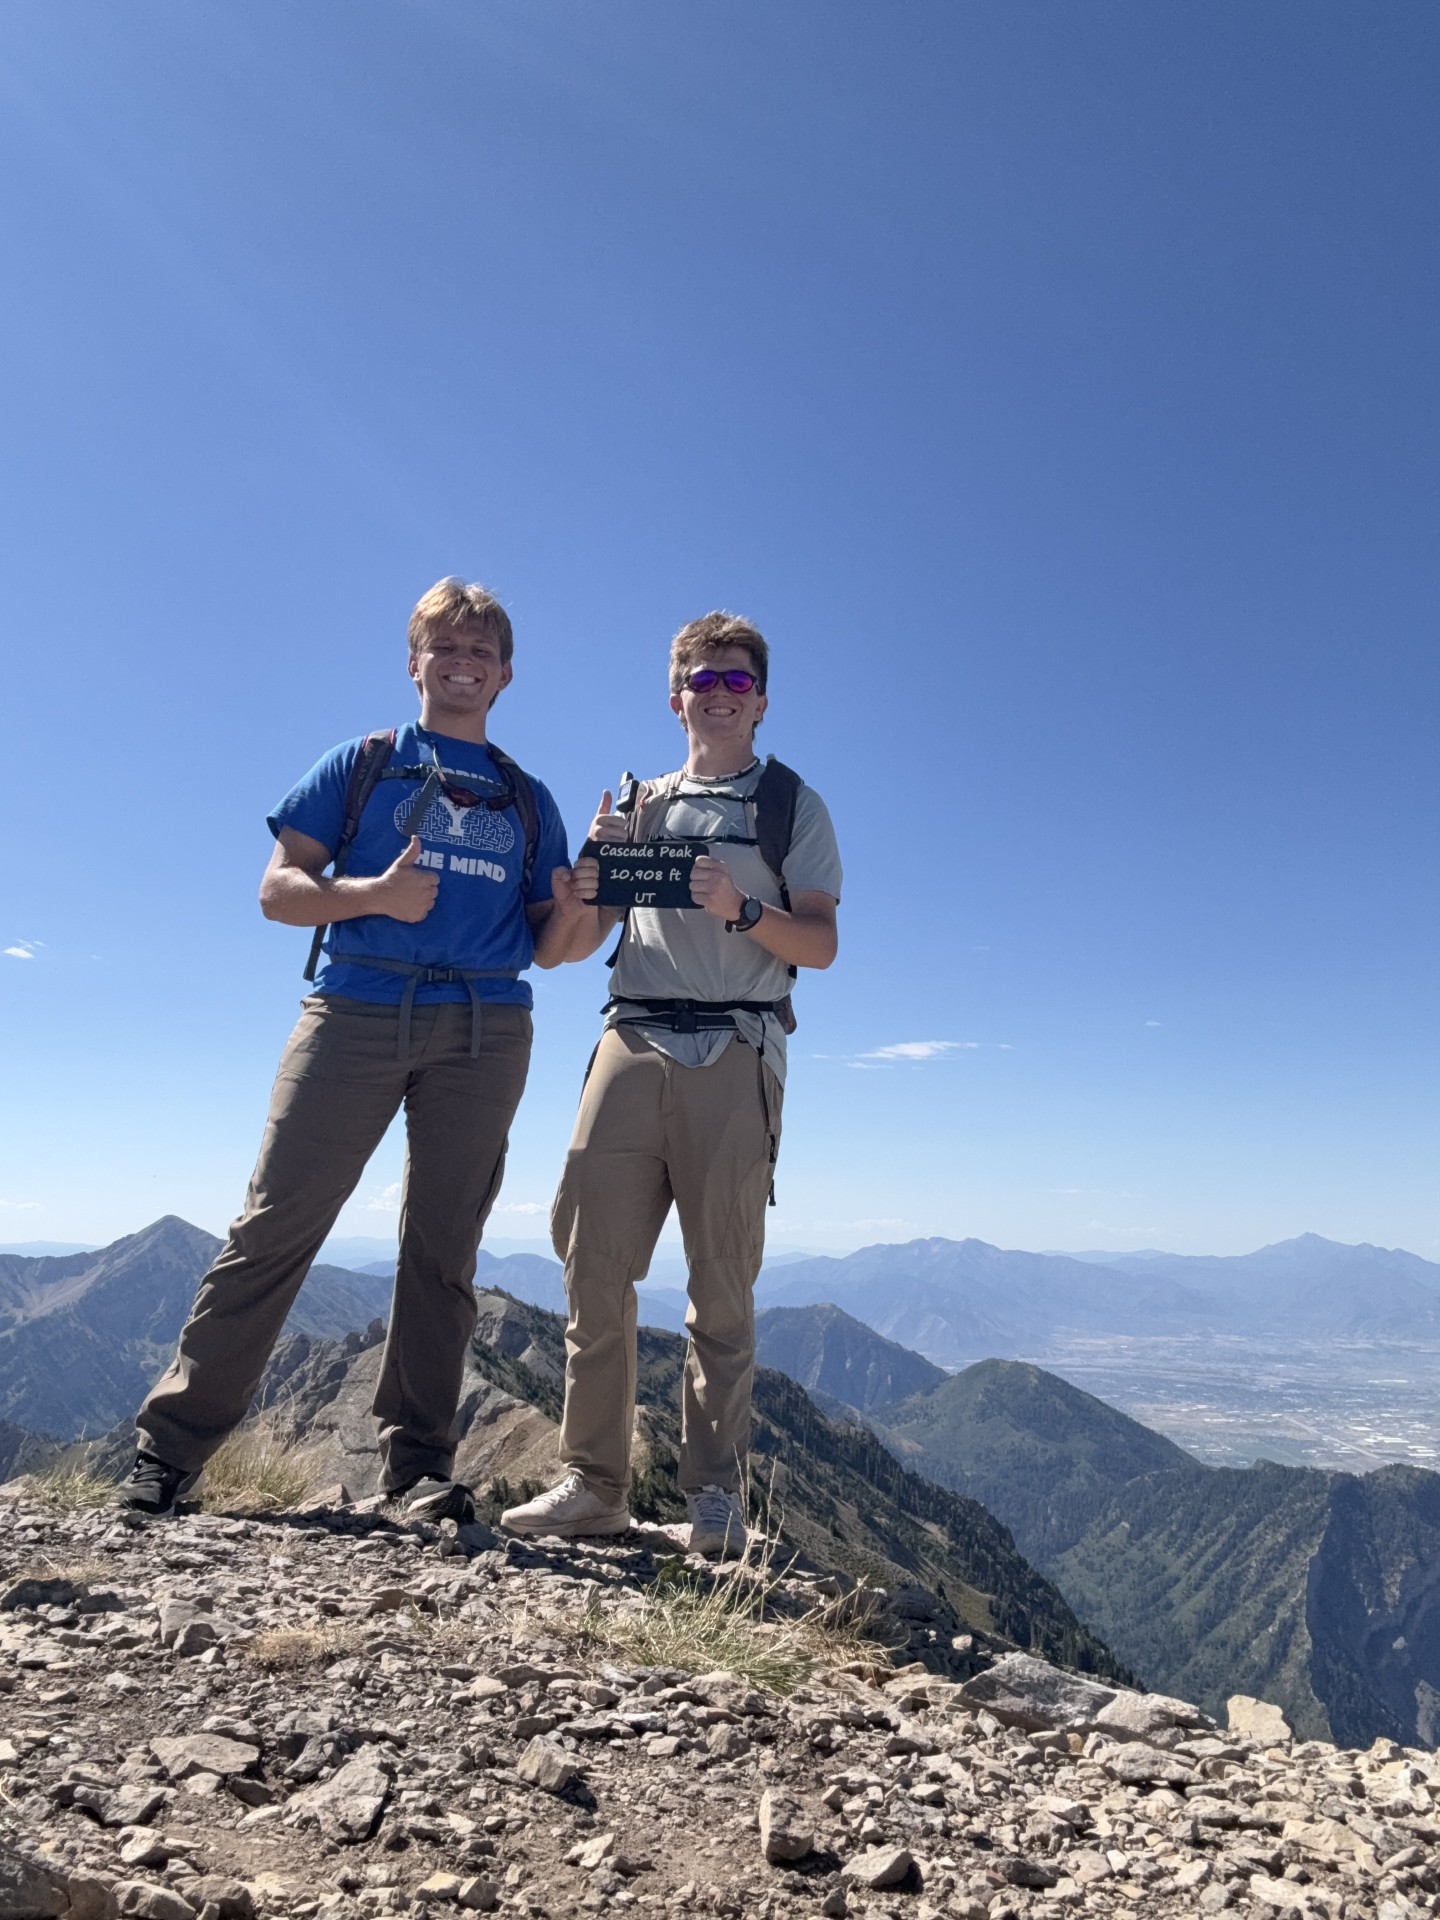
    Two climbers together on the 10,908-foot summit of Cascade Mountain Utah
    Summit reached

    Dawson and Chandler on Cascade Mountain.

    The summit sign reads 10,908 feet. Behind them, Utah Valley and the central Wasatch make clear why Cascade belongs in the Wasatch Seven even though it falls just short of 11,000 feet.

    Reference route—not claimed as their exact track

    The Common Dry Fork / South Ridge Route

    Until the climb track is logged, use this section as route context rather than a reconstruction of Dawson and Chandler’s exact line.

    Route elementPublished range / characterWhy it matters
    Summit elevation10,908 ftUtah County Atlas and summit marker agree
    Common approachDry Fork → South RidgeFrequently described as one of the more straightforward Cascade routes
    Published distance~12–15 mi RT depending startRoad access and route choice change the total materially
    Published gain~3,700–5,500 ft accumulatedRidge ups and downs make net elevation misleading
    TerrainTrail → ridge travel → scramblingNavigation becomes more important beyond the saddle
    CommitmentFull-day objectiveEarly start and turnaround planning matter even in good weather
    Approach

    Dry Fork to the High Saddle

    Published accounts describe a long approach from the Kyhv Peak Road / Rock Canyon high-country side toward the saddle south of Cascade. The lower miles can feel like ordinary Wasatch trail hiking, which makes it easy to underestimate what remains.

    Ridge

    The Mountain Starts Taking Elevation Back

    From the saddle, the route turns into a long northward ridge journey. Intermediate rises and dips mean the summit is not reached by one clean final climb. Total accumulated gain is therefore higher than a simple trailhead-to-summit calculation.

    South summit area

    Do Not Stop at the Wrong High Point

    Cascade has more than one significant summit point. The true 10,908-foot summit is the higher northern objective. A long day can make the nearer high point feel psychologically final before the route actually is.

    Return

    The Ridge Has to Be Re-Climbed

    The same undulations that make the approach deceptive remain on the way home. This is one reason Cascade can feel dramatically longer than its net elevation profile suggests.

    Lower than Timp—often harder mentally

    Why Cascade Feels So Long

    The summit elevation is not the right measure of this mountain’s difficulty.

    01

    Repeated Elevation

    You do not simply climb from trailhead to summit. Ridge travel repeatedly spends and re-earns vertical feet.

    02

    Navigation Load

    A less-developed route requires constant small decisions. That adds mental fatigue to physical fatigue.

    03

    False-Finish Psychology

    Ridge points look like they should be the end. Then another section appears. Cascade can feel longer than the map says.

    04

    Loose Terrain

    Every mile on rough limestone and scree costs more energy than a mile on smooth trail.

    05

    Exposure to Weather

    The high ridge provides little shelter. Wind, heat and thunderstorms have more opportunity to influence a long day.

    06

    The Descent Is Still Long

    The summit is only the midpoint. Fatigue arrives before the technical and navigation decisions are finished.
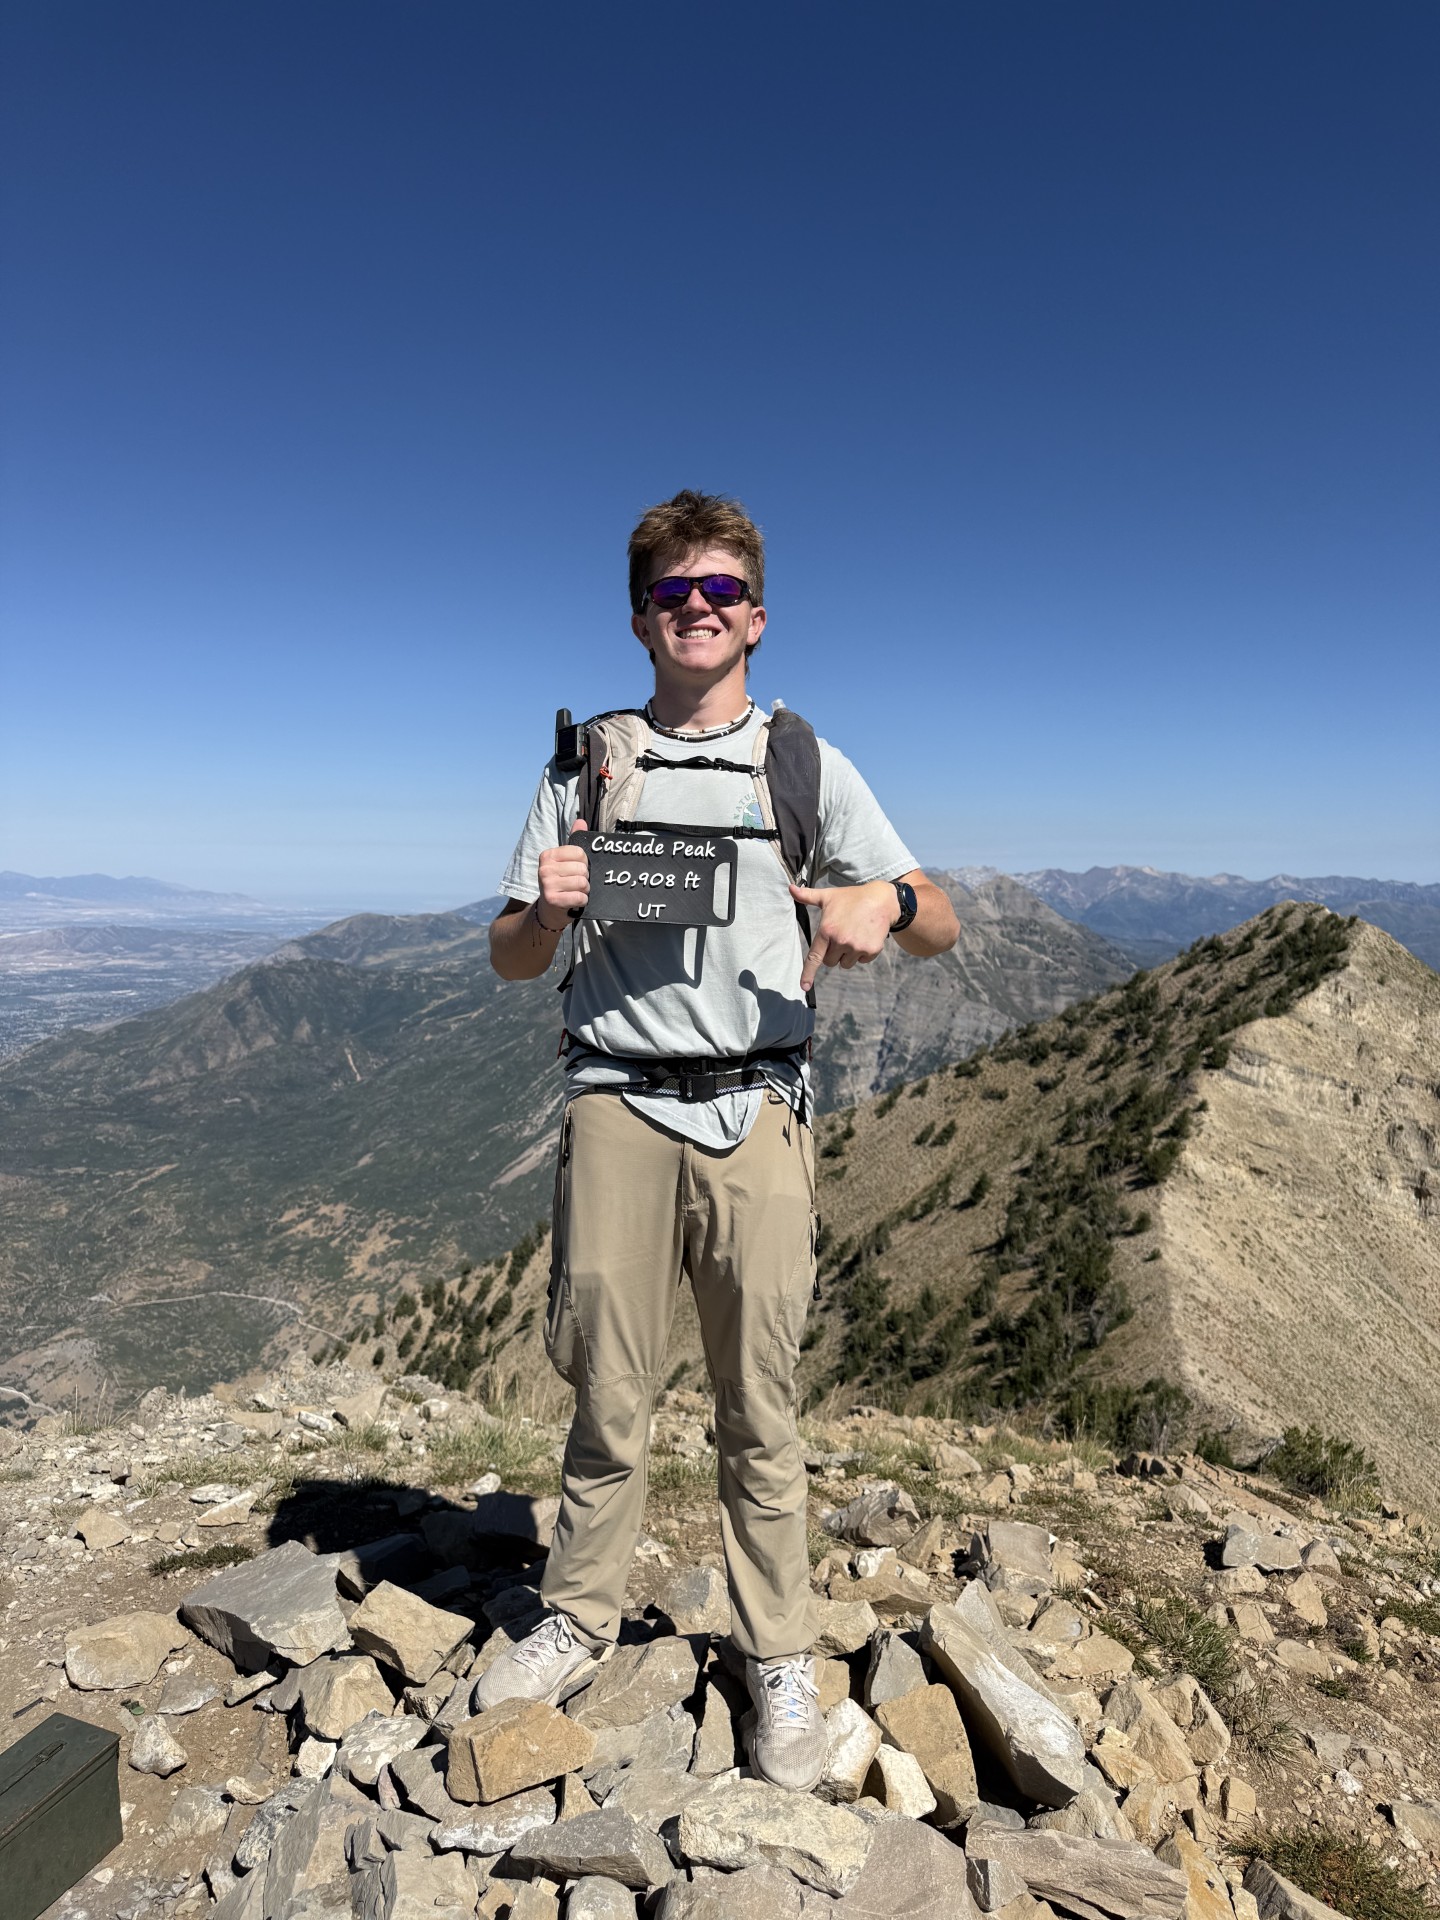
    Climber holding a Cascade Peak 10,908 foot summit sign above Utah Valley
    The proof is simple

    10,908 Feet—and a Lot More Mountain Than the Elevation Suggests.

    Cascade falls 844 feet below Timpanogos, but the route character can make it feel like the more complicated day.

    The obvious comparison

    Cascade Mountain vs Mount Timpanogos

    The peaks are neighbors, but they solve very different hiking goals.

    QuestionCascade MountainMount Timpanogos
    Elevation10,908 ft11,752 ft
    Trail characterRougher, route-dependent, ridge travelEstablished high-use summit trails
    NavigationMore importantUsually straightforward in summer
    CrowdsGenerally much lowerOne of Utah’s busiest major summit hikes
    Best forExperienced local peakbaggersClassic Utah mountain experience
    Psychological challengeLong ridge / repeated false finishesLong sustained endurance day
    Our recommendation: if you have never done a long Wasatch peak, climb Timpanogos first. If established trails no longer answer what you want from a mountain day, Cascade becomes a much more interesting objective. Plan Mount Timpanogos →
    What this climb adds to GSG

    Field Lessons We Can Use on the Utah County Page

    This ascent changes Cascade from research-only coverage to a first-hand GSG peak.

    Lesson 1

    “Long” Belongs in the Opening

    The biggest planning mistake is treating Cascade as a compact hike because it is below 11,000 feet. The mountain’s length and ridge geometry are defining characteristics, not secondary details.

    Lesson 2

    The Summit Is Not the Only Difficulty

    Peak profiles often over-focus on final scrambling. Cascade’s accumulated fatigue begins much earlier. Approach length and repeated gains are part of the technical decision-making problem.

    Lesson 3

    Route Statistics Need a Range

    Published mileage varies widely. That is not automatically bad data; different trailhead positions and route choices can produce genuinely different Cascade days.

    Lesson 4

    It Is a Progression Peak

    Cascade belongs after hikers have already learned long-day pacing, offline navigation and basic scrambling. It should never be presented as a normal “best hike near Provo” recommendation for everyone.

    Who should attempt it?

    A Cascade Readiness Test

    If several of these are new to you, build another step before Cascade.

    Fitness

    Long Wasatch Days Are Normal

    You should already know how your body responds after 6–8 hours of continuous mountain movement and several thousand feet of climbing.

    Navigation

    You Can Follow More Than a Trail

    Carry an offline route and know how to use it. The ability to identify that you are off-route early is more valuable than finding the perfect GPX track online.

    Terrain

    Loose Rock Does Not Change Your Composure

    Simple scrambling, unstable rock and uneven ridge travel should slow you down—not make you freeze or rush.

    Decision making

    You Can Turn Around After Investing Hours

    Long approaches create sunk-cost pressure. Cascade is exactly the kind of mountain where a weather or timing turnaround can happen after you’ve already worked hard.

    Use the Mountain Readiness Assessment before moving into specialist Wasatch objectives →

    Climber Journey · Choose → Prepare → Plan → Climb → Record

    Make Cascade a Deliberate Progression Peak.

    Add Cascade to My Climb only after you can explain which route you are using, how long your specific starting point makes the day, where the route-finding begins and what time you will turn around. Then record the track after the climb so the next decision becomes better than the last one.

    Dream→Choose Cascade→Prepare→Plan Route→Climb→Record
    Evidence & source notes

    What Is First-Hand—and What Is Reference Data

    The distinction matters more on Cascade than on a trail with one universally measured route.

    First-hand

    Dawson + Chandler

    • Successful Cascade summit.
    • 10,908-foot summit photographs.
    • First-hand characterization: a very long climb.
    • Three original GSG-hosted photos from the summit.

    Not yet logged: exact GPX, elapsed time, route name, accumulated gain and precise distance.

    Reference data

    Route Context

    • Utah County Atlas — 10,908-foot summit.
    • SummitPost — South Ridge / Dry Fork route context.
    • Multiple historic Dry Fork reports — route-length variation by starting point.
    • Utah Avalanche Center — use whenever snow is present.
    Cascade Mountain FAQ

    Planning the 10,908-Foot Utah County Peak

    Short answers without pretending this field post owns every route variation.

    How high is Cascade Mountain in Utah?

    Cascade Mountain in Utah County reaches 10,908 feet. The Utah County Atlas lists that elevation, and the summit marker visible in Dawson and Chandler’s photographs also reads 10,908 feet.

    Is Cascade Mountain near Mount Timpanogos?

    Yes. Cascade rises immediately south of Provo Canyon near Mount Timpanogos in the central Wasatch. Timpanogos is the better-known neighbor, while Cascade is generally rougher, quieter and more route-dependent.

    How long is the Cascade Mountain hike?

    It depends on route and starting point. Published South Ridge/Dry Fork routes commonly fall in roughly the 12–15 mile range, and gain estimates vary because of road access and repeated ridge climbs. We will not assign an exact number to Dawson and Chandler’s climb until their GPX is logged.

    Is Cascade Mountain harder than Mount Timpanogos?

    Cascade can feel harder even though it is lower. Timpanogos has established high-use trails and is usually a larger mainstream endurance hike. Cascade adds navigation, ridge undulations, loose terrain and scrambling.

    Is Cascade Mountain part of the Wasatch Seven?

    Yes. Cascade is one of the seven major peaks in the Wasatch Seven challenge around Utah Valley, alongside Nebo, Timpanogos, Lone Peak, Provo Peak, Loafer Mountain and Spanish Fork Peak.

    What is the standard route on Cascade Mountain?

    The South Ridge reached from the Dry Fork area is commonly described as one of the more straightforward routes, though it remains a long, rugged mountain day with navigation and scrambling. Other approaches can materially change the statistics.

    Who should attempt Cascade Mountain?

    Experienced hikers who already know how they perform on long Wasatch days, several thousand feet of gain, loose terrain, navigation and basic scrambling. It is not an ideal first Utah County summit.

    What is the best season for Cascade Mountain?

    For normal hiking and scrambling, the most reliable period is generally mid-summer through early fall after lingering snow is gone. Snow changes the mountain dramatically because Cascade contains serious avalanche terrain; use current avalanche and access information whenever winter conditions remain.

    The field verdict

    Cascade Is the Peak You Climb After “Long” Stops Scaring You.

    It is lower than Timpanogos, less famous than Timpanogos and far less straightforward than Timpanogos. That is exactly the appeal. Dawson and Chandler reached the 10,908-foot summit after a very long Wasatch day—and Cascade now moves from research-only coverage into Global Summit Guide’s first-hand Utah County experience.

    Was this helpful?

    Yes
    No
    Thanks for your feedback!
  • Kings Peak via Henrys Fork: 3-Day Backpacking Guide

    Trip Reports / Utah

    Kings Peak via Henrys Fork: our 3-day backpack to Utah’s highest summit

    13,528 ft
    Utah high point
    29 mi
    Round trip
    3 days
    Standard itinerary
    ~4,100 ft
    Total elevation gain
    ★ Part of the Hub This Kings Peak trip report sits inside our master mountaineering reference covering routes, training, gear, and trip guides for every major peak and high-point objective. Visit the Hub →

    If you live in Utah and you are serious about mountains, Kings Peak is the rite of passage. At 13,528 feet it is the state high point, it is non-technical, and the Henrys Fork approach is the cleanest route in. We had done bigger peaks (Aconcagua, Kilimanjaro) but had somehow never climbed our own state’s high point until late August 2023. Three days, 29 miles, one boulder field that lasts an hour and a half, and a summit ridge with views all the way into Wyoming. This is the unedited trip report. What worked, what we underestimated, and what we would do differently next time we drove the 3 hours up from Salt Lake. The full peak-by-peak progression framework that this trip slots into lives in our master mountaineering hub.

    The route at a glance

    Kings Peak sits at the eastern edge of the Uinta Mountains in the High Uintas Wilderness of northeastern Utah. The Uintas are the only east-west running major mountain range in the lower 48, a strange geographic detail that becomes obvious once you are standing on Anderson Pass looking down into both Painter Basin (south) and Henrys Fork Basin (north). The mountain is approached from three sides: Henrys Fork from the north (the most popular), Yellowstone Creek from the south (longer, less traveled), and the Uinta River drainage from the southeast (rarely used). Henrys Fork is the standard route because it is the shortest at 29 miles round trip and the trailhead at 9,400 feet starts you within reach of a single backpacking day to Dollar Lake.

    The trailhead is in Wyoming, which surprises first-time visitors. You drive 3 hours from Salt Lake City east on I-80 across the state line, exit at Lyman, drop south through Mountain View on Wyoming 410, and then follow the dirt Forest Road 17 for the final 15 miles to the Henrys Fork Trailhead in the Ashley National Forest. No fees, no permits, just a self-registration kiosk at the trailhead. From there, the trail follows Henrys Fork creek upstream through forest and meadow for 8 miles to Dollar Lake at roughly 10,800 feet, then continues another 4 miles climbing through Gunsight Pass into Painter Basin and up to Anderson Pass at 12,800 feet. From Anderson Pass, the summit ridge runs 1.5 miles of class 2 boulder hopping to the 13,528-foot summit.

    Phase 1: the drive and the trailhead (Day 0)

    Day 0

    Salt Lake City to Henrys Fork Trailhead

    3 hours driving, 9,400 ft trailhead
    FridayTrailhead camp

    We left Salt Lake at 2 PM on Friday and rolled into the Henrys Fork Trailhead campground around 5:30 PM. The drive is straightforward until the last 15 miles, which run on dirt Forest Road 17 from Mountain View, Wyoming. The road is passable by any car in dry conditions but becomes hard work after rain. There is no cell signal from Mountain View onward, so download offline maps before you leave.

    The trailhead has a small campground with vault toilets and primitive sites scattered along the access road. Cost is around $10 per night per site. We grabbed a spot, set up the tent, and ate a quick dinner at the truck. The mosquitoes were thick at the trailhead in late August (this was a wet year), and we burned through more bug spray in 30 minutes at the trailhead than we did the entire rest of the trip above tree line. Recommendation: pack permethrin-treated layers if you are going during peak mosquito season, which in the Uintas is roughly mid-July through mid-August.

    Phase 2: backpacking in to Dollar Lake (Day 1)

    Day 1

    Henrys Fork Trailhead to Dollar Lake

    8 miles, 1,400 ft gain
    Saturday5-6 hours backpacking

    We started hiking at 8 AM. The first 3 miles climb gently through lodgepole pine forest along Henrys Fork creek, gaining about 600 feet to Elkhorn Crossing. The trail crosses the creek twice in the first 4 miles. In late August the water level was low enough to rock-hop both crossings without changing footwear. In early summer (June and early July), expect to wade or use stepping logs that are often submerged. The trail is well-maintained, well-marked, and easy to follow.

    Past Elkhorn Crossing the forest opens into the broad Henrys Fork meadows. This is the visual payoff of the approach: the upper Uinta basin stretching south, the cathedral walls of Henrys Fork Peak on the right (the rounded high mountain that frames the basin), and Kings Peak itself visible far to the south as a dark, blocky summit. Dollar Lake sits at about 8 miles in, roughly 10,800 feet, on a small bench just east of the main trail. Most people camp here. Some push 1 to 2 miles further to Henrys Fork Lake at 10,900 feet for a shorter summit-day approach. We chose Dollar Lake for the views. The backpacking kit that makes a trip like this work is detailed in our expedition pack guide, our layering systems article, our trekking poles guide, and the broader gear context in our crampons and ice axes guide for the snow conditions that linger early season.

    Dollar Lake, ~3 PM Saturday afternoon

    We had been climbing for six hours, complaining the whole time about pack weight. Then we crested the small ridge above the lake, and Kings Peak was sitting right there at the south end of the basin, perfectly framed between the ridgelines. Suddenly nobody was complaining anymore.

    Camp setup at Dollar Lake means following standard High Uintas Wilderness regulations: camp at least 200 feet from water, no campfires above 10,800 feet (Dollar Lake is right at that line, so practically no fires), and pack out all waste including used toilet paper. The mosquito situation was much better than at the trailhead. The afternoon thunderstorms missed us, but we could see lightning on the ridges to the east starting around 4 PM. We ate dinner early, did our gear prep for summit day, and were asleep by 9 PM.

    Phase 3: summit day (Day 2)

    Day 2

    Dollar Lake to Kings Peak summit and return

    14 miles, 2,700 ft gain
    Sunday~10 hours total

    We left camp at 5:00 AM in headlamp light. The summit day timing is the single most important decision of the trip: be off the exposed summit ridge before 1:00 PM, when the standard Uinta afternoon thunderstorms start firing. We aimed for a 10 AM summit, which gave us 3 hours of buffer to be back below Anderson Pass before the lightning risk built up. Some groups push for a 9 AM summit. Either works. A noon summit attempt is asking for trouble.

    The trail from Dollar Lake climbs gradually through Henrys Fork Basin for the first 2 miles to Henrys Fork Lake (10,900 feet). From there it steepens toward Gunsight Pass at 11,888 feet. The view from Gunsight Pass is one of the highlights of the whole trip: looking south into Painter Basin and the upper Uinta drainage with Kings Peak rising at the southwest corner. The boulder field on the summit ridge is visible from here, which is sobering. From Gunsight Pass, the trail drops 300 feet into the basin then climbs steadily for the next 1.5 miles to Anderson Pass at 12,800 feet.

    Anderson Pass is where the trail ends and the route begins. The summit ridge runs 1.5 miles roughly west to the Kings Peak summit, all of it class 2 boulder hopping over car-sized blocks of quartzite. There is no exposure (the ridge is wide and the drops on either side are gentle), but the cumulative fatigue is significant. We averaged about 0.7 miles per hour on the boulder section. Trekking poles helped on the easier parts and were a nuisance on the larger blocks. Most experienced hikers stow them after the first 10 minutes of bouldering.

    Kings Peak summit, 10:15 AM

    The summit register is bolted to a USGS marker on a flat slab at the high point. We signed our names, took the obligatory summit photographs, and looked east. The view stretches all the way into Wyoming, out to the Wind River Range, with the entire eastern Uinta basin spread out below. The most striking thing is how flat the surrounding terrain is once you are this high: Kings Peak is meaningfully taller than anything around it for fifty miles in any direction.

    We spent 25 minutes on the summit, ate a quick lunch, and started the descent at 10:45 AM. The boulder hop on the way down was actually harder than the way up: tired legs, less concentration, more weight on the knees with each step. Two of our group rolled ankles within the first 20 minutes. We slowed the pace, took breaks every 15 minutes, and reached Anderson Pass at 12:15 PM. Lightning was visible on the high ridges to the east as we descended, which validated the early-start strategy. We rolled back into camp at Dollar Lake at 3:30 PM, exhausted but with the summit secured. The altitude physiology that makes a 13,528 foot summit meaningful even for Utah-acclimated hikers is detailed in our altitude acclimatization explainer, with the symptoms framework in our altitude sickness guide and the broader peak progression context in our conquer-peaks mountaineering hub.

    Phase 4: packing out (Day 3)

    Day 3

    Dollar Lake to Henrys Fork Trailhead

    8 miles, mostly downhill
    Monday4-5 hours backpacking

    The pack out is the easiest day of the trip. We broke camp at 7:30 AM, hiked the 8 miles back to the trailhead by noon, and were sitting in a diner in Mountain View by 1:30 PM eating something that involved bacon. The 3-hour drive back to Salt Lake got us home by 5:30 PM, exactly 72 hours after we had left on Friday.

    The descent through Henrys Fork basin in the morning light is beautiful in a different way than the inbound trip. The angle of light hits the wildflower meadows from the east instead of overhead, and the entire basin glows for the first hour after sunrise. The mosquitoes at the trailhead were just as aggressive on the way out as they had been on Friday, which was a fitting reminder of where we had been.

    What it actually cost us

    Per-person spending for the 3-day Kings Peak trip

    Total: roughly $150 to $250 per person for 3 days. Kings Peak is one of the cheapest meaningful peak experiences in the American West, mostly because the trailhead is free, the wilderness is free, and the distance from Salt Lake (3 hours) keeps fuel costs low. The biggest variable is gear: if you already own backpacking equipment, the trip is essentially food, fuel, and the trailhead campground. Solo hikers spend more (no shared fuel or food), groups of 4 to 6 share most costs.

    Line itemPer personWhat it covered
    Gas (Salt Lake to Henrys Fork, round trip)~$35~360 miles total, shared 4 ways
    Trailhead campground (1 night)$3$10 site shared 4 ways
    Permits and park fees$0None required
    Food (3 days backpacking)$45Mix of dehydrated meals and snacks
    Fuel (canister) and shared cooking$8Half canister per person
    Diner stop on the way home$25Real food in Mountain View
    Bug spray and odds and ends$10Permethrin spray, batteries
    ALL-IN PER PERSON~$1263-day trip total

    Add gear if you do not already own it: a 3-season backpacking tent ($200-$500), a 60-70L pack ($200-$350), a 20-degree sleeping bag ($150-$350), a sleeping pad ($80-$150), a stove and pot system ($60-$120), and trekking poles ($60-$150). A complete kit from scratch runs $750-$1,600. Most Utah backpackers build this kit incrementally over a few seasons. The full backpacking and climbing kit framework lives in our expedition gear list, with the specialized items broken out in our boots guide and our sleeping bags article.

    What we would do differently

    Six honest takeaways from our trip that we wish someone had told us:

    1. Camp closer to Anderson Pass if you can. We camped at Dollar Lake (8 miles in, 10,800 feet). Several groups we passed had pushed another 2 to 3 miles to camps at Henrys Fork Lake or even higher in the basin. The summit day from Henrys Fork Lake is roughly 2 hours shorter round trip, which means a 7 AM start gets you the same 10 AM summit window with less pre-dawn hiking. Trade-off is a heavier first day and a slightly less scenic camp.
    2. Treat the mosquitoes seriously. Permethrin-treat your hiking pants and long-sleeve shirts before you leave. DEET works in the moment but wears off. A bug net hat saves the morning and evening hours at camp. We did not do enough on this and paid for it.
    3. Start summit day at 5 AM, not 6. An extra hour of buffer before the 1 PM thunderstorm window is the difference between a relaxed summit and a frantic descent. Headlamps are a small investment for a much bigger margin of safety.
    4. Watch your knees on the boulder descent. The summit ridge boulder field is harder on the descent than the ascent. We had two ankle rolls within 20 minutes. Take breaks, slow down, and consider knee braces if you have any history of knee issues.
    5. Bring more water than you think. The trail crosses Henrys Fork creek several times and there is water at Dollar Lake and Henrys Fork Lake. From Anderson Pass to the summit there is no water, and the round-trip from camp to summit and back is 6 to 8 hours. We each carried 3 liters and that was barely enough on a hot August day.
    6. Check trail conditions before going. Snow lingers on the north-facing slopes into early July, and the Gunsight Pass area can hold snow even later in cool years. Check the High Uintas Wilderness reports on the Ashley National Forest website before you commit to dates. The mountain weather framework that helps with this decision is in our mountain weather guide.

    The thunderstorm risk that locals take seriously

    The standard Uinta afternoon thunderstorm pattern is predictable and dangerous. Through July and August, daytime heating in the basins drives convective storms that build over the high ridges starting around 1 PM and peak between 3 PM and 6 PM. Kings Peak sits at the highest point for fifty miles in any direction, which means it attracts lightning preferentially when the storms come through. Hikers have died on the summit ridge from electrical strikes within the past two decades, and the local search-and-rescue teams in Daggett and Summit counties know the pattern well. The protocol is simple: be off the summit by 1 PM. Anyone you meet on the trail going up after 11 AM is taking unnecessary risk.

    The good news is that thunderstorm risk is forecastable. The National Weather Service Salt Lake City office issues thunderstorm probability forecasts for the High Uintas zone, and the percentages are usually accurate within plus or minus 20 percent. A day with 40% afternoon thunderstorm probability means most groups have a clean weather window before 1 PM. A day with 70% probability means many groups end up in storms by mid-afternoon. We did not climb on a 70% day. If you are flexible on dates, watching the forecast for a low-thunderstorm-probability window is the highest-impact preparation decision you can make. The cold-weather and storm-safety context that applies above tree line is in our frostbite prevention article and the broader high-altitude framework in our high-altitude training program.

    Kings Peak in the broader peak-bagging context

    Kings Peak is the second-easiest state high point west of the Mississippi (after Black Mesa in Oklahoma at 4,975 feet). The 50 US state high points are a peak-bagging objective that draws thousands of completers each year, with Kings Peak typically attempted as one of the western Rocky Mountain group. The harder state high points (Denali in Alaska at 20,310 feet, Granite Peak in Montana at 12,799 feet with technical climbing, Gannett Peak in Wyoming at 13,809 feet) require expedition-level commitment. Kings Peak is the gateway state high point that introduces hikers to multi-day backpacking at meaningful elevation without requiring technical climbing skills. The bigger 50-state high point progression and the global 7-Summits framework that often parallels it lives in our Seven Summits guide and our master mountaineering hub.

    For Utah climbers, Kings Peak is also the entry point into the High Uintas Wilderness as a backpacking destination beyond a single peak. The Uintas hold dozens of peaks above 12,000 feet, hundreds of alpine lakes, and roughly 1,000 miles of trail. Kings Peak is the most-climbed peak in the range but represents a small fraction of what the wilderness offers. Hikers who complete Kings Peak and want more typically progress to Gilbert Peak, Mount Lovenia, Mount Emmons, or the Painter Basin and West Fork Whiterocks loop. The Uintas reward repeat visits and are the most underrated multi-day wilderness in the lower 48.

    After Kings Peak: where to go next

    Kings Peak is a great stepping stone if your bigger ambition is high-altitude expedition climbing. The skills it builds (multi-day pack carrying, camping above 10,000 feet, navigating exposed terrain above tree line, managing thunderstorm risk) are foundational for objectives like Mount Whitney (14,505 feet) and the broader Sierra high country. From Whitney the natural progression is Aconcagua, the South American 7-Summits peak we have covered in detail in our Aconcagua trip report and Aconcagua routes guide. The decision framework for picking the next mountain after Kings Peak depends on whether you want to stay in the western US (Whitney, then Rainier or Hood) or skip directly to international objectives (Kilimanjaro or Aconcagua). The framework for that decision is in our Kilimanjaro vs Aconcagua first-7-summit framework.

    The bottom line on Kings Peak

    Kings Peak is the right first multi-day peak experience for Utah hikers who want to step up from day-hiking. The trail is straightforward, the elevation is real but manageable, the cost is minimal, and the payoff (standing on the highest point in Utah with the entire eastern half of the state spread out below) is genuinely meaningful. The two structural risks (afternoon thunderstorms and the boulder field) are well-understood and avoidable with reasonable planning. Pick a low-thunderstorm-probability window in late July or August, start your summit day at 5 AM, treat your bug spray seriously, and you will likely have a great trip. The cross-region peak progression context that places Kings Peak alongside other mountain objectives lives in our master mountaineering hub, with the broader trekking and expedition framework in our mountaineering for beginners guide.

    ★ Master Resource

    Plan your next mountain trip

    Routes, training timelines, gear lists, cost frameworks, and trip reports from every major peak and high-point objective we cover.

    Visit the Master Hub →

    Frequently asked questions

    How hard is Kings Peak from Henrys Fork?

    Kings Peak via Henrys Fork is moderate for fit backpackers and challenging for casual hikers. The route is 29 miles round trip with roughly 4,100 feet of total elevation gain across 3 days. The trail is non-technical (no ropes, no exposure beyond class 2 boulder hopping on the summit ridge), but the distance, altitude (summit at 13,528 feet), and weather exposure above tree line make it a real undertaking. Most people complete it as a 3-day trip with one night each at Dollar Lake or nearby.

    How long does it take to hike Kings Peak?

    The standard itinerary is 3 days: Day 1 backpack 8 miles in to Dollar Lake, Day 2 summit (12 to 14 miles round trip including the summit ridge), Day 3 pack 8 miles out. Strong hikers can complete it as a 2-day trip with one night at Dollar Lake or higher. The single-day push (29 miles in one day) is done by experienced peak baggers but is not recommended for first-timers due to elevation exposure and storm risk above tree line.

    When is the best time to climb Kings Peak?

    Late July through mid September is the standard window. Snow lingers on north-facing slopes and at the higher passes into early July. After mid September, the weather becomes unpredictable and the first snow storms typically hit by late September. Peak conditions are usually the first three weeks of August: trail snow-free, mosquitoes diminishing, and afternoon thunderstorm risk still present but more predictable. Avoid August weekends if you want solitude.

    Where is the Henrys Fork Trailhead and how do you get there?

    The Henrys Fork Trailhead is at 9,400 feet in the Ashley National Forest, accessed via Mountain View, Wyoming (despite climbing Utah’s high point). Drive from Salt Lake City takes 3 to 3.5 hours: I-80 east into Wyoming, exit at Lyman, drive south on Wyoming 410 to Mountain View, then continue on Forest Road 17 to the trailhead. The last 15 miles of dirt road is passable by 2WD in dry conditions but becomes difficult after rain. No fees, no permits required for the trailhead.

    How dangerous are the afternoon thunderstorms on Kings Peak?

    Significant. The exposed summit ridge above Anderson Pass is the highest terrain for many miles in any direction and attracts lightning strikes during the afternoon thunderstorm pattern that hits the Uintas almost daily in summer. Standard protocol is to be off the summit by 1:00 PM, which means starting the summit push from Dollar Lake by 5:00 AM or earlier. Hikers caught above tree line during electrical storms have died on Kings Peak. The risk is real and locally well-known.

    What is the boulder field on the summit ridge like?

    The summit ridge from Anderson Pass to Kings Peak is roughly 1.5 miles of class 2 boulder hopping. The boulders are car-sized in places and require continuous attention to foot placement. No exposure (the ridge is wide), no climbing skill required, but the cumulative fatigue of two solid hours of boulder hopping after a long approach is what wears most hikers down. Trekking poles are mixed: useful for balance but a pain to manage on the larger blocks. Most experienced hikers stow them on the boulder section.

    Do you need any permits for Kings Peak?

    No permits required. Henrys Fork Trailhead is on Ashley National Forest land with no fees, no quota system, and no advance registration. Standard wilderness regulations apply: groups limited to 14 people, camp at least 200 feet from water, no campfires above 10,800 feet in the High Uintas Wilderness, and pack out all waste. The free trailhead self-registration at the kiosk is for trail counts and search-and-rescue purposes.

    Kings Peak Planning Update

    Planning the Henrys Fork Route After Reading Our Trip Report

    Our three-day climb shows what the Henrys Fork route actually felt like in the field. For hikers using that experience to plan their own trip, these are the route decisions that matter most before leaving the trailhead.

    28–30 miles Typical round-trip distance depending on campsite and exact route.
    3 days A comfortable first-time itinerary using one base camp.
    13,528 ft Utah’s highest summit and highest of the Utah 13ers.
    Class 1–2 Mostly trail followed by sustained boulder travel above Anderson Pass.
    Campfire-rule clarification: High Uintas Wilderness regulations should be checked by location rather than treated as a simple elevation cutoff. Current Forest Service material specifically lists both Dollar Lake and Henrys Fork Lake among campfire-restricted sites. Plan on using a stove and verify current Ashley National Forest restrictions before your trip.
    Camp Choice

    Dollar Lake

    Best for a balanced three-day itinerary and the camp we used. The trade-off is a longer summit day.

    Higher Camp

    Henrys Fork Lake

    Moving farther up the basin makes Day 1 harder but reduces summit-day mileage and pre-dawn travel.

    Summit Strategy

    Protect the Morning Window

    The exposed terrain above Anderson Pass is the wrong place to be when summer convection begins building over the Uintas.

    Continue Exploring Utah

    Where Kings Peak Fits in the Bigger Utah Mountain Picture

    Before leaving: verify current road access, weather, fire restrictions, trail conditions and wilderness rules with Ashley National Forest. Conditions in the High Uintas can change quickly even during the normal summer season.

    Was this helpful?

    Yes
    No
    Thanks for your feedback!
Language »