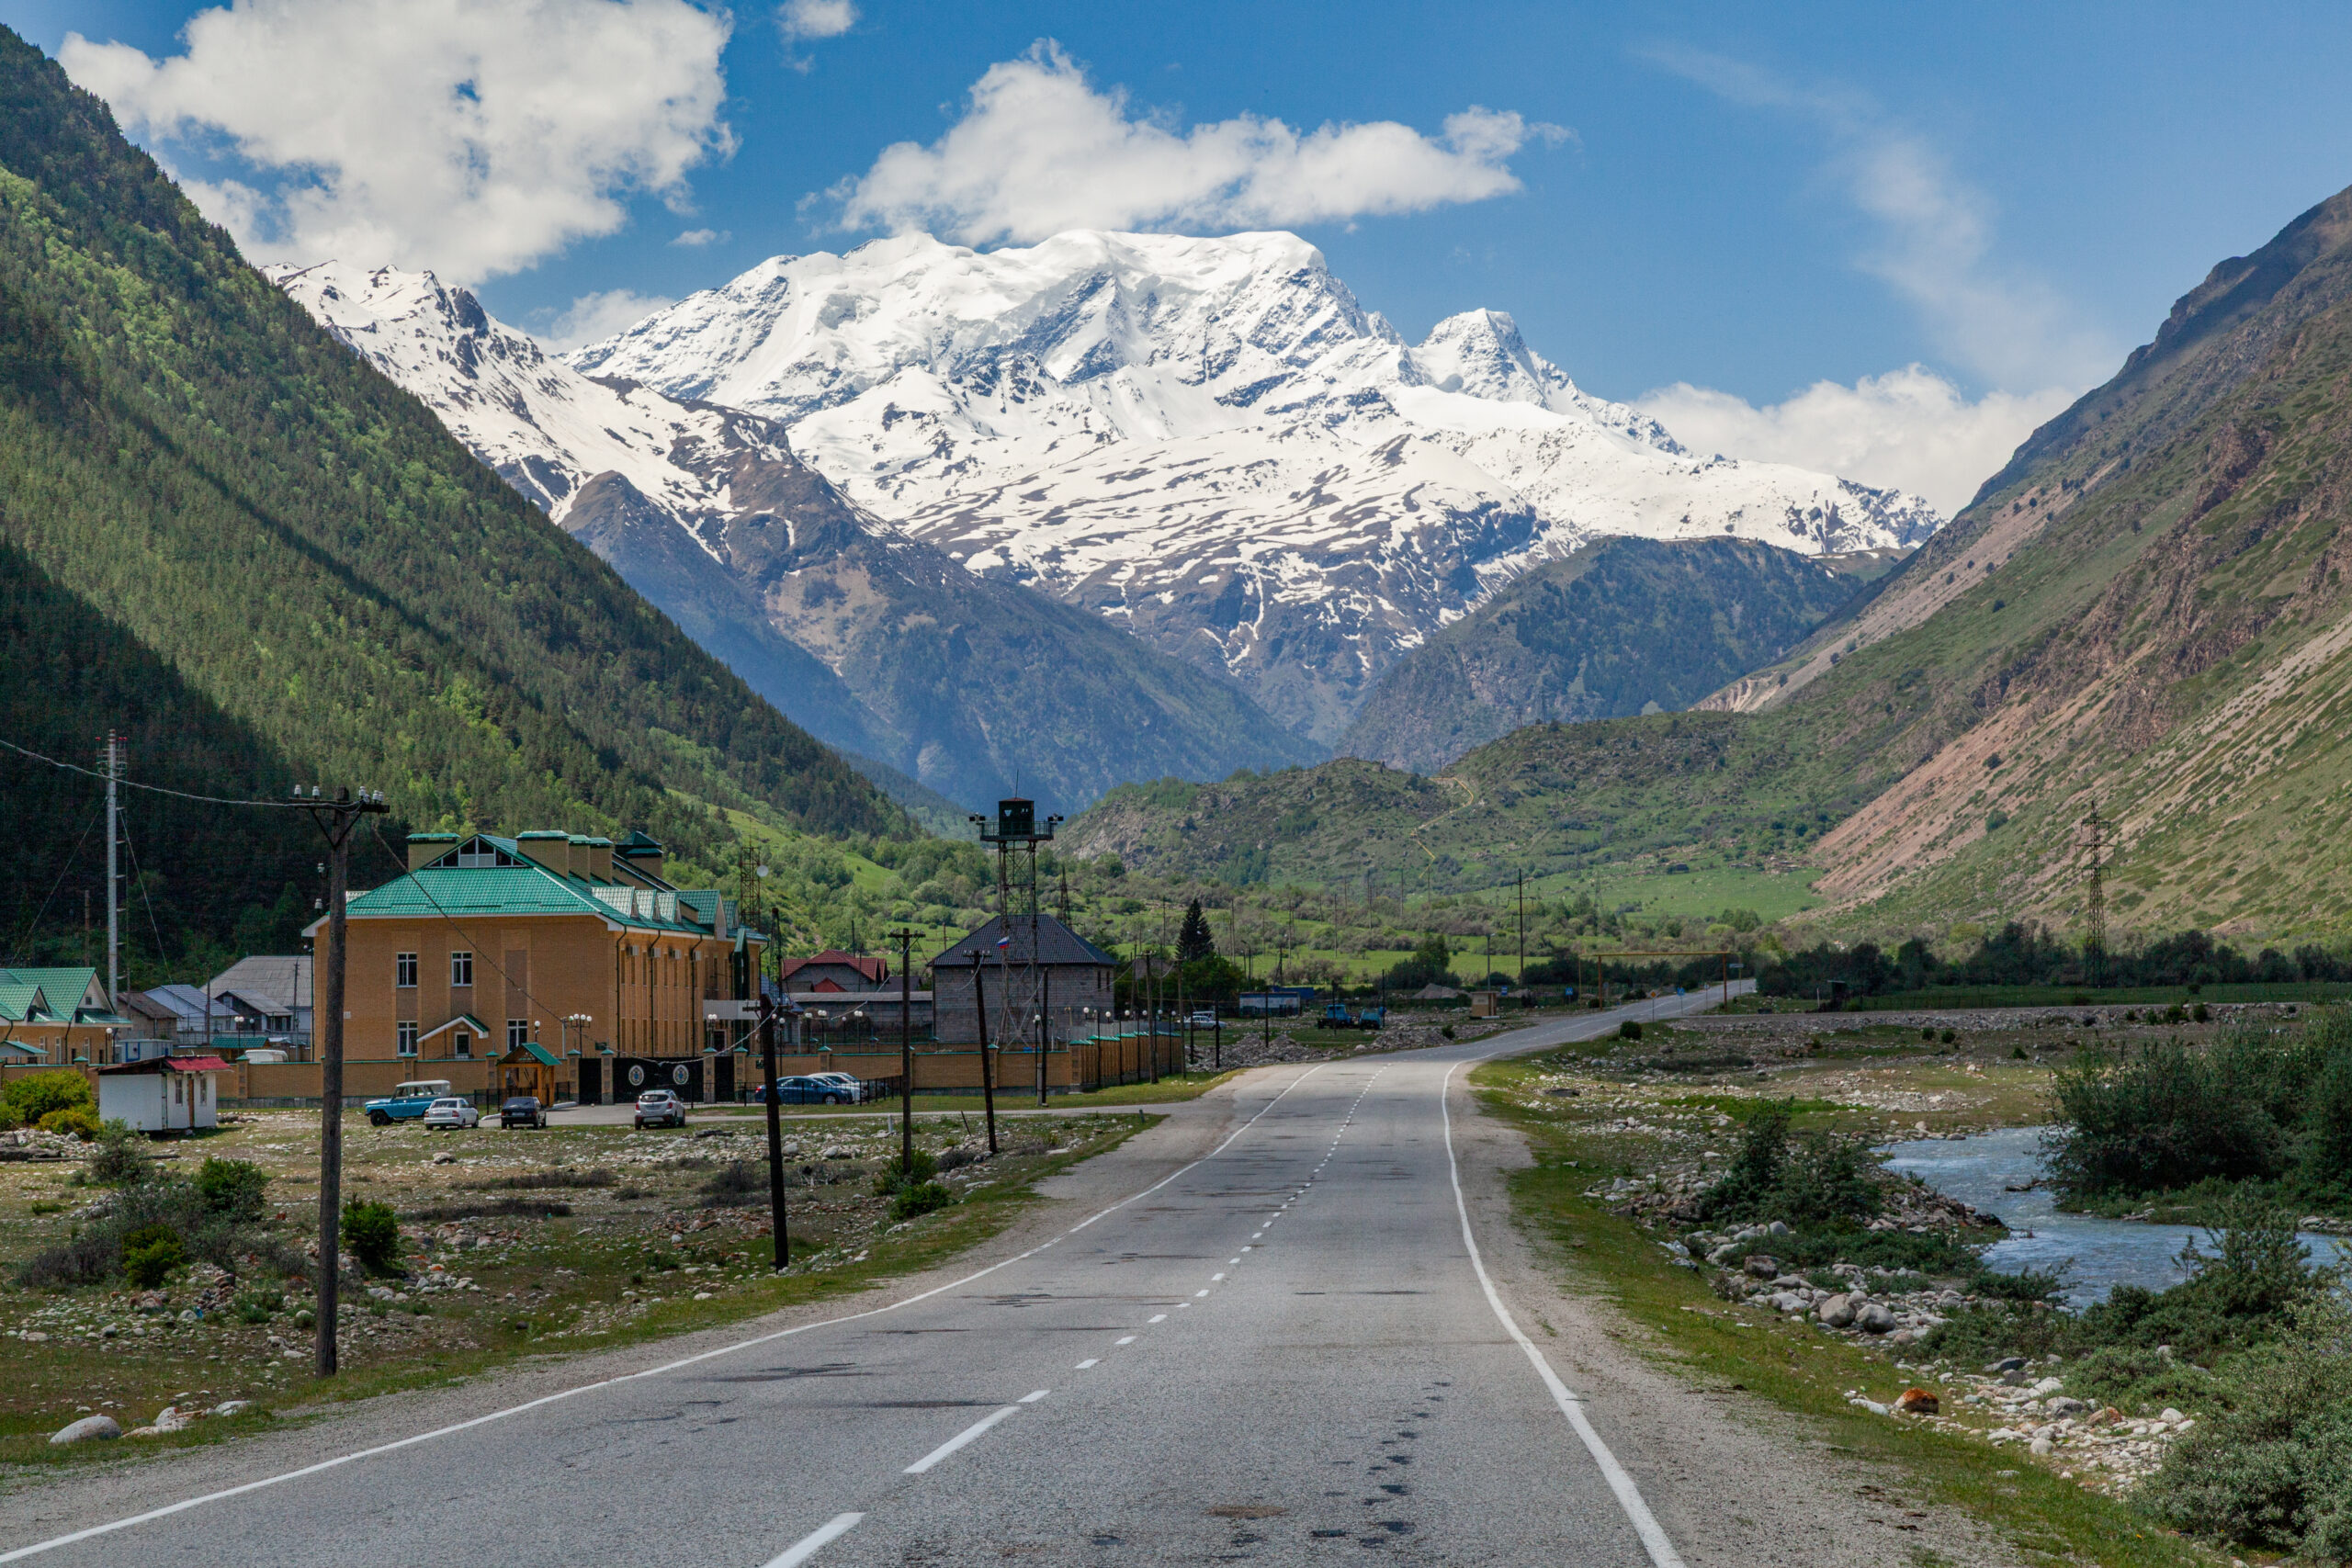
The Bottleneck is a steep snow-and-ice couloir high on K2’s standard summit route, followed by a traverse directly beneath the Great Serac. Its danger is not one thing. Extreme altitude, technical terrain, hanging ice, shared fixed ropes, crowding and a mandatory descent through the same zone overlap in a passage where rescue is limited and a single route failure can affect everyone above it.
~8,200 m / 26,900 ftSteep couloir + exposed traverseGreat Serac overheadClimbed twice on summit day
~8,200 mElevation of the Bottleneck zone
8,611 mK2 summit elevation
~400 mVertical distance from Bottleneck zone to summit
2 passesAscent and descent on the normal summit line
11 deathsK2’s 2008 Bottleneck disaster
The direct answer
Why Is the K2 Bottleneck So Dangerous?
Because climbers must negotiate steep, technical terrain above 8,000 meters while directly exposed to an unstable hanging serac—and then reverse the same passage when they are more tired. Fixed ropes can make movement more efficient, but they cannot stabilize the ice above the route. They also create a shared system: if a rope is badly placed, damaged or cut by icefall, many climbers may suddenly face the same descent problem.
The Bottleneck is often described as K2’s most consequential single passage, but it should not be treated as a mathematically proven “deadliest place in climbing.” What makes it exceptional is the concentration of hazards in one unavoidable upper-route choke point. The 2008 disaster demonstrated how quickly those hazards can compound.
The Crux Comes After Camp IV, High in the Death Zone
K2 Base Camp sits near 5,000 m on the Godwin-Austen Glacier. Camp IV is placed high on the Shoulder. From there, the summit line steepens into the Bottleneck and then traverses beneath hanging ice before climbing the final summit slopes.
Base Camp · Upper Abruzzi · Bottleneck Zone · Summit
This is geographic orientation, not a climbing GPS track. The high-route markers are deliberately schematic because the route and fixed lines change.
Base Camp and summit coordinates are drawn from current mapped records. Upper-route markers show context only and should never be used for navigation.
02 · Terrain anatomy
The Bottleneck Is a Couloir Followed by a Traverse Under Hanging Ice
The name makes it sound like a narrow slot. In practice, the critical upper passage is a sequence: steep snow or ice through the Bottleneck, then a leftward traverse beneath the Great Serac, then upper snow slopes toward the summit.
K2’s south-side routes. The Abruzzi Spur and Cesen/South-Southeast Spur converge high on the mountain, which is why choosing the Cesen does not remove the Bottleneck from summit day.
Below
The Shoulder / Camp IV
The summit push begins from the high Shoulder, typically around 7,900–8,000 m. Climbers are already profoundly hypoxic before the most consequential terrain begins.
Crux
The Bottleneck
A steep snow-and-ice ramp rises toward the upper traverse. Surface conditions can range from supportive snow to hard ice, changing both speed and protection difficulty.
Above
The Serac Traverse
The route traverses beneath a large hanging ice barrier before continuing onto upper snow slopes. Climbers cannot predict exactly when a serac block will release.
The altitude changes everything
A Technical Traverse at 8,200 m Is Not the Same Problem as a Technical Traverse at 4,000 m.
Speed, judgment, dexterity and recovery are all reduced. Small delays become expensive, while errors become harder to correct and rescue becomes less realistic.
03 · Why the risk compounds
Six Hazards Overlap in the Same Passage
Any one of these can be manageable. The Bottleneck becomes exceptional because they operate together and can reinforce one another.
1
Great Serac
Hanging ice above the traverse creates an objective hazard that climbing skill cannot remove. Exposure can only be minimized, not eliminated.
2
Extreme Altitude
Above 8,000 m, hypoxia, dehydration, cold and fatigue reduce movement speed and decision quality exactly where precision matters most.
3
Steep Terrain
A slip on hard snow or ice can become a major fall. Transitions, clipping, rappelling and passing other climbers require concentration.
4
Fixed-Line Dependency
Shared ropes improve efficiency but concentrate risk. A damaged line, weak anchor or missing section can change the problem for everyone above it.
5
Congestion
Only so many climbers can move through the traverse at once. Queues increase time under the serac and push summit arrivals later.
6
Mandatory Descent
Summit success does not bypass the hazard. Climbers return through the same zone with less energy, less daylight and potentially changed route infrastructure.
The key idea: exposure is multiplicative, not additive.
A climber delayed by congestion spends longer under objective ice. That delay may cause a later summit. A later summit creates a darker descent. Darkness makes rope damage and route-finding harder to manage. The Bottleneck becomes dangerous because one problem can increase exposure to the next.
04 · Objective hazard
The Great Serac Cannot Be Made Safe by Technique
Technique determines how efficiently a climber moves beneath it. Technique does not determine whether a block of hanging ice releases.
The serac changes the risk equation.
The American Alpine Journal described the Bottleneck as a leftward-slanting snow-and-ice ramp between the upper Abruzzi rocks and a large serac barrier. A major change in the hanging ice after 2001 made the passage more difficult and helped stop summit activity in 2002 and 2003. By 2004 the zone was passable again—but still slow and consequential.
That history matters because the Bottleneck is not a fixed climbing feature. Serac geometry, snow accumulation, ice hardness and the exact fixed-line path can change from season to season.
Risk management is mostly exposure management.
Teams can choose a better weather window, move efficiently, avoid unnecessary stops, stagger departures and turn around when traffic destroys the time margin. None of those actions converts the hanging ice into a predictable hazard.
The decision begins below the Bottleneck
A Climber Who Reaches the Bottom of the Bottleneck Too Late Is Already Losing Descent Margin.
The critical turnaround decision is not made on the summit. It starts when progress through the upper fixed lines is slower than the plan assumed.
05 · Shared infrastructure
Fixed Ropes Reduce Movement Difficulty—but Create a Common Failure System
Modern K2 summit pushes rely heavily on fixed rope through the Bottleneck and traverse. That improves efficiency but does not turn the route into protected terrain in the ordinary sense.
What fixed ropes help with
Efficiency and Fall Protection
Provide a known line through steep snow and ice.
Reduce the need for every climber to build independent protection.
Help climbers maintain movement in darkness or poor visibility.
Allow coordinated route preparation before the summit window.
What fixed ropes cannot solve
Objective Ice and System Failure
They do not protect from serac collapse.
They can be cut or buried by falling ice.
Anchors can fail or be poorly placed.
Old rope can deteriorate or become difficult to distinguish.
A queue forms when many climbers depend on one line.
The historical warning predates 2008.
In 1986, Wojciech Wróz died while descending the Abruzzi after the first ascent of the Magic Line. The American Alpine Journal reports that he fell at roughly 8,100 m while rappelling near the Bottleneck, where a gap existed between fixed-rope sections. The exact cause was unknown, but the accident illustrates how consequential a small rope-system problem becomes at this altitude.
View above Camp IV on K2. The summit push leaves the Shoulder and enters progressively steeper upper terrain before reaching the Bottleneck and serac traverse. Wikimedia Commons, CC BY-SA 4.0.
06 · Route-choice myth
The Cesen Route Does Not Avoid the Bottleneck
The Cesen / South-Southeast Spur avoids some lower Abruzzi terrain, but it joins the Abruzzi high on the Shoulder. From there, both routes share the Bottleneck, traverse and final summit slopes.
Route
Lower mountain
High convergence
Bottleneck exposure
What it changes
Abruzzi Spur
House’s Chimney, Black Pyramid, Shoulder
Already on standard upper line
Yes
Strongest infrastructure and most familiar commercial system
Cesen / SSE Spur
Different, steeper lower and middle line
Joins Abruzzi at the Shoulder
Yes
Avoids some Abruzzi lower-route problems, not the upper serac problem
The Disaster Was Not “One Serac Killed 11 People.”
Two climbers died in falls before the main icefall crisis. Later serac collapse damaged the fixed-line descent system, leaving climbers above the Bottleneck in darkness, extreme altitude and confusion. The tragedy became a chain.
07 · Case study
Why the 2008 K2 Disaster Escalated So Fast
American Alpine Journal records 74 climbers from 10 expeditions attempting K2 that year, 17 summiters from six teams, and 11 deaths during or after the August 1 Bottleneck disaster.
Early Aug. 1
Multiple teams left Camp IV for the same summit window. Rope preparation and traffic in the Bottleneck slowed the line.
Ascent
Serbian climber Dren Mandić fell during the climb. Pakistani climber Jehan Baig later fell during efforts around the accident. Both deaths occurred before the main serac crisis.
Afternoon
Many climbers continued upward despite the delays. Summit arrivals extended late into the day, reducing daylight for descent.
Evening
Rolf Bae was killed when ice released near the serac as the Norwegian group descended. Falling ice also damaged or stripped fixed lines on the traverse.
Night
Climbers above the Bottleneck now faced steep descent terrain without the rope system they expected, in darkness and extreme fatigue.
Aug. 2
Further falls, icefall and exposure killed additional climbers. Survivor accounts differ on some exact movements and rescue attempts, so the high-confidence history should preserve those uncertainties.
Why this page and the K2 2008 page are different
This page owns the terrain mechanism: why the Bottleneck can turn delays and route damage into a multi-team emergency. The dedicated 2008 disaster page owns the climber-by-climber chronology, victims, survivors and disputed sequence.
2008 Was the Clearest Disaster—Not the Only Warning
The terrain has repeatedly shown that the hazard comes from both objective ice and the difficulty of descending fixed, steep terrain at extreme altitude.
Season / event
What happened
What it shows
1986 · Wojciech Wróz
Fell to his death around 8,100 m while descending fixed ropes near the Bottleneck after the Magic Line ascent.
Descent systems and rope transitions can be fatal even without a serac collapse.
2001–2003 · serac change
AAC reported that serac fall changed the Bottleneck geometry and helped stop summit activity in 2002 and 2003.
The route itself changes; a “known” crux is not physically constant.
2008 · 11 deaths
Falls, delay, late summits, serac collapse and fixed-rope loss combined into K2’s deadliest tightly bounded modern disaster.
Shared infrastructure can convert individual exposure into shared system failure.
2021 winter
John Snorri, Ali Sadpara and Juan Pablo Mohr disappeared high on K2 after last communication around the upper mountain; their deaths reinforced how little rescue margin exists near the Bottleneck in winter conditions.
Extreme altitude and weather can make even locating climbers impossible.
2023 · Muhammad Hassan
A Pakistani high-altitude worker was critically injured near the Bottleneck during a crowded summit push and later died.
Congestion and rescue limitations remain modern operational problems even when fixed lines and commercial support are strong.
09 · Congestion
Other Climbers Become Part of Your Bottleneck Risk
Summit windows compress independent expeditions into the same upper-route system.
A queue changes exposure time.
On easier ground, a queue may be inconvenient. Beneath K2’s hanging serac, a queue can increase the number of minutes or hours that climbers remain inside the objective-hazard zone. It can also delay summit arrival and make the return through the Bottleneck later and darker.
This is why crowding on K2 is not just an aesthetic debate about commercialization. At the Bottleneck, traffic can directly change the timing and exposure assumptions of every team sharing the line.
More fixed rope does not automatically mean more safety.
Better line preparation can reduce individual technical workload. But when dozens of climbers rely on the same line, that infrastructure becomes a single shared dependency. The correct comparison is not “fixed rope versus no fixed rope”; it is whether the system has enough redundancy, anchor quality, traffic management and time margin for the number of people using it.
10 · Decision framework
The Best Bottleneck Decision May Be Made Before You Enter It
A climber cannot control the serac. The controllable part is whether the team enters the zone with enough time, speed, weather, oxygen, rope confidence and descent reserve.
Time
Behind Schedule
If fixed-line delays push the team far behind the planned Bottleneck crossing, the summit may no longer leave a responsible descent margin.
Traffic
Queue Not Moving
A stationary queue under the serac changes the objective exposure. “We are already here” is not a safety argument.
Surface
Hard Ice / Fresh Loading
Condition changes can make a familiar route slower, more technical or more avalanche-prone than the team prepared for.
Ropes
Uncertain Line System
Missing, damaged, badly anchored or confusing fixed lines can multiply descent risk. Do not assume the ascent system will remain intact.
Weather
Window Too Short
The forecast must protect the descent through the Bottleneck, not merely the hour when the team hopes to stand on the summit.
Human performance
Climber Deterioration
Slow pace, cold injury, oxygen problems or cognitive decline before the crux are warnings that the return trip may become worse.
Summit time is not the real deadline.
The meaningful deadline is the latest time the team can reverse the Bottleneck and serac traverse with enough daylight, oxygen and movement reserve for current conditions. That time changes by team and season; it should be set before summit fever enters the decision.
11 · Frequently asked questions
K2 Bottleneck FAQ
Direct answers to the search questions that most often surround K2’s upper crux.
What is the K2 Bottleneck?
The Bottleneck is a steep snow-and-ice passage on K2’s standard upper summit route, around 8,200 meters. Climbers ascend the couloir and then traverse beneath a large hanging serac before reaching the upper summit slopes.
Why is the K2 Bottleneck so deadly?
It combines steep technical terrain, extreme altitude, exposure beneath unstable hanging ice, dependence on fixed ropes, possible congestion and the need to reverse the same terrain during descent.
How high is the Bottleneck on K2?
Most modern route descriptions place the Bottleneck around 8,200 meters, or roughly 26,900 feet, approximately 400 vertical meters below K2’s 8,611-meter summit.
Can climbers avoid the Bottleneck by taking the Cesen Route?
No. The Cesen or South-Southeast Spur joins the Abruzzi high on the Shoulder, so climbers using either route normally share the Bottleneck and serac traverse on summit day.
Did the serac kill all 11 climbers in 2008?
No. Two climbers died in falls before the main serac crisis. Later serac collapse damaged fixed ropes and contributed to a sequence of additional falls, icefall, entanglement, exhaustion and exposure above the Bottleneck.
Why do climbers still use the Bottleneck route?
The Abruzzi Spur remains K2’s most established summit route, and the Cesen joins it above the Shoulder. Alternative routes usually introduce their own major technical and logistical problems rather than offering an obviously safer commercial summit line.
Do fixed ropes make the Bottleneck safe?
No. Fixed ropes can reduce movement difficulty and fall exposure, but they cannot stop serac collapse. They can also be damaged by icefall or create congestion when many climbers depend on the same line.
Is the Bottleneck the deadliest place in climbing?
It is one of the most consequential passages in high-altitude mountaineering, but there is no standardized global dataset that proves one specific location is universally the “deadliest.” Its reputation comes from the combination of objective ice hazard, extreme altitude, route concentration and major historical disasters.
12 · Sources & methodology
Terrain Claims Come From Route Records; Disaster Claims Stay Separate From the Terrain Explanation
The page uses American Alpine Journal route records, survivor-era reporting and current route analysis. It does not convert historical deaths into a fake location-specific probability.
There is no responsible denominator for “Bottleneck death rate” because climber exposures, route variants, traffic, repeated crossings and historical reporting are inconsistent. The page therefore explains mechanism and evidence rather than publishing a precise-looking location risk percentage.
About this guide
Global Summit Guide
This is a research-based explanation of K2’s upper-route terrain and disaster history. Global Summit Guide does not present it as first-hand Bottleneck experience. Historical facts, route mechanics and disputed 2008 details are kept separate so the evidence is not stronger than the sources allow.
This page owns the Bottleneck terrain question. Use the K2 parent and disasters hub for broader context, then move into the route, mortality, success and weather pages that explain the rest of the mountain.
The summit is only halfway through the Bottleneck problem
The Most Important Question Is Not “Can I Get Through?” It Is “Can I Get Back Through?”
K2’s upper route rewards speed and discipline, but no amount of skill can make hanging ice predictable. The decision margin has to survive the summit, the descent and the possibility that the route below has changed.
⛏ Skills Cluster · Mountaineering Safety · 2026 Field Guide
Ice Axe Self-Arrest: The Most Critical Mountaineering Skill
The complete 2026 guide to stopping a slide on snow. Step-by-step technique for all four falling positions, equipment selection, training progression, and field-tested guidance from Dawson Ludlow’s Mount Hood May 2026 training with Timberline Mountain Guides plus Kilimanjaro Lemosho 2024 experience.
By Dawson Ludlow · Safety & Mountaineering Contributor · Edited by Travis Ludlow
Published June 24, 2026 · v4.0 build · Last verified: June 24, 2026 · Reading time 16 minutes
Author credentials: Dawson Ludlow is Wilderness First Aid certified with first-hand mountaineering experience on Mount Kilimanjaro via the Lemosho Route (2024, African Walking Company) and Mount Hood via the South Side Hogsback route (May 2026, Timberline Mountain Guides). Self-arrest training conducted as part of both expeditions.
📋 Editorial Standards & Source Verification
This skills guide cross-references five primary source categories: (1) Dawson Ludlow’s first-hand Mount Hood training (May 2026, Timberline Mountain Guides) and Mount Kilimanjaro experience (2024); (2) Established mountaineering instruction programs including American Alpine Institute, NOLS Wilderness Medicine, RMI Expeditions, and Mountain Madness curricula; (3) Published mountaineering reference texts including “Mountaineering: The Freedom of the Hills” (9th edition) and “Glacier Travel and Crevasse Rescue” by Andy Selters; (4) AMGA (American Mountain Guides Association) technical standards for snow climbing skills; (5) Internal Global Summit Guide research cross-referenced with our mountaineering and skills content.
Critical safety note: Self-arrest cannot be learned safely from text alone. This guide explains the technique and informs decision-making but is not a substitute for hands-on instruction from a qualified mountaineering guide or course.
◆ FIRST-HAND Editorial Framing
Dawson Ludlow completed self-arrest training as part of two mountaineering expeditions: Mount Kilimanjaro via the Lemosho Route (2024) which included basic snow technique briefings, and Mount Hood South Side Hogsback (May 2026) which included one full day of intensive self-arrest drills with Timberline Mountain Guides on the Palmer Snowfield. The technique sequences below reflect the specific instruction received from AMGA-certified guides during that training, not generic online content.
For climbers planning to learn self-arrest, the recommendation is unambiguous: take a formal course before attempting unsupervised practice. Cost is $300-1,200 depending on location and duration — substantially less than a single mountaineering injury or rescue cost.
⚡ Quick Verdict — Featured Snippet Target
What Is an Ice Axe Self-Arrest?
An ice axe self-arrest is the technique used to stop an uncontrolled slide on a snow slope using an ice axe. The mountaineer rotates into a face-down position with the axe head near the shoulder, drives the pick into the snow surface, and applies maximum body weight pressure on the axe until the slide stops. Self-arrest is considered the single most important mountaineering safety skill because uncontrolled slides on snow are among the most common causes of mountaineering injury and death. Proper technique requires 1-2 days of supervised practice and cannot be safely learned from videos or text alone.
⚠ Critical Safety Warning
This article is educational content — not a substitute for hands-on instruction. Attempting self-arrest practice without proper supervision risks serious injury including broken bones, lacerations from the ice axe pick, and crampon punctures. Self-arrest training requires a safe practice environment with appropriate slope angle, snow consistency, and runout — conditions that vary substantially across terrain.
The Mountaineers, American Alpine Institute, NOLS, and other established programs offer 1-2 day snow skills courses that include supervised self-arrest practice. This is the only safe path to learning the skill. Use this guide to inform your decision to take a course, prepare for the curriculum, and reinforce learning afterward — not as a primary instruction source.
Self-arrest is the most important safety skill in mountaineering because uncontrolled slides on snow are among the most common causes of injury and death in alpine environments. Unlike technical rock or ice climbing where protection systems prevent falls, snow travel often involves moderate slopes where mountaineers move unroped — and a single slip can develop into a sliding fall that accelerates rapidly.
The statistics are sobering. American Alpine Club accident data shows uncontrolled slides as a leading cause of mountaineering fatalities in North America, particularly on Mount Hood, Mount Rainier, Mount Shasta, and similar moderate-snow objectives. Most of these incidents involve climbers who either lacked self-arrest training or were unable to execute the technique fast enough when the slide began.
The technique itself is straightforward. The challenge is reaction time. On a 30-40 degree snow slope, a falling body can reach 30+ mph within 3-4 seconds. Self-arrest must be initiated within the first 1-2 seconds of a fall to be reliable — which is why repetitive practice to build muscle memory matters more than understanding the theory.
◆ Why Practice Matters More Than Theory
A mountaineer who has practiced self-arrest 100 times over 2-3 days reacts in 1-2 seconds. A mountaineer who has only read about the technique reacts in 4-6 seconds — typically too slow to arrest before reaching dangerous speeds. The difference is muscle memory built through repetition, not knowledge. This is why no amount of reading replaces a formal course.
Equipment You Need
Self-arrest requires specific equipment. The ice axe is the primary tool, but secondary equipment affects both training safety and real-world effectiveness.
The Ice Axe
You need a mountaineering walking axe — not an ice climbing tool. The distinction matters. Walking axes have straight or slightly curved shafts 50-70cm long with a relatively flat pick angle suitable for dragging across snow during arrest. Ice climbing tools (45-55cm with aggressively curved shafts and steep pick angles) are designed for swinging into vertical ice and perform poorly in self-arrest. Confirm you’re buying a “general mountaineering axe” or “walking axe” rather than an “ice tool” or “technical climbing axe.”
Axe length depends on your height. The traditional method is to hold the axe head with arm hanging at your side — the spike should reach the ankle bone. Modern mountaineering tends toward slightly shorter axes (60-65cm for most adults) than the traditional sizing suggested.
The Head Components
The head of the axe contains four functional parts: the pick (the pointed end, used for arrest and traction), the adze (the flat shovel-like end, used for chopping steps and platforms), the shaft (the long handle), and the spike (the metal point at the bottom of the shaft, used for walking and self-belay). Understanding which part does what is essential for proper grip during arrest.
Boots and Crampons
Mountaineering boots with stiff soles are required for crampon use and provide secondary friction during arrest via boot toes pressed into snow. Crampons should be removed for self-arrest practice on training slopes — the points can catch and cause violent rotation. For real-world arrest with crampons on, technique requires raising your knees to keep crampons off the snow during the arrest.
Helmet
A helmet is mandatory for self-arrest practice. Falls during training are common, and the ice axe pick is a sharp implement that can cause head injuries if it strikes you during a botched arrest attempt.
Clothing
Long-sleeved layers protect against snow burn during practice. Waterproof pants prevent getting soaked during repetitive falls. Gloves with reasonable grip on the axe head are important — bare hands stick to cold metal and can be injured during practice.
Self-arrest becomes essential on moderate snow slopes (20-45 degrees) where mountaineers travel unroped. These are the conditions where most slip-and-slide incidents occur — gentle enough to feel safe, steep enough that an uncontrolled slide develops dangerous speed within seconds.
The 6-Step Technique
The standard self-arrest sequence works from any falling position. The fundamental steps are the same; what varies is the starting position and the rotation required to reach the standard arrest position.
Step 1 of 6
Grip the Ice Axe Correctly
Foundation: Wrong grip = no arrest possible
Hold the ice axe with your dominant hand wrapping around the head. The adze (flat side) faces forward (away from you); the pick faces backward (toward you); the spike points down toward your feet. Your thumb wraps under the adze; fingers grip the pick side. This is sometimes called the “self-arrest grip” — distinct from the “walking grip” used for general travel.
The grip enables the pick to engage the snow when you roll over for arrest. With a reversed grip (adze facing back, pick facing forward), the arrest is impossible — the pick can’t engage. Practice the grip until it’s automatic. The transition from walking grip to arrest grip must happen reflexively during a fall.
Many mountaineers carry the axe in the walking grip during normal travel and switch to the arrest grip only when entering steep terrain. This transition itself is a skill — practice it on flat ground before applying on slopes.
Step 2 of 6
Identify Your Fall Position
Sequence: Recognition determines what comes next
The moment you start sliding, identify which of four positions you’re in: head-first on stomach, head-first on back, feet-first on back, or feet-first on stomach. Each position requires a slightly different sequence to reach the standard arrest position (face-down, feet-down, axe across chest with pick engaged).
The “feet-first on stomach” position is the easiest — you’re already partially in arrest position and only need to drive the pick into the snow. The “head-first on back” position is the hardest — you must rotate 180 degrees to reach standard arrest while gaining speed throughout the rotation.
Recognition happens in milliseconds. This is why practice matters: trained mountaineers move directly to the appropriate recovery sequence based on muscle memory, while untrained climbers waste 2-3 critical seconds processing what’s happening.
Step 3 of 6
Roll Toward the Pick
Direction: Wrong roll causes injury, not arrest
If you’re on your back, roll toward the side where you hold the axe — never the opposite direction. Rolling away from the pick would drag it across your arm or face, potentially causing serious injury. The roll is initiated with hip drive and arm position; your dominant arm (holding the axe head) pulls toward your chest while your hips rotate.
For head-first falls, the rolling motion is the foundation of getting into position. A head-first slide must be rotated to feet-first before arrest is reliable — attempting to arrest head-first risks face injury and provides much less stopping power. The rotation uses arm position and body twist combined with the friction created by the partially-engaged pick.
The roll direction depends on which hand holds the axe. Right-handed mountaineers typically hold the axe in the right hand and roll right. Left-handed mountaineers do the opposite. Confirm which hand you’ll hold the axe in during the planning stage of any climb — this isn’t a decision to make mid-fall.
Step 4 of 6
Drive the Pick into the Snow
Power: Shoulder pressure, not hand pressure
Position the axe diagonally across your chest with the head near your shoulder and the spike near your hip. Drive the pick into the snow surface using shoulder and chest pressure — not just hand force. The point of contact should be your shoulder pressing down on the axe head, with your full body weight transferring through the shoulder into the pick.
Hand grip alone provides nowhere near enough force to arrest a fall at speed. Your hand stabilizes the axe; your shoulder and chest provide the pressure. This is counterintuitive — beginners often try to “push” the axe down with their hands, which gives them about 10% of the force they could apply with proper body positioning.
The pick enters the snow at approximately a 60-70 degree angle relative to the slope surface. Too shallow and the pick skips across the snow without biting. Too steep and the pick digs straight down without creating the friction needed to slow you.
Step 5 of 6
Raise Your Knees and Dig In
Stability: Boots and knees create secondary friction
Bend your knees and press the front of your boots into the snow. The boot toes provide secondary friction — supplementing but not replacing the pick. With knees bent and toes pressed in, you create three points of contact with the slope: the axe pick (primary), and two boot toes (secondary).
If you’re wearing crampons, raise your knees enough to keep the crampon points off the snow during the arrest. Crampon points catching during a slide cause violent cartwheeling — the climber’s body rotates around the catch point, often resulting in serious injury or loss of axe control. This is the single most dangerous mistake during self-arrest with crampons.
Practice both with and without crampons. The knee-raise required to keep crampons off is significant and counterintuitive — many trained mountaineers fail this on first crampon attempts because the muscle memory is for “press toes in” rather than “raise knees and press boot front in.”
Step 6 of 6
Maintain the Arrest Position
Discipline: Premature release causes continued slide
Hold the arrest position with full body pressure on the axe head until you stop completely. Even after slowing, maintain pressure — the slope may have variable hardness, and partial release can cause continued sliding. The classic mistake is feeling the deceleration and prematurely lifting body weight off the axe before friction has fully stopped you.
Once stopped, secure the axe with both hands before attempting to stand. Many secondary falls occur immediately after a successful arrest because the climber attempts to stand or move before fully stabilizing. From a stopped self-arrest position, you must: (1) Confirm you’ve stopped; (2) Both hands on axe; (3) Test the snow surface for stability; (4) Slowly move to a controlled stance.
If you’ve slid into terrain different from where you fell (different slope angle, different snow consistency, nearby crevasse or rock), reassess the entire situation before moving. The arrest stopped you; the next decision determines whether you stay safe.
Self-arrest training conditions matter as much as the technique itself. Practice slopes need to be steep enough to generate real sliding, soft enough that the pick engages well, and have safe runouts (no rocks, cliffs, or crevasses). Find a qualified course at a suitable venue — Mount Hood’s Palmer Snowfield is one of the most popular training locations in North America.
The Four Falling Positions
Self-arrest must work from any starting position because real falls happen unpredictably. The four positions are defined by two variables: head-first vs feet-first, and stomach-down vs back-down. Each requires a different recovery sequence.
Position
Difficulty
Recovery Sequence
Why It’s Hard
Feet-first on stomach
★ Easiest
Drive pick → bend knees → hold
Already in arrest orientation
Feet-first on back
★★ Moderate
Roll toward axe → drive pick → bend knees → hold
Requires 180° roll mid-slide
Head-first on stomach
★★★ Hard
Pick out perpendicular to slope → rotate body 180° around pick → drive pick → bend knees
Requires rotation while accelerating
Head-first on back
★★★★ Hardest
Roll to head-first stomach → rotate 180° around pick → drive pick → bend knees
Two-step rotation while accelerating
The Head-First Rotation
Head-first falls are the hardest scenarios. The recovery uses a technique called the “pivot arrest” — instead of trying to drag the pick from a head-first orientation, you reach the axe out to the side perpendicular to the slope, plant the pick firmly, and use it as a pivot point to rotate your body 180 degrees so your feet point downhill. After the rotation completes, drive the pick fully and complete the standard arrest sequence.
This rotation technique is the most counterintuitive part of self-arrest training. The instinct is to put the axe straight ahead (in the direction of slide), but that doesn’t create the leverage needed to rotate. Reaching out perpendicular creates a fixed point that the body rotates around.
⚠ Practice in This Order
Standard course curriculum practices the four positions in difficulty order: feet-first stomach → feet-first back → head-first stomach → head-first back. Skipping ahead before mastering each level builds bad muscle memory. The head-first techniques specifically should not be practiced unsupervised — falls from a head-first orientation can cause neck injuries even on training slopes.
How to Learn Self-Arrest
Self-arrest cannot be safely learned from text, videos, or unsupervised practice. The progression below outlines the standard learning path used by reputable mountaineering programs.
Step 1: Take a Formal Course
The starting point is a 1-3 day mountaineering skills course that includes supervised self-arrest practice. Reputable providers include American Alpine Institute (Washington, Colorado, Alaska), NOLS (multiple locations), RMI Expeditions (Mount Rainier), Mountain Madness (Pacific Northwest), Northwest Alpine Guides (Cascades), and similar programs at glacier-accessible mountains worldwide.
Course costs range from $300 (1-day Mount Hood basic course) to $1,200+ (3-day comprehensive snow skills). Look for AMGA-certified instructors and venues with appropriate practice terrain — gradual snow slopes with safe runouts.
Step 2: Repetitive Practice in the Course
During the course, expect to practice each falling position 15-30 times. Yes, that’s a lot of falls. The repetition builds the reflexive muscle memory that distinguishes trained mountaineers from beginners during real falls. Don’t shortcut this — the value of the course is in the volume of practice, not just the information delivered.
Step 3: Refresher Before Each Season
Self-arrest is a perishable skill. Mountaineers who practiced in spring 2024 are not fully proficient by spring 2026 without practice in between. A half-day refresher before each climbing season — typically conducted on a local snowfield with a partner — maintains the skill at deployable level. The refresher can be self-directed once initial proficiency is established.
Step 4: Practice on Each Trip
On any mountaineering trip with snow travel, conduct a brief self-arrest practice session in the first day’s snow contact. Five to ten falls on local snow conditions calibrates your reactions to the specific snow consistency of that trip — firn snow, neve, wet spring snow, and packed powder all require slightly different technique.
Common Mistakes
Most self-arrest failures result from a small number of recurring mistakes. Awareness of these reduces the chance of repeating them.
Mistake
What Happens
The Fix
Wrong grip on axe
Pick can’t engage snow when needed
Practice arrest grip until automatic
Hand pressure instead of shoulder pressure
Insufficient force to slow slide
Drive with shoulder; hand stabilizes only
Rolling wrong direction
Pick drags across arm/face
Always roll toward your axe-hand side
Crampon points engaged during arrest
Catches and cartwheels climber
Raise knees; keep crampons off snow
Attempting arrest head-first
Face injury, weak arrest force
Rotate to feet-first first using pivot
Premature release after slowing
Slide continues; secondary fall
Hold pressure until fully stopped
Pick angle too shallow
Pick skips across snow surface
60-70° angle to slope; check during practice
Standing up before stable
Secondary fall after successful arrest
Confirm stop, both hands on axe, test snow
Snow conditions vary enormously across alpine terrain. Firn snow (hard, granular, compressed) accepts pick engagement well. Wet spring corn snow grips easily. Powder is harder to arrest in. Hard ice resists pick penetration substantially. Calibrate your technique to the snow you’re actually traveling on.
When Self-Arrest Won’t Work
Self-arrest has limits. Understanding when the technique becomes unreliable is as important as knowing how to execute it.
Above 45 Degree Slopes
Self-arrest reliability degrades rapidly above approximately 45 degrees of slope angle. On gentle slopes (20-30 degrees), self-arrest from any falling position is highly reliable for trained mountaineers. On moderate slopes (30-45 degrees), self-arrest remains feasible but requires faster reactions. Above 45 degrees, self-arrest becomes unreliable and mountaineers should be using protection systems (belays, fixed lines, running protection) rather than depending on arrest as primary safety.
On Hard Ice
The pick of a standard mountaineering walking axe penetrates softer firn snow well but skips on water ice. Hard ice surfaces and refrozen snow that has lost surface texture (sometimes called “boilerplate”) resist pick engagement. Self-arrest on these surfaces is unreliable even on moderate slopes. Mountaineers traveling icy terrain should use crampons aggressively and either rope up or use protection systems.
At High Speeds
Self-arrest must be initiated within the first 1-2 seconds of a fall. After 3-5 seconds of acceleration on moderate slopes, the body reaches speeds (25-35 mph) where pick engagement may not generate enough friction to overcome momentum. Once you’re moving fast, the arrest becomes less about technique and more about luck.
With Heavy Pack Loads
Heavy packs (50+ lbs) significantly change the body mechanics of self-arrest. The center of mass shifts, the rotation required for head-first recovery becomes harder, and the pack may bunch into the back of the head during arrest. Mountaineers carrying heavy loads should treat self-arrest as marginal protection and use rope systems on any terrain where falls are possible.
On Exposed Terrain Above Cliffs
Self-arrest stops a slide, but it doesn’t reverse the slide that already happened. On terrain where the runout below contains cliffs, crevasses, or rocks, even successful self-arrest may not prevent serious consequences if you slide far enough before stopping. On exposed terrain, mountaineers should either avoid the route entirely or use protection systems that prevent the initial fall.
⚠ The Safety Hierarchy
Self-arrest is the third line of defense, not the first. The mountaineering safety hierarchy is: (1) Don’t fall (good technique, conservative decisions); (2) If you fall, have protection (rope, anchors, running protection); (3) If protection fails, self-arrest. Climbers who treat self-arrest as primary safety are operating below standard mountaineering practice.
Frequently Asked Questions
What is an ice axe self-arrest?
An ice axe self-arrest is the technique used to stop an uncontrolled slide on a snow slope using an ice axe. The technique involves rotating into a face-down position with the axe head near the shoulder, driving the pick into the snow surface, and using body weight to apply maximum pressure on the axe until the slide stops. Self-arrest is considered the single most important mountaineering safety skill because uncontrolled slides on snow are among the most common causes of mountaineering injury and death.
How long does it take to learn self-arrest?
Basic self-arrest from the standard feet-first-on-back position can be learned in 2-3 hours of focused practice. Full proficiency across all four falling positions requires 1-2 full days of repetitive practice with a qualified instructor. Most mountaineering training programs include 1-2 days of self-arrest drills as a core part of their curriculum. Practice should occur on slopes with safe runouts that allow falls without serious consequences.
Can you self-arrest on hard ice?
Self-arrest is substantially more difficult on hard ice than on snow and may not be possible above certain steepness thresholds. The pick of a standard mountaineering walking axe penetrates softer firn snow well but skips on water ice. On hard ice or steep snow above about 45 degrees, self-arrest reliability drops dramatically. Mountaineers traveling on icy terrain typically rope up and use running protection rather than depending solely on self-arrest.
Do you need crampons to self-arrest?
Crampons are not used in the self-arrest technique itself — pressing crampon points into snow during a slide can cause the crampons to catch and cartwheel you violently. Standard self-arrest technique uses the axe pick as primary arrest force, with bent knees and boot toes providing secondary friction. Crampons remain on for general travel but should not be actively used during the arrest. Practice self-arrest both with and without crampons to develop the muscle memory for real-world scenarios.
What is the difference between an ice axe and an ice tool?
An ice axe (walking axe, mountaineering axe) is the 50-70cm long-handled tool used for general mountaineering, glacier travel, and snow climbing. Ice tools (or ice climbing axes) are shorter (45-55cm) with aggressively curved shafts designed specifically for vertical ice climbing. For self-arrest training and general mountaineering, you need an ice axe — not an ice tool. Ice tools do not perform self-arrest reliably because their curved shafts and aggressive pick angles are optimized for swinging into ice rather than dragging across snow.
When should you wear a leash on an ice axe?
Most modern mountaineering training discourages leashes on the ice axe because they create entanglement risk during a fall and can pull the axe across your face during arrest. Some traditional climbers still use wrist leashes for security. The current consensus from American Alpine Institute, AMGA, and major mountaineering programs is that leashless travel is preferred for general mountaineering, with the axe held loosely and dropped if needed during a fall. Practice both leashed and leashless to understand the tradeoffs.
How steep can you self-arrest on?
Self-arrest reliability degrades rapidly above approximately 45 degrees of slope angle. On gentle slopes (20-30 degrees), self-arrest from any falling position is highly reliable for trained mountaineers. On moderate slopes (30-45 degrees), self-arrest remains feasible but requires faster reactions. Above 45 degrees, self-arrest becomes unreliable and mountaineers should be using protection systems (belays, fixed lines, running protection). On 50-degree-plus terrain, self-arrest should be considered a backup rather than a primary safety system.
Should I take a mountaineering course before attempting self-arrest?
Yes. Self-arrest cannot be learned safely from videos or text alone. Without proper instruction, common mistakes including improper grip, wrong roll direction, and crampon catches can cause serious injury during practice. American Alpine Institute, NOLS, Mountain Madness, RMI Expeditions, and most regional mountaineering programs offer dedicated snow skills courses that include 1-2 days of supervised self-arrest practice. Course costs range from $300-1,200 depending on duration and location. This investment is the single most cost-effective safety expenditure in mountaineering.
Methodology + Editorial Standards
How This Guide Was Built
Author Credentials
Dawson Ludlow is Wilderness First Aid certified with first-hand mountaineering experience on Mount Kilimanjaro via the Lemosho Route (2024, African Walking Company) and Mount Hood via the South Side Hogsback route (May 2026, Timberline Mountain Guides). Self-arrest training was conducted as part of the Mount Hood expedition specifically — one full day on the Palmer Snowfield with AMGA-certified instructors.
Source Categories
This guide cross-references five primary source categories: (1) Dawson Ludlow’s first-hand training at Mount Hood (May 2026) and basic snow technique briefings at Kilimanjaro (2024); (2) Established mountaineering instruction programs including American Alpine Institute, NOLS Wilderness Medicine, RMI Expeditions, and Mountain Madness curricula; (3) Published mountaineering reference texts including “Mountaineering: The Freedom of the Hills” (9th edition, The Mountaineers Books) and “Glacier Travel and Crevasse Rescue” by Andy Selters; (4) AMGA (American Mountain Guides Association) technical standards for snow climbing skills; (5) Internal Global Summit Guide research cross-referenced with our existing mountaineering content.
Editorial Approach
This guide focuses on technique fundamentals rather than advanced edge cases. The goal is to inform climbers preparing for or supplementing formal courses — not to replace courses. Where technique varies between teaching programs (leash use, specific grip variations), we describe the modern consensus position while noting alternatives where relevant.
Update Cycle
This guide is reviewed annually. The next scheduled review is June 2027. Self-arrest technique itself is stable, but equipment recommendations and course availability change. Confirm current course options and equipment models within weeks of training.
About The Author
DL
Dawson Ludlow
Safety & Mountaineering Contributor · Wilderness First Aid Certified · Edited by Travis Ludlow
Dawson Ludlow covers mountaineering safety and technical skills for Global Summit Guide. First-hand experience includes Mount Kilimanjaro via the Lemosho Route (2024) with African Walking Company and Mount Hood via the South Side Hogsback route (May 2026) with Timberline Mountain Guides. Self-arrest training was conducted as part of the Mount Hood expedition with AMGA-certified instructors.
Wilderness First Aid certified. The Global Summit Guide editorial team includes Travis Ludlow (Editor, first-hand experience on Pico de Orizaba, Iztaccíhuatl, Mount Fuji, and Ludlow family Patagonia January 2025) and Walker Ludlow (gear coverage).
Continue Building Your Skills
Mountaineering Safety & Skills (Coming in Skills Cluster)
The next steps after reading this guide: book a 1-3 day mountaineering skills course with a reputable provider, practice the falling positions in the order outlined, and complete a refresher before each climbing season. Self-arrest is one skill in a broader mountaineering safety toolkit — explore our growing skills cluster for more.
The definitive 2026 safety pillar for hikers, climbers, and mountaineers — covering hiking safety tips, solo hiking alone safety, what to do if you get lost (STOP framework), mountaineering safety protocols, the 10 essentials, weather and wildlife hazards, navigation, emergency communication, and the complete framework for safe travel in mountain terrain.
By Travis Ludlow · Editor & Route Research, Global Summit Guide
Published June 9, 2026 · Last verified: June 9, 2026 · Reading time 38 minutes
Editorial approach: Synthesis pillar combining first-hand mountain safety experience from our editorial team’s Kilimanjaro, Mexican volcanoes, Rainier-class, and Patagonia climbs with extensively researched protocols · Safety review:Dawson Ludlow (Wilderness First Aid certified) — the safety content has been reviewed by Dawson Ludlow whose Wilderness First Aid (WFA) certification provides the safety framework for our editorial coverage · Cross-referenced with Wilderness Medical Society, American Alpine Club, National Park Service, and Search and Rescue protocols · Gear review: Walker Ludlow
This Complete Mountain Safety Guide is a foundational E-E-A-T (Experience, Expertise, Authoritativeness, Trust) pillar for Global Summit Guide. Safety content is YMYL (Your Money or Your Life) under Google’s Search Quality Guidelines — meaning we apply extra rigor to sourcing, credential verification, and accuracy.
Specifically, this guide synthesizes: (1) first-hand mountain experience from our editorial team’s climbs of Kilimanjaro, Pico de Orizaba, Iztaccíhuatl, Rainier-class peaks, and Patagonia travel; (2) Wilderness First Aid certified safety review by Dawson Ludlow; (3) authoritative sources including Wilderness Medical Society (WMS), American Alpine Club (AAC) Accidents in North American Mountaineering, National Park Service Search and Rescue statistics, avalanche.org, and established Search and Rescue (SAR) protocols. No affiliate partnerships influence safety recommendations.
⚠ Important Safety Disclaimer
This guide is educational content, not professional safety training. Reading articles about mountain safety is not a substitute for in-person Wilderness First Aid (WFA), Wilderness First Responder (WFR), or AIARE avalanche education courses. Specifically, no online article — including this comprehensive guide — can replicate the hands-on practice, scenario-based training, and instructor feedback that real safety education requires.
If you plan serious mountain trips, take the appropriate certification courses: WFA (16-hour course) for day hikers and weekend backpackers; WFR (80-hour course) for serious backcountry travelers; AIARE Level 1 for anyone entering avalanche terrain in winter. Notably, this guide is designed as a knowledge supplement and reference resource — not as primary safety training.
⚡ The Mountain Safety Verdict in One Sentence
Mountain safety is 80% pre-trip preparation and 20% in-the-moment judgment — meaning the vast majority of safety incidents are prevented before climbers ever leave home. Specifically, telling someone your route, carrying the 10 essentials, checking weather forecasts, choosing trips within your ability level, and bringing emergency communication account for the difference between a safe day and a Search and Rescue call.
The single most important safety practice: Tell someone your detailed route and expected return time. The second most important: Carry a personal locator beacon (PLB) or satellite messenger for any trip beyond cell service. Generally, these two practices prevent more SAR incidents than all other safety practices combined.
10
Essentials to carry
STOP
If you get lost
PLB
Emergency beacon
80%
Safety is preparation
Why This Safety Guide Matters — Editorial Credentials
This Complete Mountain Safety Guide is reviewed by Dawson Ludlow, Wilderness First Aid (WFA) certified. Generally, WFA certification involves a 16-hour intensive training course covering wilderness-specific medical scenarios that don’t occur in urban first aid — including extended evacuation timelines, environmental medicine (hypothermia, heat illness, altitude), specific wilderness hazards (bears, snake envenomation, drowning), and decision-making in resource-limited settings.
Additionally, our editorial team has direct mountain experience: Travis Ludlow has personally climbed Mount Kilimanjaro (5,895m, Tanzania), Pico de Orizaba (5,636m, Mexico), Iztaccíhuatl (5,230m, Mexico), Rainier-class peaks, and various Utah and Mexican volcanoes. Specifically, this combination of credentialed safety review plus first-hand mountain experience provides the foundation for our safety content. Notably, however, online articles are never a substitute for in-person safety training — take WFA, WFR, or AIARE courses if you plan serious mountain trips.
The single most important practice: Tell someone your detailed route and expected return time before every hike.
The 10 Essentials (carry on every hike): Navigation, Sun protection, Insulation, Illumination, First aid, Fire, Repair kit, Nutrition, Hydration, Emergency shelter. If you get lost: STOP — Stop, Think, Observe, Plan. For emergency communication beyond cell service: Carry a personal locator beacon (ACR ResQLink) or satellite messenger (Garmin inReach Mini, ZOLEO).
Solo hiking safety: Tell someone your route, carry PLB/satellite messenger, stay on marked trails, hike well within ability. Weather: Check forecasts, turn back when conditions deteriorate, recognize hypothermia and lightning danger. Wildlife: Bear spray in bear country, food storage protocols, recognize species-specific responses. The most critical training: Wilderness First Aid (WFA) certification course — 16 hours.
🛡 The Mountain Safety Decision Framework
Mountain safety operates across three distinct timeframes that require different approaches. First, pre-trip preparation (weeks/days before): route planning, weather analysis, gear preparation, emergency contact systems, fitness assessment, ability matching. Second, in-the-moment judgment (during the trip): weather observation, turnaround decisions, hazard recognition, fatigue management, group coordination. Third, emergency response (if something goes wrong): wilderness first aid, communication activation, survival protocols, rescue coordination.
Generally, the most common mistake is over-investing in emergency response training while under-investing in pre-trip preparation. Specifically, telling someone your route and carrying the 10 essentials prevents more incidents than any other practice. Notably, the second most common mistake is under-investing in weather analysis — most mountain emergencies start with weather conditions the climber should have seen coming.
Mountain safety is the integrated discipline of preventing, recognizing, and responding to hazards in mountain terrain — covering hiking safety, mountaineering safety, wilderness survival, and emergency response. Generally, mountain safety differs from general outdoor safety because mountain environments combine multiple compounding hazards (altitude, weather severity, terrain difficulty, distance from rescue, communication challenges) that don’t typically occur together in lower-elevation outdoor settings. Specifically, mountain safety requires preparation across navigation, weather, terrain, wildlife, water, altitude, and emergency communication categories — each with its own protocols and required knowledge. Notably, the foundation of mountain safety is the principle that most incidents are preventable through pre-trip preparation — telling someone your route, carrying the 10 essentials, checking weather, choosing appropriate objectives, and bringing emergency communication. The discipline ranges from basic hiking safety (sufficient for day hikes on marked trails) through advanced mountaineering safety (required for technical alpine objectives) to expedition-level safety (required for high-altitude and remote climbing). Generally, every hiker and climber should at minimum take a Wilderness First Aid (WFA) course; more serious mountain travelers should add Wilderness First Responder (WFR) certification and avalanche education (AIARE Level 1).
Key Takeaways
Tell someone your route — single most important safety practice.
Carry the 10 essentials — non-negotiable for any hike beyond well-traveled day use.
If lost: STOP framework — Stop, Think, Observe, Plan.
Solo hiking requires extra preparation — PLB, well-traveled trails, ability margin.
Descent is statistically more dangerous than ascent — fatigue management critical.
Personal locator beacon or satellite messenger for any trip beyond cell service.
WFA certification recommended for serious hikers; WFR for backcountry travelers.
Weather is the underlying cause of most mountain emergencies.
Bear country requires bear spray + proper food storage protocols.
Avalanche terrain requires AIARE training — no substitute for in-person education.
Updated June 2026 · Foundational safety pillar (4th of 10) · WFA-certified safety review · 10 Essentials + STOP framework + Solo hiking + Mountaineering safety
Why Mountain Safety Matters
Mountain environments combine multiple compounding hazards in ways that lower-elevation outdoor settings typically don’t — altitude, severe weather, technical terrain, distance from rescue, communication challenges, and rapid condition changes all stack together to make mountain travel meaningfully more dangerous than general hiking. Generally, this is why a dedicated mountain safety framework is necessary. Specifically, what works for a state park day hike may be inadequate or actively dangerous when applied to mountain terrain where temperatures can drop 30°F in an hour, where afternoon thunderstorms develop predictably on exposed ridges, where a sprained ankle becomes a multi-day rescue operation, and where Search and Rescue may be 6-24 hours away even when activated.
What distinguishes safe mountain travelers from unsafe ones is not skill or fitness alone — it’s the systematic application of preparation practices and judgment frameworks that mountain communities have developed over decades. Generally, the safest climbers and hikers in any community are those who consistently apply the same boring practices: telling someone their route, carrying the 10 essentials, checking weather, choosing trips within ability, turning back when conditions deteriorate. Specifically, the National Park Service publishes annual Search and Rescue statistics showing that the majority of incidents involve hikers and climbers who failed at one or more of these basic practices. Notably, this means that mountain safety is largely teachable and learnable — it’s not a function of mysterious mountain skills, but of the systematic application of well-documented protocols.
The 7 Core Pillars of Mountain Safety
Mountain safety is best organized around seven core pillars that comprehensively cover the hazards and protocols relevant to hiking, climbing, and mountaineering. Generally, every safety incident can be analyzed back to inadequate preparation in one or more of these pillars:
Specifically, the 10 essentials packing system (described next) addresses pillars 1, 2, 4, 6, and 7 directly through gear; pillars 3 and 5 require knowledge and judgment more than gear alone. Notably, comprehensive mountain safety requires competence across all seven pillars — overemphasis on any single pillar at the expense of others is a common pattern in unsafe climbers.
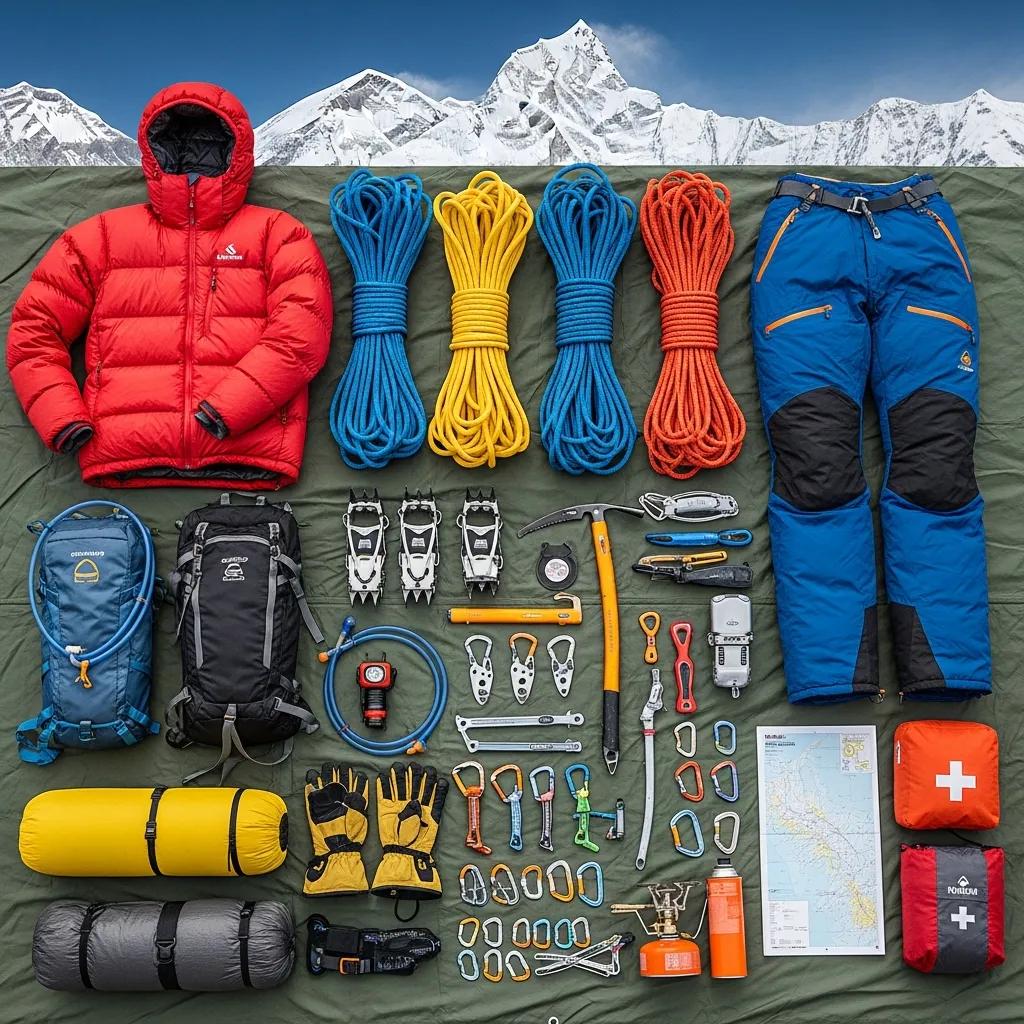
The 10 Essentials — Non-Negotiable Hiking Packing List
The 10 Essentials System
The 10 Essentials is the standard safety packing framework developed by the Mountaineers and adopted by national parks, search and rescue organizations, and safety educators worldwide. Carry these 10 systems on every hike beyond well-traveled day-use trails.
Extra food beyond planned needs. 24-hour emergency food minimum.
9Hydration
Extra water + water purification (tablets, filter). 1.5L+ capacity baseline.
10Emergency Shelter
Emergency bivvy or space blanket. Allows surviving unplanned overnight.
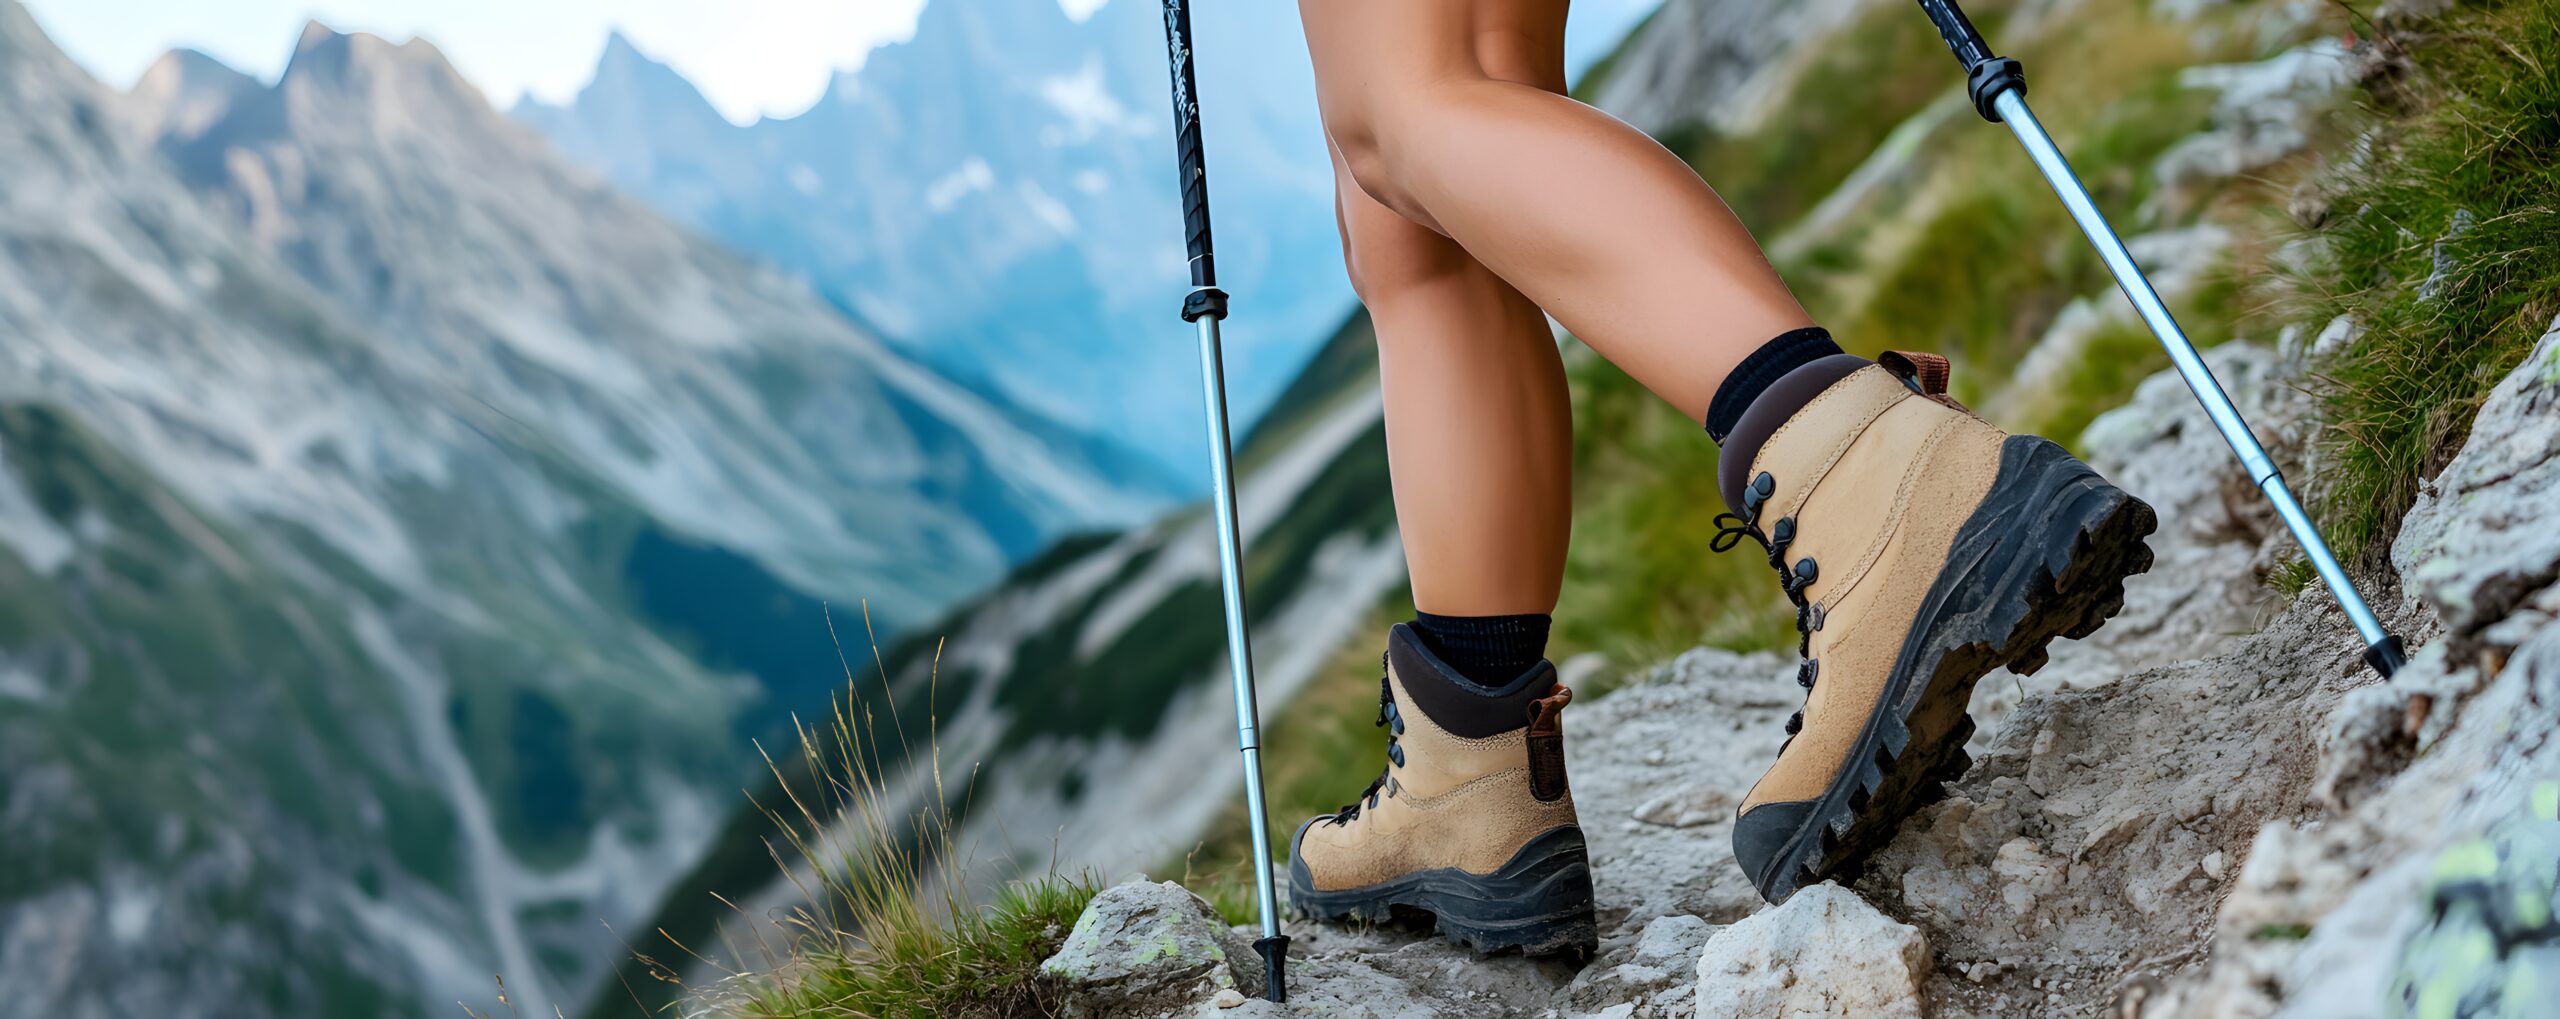
Proper footwear is foundational to mountain safety. Generally, the right hiking boots prevent the single most common minor injury that becomes serious on mountain trips — ankle sprains, falls, and blisters that compound into evacuation situations. Specifically, mountain travel requires sturdy boots appropriate for the terrain: lightweight trail runners for maintained trails, mid-weight hiking boots for off-trail and rough terrain, full mountaineering boots for technical climbing with crampons. Notably, boots must be broken in before serious mountain trips — new boots on a major peak are a guaranteed blister scenario.Photo: Mountaineering footwear. Global Summit Guide media library.
Essential Hiking Safety Tips — The Foundation
The fundamental hiking safety tips that prevent the vast majority of Search and Rescue incidents. Generally, these practices are universal — they apply equally to first-time day hikers, experienced backpackers, and mountaineers. Specifically, mountain safety experts consistently identify the same core practices as the highest-leverage hiking safety tips:
The 15 Most Important Hiking Safety Tips
#
Hiking Safety Tip
Why It Matters
1
Tell someone your detailed route and expected return time
Triggers SAR response if you don’t return. Single most important practice.
2
Carry the 10 essentials in full
Prevents typical incidents from becoming life-threatening
3
Check weather forecasts before and during trip
Weather causes most mountain emergencies
4
Start early to allow daylight buffer
Most accidents happen on tired late-day descents
5
Stay on marked trails unless experienced off-trail
Off-trail navigation skill is harder than people assume
6
Drink water before you feel thirsty
Dehydration impairs judgment before you notice
7
Eat regularly — every 60-90 minutes
Blood sugar management critical for fatigue prevention
8
Wear appropriate footwear (broken in)
Foot problems are the most common minor injury
9
Layer clothing for temperature variability
Mountain temps swing 30°F+ in a single day
10
Know turnaround time and honor it
Summit fever causes more deaths than weather
11
Trust your instincts — turn back if something feels wrong
Subconscious risk recognition is real
12
Carry communication device (PLB, satellite messenger)
Cell service unreliable in mountains
13
Hike with appropriate fitness for the objective
Fatigue causes most serious incidents
14
Recognize and respect altitude effects
Altitude sickness can be fatal
15
Take a Wilderness First Aid (WFA) course
16 hours of training prevents most serious outcomes
◆ The Single Most Important Hiking Safety Tip
Tell someone your detailed route and expected return time before every hike. Generally, this single practice prevents more Search and Rescue tragedies than all other safety practices combined. Specifically, what to include: trailhead name, planned route, intended summit or turn-around point, expected return time, vehicle make/model/license, what to do if you don’t return by a specific time. Notably, this practice activates SAR response automatically — even if you can’t communicate, your contact will trigger help once you’ve passed your expected return time. Cards or web services that automate this exist (e.g., Caltopo route sharing) but a text message to a trusted person is equally effective.
Hiking Alone Safety — 12 Essential Tips for Solo Hikers
Hiking alone safety requires fundamentally different preparation than group hiking — solo hikers lose the single biggest safety asset of having a partner who can call for help, treat injuries, or share critical decisions. Generally, solo hiking can be done safely but only with significantly increased preparation rigor. Specifically, here are the 12 essential tips for hiking alone safety:
SOLO TIP #1
Always Tell Someone — Without Exception
For solo hikers, telling someone your detailed route is not optional — it’s the entire safety net. Specifically, solo hikers cannot self-rescue from major injuries; if you don’t return, SAR response is your only hope. Generally, share: trailhead, route, intended turnaround time, expected return time, and a contact protocol if you’re late. Use written communication (text or email) rather than verbal so the details are documented.
SOLO TIP #2
Carry a Personal Locator Beacon or Satellite Messenger
For solo hikers, emergency communication beyond cell service is essentially mandatory. Generally, options include: ACR ResQLink PLB ($300-400, no subscription), Garmin inReach Mini ($300+ + $15-50/month subscription), ZOLEO ($200+ subscription model), or Apple iPhone 14+ Emergency SOS via satellite. Specifically, satellite messengers (two-way) are preferred over PLBs (one-way) for solo hiking because two-way communication lets you describe your situation to rescuers.
SOLO TIP #3
Stick to Well-Traveled Trails Within Your Ability
Solo trips are not the time to push your limits or attempt remote off-trail objectives. Generally, the right solo objective is a trail you’ve done before, or a well-established marked trail with significant other hiker traffic. Specifically, if you injure yourself on a popular trail, other hikers can call for help; on a remote off-trail route, you might lie undiscovered for days. Notably, save edge-of-ability and remote trips for groups.
SOLO TIP #4
Hike Well Within Your Fitness Margin
Solo hikers should plan trips substantially below their maximum capability. Generally, the rule of thumb: do solo trips at 60-70% of your maximum group-trip ability. Specifically, this margin provides reserve capacity for unexpected challenges (route finding errors, weather changes, minor injuries). Notably, the most common cause of solo hiking incidents is overestimating ability — a trip that’s well within your capability with a partner can exceed your safety margin when alone.
SOLO TIP #5
Start Early — Always
Solo hikers need maximum daylight buffer. Generally, start at first light or even before — using a headlamp for the first 30-60 minutes is preferable to running out of daylight at the end. Specifically, most accidents happen on tired late-day descents, and solo hikers can’t share fatigue with a partner. Notably, the standard recommendation for solo trips is to plan for a midday turnaround — this gives 6+ hours of margin before darkness.
SOLO TIP #6
Carry Extra Water and Food
For solo trips, pack approximately 50% more water and food than you estimate needing. Specifically, if you typically carry 2L for a day hike, carry 3L solo; if you typically bring 1,500 calories, bring 2,300. Generally, this margin protects against situations where you become injured or delayed and need to wait for rescue. Notably, water purification (Sawyer Squeeze, Aquamira tablets) is essential for solo trips longer than 3-4 hours.
SOLO TIP #7
Trust Your Instincts About Other Hikers
If another hiker on the trail makes you uncomfortable for any reason — change your plans. Generally, solo hikers (especially solo women) face occasional safety concerns from other people, and the right response to discomfort is to: turn around, hike with another group, or change to a more populated trail. Specifically, never feel obligated to share your route, accommodation, or specific plans with strangers met on trail. Notably, this is a real consideration that group hikers don’t face the same way.
SOLO TIP #8
Be Especially Cautious About Minor Injuries
For solo hikers, minor injuries are disproportionately dangerous. Generally, a sprained ankle that’s a minor inconvenience in a group can prevent walking — leaving a solo hiker stranded in the backcountry. Specifically, the right response to any injury on a solo trip is to immediately stop, assess, and consider activating emergency response. Notably, the heroic solo hiker who pushes through an injury often becomes the SAR case who couldn’t be reached in time.
SOLO TIP #9
Practice Self-Rescue Mindset
Solo hikers should think through self-rescue scenarios before they happen. Generally, mental preparation includes: how would I splint a sprained ankle and self-evacuate? How would I find shelter if injured? How would I signal for rescue? What’s my decision threshold for activating the PLB? Specifically, having pre-thought answers prevents panic-based decision-making in real emergencies. Notably, this mindset is taught in Wilderness First Aid courses.
SOLO TIP #10
Choose Solo Trips in Higher-Traffic Areas First
Build solo hiking experience progressively. Generally, start solo trips on well-marked, high-traffic trails (e.g., popular national park day hikes); progress to backcountry solo trips only after substantial experience. Specifically, the wrong progression is to start solo trips on remote routes thinking you’re being adventurous — the right progression is building competence on safer terrain first. Notably, solo trips on remote 14ers, off-trail mountaineering, or wilderness areas should follow years of solo experience on easier terrain.
SOLO TIP #11
Make Noise in Wildlife Country
Solo hikers are particularly vulnerable to wildlife surprise encounters because solo hiking is quieter than group hiking. Generally, make consistent noise in bear country (especially during peak feeding times near streams and berry patches): talk, sing, clap occasionally, or attach a bear bell. Specifically, this is even more important for solo hikers than groups because solo hikers cover ground more quietly. Notably, bear spray is essential for solo hiking in bear country.
SOLO TIP #12
Establish Check-In Protocols
Set up automatic check-ins with your contact. Generally, options include: text at trailhead before starting, text at turnaround/summit, text at trailhead on return; satellite messenger automated tracking shared with contact (Garmin inReach offers this); CalTopo or Strava route sharing. Specifically, automated check-ins remove the burden of remembering to communicate while you’re focused on the hike. Notably, the contact should be instructed to call SAR if scheduled check-ins are missed by a defined time threshold.
What to Do If You Get Lost While Hiking — The STOP Framework
If you become lost or disoriented while hiking, follow the STOP framework — the standard wilderness survival protocol taught by Search and Rescue organizations and wilderness first aid programs. Generally, the worst response to being lost is to continue moving, which compounds navigation errors and exhausts you further. Specifically, the STOP acronym provides a structured response that prevents panic-based mistakes:
The STOP Framework — If You Get Lost
S
STOP
Stop moving immediately. Stay where you are while you assess the situation rationally.
T
THINK
Think calmly about your situation. When did you last know where you were? What direction were you traveling?
O
OBSERVE
Observe your surroundings. Check map, sun position, listen for sounds, identify landmarks.
P
PLAN
Plan deliberately. Stay put, backtrack, find shelter, or navigate to known landmark. Activate PLB if needed.
Generally, after STOP, the right action is usually to stay put if you’ve told someone your route — Search and Rescue will start looking based on your shared itinerary, and moving makes you harder to find. Specifically, if you have a personal locator beacon (PLB) or satellite messenger and your situation is serious, activate it immediately — don’t wait until darkness or worsening conditions. Notably, the most common “lost hiker” scenario is actually a wandering off-trail mistake that can be corrected by backtracking carefully to the last known trail junction.
Detailed Protocols if Lost
Phase
Action
Notes
Initial response (first 10 min)
STOP. Sit down. Drink water. Eat something. Breathe.
Decision quality declines under stress — calm before action
Assessment (10-30 min)
Map check. Sun position. Listen. Identify last known location.
Try to determine where you went wrong
Decision (30-60 min)
Stay or move? PLB or wait?
Generally stay if route was shared with contact
Stay-put protocol
Find shelter, build signal (bright clothing/SOS), conserve resources
Stay visible from air; conserve water
Self-rescue protocol
Move only with confidence in direction; mark route as you go
Build cairns or marks at intervals
Emergency activation
PLB or satellite messenger; clear messaging if 2-way
Don’t delay if conditions deteriorate
Overnight unplanned
Emergency shelter; insulation; signal fire if safe
The 10 essentials prevent overnight emergencies from being fatal
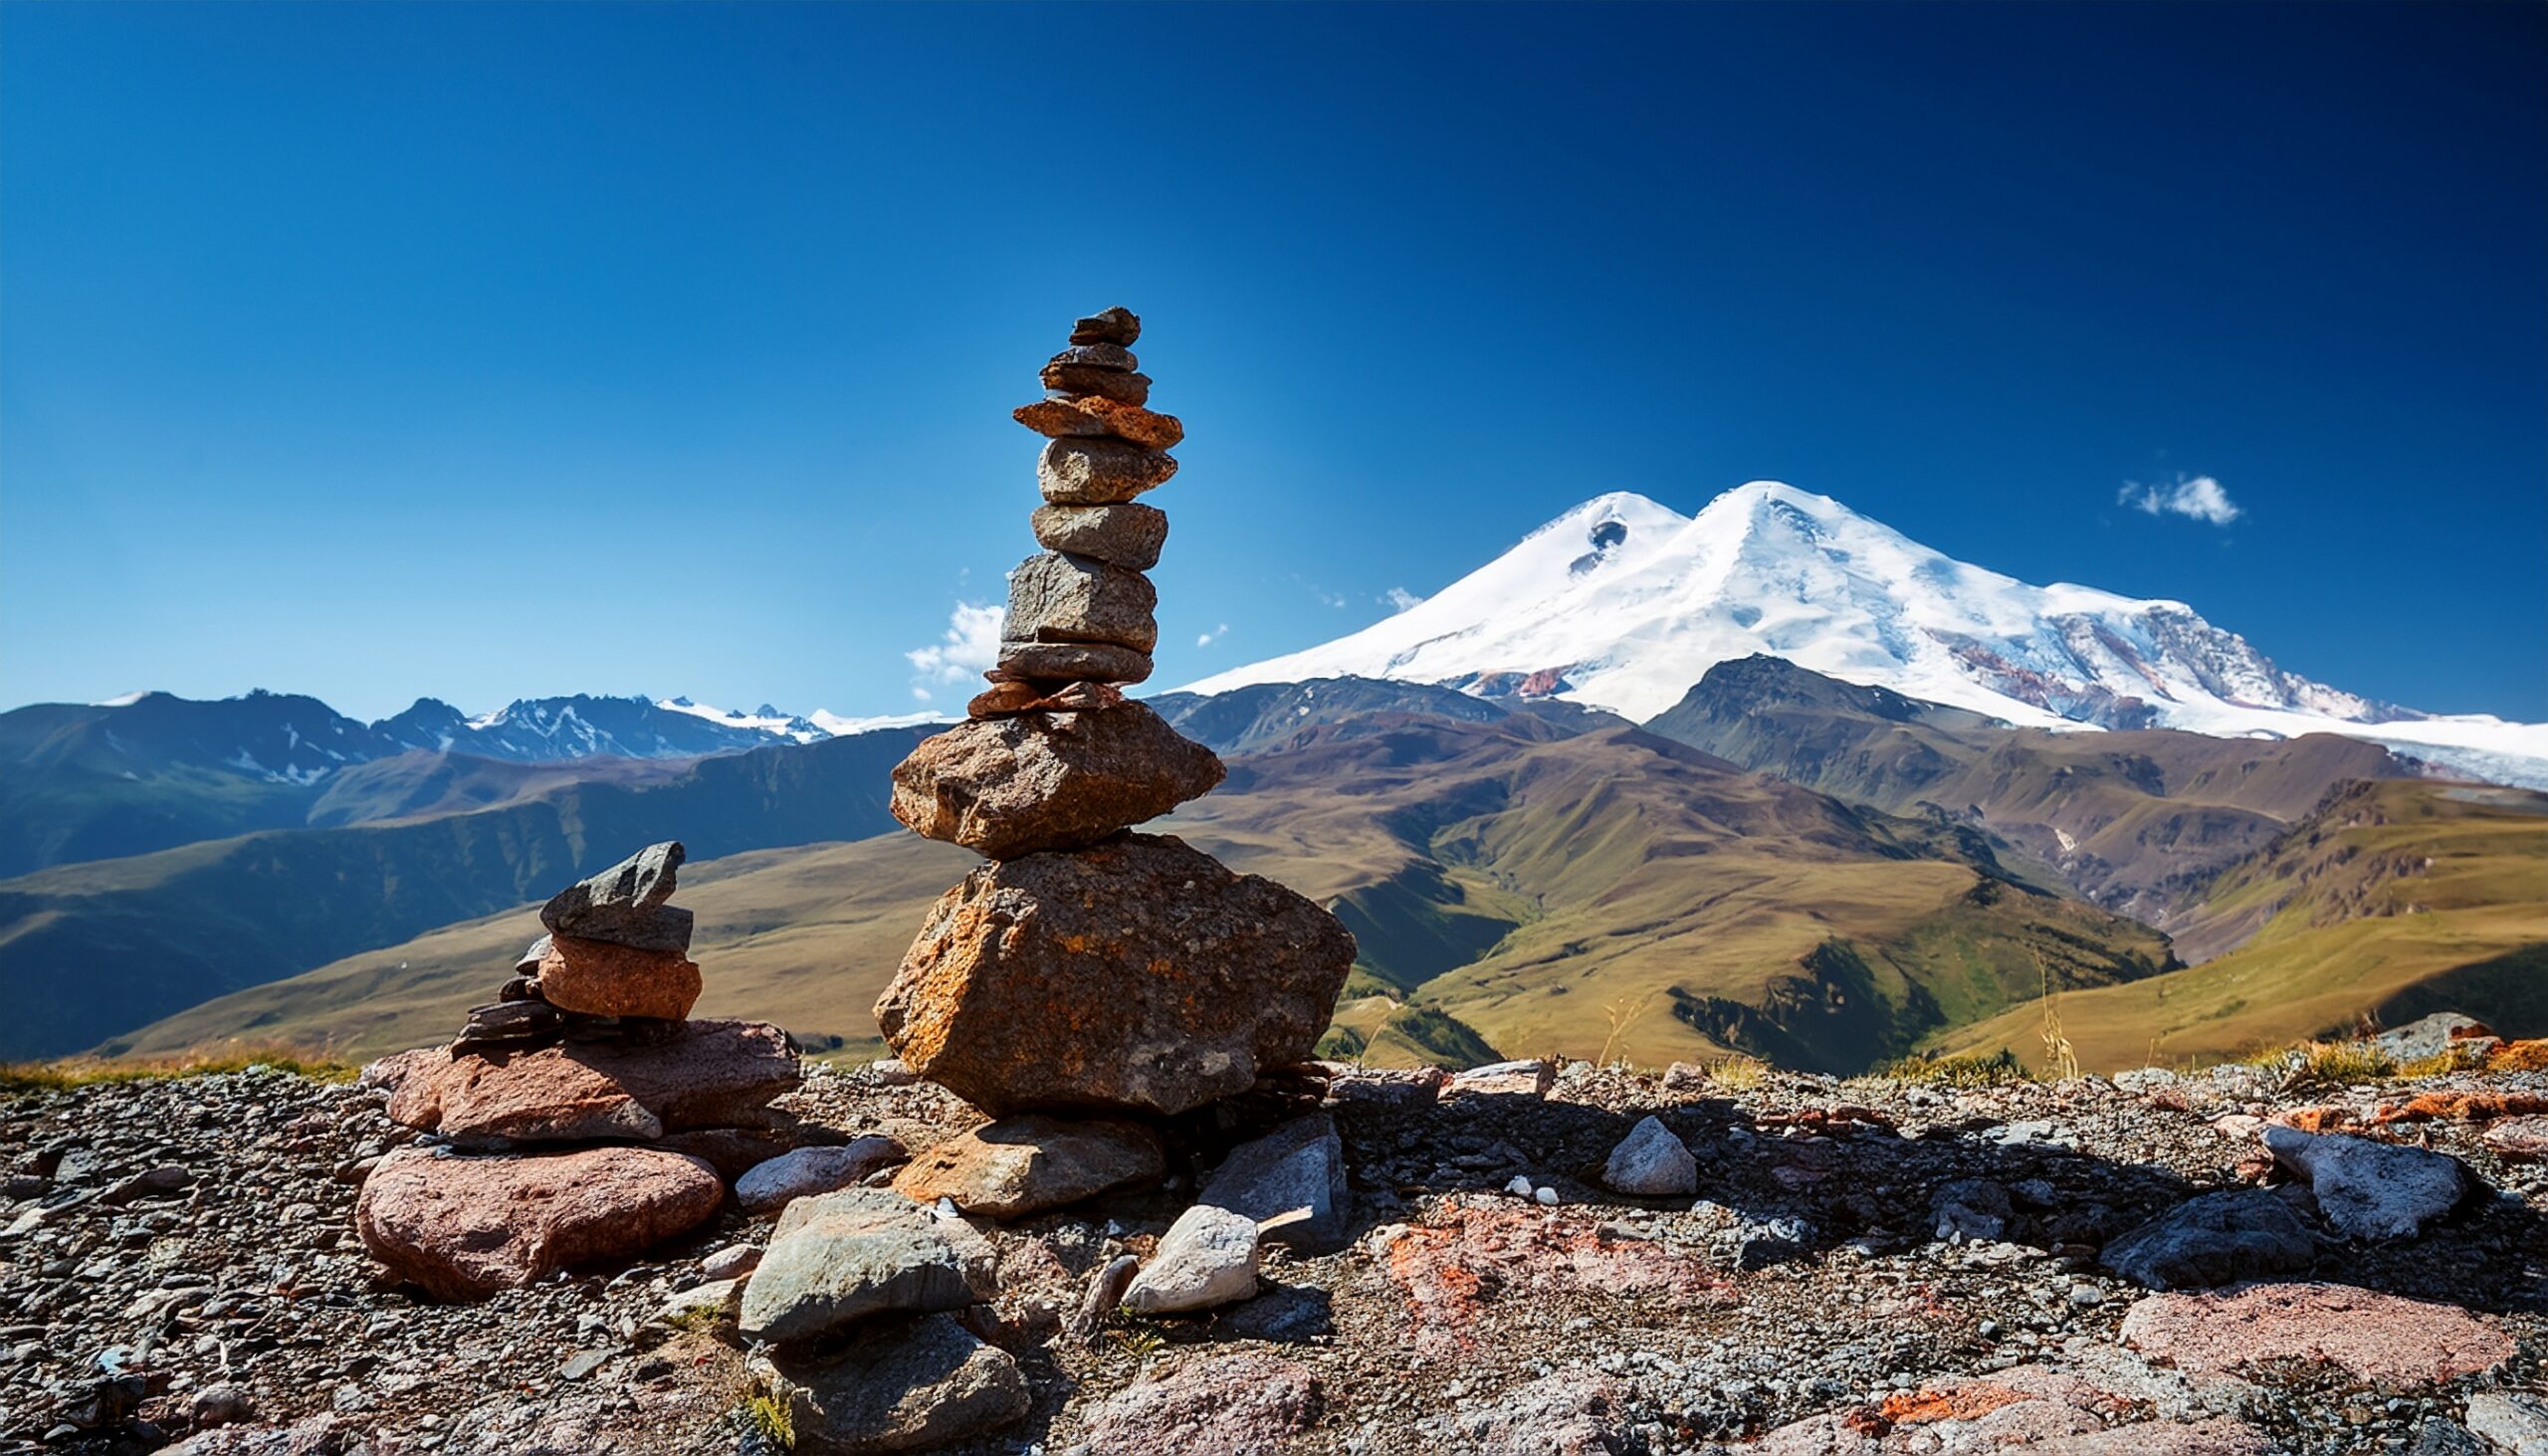
Cairns and trail markers are the navigation backbone of mountain hiking. Generally, mountain trails use multiple marking systems: painted blazes on trees in forested areas, cairns (stacked rocks) above treeline, signage at junctions, and GPS waypoints for off-trail navigation. Specifically, cairns become critical above treeline where forest trail markers don’t apply — the route from cairn to cairn requires visual line-of-sight navigation. Notably, fog and snow can hide cairns, which is why every mountain traveler should carry a map and compass (and know how to use them) regardless of GPS reliance.Photo: Cairns and trail markers. Global Summit Guide media library.
Navigation & Route Finding Safety
Navigation competence prevents getting lost — the foundational mountain safety skill. Generally, modern mountain navigation combines traditional skills (map and compass) with electronic tools (GPS, smartphone apps), with neither alone being sufficient. Specifically, the standard navigation toolkit includes:
Garmin GPSMAP, eTrex; battery life longer than phones
Smartphone apps
Topo maps, route guidance, offline navigation
Gaia GPS (industry standard), AllTrails, FarOut for thru-hikers
Altimeter watch
Elevation confirmation, contour matching
Useful for confirming position on topo map
Personal locator beacon
Emergency activation
ACR ResQLink — backup if navigation fails completely
Weather Hazards in the Mountains
Weather is the underlying cause of most serious mountain emergencies — and weather-related deaths are the most preventable because forecasts are widely available and conditions are usually observable before they become dangerous. Generally, the most important weather hazards in mountains are:
Hazard
Recognition
Response
Thunderstorms / Lightning
Building cumulonimbus clouds; static in air; thunder approach
Get off exposed ridges immediately; avoid summit areas after 11 AM in summer
Hypothermia conditions
Cold + wet + wind = hypothermia risk regardless of temperature
Stay dry; layer appropriately; recognize early shivering and confusion
Whiteout / blizzard
Heavy snow + wind reducing visibility
Shelter in place; emergency bivvy; don’t continue navigation in zero-vis
Severe wind
50+ mph sustained wind on exposed terrain
Crawl if needed; descend to sheltered terrain; avoid ridge exposure
Heat / sun exposure
High UV at altitude; dehydration risk
Sun protection; hydration; early starts
Sudden temperature drops
30-50°F drops common in mountain weather changes
Layer system + emergency shelter
⚠ The Single Most Important Weather Rule for Mountain Safety
Summit before noon in summer. Generally, this single rule prevents the most common weather-related mountain emergency: afternoon thunderstorms on exposed ridges. Specifically, in the Mountain West and other thunderstorm-prone regions, building convective activity typically develops between 11 AM and 2 PM and produces lightning strikes on exposed terrain. Notably, climbers who summit by 10-11 AM and are descending below treeline by noon avoid 90%+ of summer lightning incidents. The rule applies to Colorado 14ers, Sierra Nevada peaks, Tetons, Wind Rivers, and any region with classic summer afternoon thunderstorm patterns.
Wildlife Safety — Bears, Lions, and Other Concerns
Bear Country Safety
Species
Locations
Response if Encountered
Black bears
Wide US distribution; Appalachians, Rockies, PNW, Sierra
Stand ground, make noise, look large. Fight back if attacked (rare).
Play dead with bear spray ready. Fight only if attack continues.
Polar bears
Far north Alaska, Canada
Bear spray + firearm protocol; don’t enter without proper preparation
Generally, bear country requires: bear spray on your hip (not buried in pack), proper food storage (bear canisters required in many parks), making noise while hiking, and group hiking when possible. Specifically, bear spray is the single most effective bear defense — studies show 90%+ effectiveness when properly used; firearms are significantly less effective in bear encounters than properly deployed bear spray.
Mountain Lions, Snakes, and Other Wildlife
Mountain lions / cougars: Stand tall, make noise, look large, fight back if attacked. Don’t run.
Moose: Particularly dangerous in fall rut; give wide berth (100+ yards minimum).
Rattlesnakes: Watch step placement; ankle gaiters in snake country; respond with elevation and slow evacuation if bitten.
Ticks: Lyme disease vector; check after hikes; treat clothing with permethrin in high-risk areas.
Insects: DEET 30%+ for serious mosquito country; mosquito nets for camping.
Water Safety and River Crossings
Drowning is one of the top causes of hiking deaths — particularly in stream and river crossings, which are deceptively dangerous. Generally, the safest approach to water crossings is:
Cross in the morning — water levels typically lowest before afternoon melt
Cross at wide, shallow sections — avoid narrow deep channels
Use trekking poles for three-point stability
Face upstream while crossing for stability
Unbuckle pack hip belt and sternum strap — be able to shed pack if you fall
Turn back if water is above your knees in fast current
Never cross alone in dangerous water — wait for help or backtrack
Mountaineering Safety — Beyond Basic Hiking
Mountaineering safety adds technical skills and gear requirements beyond standard hiking safety — and this is where Global Summit Guide’s specific expertise focuses. Generally, mountaineering safety covers: rope team travel for crevasse protection on glaciated peaks, ice axe self-arrest technique, crampon proficiency, basic rock climbing safety, route finding on technical terrain, weather windows on multi-day expeditions, and altitude management on serious peaks. Specifically, mountaineering safety is what distinguishes the more demanding objectives — Mount Elbrus, Aconcagua, Denali, and the 8,000-meter peaks — from standard hiking destinations.
Core Mountaineering Safety Skills
Skill
Where Required
How to Learn
Ice axe self-arrest
Glaciated peaks, steep snow
Mountaineering instruction; practice on safe slope
Altitude sickness is one of the most serious mountain hazards and one of the most preventable through proper acclimatization. Generally, the three altitude conditions to recognize and respond to are: AMS (Acute Mountain Sickness), HAPE (High Altitude Pulmonary Edema), and HACE (High Altitude Cerebral Edema). Specifically, all three can be fatal if ignored, and the only definitive treatment is descent.
Generally, avalanche safety is the one area of mountain safety where online education is genuinely inadequate — you must take in-person AIARE (American Institute for Avalanche Research and Education) courses to learn this material. Specifically, AIARE Level 1 is a 3-day course covering avalanche terrain recognition, snowpack assessment, decision-making frameworks, and companion rescue. Notably, anyone entering avalanche terrain (steep snow slopes 30-45° at any elevation in winter and spring) needs AIARE Level 1 training plus full avalanche rescue equipment: beacon, probe, shovel — and the partner training to use them effectively.
Wilderness First Aid Essentials
The 16-hour Wilderness First Aid (WFA) certification course is the foundation for all serious mountain travel. Generally, WFA covers wilderness-specific medical scenarios that don’t occur in urban first aid:
Extended evacuation timelines (hours to days vs urban minutes)
Environmental medicine (hypothermia, hyperthermia, altitude, lightning, drowning)
Wilderness-specific injuries (orthopedic injuries far from rescue, traumatic wounds, snake envenomation)
Decision-making in resource-limited settings (evacuate vs treat in place decisions)
Improvised treatments (splints from trekking poles, makeshift slings, emergency shelter)
Generally, WFA certification is recommended for any serious hiker; Wilderness First Responder (WFR) certification (80 hours) is recommended for backcountry travelers, professional outdoor guides, and serious mountaineers.
Emergency Communication
Device
Function
Cost
Best For
Cell phone
Voice calls and texts where coverage exists
None additional
Front-country trails near roads
Personal Locator Beacon (PLB)
One-way emergency activation via 406 MHz frequency to SAR satellites
$300-400 device, no subscription
Budget-conscious backcountry; long-term value
Garmin inReach Mini 2
Two-way text via Iridium satellite; weather; tracking; SOS
$300-400 + $15-50/mo subscription
Most popular choice for serious hikers
ZOLEO
Two-way text via satellite + cell; weather; SOS
$200 + $20-50/mo subscription
Hybrid satellite-cell coverage
SPOT X
Two-way text via Globalstar satellite; SOS
$250 + $15-30/mo subscription
Budget two-way satellite option
Apple iPhone 14+ Emergency SOS
One-time emergency contact via satellite
Included with iPhone
Backup; not primary device
Comprehensive preparation is the foundation of mountain safety. Generally, the gear that distinguishes safe from unsafe mountain travelers is not the most expensive equipment but the most appropriate equipment for the specific objective — the right boots for the terrain, the right insulation for the temperature range, the right communication device for the distance from cell service. Specifically, expedition-level objectives like serious mountaineering require gear systems that day hikers don’t think about: emergency shelter, satellite communication, full medical kits, and the redundancy required when rescue is days away. Notably, no amount of gear substitutes for skills and judgment — the gear enables safe decisions, it doesn’t create them.Photo: Expedition gear systems. Global Summit Guide media library.
Why Do Hikers Put Vaseline on Their Feet?
Hikers put Vaseline (petroleum jelly) on their feet primarily to prevent blisters by reducing friction between skin and socks on long distances. Generally, Vaseline creates a low-friction barrier that allows fabric to slide smoothly against skin rather than catching and creating shear forces that lift skin layers and form blisters. Specifically, ultra-distance hikers, thru-hikers (Appalachian Trail, Pacific Crest Trail, Continental Divide Trail), and serious mountaineers apply Vaseline to hot spots before hiking begins and reapply at breaks.
The technique works but has tradeoffs:
Vaseline can darken socks and trap dirt and grime
Vaseline can soften skin over multi-day use, leading to other foot problems
Vaseline is heavier and messier than alternatives like specialized anti-friction balms
Modern alternatives that most experienced hikers prefer over Vaseline:
Pre-taping hot spots with kinesio tape, leukotape, or moleskin remains the gold standard
Notably, the broader category of products is called anti-friction balms, and the technique is part of a comprehensive foot care system that includes: proper boot fit (broken in), moisture-wicking socks, sock liners, pre-taping known hot spots, and regular breaks to check feet on multi-day hikes.
Common Safety Mistakes That Lead to SAR Calls
⚠ The 10 Most Common Mountain Safety Mistakes
(1) Not telling anyone the route — single most common factor in SAR cases. (2) Starting too late — afternoon turnarounds become dangerous at altitude or in storms. (3) Underestimating weather changes — mountain weather changes in hours, not days. (4) Pushing past turnaround time — summit fever causes more deaths than any single hazard. (5) Inadequate gear for conditions — wrong boots, no rain shell, insufficient layers. (6) Solo hiking without communication device — minor injuries become rescue cases. (7) Off-trail navigation overconfidence — trail finding skill harder than people assume. (8) Ignoring early altitude symptoms — AMS can progress to HAPE/HACE quickly. (9) Skipping the 10 essentials to save weight — emergency shelter and first aid prevent the worst outcomes. (10) No Wilderness First Aid training — minor injuries become catastrophic without basic medical skills.
Recommended Safety Training Courses
Course
Duration
Cost
Recommended For
Wilderness First Aid (WFA)
16 hours (2 days)
$200-400
Day hikers, weekend backpackers — minimum baseline
Generally, the priority order for most hikers and climbers: WFA first, then add subject-specific courses as objectives demand (AIARE for winter; crevasse rescue for glacier objectives; basic mountaineering for technical peaks).
Frequently Asked Questions About Mountain Safety
What to do if you get lost while hiking?
If you get lost while hiking, follow the STOP acronym taught by Search and Rescue organizations: STOP (stop moving immediately), THINK (think calmly about your situation), OBSERVE (observe your surroundings, map, sun position, sounds), and PLAN (make a deliberate plan based on the previous steps). The worst response to being lost is to keep walking, which compounds navigation errors and exhausts you. Sit down for 5-10 minutes and assess: when did you last know your location, what direction were you traveling, what landmarks did you pass, how much daylight remains. If you’ve told someone your route and expected return time, staying put is often the best decision — Search and Rescue will start looking based on your shared itinerary. Use a personal locator beacon (PLB) or satellite messenger (Garmin inReach, ZOLEO) immediately if you have one and your situation is serious.
Is hiking alone safe?
Solo hiking can be done safely with proper preparation, but it requires significantly more risk management than hiking with a partner. Solo hiking removes the single biggest safety advantage of having a partner — someone to call for help, treat injuries, or share decisions during stress. Solo hikers should: tell someone their detailed route and expected return time, carry a personal locator beacon (PLB) or satellite messenger, stick to well-traveled trails for solo trips, hike well within their ability level, pack the 10 essentials in full, check weather forecasts thoroughly, carry extra food and water for emergencies, and start early to allow buffer time. Certain hazards become disproportionately dangerous when solo: minor injuries (sprains, falls) that would be manageable in a group can become life-threatening alone if they prevent walking. Hiking alone is widely practiced and rewarding but requires honest acknowledgment of the elevated risk and corresponding preparation.
What are the most important hiking safety tips?
The most important hiking safety tips are: (1) Tell someone your route and expected return time — this is the single most important safety practice because it triggers Search and Rescue response if you don’t return; (2) Carry the 10 essentials (navigation, sun protection, insulation, illumination, first aid, fire, repair kit, nutrition, hydration, emergency shelter); (3) Check weather forecasts and turn back if conditions deteriorate; (4) Stay on marked trails unless you are highly experienced with off-trail navigation; (5) Start early to allow buffer time before darkness; (6) Carry water purification and more water than you think you need; (7) Know your limits and turn back when fatigue, weather, or terrain exceed your ability; (8) Carry a means of communication (PLB or satellite messenger for remote trips, cell phone for popular trails); (9) Understand the specific hazards of your area (wildlife, weather patterns, terrain risks); (10) Wear appropriate footwear (sturdy hiking boots) and layered clothing. These basic tips prevent the vast majority of Search and Rescue incidents.
Why do hikers put vaseline on their feet?
Hikers put Vaseline (petroleum jelly) on their feet primarily to prevent blisters by reducing friction between skin and socks on long distances. Vaseline creates a low-friction barrier that allows fabric to slide smoothly against skin rather than catching and creating shear forces that lift skin layers and form blisters. Ultra-distance hikers, thru-hikers (Appalachian Trail, Pacific Crest Trail, Continental Divide Trail), and serious mountaineers apply Vaseline to hot spots before hiking begins and reapply at breaks. The technique works for blister prevention but has tradeoffs: Vaseline can darken socks and trap dirt and grime, can soften skin over multi-day use leading to other foot problems, and is heavier and messier than alternatives like specialized anti-friction balms (Body Glide, Trail Toes) which are preferred by most modern hikers. The broader category of products is called anti-friction balms, and most experienced hikers prefer these specialized products over Vaseline. Pre-taping hot spots with kinesio tape, leukotape, or moleskin remains the gold standard for blister prevention on serious hikes.
What are the 10 essentials for hiking?
The 10 essentials for hiking are a standardized safety packing list developed by the Mountaineers and adopted by national parks, search and rescue organizations, and safety educators worldwide. The 10 systems are: (1) Navigation — map, compass, GPS, altimeter; (2) Sun protection — sunscreen, sunglasses, sun hat; (3) Insulation — extra layers beyond expected needs; (4) Illumination — headlamp with spare batteries; (5) First aid — wilderness-specific kit; (6) Fire — lighter, matches, fire starter; (7) Repair kit and tools — knife, duct tape, basic repair; (8) Nutrition — extra food beyond expected needs; (9) Hydration — extra water and means to purify more; (10) Emergency shelter — bivvy, emergency blanket, tarp. These are not the only items needed but represent the minimum systems that prevent typical hiking emergencies from becoming life-threatening. The 10 essentials are non-negotiable for any hike beyond well-traveled day-use trails — and even short trails should carry several systems. Many search and rescue incidents involve hikers missing one or more of the 10 essentials.
How do you stay safe hiking alone?
To stay safe hiking alone: (1) Tell someone your detailed route, expected return time, and what to do if you don’t return — this is the single most important step; (2) Carry a personal locator beacon (PLB) like an ACR ResQLink or satellite messenger like Garmin inReach Mini for emergency communication; (3) Stick to well-traveled trails appropriate for your skill level; (4) Hike well within your ability — solo trips are not the time to push limits; (5) Start early to have daylight buffer; (6) Check weather thoroughly and turn back at the first sign of deterioration; (7) Carry the full 10 essentials plus extras (more food, water, layers); (8) Trust your instincts — if something feels off (other hikers seem suspicious, weather is changing, terrain is harder than expected), turn back; (9) Be especially careful about minor injuries — a sprained ankle alone in the backcountry can become life-threatening; (10) Avoid solo trips in extreme terrain or remote areas until you have substantial solo experience on easier trails first. Solo hiking is widely practiced and rewarding but requires significant additional preparation beyond group hiking.
What is the most common cause of hiking deaths?
The most common causes of hiking deaths vary by region but generally include: (1) Falls from cliffs, scrambling terrain, or slippery surfaces — particularly in mountain terrain; (2) Drowning in stream crossings, lakes, or unexpected water hazards; (3) Heart attacks and cardiovascular events during strenuous effort, particularly in older hikers; (4) Hypothermia from cold and wet exposure, especially in shoulder seasons when hikers underestimate weather risk; (5) Heat-related deaths in desert hiking and summer mountain hiking; (6) Avalanches and rockfalls in winter and shoulder seasons; (7) Lightning strikes on exposed ridges; (8) Getting lost leading to exposure deaths from extended time without shelter or water. Falls and cardiovascular events together account for the majority of hiking fatalities in most national park systems. The underlying common factor in most hiking deaths is inadequate preparation — the right safety practices (telling someone your route, carrying the 10 essentials, checking weather, staying within ability) would prevent most of these incidents.
Do I need a personal locator beacon for hiking?
Yes, a personal locator beacon (PLB) or satellite messenger is strongly recommended for any hiking beyond well-traveled day-use trails with reliable cell coverage. PLBs and satellite messengers enable emergency communication when cell phones don’t work — which is essentially all backcountry terrain, most mountain areas, and many trails just a few miles from roads. The main options are: (1) Personal Locator Beacons (PLBs) like ACR ResQLink — one-time activation triggers Search and Rescue via the 406 MHz emergency frequency, no subscription required; (2) Satellite messengers like Garmin inReach Mini, ZOLEO, SPOT X — two-way text communication, weather updates, tracking, requires monthly subscription ($15-50/month); (3) Apple iPhone 14+ with Emergency SOS via satellite — basic emergency contact, included free with newer iPhones. Satellite messengers are the most popular choice for serious hikers because of two-way communication capability, which lets rescuers know your situation and lets you communicate with family. Cost: $200-450 device + subscription. PLBs are cheaper long-term: $300-400 device, no subscription required.
What is the most dangerous part of hiking?
Statistically, the most dangerous part of hiking is descent — when fatigue accumulates, knees and ankles weaken, attention wanders, and falls become significantly more likely. This is contrary to most hikers’ expectation that ascent is more dangerous. Search and Rescue statistics consistently show that the majority of falls, slips, and injuries occur on descents from summits or high points, often after climbers have safely reached their goal and are mentally and physically depleted on the way back. Other particularly dangerous moments include: (1) Stream and river crossings (drowning is a major cause of death); (2) Steep scree and loose terrain descents; (3) Snow and ice patches that surprise hikers in spring and shoulder seasons; (4) Late afternoon storms on exposed ridges; (5) Off-trail or shortcut attempts when tired or lost. The underlying principle is that danger increases with fatigue — and hiking deaths predominantly occur late in the day when climbers are tired.
How do I prepare for hiking in bear country?
To prepare for hiking in bear country: (1) Carry bear spray (Counter Assault, UDAP, Frontiersman) in an accessible holster on your hip — not buried in your pack; (2) Hike in groups when possible (bears typically avoid groups of 3+); (3) Make noise while hiking — talk, sing, or use bear bells to avoid surprising bears; (4) Store food properly using bear canisters (required in many parks like Glacier, Yellowstone, Olympic) or bear hangs; (5) Know the difference between black bear and grizzly bear responses — black bear attacks are typically predatory (fight back), grizzly attacks are typically defensive (play dead unless attacking lethally); (6) Watch for bear sign including scat, tracks, fresh diggings, and territorial markings; (7) Choose campsites away from bear travel corridors, streams, and berry patches; (8) Cook 100+ yards from sleeping area; (9) Never approach bears for photos — use a telephoto lens from safe distance; (10) Report bear encounters to land management agencies. Bear country hiking is safe with proper preparation; most fatal bear encounters involve climbers without bear spray or with improper food storage.
Methodology & Editorial Standards
How This Pillar Was Built
1. Editorial Approach: Synthesis of First-Hand + Research
This Complete Mountain Safety Guide synthesizes our editorial team’s direct mountain experience with rigorously researched safety protocols. Specifically, Travis Ludlow has personally climbed Mount Kilimanjaro (Tanzania), Pico de Orizaba and Iztaccíhuatl (Mexico), Rainier-class peaks, and Patagonia destinations — bringing first-hand observations to mountain safety topics where direct experience informs the practical content.
2. WFA-Certified Safety Review
This safety pillar receives review from Dawson Ludlow, Wilderness First Aid (WFA) certified. Specifically, WFA certification provides the credentialed safety framework that informs our editorial process — though importantly, online articles are never a substitute for in-person certification training.
3. Wilderness Medical Society
Medical safety protocols cross-reference the Wilderness Medical Society (WMS) — the professional medical society for wilderness medicine including their consensus guidelines and Wilderness Medical Society Practice Guidelines.
4. American Alpine Club
Mountaineering safety statistics and incident analysis reference the American Alpine Club (AAC), particularly their annual Accidents in North American Mountaineering publication which catalogs and analyzes climbing accidents for educational purposes.
5. National Park Service
Search and Rescue statistics, common incident patterns, and park-specific safety guidance reference National Park Service publications and educational materials.
6. Avalanche Education Sources
Avalanche safety basics reference avalanche.org and AIARE (American Institute for Avalanche Research and Education) — though importantly, online avalanche education is never sufficient; AIARE Level 1 in-person training is the minimum standard for avalanche terrain travel.
7. Editorial Independence
No affiliate partnerships with gear brands, guide services, or training providers influence recommendations. Product recommendations are based on industry consensus and the established choices of experienced mountain travelers. The article generates revenue only through Google AdSense display ads when applicable.
8. Update Cycle
This pillar is reviewed quarterly. Next scheduled review: September 2026. Gear recommendations, communication device specifications, and training course costs update as needed.
Affiliate disclosure: Global Summit Guide does not maintain affiliate partnerships with gear brands, guide services, training providers, or other companies mentioned in this Complete Mountain Safety Guide. No commission is earned from any external link clicks. This page contains no sponsored content. The site is supported by Google AdSense (Display Ads) when applicable.
Sources and References
Numbered Source References
This Complete Mountain Safety Guide synthesizes data from authoritative mountain safety organizations, medical societies, and government safety agencies.
Wilderness Medical Society · https://wms.org/ — Practice Guidelines and Wilderness Medical Society consensus guidelines.
Methodology note. Quarterly review cycle — next review September 2026. Gear specifications and training course costs update as needed. Take in-person WFA, WFR, AIARE courses for actual safety training — online articles supplement but never replace certified safety education.
About the Author
Travis Ludlow
Editor & Route Research, Global Summit Guide
Travis Ludlow is the editor of Global Summit Guide, an independent mountaineering, hiking, and adventure travel resource. Travis has personally climbed Mount Kilimanjaro (Tanzania), Pico de Orizaba and Iztaccíhuatl (Mexico), and Rainier-class peaks, and has authored Global Summit Guide’s comprehensive safety, training, altitude, and skills pillars.
This Complete Mountain Safety Guide is reviewed by Dawson Ludlow, Wilderness First Aid (WFA) certified — providing the credentialed safety framework that informs the editorial process. Notably, the editorial process at Global Summit Guide also includes gear review by Walker Ludlow.
Expertise areas: Mountain safety pillars, mountaineering training, altitude sickness prevention, technical skills progression. Editorial role: Editor and route research for Global Summit Guide’s 700+ published articles. Approach: Synthesis of first-hand experience with rigorously researched safety protocols, WFA-certified safety review on all safety content. Read more about the Global Summit Guide editorial team →
Mountain safety is not optional or advanced — it’s the foundation that makes every mountain trip possible. Generally, the most important step you can take is to invest in a Wilderness First Aid (WFA) course within the next 6 months — 16 hours of in-person training that will fundamentally change how you approach mountain travel. Specifically, this guide provides the knowledge framework, but actual safety competence requires the in-person training and practice that online content cannot replicate. Notably, the second most important step is to set up your personal protocols today: tell someone your routes, build your 10 essentials kit, purchase a personal locator beacon or satellite messenger if you don’t have one. Mountain safety is a lifelong learning process — start with the foundations.