<

Category: altitude sickness

  • Climbers preparing for high-altitude ascent at Gasherbrum I base camp, surrounded by tents and snow-capped peaks, emphasizing acclimatization for altitude sickness management.

    Gasherbrum I Acclimatization Strategy

    Altitude Sickness: Key Remedies and Medical Treatments

    Climbing Gasherbrum I, one of the highest peaks in the Karakoram range, requires meticulous preparation, particularly regarding acclimatization. This process is crucial for climbers to adapt to the reduced oxygen levels at high altitudes, which can significantly impact their performance and safety. In this article, we will explore the physiological effects of high altitude on climbers, the recommended acclimatization timeline, prevention strategies for altitude sickness, essential gear, and effective expedition planning. By understanding these elements, climbers can enhance their chances of a successful ascent while minimizing risks associated with altitude sickness.

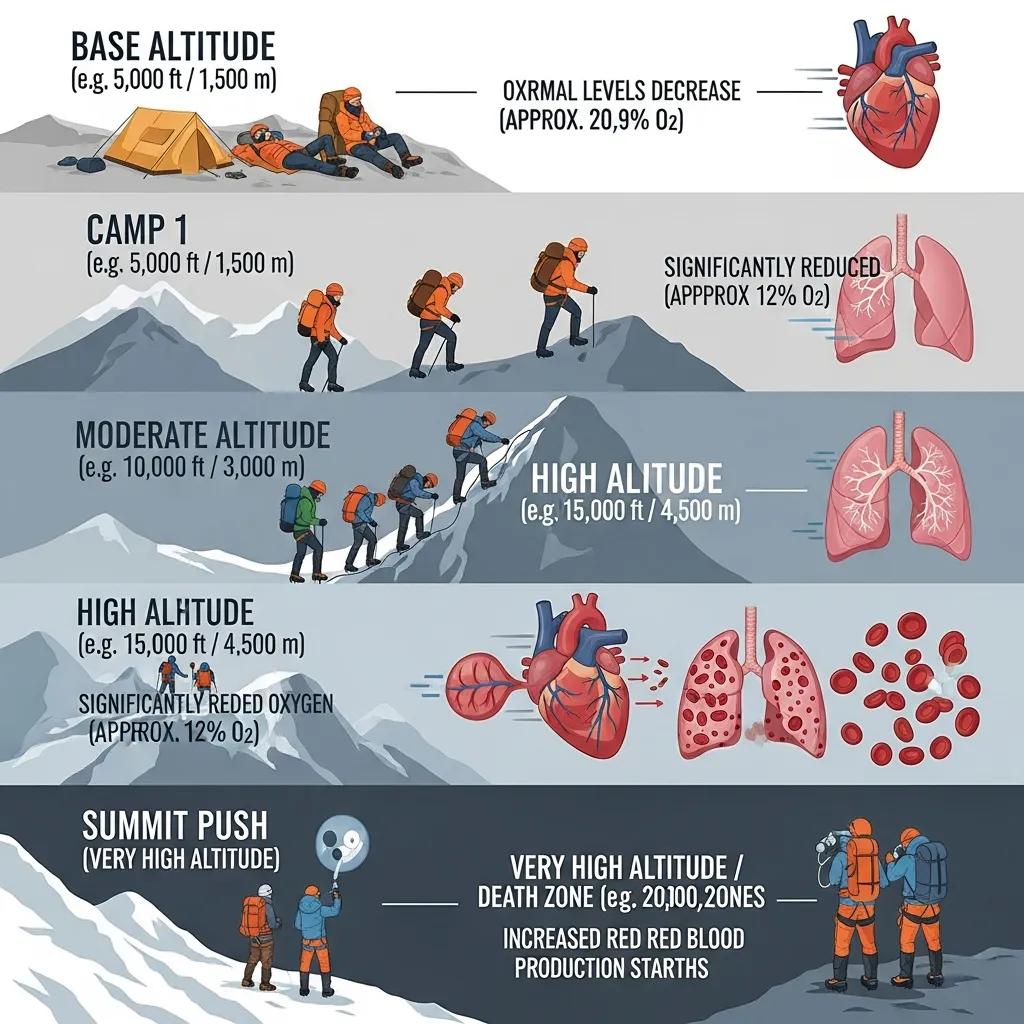
    What Are the Physiological Effects of High Altitude on Climbers?

    High altitude significantly affects climbers’ physiology, primarily due to the reduced availability of oxygen. As altitude increases, the atmospheric pressure decreases, leading to lower oxygen levels in the air. This reduction can result in various physiological responses, including increased heart rate, elevated breathing rates, and changes in blood chemistry. The body attempts to compensate for the lack of oxygen by producing more red blood cells, a process known as erythropoiesis. However, this adaptation takes time, which is why acclimatization is essential for climbers aiming to reach the summit of Gasherbrum I.

    Further research into high-altitude physiology, such as studies on Gasherbrum II, provides additional context on how the body adapts to hypoxic conditions.

    Gasherbrum II Acclimatization Adaptations & Hypoxia Performance

    Additionally, the ¦E data from the same testing protocol were used for estimating Ventilatory. More precisely, the acclimatization adaptations were more enhanced during Gasherbrum II.


    EFFECTS OF HIGH–ALTITUDE ALPINISTIC EXPEDITION MAY BE LESS STRONG STIMULUS FOR PERFORMANCE IN HYPOXIA, THAN ACCLIMATIZATION, 2012

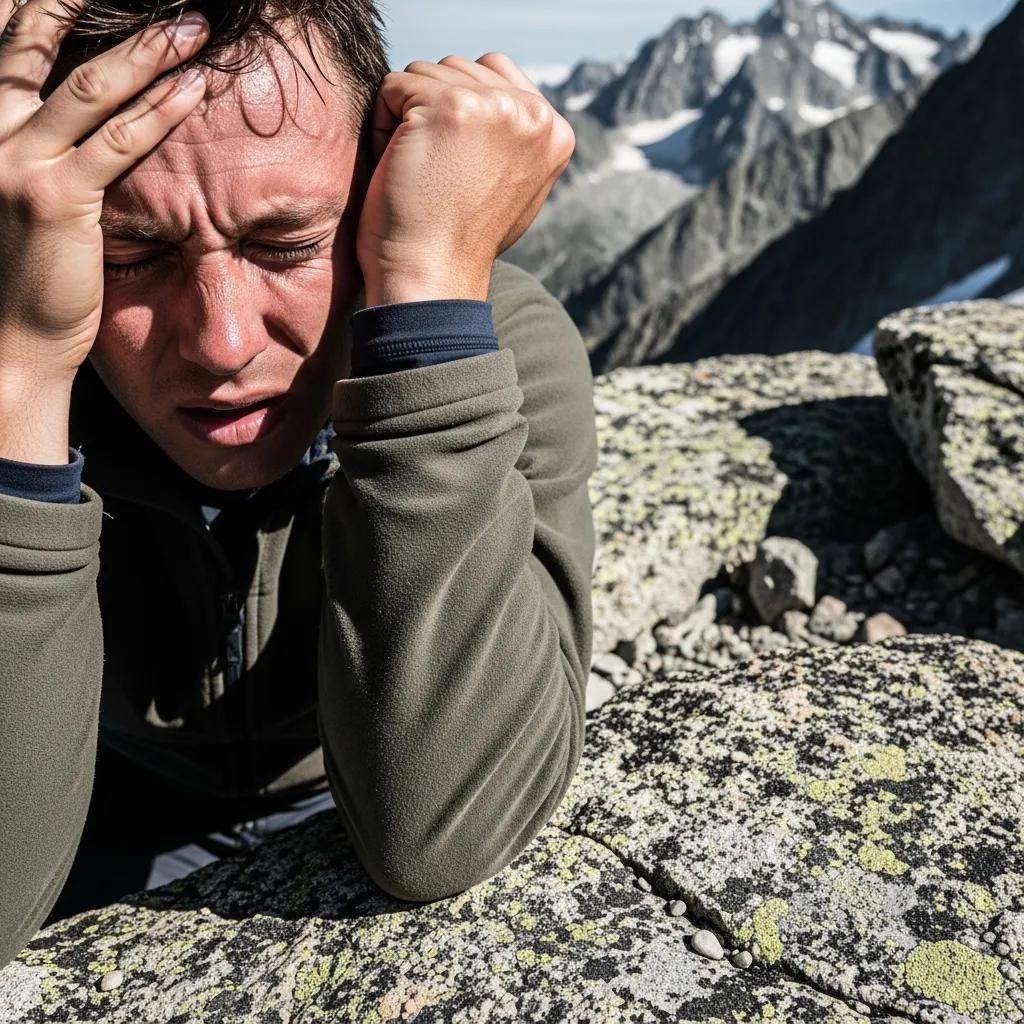
    The symptoms of altitude sickness can manifest as headaches, nausea, dizziness, and fatigue. These symptoms can escalate to more severe conditions, such as High Altitude Pulmonary Edema (HAPE) or High Altitude Cerebral Edema (HACE), which can be life-threatening. Understanding these physiological effects underscores the importance of a well-structured acclimatization strategy to ensure climbers can safely navigate the challenges posed by high altitudes.

    What Is the Recommended Acclimatization Timeline for Gasherbrum I?

    Climber resting during acclimatization journey at high altitude

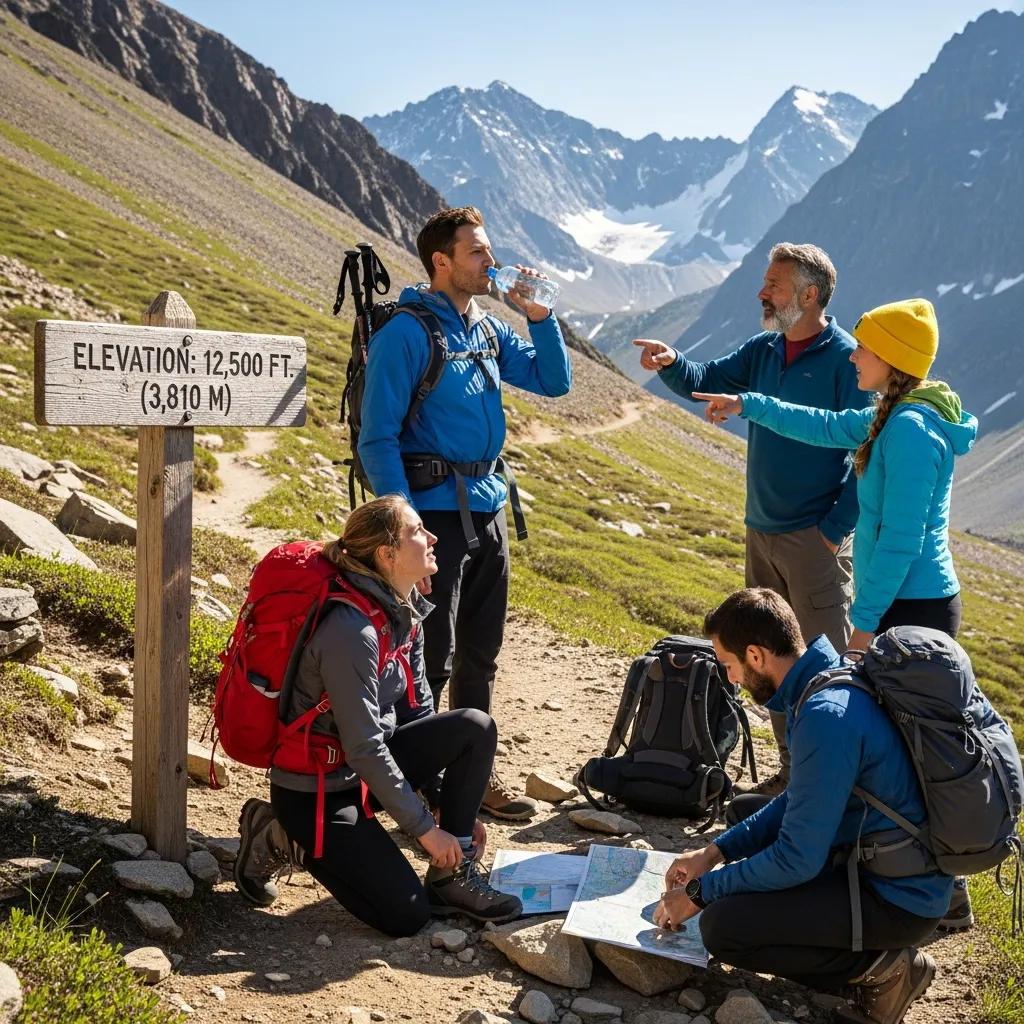
    A well-planned acclimatization timeline is crucial for climbers preparing for Gasherbrum I. Typically, a 4-6 week acclimatization schedule is recommended to allow the body to adapt adequately to high altitude. This timeline should include gradual ascent techniques, where climbers increase their altitude slowly, allowing their bodies to adjust to the decreasing oxygen levels.

    How to Structure a 4-6 Week Acclimatization Schedule for Optimal Adaptation?

    To optimize acclimatization, climbers should follow a structured weekly plan that includes specific activities aimed at enhancing their adaptation to high altitudes. Here’s a suggested breakdown:

    1. Weeks 1-2: Begin with moderate ascents to base camp, focusing on hydration and nutrition. Incorporate light physical activities to stimulate cardiovascular adaptation.
    2. Weeks 3-4: Gradually increase altitude by ascending to higher camps, ensuring to include rest days to allow for recovery. Monitor symptoms of altitude sickness closely.
    3. Weeks 5-6: Conduct acclimatization climbs to higher altitudes, utilizing supplemental oxygen if necessary. This phase is critical for preparing for the summit push.

    This gradual approach helps climbers build endurance and reduces the risk of altitude sickness, making it a vital component of any successful expedition.

    When and How Should Supplemental Oxygen Be Integrated?

    Supplemental oxygen can be a crucial tool for climbers on Gasherbrum I, especially during the final ascent. It is generally recommended to integrate supplemental oxygen when reaching altitudes above 7,000 meters, where the oxygen levels are significantly lower. Climbers should discuss their oxygen strategy with expedition operators, considering factors such as individual acclimatization rates and overall health.

    Using supplemental oxygen can help alleviate the symptoms of altitude sickness and improve performance during critical phases of the climb. However, it is essential to use it judiciously, as reliance on supplemental oxygen can hinder the body’s natural acclimatization process.

    How Can Altitude Sickness Be Prevented During Gasherbrum I Expeditions?

    Climber hydrating and eating at high altitude to prevent altitude sickness

    Preventing altitude sickness is paramount for climbers on Gasherbrum I. The key strategies include gradual ascent, maintaining proper hydration, and monitoring symptoms closely. Climbers should be aware of their bodies and recognize early signs of altitude sickness to take appropriate action.

    What Safety Protocols and Monitoring Techniques Are Essential?

    Implementing safety protocols is essential for managing the risks associated with altitude sickness. Climbers should:

    • Monitor Symptoms: Regularly assess for symptoms of altitude sickness, such as headaches, nausea, and fatigue.
    • Emergency Preparedness: Have a clear plan for descending to lower altitudes if symptoms worsen.
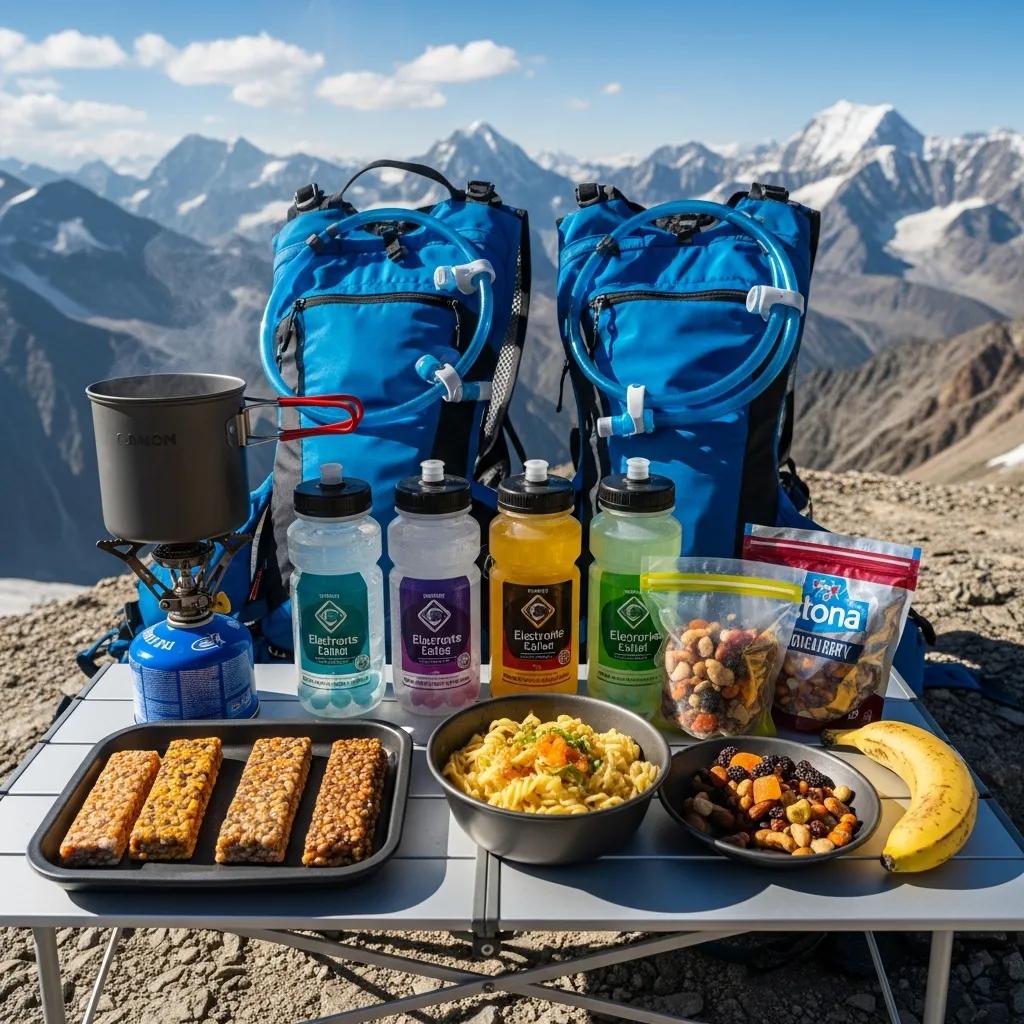
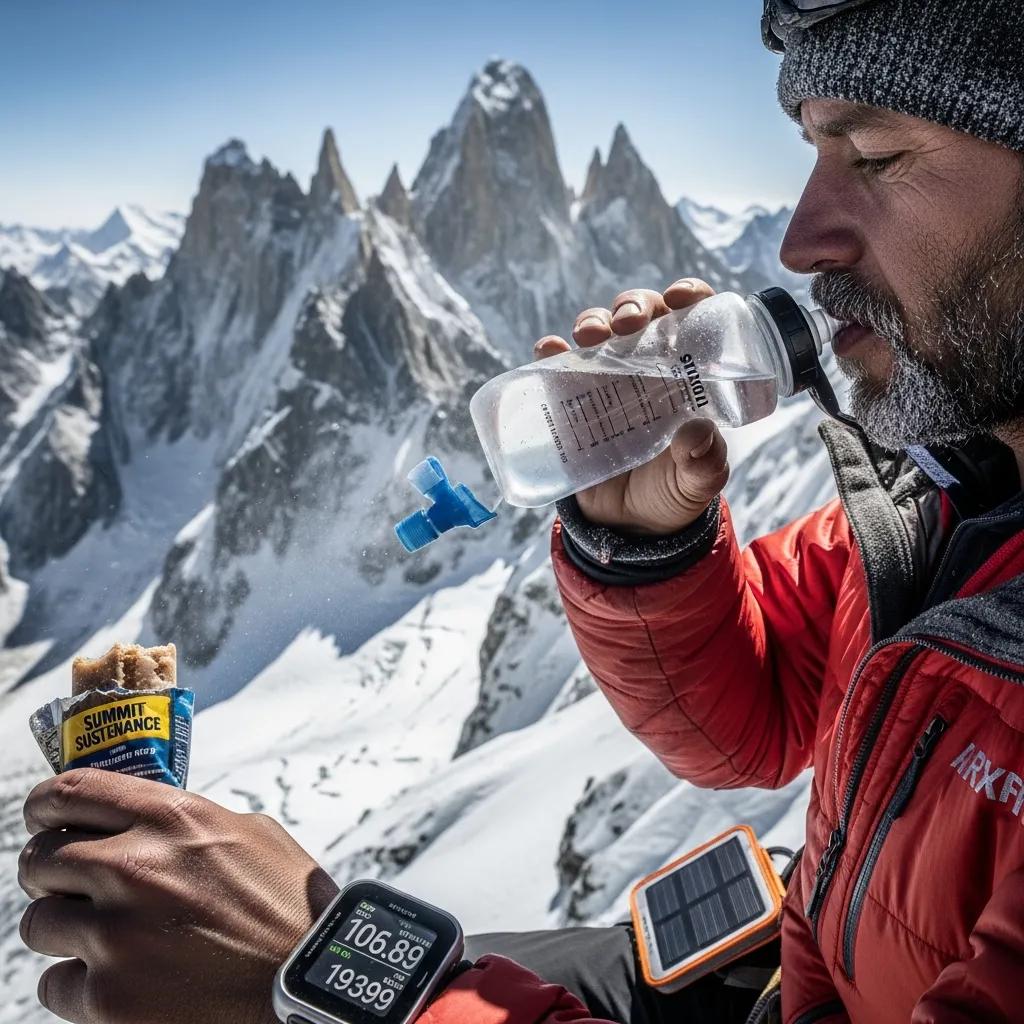
    • Hydration and Nutrition: Maintain adequate hydration and consume high-calorie foods to support energy levels.

    These protocols can significantly enhance safety during the expedition, ensuring that climbers are prepared to respond to altitude-related challenges.

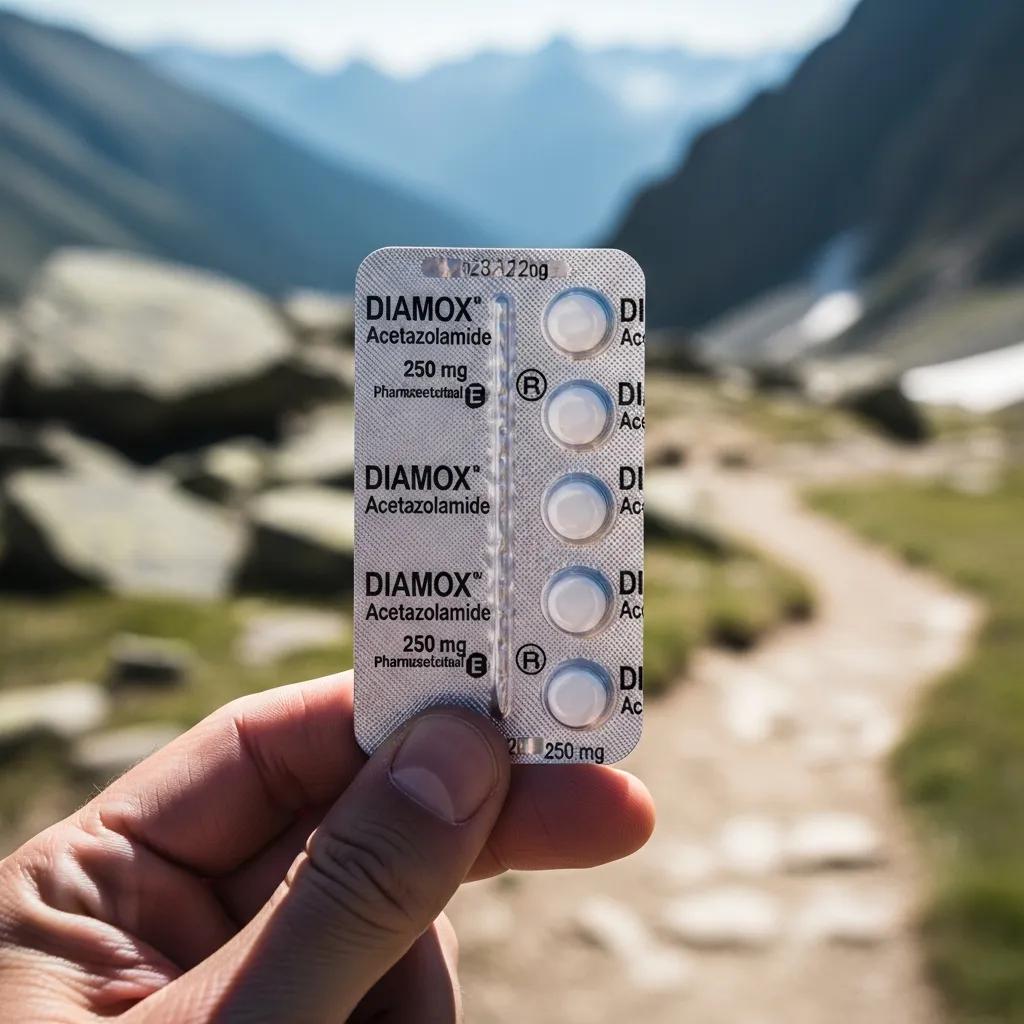
    Which Medications and Natural Remedies Support Prevention?

    Several medications and natural remedies can support the prevention of altitude sickness. Commonly used medications include Acetazolamide, which helps speed up acclimatization by promoting respiratory alkalosis. Additionally, natural remedies such as ginger and ginseng may help alleviate nausea and improve overall well-being. Staying hydrated is also crucial, as dehydration can exacerbate symptoms of altitude sickness.

    The effectiveness of medications like Acetazolamide in preventing acute mountain sickness and aiding acclimatization has been a subject of detailed study.

    Acetazolamide Efficacy for AMS Prophylaxis & Acclimatization

    efficacy of acetazolamide for the prophylaxis of AMS and disclose potential factors that affect the treatment effect of acetazolamide and body mass, height, degree of prior acclimatization.

    Efficacy of acetazolamide for the prophylaxis of acute mountain sickness: A systematic review, meta-analysis and trial sequential analysis of randomized clinical trials, 2021

    What Gear Is Essential for Effective Acclimatization on Gasherbrum I?

    Having the right gear is vital for climbers preparing for Gasherbrum I. Essential gear includes high-quality climbing equipment, appropriate clothing layers, and safety equipment designed for extreme conditions.

    To ensure you have all the necessary equipment for your climb, consider consulting gear and safety guidelines. Proper preparation is key to a successful and safe expedition.

    How to Choose and Use Acclimatization-Specific Gear?

    When selecting gear for acclimatization, climbers should consider the following:

    • Climbing Gear Essentials: Invest in high-altitude boots, crampons, and ice axes that are reliable and suited for the terrain.
    • Clothing Layers: Use a layering system that allows for temperature regulation, including moisture-wicking base layers, insulating mid-layers, and waterproof outer layers.
    • Safety Equipment: Ensure that safety gear, such as helmets and harnesses, is in good condition and suitable for high-altitude climbing.

    Proper gear selection and usage can significantly enhance climbers’ comfort and safety during their acclimatization process.

    How Should Climbers Plan Their Gasherbrum I Expedition for Successful Acclimatization?

    Effective expedition planning is crucial for successful acclimatization on Gasherbrum I. Climbers must consider various factors, including itinerary planning, logistical support, and risk management.

    For those looking to plan their next adventure, trip planning is essential. A well-thought-out plan can make all the difference in ensuring a safe and enjoyable experience.

    What Are Key Considerations in Trip Planning and Logistics?

    When planning an expedition, climbers should focus on:

    • Acclimatization Strategy: Develop a clear acclimatization plan that includes gradual ascents and rest days.
    • Training Regimen: Prepare physically through a structured training program that enhances endurance and strength.
    • Emergency Preparedness: Have contingency plans in place for emergencies, including evacuation routes and communication strategies.

    These considerations are essential for ensuring a well-organized and safe climbing experience.

    How to Integrate Acclimatization Strategy into Overall Climbing Plan?

    Integrating acclimatization strategies into the overall climbing plan involves:

    • Structured Acclimatization Plan: Ensure that the acclimatization schedule is aligned with the climbing itinerary.
    • Rest Days Importance: Schedule adequate rest days to allow for recovery and adaptation.
    • Monitoring Physical Conditions: Regularly assess climbers’ physical conditions to adjust the plan as needed.

    This integration is vital for maximizing the chances of a successful summit while minimizing the risks associated with altitude sickness.

    What Can Be Learned from Recent Gasherbrum I Expedition Case Studies?

    Recent expeditions to Gasherbrum I have provided valuable insights into effective acclimatization strategies and the challenges climbers face at high altitudes. Analyzing these case studies can inform best practices for future climbers.

    How Have 2023-2026 Expeditions Informed Acclimatization Best Practices?

    Expeditions conducted between 2023 and 2026 have highlighted the importance of staged acclimatization and the use of supplemental oxygen. Climbers have reported that gradual ascents, combined with strategic rest days, significantly reduce the incidence of altitude sickness. Additionally, the integration of technology, such as wearable devices for monitoring vital signs, has emerged as a valuable tool for enhancing safety during climbs.

    What Innovations in Acclimatization and Safety Have Emerged?

    Innovations in climbing safety and acclimatization strategies have also emerged from recent expeditions. New safety protocols, including enhanced communication systems and real-time health monitoring, have been developed to improve climber safety. Furthermore, advancements in climbing gear, such as lightweight and insulated equipment, have made high-altitude climbing more accessible and safer.

    How Does Gasherbrum I Acclimatization Compare to K2 and Other Himalayan Peaks?

    Understanding how acclimatization strategies for Gasherbrum I compare to those for K2 and other Himalayan peaks can provide valuable insights for climbers.

    What Are Similarities and Differences in Acclimatization Strategies?

    Both Gasherbrum I and K2 require similar acclimatization strategies, emphasizing gradual ascent and the importance of rest days. However, K2 presents unique challenges due to its technical climbing routes and higher altitude, necessitating a more rigorous acclimatization schedule. Climbers on K2 often face harsher weather conditions, which can further complicate the acclimatization process.

    How Can Lessons from K2 Enhance Gasherbrum I Preparation?

    Lessons learned from K2 expeditions can enhance preparation for Gasherbrum I by emphasizing the need for thorough training and preparation. Climbers can benefit from adopting K2’s rigorous acclimatization protocols, including the use of supplemental oxygen and advanced safety measures. By applying these lessons, climbers can improve their chances of success on Gasherbrum I.

    What Frequently Asked Questions Do Climbers Have About Gasherbrum I Acclimatization?

    Climbers often have questions regarding the best practices for acclimatization on Gasherbrum I, particularly concerning altitude sickness prevention and the acclimatization timeline.

    What Is the Best Way to Prevent Altitude Sickness on Gasherbrum I?

    The best way to prevent altitude sickness on Gasherbrum I is through gradual ascent, proper hydration, and monitoring for symptoms. Climbers should ascend slowly, allowing their bodies to adapt to the changing altitude, and stay hydrated to support overall health.

    How Long Does Acclimatization Typically Take for Gasherbrum I Climbers?

    Acclimatization for climbers on Gasherbrum I typically takes 4-6 weeks, depending on individual responses to altitude and the specific acclimatization strategies employed. Factors such as fitness level, previous high-altitude experience, and overall health can influence the duration of acclimatization.

    For more information on planning your next climb, visit Global Summit Guide.

  • How to Acclimatize for High Altitude Climbing:

    How to Acclimatize for High Altitude Climbing:

    How to Acclimatize for High Altitude Climbing: Complete Guide

    Acclimatization is a critical process for climbers aiming to conquer high altitudes, where the air is thinner and oxygen levels are significantly reduced. This comprehensive guide will delve into the physiological effects of high altitude on the body, the stages of acclimatization, and effective strategies to prevent altitude sickness. Many climbers face challenges such as decreased performance and increased risk of altitude-related illnesses when ascending rapidly. Understanding how to acclimatize effectively can enhance safety and performance during high-altitude climbs. This article will cover the physiological effects of high altitude, the common symptoms of altitude sickness, prevention strategies, and best practices for acclimatization.

    What Are the Physiological Effects of High Altitude on the Body?

    High altitude significantly impacts the human body due to reduced oxygen availability, leading to various physiological adaptations. As altitude increases, the body experiences a decrease in oxygen saturation, which can result in hypoxia—a condition where the body or a region of the body is deprived of adequate oxygen supply. This lack of oxygen can lead to decreased physical performance, as the body struggles to meet its energy demands. To cope with these changes, the body initiates several adaptations, including increased breathing rate, elevated heart rate, and enhanced red blood cell production. These adaptations are crucial for maintaining performance and health during high-altitude activities.

    Further research highlights the complex physiological and metabolic adjustments the body undergoes in response to high-altitude exposure.

    High Altitude Physiological & Metabolic Adjustments

    Studies have yielded new information related to the physiological and metabolic adjustments made in response to both short- and long-term high-altitude exposure. These investigations have examined the potential mechanisms responsible for alterations observed in key variables such as heart rate, cardiac output, muscle blood flow, and substrate utilization. Exposure to high altitude is an environmental stressor that elicits a robust sympathoadrenal response, contributing to critical adjustments and adaptations. Factors influencing adaptation include the degree and duration of hypoxia, exercise intensity, and inter-individual variability.

    Physiological responses to exercise at altitude: an update, 2008

    How Does Hypoxia Affect Oxygen Saturation and Climber Performance?

    Hypoxia, characterized by insufficient oxygen levels, directly affects oxygen saturation in the blood, which is vital for sustaining physical performance. When climbers ascend to high altitudes, the partial pressure of oxygen decreases, leading to lower oxygen saturation levels. This reduction can impair cognitive function and physical capabilities, making it challenging to perform tasks that require concentration and strength. As a result, climbers may experience fatigue, decreased coordination, and slower reaction times. Understanding the effects of hypoxia is essential for climbers to prepare adequately and implement strategies to mitigate its impact on performance.

    Indeed, the cardiovascular system undergoes significant changes under hypoxic conditions, influencing overall physiological function.

    Cardiovascular Responses & Altitude Sickness

    The hypoxic conditions encountered at high altitude affect all physiological functions. Acute hypoxia activates the adrenergic system, inducing tachycardia and increasing pulmonary artery pressure. After a few days, the autonomic nervous system adapts, and tachycardia decreases. Permanent exposure induces erythropoiesis, which if excessive can lead to chronic mountain sickness, often associated with pulmonary hypertension and heart failure. Cardiovascular adaptations to hypoxia provide a remarkable model of oxygen availability regulation.

    Cardiovascular physiology and pathophysiology at high altitude, JP Richalet, 2024

    What Are the Stages and Processes of Acclimatization?

    Stages of acclimatization for climbers at high altitudes, showing physiological adaptations

    Acclimatization involves a series of physiological changes that occur as the body adapts to high altitude. The process typically unfolds in several stages: mountains

    • Initial Response: Upon arrival at high altitude, the body begins to increase breathing and heart rates to enhance oxygen intake.
    • Adaptation Phase: Over days to weeks, the body produces more red blood cells to improve oxygen transport, and the muscles become more efficient at utilizing oxygen.
    • Long-term Adaptation: With prolonged exposure, climbers may experience increased capillary density and mitochondrial function, further enhancing endurance and performance.

    Gradual ascent is crucial during this process, as it allows the body to adjust without overwhelming stress, reducing the risk of altitude sickness.

    What Are the Common Symptoms and Risks of Altitude Sickness?

    Altitude sickness, or acute mountain sickness (AMS), can manifest through various symptoms as climbers ascend to higher elevations. Common symptoms include:

    • Headache: Often the first sign, resulting from increased intracranial pressure.
    • Nausea and Vomiting: Gastrointestinal distress can occur due to reduced oxygen levels.
    • Fatigue: A general sense of tiredness and decreased energy levels.
    • Dizziness: Impaired balance and coordination can arise from hypoxia.

    If left unaddressed, altitude sickness can escalate to more severe conditions, such as high altitude pulmonary edema (HAPE) or high altitude cerebral edema (HACE), which can be life-threatening. Recognizing these symptoms early is vital for effective management and prevention.

    How to Recognize Acute Mountain Sickness and Other Altitude Illnesses?

    Recognizing the signs of acute mountain sickness and other altitude-related illnesses is essential for climbers. Key indicators of AMS include:

    • Persistent Headache: A headache that does not improve with rest or hydration.
    • Loss of Appetite: A significant decrease in the desire to eat.
    • Sleep Disturbances: Difficulty sleeping or frequent awakenings at night.
    • Swelling: Noticeable swelling of the hands, feet, or face.

    Other altitude illnesses, such as HAPE and HACE, present more severe symptoms, including shortness of breath at rest, confusion, and loss of coordination. Immediate descent and medical attention are critical for anyone exhibiting these symptoms.

    What Are the Best Prevention and Treatment Strategies for Altitude Sickness?

    Preventing altitude sickness involves a combination of acclimatization strategies and awareness of symptoms. Effective prevention methods include:

    • Gradual Ascent: Ascend slowly, allowing the body time to adjust to changes in altitude.
    • Hydration: Maintain adequate fluid intake to prevent dehydration, which can exacerbate symptoms.
    • Nutrition: Consume a balanced diet rich in carbohydrates to provide energy and support acclimatization.
    • Rest Days: Incorporate rest days during the ascent to facilitate recovery and adaptation.

    In case symptoms arise, immediate descent to a lower altitude is the most effective treatment. Over-the-counter medications, such as ibuprofen for headaches, can provide temporary relief, but they do not replace the need for descent.

    For those seeking comprehensive resources on global mountains and peaks, Information Hub offers valuable insights and guides tailored for mountain climbing enthusiasts. Their platform provides extensive information on trip planning, gear safety, and acclimatization strategies, ensuring climbers are well-prepared for their adventures.

    What Are the Best Practices and Schedules for Effective Acclimatization?

    Implementing best practices for acclimatization can significantly enhance a climber’s ability to adapt to high altitudes. Key practices include: mountain collections

    • Climb High, Sleep Low: Ascend to higher altitudes during the day but return to lower elevations to sleep, allowing the body to recover.
    • Monitor Symptoms: Regularly assess for signs of altitude sickness and adjust plans accordingly.
    • Incorporate Rest Days: Schedule rest days every few days to facilitate acclimatization.

    Best Practices for Acclimatization

    PracticeDescriptionBenefit
    Climb High, Sleep LowAscend during the day, descend to sleepEnhances recovery and adaptation
    Regular MonitoringCheck for symptoms dailyEarly detection of altitude sickness
    Scheduled Rest DaysPlan rest days into the itineraryAllows for physiological adaptation

    These practices are essential for ensuring a safe and successful high-altitude climbing experience.

    How Long Does Acclimatization Take and What Are Recommended Ascent Rates?

    The duration of acclimatization varies among individuals and depends on several factors, including altitude, fitness level, and ascent rate. Generally, climbers should allow:

    • 24-48 hours at altitudes above 8,000 feet (2,400 meters) for initial acclimatization.
    • 1-2 days for every additional 1,000 feet (300 meters) gained above 10,000 feet (3,000 meters).

    Recommended ascent rates suggest not exceeding an increase of 1,000 feet (300 meters) per day above 10,000 feet to minimize the risk of altitude sickness. Adhering to these guidelines can significantly enhance safety and performance during climbs.

    These recommendations are further supported by expert advice on managing ascent rates and the strategic use of supplemental oxygen.

    High Altitude Climbing Strategies & Oxygen Use

    At altitudes above 3000 m individuals should climb no more than 300-500 m a day and have a rest day every 3-4 days. At extreme altitude (5500-8848 m) supplementary oxygen can be used to increase the partial pressure of inspired oxygen. Although Everest has been climbed without oxygen, most climbers use supplementary oxygen above 7500 m.

    Oxygen at high altitude, 1998

    Can You Acclimatize Faster? Pre-Acclimatization and Training Techniques Explained

    While acclimatization is a gradual process, certain pre-acclimatization techniques can help climbers adapt more quickly. These techniques include:

    • Hypoxic Training: Engaging in training at lower oxygen levels can stimulate physiological adaptations before the actual climb.
    • Gradual Exposure: Spending time at moderate altitudes before a high-altitude expedition can enhance acclimatization.
    • Use of Supplemental Oxygen: In some cases, climbers may use supplemental oxygen during ascent to alleviate hypoxia effects.

    These methods can help climbers prepare more effectively for high-altitude challenges, although they should be used in conjunction with traditional acclimatization practices.

    Which Gear and Safety Equipment Are Essential for High Altitude Climbing?

    Proper gear and safety equipment are crucial for successful high-altitude climbing. Essential items include:

    • Layered Clothing: Insulating and moisture-wicking layers to regulate body temperature.
    • High-Altitude Boots: Sturdy footwear designed for extreme conditions.
    • Emergency Gear: Items such as a first aid kit, oxygen supply, and communication devices.

    Recommended Gear Types and Safety Ratings for Altitude Expeditions

    Gear TypeDescriptionSafety Rating
    High-Altitude BootsInsulated and waterproof footwearMust meet ISO 20345 standards
    Climbing HarnessEssential for safety during climbsUIAA certified
    Oxygen SystemsSupplemental oxygen for high altitudesCE marked for safety

    Investing in high-quality gear ensures climbers are well-equipped to handle the challenges of high-altitude environments.

    How Does Supplemental Oxygen Improve Safety and Acclimatization?

    Supplemental oxygen plays a vital role in enhancing safety and acclimatization during high-altitude climbs. By providing additional oxygen, climbers can maintain higher oxygen saturation levels, which helps mitigate the effects of hypoxia. This can lead to improved cognitive function, reduced fatigue, and enhanced physical performance. Supplemental oxygen is particularly beneficial for climbers ascending to extreme altitudes, where the risk of altitude sickness is significantly heightened.

    How Should Nutrition and Hydration Be Managed at High Altitude?

    High-altitude nutrition and hydration setup for climbers, emphasizing energy and recovery

    Nutrition and hydration are critical components of successful high-altitude climbing. Climbers should focus on:

    • Hydration: Drinking plenty of fluids to prevent dehydration, which can exacerbate altitude sickness.
    • Carbohydrate-Rich Diet: Consuming a diet high in carbohydrates to provide energy and support acclimatization.
    • Monitoring Intake: Keeping track of food and fluid intake to ensure adequate nutrition and hydration levels.

    Foods and Hydration Levels That Support Acclimatization and Performance

    Food TypeDescriptionHydration Level
    Complex CarbohydratesFoods like whole grains and fruitsHigh
    Electrolyte DrinksReplenish lost mineralsEssential for hydration
    Protein SourcesLean meats and legumesSupports muscle recovery

    These dietary strategies can significantly enhance a climber’s ability to acclimatize and perform at high altitudes.

    How to Adjust Nutrition Plans for Different Altitude Stages?

    Adjusting nutrition plans according to altitude stages is essential for optimizing performance. At lower altitudes, a balanced diet with a focus on carbohydrates and proteins is sufficient. As climbers ascend, they should increase their carbohydrate intake to meet higher energy demands and ensure adequate hydration. Monitoring individual responses to altitude and adjusting food choices accordingly can help maintain energy levels and support acclimatization.

    What Training and Pre-Acclimatization Methods Enhance Climbing Preparation?

    Training and pre-acclimatization methods are vital for climbers preparing for high-altitude expeditions. Effective strategies include:

    • Endurance Training: Building cardiovascular fitness through activities like running, cycling, or hiking.
    • Strength Training: Focusing on core and leg strength to improve climbing performance.
    • Altitude Simulation: Using altitude training masks or chambers to simulate high-altitude conditions.

    Effective Altitude Training Protocols

    ProtocolDescriptionExpected Outcome
    Endurance TrainingLong-distance activities to build staminaImproved cardiovascular fitness
    Strength TrainingResistance exercises targeting major muscle groupsEnhanced climbing power
    Altitude SimulationTraining in low-oxygen environmentsFaster acclimatization

    These training methods can significantly enhance a climber’s readiness for high-altitude challenges.

    How to Incorporate Pre-Acclimatization Techniques Before the Expedition?

    Incorporating pre-acclimatization techniques can help climbers adapt more effectively before their expedition. Strategies include:

    • Gradual Elevation Increase: Spending time at moderate altitudes before the main ascent.
    • Rest Days: Allowing for recovery and adaptation during training.
    • Monitoring Symptoms: Keeping track of any signs of altitude sickness during training.

    These techniques can help climbers prepare their bodies for the demands of high-altitude climbing.

    What Can Be Learned from Case Studies of Successful High Altitude Climbs?

    Analyzing case studies of successful high-altitude climbs provides valuable insights into effective acclimatization strategies. Many climbers have reported that gradual ascent, proper nutrition, and hydration were key factors in their success. Additionally, the use of supplemental oxygen and adherence to safety protocols significantly contributed to their ability to reach summits without experiencing severe altitude sickness.

    Which Climbs Demonstrate Effective Acclimatization Strategies?

    Several notable climbs exemplify effective acclimatization strategies. For instance, climbers on Mount Everest often utilize the “climb high, sleep low” method, allowing their bodies to adjust while minimizing the risk of altitude sickness. Other successful expeditions have emphasized the importance of gradual ascent and regular monitoring of symptoms, showcasing the effectiveness of these strategies in high-altitude environments.

    What Safety Protocols and Lessons Were Applied in These Expeditions?

    Safety protocols are paramount in high-altitude climbing to ensure the well-being of climbers. Key protocols include:

    • Thorough Planning: Detailed itineraries that account for acclimatization schedules and rest days.
    • Emergency Preparedness: Carrying essential safety equipment and having contingency plans in place.
    • Team Communication: Maintaining open lines of communication among team members to monitor health and safety.

    These protocols are essential for minimizing risks and enhancing the overall safety of high-altitude expeditions.

    For more information on planning your next adventure, visit Global Summit Guide’s trip planning section. They offer resources and advice to help you prepare for a safe and successful climb.

    Understanding the right gear is also crucial. Global Summit Guide provides detailed information on gear safety, ensuring you are well-equipped for your climb.

    To further enhance your understanding of mountain environments and climbing techniques, consider exploring Global Summit Guide’s resources on various mountains. This can provide valuable context for your acclimatization strategies.

    For personalized guidance and support, reach out to Global Summit Guide. Their team can offer expert advice tailored to your specific climbing goals.

  • How to Train for High Altitude Climbing: A Complete Program

    How to Train for High Altitude Climbing: A Complete Program

    Cluster 08 · Altitude, Training & Physiology · Updated April 2026

    How to Train for High Altitude Climbing: A Complete Program

    The general training framework for high-altitude climbing — the four pillars of fitness, periodization phases, weekly training templates, and readiness benchmarks that apply to any objective from Kilimanjaro to Denali. Less a specific month-by-month plan (see our EBC-specific program for that), more the adaptable principles that build any high-altitude program.

    4
    Training
    pillars
    4
    Periodization
    phases
    6–18
    Months
    typical
    80/10/10
    Intensity
    split
    Global Summit Guide A guide in Cluster 08 · Altitude, Training & Physiology View master hub →

    High-altitude climbing places unique demands on the body — prolonged aerobic effort, heavy load carries, steep uphill and downhill terrain, and metabolic stress from hypoxia. A training program that prepares you for a marathon won’t prepare you for Aconcagua. A bodybuilder’s routine won’t help on Kilimanjaro. What works is a four-pillar approach: aerobic conditioning, muscular strength, muscular endurance, and altitude-specific preparation, organized across four periodization phases (base, build, peak, taper). This guide covers the framework. For a specific month-by-month program applied to EBC, see our 8-month EBC training plan. For understanding the altitude physiology your training prepares you for, see our acclimatization science guide.

    How this guide was built

    Training principles sourced from evidence-based mountaineering coaching programs including Uphill Athlete (Steve House & Scott Johnston), Mountain Tactical Institute, and American Alpine Club training resources. Periodization concepts from sports science literature on endurance training (Seiler, Bompa). Altitude-specific preparation protocols cross-referenced with Wilderness Medical Society guidelines. Weighted pack training progression validated through multiple Kilimanjaro, EBC, Aconcagua, and Denali expedition outcomes. Reviewed by practicing mountaineering coaches and IFMGA-certified guides. Benchmark data from thousands of documented training cycles on major peaks. Fact-check date: April 19, 2026.

    Training Principles for Altitude Climbing

    Before the specifics, a few principles that separate effective altitude training from generic fitness work:

    Specificity beats intensity

    Nothing trains you for mountain climbing like mountain climbing. No treadmill, stair machine, or HIIT class replicates the actual demands of a 10-hour day under a 40-pound pack on uneven terrain. Your training should maximize time doing the thing you’re training for — weighted hiking on varied terrain with elevation gain and loss.

    Aerobic base dominates

    High-altitude climbing is a predominantly aerobic effort sustained over hours and days. Your aerobic base — the ability to sustain effort at moderate intensity for long periods — is the single most important fitness attribute. Build it first, build it big, and never let it slip. Most training time should be spent in zone 2 (conversational pace), not in the gym hitting PRs.

    Strength supports endurance — it doesn’t replace it

    You need enough strength to carry a pack, manage descents, and protect your joints under load. You don’t need bodybuilder mass — in fact, excess muscle is metabolic weight that must be fed oxygen your lungs can’t deliver at altitude. Strength training is supporting cast, not the lead.

    Recovery is training

    Adaptation happens during recovery, not during workouts. Sleep 8+ hours per night. Eat enough to support training. Take easy days seriously. Schedule full rest weeks every 4-6 weeks. Overtraining is the single most common way climbers ruin their preparation.

    Train descents, not just ascents

    Downhill is where most mountaineering injuries happen and where most fatigue accumulates on long trips. Every weighted hike should include meaningful descent with the same pack weight. Your quads, knees, and IT bands need the specific preparation downhill provides.


    The Four Pillars of High-Altitude Training

    Every effective altitude training program balances four distinct but integrated capacities. Think of them as the legs of a table — if one is missing, the table falls over:

    1
    Pillar 1

    Aerobic Conditioning

    The foundation of all mountaineering fitness. Develops heart and lung capacity, fat-burning efficiency, and cardiovascular reserve — the ability to sustain effort for 8-14 hour summit days. Primary modes: weighted hiking (best), trail running, stair climbing, cycling, rowing.

    Frequency4-5x/week
    Duration45-90 min
    Volume5-10 hrs/wk
    Priority50-60% time
    2
    Pillar 2

    Muscular Strength

    Supports loaded pack carries, joint stability, and descent control. Not bodybuilder mass — functional strength from compound movements. Key exercises: back squat, deadlift, lunge, step-up, overhead press, pull-up. Emphasis on full range of motion and progressive loading.

    Frequency2-3x/week
    Duration45-60 min
    Volume2-3 hrs/wk
    Priority15-20% time
    3
    Pillar 3

    Muscular Endurance

    Sustained output for hours to days under load. The bridge between pure strength and pure cardio — the ability of muscles to repeat submaximal efforts for long periods. Developed through weighted pack hikes (2-8 hours), high-rep strength circuits, and back-to-back training days.

    Frequency1-2x/week
    Duration2-8 hours
    Pack weight20-60 lb
    Priority15-20% time
    4
    Pillar 4

    Altitude-Specific Preparation

    Hypoxic exposure and mental preparation. Altitude tents (Hypoxico, Altitude Tech), pre-trip altitude exposure, intermittent hypoxic training, breath-work practice. Cannot replace proper acclimatization protocols but accelerates adaptation and reduces AMS risk by 30-50%.

    FrequencyVaries
    TimingPeak phase
    Duration2-4 weeks
    Priority5-10% time
    The 80/10/10 intensity distribution

    Elite endurance athletes — and successful high-altitude climbers — spend most of their training time at easy intensity. The proven distribution is roughly 80% easy (zone 1-2, conversational pace), 10% tempo (zone 3, breathing elevated but controlled), and 10% hard (zone 4-5, near max). Most recreational climbers invert this, training too hard too often. The result: chronic fatigue, poor aerobic base, and mediocre mountain performance. Train mostly easy. Train rarely hard. The mountain demands endurance, not intensity.


    Periodization: Four Phases of a Training Cycle

    A training cycle progresses through four distinct phases, each with different goals and training emphasis. The phases build on each other — skipping phases or ordering them wrong produces suboptimal results:

    Phase
    1
    4-8 Weeks
    Base Phase

    Build the Aerobic Foundation

    Months 1-2 of cycle · Low intensity, building volume

    The base phase establishes the cardiovascular foundation that all later phases build on. Volume up, intensity down. Mostly zone 2 aerobic work. Introduce weighted hiking at light loads. Begin strength training with moderate weights and emphasis on technique. Easy pace, consistent effort.

    • 4-5 easy cardio sessions per week (45-60 min each)
    • 1-2 weighted hikes per week (15-20 lb pack, 60-90 min)
    • 2 strength sessions per week (moderate loads, 3×8-12 reps)
    • Total weekly volume: 5-8 hours
    • Intensity: 90% easy, 10% tempo
    • Goal: Establish fitness baseline, prevent injury
    Phase
    2
    8-12 Weeks
    Build Phase

    Increase Volume and Progressive Loading

    Months 2-4 of cycle · Gradually increasing both volume and intensity

    The build phase progressively increases training volume and introduces higher-intensity work. Weighted hike duration grows. Pack weight creeps up. Strength training adds progressive overload. Tempo runs appear in cardio rotation. Weekly volume rises toward peak targets.

    • 5-6 cardio sessions per week, one longer hike
    • 2 weighted hikes per week (25-35 lb pack, 2-4 hours)
    • 2-3 strength sessions per week (70-80% 1RM, 3-4×6-10 reps)
    • 1 tempo session per week (sustained zone 3)
    • Total weekly volume: 7-10 hours
    • Intensity: 80% easy, 15% tempo, 5% hard
    Phase
    3
    4-8 Weeks
    Peak Phase

    Mountain-Specific Conditioning

    Months 4-6 of cycle · Highest training load, most specific work

    The peak phase delivers the most mountain-specific training possible. Heavy weighted hikes match expedition pack weight and duration. Altitude-specific preparation begins (hypoxic tents, pre-trip altitude exposure). Back-to-back training days simulate expedition fatigue. Volume highest of any phase.

    • 2-3 weighted hikes per week (40-60 lb, 4-8 hours)
    • Back-to-back weighted hiking weekends
    • Elevation gain priority: 1,000-1,500 m per major hike
    • Altitude tent use (if applicable) 4-8 hrs/night
    • Strength maintenance (1-2x/week, lower volume)
    • Total weekly volume: 10-12 hours
    • Test expedition gear on long hikes
    Phase
    4
    1-2 Weeks
    Taper Phase

    Reduce Volume, Preserve Fitness

    Final 1-2 weeks before expedition · Recovery-focused

    The taper phase reduces training volume while maintaining fitness, allowing complete recovery before departure. Counter to instinct — don’t train hard in the final week. Gains are banked; now you consolidate. Short easy hikes, light strength maintenance, emphasis on rest, nutrition, and gear preparation.

    • Volume reduced 40-60% from peak phase
    • 1-2 short weighted hikes (20-30 lb, 2-3 hours max)
    • 2-3 easy cardio sessions
    • 1 light strength session (maintenance only)
    • Total weekly volume: 4-5 hours
    • Sleep priority: 8-9 hours/night
    • Carbohydrate loading final days
    • Gear testing, mental preparation
    The taper is not optional

    Many climbers sabotage their expedition by training hard in the final week. The taper is physiologically essential — it allows full glycogen storage, muscle repair, and nervous system recovery. Fitness cannot be built in the final week, but it can be lost. Research consistently shows 10-20% performance improvement when athletes taper properly. Trust the work you’ve already done. Rest, eat, pack, and arrive fresh. The mountain will test your preparation; your preparation is already complete when you board the plane.


    A Weekly Training Template (Peak Phase)

    Here’s what a typical training week looks like during peak phase, with all four pillars integrated. Adjust volume and intensity for your current phase:

    DaySession TypeDurationIntensityNotes
    MondayEasy cardio (run, bike, or hike)60 minZone 2Active recovery, conversational pace
    TuesdayStrength training + short cardio60+30 minModerateLower body emphasis, compound lifts
    WednesdayTempo run or hill repeats60-75 minZone 3-4Sustained elevated effort
    ThursdayEasy cardio + core work60 minZone 2Recovery from Wednesday intensity
    FridayRest day OR light yoga/mobility30 minEasyPre-weekend recovery
    SaturdayLong weighted hike5-7 hoursZone 2-340-60 lb pack, significant elevation
    SundayBack-to-back weighted hike3-4 hoursZone 2Lighter pack, expedition fatigue sim

    Total weekly volume: ~13-15 hours. Adjust downward for earlier phases.

    Sample variations

    • Beginner base phase: 3 cardio sessions, 1 weighted hike, 2 strength sessions, 6-7 hours total.
    • Build phase: 4 cardio sessions, 2 weighted hikes, 2 strength sessions, 9-10 hours total.
    • Peak phase (above): 4 cardio sessions, 2 weighted hikes, 1-2 strength sessions, 13-15 hours total.
    • Taper phase: 3 easy cardio sessions, 1 short weighted hike, 1 light strength, 4-5 hours total.

    Readiness Benchmarks by Objective

    How do you know you’re ready? Specific benchmarks by objective tier:

    Tier 1 · Trek-Level

    Kilimanjaro / EBC Trek

    ~4,500-5,900 m · Non-technical · Guided support
    • Hike 8-10 miles with 25 lb pack comfortably
    • Ascend 3,000 ft in 2 hours with pack
    • Run 5K under 35 min OR equivalent hiking pace
    • 12-15 push-ups, 20 sit-ups, 1-min plank
    • Back-to-back 4-hour hiking days
    • No significant joint pain during/after training
    • 4-6 months training minimum
    Tier 2 · Expedition

    Aconcagua / 6,000 m Peaks

    ~6,000-6,961 m · Non-technical but serious
    • 10-14 hour day hikes with 40-50 lb pack
    • Ascend 4,000 ft in 3-4 hours with pack
    • Run 10K under 55 min OR rucking equivalent
    • Back-to-back 2-3 days of weighted hiking
    • Prior altitude experience above 4,500 m
    • Basic crampon & ice axe proficiency
    • Winter hiking experience
    • 6-10 months training
    Tier 3 · Advanced

    Denali / 7,000-8,000 m Peaks

    ~6,000-8,850 m · Self-supported, technical
    • Haul 75+ lb pack on 10-hour days
    • Climb 5,000+ ft with full load in one day
    • Sled pulling practice (Denali-specific)
    • Multiple prior 6,000+ m ascents
    • Cold-weather camping proficiency
    • Crevasse rescue skills
    • 3-week self-supported expeditions prior
    • 12-18 months training plus prior altitude CV

    Physical fitness test benchmarks

    • Weighted step-up test: 30 step-ups per leg in 60 seconds with 20 lb pack. Good: both legs comfortably. Excellent: <45 seconds.
    • VO2 max target: 40-50 ml/kg/min for men, 35-45 for women (Tier 1-2). Higher for Tier 3 objectives.
    • Deadlift: 1.5× bodyweight for 3 reps (Tier 2+). Carry capacity indicator.
    • Pull-up count: 5+ strict reps (Tier 2+). Upper body strength indicator.
    • 3,000 ft elevation gain test: Under 2 hours with 25 lb pack (Tier 1), under 1.5 hours with 40 lb (Tier 2+).
    • Back-to-back test: Complete 6 consecutive days of training without fatigue or soreness compromising quality.

    The Most Common Training Mistakes

    Starting too late

    The most common failure mode — assuming 8-12 weeks is enough for demanding objectives. For 6,000+ m peaks, budget 6+ months. For 8,000 m objectives, 12+ months. Rushed training produces inadequate preparation and reduces summit success dramatically.

    Insufficient weighted pack training

    Too much treadmill, gym, and road running. Not enough actual weighted hiking. If you can’t comfortably carry your expected expedition pack weight on your longest expected expedition day before the trip, you’re not ready.

    Overtraining

    Too many hours too fast, inadequate recovery, ignored fatigue signs. Symptoms: persistent soreness, declining performance, sleep disruption, frequent illness, loss of motivation. Fix: reduce volume, add recovery days, get more sleep.

    Ignoring descent training

    Downhill causes most mountaineering injuries and accumulates more fatigue than ascent on long trips. Every weighted hike should include meaningful descent. Your quads, knees, and IT bands need specific preparation.

    Over-emphasizing strength

    Bodybuilding-style training produces muscle mass that’s metabolic weight at altitude — energy-expensive tissue requiring oxygen your lungs can’t deliver. Functional strength supports mountaineering. Mass hinders it.

    Skipping the taper

    Training hard in the final week feels productive but sabotages performance. Research shows 10-20% performance improvement from proper taper. Trust the work you’ve done. Rest before departure.

    No altitude preparation

    Expecting fitness to replace acclimatization. Fitness and altitude tolerance are separate capacities — the fittest climber can develop AMS with rapid ascent. Include altitude tent training or pre-trip altitude exposure when possible. See our acclimatization science guide.


    High-Altitude Training FAQ: Your Common Questions Answered

    How long does it take to train for high altitude climbing?

    Training time depends on current fitness and target objective, ranging from 3-4 months for moderate peaks (Kilimanjaro, EBC) to 12-18 months for demanding objectives (Denali, Aconcagua, 8,000 m peaks). Timeline by objective: Everest Base Camp trek or Kilimanjaro 4-6 months minimum for most climbers, 12-week plan sufficient if already moderately fit. Aconcagua (6,961 m) 6-8 months for experienced hikers, 10-12 months for novices. Denali (6,190 m) 8-12 months minimum. 8,000 m peaks (Everest, K2) 12-18 months plus prior altitude experience. Technical climbs 6-12 months plus technical skills development. Fitness baseline assessment: hike 8-10 miles with 30 lb pack comfortably, run or hike 45+ minutes continuously, complete 20 push-ups 50 sit-ups 30-second plank, BMI in healthy range (18.5-28), no current injuries. Training phases: Weeks 1-4 base building, Weeks 5-12 build phase, Weeks 13-20 peak phase, Weeks 21-24 taper phase. Who needs longer: sedentary individuals starting from scratch, previous injury history, age 50+ climbers, objectives above 6,000 m, solo climbers, previous altitude illness history. Who may need shorter: elite endurance athletes, regular hikers with altitude experience, guided trips, supported climbs. Most climbers benefit from training longer rather than shorter. Adequate preparation dramatically improves summit success and reduces injury risk. See our 8-month EBC training plan.

    What are the four pillars of high altitude climbing training?

    The four pillars are aerobic conditioning, muscular strength, muscular endurance, and altitude-specific preparation — each addressing distinct physical demands of mountain climbing. Pillar 1 aerobic conditioning: foundation of all mountaineering fitness, develops heart and lung capacity, improves fat-burning efficiency, builds cardiovascular reserve for altitude. Primary modes hiking, running, cycling, swimming, stair climbing. Target 4-5 aerobic sessions per week 45-90 minutes each. Weekly total 5-10 hours. Pillar 2 muscular strength: supports loaded pack carries, protects joints under load, critical for downhill descents, enables scrambling and technical moves. Key exercises squats, deadlifts, lunges, step-ups, overhead press, pull-ups. Target 2-3 strength sessions per week 45-60 minutes each. Progress through weights gradually. Pillar 3 muscular endurance: ability to sustain effort for hours to days, core attribute for summit days, different from pure strength — focuses on repeated output. Developed through high-rep strength, long weighted hikes, circuit training. Progress weighted hike duration 2 hrs to 4 hrs to 6 hrs to 8+ hrs over cycle. Pillar 4 altitude-specific preparation: hypoxic training (altitude tents if available), elevation exposure during training, breath-work practice for altitude, acclimatization trips before main expedition. Target 2-4 weeks altitude tent use pre-trip if possible. Integration: aerobic conditioning first (months 1-2), add strength training (months 2-3), build muscular endurance (months 3-5), peak with altitude-specific work (month 5-6), taper before departure. Balance: cardio dominant 50-60% training time, strength/endurance 30-40% combined, altitude-specific 5-10%.

    What is the best cardio for altitude climbing?

    The best cardio is hiking with a weighted pack — it most closely simulates actual mountain demands — followed by stair climbing, trail running, and cycling. Tier 1 essential: weighted pack hiking (THE best mountaineering-specific cardio, progressive pack weight and duration, simulates actual activity), stair climbing (great for elevation gain simulation, treadmill incline or actual stairs, StairMaster excellent), hill or trail running (builds running economy plus terrain handling). Tier 2 highly valuable: steady-state running (cardiovascular base, easy 45-90 minute runs), cycling (lower-impact cardio, stationary OK but road/mountain preferred), rowing (full-body aerobic without impact). Tier 3 useful supplements: swimming (great recovery, lung capacity), elliptical (low-impact, recovery days), HIIT (builds VO2 max but balance with endurance). Avoid: pure sprint training, only machine-based cardio, only flat terrain, weight-bearing cardio without rest. Session types: long easy hike/run (zone 2) 1.5-3+ hours conversational pace 1-2x/week. Tempo work (zone 3) 45-75 minutes sustained 1x/week. Interval training (zone 4) 30-60 min total 3-5 min hard 2-3 min recovery 1x/week. Recovery cardio 30-60 min very easy 1-2x/week. Weekly volume: beginner 3-4 hours, intermediate 5-7 hours, advanced 7-10 hours, peak weeks 10-12 hours. Heart rate zones zone 1 50-60% recovery, zone 2 60-70% aerobic base, zone 3 70-80% tempo, zone 4 80-90% VO2 max, zone 5 90-100% peak. Intensity distribution 80% easy 10% tempo 10% hard. Weighted pack hiking is the single most valuable cardio for altitude climbing.

    What strength training do mountaineers need?

    Mountaineers need functional strength focused on lower body power, core stability, and load-bearing capacity — not bodybuilder mass but strength that translates to carrying packs, ascending terrain, handling descents. Core principles: compound movements over isolation, full range of motion, functional patterns, progressive overload, 2-3 sessions per week. Essential exercises lower body: back squat 3×8-12, deadlift 3×6-10, lunges 3×10-12 per leg, step-ups to box weighted 3×10 per leg, Bulgarian split squats 3×8-10, hip thrusts 3×10-15. Core stability: planks 3×30-60 sec, dead bugs 3×10-15, Pallof press 3×10-12, farmer’s carries 3×30-60 sec. Upper body: pull-ups 3×5-10, push-ups 3×10-20, overhead press 3×8-12, rows 3×8-12. Specific load-bearing: weighted step-ups 3×10 per leg (direct transfer), weighted carries 3 sets × 100 m, suitcase carries 3 sets × 30-60 sec. Programming phases base (weeks 1-4) 2x/week 3 sets × 8-12 reps 60-70% 1RM technique focus. Build (weeks 5-12) 2-3x/week 3-4 sets × 6-10 reps 70-80% 1RM progressive loading add weighted carry work. Peak (weeks 13-20) 2x/week 3 sets × 5-8 reps heavier emphasis muscular endurance (lots of carries) add balance challenges. Taper (weeks 21-24) 1x/week lighter loads maintenance avoid new exercises or PRs. Common mistakes: too much bodybuilding-style work, neglecting single-leg work, ignoring core beyond sit-ups, skipping grip training, not progressing weights, adding strength when already tired from cardio. Strength supports mountain performance — don’t let it dominate your training time. Cardio remains primary.

    How much weighted pack training do you need?

    Weighted pack training is the single most mountain-specific training mode — most climbers need 2-3 weighted hikes per week in the final 3 months before a major expedition, with progressive pack weight building from 20 lb to 40-60 lb depending on objective. Progression: Phase 1 adaptation (weeks 1-4) 1 hike/week 15-20 lb 60-90 minutes flat or rolling terrain easy pace. Phase 2 base building (weeks 5-12) 1-2 hikes/week 20-30 lb 1.5-3 hours rolling to moderately steep 300-600 m elevation gain. Phase 3 build (weeks 13-18) 2 hikes/week 30-40 lb 3-5 hours steep technical 600-1,200 m elevation gain. Phase 4 peak (weeks 19-22) 2-3 hikes/week 40-60 lb (match expedition) 4-8 hours match expected conditions 1,000-1,500 m elevation gain. Phase 5 taper (weeks 23-24) 1 hike/week 20-30 lb 2-3 hours easy to moderate maintain fitness prevent fatigue. Pack weight targets: Kilimanjaro (porter-supported) 15-25 lb training weight, EBC trek (with porters) 15-25 lb, Aconcagua 35-50 lb, Denali (self-supported) 50-80 lb, Alpine climbs 20-35 lb plus technical gear. Terrain progression: level walking paths to rolling hills to hiking trails with elevation to steep trails with significant elevation to mixed surfaces stream crossings scrambling. Pack packing: start with waterbottles or sandbags, use actual pack and gear for final phases, test expedition pack weight distribution, never cheat weight. Safety: never jump pack weight more than 20% in one week, back off if lower back pain develops, focus on posture and core engagement, build knee strength before heavy weight, use trekking poles for descents. Downhill training critical — downhill stresses knees, quads, IT band — include in all weighted training — actually more injury-causing than uphill.

    Do I need altitude training before a climbing expedition?

    Altitude-specific training is highly valuable but not always essential — the best altitude preparation is real altitude exposure, with hypoxic tents and elevation training as beneficial alternatives when real altitude isn’t accessible. Hierarchy: Best real altitude exposure — nothing matches actual altitude adaptation, trips to 2,500-3,500 m altitude 2-4 weeks before expedition, extended stays at moderate altitude, weekend trips to mountain areas, acclimatization begins before expedition. Second best hypoxic tent/chamber systems — simulate altitude at home, brands Hypoxico, Altitude Tech, Higher Peak, sleep at simulated 2,500-4,000 m, use 4-8 hours per night, 3-4 weeks pre-expedition typical, cost $3,000-$8,000 purchase or $200-$400/month rental, proven 30-50% AMS reduction. Third option Intermittent Hypoxic Training (IHT) — breathing masks that reduce oxygen, short intense sessions 30-45 minutes, 3-4 sessions per week for 4-6 weeks, less effective than tent systems, cost $300-$600 device. Altitude training camps Colorado, Utah, Ecuador, Nepal, California. Without altitude access: high-intensity interval training, VO2 max development, breathing practice techniques, hiking at highest accessible elevation, long cardio sessions. Who benefits most: previous AMS history, sea-level residents heading to high altitude, time-constrained trips, short expedition windows, professional climbers, solo expedition planners. Limitations: individual response varies significantly, benefits diminish rapidly after cessation, cannot replicate full altitude physiology, best as supplement not replacement for acclimatization days, does not eliminate ascent rate rules. Pre-trip altitude experience: summit easier peak before main expedition, spend acclimatization week at moderate altitude, stay at altitude before major exposure, combine vacation with altitude training. Persistence: benefits last 7-14 days after descent, significant loss after 30 days, plan main trip within 30-60 days of altitude training. See our altitude acclimatization science guide.

    What are the most common high altitude training mistakes?

    Most common mistakes include insufficient training time, neglecting weighted pack practice, overtraining, ignoring weak points, improper periodization, and not training descents. Top mistakes: Starting too late — most common issue underestimating training time needed, 8-12 weeks too short for demanding objectives, better to over-prepare than rush, 6+ months recommended for 6,000+ m objectives. Not enough weighted pack training — too much treadmill/gym work, insufficient actual weighted hiking, failing to test expedition pack weight, no downhill descent practice. Overtraining — too many hours too fast, not enough recovery time, inadequate sleep, ignoring signs of fatigue, leads to injury, illness, poor performance. Ignoring weak points — avoiding uncomfortable exercises, neglecting weaknesses (core, single-leg, etc.), only doing what you already do well. Poor periodization — not varying training intensity by phase, peaking too early or too late, no taper before expedition, missing recovery-adaptation cycle. Over-emphasizing strength — bodybuilder-style training, too much weight not enough endurance, creates unnecessary muscle mass, altitudes demand cardio more than power. Under-emphasizing cardio — running only once a week, ignoring aerobic base, missing zone 2 training, cardio is primary for altitude success. Skipping altitude preparation — no altitude-specific training, expecting fitness to replace acclimatization, ignoring hypoxic training options, no pre-trip altitude exposure. Inadequate hiking time — short duration training sessions, no practice at expedition daily hiking length, missing mental preparation for long days, endurance requires long sessions. Wrong test benchmarks — using pure fitness tests, not testing actual mountain movements, no assessment of technique under load, missing psychological preparation. Consequences: reduced summit success, injuries during training or expedition, early exhaustion on summit day, increased altitude sickness susceptibility, poor recovery. Avoid: plan timeline carefully, include weighted hiking weekly, follow structured program, include recovery days, progress gradually, test readiness, consult coaches. See our altitude sickness guide.

    How do I know if I’m ready for high altitude climbing?

    Readiness depends on passing specific physical benchmarks tailored to target peak, combined with technical skills and altitude experience. Kilimanjaro/EBC trek: hike 8-10 miles with 25-30 lb pack comfortably, ascend 3,000 ft in 2 hours carrying pack, run 5K in under 35 minutes OR walk at 4 mph on 10% incline for 45 minutes, complete 12-15 push-ups 20 sit-ups 1-minute plank, back-to-back 4-hour hiking days, no significant joint pain. Aconcagua/6,000 m peak: 10-14 hour day hikes with 40-50 lb pack, ascend 4,000 ft in 3-4 hours with pack, run 10K under 55 minutes OR rucking equivalent, back-to-back 2-3 days heavy weighted hiking, multiple prior altitude experiences (above 4,500 m), basic crampon and ice axe proficiency, winter hiking experience. Denali: haul 75+ lb pack on 10-hour days, climb 5,000+ ft with full load in one day, sled pulling practice (Denali-specific), multiple 6,000+ m ascent experiences, cold-weather camping, crevasse rescue skills, 3-week self-supported expeditions prior. 8,000 m peak: all Denali benchmarks plus previous 8,000 m or high 7,000 m success, extensive altitude experience above 6,500 m, oxygen system familiarity, expedition-length commitment tolerance, 12+ months prior altitude expeditions. Fitness tests: VO2 max above 40-50 ml/kg/min for men 35-45 for women, weighted step-up 30 per leg in 60 seconds, push-up 30+ strict form, squat 50 air squats without stopping, deadlift 1.5x bodyweight minimum, pull-up count 5+. Technical skills: crampon techniques, ice axe arrest, rope team travel, crevasse rescue, weather forecasting, navigation, emergency response. Altitude progression: day hikes above 3,500 m (many times), multi-day trips above 3,500 m (multiple), any altitude above 4,500 m (minimum for serious objectives), 5,500 m+ experience (essential for demanding peaks), individual altitude tolerance pattern established. Psychological: comfort with discomfort, decision-making under stress, group dynamics awareness, risk tolerance appropriate. Red flags: recent significant illness or injury, training not completed, limited altitude experience, family/personal crises, financial stress, gear not tested. Better to delay than attempt unprepared.


    Authoritative Sources & Further Reading

    Content reflects evidence-based mountaineering coaching programs:

    • Steve House & Scott Johnston, Training for the New Alpinism — Uphill Athlete methodology
    • Uphill Athlete — Training programs and education for mountaineers
    • Mountain Tactical Institute — Rob Shaul’s mountain athlete training research
    • American Alpine Club — Training and education resources
    • Stephen Seiler, PhD — Polarized training research for endurance athletes
    • Tudor Bompa, PhD — Foundational periodization theory
    • Wilderness Medical Society — Altitude illness prevention guidelines
    • IFMGA-certified guides on training verification
    • Reference texts: Mountaineering: The Freedom of the Hills (The Mountaineers); Training for the Uphill Athlete (House, Johnston, Jornet)
    Published: March 28, 2026
    Last updated: April 19, 2026
    Next review: July 2026
    Part of the Global Summit Guide

    Back to the Master Hub

    This guide is one of 70 across 12 thematic clusters on Global Summit Guide. The master hub organizes every guide by experience tier, specific peak, skill area, and region.

    View the Hub →
  • Andes Expedition Planning: High-Altitude Logistics

    Andes Expedition Planning: High-Altitude Logistics

    Cluster 08 · Altitude, Training & Physiology · Updated April 2026

    Andes Expedition Planning: High-Altitude Logistics for South America

    Country-by-country logistics for Peru, Bolivia, Chile, and Argentina — staging cities, seasonal patterns, permit systems, iconic peaks from Aconcagua to Alpamayo, and how altitude strategy adapts to South America’s dry continental climate. Where Himalayan/Karakoram physiology principles meet distinctly Andean logistics.

    4
    Major
    countries
    6,961m
    Aconcagua
    high point
    2 / 2
    Climbing
    seasons
    $800–8K
    Expedition
    cost range
    Global Summit Guide A guide in Cluster 08 · Altitude, Training & Physiology View master hub →

    The Andes are the world’s longest continental mountain range — nearly 7,000 km from Venezuela to Patagonia — and they differ from Himalayan/Karakoram expeditions in ways that matter for planning. The climate is continental and dry rather than monsoonal. The highest peak (Aconcagua, 6,961 m) is lower than dozens of Himalayan objectives. The climbing seasons run opposite the Northern Hemisphere (austral summer Dec-Feb for southern Andes, dry season May-Aug for northern Andes). Infrastructure is generally more developed, with paved roads reaching many base camps and commercial operators well-established. This guide walks through country-by-country logistics, staging cities, iconic peaks, and Andes-specific acclimatization considerations. For the underlying altitude physiology, see our acclimatization science guide; for Aconcagua specifically, see our complete Aconcagua routes guide.

    How this guide was built

    Expedition logistics drawn from commercial operators including Aconcagua Provincial Park, Skyline Adventures (Peru), Bolivia Climbs, Condoriri Travel, and Alpine Ascents International published itineraries. Country-specific permit and seasonal information verified against official government sources: Argentina’s Provincia de Mendoza, Peru’s SERNANP, Bolivia’s SERNAP, Chile’s CONAF. Cultural guidance from ethnographic sources and local climbing communities. Cost data compiled from current commercial expedition pricing (2025-2026 season). Reviewed by IFMGA-certified guides with extensive Andes expedition experience across all four primary climbing countries. Fact-check date: April 19, 2026.

    What Makes the Andes Distinctive

    Climbers accustomed to Himalayan expeditions often discover that Andes strategy requires different thinking. The core differences:

    • Continental climate, not monsoonal. Andes weather is driven by Pacific moisture and continental high-pressure systems rather than Indian Ocean monsoons. This produces drier, more predictable conditions with shorter but more frequent weather windows.
    • Lower absolute ceiling. The highest Andean peak (Aconcagua, 6,961 m) is lower than dozens of Himalayan objectives. No 7,000 m+ or 8,000 m peaks exist in the Andes.
    • Better road infrastructure. Most Andean base camps can be reached by vehicle, with minimal trekking approaches. This shortens expeditions dramatically compared to Nepal or Pakistan.
    • Urban staging at altitude. Cities like Cusco (3,399 m) and La Paz (3,640 m) are permanent high-altitude populations, offering developed infrastructure at altitudes that would be base camps elsewhere.
    • Two opposite seasons. Southern Andes (Argentina, Chile) climb December-February. Northern Andes (Peru, Bolivia) climb May-August. Ecuador’s equatorial peaks climb in two shorter windows.
    • Lower costs. A complete Aconcagua commercial expedition can cost less than an Everest permit alone.
    The “compressed” Andes expedition

    A 6,000 m Andes expedition typically takes 2-4 weeks compared to 4-8 weeks for equivalent Himalayan objectives. Road access to base camps eliminates long approach treks. Staging at 3,000-3,600 m in urban environments (Cusco, La Paz) provides immediate altitude exposure with full infrastructure. The result is a more intense, compressed expedition experience — less time at altitude overall, faster ascent rates, more aggressive acclimatization schedules. This works because Andean peaks max out below 7,000 m, so the absolute altitude stress is lower even with faster ascent. Climbers need to understand: this isn’t easier, it’s different. The same physiological rules apply, just applied on a shorter timeline.


    The Four Major Andes Climbing Countries

    Each country offers distinct climbing opportunities, infrastructure levels, and expedition styles:

    Country
    Peru
    May–Aug
    Technical & Varied

    Cordillera Blanca & Beyond

    Peru is the technical climbing heart of the Andes, dominated by the Cordillera Blanca — a 200 km stretch of granite-and-ice peaks with Huascarán (6,768 m) as its high point. Huaraz serves as the gateway city, with Cordillera Huayhuash and Cordillera Vilcanota offering remote alternatives. Best suited to climbers seeking technical challenge rather than altitude prestige. Famous for Alpamayo’s razor-edge aesthetic — “most beautiful mountain in the world” — and affordable, accessible climbing culture.

    Huascarán · 6,768 m Alpamayo · 5,947 m Artesonraju · 6,025 m Chopicalqui · 6,354 m Pisco · 5,752 m
    Gateway CityHuaraz (3,052m)
    Peak SeasonJune-July
    Cost Range$800-4K
    Country
    Bolivia
    May–Sep
    High Altitude & Accessible

    Cordillera Real Glaciated Peaks

    Bolivia offers the most accessible high-altitude climbing in the Andes. La Paz (3,640 m) provides instant high-altitude staging, with multiple 6,000 m peaks reachable on single-day expeditions. Huayna Potosí has become the world’s most popular “entry-level 6,000 m” — 5-7 day expeditions suitable for fit trekkers with minimal technical experience. Illimani (6,438 m) looms over La Paz as the cultural icon. Best for climbers seeking altitude experience without extreme technical demand or logistical complexity.

    Illimani · 6,438 m Huayna Potosí · 6,088 m Sajama · 6,542 m Ancohuma · 6,430 m Condoriri · 5,648 m
    Gateway CityLa Paz (3,640m)
    Peak SeasonJuly-August
    Cost Range$200-3.5K
    Country
    Argentina
    Dec–Feb
    Aconcagua & Patagonia

    Highest Peak Outside Asia

    Argentina owns Aconcagua (6,961 m) — the highest peak outside Asia and one of the Seven Summits. Mendoza serves as the gateway with exceptional commercial infrastructure, well-established permit systems, and the most developed base camp services in South America. Argentina also shares Patagonia with Chile, hosting Cerro Torre, Fitz Roy, and other technical alpine objectives. Best for Seven Summit collectors pursuing Aconcagua, or for Patagonian alpinists. The normal Aconcagua route requires no technical climbing — altitude is the challenge.

    Aconcagua · 6,961 m Tupungato · 6,570 m Cerro Torre · 3,102 m Fitz Roy · 3,359 m Nevado Juncal · 6,110 m
    Gateway CityMendoza (770m)
    Peak SeasonJanuary
    Cost Range$1.5-8K
    Country
    Chile
    Dec–Mar
    Volcanoes & Desert Peaks

    Ojos del Salado & Patagonia

    Chile offers the world’s highest volcano (Ojos del Salado, 6,893 m) and some of South America’s most distinctive climbing — dry Atacama Desert peaks, volcanic summits, and shared Patagonian peaks with Argentina. The desert approach to Ojos del Salado crosses one of the driest places on Earth before reaching glaciated summit terrain. Santiago serves as the modern, cosmopolitan gateway with excellent infrastructure. Best for climbers seeking unusual environments — volcano summits, desert approaches, and dramatic Patagonian fjords.

    Ojos del Salado · 6,893 m Llullaillaco · 6,739 m Volcán San José · 5,856 m Monte San Valentín · 4,058 m
    Gateway CitySantiago (543m)
    Peak SeasonJanuary-February
    Cost Range$1.2-5K

    Staging Cities: Your Acclimatization Base

    Every Andes expedition depends on its staging city — the urban base where you arrive, acclimatize, organize logistics, and (often) return for rest between peaks. The key staging cities each have distinct characters:

    Peru

    Cusco

    3,399 m

    Former Incan capital, UNESCO heritage, and the region’s richest cultural staging environment. Good infrastructure, extensive tourism services, and 2-3 day acclimatization is standard. Access to Cordillera Vilcanota and Vilcabamba peaks, though Cordillera Blanca peaks use Huaraz instead.

    Acclim2-3 days
    AirportInt’l
    StrengthCulture
    Bolivia

    La Paz

    3,640 m

    Highest administrative capital in the world. Arrival means immediate altitude exposure at levels exceeding many Himalayan base camps. 3-5 day acclimatization recommended. Primary gateway to Cordillera Real — Illimani looms over the city. Developed climbing services but more chaotic than Cusco.

    Acclim3-5 days
    AirportInt’l
    StrengthAltitude
    Peru

    Huaraz

    3,052 m

    Dedicated climbing town — more focused on mountaineering than tourism. Gateway to Cordillera Blanca technical peaks. Strong local climbing community, specialized gear shops, and experienced local guides. 2-4 day acclimatization typical. Less glamorous than Cusco but better for serious climbers.

    Acclim2-4 days
    AirportDomestic
    StrengthClimbing
    Argentina

    Mendoza

    770 m

    Wine region and Aconcagua gateway. Low altitude means no pre-expedition acclimatization benefit — climbers must build altitude on the mountain itself. Exceptional commercial infrastructure for Aconcagua, extensive expedition company options, permit office centralized. 1-2 days for gear prep and briefings before transferring to trailhead.

    Acclim1-2 days prep
    AirportInt’l
    StrengthLogistics
    Chile

    Santiago

    543 m

    Modern cosmopolitan capital with excellent international connections. Primary transit point for Central Chilean peaks and Ojos del Salado expeditions. Low altitude, so acclimatization happens on the mountain. Strong service economy, high-quality medical facilities, and good gear availability.

    AcclimTransit only
    AirportInt’l
    StrengthServices
    Ecuador

    Quito

    2,850 m

    Equatorial capital at near-3,000 m. Ecuador’s volcanoes (Cotopaxi, Chimborazo) are reached from Quito on short expeditions. UNESCO heritage city. Equatorial climate means two shorter climbing seasons (Dec-Feb and Jun-Sep) rather than Peru/Bolivia’s extended dry season.

    Acclim2-3 days
    AirportInt’l
    StrengthVolcanoes

    Iconic Andean Peaks: A Climber’s Menu

    Andes climbing spans from accessible high-altitude introductions (Huayna Potosí, 5-7 day expedition) to elite technical objectives (Cerro Torre, big-wall alpinism). Here’s how the flagship peaks compare:

    PeakCountryHeightDurationDifficultyBest For
    AconcaguaArgentina6,961 m18-21 daysAltitude (non-technical)Seven Summits, highest outside Asia
    Ojos del SaladoChile/Arg6,893 m10-14 daysAltitude + desertWorld’s highest volcano
    HuascaránPeru6,768 m7-14 daysTechnical moderatePeru’s highest, glaciated
    SajamaBolivia6,542 m7-10 daysAltitude (non-technical)Bolivia’s highest, volcanic
    IllimaniBolivia6,438 m7-14 daysTechnical moderateCultural icon above La Paz
    ChopicalquiPeru6,354 m7-10 daysTechnical moderateBeautiful Cordillera Blanca peak
    Huayna PotosíBolivia6,088 m5-7 daysEasy (accessible)Beginner high-altitude
    ArtesonrajuPeru6,025 m7-10 daysTechnical hardParamount Pictures peak
    AlpamayoPeru5,947 m7-14 daysHighly technical“Most beautiful mountain”
    PiscoPeru5,752 m4-5 daysEasy (non-technical)Introduction to 5,000 m+

    Andes Acclimatization: Compressed Strategy

    Andean acclimatization follows the same physiology as any altitude work (see our acclimatization science guide), but the logistics produce compressed strategies:

    Standard Andean approach

    1. Arrive at staging city (3,000-3,700 m for northern Andes). 2-3 days rest with light activity.
    2. Day hikes from staging city to 4,000-4,500 m without sleeping high. Classic climb-high-sleep-low.
    3. Warm-up peak — climb a 5,000-5,500 m peak (Pisco in Peru, Condoriri or Huayna Potosí in Bolivia) over 3-4 days.
    4. Return to staging city for 2-3 days recovery.
    5. Main objective — proceed to target peak with 1-3 camps.
    6. Descent and return — generally 1-2 days from summit to urban staging.

    Diamox usage is more common in Andes

    Because Andean expeditions compress the altitude timeline, acetazolamide (Diamox) prophylaxis is more common than on Himalayan expeditions. Typical dosing: 125 mg twice daily starting 1-2 days before altitude gain, continuing until well-acclimatized. This isn’t strictly necessary for everyone but is standard practice on guided Andean expeditions where schedules don’t allow extended natural acclimatization.

    Altitude risks specific to Andes

    • Rapid ascent rates — getting from sea level (Lima, Buenos Aires) to 3,500+ m in a day via commercial flight, followed by quick movement to higher altitudes.
    • Permanent residents misleading — locals in Cusco or La Paz are born adapted. Tourists arriving to live their normal pace at 3,600 m often develop AMS.
    • Desert dehydration — Atacama Desert and arid Andean approaches mean rapid fluid loss. Water discipline matters more than in wetter Himalaya.
    • Compressed schedules — commercial itineraries often push pace harder than Himalayan equivalents. Consider extending independently.
    Don’t let the “easier” reputation fool you

    Because Andes peaks are shorter and logistics simpler, climbers sometimes treat them as less serious. This causes real problems. Aconcagua’s summit success rate is 30-40% despite being “non-technical” — altitude kills motivation, motivation kills summits. HAPE and HACE still happen on Andean peaks, particularly on compressed schedules. Individuals still die on Aconcagua regularly, often from missed altitude illness signs. The mountain’s reputation as “accessible” doesn’t make its physiology gentler. Apply all the altitude principles from our altitude sickness guide — they work the same way at 6,500 m in Argentina as they do at 6,500 m in Nepal.


    Andes Expedition FAQ: Your Common Questions Answered

    What makes the Andes different from the Himalaya for climbing?

    The Andes differ significantly from the Himalaya in climate, altitude profile, infrastructure, and expedition style — Andean peaks feature drier continental weather, generally lower absolute elevations (max 6,961 m vs 8,849 m), austral summer climbing season, and more accessible logistics than remote Himalayan peaks. Climate differences: Andes continental climate drier more predictable, Himalaya monsoonal wet seasons extreme variability, Andean winds consistent from west (Pacific), Himalayan weather driven by monsoon patterns, Andean temperatures generally milder at equivalent altitudes, snow conditions more reliable in Andes, rain less common during climbing season. Altitude profile differences: Andes peak Aconcagua 6,961 m, Himalaya peaks 8,850 m (Everest), Andean 6,000m peaks abundant, Himalayan 7,000m+ peaks common, Andes starts lower altitude, less progression time in Andes, shorter expedition durations typical. Seasonal differences: Andes November-March (austral summer), Himalaya April-June (pre-monsoon) or Sept-Nov, Andes peak season December-February, Himalaya peak season May or October, Andes drier weather windows, Himalaya weather more unpredictable. Infrastructure comparisons: Andes multiple developed countries, Himalaya remote Nepal Pakistan Tibet India, Andes good road access to many peaks, Himalaya long approaches common, Andes helicopter rescue more available, Himalaya limited rescue infrastructure, Andes urban staging areas, Himalaya remote staging points. Expedition style: Andes shorter expeditions (2-4 weeks typical), Himalaya longer expeditions (4-8 weeks), Andes self-supported more common, Himalaya porter-supported mostly, Andes more technical climbing per peak, Himalaya more altitude per peak. Cultural factors: Andes Spanish-speaking regions, Himalaya multiple languages, Andes Catholic/Incan cultural blend, Himalaya Buddhist/Hindu cultures, Andes tourism infrastructure developed, Himalaya developing tourism in some areas. Technical considerations: Andes volcanic peaks common, Himalaya granite and ice peaks, Andes steep snow/ice climbing typical, Himalaya mixed terrain variety, Andes shorter climbing durations, Himalaya longer summit days. Cost comparisons: Andes generally less expensive per peak, Himalaya higher costs for 8,000m peaks. Each mountain range has unique characteristics that affect climbing strategy. The Andes offer excellent opportunities for high-altitude climbers who want varied terrain, accessible logistics, and diverse peak options. See our altitude acclimatization guide.

    Which countries have the best Andes climbing?

    Peru, Bolivia, Chile, and Argentina each offer distinct Andes climbing opportunities — Peru’s Cordillera Blanca for technical peaks, Argentina for Aconcagua and commercial infrastructure, Bolivia for high-altitude glaciers, Chile for volcanic peaks and desert Andes. Peru Cordillera Blanca: technical climbing paradise, famous peaks Huascarán (6,768 m) Alpamayo (5,947 m) Artesonraju, access from Huaraz (3,052 m), expedition duration 2-4 weeks typical, climbing season May-August (dry season), cost moderate compared to other Andes, infrastructure well-developed for climbing, permits Huascarán National Park fees. Peru other ranges: Cordillera Huayhuash (more remote), Cordillera Vilcanota (technical), Cordillera Vilcabamba (Incan heritage), Cordillera Urubamba (accessible), individual peak characteristics. Argentina Aconcagua region: Aconcagua (6,961 m) highest peak outside Asia, access from Mendoza (770 m), Cerro Tupungato (6,570 m), Nevado Juncal (6,110 m), excellent commercial infrastructure, permit systems well-established, climbing season December-February. Argentina Patagonian Andes: Cerro Torre (3,102 m) technical, Fitz Roy range, Paine National Park, challenging weather, shorter climbing seasons. Bolivia Cordillera Real: Illimani (6,438 m) iconic peak, Huayna Potosí (6,088 m) popular, Ancohuma (6,430 m), access from La Paz (3,640 m), glaciated high-altitude climbing, climbing season May-September, cultural significance important. Bolivia other areas: Cordillera Apolobamba (remote), Sajama volcano (6,542 m), Tunari area, unique Bolivian cultural context. Chile Northern Andes: Atacama Desert peaks, Ojos del Salado (6,893 m) world’s highest volcano, Llullaillaco (6,739 m), Volcán San José (5,856 m), volcanic peaks abundant, dry stable weather, climbing season December-March. Chile Patagonian: Paine National Park, Monte San Valentín (4,058 m), Chilean fjords climbing, challenging weather, unique wilderness. Best country by objective: technical climbing Peru (Cordillera Blanca), high altitude Argentina (Aconcagua), commercial climbing Argentina, cost-conscious Peru or Bolivia. Each country offers unique experiences and climbing opportunities.

    What are the iconic Andes peaks to climb?

    The iconic Andes peaks span from Aconcagua (highest outside Asia) to Alpamayo (one of the world’s most beautiful), offering diverse technical challenges, altitudes, and cultural settings. Aconcagua (Argentina 6,961 m): highest peak in Western and Southern Hemispheres, Seven Summit peak, non-technical normal route, altitude main challenge, commercial infrastructure excellent, expedition duration 18-21 days, climbing season December-February, cost $3,000-8,000 commercial. Huascarán (Peru 6,768 m): highest peak in Peru, technical challenge moderate, Cordillera Blanca icon, access from Huaraz, climbing season May-August, expedition duration 7-14 days, multiple technical variations, challenging icefall sections. Ojos del Salado (Chile/Argentina 6,893 m): second highest Andes peak, world’s highest volcano, desert approach, technical elements moderate, altitude primary challenge, climbing season December-March. Alpamayo (Peru 5,947 m): ‘most beautiful mountain in world’ (UNESCO recognition), highly technical, pyramid-shaped summit, Class 5 climbing on main faces, climbing season May-August, advanced mountaineering required. Illimani (Bolivia 6,438 m): iconic Bolivian peak, views from La Paz, technical challenges moderate, glaciated route, climbing season May-September, cultural significance important. Huayna Potosí (Bolivia 6,088 m): popular beginner high-altitude peak, technical challenge minimal, access from La Paz, rapid acclimatization possible, climbing season May-September, expedition duration 5-7 days, excellent for first-time high altitude. Artesonraju (Peru 6,025 m): known as ‘Paramount mountain’ (film inspiration), technical climbing, beautiful pyramid form, Cordillera Blanca. Chopicalqui (Peru 6,354 m): beautiful Andean peak, technical challenges moderate, glaciated approach. Pisco (Peru 5,752 m): popular beginner peak, non-technical normal route, high altitude experience, access from Huaraz, 4-5 day expedition. Sajama (Bolivia 6,542 m): highest peak in Bolivia, volcanic peak, non-technical, remote location. Each peak offers unique experiences and challenges. See our Aconcagua routes guide.

    When is the best time for Andes climbing?

    Andes climbing seasons vary by latitude and country — Argentina/Chile climb in austral summer (December-February), while Peru/Bolivia climb in dry season (May-August). Southern Andes austral summer (December-February): peak climbing season, stable weather patterns, longer daylight hours, higher temperatures, reduced snowfall risk, most commercial expeditions. Specific Argentina timing: Aconcagua December-February prime, Tupungato December-February, Cerro Plomo December-January, Patagonian peaks December-February, expedition planning October-November departures. Chilean timing: Ojos del Salado December-March, Llullaillaco December-March, Volcán San José December-March, Atacama peaks December-March, Patagonian peaks November-February. Northern Andes dry season (May-August): peak climbing season, stable high pressure systems, clear skies predominate, snow consolidation, good weather windows, most technical climbs. Specific Peru timing: Cordillera Blanca May-August, Cordillera Huayhuash May-August, Huascarán June-July peak, Alpamayo June-August optimal, technical routes best mid-season. Bolivian timing: Cordillera Real May-September, Illimani May-September, Huayna Potosí May-September, Sajama May-September, Apolobamba range May-September. Ecuador (equatorial): December-February dry season, June-September second dry season, Cotopaxi both seasons good, Chimborazo both seasons good, equatorial weather less seasonal. Peak performance months: Argentina January (mid-summer), Chile January-February, Peru June-July (dry heart), Bolivia July-August (stable), Ecuador December-January. Individual peak optimal times: Aconcagua mid-December to mid-February, Ojos del Salado December-February, Huascarán June-July, Alpamayo June-July-August, Illimani June-July, Huayna Potosí June-July, Pisco June-August. Weather pattern considerations: Southern Hemisphere patterns jet stream affects peak weather El Niño/La Niña cycles Pacific moisture sources Andes rain shadow effects desert vs tropical boundaries. Successful Andes climbing depends heavily on choosing the right time of year.

    How do staging cities affect Andes acclimatization?

    Staging cities play a crucial role in Andes acclimatization, providing intermediate altitudes between sea level and peak elevations — the most important being Cusco (Peru 3,399m), La Paz (Bolivia 3,640m), Huaraz (Peru 3,052m), Mendoza (Argentina 770m), and Santiago (Chile 543m). Cusco Peru: ancient Incan capital, altitude starting point, expedition infrastructure, cultural immersion, 2-3 day acclimatization typical, guide networks extensive, equipment available, international airport. La Paz Bolivia: highest administrative capital, direct altitude exposure, 3-5 day acclimatization, cultural significance, comprehensive services, high-altitude experience, Bolivia’s climbing hub, international flights. Huaraz Peru: Cordillera Blanca gateway, technical climbing hub, 2-4 day acclimatization, specialized guides, climbing-focused town, multiple peak access, climbing community, local expertise. Mendoza Argentina: Aconcagua gateway, low altitude starting point, wine region, expedition companies, cultural experience, good infrastructure, business services, international access. Santiago Chile: central Chile climbing, low altitude start, modern infrastructure, diverse climbing options, urban cosmopolitan, services comprehensive, international airport, transit hub. Quito Ecuador: Ecuadorian capital, volcano country access, cultural blend, 2-3 day acclimatization, good services, variety of peaks. Cities by altitude gain approach: sea-level start cities Mendoza (Aconcagua trip) Santiago (Chilean peaks) Buenos Aires (transit), large altitude gain needed. Moderate altitude starts: Quito (Ecuador), Huaraz (Peru), direct mid-altitude exposure, good acclimatization start. High altitude starts: Cusco (Peru), La Paz (Bolivia), direct high-altitude exposure, quick acclimatization possible. Acclimatization strategies by city vary: Cusco approach 1 day rest after arrival short day hikes gradual altitude increase hydration emphasis altitude medication consideration. La Paz approach 2-3 days acclimatization short hikes around city gradually higher day trips altitude effects monitoring. Huaraz approach 2-3 days acclimatization short hikes near city valley exploration gradual altitude increase. Mendoza approach 1-2 days business/cultural pre-trip preparation equipment checks final arrangements low-altitude rest.

    What permits do you need for Andes climbing?

    Andes climbing permits vary significantly by country and peak, ranging from simple park entry fees to complex commercial climbing permits. Argentina permits — Aconcagua permits: required for all Aconcagua climbers, cost $800-1,200 USD (peak season), includes park entry rescue services waste management, available online or in Mendoza, climbing season availability, waste management fees mandatory, rescue insurance included. Other Argentine peaks: park entry fees vary, some require climbing registration, few peaks need formal permits, commercial expeditions handle paperwork, individual permits easier. Peru permits — national park fees: Huascarán National Park $25-35 USD, Cordillera Huayhuash $30-40 USD, other park fees $15-25 USD, Peruvian Alpine Club membership helpful. Climbing permits: most peaks no specific climbing permit, restricted areas special permits needed, commercial expeditions business permits, professional guides preferred. Bolivia permits: most peaks no formal permits, national park entry fees $5-15 USD, commercial permits for operators, individual climbers typically okay, local registration sometimes needed. Chile permits — Aconcagua side: Chilean permits for border areas, Aconcagua base camp access, park permits needed, commercial operators handle. Northern Chile peaks: Ojos del Salado Chilean permit required, park entry fees, border area considerations. Patagonian Chile: Paine National Park $20-30 USD, climbing permits for some areas. Commercial vs independent considerations: commercial expeditions permits typically included simpler paperwork higher costs overall experienced operators emergency response. Independent climbing self-acquired permits research required lower costs more logistics work better local contacts needed. Permit application process — timeline considerations 2-6 months ahead typical peak season early application commercial permits easier individual permits variable. Required documentation passport information insurance verification medical clearance sometimes experience documentation guide certifications. Insurance requirements: evacuation coverage mandatory most peaks, medical insurance required, climbing-specific coverage important, rescue services included some permits, emergency contact required. See our mountain climbing costs guide.

    How does Andes acclimatization differ from Himalayan?

    Andes acclimatization differs significantly from Himalayan due to altitude profiles, approach styles, climate patterns, and infrastructure — Andean climbers often start from lower elevations with faster ascent rates, while Himalayan climbers have more gradual progression but longer total expedition times. Altitude profile differences — Andes starting altitudes: sea level to moderate altitude common, Mendoza (770 m) Aconcagua start, Cusco (3,399 m) Peru peaks, La Paz (3,640 m) Bolivian peaks, quick altitude gain possible, less progressive approach. Himalayan starting altitudes: Katmandu (1,400 m) Nepal, Skardu (2,450 m) Pakistan, Lhasa (3,650 m) Tibet, gradual altitude progression, longer approach times, built-in acclimatization. Approach differences — Andes approaches: road access common, short trek times, vehicle support available, less porter dependency, urban staging, commercial infrastructure. Himalayan approaches: foot approaches predominant, multi-day treks common, porter support essential, remote staging points, limited road access, traditional expedition style. Expedition duration: Andes 2-4 weeks total compressed acclimatization shorter summit pushes faster recovery needed multiple peaks possible flexible scheduling. Himalayan 4-8 weeks typical extended acclimatization longer summit pushes gradual fitness building single-peak focus fixed schedules. Acclimatization strategies: Andes approach rapid altitude gain intensive day trips strategic staging medication often used shorter acclimatization peak-specific preparation. Himalayan approach gradual progression extended camp rotations long acclimatization periods natural progression longer recovery traditional patterns. Climate differences: Andes continental climate predominant drier conditions overall stable high pressure reliable weather patterns shorter weather windows temperature extremes. Himalayan monsoon-influenced weather wet seasons extreme complex weather systems long weather windows sometimes seasonal variations dramatic moisture patterns. Infrastructure impact: Andes medical facilities available communication infrastructure transportation access commercial support emergency response rescue capabilities. Himalayan limited medical access satellite communication needed remote locations porter-dependent logistics limited rescue expedition-style support. Oxygen and altitude drugs: Andes oxygen optional most peaks medications commonly used Diamox prevalent short-term use typical. Himalayan oxygen essential above 7,500m extended medication use specialized protocols long-term altitude drugs. Both ranges require excellent preparation and acclimatization understanding. See our altitude acclimatization guide.

    How much does an Andes expedition cost?

    Andes expedition costs vary significantly by country, peak, style, and duration — ranging from $2,000-8,000 for commercial programs to $800-3,000 for independent climbs. Commercial expeditions: Aconcagua (Argentina) $3,000-8,000, Cordillera Blanca peaks (Peru) $1,500-4,000, Illimani (Bolivia) $1,200-3,500, Ojos del Salado (Chile) $2,500-5,000, Huayna Potosí (Bolivia) $500-1,500. Independent expeditions: Aconcagua $1,500-3,500, Cordillera Blanca $800-2,500, Illimani $500-1,800, Ojos del Salado $1,200-3,000, Huayna Potosí $200-800. Major cost components — international travel: US to Andes $400-800, Europe to Andes $600-1,200, Asia to Andes $1,000-2,000, peak season premium, advance booking savings. Internal transportation: domestic flights $100-400, long-distance buses $20-80, private transfers $50-200, 4WD vehicle rentals $80-200/day, local transportation $10-50/day. Accommodation pre-expedition: budget hostels $10-30/night, mid-range hotels $40-80/night, luxury hotels $100-300/night, climbing lodges $30-100/night, apartment rentals $40-120/night. Guide services: IFMGA guides $200-500/day, local guides $100-300/day, group rates available, multi-day discounts, insurance costs included. Porter services: high-altitude porters $50-150/day, trekking porters $20-80/day, load limits vary, cultural considerations, fair wage importance. Equipment costs — rental options: climbing gear rental $20-50/day, specialized equipment $30-80/day, high-altitude boots $10-25/day, clothing systems $15-40/day. Purchase alternatives: complete equipment $3,000-8,000, selected rental items $500-1,500, local purchases $200-800, international shipping $200-500. Permits and fees: Argentina Aconcagua $800-1,200 peak season, Peru Huascarán $25-35, Bolivia park entries $5-15, Chile Ojos del Salado $50-100. Insurance requirements: basic travel insurance $50-200, climbing-specific $200-800, evacuation coverage $200-600, high-altitude coverage $300-1,000. Cost comparison by country — most affordable: Bolivia (lowest overall), Peru (moderate costs), Ecuador (moderate costs). Higher costs: Argentina (moderate-high), Chile (higher costs), specialized expeditions. Seasonal variations: peak season premium 20-40% higher costs, shoulder season savings 20-30% lower costs. Andes expeditions offer excellent value compared to other major mountain ranges. See our complete mountain climbing costs guide.


    Authoritative Sources & Further Reading

    Content reflects expedition practice and official government sources:

    • Aconcagua Provincial Park (Argentina) — Official permits and expedition protocols
    • SERNANP (Peru) — National protected areas and climbing permits
    • SERNAP (Bolivia) — National parks and protected areas
    • CONAF (Chile) — National forestry and parks service
    • Federación Argentina de Montañismo — Climbing registration and services
    • Peruvian Alpine Club — Member services and climbing resources
    • American Alpine Club — Andes expedition reports and history
    • Commercial operators: Alpine Ascents International, Skyline Adventures, Bolivia Climbs, Condoriri Travel, Aventuras Patagónicas
    • IFMGA-certified guides with multi-country Andes expedition experience
    • Reference texts: Aconcagua: A Climbing Guide (R.J. Secor); The Andes: A Trekker’s Guide (Kathy Jarvis); Classic Climbs of the Cordillera Blanca (Brad Johnson)
    Published: April 19, 2026
    Last updated: April 19, 2026
    Next review: July 2026
    Part of the Global Summit Guide

    Back to the Master Hub

    This guide is one of 70 across 12 thematic clusters on Global Summit Guide. The master hub organizes every guide by experience tier, specific peak, skill area, and region.

    View the Hub →
  • Altitude Sickness: Symptoms, Prevention, and Treatment Guide

    Altitude Sickness: Symptoms, Prevention, and Treatment Guide

    Cluster 08 · Altitude, Training & Physiology · Updated April 2026

    Altitude Sickness: Symptoms, Prevention & Treatment Guide

    The definitive 2026 medical guide to altitude sickness for trekkers and climbers — covering Acute Mountain Sickness (AMS), High-Altitude Pulmonary Edema (HAPE), and High-Altitude Cerebral Edema (HACE). Symptoms, Lake Louise scoring, prevention protocols, medications including Diamox and dexamethasone, and descent decision frameworks for high-altitude expeditions.

    3
    Forms of
    altitude illness
    2,500 m
    Threshold
    elevation
    25–50%
    AMS rate
    above 3,500 m
    300–500 m
    Safe daily
    ascent rate
    Global Summit Guide A guide in Cluster 08 · Altitude, Training & Physiology View master hub →
    Medical disclaimer: This guide is for educational purposes only and does not replace professional medical advice. Altitude sickness can be life-threatening — consult a physician familiar with altitude medicine before any trip above 3,500 m, especially regarding prescription medications. In an emergency at altitude, descend immediately and seek medical care. Individual responses to altitude vary significantly.

    Altitude sickness is the single greatest medical risk facing trekkers and climbers above 2,500 meters. It’s not rare — 25-50% of travelers ascending above 3,500 m too quickly develop Acute Mountain Sickness (AMS), and even the mildest cases can progress to life-threatening High-Altitude Pulmonary Edema (HAPE) or High-Altitude Cerebral Edema (HACE) within hours. What makes altitude sickness distinctive is that it’s both predictable and preventable — predictable because we understand the physiology, preventable because ascent rate is the primary modifiable risk factor. This guide provides the complete clinical picture: the three forms of altitude sickness, the Lake Louise Score diagnostic system, prevention protocols, medications, treatment algorithms, and the descent decision framework that has saved countless climbers’ lives.

    How this guide was built

    Medical content verified against Wilderness Medical Society (WMS) Practice Guidelines for Acute Altitude Illness (2024 update), International Society for Mountain Medicine protocols, and peer-reviewed research from High Altitude Medicine & Biology and New England Journal of Medicine. Drug dosing follows UpToDate clinical references and WMS prescribing guidelines. Lake Louise Score methodology per 2018 Lake Louise AMS Consensus. Treatment algorithms aligned with Himalayan Rescue Association (HRA) field protocols. Reviewed by practicing wilderness medicine physicians with altitude expedition experience. Fact-check date: April 19, 2026. Not medical advice — consult a physician for trip-specific guidance.

    What Is Altitude Sickness? The Physiology

    Altitude sickness is a spectrum of medical conditions caused by the body’s inability to adapt quickly enough to reduced oxygen availability at elevation. At sea level, atmospheric pressure is 760 mmHg and oxygen makes up 21% of the air. At 3,500 m, atmospheric pressure drops to approximately 500 mmHg — the percentage of oxygen stays the same, but the partial pressure drops significantly, meaning each breath delivers less oxygen to the bloodstream.

    Why altitude affects us

    When the body detects reduced oxygen (hypoxia), it initiates a cascade of adaptive responses: increased breathing rate, increased heart rate, and eventually increased red blood cell production. This adaptive process is called acclimatization, and it takes time — typically 1-3 days at each new elevation for initial adjustments, 1-2 weeks for substantial adaptation. When people ascend faster than their body can acclimatize, altitude sickness develops.

    Altitude categories and risk

    ElevationCategoryRiskNotes
    Below 1,500 mLowNoneNo risk of altitude sickness
    1,500-2,500 mModerateMinimalMost healthy individuals unaffected
    2,500-3,500 mHighAMS possible10-25% affected with rapid ascent
    3,500-5,500 mVery highSignificant25-50% AMS, HAPE/HACE possible
    Above 5,500 mExtremeSevereProgressive deterioration, death zone above 8,000 m

    The Three Forms of Altitude Sickness

    Altitude sickness exists on a spectrum of severity. Understanding all three forms — and their progression — is essential for safe high-altitude travel:

    Mildest
    AMS
    Most common
    Treatable · Resolves with rest or descent

    Acute Mountain Sickness

    AMS — The starting point of altitude illness
    25-50%
    Above 3,500 m

    AMS is the mildest and most common form of altitude sickness. It typically develops 6-24 hours after rapid ascent above 2,500 m. Not dangerous in itself, but it’s a warning sign that the body isn’t acclimatizing well — and it can progress to HAPE or HACE if ignored. Most AMS resolves with rest at current altitude or modest descent.

    • Headache (hallmark)
    • Nausea, vomiting
    • Loss of appetite
    • Fatigue, weakness
    • Dizziness
    • Sleep disturbance
    • STOP ascending
    • Rest 24-48 hours
    • Hydration 3-4 L/day
    • Acetaminophen for headache
    • Consider Diamox
    • Descend if not improving
    Life-Threatening
    HAPE
    Lungs
    Emergency · Immediate descent required

    High-Altitude Pulmonary Edema

    HAPE — Fluid accumulation in the lungs
    0.2–6%
    Fatal if untreated

    HAPE is a life-threatening emergency — fluid accumulating in the lungs prevents oxygen exchange and causes progressive drowning from within. Typically develops 2-5 days after ascent above 2,500 m. Without immediate descent and treatment, HAPE has a mortality rate of up to 50%. With proper treatment, fatalities drop dramatically. Previous HAPE episodes strongly predict future ones.

    • Breathlessness at REST
    • Cough → pink/frothy sputum
    • Drowning sensation
    • Cyanosis (blue lips/nails)
    • Elevated heart rate
    • Crackling lung sounds
    • DESCEND 500-1,000 m NOW
    • Supplemental oxygen
    • Nifedipine 30 mg XR
    • Dexamethasone if HACE
    • Gamow bag if stuck
    • Helicopter evacuation
    Life-Threatening
    HACE
    Brain
    Emergency · Can be fatal in hours

    High-Altitude Cerebral Edema

    HACE — Brain swelling from hypoxia
    0.5–1%
    Fatal if untreated

    HACE is a neurological emergency — brain swelling causes rapid deterioration of mental status and coordination. Usually follows AMS at altitudes above 4,000 m. HACE can progress from recognizable symptoms to coma within hours. The diagnostic test: ataxia (inability to walk heel-to-toe in a straight line) is the classic early warning. Frequently coexists with HAPE. Untreated HACE is nearly always fatal.

    • Severe progressive headache
    • Confusion, disorientation
    • Ataxia (wobbly walking)
    • Slurred speech
    • Hallucinations
    • Loss of consciousness
    • DESCEND IMMEDIATELY
    • Dexamethasone 8 mg initial
    • Supplemental oxygen
    • Continue 4 mg every 6 hrs
    • Gamow bag as last resort
    • Hospital evacuation
    !
    The ataxia test — HACE’s most important sign

    Ataxia — the inability to walk heel-to-toe in a straight line — is HACE’s most specific early warning sign. Any climber showing ataxia has HACE until proven otherwise. The test is simple: have them walk a 10-step straight line, placing each heel directly in front of the opposite toe. If they step off the line, sway, or cannot complete it, the diagnosis is HACE. Do not wait for more symptoms. Descent must begin immediately. This single test has saved more climbers’ lives than any other field diagnostic in altitude medicine.


    The Lake Louise Score: Standardized AMS Assessment

    Developed at the 1991 International Hypoxia Symposium in Lake Louise, Alberta, the Lake Louise Score (LLS) is the gold-standard diagnostic tool for Acute Mountain Sickness. The 2018 revision simplified the scoring to four symptom categories, each rated 0-3 points.

    The four scored symptom categories

    • Headache: 0 (none), 1 (mild), 2 (moderate), 3 (severe/incapacitating)
    • GI symptoms (nausea/vomiting): 0 (good appetite), 1 (poor appetite/nausea), 2 (moderate nausea/vomiting), 3 (severe vomiting, incapacitating)
    • Fatigue/weakness: 0 (none), 1 (mild), 2 (moderate), 3 (severe/incapacitating)
    • Dizziness/lightheadedness: 0 (none), 1 (mild), 2 (moderate), 3 (severe/incapacitating)

    AMS diagnosis requires: recent ascent above 2,500 m + headache present + total score of 3 or more.

    Score interpretation and clinical action

    0–2
    No AMS
    Normal / acclimatizing

    Continue with normal ascent protocol. Monitor for symptoms as elevation increases. Hydration and rest still essential.

    3–5
    Mild AMS
    Stop ascending

    Rest at current altitude 24-48 hours. Hydrate. Acetaminophen for headache. Consider Diamox. May resume ascent if resolved.

    6–9
    Moderate AMS
    Descend 300-1,000 m

    Descend immediately. Start acetazolamide 250 mg twice daily. Monitor for HAPE/HACE progression. Don’t delay.

    10–12
    Severe AMS
    Descend 500+ m now

    Descend immediately. Consider dexamethasone. Assess for HAPE/HACE. Evacuation may be needed. Never continue upward.

    When to use the Lake Louise Score

    The Lake Louise Score should be assessed daily at all elevations above 3,500 m. The evening — after the trekking day but before sleep — is the most useful assessment time. Trek leaders commonly assess entire groups. Self-assessment requires honest reporting: downplaying symptoms is dangerous. Any ataxia or confusion overrides the Lake Louise Score entirely — treat as HACE regardless of numerical score. The score complements but doesn’t replace clinical judgment. Pulse oximetry (SpO2 below 80% at 4,000 m is concerning) provides objective data alongside the Lake Louise Score.


    Prevention: How to Avoid Altitude Sickness

    Altitude sickness prevention is the safest and most effective approach — treatment is always a backup to good prevention. The core principle: ascent rate is the primary modifiable risk factor.

    The ascent rate rules

    • Below 3,000 m: Generally safe to ascend rapidly.
    • 3,000-4,000 m: Ascend no more than 300-500 m per day for sleeping elevation.
    • Above 4,000 m: Strictly follow 300-500 m/day rule for sleeping elevation.
    • Every 1,000 m gained: Spend 2 nights at same elevation (rest day).
    • “Climb high, sleep low”: Hike to higher altitude during day, return to lower elevation for sleeping.

    Non-medication prevention

    • Hydration: 3-4 liters daily at altitude. Dehydration mimics and worsens AMS.
    • Arrival acclimatization: 2-3 days at moderate altitude (2,500-3,500 m) before higher ascents.
    • Avoid alcohol in first 48 hours at altitude.
    • Avoid sleeping pills — they suppress breathing.
    • Maintain carbohydrate-rich diet.
    • Avoid smoking — worsens altitude effects.
    • Active rest days — short higher hikes with descent to sleep.

    Medications for prevention

    The two main prevention medications are acetazolamide (Diamox) and dexamethasone. Both require prescription — consult a travel medicine physician:

    • Acetazolamide (Diamox): 125-250 mg twice daily. Start 1-2 days before ascent above 2,500 m, continue first 2 days at target altitude. Gold-standard preventive — reduces AMS incidence by ~50%. Side effects: tingling, frequent urination, altered taste.
    • Dexamethasone: 2 mg four times daily or 4 mg twice daily. Reserved for high-risk situations or previously affected climbers.
    • Ibuprofen: 600 mg three times daily may reduce AMS incidence (studies mixed).

    Who should consider prevention medication

    • Previous history of AMS, HAPE, or HACE.
    • Rapid ascent profile unavoidable (flying to La Paz at 3,640 m, Lhasa at 3,650 m).
    • Known individual susceptibility from prior trips.
    • Essential travel above 3,500 m.
    • Short trip duration preventing gradual acclimatization.

    For deeper acclimatization science and practical ascent protocols, see our acclimatization explained guide.


    Treatment: When Altitude Sickness Strikes

    Treatment protocols depend entirely on severity. The golden rule across all altitude sickness: when in doubt, descend.

    AMS treatment (mild-moderate)

    • STOP ascending — never continue upward with active AMS.
    • Rest 24-48 hours at current elevation.
    • Hydration: 3-4 liters fluid daily.
    • Acetaminophen 500-1,000 mg for headache (avoid aspirin).
    • Anti-nausea medication (ondansetron 4-8 mg) if needed.
    • Acetazolamide: 250 mg twice daily (treatment dose).
    • If symptoms improve: Resume slow ascent after 24-48 hours.
    • If symptoms persist or worsen: Descend 300-1,000 m.

    HAPE treatment (emergency)

    • IMMEDIATE DESCENT at least 500-1,000 m — this is essential.
    • Supplemental oxygen if available.
    • Nifedipine: 30 mg extended release every 12 hours (reduces pulmonary artery pressure).
    • Sildenafil or tadalafil — alternative pulmonary vasodilators.
    • Acetazolamide 250 mg twice daily as adjunct.
    • Dexamethasone 4 mg every 6 hours if HACE also present.
    • Gamow bag (hyperbaric chamber) during evacuation if available.
    • Helicopter evacuation when conditions permit.

    HACE treatment (emergency)

    • IMMEDIATE DESCENT — life-saving and non-negotiable.
    • Dexamethasone: 8 mg initial dose, then 4 mg every 6 hours.
    • Supplemental oxygen.
    • Gamow bag if descent delayed.
    • Hospital evacuation mandatory once safely at lower altitude.
    Dexamethasone warning

    Dexamethasone is extraordinarily effective at reducing cerebral edema and altitude symptoms — but this creates a serious hazard. Dexamethasone masks altitude sickness rather than curing it. Climbers who feel better on dexamethasone may be tempted to continue ascending, which can rapidly lead to catastrophic deterioration. Dexamethasone is a descent medication, not an ascent medication. Anyone who has required dexamethasone must descend, regardless of how good they feel. This rule has no exceptions. The drug buys time for descent — it does not cure the underlying hypoxic injury.

    Treatment tools

    • Gamow bag (portable hyperbaric chamber): Inflatable pressurized bag simulating descent of 1,500-3,000 m. Used when physical descent is impossible. Rented at major expedition bases.
    • Pulse oximeter: Measures SpO2. Below 80% at 4,000 m indicates severe altitude illness.
    • Oxygen cylinders: Available at major trekking camps and hotels.
    • Satellite communication (InReach, satellite phone): Essential for evacuation coordination.

    For pre-trip preparation that reduces altitude illness risk, see our high altitude training program.


    Descent Decision Framework

    The decision to descend is often the most critical in altitude medicine — and frequently the hardest due to psychological factors. Use this structured approach:

    SituationActionDistance
    No symptoms (acclimatizing)Continue normal ascent rate
    Mild AMS (LLS 3-5)Stop ascent, rest 24-48 hrsStay or descend 300 m
    Moderate AMS (LLS 6-9)Descend300-1,000 m
    Severe AMS (LLS 10-12)Descend immediately500+ m
    Any HAPE symptomsEMERGENCY DESCENT500-1,000+ m minimum
    Any HACE symptoms (especially ataxia)EMERGENCY DESCENT500-1,000+ m minimum
    SpO2 <80% at 4,000 mDescend500+ m
    Unable to descendGamow bag + medicationsSimulate descent
    Psychological factors that delay descent

    Understanding the psychological traps that delay descent helps climbers and trip leaders override them. The most common: sunk cost fallacy (“we’ve come this far…”), summit fever (goal-focused mentality), peer pressure (not wanting to hold the group back), denial (minimizing symptoms), cost considerations (expensive trip), and limited opportunity (may never return). Override all of these for any HAPE/HACE symptoms. The mountaineering saying applies: “Reaching the summit is optional; returning home is mandatory.” Summits can be attempted again. Mountains remain. People do not.


    Altitude Sickness FAQ: Your Common Questions Answered

    What is altitude sickness?

    Altitude sickness is a group of medical conditions developing when the body cannot adapt quickly enough to reduced oxygen at elevation — typically above 2,500 m (8,200 ft). Three forms of increasing severity: AMS (Acute Mountain Sickness) mildest and most common, symptoms headache plus nausea/fatigue/dizziness/sleep disturbance, onset 6-24 hours after rapid ascent, affects 25-50% above 3,500 m. HAPE (High-Altitude Pulmonary Edema) life-threatening fluid in lungs, symptoms severe breathlessness at rest, dry cough progressing to pink/frothy sputum, drowning sensation, blue lips, usually above 2,500 m within 2-5 days, affects 0.2-6% of climbers. HACE (High-Altitude Cerebral Edema) life-threatening brain swelling, symptoms severe confusion, inability to walk straight (ataxia), hallucinations, loss of consciousness, usually follows AMS above 4,000 m, affects 0.5-1% of climbers. Why altitude sickness happens: at sea level atmospheric pressure 760 mmHg with oxygen 21%. At 3,500 m pressure drops to ~500 mmHg. Percentage of oxygen remains same but partial pressure decreases significantly. Lower oxygen pressure means less oxygen per breath reaches bloodstream. Body cannot deliver sufficient oxygen — triggering physiological responses and symptoms. Who gets it: anyone regardless of age, fitness, or experience. Individual susceptibility varies enormously. Prior altitude sickness strongly predicts future episodes. Fitness does NOT prevent altitude sickness. Ascent rate is biggest modifiable risk factor. Altitude categories: low sea level to 1,500 m, moderate 1,500-2,500 m, high 2,500-3,500 m (altitude sickness begins), very high 3,500-5,500 m, extreme above 5,500 m.

    What are the symptoms of altitude sickness?

    Altitude sickness symptoms range from mild discomfort (AMS) to life-threatening emergencies (HAPE/HACE). AMS symptoms: headache hallmark (bilateral, worse with exertion), nausea with or without vomiting, loss of appetite, fatigue and weakness, dizziness, sleep disturbances (insomnia, vivid dreams, periodic breathing), irritability, Lake Louise Score ≥3 with headache diagnostic. HAPE symptoms: shortness of breath at rest (not just with exertion), cough initially dry progressing to pink/frothy sputum, drowning sensation, cyanosis (blue lips/fingernails), elevated heart rate, fever possible, crackling sounds in lungs, severe weakness. HACE symptoms: severe progressive headache unresponsive to medications, confusion, disorientation, behavioral changes, ataxia (unable to walk heel-to-toe), slurred speech, hallucinations, loss of consciousness possible, can follow AMS rapidly (hours), frequently coexists with HAPE. Red flag combinations requiring immediate descent: AMS symptoms NOT improving after 24 hours, AMS symptoms WORSENING despite staying, any HAPE symptom (especially breathlessness at rest), any HACE symptom (especially ataxia or confusion), peripheral oxygen saturation below 80% at 4,000+ m. Lake Louise Score for AMS diagnosis: headache 0-3 points, GI 0-3 points, fatigue/weakness 0-3 points, dizziness 0-3 points. Total ≥3 with headache = AMS. 3-5 mild, 6-9 moderate, 10+ severe. Early recognition essential — AMS can rapidly progress to HAPE or HACE. When in doubt, descend.

    How do you prevent altitude sickness?

    Prevention centers on controlled ascent rate plus proper acclimatization, with medications as supplementary support. Primary prevention: gradual ascent 300-500 m per day sleeping elevation above 3,000 m, rest day every 1,000 m, climb high sleep low (hike higher during day return to lower elevation for sleeping), arrival acclimatization 2-3 days at moderate altitude before higher ascents, hydration 3-4 liters daily, avoid alcohol first 48 hours, avoid sleeping pills (suppress breathing), maintain carbohydrate-rich diet, avoid smoking. Ascent rate rules: below 3,000 m generally safe rapid ascent, 3,000-4,000 m 300-500 m per day sleeping, above 4,000 m strictly 300-500 m/day rule, every 1,000 m gained spend 2 nights at same elevation, build in active rest days with minor higher hikes. Medication prevention: Acetazolamide (Diamox) gold-standard, 125-250 mg twice daily starting 1-2 days before altitude, continuing first 2 days at target altitude, reduces AMS by ~50%, side effects tingling, frequent urination, altered taste. Dexamethasone 2 mg four times daily or 4 mg twice daily, reserved for high-risk or known susceptibility. Ibuprofen 600 mg three times daily may reduce AMS. Who should consider medication: previous history of AMS/HAPE/HACE, rapid ascent unavoidable (flying to La Paz, Lhasa), known individual susceptibility, essential travel above 3,500 m. Pre-acclimatization strategies: hypoxic tents at home, 3-5 days at moderate altitude before trek, multiple shorter altitude exposures weeks before main trip, cardiovascular fitness training (doesn’t prevent AMS but improves performance). See our acclimatization science guide.

    How do you treat altitude sickness?

    Treatment depends on severity. Golden rule: when in doubt, descend. AMS treatment (mild): STOP ascending immediately, rest 24-48 hours at current elevation, hydration 3-4 liters daily, acetaminophen or ibuprofen for headache (avoid aspirin), anti-nausea medication if needed, if symptoms improve resume slow ascent, if symptoms worsen descend. AMS treatment (moderate-severe): Acetazolamide 250 mg twice daily (treatment dose higher than prevention), Dexamethasone 4 mg every 6 hours (moderate-severe cases), descend 300-1,000 m (almost always relieves symptoms), supplemental oxygen, Gamow bag if descent impossible. HAPE treatment (life-threatening): IMMEDIATE DESCENT 500-1,000 m essential, supplemental oxygen, Nifedipine 30 mg extended release every 12 hours (reduces pulmonary artery pressure), Sildenafil or tadalafil alternative, Gamow bag during evacuation, Acetazolamide 250 mg twice daily adjunct, Dexamethasone 4 mg every 6 hours if HACE also present. HACE treatment (life-threatening): IMMEDIATE DESCENT life-saving, Dexamethasone 8 mg initial then 4 mg every 6 hours, supplemental oxygen, Gamow bag if descent delayed, evacuation to lower altitude hospital mandatory. Treatment tools: Gamow bag (hyperbaric chamber) simulates descent of 1,500-3,000 m portable device for emergencies. Pulse oximeter monitors SpO2 — below 80% at 4,000 m indicates severe. Oxygen cylinders at major trekking camps. Satellite phones/InReach essential for evacuation. When to call evacuation: any HAPE symptoms not improving with descent, any HACE symptoms, inability to descend, loss of consciousness, cyanosis, ataxia. Recovery timeline: mild AMS 24-72 hours, moderate-severe 24-48 hours after descent, HAPE 1-3 days lung clearance 2-4 weeks, HACE days to weeks.

    What is the Lake Louise score?

    The Lake Louise Score (LLS) is the standardized medical assessment tool for diagnosing and grading AMS. Developed at the 1991 International Hypoxia Symposium in Lake Louise, Alberta. Self-assessed questionnaire with 4 symptom categories. Each category scored 0-3 points. Total ranges 0-12. AMS diagnosis requires recent ascent above 2,500 m, headache present, total score ≥3. The 4 categories and scoring: Headache 0 none, 1 mild, 2 moderate, 3 severe/incapacitating. GI (nausea/vomiting) 0 good appetite, 1 poor appetite or nausea, 2 moderate nausea or vomiting, 3 severe. Fatigue/weakness 0 none, 1 mild, 2 moderate, 3 severe. Dizziness 0 none, 1 mild, 2 moderate, 3 severe. 2018 revision removed sleep disturbance as standalone category. Score interpretation: 0-2 no AMS (may not yet be acclimatized), 3-5 with headache mild AMS, 6-9 with headache moderate AMS, 10-12 with headache severe AMS. Clinical decision-making: 3-5 mild stop ascending rest and hydrate may resume in 24 hours if resolved, 6-9 moderate descend 300-1,000 m start acetazolamide, 10-12 severe descend 500+ m consider dexamethasone monitor for HAPE/HACE. Any ataxia or confusion overrides score — treat as HACE. When to use: daily self-assessment above 3,500 m, evening evaluation of trekking day, before descending from high camps, when any symptoms appear, group-wide assessments. Limitations: doesn’t assess HAPE or HACE directly, subjective, other conditions can mimic AMS, should complement not replace clinical judgment, pulse oximetry provides objective data alongside LLS.

    What medications help with altitude sickness?

    Several medications prevent and treat altitude sickness. Acetazolamide (Diamox) is most common for prevention, dexamethasone reserved for emergency treatment. All require physician prescription. Acetazolamide (Diamox) primary prevention: brand Diamox generic acetazolamide. Mechanism carbonic anhydrase inhibitor promotes bicarbonate excretion causing mild metabolic acidosis stimulating faster breathing — accelerating natural acclimatization. Prevention dose 125-250 mg twice daily starting 1-2 days before ascent above 2,500 m continuing first 2 days at target altitude. Treatment dose 250 mg twice daily. Reduces AMS incidence by ~50%. Side effects tingling in fingers/toes/face (paresthesia), frequent urination, altered taste (carbonated drinks taste flat), mild nausea. Contraindications sulfa drug allergy, kidney disease, liver disease, pregnancy. Dexamethasone emergency drug: brand Decadron. Potent corticosteroid reduces inflammation stabilizes cerebral edema in HACE. Prevention dose 2 mg every 6 hours or 4 mg twice daily. HACE treatment 8 mg initial then 4 mg every 6 hours. Moderate-severe AMS treatment 4 mg every 6 hours. Dramatic effect — reduces cerebral edema rapidly. Can mask serious illness — user must still descend. Side effects mood changes, GI upset, insomnia, increased urination. CRITICAL WARNING: NEVER continue ascending on dexamethasone — only masks symptoms, must descend after administration. Pulmonary vasodilators for HAPE: Nifedipine 30 mg extended-release every 12 hours reduces pulmonary artery pressure. Sildenafil (Viagra) 50 mg three times daily alternative. Tadalafil (Cialis) 10 mg twice daily alternative. Other: Ibuprofen 600 mg three times daily may prevent AMS headache. Ondansetron 4-8 mg for nausea. Acetaminophen safer for altitude headache than ibuprofen. Avoid aspirin, sleeping pills, strong opioids. All require physician prescription.

    At what altitude does altitude sickness begin?

    Altitude sickness can begin as low as 2,500 m (8,200 ft) though most cases develop between 3,000 m and 5,500 m. Exact threshold varies between individuals. Altitude thresholds: below 1,500 m low altitude no risk, 1,500-2,500 m moderate altitude low risk most healthy individuals unaffected, 2,500-3,500 m high altitude AMS begins (10-25% affected with rapid ascent), 3,500-5,500 m very high altitude significantly elevated risk (30-50% AMS HAPE/HACE possible), above 5,500 m extreme altitude no permanent human habitation progressive deterioration. Common destinations: Low/moderate (generally safe) Tour du Mont Blanc max 2,665 m low risk, Torres del Paine W Circuit max ~1,000 m no altitude issues. High altitude (AMS possible) Rocky Mountain Park Colorado up to 3,600 m some AMS, Machu Picchu 2,430 m mild effects, Atlas Mountains Toubkal 4,167 m moderate risk. Very high (significant AMS risk) Everest Base Camp 5,550 m Kala Patthar AMS common, Kilimanjaro summit 5,895 m HAPE/HACE possible with rapid ascent, Aconcagua 6,961 m high AMS risk, Manaslu Circuit 5,106 m max, K2 Base Camp 5,000 m. Extreme (acclimatization essential) 8,000 m peaks death zone oxygen typical, Everest 8,849 m, K2 8,611 m. Individual variation factors: genetics (susceptibility varies 10x between individuals), previous altitude experience, baseline fitness (doesn’t predict AMS), age (teens and young adults often MORE susceptible), prior AMS history strongly predicts future episodes, pre-existing cardiopulmonary conditions. Ascent rate vs absolute altitude: rapid ascent BIGGER risk than absolute altitude. Flying from sea level to 3,500 m (La Paz, Lhasa) causes more AMS than gradual ascent to 4,500 m. Key thresholds: 2,500 m AMS possible, 3,500 m Lake Louise assessments, 4,000 m mandatory acclimatization days, 4,500 m HAPE/HACE screening, 5,000 m extended acclimatization essential, 5,500 m short duration only for most climbers.

    Can fitness level prevent altitude sickness?

    No — cardiovascular fitness does NOT prevent altitude sickness. Persistent myth in mountaineering. Fit individuals are just as susceptible as unfit individuals. Why fitness doesn’t prevent altitude sickness: altitude sickness results from inability to acclimatize to reduced oxygen — physiological response unrelated to cardiovascular conditioning. Fitness improves oxygen utilization at current capability but doesn’t increase oxygen uptake beyond what body can extract from low-oxygen environment. Ability to acclimatize primarily genetic and not trainable through fitness. Some studies suggest fitter individuals may push harder and ascend faster — potentially INCREASING AMS risk. What fitness DOES help: endurance for long trekking days, recovery between trekking days, carrying pack weight, overall trip enjoyment and performance, cardiovascular health baseline reducing other risks, mental resilience during challenging conditions. What actually prevents altitude sickness: gradual ascent (300-500 m per day sleeping elevation), proper acclimatization schedule, hydration, appropriate medications (Diamox), individual susceptibility (genetic), recognition and response to early symptoms, climb high sleep low protocols. Common misconceptions: ‘I run marathons so altitude won’t affect me’ Wrong marathon runners get AMS. ‘Young people don’t get altitude sickness’ Actually younger people may be MORE susceptible. ‘I’m acclimatized from prior trips’ Acclimatization doesn’t persist more than 1-2 weeks after return to sea level. ‘Fit climbers can skip acclimatization days’ Common and dangerous mistake. Historical evidence: professional mountaineers still get altitude sickness. World-class climbers have died from HAPE/HACE. Elite Sherpa guides experience altitude effects. Military special forces affected at altitude. What trainable factors matter: previous altitude exposure (1-2 weeks benefit), hypoxic training, psychological preparation, skill at self-assessment, practiced response protocols. Don’t rely on fitness to skip acclimatization. Follow standard ascent rates regardless of fitness. Take Diamox if predisposed. Be prepared to descend even at peak fitness. See our training program guide.


    Authoritative Sources & Further Reading

    Content reflects authoritative altitude medicine sources:

    • Wilderness Medical Society (WMS) — wms.org — Practice Guidelines for Acute Altitude Illness (2024 update)
    • International Society for Mountain Medicine (ISMM) — ismm.org — Professional altitude medicine standards
    • Himalayan Rescue Association (HRA) — himalayanrescue.org — Nepal field protocols and aid posts
    • Lake Louise AMS Consensus (2018 revision) — Standardized scoring system
    • High Altitude Medicine & Biology journal — Peer-reviewed altitude research
    • New England Journal of Medicine — Altitude illness clinical reviews
    • UpToDate — Clinical decision support for altitude medications
    • CDC Yellow Book — Travel medicine altitude chapter
    • Reference texts: Going Higher: The Story of Man and Altitude by Charles Houston, Altitude Illness: Prevention & Treatment by Stephen Bezruchka
    Published: March 19, 2026
    Last updated: April 19, 2026
    Next review: July 2026
    Part of the Global Summit Guide

    Back to the Master Hub

    This guide is one of 71 across 12 thematic clusters on Global Summit Guide. The master hub organizes every guide by experience tier, specific peak, skill area, and region.

    View the Hub →
  • Altitude Sickness Treatment: How to Recover Safely

    Altitude Sickness Treatment: How to Recover Safely

    Mountain landscape with hiker at high elevation, representing altitude sickness treatment

    Altitude Sickness Treatment: How to Recover Safely at High Elevation

    Altitude sickness, also known as acute mountain sickness (AMS), occurs when individuals ascend to high elevations too quickly, leading to a range of symptoms that can affect their health and well-being. This comprehensive guide will explore effective treatments and recovery strategies for altitude sickness, ensuring that adventurers can enjoy their high-altitude experiences safely. Readers will learn about the symptoms of altitude sickness, the role of medications like Diamox, and various remedies and acclimatization techniques. Understanding these aspects is crucial for anyone planning to travel to high elevations, as it can significantly impact their safety and enjoyment. This article will cover the symptoms and early warning signs, the use of Diamox, effective remedies, acclimatization techniques, emergency treatments, and mountain-specific risks.

    What Are the Symptoms and Early Warning Signs of Altitude Sickness?

    Altitude sickness manifests through various symptoms that can escalate if not addressed promptly. Recognizing these early warning signs is essential for effective treatment and recovery. Common symptoms include headaches, nausea, dizziness, and fatigue, which can significantly hinder one’s ability to enjoy high-altitude activities.

    Which Symptoms Indicate Acute Mountain Sickness?

    Acute mountain sickness (AMS) is characterized by specific symptoms that can vary in severity. Key indicators include:

    • Severe Headache: Often described as a throbbing pain, this is one of the most common symptoms.
    • Confusion: Cognitive impairment can occur, making it difficult to think clearly.
    • Loss of Coordination: Difficulty in maintaining balance or performing physical tasks can signal worsening conditions.

    Recognizing these symptoms early can prompt timely intervention, preventing the progression to more severe forms of altitude sickness.

    Indeed, understanding the prevalence and severity of acute mountain sickness is crucial for effective intervention.

    Acute Mountain Sickness: Prevention & Treatment Interventions

    Up to half of people who ascend to heights above 2500 m may develop acute mountain sickness, pulmonary oedema, or cerebral oedema, with the risk being greater at higher altitudes, and with faster rates of ascent. We conducted a systematic review and aimed to answer the following clinical questions: What are the effects of interventions to prevent, and to treat, acute mountain sickness?

    Altitude sickness, 2010

    How to Recognize Severe Conditions: HAPE and HACE?

    High altitude pulmonary edema (HAPE) and high altitude cerebral edema (HACE) are severe forms of altitude sickness that require immediate attention.

    • Symptoms of HAPE: This condition is marked by shortness of breath, a persistent cough, and fluid retention, which can lead to respiratory failure if untreated.
    • Symptoms of HACE: Key signs include severe headaches, confusion, and loss of consciousness, indicating swelling in the brain.
    • Importance of Immediate Descent: Both HAPE and HACE are life-threatening and necessitate immediate descent to lower altitudes for recovery.

    Understanding these severe conditions is vital for anyone venturing into high-altitude environments, as early recognition can save lives.

    How Does Diamox Dosage Aid in Altitude Sickness Treatment?

    Close-up of Diamox tablets with mountain trail background, highlighting altitude sickness treatment

    Diamox, or acetazolamide, is a medication commonly used to prevent and treat altitude sickness. It works by accelerating the acclimatization process, allowing the body to adjust to lower oxygen levels more effectively.

    What Is the Recommended Diamox Dosage for Prevention and Recovery?

    For effective altitude sickness management, the recommended Diamox dosage varies based on individual needs:

    • Dosage for Prevention: Typically, a dose of 125-250 mg taken twice daily is advised for those ascending to high altitudes.
    • Dosage for Recovery: If symptoms develop, increasing the dosage to 250 mg twice daily can help alleviate symptoms.
    • Timing of Administration: It is best to start taking Diamox at least 24 hours before ascending to high altitudes for optimal effectiveness.

    Following these guidelines can significantly enhance the body’s ability to cope with altitude changes.

    What Are the Side Effects and Contraindications of Diamox?

    While Diamox is effective, it is essential to be aware of its potential side effects and contraindications:

    • Common Side Effects: These may include tingling in the fingers and toes, increased urination, and gastrointestinal disturbances.
    • Severe Reactions: Allergic reactions, though rare, can occur and may require immediate medical attention.
    • Who Should Avoid Diamox: Individuals with a known allergy to sulfa drugs or those with certain medical conditions should consult a healthcare provider before use.

    Understanding these factors can help individuals make informed decisions about using Diamox for altitude sickness.

    What Are Effective High Altitude Sickness Remedies and Medical Treatments?

    In addition to medications like Diamox, several remedies and medical treatments can aid in the recovery from altitude sickness.

    How Does Oxygen Therapy Support Recovery from Altitude Sickness?

    • Mechanism of Oxygen Therapy: By providing supplemental oxygen, it helps alleviate symptoms by increasing the amount of oxygen available to the body.
    • When to Use Oxygen Therapy: It is particularly beneficial for individuals experiencing severe symptoms or those with pre-existing respiratory conditions.
    • Benefits of Oxygen Therapy: This treatment can lead to rapid symptom relief and improved overall well-being, allowing individuals to acclimatize more effectively.

    Utilizing oxygen therapy can be a game-changer for those struggling with altitude sickness.

    Further research underscores the efficacy of oxygen therapy, comparing it favorably with other advanced treatments.

    Hyperbaric & Oxygen Therapy for AMS Treatment

    This study demonstrated that hyperbaric therapy was as effective as oxygen therapy for the immediate treatment of AMS. Both methods were successful in resolving or improving the symptoms of AMS.

    Treatment of acute mountain sickness: hyperbaric versus oxygen therapy, 1991

    What Alternative Medications and Natural Remedies Are Available?

    Several alternative treatments and natural remedies can complement traditional medical approaches to altitude sickness:

    • Ginger: Known for its anti-nausea properties, ginger can help alleviate gastrointestinal symptoms associated with altitude sickness.
    • Ginkgo Biloba: This herb may improve blood circulation and oxygen delivery, potentially reducing the risk of altitude sickness.
    • Hydration: Staying well-hydrated is crucial, as dehydration can exacerbate symptoms.

    These remedies can provide additional support for individuals seeking to manage altitude sickness effectively.

    How to Acclimatize to High Altitude: Prevention Tips and Techniques

    Climbers resting at high altitude, emphasizing acclimatization techniques for altitude sickness prevention

    Acclimatization is a vital process for preventing altitude sickness. Gradual ascent and proper preparation can significantly reduce the risk of developing symptoms.

    Effective prevention strategies often combine environmental adjustments with pharmacological support to enhance the body’s adaptation.

    Altitude Sickness Prevention: Acclimatization & Medications

    Acute exposure to high altitude can cause acute altitude illnesses and is associated with impaired cognitive and physical performance. The most effective preventive strategies currently recommended include environmental acclimatization (slow ascent and/or pre-acclimatization) or pharmacological support of acclimatization using acetazolamide.

    Dexamethasone for prevention of AMS, HACE, and

    HAPE and for limiting impairment of performance after rapid ascent to high altitude: a narrative review, H Gatterer, 2025

    What Are Best Practices for Gradual Acclimatization?

    To acclimatize effectively, consider the following best practices:

    • Adding Rest Days: Incorporate rest days into your itinerary to allow your body to adjust to higher elevations.
    • Climb High, Sleep Low: Ascend to higher altitudes during the day but return to lower elevations to sleep, promoting acclimatization.
    • Monitoring Symptoms: Pay close attention to how your body responds to altitude changes and be prepared to descend if symptoms arise.

    Implementing these strategies can enhance your body’s ability to adapt to high altitudes.

    How Do Hydration, Nutrition, and Rest Prevent Altitude Sickness?

    Proper hydration, nutrition, and rest are essential components of altitude sickness prevention:

    • Hydration Strategies: Drink plenty of fluids to maintain hydration levels, as dehydration can worsen symptoms.
    • Nutritional Needs: Consuming a balanced diet rich in carbohydrates can provide the energy needed for physical exertion at high altitudes.
    • Importance of Rest: Adequate rest is crucial for recovery and acclimatization, allowing the body to adapt to lower oxygen levels.

    By prioritizing these factors, individuals can significantly reduce their risk of altitude sickness.

    What Emergency Treatments and Descent Protocols Ensure Safe Recovery?

    In the event of altitude sickness, knowing the appropriate emergency treatments and descent protocols is critical for ensuring safety.

    When and How Should Descent Be Initiated?

    Descent should be initiated as soon as severe symptoms are recognized.

    • Setting Objective Cutoffs: Establish clear criteria for when to descend, such as the onset of severe headaches or confusion.
    • Turnaround Time: Implement a turnaround time to ensure that individuals do not push themselves beyond safe limits.
    • Safety Measures: Always prioritize safety by descending to lower altitudes where symptoms can be managed more effectively.

    Understanding when and how to descend can prevent complications associated with altitude sickness.

    What Are the Guidelines for Using Portable Oxygen and Medical Support?

    Using portable oxygen and seeking medical support can be lifesaving in severe cases of altitude sickness.

    • When to Use Portable Oxygen: If symptoms persist despite descent, using portable oxygen can provide immediate relief.
    • Benefits of Portable Oxygen: It helps restore oxygen levels in the body, alleviating symptoms and improving overall function.
    • Medical Support Considerations: Always have a plan for accessing medical support in remote areas, as timely intervention can be crucial.

    These guidelines can enhance safety and recovery for those affected by altitude sickness.

    How Do Mountain-Specific Risks Affect Altitude Sickness Treatment and Recovery?

    Different mountains present unique risks that can influence altitude sickness treatment and recovery strategies.

    What Are the Unique Altitude Sickness Risks on Everest, Kilimanjaro, and Denali?

    • Risks on Everest: Extreme altitude and harsh weather conditions increase the likelihood of severe altitude sickness.
    • Risks on Kilimanjaro: Rapid ascent without proper acclimatization can lead to AMS, HAPE, or HACE.
    • Risks on Denali: The combination of extreme cold and high altitude can exacerbate symptoms and complicate recovery.

    Understanding these risks is essential for developing effective treatment plans.

    How Should Treatment and Recovery Plans Be Tailored to Specific Mountains?

    Tailoring treatment and recovery plans to specific mountains involves considering various factors:

    • Acclimatization Strategies: Adjust ascent rates and rest days based on the mountain’s elevation and conditions.
    • Weather Considerations: Monitor weather patterns that may impact safety and recovery.
    • Logistical Planning: Ensure access to medical support and resources during the climb.

    By customizing plans to the specific challenges of each mountain, climbers can enhance their safety and recovery outcomes.

    Frequently Asked Questions

    What is the difference between Acute Mountain Sickness (AMS) and High Altitude Pulmonary Edema (HAPE)?

    Acute Mountain Sickness (AMS) is a common condition that occurs when individuals ascend to high altitudes too quickly, leading to symptoms like headaches, nausea, and fatigue. In contrast, High Altitude Pulmonary Edema (HAPE) is a more severe condition characterized by fluid accumulation in the lungs, resulting in symptoms such as shortness of breath and a persistent cough. While AMS can often be managed with acclimatization and hydration, HAPE requires immediate medical attention and descent to lower altitudes.

    How can I prepare for a high-altitude trek to minimize the risk of altitude sickness?

    Preparation for a high-altitude trek involves several key strategies. First, ensure you are physically fit and accustomed to hiking. Gradual ascent is crucial; plan your itinerary to include rest days and avoid rapid elevation changes. Staying well-hydrated and consuming a diet rich in carbohydrates can also help. Additionally, consider pre-acclimatization techniques, such as spending time at intermediate altitudes before your trek, and consult a healthcare provider about medications like Diamox for preventive measures.

    What should I do if I experience symptoms of altitude sickness while hiking?

    If you experience symptoms of altitude sickness while hiking, the first step is to stop ascending and rest. Monitor your symptoms closely; if they worsen, initiate a descent to lower altitudes immediately. Hydration is essential, so drink plenty of fluids. If symptoms persist or become severe, such as confusion or difficulty breathing, seek medical assistance as soon as possible. Always prioritize safety and do not push through severe symptoms.

    Are there specific foods or drinks that can help prevent altitude sickness?

    Yes, certain foods and drinks can aid in preventing altitude sickness. Staying well-hydrated is crucial, so drink plenty of water and consider electrolyte-rich beverages. Foods high in carbohydrates, such as pasta, rice, and fruits, can provide the necessary energy for physical exertion at high altitudes. Additionally, ginger tea may help alleviate nausea, while foods rich in antioxidants, like berries, can support overall health during your trek.

    What role does physical fitness play in preventing altitude sickness?

    Physical fitness plays a significant role in preventing altitude sickness. Individuals who are physically fit tend to have better cardiovascular health, which can enhance oxygen delivery to tissues during high-altitude activities. Regular aerobic exercise can improve your body’s ability to acclimatize to lower oxygen levels. However, even fit individuals can experience altitude sickness, so it’s essential to combine fitness with proper acclimatization strategies and hydration to minimize risks.

    How can I recognize when to seek medical help for altitude sickness?

    Recognizing when to seek medical help for altitude sickness is crucial for safety. If you experience severe symptoms such as persistent headaches, confusion, loss of coordination, or difficulty breathing, it’s essential to descend immediately and seek medical assistance. Additionally, if symptoms do not improve with rest and hydration, or if they worsen, do not hesitate to contact a healthcare professional. Early intervention can prevent serious complications associated with altitude sickness.

    Conclusion

    Effectively managing altitude sickness is essential for ensuring a safe and enjoyable high-altitude experience. By understanding symptoms, utilizing medications like Diamox, and implementing acclimatization strategies, adventurers can significantly reduce their risk of severe complications. Prioritizing preparation and awareness can enhance overall well-being during mountain treks. For more insights and resources on altitude sickness prevention and treatment, explore our comprehensive guides today.

  • What Is Altitude Sickness? Symptoms, Causes, How to Treat It

    What Is Altitude Sickness? Symptoms, Causes, How to Treat It

    What Is Altitude Sickness? Comprehensive Guide to Symptoms, Causes, and Effective Treatments

    Altitude sickness, also known as acute mountain sickness (AMS), is a condition that arises when individuals ascend to high altitudes too quickly, leading to a range of symptoms due to reduced oxygen levels. This guide will delve into the symptoms, causes, and effective treatments for altitude sickness, providing valuable insights for those planning high-altitude adventures. Many travelers and mountaineers experience discomfort or health issues when exposed to elevations above 8,000 feet, making it crucial to understand how to recognize and manage these symptoms. We will explore common symptoms, the physiological mechanisms behind altitude sickness, prevention techniques, and treatment options. Additionally, we will identify high-risk locations and answer frequently asked questions to equip you with the knowledge needed for safe mountain excursions.

    Further research provides a comprehensive overview of acute mountain sickness, detailing its underlying mechanisms, preventive measures, and therapeutic approaches.

    Acute Mountain Sickness: Pathophysiology, Prevention & Treatment

    In this article, we describe the setting and clinical features of acute mountain sickness and high-altitude cerebral edema, including an overview of the known pathophysiology, and practical recommendations for prevention and treatment.

    Acute mountain sickness: pathophysiology, prevention, and treatment, C Imray, 2010

    What Are the Common Symptoms of Acute Mountain Sickness and High Altitude Illness?

    Altitude sickness manifests through various symptoms that can range from mild to severe. Recognizing these symptoms early is essential for effective management and prevention of complications. mountains k2 climb guide pakistan china

    How to Recognize Headache, Nausea, and Dizziness as Early Warning Signs

    Person experiencing headache and nausea at high altitude, illustrating early signs of altitude sickness

    The initial symptoms of altitude sickness often include headache, nausea, and dizziness. These early warning signs typically occur within hours of ascending to high altitudes. A headache may feel similar to a tension headache, while nausea can lead to vomiting if not addressed promptly. Dizziness often accompanies these symptoms, making it difficult for individuals to maintain balance or focus. If you experience these symptoms, it is crucial to descend to a lower altitude and rest to alleviate discomfort.

    What Are the Differences Between Mild and Severe Symptoms?

    Mild symptoms of altitude sickness may include fatigue, loss of appetite, and sleep disturbances. In contrast, severe symptoms can escalate to high altitude pulmonary edema (HAPE) or high altitude cerebral edema (HACE), which are life-threatening conditions. HAPE is characterized by shortness of breath, a persistent cough, and fluid accumulation in the lungs, while HACE involves confusion, ataxia, and altered consciousness. Understanding these differences is vital for recognizing when to seek medical attention.

    The complex interplay between HACE, AMS, and HAPE, including their pathophysiology and individual susceptibility, continues to be a subject of ongoing study.

    HACE & AMS: Pathophysiology, Susceptibility & Prevention

    The diagnosis, treatment and prevention of high altitude cerebral edema (HACE) are fairly well established. The major unresolved issues are 1) the pathophysiology, 2) the individual susceptibility, and 3) the relationship of HACE to acute mountain sickness (AMS) and to high altitude pulmonary edema (HAPE).

    High altitude cerebral edema and acute mountain sickness: a pathophysiology update, 1999

    What Causes Altitude Sickness? Understanding Hypoxia and Rapid Ascent Effects

    Altitude sickness primarily results from hypoxia, a condition where the body receives insufficient oxygen due to lower atmospheric pressure at high altitudes.

    How Does Low Oxygen at High Altitude Trigger Mountain Sickness?

    As altitude increases, the partial pressure of oxygen decreases, leading to reduced oxygen saturation in the blood. This lack of oxygen can impair cellular function and lead to symptoms associated with altitude sickness. The body struggles to adapt to these changes, resulting in physiological stress that manifests as headaches, nausea, and fatigue. Understanding the mechanisms of hypoxia is crucial for preventing altitude sickness.

    Why Does Rapid Ascent Increase Risk of Acute Mountain Sickness?

    Rapid ascent to high altitudes significantly increases the risk of developing altitude sickness. When individuals ascend too quickly, the body does not have adequate time to acclimatize to the lower oxygen levels. Studies indicate that ascending more than 1,000 feet per day without proper acclimatization can lead to a higher incidence of AMS. To mitigate this risk, it is essential to plan gradual ascents and incorporate rest days into your itinerary.

    How Can You Prevent Altitude Sickness? Proven Acclimatization and Safety Techniques

    Preventing altitude sickness involves a combination of acclimatization strategies and lifestyle adjustments.

    What Are Stepwise Acclimatization Schedules to Reduce Risk?

    Hikers discussing acclimatization strategies on a mountain trail, emphasizing prevention of altitude sickness

    A stepwise acclimatization schedule is vital for reducing the risk of altitude sickness. This approach involves ascending gradually, allowing the body to adjust to changes in oxygen levels. A common recommendation is to ascend no more than 1000 feet per day after reaching 8,000 feet, with additional rest days for every 3,000 feet gained. This method helps the body adapt and can significantly decrease the likelihood of developing AMS.

    Effective acclimatization strategies are crucial for anyone venturing to high altitudes, ensuring the body can adapt to reduced oxygen levels.

    High-Altitude Acclimatization for Travelers

    adaptation at high altitudes is vital for soldiers, travelers, and athletes to avoid high-altitude sickness.

    A study of survival strategies for improving acclimatization of lowlanders at high-altitude, 2023

    Which Lifestyle and Medication Strategies Help in Prevention?

    In addition to acclimatization, certain lifestyle changes and medications can aid in preventing altitude sickness. Staying well-hydrated, avoiding alcohol, and consuming a high-carbohydrate diet can enhance oxygen delivery and energy levels. Medications such as acetazolamide (Diamox) can also be prescribed to help prevent AMS by promoting acclimatization. Consulting with a healthcare provider before your trip can help determine the best prevention strategies for your specific needs.

    What Are the Recommended Treatments for Mountain Sickness? Comparing Medications and Methods

    When altitude sickness occurs, prompt treatment is essential to prevent complications.

    How Do Acclimatization and Oxygen Therapy Aid Recovery?

    Acclimatization remains the most effective treatment for altitude sickness. Descending to a lower altitude can alleviate symptoms significantly. In cases of severe altitude sickness, supplemental oxygen therapy may be necessary to restore adequate oxygen levels in the body. This therapy can provide immediate relief and is often used in conjunction with descent to ensure a safe recovery.

    What Medications Are Effective for High Altitude Pulmonary and Cerebral Edema?

    For severe cases of altitude sickness, particularly HAPE and HACE, medications such as dexamethasone may be administered to reduce inflammation and swelling in the brain and lungs. These medications can be life-saving when used in conjunction with immediate descent. Understanding the appropriate use of these treatments is crucial for anyone venturing into high-altitude environments.

    When Should You Seek Emergency Help for Severe Altitude Sickness?

    Recognizing when to seek emergency help is critical for individuals experiencing severe altitude sickness.

    What Are the Signs of High Altitude Pulmonary Edema and Cerebral Edema?

    Signs of HAPE include a persistent cough, difficulty breathing, and chest tightness, while HACE symptoms may involve confusion, severe headache, and loss of coordination. If these symptoms occur, it is imperative to seek medical assistance immediately. Delaying treatment can lead to serious complications or even death.

    What Immediate Actions Should Be Taken in Emergency Situations?

    In emergency situations, the first step is to descend to a lower altitude as quickly as possible. Administering supplemental oxygen, if available, can also provide immediate relief. It is essential to remain calm and ensure that the affected individual is monitored closely until help arrives.

    Which Mountains Pose the Highest Risk for Altitude Sickness? Identifying High-Risk Locations

    Certain mountains are known for their increased risk of altitude sickness due to their elevation and accessibility.

    What Are the Characteristics of High-Risk Mountains Worldwide?

    Mountains such as Mount Everest, K2, and Denali are notorious for their high altitudes and challenging conditions. These peaks often exceed 8,000 feet, where the risk of altitude sickness significantly increases. Understanding the characteristics of these high-risk mountains can help climbers prepare adequately for their expeditions.

    How to Prepare Specifically for High-Risk Mountain Expeditions?

    Preparation for high-risk mountain expeditions should include thorough research, physical conditioning, and a well-structured acclimatization plan. Engaging in pre-expedition training, such as hiking at increasing elevations, can enhance physical fitness and improve the body’s ability to adapt to high altitudes. Additionally, carrying essential supplies, including medications and oxygen, can be crucial for safety.

    Frequently Asked Questions

    What Are the Long-Term Effects of Altitude Sickness?

    While most individuals recover from altitude sickness without lasting effects, some may experience long-term complications, particularly if they have suffered from severe forms like HAPE or HACE. These complications can include persistent respiratory issues or cognitive difficulties. It’s essential to monitor any ongoing symptoms after descending and consult a healthcare professional if concerns arise. Understanding the potential long-term effects can help individuals make informed decisions about future high-altitude activities.

    How Can You Differentiate Between Altitude Sickness and Other Illnesses?

    Altitude sickness can mimic other conditions such as dehydration, flu, or food poisoning. Key differentiators include the timing of symptoms, which typically arise within hours of ascent, and their correlation with altitude gain. Symptoms like headache, nausea, and dizziness are common in altitude sickness but may not be present in other illnesses. If symptoms persist or worsen with altitude, it is crucial to descend and seek medical advice to rule out other serious conditions.

    Are Certain Individuals More Susceptible to Altitude Sickness?

    Yes, susceptibility to altitude sickness can vary significantly among individuals. Factors such as age, pre-existing health conditions, and previous experiences with altitude can influence risk. For instance, individuals with respiratory or cardiovascular issues may be at higher risk. Additionally, those who have previously experienced altitude sickness are more likely to encounter it again. Understanding personal risk factors can help in planning safer high-altitude excursions.

    What Role Does Hydration Play in Preventing Altitude Sickness?

    Hydration is crucial in preventing altitude sickness, as it helps maintain blood volume and supports overall physiological function. At high altitudes, the body loses moisture more rapidly due to increased respiration and lower humidity levels. Staying well-hydrated can enhance oxygen delivery to tissues and reduce the likelihood of symptoms. It is recommended to drink plenty of fluids, particularly water, and to avoid alcohol and caffeine, which can contribute to dehydration.

    Can You Develop Altitude Sickness After Acclimatizing?

    Yes, it is possible to develop altitude sickness even after a period of acclimatization. Factors such as rapid ascent, individual susceptibility, and the altitude reached can all contribute to the onset of symptoms. Acclimatization helps reduce the risk but does not eliminate it entirely. Continuous monitoring of symptoms and readiness to descend if they occur is essential, even for those who have acclimatized successfully.

    What Should You Do If Symptoms of Altitude Sickness Persist?

    If symptoms of altitude sickness persist despite descending to a lower altitude, it is crucial to seek medical attention. Persistent symptoms may indicate a more severe condition, such as HAPE or HACE, which require immediate treatment. Healthcare professionals can provide necessary interventions, including supplemental oxygen or medications, to address complications. Being proactive about health and safety is vital when dealing with altitude-related issues.

    How Long Does It Take to Recover from Altitude Sickness?

    Recovery from altitude sickness typically occurs within 24-48 hours after descending to a lower altitude. However, the duration may vary depending on the severity of symptoms and individual health factors. It is essential to monitor symptoms closely and seek medical attention if they persist.

    Can Altitude Sickness Occur at Moderate Elevations?

    Yes, altitude sickness can occur at moderate elevations, particularly for individuals who ascend rapidly or have a history of AMS. Symptoms may arise at elevations as low as 6,000 feet, especially in those unaccustomed to high altitudes. Awareness of this risk is crucial for anyone planning to travel to elevated regions.

    Conclusion

    Understanding altitude sickness is essential for anyone planning high-altitude adventures, as it can significantly impact your experience and safety. By recognizing symptoms, implementing effective prevention strategies, and knowing when to seek treatment, you can enjoy your journey with confidence. Equip yourself with the knowledge to tackle high elevations and ensure a safe expedition. Explore our resources for more tips and guidance on high-altitude travel today.

Language »