
Avalanche Safety for Mountaineers: Complete Guide
Terrain assessment, snowpack evaluation, and the three essential rescue tools — beacon, probe, shovel. Plus the training path that actually works, survival statistics every climber should know, and the decision framework that keeps mountaineers alive in snow terrain. Written for climbers, not recreational skiers.
rescued <18 min
rescue tools
slope angle
rescue kit
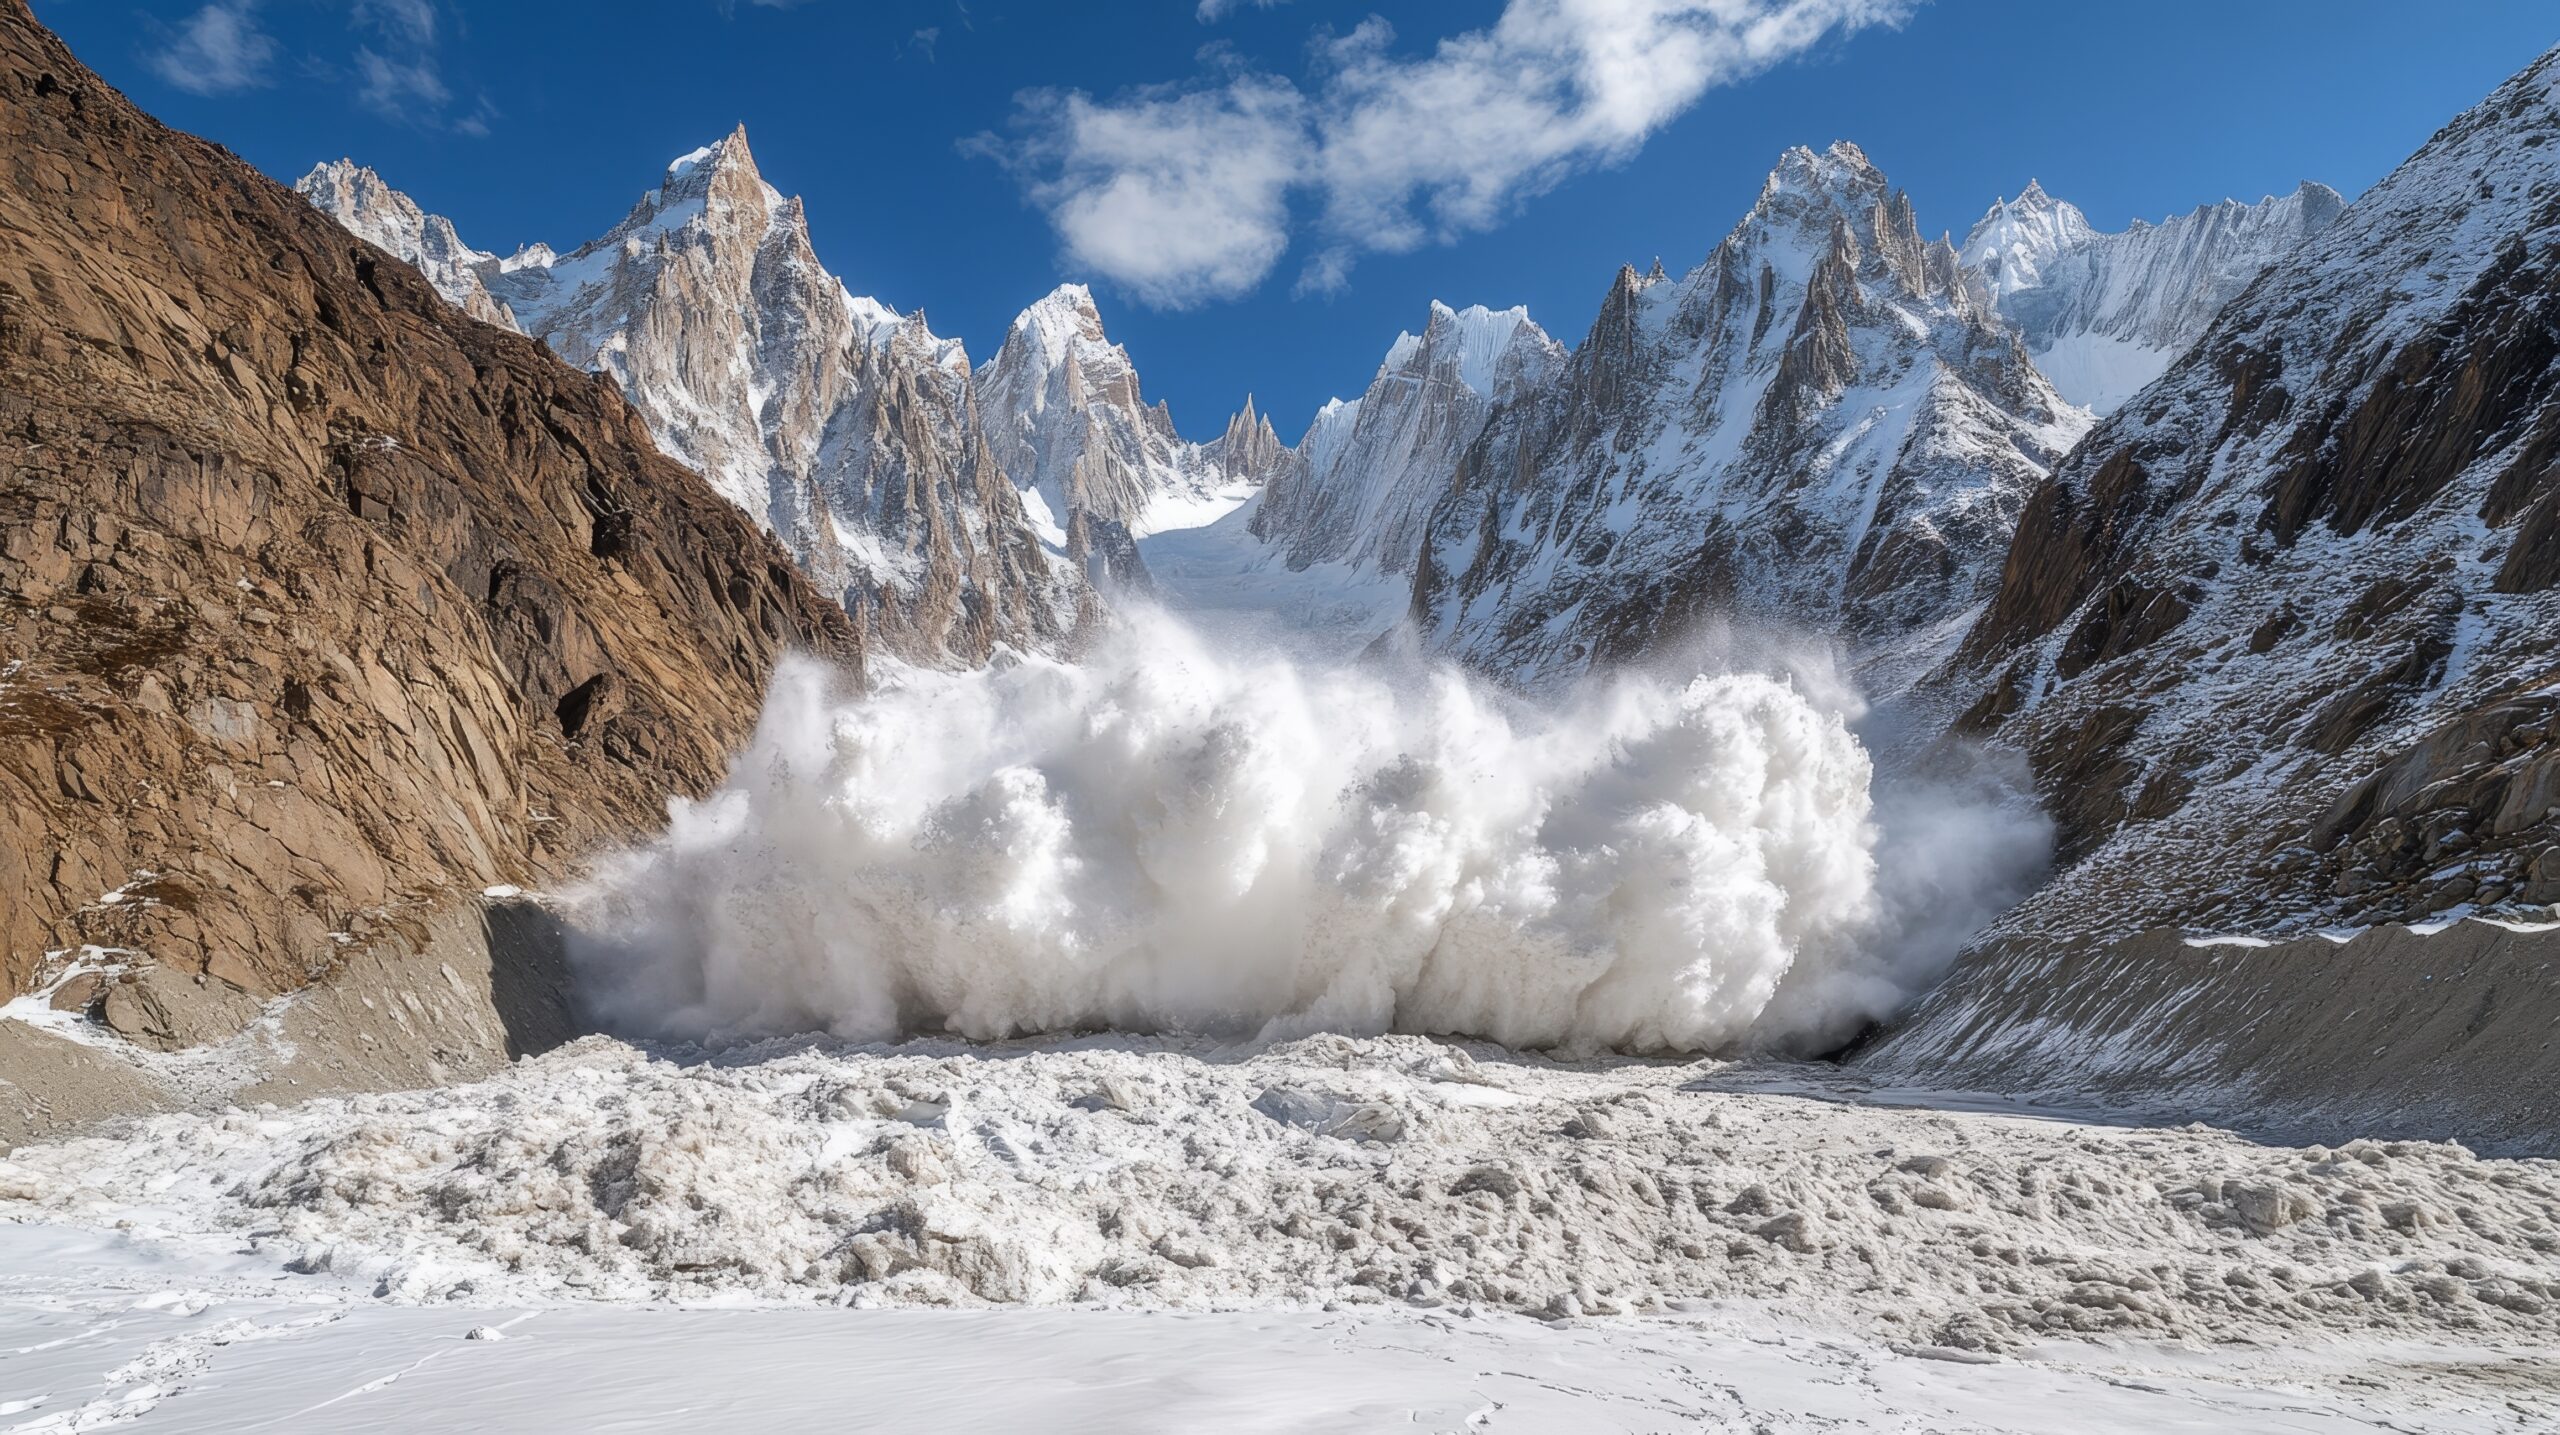
Avalanches are the leading cause of winter mountaineering deaths worldwide — more than falls, more than hypothermia, more than altitude illness. The terrifying part isn’t just the burial; it’s the statistical clock. After 18 minutes buried, survival rate drops from 91% to under 50%. Professional rescue almost never arrives in time. This guide covers the terrain recognition, rescue gear, and training that let mountaineers in avalanche country survive when the worst happens — not by avoiding snow terrain, but by operating in it with competence.
Content reflects current curricula from the American Institute for Avalanche Research and Education (AIARE), the Canadian Avalanche Association (CAA), and European avalanche research institutes. Survival statistics come from the Swiss Federal Institute for Snow and Avalanche Research (SLF) and the Colorado Avalanche Information Center (CAIC). Gear recommendations reflect 2026 product availability and reviewed specifications. Reviewed by AIARE Level 2 certified instructors. Fact-check date: April 19, 2026.
The Three Essential Avalanche Rescue Tools (Beacon, Probe, Shovel)
Every climber in avalanche terrain carries three specific items. Missing any one renders the others useless. A beacon without a probe and shovel is a $400 luxury — you can’t dig someone out with your hands in compressed avalanche debris, and you can’t pinpoint a location without a probe once the beacon narrows the search.
Avalanche Beacon
A transceiver worn on your body that constantly transmits a signal on 457 kHz. If you’re buried, partners switch theirs to receive mode and follow the signal to your location. Modern digital beacons display direction arrows and distance in meters, reducing search time from the 10+ minutes required by older analog beacons to 2–5 minutes.
Probe
A collapsible aluminum or carbon rod (240–320 cm extended) used to precisely locate a buried climber once the beacon has narrowed the search to within about 1 meter. Probe strikes confirm burial depth and direction to dig. Carbon probes are faster to deploy than aluminum — every second matters in rescue.
Shovel
A metal-bladed collapsible shovel with a sturdy shaft. Avalanche debris is compressed to roughly ice density — plastic shovels shatter, hands do almost nothing. Dig downhill of the probe strike; follow the tool-parallel-to-slope technique taught in AIARE courses. Budget at least 5–15 minutes to dig out a typical burial.
The single biggest mistake mountaineers make is buying the three rescue tools and never training with them. A fully-equipped rescuer who has never practiced takes 25+ minutes to execute a rescue that a trained rescuer completes in 7–10 minutes. That difference is almost exactly the survival window. Buy the gear, then take an AIARE 1 course, then practice every month during snow season with your climbing partners. Skill decays fast without practice.
How to Use an Avalanche Beacon: The Search Sequence
Using an avalanche beacon competently is a learned skill, not an intuitive one. The sequence below is the standard companion-rescue protocol taught by AIARE. Read it; then take the course; then practice it until it’s automatic.
Confirm the avalanche has stopped
Watch the victim’s last seen point. Wait for debris to stop moving and secondary slides to settle. Do not enter the slide path if there’s remaining hazard — another slide can bury rescuers. Scan for airway signs (hand, foot, gear) before committing.
Switch all beacons to SEARCH mode
Every remaining team member switches their beacon from transmit to search. Check that yours is in receive mode before entering the debris field — otherwise you’ll confuse your own signal with the victim’s. Most modern beacons have a physical switch or prominent button.
Signal search — locate the signal
Walk in a grid pattern across the debris field until your beacon picks up a signal (typically 40–60 m range for modern digital beacons). Follow direction arrows and distance readings. This phase usually takes 1–3 minutes of walking.
Coarse search — narrow to within 3 m
Once you have a signal, follow the direction indicator while watching distance decrease. Move at a deliberate walking pace. When you get to 3 m, slow down — rushing causes you to overshoot.
Fine search — pinpoint within 1 m
Below 3 m, reduce your pace to a slow shuffle. Hold the beacon close to the snow surface and move it in a methodical cross pattern. The lowest distance reading is the closest point. Mark that spot with a ski pole or gear.
Probe — confirm exact location and depth
Probe in a spiral pattern around the pinpoint, working outward. Leave the probe in place when you strike the victim — it marks the spot and shows depth. Probe strike confirms you’re over a body, not a boulder or tree.
Shovel — strategic excavation
Dig downhill of the probe, creating a V-shape trench that lets you reach the victim without collapsing snow onto them. In deep burials, multiple rescuers should shovel in rotation — the lead shoveler tires in 2–3 minutes and should swap. Expose airway first, then excavate torso.
Target time for complete sequence from avalanche stop to airway exposed: 7–10 minutes for a trained team. Untrained teams frequently take 20+ minutes — which is past the 91% survival window.
What Terrain Is Most Dangerous for Avalanches?
Most avalanche deaths involve human choice — climbers moving into identifiable dangerous terrain when safer alternatives existed. Learning to recognize hazardous terrain features is the single highest-leverage skill in avalanche safety.
30–45° Slopes
The most dangerous slope angle range. Steeper slopes avalanche more frequently but often sluff before building dangerous slabs. Slopes under 30° rarely slide. The 38° peak fatality angle reflects this: steep enough to produce devastating slides, gentle enough to appear climbable.
Convex Rolls
Where a slope transitions from less steep to more steep. Tension fractures start at convex rolls — the snow above is being pulled downhill while the snow below remains anchored. Most slab avalanches initiate here.
Leeward Slopes
Downwind of ridgelines where wind deposits snow into thick, cohesive slabs. Slabs on leeward slopes are denser and more unstable than naturally-fallen snow. Wind loading from 30 km/h+ winds redistributes snow dramatically in hours.
Terrain Traps
Features below a slope that trap debris and deepen burials: gullies, cliffs, tree stands, large rocks. A small avalanche on a gentle slope can bury a climber 3+ meters deep if they end up in a gully. Always consider what’s below a slope, not just the slope itself.
Recent Slide Paths
Obvious debris piles, stripped trees, or bare rock from recent avalanches. This slope has slid recently and could slide again — the persistent weak layer that caused the first slide is often still present. Also means you’re in known avalanche terrain.
Cornices
Overhanging snow formations on ridgelines. Cornice collapses trigger large avalanches on the slope below — climbers safely on a slope can die from cornice-triggered slides above them. Stay well off cornices and aware of slopes below them.
Open Slopes > 30°
Large, uninterrupted slopes with no terrain features (trees, rocks) to slow a slide. Even moderate avalanches on these slopes produce devastating debris flows. Dense timber or complex terrain slows avalanches significantly.
Shallow Snowpack Areas
Rocky areas with thin snow cover where weak layers are closer to the surface and more easily triggered. Common avalanche start zones on otherwise-stable slopes. Especially hazardous in early season and after cold, dry snowpack periods.
AIARE terrain categories
AIARE uses three categories for avalanche terrain assessment: Simple (gentle angles, low consequence, clear runout), Challenging (moderate angles, some consequence, requires judgment), and Complex (steep angles, significant consequence, demands expertise). Most mountaineering accidents occur in Challenging terrain — not Complex — because climbers overestimate their ability to manage moderate-looking hazards.
How Long Can You Survive Buried in an Avalanche?
Every climber needs these numbers in their head. They drive every decision about gear, training, and companion rescue urgency.
What drives the cliff at 18 minutes
The primary cause of avalanche death is asphyxiation from carbon dioxide buildup, not direct trauma or hypothermia. In the first few minutes, the buried victim breathes remaining air pockets. By 18–20 minutes, exhaled CO₂ accumulates in the confined space faster than oxygen can be obtained. Victims with air pockets (space between face and snow) survive 2–3 times longer than victims buried directly in compressed snow.
Why professional rescue almost never helps
Organized rescue teams typically arrive 60+ minutes after an avalanche, even in well-resourced mountain regions. By that time, survival rate is below 20%. The math is brutally clear: companion rescue is the only rescue that works. Every minute between the avalanche and the first probe strike costs survival probability.
Victims who manage to create an air pocket in front of their face during burial have 3-5x longer survival windows than victims buried directly face-down in compressed snow. This is why the “hands in front of face” technique is taught in avalanche safety courses. During the avalanche itself, attempting to create space around your airway can be the difference between life and death — even if you can’t swim to the surface.
AIARE Avalanche Training: Which Course Do You Need?
Avalanche safety training isn’t optional for mountaineers in snow terrain. AIARE (American Institute for Avalanche Research and Education) is the US standard; Canada’s CAA courses and various European national certifications are equivalents.
AIARE 1
Terrain recognition, basic snowpack assessment, group decision-making, companion rescue with beacon/probe/shovel. The minimum qualification for any mountaineering in avalanche terrain. Most guide services require AIARE 1 for winter clients.
AIARE 2
Professional-level snowpack analysis, weather integration, complex terrain decisions, multi-party rescue scenarios. Recommended for climbers operating in remote terrain without guide support. Prerequisite: AIARE 1 + field experience.
Rescue Course
Pure rescue skill refinement — timed scenarios, multi-victim burials, rescue leadership. Best taken annually as a skill refresher. Complements AIARE 1 or 2; doesn’t replace comprehensive training.
The ongoing practice requirement
Avalanche rescue skill decays rapidly without practice. A climber who took AIARE 1 five years ago and never practiced is functionally untrained in an actual rescue. Monthly beacon practice sessions with climbing partners during snow season maintain the skill. Most guide services and climbing clubs organize rescue practice days — use them.
For broader safety planning see our Mountain Weather guide and Mountain Climbing Insurance guide. For avalanche-terrain peaks specifically, our Denali Climbing Guide and Top 50 Technical Objectives cover peaks where these skills are essential.
When Is Avalanche Risk Highest for Climbers?
Avalanche hazard is dynamic — the same slope can be safe one day and lethal the next. Understanding the timing patterns lets you plan around peak risk periods.
The 24-72 hour post-storm rule
The most dangerous window for avalanches is the 24 to 72 hours following significant snowfall (10+ cm new snow). The fresh snow creates a slab over older snowpack; the bond between layers takes time to stabilize. Most backcountry avalanche fatalities occur in this window. Waiting 3 days after a storm significantly reduces hazard — a discipline that saves more climbers than all the fancy gear combined.
Additional high-risk conditions
- Rapid warming periods — The first warm day after a cold spell makes wet avalanches likely. Afternoon temperatures above 0 °C on slopes in direct sun raise wet-slide risk dramatically.
- Wind events — Sustained winds of 30 km/h+ redistribute snow, creating wind-loaded slabs on leeward slopes. Hazard can change within hours.
- Spring transitions — Warming temperatures progressively destabilize winter snowpack. April-May in North America and September-October in the Southern Alps are notably hazardous.
- Afternoon hours — Solar heating weakens snow bonds through the day. Morning climbs are generally safer than afternoon climbs on sunny slopes.
- End of a dry spell after a weak layer — A buried weak layer that survives multiple snowfalls becomes a “persistent weak layer” — a ticking time bomb that can produce large avalanches weeks after the original storm.
Avalanche danger scale
| Danger Level | Meaning | Typical conditions | Most fatalities occur here? |
|---|---|---|---|
| 1 · Low | Generally stable | Old snowpack, no recent storms | Rare |
| 2 · Moderate | Heightened awareness | Slight instability in specific terrain | Some |
| 3 · Considerable | Careful terrain choice | Human-triggered avalanches likely | Yes — most fatalities |
| 4 · High | Dangerous conditions | Natural avalanches probable | Some (fewer climbers out) |
| 5 · Extreme | Avoid all avalanche terrain | Widespread natural avalanches | Very few — climbers stay home |
Counterintuitively, most avalanche deaths occur at Level 3 (Considerable) danger, not Level 5 (Extreme) — because climbers correctly stay out of avalanche terrain on Extreme days but underestimate the risk on Considerable days. Take Level 3 warnings seriously.
Where to check avalanche forecasts
Major regional avalanche forecast services:
- avalanche.org — Aggregator for 25+ US avalanche centers including CAIC (Colorado), NWAC (Cascades), Utah Avalanche Center
- avalanche.ca — Avalanche Canada national forecasts
- Lawine.org — Swiss Federal Institute (SLF) forecasts for Alps
- Avalanches.org — European Avalanche Warning Services aggregator
- Mountain Forecast (mountain-forecast.com) — Integrated weather + avalanche context
Avalanche Safety FAQ: Your Common Questions Answered
What are the three essential avalanche rescue tools?
The three essential avalanche rescue tools are the beacon (avalanche transceiver), the probe, and the shovel. The beacon is worn on your body and transmits a signal when the avalanche is moving; if you are buried, your partners switch their beacons to receive mode and follow the signal to your location. The probe is a collapsible rod used to pinpoint your exact position under the snow once the beacon narrows the search area. The shovel is used to dig you out rapidly — typically 1 to 2 meters of compressed avalanche debris must be removed. All three tools are non-negotiable for any mountaineering in avalanche terrain. A beacon without a probe and shovel is useless because you cannot dig someone out with your hands in compressed avalanche debris. Total cost for complete kit: $400 to $700.
How do you use an avalanche beacon?
An avalanche beacon is worn under your outer layer against your body, on all day, in transmit mode. If a partner is buried in an avalanche, you switch your beacon from transmit to search mode. The beacon displays direction arrows and distance in meters to the buried beacon. Walk the direction indicated, following the signal path. As distance decreases below 3 meters, slow down and orient the beacon carefully to pinpoint the signal. Once at approximately 1 meter distance, use your probe to precisely locate the buried climber, then shovel from downhill of the probe. Practice regularly — the skill degrades without monthly refresher training. Modern digital beacons (Mammut Barryvox, BCA Tracker, Ortovox Diract) cost $350–$500 and are vastly easier to use than older analog beacons.
What terrain is most dangerous for avalanches?
The most dangerous avalanche terrain features are: (1) Slopes between 30 and 45 degrees — this angle range produces the vast majority of avalanche fatalities, with 38 degrees being the peak. (2) Terrain traps like gullies, cliffs, trees, and rocks below the slope, which can kill buried climbers even in small avalanches. (3) Convex rolls where the slope steepens — tension fractures start here. (4) Leeward (downwind) slopes where wind deposits snow creating unstable slabs. (5) Recent avalanche paths showing obvious debris or stripped trees. (6) Cornices on ridges that can break off and trigger slides below. (7) Terrain above 3,000 meters with recent storm snow. Safer terrain includes slopes under 30 degrees, ridgelines and wind-scoured areas, dense timber, and areas you can see have already avalanched this season. The AIARE terrain categories are Simple, Challenging, and Complex — most mountaineering accidents occur in Challenging terrain.
What is an AIARE avalanche course?
AIARE (American Institute for Avalanche Research and Education) is the primary avalanche safety certification in the United States. AIARE 1 is a 3-day introductory course covering terrain recognition, basic snowpack assessment, group decision-making, and companion rescue with beacon/probe/shovel. AIARE 2 is an advanced 4-day course covering professional-level snowpack analysis, weather integration, and complex terrain decisions. AIARE courses cost $400–$700 in the United States and are offered by certified providers in every major mountain region. International equivalents include Canada’s Canadian Avalanche Association (CAA) courses and Europe’s various national certification bodies. An AIARE 1 course is considered the minimum qualification for mountaineering in avalanche terrain — most guide services require it for winter mountaineering clients.
What should you do if caught in an avalanche?
If caught in an avalanche: (1) Try to escape off the side of the slide if possible — avalanches move fastest in the middle. (2) Discard heavy gear like backpacks only if necessary — they can also help mark your position. (3) Attempt swimming motions to stay near the surface. (4) As the avalanche slows, make an air pocket in front of your face by creating space with your arms. (5) If possible, reach one hand upward — it may help partners locate you and can serve as a reference point when buried. (6) Conserve oxygen by staying calm and breathing slowly. (7) Do not call out until you hear rescuers nearby — sound does not travel well through snow and yelling wastes oxygen. Survival statistics: 91% survival rate if rescued within 18 minutes, dropping to 34% after 35 minutes due to asphyxiation. This is why companion rescue matters more than professional rescue — professional rescue almost never arrives in time.
How long can you survive buried in an avalanche?
Avalanche burial survival statistics from the Colorado Avalanche Information Center and international avalanche research: 91% of buried victims survive if rescued within 18 minutes. Survival drops to 34% by 35 minutes due to asphyxiation, the primary cause of avalanche death. After 90 minutes, survival rate drops to under 10%. Beyond 2 hours, survival becomes extremely rare. The critical factors are: (1) Whether the victim has an air pocket — makes a 10x difference in survival time. (2) Burial depth — shallower burials allow faster rescue. (3) Whether a beacon is worn — beacon-equipped victims are rescued an average of 15+ minutes faster. (4) Companion rescue capability — professional rescue almost always arrives too late. This is why every mountaineer in avalanche terrain must carry beacon, probe, and shovel, and must be trained to perform companion rescue within 15 minutes.
Do you need an avalanche airbag for mountaineering?
Avalanche airbags (BCA Float, Mammut Protection, Black Diamond JetForce) reduce burial risk but are not universally required for mountaineering. Research from the Swiss Federal Institute suggests airbags reduce mortality by approximately 11% in avalanche incidents. They work by inflating a large balloon during the avalanche, increasing the victim’s volume-to-density ratio so they stay closer to the surface. Airbags are more standard in backcountry skiing than mountaineering because skiers typically travel heavier and faster through avalanche terrain. For mountaineers, airbags are recommended for: winter climbing in known avalanche zones, ski mountaineering objectives, and climbs during elevated avalanche hazard. Cost is $800–$1,200 for complete systems. For many mountaineers, budget priority should go to beacon-probe-shovel and AIARE training first; airbags are an upgrade once the basics are mastered.
When is avalanche risk highest for climbers?
Avalanche risk for mountaineers is highest during: (1) The 24 to 72 hours following significant snowfall (10+ cm new snow) — the primary risk window. (2) Rapid warming periods, especially the first warm day after a cold spell — wet avalanches become likely. (3) High winds that create wind-loaded slabs on leeward slopes — 30 km/h+ winds redistribute snow dangerously. (4) Spring conditions when warming destabilizes winter snowpack. (5) The hour of the day matters — mornings are safer than afternoons when solar heating weakens snow bonds. (6) Late in the climbing day when temperatures have peaked. Always check the local avalanche forecast before any winter or spring climb — avalanche.org covers the United States, avalanche.ca covers Canada, and various national services cover European and other regions. Forecasts rate danger on a 1-5 scale; most fatalities occur at Considerable (3) level, not Extreme (5), because climbers stay home on Extreme days.
Authoritative Sources & Further Reading
Content reflects current curricula from major avalanche safety organizations and peer-reviewed research:
- American Institute for Avalanche Research and Education (AIARE) — aiare.org — Course curricula and certification standards
- Canadian Avalanche Association (CAA) — avalancheassociation.ca — Canadian equivalent certification
- Swiss Federal Institute for Snow and Avalanche Research (SLF) — slf.ch — Peer-reviewed avalanche survival research
- Colorado Avalanche Information Center (CAIC) — avalanche.state.co.us — US survival statistics and incident reporting
- Avalanche.org — US avalanche forecast network aggregator
- Avalanche Canada — avalanche.ca — Canadian avalanche forecast service
- European Avalanche Warning Services (EAWS) — avalanches.org — European standards and forecasts
- American Alpine Club — Accidents in North American Climbing — Annual incident analysis
- Reference texts: Staying Alive in Avalanche Terrain (Tremper), Snow Sense (Fredston and Fesler), Freedom of the Hills (The Mountaineers)
- Gear manufacturers: Mammut, BCA (Backcountry Access), Ortovox, Black Diamond, Pieps, Voile
Related Guides Across the Hub
The most commonly referenced companion guides for avalanche-terrain planning — weather, insurance, training, and peaks where these skills apply.
Back to the Master Hub
This guide is one of 71 across 12 thematic clusters on Global Summit Guide. The master hub organizes every guide by experience tier, specific peak, skill area, and region.