<

Category: Expedition Planning

  • Climbing Mount Vinson: The Ultimate Antarctic Adventure

    Climbing Mount Vinson: The Ultimate Antarctic Adventure

    Mountaineering in Antarctica: A Guide to the Frozen Continent’s Peaks

    By Travis Ludlow, Global Summit Guide

    Mountaineering in Antarctica presents a unique blend of breathtaking beauty and formidable challenges. This guide aims to equip adventurers with essential knowledge about climbing the frozen continent’s peaks, including preparation, safety, and the best routes. As climbers face extreme weather conditions and rugged terrains, understanding the intricacies of Antarctic mountaineering becomes crucial. This article will delve into the essential preparation steps, safety considerations, and equipment recommendations necessary for a successful expedition. Additionally, we will explore the key mountain ranges, the logistics of planning an expedition, and the latest trends in Antarctic mountaineering.

    Comprehensive Guide to Mountaineering in Antarctica

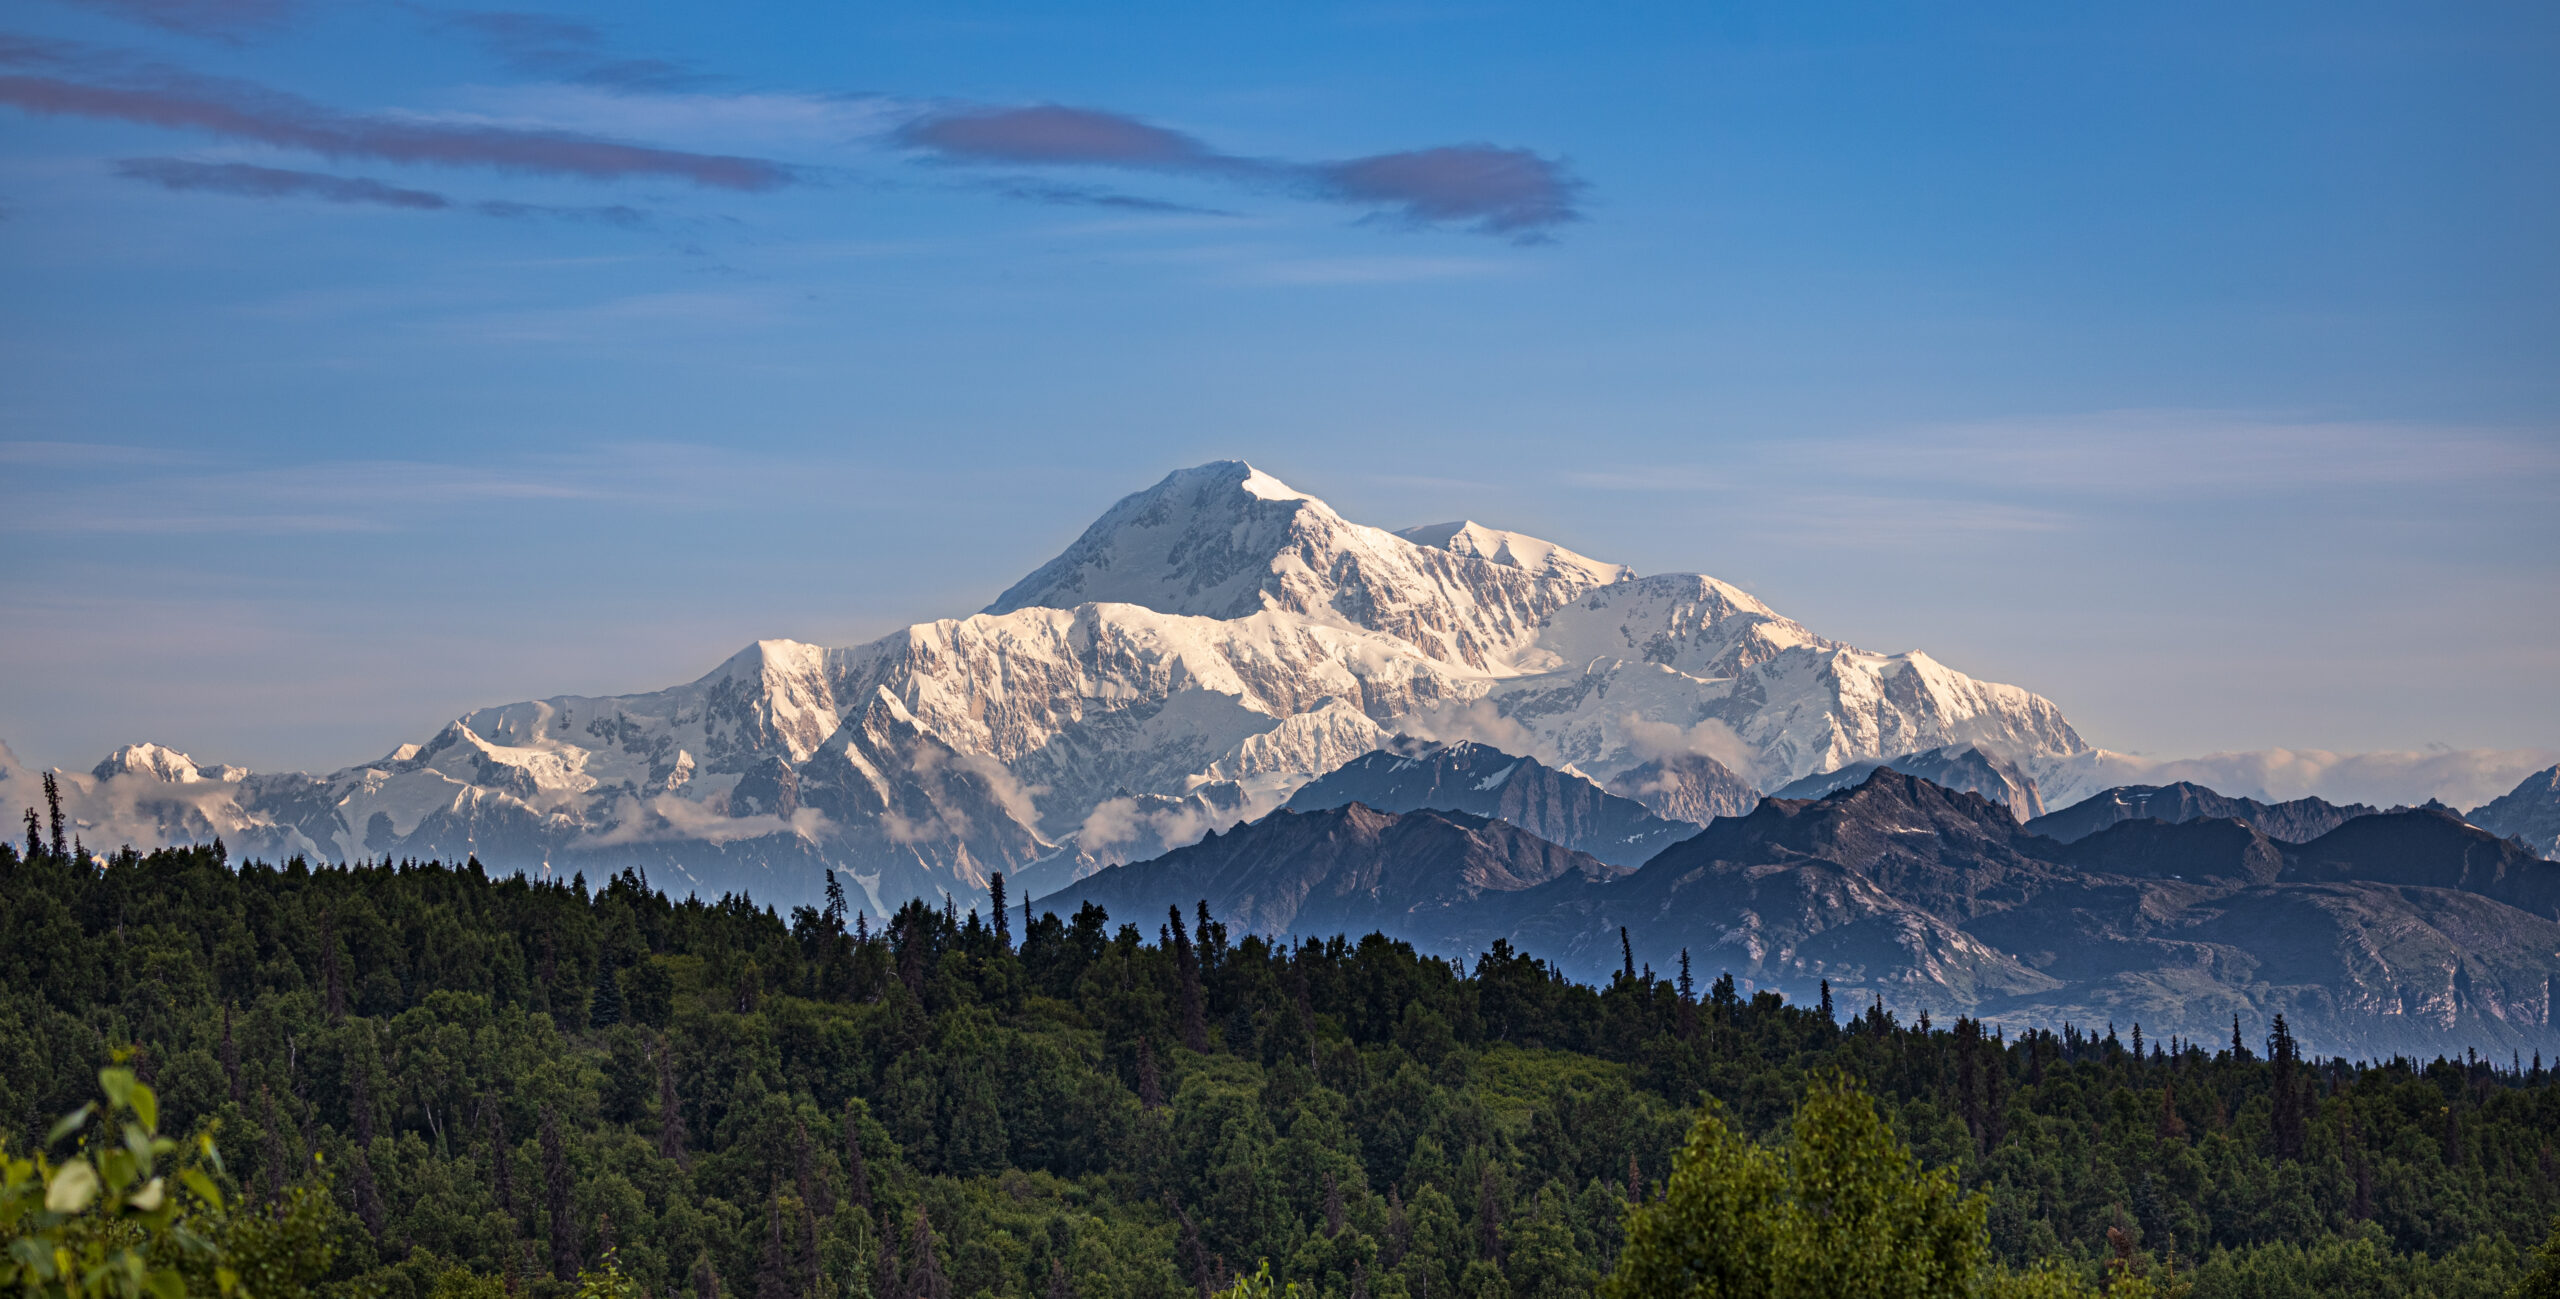
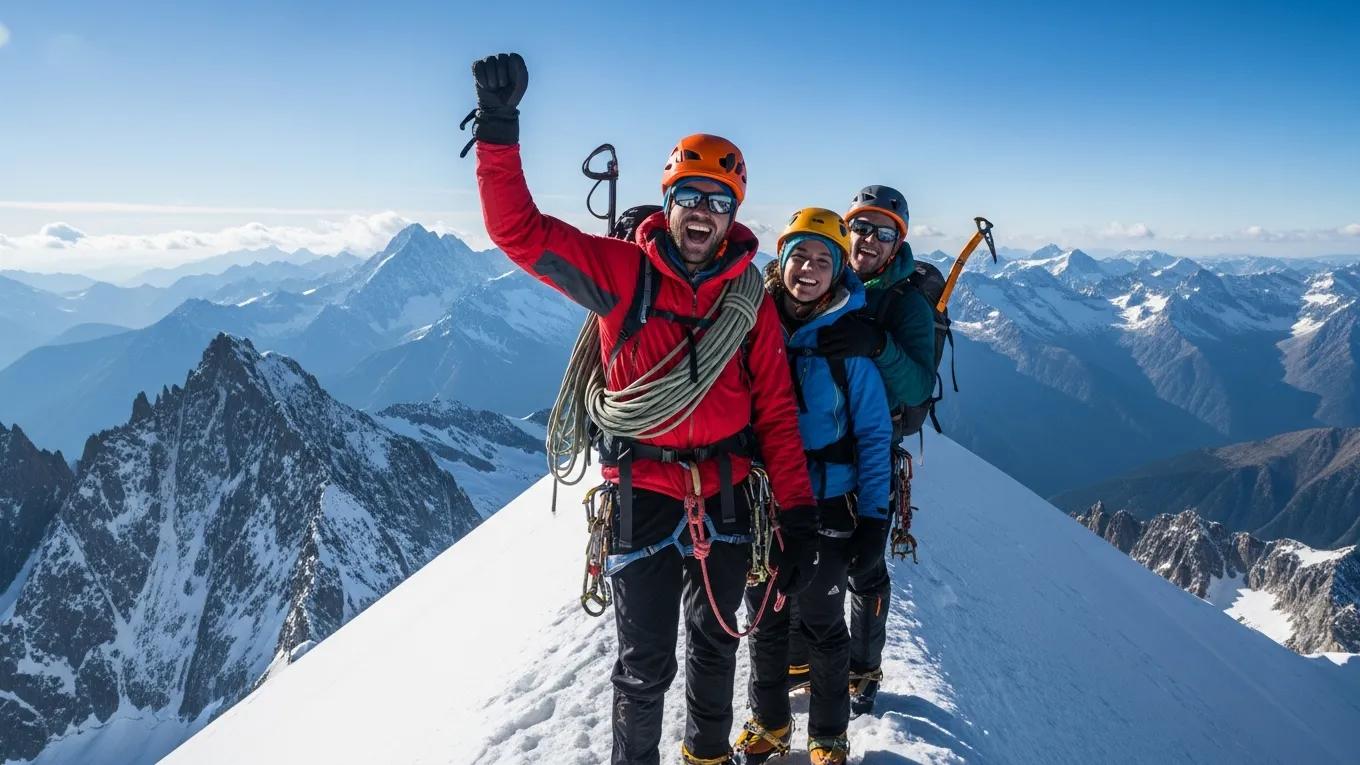
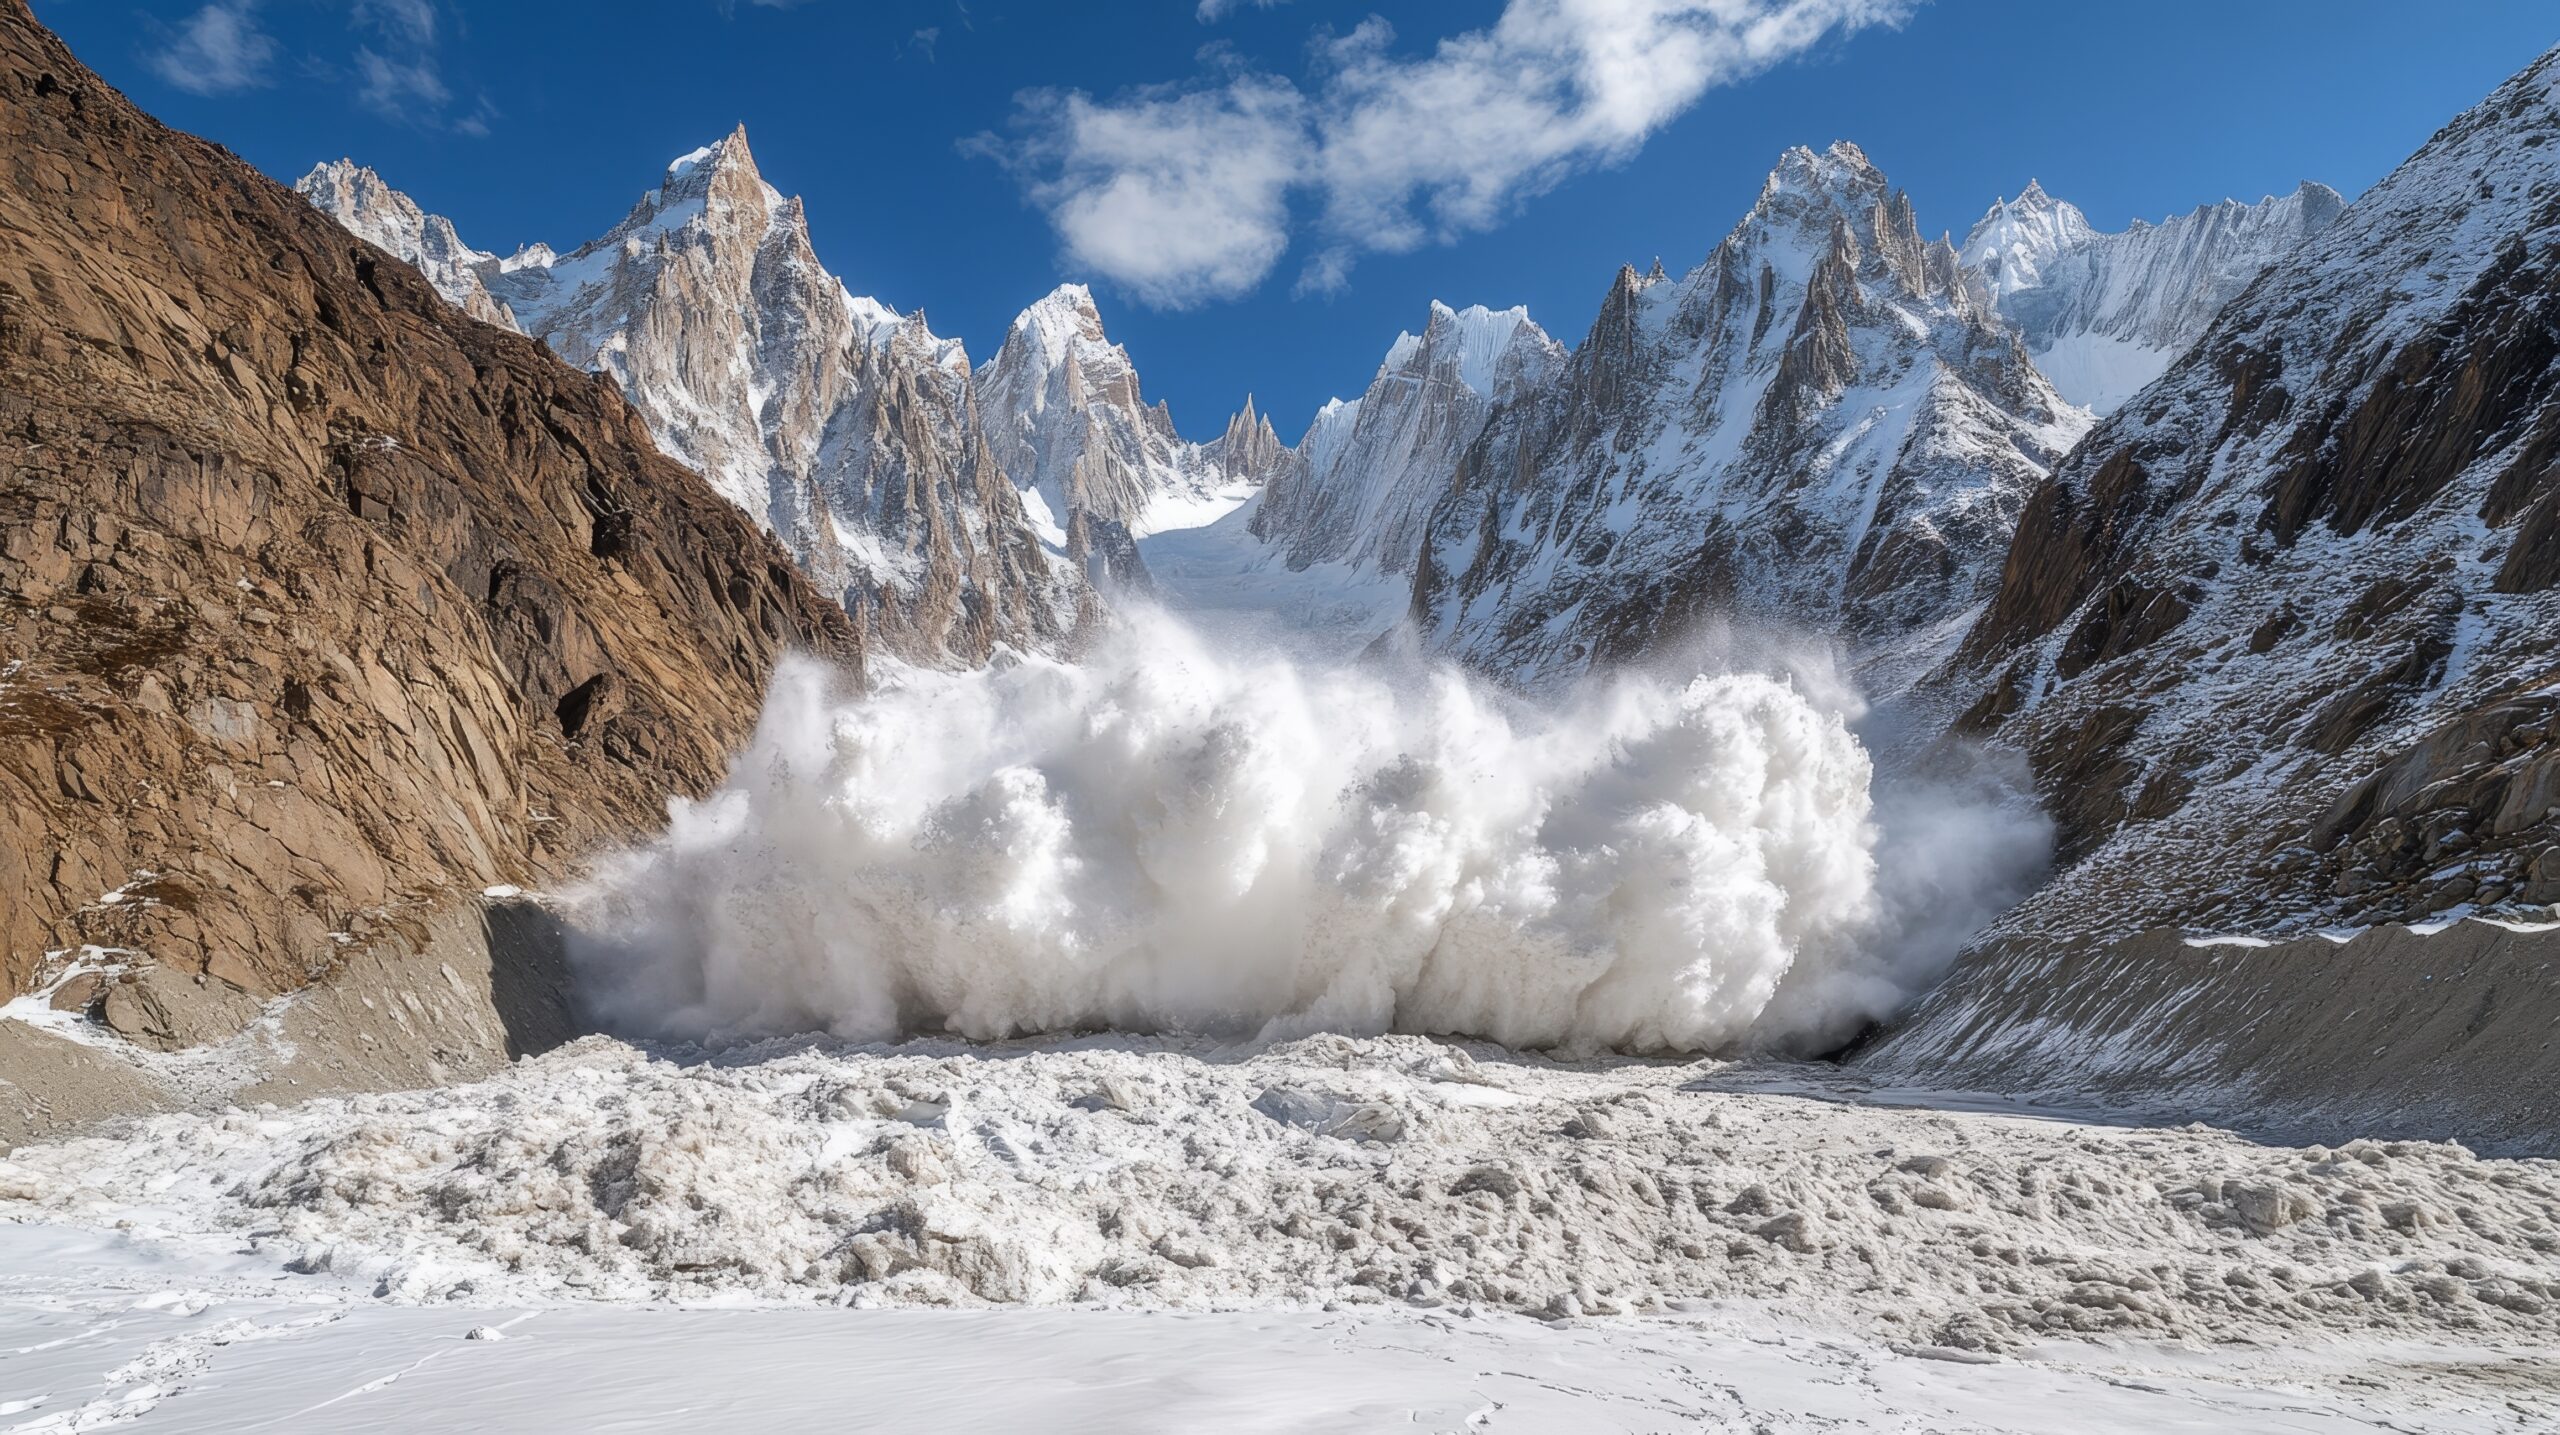
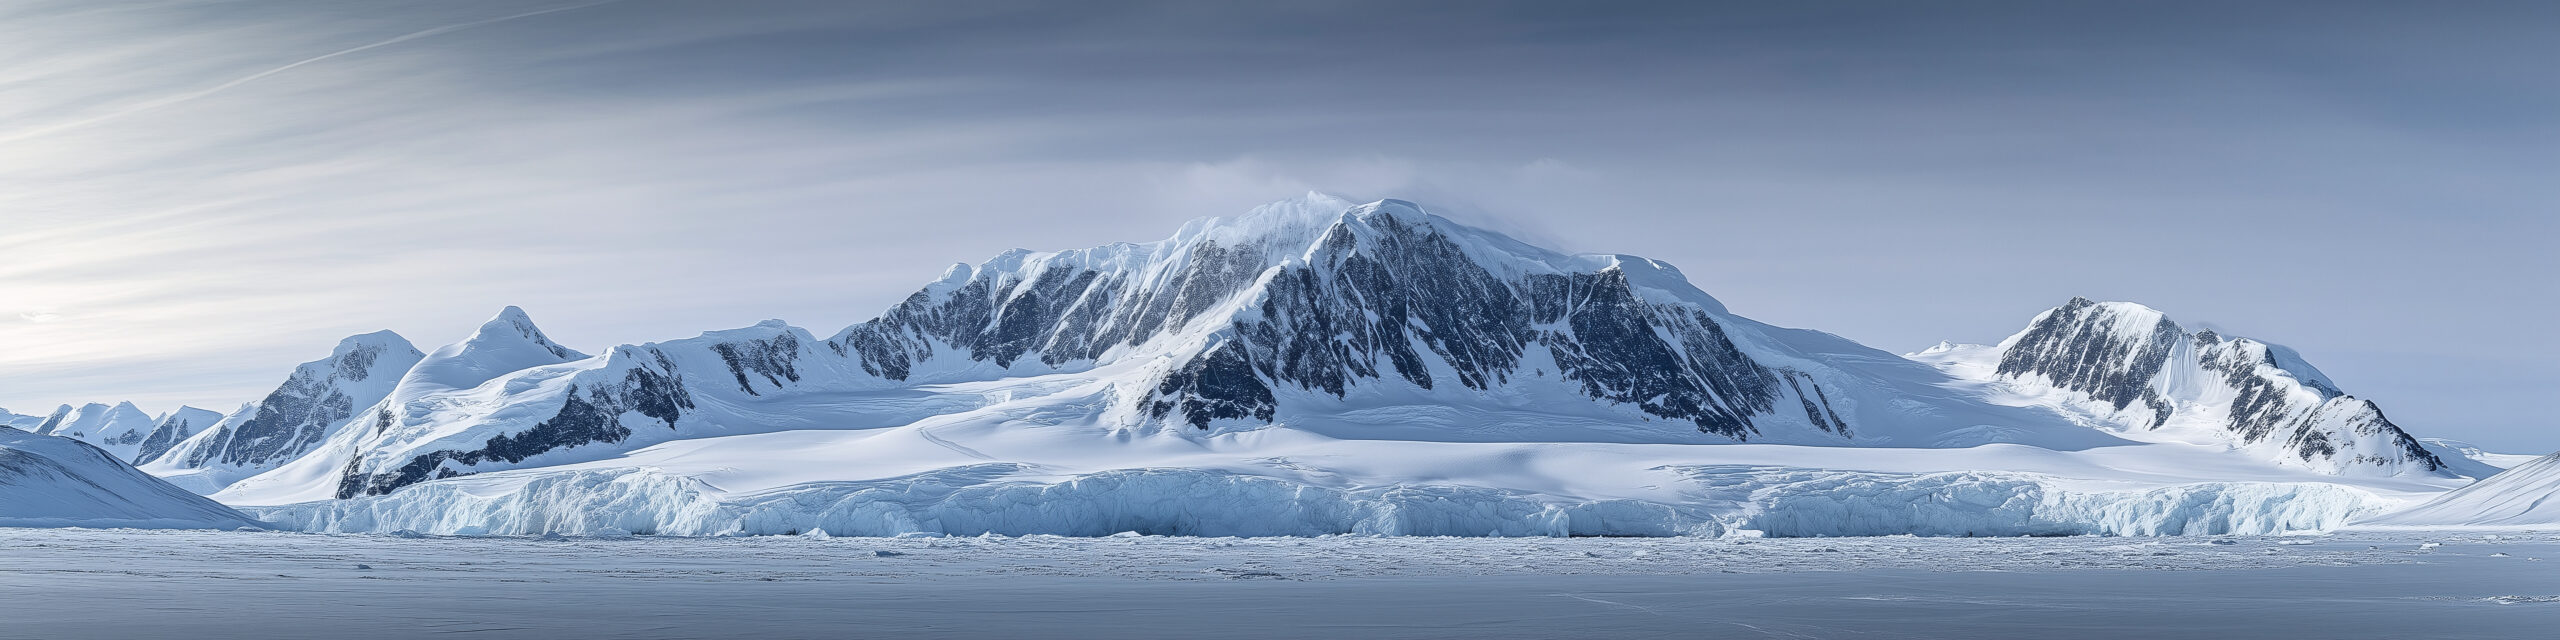
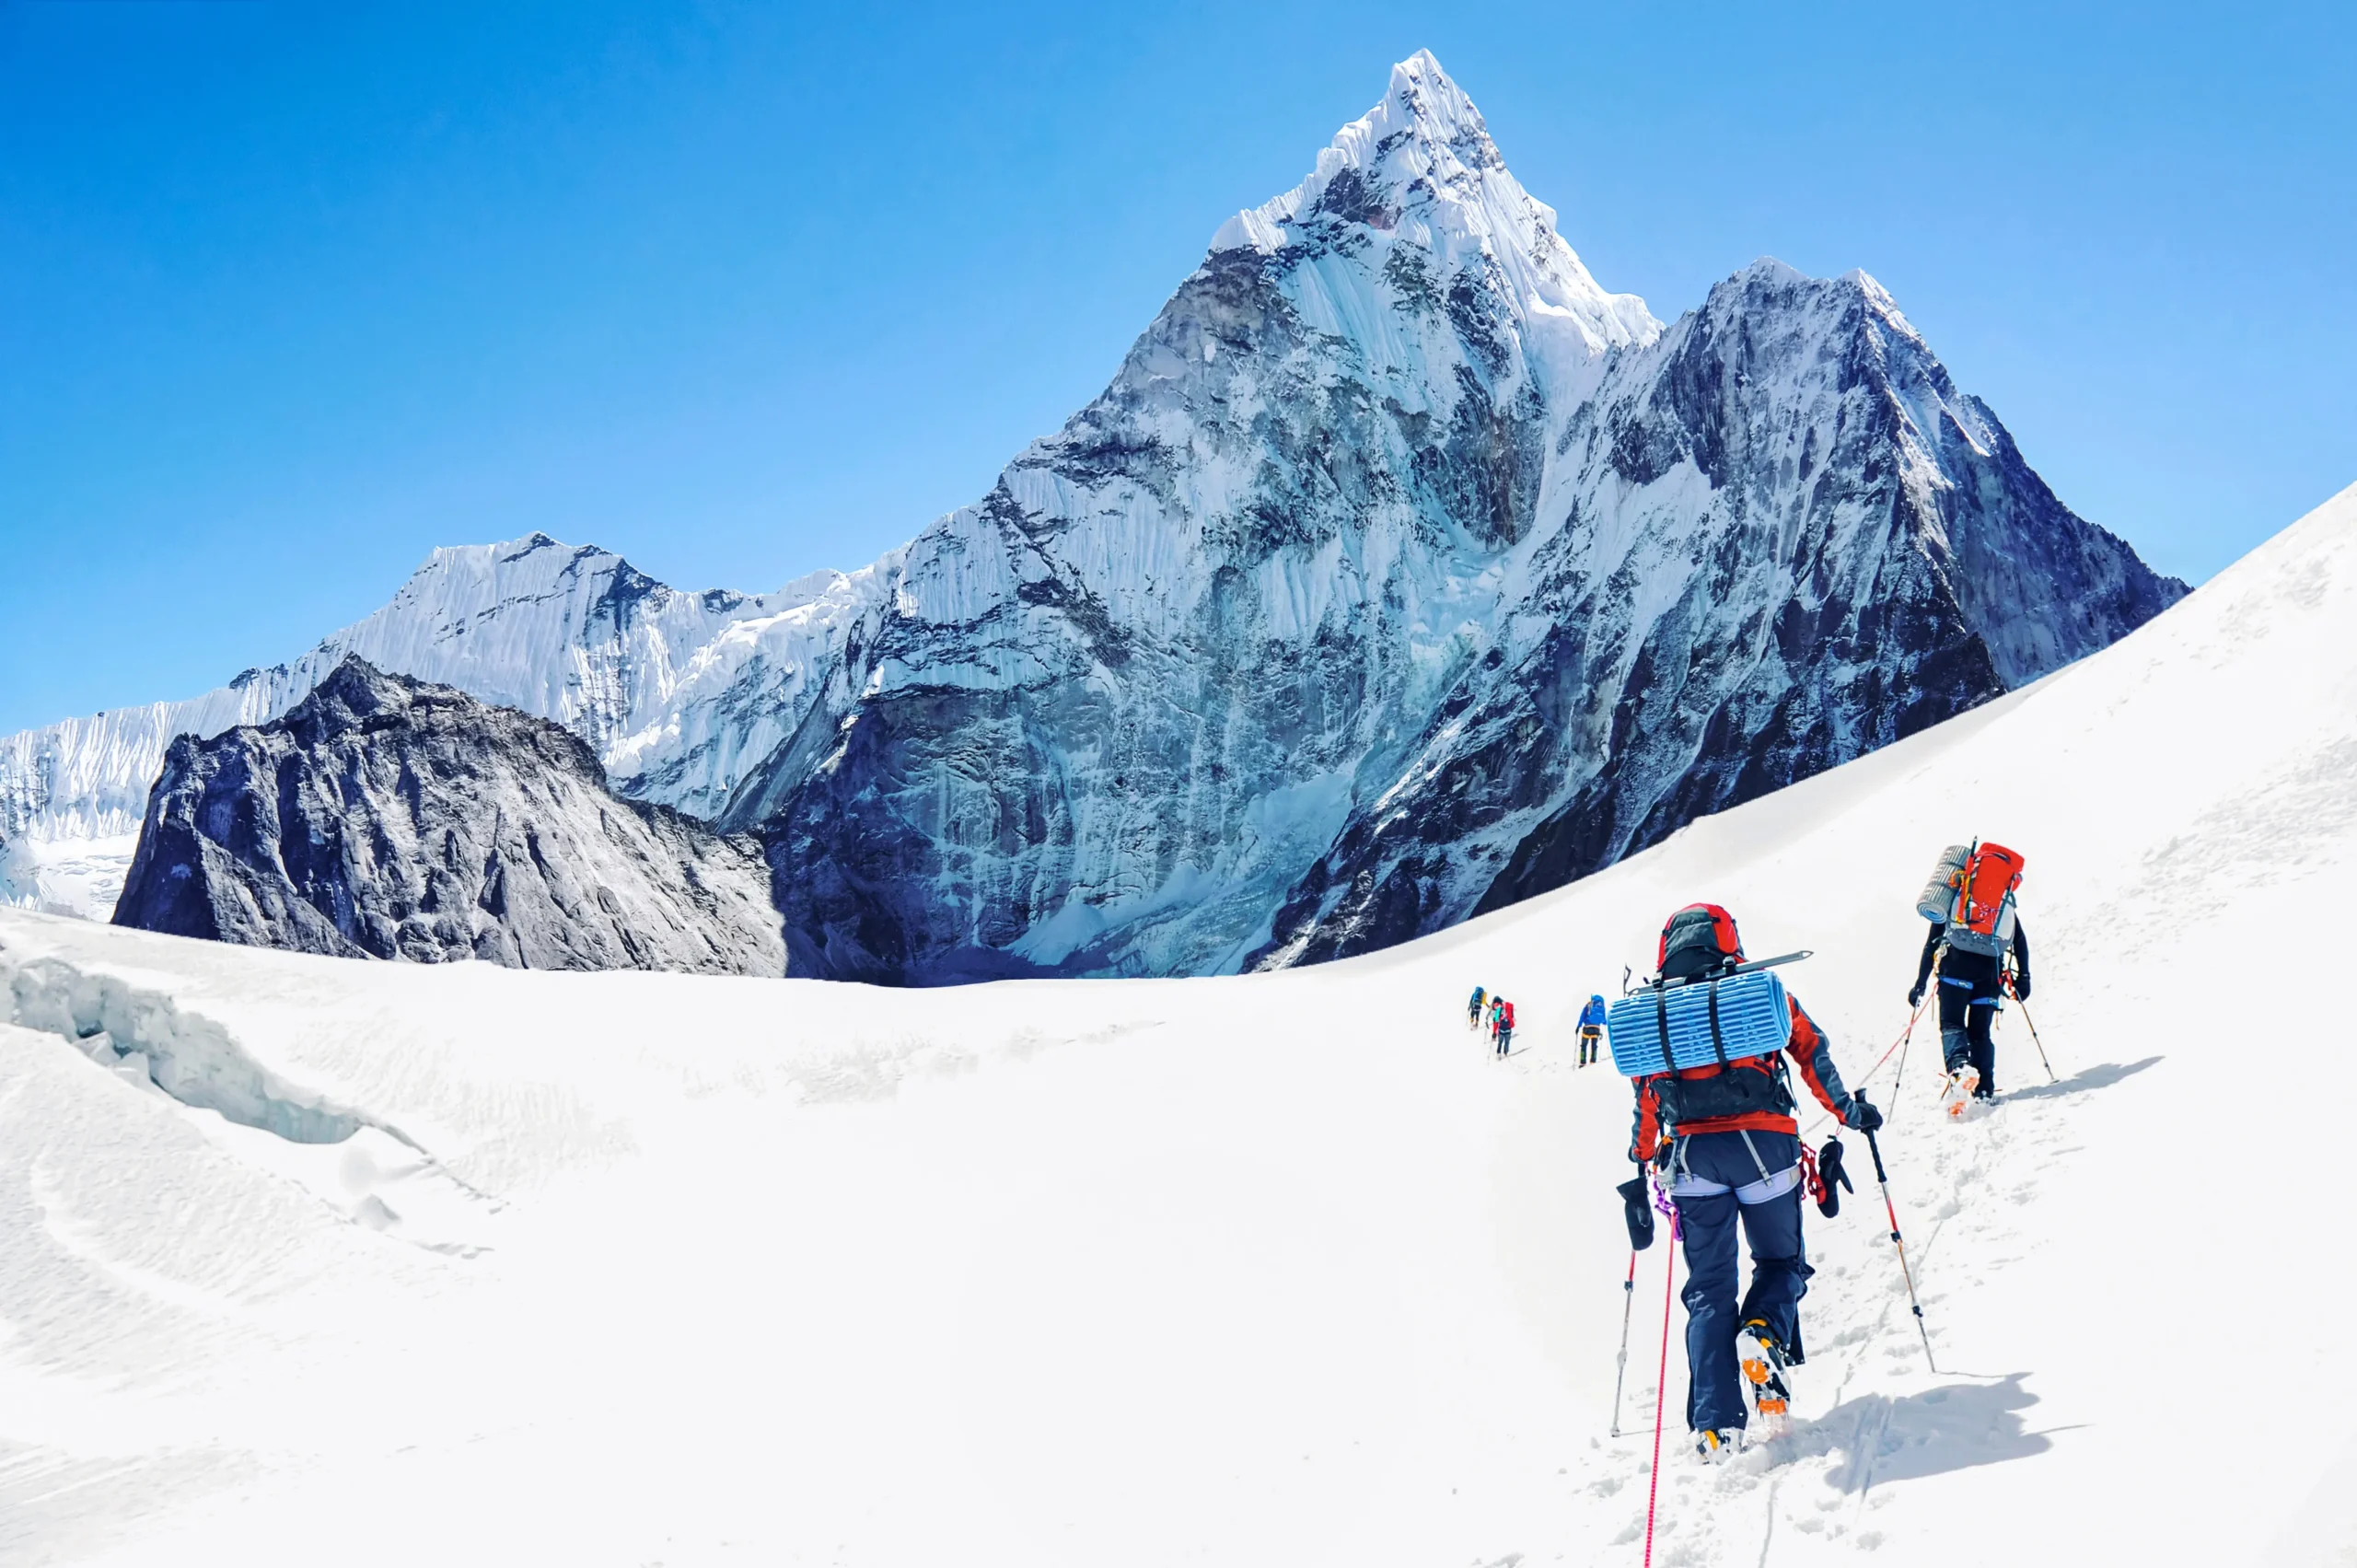
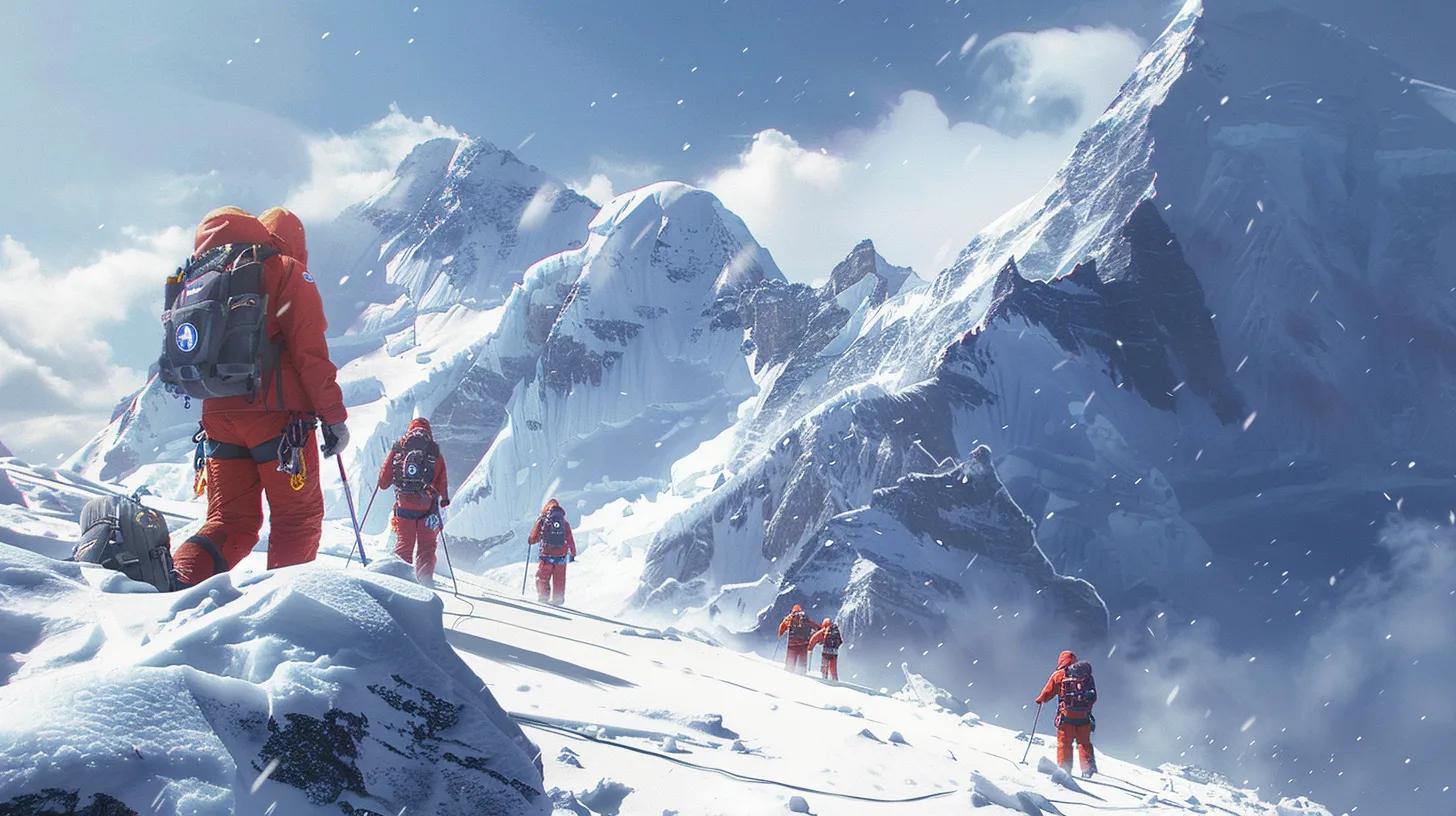
    Mountaineering in Antarctica is characterized by its extreme conditions and stunning landscapes. Climbers must navigate unpredictable weather, icy terrains, and high altitudes, making thorough preparation essential. The continent is home to some of the world’s highest peaks, including Mount Vinson, which stands at 16,050 feet. Understanding the unique challenges of Antarctic mountaineering, such as acclimatization and route selection, is vital for a successful climb. This guide will provide insights into the necessary steps to prepare for an expedition, ensuring climbers are well-equipped to tackle the frozen wilderness.

    Essential Preparation

    Climbers preparing for an Antarctic expedition with essential gear and equipment

    Preparation for an Antarctic expedition involves several critical steps to ensure safety and success. Climbers should focus on the following aspects:

    • Physical Conditioning: Building endurance and strength is essential for tackling the demanding climbs in Antarctica. Regular cardiovascular and strength training can help climbers prepare for the physical challenges ahead.
    • Route Selection: Choosing the right route is crucial. Climbers should research various paths, considering factors such as difficulty, weather conditions, and personal experience.
    • Permit Requirements: Obtaining the necessary permits is a vital step in planning an Antarctic expedition. Climbers must comply with regulations set forth by the Antarctic Treaty and other governing bodies.

    Understanding the specific physical demands of such environments, including the challenges posed by heavy equipment and difficult terrain, is crucial for effective preparation.

    Physical Demands & Equipment in High-Altitude Cold Environments

    Ten representatives of the Institute of Human Performance were integrated into a marine battalion during a high altitude cold weather training operation for the purpose of gathering descriptive and objective information about the types of physical performance tasks encountered by marine infantryment MOS 0311. Sustained marches, under varified atmospheric conditions, weighted with awkward personal protective equipment approaching 70 of ones body weight, was identified as the overriding physical task in this environment. Unpacked snow, and grades of 10-15 were routinely encountered. An ability to maintain a line of march for periods of four to six hours were not uncommon. The arduous nature of this task was confounded by frequent falling into deep snow while wearing snow shoes and having to reestablish an upright position.

    Physical Performance Tasks Required of US Marines Operating in a High Altitude Cold Weather Environment., 1982

    For those looking to enhance their preparation, Information Hub offers comprehensive resources on trip planning, gear advice, and vetted operator listings relevant to Antarctic climbs.

    Safety Considerations

    Climbers practicing safety drills in Antarctica, emphasizing emergency preparedness and teamwork

    Safety is paramount in Antarctic mountaineering, where conditions can change rapidly. Climbers should adhere to the following safety protocols:

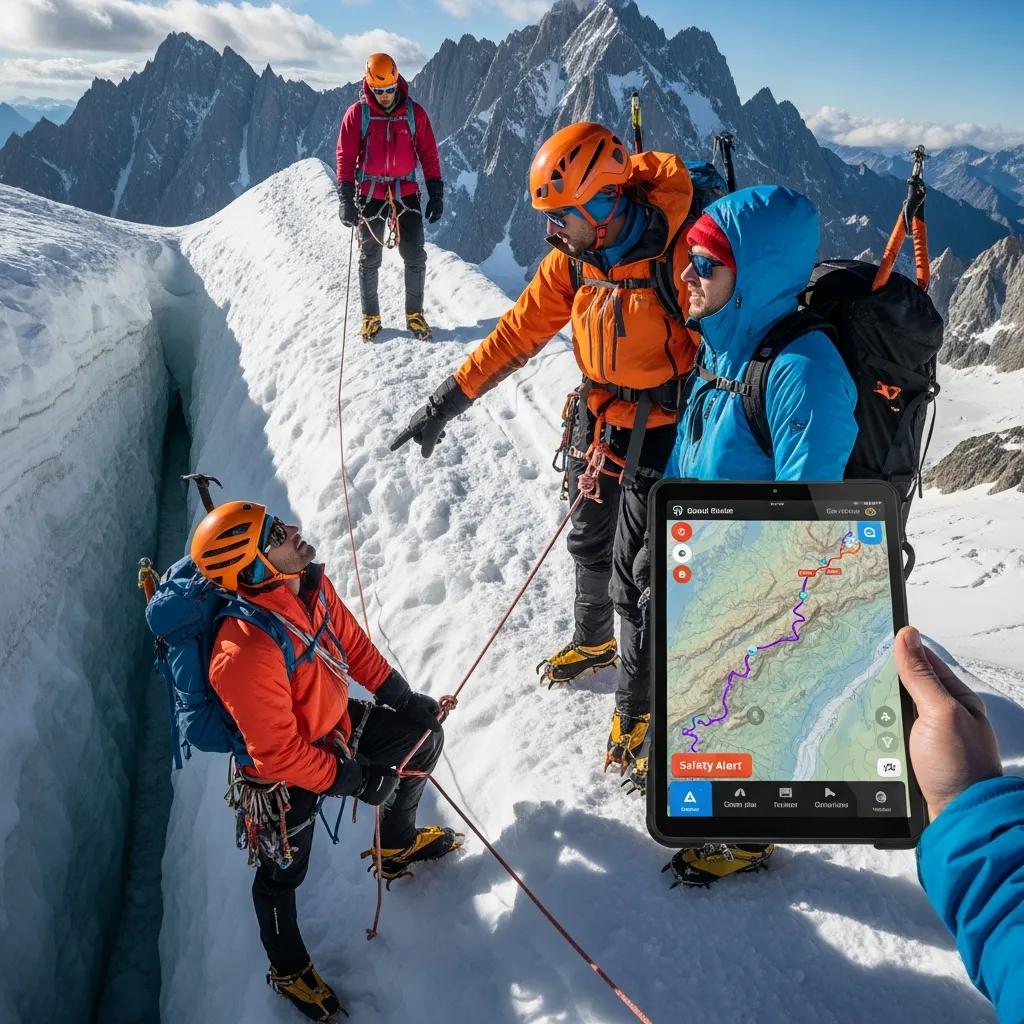
    • Emergency Preparedness: Having a well-thought-out emergency plan is essential. This includes knowing evacuation routes and having communication devices on hand.
    • Acclimatization Techniques: Gradually acclimatizing to high altitudes can prevent altitude sickness. Climbers should spend time at intermediate elevations before attempting higher peaks.
    • Regular Drills for Safety: Conducting regular safety drills can prepare climbers for emergencies, ensuring everyone knows their roles and responsibilities.

    To enhance safety, climbers should consider investing in high-quality safety gear, such as avalanche beacons and first aid kits, which can be sourced from Information Hub’s recommended equipment lists.

    Best Routes

    Antarctica offers several popular climbing routes, each with its unique challenges and rewards. Notable routes include:

    • Vinson Massif Route: This is the most common route to the summit of Mount Vinson, known for its stunning views and technical challenges.
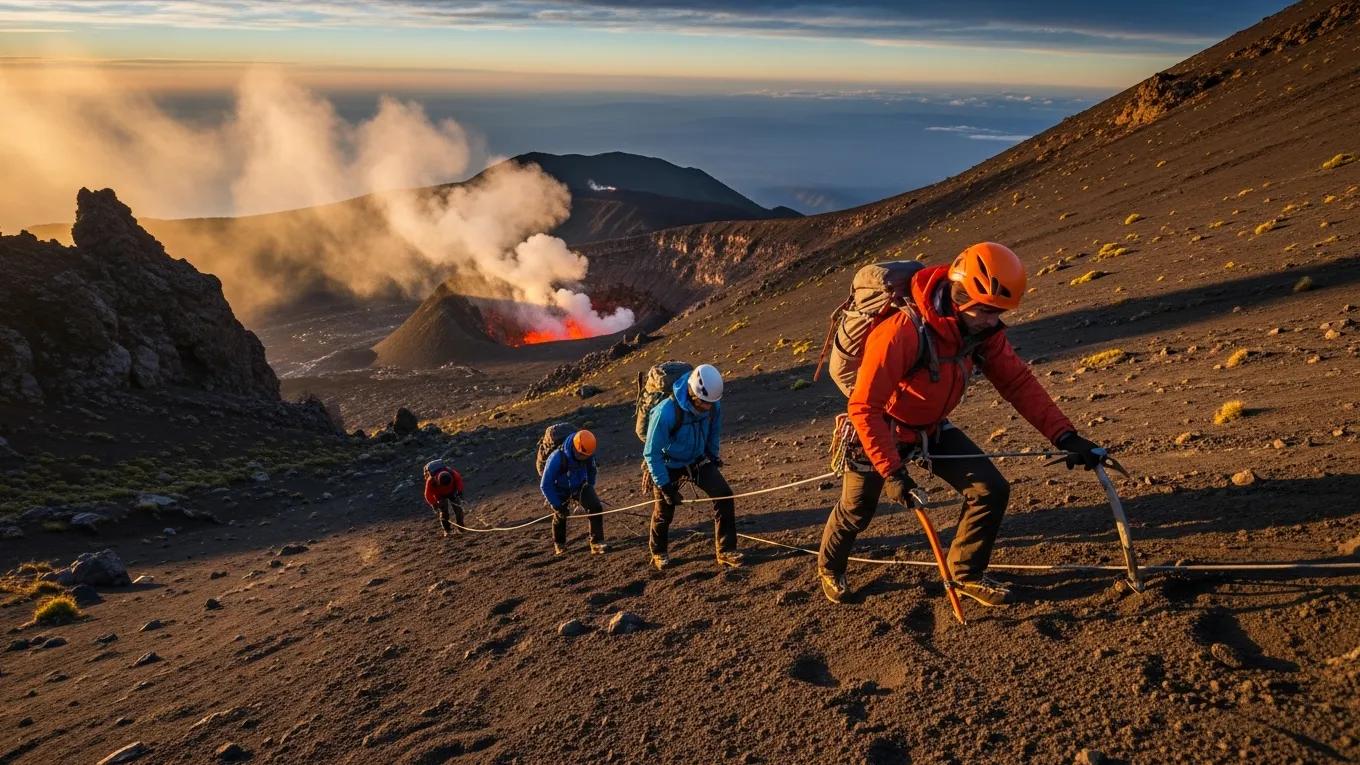
    • Mount Erebus Climbing Challenges: Climbing Mount Erebus, an active volcano, presents unique hazards, including volcanic gases and unstable ice.

    Understanding the specifics of each route can help climbers choose the best path for their skills and experience level.

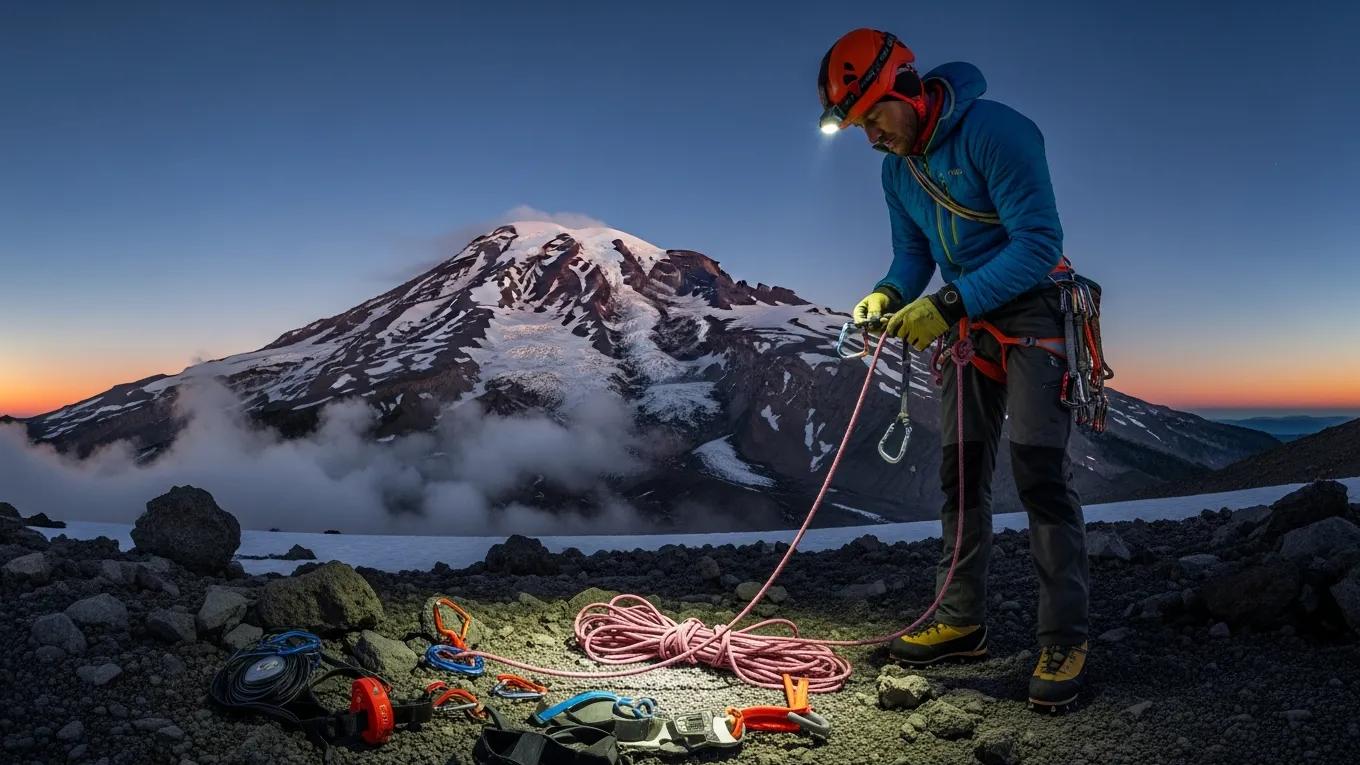
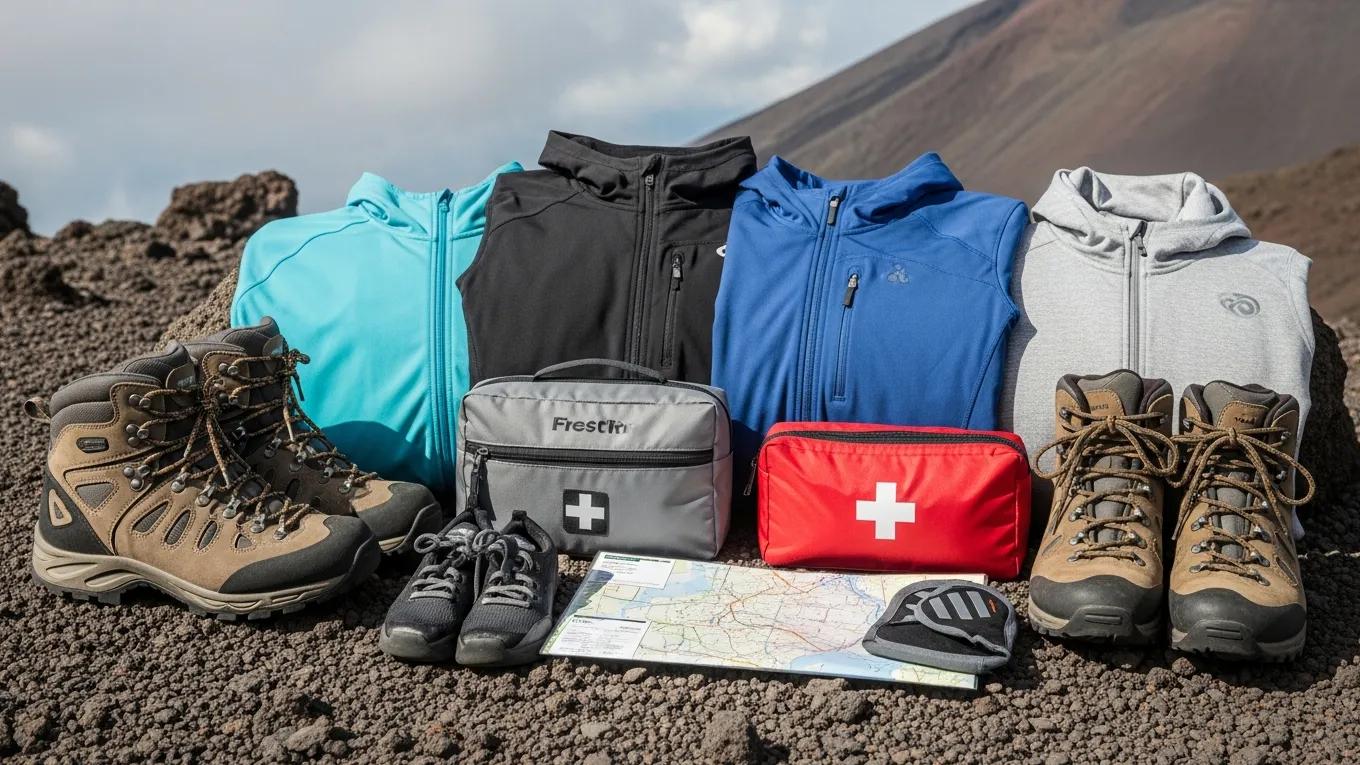
    Equipment Recommendations

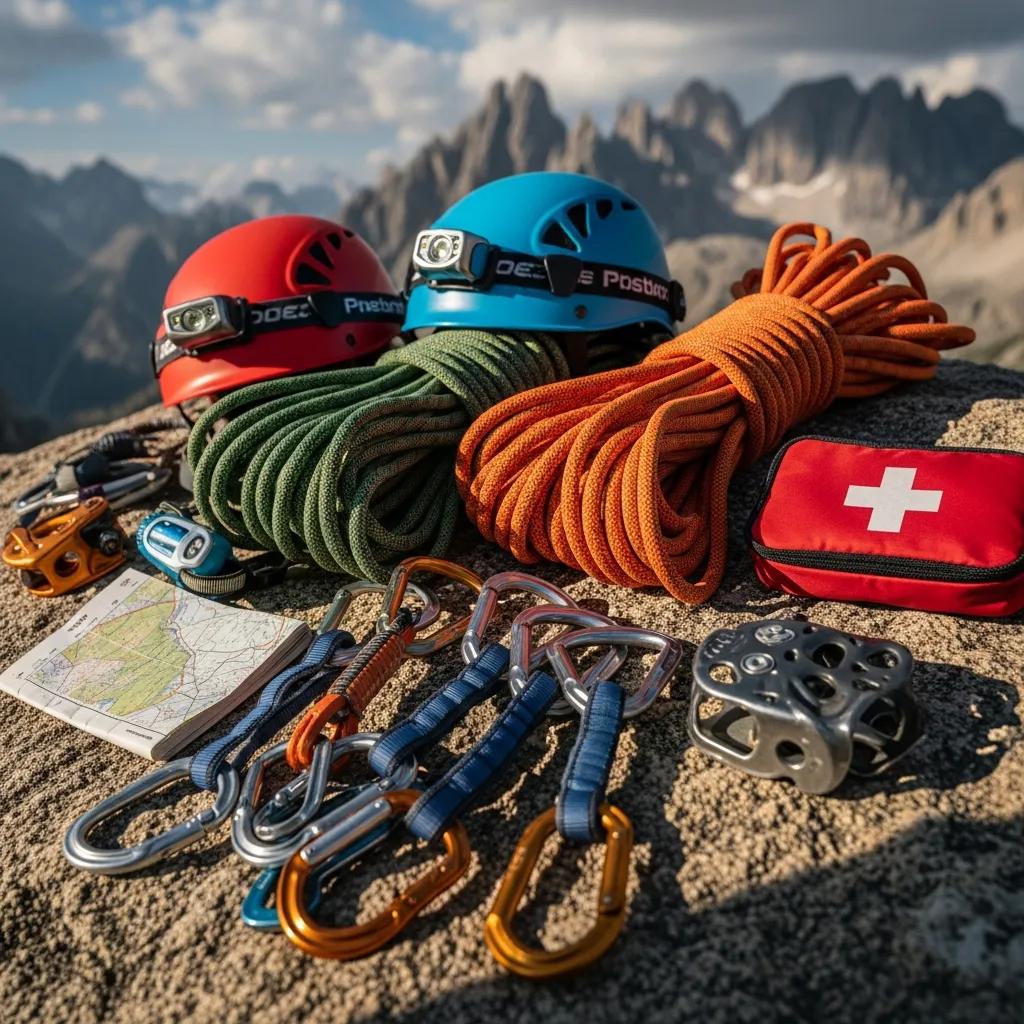
    When preparing for an Antarctic expedition, selecting the right equipment is crucial. Recommended gear includes:

    • Clothing Layers for Extreme Conditions: Climbers should invest in high-quality, insulated clothing that can withstand sub-zero temperatures.
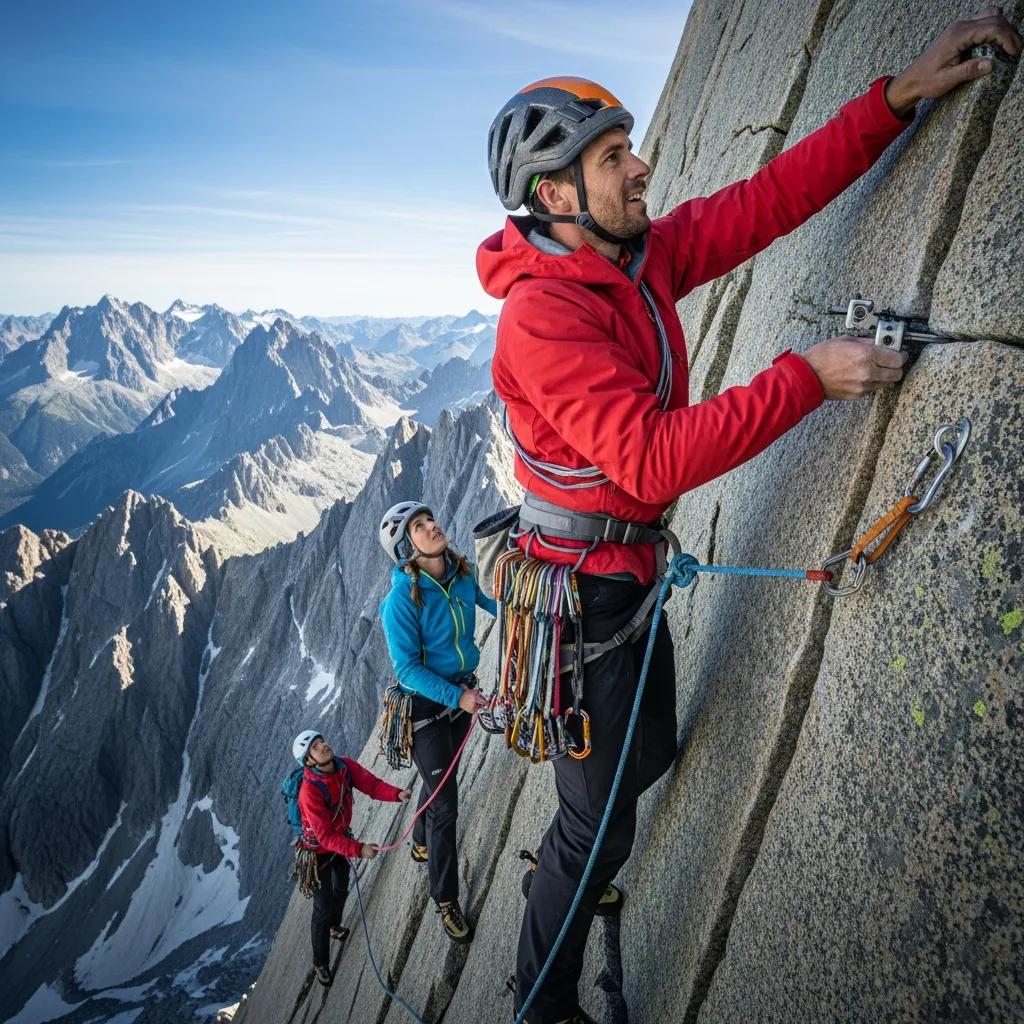
    • Technical Gear Essentials: Ice axes, crampons, and harnesses are vital for navigating icy terrains safely.
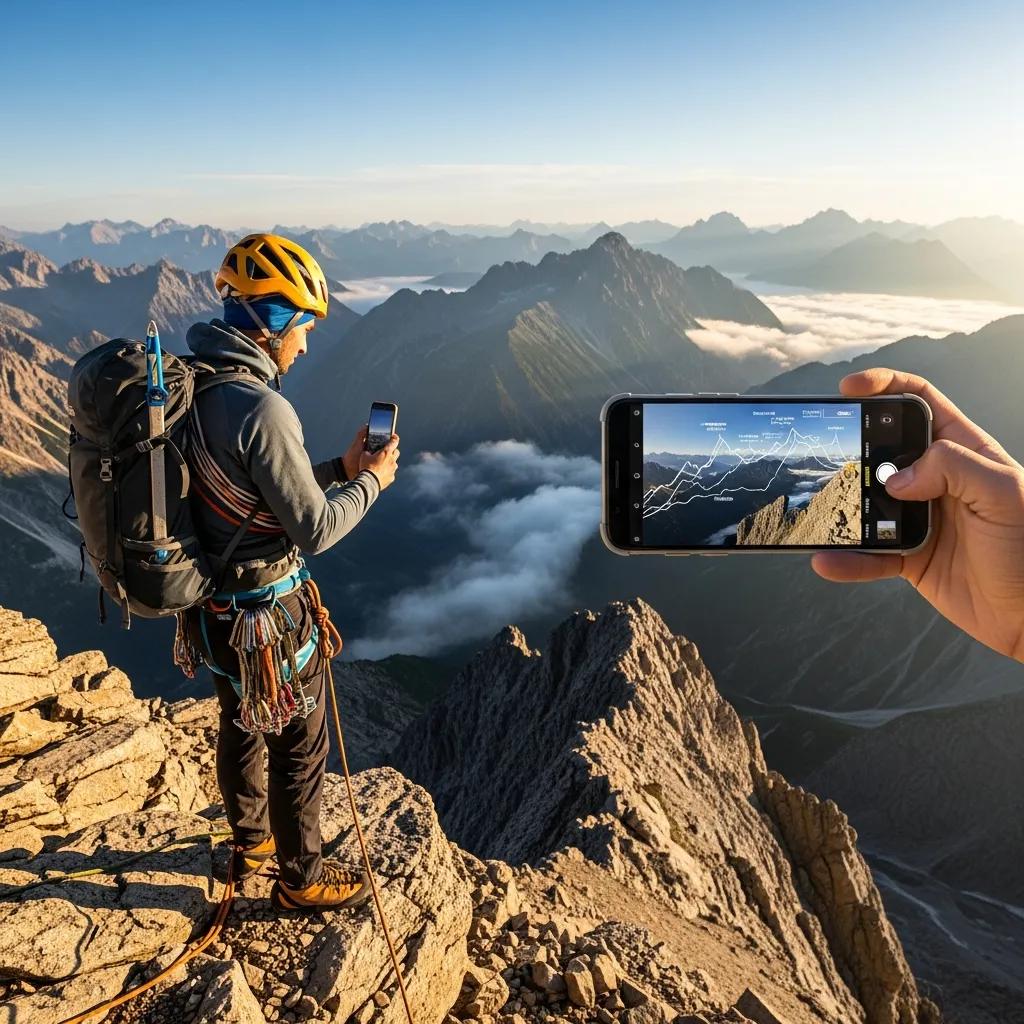
    • Navigation and Communication Tools: GPS devices and satellite phones are essential for maintaining communication and ensuring safe navigation in remote areas.

    To ensure climbers have the best equipment, Information Hub provides detailed recommendations and resources for sourcing high-quality mountaineering gear.

    The reliability of mountaineering equipment in extreme polar conditions is paramount, often requiring specialized testing and evaluation.

    Mountaineering Equipment Testing in Polar Environments

    1. Pursuant to a request from US Army Natick Laboratories, the Arctic Institute of North America carried out testing and evaluation of certain commercially available mountaineering equipment, considered by the project investigator to be the best available on the commercial market today. This equipment was tested under varying climatic conditions and extremes in the St. Elias Mountains of the southwestern Yukon Territory, Canada. Tests were carried out in the low altitude forested region near Kluane Lake, in the medium altitude alpine environment of the central St. Elias Mountains, and in the severe high altitude polar environment of Canadas highest mountain, Mt. Logan.

    Mountaineering Equipment Evaluation, 1972

    What Are the Key Antarctic Mountain Ranges and Their Characteristics?

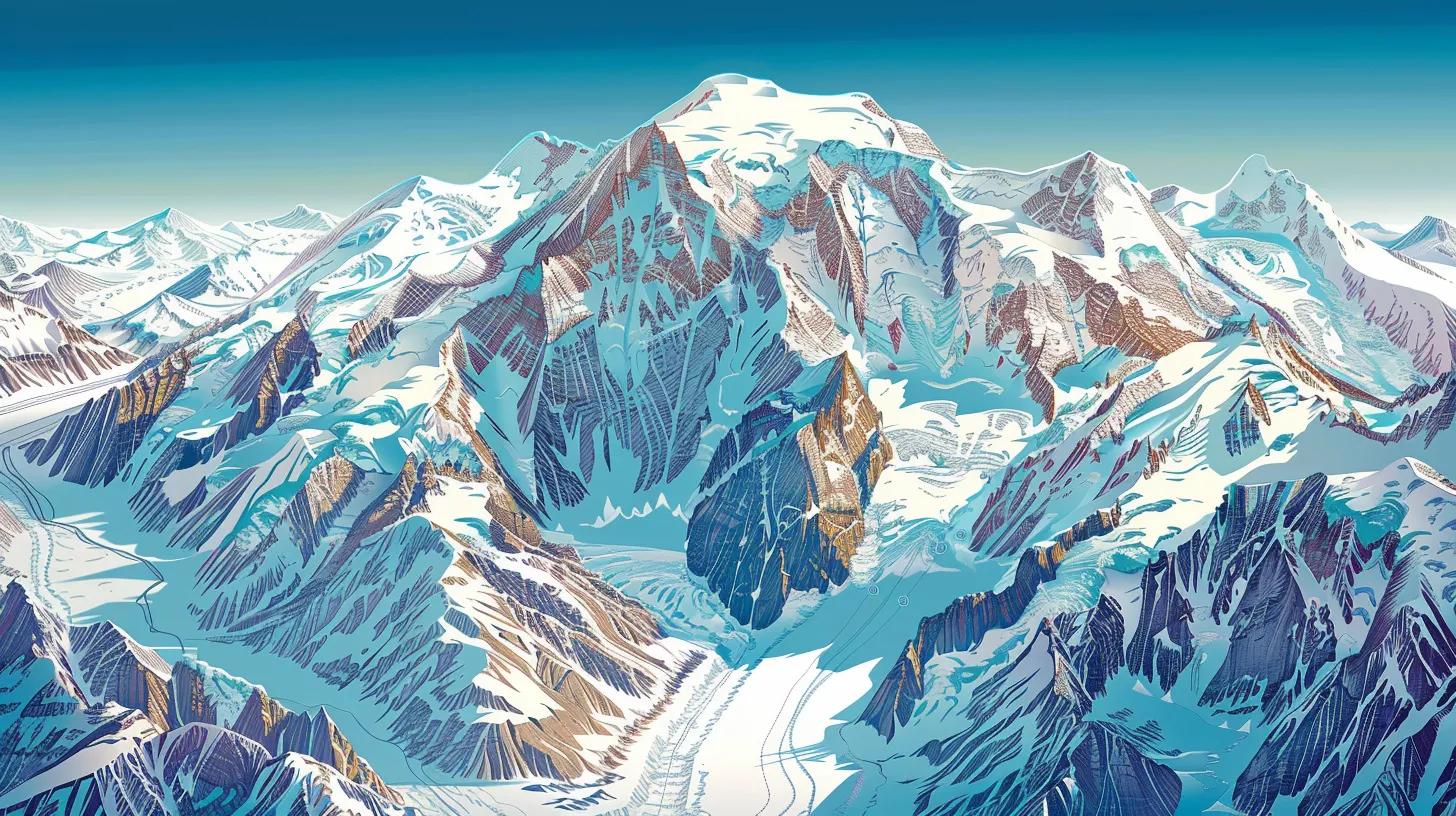
    Antarctica is home to several prominent mountain ranges, each with distinct features and climbing challenges. Understanding these ranges is essential for climbers planning their expeditions.

    Which Peaks Define Antarctica’s Mountain Landscape?

    The Antarctic landscape is defined by several key peaks, including:

    • Mount Vinson: The highest peak in Antarctica, known for its challenging climbs and extreme weather conditions.
    • Mount Tyree: The second-highest peak, offering a less-traveled but equally rewarding climbing experience.
    • Mount Erebus: An active volcano that presents unique challenges due to its volcanic activity and ice formations.

    What Are the Elevations and Climbing Difficulties of Major Antarctic Mountains?

    The elevations and climbing difficulties of major Antarctic mountains vary significantly. Here’s a comparison of some notable peaks:

    Peak NameElevation (feet)Difficulty Level
    Mount Vinson16,050High
    Mount Tyree15,919High
    Mount Erebus12,448Moderate to High

    This table illustrates the varying challenges climbers may face when attempting to summit these iconic peaks.

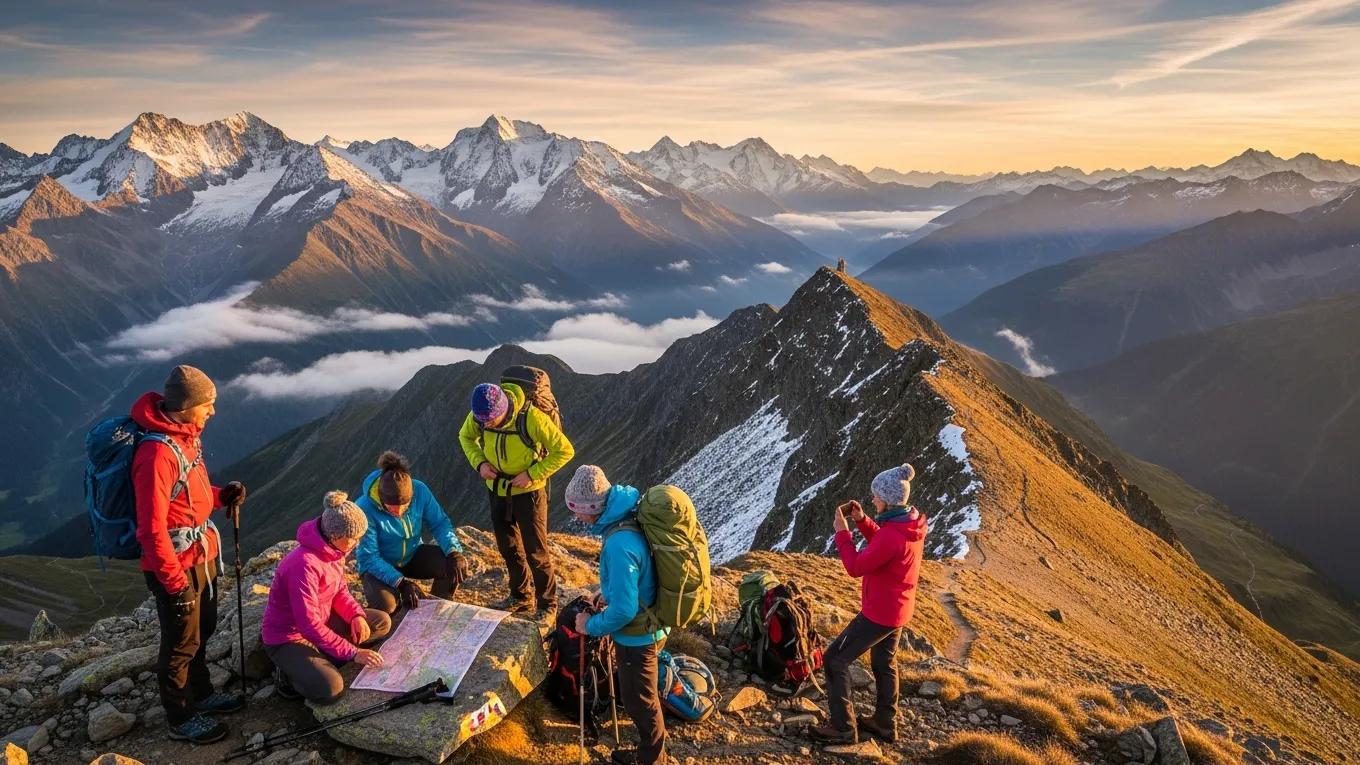
    How to Plan a Successful Mountaineering Expedition in Antarctica?

    Planning a successful mountaineering expedition in Antarctica requires careful consideration of several factors. Climbers should focus on:

    • Research and Itinerary Creation: Thorough research on routes, weather patterns, and potential hazards is essential for creating a comprehensive itinerary.
    • Setting Clear Goals: Defining personal and group goals can help maintain focus and motivation throughout the expedition.
    • Physical Preparation: Ensuring all team members are physically prepared for the challenges ahead is crucial for safety and success.

    What Permits and Regulatory Approvals Are Required for Antarctic Climbs?

    Climbers must navigate a complex web of regulations when planning expeditions in Antarctica. Key considerations include:

    • Permit Application Process: Understanding the application process for permits is essential. Climbers should familiarize themselves with the requirements set by the Antarctic Treaty and other governing bodies.
    • Environmental Regulations: Adhering to environmental regulations is crucial for preserving the pristine Antarctic ecosystem. Climbers must follow guidelines to minimize their impact on the environment.

    What Are the Essential Timelines and Logistics for Expedition Preparation?

    Effective expedition preparation involves careful planning of timelines and logistics. Key considerations include:

    • Transportation Options: Understanding the available transportation options to and from Antarctica is essential for planning.
    • Accommodation Considerations: Climbers should research accommodation options, including base camps and lodges, to ensure a comfortable stay before and after climbs.

    What Are the Detailed Guidelines for Climbing Mount Vinson?

    Climbing Mount Vinson requires adherence to specific guidelines to ensure safety and success. Key aspects include:

    • Route Details for Vinson: The most common route is the Vinson Normal Route, which is recommended for climbers with moderate to high experience.
    • Safety Protocols Specific to Vinson: Climbers should be aware of the unique safety protocols associated with climbing Vinson, including weather monitoring and emergency procedures.

    What Are the Established Routes and Their Difficulty Levels on Mount Vinson?

    Mount Vinson offers several established routes, each with varying difficulty levels:

    Route NameDifficulty LevelDescription
    Vinson Normal RouteModerateThe most accessible route for climbers.
    West Face RouteHighA more technical route requiring advanced skills.

    This table highlights the different routes available for climbers, allowing them to choose based on their skill level.

    What Safety Protocols and Environmental Considerations Should Climbers Follow?

    Climbers must adhere to strict safety protocols and environmental considerations while on Mount Vinson:

    • Emergency Preparedness: Having a solid emergency plan in place is crucial for ensuring safety during the climb.
    • Leave No Trace Principles: Following Leave No Trace principles helps protect the fragile Antarctic environment, ensuring it remains pristine for future generations.

    Which Gear and Safety Equipment Are Recommended for Polar Mountaineering?

    Selecting the right gear and safety equipment is vital for successful polar mountaineering. Recommended items include: gear safety.

    • Clothing Specifications: Insulated, waterproof clothing is essential for protection against extreme cold and wet conditions.
    • Technical Equipment Needs: Essential gear includes ice axes, crampons, and climbing harnesses to navigate icy terrains safely.

    What Are the Specifications for Cold-Weather Climbing Gear in Antarctica?

    Cold-weather climbing gear must meet specific specifications to ensure safety and comfort. Key considerations include:

    • Insulation Requirements: Gear should provide adequate insulation to protect against sub-zero temperatures.
    • Waterproofing Standards: All clothing and equipment should be waterproof to prevent hypothermia and frostbite.

    How to Select and Use Safety Equipment for Antarctic Expeditions?

    Selecting and using safety equipment correctly is crucial for ensuring climber safety. Key guidelines include:

    • Essential Gear for Safety: Climbers should carry essential safety gear, including first aid kits and communication devices.
    • Maintenance and Checks: Regularly checking and maintaining equipment ensures it functions correctly during expeditions.

    How to Choose and Contact Reliable Antarctic Expedition Operators?

    Choosing a reliable expedition operator is crucial for a successful Antarctic climb. Key criteria include:

    • Experience and Reputation: Operators should have a proven track record of successful expeditions in Antarctica.
    • Safety Protocols: Ensure that the operator follows strict safety protocols to protect climbers during their journey.

    What Criteria Define Vetted and Experienced Antarctic Climbing Operators?

    When selecting an expedition operator, consider the following criteria:

    • Guide-to-Client Ratio: A lower ratio ensures personalized attention and safety during climbs.
    • Certifications and Safety Planning: Operators should have the necessary certifications and a solid safety plan in place.

    Where to Find Operator Listings and How to Initiate Expedition Bookings?

    Finding reliable expedition operators can be done through various resources:

    • Online Resources for Operator Listings: Websites dedicated to mountaineering often provide listings of vetted operators.
    • Booking Tips and Considerations: When initiating bookings, consider factors such as group size, experience level, and safety protocols.

    For those seeking assistance with trip planning, Global Summit Guide offers resources to help you prepare.

    What Are the Latest Trends and Safety Updates for Antarctic Mountaineering?

    As of the most recent information, several trends and updates are shaping the landscape of Antarctic mountaineering. Key points include:

    • Recent Trends in Polar Tourism: An increase in interest in polar tourism has led to more climbers seeking expeditions in Antarctica.
    • Safety Updates for Climbers: New safety protocols and gear advancements are continually being developed to enhance climber safety.

    What Are the Recent Statistics on Antarctic Expedition Permits and Participation?

    Recent statistics indicate a growing interest in Antarctic expeditions, with an increase in permits issued for climbers. This trend reflects the rising popularity of polar mountaineering among adventure enthusiasts.

    Which Advances in Gear Technology and Safety Protocols Should Climbers Know?

    Advancements in gear technology and safety protocols are crucial for modern climbers. Key developments include:

    • Innovations in Climbing Gear: New materials and designs are enhancing the performance and safety of climbing gear.
    • Updates in Safety Protocols: Continuous improvements in safety protocols are helping to reduce risks associated with Antarctic expeditions.

    To ensure you have the right gear and safety equipment, consult resources like Global Summit Guide.

    When considering your next adventure, remember that Global Summit Guide offers comprehensive information on various mountains.

    For those interested in connecting with fellow mountaineers or seeking expert advice, Global Summit Guide’s contact page provides a means to get in touch.

  • Mastering Denali: Your Complete Mountaineering Guide

    Mastering Denali: Your Complete Mountaineering Guide

    The Complete Guide to Climbing Denali: Routes, Permits, and Preparation

    By Travis Ludlow, Global Summit Guide

    Climbing Denali, the highest peak in North America, is a formidable challenge that attracts mountaineers from around the globe. This comprehensive guide will equip you with essential knowledge about the various routes, necessary permits, and preparation strategies required for a successful ascent. Many climbers face difficulties in navigating the complexities of Denali’s terrain and the bureaucratic requirements for permits. By understanding the intricacies of climbing Denali, you can enhance your chances of a safe and successful expedition. This article will cover the main climbing routes, the permits needed, preparation strategies, safety considerations, and more to ensure you are well-prepared for your adventure.

    Comprehensive Guide to Climbing Denali

    This guide serves as a detailed resource for climbers looking to summit Denali. It encompasses vital information about the mountain’s routes, the permits required, and the preparation necessary for a successful climb. Whether you are a seasoned mountaineer or a novice adventurer, this guide aims to provide insights that will help you navigate the challenges of climbing Denali. The information is structured to address the key aspects of your expedition, ensuring you have a clear understanding of what to expect.

    Main Climbing Routes

    Illustrative map of Denali's climbing routes, showcasing West Buttress, Muldrow, and Cassin paths

    Denali offers several routes, each with its unique challenges and characteristics. Understanding these routes is crucial for selecting the best path for your climbing experience.

    West Buttress Route

    The West Buttress Route is the most popular and frequently climbed path to the summit of Denali. This route is known for its relatively straightforward ascent, making it accessible for climbers with moderate experience. The climb typically takes around 14 to 21 days, depending on weather conditions and climber acclimatization. However, climbers should be prepared for significant altitude and weather challenges, including crevasses and high winds.

    Muldrow Route

    The Muldrow Route is less traveled and offers a more remote experience. This route requires advanced mountaineering skills due to its technical sections and navigation challenges. Climbers can expect to spend approximately 10 to 16 days on this route, which features stunning views but also demands a higher level of self-sufficiency and route-finding ability.

    Cassin Route

    The Cassin Route is one of the most technical and challenging paths on Denali, suitable for experienced climbers. This route features steep ice and rock sections, requiring advanced climbing techniques and equipment. The ascent typically takes around 10 to 14 days, and climbers must be prepared for extreme weather conditions and potential hazards.

    Necessary Permits

    Climbing Denali requires specific permits to ensure safety and environmental protection. Understanding the permit process is essential for a successful expedition.

    • Denali Climbing Permit: Required for all climbers attempting to summit Denali.
    • Backcountry Permit: Necessary for camping in backcountry areas.
    • Special Use Permit: Required for commercial guiding services or special events.

    Obtaining these permits involves an application process that includes fees and deadlines. It is crucial to plan ahead and ensure all necessary permits are secured before your expedition.

    Preparation Strategies

    Climbers training for Denali expedition, showcasing physical preparation and determination

    Preparing for a Denali expedition involves both physical training and logistical planning. Here are some key strategies to consider:

    • Physical Training: Engage in a rigorous training regimen that includes cardiovascular exercises, strength training, and endurance activities. Focus on building leg strength and aerobic capacity to handle the demands of high-altitude climbing.
    • Gear Preparation: Invest in high-quality gear suitable for extreme conditions. Essential items include mountaineering boots, crampons, ice axes, and appropriate clothing layers to protect against cold and wind.
    • Emergency Preparedness: Familiarize yourself with emergency protocols and carry essential safety equipment, such as a first aid kit, communication devices, and navigation tools.

    Safety Considerations

    Safety is paramount when climbing Denali. Climbers must adhere to regulations and implement effective communication strategies within their teams. Key safety measures include:

    • Regulations to Follow: Abide by all park regulations and guidelines to minimize environmental impact and ensure safety.
    • Team Communication: Establish clear communication protocols among team members to enhance coordination and decision-making during the climb.
    • Risk Mitigation Strategies: Be aware of potential hazards, such as avalanches and crevasses, and develop contingency plans to address these risks.

    What Are the Main Denali Climbing Routes and Their Challenges?

    The main climbing routes on Denali include the West Buttress, Muldrow, and Cassin routes. Each presents unique challenges, from technical climbing on the Cassin Route to the more accessible West Buttress. Understanding these challenges is crucial for selecting the appropriate route based on your skill level and experience.

    How Does the West Buttress Route Compare to Other Paths?

    The West Buttress Route is favored for its relative ease compared to the Muldrow and Cassin routes. While it still poses significant challenges, such as altitude and weather, it is generally more manageable for climbers with moderate experience. In contrast, the Muldrow Route requires advanced navigation skills, and the Cassin Route demands technical climbing expertise.

    What Are the Characteristics of the Muldrow Glacier Route?

    The Muldrow Glacier Route is characterized by its remote setting and technical challenges. Climbers must navigate complex terrain and be prepared for self-sufficiency. This route offers stunning views but requires a higher level of skill and experience compared to the West Buttress Route.

    How Do You Obtain and Manage Denali Climbing Permits?

    Obtaining Denali climbing permits involves a structured application process. Climbers must submit their applications well in advance, paying attention to deadlines and fees. Managing these permits effectively is crucial for ensuring compliance with park regulations and a smooth climbing experience.

    What Is the Official Permit Application Process?

    The official permit application process includes submitting an application form, paying the required fees, and providing details about your climbing plans. It is essential to follow the guidelines provided by the National Park Service to ensure your application is processed without delays.

    What Are the Permit Requirements and Restrictions?

    Permit requirements include providing information about your climbing team, planned route, and expected duration of the climb. Restrictions may apply based on the time of year and the number of climbers allowed on specific routes.

    How Should You Prepare Physically and Logistically for a Denali Expedition?

    Preparing for a Denali expedition requires a comprehensive approach that includes both physical training and logistical planning. Climbers should focus on building endurance and strength while also ensuring they have the necessary gear and supplies for their journey.

    What Training Regimens Best Prevent Altitude Sickness?

    Training regimens should include acclimatization hikes at high altitudes to help your body adjust to lower oxygen levels. Gradually increasing your elevation during training can significantly reduce the risk of altitude sickness during the climb.

    How to Plan Base Camp Logistics and Expedition Duration?

    Planning base camp logistics involves determining the best locations for setting up camps along your route. Consider factors such as water sources, shelter from the elements, and proximity to climbing routes when selecting your base camp sites.

    What Gear and Safety Protocols Are Essential for Climbing Denali?

    Essential gear for climbing Denali includes high-quality mountaineering equipment, clothing layers, and safety gear. Safety protocols should be established to address potential hazards and ensure effective communication among team members. intermediate climbing guide

    What Safety Measures Mitigate Risks on Denali?

    Safety measures include adhering to park regulations, maintaining clear communication, and being aware of environmental conditions. Regularly assessing risks and adjusting plans accordingly can help mitigate potential dangers during the climb.

    How Do Weather and Environmental Conditions Affect Denali Climbing?

    Weather and environmental conditions play a significant role in the success of Denali climbs. Climbers must be prepared for rapidly changing weather patterns and understand how these conditions can impact their ascent.

    What Are Typical Weather Patterns and Their Impact on Expeditions?

    Typical weather patterns on Denali include extreme cold, high winds, and sudden storms. These conditions can significantly affect climbing schedules and safety, making it essential for climbers to monitor forecasts and be prepared for changes.

    How Is Climate Change Influencing Climbing Windows and Safety?

    Climate change is altering weather patterns and glacial conditions on Denali, potentially impacting climbing windows and safety. Climbers should stay informed about these changes and adjust their plans accordingly to ensure a safe expedition.

    Recent research provides specific insights into how Denali’s weather patterns are evolving, offering valuable context for climbers.

    Denali Weather & Climate: Climbing Season Trends

    An overview of climatological and meteorological conditions and their seasonal variability in the Denali summit region is presented, based on the NCEP–NCAR reanalysis 1 dataset for the 1948–2018 period. The number of very cold days (<−35°C) during the climbing season (April–July) has decreased by approximately a day per decade. The number of very windy days (≥20 m s−1) during the climbing season also shows a decreasing trend for the majority of the time series.

    The mountain weather and climate of Denali, Alaska—

    An overview, L Hartl, 1948

    What Are the Options for Guided Denali Expeditions and Professional Support?

    For those seeking additional support, guided Denali expeditions offer a structured approach to climbing the mountain. Professional guides provide expertise and assistance, enhancing the overall experience for climbers.

    How to Choose a Certified Denali Expedition Operator?

    When selecting a certified Denali expedition operator, consider factors such as experience, safety records, and client reviews. A reputable operator will have a proven track record of successful climbs and a commitment to safety.

    What Are the Benefits of Guided Climbs Versus Independent Ascents?

    Guided climbs offer several advantages, including expert guidance, logistical support, and enhanced safety measures. Independent ascents provide a sense of adventure and self-sufficiency but require a higher level of preparation and experience.

    To ensure a successful climb, consider using trip planning resources to help organize your expedition.

    Many climbers find that gear and safety are paramount for a successful and safe ascent. Proper equipment and knowledge can significantly reduce risks.

    For those interested in exploring other peaks, mountain guides can provide valuable insights and support.

    Climbing Denali requires careful planning and preparation. If you need assistance, consider reaching out through our contact page for expert advice.

  • Volcano Climbing Basics: Hazards, Gear & Best Times

    Volcano Climbing Basics: Hazards, Gear & Best Times

    Volcano Climbing Basics: Essential Safety Tips, Gear Checklist & Optimal Climbing Seasons

    By Travis Ludlow, Global Summit Guide

    Volcano climbing offers rare scenery and a technical experience, but it carries real hazards. This guide summarises what you need to know: safety practices, essential kit, and when to climb. Use the checklists and timing guidance to plan a safer, more predictable trip. Before you commit to dates, double-check local rules, permit windows and available rescue services; small administrative steps before departure often prevent large problems on the mountain.

    Volcano Climbing Basics

    Volcano climbing means ascending volcanic peaks with widely varying terrain and risk. Know the volcano’s recent activity, surface conditions (ash, lava, scree) and route technicality before you go. Proper preparation—route research, weather checks and gear selection—lets you manage the known hazards and reduce surprise risks. Reconnaissance is practical: study topographic maps, read recent trip reports, check official advisories and, if possible, speak with local rangers or guides who know seasonal quirks. Consider simple reconnaissance hikes close to base elevation to test boots, pack weight and team pacing before attempting a summit push.

    Essential Safety Tips:

    Climber checking safety gear before ascending a volcano, emphasizing safety in climbing

    Safety is non-negotiable. Use the following practical measures to reduce risk on the mountain:

    • Acclimatization: Gradually acclimatize to higher altitudes to prevent altitude sickness, which can severely impact your health.
    • Hydration: Maintain proper hydration levels, as climbing can lead to dehydration, especially in high-altitude environments.
    • Emergency Preparedness: Always have a plan for emergencies, including knowledge of evacuation routes and access to communication devices.
    • Protective Equipment: Wear a helmet where rockfall is possible and carry a dust/respiratory mask for ash exposure or heavy fumes; eye protection is useful in windy conditions with abrasive ash.
    • Weather Windows & Turn-Around Times: Set conservative turn-around times and respect weather windows; a disciplined turnaround decision saves lives.
    • Briefing & Decision Points: Before the climb, brief your group on critical decision points (e.g., gear thresholds, too-windy limits) and who makes the final call in an emergency.
    • Buddy Checks: Regularly check teammates for signs of hypothermia, dehydration, fatigue or AMS (acute mountain sickness) and swap responsibilities as needed.

    Apply these measures consistently. Also monitor the volcano’s current activity and brief your team on escape routes and decision points before the climb. Habitual pre-start checks (weather, radios, spare batteries, permit) and simple contingency plans for delayed return or injury make informal rescues more feasible and faster.

    Gear Checklist:

    Essential volcano climbing gear including boots, clothing layers, and safety equipment

    Right gear reduces risk and keeps you mobile. Use layered clothing, solid footwear and basic safety kit tailored to the route and season.

    • Clothing Layers: Dress in moisture-wicking base layers, insulating mid-layers, and waterproof outer layers to adapt to changing weather conditions.
    • Footwear Requirements: Invest in sturdy, waterproof hiking boots with good ankle support to navigate rocky and uneven terrain.
    • Safety Equipment: Carry a first aid kit, a map, a compass, and a multi-tool for emergencies.
    • Headlamp & Spare Batteries: Essential for early starts, late descents or sudden delays.
    • Trekking Poles: Help with balance on scree and steep slopes and reduce fatigue on long descents.
    • Sunglasses & Sun Protection: High-altitude sun exposure is stronger; include SPF lip balm and sunscreen.
    • Respiratory Protection: A close-fitting dust mask (e.g., N95-equivalent) can reduce inhalation of ash or dust in windy conditions.
    • Portable Power: Keep a charged power bank and cables for GPS, phone or emergency beacon.

    Gear TypeDescriptionImportance
    Clothing LayersMoisture-wicking, insulating, and waterproofProtects against weather changes
    FootwearSturdy, waterproof hiking bootsProvides support and traction
    Safety EquipmentFirst aid kit, map, compassEssential for emergencies

    Use the table and list to build a pack that matches the route’s exposure, duration and altitude. Test gear on shorter hikes before your climb. Pack smart: place frequently used items (map, first aid, headlamp, water) near the top or in accessible pockets and distribute weight so the load feels stable when you move across uneven ground. If you hire a guide or join an organized trip, confirm group kit responsibilities to avoid duplication and ensure essential items are carried.

    Which Volcanic Hazards Pose the Greatest Risks to Climbers?

    Climbers should be aware of several volcanic hazards that can pose significant risks:

    • Lava Flows: These can occur unexpectedly and can be extremely dangerous.
    • Gas Emissions: Volcanic gases can be toxic and may lead to respiratory issues.
    • Rockfalls: Loose rocks can fall from the volcano’s slopes, posing a risk to climbers below.

    Know the hazard profile for your objective and plan mitigations: safe distances for gas, route choices to avoid unstable slopes and contingency plans for sudden flows or rockfall. Be alert to precursor signals such as fresh steaming, new fumaroles or sudden increases in gas smell; if you are unsure about current conditions, delay or cancel the climb. Where lahars (mudflows) are possible, avoid low gullies and river channels during and after heavy rain. For further insights, refer to the mountain weather for climbers.

    A clear grasp of volcanic hazards and their potential for catastrophic events is the foundation of any effective risk assessment for climbers.

    Understanding Volcanic Hazards & Risk Assessment

    This chapter reviews the physical characteristics of a wide range of volcanic hazards pertinent to assessments of vulnerability and risk with respect to humans, buildings, lifelines, and other infrastructure. When deaths related indirectly to eruptions are excluded, the record of fatalities from eruptions is dominated by a few catastrophic events that produced numerous deaths as a result of pyroclastic flows, lahars, or tsunamis.

    Volcanic hazards risk assessment, RJ Blong, 1996

    What Strategies and Equipment Mitigate Volcano Climbing Risks?

    To enhance safety during volcano climbing, climbers should employ specific strategies and utilize appropriate equipment:

    • Use of GPS Devices: GPS devices can help navigate challenging terrains and keep track of the climbing route.
    • Communication Tools: Carrying a satellite phone or radio can ensure communication in case of emergencies.
    • Group Climbing: Climbing in groups can provide support and increase safety through shared resources and knowledge.

    These strategies and equipment can significantly reduce the risks associated with volcano climbing, allowing climbers to focus on the adventure. In addition to hardware, invest time in practical skills: navigation with map and compass, basic wilderness first aid, and familiarisation with your chosen GPS interface. Practice using communication devices before you leave and agree how and when they will be used during the trip.

    New technologies like real-time climber tracking are being developed to strengthen disaster prevention and response.

    Real-Time Climber Tracking for Volcanic Disaster Prevention

    We carry out experiments to grasp the movement of climbers as well as an experiment to share the disaster situation with related organizations in real time, at Nasudake in 2020 and Ontakesan in 2022. In the experiments, small beacons are distributed to many climbers, and their movements are detected by receivers installed on mountain trails in advance. We build an online viewer to visualize the monitoring results on a web map in real time, and share them with the related organizations, and exchange opinions with them about the use of the acquired data for disaster prevention. Based on the results of the experiments, we consider how to solve problems related to volcanic disaster prevention during not only disasters but also normal times, such as updating drills and revising evacuation plans.

    Consideration for Solving Problems Related to Volcanic Disaster Prevention by Real-Time Grasping of Climber Movement, 2023

    Optimal Climbing Seasons:

    Timing your ascent reduces weather-related risk and improves conditions on the route. Choose windows with stable weather and lower hazard probability for the specific volcano. Seasonal windows vary with latitude and elevation, so a popular local season does not necessarily apply to every route on a given mountain.

    When Are the Best Times and Seasons to Climb Volcanoes Safely?

    Generally, the optimal climbing seasons for volcanoes are during the dry months when weather conditions are more stable. For many regions, this typically falls between late spring and early fall. Climbers should research the specific volcano they plan to ascend to determine the best time for their expedition. Also consider how elevation changes microclimates: summit conditions may remain winter-like while lower slopes are temperate.

    How Do Seasonal Weather Patterns Affect Volcano Climbing Conditions?

    Seasonal weather patterns can significantly impact climbing conditions. For instance, heavy rainfall can lead to mudslides, while snow can create hazardous icy conditions. Understanding these patterns helps climbers prepare adequately for their ascent. Keep in mind that short storms can create rapidly deteriorating visibility and rapidly change slope stability, so carry weatherproof layers and plan shorter daily gains during volatile seasons.

    Which Months Offer Optimal Climbing Windows for Popular Volcanoes?

    Many popular volcanoes have specific months that are considered ideal for climbing. For example, climbing Mount Kilimanjaro is best from January to March and June to October, while Mount Fuji is most accessible from July to September. Researching these windows can help climbers plan their trips effectively. If your objective is less-travelled, check local guide operator calendars and park advisories for up-to-date closures or seasonal access limitations.

    How Do Climbing Routes and Permit Requirements Influence Volcano Expedition Planning?

    Different volcanoes have various climbing routes, each with its own level of difficulty. Some routes may require permits, which can influence expedition planning. Climbers should familiarize themselves with the specific requirements for the volcano they intend to climb, including any necessary permits and regulations. In many areas, permits are used to limit numbers and protect sensitive terrain; secure permits early and carry physical or digital proof while on the trail.

    What Are the Common Climbing Routes and Their Difficulty Levels?

    Common climbing routes vary in difficulty, from beginner-friendly paths to challenging ascents requiring technical skills. For instance, the Inca Trail to the summit of Cotopaxi is a popular route that offers stunning views but requires a moderate level of fitness. Understanding the difficulty levels of different routes is crucial for selecting the right climb. Look for route descriptions that note altitude gain per day, expected terrain type (scree, snow, volcanic rock) and recommended experience level.

    How and Where Can Climbers Obtain Necessary Permits?

    Permits for climbing volcanoes can often be obtained through local authorities or national parks. It is essential for climbers to secure these permits in advance to avoid any last-minute issues. Checking the specific requirements for each volcano is vital for a smooth climbing experience. When available, buy permits from official portals or authorised visitor centres and confirm whether guides are mandatory; if hiring a guide, confirm they are licensed and insured.

    What Emergency Procedures and Rescue Protocols Should Volcano Climbers Know?

    Climbers should be familiar with emergency procedures and rescue protocols in case of an incident. This includes knowing how to signal for help, the location of the nearest medical facilities, and the steps to take in case of an evacuation. Being prepared can make a significant difference in emergency situations. Know the local emergency numbers, planned evacuation assembly points and whether helicopter extraction is available for the area you are visiting.

    How to Recognize and Respond to Volcano Eruption Hazards During a Climb?

    Recognizing signs of volcanic activity, such as increased gas emissions or seismic activity, is crucial for climbers. If any signs of an eruption are detected, climbers should follow established evacuation routes and protocols to ensure their safety. Practice rapid retreat drills with your team so everyone knows where to go and how to move quickly while carrying pack and emergency kit.

    What Are the Recommended Rescue and Evacuation Procedures?

    In the event of an emergency, climbers should follow the established rescue and evacuation procedures outlined by local authorities. This may include moving to designated safe zones and awaiting further instructions from rescue teams. Keep in mind that evacuations may require moving crosswind from ash plumes and avoiding natural channels that can funnel pyroclastic flows or lahars.

    Which Volcanoes Are Considered the Best and Safest to Climb Globally?

    Some volcanoes are renowned for their safety and accessibility for climbers. For example, Mount St. Helens in the United States offers well-maintained trails and clear safety guidelines. Researching and selecting safer volcanoes can enhance the climbing experience. Prioritise objectives with established trail maintenance, clear signposting and reliable park support for visitors when possible.

    What Criteria Define the Best Volcanoes for Climbing?

    The best volcanoes for climbing are often defined by their accessibility, established routes, and safety records. Climbers should consider these factors when planning their expeditions to ensure a rewarding experience. Other helpful criteria include the availability of guided services, rescue infrastructure, and solid trip reports from recent seasons.

    What Are Examples of Popular Volcanoes with Established Climbing Routes?

    Popular volcanoes with established climbing routes include Mount Kilimanjaro, Mount Fuji, and Mount St. Helens. These volcanoes offer a range of climbing experiences suitable for different skill levels. When selecting an objective, compare route length, total elevation gain and the presence of technical sections to match your skill set.

    How Can Climbers Monitor Volcanic Activity and Stay Updated on Safety Alerts?

    Climbers should utilize resources such as geological surveys and local news outlets to monitor volcanic activity. Staying informed about any changes in volcanic conditions is essential for safety. Subscribe to official alert feeds, follow park ranger accounts where available, and set reminders to check conditions in the week leading up to travel.

    What Resources Provide Real-Time Volcanic Activity and Eruption Data?

    Several online platforms provide real-time data on volcanic activity, including the United States Geological Survey (USGS) and the Global Volcanism Program. These resources can help climbers stay updated on potential hazards. Local universities and national geological agencies often maintain more detailed advisories specific to particular volcanoes, so combine global feeds with regional information.

    How to Integrate Volcanic Alerts into Climbing Trip Planning?

    Incorporating volcanic alerts into trip planning involves regularly checking for updates and adjusting plans accordingly. This proactive approach can help climbers avoid dangerous situations. Build flexibility into travel plans and keep alternate objectives so that a sudden advisory does not force a hazardous decision on summit day.

    What Are the Latest Safety Protocols and Best Practices in Volcano Climbing?

    Staying informed about the latest safety protocols and best practices is crucial for climbers. This includes understanding the current guidelines from local authorities and adhering to established safety measures. Practical best practices include conservative pacing, prioritising team safety over summit success, and maintaining effective group communication throughout the climb.

    Which Organizations and Research Inform Current Volcano Climbing Safety Standards?

    Organizations such as the International Association of Volcanology and Chemistry of the Earth’s Interior (IAVCEI) provide valuable research and guidelines for safe climbing practices. Engaging with these resources can enhance climbers’ knowledge and safety. Local park services, mountain rescue organisations and university geological departments are additional sources of applied guidance and region-specific advice.

    How Have Recent Case Studies Influenced Climbing Safety Recommendations?

    Recent case studies on volcanic eruptions and climbing incidents have led to updated safety recommendations. Analyzing these cases helps climbers understand potential risks and improve their preparedness. Operators and agencies now emphasise pre-trip briefings, stricter permit controls, and better on-trail monitoring in high-use volcanic areas.

    Tragic incidents have shown why safety protocols and risk mitigation must continually improve for people visiting volcanic areas.

    Ensuring Volcano Visitor Safety & Risk Mitigation

    Based on the growing popularity of active and dormant volcanic destinations, it is crucial for all stakeholders involved (monitoring agencies, emergency services, local authorities) to do everything in their power to ensure that visitors in active volcanic areas are as safe as possible. An unfortunate reminder that there is much room for improvement was the tragic event from December 2019 in New Zealand, when the active volcano Whakaari (White Island) erupted, resulting in the death of 22 volcano tourists including tour guides who were present on the island at the time of the eruption. As vast numbers of volcanic environments and their distinct geodiversity are used for a wide range of outdoor activities worldwide, the implementation of suitable safety measures for volcano tourists, especially in active environments, is more than ever of unquestionable importance with no time to lose.

    Volcano tourism and visitor safety: still playing with fire? a 10-year update, 2022

    Frequently Asked Questions

    What should I do if I encounter a volcanic eruption while climbing?

    If you detect increased gas, ash, or seismic signs of an eruption, stay calm and move away from the volcano along pre-identified evacuation routes. Head crosswind from plumes, avoid gullies that channel pyroclastic flows or lahars, and seek higher ground if instructed. Notify your group and local authorities via your communication device and follow their directions. As you retreat, protect your airway and eyes where possible, move deliberately to the closest safe zone and account for every team member at pre-arranged checkpoints.

    How can I prepare for altitude sickness when climbing a volcano?

    Acclimatise slowly: spend days at intermediate elevations and limit nightly gains. Stay well hydrated, eat enough carbohydrates and avoid alcohol. If you develop persistent headache, nausea or dizziness, descend immediately and seek medical help. Consider carrying altitude medication if advised by a medical professional and practise conservative pacing during the ascent. For detailed information on climbing techniques, refer to expert mountaineering guide.

    What are the best practices for climbing in a group?

    Agree roles and communication signals before you start. Keep the group together at a pace that suits the slowest member. Share navigation and safety gear, perform regular status checks, and decide go/no‑go points in advance. Establish a simple lost-person protocol (e.g., wait times, whistle signals) and run through it before departure so everyone understands the plan.

    How do I choose the right climbing route for my skill level?

    Match route difficulty to your fitness and technical ability. Check route descriptions, elevation gain, surface type and objective hazards. When in doubt, pick a well-marked, lower-exposure route and build experience progressively. Read recent trip reports to verify that trail conditions match published descriptions; conditions on volcanic slopes can change seasonally.

    What should I include in my emergency kit for volcano climbing?

    Pack a compact first aid kit, whistle, headlamp with spare batteries, multi-tool, and a map. Add non-perishable food, water purification tablets, thermal blanket and a portable charger or satellite communicator. Keep the kit accessible and practice using items before the trip. Store small repair items (duct tape, cord) and a basic splint in case of limb injury; a lightweight shelter or tarp can be valuable during unexpected waits.

    How can I stay informed about volcanic activity before my climb?

    Check updates from the USGS or your country’s geological agency, follow local park authorities and monitor local media. Join local climbing groups or contact ranger stations for recent route and hazard reports. Set a schedule to re-check activity alerts in the 72 hours leading up to departure and again the morning of your planned ascent.

    What are the environmental considerations when climbing a volcano?

    Follow Leave No Trace: stay on marked trails, carry out waste and avoid disturbing wildlife. Respect cultural sites and local rules set by indigenous groups or authorities to protect both the environment and local communities. Use existing campsites where provided and avoid creating new fire rings or disturbances; fragile volcanic soils and vegetation recover slowly from trampling.

    Conclusion

    Volcano climbing is rewarding but requires disciplined planning and risk management. Use the safety tips, gear checklist and season guidance here to build a clear plan, monitor volcanic activity, and prepare emergency procedures. With the right preparation you reduce risk and increase the chance of a safe, successful ascent. Prioritise conservative decision-making, practice essential skills in safer environments and keep safety conversations part of every stage of your trip.

  • Alps Regional Planning: Routes, Logistics & Safety

    Alps Regional Planning: Routes, Logistics & Safety

    Comprehensive Alps Regional Planning: Routes, Logistics & Safety for Alpine Expeditions

    By Travis Ludlow, Global Summit Guide

    Planning an Alps expedition requires knowledge of the region’s specific challenges and practical steps. This guide focuses on route choice, logistics and safety protocols. You will learn how to select and navigate hiking routes, read difficulty ratings, plan transport and accommodation, prepare essential gear, and work with professional guides. We also cover environmental factors and how technology can support your preparation.

    Use this guide as a structured checklist while you research and prepare. Start by defining objectives (day hikes, multi-day treks, technical climbs), then build timelines, budget estimates and contingency plans. Early decisions—season, group size, fitness levels—shape route options, permit needs and equipment lists. Updating the plan regularly as you approach departure ensures decisions reflect the latest conditions and operator availability.

    How do I select and navigate the best Alps hiking routes?

    Choose routes by matching terrain, weather and your fitness. Check trail grade, elevation gain and technical sections before you go. Use GPS devices or hiking apps for navigation and cross-check with a paper map. Always review recent weather forecasts and trail reports before departure.

    Interactive maps and annotated routes help you visualize the line, see elevation profiles and identify hazards. Use tools that show waypoints, water sources and shelter locations. Enable live updates where possible to receive recent trail-condition reports.

    When selecting a route, follow a simple decision workflow: identify candidate routes that meet your objective, filter by technical difficulty and elevation, confirm seasonal access (snow and glacier presence), then check logistics for start and end points. For multi-day plans, build daily stage targets that account for daylight hours and terrain difficulty rather than only distance. Incorporate rest and acclimatisation days in your route timeline to reduce fatigue and altitude risk.

    • Pre-selection checklist: objective, distance, elevation gain, technical grade, water and shelter availability, nearest emergency access.
    • On-route navigation plan: primary GPS track, paper map & compass backup, predefined waypoints, and a decision point schedule for turnarounds or bailouts.

    What are the key route types and difficulty ratings in the Alps?

    Diverse hiking trails in the Alps showcasing different terrains and difficulty levels

    The Alps host several route categories. Knowing the type helps set expectations and plan gear and time.

    • Hiking Trails: Generally well-marked and suitable for all skill levels, these trails offer scenic views and moderate challenges.
    • Trekking Routes: More demanding than standard hiking trails, trekking routes often involve longer distances and varied terrain, requiring a higher level of fitness.
    • Climbing Routes: These routes are designed for experienced climbers and may include technical sections requiring specialized gear and skills.

    Difficulty ratings run from easy to very difficult. Use the rating plus distance and elevation to assess whether a route matches your skills.

    Beyond the broad categories above, consider sub-factors that influence perceived difficulty. Rocky or exposed ridgelines increase time and concentration requirements; loose scree slows progress and increases fatigue; glaciers and snowfields demand specific equipment and route-finding skills. Seasonal timing affects difficulty: late spring or early autumn can leave high passes with lingering snow, while late summer may expose more loose rock due to melt.

    • Terrain modifiers: exposure, technical moves, objective hazards (rockfall, crevasses), and distance between shelters.
    • Seasonal modifiers: persistent snowpack, glacier melt patterns, and daylight variation.

    How can interactive maps and route annotations improve navigation?

    Digital maps provide trail lines, elevation charts, points of interest and hazard markers. They make planning and on-route decisions faster and clearer.

    • Semantic Annotations: These enhance the user experience by providing context-specific information, such as nearby water sources or rest areas.
    • User-Generated Content: Many platforms allow hikers to share their experiences, offering insights into trail conditions and recommendations.
    • Visual Aids: Interactive maps often include photos and videos, helping hikers visualize the terrain and prepare accordingly.

    Use these resources to improve route planning, reduce navigation errors and anticipate logistical needs. mountain route comparisons

    Practical tips when relying on digital tools: download offline maps and tracks before you leave mobile coverage, save multiple track files (primary and alternative), and keep a printable map copy in a waterproof sleeve. Record waypoints for critical locations—trail junctions, water sources and potential shelters. Manage power by carrying spare batteries or a power bank designed for outdoor use and by turning off non-essential connectivity while hiking.

    • Backup strategy: Offline maps + paper map; primary GPS + phone as secondary; fully charged batteries + spares.
    • Annotation practice: Mark bail-out routes, emergency rendezvous points, and estimated times between waypoints.

    What essential logistics should I plan for an Alps expedition?

    Logistics cover transport, lodging and permits. Plan each element to avoid delays and keep your schedule flexible for weather or route changes.

    Which transport and accommodation options best support alpine trips?

    When choosing transport and accommodation, weigh access, cost and timing. Select options that minimise transit time to trailheads and provide contingency plans.

    Transport OptionDescriptionBenefits
    TrainsExtensive rail network connecting major cities and townsEco-friendly, scenic views
    BusesLocal bus services reach remote areasCost-effective, flexible schedules
    Car RentalsIdeal for exploring off-the-beaten-path locationsConvenience, freedom to explore

    Accommodation ranges from hotels and lodges to campsites and mountain huts. Book popular huts in advance and choose based on resupply needs, shelter and group size.

    When arranging transport, create a transit timeline that aligns public transport timetables with your route start times. If relying on local buses or seasonal shuttle services, confirm timetables close to departure as schedules change seasonally. If driving, plan parking logistics at trailheads and consider vehicle shuttles when start and end points differ.

    • Booking tips: reserve mountain huts early (peak season fills quickly), confirm check-in policies, and identify alternative lodging in nearby valleys.
    • Resupply planning: note towns with shops and opening hours; plan food quantities for each stage with a reserve margin.

    What permits and regulatory considerations are required for climbing in the Alps?

    Many routes and protected areas have specific permit rules. Research local requirements early and obtain necessary permits before travel.

    • Permit Requirements: Some areas may require climbing permits, especially for popular or protected routes.
    • Regulatory Considerations: Familiarize yourself with local regulations regarding environmental protection and safety standards to ensure compliance during your expedition.

    Clear logistics planning reduces the chance of fines, denied access or unnecessary delays on route.

    Permit and access steps: identify the managing authority for the region or protected area, review online permit procedures and fees, note application lead times, and keep digital and printed copies of permits during travel. Some huts or refuges require advance booking and a deposit; check cancellation and no-show policies. Verify vehicle restrictions where certain mountain roads close seasonally or require special passes.

    Which gear and safety protocols are critical for mountain climbing in the Alps?

    Essential alpine climbing gear including harness, ice axe, and helmet on a rocky surface

    Correct equipment and consistent safety checks are essential. Gear influences your ability to manage technical sections, weather and emergencies.

    What safety equipment is essential for alpine climbing?

    Core safety items include a certified climbing harness, ice axe and crampons for snow and ice, and a helmet to protect from rockfall.

    • Climbing Harness: Provides support and safety during ascents and descents.
    • Ice Axe and Crampons: Crucial for navigating icy terrain and maintaining traction.
    • Helmet: Protects against falling rocks and other hazards.

    Buy reliable equipment, fit it properly and inspect it before each trip.

    Build a comprehensive gear list around the route type and expected conditions. Clothing should follow a layering system: base layer for moisture management, insulating mid-layer, and a waterproof/breathable outer shell. Footwear must match terrain—stiffer boots for glacier travel or heavy scree, flexible footwear for light trails. Include a compact repair kit (cord, multi-tool, duct tape), a lightweight emergency shelter or bivvy, headlamp with spare batteries, and a refillable water system plus purification option. Prepare a personal kit and a group kit, where shared items (e.g., rope, ice screws, stove, group first-aid) are listed and assigned before departure.

    • Clothing & footwear: layering system, spare socks, gaiters for scree/snow.
    • Group equipment: rope, anchor slings, ascenders or prusiks if needed, multi-person shelter.
    • Personal safety: whistle, mirror, personal locator beacon or satellite messenger for remote areas.

    How do I prepare for altitude sickness and other alpine hazards?

    High altitude can cause headaches, nausea and reduced performance. Plan acclimatisation days and recognize symptoms early.

    • Acclimatization Strategies: Gradually ascend to higher altitudes to allow your body to adjust.
    • Emergency Preparedness: Carry essential supplies, such as oxygen and first aid kits, to address potential health issues promptly.

    Prepare an emergency plan, carry a first-aid kit and know descent routes. If symptoms worsen, descend immediately.

    Recognise early symptoms of altitude-related illness—headache, nausea, sleep disturbance, and reduced exercise tolerance—and adopt a conservative approach if they appear. Schedule lower-intensity days after significant elevation gain and allow full rest days for acclimatisation. Hydration and good nutrition support acclimatisation. For other hazards, practice movement on exposed and loose terrain in training, rehearse ropework and crevasse rescue basics if glaciers are involved, and learn how to mitigate rockfall risk by spacing team members and moving deliberately when crossing exposed slopes.

    • Emergency plan components: assigned leader, communication plan, nearest evacuation points, and designated meeting points in poor visibility.
    • Medical kit: items to treat common alpine issues—blisters, sprains, hypothermia prevention—and clear instructions on when to evacuate for professional care.

    How do professional operators and climbing guides enhance Alps expeditions?

    Qualified operators and guides improve safety, route selection and logistics. They add local knowledge and structured emergency procedures.

    What services and certifications should I look for in alpine guides?

    Pick guides with recognised certifications, local route experience and clear safety procedures.

    • Certified Training: Look for guides with recognized certifications, such as those from the International Federation of Mountain Guides Associations (IFMGA).
    • Local Knowledge: Experienced guides possess valuable insights into the terrain, weather patterns, and potential hazards.
    • Safety Protocols: Ensure that the guide follows established safety protocols and carries necessary equipment.

    A qualified guide reduces risk, speeds decision-making and improves your learning on the mountain.

    When evaluating operators, ask about group size limits, emergency insurance and evacuation procedures, guide-to-client ratios, recent route experience in the exact area you plan to visit, and whether guides provide technical training during the expedition. Request references or reviews from recent clients, and confirm that the operator maintains equipment standards and regular guide training. Ensure the operator can accommodate your objectives (e.g., skill development, summit attempts, photography-focused trips) and understands your group’s fitness and experience levels. mountains

    • Questions to ask: lead guide experience on the route, contingency plans, equipment provided, cancellation and refund policies.
    • Documentation: contracts, permits handled, and emergency contact lists.

    How do operators support route navigation and safety management?

    Operators deliver briefings, use monitoring tools for weather and trail status, and maintain emergency plans.

    • Pre-Expedition Briefings: Informing climbers about the route, potential hazards, and safety measures.
    • Real-Time Monitoring: Utilizing technology to track weather conditions and trail status, ensuring climbers are informed of any changes.
    • Emergency Response Plans: Having established protocols in place to address emergencies effectively.

    Their support helps you focus on the climb while they manage logistics and risk.

    Operators can coordinate local transport, manage hut reservations, stage caches of fuel or food if allowed, and liaise with local rescue services when necessary. Their situational awareness—recent route conditions, shepherded local advice, and vetted weather sources—often compensates for gaps in individual planning. Confirm what is included in the operator package and what responsibilities remain with clients, such as personal equipment or travel to the meeting point.

    What environmental and regulatory factors impact Alps regional planning?

    Environmental protections and local regulations shape route access and acceptable behaviour. Plan to meet both safety and conservation requirements.

    How does climate change affect alpine safety and route conditions?

    Climate change increases weather variability and alters snow and glacier conditions. Expect faster melt, rockfall and new route hazards.

    • Changing Weather Patterns: Increased unpredictability in weather can lead to sudden storms or temperature fluctuations.
    • Increased Hazards: Melting glaciers and unstable snow conditions can create new dangers for climbers.

    Account for changing conditions in route choice, timing and safety margins.

    Adapt route selection to account for seasonal and longer-term changes. Routes that were safe in past decades may now feature unstable rock or receding snow that changes approach lines. When possible, consult recent trip reports or local guides for up-to-date route descriptions. Accept that some classic lines may require different techniques or timing to remain safe.

    What are the key environmental protections and regulations for alpine expeditions?

    Follow conservation rules such as Leave No Trace and local waste policies to protect habitats and maintain access.

    • Leave No Trace Principles: Encouraging climbers to minimize their impact on the environment.
    • Waste Management Regulations: Ensuring proper disposal of waste to protect local ecosystems.

    Compliance preserves landscapes and avoids penalties.

    Specific regulatory items to check: seasonal closures for wildlife breeding, designated camping zones, fire restrictions and human waste management rules for huts and high-use areas. In many locations, carrying out all non-biodegradable waste and properly storing food to avoid wildlife encounters are mandatory. Respect local signage and community rules to maintain good relations between visitors and local residents.

    How can technology and recent case studies improve Alps expedition planning?

    Use technology to improve planning, navigation and permit management. Verify digital data with local sources.

    What emerging technologies support alpine safety and permit verification?

    Tools like GPS units provide accurate positioning. Blockchain-based permit systems can verify authorisations where used.

    • GPS Navigation Systems: Providing accurate location tracking and route guidance.
    • Blockchain Applications: Ensuring secure and transparent permit verification processes.

    Combine tech tools with traditional navigation and local briefings for robust planning.

    Other useful technologies include satellite messengers or personal locator beacons for remote communication when mobile coverage is absent, and multi-function devices that combine GPS, altimeter and barometer readings to help interpret changing conditions. Always cross-check automated guidance with topographic maps and local advice to avoid over-reliance on any single data source. Keep firmware and map data up to date before departure.

    What lessons do recent 2023 alpine expeditions provide for planners?

    Recent expeditions show that flexible plans and local collaboration reduce risk and improve outcomes.

    • Adaptability: The ability to adjust plans based on real-time conditions is crucial for safety.
    • Community Engagement: Collaborating with local communities can provide valuable insights and support for expeditions.

    Apply adaptability and community input to your planning to increase safety and efficiency.

    Case observations underscore the benefits of building redundancy into itineraries—extra days for weather delays, alternative lower routes, and shared contingency funds. Partnerships with local guides and hut-keepers often unlock rapid updates on trail conditions, short-notice transport changes, and practical advice on water availability or shelter status. Emphasise communication: ensure family or colleagues know your revised plans so any emergency response is coordinated and informed.

    How do I monitor and update my Alps expedition plans effectively?

    Maintain an active plan that you update as conditions change. Assign responsibilities for monitoring weather and route reports.

    Which tools and alerts provide real-time alpine weather and hazard updates?

    Use interactive maps and reliable weather services to receive live updates on conditions and hazards.

    • Interactive Maps: Offering live updates on trail conditions and weather forecasts.
    • Weather Forecasting Tools: Providing accurate and timely information about changing weather patterns.

    Regularly check these tools during the lead-up and while on route to stay ahead of hazards.

    Create an information flow where one person monitors updates (a designated planner or leader) and communicates significant changes to the group. Use a simple notation system for changes (green = no change, amber = monitor, red = act) and set review intervals—daily for immediate pre-departure and twice daily while on longer treks. If operating with an external guide or operator, confirm how they will convey alerts and whether they will change plans on your behalf.

    How often should I review and update routes, safety info, and operator listings?

    Review routes, safety information and operator listings regularly. Track changes and update team plans.

    • Conduct Reviews: At least once a month leading up to the expedition.
    • Document Changes: Keep a record of any updates to routes or safety protocols.

    Monthly reviews in the lead-up and immediate checks before departure keep plans current.

    In the final two weeks, increase review cadence to weekly or every few days depending on weather volatility. Maintain a single source of truth for the plan—a shared document or checklist—so all team members reference the same latest version. Keep contact details for local authorities, hut managers and transport providers easily accessible in both digital and printed form.

    What are the best practices for integrating semantic data and structured content in Alps planning?

    Structured data improves how route, gear and safety details are organised and searched.

    How does schema.org markup enhance alpine route and gear information?

    Applying schema.org helps search engines and tools present route and gear data more clearly to users.

    Use route and place-oriented schema types to mark up key attributes such as difficulty, elevation gain, and required permits. Structured markup enables richer search result snippets and better integration with mapping and planning tools, improving discoverability and clarity for users searching for route-specific guidance.

    What multimodal content optimizations improve user understanding and engagement?

    Use interactive maps and infographics to simplify complex information and aid decision-making.

    • Incorporating Interactive Maps: Allowing users to visualize routes and conditions.
    • Using Infographics: Presenting complex information in an easily digestible format.

    They make planning faster and reduce misinterpretation of technical details.

    Multimodal assets that combine annotated photos, short video clips of technical sections and simple elevation graphs help users form realistic expectations. For example, an annotated photo showing the line for a tricky ridge gives a clearer sense of exposure than a text description alone. Ensure multimedia includes captions and alt text to retain accessibility and search visibility.

    Frequently Asked Questions

    What should I consider when choosing the best time for an Alps expedition?

    Pick timing based on weather, trail access and your objectives. Summer (June–September) generally offers the most stable conditions for hiking. Spring and autumn can reduce crowds but expect more variable weather. Always check local forecasts and recent trail reports before committing.

    Also factor in hut opening dates, snowmelt timing for higher passes, and local festival or peak-season traffic. If seeking quiet routes, early summer shoulder periods often balance stable conditions with fewer visitors. For late-season objectives, plan for colder nights, shorter days and early returns to lower elevations.

    How can I ensure my physical fitness is adequate for an Alps expedition?

    Begin a training plan months before travel. Prioritise aerobic fitness, leg strength and flexibility. Include hikes with a loaded pack to simulate conditions, and train on similar terrain. If possible, practise at altitude or schedule gradual acclimatisation. Consult a coach for personalised guidance.

    Progressive overload works well: increase weekly hiking distance and elevation gain gradually, include hill repeats for strength and stair or weighted step training for power. Add cross-training—cycling or swimming—to build aerobic base without excessive joint stress. Include practice days matching expected daily stage durations and weight carried to gauge pacing and nutrition needs.

    What are the best practices for minimizing environmental impact during an expedition?

    Minimize impact by following Leave No Trace: pack out waste, stay on marked paths and avoid wildlife disturbance. Use biodegradable products where allowed and keep noise low. Learn local species and rules to reduce unintended harm.

    When camping, use durable surfaces for tents, avoid creating new fire rings, and use portable stoves where open fires are restricted. Dispose of human waste according to local regulations—some high-use areas require packing out waste or using designated facilities. Encourage team members to adopt consistent low-impact habits to reduce cumulative effects across trips.

    How can I effectively communicate with my expedition team during the climb?

    Agree on communication methods before the climb: radios, signals and check-in intervals. Assign a lead and set regular meeting points. Practice non-verbal signals and ensure everyone knows emergency procedures.

    Establish clear expectations for pacing, rest stops and decision-making authority. For larger groups, split into smaller pairs with designated pair leaders and pre-agreed check-in intervals. Carry compact, standardized checklists for emergency steps so all members can reference the same procedures during stressful situations.

    What role does nutrition play in preparing for an Alps expedition?

    Fuel preparation with a balanced diet: carbohydrates for energy, protein for recovery and fats for endurance. On route, eat frequent small, high-energy snacks such as nuts and energy bars. Keep hydrated; carry extra water and note refill points.

    Before the expedition, build calorie intake and macronutrient planning around training load to ensure energy stores and recovery are adequate. Practice nutrition strategies on training hikes to identify foods that sit well and supplies that are easy to access while moving. Include electrolyte sources to support hydration and consider easily prepared hot meals in colder conditions to support morale and warmth.

    What are the common challenges faced during an Alps expedition, and how can I prepare for them?

    Prepare for variable weather, altitude effects and technical terrain. Study route descriptions, monitor forecasts and include acclimatisation days. Train on similar terrain and carry gear for wet, cold and steep conditions. Plan escape routes and set conservative turnaround decisions.

    Additional common challenges include late-season objective hazards (rockfall, melting snow bridges), transport cancellations, and hut overbooking. Build contingency time into itineraries, maintain reserve funds for unexpected costs, and keep flexible transport options where possible. Prioritise conservative decision-making: it is usually safer to turn back and attempt again than to press on into deteriorating conditions.

    Conclusion

    Effective planning gives you safer, more enjoyable Alps expeditions. Use the route, logistics and gear guidance in this guide and consult professional operators when needed. Start planning with up-to-date maps, clear checklists and confirmed permits.

    Summary checklist: define objectives and season, shortlist routes and verify difficulty, confirm transport and accommodation, assemble and test gear, schedule acclimatisation, assign roles for monitoring and communication, and document emergency procedures. Revisit and revise the plan regularly as departure approaches and keep backup options ready.

  • When To Climb: Peak vs Shoulder Season Strategies

    When To Climb: Peak vs Shoulder Season Strategies

    Best Time To Climb Mountains: When To Climb – Peak vs Shoulder Season Strategies

    By Travis Ludlow, Global Summit Guide

    Timing your climb affects both safety and enjoyment. Peak seasons usually give more stable weather and higher success rates; shoulder seasons offer fewer crowds and lower costs but more variable conditions. This guide explains what peak and shoulder seasons mean, the typical weather you’ll face, the main benefits and risks of each, and how to plan expeditions around seasonal factors.

    Peak Season Strategies

    Peak season is the period when local conditions are most favourable for climbing: more stable weather, milder temperatures, and clearer skies. These factors improve visibility and reduce weather-related hazards, so plan routes and logistics to match peak windows for your chosen range.

    Regional timing varies. For example, the Himalayas see peak conditions in April–May; the Andes are often best from June–August. Expect larger crowds during peak times, which can increase route congestion and introduce additional safety considerations.

    During peak season you can rely on established guide services and operators who are familiar with typical conditions. Use reputable sources—such as established guide services and climbing information hubs—to confirm timing, permits and logistical details before you book.

    Beyond weather, peak windows simplify many operational tasks: resupply options, vehicle access, and medical evacuation procedures tend to run more predictably because local services work at higher capacity. When booking during a peak period, prioritise operators who publish clear itineraries and contingency plans; ask specifically about group sizes, daily mileage expectations and emergency response protocols. These operational details reduce uncertainty and help teams maintain conservative margins for safety while still taking advantage of the better weather window.

    Shoulder Season Strategies

    Climbers experiencing the tranquility of shoulder season on a mountain trail

    Shoulder season covers transitional periods between peak and off-peak. Advantages include fewer people on routes and often lower permit or service costs. That solitude can make for a quieter, more focused climb.

    But shoulder seasons bring more variable weather. Temperatures and precipitation can change quickly. For example, the Rocky Mountains may still have snowstorms in late spring or early fall, so expect to adapt your gear and schedule accordingly.

    To manage shoulder season risk, monitor local forecasts, build contingency days into your itinerary, and be prepared to change plans. Consult reliable resources for route conditions and seasonal advice before departure.

    Decision-making in shoulder seasons often leans toward flexibility and conservative margins. Practically, this means setting earlier turnaround times, limiting exposure on corniced crests or unstable slopes, and choosing routes where descent options exist at multiple points. Teams should practise rapid gear changes and emergency shelter construction in training so that, if weather closes in, the group can secure itself quickly and execute a safe retreat without relying on external support that might be limited outside peak months.

    Optimal Conditions for Climbers

    Climbers celebrating their success at a mountain summit under optimal weather conditions

    Optimal conditions depend on the route and the season. Stable weather during peak windows usually raises success rates and lowers objective hazards. Shoulder season can still offer good days, but increased variability raises the need for contingency planning and conservative decision-making.

    ConditionPeak SeasonShoulder Season
    Weather StabilityHighVariable
    CrowdsHigherLower
    Success RateHigherLower

    The table summarises typical differences between seasons. When planning, also assess seasonal route hazards such as accelerated snowmelt or increased rockfall in shoulder periods, and factor those into your risk assessment.

    Interpreting these contrasts in practical terms helps teams prioritise: if your objective is technical climbing with long approach days, favour peak windows where objective hazard exposure is lower. If you prioritise solitude or photography, shoulder windows may be better but require trade-offs. Make a simple decision matrix that weights variables such as objective hazard, evacuation time, and likelihood of encountering assisted services to choose the window that matches your team’s risk tolerance and logistical capability.

    How Are Peak and Shoulder Seasons Defined in Mountaineering?

    Seasons are defined by recurring climatic patterns that influence safety and climbability. Peak seasons have extended periods of predictable, favourable weather; shoulder seasons are the transition windows with more fluctuation. For example, the Alps generally have a peak from June–September, with shoulder periods in late May and early October.

    Definitions are also shaped by local infrastructure. A “peak” on one mountain may be a shoulder period on another if local transport, rescue services and guiding operations differ. When researching a target mountain, collect information on both climate and infrastructure calendars so you understand when safe access and reliable support align with good weather.

    What Are the Typical Weather Patterns During Each Season?

    Peak seasons usually bring longer stretches of clear skies and lower precipitation probability. Shoulder seasons can include rapid temperature swings, sudden storms or late-season snow. Check multi-day forecasts and historical patterns before committing to a route.

    Look for patterns such as diurnal wind shifts, seasonal precipitation cycles and temperature inversions that can affect snow stability and visibility. Combine short-term weather models with recent trip reports to form a composite view of likely conditions for the exact dates you plan to travel.

    What Are the Advantages of Climbing in Peak Season?

    Climbing during peak season offers clear operational benefits you can use to plan safer trips. The following list highlights the main practical advantages.

    • Stable Weather Conditions: Peak seasons typically feature clear skies and minimal precipitation, which are crucial for safe climbing.
    • Higher Success Rates: With optimal conditions, climbers are more likely to reach their summits successfully.
    • Safety Considerations: Experienced guides and operators are more readily available during peak seasons, providing additional safety and support.

    In addition to those items, peak seasons tend to reduce uncertainty around rapid rescues and permit enforcement. Rescue teams operate on regular schedules during peak months, communications infrastructure is more likely to be fully staffed, and access roads are less likely to be closed. These factors lower operational risk and make it easier to keep a predictable itinerary—valuable when coordinating large teams or organising complex logistics.

    How Do Weather Conditions Favor Climbing Success in Peak Season?

    Stable temperatures and reduced precipitation let teams move efficiently and keep objective hazard exposure low. In the Himalayas, for example, clearer skies and milder conditions in peak months support safer high-altitude progress and predictable acclimatization schedules.

    Good peak weather improves visibility for route-finding and reduces time spent in exposed terrain, which directly affects fatigue and decision-making quality. Less time dealing with weather-related delays preserves energy for technical sections and lowers the cumulative physiological stress of a multi-day ascent.

    What Safety Protocols Are Recommended During Peak Season Climbs?

    Follow standard safety protocols: confirm route conditions, carry appropriate weather-resistant clothing and safety kit, and climb with experienced guides when possible. Pre-trip briefings, emergency plans and clear communication procedures further reduce risk.

    During peak operations, maintain disciplined group management: check in at scheduled intervals, set explicit turn‑around times for key objectives, and rehearse emergency procedures before leaving base camp. Even in good weather, technical problems and illness can occur; having clear leadership and an agreed decision-making framework is essential to translating peak-season advantages into safe outcomes.

    What Are the Benefits and Challenges of Shoulder Season Mountaineering?

    Shoulder season climbing brings definite benefits that appeal to certain objectives and budgets. Key benefits include:

    • Fewer Crowds: Climbers can enjoy a more solitary experience, allowing for deeper connections with nature.
    • Cost-Effectiveness: Permits and services may be less expensive during shoulder seasons, making it a more budget-friendly option.
    • Unique Experiences: Climbers may encounter different flora and fauna, as well as stunning landscapes that are less frequented.

    These upsides come with trade-offs. Expect less predictable weather and build contingency plans—extra days, flexible transport, and conservative turnaround times help manage those risks.

    Shoulder windows also provide unique opportunities for learning. Fewer groups on the route mean quieter camps and more time for navigation practice, snow condition assessment, and small-group skill-building. For guided groups, this can be an ideal time to focus on technique and client education, provided the team accepts a potentially slower schedule and a higher emphasis on self-reliance.

    How Does Shoulder Season Affect Climbing Risks and Safety?

    Shoulder season raises objective risk through more frequent and less predictable weather events. Monitor forecasts closely, set conservative decision points, and pack additional protective and emergency gear to reduce exposure to sudden storms or temperature drops.

    Risk management in shoulder months often requires more active daily assessment: evaluate overnight changes, inspect snowpack frequently, and be ready to alter route choices with short notice. Teams that practise conservative navigation and maintain simple, redundant communication plans will generally manage shoulder-season hazards better than groups that rely on rigid schedules.

    What Gear Adaptations Are Necessary for Shoulder Season Climbs?

    Gear choices should prioritise versatility and protection. Common adaptations include layered clothing systems, robust weather-resistant outer layers, and a larger emergency kit with extra food and water to cover weather-related delays.

    Practical gear checklist items to prioritise in shoulder season include:

    • Layering system with thermal base layers, insulating mid-layers and waterproof outer shells for sudden temperature swings.
    • Compact shelter options such as bivy sacks or four-season tents if you expect unexpected overnight stops.
    • Navigation aids: reliable maps, GPS device and spare batteries; compasses and basic route notes are essential in case electronic devices fail.
    • Expanded emergency kit: extra food rations, water purification tablets, repair tape and multi-tool, plus a small medical kit with high-elevation considerations.

    How Do Mountain-Specific Seasonal Considerations Influence Climbing Plans?

    Each range has distinct seasonal behaviour that affects route choice and timing. Study local microclimates and route reports—for example, the Andes can show sharp differences in conditions from one side of the range to the other—and adapt your plan and gear list to those specifics.

    Consult regional guidebooks and recent trip logs to identify season-specific hazards such as persistent cornices, spring runoff timing or late-season freeze-thaw cycles. Plan alternate routes that reduce exposure to the most volatile terrain if forecasts deteriorate or if you encounter unexpected conditions during the approach.

    What Are Seasonal Climbing Tips for Popular Mountains Like Everest and Kilimanjaro?

    When planning climbs on peaks such as Everest or Kilimanjaro, follow established timing, permitting and acclimatisation practices. Match your itinerary to known peak windows and allow time for staged ascent and contingency days.

    Know the local safety and risk-management protocols for each peak, especially in regions like East Africa, and apply them to route planning, guide selection and emergency procedures.

    Mountain Climbing Safety: Risk Management & Protocols

    This study examined safety concerns, risk management and standards of practice for preparing and handling emergencies in the East African afro‑alpine regions (Mt. Kenya, the Rwenzori and Mt. Kilimanjaro). It outlines recommended standards of practice and risk assessment approaches for outdoor adventure programmes.

    Standards of practice, risk assessment, and safety concerns in outdoor adventure programmes in the afro-alpine mountains of east

    Africa, LJ Wachira, 2022

    • Research Peak Times: Understanding the best times to climb these mountains can significantly impact success rates.
    • Book Early: Due to high demand, securing permits and guides well in advance is essential.
    • Prepare for Altitude: Climbers should acclimatize properly to avoid altitude sickness, which can be more prevalent during peak seasons.

    For high-profile mountains with complex logistics, break planning into phases: permit and transport, gear and supplies, acclimatisation schedule, and emergency contingencies. Allocate time early in the planning phase to confirm each of these elements so you can pivot quickly if permit windows shift, flights are delayed, or local conditions change.

    How Does Elevation and Location Impact Seasonal Climbing Strategies?

    Elevation magnifies weather effects: higher terrain can stay colder and retain snow longer. Location matters too—exposure, aspect and local wind patterns change conditions. For example, the Rockies can see snow at higher elevations well into late spring, while lower routes may be stable.

    How Should Climbers Plan Expeditions According to Seasonal Factors?

    Effective seasonal planning focuses on three practical steps:

    • Monitor Weather Patterns: Staying informed about local weather forecasts can help climbers anticipate changes and adjust their plans.
    • Understand Permit Requirements: Different seasons may have varying permit requirements, so climbers should research these in advance.
    • Utilize Seasonal Climbing Calendars: Climbers can benefit from using seasonal climbing calendars to identify the best times for their expeditions.

    Expand each of those three steps into day-by-day actions when you build an itinerary. For monitoring, set specific times to check short-term forecasts and delegate a team member to interpret models. For permits, create a timeline that lists key deadlines and contact points for local authorities. For calendars, cross-reference historic trip reports with current-year weather and route updates so you have both context and contemporary input when making final decisions.

    What Are the Permit Requirements and Operator Services by Season?

    Permit availability and operator services change with demand. Peak season often requires earlier bookings and stricter permit allocations; shoulder season can offer more flexibility. Check official park or local operator sites for current rules and timing.

    When you contact operators, ask about cancellation policies, group minimums and what their contingency plans include. Clear contracts that outline what happens if weather forces delays—who covers additional nights, evacuation costs and equipment replacements—will prevent surprises and help you assess provider reliability before committing financially.

    How Can Climbers Use Seasonal Climbing Calendars and Weather Data Effectively?

    Use calendars and data to: review historical weather patterns, account for long‑term climatic trends, and update plans with real‑time forecasts during the trip. Combine historical context with live data to make practical, safety‑based decisions.

    Set up a simple planning dashboard before departure that contains region-specific historical summaries, links to multiple forecast models and a checklist of decision points tied to forecast thresholds. This approach turns raw information into operational choices you can act on quickly when conditions change.

    What Are the Emerging Trends and Climate Impacts on Climbing Seasons?

    Climate change is shifting seasonal patterns and increasing weather variability. Climbers should track these trends for their chosen regions and adjust timing, risk assessments and gear lists as long‑term patterns evolve.

    Longer-term shifts may require rethinking classic season windows and putting a greater emphasis on real-time condition monitoring rather than relying solely on calendar expectations. Stay engaged with regional guide associations and research outputs that summarise how seasonal behaviour is changing for the particular mountain systems you climb.

    How Is Climate Change Affecting Peak and Shoulder Season Conditions?

    Warming and altered precipitation patterns are changing when and how routes are climbable. Examples include earlier snowmelt and a higher frequency of extreme weather events, both of which can alter route safety and timing.

    Why Are Shoulder Season Expeditions Increasing in Popularity?

    Shoulder season trips are growing because they can be more affordable, less crowded and offer distinct natural experiences. These benefits appeal to climbers who prioritise solitude or lower cost over predictable weather.

    As shoulder season interest rises, understanding its trade-offs—especially weather variability and necessary preparedness—becomes more important for safe planning.

    Frequently Asked Questions

    What Should Climbers Consider When Choosing Between Peak and Shoulder Seasons?

    Decide based on weather stability, crowd tolerance and your experience level. Choose peak season for predictability and higher support; choose shoulder season for solitude and lower costs if you can accept greater uncertainty and carry extra contingency gear.

    How Can Climbers Prepare for Unpredictable Weather in Shoulder Seasons?

    Prepare by monitoring forecasts, packing a flexible layering system, choosing weather‑resistant gear and carrying emergency supplies like extra food and water. Build buffer days into your schedule so you can delay or reroute if conditions worsen.

    What Are the Key Differences in Climbing Gear for Peak vs. Shoulder Seasons?

    Peak-season gear tends to be lighter and more breathable. For shoulder-season climbs, prioritise layered clothing, durable weatherproof shells and an expanded emergency kit to cover potential delays or sudden storms.

    How Do Climbers Ensure Safety During High Crowds in Peak Seasons?

    Avoid congestion by starting early, planning less crowded routes or times, and keeping clear communication with your team and guides. Follow established route etiquette and be prepared to change plans if crowding creates unsafe conditions.

    What Role Does Acclimatization Play in Seasonal Climbing Success?

    Acclimatisation reduces the risk of altitude illness by allowing your body to adapt to lower oxygen. Plan gradual ascents, include rest days and follow recognised acclimatisation schedules—this applies in any season and is critical for safety at altitude.

    How Can Climbers Utilize Seasonal Climbing Calendars Effectively?

    Use calendars to pick your target window, then cross‑check with historical weather and recent route reports. Adjust plans as real‑time forecasts update and maintain flexibility in logistics to respond to changing conditions.

    Conclusion

    Choosing the right season shapes your risk profile and experience. Peak season favours predictable conditions and higher support; shoulder season offers solitude and savings but needs stronger contingency planning. Plan around local weather patterns, follow safety protocols, and use reliable resources to prepare. With careful planning you increase both safety and the chance of a successful climb.

    Final practical checklist: confirm permits and operator policies early, build at least one full contingency day per week of planned travel, carry a compact emergency shelter and extra rations, delegate weather-monitoring responsibilities within your team, and agree on conservative turn‑around criteria before departure. These concrete steps convert season-based planning into actions that protect your team and maximise enjoyment on the mountain.

  • Unlock Peak Adventures: Read Route Descriptions Like a Pro

    Unlock Peak Adventures: Read Route Descriptions Like a Pro

    How to Read Peak Route Descriptions Like a Pro: Mastering Mountain Route Interpretation for Safe Summit Navigation

    Reading peak route descriptions is a core skill for safe mountain travel. This guide breaks down how to interpret the details that affect planning and risk: route stats, hazards, navigation tools and community reports. You’ll learn to extract actionable information so you can choose routes, time your ascent, and prepare equipment with confidence. Alongside technique and judgement, good interpretation reduces surprises on approach, at the crux, and during descent. Treat route descriptions as working documents: update your plan as you gather recent reports, weather data and observations from local parties.

    Reading Peak Route Descriptions

    Route descriptions present structured information—elevation profiles, difficulty ratings and key landmarks. Learn to read these elements so you can plan pacing, gear and navigation. A clear description helps you predict the climb’s physical and mental demands. In many guides the description will also include estimated times for approach, ascent and descent; treat those times as guides, not guarantees, and allow extra time for variable terrain, group pace and short technical sections.

    Understanding Route Details

    Critical route details let you judge feasibility and safety. Elevation profiles show steepness and sustained gain. Hazard notes warn of risks like loose rock or unstable weather. Summit summaries describe commitment and exposure so you can match the route to your skills and objectives. When a route description notes sustained steep sections or long exposed ridgelines, plan shorter daily objectives, additional protection if available, and consider early starts to avoid afternoon weather.

    If you want more background, Information Hub provides resources and expert insight you can use to make safer, better-informed decisions on the mountain. Use those resources to compare multiple descriptions of the same route—differences often reveal subjective judgment or seasonal issues that affect difficulty.

    Recognizing Potential Hazards

    Identifying hazards is essential. Expect changing weather, the possibility of altitude sickness, and the need for clear emergency protocols. Recognizing these risks ahead of time lets you prepare and respond more effectively during an ascent. Consider how objective hazards (rockfall, crevasses, avalanche paths) differ from subjective difficulties (fitness, route-finding), and plan mitigations for both.

    Hazard identification has shifted from long field surveys to more advanced, faster methods over recent decades.

    Mountain Hazard Identification & Management

    Methods and techniques for the identification, monitoring and management of natural hazards in high mountain areas are listed and explained. Early approaches relied on intensive, time-consuming fieldwork and mapping, with primary dependence on interpreting landforms, sediments and vegetation as indicators of slope failures, rock falls, debris flows, floods and accelerated soil surface erosion. Over the past two decades both the need for—and the ability to—identify potential hazards accurately have increased.

    Systems for hazards identification in high mountain areas: an example from the Kullu District,

    Western Himalaya, E Saczuk, 2004

    Using Navigation Tools

    Climber using GPS and map on a mountain trail, highlighting navigation tools for climbing

    Navigation tools are central to following your chosen line. Use GPS devices, topographic maps and weather forecasts together. Practice them in different conditions so you can rely on their data when it matters. Build a routine: download offline maps, load key waypoints (trailheads, junctions, bivy spots and the summit), and verify bearings with a compass. Train to switch quickly between tools if one becomes unreliable.

    ToolFeatureApplication
    GPS DevicesReal-time location trackingEnsures accurate navigation
    Topographic MapsDetailed terrain informationHelps identify elevation changes
    Weather AppsForecasting and alertsAids in planning for changing conditions

    The table shows how each tool provides specific data—position, terrain detail and weather—that supports safer, more effective route following. In practice, cross-check these sources: if the GPS indicates a track but the contour pattern on the topo map shows an impassable cliff, slow down and verify by sight or photograph. Keep spare batteries or a power bank; cold and frequent use can quickly deplete devices.

    Integrating Community Insights

    Climbers sharing experiences around a campfire in a mountainous setting, showcasing community insights

    Community reports and trip notes provide up-to-date conditions and practical tips you won’t find in a static description. Use those accounts to adjust your plan based on recent experience and local knowledge, and contribute your own observations when you can. Prioritise recent trip reports for time-sensitive information like snow levels, newly exposed scree or damaged access routes. When reading trip notes, look for clear descriptions of where the party was on the route, what time they passed key landmarks, and any photos that corroborate the text.

    When possible, contact the author of a trip report with specific questions—many climbers are willing to give small clarifications that can change a decision in the field. Keep a short note of reliable local contacts or guiding services who can confirm current approach conditions or permit updates.

    What Are Peak Route Descriptions and Why Are They Essential for Climbers?

    Peak route descriptions outline the technical challenges, terrain features and safety considerations of a climb. They let you assess whether a route matches your skill level and objectives and support better planning for a safer ascent. Good descriptions include approach notes, crux locations, typical snow or ice coverage, and descent options. Read each description as a checklist: what skills are required, where the hardest moves occur, and what escape routes exist if conditions change.

    Defining Peak Route Descriptions: Key Concepts and Terminology

    Key concepts include a route overview (a brief summary), difficulty ratings (the route’s grade) and technical pitches (sections requiring advanced skills or equipment). Knowing these terms helps you interpret descriptions accurately during planning. Identify the language that signals commitment—phrases such as “no easy retreat,” “exposed traverse,” or “route-finding complex” indicate higher risk and the need for stronger contingency planning.

    How Understanding Route Descriptions Enhances Summit Planning and Safety

    Understanding route descriptions helps you pick routes that suit your experience, anticipate challenges and prepare appropriate gear and contingency plans. That planning reduces risk and increases confidence on the climb. When you align time-of-day choices, group composition and gear to the description’s details you lower objective exposure and improve decision-making under stress.

    How Do You Interpret Climbing Grades and Symbols in Route Descriptions?

    Climbing grades and symbols standardize how difficulty and hazards are communicated. Learn the grading system used on a route so you can judge the challenge and decide if the climb is appropriate for you. Look for additional symbols or abbreviations that describe protection quality, rock condition, or mandatory gear—these often change how a grade feels in practice.

    What Are the Common Climbing Grade Systems and Their Scales?

    Common systems include the Yosemite Decimal System (YDS), the French grading system, and the V-scale for bouldering. Each uses its own scale to describe difficulty; identify which one applies to your route before you commit. If you regularly climb in areas that use different systems, build a quick reference conversion chart or mental mapping so you can assess difficulty at a glance when reading varied sources.

    Which Symbols and Notations Are Used to Indicate Route Difficulty and Hazards?

    Route symbols flag technical sections, exposure and specific gear needs. Familiarize yourself with common notations so the description gives a clear picture of what to expect on the ground. Notations may note fixed protection, loose rock, seasonal snow, or objective hazards; learning to read those at scale helps you prioritise what to pack and how to time the climb.

    What Navigation Techniques Help You Read and Follow Summit Routes Accurately?

    Strong navigation skills—reading map symbols, interpreting elevation profiles and planning lines—are essential for following summit routes accurately and safely. Develop a habit of pre-visualising the route: identify key turns, saddles and ridgelines on the map and mark them on your device so you know what to expect at each stage of the climb.

    How to Use Maps, Diagrams, and GPS Tools for Route Finding

    Combine topographic maps, route diagrams and GPS tracks to cross-check position and terrain. Practice reading contour lines and using GPS waypoints before relying on these tools in remote or technical terrain. Set intermediate waypoints for critical decision points (first bivy, crux approach, descent junction) and use those to measure progress as well as to orient if visibility drops.

    When following a route diagram, translate drawn features into map features: saddles become contour saddles, scree slopes align with contour spacing, and small streams on the map often mark safe approach corridors. If the route description mentions vegetation boundaries or rock bands, mark those on your map to aid real-world identification.

    What Are Best Practices for Identifying Landmarks and Route Features?

    Use distinctive visual markers, changes in elevation and mapped features as reference points. Check your position frequently against your map or GPS to confirm you’re on the intended line. When visibility or terrain makes landmarks unreliable, slow down, take a bearing and use short backtracks to confirm the line rather than continuing on uncertain ground.

    How Can You Integrate Safety Protocols and Gear Recommendations When Reading Routes?

    Read every route description through a safety lens. Match gear, skills and escape options to the risks described, and ensure you have clear contingency plans for likely hazards. Prepare both equipment and human factors: pacing, rest breaks, role assignments (lead, navigator, communicator) and clear turnaround criteria.

    Which Safety Considerations Should You Evaluate from Route Descriptions?

    Assess factors such as exposure to weather, objective hazards and technical difficulty. Use that assessment to plan timing, team composition and emergency procedures for the climb. Consider whether the route requires extra safety equipment like helmets for rockfall, glacier gear, or a rope for exposed scrambling sections.

    What Gear Is Recommended Based on Route Difficulty and Hazards?

    Gear recommendations depend on the route’s difficulty and hazards. Use route notes to identify required technical kit and clothing needs, and weigh those against your experience when preparing equipment. Pack modular gear for flexibility: a lightweight emergency shelter, a repair kit, spare layers, and small items that can change a descent from precarious to manageable. Decide in advance who carries shared gear and build redundancy for critical items.

    How Do You Plan Your Ascent Effectively Using Peak Route Descriptions?

    Effective ascent planning follows a systematic approach: gather route data, compare it to your skills, and build contingencies for identified hazards before you set out. Translate descriptive elements into a timeline and decision points—where you will reassess weather, when to turn back if conditions worsen, and where safe bivy options exist.

    What Are Step-by-Step Strategies for Trip Planning Based on Route Data?

    Steps: collect route information and recent reports, evaluate your fitness and technical skills, then plan timing, gear and escape options. Review the plan with your team and adjust as new information appears. Add concrete checkpoints: planned start time, estimated time to the crux, planned retreat time if the crux is not reached safely, and a firm descent start time to avoid nightfall in technical terrain.

    Include logistical planning—transport, permits, and a realistic plan for how to access last-minute weather updates. Practice transitions you expect on the route (putting on crampons, changing to heavier layers, short technical ropework) to avoid mistakes under fatigue.

    How to Use Case Studies and Templates to Prepare for Your Climb

    Study case examples and planning templates to identify common pitfalls and proven strategies. Apply those lessons to your own plan to reduce surprises on the mountain. Templates that list mandatory gear, team roles, key waypoints and emergency numbers help standardise planning and reduce overlooked items before leave.

    What Are Common Challenges in Reading Peak Route Descriptions and How Can You Overcome Them?

    Common issues include vague descriptions and unfamiliar symbols. Overcome these by seeking clarification from experienced climbers and consulting multiple sources to build a clearer picture. Keep a short glossary of terms and symbols used in your area so you can decode older guides or shorthand in trip reports quickly.

    How to Interpret Ambiguous or Complex Route Information

    When a description is unclear, cross-check it with maps, photos and trip reports. Learn standard symbols and terminology so you can resolve ambiguity before committing to a route. If ambiguity remains, treat the route as having higher uncertainty: lean toward simpler objectives, add margin to your time estimate, or plan additional reconnaissance before committing to complex sections.

    What Resources and Tools Can Enhance Your Route Reading Skills?

    Guidebooks, online forums and local climbers are reliable resources for improving route-reading. Combine several sources to verify conditions and fill gaps in a route description. Practice extracting repeated themes across accounts—if several reports mention the same loose band or tricky descent, assume it will be present on your visit.

    Which Emerging Technologies Are Improving Peak Route Reading and Safety?

    Digital route maps and GPS integration provide timely data that improves situational awareness and helps you adapt to changing conditions on the approach and ascent. New tools make it easier to overlay weather, recent tracks and satellite imagery so you can pre-identify problem areas before arrival.

    How Are Digital Route Maps and GPS Integration Changing Navigation?

    Digital maps and GPS offer accurate, real-time position and route data. Use them to cross-check your planned line and to make better-informed decisions while on the mountain. Learn how to export and share route files with your group; consistent waypoints reduce confusion and keep the whole team oriented during complex moves.

    What Role Do Augmented Reality and Mobile Apps Play in Modern Mountaineering?

    Augmented reality and mobile apps add interactive overlays and route-context information. They can help you visualise terrain features, identify landmarks and access community updates while navigating. Use AR cautiously: it’s a powerful aid in moderate visibility, but do not rely on it as your only means of navigation—always validate AR overlays against a map and physical features.

    Frequently Asked Questions

    What should I consider when choosing a climbing route based on peak route descriptions?

    Match the route to your skill level, check the difficulty rating and note hazards listed in the description. Study the elevation profile to understand steep sections. Also factor in weather and season. Aligning your abilities with the route’s demands improves safety and enjoyment. Additionally, consider logistics such as access, required permits, and whether the route’s descent can be completed safely given your planned start time.

    How can I effectively communicate with the climbing community for better route insights?

    Join local forums, social media groups and meetups. Ask specific questions about recent conditions and share your trip details. Be open to feedback and contribute your own observations to build trust and useful trip reports. When asking for information, provide the date you plan to go, your intended line, and any constraints—this helps responders give directly applicable advice.

    What are the best practices for using GPS devices while climbing?

    Charge your device fully and download maps before you leave. Learn features like waypoint marking and route tracking, and check your position regularly against the planned line. Carry a map and compass as a backup for technical failures or battery loss. Practice recovering from a lost signal and carrying spare power sources; know how to switch units to conserve battery for critical navigation windows.

    How can I prepare for unexpected weather changes during a climb?

    Check the forecast before you go and monitor conditions during the climb. Carry waterproof layers, extra insulation and a reliable shelter. Learn the signs of deteriorating weather and keep a flexible plan that allows for retreat or alternative routes. Plan buffer days in your schedule when possible so that weather windows can be used safely rather than forcing risky moves on marginal days.

    What role does physical fitness play in successfully navigating peak routes?

    Fitness affects endurance, strength and recovery on steep or exposed terrain. Regular cardio, strength and flexibility training reduces fatigue and injury risk, letting you focus on navigation and safety during the climb. Train for the specific demands of the route—long approaches, sustained scrambling or technical moves—to build confidence and reduce decision fatigue on the mountain.

    How can I assess the reliability of online climbing resources and trip reports?

    Evaluate the source—established organisations and experienced climbers are more reliable. Look for multiple recent reports, check dates and cross-reference photos or GPS tracks. Engage in forums to test the credibility of specific accounts. Give more weight to reports that include photos with timestamps or GPS data, and treat single, undated accounts as anecdotal unless corroborated.

    What are the benefits of using augmented reality apps for climbing navigation?

    AR apps overlay route information on the landscape, showing location, route lines and nearby landmarks. They help visualise complex terrain and hazards, and they can integrate community updates for a richer, more useful navigation aid. Use AR to confirm features and to teach less-experienced partners how a route maps to the terrain, but always validate against map and compass readings before committing to technical sections.

    Conclusion

    Reading peak route descriptions well improves safety and confidence on the mountain. Use route details, hazard notes and navigation tools to make informed choices that match your skills and objectives. Tap community knowledge to fill gaps and refine plans. Apply these practices to plan safer, more enjoyable climbs. Finally, treat every outing as an opportunity to refine your interpretation skills—log what you learned about a route and feed that information back into the community so others benefit.

  • How to Train for High Altitude Climbing: A Complete Program

    How to Train for High Altitude Climbing: A Complete Program

    How to Train for High Altitude Climbing: A Complete Program (2026) | Global Summit Guide
    Cluster 08 · Altitude, Training & Physiology · Updated April 2026

    How to Train for High Altitude Climbing: A Complete Program

    The general training framework for high-altitude climbing — the four pillars of fitness, periodization phases, weekly training templates, and readiness benchmarks that apply to any objective from Kilimanjaro to Denali. Less a specific month-by-month plan (see our EBC-specific program for that), more the adaptable principles that build any high-altitude program.

    4
    Training
    pillars
    4
    Periodization
    phases
    6–18
    Months
    typical
    80/10/10
    Intensity
    split
    Global Summit Guide A guide in Cluster 08 · Altitude, Training & Physiology View master hub →

    High-altitude climbing places unique demands on the body — prolonged aerobic effort, heavy load carries, steep uphill and downhill terrain, and metabolic stress from hypoxia. A training program that prepares you for a marathon won’t prepare you for Aconcagua. A bodybuilder’s routine won’t help on Kilimanjaro. What works is a four-pillar approach: aerobic conditioning, muscular strength, muscular endurance, and altitude-specific preparation, organized across four periodization phases (base, build, peak, taper). This guide covers the framework. For a specific month-by-month program applied to EBC, see our 8-month EBC training plan. For understanding the altitude physiology your training prepares you for, see our acclimatization science guide.

    How this guide was built

    Training principles sourced from evidence-based mountaineering coaching programs including Uphill Athlete (Steve House & Scott Johnston), Mountain Tactical Institute, and American Alpine Club training resources. Periodization concepts from sports science literature on endurance training (Seiler, Bompa). Altitude-specific preparation protocols cross-referenced with Wilderness Medical Society guidelines. Weighted pack training progression validated through multiple Kilimanjaro, EBC, Aconcagua, and Denali expedition outcomes. Reviewed by practicing mountaineering coaches and IFMGA-certified guides. Benchmark data from thousands of documented training cycles on major peaks. Fact-check date: April 19, 2026.

    Training Principles for Altitude Climbing

    Before the specifics, a few principles that separate effective altitude training from generic fitness work:

    Specificity beats intensity

    Nothing trains you for mountain climbing like mountain climbing. No treadmill, stair machine, or HIIT class replicates the actual demands of a 10-hour day under a 40-pound pack on uneven terrain. Your training should maximize time doing the thing you’re training for — weighted hiking on varied terrain with elevation gain and loss.

    Aerobic base dominates

    High-altitude climbing is a predominantly aerobic effort sustained over hours and days. Your aerobic base — the ability to sustain effort at moderate intensity for long periods — is the single most important fitness attribute. Build it first, build it big, and never let it slip. Most training time should be spent in zone 2 (conversational pace), not in the gym hitting PRs.

    Strength supports endurance — it doesn’t replace it

    You need enough strength to carry a pack, manage descents, and protect your joints under load. You don’t need bodybuilder mass — in fact, excess muscle is metabolic weight that must be fed oxygen your lungs can’t deliver at altitude. Strength training is supporting cast, not the lead.

    Recovery is training

    Adaptation happens during recovery, not during workouts. Sleep 8+ hours per night. Eat enough to support training. Take easy days seriously. Schedule full rest weeks every 4-6 weeks. Overtraining is the single most common way climbers ruin their preparation.

    Train descents, not just ascents

    Downhill is where most mountaineering injuries happen and where most fatigue accumulates on long trips. Every weighted hike should include meaningful descent with the same pack weight. Your quads, knees, and IT bands need the specific preparation downhill provides.


    The Four Pillars of High-Altitude Training

    Every effective altitude training program balances four distinct but integrated capacities. Think of them as the legs of a table — if one is missing, the table falls over:

    1
    Pillar 1

    Aerobic Conditioning

    The foundation of all mountaineering fitness. Develops heart and lung capacity, fat-burning efficiency, and cardiovascular reserve — the ability to sustain effort for 8-14 hour summit days. Primary modes: weighted hiking (best), trail running, stair climbing, cycling, rowing.

    Frequency4-5x/week
    Duration45-90 min
    Volume5-10 hrs/wk
    Priority50-60% time
    2
    Pillar 2

    Muscular Strength

    Supports loaded pack carries, joint stability, and descent control. Not bodybuilder mass — functional strength from compound movements. Key exercises: back squat, deadlift, lunge, step-up, overhead press, pull-up. Emphasis on full range of motion and progressive loading.

    Frequency2-3x/week
    Duration45-60 min
    Volume2-3 hrs/wk
    Priority15-20% time
    3
    Pillar 3

    Muscular Endurance

    Sustained output for hours to days under load. The bridge between pure strength and pure cardio — the ability of muscles to repeat submaximal efforts for long periods. Developed through weighted pack hikes (2-8 hours), high-rep strength circuits, and back-to-back training days.

    Frequency1-2x/week
    Duration2-8 hours
    Pack weight20-60 lb
    Priority15-20% time
    4
    Pillar 4

    Altitude-Specific Preparation

    Hypoxic exposure and mental preparation. Altitude tents (Hypoxico, Altitude Tech), pre-trip altitude exposure, intermittent hypoxic training, breath-work practice. Cannot replace proper acclimatization protocols but accelerates adaptation and reduces AMS risk by 30-50%.

    FrequencyVaries
    TimingPeak phase
    Duration2-4 weeks
    Priority5-10% time
    The 80/10/10 intensity distribution

    Elite endurance athletes — and successful high-altitude climbers — spend most of their training time at easy intensity. The proven distribution is roughly 80% easy (zone 1-2, conversational pace), 10% tempo (zone 3, breathing elevated but controlled), and 10% hard (zone 4-5, near max). Most recreational climbers invert this, training too hard too often. The result: chronic fatigue, poor aerobic base, and mediocre mountain performance. Train mostly easy. Train rarely hard. The mountain demands endurance, not intensity.


    Periodization: Four Phases of a Training Cycle

    A training cycle progresses through four distinct phases, each with different goals and training emphasis. The phases build on each other — skipping phases or ordering them wrong produces suboptimal results:

    Phase
    1
    4-8 Weeks
    Base Phase

    Build the Aerobic Foundation

    Months 1-2 of cycle · Low intensity, building volume

    The base phase establishes the cardiovascular foundation that all later phases build on. Volume up, intensity down. Mostly zone 2 aerobic work. Introduce weighted hiking at light loads. Begin strength training with moderate weights and emphasis on technique. Easy pace, consistent effort.

    • 4-5 easy cardio sessions per week (45-60 min each)
    • 1-2 weighted hikes per week (15-20 lb pack, 60-90 min)
    • 2 strength sessions per week (moderate loads, 3×8-12 reps)
    • Total weekly volume: 5-8 hours
    • Intensity: 90% easy, 10% tempo
    • Goal: Establish fitness baseline, prevent injury
    Phase
    2
    8-12 Weeks
    Build Phase

    Increase Volume and Progressive Loading

    Months 2-4 of cycle · Gradually increasing both volume and intensity

    The build phase progressively increases training volume and introduces higher-intensity work. Weighted hike duration grows. Pack weight creeps up. Strength training adds progressive overload. Tempo runs appear in cardio rotation. Weekly volume rises toward peak targets.

    • 5-6 cardio sessions per week, one longer hike
    • 2 weighted hikes per week (25-35 lb pack, 2-4 hours)
    • 2-3 strength sessions per week (70-80% 1RM, 3-4×6-10 reps)
    • 1 tempo session per week (sustained zone 3)
    • Total weekly volume: 7-10 hours
    • Intensity: 80% easy, 15% tempo, 5% hard
    Phase
    3
    4-8 Weeks
    Peak Phase

    Mountain-Specific Conditioning

    Months 4-6 of cycle · Highest training load, most specific work

    The peak phase delivers the most mountain-specific training possible. Heavy weighted hikes match expedition pack weight and duration. Altitude-specific preparation begins (hypoxic tents, pre-trip altitude exposure). Back-to-back training days simulate expedition fatigue. Volume highest of any phase.

    • 2-3 weighted hikes per week (40-60 lb, 4-8 hours)
    • Back-to-back weighted hiking weekends
    • Elevation gain priority: 1,000-1,500 m per major hike
    • Altitude tent use (if applicable) 4-8 hrs/night
    • Strength maintenance (1-2x/week, lower volume)
    • Total weekly volume: 10-12 hours
    • Test expedition gear on long hikes
    Phase
    4
    1-2 Weeks
    Taper Phase

    Reduce Volume, Preserve Fitness

    Final 1-2 weeks before expedition · Recovery-focused

    The taper phase reduces training volume while maintaining fitness, allowing complete recovery before departure. Counter to instinct — don’t train hard in the final week. Gains are banked; now you consolidate. Short easy hikes, light strength maintenance, emphasis on rest, nutrition, and gear preparation.

    • Volume reduced 40-60% from peak phase
    • 1-2 short weighted hikes (20-30 lb, 2-3 hours max)
    • 2-3 easy cardio sessions
    • 1 light strength session (maintenance only)
    • Total weekly volume: 4-5 hours
    • Sleep priority: 8-9 hours/night
    • Carbohydrate loading final days
    • Gear testing, mental preparation
    The taper is not optional

    Many climbers sabotage their expedition by training hard in the final week. The taper is physiologically essential — it allows full glycogen storage, muscle repair, and nervous system recovery. Fitness cannot be built in the final week, but it can be lost. Research consistently shows 10-20% performance improvement when athletes taper properly. Trust the work you’ve already done. Rest, eat, pack, and arrive fresh. The mountain will test your preparation; your preparation is already complete when you board the plane.


    A Weekly Training Template (Peak Phase)

    Here’s what a typical training week looks like during peak phase, with all four pillars integrated. Adjust volume and intensity for your current phase:

    DaySession TypeDurationIntensityNotes
    MondayEasy cardio (run, bike, or hike)60 minZone 2Active recovery, conversational pace
    TuesdayStrength training + short cardio60+30 minModerateLower body emphasis, compound lifts
    WednesdayTempo run or hill repeats60-75 minZone 3-4Sustained elevated effort
    ThursdayEasy cardio + core work60 minZone 2Recovery from Wednesday intensity
    FridayRest day OR light yoga/mobility30 minEasyPre-weekend recovery
    SaturdayLong weighted hike5-7 hoursZone 2-340-60 lb pack, significant elevation
    SundayBack-to-back weighted hike3-4 hoursZone 2Lighter pack, expedition fatigue sim

    Total weekly volume: ~13-15 hours. Adjust downward for earlier phases.

    Sample variations

    • Beginner base phase: 3 cardio sessions, 1 weighted hike, 2 strength sessions, 6-7 hours total.
    • Build phase: 4 cardio sessions, 2 weighted hikes, 2 strength sessions, 9-10 hours total.
    • Peak phase (above): 4 cardio sessions, 2 weighted hikes, 1-2 strength sessions, 13-15 hours total.
    • Taper phase: 3 easy cardio sessions, 1 short weighted hike, 1 light strength, 4-5 hours total.

    Readiness Benchmarks by Objective

    How do you know you’re ready? Specific benchmarks by objective tier:

    Tier 1 · Trek-Level

    Kilimanjaro / EBC Trek

    ~4,500-5,900 m · Non-technical · Guided support
    • Hike 8-10 miles with 25 lb pack comfortably
    • Ascend 3,000 ft in 2 hours with pack
    • Run 5K under 35 min OR equivalent hiking pace
    • 12-15 push-ups, 20 sit-ups, 1-min plank
    • Back-to-back 4-hour hiking days
    • No significant joint pain during/after training
    • 4-6 months training minimum
    Tier 2 · Expedition

    Aconcagua / 6,000 m Peaks

    ~6,000-6,961 m · Non-technical but serious
    • 10-14 hour day hikes with 40-50 lb pack
    • Ascend 4,000 ft in 3-4 hours with pack
    • Run 10K under 55 min OR rucking equivalent
    • Back-to-back 2-3 days of weighted hiking
    • Prior altitude experience above 4,500 m
    • Basic crampon & ice axe proficiency
    • Winter hiking experience
    • 6-10 months training
    Tier 3 · Advanced

    Denali / 7,000-8,000 m Peaks

    ~6,000-8,850 m · Self-supported, technical
    • Haul 75+ lb pack on 10-hour days
    • Climb 5,000+ ft with full load in one day
    • Sled pulling practice (Denali-specific)
    • Multiple prior 6,000+ m ascents
    • Cold-weather camping proficiency
    • Crevasse rescue skills
    • 3-week self-supported expeditions prior
    • 12-18 months training plus prior altitude CV

    Physical fitness test benchmarks

    • Weighted step-up test: 30 step-ups per leg in 60 seconds with 20 lb pack. Good: both legs comfortably. Excellent: <45 seconds.
    • VO2 max target: 40-50 ml/kg/min for men, 35-45 for women (Tier 1-2). Higher for Tier 3 objectives.
    • Deadlift: 1.5× bodyweight for 3 reps (Tier 2+). Carry capacity indicator.
    • Pull-up count: 5+ strict reps (Tier 2+). Upper body strength indicator.
    • 3,000 ft elevation gain test: Under 2 hours with 25 lb pack (Tier 1), under 1.5 hours with 40 lb (Tier 2+).
    • Back-to-back test: Complete 6 consecutive days of training without fatigue or soreness compromising quality.

    The Most Common Training Mistakes

    Starting too late

    The most common failure mode — assuming 8-12 weeks is enough for demanding objectives. For 6,000+ m peaks, budget 6+ months. For 8,000 m objectives, 12+ months. Rushed training produces inadequate preparation and reduces summit success dramatically.

    Insufficient weighted pack training

    Too much treadmill, gym, and road running. Not enough actual weighted hiking. If you can’t comfortably carry your expected expedition pack weight on your longest expected expedition day before the trip, you’re not ready.

    Overtraining

    Too many hours too fast, inadequate recovery, ignored fatigue signs. Symptoms: persistent soreness, declining performance, sleep disruption, frequent illness, loss of motivation. Fix: reduce volume, add recovery days, get more sleep.

    Ignoring descent training

    Downhill causes most mountaineering injuries and accumulates more fatigue than ascent on long trips. Every weighted hike should include meaningful descent. Your quads, knees, and IT bands need specific preparation.

    Over-emphasizing strength

    Bodybuilding-style training produces muscle mass that’s metabolic weight at altitude — energy-expensive tissue requiring oxygen your lungs can’t deliver. Functional strength supports mountaineering. Mass hinders it.

    Skipping the taper

    Training hard in the final week feels productive but sabotages performance. Research shows 10-20% performance improvement from proper taper. Trust the work you’ve done. Rest before departure.

    No altitude preparation

    Expecting fitness to replace acclimatization. Fitness and altitude tolerance are separate capacities — the fittest climber can develop AMS with rapid ascent. Include altitude tent training or pre-trip altitude exposure when possible. See our acclimatization science guide.


    High-Altitude Training FAQ: Your Common Questions Answered

    How long does it take to train for high altitude climbing?

    Training time depends on current fitness and target objective, ranging from 3-4 months for moderate peaks (Kilimanjaro, EBC) to 12-18 months for demanding objectives (Denali, Aconcagua, 8,000 m peaks). Timeline by objective: Everest Base Camp trek or Kilimanjaro 4-6 months minimum for most climbers, 12-week plan sufficient if already moderately fit. Aconcagua (6,961 m) 6-8 months for experienced hikers, 10-12 months for novices. Denali (6,190 m) 8-12 months minimum. 8,000 m peaks (Everest, K2) 12-18 months plus prior altitude experience. Technical climbs 6-12 months plus technical skills development. Fitness baseline assessment: hike 8-10 miles with 30 lb pack comfortably, run or hike 45+ minutes continuously, complete 20 push-ups 50 sit-ups 30-second plank, BMI in healthy range (18.5-28), no current injuries. Training phases: Weeks 1-4 base building, Weeks 5-12 build phase, Weeks 13-20 peak phase, Weeks 21-24 taper phase. Who needs longer: sedentary individuals starting from scratch, previous injury history, age 50+ climbers, objectives above 6,000 m, solo climbers, previous altitude illness history. Who may need shorter: elite endurance athletes, regular hikers with altitude experience, guided trips, supported climbs. Most climbers benefit from training longer rather than shorter. Adequate preparation dramatically improves summit success and reduces injury risk. See our 8-month EBC training plan.

    What are the four pillars of high altitude climbing training?

    The four pillars are aerobic conditioning, muscular strength, muscular endurance, and altitude-specific preparation — each addressing distinct physical demands of mountain climbing. Pillar 1 aerobic conditioning: foundation of all mountaineering fitness, develops heart and lung capacity, improves fat-burning efficiency, builds cardiovascular reserve for altitude. Primary modes hiking, running, cycling, swimming, stair climbing. Target 4-5 aerobic sessions per week 45-90 minutes each. Weekly total 5-10 hours. Pillar 2 muscular strength: supports loaded pack carries, protects joints under load, critical for downhill descents, enables scrambling and technical moves. Key exercises squats, deadlifts, lunges, step-ups, overhead press, pull-ups. Target 2-3 strength sessions per week 45-60 minutes each. Progress through weights gradually. Pillar 3 muscular endurance: ability to sustain effort for hours to days, core attribute for summit days, different from pure strength — focuses on repeated output. Developed through high-rep strength, long weighted hikes, circuit training. Progress weighted hike duration 2 hrs to 4 hrs to 6 hrs to 8+ hrs over cycle. Pillar 4 altitude-specific preparation: hypoxic training (altitude tents if available), elevation exposure during training, breath-work practice for altitude, acclimatization trips before main expedition. Target 2-4 weeks altitude tent use pre-trip if possible. Integration: aerobic conditioning first (months 1-2), add strength training (months 2-3), build muscular endurance (months 3-5), peak with altitude-specific work (month 5-6), taper before departure. Balance: cardio dominant 50-60% training time, strength/endurance 30-40% combined, altitude-specific 5-10%.

    What is the best cardio for altitude climbing?

    The best cardio is hiking with a weighted pack — it most closely simulates actual mountain demands — followed by stair climbing, trail running, and cycling. Tier 1 essential: weighted pack hiking (THE best mountaineering-specific cardio, progressive pack weight and duration, simulates actual activity), stair climbing (great for elevation gain simulation, treadmill incline or actual stairs, StairMaster excellent), hill or trail running (builds running economy plus terrain handling). Tier 2 highly valuable: steady-state running (cardiovascular base, easy 45-90 minute runs), cycling (lower-impact cardio, stationary OK but road/mountain preferred), rowing (full-body aerobic without impact). Tier 3 useful supplements: swimming (great recovery, lung capacity), elliptical (low-impact, recovery days), HIIT (builds VO2 max but balance with endurance). Avoid: pure sprint training, only machine-based cardio, only flat terrain, weight-bearing cardio without rest. Session types: long easy hike/run (zone 2) 1.5-3+ hours conversational pace 1-2x/week. Tempo work (zone 3) 45-75 minutes sustained 1x/week. Interval training (zone 4) 30-60 min total 3-5 min hard 2-3 min recovery 1x/week. Recovery cardio 30-60 min very easy 1-2x/week. Weekly volume: beginner 3-4 hours, intermediate 5-7 hours, advanced 7-10 hours, peak weeks 10-12 hours. Heart rate zones zone 1 50-60% recovery, zone 2 60-70% aerobic base, zone 3 70-80% tempo, zone 4 80-90% VO2 max, zone 5 90-100% peak. Intensity distribution 80% easy 10% tempo 10% hard. Weighted pack hiking is the single most valuable cardio for altitude climbing.

    What strength training do mountaineers need?

    Mountaineers need functional strength focused on lower body power, core stability, and load-bearing capacity — not bodybuilder mass but strength that translates to carrying packs, ascending terrain, handling descents. Core principles: compound movements over isolation, full range of motion, functional patterns, progressive overload, 2-3 sessions per week. Essential exercises lower body: back squat 3×8-12, deadlift 3×6-10, lunges 3×10-12 per leg, step-ups to box weighted 3×10 per leg, Bulgarian split squats 3×8-10, hip thrusts 3×10-15. Core stability: planks 3×30-60 sec, dead bugs 3×10-15, Pallof press 3×10-12, farmer’s carries 3×30-60 sec. Upper body: pull-ups 3×5-10, push-ups 3×10-20, overhead press 3×8-12, rows 3×8-12. Specific load-bearing: weighted step-ups 3×10 per leg (direct transfer), weighted carries 3 sets × 100 m, suitcase carries 3 sets × 30-60 sec. Programming phases base (weeks 1-4) 2x/week 3 sets × 8-12 reps 60-70% 1RM technique focus. Build (weeks 5-12) 2-3x/week 3-4 sets × 6-10 reps 70-80% 1RM progressive loading add weighted carry work. Peak (weeks 13-20) 2x/week 3 sets × 5-8 reps heavier emphasis muscular endurance (lots of carries) add balance challenges. Taper (weeks 21-24) 1x/week lighter loads maintenance avoid new exercises or PRs. Common mistakes: too much bodybuilding-style work, neglecting single-leg work, ignoring core beyond sit-ups, skipping grip training, not progressing weights, adding strength when already tired from cardio. Strength supports mountain performance — don’t let it dominate your training time. Cardio remains primary.

    How much weighted pack training do you need?

    Weighted pack training is the single most mountain-specific training mode — most climbers need 2-3 weighted hikes per week in the final 3 months before a major expedition, with progressive pack weight building from 20 lb to 40-60 lb depending on objective. Progression: Phase 1 adaptation (weeks 1-4) 1 hike/week 15-20 lb 60-90 minutes flat or rolling terrain easy pace. Phase 2 base building (weeks 5-12) 1-2 hikes/week 20-30 lb 1.5-3 hours rolling to moderately steep 300-600 m elevation gain. Phase 3 build (weeks 13-18) 2 hikes/week 30-40 lb 3-5 hours steep technical 600-1,200 m elevation gain. Phase 4 peak (weeks 19-22) 2-3 hikes/week 40-60 lb (match expedition) 4-8 hours match expected conditions 1,000-1,500 m elevation gain. Phase 5 taper (weeks 23-24) 1 hike/week 20-30 lb 2-3 hours easy to moderate maintain fitness prevent fatigue. Pack weight targets: Kilimanjaro (porter-supported) 15-25 lb training weight, EBC trek (with porters) 15-25 lb, Aconcagua 35-50 lb, Denali (self-supported) 50-80 lb, Alpine climbs 20-35 lb plus technical gear. Terrain progression: level walking paths to rolling hills to hiking trails with elevation to steep trails with significant elevation to mixed surfaces stream crossings scrambling. Pack packing: start with waterbottles or sandbags, use actual pack and gear for final phases, test expedition pack weight distribution, never cheat weight. Safety: never jump pack weight more than 20% in one week, back off if lower back pain develops, focus on posture and core engagement, build knee strength before heavy weight, use trekking poles for descents. Downhill training critical — downhill stresses knees, quads, IT band — include in all weighted training — actually more injury-causing than uphill.

    Do I need altitude training before a climbing expedition?

    Altitude-specific training is highly valuable but not always essential — the best altitude preparation is real altitude exposure, with hypoxic tents and elevation training as beneficial alternatives when real altitude isn’t accessible. Hierarchy: Best real altitude exposure — nothing matches actual altitude adaptation, trips to 2,500-3,500 m altitude 2-4 weeks before expedition, extended stays at moderate altitude, weekend trips to mountain areas, acclimatization begins before expedition. Second best hypoxic tent/chamber systems — simulate altitude at home, brands Hypoxico, Altitude Tech, Higher Peak, sleep at simulated 2,500-4,000 m, use 4-8 hours per night, 3-4 weeks pre-expedition typical, cost $3,000-$8,000 purchase or $200-$400/month rental, proven 30-50% AMS reduction. Third option Intermittent Hypoxic Training (IHT) — breathing masks that reduce oxygen, short intense sessions 30-45 minutes, 3-4 sessions per week for 4-6 weeks, less effective than tent systems, cost $300-$600 device. Altitude training camps Colorado, Utah, Ecuador, Nepal, California. Without altitude access: high-intensity interval training, VO2 max development, breathing practice techniques, hiking at highest accessible elevation, long cardio sessions. Who benefits most: previous AMS history, sea-level residents heading to high altitude, time-constrained trips, short expedition windows, professional climbers, solo expedition planners. Limitations: individual response varies significantly, benefits diminish rapidly after cessation, cannot replicate full altitude physiology, best as supplement not replacement for acclimatization days, does not eliminate ascent rate rules. Pre-trip altitude experience: summit easier peak before main expedition, spend acclimatization week at moderate altitude, stay at altitude before major exposure, combine vacation with altitude training. Persistence: benefits last 7-14 days after descent, significant loss after 30 days, plan main trip within 30-60 days of altitude training. See our altitude acclimatization science guide.

    What are the most common high altitude training mistakes?

    Most common mistakes include insufficient training time, neglecting weighted pack practice, overtraining, ignoring weak points, improper periodization, and not training descents. Top mistakes: Starting too late — most common issue underestimating training time needed, 8-12 weeks too short for demanding objectives, better to over-prepare than rush, 6+ months recommended for 6,000+ m objectives. Not enough weighted pack training — too much treadmill/gym work, insufficient actual weighted hiking, failing to test expedition pack weight, no downhill descent practice. Overtraining — too many hours too fast, not enough recovery time, inadequate sleep, ignoring signs of fatigue, leads to injury, illness, poor performance. Ignoring weak points — avoiding uncomfortable exercises, neglecting weaknesses (core, single-leg, etc.), only doing what you already do well. Poor periodization — not varying training intensity by phase, peaking too early or too late, no taper before expedition, missing recovery-adaptation cycle. Over-emphasizing strength — bodybuilder-style training, too much weight not enough endurance, creates unnecessary muscle mass, altitudes demand cardio more than power. Under-emphasizing cardio — running only once a week, ignoring aerobic base, missing zone 2 training, cardio is primary for altitude success. Skipping altitude preparation — no altitude-specific training, expecting fitness to replace acclimatization, ignoring hypoxic training options, no pre-trip altitude exposure. Inadequate hiking time — short duration training sessions, no practice at expedition daily hiking length, missing mental preparation for long days, endurance requires long sessions. Wrong test benchmarks — using pure fitness tests, not testing actual mountain movements, no assessment of technique under load, missing psychological preparation. Consequences: reduced summit success, injuries during training or expedition, early exhaustion on summit day, increased altitude sickness susceptibility, poor recovery. Avoid: plan timeline carefully, include weighted hiking weekly, follow structured program, include recovery days, progress gradually, test readiness, consult coaches. See our altitude sickness guide.

    How do I know if I’m ready for high altitude climbing?

    Readiness depends on passing specific physical benchmarks tailored to target peak, combined with technical skills and altitude experience. Kilimanjaro/EBC trek: hike 8-10 miles with 25-30 lb pack comfortably, ascend 3,000 ft in 2 hours carrying pack, run 5K in under 35 minutes OR walk at 4 mph on 10% incline for 45 minutes, complete 12-15 push-ups 20 sit-ups 1-minute plank, back-to-back 4-hour hiking days, no significant joint pain. Aconcagua/6,000 m peak: 10-14 hour day hikes with 40-50 lb pack, ascend 4,000 ft in 3-4 hours with pack, run 10K under 55 minutes OR rucking equivalent, back-to-back 2-3 days heavy weighted hiking, multiple prior altitude experiences (above 4,500 m), basic crampon and ice axe proficiency, winter hiking experience. Denali: haul 75+ lb pack on 10-hour days, climb 5,000+ ft with full load in one day, sled pulling practice (Denali-specific), multiple 6,000+ m ascent experiences, cold-weather camping, crevasse rescue skills, 3-week self-supported expeditions prior. 8,000 m peak: all Denali benchmarks plus previous 8,000 m or high 7,000 m success, extensive altitude experience above 6,500 m, oxygen system familiarity, expedition-length commitment tolerance, 12+ months prior altitude expeditions. Fitness tests: VO2 max above 40-50 ml/kg/min for men 35-45 for women, weighted step-up 30 per leg in 60 seconds, push-up 30+ strict form, squat 50 air squats without stopping, deadlift 1.5x bodyweight minimum, pull-up count 5+. Technical skills: crampon techniques, ice axe arrest, rope team travel, crevasse rescue, weather forecasting, navigation, emergency response. Altitude progression: day hikes above 3,500 m (many times), multi-day trips above 3,500 m (multiple), any altitude above 4,500 m (minimum for serious objectives), 5,500 m+ experience (essential for demanding peaks), individual altitude tolerance pattern established. Psychological: comfort with discomfort, decision-making under stress, group dynamics awareness, risk tolerance appropriate. Red flags: recent significant illness or injury, training not completed, limited altitude experience, family/personal crises, financial stress, gear not tested. Better to delay than attempt unprepared.


    Authoritative Sources & Further Reading

    Content reflects evidence-based mountaineering coaching programs:

    • Steve House & Scott Johnston, Training for the New Alpinism — Uphill Athlete methodology
    • Uphill Athlete — Training programs and education for mountaineers
    • Mountain Tactical Institute — Rob Shaul’s mountain athlete training research
    • American Alpine Club — Training and education resources
    • Stephen Seiler, PhD — Polarized training research for endurance athletes
    • Tudor Bompa, PhD — Foundational periodization theory
    • Wilderness Medical Society — Altitude illness prevention guidelines
    • IFMGA-certified guides on training verification
    • Reference texts: Mountaineering: The Freedom of the Hills (The Mountaineers); Training for the Uphill Athlete (House, Johnston, Jornet)
    Published: March 28, 2026
    Last updated: April 19, 2026
    Next review: July 2026
    Part of the Global Summit Guide

    Back to the Master Hub

    This guide is one of 70 across 12 thematic clusters on Global Summit Guide. The master hub organizes every guide by experience tier, specific peak, skill area, and region.

    View the Hub →
  • Peak Profile Template: Standardized Guide Format for Climbs

    Peak Profile Template: Standardized Guide Format for Climbs

    Peak Profile Template: Standardized Guide Format for Climbs

    A peak profile template gives climbers a consistent way to record a climb and plan future trips. This guide explains why standard formats matter for safety, clarity, and expedition planning. It covers what a peak profile is, the main benefits, required data fields, and practical steps to build route templates. You’ll also find guidance on adding safety details and gear recommendations so profiles are useful in the field. The guidance that follows is written for climbers, trip leaders, guidebook authors and club administrators who need repeatable, printable and digital forms for pre-trip planning, briefings and trip debriefs.

    What is a Peak Profile Template and Why is it Essential for Mountain Summit Guides?

    A peak profile template is a standard form for recording a mountain climb’s key facts: route options, terrain, and safety measures. That structure ensures climbers can access the information they need to make decisions, assess risk, and prepare appropriately. Clear, concise profiles support both new and experienced climbers in choosing routes and planning logistics. In practice they are used as a pre-trip briefing document, a checklist for gear and communications, and a post-trip record that preserves lessons learned for future teams.

    Defining Peak Profile Templates in Mountaineering Documentation

    Peak profile templates collect the essential data points for a climb and present them consistently. Typical sections list the mountain’s name, elevation, location, and detailed route descriptions. Standardizing these fields makes it easy to compare peaks and share reliable information within the climbing community. A good template will also include metadata such as author, last updated date, version number and a short note field for contributors to record changes or conditions encountered.

    Key Benefits of Using Standardized Guide Formats for Climbs

    Standardized guide formats reduce uncertainty and speed decision-making before and during a climb. They improve safety, streamline planning, and make information easier to use in the field. The benefits shown below reflect those practical improvements.

    • Consistency and Clarity: Standardized formats ensure that all necessary information is presented uniformly, making it easier for climbers to understand and utilize the data.
    • Comprehensive Trip Planning: By providing a complete overview of a climb, these templates facilitate better preparation and risk assessment.
    • Safety and Gear Management: Standardized profiles help climbers identify essential gear and safety protocols, reducing the likelihood of accidents during climbs.

    For teams and individuals implementing templates, Information Hub offers practical resources and step‑by‑step guidance to build profiles that meet climbers’ needs. In real-world use, a template speeds briefings and reduces last-minute omissions: for example, a concise page listing approach times, permit needs and critical contacts makes it faster to check readiness before leaving base camp.

    Which Essential Data Fields Should a Standardized Peak Profile Include?

    Well-organized peak profile template with climbing gear in an outdoor setting

    A complete peak profile lists the core data points you need to plan and execute a climb. Typical entries include the mountain name, elevation, location, route descriptions, and safety notes. Beyond these basics, useful templates also capture logistics and legal requirements so teams can prepare efficiently.

    • Mountain Name: The official name of the mountain being climbed.
    • Elevation: The height of the mountain, which is crucial for assessing difficulty.
    • Location: Geographic details that help climbers find the mountain.

    These foundational attributes form the basis of any peak profile template, providing essential context for climbers.

    Mountain Name, Elevation, and Location: Foundational Attributes

    The mountain name identifies the objective; elevation indicates likely physical demand and altitude effects. Location details — coordinates, access points and parking or approach routes — are necessary for navigation and logistics. Together they give a clear starting point for planning. Additional practical fields to include are nearest town or access airstrip, typical approach time, difficulty grading system used, and permit or fee information when relevant.

    Climbing Routes, Difficulty Levels, and Safety Notes: Core Climb Information

    Profiles should list available routes, their difficulty ratings, and concise safety notes. Include objective hazards, typical weather patterns, altitude sickness risks, and recommended emergency procedures so climbers can match routes to their skills and prepare mitigation steps. Good route descriptions are structured: an approach summary, key waypoints and time estimates, technical pitches or obstacles, recommended gear for each section, and descent options.

    Proper preparedness, including matching skillsets to route difficulty, is key to reducing the risks of high‑altitude mountaineering.

    Mountaineering Preparedness & Risk Guidance

    At high altitude, lack of skills, experience and preparedness increases the risk of accidents, injuries and death. The study recommended collecting and adapting readiness strategies used by expert high‑altitude climbers into a guidance document for adventure tourists.

    Preparedness and Peak Performance for Mountaineering Tourists, 2023

    How to Create a Comprehensive Climbing Route Template for Accurate Peak Documentation?

    Build a climbing route template with a clear scope, consistent fields, and useful visuals so the file is accurate and usable in planning and on the mountain. Choose a file format that fits your workflow — a shared spreadsheet, a formatted document, or a simple database — and define required fields so contributors supply consistent information.

    • Identify Key Elements: Determine the essential information that needs to be documented, such as route descriptions, difficulty ratings, and safety protocols.
    • Use a Standardized Format: Adopt a consistent layout that allows for easy comparison between different routes.
    • Incorporate Visual Aids: Utilize maps and elevation profiles to enhance understanding and navigation.

    Follow these steps to produce templates that teams can rely on before and during expeditions. Also define responsibilities: who is authorized to update a profile, how changes are tracked, and where archive versions are stored for accountability.

    Step-by-Step Guide to Documenting Climbing Routes Effectively

    Use a repeatable workflow when documenting routes:

    • Gather Information: Collect data on the route, including descriptions, difficulty levels, and safety notes.
    • Organize Data: Use a standardized template to present the information clearly.
    • Review and Update: Regularly review and update the template based on new experiences and feedback from other climbers.

    That systematic approach helps keep route records accurate and practically useful. When possible, capture the person who supplied each field and the date of the observation so later readers can judge the currency of a report.

    Integrating GPS Data and Elevation Profiles for Route Accuracy

    Add GPS tracks and elevation profiles to improve precision. GPS points fix key features and access routes; elevation charts show steep sections and total ascent. Together these elements make physical demands and navigation clearer for planning and pacing. Include commonly used export formats (for example GPX or KML), waypoint names, and timestamps so tracks can be replayed and validated by others using mapping apps or handheld GPS units.

    What Safety and Gear Information Should be Integrated into Peak Profiles?

    Essential climbing gear including helmets and ropes on a rocky surface in a mountain environment

    Every peak profile should include a focused safety section and a gear list tailored to the route’s conditions and hazards. Make lists modular so teams can adapt the base kit to seasonal or route-specific needs without losing sight of minimum safety items.

    • Essential Gear Lists: A comprehensive list of gear required for the climb, tailored to the specific conditions and challenges of the route.
    • Safety Protocols: Guidelines for managing risks, including weather considerations and emergency procedures.
    • Recommended Practices: Best practices for climbing, such as hydration strategies and acclimatization tips.

    Including Safety Protocols and Risk Mitigation Strategies in Summit Guides

    Outline clear safety protocols that address weather, signs and management of altitude sickness, and emergency response steps. Specify when to turn back and list contact or evacuation options so teams can make informed, timely decisions. Include standard check-in times, expected radio or phone windows, and a simple escalation ladder that lists local rescue contacts and the steps to call for assistance. Keep instructions concise and action-oriented so they can be referenced quickly in pressure situations.

    Adventure carries inherent risks; robust safety standards and disciplined risk management reduce those risks.

    Mountain Safety Standards & Risk Management

    Adventure is linked to risk of injuries and fatalities; this study examined safety concerns, risk management and standards of practice for preparing and handling emergencies in the East African afro‑alpine regions of Mt. Kenya, the Rwenzori Mountains and Mt. Kilimanjaro.

    Standards of practice, risk assessment, and safety concerns in outdoor adventure programmes in the afro‑alpine mountains of east

    Africa, LJ Wachira, 2022

    Recommended Gear Lists and Product Specifications for Climbers

    Produce a gear list that matches route conditions. Include technical climbing equipment (ropes, harnesses, carabiners), clothing layers for expected weather, and safety items (helmet, first‑aid kit, navigation tools). Where useful, add brief product specs or performance criteria to guide purchasing decisions. Organize gear by category — technical hardware, clothing and footwear, overnight kit, navigation and communication, and emergency supplies — to make packing and checking faster before a climb.

    How Can Trip Planning Templates Enhance Summit Expedition Preparation?

    Trip planning templates organise logistics so teams don’t miss critical items. They turn planning into checkable tasks for gear, food, timing and communications. Well-structured templates reduce cognitive load during planning, freeing leaders to focus on route-specific decisions and contingency planning.

    Careful expedition planning is essential; small oversights can compromise an entire climb.

    Essential Mountaineering Expedition Planning

    Planning an expedition, especially a major climb such as Mount McKinley, requires detailed attention to food, equipment and personnel — and to administrative items like applications and reservations, which can determine success or failure.

    Expedition Planning., 1977
    • Comprehensive Checklists: Include checklists for gear, food, and safety equipment to ensure nothing is overlooked.
    • Timeline Planning: Establish a timeline for the expedition, including travel, acclimatization, and climbing days.
    • Coordination with Team Members: Facilitate communication and coordination among team members to ensure everyone is on the same page.

    Using trip templates reduces the chance of missed steps and helps teams coordinate timelines, supplies and emergency plans. Add an alternate-itinerary section for common failure points (late arrival, bad weather, injury) so leaders can execute a fallback plan without rebuilding logistics under stress.

    Using Peak Profiles to Develop Effective Summit Expedition Checklists

    Reference the peak profile to build a checklist tailored to that climb’s specific risks and equipment needs. That ensures you pack appropriate gear and plan acclimatisation and contingency steps. Consider including a short “mandatory items” line that all team members must sign off on during the pre-departure check.

    Linking Peak Profiles with Trip Planning Tools for Seamless Coordination

    Connect peak profiles with your planning tools so team members can access route details, timelines and gear lists in one place. This reduces errors and improves communication before and during the expedition. Where possible, integrate profiles with shared calendars, cloud folders for key documents (permits, maps) and a single communication channel for day-of status updates.

    What Are Best Practices for Documenting and Standardizing Mountaineering Profiles?

    Follow consistent formatting, use structured data where possible, and keep profiles current with recent statistics or route changes. These steps improve readability, searchability and reliability. A consistent template reduces friction for contributors and makes automated checks or exports easier when building a digital route library.

    • Consistent Formatting: Use a uniform format for all profiles to enhance readability and usability.
    • Structured Data Markup: Implement structured data to improve searchability and accessibility of information.
    • Incorporating Recent Climbing Statistics and Industry Updates: Regularly update profiles with the latest data to ensure relevance and accuracy.

    When documenting, keep a visible change log and a contributor field so readers can see who added or verified information. Test templates in a low-risk setting (local crag or short approach) to ensure fields are understandable and practical before applying them to major expeditions.

    Adopting Consistent Formatting and Structured Data Markup

    Use a standard layout and clear field labels. If you publish profiles online, add structured data markup to help others find accurate, machine‑readable information. Consistent labels (for example “approach time”, “technical crux”, “bivy options”) make cross-peak comparisons and automated sorting easier for teams and researchers.

    Incorporating Recent Climbing Statistics and Industry Updates

    Update profiles with recent route reports, incident statistics and regulatory changes so planning decisions reflect current conditions and best practices. Encourage trip leaders to append short condition notes after each use so the living document reflects real experience rather than a static description.

    How to Utilize Visual Aids Like Route Maps and Elevation Charts in Peak Profiles?

    Use maps, elevation charts and annotated photos to show route lines, key landmarks and steep or exposed sections. Visual aids reduce ambiguity and improve navigation and pacing decisions. A well-annotated image can quickly communicate the appearance of the crux and the safest places to bivi or escape a route.

    • Route Maps: Detailed maps that outline the climbing route, including key landmarks and potential hazards.
    • Elevation Charts: Graphical representations of the climb’s elevation changes, allowing climbers to assess the physical demands of the route.
    • Annotated Images: Images that highlight specific features of the climb, such as difficult sections or scenic viewpoints.

    When paired with concise text, these visuals give a practical picture of the climb’s terrain and demands. Add scale bars, north arrows and contour interval notes where relevant so readers understand distances and gradient at a glance.

    What Are Common User Questions About Peak Profile Templates and Summit Guides?

    Climbers commonly ask what to include in a profile, how to keep formats consistent, and which documentation practices work best for routes and safety. Addressing these common concerns in a template’s help text or an introductory section reduces repeated questions and improves the quality of contributions.

    • What information should be included in a peak profile?
    • How can I ensure my peak profile is standardized?
    • What are the best practices for documenting climbing routes?

    Answering these questions helps climbers understand how to compile useful, standardised profiles they can rely on in planning and during climbs.

    How to Document a Mountain Climb Using a Peak Profile Template?

    Document a climb in three steps: collect accurate data, fill the standardized template, and review the entry after the trip to capture lessons learned. Keeping notes on conditions, decision points and unexpected issues helps other teams anticipate the same challenges more effectively.

    • Collect Data: Gather all relevant information about the climb, including route details and safety protocols.
    • Fill Out the Template: Use the standardized format to document the information clearly and concisely.
    • Review and Revise: Regularly review the documented profile to ensure accuracy and relevance.

    Follow these steps to maintain a reliable record that benefits future planning and team briefings. Where possible, include photos with captions and short file names that link back to the profile fields for quick verification.

    What Safety Information is Critical in Summit Expedition Guides?

    Include weather patterns, altitude sickness guidance, and clear emergency protocols. Those elements directly affect decision points and contingency planning on the mountain. Make the safety section actionable with bullet-pointed steps that are easy to scan in an emergency.

    • Weather Patterns: Understanding local weather conditions and how they can impact climbing safety.
    • Altitude Sickness Awareness: Information on recognizing and managing altitude sickness symptoms.
    • Emergency Protocols: Clear guidelines for responding to emergencies during climbs.

    Integrating these safety items into profiles improves preparedness and reduces avoidable risk during expeditions. Encourage teams to rehearse emergency workflows and confirm communication devices before committing to high exposure segments.

    Frequently Asked Questions

    What are the best tools for creating peak profile templates?

    Use tools that match your needs: Google Docs or Microsoft Word for quick, shareable templates; Climb Pro or Mountain Project for route mapping and gear lists; and Canva for visual layouts. Choose the tool that fits your workflow and the level of detail you need. For collaborative editing, cloud documents and version-controlled spreadsheets make it easy to track changes and roll back if necessary.

    How often should peak profiles be updated?

    Update profiles after each expedition to capture new route notes and lessons. Also review them annually or whenever significant changes occur, such as new access rules, route changes or notable incidents. If a route is used regularly, add a short seasonal summary so readers can see how conditions evolve through the year.

    Can peak profiles be shared with other climbers?

    Yes. Sharing profiles helps the community learn and improves collective safety. Publish profiles on community sites or in team folders, but check accuracy before sharing to avoid passing on outdated information. When sharing, mark the profile’s last-verified date and list any known condition caveats.

    What role do visual aids play in peak profiles?

    Visuals clarify route lines, highlight hazards and show elevation change. They help you assess technical sections and energy requirements, making planning more reliable than text alone. Use high-contrast annotations and short captions to make images usable even on small mobile screens or printed copies.

    How can I ensure my peak profile is accessible to others?

    Save profiles in common formats (PDF, DOCX) and upload them to community platforms. Use clear file names, section headings and structured data where possible to improve discoverability. Also provide a short printable summary page for team leaders who prefer paper briefings.

    What are the common mistakes to avoid when creating peak profiles?

    Avoid omitting safety details or gear lists, using inconsistent formats, and failing to update profiles. Also solicit feedback from other climbers; regular review and revision are essential to keep profiles useful. Standardize terminology (for example, use the same grading scale across profiles) to reduce confusion when comparing routes.

    Conclusion

    Using a peak profile template improves expedition planning by giving you a clear, repeatable way to record routes, risks and gear needs. Standardised profiles raise safety and clarity, and sharing them builds community knowledge. Adopt a template, keep it current, and use it to prepare practical checklists before your next climb.

    Start small: implement a single template for your next few trips, collect feedback from participants, and iterate. Over time a maintained, well-structured profile library becomes an essential part of safe, efficient climbing operations and helps teams learn from each ascent without repeating avoidable mistakes.

  • Avalanche Safety for Mountaineers: Complete Guide

    Avalanche Safety for Mountaineers: Complete Guide

    Avalanche Safety for Mountaineers: Complete Guide (2026) | Global Summit Guide
    Cluster 12 · Planning, Safety & Weather · Updated April 2026

    Avalanche Safety for Mountaineers: Complete Guide

    Terrain assessment, snowpack evaluation, and the three essential rescue tools — beacon, probe, shovel. Plus the training path that actually works, survival statistics every climber should know, and the decision framework that keeps mountaineers alive in snow terrain. Written for climbers, not recreational skiers.

    91%
    Survival if
    rescued <18 min
    3
    Essential
    rescue tools
    30–45°
    Danger
    slope angle
    $400–700
    Complete
    rescue kit
    Global Summit Guide A guide in Cluster 12 · Planning, Safety & Weather View master hub →

    Avalanches are the leading cause of winter mountaineering deaths worldwide — more than falls, more than hypothermia, more than altitude illness. The terrifying part isn’t just the burial; it’s the statistical clock. After 18 minutes buried, survival rate drops from 91% to under 50%. Professional rescue almost never arrives in time. This guide covers the terrain recognition, rescue gear, and training that let mountaineers in avalanche country survive when the worst happens — not by avoiding snow terrain, but by operating in it with competence.

    How this guide was built

    Content reflects current curricula from the American Institute for Avalanche Research and Education (AIARE), the Canadian Avalanche Association (CAA), and European avalanche research institutes. Survival statistics come from the Swiss Federal Institute for Snow and Avalanche Research (SLF) and the Colorado Avalanche Information Center (CAIC). Gear recommendations reflect 2026 product availability and reviewed specifications. Reviewed by AIARE Level 2 certified instructors. Fact-check date: April 19, 2026.

    The Three Essential Avalanche Rescue Tools (Beacon, Probe, Shovel)

    Every climber in avalanche terrain carries three specific items. Missing any one renders the others useless. A beacon without a probe and shovel is a $400 luxury — you can’t dig someone out with your hands in compressed avalanche debris, and you can’t pinpoint a location without a probe once the beacon narrows the search.

    01

    Avalanche Beacon

    $350–$500
    Locates buried climbers

    A transceiver worn on your body that constantly transmits a signal on 457 kHz. If you’re buried, partners switch theirs to receive mode and follow the signal to your location. Modern digital beacons display direction arrows and distance in meters, reducing search time from the 10+ minutes required by older analog beacons to 2–5 minutes.

    Mammut Barryvox · BCA Tracker S / T3 · Ortovox Diract Voice · Pieps Powder BT
    02

    Probe

    $60–$120
    Pinpoints exact burial location

    A collapsible aluminum or carbon rod (240–320 cm extended) used to precisely locate a buried climber once the beacon has narrowed the search to within about 1 meter. Probe strikes confirm burial depth and direction to dig. Carbon probes are faster to deploy than aluminum — every second matters in rescue.

    BCA Stealth 240 · Ortovox Carbon 240 · Black Diamond QuickDraw 280
    03

    Shovel

    $60–$150
    Excavates buried climber

    A metal-bladed collapsible shovel with a sturdy shaft. Avalanche debris is compressed to roughly ice density — plastic shovels shatter, hands do almost nothing. Dig downhill of the probe strike; follow the tool-parallel-to-slope technique taught in AIARE courses. Budget at least 5–15 minutes to dig out a typical burial.

    BCA RS / Dozer · Voile Telepro T6 · Black Diamond Evac · Mammut Alugator
    Gear without training is gear without value

    The single biggest mistake mountaineers make is buying the three rescue tools and never training with them. A fully-equipped rescuer who has never practiced takes 25+ minutes to execute a rescue that a trained rescuer completes in 7–10 minutes. That difference is almost exactly the survival window. Buy the gear, then take an AIARE 1 course, then practice every month during snow season with your climbing partners. Skill decays fast without practice.


    How to Use an Avalanche Beacon: The Search Sequence

    Using an avalanche beacon competently is a learned skill, not an intuitive one. The sequence below is the standard companion-rescue protocol taught by AIARE. Read it; then take the course; then practice it until it’s automatic.

    01

    Confirm the avalanche has stopped

    Watch the victim’s last seen point. Wait for debris to stop moving and secondary slides to settle. Do not enter the slide path if there’s remaining hazard — another slide can bury rescuers. Scan for airway signs (hand, foot, gear) before committing.

    02

    Switch all beacons to SEARCH mode

    Every remaining team member switches their beacon from transmit to search. Check that yours is in receive mode before entering the debris field — otherwise you’ll confuse your own signal with the victim’s. Most modern beacons have a physical switch or prominent button.

    03

    Signal search — locate the signal

    Walk in a grid pattern across the debris field until your beacon picks up a signal (typically 40–60 m range for modern digital beacons). Follow direction arrows and distance readings. This phase usually takes 1–3 minutes of walking.

    04

    Coarse search — narrow to within 3 m

    Once you have a signal, follow the direction indicator while watching distance decrease. Move at a deliberate walking pace. When you get to 3 m, slow down — rushing causes you to overshoot.

    05

    Fine search — pinpoint within 1 m

    Below 3 m, reduce your pace to a slow shuffle. Hold the beacon close to the snow surface and move it in a methodical cross pattern. The lowest distance reading is the closest point. Mark that spot with a ski pole or gear.

    06

    Probe — confirm exact location and depth

    Probe in a spiral pattern around the pinpoint, working outward. Leave the probe in place when you strike the victim — it marks the spot and shows depth. Probe strike confirms you’re over a body, not a boulder or tree.

    07

    Shovel — strategic excavation

    Dig downhill of the probe, creating a V-shape trench that lets you reach the victim without collapsing snow onto them. In deep burials, multiple rescuers should shovel in rotation — the lead shoveler tires in 2–3 minutes and should swap. Expose airway first, then excavate torso.

    Target time for complete sequence from avalanche stop to airway exposed: 7–10 minutes for a trained team. Untrained teams frequently take 20+ minutes — which is past the 91% survival window.


    What Terrain Is Most Dangerous for Avalanches?

    Most avalanche deaths involve human choice — climbers moving into identifiable dangerous terrain when safer alternatives existed. Learning to recognize hazardous terrain features is the single highest-leverage skill in avalanche safety.

    30–45° Slopes

    Peak fatality angle: 38°

    The most dangerous slope angle range. Steeper slopes avalanche more frequently but often sluff before building dangerous slabs. Slopes under 30° rarely slide. The 38° peak fatality angle reflects this: steep enough to produce devastating slides, gentle enough to appear climbable.

    Convex Rolls

    Where slabs initiate

    Where a slope transitions from less steep to more steep. Tension fractures start at convex rolls — the snow above is being pulled downhill while the snow below remains anchored. Most slab avalanches initiate here.

    Leeward Slopes

    Wind-loaded slabs

    Downwind of ridgelines where wind deposits snow into thick, cohesive slabs. Slabs on leeward slopes are denser and more unstable than naturally-fallen snow. Wind loading from 30 km/h+ winds redistributes snow dramatically in hours.

    Terrain Traps

    Amplify small slides

    Features below a slope that trap debris and deepen burials: gullies, cliffs, tree stands, large rocks. A small avalanche on a gentle slope can bury a climber 3+ meters deep if they end up in a gully. Always consider what’s below a slope, not just the slope itself.

    Recent Slide Paths

    Structural evidence

    Obvious debris piles, stripped trees, or bare rock from recent avalanches. This slope has slid recently and could slide again — the persistent weak layer that caused the first slide is often still present. Also means you’re in known avalanche terrain.

    Cornices

    Trigger mechanism

    Overhanging snow formations on ridgelines. Cornice collapses trigger large avalanches on the slope below — climbers safely on a slope can die from cornice-triggered slides above them. Stay well off cornices and aware of slopes below them.

    Open Slopes > 30°

    Unbroken runout

    Large, uninterrupted slopes with no terrain features (trees, rocks) to slow a slide. Even moderate avalanches on these slopes produce devastating debris flows. Dense timber or complex terrain slows avalanches significantly.

    Shallow Snowpack Areas

    Weak layer exposure

    Rocky areas with thin snow cover where weak layers are closer to the surface and more easily triggered. Common avalanche start zones on otherwise-stable slopes. Especially hazardous in early season and after cold, dry snowpack periods.

    AIARE terrain categories

    AIARE uses three categories for avalanche terrain assessment: Simple (gentle angles, low consequence, clear runout), Challenging (moderate angles, some consequence, requires judgment), and Complex (steep angles, significant consequence, demands expertise). Most mountaineering accidents occur in Challenging terrain — not Complex — because climbers overestimate their ability to manage moderate-looking hazards.


    How Long Can You Survive Buried in an Avalanche?

    Every climber needs these numbers in their head. They drive every decision about gear, training, and companion rescue urgency.

    < 18 min
    91%
    Survival rate
    18–35 min
    34%
    Survival rate
    35–90 min
    20%
    Survival rate
    90–120 min
    < 10%
    Survival rate
    > 2 hrs
    ~0%
    Survival rate

    What drives the cliff at 18 minutes

    The primary cause of avalanche death is asphyxiation from carbon dioxide buildup, not direct trauma or hypothermia. In the first few minutes, the buried victim breathes remaining air pockets. By 18–20 minutes, exhaled CO₂ accumulates in the confined space faster than oxygen can be obtained. Victims with air pockets (space between face and snow) survive 2–3 times longer than victims buried directly in compressed snow.

    Why professional rescue almost never helps

    Organized rescue teams typically arrive 60+ minutes after an avalanche, even in well-resourced mountain regions. By that time, survival rate is below 20%. The math is brutally clear: companion rescue is the only rescue that works. Every minute between the avalanche and the first probe strike costs survival probability.

    The air pocket factor

    Victims who manage to create an air pocket in front of their face during burial have 3-5x longer survival windows than victims buried directly face-down in compressed snow. This is why the “hands in front of face” technique is taught in avalanche safety courses. During the avalanche itself, attempting to create space around your airway can be the difference between life and death — even if you can’t swim to the surface.


    AIARE Avalanche Training: Which Course Do You Need?

    Avalanche safety training isn’t optional for mountaineers in snow terrain. AIARE (American Institute for Avalanche Research and Education) is the US standard; Canada’s CAA courses and various European national certifications are equivalents.

    Entry level

    AIARE 1

    3 days · 24 hours
    $400–$700
    Covers

    Terrain recognition, basic snowpack assessment, group decision-making, companion rescue with beacon/probe/shovel. The minimum qualification for any mountaineering in avalanche terrain. Most guide services require AIARE 1 for winter clients.

    Intermediate

    AIARE 2

    4 days · 32 hours
    $700–$1,100
    Covers

    Professional-level snowpack analysis, weather integration, complex terrain decisions, multi-party rescue scenarios. Recommended for climbers operating in remote terrain without guide support. Prerequisite: AIARE 1 + field experience.

    Advanced

    Rescue Course

    1–2 days · 8–16 hours
    $200–$400
    Focus

    Pure rescue skill refinement — timed scenarios, multi-victim burials, rescue leadership. Best taken annually as a skill refresher. Complements AIARE 1 or 2; doesn’t replace comprehensive training.

    The ongoing practice requirement

    Avalanche rescue skill decays rapidly without practice. A climber who took AIARE 1 five years ago and never practiced is functionally untrained in an actual rescue. Monthly beacon practice sessions with climbing partners during snow season maintain the skill. Most guide services and climbing clubs organize rescue practice days — use them.

    For broader safety planning see our Mountain Weather guide and Mountain Climbing Insurance guide. For avalanche-terrain peaks specifically, our Denali Climbing Guide and Top 50 Technical Objectives cover peaks where these skills are essential.


    When Is Avalanche Risk Highest for Climbers?

    Avalanche hazard is dynamic — the same slope can be safe one day and lethal the next. Understanding the timing patterns lets you plan around peak risk periods.

    The 24-72 hour post-storm rule

    The most dangerous window for avalanches is the 24 to 72 hours following significant snowfall (10+ cm new snow). The fresh snow creates a slab over older snowpack; the bond between layers takes time to stabilize. Most backcountry avalanche fatalities occur in this window. Waiting 3 days after a storm significantly reduces hazard — a discipline that saves more climbers than all the fancy gear combined.

    Additional high-risk conditions

    • Rapid warming periods — The first warm day after a cold spell makes wet avalanches likely. Afternoon temperatures above 0 °C on slopes in direct sun raise wet-slide risk dramatically.
    • Wind events — Sustained winds of 30 km/h+ redistribute snow, creating wind-loaded slabs on leeward slopes. Hazard can change within hours.
    • Spring transitions — Warming temperatures progressively destabilize winter snowpack. April-May in North America and September-October in the Southern Alps are notably hazardous.
    • Afternoon hours — Solar heating weakens snow bonds through the day. Morning climbs are generally safer than afternoon climbs on sunny slopes.
    • End of a dry spell after a weak layer — A buried weak layer that survives multiple snowfalls becomes a “persistent weak layer” — a ticking time bomb that can produce large avalanches weeks after the original storm.

    Avalanche danger scale

    Danger LevelMeaningTypical conditionsMost fatalities occur here?
    1 · LowGenerally stableOld snowpack, no recent stormsRare
    2 · ModerateHeightened awarenessSlight instability in specific terrainSome
    3 · ConsiderableCareful terrain choiceHuman-triggered avalanches likelyYes — most fatalities
    4 · HighDangerous conditionsNatural avalanches probableSome (fewer climbers out)
    5 · ExtremeAvoid all avalanche terrainWidespread natural avalanchesVery few — climbers stay home

    Counterintuitively, most avalanche deaths occur at Level 3 (Considerable) danger, not Level 5 (Extreme) — because climbers correctly stay out of avalanche terrain on Extreme days but underestimate the risk on Considerable days. Take Level 3 warnings seriously.

    Where to check avalanche forecasts

    Major regional avalanche forecast services:

    • avalanche.org — Aggregator for 25+ US avalanche centers including CAIC (Colorado), NWAC (Cascades), Utah Avalanche Center
    • avalanche.ca — Avalanche Canada national forecasts
    • Lawine.org — Swiss Federal Institute (SLF) forecasts for Alps
    • Avalanches.org — European Avalanche Warning Services aggregator
    • Mountain Forecast (mountain-forecast.com) — Integrated weather + avalanche context

    Avalanche Safety FAQ: Your Common Questions Answered

    What are the three essential avalanche rescue tools?

    The three essential avalanche rescue tools are the beacon (avalanche transceiver), the probe, and the shovel. The beacon is worn on your body and transmits a signal when the avalanche is moving; if you are buried, your partners switch their beacons to receive mode and follow the signal to your location. The probe is a collapsible rod used to pinpoint your exact position under the snow once the beacon narrows the search area. The shovel is used to dig you out rapidly — typically 1 to 2 meters of compressed avalanche debris must be removed. All three tools are non-negotiable for any mountaineering in avalanche terrain. A beacon without a probe and shovel is useless because you cannot dig someone out with your hands in compressed avalanche debris. Total cost for complete kit: $400 to $700.

    How do you use an avalanche beacon?

    An avalanche beacon is worn under your outer layer against your body, on all day, in transmit mode. If a partner is buried in an avalanche, you switch your beacon from transmit to search mode. The beacon displays direction arrows and distance in meters to the buried beacon. Walk the direction indicated, following the signal path. As distance decreases below 3 meters, slow down and orient the beacon carefully to pinpoint the signal. Once at approximately 1 meter distance, use your probe to precisely locate the buried climber, then shovel from downhill of the probe. Practice regularly — the skill degrades without monthly refresher training. Modern digital beacons (Mammut Barryvox, BCA Tracker, Ortovox Diract) cost $350–$500 and are vastly easier to use than older analog beacons.

    What terrain is most dangerous for avalanches?

    The most dangerous avalanche terrain features are: (1) Slopes between 30 and 45 degrees — this angle range produces the vast majority of avalanche fatalities, with 38 degrees being the peak. (2) Terrain traps like gullies, cliffs, trees, and rocks below the slope, which can kill buried climbers even in small avalanches. (3) Convex rolls where the slope steepens — tension fractures start here. (4) Leeward (downwind) slopes where wind deposits snow creating unstable slabs. (5) Recent avalanche paths showing obvious debris or stripped trees. (6) Cornices on ridges that can break off and trigger slides below. (7) Terrain above 3,000 meters with recent storm snow. Safer terrain includes slopes under 30 degrees, ridgelines and wind-scoured areas, dense timber, and areas you can see have already avalanched this season. The AIARE terrain categories are Simple, Challenging, and Complex — most mountaineering accidents occur in Challenging terrain.

    What is an AIARE avalanche course?

    AIARE (American Institute for Avalanche Research and Education) is the primary avalanche safety certification in the United States. AIARE 1 is a 3-day introductory course covering terrain recognition, basic snowpack assessment, group decision-making, and companion rescue with beacon/probe/shovel. AIARE 2 is an advanced 4-day course covering professional-level snowpack analysis, weather integration, and complex terrain decisions. AIARE courses cost $400–$700 in the United States and are offered by certified providers in every major mountain region. International equivalents include Canada’s Canadian Avalanche Association (CAA) courses and Europe’s various national certification bodies. An AIARE 1 course is considered the minimum qualification for mountaineering in avalanche terrain — most guide services require it for winter mountaineering clients.

    What should you do if caught in an avalanche?

    If caught in an avalanche: (1) Try to escape off the side of the slide if possible — avalanches move fastest in the middle. (2) Discard heavy gear like backpacks only if necessary — they can also help mark your position. (3) Attempt swimming motions to stay near the surface. (4) As the avalanche slows, make an air pocket in front of your face by creating space with your arms. (5) If possible, reach one hand upward — it may help partners locate you and can serve as a reference point when buried. (6) Conserve oxygen by staying calm and breathing slowly. (7) Do not call out until you hear rescuers nearby — sound does not travel well through snow and yelling wastes oxygen. Survival statistics: 91% survival rate if rescued within 18 minutes, dropping to 34% after 35 minutes due to asphyxiation. This is why companion rescue matters more than professional rescue — professional rescue almost never arrives in time.

    How long can you survive buried in an avalanche?

    Avalanche burial survival statistics from the Colorado Avalanche Information Center and international avalanche research: 91% of buried victims survive if rescued within 18 minutes. Survival drops to 34% by 35 minutes due to asphyxiation, the primary cause of avalanche death. After 90 minutes, survival rate drops to under 10%. Beyond 2 hours, survival becomes extremely rare. The critical factors are: (1) Whether the victim has an air pocket — makes a 10x difference in survival time. (2) Burial depth — shallower burials allow faster rescue. (3) Whether a beacon is worn — beacon-equipped victims are rescued an average of 15+ minutes faster. (4) Companion rescue capability — professional rescue almost always arrives too late. This is why every mountaineer in avalanche terrain must carry beacon, probe, and shovel, and must be trained to perform companion rescue within 15 minutes.

    Do you need an avalanche airbag for mountaineering?

    Avalanche airbags (BCA Float, Mammut Protection, Black Diamond JetForce) reduce burial risk but are not universally required for mountaineering. Research from the Swiss Federal Institute suggests airbags reduce mortality by approximately 11% in avalanche incidents. They work by inflating a large balloon during the avalanche, increasing the victim’s volume-to-density ratio so they stay closer to the surface. Airbags are more standard in backcountry skiing than mountaineering because skiers typically travel heavier and faster through avalanche terrain. For mountaineers, airbags are recommended for: winter climbing in known avalanche zones, ski mountaineering objectives, and climbs during elevated avalanche hazard. Cost is $800–$1,200 for complete systems. For many mountaineers, budget priority should go to beacon-probe-shovel and AIARE training first; airbags are an upgrade once the basics are mastered.

    When is avalanche risk highest for climbers?

    Avalanche risk for mountaineers is highest during: (1) The 24 to 72 hours following significant snowfall (10+ cm new snow) — the primary risk window. (2) Rapid warming periods, especially the first warm day after a cold spell — wet avalanches become likely. (3) High winds that create wind-loaded slabs on leeward slopes — 30 km/h+ winds redistribute snow dangerously. (4) Spring conditions when warming destabilizes winter snowpack. (5) The hour of the day matters — mornings are safer than afternoons when solar heating weakens snow bonds. (6) Late in the climbing day when temperatures have peaked. Always check the local avalanche forecast before any winter or spring climb — avalanche.org covers the United States, avalanche.ca covers Canada, and various national services cover European and other regions. Forecasts rate danger on a 1-5 scale; most fatalities occur at Considerable (3) level, not Extreme (5), because climbers stay home on Extreme days.


    Authoritative Sources & Further Reading

    Content reflects current curricula from major avalanche safety organizations and peer-reviewed research:

    • American Institute for Avalanche Research and Education (AIARE) — aiare.org — Course curricula and certification standards
    • Canadian Avalanche Association (CAA) — avalancheassociation.ca — Canadian equivalent certification
    • Swiss Federal Institute for Snow and Avalanche Research (SLF) — slf.ch — Peer-reviewed avalanche survival research
    • Colorado Avalanche Information Center (CAIC) — avalanche.state.co.us — US survival statistics and incident reporting
    • Avalanche.org — US avalanche forecast network aggregator
    • Avalanche Canada — avalanche.ca — Canadian avalanche forecast service
    • European Avalanche Warning Services (EAWS) — avalanches.org — European standards and forecasts
    • American Alpine Club — Accidents in North American Climbing — Annual incident analysis
    • Reference texts: Staying Alive in Avalanche Terrain (Tremper), Snow Sense (Fredston and Fesler), Freedom of the Hills (The Mountaineers)
    • Gear manufacturers: Mammut, BCA (Backcountry Access), Ortovox, Black Diamond, Pieps, Voile
    Published: February 15, 2026
    Last updated: April 19, 2026
    Next review: July 2026
    Part of the Global Summit Guide

    Back to the Master Hub

    This guide is one of 71 across 12 thematic clusters on Global Summit Guide. The master hub organizes every guide by experience tier, specific peak, skill area, and region.

    View the Hub →
  • How to Use Global Summit Guides Effectively

    How to Use Global Summit Guides Effectively

    How to Use Global Summit Guides Effectively (2026) | Global Summit Guide
    Cluster 02 · Beginner Progression · Updated April 2026

    How to Use Global Summit Guides Effectively

    The meta-guide to navigating 71 guides across 12 thematic clusters — hub-and-spoke structure, research workflow, cluster selection, and how to build a personal climbing plan from the full library. If the volume of the site feels overwhelming, this is your map through it.

    71
    Total
    guides
    12
    Thematic
    clusters
    3
    Reading
    paths
    6
    Planning
    workflow steps
    Global Summit Guide A guide in Cluster 02 · Beginner Progression View master hub →

    Global Summit Guide contains 71 guides totaling roughly 250,000 words of mountaineering content. Browsing randomly produces interesting reading but rarely actionable planning. The site is built to reward a specific navigation pattern — hub to cluster to anchor to specific spoke — and this guide walks through exactly how to use that pattern, whether you’re a new climber orienting yourself, a specific-peak researcher, or someone planning a multi-year project.

    What this guide covers

    This is a navigation and workflow guide, not a content guide — you won’t learn anything about specific peaks here. You will learn how the site is structured, which cluster applies to which question, and how to sequence your reading so you end up with a concrete climbing plan rather than scattered knowledge. Readers who use this workflow typically research a peak in 5–8 targeted sessions rather than bouncing between unrelated articles for weeks. Fact-check date: April 19, 2026.

    01 · How the Site Is Structured

    Global Summit Guide uses a hub-and-spoke architecture. Every guide on the site fits into one of 12 thematic clusters; every cluster has one anchor guide (the comprehensive entry point) and several sibling guides (deeper dives on specific aspects of the cluster’s topic). The master hub — the Conquer Peaks page — indexes every guide and cluster in one place.

    The navigation hierarchy

    1. Master hub — Organized by cluster, with ★ marking each cluster’s anchor guide. Start here when you don’t yet know which topic you need.
    2. Cluster anchor — Comprehensive entry guide for one topic area. Covers the basics plus links to every sibling guide. Start here when you know your topic but need orientation.
    3. Sibling guide — Deeper dive on one specific aspect of the cluster’s topic. These go into detail the anchor can’t cover.
    4. Cross-cluster reference — Every spoke links to relevant guides in other clusters (gear guides from Cluster 09, altitude science from Cluster 08, etc.). Follow these when your research question spans clusters.

    The three consistent tie-backs on every spoke

    Every spoke guide contains three separate links back to the master hub: the Hub Strip right below the hero (gold band with star marker), the Internal Links grid with the hub marked ★ as the first link, and the Guide CTA block at the bottom of the article. If you’re ever lost in the site, one of these three is always within scroll distance — just click the hub and navigate fresh.

    Anchor-first is the rule, not the exception

    Regardless of what brought you to a cluster, read the anchor first. Siblings are written assuming you’ve already absorbed the anchor’s framework; reading siblings alone can produce real confusion. The Kilimanjaro cost guide, for instance, references route-selection decisions covered in the Kilimanjaro Climbing Guide anchor — starting with the cost guide makes you miss the context that makes the cost conversation meaningful.


    02 · The 12 Clusters, Explained

    Each cluster covers one coherent topic area. The cluster boundaries were drawn to make cross-cluster reference useful — when you’re researching Kilimanjaro (Cluster 06), you’ll predictably need altitude science (Cluster 08), gear (Cluster 09), and weather/safety (Cluster 12). The clusters are ordered below roughly by how a new reader might approach them.

    All 12 cluster tiles above link back to the master hub, where each cluster is expanded with its full list of guides. Click any cluster that matches what you’re researching.


    03 · The Three Reading Paths

    Most readers fall into one of three patterns. Each has a recommended starting sequence that builds foundation before drilling into specifics.

    Path A · New to mountaineering

    You’ve hiked but never climbed

    Goal: foundational understanding of what mountaineering is, whether it fits your life, and what your first concrete steps should be.

    Path B · Specific peak

    You’re researching one peak

    Goal: complete research on a specific peak — routes, costs, operators, timing, training needs, gear requirements.

    • Find the peak’s cluster on the master hub
    • Read the peak’s main anchor guide first
    • Drill into cluster siblings: cost, timing, routes
    • Cross-reference altitude (Cluster 08) and gear (Cluster 09)
    • End with planning & safety (Cluster 12) for budgeting
    Path C · Multi-year project

    You’re planning a big project

    Goal: multi-peak roadmap for Seven Summits, all 14 eight-thousanders, or a broader mountaineering arc across years.


    04 · Researching a Specific Peak: Step by Step

    This is the most common research pattern — you’ve decided on a peak and want to understand everything needed to climb it. The workflow below typically produces a complete climb plan in 5–8 focused reading sessions.

    Find the peak’s cluster

    Every major peak has a home cluster on the master hub. Kilimanjaro lives in Cluster 06 (7 dedicated guides). Everest lives in Cluster 05 (3 guides). Aconcagua, Denali, Vinson, Elbrus, and Carstensz are consolidated in Cluster 07. Mount Fuji and Utah peaks are in Cluster 11. Alps peaks are in Cluster 10. Scan the master hub for your peak name to find its cluster.

    Start at: Master hub

    Read the peak’s anchor guide

    The cluster’s anchor — titled something like “[Peak] Climbing Guide” or “How to Climb [Peak]” — is the comprehensive entry point. It covers routes, costs, seasons, operators, difficulty, and links to every sibling in the cluster. Don’t skip this even if you want specific information — the anchor provides the frame that makes specialized guides meaningful.

    Example anchors: Kilimanjaro Climbing Guide · How to Climb Mount Everest · Aconcagua Routes Guide · Denali Climbing Guide

    Drill into cluster siblings

    Each cluster has specialized siblings addressing specific questions. For Kilimanjaro: a cost guide, monthly climate guide, route-by-route timing guide, training program, 7-day Lemosho trip report, and packing guide. Choose the siblings that match your current research questions — you probably don’t need all of them in your first pass.

    Pattern: Anchor → cost guide → training guide → trip report → packing guide

    Cross-reference altitude (Cluster 08)

    Any peak above 3,500 m requires understanding altitude physiology. Altitude Acclimatization Explained covers the core science; Altitude Sickness Guide covers recognition and treatment; Train for High-Altitude Climbing covers the structured training program. Don’t skip these — altitude is consistently what separates success from failure on high peaks.

    Essential: Acclimatization · Sickness recognition · Training program

    Cross-reference gear (Cluster 09)

    The master gear list is the starting point. For specific items, drill into boots, crampons, sleeping bags, and other category-specific guides. Match gear choices to your peak’s demands — expedition boots aren’t needed for Kilimanjaro, but are non-negotiable for Denali.

    Drill order: Master list → boots → hardware → sleep system

    Close with Planning & Safety (Cluster 12)

    The Mountain Climbing Costs guide frames budget by experience level. The weather guide covers mountain-specific forecasting. Cluster 12 ties the project together with the realistic logistical framing — permits, insurance, rescue coverage, and cost contingencies.

    Final step: Budget framework · Weather · Logistics

    Total reading time for a complete peak research workflow: typically 5–8 hours spread across multiple sessions over 2–4 weeks. This is not a single sitting — mountaineering research rewards digestion time between readings.


    05 · Building a Climbing Plan

    Once your research is done, converting it to an actual plan requires explicit planning steps. The site is structured to support this — most guides end with “Next Steps” or “Your Action Plan” sections. The sequence below is how committed climbers typically convert research into action.

    The six-step planning sequence

    1. Define your objective specifically. Not “I want to climb Kilimanjaro” but “I want to climb Kilimanjaro via the 8-day Lemosho route in August 2027 with a reputable mid-tier operator, summit-rate target 85%+.” The specificity drives every subsequent decision.
    2. Honest self-assessment. Use the readiness checklist from the Mountaineering for Beginners guide or the first-peak framework from Seven Summits for Beginners. Where do you actually stand on fitness, skills, altitude experience, and budget?
    3. Identify skill gaps. What does the peak require that you don’t currently have? Usually this breaks down into training gaps, technical skill gaps, and altitude-experience gaps. Map each to a specific remediation — training program, introductory course, intermediate peak to build calibration.
    4. Budget the project. Use the Mountain Climbing Costs framework to produce a realistic total. Include training-peak costs, gear acquisition phased over 12–18 months, insurance, and contingency for a failed summit attempt that requires a re-try.
    5. Select your operator. The peak’s main guide lists reputable operators. Contact 3 for quotes and pre-trip briefings. Ask about guide-to-client ratios, cancellation policies, and weather contingency protocols.
    6. Execute on timeline. A 12-month climbing plan typically has: training base (months 1–6), intermediate peak (month 5 or 6), gear acquisition (ongoing), operator booking (month 3), final training (months 7–11), climb (month 12).
    Common planning mistake

    The single most common planning error is skipping the intermediate peak. Climbers research Kilimanjaro extensively, book it, train hard — then arrive with no prior experience above 4,000 m. The result is a much lower summit rate than training alone predicts. An intermediate peak (Colorado 14er, Mexican volcano, Rainier) bridges the gap between training and your goal climb. Don’t skip it.


    06 · Updates & Review Cycles

    Every guide on Global Summit Guide shows its update cadence explicitly — you can see exactly how current the information is on any page.

    Where to find update dates

    Three places on every guide: the Published date and Last Updated date in the byline at the top of the article, and a full Sources block at the end of every article showing published date, last updated, next review, and the editorial team responsible. If a “Next Review” date has passed, the information has been held to standard through that review cycle even if it hasn’t been visibly updated in the interim.

    How frequently guides are updated

    • Cluster anchors and master hub — Reviewed every 90 days minimum
    • Price-sensitive guides (operator costs, permit fees) — Updated whenever significant changes occur, minimum quarterly
    • Seven Summits and Everest clusters — Most frequent updates because of fast-changing operator and permit environments
    • Foundational guides (skills, physiology, definitions) — Updated when authoritative sources change their guidance, which is infrequent

    If you notice information on the site that conflicts with current operator documentation or authoritative sources, the editorial team is reachable through the about page. Corrections are prioritized.


    Frequently Asked Questions

    How is the Global Summit Guide site organized?

    Global Summit Guide uses a hub-and-spoke structure. A single master hub — the Conquer Peaks page — indexes every guide on the site, organized into 12 thematic clusters. Each cluster covers one major topic area (Seven Summits, Beginner Progression, Technical Mountaineering, Everest, Kilimanjaro, altitude physiology, gear, regional guides, etc.) and contains 3–10 individual spoke guides. Within each cluster, one guide is designated the anchor — the comprehensive entry point that links to every sibling in the cluster. Readers navigate by starting at the hub to find their cluster, reading the anchor for orientation, then drilling into specific spoke guides as needed.

    Where should I start if I’m new to mountaineering?

    Start with the Cluster 02 anchor: Mountaineering for Beginners: Complete Getting Started Guide. This covers what mountaineering actually is, whether it fits your life, core skills to build first, a realistic first-year progression, phased gear strategy, and how to find reputable instruction. Then read the Hiking vs Trekking vs Mountaineering guide to confirm you understand discipline boundaries. Then the 10 Best Mountains to Climb for Beginners for specific first-peak recommendations. Finally, the altitude acclimatization guide and mountain climbing gear list round out the foundational knowledge. This four-guide sequence gives you the research foundation to start planning concrete next steps.

    How do I research a specific peak using this site?

    The recommended research workflow is: (1) Find the peak’s cluster — Kilimanjaro has its own dedicated cluster with 7 guides, Everest has 3 guides, and each Seven Summits peak has at least one comprehensive guide. (2) Read the peak’s main guide first — typically titled [Peak] Climbing Guide or [Peak] Routes Guide — which covers routes, costs, difficulty, seasons, and operators. (3) Read any specialized guides in the cluster — training programs, packing lists, trip reports, cost breakdowns. (4) Cross-reference with cross-cluster guides — altitude acclimatization (Cluster 08), gear lists (Cluster 09), weather and safety (Cluster 12). A complete peak research workflow typically touches 5–8 guides across 3–4 clusters.

    How do I build a climbing plan using Global Summit Guide?

    A useful climbing plan workflow: Step 1 — Define your objective (specific peak and target timeline) using the cluster anchor for that peak category. Step 2 — Honest self-assessment against the Mountaineering for Beginners readiness checklist or the Seven Summits for Beginners first-peak framework. Step 3 — Map your skill gaps to specific training requirements using the altitude training program guide and peak-specific training guides. Step 4 — Budget the project using the Mountain Climbing Costs guide’s framework by level. Step 5 — Identify specific operators using the peak’s dedicated guide’s operator list. Step 6 — Gear inventory and acquisition using the master gear list plus category-specific buying guides (boots, crampons, sleeping bags). The full workflow typically consumes 15–20 guides across multiple reading sessions spread over weeks.

    What are the 12 clusters on Global Summit Guide?

    The 12 thematic clusters are: (01) Seven Summits & Flagship — the Seven Summits project framework and individual peak overviews. (02) Beginner Progression — getting started in mountaineering, first peaks, and discipline definitions. (03) Technical & Expert — advanced objectives and technical climbing. (04) Non-Technical Treks — trekking objectives and non-technical peak lists. (05) Everest — dedicated coverage of climbing Mount Everest. (06) Kilimanjaro — complete Kilimanjaro resource library. (07) Other Seven Summits peaks — Aconcagua, Denali, Vinson, Elbrus, Carstensz coverage. (08) Altitude, Training & Physiology — altitude science and training programs. (09) Gear & Equipment — buyer’s guides and gear strategy. (10) Regional Guides — Alps, Andes, Rockies, and other range-specific content. (11) Japan & Local/Utah — regional niche guides. (12) Planning, Safety & Weather — cost frameworks, safety protocols, and weather systems.

    How often is the site updated?

    Every guide on Global Summit Guide has a visible “Last Updated” date and a “Next Review” date shown in the Sources block at the end of each article. Major guides are reviewed and updated quarterly at minimum, with price-sensitive guides (costs, operator fees, permit prices) updated whenever significant changes occur. The Seven Summits and Everest clusters are the most frequently-updated because they reference rapidly-changing cost structures and operator policies. Cluster anchor guides and the master hub are reviewed at least every 90 days to ensure all internal links remain valid and all cross-cluster references stay current.


    Editorial Standards & Site Information

    Global Summit Guide editorial practice reflects the following standards:

    • Hub-and-spoke content architecture — Adopted for topical depth while maintaining navigational clarity
    • Quarterly review cycles — Every guide reviewed minimum every 90 days for accuracy and link integrity
    • Certified guide review — Technical content reviewed by AMGA-certified and IFMGA-certified mountain guides
    • Source transparency — Every guide lists authoritative sources used (operators, official park authorities, medical/physiology bodies, AAC)
    • Update visibility — Published date, Last Updated date, and Next Review date visible on every article
    • Correction policy — Reader-reported corrections prioritized, with changes visible in the updated date
    • No hidden affiliate relationships — Operator recommendations are editorial, not sponsored
    • Editorial team contact — Available through the About page
    Published: February 15, 2026
    Last updated: April 19, 2026
    Next review: July 2026
    Part of the Global Summit Guide

    Back to the Master Hub

    Now that you know the site structure, the master hub is your launching point for any climbing research project. Bookmark it — you’ll use it more than any other page on the site.

    View the Hub →
Language »