
Last updated July 20, 2026
{ “@context”: “https://schema.org”, “@type”: “Article”, “headline”: “Mount Everest Training Plan: How to Prepare (2026)”, “description”: “How to train for Mount Everest – a month-by-month plan covering endurance, strength, altitude prep, and the experience and fitness benchmarks you need before you go.”, “author”: { “@type”: “Person”, “name”: “Travis Ludlow”, “jobTitle”: “Editor, Global Summit Guide”, “url”: “https://globalsummitguide.com/about/” }, “publisher”: { “@type”: “Organization”, “name”: “Global Summit Guide”, “url”: “https://globalsummitguide.com/”, “logo”: { “@type”: “ImageObject”, “url”: “https://globalsummitguide.com/wp-content/uploads/2026/02/global-logo-new-2.png” } }, “datePublished”: “2026-03-15”, “dateModified”: “2026-07-20T21:06:08+00:00”, “mainEntityOfPage”: “https://globalsummitguide.com/mount-everest-nepal-tibet/mount-everest-training-plan-prepare-for-the-worlds-highest-peak/”, “articleSection”: “Asia”, “about”: { “@type”: “Mountain”, “name”: “Mount Everest” }, “image”: “https://globalsummitguide.com/wp-content/uploads/2026/04/AdobeStock_1150423621-scaled.jpeg”, “keywords”: “mount everest training, how to train for everest, everest training plan, everest fitness, training for high altitude, everest preparation” } { “@context”: “https://schema.org”, “@type”: “ItemList”, “name”: “Mount Everest Training Plan Phases”, “description”: “The four periodized phases of a 12-month Mount Everest training plan, from aerobic foundation to taper.”, “numberOfItems”: 4, “itemListElement”: [ { “@type”: “ListItem”, “position”: 1, “item”: { “@type”: “CreativeWork”, “name”: “Phase 1 — Foundation”, “description”: “Months 1-3. Build a deep aerobic base with consistent Zone 2 endurance work, plus general full-body strength. The goal is durability and a big engine – long, easy efforts and injury-free consistency, not intensity.” } }, { “@type”: “ListItem”, “position”: 2, “item”: { “@type”: “CreativeWork”, “name”: “Phase 2 — Build”, “description”: “Months 4-7. Raise volume and start specificity: longer endurance days, hill and stair work, and progressively weighted pack carries. Strength shifts toward strength-endurance for the legs, posterior chain, and core.” } }, { “@type”: “ListItem”, “position”: 3, “item”: { “@type”: “CreativeWork”, “name”: “Phase 3 — Peak / Mountain-Specific”, “description”: “Months 8-11. The most Everest-like phase: heavy pack carries up big vertical, back-to-back long days that mimic rotations, and as much real high-altitude exposure as you can get. This is where the climb is won or lost.” } }, { “@type”: “ListItem”, “position”: 4, “item”: { “@type”: “CreativeWork”, “name”: “Phase 4 — Taper”, “description”: “Final 3-4 weeks. Cut volume sharply while keeping a little intensity, prioritize sleep and recovery, and arrive at Base Camp rested rather than exhausted. Fitness is banked by now – the job is to show up fresh.” } } ] } { “@context”: “https://schema.org”, “@type”: “FAQPage”, “mainEntity”: [ { “@type”: “Question”, “name”: “How long do you need to train for Everest?”, “acceptedAnswer”: { “@type”: “Answer”, “text”: “Plan a dedicated 12-month training build (9 months at an absolute minimum) for the expedition itself – but that sits on top of years of prior mountaineering. Everest is not a fitness goal you start from scratch; it’s the capstone of a long progression through 6,000 m and 7,000 m peaks. The 12-month plan sharpens an already-experienced climber.” } }, { “@type”: “Question”, “name”: “What kind of fitness does Everest require?”, “acceptedAnswer”: { “@type”: “Answer”, “text”: “Sustained aerobic endurance and load-carrying strength-endurance – not raw speed or maximal strength. You need a huge engine that can keep working for many hours a day, day after day, for weeks, while carrying a pack at altitude. Think ‘durable diesel,’ not ‘sprinter.’ Aerobic base and weighted uphill carries are the core of the work.” } }, { “@type”: “Question”, “name”: “What is the most important type of training for Everest?”, “acceptedAnswer”: { “@type”: “Answer”, “text”: “Two things: a deep aerobic base built from long, easy (Zone 2) endurance sessions, and progressively weighted pack carries up steep terrain or stairs. The weighted uphill carry is the single most Everest-specific exercise there is – it trains the exact demand of the mountain. Everything else supports these two.” } }, { “@type”: “Question”, “name”: “Do I need prior altitude experience?”, “acceptedAnswer”: { “@type”: “Answer”, “text”: “Yes – it’s non-negotiable. You cannot fully train acclimatization at sea level, so reputable operators expect prior high-altitude experience, typically including 6,000 m and ideally 8,000 m peaks. Nepal has also approved a rule requiring a prior 7,000 m summit in Nepal, expected to take effect in a future season. Build this experience over years before Everest.” } }, { “@type”: “Question”, “name”: “Can I train for Everest at sea level?”, “acceptedAnswer”: { “@type”: “Answer”, “text”: “You can build most of the fitness at sea level – stairs, hills, weighted carries, strength work, and long endurance days all translate. Hypoxic (altitude) tents can help pre-acclimatize somewhat. But genuine high-altitude experience on real mountains is a separate requirement that sea-level training can’t replace.” } }, { “@type”: “Question”, “name”: “How heavy should my training pack be?”, “acceptedAnswer”: { “@type”: “Answer”, “text”: “Build up gradually. Start light and progress over months toward carrying roughly 15-20 kg up steep terrain or stairs for several hours. Never jump to heavy loads – that’s how knees, backs, and Achilles tendons get injured. Progressive overload, adding a little weight or vertical each week, is the safe path to the carrying capacity Everest demands.” } }, { “@type”: “Question”, “name”: “Should I do strength training?”, “acceptedAnswer”: { “@type”: “Answer”, “text”: “Yes, but the right kind. Focus on the legs, posterior chain, and core with strength-endurance work – squats, step-ups, lunges, deadlifts, and core stability – typically twice a week, tapering near the expedition. The aim is durable, resilient legs and a strong core for carrying loads, not maximal gym numbers.” } }, { “@type”: “Question”, “name”: “How do I know if I’m fit enough for Everest?”, “acceptedAnswer”: { “@type”: “Answer”, “text”: “Useful benchmarks: comfortably carrying a 15-20 kg pack for 4-6 hours over significant vertical gain, repeating big days back to back without breaking down, and sustaining long Zone 2 efforts with ease. You’ll also need the now-mandatory medical certificate confirming you’re fit to climb. If those efforts feel manageable – and you have the altitude resume – you’re in the right zone.” } } ] } { “@context”: “https://schema.org”, “@type”: “BreadcrumbList”, “itemListElement”: [ { “@type”: “ListItem”, “position”: 1, “name”: “Home”, “item”: “https://globalsummitguide.com/” }, { “@type”: “ListItem”, “position”: 2, “name”: “Mountains”, “item”: “https://globalsummitguide.com/mountains//” }, { “@type”: “ListItem”, “position”: 3, “name”: “Mount Everest”, “item”: “https://globalsummitguide.com/mount-everest-nepal-tibet/” }, { “@type”: “ListItem”, “position”: 4, “name”: “Training Plan” } ] } @import url(‘https://fonts.googleapis.com/css2?family=Outfit:wght@300;400;500;600;700&family=DM+Serif+Display:ital@0;1&display=swap’); .etp-page { font-family: ‘Outfit’, sans-serif; color: #122a44; line-height: 1.65; margin: 0 auto; padding: 0; } .etp-page h1, .etp-page h2, .etp-page h3, .etp-page h4 { font-family: ‘DM Serif Display’, serif; font-weight: 400; color: #0a1929; line-height: 1.15; } .etp-page p { font-size: 1.02rem; margin-bottom: 1.1em; } .etp-page a { color: #2e5986; text-decoration: none; border-bottom: 1px solid #c8d4e0; } .etp-page a:hover { color: #d4913a; border-bottom-color: #d4913a; } .etp-hero { position: relative; padding: 0; color: #f5e4c8; overflow: hidden; background: #0a1929; border-radius: 12px; margin-bottom: 0; } .etp-hero-image { width: 100%; height: auto; display: block; max-width: 100%; } .etp-hero-text { padding: 40px 36px; background: linear-gradient(135deg, rgba(10,25,41,0.93), rgba(46,89,134,0.86)); } .etp-hero-tag { font-size: 0.84rem; color: #d4913a; text-transform: uppercase; letter-spacing: 2px; font-weight: 700; margin-bottom: 14px; } .etp-hero h1 { color: #f5e4c8 !important; font-size: 2.3rem; line-height: 1.1; margin: 0 0 16px; } .etp-hero h1 em { color: #d4913a; font-style: italic; } .etp-hero p { color: #f5e4c8; font-size: 1.06rem; line-height: 1.5; margin: 0; } .etp-byline { background: #f8f4ec; padding: 14px 22px; font-size: 0.85rem; color: #5a4f30; border: 1px solid #e8d8ad; border-radius: 8px; margin: 18px 0; } .etp-byline-top { display: flex; justify-content: space-between; flex-wrap: wrap; gap: 10px; align-items: center; margin-bottom: 8px; } .etp-byline-author { font-weight: 600; color: #0a1929; font-size: 0.94rem; } .etp-byline-author a { color: #2e5986; border-bottom: none; } .etp-byline-meta { color: #7a6f50; font-size: 0.82rem; } .etp-byline-credentials { font-size: 0.82rem; color: #5a4f30; line-height: 1.45; padding-top: 6px; border-top: 1px solid #e8d8ad; font-style: italic; } .etp-byline-credentials strong { color: #0a1929; font-style: normal; } .etp-editorial-callout { background: linear-gradient(135deg, #e8f0f7 0%, #d4e4f0 100%); border-left: 5px solid #2e5986; padding: 18px 24px; margin: 22px 0; border-radius: 8px; font-size: 0.92rem; color: #0a1929; } .etp-editorial-callout .etp-editorial-title { font-weight: 700; color: #2e5986; font-size: 0.95rem; margin-bottom: 5px; display: block; } .etp-editorial-callout p { margin: 0 0 8px; font-size: 0.92rem; line-height: 1.5; } .etp-editorial-callout p:last-child { margin-bottom: 0; } .etp-framing { background: linear-gradient(135deg, #e8f0d8 0%, #cfe0b0 100%); border: 2px solid #5a8a2e; padding: 18px 24px; margin: 18px 0; border-radius: 10px; } .etp-framing h4 { color: #4a7a3d; margin: 0 0 8px; font-size: 1rem; } .etp-framing p { margin: 0 0 8px; font-size: 0.92rem; line-height: 1.55; color: #0a1929; } .etp-framing strong { color: #4a7a3d; } .etp-framing p:last-child { margin-bottom: 0; } .etp-quick-verdict { background: linear-gradient(135deg, #a83a2b 0%, #c84a3b 100%); color: #fff; padding: 30px 36px; margin: 26px 0; border-radius: 14px; box-shadow: 0 8px 24px rgba(168,58,43,0.4); border: 4px solid #d4913a; } .etp-quick-verdict h2 { margin: 0 0 14px !important; font-size: 1.5rem !important; color: #fff !important; padding-bottom: 0 !important; border-bottom: none !important; } .etp-quick-verdict h2 em { color: #fdd47a; font-style: italic; } .etp-quick-verdict p { margin: 0 0 12px; font-size: 1.06rem; color: #fff; line-height: 1.55; } .etp-quick-verdict p:last-child { margin-bottom: 0; } .etp-quick-verdict strong { color: #fdd47a; font-weight: 700; } .etp-quick-verdict .etp-verdict-tag { display: inline-block; background: #d4913a; color: #0a1929; padding: 4px 12px; border-radius: 4px; font-size: 0.78rem; font-weight: 700; text-transform: uppercase; letter-spacing: 0.6px; margin-bottom: 12px; } .etp-stat-grid { display: grid; grid-template-columns: repeat(4, 1fr); gap: 12px; padding: 22px; background: linear-gradient(135deg, #0a1929 0%, #122a44 100%); color: #f5e4c8; border-radius: 10px; margin: 22px 0; } .etp-stat { background: #1a3354; border: 1px solid #d4913a; border-radius: 8px; padding: 14px 12px; text-align: center; } .etp-stat-num { font-family: ‘DM Serif Display’, serif; font-size: 1.4rem; color: #d4913a; line-height: 1; margin-bottom: 4px; } .etp-stat-label { font-size: 0.72rem; color: #f5e4c8; text-transform: uppercase; letter-spacing: 0.6px; } .etp-toc { background: #f8f4ec; border: 1px solid #e8d8ad; border-radius: 10px; padding: 18px 24px; margin: 22px 0; } .etp-toc h4 { margin: 0 0 12px; font-size: 1.08rem; color: #0a1929; } .etp-toc ol { margin: 0; padding-left: 22px; columns: 2; column-gap: 28px; font-size: 0.92rem; } .etp-toc li { margin-bottom: 5px; line-height: 1.4; } .etp-inline-image { margin: 32px 0; border-radius: 10px; overflow: hidden; box-shadow: 0 4px 14px rgba(212,200,168,0.5); } .etp-inline-image img { width: 100%; height: auto; display: block; max-width: 100%; } .etp-inline-image figcaption { padding: 14px 22px; background: #f8f4ec; font-size: 0.88rem; color: #5a4f30; font-style: italic; line-height: 1.5; } .etp-inline-image figcaption strong { color: #0a1929; font-style: normal; } .etp-section-header { background: linear-gradient(135deg, #122a44 0%, #2e5986 100%); color: #f5e4c8; padding: 28px 34px; margin: 40px 0 24px; border-radius: 12px; border-left: 8px solid #d4913a; box-shadow: 0 6px 18px rgba(18,42,68,0.4); } .etp-section-header h2 { color: #d4913a !important; font-size: 1.85rem !important; margin: 0 0 6px !important; padding: 0 !important; border: none !important; } .etp-section-header h2 em { color: #fdd47a; font-style: italic; } .etp-section-header p { color: #f5e4c8; font-size: 0.96rem; margin: 0; line-height: 1.5; } .etp-content { padding: 24px 0 0; } .etp-content h2 { font-size: 1.95rem; margin-top: 48px; margin-bottom: 18px; padding-bottom: 11px; border-bottom: 2px solid #d4913a; } .etp-content h2:first-of-type { margin-top: 0; } .etp-content h2 em { color: #d4913a; font-style: italic; } .etp-content h3 { font-size: 1.38rem; margin-top: 28px; margin-bottom: 12px; color: #0a1929; } .etp-content h4 { font-size: 1.1rem; margin-top: 22px; margin-bottom: 10px; color: #0a1929; } .etp-route-card { background: #fff; border-radius: 12px; padding: 24px 28px; margin: 22px 0; border-left: 6px solid #2e5986; box-shadow: 0 3px 10px rgba(212,200,168,0.4); } .etp-route-card.standard { border-left-color: #d4913a; } .etp-route-card.alternative { border-left-color: #5a8a2e; } .etp-route-card.alternative-2 { border-left-color: #2e5986; } .etp-route-card.winter { border-left-color: #a83a2b; } .etp-route-card-tag { display: inline-block; padding: 5px 14px; border-radius: 4px; font-size: 0.76rem; font-weight: 700; text-transform: uppercase; letter-spacing: 0.6px; margin-bottom: 10px; font-family: ‘Outfit’, sans-serif; } .etp-route-card.standard .etp-route-card-tag { background: #d4913a; color: #0a1929; } .etp-route-card.alternative .etp-route-card-tag { background: #5a8a2e; color: #fff; } .etp-route-card.alternative-2 .etp-route-card-tag { background: #2e5986; color: #fff; } .etp-route-card.winter .etp-route-card-tag { background: #a83a2b; color: #fff; } .etp-route-card h3 { margin: 6px 0 8px; font-size: 1.36rem; color: #0a1929; } .etp-route-card h3 em { color: #d4913a; font-style: italic; } .etp-route-card p { margin: 0 0 10px; } .etp-route-card p:last-child { margin-bottom: 0; } .etp-route-stats { display: grid; grid-template-columns: repeat(4, 1fr); gap: 8px; margin: 14px 0; } .etp-route-stat { background: #f8f4ec; border: 1px solid #e8d8ad; border-radius: 6px; padding: 8px; text-align: center; } .etp-route-stat-label { font-size: 0.68rem; color: #7a6f50; text-transform: uppercase; letter-spacing: 0.4px; margin-bottom: 2px; } .etp-route-stat-value { font-size: 0.9rem; font-weight: 700; color: #0a1929; } .etp-table { width: 100%; border-collapse: collapse; margin: 22px 0; font-size: 0.88rem; background: #fff; box-shadow: 0 2px 7px rgba(212,200,168,0.5); border-radius: 8px; overflow: hidden; } .etp-table th { background: #0a1929; color: #f5e4c8; padding: 11px 12px; text-align: left; font-weight: 500; font-size: 0.78rem; text-transform: uppercase; letter-spacing: 0.4px; } .etp-table td { padding: 9px 12px; border-bottom: 1px solid #e8e2d4; vertical-align: top; } .etp-table tr:nth-child(even) td { background: #fbf7ef; } .etp-table td strong { color: #0a1929; } .etp-table a { color: #2e5986; font-weight: 700; } .etp-callout-info { background: #e8f0f7; border-left: 5px solid #2e5986; padding: 16px 22px; border-radius: 6px; margin: 20px 0; font-size: 0.95rem; color: #0a1929; } .etp-callout-info strong { color: #0a1929; } .etp-callout-info .etp-callout-title { font-weight: 700; color: #2e5986; font-size: 0.98rem; margin-bottom: 6px; display: block; } .etp-callout-warning { background: #fdf3e8; border-left: 5px solid #b86a15; padding: 16px 22px; border-radius: 6px; margin: 20px 0; font-size: 0.95rem; color: #0a1929; } .etp-callout-warning strong { color: #b86a15; } .etp-callout-warning .etp-callout-warning-title { font-weight: 700; color: #b86a15; font-size: 0.98rem; margin-bottom: 6px; display: block; } .etp-callout-danger { background: #fbe5e2; border-left: 5px solid #a83a2b; padding: 16px 22px; border-radius: 6px; margin: 20px 0; font-size: 0.95rem; color: #0a1929; } .etp-callout-danger strong { color: #a83a2b; } .etp-callout-danger .etp-callout-danger-title { font-weight: 700; color: #a83a2b; font-size: 0.98rem; margin-bottom: 6px; display: block; } .etp-callout-success { background: #e8f0d8; border-left: 5px solid #5a8a2e; padding: 16px 22px; border-radius: 6px; margin: 20px 0; font-size: 0.95rem; color: #0a1929; } .etp-callout-success strong { color: #5a8a2e; } .etp-callout-success .etp-callout-success-title { font-weight: 700; color: #5a8a2e; font-size: 0.98rem; margin-bottom: 6px; display: block; } .etp-callout-success ul { margin: 6px 0 0; padding-left: 20px; } .etp-callout-success li { margin-bottom: 5px; } .etp-faq-item { background: #f8f4ec; border-radius: 8px; margin-bottom: 11px; } .etp-faq-item summary { padding: 14px 20px; cursor: pointer; font-family: ‘DM Serif Display’, serif; font-size: 1.04rem; color: #0a1929; list-style: none; } .etp-faq-item summary::-webkit-details-marker { display: none; } .etp-faq-item summary::after { content: ‘+’; float: right; color: #d4913a; font-size: 1.4rem; line-height: 0.8; } .etp-faq-item[open] summary::after { content: ‘-‘; } .etp-faq-item div { padding: 0 20px 16px; font-size: 0.93rem; color: #0a1929; } .etp-methodology { background: #f8f4ec; border: 2px solid #2e5986; padding: 22px 26px; border-radius: 10px; margin: 26px 0; } .etp-methodology h3 { margin: 0 0 12px; font-size: 1.18rem; color: #2e5986; } .etp-methodology h4 { font-size: 1rem; margin: 14px 0 6px; color: #0a1929; } .etp-methodology p { font-size: 0.92rem; line-height: 1.55; margin: 0 0 8px; color: #0a1929; } .etp-author-bio { background: linear-gradient(135deg, #f8f4ec 0%, #fbf7ef 100%); border: 2px solid #d4913a; padding: 26px 30px; border-radius: 12px; margin: 32px 0 18px; display: flex; gap: 22px; align-items: flex-start; } .etp-author-bio-image { flex-shrink: 0; width: 100px; height: 100px; border-radius: 50%; background: #d4913a url(‘https://globalsummitguide.com/wp-content/uploads/2026/03/561db5f8-15bb-43d8-9eba-251a8c35f89f.jpg’) center/cover; border: 3px solid #d4913a; } .etp-author-bio-content { flex: 1; } .etp-author-bio h3 { margin: 0 0 4px; font-size: 1.26rem; color: #0a1929; } .etp-author-bio .etp-author-title { font-size: 0.9rem; color: #b86a15; font-weight: 700; margin-bottom: 11px; font-style: italic; } .etp-author-bio p { margin: 0 0 9px; font-size: 0.92rem; line-height: 1.55; color: #0a1929; } .etp-related { background: #f8f4ec; padding: 22px; border-radius: 10px; margin: 22px 0; } .etp-related h4 { margin-top: 0; margin-bottom: 13px; color: #0a1929; } .etp-related h4.etp-related-sub { margin-top: 18px; } .etp-related ul { margin: 0; padding-left: 20px; } .etp-related li { margin-bottom: 6px; font-size: 0.92rem; } .etp-final-cta { background: linear-gradient(135deg, #122a44 0%, #1e3a5f 100%); color: #f5e4c8; padding: 36px 30px; border-radius: 14px; margin: 32px 0 0; text-align: center; border: 3px solid #d4913a; box-shadow: 0 8px 22px rgba(18,42,68,0.4); } .etp-final-cta h3 { color: #d4913a; margin: 0 0 12px; font-size: 1.6rem; } .etp-final-cta h3 em { color: #fdd47a; font-style: italic; } .etp-final-cta > p { color: #f5e4c8; font-size: 1.02rem; margin: 0 auto 22px; max-width: 600px; line-height: 1.55; } .etp-cta-button { display: inline-block; background: transparent; color: #f5e4c8 !important; padding: 13px 24px; border-radius: 6px; font-weight: 600; border: 2px solid #d4913a !important; margin: 0 5px 8px; text-decoration: none !important; transition: all 0.15s; } .etp-cta-button:hover { background: #d4913a; color: #0a1929 !important; } @media (max-width: 768px) { .etp-page { padding: 0 4px; } .etp-stat-grid { grid-template-columns: repeat(2, 1fr); } .etp-route-stats { grid-template-columns: repeat(2, 1fr); } .etp-toc ol { columns: 1; } .etp-hero-text { padding: 28px 18px; } .etp-hero h1 { font-size: 1.7rem; } .etp-hero p { font-size: 0.96rem; } .etp-byline, .etp-editorial-callout, .etp-framing, .etp-quick-verdict, .etp-route-card, .etp-section-header { padding: 18px 20px; } .etp-quick-verdict h2 { font-size: 1.3rem !important; } .etp-section-header h2 { font-size: 1.5rem !important; } .etp-final-cta { padding: 26px 20px; } .etp-final-cta h3 { font-size: 1.35rem; } .etp-author-bio { flex-direction: column; align-items: center; text-align: center; } .etp-content h2 { font-size: 1.6rem; } .etp-content h3 { font-size: 1.22rem; } .etp-table { font-size: 0.78rem; } .etp-table th, .etp-table td { padding: 6px 5px; } }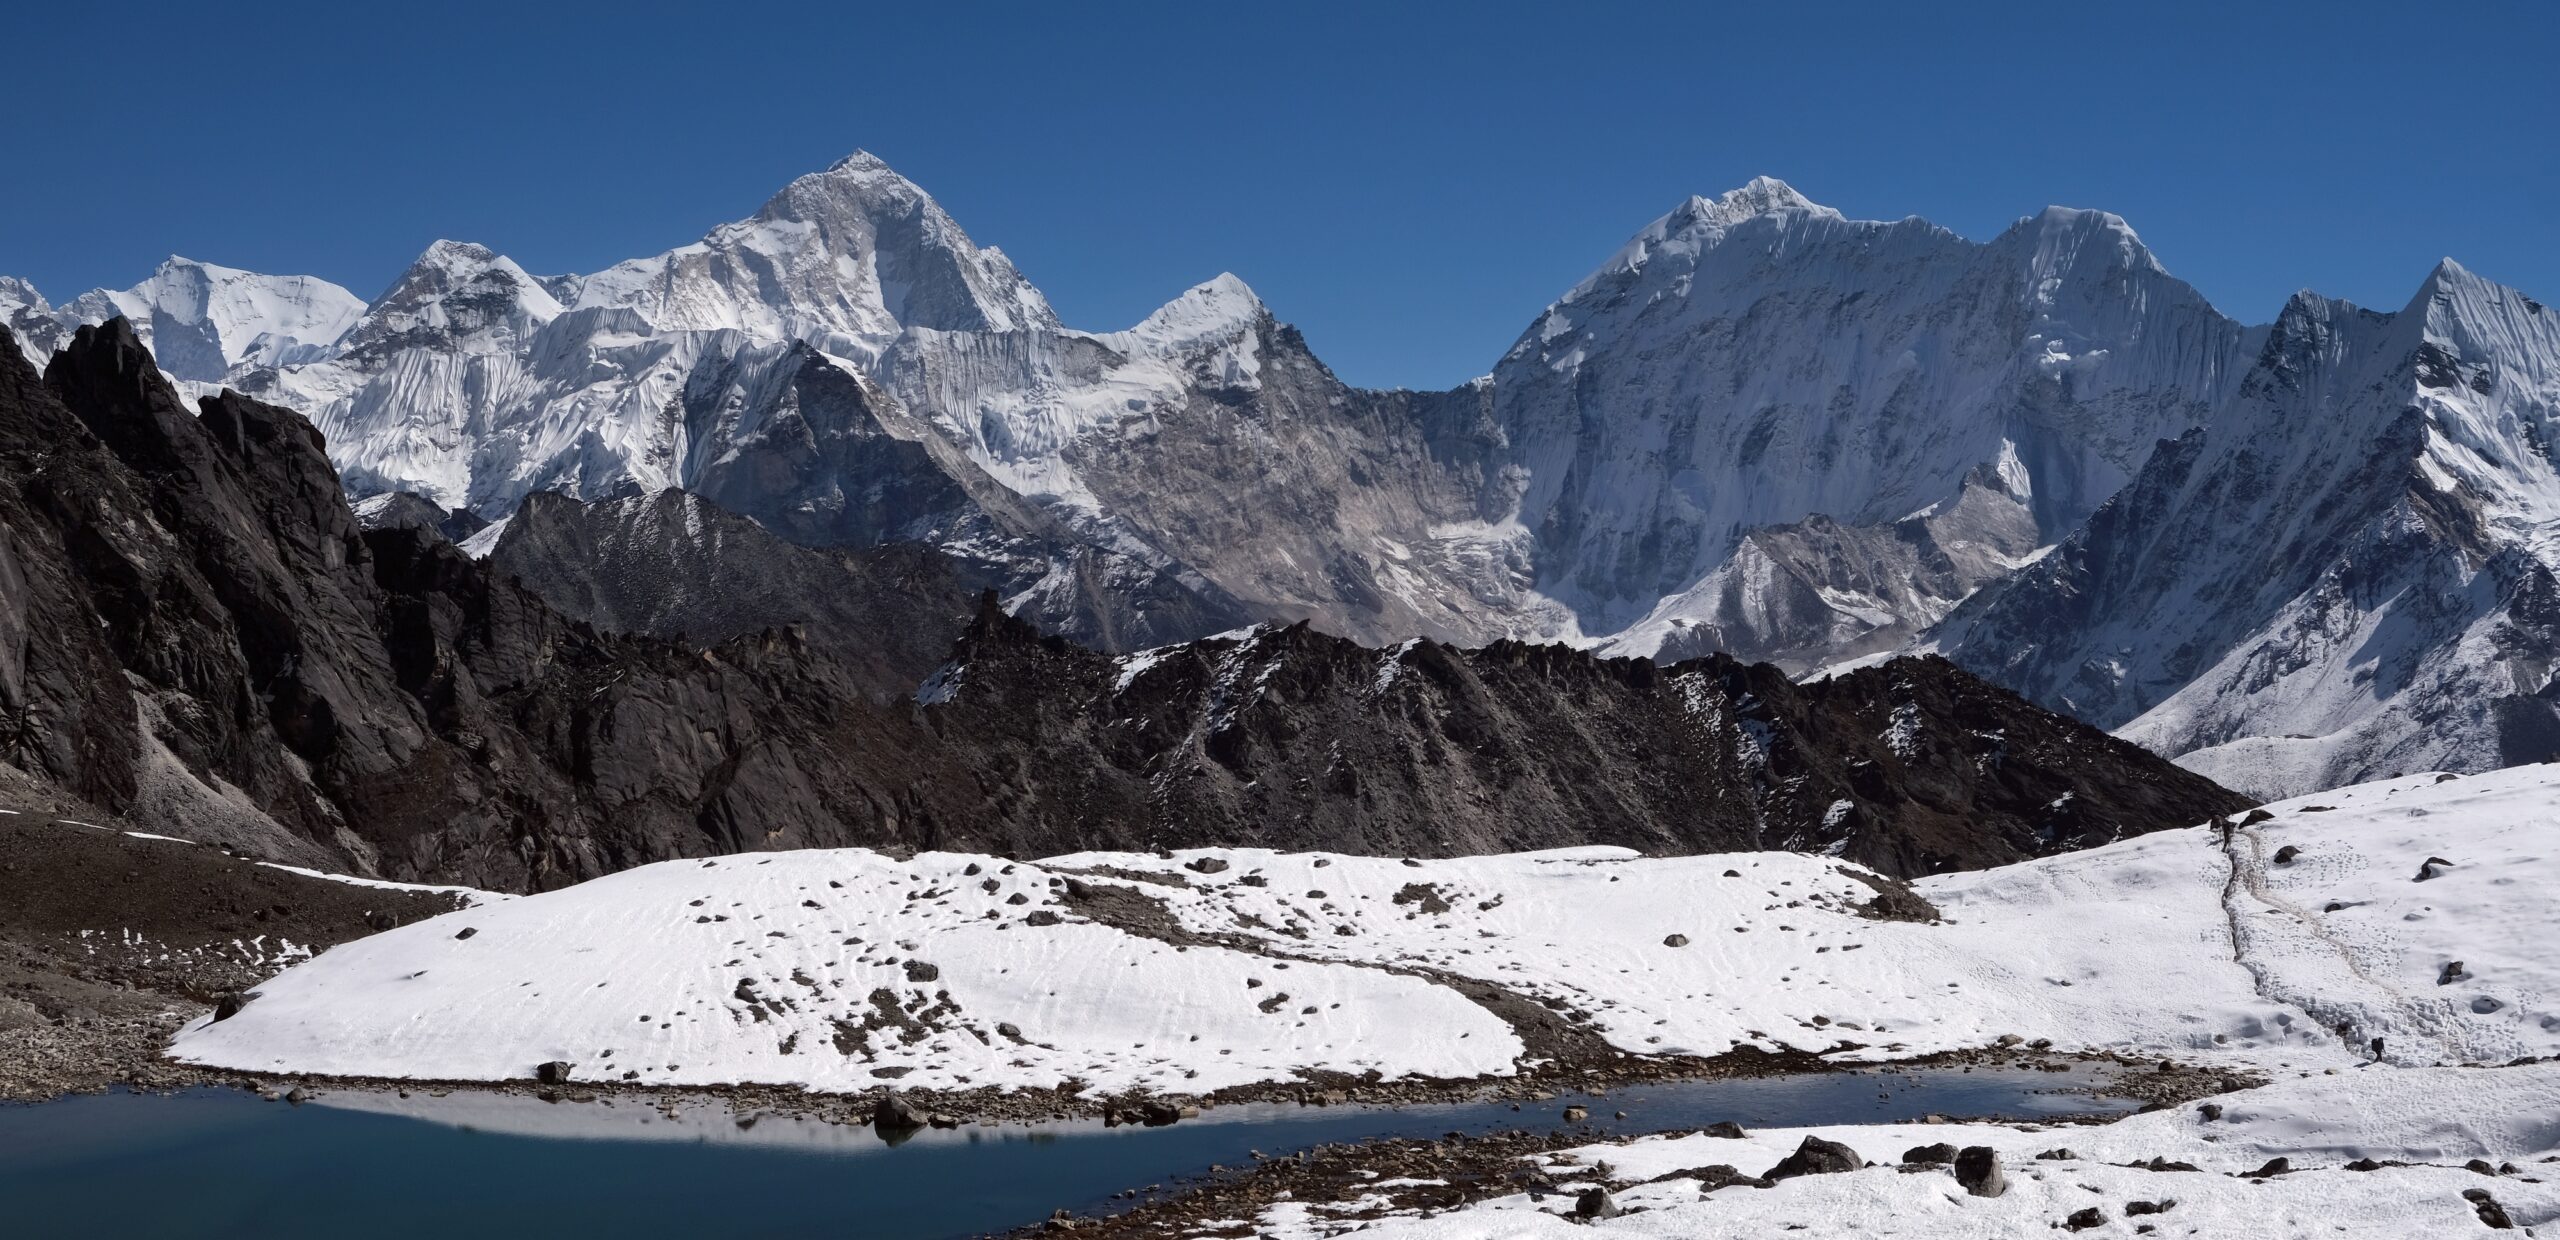
Mount Everest Training Plan: How to Prepare (2026)
Everest is an endurance event at the edge of human survival — roughly two months of effort at extreme altitude, carrying loads, day after day. Training for it isn’t about gym mirrors or PRs; it’s about building a vast aerobic engine and durable, load-carrying legs on top of years of real mountain experience. This is a month-by-month plan: the four phases, the workouts that matter, the altitude reality, and how to know when you’re truly ready.
Timeline: a focused 12-month build (9 minimum) — on top of years of prior climbing.
The big two: a deep aerobic base and progressively weighted uphill carries.
Strength: legs, posterior chain, and core — strength-endurance, not max lifts.
Altitude: real high-altitude experience is a separate, non-negotiable requirement.
The goal: arrive fit, healthy, and fresh — and with your mandatory medical clearance in hand.
📑 On This Page
What Everest Actually Demands
To train intelligently, you have to understand the specific physical problem Everest poses. It is not a sprint, a single hard day, or a feat of maximal strength. It is a multi-week endurance event in which you walk uphill for many hours a day, carrying a pack, in progressively thinner air, repeating that effort over and over with limited recovery. Your body has to keep producing usable energy aerobically for a very long time, on terrain that punishes weak legs and a small engine.
That shapes everything. The climber who succeeds on Everest is rarely the strongest or the fastest — it’s the one with the deepest aerobic base, the most durable legs, the best efficiency, and the experience to move steadily without burning out. Training, therefore, is overwhelmingly about aerobic endurance and load-carrying strength-endurance, with everything else in support. If you train like a sprinter or a bodybuilder, you’ll arrive strong and fast and still fail; if you train like an endurance mountaineer, you give yourself a chance.
Find Hotels, Flights & Trips for the World’s Best Hiking Destinations
The Global Summit Guide Travel Shop on Expedia — curated for outdoor adventurers, mountaineers, and serious hikers. Patagonia to the Alps. Nepal to the Rockies. Curated lodging for every region we cover.
Explore Travel Shop on Expedia →
Before You Start: The Prerequisites
A training plan assumes a starting point — and for Everest, that starting point is already high. This plan sharpens an experienced mountaineer; it does not turn a beginner into an Everest climber in a year. Before you begin a dedicated Everest build, you should genuinely have:
- Years of mountaineering, including prior 6,000 m and ideally 8,000 m peaks — the altitude resume matters as much as the fitness.
- Solid technical skills — fixed-rope ascending and descending, crampon and ice-axe use, ladder crossings, and self-care at altitude.
- An injury-free, healthy base — joints, back, and tendons that can absorb a year of progressive loading.
- Medical clearance — Everest now requires a medical certificate (within 30 days of the permit, including cardiac screening). Get a check-up before you even begin heavy training.
If you’re not there yet, that’s not a failure — it’s a map. Our Everest progression plan lays out the multi-year path of peaks that builds the experience this training assumes.
The 12-Month Plan: Four Phases
Effective endurance training is periodized — organized into phases that build on each other, rather than doing the same thing year-round. The classic structure moves from a broad aerobic and strength foundation toward increasingly Everest-specific work, then tapers so you arrive fresh. Here’s the year at a glance:
Phase 1 — Foundation
Build a deep aerobic base with consistent Zone 2 endurance work, plus general full-body strength. The goal is durability and a big engine – long, easy efforts and injury-free consistency, not intensity.
Phase 2 — Build
Raise volume and start specificity: longer endurance days, hill and stair work, and progressively weighted pack carries. Strength shifts toward strength-endurance for the legs, posterior chain, and core.
Phase 3 — Peak / Mountain-Specific
The most Everest-like phase: heavy pack carries up big vertical, back-to-back long days that mimic rotations, and as much real high-altitude exposure as you can get. This is where the climb is won or lost.
Phase 4 — Taper
Cut volume sharply while keeping a little intensity, prioritize sleep and recovery, and arrive at Base Camp rested rather than exhausted. Fitness is banked by now – the job is to show up fresh.
Nine months is a workable minimum if you’re already very fit and experienced; twelve gives more room to build safely and absorb setbacks. The phases overlap at the edges — you don’t flip a switch, you shift emphasis.
The Training Pillars
Whatever the phase, the work rests on a few pillars. Get the proportions right — heavy on the first two — and the plan takes care of itself.
- 1. Aerobic endurance (the foundation). Long, easy Zone 2 sessions — hiking, trail running, cycling, ski touring — building from an hour or two toward all-day efforts. This is where most of your hours go, all year.
- 2. Weighted uphill carries (the specificity). The most Everest-like training there is: a loaded pack up hills, trails, or a stair machine. Build weight and vertical gradually over months. Nothing else replicates the mountain’s demand as closely.
- 3. Strength-endurance. Legs, posterior chain, and core — squats, step-ups, lunges, deadlifts, and core stability — for resilient, fatigue-resistant legs. Twice a week, easing off near the expedition.
- 4. Vertical & back-to-back days. Accumulate vertical meters, and string long days together on weekends to rehearse the consecutive-day grind of acclimatization rotations.
- 5. Mobility & injury prevention. The quiet pillar — ankle, knee, hip, and back resilience work that keeps you training consistently. Consistency, not heroics, builds the engine.
A Sample Training Week
Here’s how the pillars come together in a typical week during the Build and Peak phases. Treat it as a template to adapt with a coach, not a rigid prescription — recovery needs are individual, and the weekend “big days” are the heart of it.
| Day | Focus | Example session |
|---|---|---|
| Monday | Recovery / mobility | Easy walk, stretching, and mobility work — or full rest. |
| Tuesday | Aerobic + strength | Zone 2 cardio (60-90 min) plus a leg/core strength-endurance session. |
| Wednesday | Weighted carry | Loaded pack up hills or a stair machine, building vertical at a steady, sustainable pace. |
| Thursday | Aerobic | Longer Zone 2 effort — hike, trail run, or ride — kept genuinely easy. |
| Friday | Strength + mobility | Second strength-endurance session; mobility and prehab. |
| Saturday | Big day 1 | A long mountain day with a pack and significant vertical gain. |
| Sunday | Big day 2 (back-to-back) | A second long day on tired legs — the rotation simulator. Then recover hard. |
Volume rises through the Build and Peak phases, then drops sharply in the taper. Every 3-4 weeks, pull back into an easier recovery week — adaptation happens during rest, not during the work itself.
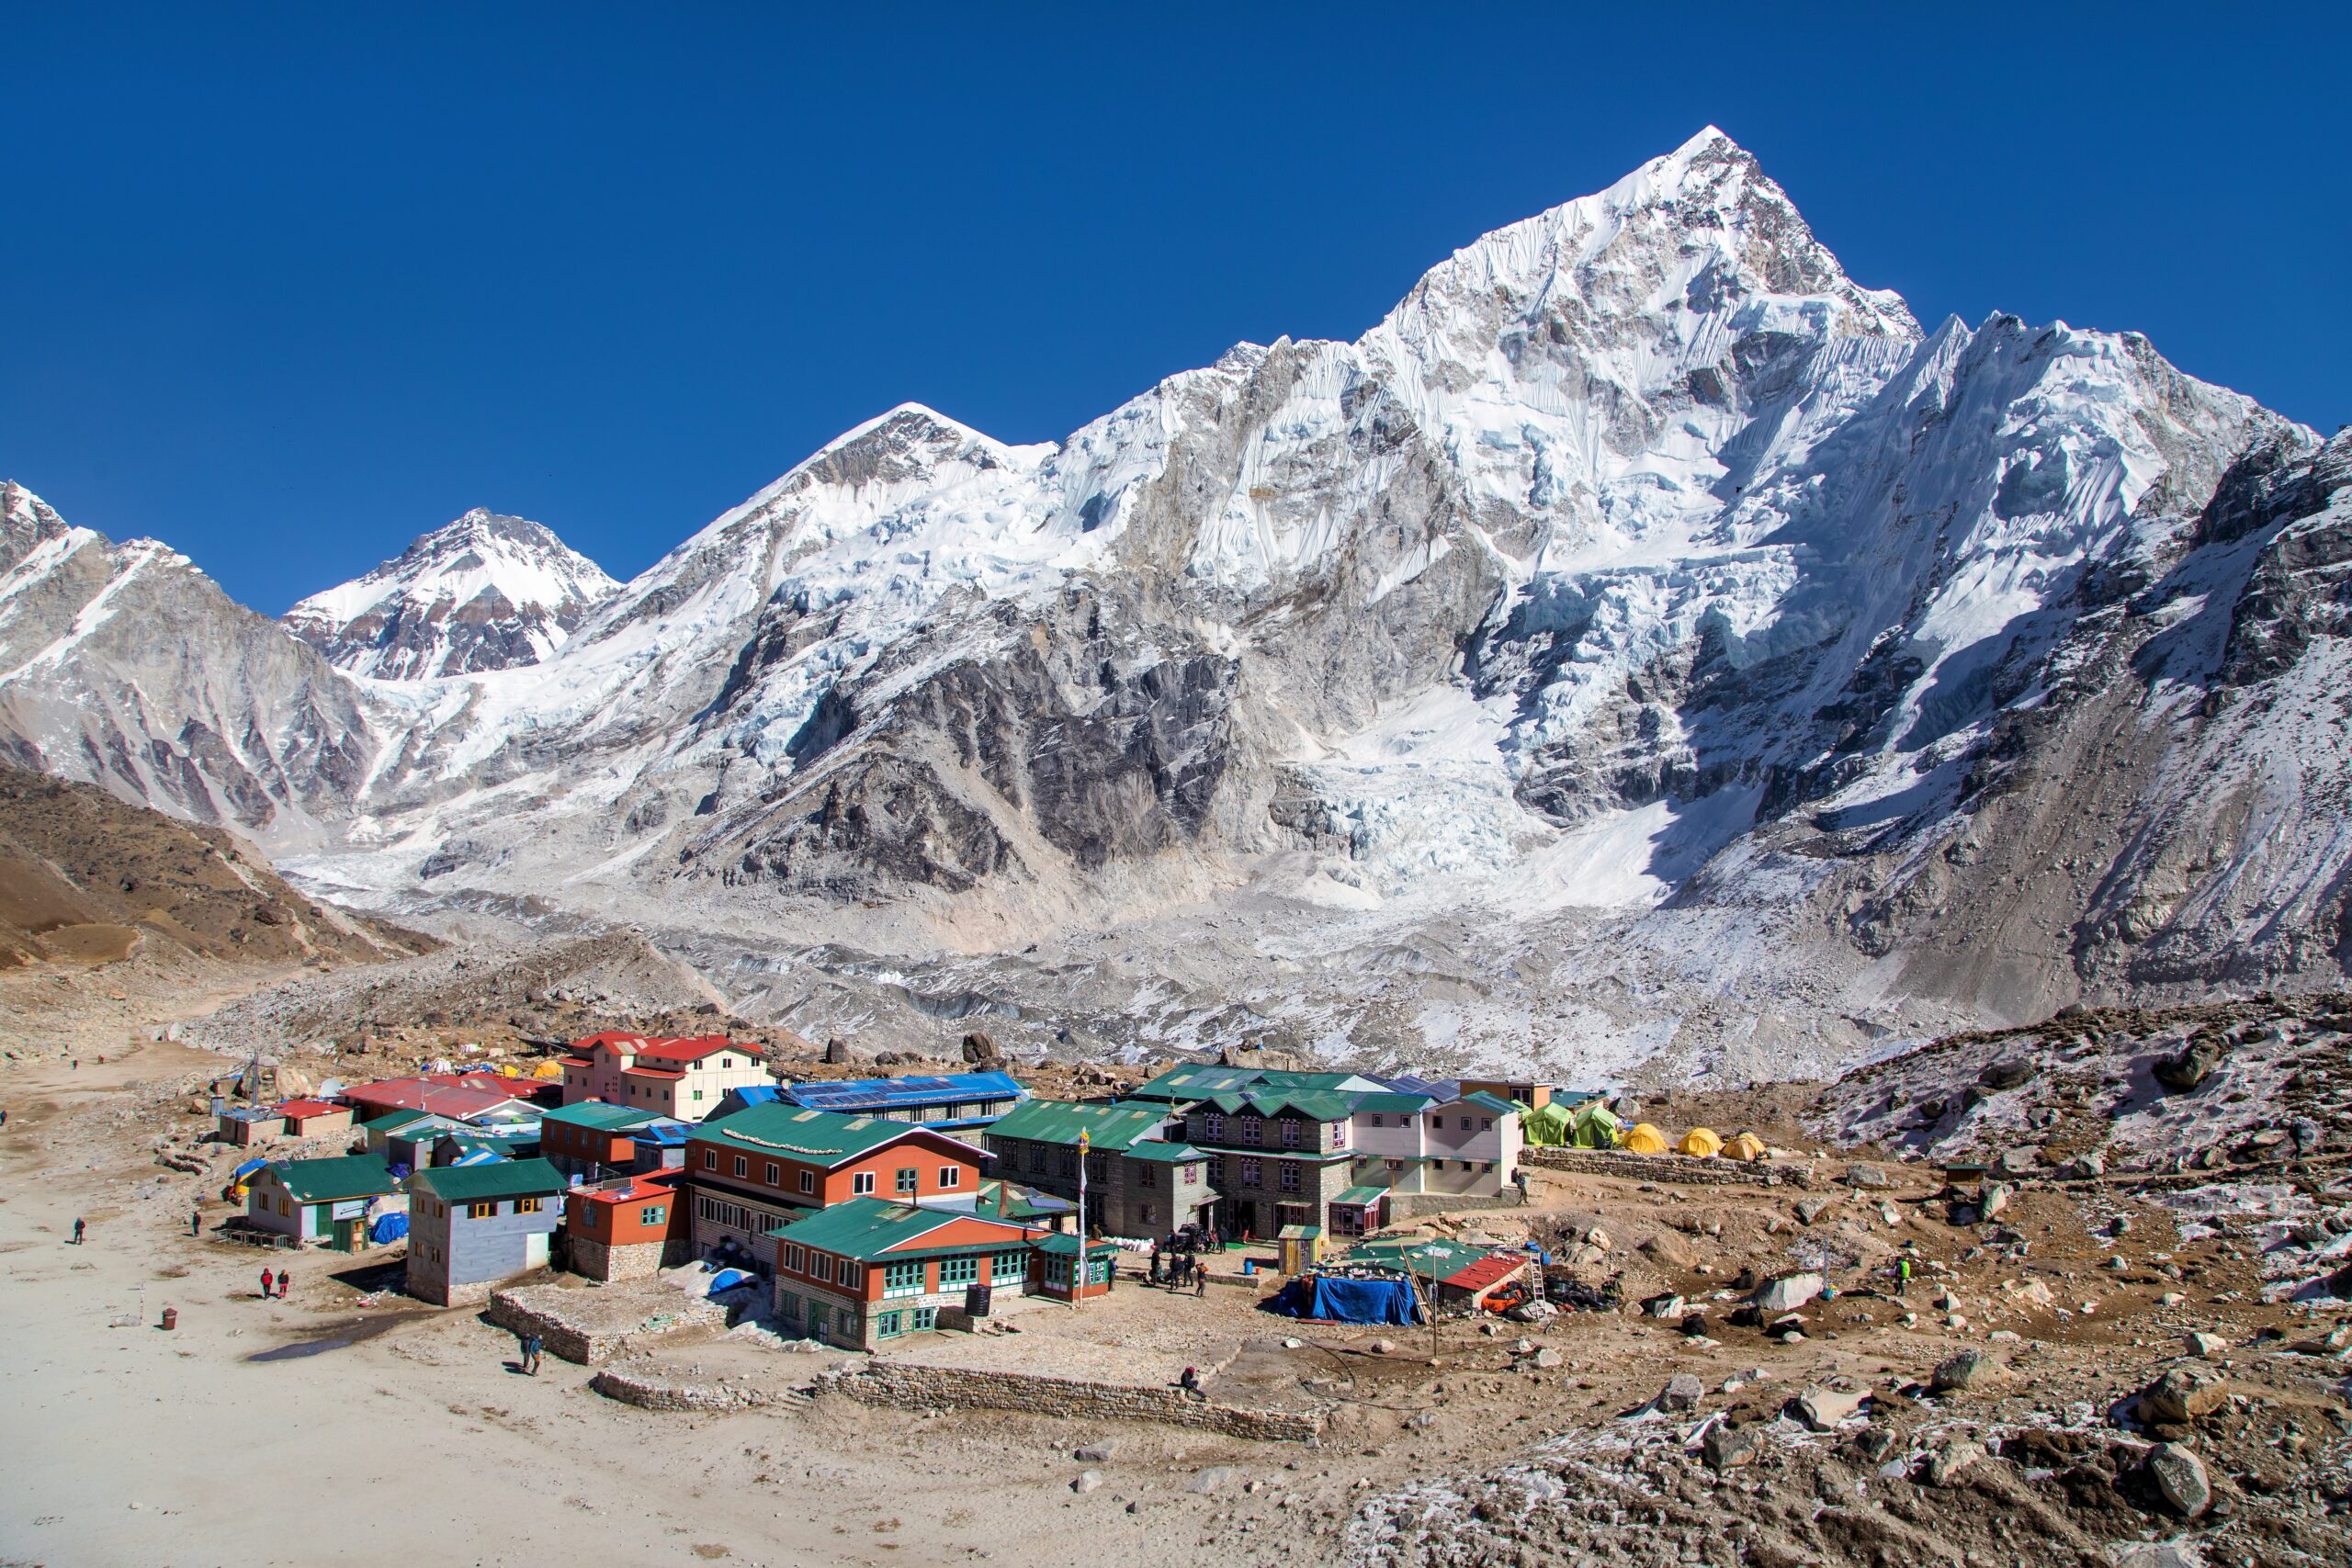
Altitude: The Part You Can’t Fake
Here is the hard truth no training plan can engineer around: you cannot fully prepare for extreme altitude at sea level. Fitness helps you move efficiently and recover, but it does not make you immune to the death zone — supremely fit climbers still get altitude sickness, and fitness can even tempt people to ascend too fast. Acclimatization is a physiological adaptation that only real exposure builds.
- Climb real high-altitude peaks first — a progression through 6,000 m and 7,000 m mountains (and ideally an 8,000 m peak) is the only true preparation, and increasingly a requirement.
- Hypoxic / altitude tents can offer a modest pre-acclimatization boost before a trip, but they are a supplement, not a substitute, for mountain experience.
- On the expedition itself, the weeks of acclimatization rotations do the real work — which is why arriving fit enough to recover well between them matters so much.
Understand the physiology in our acclimatization guide and the health risks in the Everest medical guide.
Fueling, Recovery & the Mind
Training is only half the equation — adaptation happens when you rest and refuel. Three things turn hard work into fitness rather than injury:
Fuel enough. Big training days demand real fuel; under-eating while training heavily is a fast route to injury, illness, and burnout. Eat plenty of quality food to support the workload, stay well hydrated, and don’t treat training as a way to cut weight — you need energy and resilient tissue, not depletion. For individualized fueling, work with a sports dietitian.
Recover deliberately. Sleep is the most powerful recovery tool there is; protect it. Build easy weeks into the plan, listen to warning signs (persistent fatigue, nagging niggles, poor sleep, stalled progress), and back off before they become injuries. More training is not better training — absorbed training is.
Train the mind. Everest is as much mental as physical: the patience to wait out weather, the discipline to turn around, the tolerance for discomfort and tedium over weeks. Long, hard training days are where you build that resilience — practice staying steady and positive when you’re tired, because that’s the exact skill the mountain will test.
Common Training Mistakes
- Too much intensity, not enough base. Chasing hard interval sessions while neglecting the long, easy aerobic hours — the base is what carries you for two months.
- Skipping weighted carries. Plenty of cardio but no loaded uphill work, then being crushed by a pack on the mountain.
- Loading too fast. Jumping to heavy packs or big vertical and injuring knees, backs, or Achilles — progress gradually.
- Ignoring altitude experience. Arriving fit but under-experienced at altitude, the most dangerous combination of all.
- Peaking too early or skipping the taper. Arriving at Base Camp exhausted instead of fresh.
- Neglecting recovery. No easy weeks, poor sleep, under-fueling — turning good work into injury.
Are You Ready? Benchmarks
Fitness for Everest is hard to reduce to a single number, but these practical benchmarks tell you whether the engine and legs are there:
- Comfortably carry a 15-20 kg pack for 4-6 hours over significant vertical gain.
- Repeat a big day back-to-back — and feel ready to do it again — without breaking down.
- Sustain long Zone 2 efforts with ease, recovering quickly between hard days.
- Hold steady, efficient form when tired — the mark of a deep base, not just willpower.
- Have your medical certificate confirming you’re fit to climb (mandatory for 2026).
If those feel manageable — and you have the altitude resume behind you — you’re training in the right place. If they don’t yet, you have your targets. Pair this with the gear list and the full Everest climbing guide as you build.
How We Built This Plan
Our method.
- Training structure reflects established endurance-mountaineering principles: aerobic periodization, progressive overload, strength-endurance, and the weighted-carry specificity used across reputable high-altitude programs.
- Altitude guidance is grounded in the reality that acclimatization requires genuine exposure and cannot be fully trained at sea level.
- 2026 requirements (the mandatory medical certificate) reflect Nepal’s current rules.
- General, not personal: this is educational guidance, not coaching or medical advice. Train under a qualified coach and get medical clearance first. Research-based; last verified June 28, 2026.
Everest Training FAQ
How long do you need to train for Everest?
Plan a focused 12-month build (9 minimum) – on top of years of prior mountaineering. Everest is the capstone of a long progression, not a from-scratch fitness goal.
What kind of fitness does Everest require?
Sustained aerobic endurance and load-carrying strength-endurance – a big, durable engine that works for hours a day for weeks at altitude, not speed or max strength.
What’s the most important training?
A deep aerobic (Zone 2) base and progressively weighted uphill carries. The loaded uphill carry is the single most Everest-specific exercise there is.
Do I need prior altitude experience?
Yes, non-negotiably – typically 6,000 m and ideally 8,000 m peaks. You can’t fully train acclimatization at sea level, and Nepal has approved a coming 7,000 m-peak requirement.
Can I train at sea level?
You can build most of the fitness at sea level (stairs, hills, carries, strength, long endurance), and altitude tents help a little. But real high-altitude experience is a separate, essential requirement.
How heavy should my training pack be?
Build gradually toward 15-20 kg over steep terrain for several hours. Never start heavy – progressive overload protects your joints and tendons.
Should I do strength training?
Yes – legs, posterior chain, and core, with a strength-endurance focus, about twice a week, easing off near the expedition. Durable legs, not max gym numbers.
How do I know I’m fit enough?
If you can carry 15-20 kg for 4-6 hours over big vertical, repeat long days back-to-back, and sustain long Zone 2 efforts easily – and you have the altitude resume and medical clearance – you’re in the right zone.
About the Author
Train for the Mountain, Not the Mirror
Build the engine, carry the load, bank the altitude, and arrive fresh. Do the unglamorous aerobic hours for a year, and you give yourself the fitness Everest actually rewards.
See the progression plan → Back to the full guide →Was this helpful?
🏔Related training
🧭Explore & compare
Global Summit Guide is an independent mountaineering resource founded in 2026. The team combines first-hand trekking and climbing experience with in-depth research and professional health and nutrition review to help climbers choose objectives, prepare properly, and stay safe.
Health, altitude, and nutrition content is reviewed by Taylor Ludlow (Registered Nurse) and Brigg Hoopes (Nutritionist).
What We Don't Know Yet
Mountain information changes quickly. This box explains the limits of what this page can responsibly promise.
- Guide-company prices, departure dates, guide ratios, included services, and cancellation rules can change without notice.
- Weather, snowpack, avalanche risk, road access, and route conditions can change quickly and may be different on your climbing dates.
- Fitness and altitude response vary by person; no guide, itinerary, or training plan can guarantee acclimatization or summit success.
Verify current conditions with official land managers, guide services, local forecasts, and current route reports before booking or climbing.
Part of this Global Summit Guide cluster
Explore the complete Training guide for more context, routes, planning links, and related resources.
Mountaineering, rock and ice climbing, glacier travel, and high-altitude activity are inherently dangerous and can result in serious injury or death. The information on Global Summit Guide is provided for general informational and educational purposes only and is not a substitute for professional instruction, qualified guiding, proper equipment, or your own judgment and experience.
Route conditions, weather, snowpack, permits, regulations, and hazards change constantly and may differ from what is described here. Details may be incomplete, out of date, or contain errors. Always verify current information with local authorities, certified guides, and official sources before making any decision in the mountains.
Nothing on this site is medical, legal, or financial advice. Our fitness, acclimatization, altitude, and nutrition content is general in nature; consult a qualified physician before beginning any strenuous exercise program or exposing yourself to high altitude.
You are solely responsible for your own safety and decisions. To the fullest extent permitted by law, Global Summit Guide and its team accept no liability for any loss, injury, damage, or expense arising from use of, or reliance on, this information. By using this site you acknowledge these risks and accept these terms.
Some links on this site may be affiliate links. If you buy through them we may earn a small commission at no extra cost to you; this never affects our recommendations.
Global Summit Guide recommendation path
Next Best Mountain to Research
Use these recommendations to continue the right planning path instead of stopping on one page.
Use current permit, weather, route, and operator information before booking or climbing.