
Global Summit Guide logo featuring mountain imagery, symbolizing hiking and mountaineering resources for trip planning and safety.

Tag: washington

  • Mount Shuksan Expedition Update 2026: The Sulphide Glacier, the Summit Pyramid

    Mount Shuksan, a glaciated non-volcanic horn in the North Cascades of Washington
    9,131 ft (2,783 m) · North Cascades · Washington

    Mount Shuksan: the most photographed peak that climbs like a mountain

    Shuksan is one of the most photographed mountains in the world, its reflection in Picture Lake a Cascades icon. Behind the postcard is a serious alpine climb: a non-volcanic, heavily glaciated horn beside the volcano Baker, where every route finishes with a rock climb up the summit pyramid. This update covers the Sulphide Glacier, the classics, permits, and an honest readiness view. Heights in feet (metres).

    Research-based updateSafety and medical reviewReviewed each Cascade seasonOur team has not climbed Shuksan

    Updated 27 July 2026 · Compiled by Travis Ludlow · Safety review by Dawson Ludlow · Medical review by Taylor Ludlow, RN

    9,131 ftSummit (2,783 m)
    Non-volcanicGlaciated rock horn
    Summit pyramidEvery route’s finish
    SulphideStandard glacier route
    Jul-SepSeason
    N. Cascades NPWilderness permit

    Single-mountain expedition update, compiled from National Park Service information, guide-service route descriptions, and published climbing records. Our team has not climbed Mount Shuksan; the only first-hand summit anyone on our team claims is Kilimanjaro. This is a planning briefing for climbers with alpine skills, not a how-to and not a substitute for training or a guide.

    A postcard from the outside, an alpine climb up close.

    Shuksan is admired by millions from the roadside at Picture Lake, and climbed by far fewer. It is not a volcano like its neighbour Baker but a glacier-carved rock horn, and its every route ends with a rock climb up the summit pyramid. Even the moderate Sulphide Glacier demands glacier travel, crevasse rescue, and exposed Class 3 to 4 rock. It is a superb step up from a volcano walk-up toward real alpine climbing.

    • One of the most photographed peaks on Earth.
    • Non-volcanic, glaciated rock horn beside Baker.
    • Every route finishes on the summit pyramid.
    • Standard route: the Sulphide Glacier.
    • Glacier plus rock skills required, not a hike.
    The mountain

    What Shuksan involves

    An accessible but genuine alpine climb: a glacier, a rock pyramid, and Cascade weather, all in a short, committing package.

    Mount Shuksan rises to 9,131 ft in the North Cascades of Washington, a heavily glaciated, non-volcanic peak within North Cascades National Park, beside the volcano Mount Baker. Where Baker is a rounded ice-clad volcano, Shuksan is a craggy horn of rock, wrapped in glaciers and topped by a distinct rock pyramid. That structure is what makes it so photogenic, and what makes it a real climb rather than a walk.

    The standard Sulphide Glacier route begins with a forest approach to a high camp, then an alpine start across the glacier to the base of the summit pyramid, where climbers swap crampons for a Class 3 to 4 rock scramble to the top. It is very achievable for competent alpine climbers, and a fine objective for those building skills, but it asks for glacier travel, crevasse rescue, and comfort on exposed rock. Build those first with glacier travel basics and crevasse rescue basics.

    Postcard and climb

    The postcard, and the pyramid

    The same features that make Shuksan the most photographed peak in the Cascades are what make it a serious summit.

    Shuksan’s fame is built on one view: its reflection in Picture Lake, off the Mount Baker Highway, a scene printed on countless calendars and postcards. The steep glaciers dropping off its north side, the layered rock, and the sharp summit give it a drama that few peaks match, and draw photographers in every season. Most who admire it never set foot above the meadows.

    Those who climb it meet a different mountain. Whatever route reaches the base of the summit pyramid, the top itself is a rock tower, roughly 500 to 600 ft of Class 3 to 4 climbing, or steep snow in early season. It is the crux of every ascent, exposed and committing, and if the rock is glazed with ice, the right decision is to turn around below it. The postcard and the pyramid are the same mountain, seen from two very different places.

    Icy rock is a turnaround

    The summit pyramid is unavoidable, and it is dangerous when iced. If conditions coat the rock, a strong team accepts a high point below the summit rather than forcing it. The mountain will still be photogenic next season.

    A wide panorama of Mount Shuksan and the North Cascades

    The most photographed peak in the Cascades

    From Picture Lake to Artist Point, Shuksan anchors some of the most famous views in the Pacific Northwest. Its cascading glaciers and layered rock are a photographer’s gift, and a climber’s challenge. The same relief that fills the frame is the relief you climb to reach its rocky summit.

    Honest self-assessment

    Are you ready for Shuksan?

    Shuksan rewards climbers who bring two skill sets, glacier and rock, and the judgment to read the weather. These are the prerequisites.

    Glacier skills

    Rope, Axe, Crampons

    Even the standard route crosses a real glacier. Roped travel and crevasse rescue are prerequisites, not extras.

    Evidence: prior glaciated climbs.
    Alpine rock

    The Summit Pyramid

    Every route tops out on 500 to 600 ft of exposed Class 3 to 4 rock. You must be comfortable moving on it.

    Evidence: prior exposed alpine rock.
    Weather judgment

    Cascade Conditions

    North Cascades weather turns fast. Reading it, and knowing when the pyramid is too icy, is a safety skill.

    Evidence: sound calls in changeable weather.
    Turnaround discipline

    Ice Means Stop

    If the summit rock is coated in ice, the safe answer is to descend. Ego is the real hazard here.

    Evidence: willingness to turn back.
    RequirementBaselineWhy it matters
    Glacier competenceRoped travel and crevasse rescueThe Sulphide and other routes cross live glaciers.
    Alpine rockComfortable on Class 3-4 exposureThe summit pyramid is unavoidable on every route.
    FitnessStrong for a long approach and summit dayA forest approach plus a big summit day, back to back.
    Weather senseAble to read fast Cascade changesConditions and the pyramid’s state shift quickly.
    PermitsNorth Cascades wilderness permitOvernight trips need a park permit; access is limited.
    JudgmentWilling to turn aroundIcy summit rock is a clear stop signal.

    If you are coming from a volcano like Mount Baker, Shuksan is a natural next step that adds real rock to your glacier skills.

    The routes

    The Sulphide, and the classics

    One moderate standard route, and two celebrated harder lines. All of them finish on the same summit pyramid.

    The standard route

    Sulphide Glacier

    The most popular and moderate line, from the south, and the route of the 1906 first ascent. It crosses the Sulphide Glacier to the base of the summit pyramid, then climbs a Class 3 to 4 gully to the top. It is an excellent introduction to North Cascades alpine climbing, but it is still a glacier climb with a real rock finish.

    • Moderate glacier travel from the south
    • Class 3-4 summit-pyramid gully
    • The 1906 first-ascent line
    • A fine step up to alpine climbing
    Best fit: competent glacier climbers building alpine rock.
    The classics

    Fisher Chimneys and the North Face

    The Fisher Chimneys, from the north, is a celebrated North Cascades classic, demanding rock, steep snow, and route-finding through the chimneys, Winnie’s Slide, and Hell’s Highway before the pyramid. The North Face is a serious ice and alpine climb. Both are steps beyond the Sulphide in commitment and skill.

    • Fisher Chimneys: a North Cascades classic
    • Rock, steep snow, and route-finding
    • North Face: a serious ice line
    • For experienced alpine climbers
    Best fit: experienced alpinists seeking a classic line.
    FactorSulphide GlacierFisher Chimneys / North Face
    SideSouthNorth
    CharacterModerate glacier plus rock finishRock, steep snow, ice, route-finding
    Grade feelAn intro to Cascade alpineA North Cascades classic and beyond
    SummitThe pyramid gullyThe pyramid, via a harder approach
    Who it suitsCompetent glacier climbersExperienced alpinists

    For the volcano beside it, see our Mount Baker update; for the range’s giant, our Mount Rainier update.

    Route profile

    The Sulphide Glacier, step by step

    An overview of the standard route, from the trailhead to the summit pyramid and back.

    Gateway

    Bellingham / Seattle

    The cities and the Mount Baker Highway that lead to the trailheads.

    Trailhead

    Shannon Ridge or Lake Ann

    Sulphide Glacier from the south; Fisher Chimneys from the north.

    Forest approach

    Old-growth And Meadows

    A several-mile hike through forest and alpine meadow to camp.

    High camp

    Glacier’s Edge

    Camp near the toe of the glacier, below the upper route.

    The glacier

    Sulphide Crossing

    An alpine start and a roped crossing of the glacier at dawn.

    Base of the pyramid

    Crampons Off

    The glacier ends at the foot of the summit pyramid.

    Summit pyramid ~9,131 ft

    The Rock Finish

    500 to 600 ft of Class 3 to 4 rock, or steep snow early season.

    Descent

    Down The Route

    Reverse the pyramid and the glacier back to camp and out.

    The pyramid is the point

    The glacier gets you to the base; the summit pyramid gets you to the top. Save energy and time for that final rock, check its condition before committing, and treat it as the real climb it is.

    How a trip runs

    A Shuksan climb timeline

    Shuksan is usually a two to three-day climb: a forest approach, a night at high camp, and a big summit day on glacier and rock.

    1

    Travel to the trailhead

    Drive from Seattle or Bellingham to the Sulphide or Fisher Chimneys trailhead.

    2

    Hike in through the forest

    Climb through old-growth forest and alpine meadow to a high camp.

    3

    Review skills at camp

    Refresh glacier travel and rope work, and prepare for an alpine start.

    4

    Alpine start on the glacier

    Leave before dawn and cross the glacier toward the summit pyramid.

    5

    Climb the summit pyramid

    Swap to rock and climb the Class 3 to 4 pyramid to the true summit.

    6

    Descend to camp

    Reverse the pyramid and glacier carefully back to high camp.

    7

    Pack out

    Hike back down through the forest to the trailhead.

    Money and rules

    Cost, permits and access

    Shuksan is an affordable, short guided climb by big-mountain standards, but it does need a park permit and comes with limited peak-season access.

    ComponentFigureNote
    Guided climbTwo to three daysA short guided program, often two to three days on Shuksan.
    Wilderness permitNorth Cascades NPRequired for overnight trips; limited in peak season.
    Trailhead accessNational forest roadsForest-road driving to the Sulphide or Fisher trailheads.
    Personal gearGlacier and rock kitCrampons, axe, harness, helmet, and rock protection as needed.
    SkillsGlacier and rockThe skills to climb a glacier and exposed alpine rock.

    Plan the permit early

    The summit, route, and camps sit within North Cascades National Park, so overnight trips need a wilderness permit, and access to popular North Cascades zones is limited in peak season. Sort this early, and confirm the current rules with the park, because it can be the deciding factor in when, and whether, you climb.

    Choosing a team

    Choosing a Shuksan guide

    Several North Cascades guide services climb Shuksan, often as a skills-and-summit program. These are the questions worth asking.

    Route match

    Sulphide Or Fisher

    Which route suits your skills, from moderate glacier to classic chimneys.

    Ratio on rock

    Tighter On The Pyramid

    The summit rock calls for a low guide-to-client ratio.

    Conditions

    Pyramid State

    Ask about the current state of the summit rock and glacier.

    Permits

    Handled In Advance

    A good operator sorts the North Cascades permits and access.

    Skills taught

    Learn As You Climb

    Many programs teach glacier and rock skills along the way.

    Weather plan

    Flexible Dates

    Cascade weather means a plan that can move or wait.

    How to choose an expedition operator covers the vetting, and the operator directory is a place to start.

    Mount Shuksan's glaciers and rocky summit pyramid

    Glacier below, rock above

    Shuksan asks for two mountaineers in one: the glacier traveller who crosses the Sulphide roped and watchful, and the rock climber who takes the sharp end on the summit pyramid. That combination, in a compact and beautiful package, is exactly why it is such a rewarding step in a climber’s progression.

    The hazards

    Difficulty and hazard, honestly

    Shuksan is accessible, but not casual. Its hazards are the glacier, the rock pyramid, and the speed of Cascade weather.

    HazardWhat it isHow to treat it
    The summit pyramidExposed alpine rockUnavoidable Class 3-4; icy rock is a turnaround.
    CrevassesLive glaciersThe Sulphide and other glaciers require roped travel.
    Fast weatherCascade changeabilityStorms and cloud arrive quickly; the pyramid can ice up.
    Route-findingEspecially Fisher ChimneysComplex terrain rewards navigation and experience.
    Timing

    Season and weather

    Summer is the season for the rock summit pyramid; early season means steep snow, and Cascade weather decides the rest.

    July-Aug

    Prime

    The summit pyramid is workable rock; the classic window.

    September

    Good

    Often stable and quiet, into early autumn.

    Early season

    Steep Snow

    The pyramid holds steep snow rather than clean rock.

    Winter

    Ice And Alpine

    The North Face and ice lines, for experts only.

    Any time

    Weather Rules

    Cascade conditions decide far more than the calendar.

    Live wind and weather for Mount Shuksan. Source: Windy.com. For how to read a mountain forecast, see our weather guide.
    Mount Shuksan, in the North Cascades of Washington, beside Mount Baker. Map: OpenStreetMap contributors.
    History

    A short history of Shuksan

    From a 1906 first ascent to a place on the world’s most photographed lists.

    Mount Shuksan was first climbed, by the accepted record, on 7 September 1906 by Asahel Curtis and W. Montelius Price, by the Sulphide Glacier, though an earlier ascent in 1897 has been claimed. Several of the mountain’s glaciers carry the names of those early climbers. The name Shuksan itself comes from a Lummi word meaning high peak, and the mountain has been a landmark to the peoples of the North Cascades far longer than it has been climbed.

    In the modern era, Shuksan became one of the most photographed mountains anywhere, its image tied to the Mount Baker area and the view across Picture Lake. For climbers it has stayed a beloved objective, valued precisely because it pairs an approachable glacier with a genuine rock summit, a mountain that looks like a poster and climbs like the real thing.

    Questions

    Mount Shuksan FAQ

    The questions climbers ask most about the difficulty, the summit pyramid, the permits, and the season.

    How high is Mount Shuksan, and where is it?

    Mount Shuksan is 9,131 ft (2,783 m), in the North Cascades of Washington, within North Cascades National Park and beside the Mount Baker scenic area. It is one of the highest peaks in the state, though not the tallest, and sits about 11 miles from the Canadian border. Its name comes from a Lummi word meaning high peak.

    Is Shuksan a volcano like Mount Baker?

    No, and that is part of what makes it distinctive. Its neighbour Mount Baker is a stratovolcano, but Shuksan is a non-volcanic peak, a glacially carved horn of metamorphic rock draped in glaciers. That structure gives it steep rock faces and cascading icefall glaciers, and the craggy, layered look that makes it so photogenic.

    Why is Shuksan so famous in photos?

    It is often called one of the most photographed mountains in the world. Its reflection in Picture Lake, in the Heather Meadows area off the Mount Baker Highway, is a Pacific Northwest icon, and the peak’s dramatic relief and glaciers draw photographers year-round. The postcard, though, hides a serious climb.

    Is Shuksan a hike or a real climb?

    A real climb. Even the standard Sulphide Glacier route requires glacier travel, crevasse-rescue skill, and a Class 3 to 4 rock scramble up the summit pyramid, and every other route is harder. It is not a walk-up, and it is a common step up for climbers moving from a volcano like Baker toward technical alpine terrain.

    What is the summit pyramid?

    The summit pyramid is the final rock tower that tops every route on Shuksan, roughly 500 to 600 ft of climbing on alpine rock, or steep snow in early season. On the standard route it is climbed by a Class 3 to 4 gully; if it is coated in ice, the safe choice is to turn around. Reaching the true summit means climbing this pyramid, whatever route you took to its base.

    What are the main routes?

    The Sulphide Glacier, from the south, is the standard and most popular line, a moderate glacier climb finishing on the summit-pyramid gully, and the route of the 1906 first ascent. The Fisher Chimneys, from the north, is a celebrated North Cascades classic that demands rock, steep snow, and route-finding skill. The North Face is a serious ice and alpine objective for experienced climbers.

    When is the season, and do I need a permit?

    The main climbing season is roughly July to September, when the summit pyramid is workable rock; early season means steep snow instead. Because the summit, route, and camps lie within North Cascades National Park, a wilderness permit is required for overnight trips, and access to popular North Cascades zones is limited in peak season. Confirm current permit rules with the park before you go.

    What experience do you need?

    Solid glacier travel and crevasse-rescue skills, comfort on exposed Class 3 to 4 alpine rock, and the judgment to read fast-changing Cascade weather. Shuksan is very achievable for competent alpine climbers and a superb objective for those building technical skills, but it is more than a fit hiker should take on unroped or unpracticed.

    Transparency

    How we built this update

    What this page is based on, who reviewed it, and what we do not claim to know.

    Sources

    • National Park Service information for North Cascades access and permits.
    • Guide-service route descriptions for the Sulphide Glacier and Fisher Chimneys.
    • Published climbing records for the routes, grades, and 1906 first ascent.
    • Glacier and geography references for the mountain’s non-volcanic structure.
    • Our own glacier travel and crevasse rescue guides for the core skills.

    Review and standards

    Compiled by Travis Ludlow and reviewed for safety by Dawson Ludlow, our Climbing and Mountaineering Lead (Wilderness First Aid), whose highest first-hand summit is Kilimanjaro. Health and medical points were reviewed by Taylor Ludlow, RN. We do not fabricate summit experience, quotes, or credentials, and we say plainly when we are reporting rather than recounting.

    What we do not claim to know

    Conditions on Shuksan change through the season, and no web page can replace current route reports and a guide’s judgment. In particular:

    • The summit pyramid’s state, rock or snow or ice, varies week to week.
    • Permit rules and North Cascades access limits change; confirm with the park.
    • Glacier conditions shift with the season and the year.
    • Our team has not climbed Shuksan, so we report records and route descriptions, not personal experience.
    Global Summit Guide research team

    Global Summit Guide research

    We compile mountain updates from park information, guide route descriptions, and published records, review them for safety and medical accuracy, and refresh them each season. We are transparent about what we have and have not climbed, and Shuksan is a research-based briefing, not a personal account.

    About our team and standards ->
    Plan your North Cascades climb

    Come for the postcard. Respect the pyramid.

    Build the foundation with our glacier travel and crevasse rescue guides, pair Shuksan with the volcano next door in our Mount Baker update, and weigh yourself against our fitness standards. Trips stage through Bellingham and Seattle, so for flights and lodging, browse travel on Expedia.

    Disclosure: the Expedia link above is a sponsored affiliate link, and we may earn a commission at no extra cost to you. It is the only affiliate link on this page; our route, permit, and safety guidance is independent.

    Was this helpful?

    Yes
    No
    Thanks for your feedback!
  • Mount Baker Climbing Update 2026: Routes, Season, Permits & Glacier Training

    Mount Baker, a heavily glaciated volcano in the North Cascades of Washington State
    Mount Baker is 10,781 ft (3,286 m), the second-most glaciated peak in the Lower 48. It is the classic first glaciated volcano and the Cascades’ great training ground.
    Expedition Updates · Cascades

    Mount Baker climbing update

    The Cascades’ glacier-mountaineering classroom, and the best first glaciated volcano in the Lower 48. This page tracks the season, the two standard routes, the permits and access, the cost, the hazards, and where Baker fits your progression. A single-mountain page in our Expedition Updates directory. Heights in feet (metres).

    Current status In season May to Sep 10,781 ft (3,286 m)

    The best classroom in the Cascades, with no climbing fee to get in.

    Baker is where climbers learn glacier travel, crevasse rescue, and roped movement before Rainier, Denali, and the Alps. Its two standard routes, the Coleman-Deming and the Easton Glacier, are moderate glacier climbs run heavily as skills-and-summit courses.

    Unlike Rainier, Baker charges no climbing permit or fee, just a Northwest Forest Pass to park and a free self-issued wilderness permit. What it does ask for is skill: over 7,000 ft of gain, a long summit day, and real crevasse and avalanche hazard. Beginner-friendly is not the same as easy.

    10,781 ft

    Summit (3,286 m)

    Third-highest in Washington, second-most glaciated in the Lower 48.

    No fee

    Climbing permit

    Just a Northwest Forest Pass to park; no climbing charge.

    May to Jul

    Prime season

    Best snow and firmest crevasse bridges.

    Mount Baker, known by its Indigenous name Kulshan, dominates the skyline north of Seattle and east of Bellingham. It is one of the snowiest places on earth, holding a world-record single-season snowfall, and its deep glaciation is exactly what makes it such a good place to learn. This page owns the current picture, the season, the routes, the access, and where Baker sits in a climbing progression. For the full history, route detail, and gear, see our Mount Baker climb guide.

    Season and status

    A long summer window, with the best conditions early.

    Baker is climbed from late spring through summer, roughly May to September. May to July usually brings the best snow cover and the firmest crevasse bridges, which is why the guided skills courses cluster there, while later in the summer the glaciers open up, route-finding gets harder, and crevasse hazard rises. Weather is the deciding factor on any given summit day, so teams build in flexibility rather than betting on a single date.

    The glacier classroom

    Why Baker is the peak climbers learn on.

    More than a summit in its own right, Baker is the Pacific Northwest’s teaching mountain. Its moderate, heavily glaciated routes are the ideal place to learn the core skills of glaciated mountaineering: roped glacier travel, crevasse rescue, cramponing, and self-arrest, in real terrain but without extreme technical difficulty. Guide services run constant skills-and-summit courses here for exactly that reason, and climbers routinely use Baker as the proving ground before Rainier, Denali, and bigger objectives in the Alps and the Andes. If you want one mountain to build glacier competence on, this is the one.

    The honest framing: treat Baker as a skills investment, not just a summit. The glacier-travel and crevasse-rescue habits you build here are what keep you safe on every bigger glaciated peak afterward. Pair it with our first glacier climb training and crevasse rescue basics guides.

    The two standard routes

    Coleman-Deming and Easton, plus a step up.

    Coleman-Deming (north side)

    The most popular and most guided route, from the Heliotrope Ridge trailhead. It climbs to Hogsback Camp around 6,000 ft, then up the Coleman Glacier, across the Deming Glacier, and finishes up the steep Roman Wall, the crux, to the summit plateau and Grant Peak. Expect over 7,000 ft of gain and a summit day near 5,000 ft.

    Easton Glacier (south side)

    From the Schriebers Meadow trailhead, a gentler, broad-glacier ascent that is popular for skills courses and ski descents. A slightly more forgiving introduction to the mountain, with its own long summit day.

    North Ridge (a step up)

    A steeper, more technical ice route for experienced climbers, and a natural next objective once the standard routes feel comfortable. Not an introductory line.

    Permits and access

    Simpler and cheaper than Rainier.

    Baker’s access is refreshingly straightforward. There is no climbing permit and no climbing fee for the mountain, which sets it apart from Rainier. What you need is a Northwest Forest Pass to park at the trailhead, at $30 for the year or $5 for the day, or an equivalent Interagency pass, plus a free self-issued wilderness permit that you fill out at the trailhead. The Mount Baker Wilderness rules apply: a maximum party size of 12, no campfires, and packing out all human waste. Passes and information are available at the Glacier Public Service Center on the Mount Baker Highway.

    Cost

    One of the most affordable big glaciated climbs anywhere.

    What a Mount Baker climb costs, per climber. Confirm current figures with the Forest Service and your guide service.
    ItemCostNotes
    Northwest Forest Pass (parking)$30 per year or $5 per dayRequired at the trailheads; an Interagency or America the Beautiful pass also works.
    Climbing permit or feeNoneUnlike Rainier, Baker charges no climbing fee; you self-issue a free wilderness permit at the trailhead.
    Guided climb or skills course$1,000 to $1,600A 2 to 3 day Coleman-Deming or Easton climb, usually including glacier training.
    Self-guided direct costPass, gear, and travelThe real requirement is not money but glacier-travel and crevasse-rescue skill.
    Guided or self-guided? If you do not yet have glacier skills, a guided skills-and-summit course is the safest and most useful way to climb Baker, and it doubles as training for everything after. If you do have the skills, Baker is one of the cheapest big glaciated climbs going. Either way, check your base against our fitness standards and pick a team with our how to choose an operator guide.

    Hazards

    A moderate climb with real, serious dangers.

    ⚠ Do not be fooled by the beginner rating

    Baker is rated as an introductory glacier climb, but that describes the technical difficulty, not the seriousness. The Coleman-Deming route gains over 7,000 ft with a summit day close to 5,000 ft, the glaciers are heavily crevassed, the Roman Wall is steep, avalanche hazard is real, and the weather changes fast enough to end summit bids without warning. Baker is also an active volcano, with steam venting from Sherman Crater and lahars as its greatest geologic hazard.

    It demands glacier-travel and crevasse-rescue competence, sound turnaround discipline, and respect for the forecast. Learn or refresh the fundamentals with our crevasse rescue basics guide. This page is educational and is not a substitute for training or a guide.

    Weather and timing

    A live look at one of the snowiest mountains on earth.

    Baker sits directly in the path of Pacific storms and collects extraordinary amounts of snow, and its weather can turn from clear to whiteout quickly. Summit day success hinges on catching a settled window. The live map below shows current conditions for the massif; use it as background and rely on the Northwest Avalanche Center and a mountain forecast for the actual go decision.

    Live wind and weather for Mount Baker. Source: Windy.com. For how to read a mountain forecast, see our weather guide.
    Mount Baker, in the North Cascades of Washington State, near Bellingham. Map: OpenStreetMap contributors.

    Where Baker fits your progression

    The rung below the bigger glaciated peaks.

    Baker’s real value is as a stepping-stone. It is the natural place to build glacier competence before stepping up to a bigger, more committing objective, and the skills transfer directly. Once Baker feels controlled, the usual next steps are its Cascades neighbour Mount Rainier, with its longer summit day and glacier complexity, and from there the far bigger commitment of Denali in Alaska. See how the pieces fit together in our progression plans, and track current conditions on the next objectives in our Rainier and Denali updates.

    Go or no-go checklist

    Work through these before you climb.

    Before you go

    • Have the glacier skills – roped travel, crevasse rescue, and self-arrest, or book a guide who teaches them.
    • Buy the Northwest Forest Pass – and self-issue the free wilderness permit at the trailhead.
    • Pick the route for the conditions – Coleman-Deming or Easton, based on snow, season, and crowds.
    • Check the forecast and avalanche report – weather is the main reason summit days fail here.
    • Respect the beginner rating – 7,000+ ft of gain and a long summit day are serious regardless of grade.
    • Pack it out – carry out all waste; the wilderness rules are strict for good reason.

    Mount Baker update FAQ

    The questions climbers ask most about permits, routes, and the season.

    Do you need a permit to climb Mount Baker?

    There is no climbing permit or climbing fee for Mount Baker itself. What you need is a Northwest Forest Pass to park at the trailhead, which costs $30 for the year or $5 for the day, or an Interagency or America the Beautiful pass, plus a free self-issued wilderness permit filled out at the trailhead. Wilderness rules apply: a maximum party size of 12, no campfires, and packing out all waste. This is simpler and cheaper than Rainier, which does charge a climbing pass.

    Is Mount Baker a good first glaciated peak?

    Yes. Baker is the classic first glaciated volcano and one of the best glacier-mountaineering training grounds in the Lower 48. Its two standard routes are ideal for learning roped glacier travel, crevasse rescue, cramponing, and self-arrest, which is why guide services run so many skills-and-summit courses on it and why it is standard preparation for Rainier, Denali, and the Alps. The one caveat is that beginner-friendly does not mean easy.

    Which Mount Baker route should I climb?

    The Coleman-Deming route, from the Heliotrope Ridge trailhead on the north side, is the most popular and most guided line, climbing the Coleman and Deming Glaciers to the steep Roman Wall crux and the summit. The Easton Glacier route, from Schriebers Meadow on the south side, is a gentler, broad-glacier climb popular for skills courses and ski descents. The North Ridge is a steeper, more technical ice route for experienced climbers.

    How hard is it to climb Mount Baker?

    It is a moderate glacier climb rather than technical rock, but it is a serious mountain day. Expect over 7,000 ft of elevation gain from the trailhead, a summit day of close to 5,000 ft, real crevasse and avalanche hazard, the steep Roman Wall, and famously fast-changing weather. It requires glacier-travel and crevasse-rescue skills, or a guide who has them. As the guide services put it, do not be fooled by the beginner rating.

    When is the Mount Baker climbing season?

    Late spring through summer, roughly May to September. May to July usually offers the best snow and the firmest crevasse bridges, while later summer opens more crevasses and makes route-finding harder. Weather is the single biggest factor in whether a summit day succeeds, so build in flexibility.

    How much does it cost to climb Mount Baker?

    A guided two or three day climb or a combined skills-and-summit course runs roughly $1,000 to $1,600. If you have the skills to go self-guided, the direct costs are just the Northwest Forest Pass, your gear, and travel, which makes Baker far cheaper and more accessible than Rainier or Denali. The real prerequisite is competence on a glacier, not a big budget.

    Is Mount Baker an active volcano?

    Yes. Baker is an active stratovolcano monitored by the USGS Cascades Volcano Observatory. Steam vents from Sherman Crater just south of the summit, activity that increased noticeably in 1975 and 1976, and lahars, volcanic mudflows, are considered its greatest geologic hazard. It is not currently erupting, and it is climbed routinely, but it is a living volcano rather than an inert peak.

    How high is Mount Baker and where is it?

    Mount Baker is 10,781 ft (3,286 m), the third-highest peak in Washington and the second-most glaciated mountain in the Lower 48 after Rainier. It stands in the North Cascades near Bellingham, about two and a half hours north of Seattle. Its Indigenous name is Kulshan, and it is one of the snowiest places on earth, holding a world-record single-season snowfall from the winter of 1998 to 1999.

    📋 How this update is built

    This page is compiled by Travis Ludlow, Founder and Head of Research at Global Summit Guide, from US Forest Service access rules, USGS Cascades Volcano Observatory monitoring, and guide-service route information, with sources named below. It was reviewed for safety by Dawson Ludlow, our Climbing and Mountaineering Lead (Wilderness First Aid), whose highest first-hand summit is Kilimanjaro.

    Our team has not climbed Mount Baker, so we report official rules and route information rather than personal experience, and we review this page through the climbing season. Passes, rules, and volcanic status can change, so confirm current access and conditions with the Forest Service and USGS before you plan around them.

    Planning a Baker climb?

    Start with our Mount Baker climb guide, build the skills with our first glacier climb training guide, and see where it leads in our progression plans. Most climbers stage through Bellingham or Seattle, so for flights and lodging, browse travel on Expedia.

    Disclosure: the Expedia link above is a sponsored affiliate link. We may earn a commission at no extra cost to you.

    US peaks · Mount Baker · Related guides

    Mount Baker: Plan the Whole Climb

    Permits, routes, difficulty, weather and logistics all decide the day. Start with the main guide, then go deeper below.

    Was this helpful?

    Yes
    No
    Thanks for your feedback!
  • Mount Baker vs Mount Rainier: Which Glaciated Volcano Wins?

    Mountain Comparisons · 2026 Guide

    Mount Baker vs Mount Rainier: Which Glaciated Volcano Wins?

    Mount Rainier rises to 14,410 feet in central Washington — the most heavily glaciated peak in the contiguous United States and the canonical Pacific Northwest expedition mountain. Mount Baker sits 200 miles north at 10,781 feet, just below the Canadian border in the North Cascades. Baker is 3,629 feet shorter. By every metric of “bigness,” Rainier wins. But Baker has earned a reputation as the training mountain for Rainier — the climb that every major guide service recommends as preparation before committing to the bigger objective. The right question isn’t “which is harder?” — it’s “in what order should you climb them?”

    The Verdict

    For nearly every climber, the answer is Baker first, Rainier second — Baker offers true glaciated mountaineering on forgiving terrain; Rainier demands those skills already in place on terrain that punishes mistakes more severely.

    North Cascades · Washington

    Mount Baker

    Premier beginner glaciated peak in the lower 48. The canonical Rainier training mountain. Real glacier travel on forgiving terrain.

    Elevation10,781 ft
    Round trip~12.5 miles
    Elevation gain~7,400 ft
    Typical time2–3 days
    Technical?Moderate glaciated
    Annual climbers~5,000–7,000
    Permit cost$5 (parking only)
    Best seasonMay–September
    Central Cascades · Washington

    Mount Rainier

    Most glaciated peak in the lower 48. The Pacific Northwest’s iconic expedition mountain. Real consequence on technical terrain.

    Elevation14,410 ft
    Round trip~14.5 miles
    Elevation gain~9,000 ft
    Typical time2–3 days
    Technical?Yes (advanced)
    Annual climbers~10,000 attempts
    Permit cost$63 + wilderness
    Best seasonLate Jun–early Sep

    Two glaciated volcanoes, two completely different skill tiers

    On the map, Baker and Rainier look like siblings. Both are stratovolcanoes in Washington State’s Cascade Range. Both are heavily glaciated. Both have well-established standard routes climbed by thousands of mountaineers each summer. Both require crampons, ice axes, rope teams, and crevasse rescue skills.

    In practice, the two mountains sit on opposite ends of the glaciated climbing difficulty spectrum.

    Mount Baker’s standard route — the Coleman-Deming Glacier from the Heliotrope Ridge trailhead — is described by Blackbird Mountain Guides as “non-technical but require good fitness, basic mountaineering skills, and the ability to travel roped on glaciers.” The route climbs 7,400 feet across roughly 12.5 miles round trip, gaining the Coleman Glacier, crossing onto the Deming Glacier, and ascending the Roman Wall — a sustained 30-35 degree snow slope — to reach the summit plateau. Glacier travel is real: there are crevasses, seracs, and the need for rope team movement. But the angles are moderate, the route is well-established, and the consequence of a fall is recoverable on most sections.

    Mount Rainier’s standard route — the Disappointment Cleaver via Camp Muir — is meaningfully harder on every measurable axis. The route covers 14.5 miles round trip and 9,000 feet of elevation gain, but the comparable metrics understate the difference. Rainier’s upper mountain involves crevasse fields that change daily, collapsing snow bridges, fixed ladder crossings in some seasons, rockfall on the Cleaver itself, and altitude that climbs above 14,000 feet. According to National Park Service data, in 2018 the mountain saw 10,762 attempts with 5,135 successful summits — a 48% success rate. Mount Baker guided programs typically report 70-85% success rates by comparison.

    Why every guide service recommends Baker first

    There’s an unusually strong consensus among Pacific Northwest guide services about the Baker-to-Rainier progression. Blackbird Mountain Guides puts it directly: “Is Mt. Baker good training for Rainier or Denali? Absolutely. With crevasses, alpine starts, and route finding challenges, it’s ideal preparation.”

    This is not marketing copy. The technical skill set required for Rainier is identical to what Baker teaches — roped glacier travel, crevasse rescue, crampon technique, alpine pacing, altitude tolerance. Baker simply teaches these skills on shorter, less consequential terrain. The progression matters because Rainier’s 48% success rate is partially explained by climbers attempting it without sufficient glacier experience. Climbers who summit Baker first arrive at Rainier with the muscle memory and decision-making practice that turns a 50/50 climb into something closer to 70/30 in their favor.

    The data: success rates, climbers, and what they reveal

    ~75%
    Baker guided success rate
    Baker guided programs typically report 70-85% summit success depending on season and weather window
    Source: Northwest Alpine Guides, American Alpine Institute
    ~48%
    Rainier summit success
    10,762 attempts, 5,135 summits in 2018 — the most recent fully published NPS data
    Source: National Park Service climbing statistics
    ~$1,300
    Baker guided 2-day cost
    Northwest Alpine Guides 2026 pricing for Coleman-Deming or Easton Glacier 2-day program
    Source: Northwest Alpine Guides 2026 schedule
    ~$2,500
    Rainier guided 3-day cost
    Major operators (RMI, IMG, Alpine Ascents) charge $2,250-$2,995 for standard Disappointment Cleaver programs
    Source: 2026 guide service pricing

    The gap in success rates tells the story. Baker’s 75% success rate is roughly 50% better than Rainier’s 48% rate. That difference isn’t because Baker is “easy” — it’s because Baker’s lower altitude, shorter summit day, and more forgiving terrain make weather windows wider and turnaround pressure lower. Climbers who get pinned down by a storm on Rainier often fail to summit at all; climbers in the same conditions on Baker can often still complete the climb.

    This is the structural insight that makes Baker the right first-glaciated-peak choice: you learn the skills you’d need on Rainier, but you summit more reliably while you learn them.

    Mount Baker deep-dive: the Coleman-Deming route in detail

    The route in stages

    The Coleman-Deming route from Heliotrope Ridge to the summit moves through four distinct terrain bands:

    1. Heliotrope Ridge trailhead to Hogsback Camp (3,700–6,200 ft). A well-maintained trail climbs through old-growth Pacific Northwest forest, crosses Kulshan Creek at around 2 miles, breaks out of the trees at roughly 5,400 feet, and ascends a final moraine into Hogsback Camp at the edge of the Coleman Glacier. Most climbers reach Hogsback Camp in 3-4 hours with a 35-45 lb pack. Campsites are scattered between 6,000 and 6,200 feet along the glacier’s edge.
    2. Hogsback Camp onto the Coleman Glacier (6,200–8,500 ft). Above the moraine, the route ropes up and enters real glacier terrain. The Coleman Glacier has substantial crevasse fields, and rope team travel is mandatory from this point. The route winds northeast across the glacier, climbing moderately on 20-30 degree snow. Most climbers practice rope team movement, crevasse rescue setup, and pacing on the Coleman Glacier the afternoon before summit day.
    3. Colfax Col and the Black Buttes traverse (8,500–10,000 ft). The route climbs to Colfax Col — the saddle between the Black Buttes formation and Mount Baker’s main summit cone. Climbers skirt the Black Buttes (a complex of volcanic spires) at safe distance to avoid rockfall and avalanche risk from the Buttes themselves. From Colfax Col the route turns east-northeast and crosses onto the upper Deming Glacier.
    4. The Roman Wall and summit plateau (10,000–10,781 ft). The technical crux: a sustained 30-35 degree snow slope known as the Roman Wall climbs roughly 700-800 vertical feet to the summit plateau. Conditions vary year to year — some seasons offer firm consolidated snow ideal for crampon technique; other seasons present icy or rotten sections requiring more care. Above the Roman Wall, the broad summit plateau leads to the true summit at Grant Peak. The summit is actually the rim of an ice-filled volcanic crater roughly 1,300 feet deep.

    Mount Baker permits and access (2026)

    Baker’s permit system is among the simplest in the Cascades — there is no climbing-specific permit:

    • Northwest Forest Pass: Required for parking at the Heliotrope Ridge trailhead. $5 per day or $30 annual. Available at the Glacier Public Service Center, REI, or online.
    • Wilderness Permit: Free, self-issued at the trailhead. Required for all entries into the Mount Baker Wilderness.
    • Pack-out human waste: Required. Most climbers use blue bags or WAG bags. No bags provided at the trailhead — bring your own.
    • Group size limit: 12 climbers maximum in the wilderness.

    Access to the Heliotrope Ridge trailhead is via State Highway 542 east from Bellingham. Forest Road 39 (Glacier Creek Road) is the access route from SR-542. The road is susceptible to washouts and may not fully clear of snow until mid-June in heavy snow years. Climbers attempting Baker in May or early June should check current road conditions via the Mount Baker Snoqualmie National Forest website.

    Baker is still a real glaciated mountain

    “Beginner-friendly” doesn’t mean “safe to take lightly.” Mount Baker has substantial crevasse fields on both the Coleman and Easton Glaciers. The Mountaineers note that “there are many crevasses on this climb” and that the start of the Coleman Glacier can be tricky to discern — many parties have inadvertently roped up too late, only to encounter the first crevasse minutes later.

    The Black Buttes section presents avalanche and rockfall hazard. Climbers must keep enough distance from the Buttes to avoid debris coming down from above. The Roman Wall itself is steep enough that a slide-arrest scenario is non-trivial. Baker is the easier of the two mountains compared in this article — but it is not, in any way, a casual hike. Real glacier travel skills are required.

    Mount Baker guide services

    Mount Baker is one of the most-guided peaks in the lower 48, with multiple established services offering programs from 2 to 6 days:

    • American Alpine Institute (AAI) — Bellingham-based, runs both Coleman-Deming and Easton Glacier programs. The 3-day instructional climb is the canonical first glaciated mountaineering experience for many Pacific Northwest climbers.
    • Northwest Alpine Guides — 2-day Coleman-Deming or Easton Glacier programs at $1,300. Adapts route choice based on conditions. Intermediate pace requires prior mountaineering experience (5,000+ ft single-day gain).
    • Mountain Madness — Multi-day Baker programs including skills instruction and summit attempts.
    • Northwest Mountain School — IFMGA-licensed guides, custom and scheduled programs.
    • Blackbird Mountain Guides — North Cascades-based, runs Coleman-Deming and Easton programs.
    • Skyline Mountain Guides — 3-day Coleman-Deming program with built-in skills instruction.
    • Edgeworks Outdoor — 3-day programs on Coleman-Deming, Easton, and North Ridge variants.

    Typical 3-day program cost: $700-$1,500 per person depending on group size and program structure. Most 3-day programs explicitly target first-time mountaineers and include instruction in crampons, ice axe self-arrest, rope team travel, and crevasse rescue setup. The 3-day programs report meaningfully higher success rates than 2-day programs because they build in skill instruction and acclimatization time.

    The Coleman–Deming Route is a perfect first big mountain climb for climbers looking to elevate their mountaineering experience! The route involves glacier travel, rope team movement, and use of crampons and ice axe—all taught and reinforced by our Skyline Team.

    Skyline Mountain Guides — 2026 Mount Baker Coleman-Deming program

    Mount Rainier deep-dive: the Disappointment Cleaver route in detail

    The route in stages

    The Disappointment Cleaver route is structurally different from Baker — longer, higher, with technical sections that demand more of climbers:

    1. Paradise to Camp Muir (5,400–10,080 ft). The 4-6 hour ascent from Paradise to Camp Muir via the Muir Snowfield. The route gains 4,680 feet in 4.5 miles — a sustained but moderate slope. Camp Muir is a permanent high camp with stone shelters, guide-service tents, and ranger station. Most climbers arrive in early afternoon, prepare gear, eat, and try to sleep by 6 p.m. for a midnight summit start.
    2. Camp Muir to Ingraham Flats (10,080–11,000 ft). The summit attempt begins between midnight and 1 a.m. Climbers cross the Cowlitz Glacier to Cathedral Gap, traverse along the Ingraham Glacier, and reach Ingraham Flats at roughly 11,000 ft. This section involves the first real exposure to active crevasse terrain and serac fall potential from the Ingraham Icefall above.
    3. The Disappointment Cleaver proper (11,000–12,300 ft). The Cleaver is a rocky ridge that climbers ascend to bypass the most heavily crevassed section of the Ingraham Glacier. The Cleaver presents real rockfall hazard — climbers wear helmets and move efficiently. The Cleaver itself is exposed scrambling on rock, often with rope team protection. The name comes from early climbers who reached the top of the Cleaver and felt “disappointed” to realize how much climbing remained above.
    4. Upper mountain to summit (12,300–14,410 ft). Above the Cleaver, the route returns to the Ingraham Glacier and ascends 2,100 feet of moderate glacier on the upper mountain. Crevasses become more frequent and route-finding becomes critical. In some seasons fixed ladders are placed across larger crevasses by guide services. The summit crater rim is reached at Columbia Crest — Rainier’s true high point at 14,410 ft.

    Mount Rainier permits and access (2026)

    Rainier’s permit system is the most regulated of any peak in this comparison cluster:

    • Climbing Cost Recovery Fee: $63 per climber per calendar year. Required for all travel above 10,000 ft or onto any glacier. Funds high-camp rangers and waste management.
    • Wilderness Permit: Required for overnight stays. Managed through Recreation.gov with roughly two-thirds available for advance reservation (May 1 to the first federal holiday in October) and one-third walk-up only.
    • Park Entrance Fee: $30 per vehicle (or America the Beautiful annual pass).
    • Pack out human waste: Required above Camp Muir. Blue bags provided.

    Most climbers access via the Paradise trailhead, accessible year-round from the Nisqually entrance on the south side of Mount Rainier National Park. See our Mount Whitney vs Mount Rainier comparison for full Rainier route and permit detail.

    Mount Rainier guide services

    Four major operators hold Mount Rainier concession permits:

    • RMI Expeditions (Rainier Mountaineering, Inc.) — The largest Rainier operator. Multiple program lengths. 3-day Disappointment Cleaver: $2,250-$2,995.
    • International Mountain Guides (IMG) — Park-concession holder with multi-day instructional programs.
    • Alpine Ascents International (AAI Seattle) — Premier guided programs. Includes the Rainier Seminar (training-and-climb) for first-time mountaineers.
    • Mount Rainier Alpine Guides — Smaller operator with personalized programs.

    All four require either prior glacier mountaineering experience (often Baker is the cited example) or completion of a pre-climb seminar. This is the structural reason Baker fits so naturally as the prerequisite climb — it directly satisfies the experience requirement that Rainier operators look for.

    Glacier recession and what it means for both peaks

    Both Mount Baker and Mount Rainier are heavily affected by climate-driven glacier recession. See Investigation 12: Glacier recession and the future of mountaineering routes for the broader picture across Cascade volcanoes.

    On Mount Baker, the Coleman Glacier has receded measurably over the past three decades, with new crevasse fields opening and the lower glacier toe retreating further uphill each season. The route’s standard line through the Coleman has shifted multiple times as new crevasses opened. The bergschrund at the base of the Roman Wall is now wider and more challenging in late season than it was historically.

    On Mount Rainier, the impact is more severe. Multiple Rainier glaciers (Nisqually, Cowlitz, Emmons-Winthrop) have receded substantially, with documented changes in crevasse patterns season over season. The Ingraham Icefall has become increasingly active. Some routes that were once climbable are now considered too dangerous in most seasons. Recent years have seen success rates vary wildly month-to-month — Alpine Ascents International reports a range from 45% to 90% across different months in 2024-2025 based on conditions.

    The practical effect for both peaks: route conditions matter more than they used to. Guide services adapt their route choice based on current conditions. Independent climbers must research recent trip reports and current conditions before committing. The “standard route” is increasingly a moving target rather than a fixed line up the mountain.
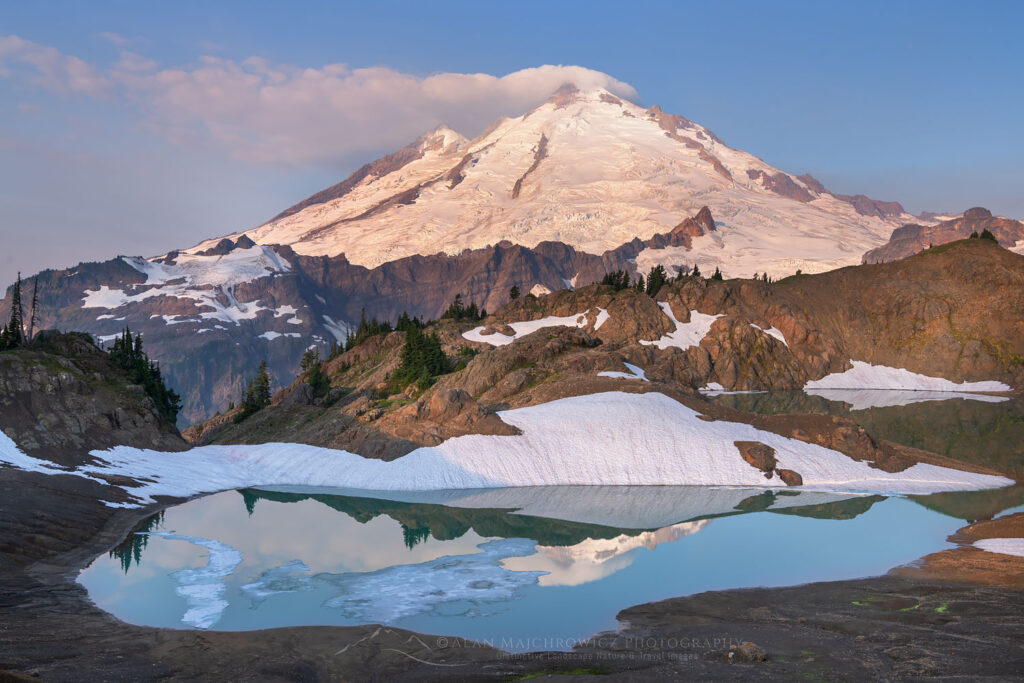
    Mount Baker reflected in Goat Lake on Ptarmigan Ridge, Washington's North Cascades.
    Mount Baker seen from Goat Lake on Ptarmigan Ridge, Mount Baker Wilderness. North Cascades Washington

    The skills gap: what each mountain actually demands

    Mount Baker’s skill demands

    • Multi-day camping commitment: Carrying a 35-45 lb pack to high camp at 6,000-7,000 ft. Setting up tents, melting snow for water, cooking meals at altitude
    • Aerobic endurance: 7,400 feet of elevation gain across roughly 12.5 miles round trip. The summit day itself involves 4,500-5,000 ft of climbing with a light pack from high camp
    • Basic to intermediate crampon technique: French technique, flat-footing, and front-pointing on the Roman Wall’s 30-35 degree snow
    • Self-arrest reflexes: Important particularly on the Roman Wall where a slide could run out
    • Rope team movement: 3-person rope teams are standard. Climbers must maintain proper spacing, manage the rope, and stop progress immediately when a teammate has issues
    • Crevasse rescue setup: Z-pulley system, prusik ascending, partner extraction — taught in 3-day programs, expected from independent climbers
    • Mild altitude tolerance: 10,781 ft is high enough that some climbers feel mild altitude effects (shortness of breath, fatigue), but rarely causes serious AMS

    Mount Rainier’s skill demands

    • Everything Baker requires, plus:
    • Advanced glacier travel: Reading more complex crevasse patterns, navigating around or across crevasses that change daily, recognizing weakening snow bridges
    • Confident crevasse rescue under pressure: Practiced repeatedly until reflexive — the consequences of a fall into a crevasse on Rainier are more severe than on Baker
    • Faster alpine pacing: Maintaining 1,000 ft/hour on the upper mountain at 12,000+ feet — a meaningfully harder pace than Baker’s summit day
    • Significant altitude tolerance: 14,410 ft causes real altitude effects in most climbers. AMS symptoms must be managed without compromising pace
    • Heavier pack carrying: 45-55 lb packs to Camp Muir on Day 1; 10-15 lb summit packs on Day 2
    • Rockfall awareness on the Cleaver: Helmet protocol, moving efficiently through exposed sections, recognizing daily/seasonal rockfall patterns
    • Weather decision-making at higher consequence: Turning around at 13,000 feet is harder than turning around at 9,000 feet — both because of physical investment and because the weather window that opened the climb may not return

    The fundamental insight: Baker teaches all the foundational skills. Rainier demands those same skills, applied faster, at higher altitude, with less margin for error. Climbing Baker first lets you build the skills in a lower-consequence environment, then bring them to Rainier already absorbed into muscle memory. This is why every major guide service explicitly recommends Baker before Rainier — it’s not a marketing structure, it’s a curriculum.

    Cost comparison: Baker is meaningfully cheaper

    Mount Baker costs

    • Northwest Forest Pass: $5/day or $30/year
    • Wilderness permit: free
    • Pre-climb lodging in Bellingham or Glacier: $80-$200
    • Camping gear (if not owned): variable; can rent locally
    • Food, gas, transit: $80-$150
    • Total unguided per person: $150-$400
    • Guided 2-day climb: $1,300 (Northwest Alpine Guides)
    • Guided 3-day climb: $700-$1,500 (AAI, Mountain Madness, Blackbird, Skyline)

    Mount Rainier costs

    • NPS climbing cost recovery fee: $63 per year
    • Wilderness permit: included with guide programs
    • Park entrance fee: $30
    • Pre/post-climb lodging in Ashford or Seattle: $200-$400
    • Food/gas/transit: $100-$200
    • Tip for guides (~10% of program): $225-$300
    • Total unguided per person: $300-$600 plus gear
    • Guided 3-day climb: $2,250-$2,995 (RMI, IMG, Alpine Ascents)
    • Guided 4+ day seminar climb: $3,200-$4,500 (Alpine Ascents Rainier Seminar)

    The cost gap is substantial: Rainier guided is roughly 2x the cost of Baker guided. For climbers building a multi-year progression, this matters — climbing Baker first lets you invest a smaller amount to test your interest, build skills, and assess your fitness before committing to the higher-cost Rainier program. For full Rainier cost breakdown, see our Mount Whitney vs Mount Rainier comparison. See Investigation 18: What’s in a mountain guide’s pack for the gear list that covers both peaks.

    The honest verdict: when each is the right choice

    For 90% of climbers, the answer is clear: Baker first, Rainier second. But there are specific scenarios where the order varies.

    Pick Mount Baker first if

    You’re new to glaciated mountaineering and want a real first experience
    Baker
    You’re building toward Rainier or Denali as your major objective
    Baker
    You want to test your fitness and altitude tolerance before committing $2,500+ to Rainier
    Baker
    You have a budget under $1,500 for a guided experience
    Baker
    You want to maximize summit probability — Baker’s 70-85% rate is meaningfully higher than Rainier’s 48%
    Baker

    Pick Mount Rainier first if

    You have prior glacier mountaineering experience from Alaska, the Alps, or another major range
    Rainier
    You’re preparing for Denali or 7,000m+ peaks on a compressed timeline
    Rainier
    You have $2,500-$4,000 budgeted and accept the lower summit probability
    Rainier
    You’re committed to a 4+ day Rainier seminar climb that builds in skills instruction
    Rainier
    You specifically want the 14,000-foot benchmark over the glacier-skills benchmark
    Rainier

    The recommended sequence (Year 1 to Year 3)

    For climbers building a multi-year glaciated mountaineering progression, the canonical sequence is:

    1. Year 1, summer: Mount Baker via Coleman-Deming Glacier (3-day guided program). Build foundational glacier skills, rope team experience, crampon technique.
    2. Year 2, June-July: Mount Rainier via Disappointment Cleaver (3-4 day guided program). Apply Baker skills on bigger, more committing terrain.
    3. Year 2 or 3, winter: Glacier skills clinic, ice climbing course, or rescue practice to deepen the technical base.
    4. Year 3+: Independent Rainier climbs, then progression to international objectives — Aconcagua, Denali, 6,000m peaks (see Investigation 06: Your first big mountain for the next-step progression).
    The “I’ll skip Baker and just climb Rainier” trap

    Each year, hundreds of climbers attempt Rainier without prior glacier experience, betting that the guide service will teach them what they need to know on the climb itself. This is the largest single contributor to Rainier’s 48% summit success rate. Climbers without prior glacier skills consistently underperform on Rainier compared to those who built skills on Baker first.

    The independent-climber success rate on Rainier is ~44% — meaningfully lower than guided. The guided rate of ~60% reflects climbers who arrived with some prior experience plus the structured instruction of the guided program. If you want to maximize your odds of summiting Rainier, climb Baker first. This isn’t gatekeeping — it’s the structural advice from every major guide service in the region.

    Best month to climb each: side-by-side

    For the full framework, see Investigation 19: Best month to climb each mountain.

    MonthMount BakerMount Rainier
    JanuaryWinter ski mountaineering onlyWinter mountaineering only
    FebruaryWinter ski mountaineering onlyWinter mountaineering only
    MarchAdvanced ski mountaineeringAdvanced winter conditions
    AprilRoad still closed in many yearsSpring conditions; advanced only
    MayGood — depending on road opening; deep snowMarginal — spring conditions
    JuneExcellent — peak season beginsGood — early season conditions
    JulyExcellent — peak conditionsExcellent — peak season
    AugustGood — exposed crevasses; route-finding harderExcellent — stable conditions
    SeptemberFair — variable conditions; weather windows shorterGood — early month; deteriorating late
    OctoberMarginal — fall storms beginningMarginal — winter conditions returning
    NovemberWinter conditionsWinter mountaineering only
    DecemberWinter ski mountaineering onlyWinter mountaineering only

    Quick-reference comparison

    FactorMount BakerMount Rainier
    Elevation10,781 ft14,410 ft
    LocationNorth Cascades, WashingtonCentral Cascades, Washington
    Standard routeColeman-Deming GlacierDisappointment Cleaver
    Route gradeBeginner-intermediate glaciatedIntermediate-advanced glaciated
    Round trip distance~12.5 miles~14.5 miles
    Elevation gain~7,400 ft~9,000 ft
    Days required2-3 days2-4 days
    Technical demandsGlacier travel, rope team, basic crampon/axeAdvanced glacier travel, complex crevasse rescue, fast pacing at altitude
    Annual climbers~5,000-7,000~10,000 attempts
    Summit success rate~70-85% (guided)~48% overall
    Permit cost$5 parking (no climbing fee)$63 climbing fee + wilderness
    Cost (unguided)$150-$400 per person$300-$600 per person plus gear
    Cost (guided)$700-$1,500 (3-day)$2,250-$2,995 (3-day)
    Best seasonJune-JulyLate June-early September
    Best forFirst glaciated climb / Rainier prepIntermediate-advanced glaciated objective

    Frequently Asked Questions

    Is Mount Baker harder than Mount Rainier?

    No. Mount Rainier is meaningfully harder than Mount Baker. Rainier is 3,629 feet taller, has more crevasses, more objective hazard, longer summit-day distance, and demands more advanced glacier travel skills.

    Baker is widely considered the premier Rainier training peak precisely because it offers real glaciated mountaineering on more forgiving terrain. Most major guide services explicitly recommend climbing Baker before Rainier.

    Should I climb Baker before Rainier?

    Yes, in almost all cases. Baker is the canonical Rainier preparation climb. It teaches the same fundamental skills — rope team travel, crevasse rescue, crampon and ice axe technique, altitude exposure, glacier reading — on shorter, less consequential terrain.

    The Mount Baker Coleman-Deming route is rated as a beginner-friendly glacier climb; Rainier’s Disappointment Cleaver is intermediate-to-advanced. Building Baker into your progression substantially increases Rainier success rates.

    How much does it cost to climb Mount Baker vs Mount Rainier?

    Baker unguided: $5 Northwest Forest Pass for parking, plus food, gas, and lodging. Total under $400 typically.

    Baker guided: $700-$1,500 for a 2-3 day program with American Alpine Institute, Northwest Alpine Guides, Mountain Madness, or others.

    Rainier unguided: $63 NPS climbing fee plus wilderness permit. Total under $600 plus gear.

    Rainier guided: $2,250-$2,995 for a 3-day program with RMI, IMG, or Alpine Ascents.

    Rainier guided is roughly 2x the cost of Baker guided.

    How long does each climb take?

    Mount Baker: 2-3 days for most climbers via the Coleman-Deming route, with high camp at 6,000-7,000 feet. The 2-day program is intermediate-pace and requires prior mountaineering experience. The 3-day program builds in skills instruction.

    Mount Rainier: 2-3 days minimum on the Disappointment Cleaver route, with high camp at Camp Muir (10,080 ft). Many programs run 4 days to include skills instruction and weather contingency.

    Is Mount Baker a beginner-friendly climb?

    Yes, when guided. Mount Baker’s Coleman-Deming and Easton Glacier routes are widely considered the most beginner-friendly true glaciated climbs in the lower 48.

    Major guide services run multi-day programs for first-time mountaineers with built-in instruction in glacier travel, crevasse rescue, and rope team movement. Mount Baker is genuinely accessible to fit beginners with no prior mountaineering experience, provided they go guided.

    What is Mount Baker’s success rate?

    Mount Baker guided programs typically report 70-85% summit success rates, varying by season and weather window. This is meaningfully higher than Mount Rainier’s 48% historical average.

    The higher Baker success rate reflects both lower technical demands and shorter overall commitment — bad weather windows close out Rainier climbs more often than they shut down Baker attempts.

    When is the best time to climb Mount Baker?

    May through September, with peak conditions typically in June and July. Earlier in the season the routes are fully snow-covered with stable crevasse bridges. By late summer, crevasses become more exposed and route-finding gets more complex.

    The road to the Heliotrope Ridge trailhead may not fully open until mid-June in heavy snow years. Most guided programs run June through August.

    What gear do I need for both climbs?

    The technical gear list is nearly identical: mountaineering boots, crampons, ice axe, climbing harness, helmet, rope (provided by guide services), prusiks and rescue gear, glacier glasses, multi-layer clothing system.

    For both peaks: tent, 0-20°F sleeping bag, sleeping pad, stove and fuel, food for 2-3 days, and a 60-70L pack. Mount Rainier additionally requires more cold-weather layering due to higher altitude and longer summit day exposure.

    Most guide services rent the technical gear (crampons, ice axe, harness, helmet) for both peaks at similar prices. See Investigation 18: What’s in a mountain guide’s pack for the detailed gear list both guides carry.

    What to read next

    Sources and Verification

    This comparison was built from primary sources including:

    • U.S. Forest Service, Mt. Baker-Snoqualmie National Forest — Baker access and wilderness regulations
    • U.S. National Park Service, Mount Rainier — climbing statistics and permit framework
    • Recreation.gov — 2026 permit pricing for both peaks
    • American Alpine Institute (AAI) — Mount Baker route descriptions and guided program details
    • Northwest Alpine Guides — 2026 Baker program pricing and guidance
    • The Mountaineers — Mount Baker Coleman-Deming route trip reports and route grades
    • SummitPost — Mount Baker route descriptions and historical climbing data
    • Skyline Mountain Guides — 2026 Coleman-Deming program structure
    • Blackbird Mountain Guides — How to Climb Mt. Baker analysis (August 2025)
    • Edgeworks Outdoor — Mount Baker route difficulty grading
    • RMI Expeditions — Mount Rainier climbing program information
    • International Mountain Guides (IMG) — Rainier program pricing and structure
    • Alpine Ascents International — 2026 Rainier program and success rate analysis
    • AllTrails — Mount Baker Coleman-Deming and Mount Rainier route details

    Published June 8, 2026 · Next scheduled review: November 2026 after the 2026 climbing season

    Subscribe to the Mountain Planning Brief

    Get notified when each new mountain comparison publishes. One email per release. No marketing.

    Subscribe →
    Was this helpful?

    Yes
    No
    Thanks for your feedback!
  • Mount Hood vs Mount Adams: The Pacific Northwest Volcano Showdown

    Mountain Comparisons · 2026 Guide

    Mount Hood vs Mount Adams: The Pacific Northwest Volcano Showdown

    Mount Adams sits at 12,281 feet in southern Washington. Mount Hood rises to 11,249 feet just across the Columbia River in Oregon. Adams is taller. Adams is bigger by volume — the second-largest volcano in the contiguous United States by bulk. Adams looks, on every metric, like the harder mountain. It isn’t. Hood’s South Side route packs more technical difficulty per vertical foot than almost any other walk-up volcano in the Cascades, and its short approach masks a steep upper mountain that produces multiple fatalities every climbing season. The right answer to “Hood or Adams first?” runs counter to the obvious one.

    The Verdict

    For most climbers, the answer is Adams first, Hood second — Adams teaches snow travel and altitude exposure on forgiving terrain; Hood demands those skills already in place on terrain that punishes mistakes.

    Oregon · Cascades

    Mount Hood

    Oregon’s tallest peak. Short approach, steep upper mountain. The most-climbed glaciated peak in North America after Fuji.

    Elevation11,249 ft
    Round trip~6 miles
    Elevation gain~5,400 ft
    Typical time8–12 hr
    Technical?Yes (steep snow)
    Annual climbers~10,000
    Permit cost$20 (3-day)
    Best seasonApr–early Jul
    Washington · Cascades

    Mount Adams

    Washington’s second-highest peak. The Cascades’ largest volcano by bulk. Long, non-technical snow scramble.

    Elevation12,281 ft
    Round trip~12–14 miles
    Elevation gain~6,700 ft
    Typical time12–16 hr (or 2 days)
    Technical?No (Grade I scramble)
    Annual climbers~5,000–6,000
    Permit cost$15–25
    Best seasonMay–September

    Same range, same volcanic origin, opposite climbing experiences

    Mount Hood and Mount Adams sit just 60 miles apart on opposite sides of the Columbia River Gorge. Both are stratovolcanoes. Both are part of the Cascade Volcanic Arc. Both are climbed by similar gear — boots, crampons, ice axe, helmet. Both can be done in a single day by fit climbers. The visual silhouettes are nearly interchangeable in postcards.

    Then the climbing starts and the two mountains separate completely.

    Mount Hood’s standard route — the South Side via Hogsback and Pearly Gates — is short: less than 6 miles round trip from Timberline Lodge at 5,800 feet to the 11,249-foot summit. The first half of the climb is a moderate snow slope up the Palmer Glacier. The second half — above Crater Rock around 10,500 feet — turns steep, narrow, and exposed. The Hogsback is a knife-edge snow ridge separating two sets of active fumaroles (Devil’s Kitchen and the Hot Rocks). Above the Hogsback, the Pearly Gates section is a 40-50 degree snow chute requiring confident front-pointing and ice axe technique. A fall here typically results in a long sliding fall through the Hot Rocks fumaroles and into Devil’s Kitchen — terrain where multiple climbers have died.

    Mount Adams’s standard route — the South Spur (also called South Climb) — is long: 12-14 miles round trip from Cold Springs trailhead at 5,600 feet to the 12,281-foot summit. The entire route is a sustained snow slope at moderate angle. The Mountaineers grades it “Grade I, moderate snow slopes.” Northwest Mountain School describes it as “basically non-technical.” There are no exposed sections, no narrow ridges, no steep chutes. The challenge is endurance: 6,700 feet of elevation gain over a long day.

    Why Hood’s accident statistics don’t match its reputation

    Mount Hood is consistently listed among the most-climbed glaciated peaks in North America. The SummitPost mountaineering reference describes it as “#2 in the world behind Japan’s Fuji-san” by climber traffic. That popularity is precisely what makes it dangerous. The U.S. Forest Service notes the route’s “relatively low altitude, easy approach, and short hiking/climbing distance makes it much more popular among less experienced climbers. These climbers, lacking experience, and severe weather, which can move in quickly, account for most accidents.”

    The result: Hood produces more rescues and fatalities per year than Adams despite being shorter, having a cheaper permit, and being closer to Portland. The danger isn’t the mountain — it’s the gap between the mountain’s reputation as an “easy walk-up” and the actual technical demands of its upper terrain.

    The data: why Hood looks easier and isn’t

    ~6 mi
    Mount Hood round trip
    Less than 3 miles from Timberline to summit — the shortest standard route on any major Cascade volcano
    Source: SummitPost, Mt. Hood South Side route
    ~12 mi
    Mount Adams round trip
    12-14 miles from Cold Springs trailhead — more than double Hood’s distance
    Source: The Mountaineers, Adams South Spur
    5,400 ft
    Hood elevation gain
    From Timberline Lodge (5,800 ft) to summit (11,249 ft) — gained in under 3 trail miles
    Source: U.S. Forest Service climbing data
    6,700 ft
    Adams elevation gain
    From Cold Springs trailhead (5,600 ft) to summit (12,281 ft) — spread over 6-7 trail miles
    Source: WTA, Adams South Climb route

    The numbers tell the trick: Hood gains 5,400 vertical feet in under 3 trail miles. Adams gains 6,700 vertical feet across 6-7 trail miles. Hood is half the distance with 80% of the elevation — the average slope angle on Hood is roughly twice as steep as Adams.

    That’s why Hood feels harder despite being shorter, and why the Forest Service notes its high accident rate. Steep terrain doesn’t forgive technique errors the way long moderate slopes do. A stumble on Adams’s lower-angle snow becomes a self-arrest exercise. A stumble on Hood’s Pearly Gates becomes a 1,000-foot sliding fall.

    Mount Hood deep-dive: the South Side route in detail

    The route in stages

    The South Side route from Timberline Lodge to the summit runs through four distinct terrain stages, each with different demands:

    1. Palmer Glacier (5,800–8,500 ft). A moderate, wide snow slope alongside the Palmer ski lift. The first 2,700 feet of elevation gain happen here. Snowcat or skier traffic is common. This section is the “easy” part of the climb that gives Hood its walk-up reputation.
    2. Triangle Moraine and the approach to Crater Rock (8,500–10,000 ft). Snow continues but the slope steepens. Climbers passing through here begin to feel the altitude and the wind exposure. Most camping climbers stake out the Triangle Moraine area between 8,800 and 9,400 feet.
    3. The Hogsback (10,500–11,000 ft). The narrow snow ridge between Devil’s Kitchen and Hot Rocks fumaroles. Active sulfur fumaroles flank both sides of the route. Climbers have died from gas asphyxiation in oxygen-depleted zones near the fumaroles, and from sliding falls into the rocks below. The Hogsback shifts position annually as the underlying glacier changes — some seasons it offers a wide, comfortable platform; other seasons it narrows to a few feet wide with steep drops on both sides.
    4. The Pearly Gates / Old Chute (11,000–11,249 ft). A 40-50 degree snow chute through rocks. The Pearly Gates variation is the more direct line; the Old Chute is wider and more often used when the Pearly Gates is icy or blocked. This is the technical crux of the climb. Most experienced climbers solo this section; many parties belay it. A few hundred vertical feet of fall potential.

    Mount Hood permit and access (2026)

    Mount Hood permitting changed substantially in 2024 with the introduction of a mandatory climbing permit for any travel above 9,500 feet. As of 2026:

    • Mt. Hood Climbing Permit: Required for any travel above 9,500 ft elevation. 3-day permit: $20. Annual permit: $50. Available on Recreation.gov anytime before the climb. No quota — permits cannot sell out.
    • Wilderness Permit: Required year-round on south side routes. The 3-day climbing permit counts as the wilderness permit. Annual permit holders must complete a separate online wilderness permit.
    • Sno-Park Permit: Required November 1 through April 30 at Timberline parking lots and other sno-parks. $25/day or ~$50/season.
    • WAG bag: Free at the Climbers’ Cave at Timberline Lodge. Mandatory for human waste — no exceptions.

    The Climbers’ Cave at Timberline Lodge is open 24/7 year-round and has self-issue wilderness permits, blue bags, the climber registration form, and current condition reports. Most climbers register here, sign the climb log, and start up between midnight and 2:00 a.m. for an alpine start to reach the summit at sunrise and descend before afternoon rockfall makes the upper mountain dangerous.

    The fumarole gas hazard is real and underdiscussed

    Mount Hood’s Devil’s Kitchen and Hot Rocks fumaroles emit hydrogen sulfide and other gases that can create oxygen-depleted zones along the Hogsback. Lingering in fumarole areas — especially in low-wind conditions when the gas pools — has caused fatal asphyxiation. The U.S. Highpoint Guide notes: “The fumaroles emit gases that can create oxygen-depleted zones, posing a risk of asphyxiation. It is advisable to avoid lingering in these areas.” Most climbers move through the Hogsback quickly; sitting down to rest near the fumaroles can be fatal.

    Mount Hood guide services

    Two guide services hold commercial permits for Mount Hood South Side climbs:

    • Timberline Mountain Guides — based at Timberline Lodge. One-day guided climbs typically $400-$600. Group climbs and private programs available.
    • KAF Adventures — Pacific Northwest mountaineering instruction and guided climbs. Multi-day programs include skill instruction.

    The Mazamas, a Portland-based climbing club, also runs Mount Hood climbs for $78 per member trip — substantially cheaper but requires Mazama membership and is structured as a club climb rather than a guide service.

    Mount Adams deep-dive: the South Spur route in detail

    The route in stages

    The South Spur route from Cold Springs trailhead is structurally simpler than Hood’s South Side, though substantially longer:

    1. Forest approach (5,600–7,000 ft). The first 2-3 miles climb through forest on the old Bird Creek Trail and the Round-the-Mountain Trail. Snow-covered in early season; bare dirt in late summer. Easy walking with a moderate pack.
    2. Suksdorf Ridge / Crescent Glacier approach (7,000–9,000 ft). Above timberline, the route opens up onto the south-facing snowfields. The Crescent Glacier is now significantly receded and the route mostly crosses scree and snow patches in late summer.
    3. Lunch Counter (9,200–9,400 ft). A broad bench around 9,281 feet where most two-day climbers camp. Water can sometimes be filtered from melt streams; otherwise melt snow. Excellent views and protected campsites.
    4. Piker’s Peak — the false summit (10,000–11,650 ft). The steeper section of the climb. From Lunch Counter, climbers ascend a sustained snow slope to Piker’s Peak, the cruel false summit at 11,657 ft. From Piker’s, you can see the true summit another half-mile away and several hundred feet higher. The realization that you’re not done is famously demoralizing.
    5. True summit (11,657–12,281 ft). A flatter snow plateau leads to the actual summit. Sometimes a tracked-out highway of climbers in mid-season; sometimes deserted. Views to Hood, Rainier, St. Helens, and Baker on clear days.

    Mount Adams permit and access (2026)

    Adams permitting is simpler than Hood’s but requires advance purchase since the ranger station has limited hours:

    • Mount Adams Climbing Activity Pass: Required for travel above 7,000 ft from May 1 to September 30. Available on Recreation.gov. Cost: $15-$25 depending on weekday vs. weekend. Not sold at the ranger station in person — purchase before arriving in Trout Lake.
    • Northwest Forest Pass: Required for parking at Cold Springs Campground year-round. Daily or annual options available.
    • Wilderness Permit: Free, self-issued at the South Climb Trailhead.
    • WAG bag: Mandatory for human waste above 7,000 ft. Available free at the Mount Adams Ranger Station front porch (24-hour self-serve).
    • Sno-Park Permit: Required November 1 through April 30 at Pineside and SnowKing sno-parks (used when Cold Springs road is snowed in). $25/day or ~$50/season plus $2 admin fee.

    The road to Cold Springs Campground is unmaintained and snow-bound from roughly November through late June. Most climbers wait for the road to clear (typically late June or July) before driving to the standard trailhead. In winter and early spring, climbers ski or snowshoe in from the lower sno-parks — adding several miles of approach.

    Mount Adams guide services

    A handful of approved commercial operators run guided climbs on Mount Adams. Key constraint: commercial operators cannot guide the South Climb, North Ridge, or Adams Glacier on trips requiring an overnight stay on Friday, Saturday, or Sunday per Forest Service permit conditions. Most guide services run 2-day midweek programs.

    • Northwest Mountain School (IFMGA / AMGA certified) — 2-day South Spur programs. Custom dates available for groups of 3+.
    • Timberline Mountain Guides — runs select Adams programs in addition to Hood.
    • Various smaller operators — confirm current authorization with the Mount Adams Ranger District.

    Typical guided 2-day program cost: $400-$900 per person depending on group size and ratio.

    South Spur is the easiest way to climb Mt. Adams. The hike to the Lunch Counter takes most groups 5 or 6 hours and has a few short steep sections, but is basically non-technical.

    Northwest Mountain School — Mt. Adams guide service guidance, 2026
    Snow-capped Mount Adams towering over autumn foliage and evergreen forest, Cascade volcano climbing guide.

    The skills gap: what each mountain actually demands

    Mount Hood’s skill demands

    • Confident steep-snow technique: Front-pointing on 40-50 degree snow, ice axe self-belay, ability to maintain composure on exposed terrain
    • Self-arrest mastery: A fall on the Pearly Gates or Old Chute progresses to terminal velocity within seconds. Self-arrest must be reflexive, not learned
    • Glacier hazard recognition: Reading the Hogsback’s annual changes, identifying bergschrund cracks, avoiding fumarole-adjacent terrain
    • Fast alpine pacing: The route is short, but speed is essential — afternoon rockfall on the upper mountain has killed climbers descending late
    • Weather decision-making: Hood’s weather changes in minutes; a clear summit at 6 a.m. can become a whiteout by 9 a.m.
    • Alpine start discipline: Midnight or 1 a.m. starts are non-negotiable for summer climbs. Climbers who start at “normal hours” often end up in dangerous descending conditions

    Mount Adams’s skill demands

    • Sustained aerobic endurance: 12-16 hours of continuous climbing for a single-day push, or two long days for the two-day variant. The mountain rewards engine more than technique
    • Basic crampon and ice axe technique: Flat-footing, French technique, basic self-arrest. The slope angles are forgiving enough to allow learning on the mountain
    • Heavy-pack carrying: For two-day climbers, 35-45 lb packs up to Lunch Counter
    • Altitude tolerance: 12,281 feet is high enough to cause AMS in unacclimatized climbers, particularly on a fast single-day push
    • Long-day pacing: The South Spur is mostly a slog. Climbers who burn out at Lunch Counter rarely summit
    • Route-finding through scree: In late season, the upper mountain has exposed scree fields that hide the trail. Confident navigation matters

    The structural difference: Mount Hood teaches you to climb steep technical snow. Mount Adams teaches you to climb a big mountain. Neither is inherently better — they’re different lessons. For climbers building toward Rainier, Aconcagua, Denali, or expedition objectives, Adams’s “big mountain” lesson is more directly transferable. Hood’s “steep snow” lesson matters more for objectives like Mount Stuart, the Eiger Ridge, or technical alpine routes.

    Cost comparison: both significantly cheaper than Rainier

    Mount Hood costs

    • 3-day climbing permit: $20
    • Wilderness permit: included with climbing permit
    • Sno-Park permit (Nov-Apr): $25/day or ~$50/season
    • Timberline Lodge parking: free with climbing permit
    • Pre-climb lodging (Portland or Government Camp): $100-$250
    • Food and gas: $50-$100
    • Total unguided per person: $150-$400
    • Guided one-day climb: $400-$700 (Timberline Mountain Guides, KAF Adventures)
    • Mazamas club climb: $78 (members only)

    Mount Adams costs

    • Climbing Activity Pass: $15-$25
    • Northwest Forest Pass parking: $5/day or $30/year
    • Wilderness permit: free, self-issued
    • Pre-climb lodging (Trout Lake or Hood River): $100-$250
    • Food, gas, transit (more remote): $80-$150
    • Total unguided per person: $200-$450
    • Guided 2-day climb: $400-$900 (Northwest Mountain School, others)

    Both peaks are substantially cheaper than Mount Rainier ($2,250-$2,995 guided). This makes them excellent training grounds for climbers building toward bigger objectives without the Rainier commitment. See our guide-pack investigation for the gear list that works across all three Cascade volcanoes.

    The honest verdict: when each is the right choice

    Both peaks are excellent Pacific Northwest objectives. The right choice depends on what you’re training for and where your current skills are.

    Pick Mount Adams first if

    You’re building toward bigger mountaineering objectives (Rainier, Aconcagua, Denali)
    Adams
    You want to learn snow travel on forgiving terrain
    Adams
    You prefer endurance over technical exposure
    Adams
    You want a quieter, less crowded climbing experience
    Adams
    You’re willing to drive farther and commit a full weekend to the climb
    Adams

    Pick Mount Hood first if

    You have prior steep-snow or technical alpine experience
    Hood
    You’re training for technical objectives (Mt. Stuart, Eiger Ridge, alpine rock)
    Hood
    You’re Portland-based and want a one-day climb without a long approach
    Hood
    You’re hiring a certified guide who will manage the technical sections for you
    Hood
    You want to ski or snowboard from the summit (Hood’s slopes ski better than Adams’s)
    Hood

    The “do both” sequence

    For climbers building a Pacific Northwest progression, the canonical sequence is:

    1. Year 1, late spring: Mount St. Helens (8,366 ft) for a non-glaciated introduction to Cascade volcano climbing.
    2. Year 1, summer: Mount Adams via South Spur. Learn snow travel and altitude exposure. Two-day climb with Lunch Counter camp.
    3. Year 2, May-June: Mount Hood via South Side, ideally guided or with a strong partner. Apply the snow skills learned on Adams to steeper terrain.
    4. Year 2 or 3: Mount Baker glacier skills course, then Mount Rainier (see our Mount Whitney vs Mount Rainier comparison for what comes next).
    Don’t skip Adams to climb Hood first

    The most common Pacific Northwest mountaineering mistake is climbers attempting Hood as their first “real volcano” because it’s closest to Portland and looks like a walk-up. Hood’s accident rate isn’t random — it’s the predictable result of inexperienced climbers attempting steep technical terrain on a short, accessible route. Adams’s longer drive and bigger commitment filter out underprepared climbers, which is why Adams produces far fewer rescues despite seeing similar-quality terrain at lower angles. Build the skills on Adams; apply them on Hood.

    Glacier recession and the climbing season

    Both Hood and Adams have experienced significant glacier recession over the past two decades, with measurable impacts on the climbing experience. See our investigation on glacier recession and mountaineering routes for the broader picture.

    On Hood, the Hogsback shifts position annually as the underlying Coalman Glacier changes. The bergschrund — the crack between the moving glacier and the upper snow — opens earlier each season and remains open longer. Several recent seasons have required climbers to circumvent open bergschrunds via alternate variations, adding technical difficulty to a climb that historically just followed the Hogsback straight up.

    On Adams, the Crescent Glacier (encountered on the lower South Spur route) has receded so dramatically that the route now crosses mostly rock and scree where snow travel used to be the norm. The South Climb has shifted from a “snow climb” to a “snow-and-scree mix” depending on season. The upper mountain still holds snow but the lower mountain is increasingly dry by August.

    For both mountains, the practical effect is the same: climb early in the season for the best snow conditions. Late April through early July for Hood; May through early August for Adams. After that, both routes degrade as the snow melts out and rockfall becomes a problem.

    Best month to climb each: a comparison

    See our complete best-month-each-mountain framework for the season-by-season approach we use across all major peaks.

    MonthMount HoodMount Adams
    JanuaryWinter mountaineering onlySkis or snowshoes from sno-park; long approach
    FebruaryWinter mountaineering onlySkis or snowshoes from sno-park; long approach
    MarchWinter conditions; advanced onlyLong ski tour; advanced only
    AprilExcellent — consolidated snow, low rockfallRoad still snowed in; ski tour from below
    MayExcellent — peak season beginsGood — depending on road opening
    JuneExcellent — peak seasonExcellent — best balance of snow and access
    JulyGood — late season; afternoon rockfall increasingExcellent — long days, generally stable
    AugustMarginal — significant rockfall on upper routeGood — but scree on upper mountain
    SeptemberDifficult — most parties avoid; technical conditionsFair — weather windows shorten
    OctoberWinter conditions returningMarginal — fall weather; possible early snow
    NovemberWinter mountaineering onlyWinter mountaineering only
    DecemberWinter mountaineering onlyWinter mountaineering only

    Quick-reference comparison

    FactorMount HoodMount Adams
    Elevation11,249 ft12,281 ft
    LocationOregon, CascadesWashington, Cascades
    Standard routeSouth Side / HogsbackSouth Spur / South Climb
    Route gradeTechnical snow (PD/Grade II)Snow scramble (Grade I)
    Round trip distance~6 miles~12-14 miles
    Elevation gain~5,400 ft~6,700 ft
    Days required1 day1 long day or 2 days
    Technical skillsSteep snow, self-arrest, glacier hazard recognitionBasic crampon/ice axe technique
    Required gearCrampons, ice axe, helmet, optional ropeCrampons or microspikes, ice axe, helmet
    Annual climbers~10,000~5,000-6,000
    Permit cost$20 (3-day) or $50 (annual)$15-$25 per climb
    Cost (unguided)$150-$400 per person$200-$450 per person
    Cost (guided)$400-$700 (1 day)$400-$900 (2 days)
    Best seasonApril-early JulyMay-September
    CrowdingVery crowded (Memorial Day-July)Moderate
    Best forTechnical snow trainingBig-mountain endurance training

    Frequently Asked Questions

    Is Mount Hood harder than Mount Adams?

    Yes. Mount Hood is technically harder than Mount Adams despite being 1,032 feet shorter. Hood’s South Side route includes the steep, exposed Hogsback and Pearly Gates section that requires confident crampon and ice axe technique, often with fixed rope or self-belay at the bergschrund.

    Adams’s South Spur route is a long but largely non-technical snow scramble — Grade I per most guide services. Adams demands more endurance; Hood demands more skill.

    Which should I climb first, Hood or Adams?

    Climb Mount Adams first if you’re building toward technical mountaineering. Adams is the better skill-building objective: longer day, more elevation gain, higher altitude exposure, and lower technical demands.

    Climb Mount Hood first only if you have prior glacier or steep-snow experience and can commit to the technical sections of the Hogsback. Hood’s combination of short approach, fast-changing weather, and inexperienced crowds produces a disproportionate number of accidents each year.

    How much does it cost to climb Hood vs Adams?

    Hood unguided: $20 for a 3-day climbing permit (or $50 annual), plus parking and lodging. Total under $400 typically.

    Hood guided: $400-$700 for a one-day climb with Timberline Mountain Guides or KAF Adventures.

    Adams unguided: $15-$25 Climbing Activity Pass plus parking and lodging. Total under $450.

    Adams guided: $400-$900 for a 2-day program with Northwest Mountain School or other approved operators.

    Both peaks are significantly cheaper than Mount Rainier guided programs ($2,250-$2,995).

    How long does each climb take?

    Mount Hood: 8-12 hours round trip from Timberline Lodge for fit climbers on the South Side route. Most climbers start at midnight or 1 a.m. to reach the summit at sunrise and descend before afternoon rockfall.

    Mount Adams: 1-day push or 2-day climb. Single push from Cold Springs is 12-16 hours for fit climbers. Two-day climbers camp at Lunch Counter (9,281 ft) and summit on Day 2.

    Are Hood and Adams beginner mountains?

    Adams is genuinely beginner-friendly with a guide — it teaches snow travel, crampon and ice axe basics, and altitude exposure without committing to technical terrain. A first-time climber with reasonable fitness can summit Adams with a guide.

    Hood is not a beginner mountain despite its reputation. Hood is described as “one of the most climbed glaciated peaks in North America” but its accident statistics reflect that many of those climbers are underprepared for the steep upper sections. The Pearly Gates and Hogsback are not “walk-up” terrain.

    When is the best time to climb each?

    Mount Hood: late April through mid-July. Earlier in the season the snow is consolidated and rockfall is minimal; by August the South Side route becomes hazardous from melted-out rockfall.

    Mount Adams: May through September. Earlier season offers better snow for the descent ski/glissade; late summer offers more stable weather but exposed scree on the upper mountain.

    Both peaks should be climbed pre-dawn to avoid afternoon weather and thermal instability.

    Do I need crampons and an ice axe for either climb?

    Yes for both. Mount Hood requires crampons, ice axe, helmet, and the ability to self-arrest on hard snow. The Hogsback and Pearly Gates section commonly sees fall consequence of 1,000+ vertical feet.

    Mount Adams requires crampons or microspikes (depending on conditions) and an ice axe for the upper mountain above Lunch Counter. Adams’s lower angles forgive technique errors that would be fatal on Hood.

    Can I ski or snowboard down from the summit?

    Mount Hood: Yes — experienced skiers and snowboarders regularly descend from the summit, typically using the Old Chute variation rather than the Pearly Gates. This requires advanced skiing skills on 40+ degree terrain. Many climbers ski the Palmer Glacier descent only and downclimb the technical sections.

    Mount Adams: Yes — Adams is widely considered one of the best ski descents in the Cascades. The South Spur and Southwest Chutes both offer 6,000+ vertical feet of skiable terrain on moderate to steep slopes. Spring corn skiing is the classic Adams experience.

    What to read next

    Sources and Verification

    This comparison was built from primary sources including:

    • U.S. Forest Service, Mt. Hood National Forest — Mount Hood climbing permits and access
    • U.S. Forest Service, Gifford Pinchot National Forest — Mount Adams climbing conditions
    • Recreation.gov — 2026 permit costs and access for both peaks
    • SummitPost — Mount Hood South Side route description and historical traffic data
    • The Mountaineers — Mount Adams South Spur route grade and itinerary
    • Washington Trails Association — Mount Adams South Climb description
    • Northwest Mountain School — 2026 Adams guide service guidance and pricing
    • Timberline Mountain Guides — Mount Hood guided program information
    • Mazamas — Mount Hood climb operations and member access
    • Mountain Shop — Mount Hood route dangers analysis
    • U.S. Highpoint Guide — Mount Hood permit and fumarole hazard documentation
    • Eyehike — Mount Adams logistics, road access, and sno-park information
    • WanderlustHiker — both peaks’ beginner guides and route stages

    Published May 25, 2026 · Next scheduled review: November 2026 after the 2026 climbing season

    Subscribe to the Mountain Planning Brief

    Get notified when each new mountain comparison publishes. One email per release. No marketing.

    Subscribe →
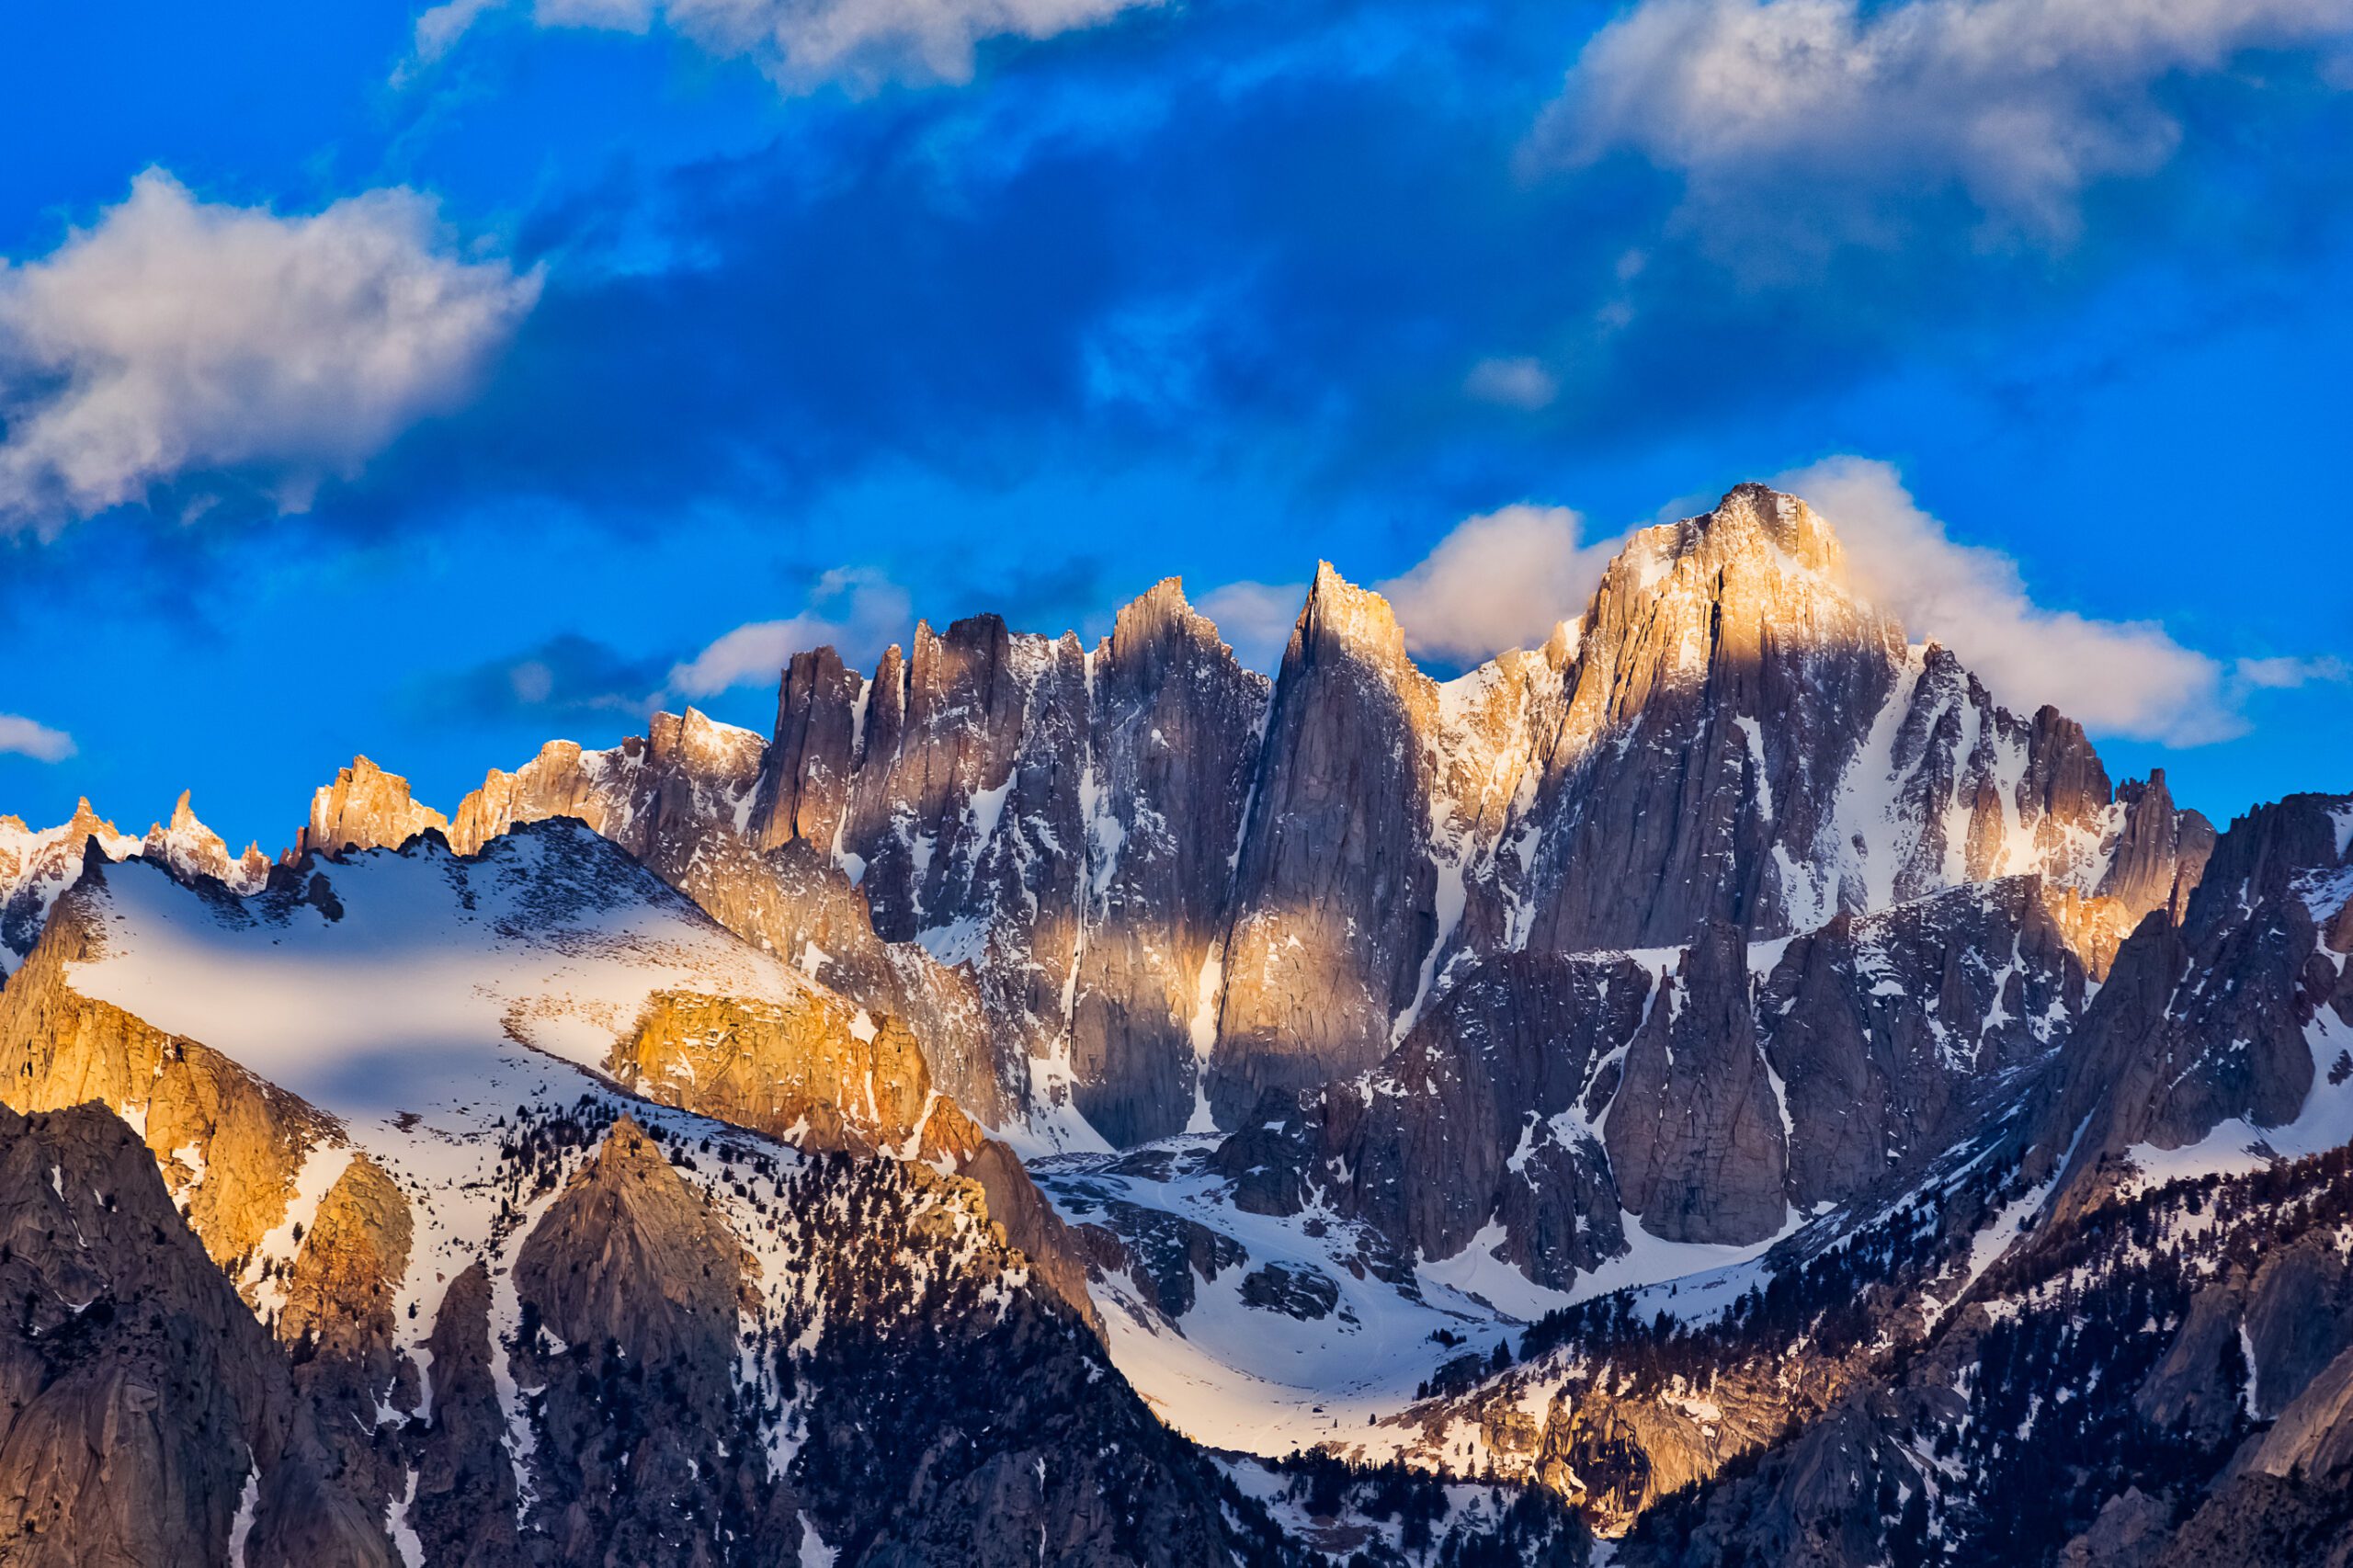
    Was this helpful?

    Yes
    No
    Thanks for your feedback!
  • Mount Whitney vs Mount Rainier: Which Is Harder? (2026)

    Mount Whitney and the Sierra Nevada above the Eastern Sierra Mount Whitney · 14,505 ft
    Mount Rainier rising above Washington with glaciers on the upper mountain Mount Rainier · 14,410 ft
    Mountain Comparison · California vs Washington · Updated 2026

    Mount Whitney vs Mount Rainier: Difficulty, Skills and Which to Climb First

    Whitney and Rainier reach nearly the same altitude, but they are not comparable climbs. Whitney is a long high-altitude hike on a trail in normal summer conditions. Rainier is a glaciated mountaineering expedition involving rope teams, crampons, crevasses, heavier loads and objective hazards. This comparison explains which is harder physically, which is harder technically, how each permit system works, what skills transfer, and the responsible progression from Whitney to Rainier.

    Two 14,000-foot peaks, two completely different objectives. Mount Whitney is a Sierra endurance and altitude test; Mount Rainier is a Cascade glacier climb.
    The direct answer

    Rainier is much harder overall. Whitney is still a serious one-day endurance and altitude test.

    Technical difficulty: Rainier by a wide margin. Objective hazard: Rainier. Total vertical and equipment demand: Rainier. Single-day hiking endurance: closer than many climbers expect, because Whitney compresses roughly 22 miles and more than 6,100 feet of ascent into one continuous effort.

    For most nontechnical hikers, the responsible sequence is Whitney first, formal snow and glacier instruction second, Mount Baker or an equivalent glacier-training climb third, and Rainier fourth. A successful Whitney climb demonstrates useful fitness and altitude tolerance; it does not demonstrate Rainier’s required technical competence.

    95 ftSummit difference
    22 miWhitney round trip
    ~9,000 ftRainier total ascent
    $15 + $6Whitney permit fees
    $82Rainier climbing fee
    2–4 daysTypical Rainier program

    Plan either mountain from the complete guide library

    Use the comparison to choose the correct objective, then move into the mountain-specific route, permit, weather, safety and acclimatization guides.

    The complete comparison scorecard

    The similar summit elevations hide major differences in route style, objective hazard, technical skill, logistics and cost.

    CategoryMount WhitneyMount RainierVerdict
    Summit elevation14,505 ft / 4,421 m14,410 ft / 4,392 mEssentially equal
    Standard routeMount Whitney TrailDisappointment Cleaver via Camp MuirDifferent sports
    Route styleMaintained hiking trail when snow-freeRoped glacier travel, snow, ice and mixed terrainRainier harder
    Round-trip distanceApproximately 22 milesApproximately 14–15 milesWhitney longer
    Total ascentMore than 6,100 ft from Whitney PortalApproximately 9,000 ft from ParadiseRainier harder
    Typical duration10–14 hour day hike or 2–3 day backpack2–4 days, depending on program and routeRainier more involved
    Technical skillsNone on a snow-free Main TrailCrampons, ice axe, rope team and glacier competenceRainier harder
    Objective hazardAltitude, exposure to weather, seasonal snow and long descentCrevasses, snow bridges, icefall, rockfall and glacier changeRainier harder
    Permit modelCompetitive reservation and lottery systemClimbing fee plus overnight wilderness reservationWhitney harder to book
    Guide required?No on the Main TrailNo legally, but strongly recommended without full glacier competenceRainier needs more support
    Typical direct fees$15 per person + $6 reservation$82 climbing fee + $12/person/night + $6 reservationRainier costs more
    Best general windowMid-July to mid-September for a snow-free trailLate May through July for many standard guided climbsDifferent seasonal windows
    Best first objectiveStrong hikers entering altitude climbingClimbers ready for a first major glacier climbWhitney first for most

    Which mountain is actually harder?

    The answer changes slightly depending on whether the question is about technical skill, danger, total effort or one-day endurance.

    Technical difficulty

    Rope, crampon and glacier skills

    Rainier

    Whitney’s summer Main Trail is walking. Rainier requires efficient movement on a rope team, crampon technique, ice-axe competence and glacier judgment.

    Objective hazard

    Hazards not fully controlled by fitness

    Rainier

    Crevasses, weak snow bridges, serac exposure, rockfall and shifting route lines make Rainier a materially more hazardous mountain.

    Total expedition demand

    Vertical, load and recovery

    Rainier

    Rainier starts lower, gains more elevation, requires heavier equipment and often asks climbers to make the summit push after limited sleep at Camp Muir.

    Single-day hiking endurance

    Continuous time on feet

    Closer than expected

    Whitney’s 22-mile day can be exhausting. It is less technical but can require more continuous hiking time than a climber expects after looking only at elevation.

    The clearest answer. Rainier is the harder mountain. Whitney can still be the harder single hiking day for someone who moves slowly, arrives poorly acclimatized or underestimates the 22-mile round trip. A comparison that says “Rainier is harder” without explaining this distinction misses why experienced Rainier climbers still take Whitney seriously.

    How will Whitney feel after climbing Rainier?

    This is the practical question behind many comparison searches: if Rainier went well, what should you expect on Whitney?

    Whitney should feel easier in these ways

    • No roped glacier travel on the snow-free Main Trail.
    • No crevasse-rescue system, harness or glacier rack.
    • Lighter pack and simpler footwear.
    • Lower objective hazard in normal summer conditions.
    • More straightforward navigation on the standard route.
    • No multi-day expedition camp system.

    Whitney can still surprise you in these ways

    • The full day may run 12–14 hours or longer.
    • The 22-mile distance creates cumulative foot and knee fatigue.
    • Much of the upper route is above 12,000 feet.
    • Dry Sierra air increases hydration demands.
    • Afternoon lightning can impose a hard turnaround schedule.
    • A same-day drive from low elevation can produce avoidable AMS.

    A climber who completed Rainier with strong reserves should normally find Whitney’s summer Main Trail technically simple and logistically light. That does not make Whitney a recovery hike. Rainier experience removes the glacier problem; it does not remove the distance, altitude or need to descend another 11 miles after the summit.

    Season changes the answer. The comparison assumes a snow-free Mount Whitney Trail. Early-season snow, ice on the switchbacks or a Mountaineer’s Route ascent changes Whitney from a long trail hike into a mountaineering or scrambling objective. Compare current conditions, not only mountain names.

    Does Whitney prepare you for Rainier?

    Yes for several physical and altitude skills. No for the technical systems that make Rainier a glacier climb.

    Skill or capacity
    Whitney tests it?
    Needed on Rainier?
    Long-day aerobic endurance
    Yes
    Yes
    Pacing above 12,000 ft
    Yes
    Yes
    Fueling and hydration under fatigue
    Yes
    Yes
    Early alpine start
    Yes
    Yes
    Long downhill durability
    Yes
    Yes
    Crampon technique
    No in summer
    Yes
    Ice-axe use and self-arrest
    No in summer
    Yes
    Roped glacier travel
    No
    Yes
    Crevasse rescue
    No
    Yes
    Moving efficiently with a heavier alpine pack
    Partly
    Yes
    Objective-hazard judgment
    Some weather exposure
    Much more important

    The correct conclusion is not “Whitney does not help.” Whitney is a valuable diagnostic climb. It reveals how you respond to altitude, whether your fueling works after ten hours, whether your feet and knees tolerate a long descent, and whether you can turn around when a schedule or symptom requires it. The missing bridge is technical instruction.

    A strong progression. Complete Whitney comfortably, take a formal snow and glacier course, climb one or more preparation peaks before Rainier, then attempt Rainier with a guide or a fully competent independent team. Whitney is the fitness and altitude checkpoint—not the final technical prerequisite.

    Elevation and effort profiles

    The summit elevations are almost equal. The starting elevations and the way the work is distributed are not.

    Mount Whitney
    6,100+ ft gain
    Whitney Portal ~8,360 ft → summit 14,505 ft · often one continuous day
    Mount Rainier
    ~9,000 ft gain
    Paradise ~5,400 ft → Camp Muir → summit 14,410 ft · multi-day glacier climb

    Whitney Portal begins almost 3,000 feet higher than Paradise. That difference explains why Whitney reaches a slightly higher summit while requiring substantially less total climbing. Rainier’s standard climb divides the ascent between the approach to Camp Muir and the overnight summit push, but the summit day occurs while wearing glacier equipment, often after only a few hours of sleep.

    Route and skill comparison

    The standard routes belong to different categories. Comparing only mileage or summit elevation hides the essential distinction.

    Mount Whitney Trail

    Whitney Portal → Trail Camp → Trail Crest → Summit. Approximately 22 miles round trip with more than 6,100 feet of ascent. In normal snow-free conditions, the route is a maintained Class 1–2 trail with no technical climbing.

    Main challenge: distance, altitude, pacing, hydration and the long return to Whitney Portal.

    Compare all Mount Whitney routes →

    Disappointment Cleaver

    Paradise → Camp Muir → Cowlitz Glacier → Ingraham Flats → Disappointment Cleaver → Columbia Crest. The exact glacier line changes as crevasses and snow bridges evolve.

    Main challenge: sustained glacier movement, technical systems, objective hazards, heavier loads and a long summit descent.

    Compare all Mount Rainier routes →

    Do not compare off-season Whitney with summer Whitney. Snow and ice can transform the Whitney Trail’s upper switchbacks and traverses. The Mountaineer’s Route is a separate Class 3 objective with route-finding and seasonal snow hazards. This page compares the standard snow-free Whitney Trail with Rainier’s standard glaciated route.

    Permits and access systems

    Whitney is generally easier to climb but harder to secure on a preferred summer date. Rainier is more expensive and administratively layered, but not governed by a comparable summit lottery.

    Permit itemMount WhitneyMount Rainier
    Permit requiredRequired year-round for day or overnight use in the Whitney Zone.Climbers must pay the climbing fee and register; overnight camping requires a wilderness permit.
    Core fee$15 per person entering the Whitney Zone.$82 per person per climb in 2026.
    Reservation fee$6 per permit reservation.$6 per wilderness reservation trip.
    Overnight chargeNo additional charge per night beyond permit fees.$12 per person per night; ages 15 and younger are free.
    Allocation systemLottery for the popular day-use and Whitney Trail overnight permit types; cancellations and later releases may become available.Camp inventory through Recreation.gov plus walk-up availability; climbers also register in person.
    Route-specific issueNorth Fork permits cover the Mountaineer’s Route and are not the same as the Whitney Trail overnight permit.The route and camps must fit current glacier conditions and available wilderness inventory.
    Main planning riskWinning the date you want.Securing camps, paying all fees and adapting to current route conditions.
    Current official fee summary. The U.S. Forest Service lists Whitney Zone reservations at $6 per permit plus $15 per person. The National Park Service lists Rainier’s 2026 climbing fee at $82 per person per climb, with overnight wilderness reservations at $12 per person per night plus $6 per trip. Always verify fees before booking because both agencies can revise schedules.

    Cost and logistics

    The permit difference is small compared with the difference in gear, instruction and guide-service costs.

    Cost categoryMount WhitneyMount Rainier
    Independent direct fees$15/person + $6 reservation, before travel and lodging.$82/person/climb + wilderness permit fees, before park travel and equipment.
    Typical guided optionOptional; day programs often begin in the hundreds of dollars, with overnight or technical routes costing more.Standard multi-day guided programs commonly cost in the low-to-mid $2,000s or more.
    Technical equipmentNormal hiking equipment in snow-free summer conditions.Mountaineering boots, crampons, ice axe, helmet, harness, carabiners, glacier layers and group rescue equipment.
    Travel baseLone Pine / Whitney Portal, California.Ashford / Paradise or White River, Washington.
    ContingencyUsually one or two flexible days for weather, road or permit changes.More valuable because glacier weather and route conditions can cancel or delay a summit attempt.
    First-time totalCan remain a relatively low-cost US highpoint trip.Often several thousand dollars when guiding, rental, travel and contingency are included.

    The cost difference reflects more than prestige. Rainier requires a commercial or independent safety system capable of managing glacier terrain. Whitney’s standard summer route can be completed with the equipment an experienced day hiker already owns. Climbers comparing guide prices should also compare instructional time, guide ratio, rental inclusions and weather policies—not only the advertised trip fee.

    Weather, snow and best season

    Whitney’s primary seasonal decision is whether the trail is snow-free. Rainier’s decision includes snow bridges, crevasse evolution, wind, precipitation and glacier-route viability.

    Whitney: Sierra summer strategy

    • Mid-July through mid-September often provides the clearest nontechnical Main Trail conditions.
    • Afternoon lightning can make an early start and summit turnaround time essential.
    • Spring and early summer snow can cover the switchbacks and change equipment needs.
    • Dry air, sun exposure and limited water high on the route increase hydration demands.

    Full Whitney weather guide →

    Rainier: glacier-window strategy

    • Late spring and early summer often provide better snow coverage over glacier features.
    • Later summer can bring larger crevasses, exposed ice and increased rockfall.
    • Upper-mountain wind and cloud can be severe while lower elevations remain pleasant.
    • The route itself can move during the season as the glacier changes.

    Full Rainier weather guide →

    Altitude and acclimatization

    A 95-foot summit difference is physiologically meaningless. The ascent schedule and starting altitude matter much more.

    Both summits are high enough to produce acute mountain sickness. Whitney Portal begins around 8,360 feet, so the standard route starts high and rises steadily to 14,505 feet. Paradise begins around 5,400 feet, and many Rainier climbers move to Camp Muir at 10,080 feet on the first climbing day before sleeping briefly and beginning the summit push.

    Altitude factorWhitneyRainier
    Starting elevationHigh trailhead near 8,360 ft.Paradise near 5,400 ft on the DC route.
    Sleeping strategyDay hikers may sleep low unless they deliberately stage in the Eastern Sierra.Most standard programs sleep at or near 10,000 ft before the summit push.
    Common mistakeDriving from sea level and beginning a 22-mile summit day immediately.Assuming a single night at Camp Muir creates full acclimatization.
    Better preparationSpend one or two nights at moderate altitude and complete an acclimatization hike.Arrive with prior altitude exposure and strong fitness; consider a longer instructional itinerary.
    Medical responseDo not ascend with worsening altitude symptoms. Descend for severe symptoms, confusion, ataxia, breathing difficulty at rest or rapid deterioration.

    Use the Whitney acclimatization guide, the Rainier acclimatization guide and the site’s general acclimatization framework to build an ascent plan appropriate to your travel origin and medical history.

    Training and gear differences

    Whitney rewards hiking volume and downhill durability. Rainier requires those qualities plus uphill load carriage and technical efficiency.

    Preparation areaWhitney emphasisRainier emphasis
    Aerobic baseLong hikes and sustained Zone 2 work.Same base, with greater weekly vertical and pack work.
    Key workout12–18 mile mountain day with 4,000–5,000 ft of gain.Back-to-back steep days carrying an alpine pack, followed by a long summit simulation.
    Downhill durabilityEssential for the 11-mile return from the summit.Essential after the summit push while still moving through glacier terrain.
    Technical practiceNot required on a snow-free Main Trail.Cramponing, self-arrest, rope-team movement, fixed lines where used and crevasse rescue.
    FootwearTrail shoes or hiking boots suited to conditions.Crampon-compatible mountaineering boots.
    Typical packDay-hiking load or backpacking load.Heavier glacier and overnight equipment.
    The best Rainier readiness test is not a treadmill number. A climber should demonstrate long-day fitness, downhill durability and the ability to learn and execute glacier systems under fatigue. Use Whitney as one physical benchmark, then add a formal glacier course and a preparation mountain.

    Which should you climb first?

    The right answer depends on your current skill set—not ambition, age or which summit looks more impressive.

    Choose Whitney first when…

    • You are a strong hiker but have no glacier experience.
    • You want to test altitude above 14,000 feet.
    • You can handle a 12–14 hour hiking day.
    • You want a lower-cost independent objective.
    • You are building toward technical mountaineering gradually.

    Choose Rainier now when…

    • You already have strong mountain fitness.
    • You have formal glacier skills or are joining a guided instructional program.
    • You are comfortable with crampons, an ice axe and rope systems.
    • You understand that weather or route conditions may end the climb.
    • Your larger goal is glacier or expedition mountaineering.
    When neither mountain is the right next step. Delay both if you have not yet completed long mountain days, have uncontrolled medical issues, cannot recognize or respond to altitude symptoms, or lack the fitness to descend safely after a turnaround. Build on local peaks before using a permit or guided trip as your deadline.

    The responsible Whitney-to-Rainier progression

    A four-stage path closes the gap between high-altitude hiking and glaciated mountaineering.

    1

    Complete Whitney well

    Finish with stable pacing, controlled altitude symptoms, working nutrition and enough reserve for the descent.

    2

    Learn snow systems

    Take formal instruction in crampons, ice axe, self-arrest, rope travel and crevasse rescue.

    3

    Climb a training glacier

    Use Mount Baker or an equivalent objective to apply the skills in real terrain before Rainier.

    4

    Attempt Rainier

    Choose a guided program or a fully competent independent team, then preserve enough schedule flexibility for weather.

    The detailed preparation ladder is in What to Climb Before Mount Rainier. After Rainier, continue with the best peaks after Mount Rainier, where objectives such as Aconcagua, Denali and international glacier peaks become part of a realistic longer-term plan.

    If your goal is Rainier within one year. Schedule Whitney early enough that it functions as an assessment rather than a final rehearsal. Leave time afterward to fix weaknesses, learn glacier systems and complete at least one snow or glacier training climb.

    Mount Whitney vs Mount Rainier FAQ

    Direct answers to the comparison questions climbers ask most often.

    Which is harder, Mount Whitney or Mount Rainier?

    Rainier is decisively harder overall because it adds glacier travel, technical equipment, objective hazards and roughly 3,000 more feet of total ascent. Whitney remains a demanding high-altitude endurance hike.

    Which is harder physically?

    Rainier usually requires greater total capacity. Whitney can be a comparable one-day endurance challenge because the standard route places 22 miles into one continuous effort.

    Which should a beginner climb first?

    A fit beginner should normally choose Whitney in snow-free summer conditions. Rainier is appropriate only through a guided instructional pathway or after the climber develops glacier competence.

    Does Whitney qualify you for Rainier?

    No. It provides evidence of endurance, altitude response and pacing. It does not provide the technical systems or glacier judgment required for an independent Rainier climb.

    Will Whitney feel easy after Rainier?

    It should feel technically easy, but the distance, altitude and long descent can still make it a serious day. Treat it as a separate endurance objective rather than a lesser version of Rainier.

    How much are the permits in 2026?

    Whitney costs $15 per person plus a $6 reservation fee. Rainier’s climbing fee is $82 per person per climb, with overnight wilderness permits costing $12 per person per night plus $6 per trip.

    Do both mountains have similar altitude risk?

    Yes, because the summits are almost the same elevation. The ascent schedule, travel from low elevation, sleeping altitude and personal susceptibility create more meaningful differences than 95 feet.

    Can Whitney be technical?

    Yes. Snow or ice on the Main Trail and any ascent of the Mountaineer’s Route can require mountaineering or scrambling skills. The nontechnical comparison applies only to normal snow-free Main Trail conditions.

    Can I climb both in the same year?

    Yes. A logical order is Whitney in summer, glacier instruction and a preparation climb, then Rainier if sufficient time remains for technical development and recovery. Do not place the climbs so close together that Whitney weaknesses cannot be corrected.

    What comes after Rainier?

    Depending on your goals, common next steps include more technical Cascade routes, Aconcagua for expedition altitude, or Denali after substantial glacier and cold-weather preparation.

    Sources, definitions and methodology

    • Mount Whitney route and permit data: U.S. Forest Service, Inyo National Forest. The official Mount Whitney page describes the 22-mile day route and 12–14 hour expectation; the wilderness permit page lists the $6 reservation fee and $15 Whitney Zone fee.
    • Mount Rainier fees and permit data: National Park Service. The 2026 climbing fee is $82 per person per climb; wilderness permits are $12 per person per night plus $6 per trip.
    • Rainier success data: The NPS recorded 10,762 climbers and 5,135 successful summits in 2018. The agency marks successful-summit totals after 2018 as no longer collected. This page therefore does not describe 48% as a current annual rate.
    • Whitney success: No official summit-completion database directly comparable with Rainier’s historic NPS data was identified. Permit success, trail starts and summit success are not interchangeable.
    • Difficulty method: The comparison separates technical difficulty, objective hazard, total expedition demand and single-day endurance rather than producing one unsupported universal score.
    • Conditions: Snow, wildfire, road access, glacier route lines and weather change. Confirm conditions with the responsible federal agency immediately before travel.

    Travis Ludlow

    Editor & Head of Research · Global Summit Guide

    Travis develops Global Summit Guide’s mountain-comparison and progression frameworks from official route records, permit systems, guide-service itineraries and climber reports. The goal of this comparison is not to make either mountain sound easy; it is to distinguish a high-altitude trail objective from a glacier climb so readers choose the correct preparation path.

    Safety and route framing reviewed by Dawson Ludlow. Altitude and medical framing reviewed by Taylor Ludlow, RN.

    Choose the climb that matches your current skills

    Use Whitney to test altitude and endurance. Use glacier instruction and preparation peaks to close the technical gap. Attempt Rainier when your fitness, skills, team and schedule all support the objective—not simply because both summits are about 14,400 feet.

    Plan Mount Whitney Build Toward Rainier
    Safety disclaimer. Mountaineering, snow travel, high-altitude hiking and glacier climbing can cause serious injury or death. This researched comparison is for planning and education, not a substitute for current agency information, professional instruction, medical advice or qualified guiding. Verify route conditions, permits, weather and equipment requirements before every climb.

    Was this helpful?

    Yes
    No
    Thanks for your feedback!
Language »