<

Tag: USA

  • Mount Baker vs Mount Rainier: Which Glaciated Volcano Wins?

    Mount Baker vs Mount Rainier: Which Glaciated Volcano Wins?

    Mountain Comparisons · 2026 Guide

    Mount Baker vs Mount Rainier: Which Glaciated Volcano Wins?

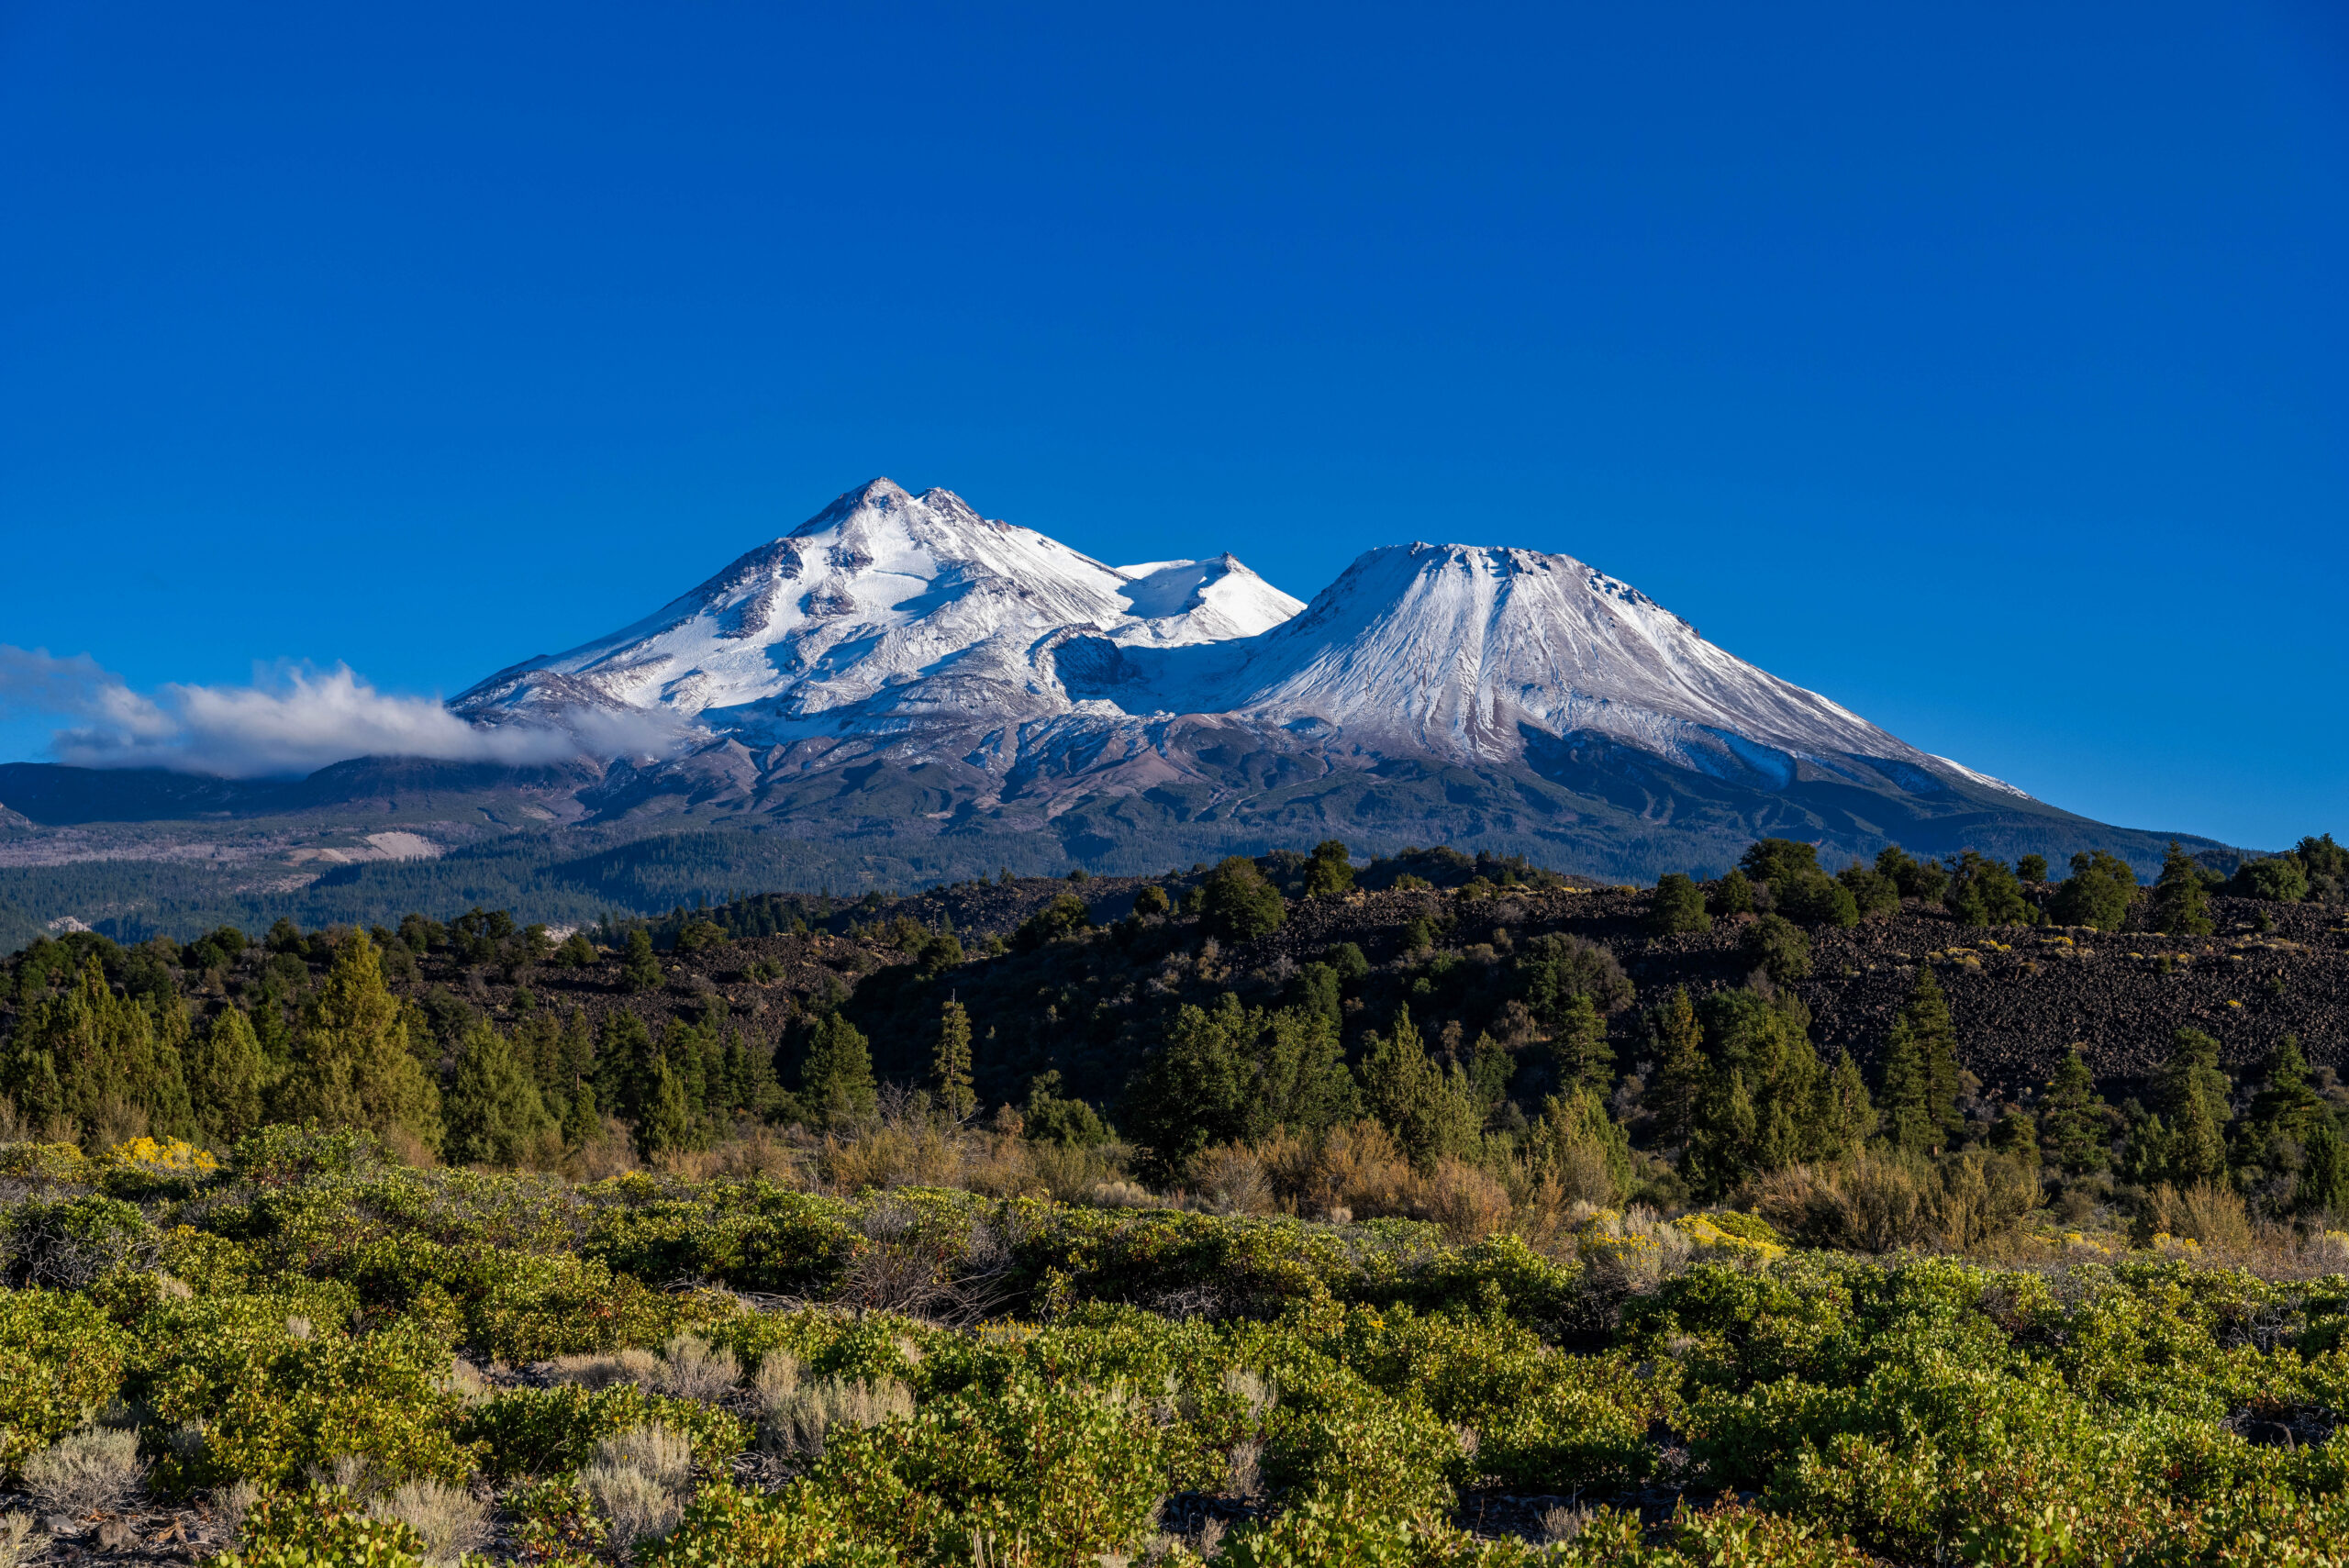
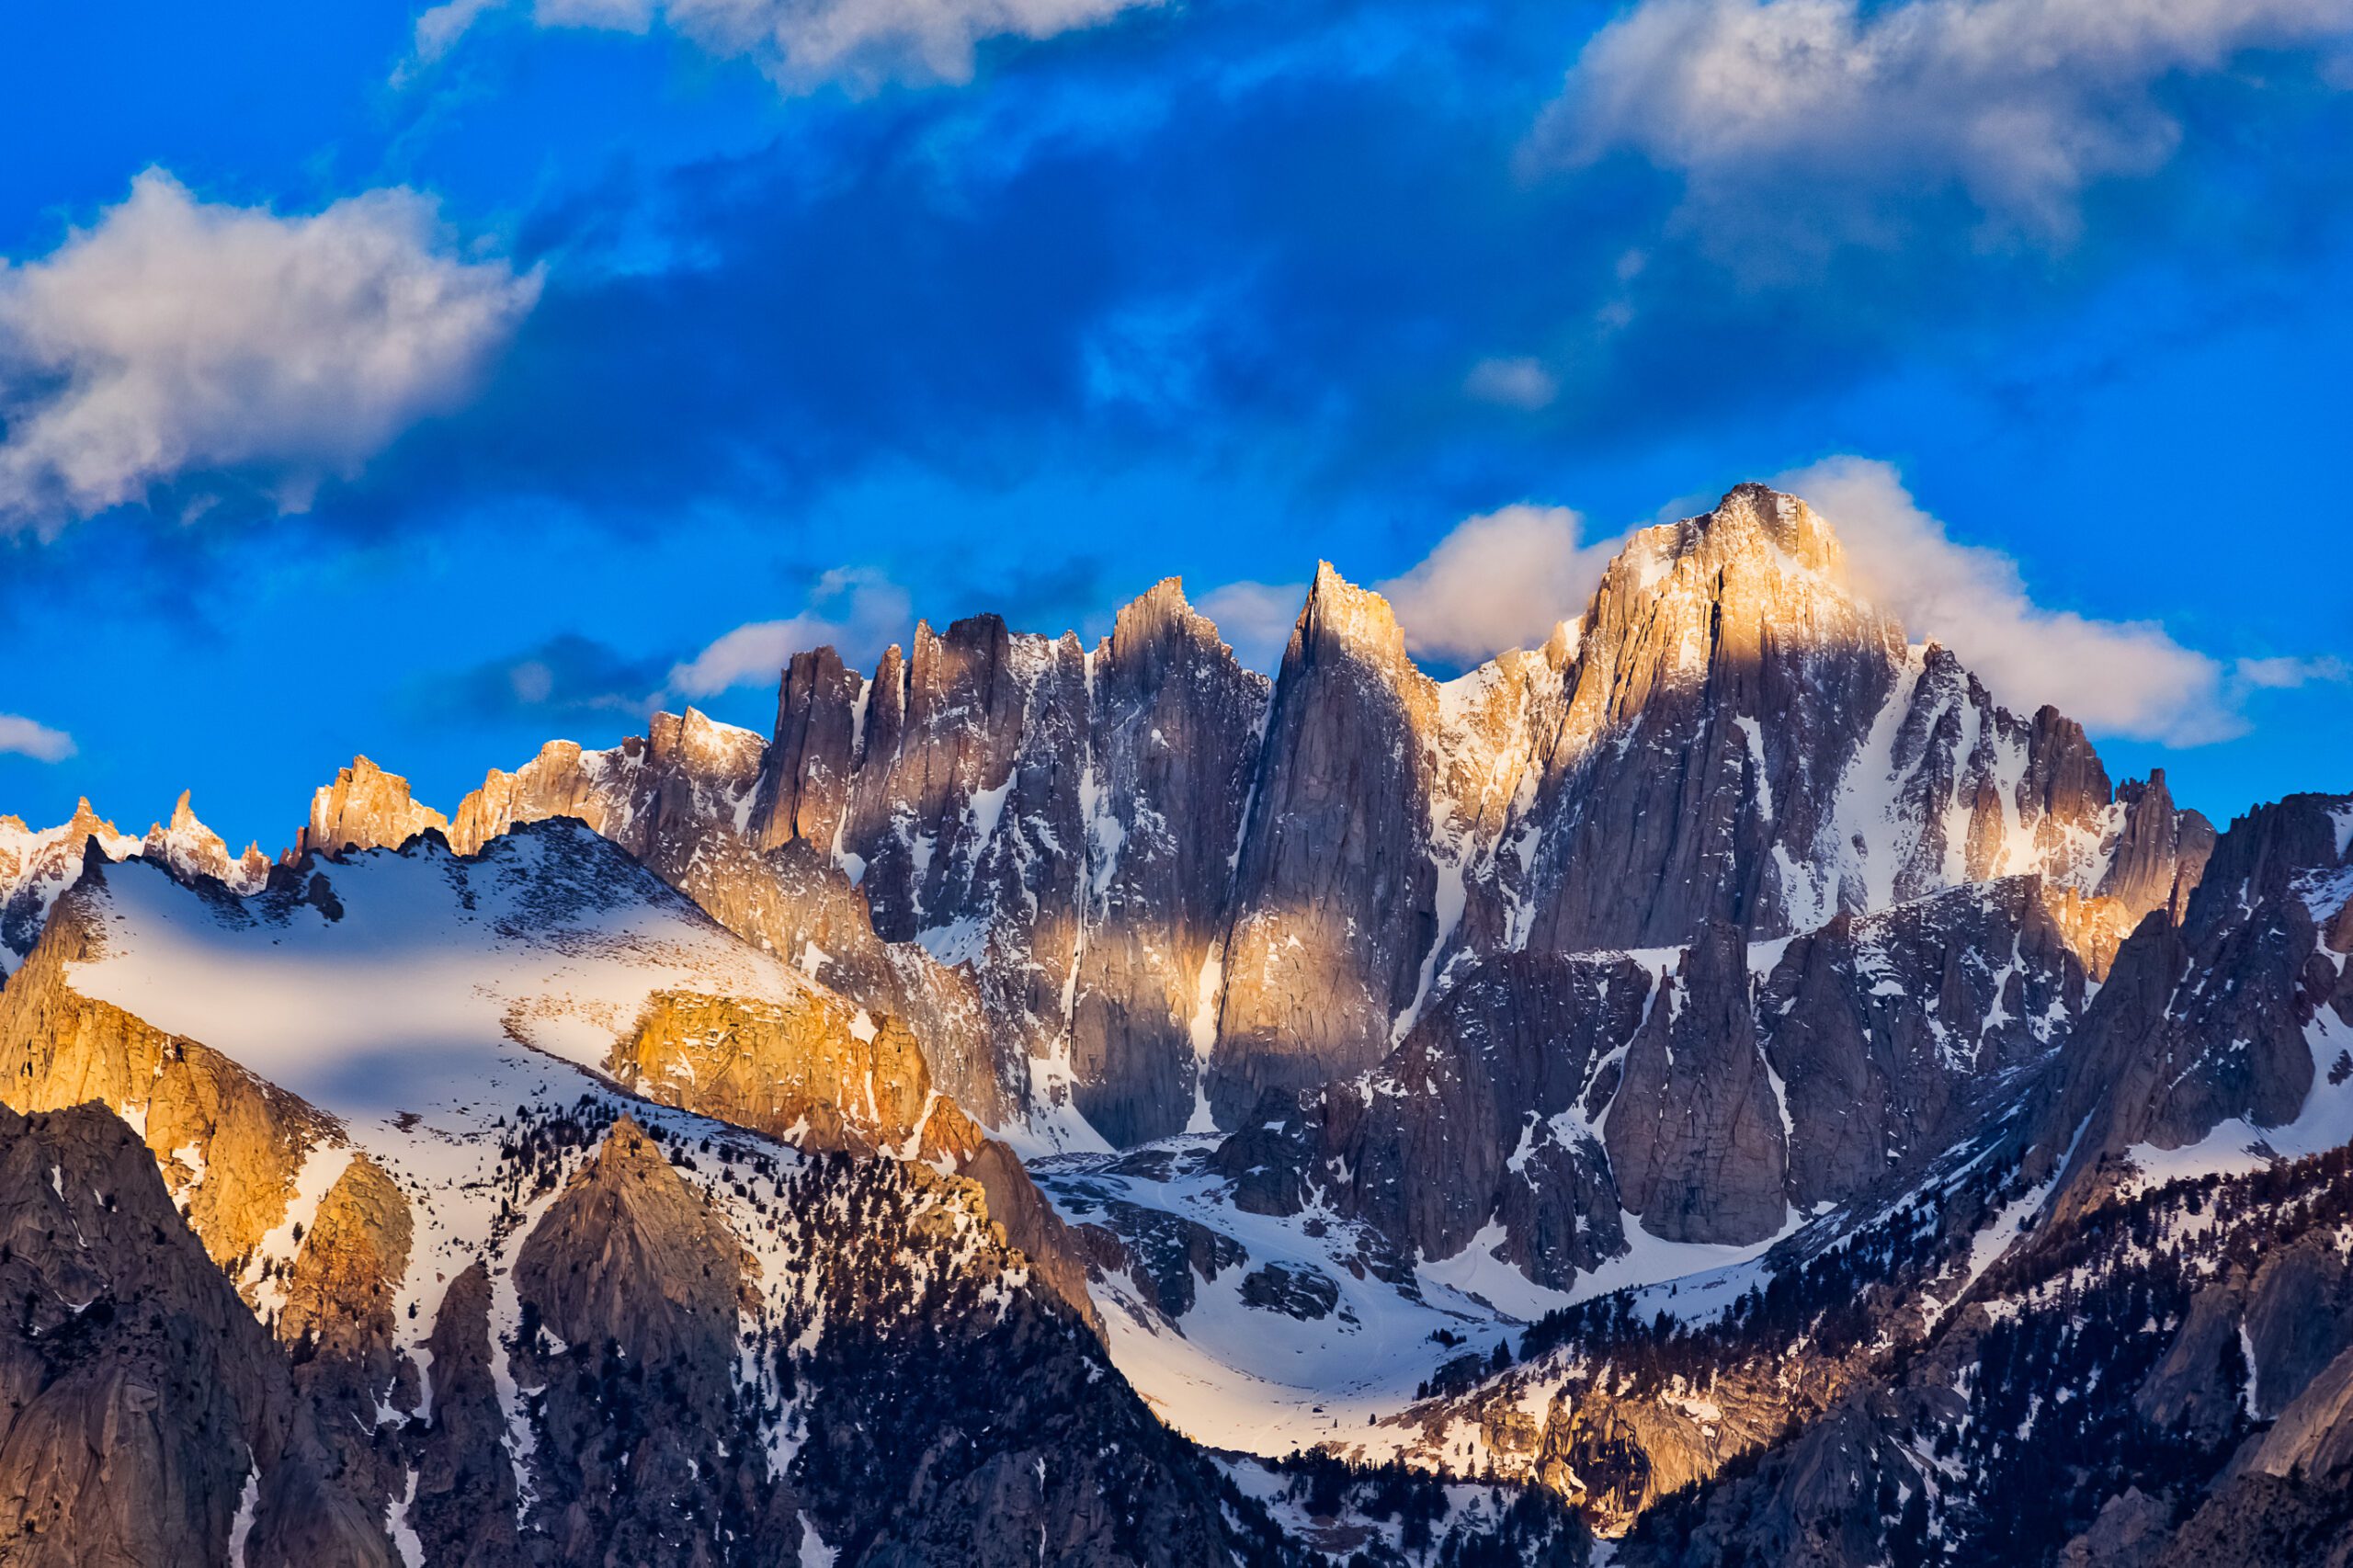
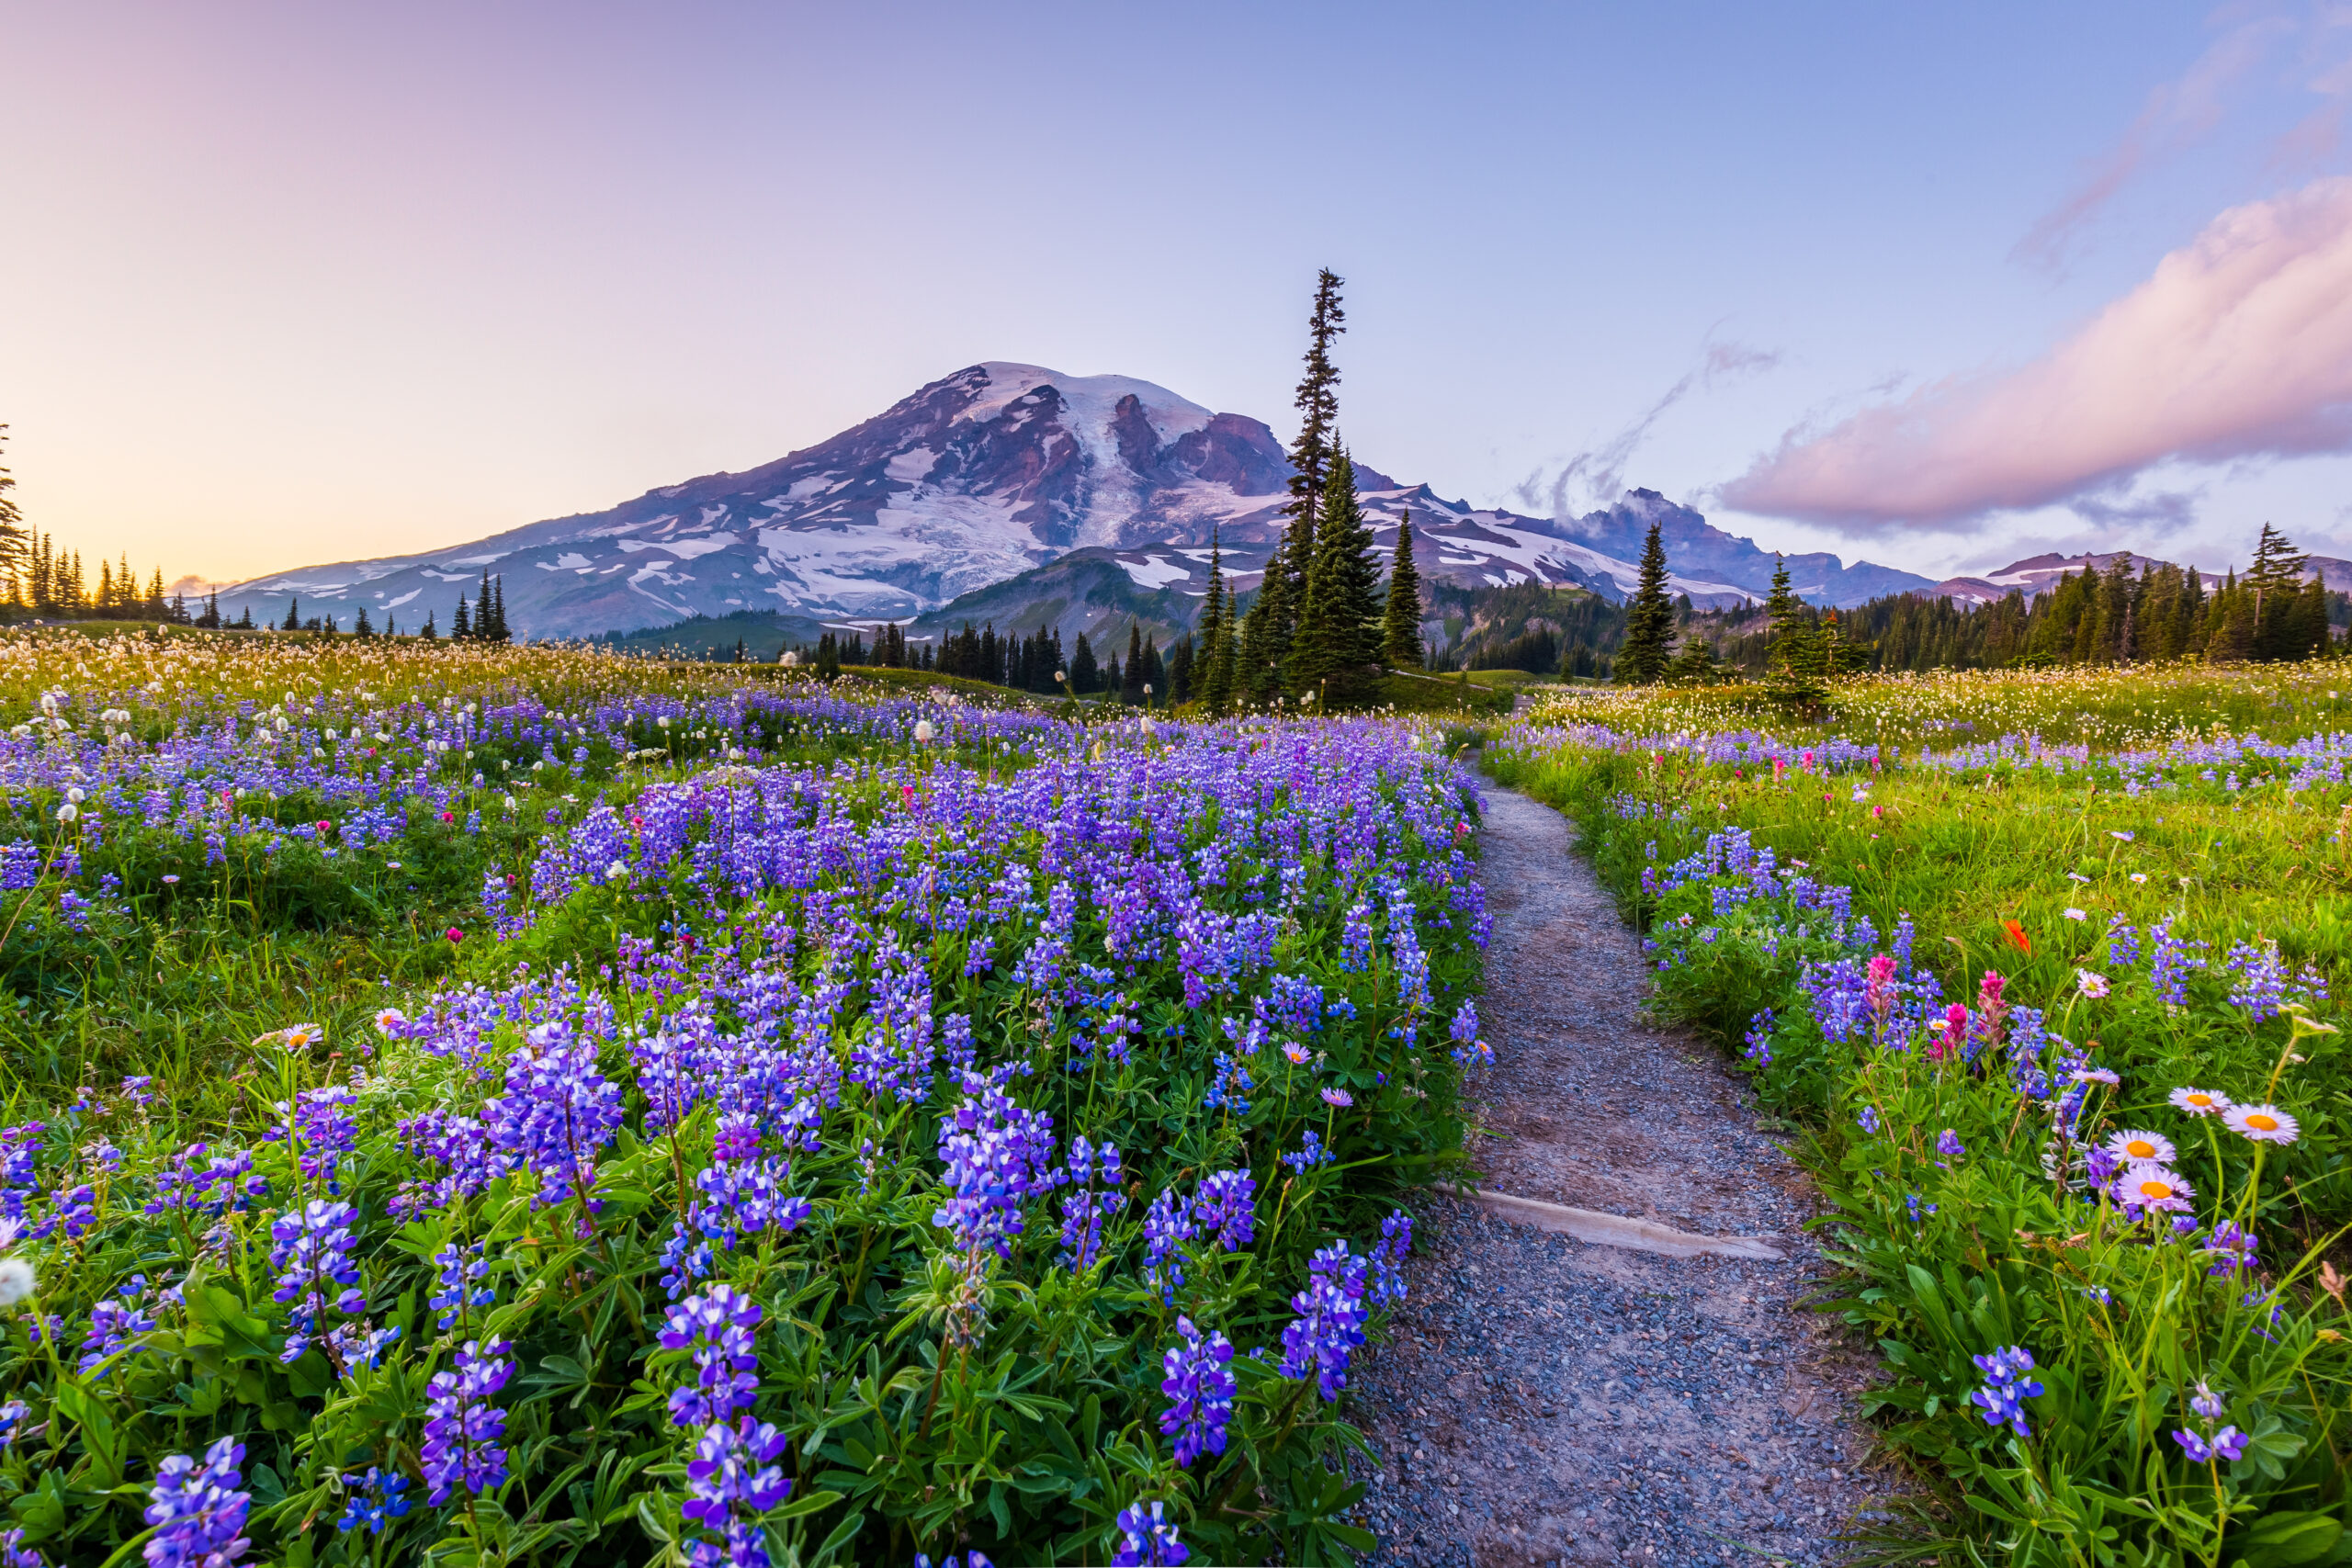
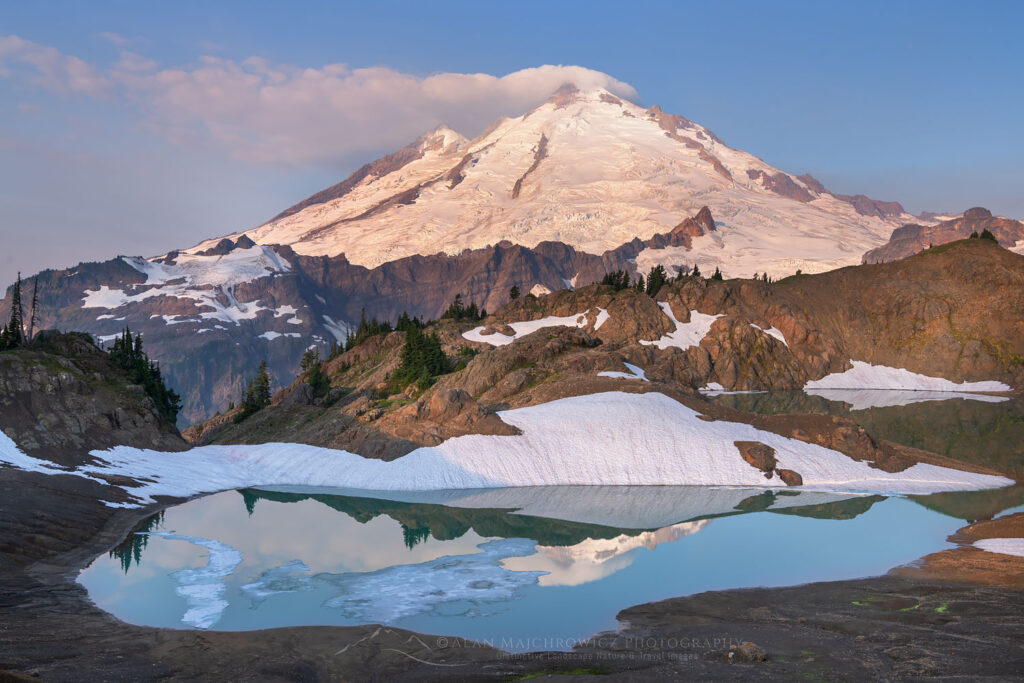
    Mount Rainier rises to 14,410 feet in central Washington — the most heavily glaciated peak in the contiguous United States and the canonical Pacific Northwest expedition mountain. Mount Baker sits 200 miles north at 10,781 feet, just below the Canadian border in the North Cascades. Baker is 3,629 feet shorter. By every metric of “bigness,” Rainier wins. But Baker has earned a reputation as the training mountain for Rainier — the climb that every major guide service recommends as preparation before committing to the bigger objective. The right question isn’t “which is harder?” — it’s “in what order should you climb them?”

    The Verdict

    For nearly every climber, the answer is Baker first, Rainier second — Baker offers true glaciated mountaineering on forgiving terrain; Rainier demands those skills already in place on terrain that punishes mistakes more severely.

    North Cascades · Washington

    Mount Baker

    Premier beginner glaciated peak in the lower 48. The canonical Rainier training mountain. Real glacier travel on forgiving terrain.

    Elevation10,781 ft
    Round trip~12.5 miles
    Elevation gain~7,400 ft
    Typical time2–3 days
    Technical?Moderate glaciated
    Annual climbers~5,000–7,000
    Permit cost$5 (parking only)
    Best seasonMay–September
    Central Cascades · Washington

    Mount Rainier

    Most glaciated peak in the lower 48. The Pacific Northwest’s iconic expedition mountain. Real consequence on technical terrain.

    Elevation14,410 ft
    Round trip~14.5 miles
    Elevation gain~9,000 ft
    Typical time2–3 days
    Technical?Yes (advanced)
    Annual climbers~10,000 attempts
    Permit cost$63 + wilderness
    Best seasonLate Jun–early Sep

    Two glaciated volcanoes, two completely different skill tiers

    On the map, Baker and Rainier look like siblings. Both are stratovolcanoes in Washington State’s Cascade Range. Both are heavily glaciated. Both have well-established standard routes climbed by thousands of mountaineers each summer. Both require crampons, ice axes, rope teams, and crevasse rescue skills.

    In practice, the two mountains sit on opposite ends of the glaciated climbing difficulty spectrum.

    Mount Baker’s standard route — the Coleman-Deming Glacier from the Heliotrope Ridge trailhead — is described by Blackbird Mountain Guides as “non-technical but require good fitness, basic mountaineering skills, and the ability to travel roped on glaciers.” The route climbs 7,400 feet across roughly 12.5 miles round trip, gaining the Coleman Glacier, crossing onto the Deming Glacier, and ascending the Roman Wall — a sustained 30-35 degree snow slope — to reach the summit plateau. Glacier travel is real: there are crevasses, seracs, and the need for rope team movement. But the angles are moderate, the route is well-established, and the consequence of a fall is recoverable on most sections.

    Mount Rainier’s standard route — the Disappointment Cleaver via Camp Muir — is meaningfully harder on every measurable axis. The route covers 14.5 miles round trip and 9,000 feet of elevation gain, but the comparable metrics understate the difference. Rainier’s upper mountain involves crevasse fields that change daily, collapsing snow bridges, fixed ladder crossings in some seasons, rockfall on the Cleaver itself, and altitude that climbs above 14,000 feet. According to National Park Service data, in 2018 the mountain saw 10,762 attempts with 5,135 successful summits — a 48% success rate. Mount Baker guided programs typically report 70-85% success rates by comparison.

    Why every guide service recommends Baker first

    There’s an unusually strong consensus among Pacific Northwest guide services about the Baker-to-Rainier progression. Blackbird Mountain Guides puts it directly: “Is Mt. Baker good training for Rainier or Denali? Absolutely. With crevasses, alpine starts, and route finding challenges, it’s ideal preparation.”

    This is not marketing copy. The technical skill set required for Rainier is identical to what Baker teaches — roped glacier travel, crevasse rescue, crampon technique, alpine pacing, altitude tolerance. Baker simply teaches these skills on shorter, less consequential terrain. The progression matters because Rainier’s 48% success rate is partially explained by climbers attempting it without sufficient glacier experience. Climbers who summit Baker first arrive at Rainier with the muscle memory and decision-making practice that turns a 50/50 climb into something closer to 70/30 in their favor.

    The data: success rates, climbers, and what they reveal

    ~75%
    Baker guided success rate
    Baker guided programs typically report 70-85% summit success depending on season and weather window
    Source: Northwest Alpine Guides, American Alpine Institute
    ~48%
    Rainier summit success
    10,762 attempts, 5,135 summits in 2018 — the most recent fully published NPS data
    Source: National Park Service climbing statistics
    ~$1,300
    Baker guided 2-day cost
    Northwest Alpine Guides 2026 pricing for Coleman-Deming or Easton Glacier 2-day program
    Source: Northwest Alpine Guides 2026 schedule
    ~$2,500
    Rainier guided 3-day cost
    Major operators (RMI, IMG, Alpine Ascents) charge $2,250-$2,995 for standard Disappointment Cleaver programs
    Source: 2026 guide service pricing

    The gap in success rates tells the story. Baker’s 75% success rate is roughly 50% better than Rainier’s 48% rate. That difference isn’t because Baker is “easy” — it’s because Baker’s lower altitude, shorter summit day, and more forgiving terrain make weather windows wider and turnaround pressure lower. Climbers who get pinned down by a storm on Rainier often fail to summit at all; climbers in the same conditions on Baker can often still complete the climb.

    This is the structural insight that makes Baker the right first-glaciated-peak choice: you learn the skills you’d need on Rainier, but you summit more reliably while you learn them.

    Mount Baker deep-dive: the Coleman-Deming route in detail

    The route in stages

    The Coleman-Deming route from Heliotrope Ridge to the summit moves through four distinct terrain bands:

    1. Heliotrope Ridge trailhead to Hogsback Camp (3,700–6,200 ft). A well-maintained trail climbs through old-growth Pacific Northwest forest, crosses Kulshan Creek at around 2 miles, breaks out of the trees at roughly 5,400 feet, and ascends a final moraine into Hogsback Camp at the edge of the Coleman Glacier. Most climbers reach Hogsback Camp in 3-4 hours with a 35-45 lb pack. Campsites are scattered between 6,000 and 6,200 feet along the glacier’s edge.
    2. Hogsback Camp onto the Coleman Glacier (6,200–8,500 ft). Above the moraine, the route ropes up and enters real glacier terrain. The Coleman Glacier has substantial crevasse fields, and rope team travel is mandatory from this point. The route winds northeast across the glacier, climbing moderately on 20-30 degree snow. Most climbers practice rope team movement, crevasse rescue setup, and pacing on the Coleman Glacier the afternoon before summit day.
    3. Colfax Col and the Black Buttes traverse (8,500–10,000 ft). The route climbs to Colfax Col — the saddle between the Black Buttes formation and Mount Baker’s main summit cone. Climbers skirt the Black Buttes (a complex of volcanic spires) at safe distance to avoid rockfall and avalanche risk from the Buttes themselves. From Colfax Col the route turns east-northeast and crosses onto the upper Deming Glacier.
    4. The Roman Wall and summit plateau (10,000–10,781 ft). The technical crux: a sustained 30-35 degree snow slope known as the Roman Wall climbs roughly 700-800 vertical feet to the summit plateau. Conditions vary year to year — some seasons offer firm consolidated snow ideal for crampon technique; other seasons present icy or rotten sections requiring more care. Above the Roman Wall, the broad summit plateau leads to the true summit at Grant Peak. The summit is actually the rim of an ice-filled volcanic crater roughly 1,300 feet deep.

    Mount Baker permits and access (2026)

    Baker’s permit system is among the simplest in the Cascades — there is no climbing-specific permit:

    • Northwest Forest Pass: Required for parking at the Heliotrope Ridge trailhead. $5 per day or $30 annual. Available at the Glacier Public Service Center, REI, or online.
    • Wilderness Permit: Free, self-issued at the trailhead. Required for all entries into the Mount Baker Wilderness.
    • Pack-out human waste: Required. Most climbers use blue bags or WAG bags. No bags provided at the trailhead — bring your own.
    • Group size limit: 12 climbers maximum in the wilderness.

    Access to the Heliotrope Ridge trailhead is via State Highway 542 east from Bellingham. Forest Road 39 (Glacier Creek Road) is the access route from SR-542. The road is susceptible to washouts and may not fully clear of snow until mid-June in heavy snow years. Climbers attempting Baker in May or early June should check current road conditions via the Mount Baker Snoqualmie National Forest website.

    Baker is still a real glaciated mountain

    “Beginner-friendly” doesn’t mean “safe to take lightly.” Mount Baker has substantial crevasse fields on both the Coleman and Easton Glaciers. The Mountaineers note that “there are many crevasses on this climb” and that the start of the Coleman Glacier can be tricky to discern — many parties have inadvertently roped up too late, only to encounter the first crevasse minutes later.

    The Black Buttes section presents avalanche and rockfall hazard. Climbers must keep enough distance from the Buttes to avoid debris coming down from above. The Roman Wall itself is steep enough that a slide-arrest scenario is non-trivial. Baker is the easier of the two mountains compared in this article — but it is not, in any way, a casual hike. Real glacier travel skills are required.

    Mount Baker guide services

    Mount Baker is one of the most-guided peaks in the lower 48, with multiple established services offering programs from 2 to 6 days:

    • American Alpine Institute (AAI) — Bellingham-based, runs both Coleman-Deming and Easton Glacier programs. The 3-day instructional climb is the canonical first glaciated mountaineering experience for many Pacific Northwest climbers.
    • Northwest Alpine Guides — 2-day Coleman-Deming or Easton Glacier programs at $1,300. Adapts route choice based on conditions. Intermediate pace requires prior mountaineering experience (5,000+ ft single-day gain).
    • Mountain Madness — Multi-day Baker programs including skills instruction and summit attempts.
    • Northwest Mountain School — IFMGA-licensed guides, custom and scheduled programs.
    • Blackbird Mountain Guides — North Cascades-based, runs Coleman-Deming and Easton programs.
    • Skyline Mountain Guides — 3-day Coleman-Deming program with built-in skills instruction.
    • Edgeworks Outdoor — 3-day programs on Coleman-Deming, Easton, and North Ridge variants.

    Typical 3-day program cost: $700-$1,500 per person depending on group size and program structure. Most 3-day programs explicitly target first-time mountaineers and include instruction in crampons, ice axe self-arrest, rope team travel, and crevasse rescue setup. The 3-day programs report meaningfully higher success rates than 2-day programs because they build in skill instruction and acclimatization time.

    The Coleman–Deming Route is a perfect first big mountain climb for climbers looking to elevate their mountaineering experience! The route involves glacier travel, rope team movement, and use of crampons and ice axe—all taught and reinforced by our Skyline Team.

    Skyline Mountain Guides — 2026 Mount Baker Coleman-Deming program

    Mount Rainier deep-dive: the Disappointment Cleaver route in detail

    The route in stages

    The Disappointment Cleaver route is structurally different from Baker — longer, higher, with technical sections that demand more of climbers:

    1. Paradise to Camp Muir (5,400–10,080 ft). The 4-6 hour ascent from Paradise to Camp Muir via the Muir Snowfield. The route gains 4,680 feet in 4.5 miles — a sustained but moderate slope. Camp Muir is a permanent high camp with stone shelters, guide-service tents, and ranger station. Most climbers arrive in early afternoon, prepare gear, eat, and try to sleep by 6 p.m. for a midnight summit start.
    2. Camp Muir to Ingraham Flats (10,080–11,000 ft). The summit attempt begins between midnight and 1 a.m. Climbers cross the Cowlitz Glacier to Cathedral Gap, traverse along the Ingraham Glacier, and reach Ingraham Flats at roughly 11,000 ft. This section involves the first real exposure to active crevasse terrain and serac fall potential from the Ingraham Icefall above.
    3. The Disappointment Cleaver proper (11,000–12,300 ft). The Cleaver is a rocky ridge that climbers ascend to bypass the most heavily crevassed section of the Ingraham Glacier. The Cleaver presents real rockfall hazard — climbers wear helmets and move efficiently. The Cleaver itself is exposed scrambling on rock, often with rope team protection. The name comes from early climbers who reached the top of the Cleaver and felt “disappointed” to realize how much climbing remained above.
    4. Upper mountain to summit (12,300–14,410 ft). Above the Cleaver, the route returns to the Ingraham Glacier and ascends 2,100 feet of moderate glacier on the upper mountain. Crevasses become more frequent and route-finding becomes critical. In some seasons fixed ladders are placed across larger crevasses by guide services. The summit crater rim is reached at Columbia Crest — Rainier’s true high point at 14,410 ft.

    Mount Rainier permits and access (2026)

    Rainier’s permit system is the most regulated of any peak in this comparison cluster:

    • Climbing Cost Recovery Fee: $63 per climber per calendar year. Required for all travel above 10,000 ft or onto any glacier. Funds high-camp rangers and waste management.
    • Wilderness Permit: Required for overnight stays. Managed through Recreation.gov with roughly two-thirds available for advance reservation (May 1 to the first federal holiday in October) and one-third walk-up only.
    • Park Entrance Fee: $30 per vehicle (or America the Beautiful annual pass).
    • Pack out human waste: Required above Camp Muir. Blue bags provided.

    Most climbers access via the Paradise trailhead, accessible year-round from the Nisqually entrance on the south side of Mount Rainier National Park. See our Mount Whitney vs Mount Rainier comparison for full Rainier route and permit detail.

    Mount Rainier guide services

    Four major operators hold Mount Rainier concession permits:

    • RMI Expeditions (Rainier Mountaineering, Inc.) — The largest Rainier operator. Multiple program lengths. 3-day Disappointment Cleaver: $2,250-$2,995.
    • International Mountain Guides (IMG) — Park-concession holder with multi-day instructional programs.
    • Alpine Ascents International (AAI Seattle) — Premier guided programs. Includes the Rainier Seminar (training-and-climb) for first-time mountaineers.
    • Mount Rainier Alpine Guides — Smaller operator with personalized programs.

    All four require either prior glacier mountaineering experience (often Baker is the cited example) or completion of a pre-climb seminar. This is the structural reason Baker fits so naturally as the prerequisite climb — it directly satisfies the experience requirement that Rainier operators look for.

    Glacier recession and what it means for both peaks

    Both Mount Baker and Mount Rainier are heavily affected by climate-driven glacier recession. See Investigation 12: Glacier recession and the future of mountaineering routes for the broader picture across Cascade volcanoes.

    On Mount Baker, the Coleman Glacier has receded measurably over the past three decades, with new crevasse fields opening and the lower glacier toe retreating further uphill each season. The route’s standard line through the Coleman has shifted multiple times as new crevasses opened. The bergschrund at the base of the Roman Wall is now wider and more challenging in late season than it was historically.

    On Mount Rainier, the impact is more severe. Multiple Rainier glaciers (Nisqually, Cowlitz, Emmons-Winthrop) have receded substantially, with documented changes in crevasse patterns season over season. The Ingraham Icefall has become increasingly active. Some routes that were once climbable are now considered too dangerous in most seasons. Recent years have seen success rates vary wildly month-to-month — Alpine Ascents International reports a range from 45% to 90% across different months in 2024-2025 based on conditions.

    The practical effect for both peaks: route conditions matter more than they used to. Guide services adapt their route choice based on current conditions. Independent climbers must research recent trip reports and current conditions before committing. The “standard route” is increasingly a moving target rather than a fixed line up the mountain.

    Mount Baker seen from Goat Lake on Ptarmigan Ridge, Mount Baker Wilderness. North Cascades Washington

    The skills gap: what each mountain actually demands

    Mount Baker’s skill demands

    • Multi-day camping commitment: Carrying a 35-45 lb pack to high camp at 6,000-7,000 ft. Setting up tents, melting snow for water, cooking meals at altitude
    • Aerobic endurance: 7,400 feet of elevation gain across roughly 12.5 miles round trip. The summit day itself involves 4,500-5,000 ft of climbing with a light pack from high camp
    • Basic to intermediate crampon technique: French technique, flat-footing, and front-pointing on the Roman Wall’s 30-35 degree snow
    • Self-arrest reflexes: Important particularly on the Roman Wall where a slide could run out
    • Rope team movement: 3-person rope teams are standard. Climbers must maintain proper spacing, manage the rope, and stop progress immediately when a teammate has issues
    • Crevasse rescue setup: Z-pulley system, prusik ascending, partner extraction — taught in 3-day programs, expected from independent climbers
    • Mild altitude tolerance: 10,781 ft is high enough that some climbers feel mild altitude effects (shortness of breath, fatigue), but rarely causes serious AMS

    Mount Rainier’s skill demands

    • Everything Baker requires, plus:
    • Advanced glacier travel: Reading more complex crevasse patterns, navigating around or across crevasses that change daily, recognizing weakening snow bridges
    • Confident crevasse rescue under pressure: Practiced repeatedly until reflexive — the consequences of a fall into a crevasse on Rainier are more severe than on Baker
    • Faster alpine pacing: Maintaining 1,000 ft/hour on the upper mountain at 12,000+ feet — a meaningfully harder pace than Baker’s summit day
    • Significant altitude tolerance: 14,410 ft causes real altitude effects in most climbers. AMS symptoms must be managed without compromising pace
    • Heavier pack carrying: 45-55 lb packs to Camp Muir on Day 1; 10-15 lb summit packs on Day 2
    • Rockfall awareness on the Cleaver: Helmet protocol, moving efficiently through exposed sections, recognizing daily/seasonal rockfall patterns
    • Weather decision-making at higher consequence: Turning around at 13,000 feet is harder than turning around at 9,000 feet — both because of physical investment and because the weather window that opened the climb may not return

    The fundamental insight: Baker teaches all the foundational skills. Rainier demands those same skills, applied faster, at higher altitude, with less margin for error. Climbing Baker first lets you build the skills in a lower-consequence environment, then bring them to Rainier already absorbed into muscle memory. This is why every major guide service explicitly recommends Baker before Rainier — it’s not a marketing structure, it’s a curriculum.

    Cost comparison: Baker is meaningfully cheaper

    Mount Baker costs

    • Northwest Forest Pass: $5/day or $30/year
    • Wilderness permit: free
    • Pre-climb lodging in Bellingham or Glacier: $80-$200
    • Camping gear (if not owned): variable; can rent locally
    • Food, gas, transit: $80-$150
    • Total unguided per person: $150-$400
    • Guided 2-day climb: $1,300 (Northwest Alpine Guides)
    • Guided 3-day climb: $700-$1,500 (AAI, Mountain Madness, Blackbird, Skyline)

    Mount Rainier costs

    • NPS climbing cost recovery fee: $63 per year
    • Wilderness permit: included with guide programs
    • Park entrance fee: $30
    • Pre/post-climb lodging in Ashford or Seattle: $200-$400
    • Food/gas/transit: $100-$200
    • Tip for guides (~10% of program): $225-$300
    • Total unguided per person: $300-$600 plus gear
    • Guided 3-day climb: $2,250-$2,995 (RMI, IMG, Alpine Ascents)
    • Guided 4+ day seminar climb: $3,200-$4,500 (Alpine Ascents Rainier Seminar)

    The cost gap is substantial: Rainier guided is roughly 2x the cost of Baker guided. For climbers building a multi-year progression, this matters — climbing Baker first lets you invest a smaller amount to test your interest, build skills, and assess your fitness before committing to the higher-cost Rainier program. For full Rainier cost breakdown, see our Mount Whitney vs Mount Rainier comparison. See Investigation 18: What’s in a mountain guide’s pack for the gear list that covers both peaks.

    The honest verdict: when each is the right choice

    For 90% of climbers, the answer is clear: Baker first, Rainier second. But there are specific scenarios where the order varies.

    Pick Mount Baker first if

    You’re new to glaciated mountaineering and want a real first experience
    Baker
    You’re building toward Rainier or Denali as your major objective
    Baker
    You want to test your fitness and altitude tolerance before committing $2,500+ to Rainier
    Baker
    You have a budget under $1,500 for a guided experience
    Baker
    You want to maximize summit probability — Baker’s 70-85% rate is meaningfully higher than Rainier’s 48%
    Baker

    Pick Mount Rainier first if

    You have prior glacier mountaineering experience from Alaska, the Alps, or another major range
    Rainier
    You’re preparing for Denali or 7,000m+ peaks on a compressed timeline
    Rainier
    You have $2,500-$4,000 budgeted and accept the lower summit probability
    Rainier
    You’re committed to a 4+ day Rainier seminar climb that builds in skills instruction
    Rainier
    You specifically want the 14,000-foot benchmark over the glacier-skills benchmark
    Rainier

    The recommended sequence (Year 1 to Year 3)

    For climbers building a multi-year glaciated mountaineering progression, the canonical sequence is:

    1. Year 1, summer: Mount Baker via Coleman-Deming Glacier (3-day guided program). Build foundational glacier skills, rope team experience, crampon technique.
    2. Year 2, June-July: Mount Rainier via Disappointment Cleaver (3-4 day guided program). Apply Baker skills on bigger, more committing terrain.
    3. Year 2 or 3, winter: Glacier skills clinic, ice climbing course, or rescue practice to deepen the technical base.
    4. Year 3+: Independent Rainier climbs, then progression to international objectives — Aconcagua, Denali, 6,000m peaks (see Investigation 06: Your first big mountain for the next-step progression).
    The “I’ll skip Baker and just climb Rainier” trap

    Each year, hundreds of climbers attempt Rainier without prior glacier experience, betting that the guide service will teach them what they need to know on the climb itself. This is the largest single contributor to Rainier’s 48% summit success rate. Climbers without prior glacier skills consistently underperform on Rainier compared to those who built skills on Baker first.

    The independent-climber success rate on Rainier is ~44% — meaningfully lower than guided. The guided rate of ~60% reflects climbers who arrived with some prior experience plus the structured instruction of the guided program. If you want to maximize your odds of summiting Rainier, climb Baker first. This isn’t gatekeeping — it’s the structural advice from every major guide service in the region.

    Best month to climb each: side-by-side

    For the full framework, see Investigation 19: Best month to climb each mountain.

    MonthMount BakerMount Rainier
    JanuaryWinter ski mountaineering onlyWinter mountaineering only
    FebruaryWinter ski mountaineering onlyWinter mountaineering only
    MarchAdvanced ski mountaineeringAdvanced winter conditions
    AprilRoad still closed in many yearsSpring conditions; advanced only
    MayGood — depending on road opening; deep snowMarginal — spring conditions
    JuneExcellent — peak season beginsGood — early season conditions
    JulyExcellent — peak conditionsExcellent — peak season
    AugustGood — exposed crevasses; route-finding harderExcellent — stable conditions
    SeptemberFair — variable conditions; weather windows shorterGood — early month; deteriorating late
    OctoberMarginal — fall storms beginningMarginal — winter conditions returning
    NovemberWinter conditionsWinter mountaineering only
    DecemberWinter ski mountaineering onlyWinter mountaineering only

    Quick-reference comparison

    FactorMount BakerMount Rainier
    Elevation10,781 ft14,410 ft
    LocationNorth Cascades, WashingtonCentral Cascades, Washington
    Standard routeColeman-Deming GlacierDisappointment Cleaver
    Route gradeBeginner-intermediate glaciatedIntermediate-advanced glaciated
    Round trip distance~12.5 miles~14.5 miles
    Elevation gain~7,400 ft~9,000 ft
    Days required2-3 days2-4 days
    Technical demandsGlacier travel, rope team, basic crampon/axeAdvanced glacier travel, complex crevasse rescue, fast pacing at altitude
    Annual climbers~5,000-7,000~10,000 attempts
    Summit success rate~70-85% (guided)~48% overall
    Permit cost$5 parking (no climbing fee)$63 climbing fee + wilderness
    Cost (unguided)$150-$400 per person$300-$600 per person plus gear
    Cost (guided)$700-$1,500 (3-day)$2,250-$2,995 (3-day)
    Best seasonJune-JulyLate June-early September
    Best forFirst glaciated climb / Rainier prepIntermediate-advanced glaciated objective

    Frequently Asked Questions

    Is Mount Baker harder than Mount Rainier?

    No. Mount Rainier is meaningfully harder than Mount Baker. Rainier is 3,629 feet taller, has more crevasses, more objective hazard, longer summit-day distance, and demands more advanced glacier travel skills.

    Baker is widely considered the premier Rainier training peak precisely because it offers real glaciated mountaineering on more forgiving terrain. Most major guide services explicitly recommend climbing Baker before Rainier.

    Should I climb Baker before Rainier?

    Yes, in almost all cases. Baker is the canonical Rainier preparation climb. It teaches the same fundamental skills — rope team travel, crevasse rescue, crampon and ice axe technique, altitude exposure, glacier reading — on shorter, less consequential terrain.

    The Mount Baker Coleman-Deming route is rated as a beginner-friendly glacier climb; Rainier’s Disappointment Cleaver is intermediate-to-advanced. Building Baker into your progression substantially increases Rainier success rates.

    How much does it cost to climb Mount Baker vs Mount Rainier?

    Baker unguided: $5 Northwest Forest Pass for parking, plus food, gas, and lodging. Total under $400 typically.

    Baker guided: $700-$1,500 for a 2-3 day program with American Alpine Institute, Northwest Alpine Guides, Mountain Madness, or others.

    Rainier unguided: $63 NPS climbing fee plus wilderness permit. Total under $600 plus gear.

    Rainier guided: $2,250-$2,995 for a 3-day program with RMI, IMG, or Alpine Ascents.

    Rainier guided is roughly 2x the cost of Baker guided.

    How long does each climb take?

    Mount Baker: 2-3 days for most climbers via the Coleman-Deming route, with high camp at 6,000-7,000 feet. The 2-day program is intermediate-pace and requires prior mountaineering experience. The 3-day program builds in skills instruction.

    Mount Rainier: 2-3 days minimum on the Disappointment Cleaver route, with high camp at Camp Muir (10,080 ft). Many programs run 4 days to include skills instruction and weather contingency.

    Is Mount Baker a beginner-friendly climb?

    Yes, when guided. Mount Baker’s Coleman-Deming and Easton Glacier routes are widely considered the most beginner-friendly true glaciated climbs in the lower 48.

    Major guide services run multi-day programs for first-time mountaineers with built-in instruction in glacier travel, crevasse rescue, and rope team movement. Mount Baker is genuinely accessible to fit beginners with no prior mountaineering experience, provided they go guided.

    What is Mount Baker’s success rate?

    Mount Baker guided programs typically report 70-85% summit success rates, varying by season and weather window. This is meaningfully higher than Mount Rainier’s 48% historical average.

    The higher Baker success rate reflects both lower technical demands and shorter overall commitment — bad weather windows close out Rainier climbs more often than they shut down Baker attempts.

    When is the best time to climb Mount Baker?

    May through September, with peak conditions typically in June and July. Earlier in the season the routes are fully snow-covered with stable crevasse bridges. By late summer, crevasses become more exposed and route-finding gets more complex.

    The road to the Heliotrope Ridge trailhead may not fully open until mid-June in heavy snow years. Most guided programs run June through August.

    What gear do I need for both climbs?

    The technical gear list is nearly identical: mountaineering boots, crampons, ice axe, climbing harness, helmet, rope (provided by guide services), prusiks and rescue gear, glacier glasses, multi-layer clothing system.

    For both peaks: tent, 0-20°F sleeping bag, sleeping pad, stove and fuel, food for 2-3 days, and a 60-70L pack. Mount Rainier additionally requires more cold-weather layering due to higher altitude and longer summit day exposure.

    Most guide services rent the technical gear (crampons, ice axe, harness, helmet) for both peaks at similar prices. See Investigation 18: What’s in a mountain guide’s pack for the detailed gear list both guides carry.

    What to read next

    Sources and Verification

    This comparison was built from primary sources including:

    • U.S. Forest Service, Mt. Baker-Snoqualmie National Forest — Baker access and wilderness regulations
    • U.S. National Park Service, Mount Rainier — climbing statistics and permit framework
    • Recreation.gov — 2026 permit pricing for both peaks
    • American Alpine Institute (AAI) — Mount Baker route descriptions and guided program details
    • Northwest Alpine Guides — 2026 Baker program pricing and guidance
    • The Mountaineers — Mount Baker Coleman-Deming route trip reports and route grades
    • SummitPost — Mount Baker route descriptions and historical climbing data
    • Skyline Mountain Guides — 2026 Coleman-Deming program structure
    • Blackbird Mountain Guides — How to Climb Mt. Baker analysis (August 2025)
    • Edgeworks Outdoor — Mount Baker route difficulty grading
    • RMI Expeditions — Mount Rainier climbing program information
    • International Mountain Guides (IMG) — Rainier program pricing and structure
    • Alpine Ascents International — 2026 Rainier program and success rate analysis
    • AllTrails — Mount Baker Coleman-Deming and Mount Rainier route details

    Published June 8, 2026 · Next scheduled review: November 2026 after the 2026 climbing season

    Subscribe to the Mountain Planning Brief

    Get notified when each new mountain comparison publishes. One email per release. No marketing.

    Subscribe →
  • Mount Shasta vs Mount Hood: Picking Your Cascades Objective

    Mount Shasta vs Mount Hood: Picking Your Cascades Objective

    Mountain Comparisons · 2026 Guide

    Mount Shasta vs Mount Hood: Picking Your Cascades Objective

    Mount Shasta rises out of Northern California’s high desert at 14,179 feet — the fifth tallest peak in California and the second tallest volcano in the Cascade Range. Mount Hood crowns Oregon’s Cascades at 11,249 feet, just 60 miles east of Portland. Both are iconic stratovolcanoes. Both have well-established commercial guide services, defined standard routes, and decades of climbing history. And both will teach you completely different things about mountaineering. The right choice between them isn’t a matter of which is “better” — it’s about what kind of mountaineer you’re trying to become.

    The Verdict

    For most climbers building toward bigger peaks, Shasta first, Hood second — Shasta’s scale, multi-day commitment, and altitude exposure mirror expedition mountaineering; Hood’s compressed technical demands suit climbers already comfortable on steep snow.

    California · Shasta-Trinity NF

    Mount Shasta

    Northern California’s iconic volcano. The Cascades’ second-tallest peak. Long approach, big elevation, expedition-style commitment.

    Elevation14,179 ft
    Round trip~11 miles
    Elevation gain~7,300 ft
    Typical time2–3 days
    Technical?Moderate (steep snow)
    Annual climbers~5,000–10,000
    Permit cost$25 (3-day)
    Best seasonApr–early Jul
    Oregon · Mt. Hood NF

    Mount Hood

    Oregon’s tallest peak. Most-climbed glaciated peak in North America after Fuji. Short approach, steep upper mountain.

    Elevation11,249 ft
    Round trip~6 miles
    Elevation gain~5,400 ft
    Typical time8–12 hr (1 day)
    Technical?Yes (steep snow chute)
    Annual climbers~10,000
    Permit cost$20 (3-day)
    Best seasonApr–early Jul

    The 2,930-foot height difference matters less than you’d expect

    On paper, Mount Shasta dwarfs Mount Hood. Shasta is nearly 3,000 feet taller — the difference between a “real 14er” and a “second-tier” volcano in many climbers’ mental rankings. The maps suggest a clear hierarchy: Shasta first because it’s bigger, then Hood as a “training peak.”

    That mental model is wrong, and it’s the source of a lot of bad climbing decisions in the Pacific Northwest.

    Mount Shasta’s standard route — Avalanche Gulch from Bunny Flat — is what mountaineers call a “Grade I snow climb” with technical sections rated at the moderate end of alpine difficulty. It’s long: 11 miles round trip with 7,300 feet of elevation gain, typically done as a 2- or 3-day climb with an overnight at Helen Lake (10,400 ft). The route includes sustained 30-35 degree snow slopes up the Gulch itself, a slightly steeper section through the Red Banks (a band of cliffs about halfway up), a traverse across the ridge above, and a final climb up Misery Hill to the summit plateau. The technical demands are real but moderate. Most experienced climbers describe Shasta as “a great route to learn and practice good cramponing technique.”

    Mount Hood’s standard route — the South Side via Hogsback and Pearly Gates — is far shorter but technically harder per vertical foot. The route packs 5,400 feet of elevation gain into less than 3 miles of climbing distance, with the final 700 feet including the Hogsback (a narrow knife-edge between active fumaroles) and the Pearly Gates (a 40-50 degree snow chute through rocks). The U.S. Forest Service notes that Hood’s “relatively low altitude, easy approach, and short hiking/climbing distance makes it much more popular among less experienced climbers” — and that this combination produces a high accident rate.

    The “easy mountain that kills you” pattern

    Both Shasta and Hood share an unfortunate distinction: they are repeatedly described as “easy walk-ups” in popular climbing media, and both produce real fatalities every climbing season as a result. The Mount Shasta Avalanche Center’s official advisory begins with this warning: “Don’t take Mount Shasta lightly. Despite being only 15 minutes off the Interstate, it’s a real mountain with real hazards. It can kill you, even the easiest route.”

    Hood’s accident rate stems from inexperienced climbers attempting technical terrain. Shasta’s stems from underprepared climbers committing to a full alpine objective without the gear, fitness, or skills it demands. The size difference between Shasta and Hood is real, but the danger profile of both is shaped by climbers underestimating what they signed up for.

    mount hood
    Lost Lake in the Oregon Cascades with Mt. Hood in the background

    The data: scale, commitment, and what each demands

    7,300 ft
    Shasta elevation gain
    From Bunny Flat (6,940 ft) to summit (14,179 ft) — the largest vertical climb on any Cascade volcano standard route
    Source: SummitPost Avalanche Gulch
    5,400 ft
    Hood elevation gain
    From Timberline (5,800 ft) to summit (11,249 ft) — compressed into under 3 trail miles
    Source: U.S. Forest Service
    11 mi
    Shasta round trip
    Long approach. Most climbers stage from Helen Lake camp at 10,400 ft and summit on Day 2
    Source: AllTrails, The Mountaineers trip reports
    6 mi
    Hood round trip
    Less than 3 miles from Timberline to summit. The shortest standard route on any major Cascade peak
    Source: SummitPost Mt. Hood

    The numbers reveal the structural difference: Shasta gains 7,300 vertical feet over 11 trail miles — an average grade of roughly 12-13%. Hood gains 5,400 feet over 6 miles — an average grade of about 17%, with the steepest sections approaching 50 degrees. Shasta is bigger; Hood is steeper per foot.

    That difference translates to different lessons. Shasta teaches you to commit to a multi-day objective at altitude: building a camp, melting snow for water, managing fatigue across days, pacing yourself across a long climb. Hood teaches you to climb steep snow safely: front-pointing, self-arrest reflexes, route reading on technical terrain, fast alpine pacing.

    Mount Shasta deep-dive: Avalanche Gulch in detail

    The route in stages

    The Avalanche Gulch route from Bunny Flat to the summit moves through four distinct terrain bands, each presenting different challenges:

    1. Bunny Flat to Horse Camp (6,940–7,900 ft). A 2-mile approach through subalpine forest on the Horse Camp Trail. Mostly snow-covered in early season; dirt and pine duff in late summer. Easy walking with a pack. Horse Camp at 7,900 ft has a Sierra Club cabin, a developed spring with running water (in season), and a latrine. Many climbers camp here as a relaxed start to a multi-day climb.
    2. Horse Camp to Helen Lake (7,900–10,400 ft). The mountain opens up as you climb above treeline. Snow conditions become continuous and the slope steepens gradually. Helen Lake (10,400 ft) is the most popular high camp on the mountain. Note: there is no lake — just a flat snow plateau with established tent platforms used by hundreds of climbers each summer weekend. Climbers melt snow for water and prepare for an alpine start.
    3. Helen Lake through Red Banks (10,400–12,800 ft). The technical heart of the climb. From Helen Lake, climbers ascend Avalanche Gulch on 30-35 degree snow slopes, generally staying to the climber’s right to avoid the slide path. Above the Gulch sits the Red Banks — a band of red volcanic cliffs about 200-400 feet high. The route passes between The Heart (on climber’s left) and The Thumb (on climber’s right) through a gap, then traverses the ridge above. This is the most technically demanding section: steeper snow, real exposure, and rockfall potential from melting cornices above.
    4. Misery Hill and the summit plateau (12,800–14,179 ft). Above the Red Banks, the route crosses the upper mountain plateau and ascends Misery Hill — a long, sustained snow slope named less for its steepness than for the soul-crushing combination of altitude, fatigue, and the long climb still ahead. From the top of Misery Hill, the summit plateau leads to a final pinnacle and the true summit at 14,179 ft.

    Mount Shasta permits and access (2026)

    Shasta’s permit system is among the easiest in the Cascades:

    • Mount Shasta Summit Pass: Required for travel above 10,000 ft. 3-day pass: $25 per person. Annual pass: $30 per person. Available at the Mount Shasta or McCloud Ranger Stations, the Fifth Season outdoor store, or self-issued at trailhead kiosks 24/7. Pay attention: rangers do check permits on the upper mountain, and climbers without a valid pass can be ticketed.
    • Wilderness Permit: Free, self-issued at trailhead kiosks. Required for all entries into the Mount Shasta Wilderness regardless of summit intent.
    • WAG bag: Mandatory for all human waste — required by Forest Order. Free WAG bags are stocked at the Bunny Flat trailhead, ranger stations, and the Fifth Season.
    • Group size limit: 10 climbers maximum per group within the Mt. Shasta Wilderness.

    The Bunny Flat trailhead is accessible year-round by vehicle, just 15 minutes off Interstate 5 from the town of Mount Shasta. The trailhead has restrooms, water, an information desk (staffed in summer), self-issue permit kiosks, and a credit card-enabled summit pass machine. Cell service is generally reliable at the trailhead and intermittent on the mountain itself.

    The “Avalanche Gulch” name is not metaphorical

    The route’s name comes from its history of major avalanche events. The Mount Shasta Avalanche Center documents that “Avalanche Gulch is named because of its tendency to avalanche.” Slide events in the Gulch have killed climbers, including parties who were following standard summit-day protocols.

    The Avalanche Center recommends climbing parties carry “avalanche beacons, probes, and shovels armed with proficient skills in their use” and check the daily avalanche forecast before climbing. Winter and spring see the highest avalanche danger, but the Center notes the hazard can exist year-round under the right conditions, including in late spring during warming cycles. A predawn start — typical for any Shasta climb — is partially motivated by avoiding afternoon wet-snow avalanches.

    Mount Shasta guide services

    Several established guide services hold commercial permits for Mount Shasta. Most offer 2-, 3-, and 4-day programs, with longer programs achieving meaningfully higher success rates:

    • Shasta Mountain Guides — Mount Shasta’s local guide service. Multiple program lengths, AMGA-trained guides.
    • International Alpine Guides — 3-day Avalanche Gulch programs with IFMGA-licensed lead guides. The 3-day program is structured specifically to maximize success rate for first-time mountaineers.
    • Sierra Mountaineering International (SMI) — California-based with extensive Cascade programs.
    • Alpine Skills International — Lake Tahoe-based, runs Shasta as part of broader Sierra Nevada programs.

    Typical 3-day program cost: $700-$1,500 per person depending on group size and ratio. Includes guide fee, group gear, instruction in crampons, ice axe self-arrest, rope team travel, and pacing — but typically excludes personal gear, transportation, food, and the summit pass.

    We believe three days provides more time to properly acclimate and learn all the necessary basic mountaineering skills. The success rate of the 3-day Mt Shasta climb is higher than on the quicker two-day climbs.

    International Alpine Guides — 2026 Mount Shasta program guidance

    Mount Hood deep-dive: South Side in detail

    The route in stages

    The South Side route from Timberline Lodge is compact but technically front-loaded — the difficulty concentrates in the upper 1,000 feet:

    1. Palmer Glacier (5,800–8,500 ft). A moderate, wide snow slope adjacent to the Palmer ski lift. The first 2,700 feet of elevation gain happen here. Snowcat or skier traffic is common during winter and spring. This section gives Hood its “walk-up” reputation — but represents only half the climb.
    2. Triangle Moraine and approach to Crater Rock (8,500–10,500 ft). The slope steepens. Climbers passing through here begin to feel altitude and wind exposure. Most camping climbers stake out the Triangle Moraine area between 8,800 and 9,400 feet for an alpine start.
    3. The Hogsback (10,500–11,000 ft). The narrow snow ridge between the Devil’s Kitchen and Hot Rocks fumaroles. Active sulfur fumaroles flank both sides of the route, emitting gases that can create oxygen-depleted zones in low-wind conditions. The Hogsback shifts position annually as the underlying glacier changes — some seasons offering a comfortable wide platform, other seasons narrowing to a few feet with steep drops on both sides.
    4. Pearly Gates / Old Chute to summit (11,000–11,249 ft). A 40-50 degree snow chute through rocks — the technical crux. The Pearly Gates is the direct line; the Old Chute is wider and used when the Pearly Gates is icy or blocked. This section is what makes Hood’s overall difficulty disproportionate to its elevation. A fall through the Pearly Gates can progress through the Hot Rocks fumaroles into Devil’s Kitchen below — terrain where multiple climbers have died.

    Mount Hood permits and access (2026)

    Hood’s permitting changed substantially in 2024 with the introduction of a mandatory climbing permit. As of 2026:

    • Mt. Hood Climbing Permit: Required for any travel above 9,500 ft elevation. 3-day permit: $20. Annual permit: $50. Available on Recreation.gov. No quota — permits cannot sell out.
    • Wilderness Permit: Required year-round on south side routes. The 3-day climbing permit counts as the wilderness permit.
    • Sno-Park Permit: Required November 1 through April 30 at Timberline parking lots. $25/day or ~$50/season.
    • WAG bag: Free at the Climbers’ Cave at Timberline Lodge. Mandatory for human waste.

    The Climbers’ Cave at Timberline Lodge is open 24/7 year-round with self-issue wilderness permits, blue bags, the climber registration form, and current condition reports. Most climbers register here and start up between midnight and 2:00 a.m. for an alpine start to reach the summit at sunrise and descend before afternoon rockfall makes the upper mountain dangerous.

    Mount Hood guide services

    Two main guide services hold commercial permits for Mount Hood:

    • Timberline Mountain Guides — based at Timberline Lodge. One-day guided climbs typically $400-$600. Group climbs and private programs.
    • KAF Adventures — Pacific Northwest mountaineering instruction and guided climbs. Multi-day programs include skill instruction.

    The Mazamas, a Portland-based climbing club, runs Mount Hood climbs for $78 per member trip — substantially cheaper but requires Mazama membership and is structured as a club climb rather than a guide service.

    The skills gap: what each mountain actually demands

    Mount Shasta’s skill demands

    • Multi-day commitment: Carrying a 35-50 lb pack with tent, sleeping bag, stove, food, and water purification for 2-3 days. Setting up camp at 10,400 ft after a 3,500 ft climb with full pack
    • Sustained aerobic endurance: 7,300 feet of elevation gain across a full climb, with most of the gain happening above 8,000 ft where the air is thinner
    • Solid crampon technique: French technique, flat-footing, and front-pointing on snow ranging from 25° to 40° depending on conditions
    • Self-arrest mastery: Particularly important above Helen Lake where a fall on hard snow can run out for hundreds of feet
    • Altitude tolerance: 14,179 ft is high enough to cause significant AMS in unacclimatized climbers. The standard 2-day climb compresses acclimatization into a single sleep at 10,400 ft
    • Avalanche awareness: Reading slope angles, recognizing dangerous snow conditions, knowing when to turn around
    • Navigation in whiteouts: Shasta’s summit plateau is large and featureless. Climbers regularly descend the wrong side of the mountain when clouds form during the descent. “It happens every year, and can result in lengthy SAR missions” per the Mount Shasta Avalanche Center.

    Mount Hood’s skill demands

    • Confident steep-snow technique: Front-pointing on 40-50° snow, ice axe self-belay, ability to maintain composure on exposed terrain
    • Self-arrest reflexes: A fall on the Pearly Gates or Old Chute progresses to terminal velocity within seconds. Self-arrest must be reflexive, not learned
    • Glacier hazard recognition: Reading the Hogsback’s annual changes, identifying bergschrund cracks, avoiding fumarole-adjacent terrain
    • Fast alpine pacing: The route is short, but speed is essential — afternoon rockfall on the upper mountain has killed climbers descending late
    • Weather decision-making: Hood’s weather changes in minutes; a clear summit at 6 a.m. can become a whiteout by 9 a.m.
    • Alpine start discipline: Midnight or 1 a.m. starts are non-negotiable. Climbers who start at “normal hours” often end up in dangerous descending conditions

    The structural difference: Mount Shasta teaches expedition-style mountaineering — carrying weight, managing camps, pacing across days, dealing with altitude. Mount Hood teaches alpine-style mountaineering — moving fast and light, climbing technical sections decisively, descending before conditions deteriorate. Climbers building toward Rainier, Aconcagua, Denali, or any expedition objective should climb Shasta first. Climbers building toward technical alpine routes (Mt. Stuart, Eiger Ridge, alpine rock objectives) get more transferable lessons from Hood.

    Cost comparison: similar permits, different total commitment

    Mount Shasta costs

    • Summit Pass: $25 (3-day) or $30 (annual)
    • Wilderness permit: free
    • Parking at Bunny Flat: free
    • Pre-climb lodging in Mount Shasta City: $100-$250
    • Camping gear (if not owned): variable; can rent locally
    • Food, gas, and water for 2-3 days: $80-$150
    • Total unguided per person: $200-$500
    • Guided 3-day climb: $700-$1,500 (International Alpine Guides, Shasta Mountain Guides, SMI)
    • Guided 2-day climb: $500-$1,000 (lower success rate)

    Mount Hood costs

    • Climbing Permit: $20 (3-day) or $50 (annual)
    • Wilderness permit: included with climbing permit
    • Parking at Timberline: free with climbing permit
    • Sno-Park permit (Nov-Apr): $25/day or ~$50/season
    • Pre-climb lodging in Portland or Government Camp: $100-$250
    • Food and gas: $50-$100
    • Total unguided per person: $150-$400
    • Guided one-day climb: $400-$700 (Timberline Mountain Guides, KAF Adventures)
    • Mazamas club climb: $78 (members only)

    Total costs are roughly similar between the two peaks for unguided climbers. Guided costs differ substantially: Shasta’s 3-day commitment makes guided programs 2-3x the cost of a Hood guided climb. For climbers on a budget, Hood guided is cheaper; for climbers prioritizing skill-building and acclimatization, Shasta’s longer guided program delivers more learning per dollar. See our guide-pack investigation for the gear list that covers both peaks.

    The honest verdict: when each is the right choice

    Both peaks are excellent objectives. The right choice depends on what you’re training for, where you live, and how much time you have.

    Pick Mount Shasta first if

    You’re building toward expedition objectives (Rainier, Aconcagua, Denali)
    Shasta
    You want to learn multi-day mountaineering on a forgiving objective
    Shasta
    You want a true 14er summit experience without leaving California
    Shasta
    You have 2-3 days to commit and prefer endurance over technical exposure
    Shasta
    You want to test altitude tolerance on a peak above 14,000 ft
    Shasta

    Pick Mount Hood first if

    You’re training for technical alpine objectives (Mt. Stuart, alpine rock, Eiger Ridge)
    Hood
    You’re Portland-based and want a one-day climb close to home
    Hood
    You have only one day available for the climb
    Hood
    You already have steep-snow experience and want to add a classic objective
    Hood
    You want to ski or snowboard from the summit (Hood is the classic Pacific Northwest summit ski)
    Hood

    The “do both” sequence

    For climbers building a Pacific Northwest progression, the canonical sequence is:

    1. Year 1, late spring: Mount St. Helens (8,366 ft) for a non-glaciated introduction to Cascade volcano climbing.
    2. Year 1, summer: Mount Adams via South Spur (12,281 ft) or Mount Shasta via Avalanche Gulch. Both teach big-mountain climbing on forgiving terrain.
    3. Year 2, May-June: Mount Hood via South Side, ideally guided or with a strong partner. Apply the snow skills learned on Adams or Shasta to steeper terrain.
    4. Year 2 or 3: Mount Baker glacier skills course, then Mount Rainier (see our Mount Whitney vs Mount Rainier comparison for the Rainier comparison and the next step).
    Both peaks reward the unglamorous skills

    First-time mountaineers on both Shasta and Hood tend to over-prepare for the technical sections (crampons, ice axe, harness) and under-prepare for the unglamorous skills that actually determine success: pacing, hydration, calorie intake, and the ability to make a hard decision about turning around.

    Both peaks have specific moments where the right decision is to descend without summiting. On Shasta: weather closing in above the Red Banks, AMS symptoms developing, group falling behind a turnaround time. On Hood: bergschrund opening up at the Hogsback, conditions deteriorating on the Pearly Gates, party slowing significantly. “Be willing to turn around if you’re not feeling it. Pick good partners. Don’t get summit fever!” per the Mount Shasta Avalanche Center. The same applies to Hood.

    Best month to climb each: side-by-side

    For the full framework, see Investigation 19: Best month to climb each mountain.

    MonthMount ShastaMount Hood
    JanuaryWinter mountaineering; high avalanche riskWinter mountaineering only
    FebruaryWinter mountaineering; high avalanche riskWinter mountaineering only
    MarchAdvanced winter conditions; long days returningWinter conditions; advanced only
    AprilExcellent — consolidated snow, ski potentialExcellent — consolidated snow, low rockfall
    MayExcellent — peak conditions for most climbersExcellent — peak season begins
    JuneExcellent — peak conditionsExcellent — peak season
    JulyGood — early July still snow-covered; late July rockfall increasesGood — late season; afternoon rockfall increasing
    AugustMarginal — scree and rockfall throughoutMarginal — significant rockfall on upper route
    SeptemberDifficult — limited snow, exposed screeDifficult — technical conditions; most parties avoid
    OctoberFall storms beginning; early snow possibleWinter conditions returning
    NovemberWinter mountaineering onlyWinter mountaineering only
    DecemberWinter mountaineering onlyWinter mountaineering only

    Quick-reference comparison

    FactorMount ShastaMount Hood
    Elevation14,179 ft11,249 ft
    LocationNorthern CaliforniaOregon, Cascades
    Standard routeAvalanche GulchSouth Side / Hogsback
    Route gradeSnow climb (Grade I-II)Technical snow (PD/Grade II)
    Round trip distance~11 miles~6 miles
    Elevation gain~7,300 ft~5,400 ft
    Days required2-3 days typical1 day
    Technical demandsMulti-day camping, sustained snow climbingShort steep snow chute, fast pacing
    Required gearCrampons, ice axe, helmet, tent, sleeping bagCrampons, ice axe, helmet, daypack
    Annual climbers~5,000-10,000~10,000
    Permit cost$25 (3-day) or $30 (annual)$20 (3-day) or $50 (annual)
    Cost (unguided)$200-$500 per person$150-$400 per person
    Cost (guided)$700-$1,500 (3-day)$400-$700 (1 day)
    Best seasonApril-early JulyApril-early July
    CrowdingHeavy on summer weekendsVery crowded (Memorial Day-July)
    Best forExpedition-style trainingTechnical snow training

    Frequently Asked Questions

    Is Mount Shasta harder than Mount Hood?

    Yes, overall. Mount Shasta is meaningfully harder than Mount Hood despite Shasta’s standard route being technically easier than Hood’s.

    Shasta demands 7,300 feet of elevation gain over 11 miles round trip and typically requires a multi-day commitment with overnight camping. Hood gains 5,400 feet over 6 miles in a single day. Shasta tests endurance, altitude, and route-finding; Hood tests steep-snow technique. Different mountains, different lessons — but Shasta’s overall difficulty is higher because of the scale of commitment required.

    Which should I climb first, Shasta or Hood?

    Climb Mount Shasta first if you’re building toward big-mountain objectives like Rainier, Aconcagua, or Denali. Shasta’s structure, scale, and required commitment more closely mirrors what those bigger peaks demand.

    Climb Mount Hood first if you’re training for technical alpine routes (Mt. Stuart, alpine rock, the Eiger Ridge) or if you live in Portland and want a one-day climb close to home. Hood teaches steep-snow technique; Shasta teaches expedition-style climbing.

    How much does it cost to climb Shasta vs Hood?

    Shasta unguided: $25 for a 3-day summit pass, plus parking, food, and lodging. Total under $500 typically.

    Shasta guided: $700-$1,500 for a 2-4 day program with International Alpine Guides, Shasta Mountain Guides, or SMI.

    Hood unguided: $20 for a 3-day climbing permit, plus parking. Total under $400 typically.

    Hood guided: $400-$700 for a one-day climb with Timberline Mountain Guides or KAF Adventures.

    Shasta’s longer commitment makes guided programs 2-3x the cost of Hood guided.

    How long does each climb take?

    Mount Shasta: 2-3 days for most climbers via the Avalanche Gulch route, with an overnight at Helen Lake (10,400 ft). Strong fit climbers can do it as a 1-day push in 16-20 hours, but this is uncommon and increases risk.

    Mount Hood: 8-12 hours round trip from Timberline Lodge as a single-day climb. Most climbers start at midnight or 1 a.m. for an alpine start.

    Are Shasta and Hood beginner mountains?

    Shasta is genuinely beginner-friendly when guided. Major guide services (International Alpine Guides, Shasta Mountain Guides, Sierra Mountaineering International) explicitly run programs for first-time mountaineers, with built-in skills instruction in crampons, ice axe self-arrest, and rope team travel.

    Hood is not a beginner mountain despite its reputation as a “walk-up.” Hood’s technical sections (Hogsback, Pearly Gates) demand confident steep-snow technique that beginners shouldn’t be learning on the route itself. Hood should be climbed after building skills on Adams, St. Helens, or Shasta.

    When is the best time to climb each?

    Mount Shasta: April through July is the prime season, with peak conditions typically in May and June. Earlier in the season the route is fully snow-covered which is generally safer for descent. By August the lower mountain melts out, exposing loose scree and increasing rockfall hazard.

    Mount Hood: late April through early July, with the best window typically May-June. After mid-July the South Side route becomes hazardous due to rockfall on the upper mountain.

    Both peaks require pre-dawn alpine starts in the summer climbing season.

    What gear do I need for Shasta vs Hood?

    Both peaks require crampons, ice axe, mountaineering boots, helmet, and the ability to self-arrest.

    Shasta additionally requires multi-day camping equipment: tent, sleeping bag rated to 20°F or colder, sleeping pad, stove and fuel, food for 2-3 days, water purification or snow-melting capability, and a larger backpack (60-70L).

    Hood is a single-day climb requiring only summit-day essentials in a daypack: water, food, layers, headlamp, basic first aid.

    Both routes can require rope and harness in certain conditions; check current conditions before climbing. Avalanche gear (beacon, probe, shovel) is recommended for both peaks in early season.

    Can I ski or snowboard down from the summit?

    Mount Shasta: Yes — Shasta is one of the classic Pacific Northwest ski descents. The Avalanche Gulch route descends easily, and several variations (Casaval Ridge, Bolam Glacier) offer skiable terrain. Fletcher Hoyt and four others made the first ski descent of Shasta in 1947 via Avalanche Gulch.

    Mount Hood: Yes — experienced skiers and snowboarders regularly descend from the summit, typically using the Old Chute variation rather than the Pearly Gates. The Palmer Glacier offers excellent skiing on the lower mountain. Many climbers ski the Palmer descent only and downclimb the technical sections.

    What to read next

    Sources and Verification

    This comparison was built from primary sources including:

    • U.S. Forest Service, Shasta-Trinity National Forest — Mount Shasta climbing regulations and access
    • U.S. Forest Service, Mt. Hood National Forest — Mount Hood permits and conditions
    • Mount Shasta Avalanche Center — Avalanche advisory, climbing regulations, hazard analysis
    • Recreation.gov — 2026 permit pricing for both peaks
    • SummitPost — Avalanche Gulch and Mt. Hood South Side route descriptions
    • The Mountaineers — Mount Shasta Avalanche Gulch trip reports and route grades
    • AllTrails — Mount Shasta via Avalanche Gulch route details
    • International Alpine Guides — 2026 Shasta program guidance and success rate analysis
    • Shasta Mountain Guides — Mount Shasta guided program information
    • Timberline Mountain Guides — Mount Hood guided program information
    • Mazamas — Mount Hood climb operations and member access
    • U.S. Highpoint Guide — Mount Hood permit and fumarole hazard documentation
    • She Dreams of Alpine — 2026 beginner’s guide to climbing Mount Shasta
    • Backcountry Sights — Avalanche Gulch route description and trip report

    Published June 1, 2026 · Next scheduled review: November 2026 after the 2026 climbing season

    Subscribe to the Mountain Planning Brief

    Get notified when each new mountain comparison publishes. One email per release. No marketing.

    Subscribe →
  • Mount Hood vs Mount Adams: The Pacific Northwest Volcano Showdown

    Mount Hood vs Mount Adams: The Pacific Northwest Volcano Showdown

    Mountain Comparisons · 2026 Guide

    Mount Hood vs Mount Adams: The Pacific Northwest Volcano Showdown

    Mount Adams sits at 12,281 feet in southern Washington. Mount Hood rises to 11,249 feet just across the Columbia River in Oregon. Adams is taller. Adams is bigger by volume — the second-largest volcano in the contiguous United States by bulk. Adams looks, on every metric, like the harder mountain. It isn’t. Hood’s South Side route packs more technical difficulty per vertical foot than almost any other walk-up volcano in the Cascades, and its short approach masks a steep upper mountain that produces multiple fatalities every climbing season. The right answer to “Hood or Adams first?” runs counter to the obvious one.

    The Verdict

    For most climbers, the answer is Adams first, Hood second — Adams teaches snow travel and altitude exposure on forgiving terrain; Hood demands those skills already in place on terrain that punishes mistakes.

    Oregon · Cascades

    Mount Hood

    Oregon’s tallest peak. Short approach, steep upper mountain. The most-climbed glaciated peak in North America after Fuji.

    Elevation11,249 ft
    Round trip~6 miles
    Elevation gain~5,400 ft
    Typical time8–12 hr
    Technical?Yes (steep snow)
    Annual climbers~10,000
    Permit cost$20 (3-day)
    Best seasonApr–early Jul
    Washington · Cascades

    Mount Adams

    Washington’s second-highest peak. The Cascades’ largest volcano by bulk. Long, non-technical snow scramble.

    Elevation12,281 ft
    Round trip~12–14 miles
    Elevation gain~6,700 ft
    Typical time12–16 hr (or 2 days)
    Technical?No (Grade I scramble)
    Annual climbers~5,000–6,000
    Permit cost$15–25
    Best seasonMay–September

    Same range, same volcanic origin, opposite climbing experiences

    Mount Hood and Mount Adams sit just 60 miles apart on opposite sides of the Columbia River Gorge. Both are stratovolcanoes. Both are part of the Cascade Volcanic Arc. Both are climbed by similar gear — boots, crampons, ice axe, helmet. Both can be done in a single day by fit climbers. The visual silhouettes are nearly interchangeable in postcards.

    Then the climbing starts and the two mountains separate completely.

    Mount Hood’s standard route — the South Side via Hogsback and Pearly Gates — is short: less than 6 miles round trip from Timberline Lodge at 5,800 feet to the 11,249-foot summit. The first half of the climb is a moderate snow slope up the Palmer Glacier. The second half — above Crater Rock around 10,500 feet — turns steep, narrow, and exposed. The Hogsback is a knife-edge snow ridge separating two sets of active fumaroles (Devil’s Kitchen and the Hot Rocks). Above the Hogsback, the Pearly Gates section is a 40-50 degree snow chute requiring confident front-pointing and ice axe technique. A fall here typically results in a long sliding fall through the Hot Rocks fumaroles and into Devil’s Kitchen — terrain where multiple climbers have died.

    Mount Adams’s standard route — the South Spur (also called South Climb) — is long: 12-14 miles round trip from Cold Springs trailhead at 5,600 feet to the 12,281-foot summit. The entire route is a sustained snow slope at moderate angle. The Mountaineers grades it “Grade I, moderate snow slopes.” Northwest Mountain School describes it as “basically non-technical.” There are no exposed sections, no narrow ridges, no steep chutes. The challenge is endurance: 6,700 feet of elevation gain over a long day.

    Why Hood’s accident statistics don’t match its reputation

    Mount Hood is consistently listed among the most-climbed glaciated peaks in North America. The SummitPost mountaineering reference describes it as “#2 in the world behind Japan’s Fuji-san” by climber traffic. That popularity is precisely what makes it dangerous. The U.S. Forest Service notes the route’s “relatively low altitude, easy approach, and short hiking/climbing distance makes it much more popular among less experienced climbers. These climbers, lacking experience, and severe weather, which can move in quickly, account for most accidents.”

    The result: Hood produces more rescues and fatalities per year than Adams despite being shorter, having a cheaper permit, and being closer to Portland. The danger isn’t the mountain — it’s the gap between the mountain’s reputation as an “easy walk-up” and the actual technical demands of its upper terrain.

    The data: why Hood looks easier and isn’t

    ~6 mi
    Mount Hood round trip
    Less than 3 miles from Timberline to summit — the shortest standard route on any major Cascade volcano
    Source: SummitPost, Mt. Hood South Side route
    ~12 mi
    Mount Adams round trip
    12-14 miles from Cold Springs trailhead — more than double Hood’s distance
    Source: The Mountaineers, Adams South Spur
    5,400 ft
    Hood elevation gain
    From Timberline Lodge (5,800 ft) to summit (11,249 ft) — gained in under 3 trail miles
    Source: U.S. Forest Service climbing data
    6,700 ft
    Adams elevation gain
    From Cold Springs trailhead (5,600 ft) to summit (12,281 ft) — spread over 6-7 trail miles
    Source: WTA, Adams South Climb route

    The numbers tell the trick: Hood gains 5,400 vertical feet in under 3 trail miles. Adams gains 6,700 vertical feet across 6-7 trail miles. Hood is half the distance with 80% of the elevation — the average slope angle on Hood is roughly twice as steep as Adams.

    That’s why Hood feels harder despite being shorter, and why the Forest Service notes its high accident rate. Steep terrain doesn’t forgive technique errors the way long moderate slopes do. A stumble on Adams’s lower-angle snow becomes a self-arrest exercise. A stumble on Hood’s Pearly Gates becomes a 1,000-foot sliding fall.

    Mount Hood deep-dive: the South Side route in detail

    The route in stages

    The South Side route from Timberline Lodge to the summit runs through four distinct terrain stages, each with different demands:

    1. Palmer Glacier (5,800–8,500 ft). A moderate, wide snow slope alongside the Palmer ski lift. The first 2,700 feet of elevation gain happen here. Snowcat or skier traffic is common. This section is the “easy” part of the climb that gives Hood its walk-up reputation.
    2. Triangle Moraine and the approach to Crater Rock (8,500–10,000 ft). Snow continues but the slope steepens. Climbers passing through here begin to feel the altitude and the wind exposure. Most camping climbers stake out the Triangle Moraine area between 8,800 and 9,400 feet.
    3. The Hogsback (10,500–11,000 ft). The narrow snow ridge between Devil’s Kitchen and Hot Rocks fumaroles. Active sulfur fumaroles flank both sides of the route. Climbers have died from gas asphyxiation in oxygen-depleted zones near the fumaroles, and from sliding falls into the rocks below. The Hogsback shifts position annually as the underlying glacier changes — some seasons it offers a wide, comfortable platform; other seasons it narrows to a few feet wide with steep drops on both sides.
    4. The Pearly Gates / Old Chute (11,000–11,249 ft). A 40-50 degree snow chute through rocks. The Pearly Gates variation is the more direct line; the Old Chute is wider and more often used when the Pearly Gates is icy or blocked. This is the technical crux of the climb. Most experienced climbers solo this section; many parties belay it. A few hundred vertical feet of fall potential.

    Mount Hood permit and access (2026)

    Mount Hood permitting changed substantially in 2024 with the introduction of a mandatory climbing permit for any travel above 9,500 feet. As of 2026:

    • Mt. Hood Climbing Permit: Required for any travel above 9,500 ft elevation. 3-day permit: $20. Annual permit: $50. Available on Recreation.gov anytime before the climb. No quota — permits cannot sell out.
    • Wilderness Permit: Required year-round on south side routes. The 3-day climbing permit counts as the wilderness permit. Annual permit holders must complete a separate online wilderness permit.
    • Sno-Park Permit: Required November 1 through April 30 at Timberline parking lots and other sno-parks. $25/day or ~$50/season.
    • WAG bag: Free at the Climbers’ Cave at Timberline Lodge. Mandatory for human waste — no exceptions.

    The Climbers’ Cave at Timberline Lodge is open 24/7 year-round and has self-issue wilderness permits, blue bags, the climber registration form, and current condition reports. Most climbers register here, sign the climb log, and start up between midnight and 2:00 a.m. for an alpine start to reach the summit at sunrise and descend before afternoon rockfall makes the upper mountain dangerous.

    The fumarole gas hazard is real and underdiscussed

    Mount Hood’s Devil’s Kitchen and Hot Rocks fumaroles emit hydrogen sulfide and other gases that can create oxygen-depleted zones along the Hogsback. Lingering in fumarole areas — especially in low-wind conditions when the gas pools — has caused fatal asphyxiation. The U.S. Highpoint Guide notes: “The fumaroles emit gases that can create oxygen-depleted zones, posing a risk of asphyxiation. It is advisable to avoid lingering in these areas.” Most climbers move through the Hogsback quickly; sitting down to rest near the fumaroles can be fatal.

    Mount Hood guide services

    Two guide services hold commercial permits for Mount Hood South Side climbs:

    • Timberline Mountain Guides — based at Timberline Lodge. One-day guided climbs typically $400-$600. Group climbs and private programs available.
    • KAF Adventures — Pacific Northwest mountaineering instruction and guided climbs. Multi-day programs include skill instruction.

    The Mazamas, a Portland-based climbing club, also runs Mount Hood climbs for $78 per member trip — substantially cheaper but requires Mazama membership and is structured as a club climb rather than a guide service.

    Mount Adams deep-dive: the South Spur route in detail

    The route in stages

    The South Spur route from Cold Springs trailhead is structurally simpler than Hood’s South Side, though substantially longer:

    1. Forest approach (5,600–7,000 ft). The first 2-3 miles climb through forest on the old Bird Creek Trail and the Round-the-Mountain Trail. Snow-covered in early season; bare dirt in late summer. Easy walking with a moderate pack.
    2. Suksdorf Ridge / Crescent Glacier approach (7,000–9,000 ft). Above timberline, the route opens up onto the south-facing snowfields. The Crescent Glacier is now significantly receded and the route mostly crosses scree and snow patches in late summer.
    3. Lunch Counter (9,200–9,400 ft). A broad bench around 9,281 feet where most two-day climbers camp. Water can sometimes be filtered from melt streams; otherwise melt snow. Excellent views and protected campsites.
    4. Piker’s Peak — the false summit (10,000–11,650 ft). The steeper section of the climb. From Lunch Counter, climbers ascend a sustained snow slope to Piker’s Peak, the cruel false summit at 11,657 ft. From Piker’s, you can see the true summit another half-mile away and several hundred feet higher. The realization that you’re not done is famously demoralizing.
    5. True summit (11,657–12,281 ft). A flatter snow plateau leads to the actual summit. Sometimes a tracked-out highway of climbers in mid-season; sometimes deserted. Views to Hood, Rainier, St. Helens, and Baker on clear days.

    Mount Adams permit and access (2026)

    Adams permitting is simpler than Hood’s but requires advance purchase since the ranger station has limited hours:

    • Mount Adams Climbing Activity Pass: Required for travel above 7,000 ft from May 1 to September 30. Available on Recreation.gov. Cost: $15-$25 depending on weekday vs. weekend. Not sold at the ranger station in person — purchase before arriving in Trout Lake.
    • Northwest Forest Pass: Required for parking at Cold Springs Campground year-round. Daily or annual options available.
    • Wilderness Permit: Free, self-issued at the South Climb Trailhead.
    • WAG bag: Mandatory for human waste above 7,000 ft. Available free at the Mount Adams Ranger Station front porch (24-hour self-serve).
    • Sno-Park Permit: Required November 1 through April 30 at Pineside and SnowKing sno-parks (used when Cold Springs road is snowed in). $25/day or ~$50/season plus $2 admin fee.

    The road to Cold Springs Campground is unmaintained and snow-bound from roughly November through late June. Most climbers wait for the road to clear (typically late June or July) before driving to the standard trailhead. In winter and early spring, climbers ski or snowshoe in from the lower sno-parks — adding several miles of approach.

    Mount Adams guide services

    A handful of approved commercial operators run guided climbs on Mount Adams. Key constraint: commercial operators cannot guide the South Climb, North Ridge, or Adams Glacier on trips requiring an overnight stay on Friday, Saturday, or Sunday per Forest Service permit conditions. Most guide services run 2-day midweek programs.

    • Northwest Mountain School (IFMGA / AMGA certified) — 2-day South Spur programs. Custom dates available for groups of 3+.
    • Timberline Mountain Guides — runs select Adams programs in addition to Hood.
    • Various smaller operators — confirm current authorization with the Mount Adams Ranger District.

    Typical guided 2-day program cost: $400-$900 per person depending on group size and ratio.

    South Spur is the easiest way to climb Mt. Adams. The hike to the Lunch Counter takes most groups 5 or 6 hours and has a few short steep sections, but is basically non-technical.

    Northwest Mountain School — Mt. Adams guide service guidance, 2026
    Mount Adams

    The skills gap: what each mountain actually demands

    Mount Hood’s skill demands

    • Confident steep-snow technique: Front-pointing on 40-50 degree snow, ice axe self-belay, ability to maintain composure on exposed terrain
    • Self-arrest mastery: A fall on the Pearly Gates or Old Chute progresses to terminal velocity within seconds. Self-arrest must be reflexive, not learned
    • Glacier hazard recognition: Reading the Hogsback’s annual changes, identifying bergschrund cracks, avoiding fumarole-adjacent terrain
    • Fast alpine pacing: The route is short, but speed is essential — afternoon rockfall on the upper mountain has killed climbers descending late
    • Weather decision-making: Hood’s weather changes in minutes; a clear summit at 6 a.m. can become a whiteout by 9 a.m.
    • Alpine start discipline: Midnight or 1 a.m. starts are non-negotiable for summer climbs. Climbers who start at “normal hours” often end up in dangerous descending conditions

    Mount Adams’s skill demands

    • Sustained aerobic endurance: 12-16 hours of continuous climbing for a single-day push, or two long days for the two-day variant. The mountain rewards engine more than technique
    • Basic crampon and ice axe technique: Flat-footing, French technique, basic self-arrest. The slope angles are forgiving enough to allow learning on the mountain
    • Heavy-pack carrying: For two-day climbers, 35-45 lb packs up to Lunch Counter
    • Altitude tolerance: 12,281 feet is high enough to cause AMS in unacclimatized climbers, particularly on a fast single-day push
    • Long-day pacing: The South Spur is mostly a slog. Climbers who burn out at Lunch Counter rarely summit
    • Route-finding through scree: In late season, the upper mountain has exposed scree fields that hide the trail. Confident navigation matters

    The structural difference: Mount Hood teaches you to climb steep technical snow. Mount Adams teaches you to climb a big mountain. Neither is inherently better — they’re different lessons. For climbers building toward Rainier, Aconcagua, Denali, or expedition objectives, Adams’s “big mountain” lesson is more directly transferable. Hood’s “steep snow” lesson matters more for objectives like Mount Stuart, the Eiger Ridge, or technical alpine routes.

    Cost comparison: both significantly cheaper than Rainier

    Mount Hood costs

    • 3-day climbing permit: $20
    • Wilderness permit: included with climbing permit
    • Sno-Park permit (Nov-Apr): $25/day or ~$50/season
    • Timberline Lodge parking: free with climbing permit
    • Pre-climb lodging (Portland or Government Camp): $100-$250
    • Food and gas: $50-$100
    • Total unguided per person: $150-$400
    • Guided one-day climb: $400-$700 (Timberline Mountain Guides, KAF Adventures)
    • Mazamas club climb: $78 (members only)

    Mount Adams costs

    • Climbing Activity Pass: $15-$25
    • Northwest Forest Pass parking: $5/day or $30/year
    • Wilderness permit: free, self-issued
    • Pre-climb lodging (Trout Lake or Hood River): $100-$250
    • Food, gas, transit (more remote): $80-$150
    • Total unguided per person: $200-$450
    • Guided 2-day climb: $400-$900 (Northwest Mountain School, others)

    Both peaks are substantially cheaper than Mount Rainier ($2,250-$2,995 guided). This makes them excellent training grounds for climbers building toward bigger objectives without the Rainier commitment. See our guide-pack investigation for the gear list that works across all three Cascade volcanoes.

    The honest verdict: when each is the right choice

    Both peaks are excellent Pacific Northwest objectives. The right choice depends on what you’re training for and where your current skills are.

    Pick Mount Adams first if

    You’re building toward bigger mountaineering objectives (Rainier, Aconcagua, Denali)
    Adams
    You want to learn snow travel on forgiving terrain
    Adams
    You prefer endurance over technical exposure
    Adams
    You want a quieter, less crowded climbing experience
    Adams
    You’re willing to drive farther and commit a full weekend to the climb
    Adams

    Pick Mount Hood first if

    You have prior steep-snow or technical alpine experience
    Hood
    You’re training for technical objectives (Mt. Stuart, Eiger Ridge, alpine rock)
    Hood
    You’re Portland-based and want a one-day climb without a long approach
    Hood
    You’re hiring a certified guide who will manage the technical sections for you
    Hood
    You want to ski or snowboard from the summit (Hood’s slopes ski better than Adams’s)
    Hood

    The “do both” sequence

    For climbers building a Pacific Northwest progression, the canonical sequence is:

    1. Year 1, late spring: Mount St. Helens (8,366 ft) for a non-glaciated introduction to Cascade volcano climbing.
    2. Year 1, summer: Mount Adams via South Spur. Learn snow travel and altitude exposure. Two-day climb with Lunch Counter camp.
    3. Year 2, May-June: Mount Hood via South Side, ideally guided or with a strong partner. Apply the snow skills learned on Adams to steeper terrain.
    4. Year 2 or 3: Mount Baker glacier skills course, then Mount Rainier (see our Mount Whitney vs Mount Rainier comparison for what comes next).
    Don’t skip Adams to climb Hood first

    The most common Pacific Northwest mountaineering mistake is climbers attempting Hood as their first “real volcano” because it’s closest to Portland and looks like a walk-up. Hood’s accident rate isn’t random — it’s the predictable result of inexperienced climbers attempting steep technical terrain on a short, accessible route. Adams’s longer drive and bigger commitment filter out underprepared climbers, which is why Adams produces far fewer rescues despite seeing similar-quality terrain at lower angles. Build the skills on Adams; apply them on Hood.

    Glacier recession and the climbing season

    Both Hood and Adams have experienced significant glacier recession over the past two decades, with measurable impacts on the climbing experience. See our investigation on glacier recession and mountaineering routes for the broader picture.

    On Hood, the Hogsback shifts position annually as the underlying Coalman Glacier changes. The bergschrund — the crack between the moving glacier and the upper snow — opens earlier each season and remains open longer. Several recent seasons have required climbers to circumvent open bergschrunds via alternate variations, adding technical difficulty to a climb that historically just followed the Hogsback straight up.

    On Adams, the Crescent Glacier (encountered on the lower South Spur route) has receded so dramatically that the route now crosses mostly rock and scree where snow travel used to be the norm. The South Climb has shifted from a “snow climb” to a “snow-and-scree mix” depending on season. The upper mountain still holds snow but the lower mountain is increasingly dry by August.

    For both mountains, the practical effect is the same: climb early in the season for the best snow conditions. Late April through early July for Hood; May through early August for Adams. After that, both routes degrade as the snow melts out and rockfall becomes a problem.

    Best month to climb each: a comparison

    See our complete best-month-each-mountain framework for the season-by-season approach we use across all major peaks.

    MonthMount HoodMount Adams
    JanuaryWinter mountaineering onlySkis or snowshoes from sno-park; long approach
    FebruaryWinter mountaineering onlySkis or snowshoes from sno-park; long approach
    MarchWinter conditions; advanced onlyLong ski tour; advanced only
    AprilExcellent — consolidated snow, low rockfallRoad still snowed in; ski tour from below
    MayExcellent — peak season beginsGood — depending on road opening
    JuneExcellent — peak seasonExcellent — best balance of snow and access
    JulyGood — late season; afternoon rockfall increasingExcellent — long days, generally stable
    AugustMarginal — significant rockfall on upper routeGood — but scree on upper mountain
    SeptemberDifficult — most parties avoid; technical conditionsFair — weather windows shorten
    OctoberWinter conditions returningMarginal — fall weather; possible early snow
    NovemberWinter mountaineering onlyWinter mountaineering only
    DecemberWinter mountaineering onlyWinter mountaineering only

    Quick-reference comparison

    FactorMount HoodMount Adams
    Elevation11,249 ft12,281 ft
    LocationOregon, CascadesWashington, Cascades
    Standard routeSouth Side / HogsbackSouth Spur / South Climb
    Route gradeTechnical snow (PD/Grade II)Snow scramble (Grade I)
    Round trip distance~6 miles~12-14 miles
    Elevation gain~5,400 ft~6,700 ft
    Days required1 day1 long day or 2 days
    Technical skillsSteep snow, self-arrest, glacier hazard recognitionBasic crampon/ice axe technique
    Required gearCrampons, ice axe, helmet, optional ropeCrampons or microspikes, ice axe, helmet
    Annual climbers~10,000~5,000-6,000
    Permit cost$20 (3-day) or $50 (annual)$15-$25 per climb
    Cost (unguided)$150-$400 per person$200-$450 per person
    Cost (guided)$400-$700 (1 day)$400-$900 (2 days)
    Best seasonApril-early JulyMay-September
    CrowdingVery crowded (Memorial Day-July)Moderate
    Best forTechnical snow trainingBig-mountain endurance training

    Frequently Asked Questions

    Is Mount Hood harder than Mount Adams?

    Yes. Mount Hood is technically harder than Mount Adams despite being 1,032 feet shorter. Hood’s South Side route includes the steep, exposed Hogsback and Pearly Gates section that requires confident crampon and ice axe technique, often with fixed rope or self-belay at the bergschrund.

    Adams’s South Spur route is a long but largely non-technical snow scramble — Grade I per most guide services. Adams demands more endurance; Hood demands more skill.

    Which should I climb first, Hood or Adams?

    Climb Mount Adams first if you’re building toward technical mountaineering. Adams is the better skill-building objective: longer day, more elevation gain, higher altitude exposure, and lower technical demands.

    Climb Mount Hood first only if you have prior glacier or steep-snow experience and can commit to the technical sections of the Hogsback. Hood’s combination of short approach, fast-changing weather, and inexperienced crowds produces a disproportionate number of accidents each year.

    How much does it cost to climb Hood vs Adams?

    Hood unguided: $20 for a 3-day climbing permit (or $50 annual), plus parking and lodging. Total under $400 typically.

    Hood guided: $400-$700 for a one-day climb with Timberline Mountain Guides or KAF Adventures.

    Adams unguided: $15-$25 Climbing Activity Pass plus parking and lodging. Total under $450.

    Adams guided: $400-$900 for a 2-day program with Northwest Mountain School or other approved operators.

    Both peaks are significantly cheaper than Mount Rainier guided programs ($2,250-$2,995).

    How long does each climb take?

    Mount Hood: 8-12 hours round trip from Timberline Lodge for fit climbers on the South Side route. Most climbers start at midnight or 1 a.m. to reach the summit at sunrise and descend before afternoon rockfall.

    Mount Adams: 1-day push or 2-day climb. Single push from Cold Springs is 12-16 hours for fit climbers. Two-day climbers camp at Lunch Counter (9,281 ft) and summit on Day 2.

    Are Hood and Adams beginner mountains?

    Adams is genuinely beginner-friendly with a guide — it teaches snow travel, crampon and ice axe basics, and altitude exposure without committing to technical terrain. A first-time climber with reasonable fitness can summit Adams with a guide.

    Hood is not a beginner mountain despite its reputation. Hood is described as “one of the most climbed glaciated peaks in North America” but its accident statistics reflect that many of those climbers are underprepared for the steep upper sections. The Pearly Gates and Hogsback are not “walk-up” terrain.

    When is the best time to climb each?

    Mount Hood: late April through mid-July. Earlier in the season the snow is consolidated and rockfall is minimal; by August the South Side route becomes hazardous from melted-out rockfall.

    Mount Adams: May through September. Earlier season offers better snow for the descent ski/glissade; late summer offers more stable weather but exposed scree on the upper mountain.

    Both peaks should be climbed pre-dawn to avoid afternoon weather and thermal instability.

    Do I need crampons and an ice axe for either climb?

    Yes for both. Mount Hood requires crampons, ice axe, helmet, and the ability to self-arrest on hard snow. The Hogsback and Pearly Gates section commonly sees fall consequence of 1,000+ vertical feet.

    Mount Adams requires crampons or microspikes (depending on conditions) and an ice axe for the upper mountain above Lunch Counter. Adams’s lower angles forgive technique errors that would be fatal on Hood.

    Can I ski or snowboard down from the summit?

    Mount Hood: Yes — experienced skiers and snowboarders regularly descend from the summit, typically using the Old Chute variation rather than the Pearly Gates. This requires advanced skiing skills on 40+ degree terrain. Many climbers ski the Palmer Glacier descent only and downclimb the technical sections.

    Mount Adams: Yes — Adams is widely considered one of the best ski descents in the Cascades. The South Spur and Southwest Chutes both offer 6,000+ vertical feet of skiable terrain on moderate to steep slopes. Spring corn skiing is the classic Adams experience.

    What to read next

    Sources and Verification

    This comparison was built from primary sources including:

    • U.S. Forest Service, Mt. Hood National Forest — Mount Hood climbing permits and access
    • U.S. Forest Service, Gifford Pinchot National Forest — Mount Adams climbing conditions
    • Recreation.gov — 2026 permit costs and access for both peaks
    • SummitPost — Mount Hood South Side route description and historical traffic data
    • The Mountaineers — Mount Adams South Spur route grade and itinerary
    • Washington Trails Association — Mount Adams South Climb description
    • Northwest Mountain School — 2026 Adams guide service guidance and pricing
    • Timberline Mountain Guides — Mount Hood guided program information
    • Mazamas — Mount Hood climb operations and member access
    • Mountain Shop — Mount Hood route dangers analysis
    • U.S. Highpoint Guide — Mount Hood permit and fumarole hazard documentation
    • Eyehike — Mount Adams logistics, road access, and sno-park information
    • WanderlustHiker — both peaks’ beginner guides and route stages

    Published May 25, 2026 · Next scheduled review: November 2026 after the 2026 climbing season

    Subscribe to the Mountain Planning Brief

    Get notified when each new mountain comparison publishes. One email per release. No marketing.

    Subscribe →
  • Mount Whitney vs Mount Rainier: Which Should You Climb First?

    Mount Whitney vs Mount Rainier: Which Should You Climb First?

    Mountain Comparisons · 2026 Guide

    Mount Whitney vs Mount Rainier: Which Should You Climb First?

    Mount Whitney is the tallest peak in the lower 48 at 14,505 feet. Mount Rainier sits 95 feet shorter at 14,410 feet. By that single metric they look interchangeable. They are not. Whitney is a strenuous hike on a non-technical trail. Rainier is a real glaciated mountaineering expedition that demands rope teams, crampons, ice axes, crevasse rescue training, and a multi-day climb. The honest comparison is not which mountain is taller — it’s which mountain you should attempt first, with what skills, and at what cost.

    The Verdict

    For most climbers, the answer is Whitney first, Rainier second — Whitney tests endurance and altitude tolerance without requiring technical skills; Rainier demands those skills already in place.

    California · Sierra Nevada

    Mount Whitney

    Tallest peak in the contiguous United States. Tests endurance, altitude, distance. Permit lottery required.

    Elevation14,505 ft
    Round trip22 miles
    Elevation gain~6,600 ft
    Typical time12–14 hr
    Technical?No (summer)
    Permit win rate~28%
    Cost (unguided)$15–50
    Best seasonJul–Sep
    Washington · Cascades

    Mount Rainier

    Most glaciated peak in the lower 48. Real expedition mountaineering — crampons, ropes, glacier travel.

    Elevation14,410 ft
    Round trip~14.5 miles
    Elevation gain~9,000 ft
    Typical time2–3 days
    Technical?Yes
    Permit$63 + wilderness
    Cost (guided)$2,250–$2,995
    Best seasonLate Jun–Sep

    The 95-foot height difference is the only thing similar about them

    Both peaks sit at almost exactly 14,400 feet. Both are climbed by tens of thousands of people each year. Both sit in the western United States, accessible from major cities, with established commercial guide services and well-documented standard routes. Almost everything else differs.

    Mount Whitney’s standard route — the Mount Whitney Trail from Whitney Portal — is a 22-mile round-trip hike with approximately 6,600 feet of elevation gain. When the trail is snow-free (typically July through late September), the U.S. Forest Service classifies the route as “non-technical, but strenuous.” Strong day-hikers complete it in 12 to 14 hours. No ropes. No crampons. No ice axes. Just trail running shoes or hiking boots, water, food, and a permit.

    Mount Rainier’s standard route — the Disappointment Cleaver via Camp Muir — is a 14.5-mile round-trip glaciated mountaineering expedition with approximately 9,000 feet of elevation gain. It involves active crevasse fields, collapsing snow bridges, rockfall on the Cleaver, and variable ladder crossings. According to National Park Service data, in 2018, 10,762 climbers attempted the mountain with 5,135 successful summits — a 48% success rate. Guided parties typically summit at around 60%; independent climbers at around 44%. Recent years have shown more month-to-month variability due to climate-affected glacier conditions: per Alpine Ascents International, success rates ranged from 45% to 90% across different months in 2024-2025.

    What “non-technical” actually means for Whitney

    The Whitney Trail is non-technical only when it’s snow-free. From October through June (sometimes longer in heavy snow years), the route requires winter mountaineering skills, traction devices, ice axes, and self-arrest capability. Inyo County Search and Rescue specifies that “May to June tends to have the highest accident and fatality rates in the permit season” — because climbers attempt the route before the snow has cleared but without the technical gear required.

    2025 saw five fatalities on Whitney — the deadliest year of the past decade. The 2026 season has already claimed one life near the summit on January 19. If you’re planning a Whitney attempt outside the July–September window, you’re not on a hike; you’re on a mountaineering route.

    The data: success rates, climbers, fatalities

    ~28%
    Whitney lottery win rate
    Applicants who receive any chosen date for the May 1–Nov 1 quota season
    Source: USDA Inyo National Forest, 2024
    ~48%
    Rainier summit success
    10,762 attempts, 5,135 summits in 2018 — the most recent fully published year
    Source: National Park Service
    ~60%
    Rainier guided success
    Versus ~44% for independent climbers — guided parties summit at a meaningfully higher rate
    Source: NPS, decade average
    5
    Whitney fatalities in 2025
    The deadliest year of the past decade. 2026 has already seen one fatality on January 19
    Source: Inyo County SAR, GearJunkie

    Permits: the lottery for Whitney, the queue for Rainier

    The permit systems are completely different in mechanism, cost, and difficulty of acquisition.

    The Mount Whitney lottery

    Mount Whitney uses a strict lottery system administered through Recreation.gov. The 2026 lottery ran February 1 through March 1, with results posted March 15. Applicants pay a $6 application fee and rank up to 15 preferred dates. If awarded a permit, the holder pays an additional $15 per person to confirm by April 21.

    During quota season (May 1 to November 1), Inyo National Forest issues 100 day-use permits and 60 overnight permits per day for the Mount Whitney Zone. Historical data from the U.S. Forest Service: in 2021, more than 25,000 applications were submitted requesting space for 108,500 people. 72% of applicants were unsuccessful. Peak dates in July and August — particularly the August 5–7 weekend in 2022 — saw success rates as low as 1% for that specific date.

    Unclaimed lottery permits release back to the public on April 22 at 7:00am Pacific. Cancellations open up throughout the season — some climbers monitor Recreation.gov daily during the season for last-minute releases, which often disappear within minutes.

    Outside the quota season (November 2 to April 30), no quota applies, but the Whitney Trail requires winter mountaineering skills and equipment due to snow and ice.

    Mount Rainier permits

    Mount Rainier uses a two-part permit system administered by the National Park Service. Every climber traveling above 10,000 feet or onto any glacier must pay the climbing cost recovery fee, which is currently $63 per climber for the calendar year (regardless of how many trips you make). The fee funds high-camp rangers, lower-mountain ranger stations, and human waste management on the upper mountain.

    In addition to the climbing fee, climbers need a wilderness permit for overnight stays. Wilderness permits are managed through Recreation.gov. About two-thirds of permits are available for advance reservation between May 1 and the first federal holiday in October; the remaining one-third are walk-up only.

    Disappointment Cleaver is the most-climbed route by a substantial margin. Per the National Park Service’s published climbing statistics, the Disappointment Cleaver route receives approximately 2,000+ attempts per year — roughly double the Emmons-Winthrop route (1,478 attempts in 2005 historical data) and an order of magnitude more than technical routes like Liberty Ridge.

    The skills gap: what each mountain actually demands

    The single most important difference between Whitney and Rainier is the gap between what an average fit hiker can handle and what each mountain requires.

    Mount Whitney’s skill demands (standard trail, summer)

    • Aerobic endurance: 22 miles of hiking with 6,600 feet of gain in a day, or split across 2-3 days with a heavy pack
    • Altitude tolerance: 14,505 feet is high enough to cause altitude sickness in unacclimated climbers. AMS symptoms are the leading cause of Whitney rescues during the summer permit season
    • Long-day pacing: 12-14 hour summit day means starting before sunrise and finishing after dark
    • Navigation: The trail is well-marked, but late-season snow patches can obscure the route above Trail Camp
    • Self-care: Hydration, calorie intake, layering for 40°F swings between trailhead and summit

    Mount Rainier’s skill demands (Disappointment Cleaver)

    • Everything Whitney requires, plus:
    • Glacier travel: Roping up in 3-person teams, maintaining proper spacing, recognizing crevasse hazards
    • Crevasse rescue: Z-pulley system, prusik ascending, partner extraction — all should be practiced before the climb, not learned on it
    • Crampon technique: Flat-footing, French technique, front-pointing on steep névé and ice
    • Ice axe technique: Self-arrest, anchoring, plunge-step descent
    • Alpine pacing: Maintaining 1,000 ft/hour ascent rate on the upper mountain at 12,000+ feet altitude
    • Heavy pack carrying: 45-55 lb packs to Camp Muir on Day 1; 10-15 lb summit packs on Day 2
    • Weather decision-making: Turning around at 13,000 feet because the wind has picked up
    • Equipment management: Crampons, ice axe, harness, helmet, rope, prusiks, locking carabiners — all must be set up correctly in cold, dark conditions at high altitude

    This is why guide services exist. The major Rainier guide services (RMI Expeditions, International Mountain Guides, Alpine Ascents International, Northeast Mountaineering) all run instructional climbs that build these skills into the expedition itself — typically with a half-day or full-day skills clinic at the trailhead or low camp before pushing for the summit.

    Mt. Rainier gives you a full on mountaineering experience. It is the perfect training ground for future mountaineering expeditions around the world.

    Northeast Mountaineering — 2026 Mount Rainier program

    Cost comparison: $50 vs. $3,000

    The cost gap is enormous because the climbs are structurally different.

    Mount Whitney costs (unguided, standard trail)

    • Permit application fee: $6
    • Permit confirmation: $15 per person
    • Whitney Portal Hostel (optional pre-climb night): ~$80
    • Lone Pine motel (optional): ~$120-180
    • Food and gas: ~$50-100
    • Total per person: $50-300 typical

    Whitney is rarely climbed with commercial guides. Most climbers do it independently with personal hiking gear they already own.

    Mount Rainier costs (guided 3-day Disappointment Cleaver)

    • Guide service fee (2026): $2,250-$2,995 depending on operator and peak vs. non-peak dates
    • NPS climbing cost recovery fee: $63
    • Wilderness permit: included in guide package
    • Park entrance fee: $30 (or America the Beautiful pass)
    • Pre/post-climb lodging in Ashford or Seattle: ~$200-400
    • Food/gas/transit: ~$100-200
    • Tip for guides (industry standard): ~10% of program cost = $225-300
    • Total per person: $2,800-$4,000

    Independent unguided climbing reduces the cost substantially — typically $200-400 total in fees, lodging, and consumables — but requires either prior glacier mountaineering experience or significant pre-trip training. For first-time mountaineers, the guided pathway is structurally safer per the documented success-rate difference (60% guided vs. 44% independent).

    Gear costs (first-time climber)

    If you don’t already own mountaineering gear, the first-time Rainier kit can add substantially to total cost:

    • Mountaineering boots: $300-500 (La Sportiva Trango, Scarpa Mont Blanc Pro)
    • Crampons: $150-250 (Petzl Vasak, Black Diamond Sabretooth)
    • Ice axe: $80-150 (Petzl Glacier, Black Diamond Raven)
    • Harness: $80-150
    • Helmet: $80-150
    • Sleeping bag rated 0°F: $300-500
    • Sleeping pad (R-value 4+): $150-250
    • Backpack (60-70L): $250-350
    • Hardshell jacket and pants: $400-700 combined
    • Mid-layer fleece and insulating jacket: $200-400
    • Base layers, socks, gloves, headlamp, glacier glasses: $200-350
    • Total first-time gear investment: $2,200-$3,700

    Rainier guide services rent most of the technical gear (crampons, ice axe, harness, helmet, sleeping bag) for around $150-250 per program. Many first-time Rainier climbers rent rather than buy — particularly if they’re not sure they’ll continue mountaineering after the trip. Per our guide-pack investigation, the difference between rented and owned gear is operationally negligible on a single climb; the difference matters more across multiple expeditions where ownership amortizes.

    The honest verdict: when each is the right choice

    Both peaks are excellent objectives. The question isn’t which is “better” — it’s which is right for your current skill level and goals.

    Pick Mount Whitney first if

    You’re a fit day-hiker without prior glacier or technical mountaineering experience
    Whitney
    You want to test altitude tolerance before investing in technical gear or a guide
    Whitney
    You’re building toward bigger mountains and want a “first 14er” benchmark
    Whitney
    Your budget for the climb is under $500
    Whitney
    You don’t yet own crampons, ice axe, harness, helmet, and don’t want to invest until you’re sure you’ll continue
    Whitney

    Pick Mount Rainier first if

    You already have basic mountaineering experience (glacier travel, crampon/ice axe technique) from somewhere else
    Rainier
    You’re specifically training for Denali, Aconcagua, or other expedition objectives
    Rainier
    You’re committed to a guided program with built-in skills instruction
    Rainier
    You have $2,500-$4,000 budgeted for the climb plus gear
    Rainier
    You want to compress your mountaineering progression — Rainier teaches more skills per trip than Whitney
    Rainier

    The “do both” sequence (most common path)

    For climbers building a multi-year mountaineering progression, the canonical sequence is:

    1. Year 1: Day hikes and weekend backpacking to build aerobic base. Climb Mount Whitney as the “altitude test.” If you summit comfortably, your altitude tolerance is good enough to continue.
    2. Year 2: Take a glacier skills course or guided Mount Baker climb to learn technical fundamentals. Climb Mount Rainier guided.
    3. Year 3+: Independent Rainier climbs, then progression to Aconcagua, Denali, or 6,000m peaks abroad (see our first big mountain comparison for the next-step progression).
    Don’t sequence backwards

    The single most common mistake we see is climbers attempting Rainier as their first “real mountain” without prior technical training. Rainier’s 48% success rate is not random — it reflects the gap between what climbers think they’re prepared for and what the mountain actually demands. Independent climbers attempting Rainier without glacier experience contribute disproportionately to the failure rate and to the rescue statistics. The structural advice across all major guide services: build glacier skills somewhere first, then take Rainier as a skill-applying climb rather than a skill-learning climb.

    Quick-reference comparison

    FactorMount WhitneyMount Rainier
    Elevation14,505 ft14,410 ft
    LocationCalifornia, Sierra NevadaWashington, Cascades
    Climb typeStrenuous day hikeGlaciated mountaineering expedition
    Days required1 day (or 2-3 backpack)2-3 days minimum
    Technical skillsNone (snow-free season)Glacier travel, crevasse rescue, rope team
    Required gearHiking boots, daypack, waterMountaineering boots, crampons, ice axe, harness, helmet
    Annual climbers~25,000–30,000 summits~10,000 attempts, ~5,000 summits
    Success rate~70%+ (summer permits)~45–50% (decade avg)
    Permit systemLottery (Feb 1–Mar 1)NPS cost recovery + wilderness
    Cost (unguided)$50–300 per person$200–400 fees + gear
    Cost (guided)Rarely guided$2,250–$2,995 (3-day)
    Best seasonJuly–SeptemberLate June–early September
    Recent fatalities5 in 2025 (decade high)~1-3 per year typical
    Best forFirst “real” mountain testFirst glaciated mountaineering objective

    Frequently Asked Questions

    Is Mount Whitney harder than Mount Rainier?

    No. Mount Rainier is meaningfully harder for most climbers. Whitney is a strenuous hike on a non-technical trail when snow-free. Rainier is real glaciated mountaineering requiring rope teams, crampons, ice axes, crevasse rescue skills, and a multi-day climb.

    Summit success rates reflect this gap: Rainier averages 45-50% historically; Whitney exceeds 70% for summer permit holders on the standard trail. The 95-foot elevation difference is the only thing that’s similar about them.

    Which should I climb first, Whitney or Rainier?

    Climb Whitney first if you’re a strong day-hiker without prior glacier or technical mountaineering experience. The Whitney Trail tests endurance and altitude tolerance without requiring technical skills.

    Climb Rainier first only if you have prior glacier travel experience, basic crampon and ice axe skills, and physical preparation for 8,000-9,000 feet of elevation gain over 2-3 days. For most climbers, the natural sequence is Whitney → glacier skills course → Rainier guided → bigger objectives.

    How much does it cost to climb Mount Rainier vs Mount Whitney?

    Whitney unguided: $15 per person reservation fee plus $6 application fee in the permit lottery, plus gas and food. Total under $50-300 per person typically.

    Rainier guided (3-day Disappointment Cleaver): $2,250-$2,995 with major operators (RMI, IMG, Alpine Ascents). Plus tips, lodging, gear rental or purchase.

    Rainier unguided: $63 NPS climbing cost recovery fee plus wilderness permit fee plus your gear (boots, crampons, ice axe, harness, helmet typically $1,500-3,000 first-time investment).

    How do I get a Mount Whitney permit?

    Apply to the Mount Whitney Lottery on Recreation.gov between February 1 and March 1. Results posted March 15. Pay $15 per person fee by April 21 to confirm.

    Unclaimed permits release April 22 at 7am Pacific. During quota season (May 1 – November 1), 100 day-use permits and 60 overnight permits are issued daily. Historical win rate: approximately 28-29% of applicants receive a permit for one of their chosen dates.

    If you don’t win the lottery, monitor Recreation.gov daily for cancellations. They appear regularly throughout the season but disappear within minutes.

    What is Mount Rainier’s success rate?

    Mount Rainier’s overall summit success rate averages 45-50% based on National Park Service data spanning multiple decades. In 2018, 10,762 climbers attempted the mountain with 5,135 successful summits (48%).

    Guided parties summit at approximately 60%; independent climbers at 44%. Recent years have shown more month-to-month variability due to climate-affected glacier conditions, with success rates ranging from 45% to 90% depending on weather windows.

    Can a beginner climb Mount Whitney?

    Yes — with serious physical preparation, in summer conditions, on the standard Mount Whitney Trail. A fit beginner who has done 10+ mile day hikes with 3,000+ feet of elevation gain can complete the Whitney day hike.

    The mountain is non-technical when snow-free (typically July through September). A beginner should NOT attempt the Mountaineer’s Route (Class 3 technical climb with fatal exposure) or the Whitney Trail outside the summer snow-free window without technical mountaineering training.

    Can a beginner climb Mount Rainier?

    Yes — but only with a guide service, and only on the standard Disappointment Cleaver route. Major guide services (RMI, IMG, Alpine Ascents, Northeast Mountaineering) explicitly run programs for first-time mountaineers, including pre-climb instruction in glacier travel, crampon use, ice axe technique, and crevasse rescue.

    The 3-day instructional programs ($2,250-$2,995) are the standard beginner pathway. Beginner solo attempts on Rainier are dangerous and not recommended.

    How long does it take to climb each mountain?

    Whitney: 12-14 hours for a fit day-hiker on the standard trail (snow-free conditions). Most hikers start between 2-4am to reach the summit by mid-morning and descend before afternoon thunderstorms. Some hikers split it into 2-3 days, camping at Outpost Camp (10,500 ft), Trail Camp (12,000 ft), or other designated sites.

    Rainier: 2-3 days minimum on the Disappointment Cleaver standard. Day 1: Paradise to Camp Muir (4-6 hours). Day 2 (summit night): Midnight or 1am start from Camp Muir, summit by 7-9am, return to Camp Muir by 11am-1pm, then descent to Paradise. Some operators add a day for skills instruction or weather contingency, making it 3-4 days total.

    What to read next

    Sources and Verification

    This comparison was built from primary sources including:

    • USDA Forest Service, Inyo National Forest — Mount Whitney permit and access data
    • U.S. National Park Service, Mount Rainier — climbing statistics and permit framework
    • Recreation.gov — 2026 permit fees and lottery mechanics for both peaks
    • Inyo County Search and Rescue — fatality and accident statistics, season analysis
    • Alpine Ascents International — 2026 Rainier program pricing and success rate analysis
    • International Mountain Guides (IMG) — Rainier program pricing 2026
    • Northeast Mountaineering — 2026 Rainier program guidance
    • RMI Expeditions — Rainier climbing program information
    • GearJunkie — Mount Whitney 2026 lottery and fatality reporting (February 2026)
    • StephAbegg.com Rainier Statistics — historical NPS climber and accident data
    • Sherpa Adventure Gear — 2018 Rainier attempt/summit data

    Published May 18, 2026 · Next scheduled review: November 2026 after the 2026 climbing season

    Subscribe to the Mountain Planning Brief

    Get notified when each new mountain comparison publishes. One email per release. No marketing.

    Subscribe →

Language »