Mountain Comparisons · 2026 Guide
Mount Shasta vs Mount Hood: Picking Your Cascades Objective
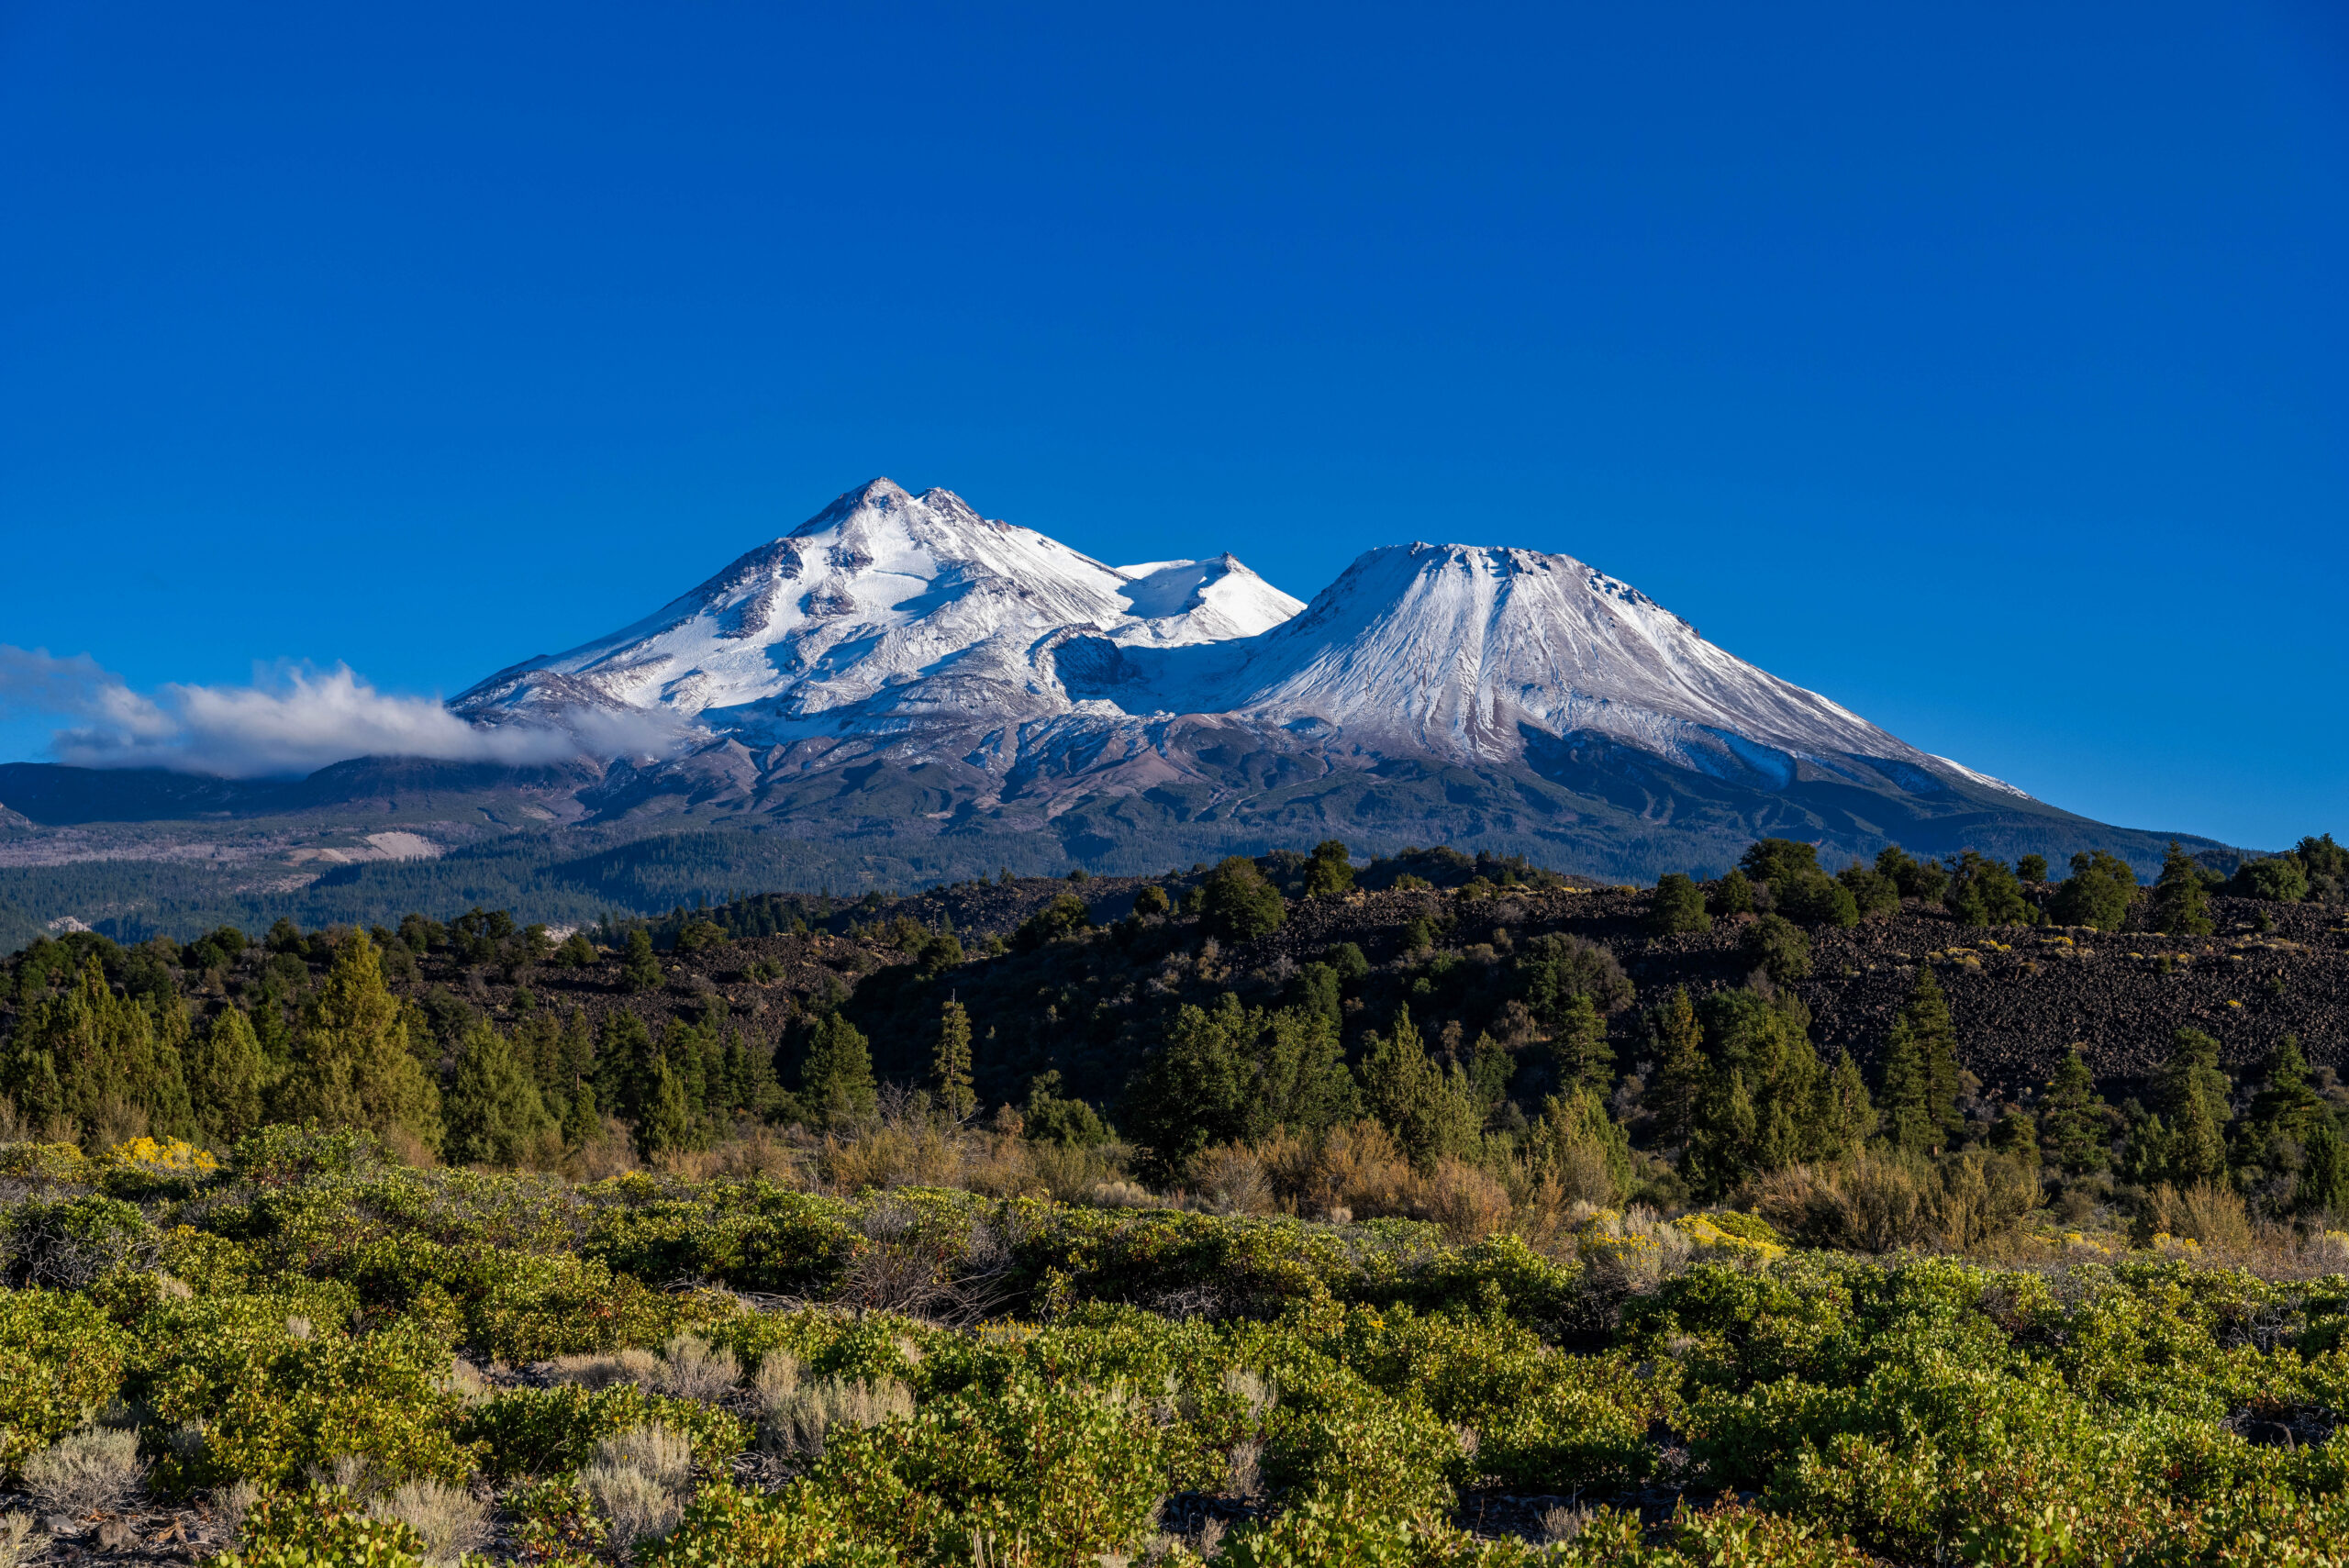
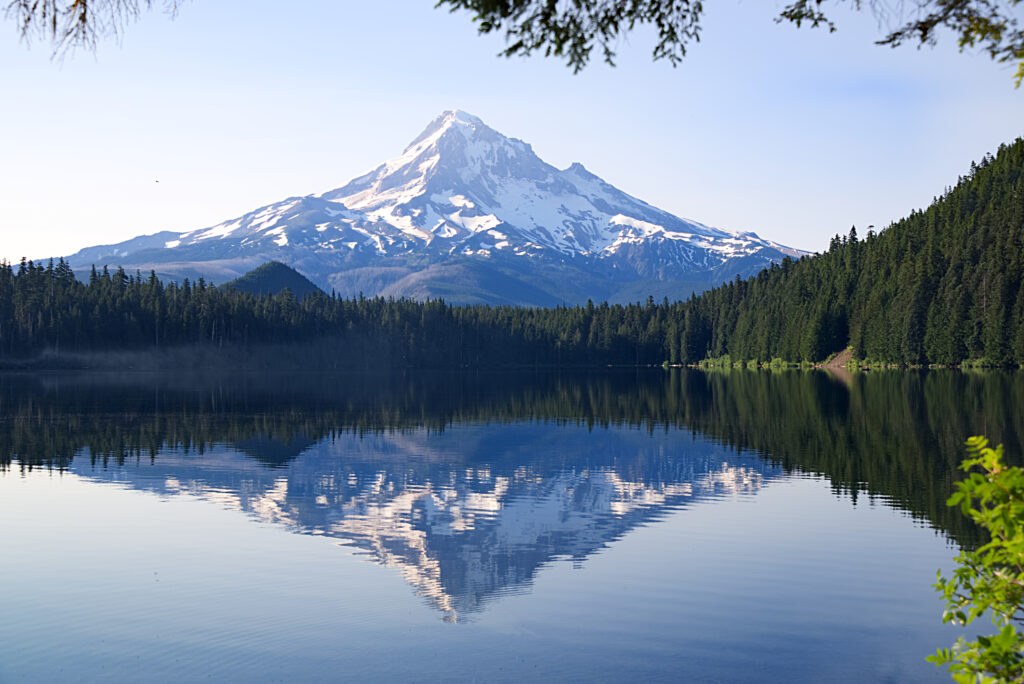
Mount Shasta rises out of Northern California’s high desert at 14,179 feet — the fifth tallest peak in California and the second tallest volcano in the Cascade Range. Mount Hood crowns Oregon’s Cascades at 11,249 feet, just 60 miles east of Portland. Both are iconic stratovolcanoes. Both have well-established commercial guide services, defined standard routes, and decades of climbing history. And both will teach you completely different things about mountaineering. The right choice between them isn’t a matter of which is “better” — it’s about what kind of mountaineer you’re trying to become.
Mount Shasta
Northern California’s iconic volcano. The Cascades’ second-tallest peak. Long approach, big elevation, expedition-style commitment.
Mount Hood
Oregon’s tallest peak. Most-climbed glaciated peak in North America after Fuji. Short approach, steep upper mountain.
The 2,930-foot height difference matters less than you’d expect
On paper, Mount Shasta dwarfs Mount Hood. Shasta is nearly 3,000 feet taller — the difference between a “real 14er” and a “second-tier” volcano in many climbers’ mental rankings. The maps suggest a clear hierarchy: Shasta first because it’s bigger, then Hood as a “training peak.”
That mental model is wrong, and it’s the source of a lot of bad climbing decisions in the Pacific Northwest.
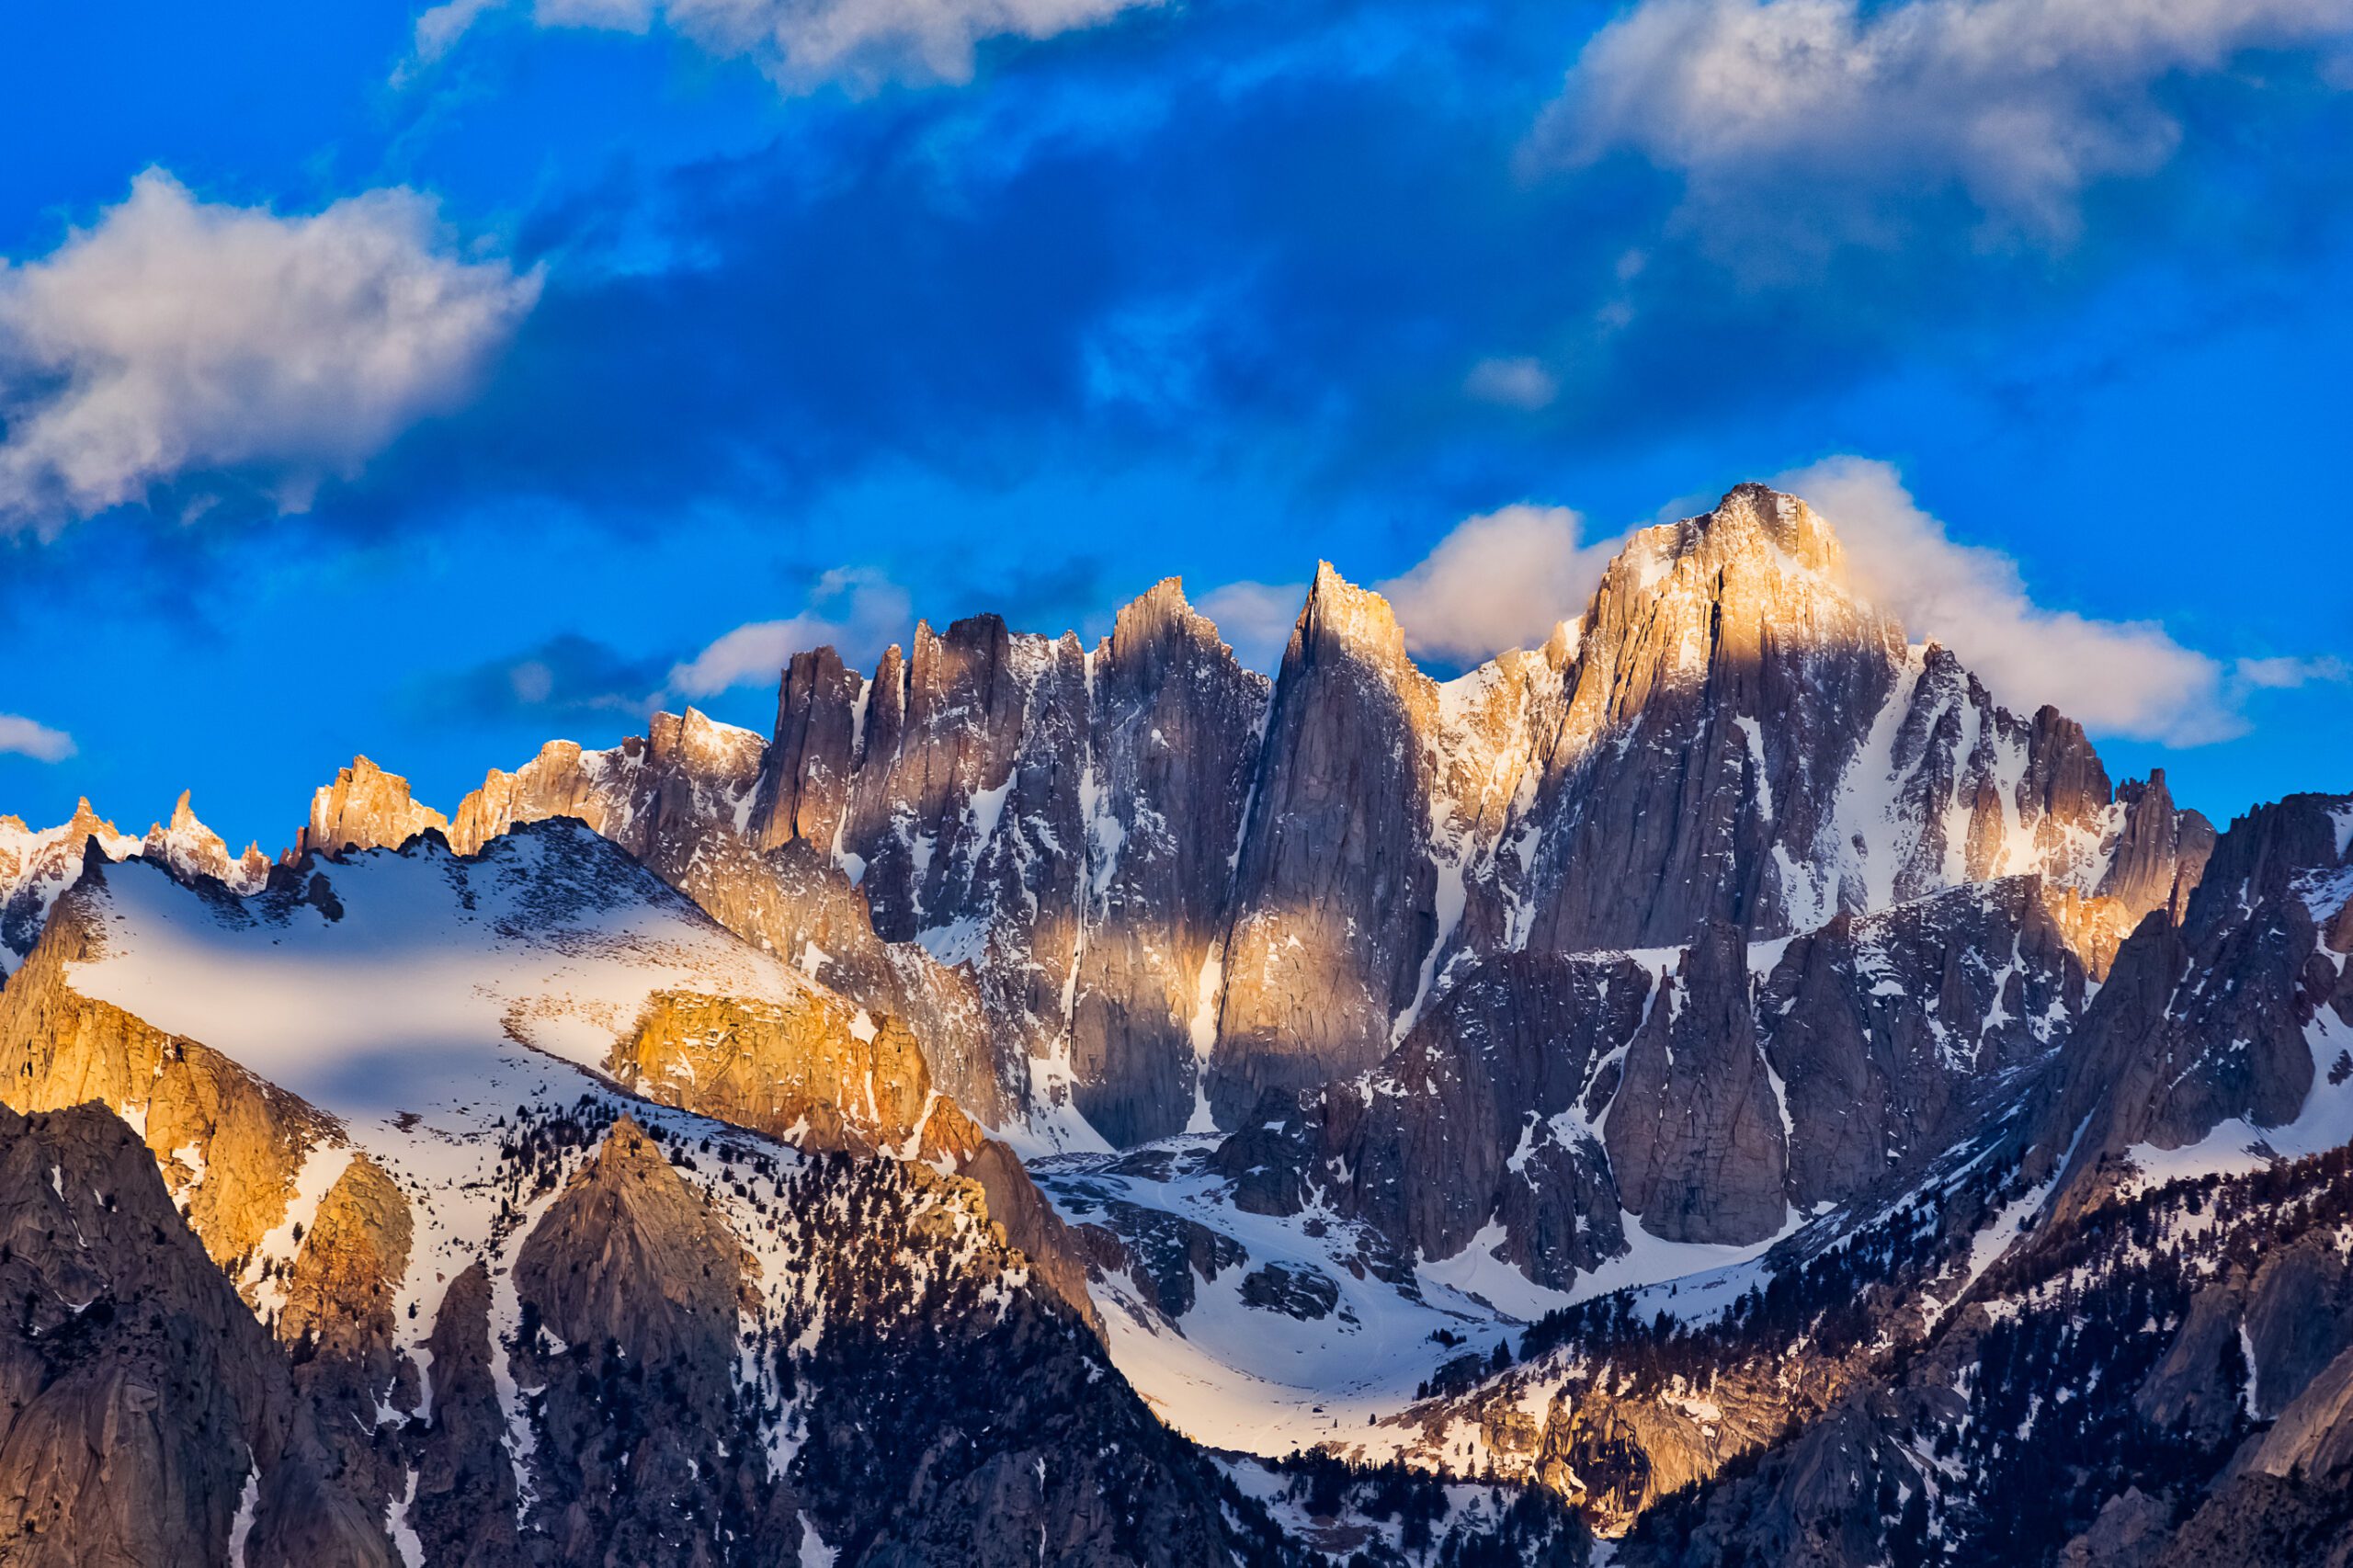
Mount Shasta’s standard route — Avalanche Gulch from Bunny Flat — is what mountaineers call a “Grade I snow climb” with technical sections rated at the moderate end of alpine difficulty. It’s long: 11 miles round trip with 7,300 feet of elevation gain, typically done as a 2- or 3-day climb with an overnight at Helen Lake (10,400 ft). The route includes sustained 30-35 degree snow slopes up the Gulch itself, a slightly steeper section through the Red Banks (a band of cliffs about halfway up), a traverse across the ridge above, and a final climb up Misery Hill to the summit plateau. The technical demands are real but moderate. Most experienced climbers describe Shasta as “a great route to learn and practice good cramponing technique.”
Mount Hood’s standard route — the South Side via Hogsback and Pearly Gates — is far shorter but technically harder per vertical foot. The route packs 5,400 feet of elevation gain into less than 3 miles of climbing distance, with the final 700 feet including the Hogsback (a narrow knife-edge between active fumaroles) and the Pearly Gates (a 40-50 degree snow chute through rocks). The U.S. Forest Service notes that Hood’s “relatively low altitude, easy approach, and short hiking/climbing distance makes it much more popular among less experienced climbers” — and that this combination produces a high accident rate.
Both Shasta and Hood share an unfortunate distinction: they are repeatedly described as “easy walk-ups” in popular climbing media, and both produce real fatalities every climbing season as a result. The Mount Shasta Avalanche Center’s official advisory begins with this warning: “Don’t take Mount Shasta lightly. Despite being only 15 minutes off the Interstate, it’s a real mountain with real hazards. It can kill you, even the easiest route.”
Hood’s accident rate stems from inexperienced climbers attempting technical terrain. Shasta’s stems from underprepared climbers committing to a full alpine objective without the gear, fitness, or skills it demands. The size difference between Shasta and Hood is real, but the danger profile of both is shaped by climbers underestimating what they signed up for.
The data: scale, commitment, and what each demands
The numbers reveal the structural difference: Shasta gains 7,300 vertical feet over 11 trail miles — an average grade of roughly 12-13%. Hood gains 5,400 feet over 6 miles — an average grade of about 17%, with the steepest sections approaching 50 degrees. Shasta is bigger; Hood is steeper per foot.
That difference translates to different lessons. Shasta teaches you to commit to a multi-day objective at altitude: building a camp, melting snow for water, managing fatigue across days, pacing yourself across a long climb. Hood teaches you to climb steep snow safely: front-pointing, self-arrest reflexes, route reading on technical terrain, fast alpine pacing.
Mount Shasta deep-dive: Avalanche Gulch in detail
The route in stages
The Avalanche Gulch route from Bunny Flat to the summit moves through four distinct terrain bands, each presenting different challenges:
- Bunny Flat to Horse Camp (6,940–7,900 ft). A 2-mile approach through subalpine forest on the Horse Camp Trail. Mostly snow-covered in early season; dirt and pine duff in late summer. Easy walking with a pack. Horse Camp at 7,900 ft has a Sierra Club cabin, a developed spring with running water (in season), and a latrine. Many climbers camp here as a relaxed start to a multi-day climb.
- Horse Camp to Helen Lake (7,900–10,400 ft). The mountain opens up as you climb above treeline. Snow conditions become continuous and the slope steepens gradually. Helen Lake (10,400 ft) is the most popular high camp on the mountain. Note: there is no lake — just a flat snow plateau with established tent platforms used by hundreds of climbers each summer weekend. Climbers melt snow for water and prepare for an alpine start.
- Helen Lake through Red Banks (10,400–12,800 ft). The technical heart of the climb. From Helen Lake, climbers ascend Avalanche Gulch on 30-35 degree snow slopes, generally staying to the climber’s right to avoid the slide path. Above the Gulch sits the Red Banks — a band of red volcanic cliffs about 200-400 feet high. The route passes between The Heart (on climber’s left) and The Thumb (on climber’s right) through a gap, then traverses the ridge above. This is the most technically demanding section: steeper snow, real exposure, and rockfall potential from melting cornices above.
- Misery Hill and the summit plateau (12,800–14,179 ft). Above the Red Banks, the route crosses the upper mountain plateau and ascends Misery Hill — a long, sustained snow slope named less for its steepness than for the soul-crushing combination of altitude, fatigue, and the long climb still ahead. From the top of Misery Hill, the summit plateau leads to a final pinnacle and the true summit at 14,179 ft.
Mount Shasta permits and access (2026)
Shasta’s permit system is among the easiest in the Cascades:
- Mount Shasta Summit Pass: Required for travel above 10,000 ft. 3-day pass: $25 per person. Annual pass: $30 per person. Available at the Mount Shasta or McCloud Ranger Stations, the Fifth Season outdoor store, or self-issued at trailhead kiosks 24/7. Pay attention: rangers do check permits on the upper mountain, and climbers without a valid pass can be ticketed.
- Wilderness Permit: Free, self-issued at trailhead kiosks. Required for all entries into the Mount Shasta Wilderness regardless of summit intent.
- WAG bag: Mandatory for all human waste — required by Forest Order. Free WAG bags are stocked at the Bunny Flat trailhead, ranger stations, and the Fifth Season.
- Group size limit: 10 climbers maximum per group within the Mt. Shasta Wilderness.
The Bunny Flat trailhead is accessible year-round by vehicle, just 15 minutes off Interstate 5 from the town of Mount Shasta. The trailhead has restrooms, water, an information desk (staffed in summer), self-issue permit kiosks, and a credit card-enabled summit pass machine. Cell service is generally reliable at the trailhead and intermittent on the mountain itself.
The route’s name comes from its history of major avalanche events. The Mount Shasta Avalanche Center documents that “Avalanche Gulch is named because of its tendency to avalanche.” Slide events in the Gulch have killed climbers, including parties who were following standard summit-day protocols.
The Avalanche Center recommends climbing parties carry “avalanche beacons, probes, and shovels armed with proficient skills in their use” and check the daily avalanche forecast before climbing. Winter and spring see the highest avalanche danger, but the Center notes the hazard can exist year-round under the right conditions, including in late spring during warming cycles. A predawn start — typical for any Shasta climb — is partially motivated by avoiding afternoon wet-snow avalanches.
Mount Shasta guide services
Several established guide services hold commercial permits for Mount Shasta. Most offer 2-, 3-, and 4-day programs, with longer programs achieving meaningfully higher success rates:
- Shasta Mountain Guides — Mount Shasta’s local guide service. Multiple program lengths, AMGA-trained guides.
- International Alpine Guides — 3-day Avalanche Gulch programs with IFMGA-licensed lead guides. The 3-day program is structured specifically to maximize success rate for first-time mountaineers.
- Sierra Mountaineering International (SMI) — California-based with extensive Cascade programs.
- Alpine Skills International — Lake Tahoe-based, runs Shasta as part of broader Sierra Nevada programs.
Typical 3-day program cost: $700-$1,500 per person depending on group size and ratio. Includes guide fee, group gear, instruction in crampons, ice axe self-arrest, rope team travel, and pacing — but typically excludes personal gear, transportation, food, and the summit pass.
We believe three days provides more time to properly acclimate and learn all the necessary basic mountaineering skills. The success rate of the 3-day Mt Shasta climb is higher than on the quicker two-day climbs.
International Alpine Guides — 2026 Mount Shasta program guidanceMount Hood deep-dive: South Side in detail
The route in stages
The South Side route from Timberline Lodge is compact but technically front-loaded — the difficulty concentrates in the upper 1,000 feet:
- Palmer Glacier (5,800–8,500 ft). A moderate, wide snow slope adjacent to the Palmer ski lift. The first 2,700 feet of elevation gain happen here. Snowcat or skier traffic is common during winter and spring. This section gives Hood its “walk-up” reputation — but represents only half the climb.
- Triangle Moraine and approach to Crater Rock (8,500–10,500 ft). The slope steepens. Climbers passing through here begin to feel altitude and wind exposure. Most camping climbers stake out the Triangle Moraine area between 8,800 and 9,400 feet for an alpine start.
- The Hogsback (10,500–11,000 ft). The narrow snow ridge between the Devil’s Kitchen and Hot Rocks fumaroles. Active sulfur fumaroles flank both sides of the route, emitting gases that can create oxygen-depleted zones in low-wind conditions. The Hogsback shifts position annually as the underlying glacier changes — some seasons offering a comfortable wide platform, other seasons narrowing to a few feet with steep drops on both sides.
- Pearly Gates / Old Chute to summit (11,000–11,249 ft). A 40-50 degree snow chute through rocks — the technical crux. The Pearly Gates is the direct line; the Old Chute is wider and used when the Pearly Gates is icy or blocked. This section is what makes Hood’s overall difficulty disproportionate to its elevation. A fall through the Pearly Gates can progress through the Hot Rocks fumaroles into Devil’s Kitchen below — terrain where multiple climbers have died.
Mount Hood permits and access (2026)
Hood’s permitting changed substantially in 2024 with the introduction of a mandatory climbing permit. As of 2026:
- Mt. Hood Climbing Permit: Required for any travel above 9,500 ft elevation. 3-day permit: $20. Annual permit: $50. Available on Recreation.gov. No quota — permits cannot sell out.
- Wilderness Permit: Required year-round on south side routes. The 3-day climbing permit counts as the wilderness permit.
- Sno-Park Permit: Required November 1 through April 30 at Timberline parking lots. $25/day or ~$50/season.
- WAG bag: Free at the Climbers’ Cave at Timberline Lodge. Mandatory for human waste.
The Climbers’ Cave at Timberline Lodge is open 24/7 year-round with self-issue wilderness permits, blue bags, the climber registration form, and current condition reports. Most climbers register here and start up between midnight and 2:00 a.m. for an alpine start to reach the summit at sunrise and descend before afternoon rockfall makes the upper mountain dangerous.
Mount Hood guide services
Two main guide services hold commercial permits for Mount Hood:
- Timberline Mountain Guides — based at Timberline Lodge. One-day guided climbs typically $400-$600. Group climbs and private programs.
- KAF Adventures — Pacific Northwest mountaineering instruction and guided climbs. Multi-day programs include skill instruction.
The Mazamas, a Portland-based climbing club, runs Mount Hood climbs for $78 per member trip — substantially cheaper but requires Mazama membership and is structured as a club climb rather than a guide service.
The skills gap: what each mountain actually demands
Mount Shasta’s skill demands
- Multi-day commitment: Carrying a 35-50 lb pack with tent, sleeping bag, stove, food, and water purification for 2-3 days. Setting up camp at 10,400 ft after a 3,500 ft climb with full pack
- Sustained aerobic endurance: 7,300 feet of elevation gain across a full climb, with most of the gain happening above 8,000 ft where the air is thinner
- Solid crampon technique: French technique, flat-footing, and front-pointing on snow ranging from 25° to 40° depending on conditions
- Self-arrest mastery: Particularly important above Helen Lake where a fall on hard snow can run out for hundreds of feet
- Altitude tolerance: 14,179 ft is high enough to cause significant AMS in unacclimatized climbers. The standard 2-day climb compresses acclimatization into a single sleep at 10,400 ft
- Avalanche awareness: Reading slope angles, recognizing dangerous snow conditions, knowing when to turn around
- Navigation in whiteouts: Shasta’s summit plateau is large and featureless. Climbers regularly descend the wrong side of the mountain when clouds form during the descent. “It happens every year, and can result in lengthy SAR missions” per the Mount Shasta Avalanche Center.
Mount Hood’s skill demands
- Confident steep-snow technique: Front-pointing on 40-50° snow, ice axe self-belay, ability to maintain composure on exposed terrain
- Self-arrest reflexes: A fall on the Pearly Gates or Old Chute progresses to terminal velocity within seconds. Self-arrest must be reflexive, not learned
- Glacier hazard recognition: Reading the Hogsback’s annual changes, identifying bergschrund cracks, avoiding fumarole-adjacent terrain
- Fast alpine pacing: The route is short, but speed is essential — afternoon rockfall on the upper mountain has killed climbers descending late
- Weather decision-making: Hood’s weather changes in minutes; a clear summit at 6 a.m. can become a whiteout by 9 a.m.
- Alpine start discipline: Midnight or 1 a.m. starts are non-negotiable. Climbers who start at “normal hours” often end up in dangerous descending conditions
The structural difference: Mount Shasta teaches expedition-style mountaineering — carrying weight, managing camps, pacing across days, dealing with altitude. Mount Hood teaches alpine-style mountaineering — moving fast and light, climbing technical sections decisively, descending before conditions deteriorate. Climbers building toward Rainier, Aconcagua, Denali, or any expedition objective should climb Shasta first. Climbers building toward technical alpine routes (Mt. Stuart, Eiger Ridge, alpine rock objectives) get more transferable lessons from Hood.
Cost comparison: similar permits, different total commitment
Mount Shasta costs
- Summit Pass: $25 (3-day) or $30 (annual)
- Wilderness permit: free
- Parking at Bunny Flat: free
- Pre-climb lodging in Mount Shasta City: $100-$250
- Camping gear (if not owned): variable; can rent locally
- Food, gas, and water for 2-3 days: $80-$150
- Total unguided per person: $200-$500
- Guided 3-day climb: $700-$1,500 (International Alpine Guides, Shasta Mountain Guides, SMI)
- Guided 2-day climb: $500-$1,000 (lower success rate)
Mount Hood costs
- Climbing Permit: $20 (3-day) or $50 (annual)
- Wilderness permit: included with climbing permit
- Parking at Timberline: free with climbing permit
- Sno-Park permit (Nov-Apr): $25/day or ~$50/season
- Pre-climb lodging in Portland or Government Camp: $100-$250
- Food and gas: $50-$100
- Total unguided per person: $150-$400
- Guided one-day climb: $400-$700 (Timberline Mountain Guides, KAF Adventures)
- Mazamas club climb: $78 (members only)
Total costs are roughly similar between the two peaks for unguided climbers. Guided costs differ substantially: Shasta’s 3-day commitment makes guided programs 2-3x the cost of a Hood guided climb. For climbers on a budget, Hood guided is cheaper; for climbers prioritizing skill-building and acclimatization, Shasta’s longer guided program delivers more learning per dollar. See our guide-pack investigation for the gear list that covers both peaks.
The honest verdict: when each is the right choice
Both peaks are excellent objectives. The right choice depends on what you’re training for, where you live, and how much time you have.
Pick Mount Shasta first if
Pick Mount Hood first if
The “do both” sequence
For climbers building a Pacific Northwest progression, the canonical sequence is:
- Year 1, late spring: Mount St. Helens (8,366 ft) for a non-glaciated introduction to Cascade volcano climbing.
- Year 1, summer: Mount Adams via South Spur (12,281 ft) or Mount Shasta via Avalanche Gulch. Both teach big-mountain climbing on forgiving terrain.
- Year 2, May-June: Mount Hood via South Side, ideally guided or with a strong partner. Apply the snow skills learned on Adams or Shasta to steeper terrain.
- Year 2 or 3: Mount Baker glacier skills course, then Mount Rainier (see our Mount Whitney vs Mount Rainier comparison for the Rainier comparison and the next step).
First-time mountaineers on both Shasta and Hood tend to over-prepare for the technical sections (crampons, ice axe, harness) and under-prepare for the unglamorous skills that actually determine success: pacing, hydration, calorie intake, and the ability to make a hard decision about turning around.
Both peaks have specific moments where the right decision is to descend without summiting. On Shasta: weather closing in above the Red Banks, AMS symptoms developing, group falling behind a turnaround time. On Hood: bergschrund opening up at the Hogsback, conditions deteriorating on the Pearly Gates, party slowing significantly. “Be willing to turn around if you’re not feeling it. Pick good partners. Don’t get summit fever!” per the Mount Shasta Avalanche Center. The same applies to Hood.
Best month to climb each: side-by-side
For the full framework, see Investigation 19: Best month to climb each mountain.
| Month | Mount Shasta | Mount Hood |
|---|---|---|
| January | Winter mountaineering; high avalanche risk | Winter mountaineering only |
| February | Winter mountaineering; high avalanche risk | Winter mountaineering only |
| March | Advanced winter conditions; long days returning | Winter conditions; advanced only |
| April | Excellent — consolidated snow, ski potential | Excellent — consolidated snow, low rockfall |
| May | Excellent — peak conditions for most climbers | Excellent — peak season begins |
| June | Excellent — peak conditions | Excellent — peak season |
| July | Good — early July still snow-covered; late July rockfall increases | Good — late season; afternoon rockfall increasing |
| August | Marginal — scree and rockfall throughout | Marginal — significant rockfall on upper route |
| September | Difficult — limited snow, exposed scree | Difficult — technical conditions; most parties avoid |
| October | Fall storms beginning; early snow possible | Winter conditions returning |
| November | Winter mountaineering only | Winter mountaineering only |
| December | Winter mountaineering only | Winter mountaineering only |
Quick-reference comparison
| Factor | Mount Shasta | Mount Hood |
|---|---|---|
| Elevation | 14,179 ft | 11,249 ft |
| Location | Northern California | Oregon, Cascades |
| Standard route | Avalanche Gulch | South Side / Hogsback |
| Route grade | Snow climb (Grade I-II) | Technical snow (PD/Grade II) |
| Round trip distance | ~11 miles | ~6 miles |
| Elevation gain | ~7,300 ft | ~5,400 ft |
| Days required | 2-3 days typical | 1 day |
| Technical demands | Multi-day camping, sustained snow climbing | Short steep snow chute, fast pacing |
| Required gear | Crampons, ice axe, helmet, tent, sleeping bag | Crampons, ice axe, helmet, daypack |
| Annual climbers | ~5,000-10,000 | ~10,000 |
| Permit cost | $25 (3-day) or $30 (annual) | $20 (3-day) or $50 (annual) |
| Cost (unguided) | $200-$500 per person | $150-$400 per person |
| Cost (guided) | $700-$1,500 (3-day) | $400-$700 (1 day) |
| Best season | April-early July | April-early July |
| Crowding | Heavy on summer weekends | Very crowded (Memorial Day-July) |
| Best for | Expedition-style training | Technical snow training |
Frequently Asked Questions
Is Mount Shasta harder than Mount Hood?
Yes, overall. Mount Shasta is meaningfully harder than Mount Hood despite Shasta’s standard route being technically easier than Hood’s.
Shasta demands 7,300 feet of elevation gain over 11 miles round trip and typically requires a multi-day commitment with overnight camping. Hood gains 5,400 feet over 6 miles in a single day. Shasta tests endurance, altitude, and route-finding; Hood tests steep-snow technique. Different mountains, different lessons — but Shasta’s overall difficulty is higher because of the scale of commitment required.
Which should I climb first, Shasta or Hood?
Climb Mount Shasta first if you’re building toward big-mountain objectives like Rainier, Aconcagua, or Denali. Shasta’s structure, scale, and required commitment more closely mirrors what those bigger peaks demand.
Climb Mount Hood first if you’re training for technical alpine routes (Mt. Stuart, alpine rock, the Eiger Ridge) or if you live in Portland and want a one-day climb close to home. Hood teaches steep-snow technique; Shasta teaches expedition-style climbing.
How much does it cost to climb Shasta vs Hood?
Shasta unguided: $25 for a 3-day summit pass, plus parking, food, and lodging. Total under $500 typically.
Shasta guided: $700-$1,500 for a 2-4 day program with International Alpine Guides, Shasta Mountain Guides, or SMI.
Hood unguided: $20 for a 3-day climbing permit, plus parking. Total under $400 typically.
Hood guided: $400-$700 for a one-day climb with Timberline Mountain Guides or KAF Adventures.
Shasta’s longer commitment makes guided programs 2-3x the cost of Hood guided.
How long does each climb take?
Mount Shasta: 2-3 days for most climbers via the Avalanche Gulch route, with an overnight at Helen Lake (10,400 ft). Strong fit climbers can do it as a 1-day push in 16-20 hours, but this is uncommon and increases risk.
Mount Hood: 8-12 hours round trip from Timberline Lodge as a single-day climb. Most climbers start at midnight or 1 a.m. for an alpine start.
Are Shasta and Hood beginner mountains?
Shasta is genuinely beginner-friendly when guided. Major guide services (International Alpine Guides, Shasta Mountain Guides, Sierra Mountaineering International) explicitly run programs for first-time mountaineers, with built-in skills instruction in crampons, ice axe self-arrest, and rope team travel.
Hood is not a beginner mountain despite its reputation as a “walk-up.” Hood’s technical sections (Hogsback, Pearly Gates) demand confident steep-snow technique that beginners shouldn’t be learning on the route itself. Hood should be climbed after building skills on Adams, St. Helens, or Shasta.
When is the best time to climb each?
Mount Shasta: April through July is the prime season, with peak conditions typically in May and June. Earlier in the season the route is fully snow-covered which is generally safer for descent. By August the lower mountain melts out, exposing loose scree and increasing rockfall hazard.
Mount Hood: late April through early July, with the best window typically May-June. After mid-July the South Side route becomes hazardous due to rockfall on the upper mountain.
Both peaks require pre-dawn alpine starts in the summer climbing season.
What gear do I need for Shasta vs Hood?
Both peaks require crampons, ice axe, mountaineering boots, helmet, and the ability to self-arrest.
Shasta additionally requires multi-day camping equipment: tent, sleeping bag rated to 20°F or colder, sleeping pad, stove and fuel, food for 2-3 days, water purification or snow-melting capability, and a larger backpack (60-70L).
Hood is a single-day climb requiring only summit-day essentials in a daypack: water, food, layers, headlamp, basic first aid.
Both routes can require rope and harness in certain conditions; check current conditions before climbing. Avalanche gear (beacon, probe, shovel) is recommended for both peaks in early season.
Can I ski or snowboard down from the summit?
Mount Shasta: Yes — Shasta is one of the classic Pacific Northwest ski descents. The Avalanche Gulch route descends easily, and several variations (Casaval Ridge, Bolam Glacier) offer skiable terrain. Fletcher Hoyt and four others made the first ski descent of Shasta in 1947 via Avalanche Gulch.
Mount Hood: Yes — experienced skiers and snowboarders regularly descend from the summit, typically using the Old Chute variation rather than the Pearly Gates. The Palmer Glacier offers excellent skiing on the lower mountain. Many climbers ski the Palmer descent only and downclimb the technical sections.
What to read next
- Investigation 06: Your first big mountain — Aconcagua vs Denali vs Elbrus — the next-step progression after a Cascade volcano
- Investigation 19: Best month to climb each mountain — season-by-season climbing calendar for major peaks
- Mount Hood vs Mount Adams — the other major Cascades comparison
- Mount Whitney vs Mount Rainier — California’s highest vs Washington’s most glaciated
- The Mountaineering Truth Project — all 20 flagship investigations
Sources and Verification
This comparison was built from primary sources including:
- U.S. Forest Service, Shasta-Trinity National Forest — Mount Shasta climbing regulations and access
- U.S. Forest Service, Mt. Hood National Forest — Mount Hood permits and conditions
- Mount Shasta Avalanche Center — Avalanche advisory, climbing regulations, hazard analysis
- Recreation.gov — 2026 permit pricing for both peaks
- SummitPost — Avalanche Gulch and Mt. Hood South Side route descriptions
- The Mountaineers — Mount Shasta Avalanche Gulch trip reports and route grades
- AllTrails — Mount Shasta via Avalanche Gulch route details
- International Alpine Guides — 2026 Shasta program guidance and success rate analysis
- Shasta Mountain Guides — Mount Shasta guided program information
- Timberline Mountain Guides — Mount Hood guided program information
- Mazamas — Mount Hood climb operations and member access
- U.S. Highpoint Guide — Mount Hood permit and fumarole hazard documentation
- She Dreams of Alpine — 2026 beginner’s guide to climbing Mount Shasta
- Backcountry Sights — Avalanche Gulch route description and trip report
Subscribe to the Mountain Planning Brief
Get notified when each new mountain comparison publishes. One email per release. No marketing.
Subscribe →