web analytics

Tag: thru hike resupply

  • Thru-Hike Resupply Strategy: Food, Boxes & Towns

    Long-distance backpacker traveling through mountain wilderness between resupply stops
    Food · trail towns · mail drops · bounce boxes · logistics

    Resupply Strategy for Long-Distance Trails

    You do not need six months of food waiting in boxes before starting a thru-hike. A resilient resupply plan combines grocery stores, selected mail drops, realistic food carries and the flexibility to change the plan once your appetite and pace become clear.

    PCT + A.T. + CDT grocery vs mail drops food-carry calculator current official guidance
    The short answer

    Start With a Hybrid Resupply Plan.

    Buy food as you go where substantial grocery stores are available. Mail boxes only where the next resupply is unusually limited, expensive, remote or poorly suited to your diet.

    That is close to the strategy recommended by the Pacific Crest Trail Association: most PCT hikers can buy food every four to ten days, while only a relatively small number of remote locations strongly favor mailed boxes.

    The Appalachian Trail is even more resupply-dense. ATC says most hikers carry only about three to six days of food at a time.

    Do not lock six months of food into one pre-trip menu.

    Appetite changes. Pace changes. Favorite foods become unbearable. Stores close. Packages arrive late. Wildfires and weather change the route.

    The strongest plan decides where food is likely to be difficult and solves those locations in advance while keeping everything else flexible.

    PCT typical availability 4–10 days PCTA guidance
    A.T. typical carry 3–6 days ATC guidance
    CDT pattern More remote towns often farther away
    Strong default Hybrid buy + strategic boxes
    Three ways to resupply

    Buy, Mail or Combine the Two

    None of the three systems is automatically correct. The question is how much flexibility you want compared with how much certainty you need.

    Strategy 1

    Buy as You Go

    Shop in trail towns as you reach them. This gives the greatest flexibility when appetite, mileage and food preferences change.

    • Minimal pre-trip food preparation.
    • Easy to change quantities as mileage increases.
    • Easy to stop buying food if the hike ends early.
    • Supports trail communities.
    • Can be expensive or limited at remote stores.
    Strategy 2

    Mail Resupply Boxes

    Prepare food ahead of time and ship it to post offices, lodges, hostels or other businesses that accept hiker packages.

    • Useful for dietary restrictions.
    • Useful at remote or poorly stocked stops.
    • Allows specialty food and dehydrated meals.
    • Adds postage and handling fees.
    • Can tie your schedule to pickup hours.
    Strategy 3

    Hybrid Resupply

    Buy in substantial trail towns and mail only to strategic locations where local options are weak.

    • Preserves most of the flexibility of buying locally.
    • Solves genuinely difficult resupply points.
    • Reduces pre-trip box preparation.
    • Works well with changing pace.
    • Matches current PCTA guidance particularly well.
    A strong starting assumption: plan to buy most food locally, identify the handful of weak resupply points, and confirm those locations again shortly before departure.
    Interactive planning tool

    How Much Food Should You Leave Town With?

    Estimate the next leg using realistic mileage rather than your best training day. Adjust the food-weight figure as you learn what your own body needs.

    Next Resupply Leg

    The two-pound default is only an editable planning example. General backpacking guidance commonly starts around 1.5–2.5 pounds of food per person per day, but long-distance appetite, calorie density, body size and effort can change the number substantially.

    Estimated food carry 5.5 days
    Walking time 5.0 days
    Food margin 0.5 day
    Estimated food weight 11.0 lb

    Recalculate whenever pace, terrain, weather, access or the next resupply location changes.

    Build the trail one food carry at a time

    The Resupply Leg Is the Basic Planning Unit

    You do not need to know exactly what you will eat five months from now. You need to understand the distance and services between one reliable stop and the next.

    Step 1

    Find the Next Reliable Stop

    Distinguish a full supermarket from a resort store, gas station or seasonal outpost.

    Step 2

    Calculate Trail Miles

    Use current route mileage and include any side trail needed to reach the road, town or resupply business.

    Step 3

    Use Realistic Pace

    Early-trip mileage, high mountains and difficult weather may be far below your eventual cruising pace.

    Step 4

    Add Margin

    Weather, injury, trail closures, transportation and an unexpected slow day can all extend the food carry.

    Backpack and hiking equipment prepared for a multi-day food carry
    Food is temporary pack weight

    The Heaviest Pack of the Week Is Usually the One Leaving Town.

    A long resupply leg can add ten pounds or more of food to a lightweight backpacking system. That is why unnecessary extra days matter—and why deliberately underpacking food can be an equally poor solution.

    What goes in the bag

    Choose Food by Calories, Weight, Convenience—and Whether You Will Still Eat It

    Long-distance food planning fails when efficiency is optimized so aggressively that the hiker no longer wants the food.

    Calorie density

    Make the Weight Work

    Nuts, nut butter, oils, tortillas, bars, dried fruit and other calorie-dense foods can deliver substantial energy without requiring a large food volume.

    Convenience

    Food You Will Actually Eat

    Long hiking days favor foods that are simple to access and require little preparation. Snacks often become as important as formal meals.

    Variety

    Prevent Menu Burnout

    One advantage of buying along the trail is the ability to respond when the meal you loved in week one becomes intolerable by week six.

    Fresh food

    Eat Heavy Items First

    Fresh fruit, vegetables and other heavier foods can work well for the first day or two after town when eaten before lighter shelf-stable foods.

    Cooking

    Hot, Cold or No-Cook

    Your resupply list changes depending on whether you carry a stove, cold-soak meals or rely primarily on food that requires no preparation.

    Dietary needs

    Mail Where Selection Matters

    Gluten-free, vegan, allergy-sensitive or otherwise specialized diets can justify more mailed boxes when small stores cannot reliably meet your needs.

    Mail drops

    Mail a Box Because the Location Needs One—not Because You Own a Spreadsheet.

    Mail drops work best where food selection is genuinely poor, town access is inconvenient or a specific diet makes the local store unreliable.

    PCTA warns that post office hours can create delays. ATC similarly suggests using hostels or businesses instead of post offices when practical because small-town post offices may have limited hours and weekend closures.

    Always confirm that a private business still accepts hiker packages, what fee it charges, the correct shipping address and how long it will hold a package.

    HIKER NAME c/o GENERAL DELIVERY TOWN, STATE ZIP CODE HOLD FOR HIKER ETA: APPROXIMATE DATE

    Verify the specific post office and current USPS rules before mailing. Photo identification may be required for pickup.

    Long-distance hiker carrying food and backpacking equipment after resupply
    Before sending any box

    The Six-Question Mail-Drop Check

    A successful resupply package requires more than writing a town name on a box.

    01

    Does the Recipient Accept Hiker Boxes?

    Call or verify through a current official guide before mailing to a private business.

    02

    What Are the Pickup Hours?

    Arriving Saturday evening can turn a convenient post office box into an unplanned town delay.

    03

    Is There a Holding Fee?

    Resorts, lodges and private stores may charge hikers to receive and store packages.

    04

    When Will You Arrive?

    Put a realistic ETA on the package and avoid mailing it months ahead unless the recipient specifically permits that.

    05

    Will Your Pace Change?

    Keep unsent boxes flexible so a support person can change quantities as appetite and mileage evolve.

    06

    What Happens if You Skip Town?

    Know whether the package can be forwarded, returned or otherwise recovered if the itinerary changes.

    Pacific Crest Trail mountain landscape illustrating remote food carries
    A store near the trail may not be on the trail

    Resupply Distance Includes the Miles—and Time—Needed to Reach Town.

    PCT hikers frequently leave the trail at a road crossing, hitch or take transportation into town, shop, complete chores and then reverse the process. A resupply point ten trail miles sooner may still be slower than a larger town with better access.

    Bounce boxes

    Useful for Occasional Access. Annoying When They Control the Hike.

    A bounce box travels ahead of you and holds equipment or supplies you want periodically but do not need every day.

    Good bounce-box candidates

    Items You Need Occasionally

    • Extra medication or specialized supplies.
    • Replacement electronics or charging accessories.
    • Maps or documents for future trail sections.
    • Town clothes or personal items.
    • Small repair or maintenance supplies.
    The downside

    You Become Tied to the Package

    • Postage repeats every time it moves.
    • Pickup hours affect your itinerary.
    • You may reach town and discover you need nothing inside.
    • Routing around closures becomes more complicated.
    • A simpler purchase in town may sometimes cost less.
    Triple Crown resupply

    PCT vs Appalachian Trail vs Continental Divide Trail

    The same hybrid principle can work on all three trails, but the size and accessibility of towns change the amount of planning required.

    Pacific Crest Trail

    Buy Most, Mail Some

    PCTA says hikers can generally buy food every four to ten days and recommends shipping to a small number of remote locations rather than preparing boxes for the entire trail.

    Some resupply points are substantial towns. Others are resorts, small stores or places requiring a side trail, hitch or shuttle.

    Appalachian Trail

    Frequent Town Access

    ATC says most hikers carry roughly three to six days of food at a time. Grocery stores, outfitters and trail communities are common enough that buying along the way is practical for many hikers.

    Mailed boxes remain useful for dietary restrictions, budget strategies and particular sections.

    Continental Divide Trail

    More Logistics Between Towns

    CDTC notes that towns are generally farther apart and tend to sit farther from the trail than on the A.T. or PCT.

    Most CDT towns still have grocery stores, but several resupply points favor mailed boxes and transportation planning becomes more important.

    Town efficiency

    A Resupply Stop Is More Than Buying Food

    Efficient hikers group several chores into one visit instead of treating groceries, gear, laundry and transportation as separate town trips.

    Town taskWhat to checkCommon planning mistake
    FoodDays to next stop, store quality, opening hours and dietary needs.Buying the same amount every town even as mileage and appetite change.
    PackagesPickup location, hours, ID, fees and ETA.Arriving after the post office closes for the weekend.
    LaundryHostel, laundromat or hotel availability.Turning a quick food stop into an unnecessary overnight stay.
    ChargingPhone, battery bank, satellite communicator and headlamp.Leaving town before every required device is charged.
    GearShoes, socks, filter condition, stove fuel and repair items.Waiting until equipment completely fails in a smaller town.
    Next legCurrent trail conditions, closures, weather and water.Buying food for an itinerary that has already changed.
    The resupply is not finished when you leave town

    Food Must Be Stored Correctly on Trail

    Long-distance trails cross multiple land jurisdictions. Food-storage regulations can change during the same hike.

    Regulations

    Know the Local Rule

    Bear canisters or other approved storage methods may be mandatory in specific parks, wilderness areas or trail segments.

    Wildlife

    Protect Animals

    Proper storage prevents bears and smaller wildlife from learning that hikers are a food source.

    Capacity

    Food Must Fit

    A long food carry means nothing if the required storage container cannot physically hold the resupply.

    Town planning

    Check Before Shopping

    Know upcoming storage requirements before leaving town so the next food carry matches your legal and practical storage capacity.

    Appalachian mountain ridges along a long-distance hiking corridor
    Different trails, different rhythm

    The A.T. Can Feel Like a Chain of Short Food Carries. The CDT Can Make Town Access Part of the Expedition.

    Resupply difficulty is not only the distance between grocery stores. It is the combination of trail miles, road access, transportation, store quality, opening hours and how much schedule flexibility you have.

    Geographic context

    Resupply Changes With the Landscape Around the Trail

    The eastern A.T., western PCT and interior CDT pass through very different settlement patterns, transportation networks and wilderness corridors.

    Appalachian Trail Dense Eastern Corridor

    Frequent road crossings and nearby communities generally create shorter food carries and easier town access.

    Pacific Crest Trail Long Wilderness Legs

    Resupply remains frequent enough for a hybrid strategy, but some remote resorts and trail exits require advance planning.

    Continental Divide Trail Remote Interior West

    Greater distances from trail to town can make transportation part of the resupply problem.

    Avoid the predictable failures

    Seven Common Resupply Mistakes

    Most resupply failures come from overconfidence in a plan that stopped adapting.

    MistakeWhy it failsBetter approach
    Mailing every box before departureYour pace and appetite may be completely different after one month.Keep future boxes editable or use a hybrid strategy.
    Using best-case mileageSnow, elevation or injury can slow the next section dramatically.Calculate with realistic terrain-specific mileage.
    Ignoring store qualityA dot labeled “store” may be a small seasonal shop with limited food.Distinguish supermarket, grocery, convenience store and resort.
    Ignoring pickup hoursYour food can be sitting safely inside a locked building all weekend.Plan arrival around confirmed hours or use a suitable private business.
    Carrying too muchExcess food creates unnecessary pack weight day after day.Track actual consumption and revise the next carry.
    Carrying too littleOne delay can turn an efficient food plan into a safety problem.Add an appropriate margin for the terrain and consequences.
    Planning onceStores, roads, fires, closures and your hiking pace all change.Rebuild the next few resupply legs as current information develops.
    Resupply questions

    Thru-Hike Resupply FAQ

    A good resupply plan becomes more accurate after the hike begins because your real pace and appetite replace assumptions.

    What is the best thru-hike resupply strategy?

    For many hikers, the strongest default is hybrid resupply: buy food in substantial trail towns and mail packages only to remote locations, limited stores or stops where dietary needs make local shopping unreliable.

    How many days of food do thru-hikers carry?

    It varies by route and section. ATC says most Appalachian Trail hikers carry roughly three to six days of food. PCTA says PCT food can generally be purchased every four to ten days. Individual remote sections can fall outside simple averages.

    Should I mail all my resupply food before starting?

    Usually not unless your dietary needs or personal preferences make mailed food particularly useful. A fully prepacked system reduces the ability to respond when your pace, appetite or food preferences change.

    When should I mail a resupply box?

    Consider a box when the available store is very small, expensive or far from the trail, when a remote location is easier to access by package than by shopping, or when dietary restrictions require specific food.

    What is a bounce box?

    A bounce box is a package sent repeatedly ahead of the hiker. It can contain supplies or equipment needed occasionally but not worth carrying every day. Frequent bouncing can become expensive and tie the itinerary to package pickup hours.

    Is PCT resupply difficult?

    PCTA says there are only a few locations without good resupply stores and food can generally be purchased every four to ten days. However, many towns require leaving the trail by side trail, road crossing, hitch or other transportation.

    Is Appalachian Trail resupply easier?

    The A.T. has frequent access to communities, grocery stores and outfitters. ATC says most hikers carry only three to six days of food at a time, making buy-as-you-go resupply practical for many hikers.

    Is CDT resupply harder?

    It generally requires more transportation planning because CDT towns can be farther apart and farther from the trail. CDTC says most towns still have good grocery stores, although several locations are better handled with mailed boxes.

    How much food should I carry?

    Calculate the distance to the next reliable resupply, divide it by realistic daily mileage and add a contingency appropriate to the terrain and consequences. Then multiply the expected days by your established daily food requirement rather than relying blindly on another hiker’s number.

    Long mountain ridges at sunset during an extended trail journey
    Plan the next carry—not every meal for the next six months

    A Good Resupply Strategy Gets More Accurate as the Hike Continues.

    Start with reliable towns, strategic mail drops and realistic margins. Then pay attention. Your pace will change. Your appetite will change. Your favorite foods will change. The trail will change. Let the resupply plan change with them.

    Was this helpful?

    Yes
    No
    Thanks for your feedback!
  • How to Plan a Thru-Hike: The Complete Beginner’s Guide

    Backpacker hiking a mountain trail with lightweight overnight gear
    Beginner planning guide · long-distance hiking · route to trailhead

    How to Plan a Thru-Hike: The Complete Beginner’s Guide

    A thru-hike is not one gigantic backpacking trip that you plan mile by mile. It is a chain of manageable trail sections connected by food, water, permits, transportation, recovery and thousands of small daily decisions. Get those systems right and the trail becomes much easier to understand.

    The short answer

    Plan the Trail in This Order: Route, Time, Rules, Food, Gear, Body, Logistics.

    Start by choosing a trail that actually fits your available time and experience. Next establish the realistic season, direction and pace. Only then should you lock down permits, resupply, gear, transportation and training.

    The classic beginner mistake is starting with products. A lighter tent does not solve an impossible work schedule, a permit problem, the wrong seasonal window or a route that requires skills you have never practiced.

    Your planning sequence

    1. Pick the right trail.
    2. Choose direction and season.
    3. Build a realistic time window.
    4. Verify permits and regulations.
    5. Design resupply and water systems.
    6. Build and test gear.
    7. Train for repeated days.
    8. Solve transportation and home logistics.
    9. Build contingency margin.
    10. Recheck live conditions before departure.

    Planning system 10 steps
    Best first move Choose trail
    Most overlooked Life logistics
    Final check Live conditions
    The complete sequence

    The 10 Steps to Planning Your First Thru-Hike

    Do them roughly in this order. Later decisions become much easier once the earlier ones are settled.

    01

    Choose the Trail

    Match distance, terrain, remoteness, climate, skills and total calendar time to your real experience.

    02

    Choose the Direction

    Northbound, southbound or a flip-flop can change weather exposure, crowding, permits and finish timing.

    03

    Set the Time Window

    Work backward from weather, snow, seasonal closures, available leave and a conservative daily pace.

    04

    Verify Permits

    Check the official trail organization and relevant land managers before making non-refundable plans.

    05

    Build the Money Plan

    Budget trail expenses and the life you are leaving behind: bills, insurance, transportation and emergency margin.

    06

    Build the Gear System

    Choose shelter, sleep, clothing, cooking, water and navigation systems only after you understand the trail.

    07

    Plan Resupply

    Identify towns and long carries, then decide where buying locally works and where mailing food makes sense.

    08

    Train the Body

    Progress toward repeated walking days, hills, a loaded pack and footwear you have already tested.

    09

    Solve Real-Life Logistics

    Transport, mail, home, work, bills, insurance, communication and emergency contacts are part of the hike.

    10

    Recheck the Trail

    Closures, snow, wildfire, storms, water availability and transportation can change after the original plan.

    Step 1 · trail selection

    Your First Thru-Hike Should Fit Your Life Before It Tests Your Legs.

    The trail name matters less than whether its actual demands fit your time, competence and tolerance for uncertainty.

    Available time

    Start With the Calendar

    If you have three weeks, do not build a plan that only works if you suddenly become twice as fast. A complete shorter route can be a better first objective than racing a famous long trail.

    Technical demands

    Know What the Trail Can Require

    Snow travel, river crossings, navigation, heat, wildlife, exposed terrain and long water carries are skills problems—not simply fitness problems.

    Resupply density

    Remote Is a Logistics Choice

    A trail with regular towns lets beginners correct food and gear mistakes more easily. Long isolated sections require stronger planning before you arrive.

    Weather window

    Some Trails Have Narrow Seasons

    Snowpack, monsoon, wildfire, desert heat or winter conditions may determine the trip more than your preferred vacation dates.

    International travel

    Border Logistics Add a Layer

    Passport rules, visas, insurance, local transportation, currency and baggage restrictions can make a shorter overseas trail more complicated than a longer domestic one.

    Experience

    Your First Long Trail Can Be a Progression

    You do not need to begin with one of the world’s longest trails. A week, then two weeks, then a month builds the systems that matter later.

    Still choosing the trail? Compare the major route families in The Great Long-Distance Trails of the World , then return here once you know what kind of journey you are planning.
    Mount Jefferson Wilderness in Oregon along the Pacific Crest Trail region
    The long-trail reality

    A Thru-Hike Is a Moving Window Through Different Seasons.

    You are not planning one weather forecast. On a months-long route, desert heat, lingering snow, thunderstorms, wildfire smoke, rain and early autumn cold can all belong to the same journey.

    Steps 2–3 · direction, season and mileage

    Do Not Build the Schedule Around Your Best Training Day.

    A sustainable thru-hike pace has to survive fatigue, resupply, weather, recovery and the occasional day when everything takes longer.

    Planning factorBeginner mistakeBetter planning rule
    Daily mileage Using the biggest pre-trip day as the normal trail pace. Start conservatively and allow pace to rise after the body adapts.
    Rest days Planning every calendar day as a full hiking day. Expect town time, weather, recovery, laundry, repairs and schedule disruption.
    Terrain Treating 20 flat miles and 20 mountain miles as equivalent. Account for elevation, footing, snow, heat and water availability.
    Direction Choosing northbound only because most other hikers do. Compare seasonal windows, start difficulty, permits and the experience you want.
    Finish date Planning to finish on the last theoretically possible day. Protect margin for weather, injury, transportation and seasonal change.
    Use average pace for logistics, not identity. A daily mileage target should help estimate food carries and finish timing—not pressure you to ignore pain, weather or terrain because a spreadsheet says you are behind.
    Orientation map · North American examples

    Three Famous Thru-Hikes, Three Very Different Planning Problems

    The Triple Crown shows why there is no universal thru-hike plan. Climate, water, trail infrastructure, navigation and permits change dramatically from one corridor to another.

    Western edge Pacific Crest Trail

    Desert, Sierra snow, long water carries, wildfire exposure and a major long-distance permit system.

    Continental spine Continental Divide Trail

    Remote terrain, route choices, high elevation, navigation, snow and multiple permit jurisdictions.

    Eastern mountains Appalachian Trail

    Frequent resupply and strong infrastructure combined with sustained climbing, rocks, roots, humidity and rain.

    Orientation only: this map is not a field-navigation tool. Build your actual route from current official trail maps, closures and the navigation system you will carry.
    Step 4 · permits and rules

    Never Assume “It Is a Trail” Means You Can Simply Start Walking.

    Long trails cross different jurisdictions. One journey can involve national parks, forests, wilderness areas, state land, tribal lands and private property.

    PCT example

    One Long-Distance Permit Can Simplify Many Areas

    The Pacific Crest Trail Association administers an interagency long-distance permit for eligible continuous trips of 500 miles or more. Local restrictions and permit terms still matter.

    CDT example

    Some Trails Require a Permit Patchwork

    The Continental Divide Trail does not have one long-distance permit covering the entire route. Long-distance hikers must identify and obtain required permits for the jurisdictions they enter.

    AT example

    Registration and Permits Are Different

    Appalachian Trail hikers can voluntarily register their trip with ATCamp, but registration does not replace permits required in specific parks or regulated areas.

    The permit rule: use blogs and forums to discover what needs checking, then verify the actual rule with the organization or land-management agency that sets it.
    Blue Ridge mountain landscape in the Appalachian Mountains
    Infrastructure changes the plan

    A Trail With Frequent Towns Can Still Be Physically Hard.

    The Appalachian Trail demonstrates the difference between logistical difficulty and hiking difficulty. Frequent road crossings and trail towns simplify many resupplies, but they do not remove steep terrain, weather, cumulative fatigue or thousands of miles of repeated impact.

    Step 5 · money

    Build the Budget in Categories, Not With One Cost-Per-Mile Number.

    Two hikers can walk the same trail and spend very different amounts. Town behavior, transportation and existing gear often create more variation than trail mileage alone.

    Getting There

    Flights, fuel, buses, shuttles, trailhead transport and transportation home from the far terminus.

    Trail Food

    Normal resupplies plus the additional calories many hikers begin buying as appetite increases during a long trip.

    Town Spending

    Restaurants, lodging, laundry, showers, charging, transportation and additional rest days.

    Gear

    Initial equipment plus realistic replacement for shoes, socks, filters, electronics and items that wear out or fail.

    Home Expenses

    Rent or mortgage, insurance, subscriptions, vehicle costs, phone service and bills that continue while you hike.

    Contingency

    An emergency reserve protects the trip when weather, medical needs, transportation or equipment failure forces an expensive change.

    A useful budget creates decision freedom. If one unexpected motel night, shuttle change or replacement pair of shoes threatens the entire hike, the financial plan is too tight.
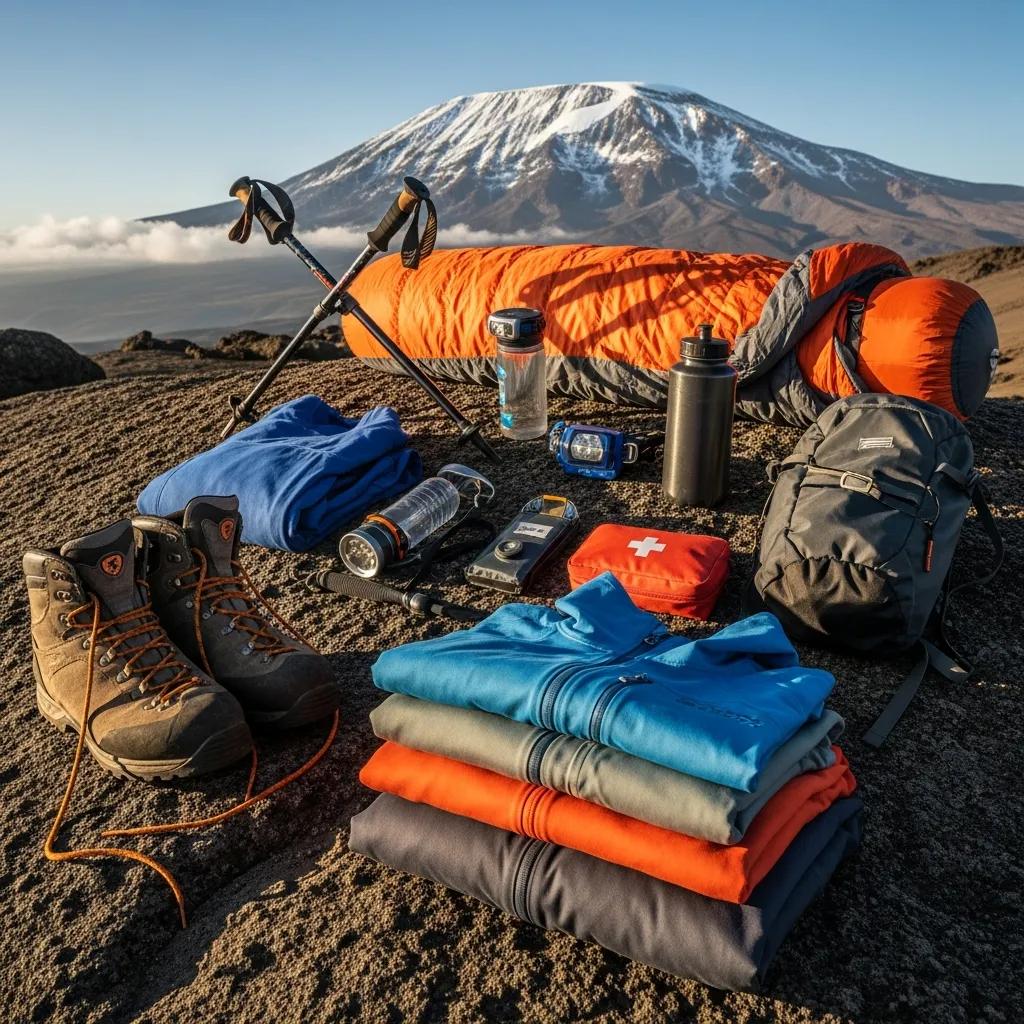
    Hiking equipment including footwear sleeping bag poles and clothing
    Step 6 · the gear system

    Build Around Function Before Weight.

    Thru-hikers talk constantly about base weight because carrying less can make thousands of repeated steps easier. But weight is useful only when the equipment still performs its job.

    Build the system from six questions: Where will you sleep? How cold can nights become? How will you stay dry? How much water must you carry? How will you navigate and communicate? What equipment does the season or route require?

    After those are answered, remove duplication and luxuries you do not value. Do not reverse the process by choosing a target pack weight first and then cutting safety margin until the number looks impressive.

    Open the Gear Planner
    Shelter

    Know Where You Will Sleep

    Tent, tarp, hammock or shelter-based system should match terrain, bugs, rain, wind, campsite availability and your tolerance for compromise.

    Sleep

    Warmth Is a System

    Sleeping bag or quilt, pad insulation, clothing, shelter and actual overnight temperatures work together. One temperature number does not describe the whole system.

    Water

    Capacity Changes by Section

    A wet forest section and a dry desert carry should not automatically use the same water capacity. Plan around the longest reliable gap.

    Footwear

    Fit Matters More Than Trail Fashion

    Use footwear that works for your feet under repeated mileage. Test it with your real socks, pack weight and terrain before departure.

    Layers

    Protect Against the Actual Climate

    Build around sun, rain, wind and overnight temperature rather than copying a gear list from a trail with different conditions.

    Electronics

    Power Has a Logistics Cost

    Phones, satellite communicators and battery banks are useful only if your resupply schedule and charging strategy keep them working.

    Step 7 · food and towns

    Do Not Plan Every Meal for a Five-Month Hike Before You Start.

    A resupply strategy should provide structure without locking you into food preferences, pace and town stops that may change after the first few weeks.

    Buy as you go

    Flexible and Simple

    Buying in trail towns reduces pre-trip packing and lets your food preferences evolve. The tradeoff is variable selection and price.

    Mail boxes

    Useful When There Is a Reason

    Mail drops can help with dietary restrictions, medication, specialized items or locations with limited resupply.

    Hybrid system

    Usually the Most Adaptable

    Buy food through normal trail towns and mail selected boxes only where the route or your personal needs justify them.

    Plan carries, not menus. Know where the major resupply points are, how many trail days separate them and which difficult sections need extra margin. Your exact food choices can remain flexible.
    Hiker using trekking poles on a mountain trail
    The fitness difference

    Thru-Hiking Fitness Is the Ability to Do It Again Tomorrow.

    A single long hike proves that you can have one long day. A thru-hike asks whether your feet, legs, connective tissue, fueling and recovery can absorb repeated days without requiring a full reset.

    Step 8 · physical preparation

    Train for Repetition, Not One Heroic Weekend.

    The goal is not to arrive capable of doing your biggest trail day. It is to arrive durable enough to let fitness build instead of immediately breaking down.

    Base phase

    Walk Frequently

    Establish a repeatable walking and hiking habit before chasing distance. Consistency gives feet and connective tissue time to adapt.

    Hill phase

    Add Vertical Gradually

    Hills, stairs and inclined treadmill work help prepare the climbing muscles and descending tolerance that flat mileage misses.

    Pack phase

    Introduce Realistic Load

    Carry the pack progressively rather than jumping from unloaded walks directly to full food-and-water weight.

    Specific phase

    Practice Consecutive Days

    Back-to-back hikes reveal footwear, fueling, recovery and pack-fit problems that one-day workouts can hide.

    Training cannot reproduce the entire thru-hike. You are preparing enough durability and familiarity to survive the early adaptation period—not trying to complete the whole trail in training before the real hike begins.
    Step 9 · getting on and off trail

    The Thru-Hike Begins Before the First Blaze.

    Terminus transportation, home obligations and the return trip deserve the same attention as backpack weight and resupply.

    Start

    Reach the Trailhead

    Airports, buses, trains, shuttle schedules, seasonal roads and remote termini can turn the first day into its own logistics project.

    Home

    Make Absence Sustainable

    Automate recurring bills, decide what happens to your vehicle, protect important documents and make sure someone can respond if a home problem develops.

    Finish

    Do Not Book the Return Too Tightly

    A rigid flight immediately after a theoretical finish date can turn normal trail delays into a bad decision. Build practical margin.

    Communication

    Set Expectations Before Leaving

    Tell family what communication will look like, how often you expect to check in and what silence should—or should not—mean.

    Emergency

    Leave Useful Information

    A trusted contact should know the trail, general direction, likely pace, important accounts and what to do if genuine concern develops.

    Documents

    Protect What You Cannot Easily Replace

    Store secure copies of permits, identification, insurance details and key travel information separately from the originals.

    A practical countdown

    A Beginner’s Thru-Hike Planning Timeline

    This is a framework rather than a universal deadline. Permit release dates, international travel and highly competitive routes can require earlier action.

    12–9 months before

    Choose the trail family, confirm the available time window, research direction and identify major permit deadlines.

    9–6 months before

    Commit to the route, begin systematic training, build the initial budget and research start and finish transportation.

    6–3 months before

    Finalize the core gear system, complete overnight shakedowns, identify resupply structure and solve major home obligations.

    3–1 months before

    Increase hiking specificity, confirm transportation, organize permits, test electronics and check seasonal conditions.

    Final 2 weeks

    Reduce panic training. Check closures, weather patterns, transportation, water information and first-section resupply.

    Final 72 hours

    Recheck official trail alerts, charge devices, verify documents and permits, review the first section and start with a manageable load and pace.

    The goal of the timeline is to move decisions earlier. The final week should be about verification and travel—not buying an entirely new shelter, learning navigation from scratch or discovering that your start area requires a permit.
    Layered Great Smoky Mountains landscape in the Appalachian region
    Start conservatively

    The First Week Is Part of the Training Plan.

    You do not need to prove the whole hike during the first three days. Give your feet, appetite, sleep system and daily routine time to settle before treating maximum mileage as the goal.

    Common planning failures

    Seven Mistakes That Make a Thru-Hike Harder Than It Needs to Be

    Most are not dramatic wilderness mistakes. They are ordinary planning decisions that remove flexibility before the hike has even begun.

    Mistake 1

    Overplanning Every Day

    Plan sections and constraints. Do not force a five-month trail to obey a daily spreadsheet created before you know your real pace.

    Mistake 2

    Starting Too Fast

    Early enthusiasm can create foot, tendon and overuse problems before the body has adapted to repeated loaded walking.

    Mistake 3

    Buying Before Researching

    The correct shelter, sleeping insulation, water capacity and clothing depend on the trail and season.

    Mistake 4

    Ignoring Town Costs

    Restaurants, rooms, transportation and extra zero days can change the budget far faster than trail food alone.

    Mistake 5

    Assuming Water Is Static

    Seasonal sources can change. Water planning should use current official and reliable trail information.

    Mistake 6

    Depending on One Device

    Navigation, permits, transportation and communication should not become impossible because one phone fails.

    Mistake 7

    No Schedule Margin

    Weather, injury, closures and transportation changes happen. A plan with no flexibility makes every delay feel like a crisis.

    What changes by trail

    Use the Same Planning Framework—Then Change the Variables.

    The sequence remains useful whether you are walking two weeks or five months. What changes is the trail’s dominant problem.

    Trail stylePlanning priorityWhat deserves extra attention
    AT-style corridorRepeated mountain mileage Wet weather, town frequency, shelter rules, rocks, roots, cumulative climbing and early-season crowding.
    PCT-style corridorSeasonal progression Desert water, Sierra snow, long-distance permits, wildfire and reaching northern terrain before late-season weather.
    CDT-style corridorNavigation and flexibility Route choices, water, snow, remoteness, multiple permit systems and greater logistical independence.
    European long trailAccommodation and route format Hut or town reservations, public transport, border crossings, seasonal services and whether camping is allowed.
    High-altitude trekAltitude and daily vertical Acclimatization, recovery, remote medical planning and weather rather than raw mileage alone.
    Beginner questions

    Thru-Hike Planning FAQ

    The answers below are deliberately planning-focused. Trail-specific rules should always be checked against current official information.

    How far in advance should you plan a thru-hike?

    For a major multi-month trail, six to twelve months gives many hikers enough time to choose a route, watch permit deadlines, build fitness, test equipment and solve work and home logistics. A shorter route can often be planned much faster.

    How much money should you save for a thru-hike?

    Build a personal budget rather than using one universal per-mile number. Include transport, permits, food, town lodging and meals, gear replacement, insurance, home expenses and emergency reserve.

    How do thru-hikers get food?

    Most combine normal grocery or convenience-store resupply with selected mailed boxes. Mail drops are most useful where store selection is limited or where dietary or medical needs justify them.

    Do you need permits for a thru-hike?

    It depends on the trail and jurisdictions crossed. The PCT offers an interagency long-distance permit for qualifying trips, while the CDT requires hikers to obtain permits for individual regulated areas. The A.T. also crosses locations with their own permit rules.

    How many miles should a beginner thru-hiker walk each day?

    There is no universal number. Terrain, elevation, heat, pack weight, snow, water and fitness all change realistic mileage. Starting conservatively gives the body a chance to adapt before mileage rises.

    Do you need ultralight gear to thru-hike?

    No. Lower weight can improve comfort and efficiency, but reliability and protection matter first. Reduce unnecessary duplication after the shelter, sleep, weather, water and safety systems are sound.

    How should you train for a thru-hike?

    Build frequent walking first, then add hills, longer hikes, pack weight and eventually back-to-back hiking days. Training should also test footwear, fueling and the equipment you will actually use.

    What is the most important part of planning a thru-hike?

    Match the objective to your life and experience. A realistic trail, seasonal window and schedule make permits, food, gear, training and transportation much easier to solve.

    Appalachian mountain landscape at sunset
    The beginner rule

    Build Enough Structure to Start. Keep Enough Flexibility to Continue.

    A strong thru-hike plan tells you where you are going, when the season works, which rules matter, how you will eat, what you will carry and how you will get home. It does not try to predict every campsite months before your first step.

    Was this helpful?

    Yes
    No
    Thanks for your feedback!
Language »