Global Summit Guide logo featuring mountain imagery, symbolizing hiking and mountaineering resources for trip planning and safety.

Tag: mountaineering training

  • Complete Mountaineering Training Guide: Couch to Summit

    Mountaineering harness and climbing gear for Denali and Everest expeditions.
    Training Cluster · Pillar Guide · Beginner to Expedition · 2026

    Complete Mountaineering Training Guide: Couch to Summit

    The complete 12-month program for high-altitude climbing — aerobic base development, strength training, climbing-specific endurance, altitude preparation, and mental conditioning. Evidence-based framework drawn from Training for the New Alpinism, Uphill Athlete methodology, and applied across major mountaineering objectives from Mount Rainier to Everest.

    📋 Editorial Standards

    This pillar guide synthesizes training methodology from Uphill Athlete (the coaching service co-founded by Steve House and Scott Johnston, authors of the genre-standard Training for the New Alpinism), Mark Twight’s Gym Jones approach, peer-reviewed exercise physiology research on aerobic training and altitude preparation, and the American College of Sports Medicine (ACSM) training guidelines. No affiliate partnerships influence recommendations. Specific program and book mentions are illustrative references, not endorsements. See full methodology and editorial standards below.

    12 mo
    Couch-to-Summit Timeline
    70-80%
    Time in Zone 1-2 Cardio
    14-18 hr
    Peak Weekly Training
    $200-$2000
    Equipment Investment

    ⚡ Quick Answer: Mountaineering Training

    Four components: (1) Aerobic base / Zone 2 cardio (70-80% of training time) · (2) Strength training (compound lifts, 2-3 sessions/week) · (3) Climbing-specific endurance (loaded carries, hill repeats) · (4) Altitude prep + mental conditioning.

    Timeline: 12 months for couch-to-summit progression to high-altitude objectives (Aconcagua, Denali, 8,000m peaks). 6-9 months for moderate peaks (Kilimanjaro, Rainier).

    Methodology: Steve House + Scott Johnston’s Training for the New Alpinism (Uphill Athlete) is the genre-standard reference. Weekly time: Builds from 8-12 hours (months 1-3) to 14-18 hours (peak phase) before tapering. Key principle: “Big base, small peak” — extensive aerobic development is the foundation.

    How This Pillar Was Built — Applied Training Experience

    This pillar guide draws on personal training application across multiple mountaineering objectives including Mount Kilimanjaro (Tanzania, 5,895m), Pico de Orizaba (Mexico, 5,636m), Iztaccíhuatl (Mexico, 5,230m), and Rainier-class Pacific Northwest peaks. Specifically, the training framework presented here represents what was actually executed and refined across multiple expedition preparations rather than theoretical prescription.

    Notably, this is a pillar post — designed to anchor the broader Training cluster on Global Summit Guide. Each of the major training topics will receive dedicated deep-dive coverage in supporting posts (see the cluster structure below). Where supporting posts exist, this pillar links to them; where they’re still in development, the pillar provides the foundational treatment that the deep-dive will expand upon.

    🏋️ The Mountaineering Training Framework

    Effective mountaineering training rests on three core principles that distinguish it from general fitness training. First, specificity: train how you’ll perform — long aerobic sessions, loaded carries, and progressive elevation gain mimic the actual demands of expedition climbing more than gym strength training alone. Second, periodization: structure training in distinct phases (base, build, peak, taper) rather than constant intensity, allowing physiological adaptation and recovery.

    Third, “big base, small peak”: spend 70-80% of training time at low intensity (Zone 1-2 cardio) to develop aerobic capacity, then layer specific work and intensity on top of that foundation. Fourth, recovery as training: sleep, nutrition, and rest days are not interruptions to training — they are when adaptation actually occurs. Fifth, progressive overload: each training cycle should be modestly harder than the previous one, whether through more time, more load, more vertical, or more frequency.

    Mountaineering training is the structured 6-12 month physical and mental preparation required to safely perform at altitude on a specific climbing objective. Generally, the training develops four physiological components — aerobic capacity, strength, climbing-specific endurance, and altitude tolerance — combined with mental preparation for sustained effort under fatigue and adverse conditions. Specifically, the modern standard for mountaineering training derives from Steve House and Scott Johnston’s Training for the New Alpinism (2014) which emphasizes large aerobic base development, periodized progression, and individualized programming based on the specific objective. Notably, mountaineering training is distinguished from general fitness training by its emphasis on extended low-intensity work (Zone 1-2 cardio comprising 70-80% of training time), load-carrying capacity (rather than pure strength), and the integration of expedition-specific elements like multi-day fatigue resistance and recovery-on-the-mountain.

    Key Takeaways

    • 4 components: aerobic base, strength, climbing-specific endurance, altitude prep + mental.
    • 70-80% of training time in Zone 1-2 — extensive aerobic base is the foundation.
    • 12-month timeline for couch-to-summit to high-altitude objectives.
    • 14-18 hours per week at peak training phase.
    • 2-3 strength sessions per week — compound lifts, progressive overload.
    • Loaded carries are critical — bridge gym fitness to mountain performance.
    • “Big base, small peak” — Steve House / Scott Johnston methodology.
    • Periodization in 4 phases: base, build, peak, taper.
    • Pre-expedition taper is essential — reduce volume 60% in final 4 weeks.
    • Mental preparation matters — visualize, build suffering tolerance, decision-making.

    📊 Mountaineering Training Quick Facts

    Training Timeline
    12 months typical
    Compressed Timeline
    6-9 months (fit start)
    Peak Weekly Hours
    14-18 hours
    Zone 2 Allocation
    70-80% of time
    Strength Sessions
    2-3 per week
    Recovery Days
    1-2 per week
    Resting HR Target
    < 60 bpm trained
    Pack Load Target
    35-50 lbs
    Vertical/Week Peak
    3,000-6,000 ft
    Long Day Duration
    6-10 hours
    Genre Standard Book
    Training for the New Alpinism
    Coaching Service
    Uphill Athlete
    Alt. Approach
    Gym Jones (Mark Twight)
    Heart Rate Zones
    5-zone model
    Aerobic Base Phase
    Months 1-3
    Specific Phase
    Months 6-9
    Peak Phase
    Months 9-11
    Taper Phase
    Month 12
    Sleep Target
    8-9 hours nightly
    Calorie Surplus
    Peak phase 200-500

    ✓ Editorial Trust Signals

    • First-hand: Multi-peak training application
    • Independent: No affiliate sponsorship
    • Cross-referenced: Uphill Athlete, ACSM, peer-reviewed
    • Last verified: June 9, 2026
    • Review cycle: Quarterly
    • Safety review: Dawson Ludlow (WFA)
    • Methodology: Training for the New Alpinism
    • 700+ source pages: Cross-linked
    Updated June 2026 · 4 fitness components · 12-month progression · Periodization framework · Heart rate zone training · Cross-linked to Skills Pillar + Progression Plans (Kilimanjaro, Rainier, Aconcagua, Denali, Elbrus, Orizaba)

    What Is Mountaineering Training?

    Mountaineering training is the structured 6-12 month physical and mental preparation required to perform safely at altitude on a specific climbing objective. Generally, the training develops four physiological components — aerobic capacity, strength, climbing-specific endurance, and altitude tolerance — combined with mental conditioning for sustained effort under fatigue. Specifically, mountaineering training is distinguished from general fitness training by three characteristics: extensive low-intensity work (70-80% of time in Zone 1-2 cardio), load-carrying emphasis (loaded carries with 25-50 pound packs), and integration of expedition-specific elements like multi-day fatigue resistance.

    The modern standard for mountaineering training derives from Steve House and Scott Johnston’s Training for the New Alpinism (2014), now considered the genre-defining reference. Generally, the methodology emphasizes the “big base, small peak” principle — extensive aerobic development as the foundation, with specific work and intensity layered on top. Specifically, House and Johnston founded Uphill Athlete, a coaching service that applies the methodology with individualized programming. Notably, an alternative framework comes from Mark Twight via Gym Jones and his books Extreme Alpinism and Kiss or Kill — emphasizing higher-intensity protocols suited to short-route alpinism.

    FIELD NOTEWhy training matters more than skill for most climbers: Among intermediate mountaineers, fitness limitations cause failure more often than technical skill limitations. Generally, climbers fail to summit not because they cannot execute the technique required but because they run out of physical capacity before reaching the summit. Specifically, on Aconcagua, Denali, Kilimanjaro, and similar peaks, success rates correlate more strongly with fitness preparation than with prior climbing experience. Notably, this is why guide services routinely require fitness benchmarks (loaded hike time, vertical gain per hour, etc.) but rarely require demonstrated technical climbing skills for non-technical peaks.

    The 4 Components of Mountaineering Fitness

    Mountaineering fitness combines four distinct physiological components, each requiring specific training protocols. Generally, the components are not interchangeable — strong cardio cannot compensate for weak strength, and gym strength cannot replace loaded-carry capacity. Specifically, the four components and their typical training allocation:

    Component% of Training TimePrimary MethodsFrequency
    1. Aerobic Base (Zone 1-2)~70%Long slow distance hiking, running, cycling, rowing4-6 sessions/week
    2. Strength Training~12%Compound lifts (squats, deadlifts, presses)2-3 sessions/week
    3. Climbing-Specific Endurance~12%Loaded carries, stair climbing, hill repeats1-3 sessions/week
    4. Altitude Prep + Mental~6%Altitude camps, visualization, stress practiceOngoing/periodic

    Component 1: Aerobic Base (Zone 1-2 Cardio)

    COMPONENT 1 OF 4 · FOUNDATION · 70-80% OF TIME

    Aerobic Base Development

    The single most important component — extensive low-intensity training builds the foundation everything else rests on.

    Aerobic base training develops the physiological foundation of mountaineering fitness: mitochondrial density, capillary networks, fat oxidation efficiency, and the cardiovascular capacity to sustain effort for hours at moderate intensity. Generally, this is achieved through long-duration, low-intensity sessions in Zone 1-2 heart rate (60-75% of maximum heart rate). Specifically, the science is unambiguous: extensive aerobic base development is the single most evidence-supported training modality for endurance performance.

    Session structure: Aerobic base sessions are typically 60-180 minutes long. Generally, the climber maintains a pace that allows continuous nasal breathing and conversation — if you can’t comfortably speak in full sentences, you’re going too hard. Specifically, beginning climbers often find Zone 2 surprisingly slow at first; this is normal and indicates the need for aerobic development.

    • Modalities: Hiking, walking, running, cycling, rowing, swimming, elliptical, ski touring
    • Heart rate target: Zone 1 (50-60% max HR) for recovery sessions, Zone 2 (60-75% max HR) for primary aerobic development
    • Session duration: 60-180 minutes (3+ hours on long weekend days)
    • Weekly frequency: 4-6 sessions per week
    • Weekly volume: 6-15 hours total Zone 1-2 time depending on phase
    70-80%Training Time
    Zone 1-2HR Target
    4-6/wkSessions
    6-15 hrWeekly Volume

    Dedicated deep-dive coming: “Zone 2 Training for Mountaineers: The Complete Aerobic Base Guide.”
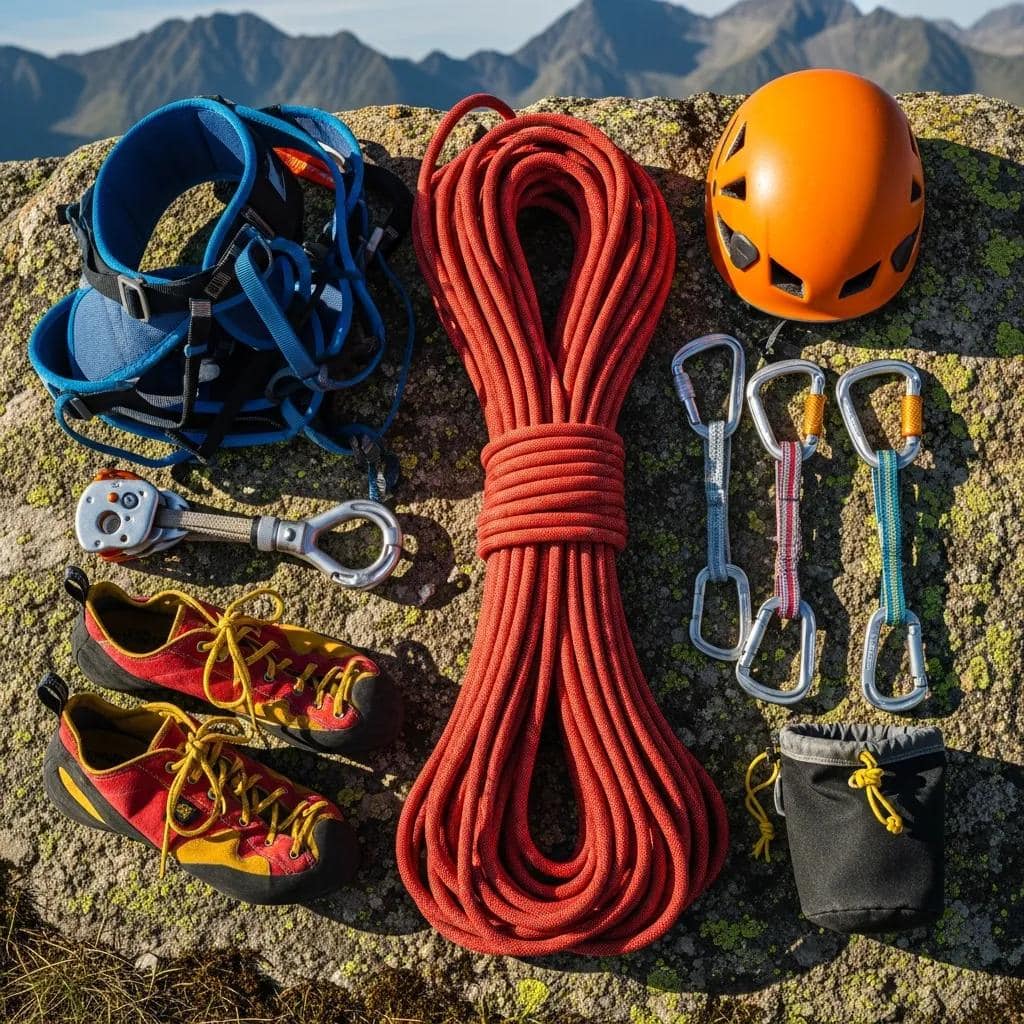
    Diverse mountain climbing gear including harness, climbing shoes, ropes, carabiners, and helmet arranged on rocky surface with mountain backdrop.
    Training prepares you to carry and use all of this — at altitude, after days of fatigue. Generally, the connection between training and expedition success runs through this gear. Specifically, every item shown adds weight (boots, crampons, ice axes, ropes, harness, helmet, layering, food, water, shelter) that the climber must carry while operating at altitude. Notably, this is why mountaineering training emphasizes load-carrying capacity rather than pure strength — the goal is to make the expedition load feel manageable across many days of effort.Photo: Mountaineering gear collection. Global Summit Guide media library.

    Component 2: Strength Training

    COMPONENT 2 OF 4 · TISSUE RESILIENCE

    Strength Training for Mountaineers

    Compound lifts emphasizing legs, posterior chain, and core build the tissue resilience that load-carrying demands.

    Strength training in a mountaineering context is fundamentally different from bodybuilding or general fitness gym work. Generally, the goal is not maximum strength or muscle mass — it is tissue resilience and the strength-to-bodyweight ratio that supports load carrying without injury over multi-week expeditions. Specifically, the program centers on compound lifts that work multiple muscle groups simultaneously and emphasize the muscles most stressed by climbing: legs, posterior chain, and core.

    Core lifts: The five most important lifts for mountaineers, in priority order:

    • Back squats: Overall leg strength foundation. Sets of 5-12 reps at progressive loads.
    • Romanian deadlifts: Posterior chain (hamstrings, glutes, lower back) — directly applicable to load carrying.
    • Bulgarian split squats: Single-leg strength critical for uneven terrain and step-ups.
    • Conventional deadlifts: Total-body strength and grip; lower frequency than other lifts.
    • Overhead presses: Shoulder stability for pack carrying and ice axe work.

    Supplementary work: Pull-ups (back), planks and anti-rotation work (core stability), step-ups with weight (mountain-specific). Generally, sessions take 45-75 minutes including warm-up.

    2-3/wkSessions
    5-12 repsWorking Sets
    ~12%Training Time
    45-75 minSession Length

    Dedicated deep-dive coming: “Strength Training for Climbers: The Foundation Lifts.”

    Component 3: Climbing-Specific Endurance

    COMPONENT 3 OF 4 · MOUNTAIN BRIDGE

    Climbing-Specific Endurance (Loaded Carries)

    Loaded carries are the secret weapon — they bridge gym fitness to mountain performance.

    Climbing-specific endurance training translates gym fitness and aerobic base into actual mountain performance. Generally, the centerpiece of this training is the loaded carry — hiking or walking with a pack weighted to expedition load (25-50 pounds typical). Specifically, loaded carries develop multiple capacities simultaneously: aerobic endurance under load, postural muscles for pack management, foot and ankle resilience for varied terrain, mental tolerance for sustained discomfort.

    Loaded carry progression: Start with 20 pounds over 1-2 hours of varied terrain. Specifically, progress by adding 5 pounds every 2-3 weeks while extending duration to 4-6 hours by mid-training cycle. Notably, the goal is to have completed multiple 4-6 hour loaded sessions before any expedition over 5,000m.

    • Loaded hikes: 25-50 lb pack over varied terrain, 2-6+ hours
    • Stair climbing: With or without weight, 30-60 min sessions; excellent vertical-equivalent training
    • Hill repeats: Short steep hills with progressive loads, 30-45 min sessions
    • Treadmill incline: 12-15% incline at walking pace, 60-90 min sessions
    • Sandbag carries: Unusual loads that train stabilizers
    ◆ The Single Best Training Exercise

    If you can only do one type of mountaineering-specific training, choose loaded uphill hiking. Generally, this single activity develops aerobic capacity, leg strength, core stability, foot resilience, mental tolerance, and pack-management skill simultaneously. Specifically, weekend loaded hikes of 4-8 hours with progressive load are the most expedition-specific training available to anyone with access to even modest hills. Notably, climbers without hill access can simulate this with stair climbing or treadmill incline — both are highly effective substitutes.

    1-3/wkSessions
    25-50 lbPack Load
    2-6 hrDuration
    ~12%Training Time

    Dedicated deep-dive coming: “Loaded Carries: The Mountaineer’s Secret Weapon.”

    Component 4: Altitude + Mental Preparation

    COMPONENT 4 OF 4 · INTEGRATION LAYER

    Altitude Preparation and Mental Conditioning

    The integration layer — pre-altitude exposure and mental rehearsal tie physical preparation to performance.

    The fourth component integrates the prior three with the expedition environment. Generally, this includes pre-expedition altitude exposure where feasible, mental rehearsal of expedition scenarios, stress inoculation through progressively challenging training days, and decision-making practice under fatigue. Specifically, the mental component is often undertrained — climbers focus heavily on physical preparation while skipping the mental rehearsal that makes hard training transferable to expedition performance.

    Altitude preparation strategies:

    • Pre-altitude camps: 2-4 weeks at 2,500-4,000m in the months before expedition (most effective)
    • Weekend altitude trips: Sleeping at altitude on training weekends
    • Hypoxic tents/altitude rooms: Limited evidence — peer-reviewed studies show modest benefits at best
    • Iron stores optimization: Adequate ferritin levels support red blood cell adaptation
    • Hydration habits: Practice aggressive hydration during training

    Mental preparation methods:

    • Visualization: Mental rehearsal of summit day, descent, and emergency scenarios
    • Suffering tolerance: Progressive exposure to discomfort during long training sessions
    • Decision practice: Make pace/route/turnaround decisions during fatigued training
    • Group dynamics: Practice climbing partner communication during training
    • Process focus: Train attention on present-moment execution rather than outcome
    ~6%Training Time
    OngoingDaily Practice
    2-4 wkPre-Altitude
    LimitedHypoxic Tents

    Dedicated deep-dives coming: “How to Train for Altitude Without Mountains” + “Mental Toughness Training for High Altitude.”

    Heart Rate Zones Explained

    Mountaineering training uses a 5-zone heart rate model based on percentage of maximum heart rate. Generally, the zones correspond to different physiological adaptations and training purposes. Specifically, knowing your zones requires either lab testing (most accurate) or a field test (sufficient for most purposes). Notably, the simplest field test is: warm up 15 minutes, then run/hike all-out for 20 minutes — your average heart rate during the all-out section approximates your lactate threshold (top of Zone 3).

    Zone% Max HRSubjective EffortPurposeTime Allocation
    Zone 150-60%Very easy, can chatActive recovery5-15%
    Zone 260-75%Easy, conversationalAerobic base (workhorse)65-75%
    Zone 375-85%Moderate, broken sentencesTempo (used sparingly)5-10%
    Zone 485-92%Hard, short responsesThreshold / lactate3-8%
    Zone 592-100%Max, no talkingVO2 max (rare)0-3%
    ℹ️ The Polarized Training Principle

    Modern endurance training research strongly supports polarized training: spend 80%+ of time at low intensity (Zone 1-2) and 10-20% at high intensity (Zone 4-5), with minimal time in the “moderate” Zone 3. Generally, this approach produces better adaptations than spending most time at moderate intensity. Specifically, mountaineering training follows this principle — long easy sessions plus occasional high-intensity intervals, with little time in the middle zones.

    Dedicated deep-dive coming: “Heart Rate Zones for Mountaineering: Complete Guide.”

    The 12-Month Progression: Couch to Summit

    The standard mountaineering training framework progresses through four phases over 12 months. Generally, the progression is non-negotiable for high-altitude objectives — climbers who compress the timeline routinely underperform or fail to summit. Specifically, the four phases and their typical durations:

    PhaseMonthsFocusWeekly HoursKey Metric
    Phase 1: Base1-3Aerobic foundation, beginning strength8-12Zone 2 ease at increasing pace
    Phase 2: Build3-6Volume increase, strength progression, intro loaded carries10-14Loaded carry duration
    Phase 3: Specific6-9Mountain-specific training, vertical gain, technique12-15Vertical feet per week
    Phase 4a: Peak9-11Maximum training load, back-to-back long days14-18Multi-day fatigue resistance
    Phase 4b: Taper11-12Volume reduction, maintain intensity, recover8-12 decliningSleep, recovery markers

    Phase 1: Aerobic Base (Months 1-3)

    The base phase establishes the aerobic foundation that everything else builds upon. Generally, this is the most important phase and the one climbers most often shortcut. Specifically, base phase focuses almost exclusively on Zone 1-2 cardio with progressive volume increase from approximately 6 hours weekly to 10 hours weekly over three months.

    • Cardio: 5-6 sessions per week of 60-90 minutes Zone 1-2 (one session 2+ hours)
    • Strength: 2x per week, bodyweight progressions then add weights, focus on form
    • Specific: Minimal — establish baseline with one loaded hike at 20 lbs every 2-3 weeks
    • Recovery: 1-2 full rest days per week, prioritize sleep

    Phase 2: Build (Months 3-6)

    The build phase integrates strength with endurance and introduces meaningful loaded carries. Generally, training volume increases moderately (10-14 hours weekly) while intensity remains controlled. Specifically, this is when one anaerobic threshold session per week is added to build the upper end of aerobic capacity.

    • Cardio: 5-6 sessions per week, longer Zone 2 sessions (90-150 min), one 3+ hour weekend session
    • Strength: 2-3x per week with compound lifts at 70-85% intensity
    • Specific: 1-2 loaded carries weekly progressing from 25 to 35 lbs
    • Threshold: One Zone 3-4 session per week (intervals or steady tempo)

    Phase 3: Mountain-Specific (Months 6-9)

    The specific phase transitions to mountain-relevant training. Generally, the work becomes increasingly expedition-like with weekend loaded hikes, stair climbing or treadmill incline sessions, and ideally 1-2 mountain weekends per month. Specifically, vertical gain becomes a primary training metric — target 3,000-5,000 vertical feet weekly during this phase.

    • Cardio: Major weekend hike (5-6+ hours) plus weekday Zone 2 maintenance
    • Strength: 2x per week, transitioning to mountain-specific work (step-ups, lunges, carries)
    • Specific: 2-3 sessions weekly with 35-50 lb loads on varied terrain
    • Threshold: 1-2 sessions weekly, longer intervals (8-20 min)
    • Mountain time: Real mountain days every 2-4 weeks

    Phase 4a: Peak (Months 9-11)

    The peak phase pushes maximum training load with back-to-back weekend days simulating expedition fatigue. Generally, this is the riskiest phase — overtraining can occur if recovery is not aggressive. Specifically, weekly training time reaches 14-18 hours with one or two recovery days mandatory.

    • Cardio: Long weekend days (6-10 hours), back-to-back when possible
    • Strength: Reduce to 1-2 maintenance sessions; preserve adaptations without adding new stress
    • Specific: Heaviest loads of training cycle (45-50+ lbs), longest durations
    • Recovery: Critical — track resting HR, sleep quality, mood

    Phase 4b: Pre-Expedition Taper (Month 12)

    The taper phase reduces training stress to allow full recovery before the expedition. Generally, the principle is “rest more, intensity stays the same” — preserve fitness while eliminating accumulated fatigue. Specifically, the standard taper curve:

    WeekVolume vs PeakIntensityFocus
    4 weeks before~80%MaintainLast hard sessions, then begin reducing
    3 weeks before~60%MaintainReduce duration, keep intensity
    2 weeks before~40%Maintain on key sessionsShort quality sessions only
    1 week before~25%EasyMovement only, prioritize sleep
    2-3 days beforeRestRestFinal packing, mental preparation
    Essential climbing gear for Makalu expeditions, including insulated jacket, climbing ropes, crampons, ice axes, backpacks, and safety equipment, displayed against a scenic mountain backdrop.
    The 12-month training program prepares climbers for the full expedition gear load. Generally, the training framework’s emphasis on loaded carries directly serves the reality of expedition logistics — climbers must carry expedition gear over days or weeks at altitude. Specifically, by month 9 of training, climbers should be comfortable with 35-50 pound packs over 6-10 hour days. Notably, this is what allows the trained mountaineer to focus on technique and decision-making rather than struggling with the physical demands of expedition logistics.Photo: Expedition gear in high-altitude mountain environment. Global Summit Guide media library.

    Established Training Programs

    Several established programs apply mountaineering training principles in different ways. Generally, the choice depends on objective type, available time, and athlete preference. Specifically, the major programs:

    ProgramOriginBest ForCost
    Training for the New AlpinismSteve House + Scott Johnston (2014)Multi-month expedition prep, big peaks$25-40 book + DIY
    Uphill Athlete coachingHouse + JohnstonIndividualized programs, accountability$200-500/month
    Gym JonesMark TwightHigh-intensity alpinism, short routesCoaching cost varies
    Climbing the Seven SummitsMike Hamill (2012)Standard Seven Summits prepBook + guided service
    NOLS / RMI trainingGuide service programsClimbers using specific guide for expeditionOften included

    Training for the New Alpinism (House + Johnston)

    The genre-standard reference. Generally, the methodology emphasizes large aerobic base (70-80% Zone 1-2 time), periodization, and individualization. Specifically, House and Johnston’s framework forms the foundation for most modern mountaineering training programs and is the basis for the Uphill Athlete coaching service. Notably, the book is dense and technical — readers should expect to study it rather than skim it.

    Gym Jones (Mark Twight)

    An alternative approach emphasizing higher intensity protocols. Generally, Gym Jones-style training works well for short-route alpinism and athletes coming from CrossFit or military backgrounds. Specifically, the program features metabolic conditioning workouts, complex movement patterns, and lower aerobic base emphasis than the House/Johnston approach. Notably, Gym Jones is less appropriate for multi-week expedition objectives where pure endurance dominates.

    Climbing the Seven Summits (Mike Hamill)

    Mike Hamill’s book combines training framework with route-specific expedition guidance. Generally, the book is most useful for climbers planning to use Hamill’s guide service (Climbing the Seven Summits) or similar full-service expeditions. Specifically, Hamill provides a more accessible introduction than House/Johnston while covering Seven Summits objectives in detail.

    Uphill Athlete (External) →

    The Pre-Expedition Taper in Detail

    The pre-expedition taper is often misunderstood and underexecuted. Generally, climbers fear losing fitness during the taper and consequently train too hard in the final weeks, arriving at the expedition over-fatigued. Specifically, the science is clear: tapering preserves nearly all hard-earned fitness while eliminating accumulated training fatigue. Notably, well-tapered athletes routinely outperform their training-cycle averages.

    ⚠ The Taper Mistake That Sabotages Expeditions

    The most common taper mistake is continuing high training volume in the final 1-2 weeks before departure. Generally, climbers feel “not ready” and double down on training, often executing maximum-effort sessions in the final 7 days. Specifically, this leaves them undercut by accumulated fatigue at the start of the expedition — when they most need full recovery and sleep. Notably, even modest under-tapering (skipping the final week’s volume reduction) measurably reduces summit success rates in studies of guided expeditions.

    Common Training Mistakes

    ⚠ The 10 Most Common Mountaineering Training Mistakes

    (1) Skipping the aerobic base phase — Eager climbers jump to intensity work without building the foundation; this caps long-term progress. (2) Training too hard during Zone 2 sessions — Most “easy” runs are actually Zone 3; this prevents aerobic adaptation. (3) Inadequate loaded carries — Loaded carry training cannot start in the final 2 months; tissue resilience requires months to develop. (4) Strength training only / cardio only — Both components are essential; one cannot compensate for the other. (5) Insufficient recovery — Training does not produce adaptation; recovery from training does. (6) Over-training in the final weeks — Taper mistakes routinely sabotage otherwise good preparation. (7) Ignoring sleep quality — Sleep is the most important recovery modality; 8-9 hours nightly is non-negotiable in peak phase. (8) Wrong specificity — Training for an Aconcagua climb requires different work than training for an alpine rock route. (9) Skipping mental preparation — Physical training alone does not prepare climbers for expedition-condition decisions. (10) Single-modality training — Only running, only stairs, only cycling — variety reduces injury risk and improves overall fitness.

    Training for Specific Objectives

    Mountaineering training varies by objective. Generally, the framework above applies to all high-altitude objectives but emphasis shifts based on the specific peak. Specifically, here’s how training adapts to common objectives covered on Global Summit Guide:

    ObjectiveTimelineEmphasisProgression Plan
    Mount Kilimanjaro6-9 monthsAerobic base, hiking volumeKilimanjaro Plan
    Mount Rainier9-12 monthsAerobic base + glacier skillsRainier Plan
    Mount Elbrus9-12 monthsAerobic + altitude prepElbrus Plan
    Mont Blanc9-12 monthsAerobic + techniqueMont Blanc Plan
    Pico de Orizaba9-12 monthsAerobic + glacier skillsOrizaba Plan
    Aconcagua12-18 monthsAerobic base + extreme altitudeAconcagua Plan
    Denali12-18 monthsHeavy load carrying + extreme coldDenali Plan
    Everest / 8,000m peaks18-24+ monthsExtended periodization, multi-expedition prepMultiple progressions
    Mountaineering boots on a hiker's feet, showcasing rugged design and grip, with trekking poles in a mountainous landscape, emphasizing outdoor adventure and gear for climbing.
    Training, gear, and skills form a triangle. Generally, expedition success requires all three: physical conditioning (this pillar), gear competence (the gear hub), and technical skills (the Skills pillar). Specifically, each leg of the triangle supports the others — improved fitness lets you carry better gear; better skills make fitness more effective; better gear enables more demanding training. Notably, climbers who train without skill development or gear competence — or vice versa — typically plateau quickly.Photo: Mountaineering boots and gear arrangement. Global Summit Guide media library.

    The Training Cluster — 10 Supporting Posts

    This pillar post is the anchor of the Training cluster on Global Summit Guide. Generally, each of the major training topics will receive dedicated deep-dive coverage in supporting posts. Specifically, the cluster includes:

    Cluster RolePost TitleStatus
    PILLARComplete Mountaineering Training Guide: Couch to Summit (this post)Published
    Support 1Zone 2 Training for Mountaineers: The Complete Aerobic Base GuideComing soon
    Support 2Strength Training for Climbers: The Foundation LiftsComing soon
    Support 3Loaded Carries: The Mountaineer’s Secret WeaponComing soon
    Support 4How to Train for Altitude Without MountainsComing soon
    Support 5Periodization for Expedition ClimbersComing soon
    Support 6Recovery and Sleep for MountaineersComing soon
    Support 7Mental Toughness Training for High AltitudeComing soon
    Support 8Nutrition for Mountaineering TrainingComing soon
    Support 9Heart Rate Zones for Mountaineering: Complete GuideComing soon
    Support 10Pre-Expedition Taper: The Final 4 WeeksComing soon

    Frequently Asked Questions About Mountaineering Training

    How long does it take to train for high-altitude mountaineering?

    Complete training for high-altitude mountaineering objectives like Aconcagua (6,961m), Denali (6,190m), or 8,000-meter peaks typically requires 12-18 months for climbers starting from baseline fitness. Specifically, 6-9 months for moderate objectives like Mount Kilimanjaro (5,895m) or Mount Rainier (4,392m). The 12-month framework is the most common — the first 3 months build aerobic base, months 3-6 develop strength and integrate endurance, months 6-9 focus on mountain-specific training, and months 9-12 peak preparation plus pre-expedition taper.

    What is the most important training for mountaineering?

    Aerobic base training (Zone 1-2 cardio at 60-75% maximum heart rate) is widely considered the most important single component of mountaineering training, requiring approximately 70-80% of total training time. Aerobic capacity determines how long a climber can sustain effort at altitude, how quickly they recover between exertions, and how efficiently they utilize fat versus glycogen. Steve House and Scott Johnston’s Training for the New Alpinism emphasizes “big base, small peak” — extensive aerobic development is the foundation that everything else builds upon.

    Do I need to train at altitude before a high-altitude climb?

    Pre-expedition altitude training is beneficial when feasible but not strictly required. Climbers who can spend 2-4 weeks at moderate altitude (2,500-4,000m) in the months before their expedition typically acclimatize faster on the actual climb. However, most climbers do not have access to extensive pre-altitude training and acclimatize on-expedition through proper schedule progression. Hypoxic tent or altitude room training has limited and contested evidence — most peer-reviewed studies show modest benefits at best, far less than actual altitude exposure.

    How much should I train per week for mountaineering?

    Weekly training time varies by phase and objective. The progression is: months 1-3 (8-12 hours), months 3-6 (10-14 hours), months 6-9 (12-15 hours), months 9-11 peak (14-18 hours), month 12 taper (8-12 hours decreasing weekly). The breakdown typically allocates 70-80% to aerobic base (Zone 1-2 cardio), 10-15% to strength training, 5-10% to specific training (loaded carries, hill repeats), and 5-10% to anaerobic threshold or interval work. This is substantial — 12-18 hours per week of training is comparable to amateur endurance athletes.

    What strength training is best for mountaineering?

    Compound lifts emphasizing the legs, posterior chain, and core are the foundation of strength training for mountaineering. The key lifts include: back squats and front squats (overall leg strength), Romanian deadlifts (posterior chain), conventional deadlifts (total body), Bulgarian split squats (single-leg strength), overhead presses (shoulder stability), pull-ups (back), and planks plus anti-rotation work for the core. Generally, 2-3 sessions per week with progressive overload using rep ranges of 5-12 builds the tissue resilience needed for load-carrying at altitude.

    What heart rate zones should I train in for mountaineering?

    Mountaineering training uses a five-zone heart rate model. Zone 1 (50-60% max HR) is active recovery — easy walking, light yoga. Zone 2 (60-75% max HR) is the aerobic base zone — the workhorse of mountaineering training where 70-80% of weekly time should be spent. Zone 3 (75-85% max HR) is tempo work — moderate-pace running or hiking, used sparingly. Zone 4 (85-92% max HR) is threshold/lactate work — short intervals 1-2 times per week. Zone 5 (92-100% max HR) is VO2 max work — rare, reserved for advanced training phases. Most successful programs spend 80%+ of time in Zones 1-2.

    Can I train for mountaineering without mountains?

    Yes, much of mountaineering training can be completed without mountain access. Specifically, aerobic base training works on any terrain (treadmill, road, bike, rower); strength training requires only a gym; loaded carries can be done on local hills, parking structures, or even staircase climbing. However, mountain time is essential for mental preparation, real-world skill application, and authentic terrain experience — climbers should plan 2-4 mountain weekends during the training cycle even if technical skills already exist.

    What is the Training for the New Alpinism approach?

    Training for the New Alpinism, written by Steve House and Scott Johnston in 2014, is the genre-standard mountaineering training reference. The methodology emphasizes large aerobic base (70-80% of training in Zone 1-2), specific endurance progression, periodization with distinct base/build/peak/taper phases, and individualized programming based on the climber’s specific objective. The authors founded Uphill Athlete, a coaching service that applies the methodology with individualized programming. The book and methodology have become the de facto standard reference for serious mountaineering training.

    How do I know if I’m overtraining for mountaineering?

    Overtraining indicators include: elevated resting heart rate (5-10+ beats above baseline for multiple days), persistent fatigue that does not respond to a rest day, declining performance in routine workouts, sleep disturbances, mood changes including irritability or depression, frequent minor illnesses, and loss of motivation to train. The most reliable single indicator is morning resting heart rate measured daily — sustained elevation suggests overreaching or overtraining. The response is reduced volume (not zero training) for 5-10 days followed by gradual return.

    When should I start training for a high-altitude expedition?

    Begin formal training 12 months before the expedition departure date for high-altitude objectives. This allows time for the four progression phases: aerobic base (months 1-3), strength and endurance integration (months 3-6), mountain-specific training (months 6-9), and peak plus taper (months 9-12). Climbers with existing strong fitness can compress this to 8-9 months but starting from baseline fitness requires the full 12 months. The most successful expedition outcomes correlate strongly with adequate preparation time — undertrained climbers are substantially more likely to fail to summit or experience medical issues.

    Methodology & Editorial Standards

    How This Pillar Was Built

    1. Primary Source: Applied Training Methodology

    This pillar guide draws on personal training application across multiple mountaineering objectives including Mount Kilimanjaro (Tanzania), Pico de Orizaba (Mexico, 5,636m), Iztaccíhuatl (Mexico, 5,230m), and Rainier-class Pacific Northwest peaks. The training framework presented represents what was actually executed rather than theoretical prescription.

    2. Methodology Cross-Reference

    The 4-component framework and progression structure were validated against published methodology from Uphill Athlete (Steve House and Scott Johnston), Mark Twight’s Gym Jones approach, Mike Hamill’s Climbing the Seven Summits, and peer-reviewed exercise physiology research on aerobic training, periodization, and altitude preparation.

    3. Internal Cross-Reference

    This pillar is cross-referenced against Global Summit Guide’s existing progression plans for major mountaineering objectives (Kilimanjaro, Rainier, Mont Blanc, Elbrus, Orizaba, Aconcagua, Denali) plus the Essential Mountaineering Skills pillar and gear hub.

    4. Editorial Independence

    No affiliate partnerships influence recommendations. References to Uphill Athlete, Training for the New Alpinism, Gym Jones, and other programs are illustrative of methodologies, not endorsements. The article generates revenue only through Google AdSense display ads when applicable.

    5. Update Cycle

    This pillar is reviewed quarterly. Next scheduled review: September 2026. Supporting deep-dive posts will be added approximately monthly across the coming 12 months — each addition will update this pillar with internal links to the new supporting content.

    Affiliate disclosure: Global Summit Guide does not maintain affiliate partnerships with Uphill Athlete, Gym Jones, training book publishers, or coaching services mentioned in this pillar guide. No commission is earned from any external link clicks. This page contains no sponsored content. The site is supported by Google AdSense (Display Ads) when applicable.

    Sources and References

    Numbered Source References

    This mountaineering training pillar synthesizes data from authoritative training methodology sources combined with applied field experience.

    1. Training for the New Alpinism by Steve House and Scott Johnston (Patagonia Books, 2014) — Genre-standard mountaineering training reference.
    2. Uphill Athlete · https://uphillathlete.com/ — Coaching service applying the House/Johnston methodology.
    3. Extreme Alpinism and Kiss or Kill by Mark Twight — Alternative high-intensity approach via Gym Jones.
    4. Climbing the Seven Summits by Mike Hamill (Mountaineers Books, 2012) — Seven Summits training framework.
    5. American College of Sports Medicine (ACSM) · https://www.acsm.org/ — Exercise physiology and training guidelines.
    6. Journal of Applied Physiology — Peer-reviewed research on aerobic training, periodization, and altitude adaptation.
    7. High Altitude Medicine & Biology journal — Peer-reviewed altitude physiology research.
    8. National Strength and Conditioning Association (NSCA) · Strength training methodology and progression.
    9. American Mountain Guides Association (AMGA) · https://amga.com/ — Professional mountain guide standards.
    10. Global Summit Guide internal research — Cross-referenced from existing progression plans plus personal training application across multiple expeditions.

    Methodology note. Quarterly review cycle — next review September 2026. Exercise physiology research and training methodologies continue to evolve; verify current best practices with the cited organizations and recent peer-reviewed literature within 12 months of major expedition objectives.

    About the Author

    Travis Ludlow

    Editor & Route Research, Global Summit Guide

    Travis Ludlow is the editor of Global Summit Guide, an independent mountaineering and high-altitude hiking resource. Travis has personally applied mountaineering training methodology across multiple expeditions including Mount Kilimanjaro (Tanzania, 5,895m), Pico de Orizaba (Mexico, 5,636m), Iztaccíhuatl (Mexico, 5,230m), and Rainier-class Pacific Northwest peaks.

    Specifically, Travis has authored or edited Global Summit Guide’s training-focused content including the progression plans for Mount Kilimanjaro, Mount Rainier, Mont Blanc, Mount Elbrus, Pico de Orizaba, Aconcagua, and Denali. Notably, the editorial process at Global Summit Guide includes safety review by Dawson Ludlow (Wilderness First Aid certified) and gear review by Walker Ludlow.

    Expertise areas: Mountaineering training, expedition preparation, progression planning, high-altitude physiology, mountaineering skills. Editorial role: Editor and route research for Global Summit Guide’s 700+ published articles. Approach: Applied first-hand training methodology, cross-referenced against Uphill Athlete and Training for the New Alpinism standards. Read more about the Global Summit Guide editorial team →

    Continue Your Training Journey

    Start Your Training Journey

    The 12-month mountaineering training program is well-defined, evidence-based, and used by generations of climbers to prepare for high-altitude objectives. Generally, the path starts simply: build aerobic base, add strength, integrate loaded carries, prepare for altitude. Specifically, the framework works whether you’re targeting Kilimanjaro in 9 months or Everest in 24 months — the components and progression structure remain consistent.

    Start with Kilimanjaro Plan → Essential Skills Pillar →
    Was this helpful?

    Yes
    No
    Thanks for your feedback!
  • Mountaineering Skills 2026: Complete Beginner to Advanced Guide

    Mountaineering harness and climbing gear for Denali and Everest expeditions.
    Mountaineering Skills · Pillar Guide · Beginner to Advanced · 2026

    Complete Guide to Essential Mountaineering Skills

    The 10 core skill categories every mountaineer must master, from foot skills and ice axe self-arrest through rope work, anchors, glacier travel, and self-rescue. Comprehensive 2026 pillar reference covering progression from beginner to advanced level, learning timelines, common mistakes, and cross-references to deep-dive guides for each skill category.

    📋 Editorial Standards

    This pillar guide synthesizes technical content from American Mountain Guides Association (AMGA), American Alpine Institute (AAI), International Federation of Mountain Guides Associations (IFMGA), and American Alpine Club published curriculum, cross-referenced with personal field experience. No affiliate partnerships influence recommendations. Specific brand mentions are illustrative, not endorsements. See full methodology and editorial standards below.

    10 Skills
    Core Skill Categories
    12-24 mo
    Learning Timeline
    50-100
    Field Days for Competency
    $500-$3000
    Course + Gear Investment

    ⚡ Quick Answer: The 10 Essential Mountaineering Skills

    Foundation Skills (months 1-6): (1) Foot skills + crampon technique · (2) Ice axe mastery + self-arrest · (3) Rope work + knots

    Intermediate Skills (months 6-12): (4) Belay techniques · (5) Anchor building · (6) Glacier travel + crevasse rescue · (7) Rappelling

    Advanced Skills (months 12-24+): (8) Navigation + route finding · (9) Mountain weather + decision making · (10) Self rescue + partner rescue

    How This Guide Was Built — Field Experience Foundation

    This pillar guide draws on personal mountaineering experience across Mount Kilimanjaro (Tanzania, 5,895m), multiple Mexican volcanoes including Pico de Orizaba (5,636m) and Iztaccíhuatl (5,230m), Rainier-class peaks in the Pacific Northwest, and extensive expedition trekking experience. Specifically, the skill descriptions and progression guidance reflect what was actually required and used during these climbs, not just theoretical knowledge.

    Notably, this is a pillar post — designed to anchor the broader Skills cluster on Global Summit Guide. Each of the 10 skill categories will receive dedicated deep-dive coverage in supporting posts (see the cluster structure below). Where supporting posts exist, this pillar links to them; where they’re still in development, the pillar provides the foundational treatment that the deep-dive will expand upon. The pillar will be updated quarterly as new supporting posts publish.

    🏔 The Mountaineering Skills Framework

    Mountaineering competency is built in three tiers: Foundation, Intermediate, and Advanced. First, the Foundation tier establishes the non-negotiable safety skills — foot skills, ice axe self-arrest, and the essential knots that all roped work depends on. Second, the Intermediate tier adds the rope-based skills that enable climbing with partners: belay technique, anchor construction, glacier travel, and rappelling.

    Third, the Advanced tier develops the judgment and rescue skills that separate confident mountaineers from competent ones: navigation in poor visibility, weather decision-making, and self-rescue capabilities. Fourth, all three tiers require extensive field practice — typically 50-100 climbing days per year — for skills to become reliable under real conditions. Fifth, formal instruction is essential for the intermediate and advanced skills; the foundation skills can be self-taught but professional courses dramatically accelerate progression.

    Mountaineering skills are the combined technical, decision-making, and rescue competencies required to travel safely in mountainous terrain that includes snow, ice, glaciers, rock, exposure to fall hazards, and the consequences of remoteness from professional medical or rescue support. Generally, these skills distinguish mountaineering from hiking (which requires only basic outdoor skills) and from rock climbing (which is one component of mountaineering rather than the complete discipline). Specifically, mountaineering skills are organized in standard curricula by organizations including the American Mountain Guides Association (AMGA), American Alpine Institute (AAI), British Mountaineering Council (BMC), and International Federation of Mountain Guides Associations (IFMGA). Notably, while specific techniques vary by region, the 10 core skill categories described here are universal — every mountaineer eventually develops all of them.

    Key Takeaways

    • 10 core skill categories organized in three tiers: Foundation, Intermediate, Advanced.
    • Foot skills come first — confident footing prevents falls in the first place.
    • Ice axe self-arrest is the most critical single skill — practice 50-100 times before relying on it.
    • Knots are foundational — memorize 8 essential knots until they’re muscle memory.
    • Formal courses are essential for intermediate/advanced skills — 5-7 day courses cost $500-$1,500.
    • Crevasse rescue is the hardest single skill — practice repeatedly until systematic.
    • Decision-making cannot be taught from a book — requires extensive field time.
    • Skill progression takes 12-24 months with 50-100 climbing days per year.
    • Cost: $500-$3,000 for initial course + essential gear.
    • Practice each skill regularly — skills decay without use.

    📊 Mountaineering Skills Quick Facts

    Skill Categories
    10 (3 tiers)
    Foundation Skills
    3 (months 1-6)
    Intermediate Skills
    4 (months 6-12)
    Advanced Skills
    3 (months 12-24+)
    Most Important Skill
    Ice axe self-arrest
    Hardest Skill
    Crevasse rescue
    Practice Required
    50-100 days/year
    Formal Course Cost
    $500-$1,500
    Course Duration
    5-7 days typical
    Initial Gear Cost
    $1,500-$3,000
    Total Skill Timeline
    12-24 months
    Boots Required
    B1-B3 (varies)
    Crampons Required
    12-point
    Ice Axe Length
    45-55 cm
    Rope Diameter
    8.5-9.8mm dynamic
    Essential Knots
    8 to memorize
    Belay Methods
    4 standard
    Anchor Types
    3 major categories
    Standard Cert Bodies
    AMGA, AAI, IFMGA
    Annual Skills Audit
    Recommended

    ✓ Editorial Trust Signals

    • First-hand: Kilimanjaro + Mexico volcanoes climbs
    • Independent: No affiliate sponsorship
    • Cross-referenced: AMGA, AAI, IFMGA curricula
    • Last verified: June 9, 2026
    • Review cycle: Quarterly
    • Safety review: Dawson Ludlow (WFA)
    • Gear review: Walker Ludlow
    • 200+ source pages: Cross-linked
    Updated June 2026 · 10 essential skill categories · 3 progression tiers · Cross-linked to 200+ Global Summit Guide skills and gear pages · Pillar post for the Mountaineering Skills cluster

    What Are Mountaineering Skills?

    Mountaineering skills are the combined technical, decision-making, and rescue competencies required to travel safely in mountainous terrain. Generally, they distinguish mountaineering from hiking (which requires only basic outdoor skills) and from rock climbing (which is one component of mountaineering rather than the complete discipline). Specifically, mountaineering involves traveling off-trail through snow, ice, glaciers, rock, and exposed terrain — often at altitude, often in remote locations, and often under conditions where weather, route finding, and rescue concerns become survival-critical.

    The 10 skill categories described in this pillar guide are organized by three tiers of progression: Foundation, Intermediate, and Advanced. Generally, these tiers correspond to typical learning timelines: Foundation skills in months 1-6, Intermediate in months 6-12, Advanced in months 12-24+. Specifically, each tier builds on the previous one — you cannot safely learn intermediate skills without solid foundation skills, and advanced judgment cannot develop without extensive field application of intermediate techniques.

    FIELD NOTEThe “Skills Pyramid” perspective: Think of mountaineering skills as a pyramid with foundation skills as the base and advanced skills as the peak. The pyramid is only as tall as its base is wide. Specifically, a climber with weak foundation skills (poor footwork, sloppy knots) will plateau quickly when attempting intermediate techniques — the unstable base limits how high the pyramid can build.

    Tier 1: Foundation Skills (Months 1-6)

    The Foundation tier comprises three skills that every mountaineer must develop before attempting any technical climbing. Generally, these are the non-negotiable safety skills — foot skills that prevent falls, ice axe self-arrest that recovers from falls, and the knots that all roped work depends on. Specifically, the foundation skills can largely be self-taught with diligent practice and good resources, though a basic course substantially accelerates progression.

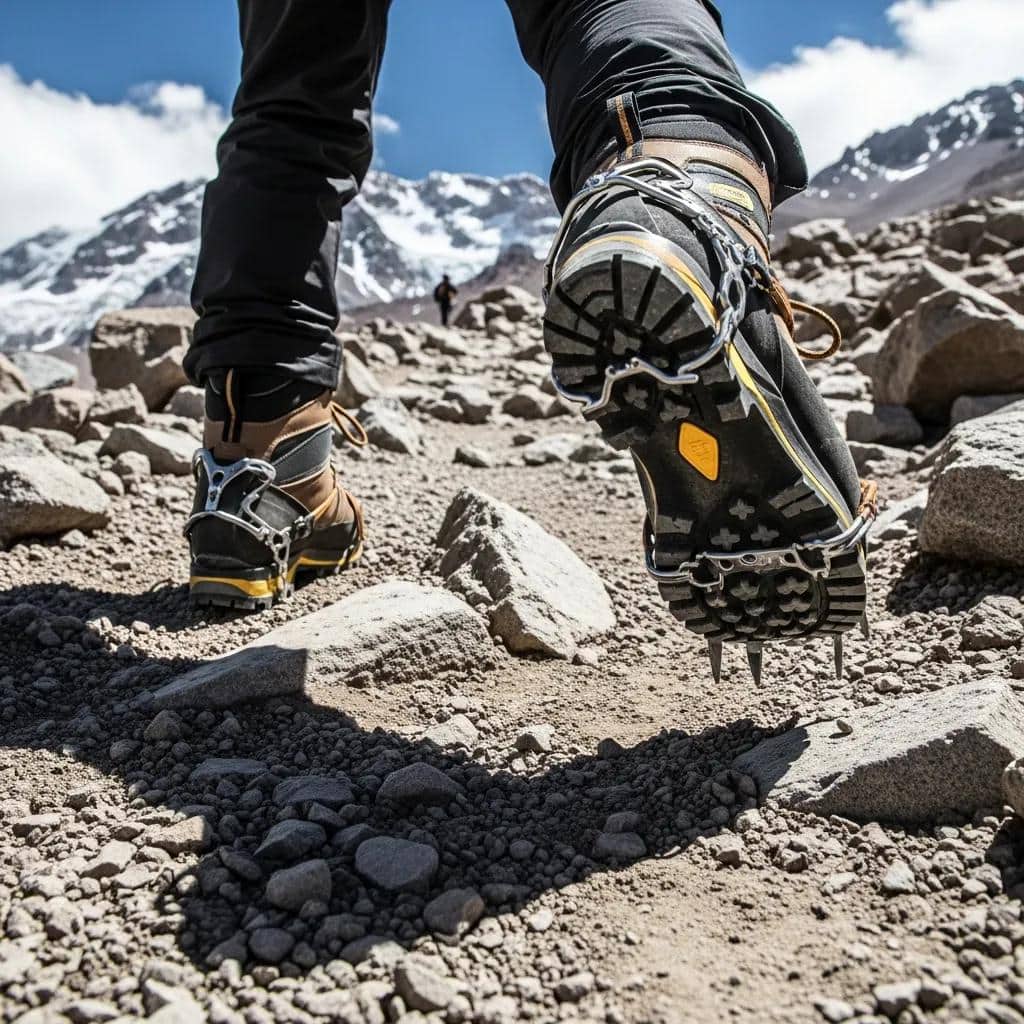
    Climber wearing mountaineering boots with crampons on rocky terrain, highlighting essential footwear for Aconcagua expeditions.
    Mountaineering boots on rocky terrain — the foundation of every other skill. Generally, foot skills depend completely on proper boot selection. Specifically, the B0/B1/B2/B3 rating system determines crampon compatibility, the boot stiffness determines French and German technique effectiveness, and the boot fit determines whether long approach days end with feet-on or feet-blistered. Notably, this is why “boots first” is the universal first-purchase recommendation for new mountaineers.Photo: Climbers in mountaineering boots on rocky terrain. Global Summit Guide media library.
    FOUNDATION · SKILL 1 OF 10

    1. Foot Skills and Crampon Technique

    Walking on snow, ice, and mixed terrain — the foundation of everything else.

    Foot skills are the foundation of all mountaineering. Generally, confident footing prevents falls in the first place, making this skill more important than rescue skills (which assume something has already gone wrong). Specifically, three primary crampon techniques cover all standard terrain:

    • French technique (pied à plat): All 10 bottom points of the crampon flat on the snow. Used for low-angle slopes up to approximately 35-40 degrees. Most energy-efficient on moderate terrain. Requires ankle flexibility.
    • German technique (frontpoint): Front 2 points kicked perpendicular into steep snow or ice. Used for slopes above 50-55 degrees and on water ice. Requires calf strength and confident commitment.
    • American technique (combination diagonal): One foot flat (French), one foot frontpointing (German). The standard technique for moderate slopes 40-55 degrees and for transitions between angles.

    Boot and crampon pairing is critical to safe technique. Generally, the B0-B3 rating system pairs boots with crampons: B0 hiking boots accept C1 (strap-on) crampons only; B1 light mountaineering boots accept C1-C2; B2 mountaineering boots accept C2 (semi-automatic); B3 technical boots accept C3 (fully automatic step-in). Notably, mismatched boot-crampon pairings are dangerous — a soft B0 boot in a stiff C2 crampon can flex unpredictably and detach mid-stride.

    Months 1-2Initial Learning
    20-50 daysField Practice
    $300-$500Crampon Cost
    Best Crampons Buyer’s Guide → Crampons + Ice Axe Guide → Microspikes vs Crampons →

    Dedicated deep-dive coming: “How to Use Crampons: Complete Step-by-Step Guide.”

    FOUNDATION · SKILL 2 OF 10 · MOST CRITICAL

    2. Ice Axe Mastery and Self-Arrest

    The single most important mountaineering skill — recovers from falls on snow and ice.

    Ice axe mastery is the single most critical mountaineering skill because it is the difference between a survivable slip and a fatal fall on any snow or ice slope. Generally, the ice axe serves multiple functions throughout a climb:

    • Cane position: Held in uphill hand on moderate terrain — the most common position during snow approach. The spike enters the snow as the climber’s third point of contact.
    • Adze position: Used for chopping steps in firm snow or ice when crampons alone don’t provide security. Also the standard position for arrest.
    • Dagger position: The pick driven into steep snow for security on steep ground (50-70 degrees).
    • Self-arrest position: The arrested position with axe head buried in snow, body weight on the shaft, feet held off snow to prevent ankle injury.

    Self-arrest must be practiced from all four falling positions: head-first feet-down, head-first feet-up, prone (face-down), and supine (back-down). Generally, each requires different recovery mechanics.

    ⚠ Self-Arrest is Practice, Not Theory

    Self-arrest must be practiced 50-100 times across multiple sessions before it becomes reliable muscle memory. Specifically, in a real fall a climber has 2-5 seconds before reaching dangerous speed — self-arrest must be reflexive, not deliberate. Generally, practice on a safe snow slope with clear runout. Notably, even experienced climbers practice self-arrest at the start of every climbing season to refresh the reflex.

    Months 2-3Initial Learning
    50-100Practice Arrests
    $80-$200Ice Axe Cost
    Crampons + Ice Axe Guide →

    Dedicated deep-dive coming: “Ice Axe Self-Arrest: The Most Critical Mountaineering Skill.”

    FOUNDATION · SKILL 3 OF 10

    3. Rope Work and Essential Knots

    Memorize 8 essential knots — the foundation of all roped climbing.

    The 8 essential mountaineering knots must be memorized until they can be tied in under 30 seconds, with cold hands, in poor lighting, with eyes closed. Generally, knots are the prerequisite to all roped climbing — without confident knot skills, all other rope-based techniques become unsafe.

    The 8 essential knots:

    • Figure-eight follow-through: The standard knot for tying into a harness. Easy to inspect visually for correctness.
    • Bowline: Alternative tie-in knot, easier to untie under load. Requires a backup stopper knot.
    • Clove hitch: Adjustable mid-rope knot, primary belay anchor knot. Adjusts length easily without untying.
    • Prusik: Friction knot used for ascending rope, crevasse rescue, and as autoblock backup on rappel.
    • Munter hitch: Belay backup knot when a belay device is lost or unavailable.
    • Double fisherman’s: Joins two ropes for rappel descent or extended slings.
    • Water knot (ring bend): Joins flat webbing for sling construction.
    • Overhand on a bight: Quick mid-rope clip-in or anchor point.
    ◆ Knot Practice Habit

    Keep a 2-meter piece of cord on your desk or by your TV. Generally, the best climbers can tie all 8 essential knots without looking — the knots are reflexes, not procedures. Specifically, professional guides report tying figure-eight follow-throughs 1,000+ times per season. Notably, the path from “can tie this knot” to “can tie this knot reflexively” takes approximately 100-200 repetitions of each knot.

    Months 1-3Initial Learning
    100-200Reps Per Knot
    $20-$40Practice Cord

    Dedicated deep-dive coming: “Essential Mountaineering Knots Every Climber Should Know.”

    Tier 2: Intermediate Skills (Months 6-12)

    The Intermediate tier comprises four skills that require formal instruction and substantial supervised practice. Generally, these are the rope-based skills that enable climbing with partners on technical terrain: belay technique, anchor construction, glacier travel with crevasse rescue, and rappelling. Specifically, attempting to self-teach these skills is risky — an incorrectly built anchor or improperly executed belay can be fatal. Notably, a 5-7 day mountaineering course with AMGA, AAI, or IFMGA instruction is the standard pathway to acquiring intermediate skills safely.

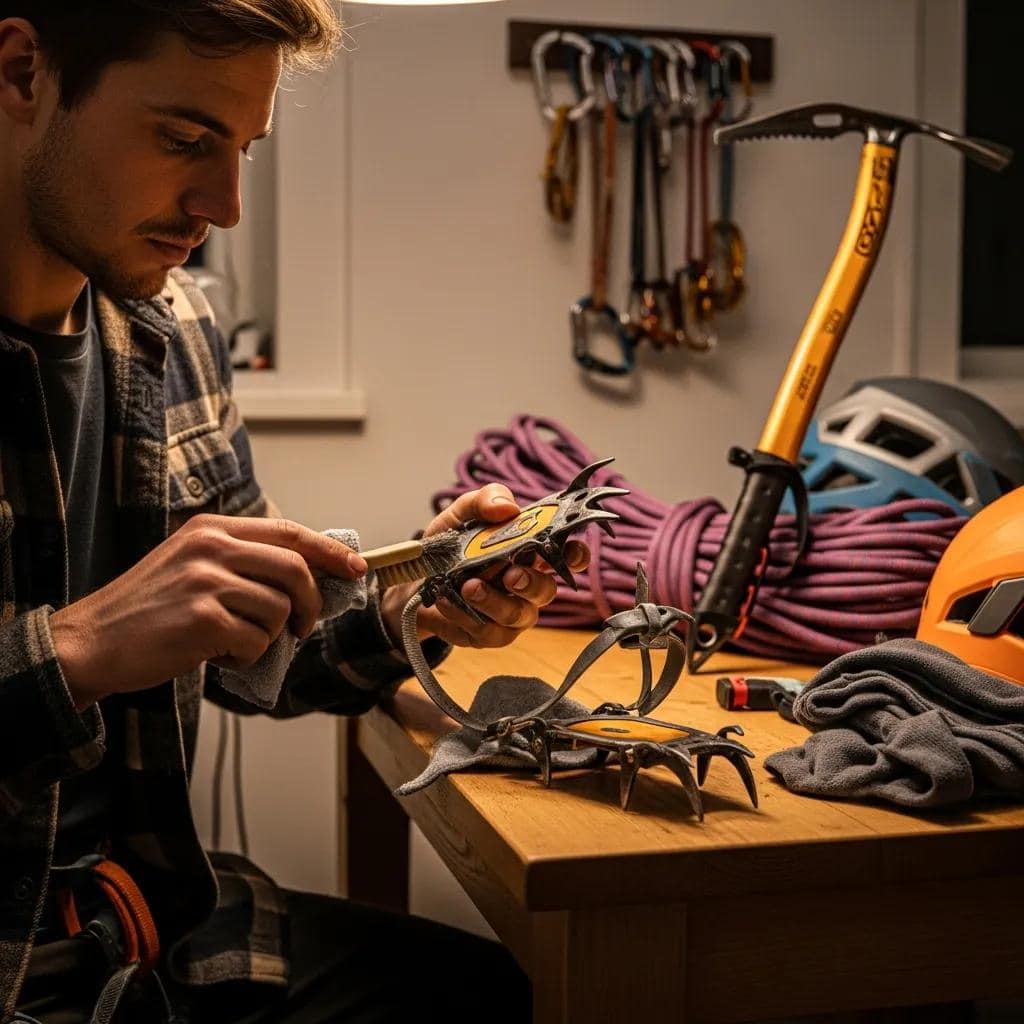
    Climber inspecting and maintaining mountaineering crampons, focusing on gear care and pre-season maintenance.
    Crampon maintenance — the unglamorous intermediate skill that prevents accidents. Generally, intermediate mountaineering skills include not just rope work and anchors but the gear-care discipline that keeps systems reliable. Specifically, this means sharpening crampon points with a hand file before each season, inspecting center bars and binding plates for cracks, replacing anti-balling plates when polyurethane shows wear, and testing strap condition on C1/C2 models. Notably, equipment failure during critical moments is preventable through routine pre-season maintenance.Photo: Crampon maintenance and inspection. Global Summit Guide media library.
    INTERMEDIATE · SKILL 4 OF 10

    4. Belay Techniques

    The partner safety skill — every climbing pair needs reliable belays.

    Belay technique is the partner safety skill — the technique by which one climber protects another from falling. Generally, four standard belay methods cover all common climbing scenarios:

    • Top rope belay: The simplest belay scenario — rope runs from climber up through an anchor at the top of the route, back down to the belayer. Most beginners learn this first.
    • Lead belay: The climber places protection (or clips bolts) while ascending. The belayer feeds out slack and arrests falls. Substantially more complex.
    • ATC (Air Traffic Controller) belay: Standard tube device used for most belay scenarios. Requires belayer’s brake-hand attention.
    • GriGri (assisted-braking) belay: Camming mechanism that locks under load. Adds safety margin but requires specific technique to feed slack smoothly.

    Multi-pitch belay transitions add complexity. Generally, multi-pitch climbing involves multiple rope-lengths stacked vertically with anchor stations between each pitch. Specifically, the belayer at the top of a pitch must transition seamlessly from belaying the climber up to belaying them on the next pitch. Notably, smooth multi-pitch transitions take 50-100 multi-pitch days to master.

    Months 4-6Initial Learning
    Course Required5-7 days
    $80-$250Belay Device

    Dedicated deep-dive coming: “How to Belay: Top Rope, Lead, and Multipitch Techniques.”

    INTERMEDIATE · SKILL 5 OF 10

    5. Anchor Building

    The technical foundation of multi-pitch climbing and mountaineering.

    Anchor building is the technical foundation of multi-pitch climbing and mountaineering. Generally, anchors must follow the SERENE-A principles:

    • Solid — Each individual placement must be solid
    • Equalized — Load distributed evenly across all components
    • Redundant — Multiple components so failure of one doesn’t fail the system
    • Efficient — Quick to build and dismantle
    • No Extension — If one component fails, no shock loading on others
    • Angle — The angle between anchor components stays below 60°

    Three major anchor categories: (1) Snow anchors include the picket (buried perpendicular to slope), deadman (T-slot anchor with axe or stuff sack buried), and bollard (snow cone or T-slot cut into snow). (2) Ice anchors include ice screws (12-22cm length depending on ice quality) and the V-thread/Abalakov anchor. (3) Rock anchors include cam placements, nut placements, and slings around natural features.

    Months 5-9Initial Learning
    Course Required5-7 days
    $300-$1500Trad Rack

    Dedicated deep-dive coming: “Anchor Building for Mountaineering and Climbing.”

    INTERMEDIATE · SKILL 6 OF 10 · HARDEST SINGLE SKILL

    6. Glacier Travel and Crevasse Rescue

    The hardest single mountaineering skill — must be practiced repeatedly until systematic.

    Glacier travel and crevasse rescue is widely considered the hardest single mountaineering skill. Generally, the skill requires multiple interrelated capabilities under time pressure: building a snow anchor while a partner hangs in a crevasse, escaping their hauling weight from your harness, ascending a rope with prusiks, constructing a mechanical advantage system, and performing the actual rescue.

    Rope team configuration: Standard rope team configuration for glacier travel is 10-15 meters between climbers on a 60m dynamic rope. Generally, three-person teams are most common (more redundant rescue capability). Specifically, climbers tie into the rope using a figure-eight follow-through with prusiks pre-attached for quick crevasse rescue if needed.

    Z-pulley (3:1 mechanical advantage) is the standard crevasse rescue technique. Generally, a Z-pulley uses two prusiks and a redirect carabiner to multiply the rescuer’s pull by approximately 3x. Specifically, the system: (1) builds a T-slot anchor with the axe, (2) transfers load from the rescuer’s harness to the anchor, (3) pre-rigs the Z-pulley, (4) hauls the fallen climber. Notably, in heavy snow conditions or with a heavy victim, a 6:1 mechanical advantage system may be required.

    Months 6-12Initial Learning
    10-20 TimesPractice to Competence
    Course EssentialCannot self-teach

    Dedicated deep-dives coming: “Glacier Travel Basics” + “Crevasse Rescue Step-by-Step Guide.”

    INTERMEDIATE · SKILL 7 OF 10

    7. Rappelling

    Controlled descent — used for retreat, downclimbing, and route descent.

    Rappelling is the controlled descent technique used for retreat from technical climbs, downclimbing complex terrain, and descending climbing routes. Generally, two primary rappel modes:

    • Single rope rappel: Used for short descents or when sufficient single-rope length covers the descent. Simplest setup.
    • Double rope rappel: Two ropes joined together for longer descents. Allows the rappeller to descend twice the single-rope length, then pull the rope down by one strand to retrieve.

    The autoblock backup (third hand) is essential for safety. Generally, a friction hitch (typically a prusik or auto-block knot) below the rappel device locks the rope if the rappeller loses control. Specifically, this is the single most important safety addition to a rappel system. Notably, professional guides require autoblock backups on virtually all rappels.

    Months 6-9Initial Learning
    20-50 RappelsTo Competence
    $30-$80ATC + Carabiners

    Dedicated deep-dive coming: “Rappelling Guide: Setup, Technique, and Safety.”

    Tier 3: Advanced Skills (Months 12-24+)

    The Advanced tier comprises three skills that cannot be taught from a book — they require extensive field time, real-world experience, and emotional self-awareness to develop. Generally, these are the judgment and rescue skills that separate confident mountaineers from competent ones. Specifically, they include navigation in poor visibility, weather decision-making, and self-rescue capabilities. Notably, the time to develop advanced skills extends throughout a mountaineering career — these skills continue to deepen over decades.

    Mountaineering expedition gear and equipment on rugged terrain, including boots, crampons, ice axes, ropes, and harness.
    Complete expedition gear in rugged high-altitude terrain. Generally, advanced mountaineering skills are applied in environments where the complete gear system matters — expedition boots, technical crampons, ice axes, ropes, harness, helmet, layering system, and emergency equipment all working together. Specifically, the advanced skills (decision-making, navigation, rescue) become survival-critical in this kind of remote, exposed environment. Notably, this is where the difference between competent and confident mountaineers becomes visible.Photo: Mountaineering expedition gear on rugged terrain. Global Summit Guide media library.
    ADVANCED · SKILL 8 OF 10

    8. Navigation and Route Finding

    Travel safely when visibility drops to meters — the mark of an advanced mountaineer.

    Navigation skills enable travel in low-visibility conditions when GPS signals fail and terrain features disappear in cloud or storm. Generally, advanced navigation combines five interlocking capabilities:

    • Topographic map reading: Interpreting contour lines, slope angle, terrain features, and the relationship between map and ground.
    • Compass use with declination correction: Most maps are oriented to true north; compasses point to magnetic north. The declination correction must be applied for accurate bearing.
    • GPS as backup: GPS provides position confirmation but should not replace map and compass — batteries fail, satellites can be obscured by terrain or weather.
    • Altimeter navigation: A wristwatch altimeter provides elevation tracking that helps confirm position on a known route.
    • Pace counting and bearing taking: Measuring distances by step count combined with compass bearings to navigate to known waypoints in low visibility.

    Notably, GPS technology has not replaced traditional navigation — it has added redundancy. Generally, advanced mountaineers carry a paper map and compass on every climb, regardless of GPS availability.

    Months 8-18Initial Development
    LifelongOngoing Refinement
    $50-$200Map + Compass

    Dedicated deep-dive coming: “Navigation Skills: Map, Compass, GPS, and Altimeter.”

    ADVANCED · SKILL 9 OF 10

    9. Mountain Weather and Decision Making

    The judgment to know when to turn around — the hardest meta-skill in mountaineering.

    Mountain weather skills combine observation, interpretation, and decision-making. Generally, mountain weather changes faster and more dramatically than at sea level — afternoon thunderstorms, sudden wind shifts, and rapid temperature drops are routine occurrences that can become life-threatening if missed. Specifically, advanced mountaineers develop the ability to:

    • Read clouds: Cap clouds (lenticular formations) over peaks indicate strong winds aloft. Mammatus clouds suggest severe convective activity. Cumulus building before noon predicts afternoon thunderstorms.
    • Track barometric pressure: Falling pressure precedes storms; rising pressure suggests clearing. A wristwatch altimeter doubles as barometer.
    • Recognize wind pattern shifts: Wind direction reversals or sudden gusts often precede frontal passages.
    • Read terrain effects: Lee waves, downslope wind acceleration, and ridge-line venturi effects all create local weather patterns invisible on forecasts.

    Summit window assessment is the practical application. Generally, summit windows are 4-12 hour periods of favorable weather suitable for the final push to a summit. Specifically, advanced mountaineers combine multiple data sources — forecasts, local observations, cloud reading, pressure trends — to identify and trust summit windows. Notably, the hardest decision in mountaineering is often the turn-around decision when weather signals are ambiguous.

    How to Read a Summit Window →
    Months 12-24+Initial Development
    LifelongSkill Refinement
    Free(Experience-based)

    Dedicated deep-dive coming: “How to Read Mountain Weather.”

    ADVANCED · SKILL 10 OF 10

    10. Self Rescue and Partner Rescue

    The skills you hope never to use — but absolutely must know.

    Self-rescue and partner-rescue skills enable response to emergencies far from professional rescue resources. Generally, mountaineering objectives often place climbers hours or days from organized rescue. Specifically, the core rescue skills include:

    • Improvised harness: When equipment is damaged or unavailable, harnesses can be constructed from webbing or rope (Swiss seat, hasty harness).
    • Improvised litter: Trekking poles, rope, and clothing can construct an emergency litter for evacuating an injured climber.
    • Assisted hoist: Used to raise an injured climber to a ledge or anchor when they cannot climb themselves.
    • Counterbalance lower: Used to descend an injured climber when only one rope is available.
    • Escaping a stuck rappel: Techniques for recovering when rope is stuck during descent.
    • Evacuation prioritization: When to evacuate, when to shelter in place, when to call for outside rescue.

    Wilderness First Aid is essential complement to rescue skills. Generally, a Wilderness First Aid (WFA) certification — typically a 16-hour course costing $200-300 — teaches medical response in remote settings. Specifically, key skills include patient assessment, bleeding control, splinting, hypothermia/heatstroke management, and medical evacuation criteria. Notably, professional guides often hold Wilderness First Responder (WFR) certification — an 80-hour intensive course that adds substantially more medical capability.

    Months 12-24+Initial Learning
    Annual RefresherRecommended
    $200-$1000WFA/WFR Course

    Dedicated deep-dive coming: “Wilderness First Aid: Essential Skills for Mountaineers.”

    The Progression Path: From Beginner to Advanced

    The 10 mountaineering skills are typically learned in a progressive sequence over 12-24 months of focused training. Generally, the progression follows the three-tier structure described above, though individual learners may move through stages at different paces.

    PhaseMonthsSkills FocusTypical Climbing Objectives
    Foundation1-2Foot skills, basic ice axe use, beginning knotsSnow scrambling, easy snowshoe ascents
    Foundation2-4Self-arrest mastery, all 8 knots, crampon techniqueMount Adams, Mount Hood normal routes
    Intermediate (Course)4-6Formal 5-7 day mountaineering courseCourse objectives (Mount Baker, North Cascades)
    Intermediate6-9Belay, rappel, basic anchors, glacier travelMount Rainier, Mount Shasta
    Intermediate9-12Crevasse rescue practice, multi-pitch skillsMount Whitney winter, Denali progression
    Advanced12-18Decision-making, navigation in poor visibilityAconcagua, Denali, Kilimanjaro
    Advanced18-24+Self/partner rescue, expert weather assessmentTechnical peaks, 6000m peaks, expedition climbing
    Beginner Guide: Rent vs Buy → Intermediate Guide → Expert Guide →

    How to Learn These Skills

    Three primary learning pathways combine to develop mountaineering competency: self-study, formal courses, and mentored climbing. Generally, all three are necessary — none alone is sufficient.

    1. Self-Study (Foundation Skills)

    Foundation skills (foot work, basic ice axe, knots) can largely be self-taught with diligent practice and good resources. Specifically, recommended self-study resources include the “Mountaineering: The Freedom of the Hills” textbook (the genre-standard reference), instructional YouTube channels from AMGA-certified guides, and supervised practice with experienced climbing partners. Notably, self-study alone is insufficient for the intermediate skills — attempting to self-teach anchors, belay, or crevasse rescue is risky.

    2. Formal Courses (Intermediate Skills)

    The standard pathway for intermediate skills is a 5-7 day mountaineering course. Generally, leading providers include:

    • American Alpine Institute (AAI) — Bellingham, WA. Comprehensive curriculum including 6-day Mountaineering 1 course.
    • RMI Expeditions — Rainier-focused training including 6-day Mountaineering Seminar.
    • Mountain Madness — Seattle-based with comprehensive instructional offerings.
    • NOLS — Extended wilderness courses including 14-30 day mountaineering expeditions.

    Notably, courses outside the United States include the British Mountaineering Council (BMC) and various European and South American instructional providers.

    3. Mentored Climbing (Advanced Skills)

    Advanced skills — judgment, decision-making, complex rescue — develop primarily through mentored climbing with experienced partners. Generally, this involves climbing with mentors who can explain decision-making in real time, providing direct feedback on choices, and progressively giving the apprentice more decision authority on climbs. Specifically, this pathway typically takes 2-5 years of regular climbing with mentor relationships. Notably, joining a local American Alpine Club (AAC) chapter is the standard way to find mentors.

    Common Mistakes in Mountaineering Skill Development

    ⚠ The 7 Most Common Skill Development Mistakes

    (1) Rushing past foundation skills — Climbers eager to start technical climbing skip the foot skills and ice axe work that prevent the falls all the other skills are trying to recover from. (2) Reading about skills instead of practicing them — Knots and self-arrest are reflexes, not procedures. (3) Skipping formal instruction — Self-teaching intermediate skills is dangerous and 10x slower than course-based learning. (4) Climbing above current skill level — The most dangerous gap between actual and assumed competence. (5) Not maintaining skills — Mountaineering skills decay without regular practice. (6) Underestimating decision-making time — Advanced judgment requires extensive field time, not just course attendance. (7) Climbing only with people at your own level — Skill development accelerates dramatically with mentor relationships.

    The Mountaineering Skills Cluster

    This pillar post is the anchor of the Mountaineering Skills cluster on Global Summit Guide. Generally, each of the 10 skill categories will receive dedicated deep-dive coverage in supporting posts. Specifically, the cluster includes:

    Cluster RolePost TitleStatus
    PILLARComplete Guide to Essential Mountaineering Skills (this post)Published
    Support 1How to Use Crampons: Complete Step-by-Step GuideComing soon
    Support 2Ice Axe Self-Arrest: The Most Critical Mountaineering SkillComing soon
    Support 3Essential Mountaineering Knots Every Climber Should KnowComing soon
    Support 4How to Belay: Top Rope, Lead, and Multipitch TechniquesComing soon
    Support 5Anchor Building for Mountaineering and ClimbingComing soon
    Support 6Glacier Travel Basics: Rope Teams and Crevasse AwarenessComing soon
    Support 7Crevasse Rescue Step-by-Step GuideComing soon
    Support 8Rappelling Guide: Setup, Technique, and SafetyComing soon
    Support 9Navigation Skills: Map, Compass, GPS, and AltimeterComing soon
    Support 10How to Read Mountain WeatherComing soon
    Support 11Wilderness First Aid: Essential Skills for MountaineersComing soon
    Diverse mountain climbing gear including harness, climbing shoes, ropes, carabiners, and helmet arranged on rocky surface with mountain backdrop.
    The complete gear system that mountaineering skills depend on. Generally, developing the 10 essential skill categories means becoming fluent with the complete equipment system. Specifically, ropes for belay and rappel, harnesses for partner protection, helmets for objective hazard, crampons and ice axes for snow and ice, and boots as the foundation everything else builds on. Notably, the 12-24 month investment in foundation, intermediate, and advanced skills returns decades of access to remote, dramatic mountain environments.Photo: Mountain climbing gear collection. Global Summit Guide media library.

    Frequently Asked Questions About Mountaineering Skills

    What are the essential mountaineering skills?

    The 10 essential mountaineering skill categories are: (1) Foot skills and crampon technique, (2) Ice axe mastery including self-arrest, (3) Rope work and knots, (4) Belay techniques, (5) Anchor building, (6) Glacier travel and crevasse rescue, (7) Rappelling, (8) Navigation and route finding, (9) Mountain weather and decision making, and (10) Self rescue and partner rescue. These skills build sequentially with foot skills as the foundation, then ice axe mastery, then progressively more complex roped skills. Most climbers develop competence in the first 6-7 skills within 12-18 months of focused training.

    How long does it take to learn mountaineering skills?

    Achieving competent mountaineer status typically takes 12-24 months with consistent training. The foundation skills (foot skills, ice axe self-arrest, basic knots) can be learned in 2-3 months of dedicated weekend practice. The intermediate skills (belay, basic anchors, rappelling, glacier travel) require a formal mountaineering course plus 6-9 months of supervised practice. The advanced skills (decision-making, route finding, complex rescues) require 12-24 months of extensive field time. Professional guides recommend 50-100 climbing days per year to maintain and develop skills — meaning most weekend mountaineers reach competency over 2-3 years.

    What is the most important mountaineering skill?

    Ice axe self-arrest is widely considered the single most critical mountaineering skill because it is the difference between a survivable slip and a fatal fall on any snow or ice slope. Self-arrest works from all four falling positions (head-first feet-down, head-first feet-up, prone, supine) and must be practiced until it becomes pure muscle memory — typically 50-100 practice arrests across multiple sessions. Beyond self-arrest, foot skills (proper crampon technique) come second in importance because confident footing prevents falls in the first place.

    Can you learn mountaineering skills without a course?

    Some mountaineering skills can be self-taught with diligent practice and good instructional resources, but several core skills require formal instruction. Foot skills, self-arrest, and basic knots can be learned through self-study with videos, books, and supervised practice with experienced friends. However, rope work, belay techniques, anchor building, and crevasse rescue are best learned in a formal course with AMGA, AAI, IFMGA-certified guides or equivalent instruction. The cost of a formal 5-7 day course is $500-1,500 USD versus the risk of incorrect technique that could be fatal.

    What is the difference between hiking and mountaineering skills?

    Hiking skills involve walking on established trails with comfortable conditions, while mountaineering skills involve traveling off-trail in mountainous terrain that may include snow, ice, glaciers, rock, and exposure to fall hazards. Hiking requires good fitness, navigation basics, weather awareness, and packing knowledge. Mountaineering adds technical skills: crampons, ice axe, rope work, anchors, belay technique, glacier travel, and self-rescue. The transition typically involves: graduating to off-trail snow travel with poles, learning crampons and ice axe basics, taking a formal mountaineering course, joining experienced climbers on supervised peaks, and progressively independent climbing.

    What skills do you need for your first mountain?

    For a first non-technical peak (e.g., Mount Hood normal route, Mount Adams, Mount Baker easy route, Mount Whitney summer route), the essential skills are: confident foot skills on snow and scree, basic ice axe technique including self-arrest, snow travel skills with proper layering, basic navigation with map and compass, and understanding of altitude effects. No roped skills are required for these peaks under normal conditions. However, a basic mountaineering course before your first peak is strongly recommended even for non-technical objectives — the course teaches situational awareness, emergency response, and safe travel principles that videos cannot convey.

    How do you practice mountaineering skills without mountains?

    Several skills can be practiced in non-mountain settings. Knots can be practiced anywhere — keep a piece of cord on your desk and tie knots while watching television. Belay technique can be practiced at any climbing gym with top-rope and lead climbing walls. Self-arrest can be practiced on suburban hills with snow (even very gentle slopes work for technique practice). Rope coiling, rope management, and prusik ascending can be practiced in a backyard. Dry tooling crags allow ice axe and crampon practice without ice. Fitness training for mountaineering can be done anywhere. However, glacier travel and crevasse rescue truly require glacial terrain to practice safely.

    Are mountaineering courses worth it?

    Yes, formal mountaineering courses are widely considered essential for safely developing mountaineering skills. A 5-7 day AMGA, AAI, or IFMGA-certified course costs $500-1,500 USD and teaches in one week what might take 12-18 months of self-study. The course provides certified instructor guidance on critical safety skills, structured curriculum from foundation to intermediate level, real-world practice in safe controlled conditions, and validation that skills are being performed correctly. The cost-benefit comparison is compelling: a single critical mistake on an anchor or knot could be fatal, while $1,000 spent on instruction is a small fraction of typical lifetime mountaineering costs.

    What is the hardest mountaineering skill to learn?

    Crevasse rescue is widely considered the hardest single mountaineering skill because it requires multiple interrelated skills under stressful conditions: building a snow anchor under load, escaping a partner’s hauling weight from your harness, ascending a rope using prusik knots, constructing a Z-pulley 3:1 or 6:1 mechanical advantage system — all while the fallen partner is in danger and time-critical. The skill must be practiced repeatedly until it becomes systematic — most climbers practice crevasse rescue 10-20 times before feeling competent. Beyond crevasse rescue, decision-making in marginal weather is considered the hardest “meta-skill” because it cannot be taught through procedure.

    How do mountaineering skills differ for snow vs rock vs mixed terrain?

    Each terrain type emphasizes different skill subsets. Snow mountaineering prioritizes foot skills, crampon technique, ice axe mastery, glacier travel, and self-arrest. Rock mountaineering prioritizes rock climbing technique, gear placements (cams, nuts), rock anchors, belay technique, and rappelling. Mixed terrain mountaineering (snow + rock + ice in the same climb) requires fluency in all three plus the judgment to transition between techniques smoothly. Most North American mountaineering is snow-focused (Pacific Northwest, Sierra Nevada, Rockies) while European Alpine mountaineering involves more mixed terrain.

    Methodology & Editorial Standards

    How This Pillar Was Built

    1. Primary Source: Personal Field Experience

    This pillar guide draws on Travis Ludlow’s personal mountaineering experience including Mount Kilimanjaro (Tanzania), multiple Mexican volcanoes (Pico de Orizaba, Iztaccíhuatl), and Rainier-class peaks in the Pacific Northwest. Skill descriptions reflect what was actually required and used during these climbs.

    2. Curriculum Cross-Reference

    The 10 skill categories and progression structure were validated against published curricula from the American Mountain Guides Association (AMGA), American Alpine Institute (AAI), the International Federation of Mountain Guides Associations (IFMGA), and the genre-standard textbook Mountaineering: The Freedom of the Hills (now in its 10th edition). The structure represents industry consensus.

    3. Internal Cross-Reference

    This pillar is cross-referenced against Global Summit Guide’s existing 200+ skills, gear, and safety pages, ensuring consistency with our complete content corpus and creating internal link equity flow for SEO purposes.

    4. Editorial Independence

    No affiliate partnerships influence recommendations. Specific course providers, brands, and books are mentioned only where they exemplify a category, not as endorsements. The article generates revenue only through Google AdSense display ads (when applicable).

    5. Update Cycle

    This pillar is reviewed quarterly. Next scheduled review: September 2026. Supporting deep-dive posts will be added approximately monthly across the coming 12 months — each addition will update this pillar with internal links to the new supporting content.

    Affiliate disclosure: Global Summit Guide does not currently maintain affiliate partnerships with the mountaineering schools, guide services, or gear brands mentioned in this pillar guide. No commission is earned from any external link clicks. This page contains no sponsored content. The site is supported by Google AdSense (Display Ads) when applicable.

    Sources and References

    Numbered Source References

    This mountaineering skills pillar synthesizes data from authoritative mountaineering education organizations and original Global Summit Guide field research.

    1. American Mountain Guides Association (AMGA) · https://amga.com/ — North American professional standard for mountaineering instruction.
    2. American Alpine Institute (AAI) · https://www.alpineinstitute.com/ — Bellingham, WA. Comprehensive mountaineering curriculum and reference.
    3. International Federation of Mountain Guides Associations (IFMGA) · https://www.ifmga.info/ — International professional standard.
    4. American Alpine Club · https://americanalpineclub.org/ — Climbing accident and safety statistics. Annual Accidents in North American Climbing publication referenced.
    5. Mountaineering: The Freedom of the Hills (10th ed.) · https://mountaineersbooks.org/ — The Mountaineers Books. Genre-standard textbook.
    6. RMI Expeditions · https://www.rmiguides.com/ — Rainier-focused training provider.
    7. Mountain Madness · https://www.mountainmadness.com/ — Seattle-based instructional provider.
    8. NOLS (National Outdoor Leadership School) · https://www.nols.edu/ — Extended wilderness courses.
    9. British Mountaineering Council (BMC) · https://www.thebmc.co.uk/ — UK mountaineering authority.
    10. Global Summit Guide internal research — Cross-referenced from existing 200+ skills, gear, and safety pages plus personal field experience.

    Methodology note. Quarterly review cycle — next review September 2026. Climbing techniques, equipment standards, and safety best practices evolve continuously; verify current information with the cited organizations within 12 months of attempting technical climbs.

    About the Author

    Travis Ludlow

    Editor & Route Research, Global Summit Guide

    Travis Ludlow is the editor of Global Summit Guide, an independent mountaineering and high-altitude hiking resource. Travis has personal climbing experience on Mount Kilimanjaro, multiple Mexican volcanoes including Pico de Orizaba and Iztaccíhuatl, and Rainier-class Pacific Northwest peaks.

    Specifically, Travis has authored or edited Global Summit Guide’s comprehensive coverage of mountaineering skills, gear, training, and safety across the site’s 700+ published articles. Notably, the editorial process at Global Summit Guide includes safety review by Dawson Ludlow (Wilderness First Aid certified) and gear review by Walker Ludlow.

    Expertise areas: Mountaineering skills, gear and equipment, training programs, altitude climbing, expedition planning, and East African mountains. Editorial role: Editor and route research for Global Summit Guide’s 700+ published articles. Approach: Independent, first-hand tested where possible, cross-referenced against AMGA/AAI/IFMGA curricula. Read more about the Global Summit Guide editorial team →

    Explore the Cluster

    Start Your Mountaineering Journey

    The 10 essential mountaineering skills are learned progressively over 12-24 months with consistent practice and formal instruction. Generally, foot skills first, then ice axe and knots, then formal course, then progressive climbing experience. Specifically, the path is well-trodden — generations of mountaineers have followed it, and the resources to support you (courses, mentors, equipment) are well-developed.

    Start with Kilimanjaro → Rainier Progression →

    Was this helpful?

    Yes
    No
    Thanks for your feedback!
  • How to use an ice axe: self-arrest, plunge step, and the 5 essential techniques

    Mountaineering Skills / Snow Travel

    How to use an ice axe: self-arrest, plunge step, and the 5 essential techniques

    5
    Essential techniques
    50-70 cm
    Typical axe length
    15-30°
    Practice slope angle
    Hours
    Practice time needed
    Part of the mountaineering skills series This skills guide supports our ice axe master guide and our broader snow travel framework. Master guide →

    The ice axe is the single most important piece of mountaineering equipment most climbers will ever own. It is the difference between walking comfortably across a snow slope and sliding uncontrollably to the bottom of one. Yet most climbers buy an ice axe and never actually practice with it — they read about self-arrest, watch a YouTube video, and assume the technique will work when they need it. It usually doesn’t. Ice axe technique requires hands-on practice on safe slopes before it can save you in real conditions. This guide covers the five essential techniques every mountaineer must know, in the sequence climbers should learn them. For broader context see our mountaineering ice axe master guide.

    Ice axe anatomy know your tool before you use it

    Understanding the parts of an ice axe matters because each part has a specific function. Climbers who use the wrong part of the axe at the wrong moment lose effectiveness or create dangerous situations.

    ★ The five parts of an ice axe

    What each part does

    1. Pick (the spike at top)
    The pointed end of the head. Used for self-arrest, swinging into ice for traction, and anchor placement.
    2. Adze (the flat shovel)
    The flat end of the head opposite the pick. Used for chopping steps in snow and ice, and for clearing snow.
    3. Head (combined pick+adze)
    The top section combining pick and adze. The handhold for self-arrest and most technical positions.
    4. Shaft (the main pole)
    The straight or slightly curved main body. Held in the hand for cane position and self-belay.
    5. Spike (the bottom tip)
    The sharp point at the bottom of the shaft. Planted into the snow during cane position and self-belay.
    + Leash (optional)
    Attaches axe to wrist or harness to prevent dropping. Use varies by region and personal preference.

    The general mountaineering ice axe described here is different from a technical ice tool. Ice tools have strongly curved shafts and are designed for swinging into vertical ice during ice climbing. General ice axes are designed for snow slopes, self-arrest, and walking. The two are not interchangeable. The framework for choosing the right ice axe is in our mountaineering ice axe guide.

    The 5 essential ice axe techniques in the order to learn them

    Ice axe skills build on each other. Climbers who skip to self-arrest without first mastering grip and cane position never develop reliable arrest technique. Follow this sequence:

    1

    Cane Position

    Foundation technique · Used on 80% of mountaineering terrain
    Fundamental

    The cane position is the foundation ice axe technique and the position climbers will use most often. The axe is held by the head with the pick facing backward (away from the direction of travel) and the spike planted into the snow on the uphill side with each step. The technique provides balance, security, and a quick path to self-arrest if a slip occurs.

    1. Hold the head of the axe in your uphill hand.The thumb wraps around the adze; fingers curl around the head. The pick should point backward, away from your direction of travel.
    2. Walk uphill diagonally across the slope.Don’t walk straight up steep slopes – traverse diagonally with the axe planted on each step.
    3. Plant the spike with each step.The bottom spike goes into the snow on your uphill side, providing a stable third point of contact.
    4. Switch hands at each switchback.When you change direction, switch the axe to your new uphill hand. The axe is always on the uphill side.
    5. Keep your weight on your feet, not the axe.The axe is a stability aid, not a load-bearer. Crampons or boot edges carry your weight; the axe prevents slips.

    When to use: moderate snow slopes (15-30 degrees), most mountaineering approaches, glacier travel on flat or gently sloped terrain. Most of the climbing on Mont Blanc, Mexican volcanoes, Kilimanjaro snowfields, and approach hikes on serious peaks uses cane position.

    2

    Plunge Step (Descent)

    Descent technique · Efficient and energy-saving
    Essential

    The plunge step is the standard descent technique on snow slopes. Climbers face downhill, lean slightly forward, and walk straight down the slope plunging each foot heel-first into the snow. The technique is dramatically faster and less tiring than the slow side-stepping descent most beginners default to.

    1. Face directly downhill.Body weight slightly forward, knees slightly bent. The axe is held in the dominant hand in cane position – spike planted with each step.
    2. Step heel-first, hard.Each step lands heel-first with body weight driving the heel into the snow. The heel should compact the snow into a step platform.
    3. Keep your body forward over your feet.The instinct is to lean back for “safety” but this causes feet to slide. Stay forward over your boots.
    4. Plant the axe spike with each step.The axe stabilizes balance but doesn’t carry weight. The spike goes in the snow next to or slightly behind you on each plunge.
    5. Maintain rhythm.Plunge stepping works best at a steady rhythm. Hesitation makes the technique less effective.

    When to use: descending moderate to steep snow slopes (15-35 degrees) with firm but forgiving snow. Does not work well on ice (use crampons) or very soft snow (creates excessive postholing). The plunge step is one of the most underused techniques among intermediate climbers – mastering it dramatically improves mountain efficiency.

    3

    Self-Belay

    Steeper-terrain protection · Pre-arrest insurance
    Essential

    Self-belay is the technique used on steeper snow where a fall would have consequences. The axe shaft is driven deep into the snow as the climber moves, creating an anchor that catches a slip before a slide can develop. Self-belay differs from cane position by depth of placement and intent – cane position is a stability aid; self-belay is active protection.

    1. Hold the axe near the head with both hands optional.One hand on the head (uphill), the other can grip the shaft lower for additional control. The pick faces backward.
    2. Drive the shaft deep into the snow above you.The shaft penetrates the snow as deeply as possible (often the full shaft length on firm snow). This creates a temporary anchor.
    3. Climb up to the axe.With the shaft planted, kick steps with your feet and ascend until you’re level with or above the axe head.
    4. Replant the axe above and repeat.Remove the axe, advance, drive it back into the snow above you. The axe is always above and providing temporary anchor security.
    5. Switch hands smoothly.On long traverses or switchbacks, switch the axe to the new uphill hand at controlled moments.

    When to use: steeper snow slopes (30-45 degrees) where consequences of a fall would be serious. Self-belay is the technique that bridges between cane position (easy slopes) and roped climbing (technical terrain). Most of the steeper snow on Aconcagua’s upper mountain, the Mexican volcano summit ridges, and Cascade volcano approaches uses self-belay technique.

    4

    Self-Arrest

    Emergency stopping technique · Must be practiced
    Critical

    Self-arrest is the technique used to stop an uncontrolled slide on snow. It is the single most important emergency skill in snow mountaineering and the technique most commonly taught incorrectly. Self-arrest must be practiced repeatedly on safe slopes before it can be relied on in real conditions – the muscle memory takes time to develop and degrades without practice.

    1. If sliding head-first or on your back, roll into proper position.The arrest position has the climber on their stomach, head uphill, with the axe across the upper chest. Rolling into position takes 2-3 seconds and is often the difference between successful arrest and continued slide.
    2. Grip the head of the axe with both hands.One hand on the head over the pick; the other on the shaft near the spike. The pick faces down into the snow on the uphill side of your body.
    3. Drive the pick into the snow gradually.Apply increasing pressure rather than slamming the pick down. Slammed picks bounce away. Gradual pressure allows the pick to bite and hold.
    4. Lift your hips off the snow.Body weight transfers to the pick. The hips being raised concentrates pressure on the pick and increases arresting force.
    5. Spread your legs and dig in with your feet.If wearing boots only, kick your feet into the snow for additional braking. If wearing crampons, KEEP YOUR FEET OFF THE SNOW – kicking crampons into the slope while sliding can cause violent flips and broken ankles.
    The crampon warning

    The single most dangerous mistake in self-arrest with crampons is letting the crampon points catch the snow during the slide. The friction creates rotational force that flips the climber violently, often resulting in broken legs, lost axe control, or continued slide in an even worse position. When wearing crampons, lift your feet off the snow during self-arrest until your body is fully stopped. Use only the axe pick to arrest. Once stopped, then carefully reset your foot position.

    When to practice: on a snow slope with 15-30 degree angle, firm but forgiving snow, and a clean runout below (no rocks, cliffs, or hazards). Most mountaineering courses spend several hours teaching self-arrest from various starting positions (head-first on back, head-first on stomach, feet-first on back, feet-first on stomach). Each position requires slightly different recovery technique. Practice repeatedly until the response is automatic.

    The truth about self-arrest

    Self-arrest works reliably only when the technique has been practiced repeatedly. Most climbers who fail to self-arrest in real situations fail because they’ve never practiced – they read about it but don’t do the dozens of practice slides needed to develop muscle memory. The technique itself is straightforward; the execution under stress is what requires practice.

    5

    Anchor Position (Belay Setup)

    Roped climbing technique · Multi-person teams
    Advanced

    The anchor position uses the ice axe as a temporary anchor for belaying a partner across snow or ice terrain. This is the technique that bridges between solo self-belay and roped technical climbing. Used in rope team travel on glaciers and on steeper snow climbs where one climber must protect another’s movement.

    1. Plunge the shaft fully into firm snow.The shaft must be deep enough to provide reliable holding force – typically the full shaft length on firm snow.
    2. Test the anchor by leaning back on it.Apply body weight to the axe head. If the axe moves, the placement is not sufficient – replant it deeper or in better snow.
    3. Sit or stand braced behind the axe.The climber’s body position is also part of the anchor system – body weight braces the axe against pull-out.
    4. Manage the rope through the axe head.The rope can be passed over the axe head (Munter hitch style) or through additional gear to create the belay system.
    5. Be prepared to escape the belay.If a fall causes the axe to start pulling out, the climber must be ready to convert to a different anchor configuration.

    When to use: rope team glacier travel, protecting a partner on steeper snow, building snow anchors for crevasse rescue. This technique extends beyond basic ice axe use into roped mountaineering skill — usually learned through formal training rather than self-study. For climbers progressing beyond solo snow travel into technical alpine objectives, this is the next skill set to develop. The broader glacier travel framework is critical context — most climbers learn anchor position as part of a complete glacier travel course.

    Sizing and length getting the right axe

    The right ice axe length affects every technique. Wrong sizing makes proper technique difficult or impossible. The classic sizing rule:

    Your heightRecommended axe lengthBest for
    Under 5’4″ (162 cm)50-55 cmGeneral mountaineering, smaller climbers
    5’4″ to 5’8″ (162-173 cm)55-60 cmGeneral mountaineering, all-purpose
    5’8″ to 6’0″ (173-183 cm)60-65 cmGeneral mountaineering, most common range
    6’0″ to 6’4″ (183-193 cm)65-70 cmGeneral mountaineering, taller climbers
    Over 6’4″ (193 cm)70-75 cmGeneral mountaineering, very tall climbers
    Technical ice climbing50-55 cm regardless of heightSteep terrain, swing-into-ice technique
    Ski mountaineering50-55 cmPackable, lightweight, mostly carried

    The traditional test: hold the axe by the head at your side with the spike pointing down. The spike should reach your ankle bone. Too short and you’ll bend over uncomfortably in cane position; too long and the axe becomes unwieldy on steeper terrain. The full sizing framework is in our mountaineering ice axe guide.

    How to practice ice axe skills developing real competence

    Reading about ice axe technique is useful but does not develop the muscle memory required for reliable use. Climbers who only read about ice axe skills fail to self-arrest when needed because the response is not automatic. The practice progression:

    1. Find a safe practice slope. 15-30 degree angle, firm but forgiving snow, clean runout below (no rocks, cliffs, trees, or other hazards). Avoid slopes with summer or spring slush which behaves differently than winter snow.
    2. Practice basic positions first. Hold the axe in cane position for 30 minutes on flat or gentle slopes. Develop comfort with the grip and the spike-planting motion.
    3. Practice plunge step descents. Walk up the practice slope and plunge step down repeatedly. Build comfort with the heel-strike motion and weight-forward position.
    4. Practice self-arrest from controlled slides. Start by sliding feet-first on your back from a low starting point. Roll into arrest position and arrest. Repeat until automatic.
    5. Practice self-arrest from each fall position. Head-first on back, head-first on stomach, feet-first on back, feet-first on stomach. Each requires slightly different recovery technique. Practice all four.
    6. Practice with crampons separately. Once arrest is reliable with boots only, practice the same techniques with crampons – emphasizing keeping feet off the snow during arrest.
    7. Take a course if possible. Mountaineering courses through organizations like the American Alpine Institute, AMGA, or Petzl Foundation training programs accelerate skill development dramatically.
    The practice principle that matters

    Self-arrest skill needs regular reinforcement. Even climbers who learned arrest competently lose the muscle memory if they don’t practice for a few seasons. Many experienced mountaineers spend an hour or two on a snow practice slope at the start of each climbing season specifically to refresh self-arrest technique. This is the difference between climbers who reliably arrest under stress and those who don’t.

    Common ice axe mistakes that cause real injuries

    • Wrong hand for terrain. Holding the axe in the downhill hand makes self-arrest dramatically slower. Always uphill hand on traverses.
    • Slamming the pick during arrest. Slammed picks bounce away. Gradual pressure allows the pick to bite and hold.
    • Failure to roll into arrest position. Many failed arrests are because the climber tried to arrest from the position they ended up in rather than rolling onto their stomach first.
    • Crampons catching during slide. The single most common cause of broken ankles in mountaineering. Keep feet UP during slides with crampons.
    • Wrong axe size for technique. A 70cm axe is unwieldy for steep terrain. A 50cm axe is uncomfortable for cane position. Match the tool to your primary terrain.
    • Never practicing. The single biggest mistake. Self-arrest technique without practice is theoretical, not reliable.
    • Using an ice tool instead of an ice axe. Ice tools are designed for technical climbing, not self-arrest. Their curved shafts and aggressive picks make arrest harder.
    • Losing the axe. Dropping an ice axe during a slide makes recovery much harder. Use a leash on steep terrain, or be very deliberate with hand grip.
    • Ignoring snow conditions. Self-arrest works on soft to firm snow but is dramatically less effective on hard ice. Recognize when conditions exceed self-arrest capability and use rope team protection.

    When you actually need an ice axe match tool to terrain

    Terrain / objectiveIce axe needed?Notes
    Snowy hiking trailsNo (microspikes if icy)Use trekking poles for stability
    Mount Whitney summer routeSometimesYes if snowfields lingering
    Colorado 14ers (summer)SometimesYes in early summer with lingering snow
    Mount Hood / Mount AdamsYes (mandatory)Standard mountaineering equipment
    Mexican volcanoes (Pico de Orizaba)Yes (mandatory)Standard mountaineering equipment
    Mont BlancYes (mandatory)Standard mountaineering equipment
    AconcaguaYes (mandatory)Standard mountaineering equipment
    DenaliYes (mandatory)Plus second tool for steeper terrain
    Technical ice climbingNo – use ice tools insteadDifferent tool category entirely
    Ski mountaineeringYes (lightweight)Carried more than used most of the time

    The general rule: any mountaineering objective with sustained snow or ice travel requires an ice axe. The microspikes-vs-crampons distinction also applies to ice axe decisions — the full snow travel gear framework is in our microspikes vs crampons decision guide.

    ★ Ice Axe Master Guide

    The complete ice axe framework

    Detailed product recommendations, type comparisons, and the broader ice axe context for mountaineering.

    Master guide →

    The bottom line on ice axe technique

    Using an ice axe requires learning five essential techniques in sequence: cane position (the foundation), plunge step (for descent), self-belay (for steeper ascent), self-arrest (for emergencies), and anchor position (for roped travel). The techniques build on each other — climbers who skip to self-arrest without first mastering grip and cane position never develop reliable emergency response. Most mountaineering objectives use cane position 80% of the time, plunge step on descent, and self-belay on steeper sections; self-arrest is the emergency backup that must work when needed. The technique requires hands-on practice on safe slopes (15-30 degree angle, firm forgiving snow, clean runout) — reading about self-arrest without practicing does not build the muscle memory required for reliable execution under stress. The critical safety rule with crampons: keep your feet OFF the snow during self-arrest to prevent rotational ankle injuries. Sizing matters — choose an axe where the spike reaches your ankle bone when held at your side, typically 50-70cm for most climbers. Quality ice axes from Petzl, Black Diamond, Grivel, or Cassin cost $80-$200 and last decades with proper care. The full ice axe framework is in our mountaineering ice axe master guide, with related snow travel gear context in our microspikes vs crampons decision guide and crampons-specific framework in our how to choose mountaineering crampons guide.

    Frequently asked questions

    How do you use an ice axe?

    Using an ice axe requires learning five essential techniques in sequence: cane position for flat to moderate terrain, plunge step for descending firm snow, self-belay for ascending steeper snow, self-arrest for stopping a slide, and anchor/security position for belaying. Beginning climbers should focus first on grip and cane position, then learn self-arrest on a safe practice slope. The pick faces backward when used as a walking aid and forward during self-arrest. Most climbers learn ice axe technique through hands-on practice on a moderate snow slope where falls have no consequences, ideally with an experienced mentor or in a mountaineering course. Practicing the techniques only in real climbing situations is dangerous – dedicated practice on safe terrain is essential.

    How do you do an ice axe self-arrest?

    To perform an ice axe self-arrest, immediately roll onto your stomach with your head facing uphill if possible. Hold the head of the ice axe near your shoulder with the pick pointed down and into the snow. Drive the pick into the snow gradually – applying full force immediately can cause the axe to bounce away. Keep your hips lifted off the snow to put all your body weight on the pick. Spread your legs and dig in with your feet (or kick them away from the slope if wearing crampons to prevent catching). The full position has the climber pressed against the slope with the pick anchored, body weight pressing the axe in, and feet stabilizing position. Self-arrest must be practiced repeatedly on safe slopes before relying on it in real climbing situations.

    What is the plunge step technique?

    The plunge step is the technique used to descend moderate to steep snow slopes efficiently. The climber walks straight down the slope, plunging each foot heel-first into the snow with body weight forward. The ice axe is held in the cane position with the spike planted on the uphill side as a stabilizer. The plunge step works well on firm snow that compacts under the heel, providing a step platform. On harder ice it is less effective and crampons or technical techniques become necessary. On soft snow the plunge step can cause excessive postholing. Most descent of snow in mountaineering uses some form of plunge step or its variants. Mastering this technique meaningfully reduces descent times and energy expenditure on most snow slopes.

    Which hand should hold the ice axe?

    The ice axe is typically held in the uphill hand when traversing a slope so the axe can plant into the slope above. When ascending straight uphill, the axe is held in the dominant hand. When traversing, the climber switches hands at each switchback so the axe is always on the uphill side. This is critical for self-arrest preparation – if a fall occurs, the climber needs to be able to convert the cane position into an arrest position. Holding the axe in the downhill hand makes self-arrest much harder and slower. The general rule: ice axe goes in the uphill hand whenever there is a downhill direction to a fall.

    What is the difference between an ice axe and an ice tool?

    An ice axe (or general mountaineering ice axe) is straight or slightly curved, has a flat adze at one end of the head, and is designed for self-arrest, plunge steps, and general mountaineering. An ice tool (used for technical ice climbing) has a strongly curved shaft, no adze (or a hammer head), a more aggressive pick, and is designed for swinging into vertical ice while ice climbing. Ice axes are used for general mountaineering on snow slopes. Ice tools are used for technical ice climbing on vertical ice or mixed terrain. Most mountaineers carry an ice axe; only technical ice climbers carry ice tools. The two are not interchangeable – an ice axe is poorly suited for technical climbing and an ice tool is awkward for general mountaineering self-arrest.

    How long should an ice axe be?

    The right ice axe length depends on your height and intended use. For general mountaineering, the traditional sizing has the spike of the ice axe reach the ankle bone when held by your side. This produces 50-70cm axes for most climbers. Shorter people typically use 50-55cm axes; taller people use 65-70cm axes. For technical climbing on steeper terrain, shorter axes (50-55cm) are preferred regardless of height because the axe is used more like a tool than a walking aid. For ski mountaineering, axes around 55-60cm balance walking comfort with technical capability. Most first-time buyers choose 60-65cm axes which work well for a wide range of objectives and heights.

    Can you practice ice axe self-arrest?

    Yes, practicing ice axe self-arrest is essential before relying on the technique in real climbing. Practice is done on a safe snow slope with several characteristics: moderate angle (15-30 degrees), firm but forgiving snow (not ice), a clean runout below with no rocks or cliffs, and ideally with experienced supervision. Beginning climbers should practice falls from each position: head first downhill on back, head first downhill on stomach, feet first on back, feet first on stomach. Each position has slightly different recovery technique. Most mountaineering courses spend several hours teaching and practicing self-arrest on a designated practice slope before sending students to real climbing terrain. Solo practice without prior instruction is possible but slower to develop reliable technique.

    Was this helpful?

    Yes
    No
    Thanks for your feedback!
Language »