

How to Use Crampons: Fit, Walk & Climb Safely
Crampons add traction on firm snow and ice, but they also add sharp points that can catch, trip or injure you. Learn how to decide when they are appropriate, verify boot compatibility, fit them correctly, move with flat-footing and front-pointing techniques, and recognize when terrain calls for formal instruction rather than self-teaching.
How do you use crampons correctly?
Start by fitting a crampon model that is genuinely compatible with your exact boot. Put crampons on before you are committed to slippery terrain, secure every binding and strap exactly as the manufacturer specifies, then walk with a slightly wider stance so the points clear your opposite leg and clothing.
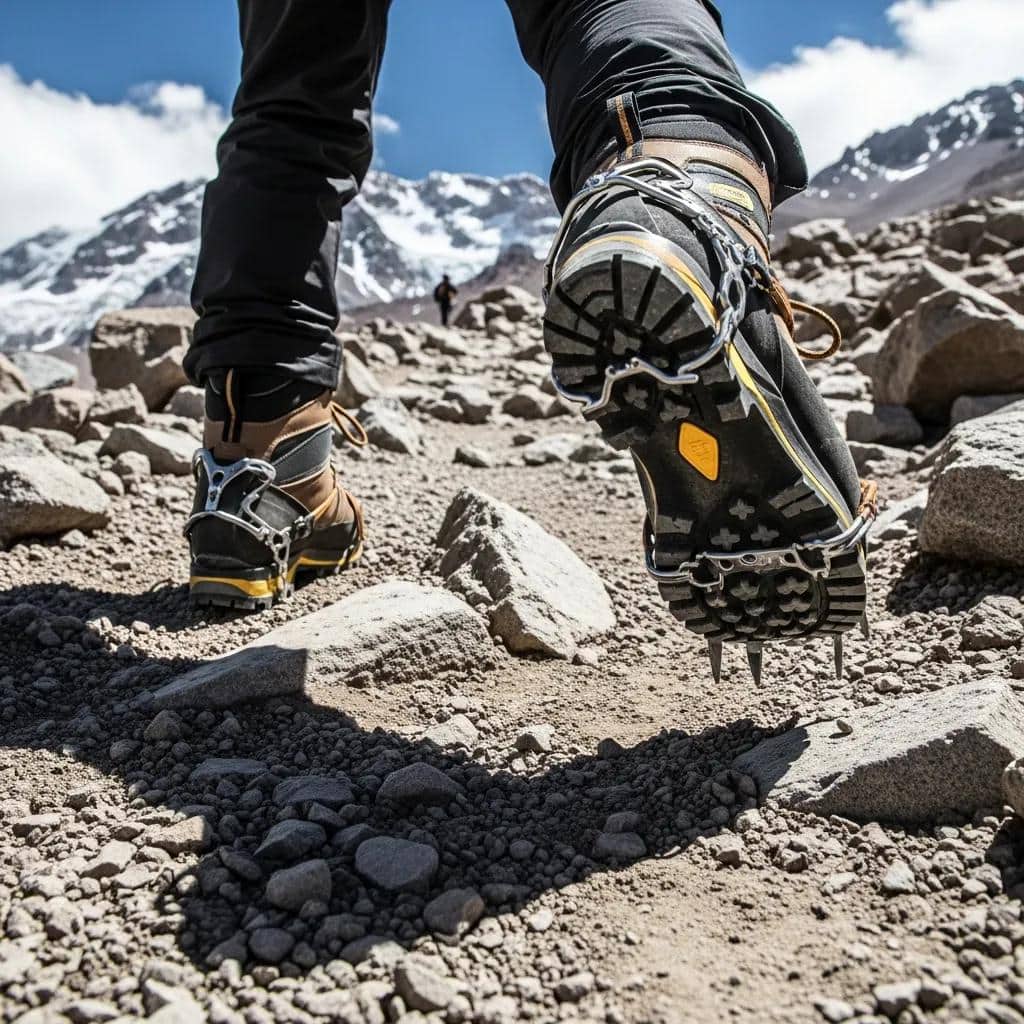
On moderate snow and ice, the efficient goal is usually to place as many downward points as possible in contact with the surface. As terrain steepens, climbers may transition through hybrid movement toward front-pointing. The exact transition is determined by snow or ice condition, boot/crampon design, slope shape, balance and consequences of a fall—not by one universal angle chart.
Crampon Skills From Setup to Field Use
Do You Need Crampons Yet?
The best trigger is not a fixed slope angle. It is the combination of surface hardness, boot traction, terrain, runout and the consequences of a slip.
Use a consequence-based test.
Ask: Is the surface frozen, compacted or icy? Is normal boot edging becoming unreliable? If I slip here, could I accelerate into rocks, cliffs, crevasses or a long uncontrolled slide? If the answer is yes, stop in a secure place and add the traction system appropriate to the terrain before you become committed.
Microspikes can be useful on low-angle icy trails, but they are not a substitute for mountaineering crampons on consequential snow or glacier terrain. Conversely, wearing full crampons on benign dirt or rock can create a new trip hazard.
Your Boots Determine the Binding System
The traditional B0–B3 / C1–C3 shorthand is still useful in some markets, but modern manufacturers increasingly describe compatibility through sole stiffness, heel/toe welts and specific binding systems. Always confirm the actual boot and crampon model together.
| Boot / binding feature | What it usually supports | What to verify |
|---|---|---|
| No heel or toe welt | Flexible basket / strap-style bindings on compatible stiff-enough footwear. | Manufacturer-approved sole stiffness, boot shape, heel retention and binding fit. |
| Heel welt only | Hybrid systems with a front basket and rear lever. | Heel lever engagement, toe-basket shape, sole stiffness and center-bar setup. |
| Toe + heel welts | Automatic / step-in systems using front and rear bails or levers. | Exact welt geometry, bail contact, lever tension and manufacturer compatibility. |
| Very flexible hiking shoe | Often unsuitable for traditional mountaineering crampons. | Do not assume a strap makes every shoe compatible; flex can cause poor retention. |
| Ski / specialty boot | Model-specific systems exist. | Use the crampon maker’s approved binding and technical notice for that boot type. |
Why the old B/C chart is not enough by itself
The British Mountaineering Council still uses B1/B2/B3 and C1/C2/C3 as a practical compatibility framework, but Petzl’s current system is organized around actual toe and heel interfaces such as FLEXLOCK and LEVERLOCK variants. The safe rule is simple: verify the exact boot–crampon combination, not just the label.

A Perfectly Good Crampon Can Be Unsafe on the Wrong Boot.
Retention depends on boot stiffness, boot shape, welts, binding geometry and correct adjustment. Fit the pair at home and verify the manufacturer’s technical notice before you trust it on consequential terrain.
Know Which Parts Are Holding You to the Mountain
Different designs vary, but most general mountaineering crampons share a front section, rear section, linking system, attachment system, points and anti-snow plates.
Downward Points
These are the workhorses of flat-foot movement. Good technique keeps multiple points engaged instead of balancing on an edge.
Front Points
Horizontal or vertical front points bite into steeper snow and ice when flat-footing is no longer practical.
Linking Bar / Cord
Sets length and may influence flex. Modern lightweight systems can use cords rather than traditional steel bars.
Toe Interface
May be a flexible basket or metal bail depending on the boot and crampon system.
Heel Interface
May be a basket or lever. Lever tension should be secure without forcing an incompatible fit.
Anti-Snow Plates
Help reduce snow balling beneath the frame. Inspect them before use and keep them installed when the manufacturer supplies them.

How to Fit Crampons to Your Boots
Do the initial setup in a warm, controlled place with the exact boots you will climb in. Manufacturer instructions take priority because adjustment hardware differs by model.
Check the crampon technical notice and boot specifications. Verify whether the binding requires heel or toe welts and whether the boot has enough rigidity for the system.
Adjust the linking bar, cord or length mechanism so the boot seats naturally into the front and rear sections without large gaps or excessive overhang.
Make sure the front basket or bail matches the shape of the boot and sits where the manufacturer intends. A wire bail should engage a compatible welt—not simply rest against rubber.
Adjust the heel basket or lever for secure engagement. A lever should close with firm, controlled resistance; forcing it can indicate a poor setting or incompatible boot.
Follow the manufacturer’s routing diagram. The safety strap should retain the crampon without creating a pressure point or loose tail that can snag.
Walk, edge, flex and twist the boot on flat ground. There should be no obvious shifting, rotation or disengagement. Recheck after the first few minutes of use.
If the crampon moves independently of the boot, stop.
Do not solve a poor fit by simply tightening everything harder. Recheck compatibility, length and binding setup. If you are unsure, have a qualified shop or guide fit the exact boot/crampon pair.
How to Put Crampons On in the Field
Choose a secure platform before you need the traction. Avoid making the transition while balanced on one foot on a slope where a slip already has consequences.
Stop in a Safe Place
Move to a flat or protected stance. Sit, kneel or use a stable position rather than balancing casually on exposed terrain.
Clear the Boot Sole
Remove packed snow, gravel and ice from the sole, welts and binding surfaces so the crampon seats against the boot correctly.
Orient Left and Right
Many models are shaped or strapped specifically for each foot. Keep buckles and loose strap tails away from the opposite leg.
Engage the Binding
Seat the toe and heel in the sequence specified by the manufacturer. Do not improvise a different attachment method.
Secure the Strap
Thread and tighten the retention strap exactly as intended. Tuck or control the remaining tail so it cannot catch a point.
Recheck After Moving
After several minutes, stop somewhere safe and inspect the fit again. Snow, boot compression and lever settling can change tension.

Walk Wide Enough That One Crampon Cannot Catch the Other Leg.
Many crampon trips happen because a point catches a gaiter, pant cuff, boot or the opposite crampon. Deliberate foot placement matters before slope angle ever becomes the main problem.
Flat-Footing, Hybrid Movement & Front-Pointing
Technique changes continuously with terrain and snow/ice quality. The goal is secure point engagement with efficient posture—not hitting a memorized angle threshold.
| Technique | How it works | Best context | Common error |
|---|---|---|---|
| Flat-footing / French technique | Keep the sole broadly parallel to the surface so multiple downward points engage. | Low to moderate firm snow or ice where ankle mobility allows a stable platform. | Rolling onto the boot edge and losing several points at once. |
| Duck-foot / diagonal variations | Turn feet outward or traverse diagonally while still maximizing downward-point contact. | Moderate slopes where straight-up flat-footing becomes awkward. | Crossing feet or letting the uphill foot catch the downhill leg. |
| Hybrid / American technique | One foot uses more downward points while the other begins using front points. | Transitions, traverses and terrain between comfortable flat-footing and full front-pointing. | Switching inconsistently without stable hips or deliberate weight transfer. |
| Front-pointing / German technique | Drive the front points into steeper snow or ice while keeping heels appropriately positioned for the surface. | Steeper terrain where flat-footing is no longer efficient or secure. | Standing too high on the points, over-fatiguing calves, or repeatedly kicking without solid purchase. |
Do not memorize “30° / 45° / 60°” as safety cutoffs.
Slope angle is only one variable. Firm alpine ice, soft snow, a traverse, a convex roll, boot stiffness and consequences of a slip can all change the right technique. Learn transitions on low-consequence terrain with qualified instruction before relying on them high on a mountain.
Descending in Crampons Is Where Tired Technique Gets Exposed
Fatigue, downhill momentum and reduced visibility of your feet make the descent especially prone to snagging and poor point placement.
Place the foot rather than swinging it. Avoid letting points scrape the opposite gaiter or pant leg.
Face downhill, traverse or turn more squarely toward the slope depending on steepness and surface. There is no single descent posture for every slope.
A rigid-legged descent magnifies small slips. Balanced, slightly flexed posture helps absorb irregularities.
On a rope team, avoid stepping on the rope or allowing slack loops to drift near the points. Rope management becomes harder when climbers are tired.
Many incidents happen when moving from snow to rock, ice to softer snow, or crampon terrain to bare trail. Reassess traction rather than carrying one technique blindly through the transition.
Crampons Make a Sliding Fall More Complicated
Sharp points can catch during a slide and violently load the ankle, knee or hip. This is why self-arrest should be practiced under qualified supervision rather than learned from a text description alone.
Good Footwork Beats a Rescue Move
The primary objective is not to fall: secure points, balanced movement, correct traction choice and conservative terrain decisions are more important than confidence in self-arrest.
Practice With an Instructor
Self-arrest body position, crampon management and axe use are dynamic skills. Practice them on a controlled snow slope where mistakes have low consequences.
Do not practice uncontrolled glissading while wearing crampons.
A point can catch suddenly and create severe lower-leg injury. If a route includes intentional glissading, remove crampons only where a qualified leader judges the transition and runout appropriate.

Front-Pointing Is Easy to Describe and Much Harder to Do Well.
Body position, kick quality, heel position, tool placement and fatigue management become increasingly important as terrain steepens. Technical ice belongs in a formal instructional progression.
Most Crampon Problems Start Before the Hardest Terrain
AAC historical accident data includes both slips on snow/ice and incidents involving faulty crampon use. The lesson is not that one mistake dominates; it is that traction equipment requires disciplined setup and movement.
Wrong Boot–Crampon Pair
Using a binding that does not match the boot’s rigidity or welt system can allow movement or detachment.
Putting Them On Too Late
Waiting until you are already insecure forces a delicate gear transition exactly where balance is worst.
Walking Too Narrow
Sharp points can catch gaiters, pants or the opposite boot. Slightly wider, deliberate steps reduce that risk.
Ignoring Balling
Snow packed under the frame can reduce effective point penetration. Use manufacturer anti-snow plates and monitor buildup.
Keeping Crampons On Too Long
Short mixed sections may be unavoidable, but long dry-rock walking dulls points and can make movement clumsy.
Learning on the Objective
Your summit climb should not be the first time you fit, walk, descend and transition techniques in crampons.
Crampons Are a Tool, Not a Uniform
Remove them when the terrain no longer benefits from the points and a safe transition location exists. The decision should again be based on surface and consequence—not pride or convenience.
| Terrain | Typical decision | Reason |
|---|---|---|
| Firm snow / ice with consequential runout | Usually keep appropriate crampons on. | Point engagement adds meaningful security. |
| Short mixed rock step | May remain in crampons if the route requires it. | Repeated transitions can be inefficient; mixed technique is a real alpine skill. |
| Extended dry rock | Often remove when a safe platform is available. | Points dull and snag; walking becomes less natural. |
| Soft, low-consequence trail snow | Reassess whether full crampons are still the best tool. | Extra points may add trip risk without adding useful traction. |
| Glissade terrain | Never assume crampons stay on. | Catching a point during a slide can cause major leg injury; use trained judgment. |
Inspect Crampons Like Safety Equipment
Crampons are simple, but they combine sharp load-bearing metal with straps, levers and adjustment hardware that can wear or loosen.
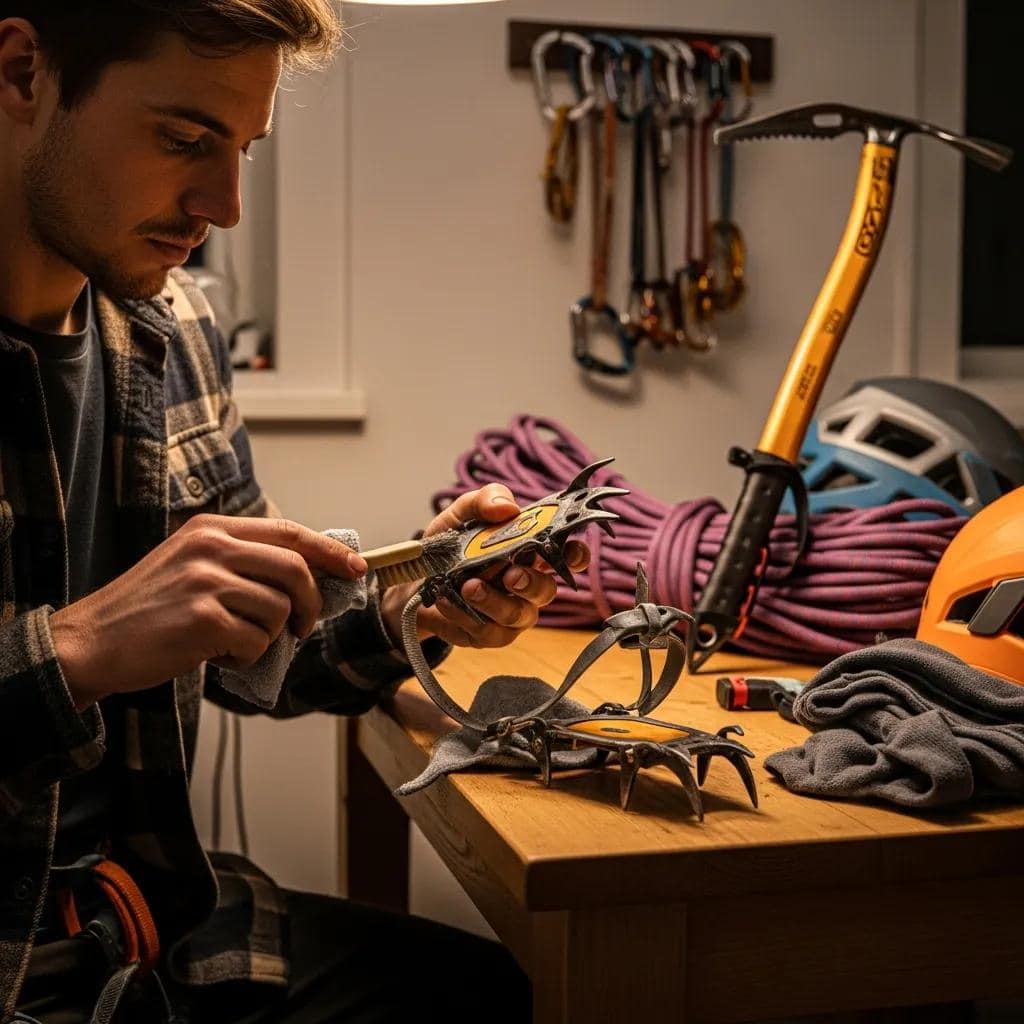
Inspect points, frame, linking system, straps, bails, heel levers and anti-snow plates. Look for cracks, deformation, corrosion, loose hardware or damaged webbing.
Rinse salt or grit when needed, dry the crampons fully and store them where wet steel will not sit against fabric or other equipment.
Follow manufacturer guidance. Maintain useful point geometry rather than aggressively grinding away metal or overheating it with power tools.
Recheck adjustment whenever you change boots—even if the nominal boot size is the same. Different sole shapes and welt positions can alter fit.
Replace damaged components only with manufacturer-approved parts. Retire a system if structural damage or excessive wear cannot be corrected safely.
Crampon Technique FAQ
Short answers to the questions beginners most often ask before practicing snow and glacier movement.
When should I put crampons on?
Put them on before terrain becomes consequential when the surface is hard or icy enough that normal boot traction is unreliable, especially when a slip could lead to a long slide, rocks, cliffs or crevasses. Do not rely on one universal slope-angle threshold.
Can I put crampons on hiking boots?
Only if the specific crampon and boot are compatible. Many flexible hiking boots are not appropriate for traditional mountaineering crampons. Check the crampon manufacturer’s technical notice and the boot’s intended compatibility.
What is French technique?
French technique, or flat-footing, aims to keep multiple downward crampon points engaged with the snow or ice. It is efficient on moderate terrain where ankle mobility permits stable full-foot contact.
What is front-pointing?
Front-pointing uses the forward-facing points on steeper snow or ice where flat-footing becomes inefficient or insecure. It requires more calf endurance and should be practiced in a controlled instructional setting before serious terrain.
Do I need anti-balling plates?
Use the anti-snow or anti-balling system supplied or specified by the manufacturer. Snow buildup under a crampon can reduce effective point contact and create a slip hazard.
Should I self-arrest with crampons on?
A real fall may happen while you are wearing crampons, but the points complicate a sliding arrest because they can catch violently. Self-arrest with crampons is a dynamic skill best practiced with qualified instruction on controlled snow.
Can I walk on rock in crampons?
Short mixed rock sections are part of mountaineering, and skilled climbers learn to move on them. Extended dry-rock walking dulls points and increases snagging, so remove crampons when the route and a safe transition point make that practical.
How tight should crampons be?
They should be secure enough that the frame does not shift or rotate independently of the boot, while levers and straps operate within the manufacturer’s intended adjustment range. Excessive force is not a substitute for compatibility.
Where Global Summit Guide’s Crampon Notes Come From
The editorial team’s direct experience is strongest on moderate-angle snow and glacier objectives rather than technical vertical ice. We keep that boundary visible.
Pico de Orizaba · Central Mexico
One of the main first-hand reference environments for this guide: high-altitude crampon travel on the north-side glacier route.
Pico de Orizaba
First-hand use of crampons on high-altitude snow and glacier terrain on Mexico’s highest mountain.
Iztaccíhuatl
First-hand crampon experience on high Mexican volcano terrain where surface condition changes traction decisions.
Mount Hood
First-hand use on the South Side / Hogsback route with guided instruction in 2026.
Experience boundary
Advanced steep ice, mixed climbing and technical front-pointing are research-supported sections rather than claimed first-hand expertise. Those skills belong in professional instruction and route-specific training.
Technique Guidance Should Follow the Equipment You Actually Own
This rebuild prioritizes current manufacturer compatibility information, current BMC winter-skills guidance and accident context over rigid one-size-fits-all rules.
Instructional limit
This guide is preparation material, not a substitute for in-person snow, glacier or ice instruction. Practice crampon movement, axe use, self-arrest and rope-team systems with a qualified instructor on low-consequence terrain before relying on them on a serious climb.
Global Summit Guide Editorial Team
This page combines first-hand moderate-angle crampon use from Pico de Orizaba, Iztaccíhuatl and Mount Hood with current BMC, manufacturer and accident-report sources. Technical ice sections are intentionally framed as skills to learn through formal instruction.
Crampons: Choose the System, Learn the Skills, Then Practice
This page owns crampon use and technique. Use the surrounding guides for buying, boot compatibility, snow tools, glacier systems and your first real practice objective.

Crampons Work Best When the Technique Is Already Familiar.
Set them up at home, learn the movements on low-consequence snow, practice transitions with qualified instruction, and only then take the skill onto a mountain where a mistake matters.


.jpg)


