
web analytics

Tag: ice axe technique

  • Ice Axe Self-Arrest: The Most Critical Mountaineering Skill

    Mountaineering ice axe and crampons on snow representing self-arrest training equipment
    ⛏ Skills Cluster · Mountaineering Safety · 2026 Field Guide

    Ice Axe Self-Arrest: The Most Critical Mountaineering Skill

    The complete 2026 guide to stopping a slide on snow. Step-by-step technique for all four falling positions, equipment selection, training progression, and field-tested guidance from Dawson Ludlow’s Mount Hood May 2026 training with Timberline Mountain Guides plus Kilimanjaro Lemosho 2024 experience.

    📋 Editorial Standards & Source Verification

    This skills guide cross-references five primary source categories: (1) Dawson Ludlow’s first-hand Mount Hood training (May 2026, Timberline Mountain Guides) and Mount Kilimanjaro experience (2024); (2) Established mountaineering instruction programs including American Alpine Institute, NOLS Wilderness Medicine, RMI Expeditions, and Mountain Madness curricula; (3) Published mountaineering reference texts including “Mountaineering: The Freedom of the Hills” (9th edition) and “Glacier Travel and Crevasse Rescue” by Andy Selters; (4) AMGA (American Mountain Guides Association) technical standards for snow climbing skills; (5) Internal Global Summit Guide research cross-referenced with our mountaineering and skills content.

    Critical safety note: Self-arrest cannot be learned safely from text alone. This guide explains the technique and informs decision-making but is not a substitute for hands-on instruction from a qualified mountaineering guide or course.

    ◆ FIRST-HAND Editorial Framing

    Dawson Ludlow completed self-arrest training as part of two mountaineering expeditions: Mount Kilimanjaro via the Lemosho Route (2024) which included basic snow technique briefings, and Mount Hood South Side Hogsback (May 2026) which included one full day of intensive self-arrest drills with Timberline Mountain Guides on the Palmer Snowfield. The technique sequences below reflect the specific instruction received from AMGA-certified guides during that training, not generic online content.

    For climbers planning to learn self-arrest, the recommendation is unambiguous: take a formal course before attempting unsupervised practice. Cost is $300-1,200 depending on location and duration — substantially less than a single mountaineering injury or rescue cost.

    ⚡ Quick Verdict — Featured Snippet Target

    What Is an Ice Axe Self-Arrest?

    An ice axe self-arrest is the technique used to stop an uncontrolled slide on a snow slope using an ice axe. The mountaineer rotates into a face-down position with the axe head near the shoulder, drives the pick into the snow surface, and applies maximum body weight pressure on the axe until the slide stops. Self-arrest is considered the single most important mountaineering safety skill because uncontrolled slides on snow are among the most common causes of mountaineering injury and death. Proper technique requires 1-2 days of supervised practice and cannot be safely learned from videos or text alone.

    ⚠ Critical Safety Warning

    This article is educational content — not a substitute for hands-on instruction. Attempting self-arrest practice without proper supervision risks serious injury including broken bones, lacerations from the ice axe pick, and crampon punctures. Self-arrest training requires a safe practice environment with appropriate slope angle, snow consistency, and runout — conditions that vary substantially across terrain.

    The Mountaineers, American Alpine Institute, NOLS, and other established programs offer 1-2 day snow skills courses that include supervised self-arrest practice. This is the only safe path to learning the skill. Use this guide to inform your decision to take a course, prepare for the curriculum, and reinforce learning afterward — not as a primary instruction source.

    4
    Falling positions
    6
    Technique steps
    45°
    Reliability threshold
    $300+
    Course cost (avg)

    Why Self-Arrest Matters

    Self-arrest is the most important safety skill in mountaineering because uncontrolled slides on snow are among the most common causes of injury and death in alpine environments. Unlike technical rock or ice climbing where protection systems prevent falls, snow travel often involves moderate slopes where mountaineers move unroped — and a single slip can develop into a sliding fall that accelerates rapidly.

    The statistics are sobering. American Alpine Club accident data shows uncontrolled slides as a leading cause of mountaineering fatalities in North America, particularly on Mount Hood, Mount Rainier, Mount Shasta, and similar moderate-snow objectives. Most of these incidents involve climbers who either lacked self-arrest training or were unable to execute the technique fast enough when the slide began.

    The technique itself is straightforward. The challenge is reaction time. On a 30-40 degree snow slope, a falling body can reach 30+ mph within 3-4 seconds. Self-arrest must be initiated within the first 1-2 seconds of a fall to be reliable — which is why repetitive practice to build muscle memory matters more than understanding the theory.

    ◆ Why Practice Matters More Than Theory

    A mountaineer who has practiced self-arrest 100 times over 2-3 days reacts in 1-2 seconds. A mountaineer who has only read about the technique reacts in 4-6 seconds — typically too slow to arrest before reaching dangerous speeds. The difference is muscle memory built through repetition, not knowledge. This is why no amount of reading replaces a formal course.

    Equipment You Need

    Self-arrest requires specific equipment. The ice axe is the primary tool, but secondary equipment affects both training safety and real-world effectiveness.

    The Ice Axe

    You need a mountaineering walking axe — not an ice climbing tool. The distinction matters. Walking axes have straight or slightly curved shafts 50-70cm long with a relatively flat pick angle suitable for dragging across snow during arrest. Ice climbing tools (45-55cm with aggressively curved shafts and steep pick angles) are designed for swinging into vertical ice and perform poorly in self-arrest. Confirm you’re buying a “general mountaineering axe” or “walking axe” rather than an “ice tool” or “technical climbing axe.”

    Axe length depends on your height. The traditional method is to hold the axe head with arm hanging at your side — the spike should reach the ankle bone. Modern mountaineering tends toward slightly shorter axes (60-65cm for most adults) than the traditional sizing suggested.

    The Head Components

    The head of the axe contains four functional parts: the pick (the pointed end, used for arrest and traction), the adze (the flat shovel-like end, used for chopping steps and platforms), the shaft (the long handle), and the spike (the metal point at the bottom of the shaft, used for walking and self-belay). Understanding which part does what is essential for proper grip during arrest.

    Boots and Crampons

    Mountaineering boots with stiff soles are required for crampon use and provide secondary friction during arrest via boot toes pressed into snow. Crampons should be removed for self-arrest practice on training slopes — the points can catch and cause violent rotation. For real-world arrest with crampons on, technique requires raising your knees to keep crampons off the snow during the arrest.

    Helmet

    A helmet is mandatory for self-arrest practice. Falls during training are common, and the ice axe pick is a sharp implement that can cause head injuries if it strikes you during a botched arrest attempt.

    Clothing

    Long-sleeved layers protect against snow burn during practice. Waterproof pants prevent getting soaked during repetitive falls. Gloves with reasonable grip on the axe head are important — bare hands stick to cold metal and can be injured during practice.
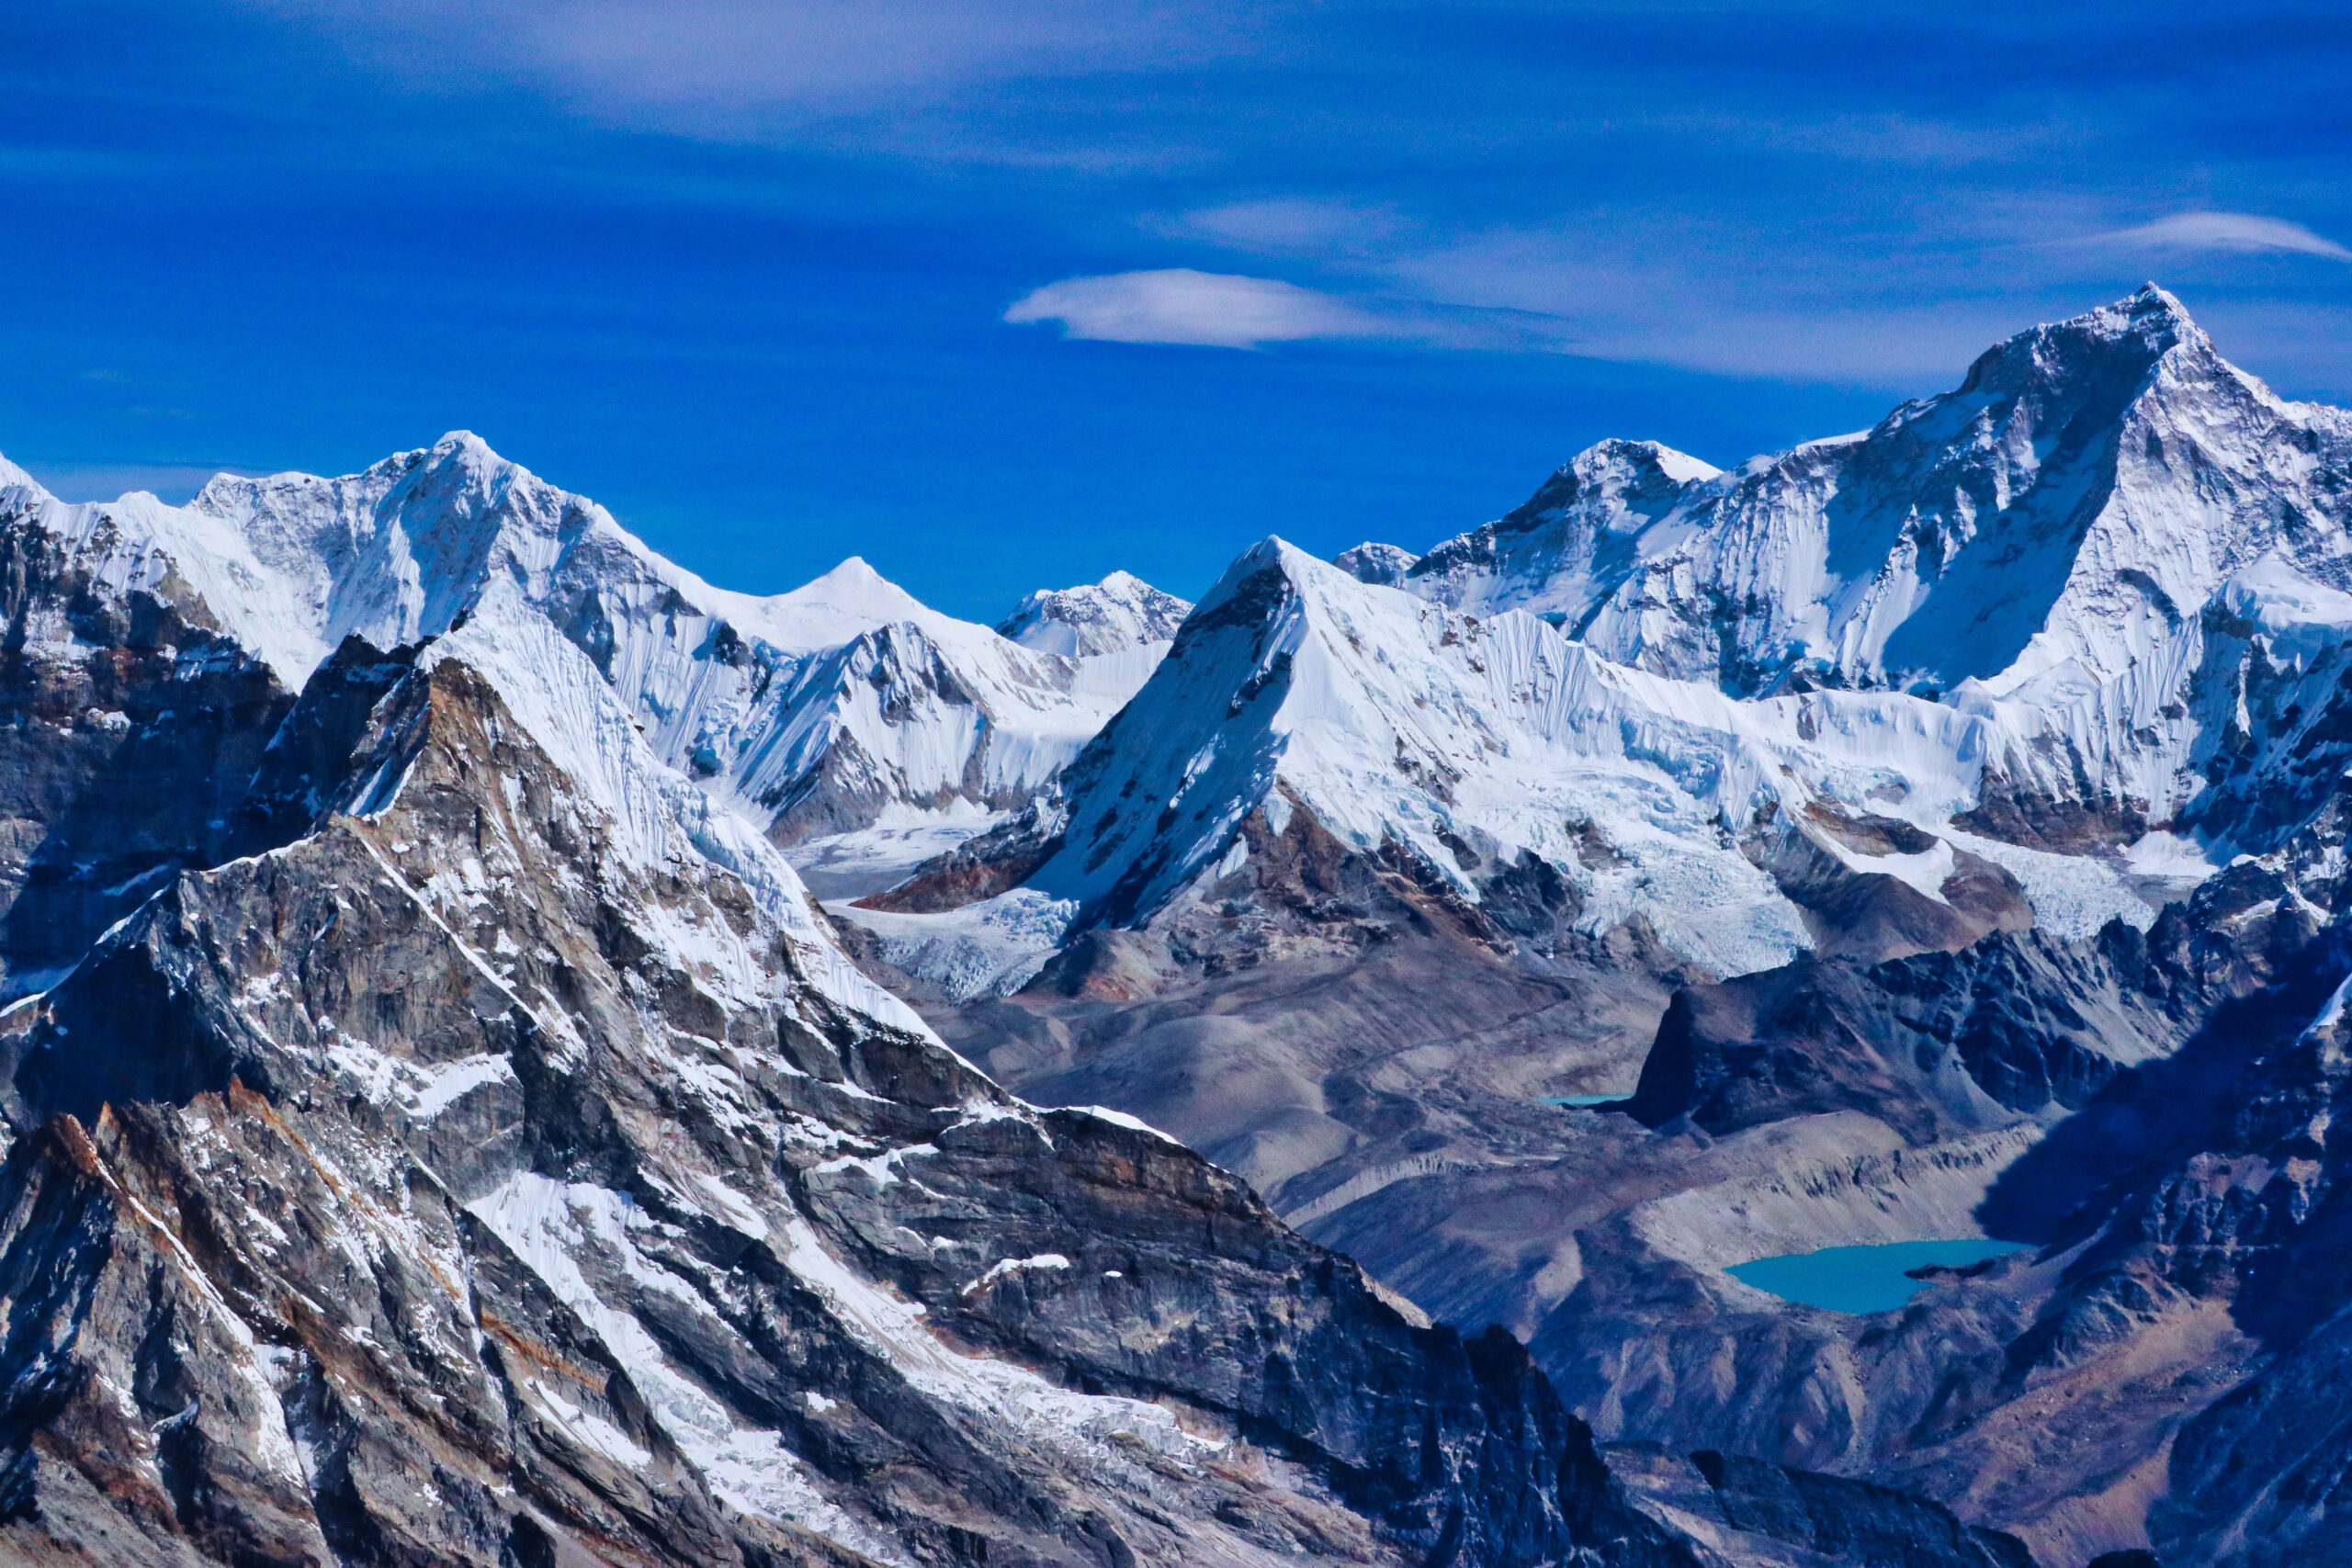
    Alpine mountain landscape representing the snow terrain where self-arrest skills become essential
    Self-arrest becomes essential on moderate snow slopes (20-45 degrees) where mountaineers travel unroped. These are the conditions where most slip-and-slide incidents occur — gentle enough to feel safe, steep enough that an uncontrolled slide develops dangerous speed within seconds.

    The 6-Step Technique

    The standard self-arrest sequence works from any falling position. The fundamental steps are the same; what varies is the starting position and the rotation required to reach the standard arrest position.

    Step 1 of 6

    Grip the Ice Axe Correctly

    Foundation: Wrong grip = no arrest possible

    Hold the ice axe with your dominant hand wrapping around the head. The adze (flat side) faces forward (away from you); the pick faces backward (toward you); the spike points down toward your feet. Your thumb wraps under the adze; fingers grip the pick side. This is sometimes called the “self-arrest grip” — distinct from the “walking grip” used for general travel.

    The grip enables the pick to engage the snow when you roll over for arrest. With a reversed grip (adze facing back, pick facing forward), the arrest is impossible — the pick can’t engage. Practice the grip until it’s automatic. The transition from walking grip to arrest grip must happen reflexively during a fall.

    Many mountaineers carry the axe in the walking grip during normal travel and switch to the arrest grip only when entering steep terrain. This transition itself is a skill — practice it on flat ground before applying on slopes.

    Step 2 of 6

    Identify Your Fall Position

    Sequence: Recognition determines what comes next

    The moment you start sliding, identify which of four positions you’re in: head-first on stomach, head-first on back, feet-first on back, or feet-first on stomach. Each position requires a slightly different sequence to reach the standard arrest position (face-down, feet-down, axe across chest with pick engaged).

    The “feet-first on stomach” position is the easiest — you’re already partially in arrest position and only need to drive the pick into the snow. The “head-first on back” position is the hardest — you must rotate 180 degrees to reach standard arrest while gaining speed throughout the rotation.

    Recognition happens in milliseconds. This is why practice matters: trained mountaineers move directly to the appropriate recovery sequence based on muscle memory, while untrained climbers waste 2-3 critical seconds processing what’s happening.

    Step 3 of 6

    Roll Toward the Pick

    Direction: Wrong roll causes injury, not arrest

    If you’re on your back, roll toward the side where you hold the axe — never the opposite direction. Rolling away from the pick would drag it across your arm or face, potentially causing serious injury. The roll is initiated with hip drive and arm position; your dominant arm (holding the axe head) pulls toward your chest while your hips rotate.

    For head-first falls, the rolling motion is the foundation of getting into position. A head-first slide must be rotated to feet-first before arrest is reliable — attempting to arrest head-first risks face injury and provides much less stopping power. The rotation uses arm position and body twist combined with the friction created by the partially-engaged pick.

    The roll direction depends on which hand holds the axe. Right-handed mountaineers typically hold the axe in the right hand and roll right. Left-handed mountaineers do the opposite. Confirm which hand you’ll hold the axe in during the planning stage of any climb — this isn’t a decision to make mid-fall.

    Step 4 of 6

    Drive the Pick into the Snow

    Power: Shoulder pressure, not hand pressure

    Position the axe diagonally across your chest with the head near your shoulder and the spike near your hip. Drive the pick into the snow surface using shoulder and chest pressure — not just hand force. The point of contact should be your shoulder pressing down on the axe head, with your full body weight transferring through the shoulder into the pick.

    Hand grip alone provides nowhere near enough force to arrest a fall at speed. Your hand stabilizes the axe; your shoulder and chest provide the pressure. This is counterintuitive — beginners often try to “push” the axe down with their hands, which gives them about 10% of the force they could apply with proper body positioning.

    The pick enters the snow at approximately a 60-70 degree angle relative to the slope surface. Too shallow and the pick skips across the snow without biting. Too steep and the pick digs straight down without creating the friction needed to slow you.

    Step 5 of 6

    Raise Your Knees and Dig In

    Stability: Boots and knees create secondary friction

    Bend your knees and press the front of your boots into the snow. The boot toes provide secondary friction — supplementing but not replacing the pick. With knees bent and toes pressed in, you create three points of contact with the slope: the axe pick (primary), and two boot toes (secondary).

    If you’re wearing crampons, raise your knees enough to keep the crampon points off the snow during the arrest. Crampon points catching during a slide cause violent cartwheeling — the climber’s body rotates around the catch point, often resulting in serious injury or loss of axe control. This is the single most dangerous mistake during self-arrest with crampons.

    Practice both with and without crampons. The knee-raise required to keep crampons off is significant and counterintuitive — many trained mountaineers fail this on first crampon attempts because the muscle memory is for “press toes in” rather than “raise knees and press boot front in.”

    Step 6 of 6

    Maintain the Arrest Position

    Discipline: Premature release causes continued slide

    Hold the arrest position with full body pressure on the axe head until you stop completely. Even after slowing, maintain pressure — the slope may have variable hardness, and partial release can cause continued sliding. The classic mistake is feeling the deceleration and prematurely lifting body weight off the axe before friction has fully stopped you.

    Once stopped, secure the axe with both hands before attempting to stand. Many secondary falls occur immediately after a successful arrest because the climber attempts to stand or move before fully stabilizing. From a stopped self-arrest position, you must: (1) Confirm you’ve stopped; (2) Both hands on axe; (3) Test the snow surface for stability; (4) Slowly move to a controlled stance.

    If you’ve slid into terrain different from where you fell (different slope angle, different snow consistency, nearby crevasse or rock), reassess the entire situation before moving. The arrest stopped you; the next decision determines whether you stay safe.
    Mountain ranges at sunset representing the alpine terrain where self-arrest training applies
    Self-arrest training conditions matter as much as the technique itself. Practice slopes need to be steep enough to generate real sliding, soft enough that the pick engages well, and have safe runouts (no rocks, cliffs, or crevasses). Find a qualified course at a suitable venue — Mount Hood’s Palmer Snowfield is one of the most popular training locations in North America.

    The Four Falling Positions

    Self-arrest must work from any starting position because real falls happen unpredictably. The four positions are defined by two variables: head-first vs feet-first, and stomach-down vs back-down. Each requires a different recovery sequence.

    PositionDifficultyRecovery SequenceWhy It’s Hard
    Feet-first on stomach★ EasiestDrive pick → bend knees → holdAlready in arrest orientation
    Feet-first on back★★ ModerateRoll toward axe → drive pick → bend knees → holdRequires 180° roll mid-slide
    Head-first on stomach★★★ HardPick out perpendicular to slope → rotate body 180° around pick → drive pick → bend kneesRequires rotation while accelerating
    Head-first on back★★★★ HardestRoll to head-first stomach → rotate 180° around pick → drive pick → bend kneesTwo-step rotation while accelerating

    The Head-First Rotation

    Head-first falls are the hardest scenarios. The recovery uses a technique called the “pivot arrest” — instead of trying to drag the pick from a head-first orientation, you reach the axe out to the side perpendicular to the slope, plant the pick firmly, and use it as a pivot point to rotate your body 180 degrees so your feet point downhill. After the rotation completes, drive the pick fully and complete the standard arrest sequence.

    This rotation technique is the most counterintuitive part of self-arrest training. The instinct is to put the axe straight ahead (in the direction of slide), but that doesn’t create the leverage needed to rotate. Reaching out perpendicular creates a fixed point that the body rotates around.

    ⚠ Practice in This Order

    Standard course curriculum practices the four positions in difficulty order: feet-first stomach → feet-first back → head-first stomach → head-first back. Skipping ahead before mastering each level builds bad muscle memory. The head-first techniques specifically should not be practiced unsupervised — falls from a head-first orientation can cause neck injuries even on training slopes.

    How to Learn Self-Arrest

    Self-arrest cannot be safely learned from text, videos, or unsupervised practice. The progression below outlines the standard learning path used by reputable mountaineering programs.

    Step 1: Take a Formal Course

    The starting point is a 1-3 day mountaineering skills course that includes supervised self-arrest practice. Reputable providers include American Alpine Institute (Washington, Colorado, Alaska), NOLS (multiple locations), RMI Expeditions (Mount Rainier), Mountain Madness (Pacific Northwest), Northwest Alpine Guides (Cascades), and similar programs at glacier-accessible mountains worldwide.

    Course costs range from $300 (1-day Mount Hood basic course) to $1,200+ (3-day comprehensive snow skills). Look for AMGA-certified instructors and venues with appropriate practice terrain — gradual snow slopes with safe runouts.

    Step 2: Repetitive Practice in the Course

    During the course, expect to practice each falling position 15-30 times. Yes, that’s a lot of falls. The repetition builds the reflexive muscle memory that distinguishes trained mountaineers from beginners during real falls. Don’t shortcut this — the value of the course is in the volume of practice, not just the information delivered.

    Step 3: Refresher Before Each Season

    Self-arrest is a perishable skill. Mountaineers who practiced in spring 2024 are not fully proficient by spring 2026 without practice in between. A half-day refresher before each climbing season — typically conducted on a local snowfield with a partner — maintains the skill at deployable level. The refresher can be self-directed once initial proficiency is established.

    Step 4: Practice on Each Trip

    On any mountaineering trip with snow travel, conduct a brief self-arrest practice session in the first day’s snow contact. Five to ten falls on local snow conditions calibrates your reactions to the specific snow consistency of that trip — firn snow, neve, wet spring snow, and packed powder all require slightly different technique.

    Common Mistakes

    Most self-arrest failures result from a small number of recurring mistakes. Awareness of these reduces the chance of repeating them.

    MistakeWhat HappensThe Fix
    Wrong grip on axePick can’t engage snow when neededPractice arrest grip until automatic
    Hand pressure instead of shoulder pressureInsufficient force to slow slideDrive with shoulder; hand stabilizes only
    Rolling wrong directionPick drags across arm/faceAlways roll toward your axe-hand side
    Crampon points engaged during arrestCatches and cartwheels climberRaise knees; keep crampons off snow
    Attempting arrest head-firstFace injury, weak arrest forceRotate to feet-first first using pivot
    Premature release after slowingSlide continues; secondary fallHold pressure until fully stopped
    Pick angle too shallowPick skips across snow surface60-70° angle to slope; check during practice
    Standing up before stableSecondary fall after successful arrestConfirm stop, both hands on axe, test snow
    Snow-covered mountain range at dawn representing winter alpine conditions where self-arrest matters most
    Snow conditions vary enormously across alpine terrain. Firn snow (hard, granular, compressed) accepts pick engagement well. Wet spring corn snow grips easily. Powder is harder to arrest in. Hard ice resists pick penetration substantially. Calibrate your technique to the snow you’re actually traveling on.

    When Self-Arrest Won’t Work

    Self-arrest has limits. Understanding when the technique becomes unreliable is as important as knowing how to execute it.

    Above 45 Degree Slopes

    Self-arrest reliability degrades rapidly above approximately 45 degrees of slope angle. On gentle slopes (20-30 degrees), self-arrest from any falling position is highly reliable for trained mountaineers. On moderate slopes (30-45 degrees), self-arrest remains feasible but requires faster reactions. Above 45 degrees, self-arrest becomes unreliable and mountaineers should be using protection systems (belays, fixed lines, running protection) rather than depending on arrest as primary safety.

    On Hard Ice

    The pick of a standard mountaineering walking axe penetrates softer firn snow well but skips on water ice. Hard ice surfaces and refrozen snow that has lost surface texture (sometimes called “boilerplate”) resist pick engagement. Self-arrest on these surfaces is unreliable even on moderate slopes. Mountaineers traveling icy terrain should use crampons aggressively and either rope up or use protection systems.

    At High Speeds

    Self-arrest must be initiated within the first 1-2 seconds of a fall. After 3-5 seconds of acceleration on moderate slopes, the body reaches speeds (25-35 mph) where pick engagement may not generate enough friction to overcome momentum. Once you’re moving fast, the arrest becomes less about technique and more about luck.

    With Heavy Pack Loads

    Heavy packs (50+ lbs) significantly change the body mechanics of self-arrest. The center of mass shifts, the rotation required for head-first recovery becomes harder, and the pack may bunch into the back of the head during arrest. Mountaineers carrying heavy loads should treat self-arrest as marginal protection and use rope systems on any terrain where falls are possible.

    On Exposed Terrain Above Cliffs

    Self-arrest stops a slide, but it doesn’t reverse the slide that already happened. On terrain where the runout below contains cliffs, crevasses, or rocks, even successful self-arrest may not prevent serious consequences if you slide far enough before stopping. On exposed terrain, mountaineers should either avoid the route entirely or use protection systems that prevent the initial fall.

    ⚠ The Safety Hierarchy

    Self-arrest is the third line of defense, not the first. The mountaineering safety hierarchy is: (1) Don’t fall (good technique, conservative decisions); (2) If you fall, have protection (rope, anchors, running protection); (3) If protection fails, self-arrest. Climbers who treat self-arrest as primary safety are operating below standard mountaineering practice.

    Frequently Asked Questions

    What is an ice axe self-arrest?

    An ice axe self-arrest is the technique used to stop an uncontrolled slide on a snow slope using an ice axe. The technique involves rotating into a face-down position with the axe head near the shoulder, driving the pick into the snow surface, and using body weight to apply maximum pressure on the axe until the slide stops. Self-arrest is considered the single most important mountaineering safety skill because uncontrolled slides on snow are among the most common causes of mountaineering injury and death.

    How long does it take to learn self-arrest?

    Basic self-arrest from the standard feet-first-on-back position can be learned in 2-3 hours of focused practice. Full proficiency across all four falling positions requires 1-2 full days of repetitive practice with a qualified instructor. Most mountaineering training programs include 1-2 days of self-arrest drills as a core part of their curriculum. Practice should occur on slopes with safe runouts that allow falls without serious consequences.

    Can you self-arrest on hard ice?

    Self-arrest is substantially more difficult on hard ice than on snow and may not be possible above certain steepness thresholds. The pick of a standard mountaineering walking axe penetrates softer firn snow well but skips on water ice. On hard ice or steep snow above about 45 degrees, self-arrest reliability drops dramatically. Mountaineers traveling on icy terrain typically rope up and use running protection rather than depending solely on self-arrest.

    Do you need crampons to self-arrest?

    Crampons are not used in the self-arrest technique itself — pressing crampon points into snow during a slide can cause the crampons to catch and cartwheel you violently. Standard self-arrest technique uses the axe pick as primary arrest force, with bent knees and boot toes providing secondary friction. Crampons remain on for general travel but should not be actively used during the arrest. Practice self-arrest both with and without crampons to develop the muscle memory for real-world scenarios.

    What is the difference between an ice axe and an ice tool?

    An ice axe (walking axe, mountaineering axe) is the 50-70cm long-handled tool used for general mountaineering, glacier travel, and snow climbing. Ice tools (or ice climbing axes) are shorter (45-55cm) with aggressively curved shafts designed specifically for vertical ice climbing. For self-arrest training and general mountaineering, you need an ice axe — not an ice tool. Ice tools do not perform self-arrest reliably because their curved shafts and aggressive pick angles are optimized for swinging into ice rather than dragging across snow.

    When should you wear a leash on an ice axe?

    Most modern mountaineering training discourages leashes on the ice axe because they create entanglement risk during a fall and can pull the axe across your face during arrest. Some traditional climbers still use wrist leashes for security. The current consensus from American Alpine Institute, AMGA, and major mountaineering programs is that leashless travel is preferred for general mountaineering, with the axe held loosely and dropped if needed during a fall. Practice both leashed and leashless to understand the tradeoffs.

    How steep can you self-arrest on?

    Self-arrest reliability degrades rapidly above approximately 45 degrees of slope angle. On gentle slopes (20-30 degrees), self-arrest from any falling position is highly reliable for trained mountaineers. On moderate slopes (30-45 degrees), self-arrest remains feasible but requires faster reactions. Above 45 degrees, self-arrest becomes unreliable and mountaineers should be using protection systems (belays, fixed lines, running protection). On 50-degree-plus terrain, self-arrest should be considered a backup rather than a primary safety system.

    Should I take a mountaineering course before attempting self-arrest?

    Yes. Self-arrest cannot be learned safely from videos or text alone. Without proper instruction, common mistakes including improper grip, wrong roll direction, and crampon catches can cause serious injury during practice. American Alpine Institute, NOLS, Mountain Madness, RMI Expeditions, and most regional mountaineering programs offer dedicated snow skills courses that include 1-2 days of supervised self-arrest practice. Course costs range from $300-1,200 depending on duration and location. This investment is the single most cost-effective safety expenditure in mountaineering.

    Methodology + Editorial Standards

    How This Guide Was Built

    Author Credentials

    Dawson Ludlow is Wilderness First Aid certified with first-hand mountaineering experience on Mount Kilimanjaro via the Lemosho Route (2024, African Walking Company) and Mount Hood via the South Side Hogsback route (May 2026, Timberline Mountain Guides). Self-arrest training was conducted as part of the Mount Hood expedition specifically — one full day on the Palmer Snowfield with AMGA-certified instructors.

    Source Categories

    This guide cross-references five primary source categories: (1) Dawson Ludlow’s first-hand training at Mount Hood (May 2026) and basic snow technique briefings at Kilimanjaro (2024); (2) Established mountaineering instruction programs including American Alpine Institute, NOLS Wilderness Medicine, RMI Expeditions, and Mountain Madness curricula; (3) Published mountaineering reference texts including “Mountaineering: The Freedom of the Hills” (9th edition, The Mountaineers Books) and “Glacier Travel and Crevasse Rescue” by Andy Selters; (4) AMGA (American Mountain Guides Association) technical standards for snow climbing skills; (5) Internal Global Summit Guide research cross-referenced with our existing mountaineering content.

    Editorial Approach

    This guide focuses on technique fundamentals rather than advanced edge cases. The goal is to inform climbers preparing for or supplementing formal courses — not to replace courses. Where technique varies between teaching programs (leash use, specific grip variations), we describe the modern consensus position while noting alternatives where relevant.

    Update Cycle

    This guide is reviewed annually. The next scheduled review is June 2027. Self-arrest technique itself is stable, but equipment recommendations and course availability change. Confirm current course options and equipment models within weeks of training.

    About The Author

    DL

    Dawson Ludlow

    Safety & Mountaineering Contributor · Wilderness First Aid Certified · Edited by Travis Ludlow

    Dawson Ludlow covers mountaineering safety and technical skills for Global Summit Guide. First-hand experience includes Mount Kilimanjaro via the Lemosho Route (2024) with African Walking Company and Mount Hood via the South Side Hogsback route (May 2026) with Timberline Mountain Guides. Self-arrest training was conducted as part of the Mount Hood expedition with AMGA-certified instructors.

    Wilderness First Aid certified. The Global Summit Guide editorial team includes Travis Ludlow (Editor, first-hand experience on Pico de Orizaba, Iztaccíhuatl, Mount Fuji, and Ludlow family Patagonia January 2025) and Walker Ludlow (gear coverage).

    Ready to Build Your Skills?

    The next steps after reading this guide: book a 1-3 day mountaineering skills course with a reputable provider, practice the falling positions in the order outlined, and complete a refresher before each climbing season. Self-arrest is one skill in a broader mountaineering safety toolkit — explore our growing skills cluster for more.

    Crampons Buyer’s Guide 8000m Peaks Ranked Meet the Team

    Ice Axe Self-Arrest: The Most Critical Mountaineering Skill · Skills Cluster Build #1 · v4.0 build · Last verified June 24, 2026 · Dawson Ludlow Author · Travis Ludlow Editor · 4 schemas + 4 images · FIRST-HAND framing (Mount Hood May 2026 + Kilimanjaro 2024)

    Was this helpful?

    Yes
    No
    Thanks for your feedback!
  • How to use an ice axe: self-arrest, plunge step, and the 5 essential techniques

    How to Use an Ice Axe: Self-Arrest, Plunge Step, and the 5 Essential Techniques | Global Summit Guide
    Mountaineering Skills / Snow Travel

    How to use an ice axe: self-arrest, plunge step, and the 5 essential techniques

    5
    Essential techniques
    50-70 cm
    Typical axe length
    15-30°
    Practice slope angle
    Hours
    Practice time needed
    ★ Part of the mountaineering skills series This skills guide supports our ice axe master guide and our broader snow travel framework. Master guide →

    The ice axe is the single most important piece of mountaineering equipment most climbers will ever own. It is the difference between walking comfortably across a snow slope and sliding uncontrollably to the bottom of one. Yet most climbers buy an ice axe and never actually practice with it — they read about self-arrest, watch a YouTube video, and assume the technique will work when they need it. It usually doesn’t. Ice axe technique requires hands-on practice on safe slopes before it can save you in real conditions. This guide covers the five essential techniques every mountaineer must know, in the sequence climbers should learn them. For broader context see our mountaineering ice axe master guide.

    Ice axe anatomy know your tool before you use it

    Understanding the parts of an ice axe matters because each part has a specific function. Climbers who use the wrong part of the axe at the wrong moment lose effectiveness or create dangerous situations.

    ★ The five parts of an ice axe

    What each part does

    1. Pick (the spike at top)
    The pointed end of the head. Used for self-arrest, swinging into ice for traction, and anchor placement.
    2. Adze (the flat shovel)
    The flat end of the head opposite the pick. Used for chopping steps in snow and ice, and for clearing snow.
    3. Head (combined pick+adze)
    The top section combining pick and adze. The handhold for self-arrest and most technical positions.
    4. Shaft (the main pole)
    The straight or slightly curved main body. Held in the hand for cane position and self-belay.
    5. Spike (the bottom tip)
    The sharp point at the bottom of the shaft. Planted into the snow during cane position and self-belay.
    + Leash (optional)
    Attaches axe to wrist or harness to prevent dropping. Use varies by region and personal preference.

    The general mountaineering ice axe described here is different from a technical ice tool. Ice tools have strongly curved shafts and are designed for swinging into vertical ice during ice climbing. General ice axes are designed for snow slopes, self-arrest, and walking. The two are not interchangeable. The framework for choosing the right ice axe is in our mountaineering ice axe guide.

    The 5 essential ice axe techniques in the order to learn them

    Ice axe skills build on each other. Climbers who skip to self-arrest without first mastering grip and cane position never develop reliable arrest technique. Follow this sequence:

    1

    Cane Position

    Foundation technique · Used on 80% of mountaineering terrain
    Fundamental

    The cane position is the foundation ice axe technique and the position climbers will use most often. The axe is held by the head with the pick facing backward (away from the direction of travel) and the spike planted into the snow on the uphill side with each step. The technique provides balance, security, and a quick path to self-arrest if a slip occurs.

    1. Hold the head of the axe in your uphill hand.The thumb wraps around the adze; fingers curl around the head. The pick should point backward, away from your direction of travel.
    2. Walk uphill diagonally across the slope.Don’t walk straight up steep slopes – traverse diagonally with the axe planted on each step.
    3. Plant the spike with each step.The bottom spike goes into the snow on your uphill side, providing a stable third point of contact.
    4. Switch hands at each switchback.When you change direction, switch the axe to your new uphill hand. The axe is always on the uphill side.
    5. Keep your weight on your feet, not the axe.The axe is a stability aid, not a load-bearer. Crampons or boot edges carry your weight; the axe prevents slips.

    When to use: moderate snow slopes (15-30 degrees), most mountaineering approaches, glacier travel on flat or gently sloped terrain. Most of the climbing on Mont Blanc, Mexican volcanoes, Kilimanjaro snowfields, and approach hikes on serious peaks uses cane position.

    2

    Plunge Step (Descent)

    Descent technique · Efficient and energy-saving
    Essential

    The plunge step is the standard descent technique on snow slopes. Climbers face downhill, lean slightly forward, and walk straight down the slope plunging each foot heel-first into the snow. The technique is dramatically faster and less tiring than the slow side-stepping descent most beginners default to.

    1. Face directly downhill.Body weight slightly forward, knees slightly bent. The axe is held in the dominant hand in cane position – spike planted with each step.
    2. Step heel-first, hard.Each step lands heel-first with body weight driving the heel into the snow. The heel should compact the snow into a step platform.
    3. Keep your body forward over your feet.The instinct is to lean back for “safety” but this causes feet to slide. Stay forward over your boots.
    4. Plant the axe spike with each step.The axe stabilizes balance but doesn’t carry weight. The spike goes in the snow next to or slightly behind you on each plunge.
    5. Maintain rhythm.Plunge stepping works best at a steady rhythm. Hesitation makes the technique less effective.

    When to use: descending moderate to steep snow slopes (15-35 degrees) with firm but forgiving snow. Does not work well on ice (use crampons) or very soft snow (creates excessive postholing). The plunge step is one of the most underused techniques among intermediate climbers – mastering it dramatically improves mountain efficiency.

    3

    Self-Belay

    Steeper-terrain protection · Pre-arrest insurance
    Essential

    Self-belay is the technique used on steeper snow where a fall would have consequences. The axe shaft is driven deep into the snow as the climber moves, creating an anchor that catches a slip before a slide can develop. Self-belay differs from cane position by depth of placement and intent – cane position is a stability aid; self-belay is active protection.

    1. Hold the axe near the head with both hands optional.One hand on the head (uphill), the other can grip the shaft lower for additional control. The pick faces backward.
    2. Drive the shaft deep into the snow above you.The shaft penetrates the snow as deeply as possible (often the full shaft length on firm snow). This creates a temporary anchor.
    3. Climb up to the axe.With the shaft planted, kick steps with your feet and ascend until you’re level with or above the axe head.
    4. Replant the axe above and repeat.Remove the axe, advance, drive it back into the snow above you. The axe is always above and providing temporary anchor security.
    5. Switch hands smoothly.On long traverses or switchbacks, switch the axe to the new uphill hand at controlled moments.

    When to use: steeper snow slopes (30-45 degrees) where consequences of a fall would be serious. Self-belay is the technique that bridges between cane position (easy slopes) and roped climbing (technical terrain). Most of the steeper snow on Aconcagua’s upper mountain, the Mexican volcano summit ridges, and Cascade volcano approaches uses self-belay technique.

    4

    Self-Arrest

    Emergency stopping technique · Must be practiced
    Critical

    Self-arrest is the technique used to stop an uncontrolled slide on snow. It is the single most important emergency skill in snow mountaineering and the technique most commonly taught incorrectly. Self-arrest must be practiced repeatedly on safe slopes before it can be relied on in real conditions – the muscle memory takes time to develop and degrades without practice.

    1. If sliding head-first or on your back, roll into proper position.The arrest position has the climber on their stomach, head uphill, with the axe across the upper chest. Rolling into position takes 2-3 seconds and is often the difference between successful arrest and continued slide.
    2. Grip the head of the axe with both hands.One hand on the head over the pick; the other on the shaft near the spike. The pick faces down into the snow on the uphill side of your body.
    3. Drive the pick into the snow gradually.Apply increasing pressure rather than slamming the pick down. Slammed picks bounce away. Gradual pressure allows the pick to bite and hold.
    4. Lift your hips off the snow.Body weight transfers to the pick. The hips being raised concentrates pressure on the pick and increases arresting force.
    5. Spread your legs and dig in with your feet.If wearing boots only, kick your feet into the snow for additional braking. If wearing crampons, KEEP YOUR FEET OFF THE SNOW – kicking crampons into the slope while sliding can cause violent flips and broken ankles.
    The crampon warning

    The single most dangerous mistake in self-arrest with crampons is letting the crampon points catch the snow during the slide. The friction creates rotational force that flips the climber violently, often resulting in broken legs, lost axe control, or continued slide in an even worse position. When wearing crampons, lift your feet off the snow during self-arrest until your body is fully stopped. Use only the axe pick to arrest. Once stopped, then carefully reset your foot position.

    When to practice: on a snow slope with 15-30 degree angle, firm but forgiving snow, and a clean runout below (no rocks, cliffs, or hazards). Most mountaineering courses spend several hours teaching self-arrest from various starting positions (head-first on back, head-first on stomach, feet-first on back, feet-first on stomach). Each position requires slightly different recovery technique. Practice repeatedly until the response is automatic.

    The truth about self-arrest

    Self-arrest works reliably only when the technique has been practiced repeatedly. Most climbers who fail to self-arrest in real situations fail because they’ve never practiced – they read about it but don’t do the dozens of practice slides needed to develop muscle memory. The technique itself is straightforward; the execution under stress is what requires practice.

    5

    Anchor Position (Belay Setup)

    Roped climbing technique · Multi-person teams
    Advanced

    The anchor position uses the ice axe as a temporary anchor for belaying a partner across snow or ice terrain. This is the technique that bridges between solo self-belay and roped technical climbing. Used in rope team travel on glaciers and on steeper snow climbs where one climber must protect another’s movement.

    1. Plunge the shaft fully into firm snow.The shaft must be deep enough to provide reliable holding force – typically the full shaft length on firm snow.
    2. Test the anchor by leaning back on it.Apply body weight to the axe head. If the axe moves, the placement is not sufficient – replant it deeper or in better snow.
    3. Sit or stand braced behind the axe.The climber’s body position is also part of the anchor system – body weight braces the axe against pull-out.
    4. Manage the rope through the axe head.The rope can be passed over the axe head (Munter hitch style) or through additional gear to create the belay system.
    5. Be prepared to escape the belay.If a fall causes the axe to start pulling out, the climber must be ready to convert to a different anchor configuration.

    When to use: rope team glacier travel, protecting a partner on steeper snow, building snow anchors for crevasse rescue. This technique extends beyond basic ice axe use into roped mountaineering skill — usually learned through formal training rather than self-study. For climbers progressing beyond solo snow travel into technical alpine objectives, this is the next skill set to develop. The broader glacier travel framework is critical context — most climbers learn anchor position as part of a complete glacier travel course.

    Sizing and length getting the right axe

    The right ice axe length affects every technique. Wrong sizing makes proper technique difficult or impossible. The classic sizing rule:

    Your heightRecommended axe lengthBest for
    Under 5’4″ (162 cm)50-55 cmGeneral mountaineering, smaller climbers
    5’4″ to 5’8″ (162-173 cm)55-60 cmGeneral mountaineering, all-purpose
    5’8″ to 6’0″ (173-183 cm)60-65 cmGeneral mountaineering, most common range
    6’0″ to 6’4″ (183-193 cm)65-70 cmGeneral mountaineering, taller climbers
    Over 6’4″ (193 cm)70-75 cmGeneral mountaineering, very tall climbers
    Technical ice climbing50-55 cm regardless of heightSteep terrain, swing-into-ice technique
    Ski mountaineering50-55 cmPackable, lightweight, mostly carried

    The traditional test: hold the axe by the head at your side with the spike pointing down. The spike should reach your ankle bone. Too short and you’ll bend over uncomfortably in cane position; too long and the axe becomes unwieldy on steeper terrain. The full sizing framework is in our mountaineering ice axe guide.

    How to practice ice axe skills developing real competence

    Reading about ice axe technique is useful but does not develop the muscle memory required for reliable use. Climbers who only read about ice axe skills fail to self-arrest when needed because the response is not automatic. The practice progression:

    1. Find a safe practice slope. 15-30 degree angle, firm but forgiving snow, clean runout below (no rocks, cliffs, trees, or other hazards). Avoid slopes with summer or spring slush which behaves differently than winter snow.
    2. Practice basic positions first. Hold the axe in cane position for 30 minutes on flat or gentle slopes. Develop comfort with the grip and the spike-planting motion.
    3. Practice plunge step descents. Walk up the practice slope and plunge step down repeatedly. Build comfort with the heel-strike motion and weight-forward position.
    4. Practice self-arrest from controlled slides. Start by sliding feet-first on your back from a low starting point. Roll into arrest position and arrest. Repeat until automatic.
    5. Practice self-arrest from each fall position. Head-first on back, head-first on stomach, feet-first on back, feet-first on stomach. Each requires slightly different recovery technique. Practice all four.
    6. Practice with crampons separately. Once arrest is reliable with boots only, practice the same techniques with crampons – emphasizing keeping feet off the snow during arrest.
    7. Take a course if possible. Mountaineering courses through organizations like the American Alpine Institute, AMGA, or Petzl Foundation training programs accelerate skill development dramatically.
    The practice principle that matters

    Self-arrest skill needs regular reinforcement. Even climbers who learned arrest competently lose the muscle memory if they don’t practice for a few seasons. Many experienced mountaineers spend an hour or two on a snow practice slope at the start of each climbing season specifically to refresh self-arrest technique. This is the difference between climbers who reliably arrest under stress and those who don’t.

    Common ice axe mistakes that cause real injuries

    • Wrong hand for terrain. Holding the axe in the downhill hand makes self-arrest dramatically slower. Always uphill hand on traverses.
    • Slamming the pick during arrest. Slammed picks bounce away. Gradual pressure allows the pick to bite and hold.
    • Failure to roll into arrest position. Many failed arrests are because the climber tried to arrest from the position they ended up in rather than rolling onto their stomach first.
    • Crampons catching during slide. The single most common cause of broken ankles in mountaineering. Keep feet UP during slides with crampons.
    • Wrong axe size for technique. A 70cm axe is unwieldy for steep terrain. A 50cm axe is uncomfortable for cane position. Match the tool to your primary terrain.
    • Never practicing. The single biggest mistake. Self-arrest technique without practice is theoretical, not reliable.
    • Using an ice tool instead of an ice axe. Ice tools are designed for technical climbing, not self-arrest. Their curved shafts and aggressive picks make arrest harder.
    • Losing the axe. Dropping an ice axe during a slide makes recovery much harder. Use a leash on steep terrain, or be very deliberate with hand grip.
    • Ignoring snow conditions. Self-arrest works on soft to firm snow but is dramatically less effective on hard ice. Recognize when conditions exceed self-arrest capability and use rope team protection.

    When you actually need an ice axe match tool to terrain

    Terrain / objectiveIce axe needed?Notes
    Snowy hiking trailsNo (microspikes if icy)Use trekking poles for stability
    Mount Whitney summer routeSometimesYes if snowfields lingering
    Colorado 14ers (summer)SometimesYes in early summer with lingering snow
    Mount Hood / Mount AdamsYes (mandatory)Standard mountaineering equipment
    Mexican volcanoes (Pico de Orizaba)Yes (mandatory)Standard mountaineering equipment
    Mont BlancYes (mandatory)Standard mountaineering equipment
    AconcaguaYes (mandatory)Standard mountaineering equipment
    DenaliYes (mandatory)Plus second tool for steeper terrain
    Technical ice climbingNo – use ice tools insteadDifferent tool category entirely
    Ski mountaineeringYes (lightweight)Carried more than used most of the time

    The general rule: any mountaineering objective with sustained snow or ice travel requires an ice axe. The microspikes-vs-crampons distinction also applies to ice axe decisions — the full snow travel gear framework is in our microspikes vs crampons decision guide.

    ★ Ice Axe Master Guide

    The complete ice axe framework

    Detailed product recommendations, type comparisons, and the broader ice axe context for mountaineering.

    Master guide →

    The bottom line on ice axe technique

    Using an ice axe requires learning five essential techniques in sequence: cane position (the foundation), plunge step (for descent), self-belay (for steeper ascent), self-arrest (for emergencies), and anchor position (for roped travel). The techniques build on each other — climbers who skip to self-arrest without first mastering grip and cane position never develop reliable emergency response. Most mountaineering objectives use cane position 80% of the time, plunge step on descent, and self-belay on steeper sections; self-arrest is the emergency backup that must work when needed. The technique requires hands-on practice on safe slopes (15-30 degree angle, firm forgiving snow, clean runout) — reading about self-arrest without practicing does not build the muscle memory required for reliable execution under stress. The critical safety rule with crampons: keep your feet OFF the snow during self-arrest to prevent rotational ankle injuries. Sizing matters — choose an axe where the spike reaches your ankle bone when held at your side, typically 50-70cm for most climbers. Quality ice axes from Petzl, Black Diamond, Grivel, or Cassin cost $80-$200 and last decades with proper care. The full ice axe framework is in our mountaineering ice axe master guide, with related snow travel gear context in our microspikes vs crampons decision guide and crampons-specific framework in our how to choose mountaineering crampons guide.

    Frequently asked questions

    How do you use an ice axe?

    Using an ice axe requires learning five essential techniques in sequence: cane position for flat to moderate terrain, plunge step for descending firm snow, self-belay for ascending steeper snow, self-arrest for stopping a slide, and anchor/security position for belaying. Beginning climbers should focus first on grip and cane position, then learn self-arrest on a safe practice slope. The pick faces backward when used as a walking aid and forward during self-arrest. Most climbers learn ice axe technique through hands-on practice on a moderate snow slope where falls have no consequences, ideally with an experienced mentor or in a mountaineering course. Practicing the techniques only in real climbing situations is dangerous – dedicated practice on safe terrain is essential.

    How do you do an ice axe self-arrest?

    To perform an ice axe self-arrest, immediately roll onto your stomach with your head facing uphill if possible. Hold the head of the ice axe near your shoulder with the pick pointed down and into the snow. Drive the pick into the snow gradually – applying full force immediately can cause the axe to bounce away. Keep your hips lifted off the snow to put all your body weight on the pick. Spread your legs and dig in with your feet (or kick them away from the slope if wearing crampons to prevent catching). The full position has the climber pressed against the slope with the pick anchored, body weight pressing the axe in, and feet stabilizing position. Self-arrest must be practiced repeatedly on safe slopes before relying on it in real climbing situations.

    What is the plunge step technique?

    The plunge step is the technique used to descend moderate to steep snow slopes efficiently. The climber walks straight down the slope, plunging each foot heel-first into the snow with body weight forward. The ice axe is held in the cane position with the spike planted on the uphill side as a stabilizer. The plunge step works well on firm snow that compacts under the heel, providing a step platform. On harder ice it is less effective and crampons or technical techniques become necessary. On soft snow the plunge step can cause excessive postholing. Most descent of snow in mountaineering uses some form of plunge step or its variants. Mastering this technique meaningfully reduces descent times and energy expenditure on most snow slopes.

    Which hand should hold the ice axe?

    The ice axe is typically held in the uphill hand when traversing a slope so the axe can plant into the slope above. When ascending straight uphill, the axe is held in the dominant hand. When traversing, the climber switches hands at each switchback so the axe is always on the uphill side. This is critical for self-arrest preparation – if a fall occurs, the climber needs to be able to convert the cane position into an arrest position. Holding the axe in the downhill hand makes self-arrest much harder and slower. The general rule: ice axe goes in the uphill hand whenever there is a downhill direction to a fall.

    What is the difference between an ice axe and an ice tool?

    An ice axe (or general mountaineering ice axe) is straight or slightly curved, has a flat adze at one end of the head, and is designed for self-arrest, plunge steps, and general mountaineering. An ice tool (used for technical ice climbing) has a strongly curved shaft, no adze (or a hammer head), a more aggressive pick, and is designed for swinging into vertical ice while ice climbing. Ice axes are used for general mountaineering on snow slopes. Ice tools are used for technical ice climbing on vertical ice or mixed terrain. Most mountaineers carry an ice axe; only technical ice climbers carry ice tools. The two are not interchangeable – an ice axe is poorly suited for technical climbing and an ice tool is awkward for general mountaineering self-arrest.

    How long should an ice axe be?

    The right ice axe length depends on your height and intended use. For general mountaineering, the traditional sizing has the spike of the ice axe reach the ankle bone when held by your side. This produces 50-70cm axes for most climbers. Shorter people typically use 50-55cm axes; taller people use 65-70cm axes. For technical climbing on steeper terrain, shorter axes (50-55cm) are preferred regardless of height because the axe is used more like a tool than a walking aid. For ski mountaineering, axes around 55-60cm balance walking comfort with technical capability. Most first-time buyers choose 60-65cm axes which work well for a wide range of objectives and heights.

    Can you practice ice axe self-arrest?

    Yes, practicing ice axe self-arrest is essential before relying on the technique in real climbing. Practice is done on a safe snow slope with several characteristics: moderate angle (15-30 degrees), firm but forgiving snow (not ice), a clean runout below with no rocks or cliffs, and ideally with experienced supervision. Beginning climbers should practice falls from each position: head first downhill on back, head first downhill on stomach, feet first on back, feet first on stomach. Each position has slightly different recovery technique. Most mountaineering courses spend several hours teaching and practicing self-arrest on a designated practice slope before sending students to real climbing terrain. Solo practice without prior instruction is possible but slower to develop reliable technique.

    Was this helpful?

    Yes
    No
    Thanks for your feedback!
Language »