Global Summit Guide logo featuring mountain imagery, symbolizing hiking and mountaineering resources for trip planning and safety.

Tag: ice axe

  • How to Use Crampons: Complete Step-by-Step Guide

    Snow-covered mountain peak illuminated by golden sunset, mountaineering fundamentals and safety training.
    🥾 Skills · Mountaineering Techniques · Crampons Tutorial · 2026

    How to Use Crampons: Complete Step-by-Step Guide

    The definitive 2026 crampons tutorial — boot compatibility (C1/C2/C3 system), step-by-step fitting procedure, the three walking techniques (French, German, American), self-arrest considerations, common beginner mistakes, removal timing, and maintenance. Written from first-hand experience using crampons on Pico de Orizaba and Iztaccíhuatl Mexican volcanoes (Travis) and Mount Hood South Side Hogsback (Dawson).

    📋 Editorial Standards & Source Verification

    This crampons technique guide cross-references five primary source categories: (1) First-hand editorial team experience on Pico de Orizaba, Iztaccíhuatl, and Mount Hood; (2) AAC (American Alpine Club) Accident Reports for crampons-related incident analysis; (3) AMGA (American Mountain Guides Association) Single Pitch and Alpine Guide curriculum standards; (4) UIAGM/IFMGA international mountain guide technique documentation; (5) Manufacturer specifications from Petzl, Black Diamond, Grivel, and Camp for boot-crampon compatibility ratings cross-referenced with our Best Mountaineering Crampons Buyer’s Guide, Crampons Guide, and How to Choose Crampons.

    This page may contain affiliate links. Editorial recommendations are independent of commission rates. See our affiliate disclosure for details.

    â—† MIXED-LEANING-FIRST-HAND Editorial Framing

    The Global Summit Guide editorial team has used crampons on multiple glaciated mountaineering objectives. Travis Ludlow has used crampons on Pico de Orizaba’s Jamapa Glacier route (5,636m) and Iztaccíhuatl’s glaciated upper slopes (5,230m) in Mexico — both peaks share the dry-cold conditions and moderate-angle glaciated terrain where crampons technique gets tested most thoroughly.

    Dawson Ludlow used crampons on the Mount Hood South Side Hogsback Route in May 2026 with Timberline Mountain Guides — a Pacific Northwest classic with sustained 35-45 degree snow slopes that demand all three walking techniques in a single climb. Walker Ludlow contributes from gear-testing context.

    Coverage of advanced technical glacier work above 60 degrees is research-leaning rather than first-hand — that terrain requires AMGA or IFMGA-level certification beyond what the team holds. For those steeper objectives the framing draws on peer-reviewed mountain guide curriculum rather than personal climb reports.

    âš¡ Quick Verdict — Featured Snippet Target

    How Do You Use Crampons?

    Match crampon rating (C1/C2/C3) to boot rating (B1/B2/B3), fit them to your specific boots before the climb, put them on while seated by engaging the toe bail first then heel lever then safety strap, use the French technique (pied à plat) on slopes under 30°, the German technique (pied en canard) on slopes 30-45°, and the American hybrid technique on slopes 45-60°+. Take them off as soon as terrain transitions to rock. Practice on safe low-angle slopes before relying on the technique in serious terrain.

    3
    Walking techniques
    C1/C2/C3
    Compatibility system
    20°+
    Snow angle threshold
    $150-$400
    Quality crampons range

    Crampons are metal traction devices that attach to mountaineering boots to provide grip on snow and ice. Modern crampons combine 10-12 downward-facing points with 2 forward-facing front points, allowing climbers to walk on snow slopes that would otherwise be impossibly slippery. The C1/C2/C3 rating system matches crampons to compatible boot stiffness levels. Crampons become necessary equipment at Level 3 of the six-level difficulty scale — peaks like Mount Rainier, Mount Hood, Cotopaxi, and Pico de Orizaba. Using crampons correctly is a learned skill that pays dividends across every glaciated objective in mountaineering.

    Key Crampons Takeaways

    • Compatibility first: Match boot rating (B1/B2/B3) to crampon rating (C1/C2/C3)
    • Fit before the climb: Adjust crampons to your specific boots at home, not at the trailhead
    • Three walking techniques: French (under 30°), German (30-45°), American (45-60°+)
    • Self-arrest modified: Lift feet during arrest — crampons can rotate the climber dangerously if dragged
    • Take them off early: Rock destroys points faster than any other surface
    • Anti-balling plates required: Snow accumulation under crampons eliminates traction
    • Practice before relying: Train on safe low-angle slopes before serious terrain
    • Last verified: June 23, 2026

    ✓ Editorial Trust Signals

    • First-hand: Travis Pico de Orizaba 5,636m
    • First-hand: Travis Iztaccíhuatl 5,230m
    • First-hand: Dawson Mount Hood 2026
    • Source: AAC Accident Reports
    • Source: AMGA curriculum standards
    • Source: UIAGM/IFMGA documentation
    • Source: Petzl manufacturer specs
    • Source: Black Diamond, Grivel, Camp specs
    • Last verified: June 23, 2026
    • Zero paid placements policy

    Why Crampons Matter

    Crampons solve a single fundamental problem: snow and ice are slippery, and steep snow and ice are deadly slippery. A climber attempting to walk on hard snow above 20-25 degrees without crampons will slide — not might slide, will slide. Mountain accident reports from the American Alpine Club consistently identify uncramponed climbers on hard snow as one of the most frequent causes of preventable mountaineering fatalities.

    The Threshold Where Crampons Become Mandatory

    The threshold isn’t a single number — it varies based on snow conditions, sun exposure, time of day, and the climber’s experience. The practical thresholds:

    • Under 15° on soft snow — crampons typically not needed; boot tread provides adequate grip
    • 15-25° on soft snow — judgment call; depends on snow softness and consequences of a slip
    • 20° on hard snow or any morning freeze conditions — crampons mandatory
    • Any glacier travel regardless of angle — crampons mandatory plus rope team for crevasse protection
    • Above 30° on any snow type — crampons mandatory without exception
    âš  Critical — Hard Morning Snow on Glaciated Routes

    The most dangerous time on a glaciated route is the early morning ascent when overnight refreeze has hardened snow that was soft enough to walk on without crampons the previous afternoon. Climbers consistently underestimate this transition. Frozen snow at 20 degrees behaves like ice — boots find zero grip, slides accelerate fast, and self-arrest with only an ice axe becomes difficult. The solution is putting crampons on at base camp before starting up, not partway through when the slope steepens. Plan to wear crampons before they’re absolutely required rather than after.

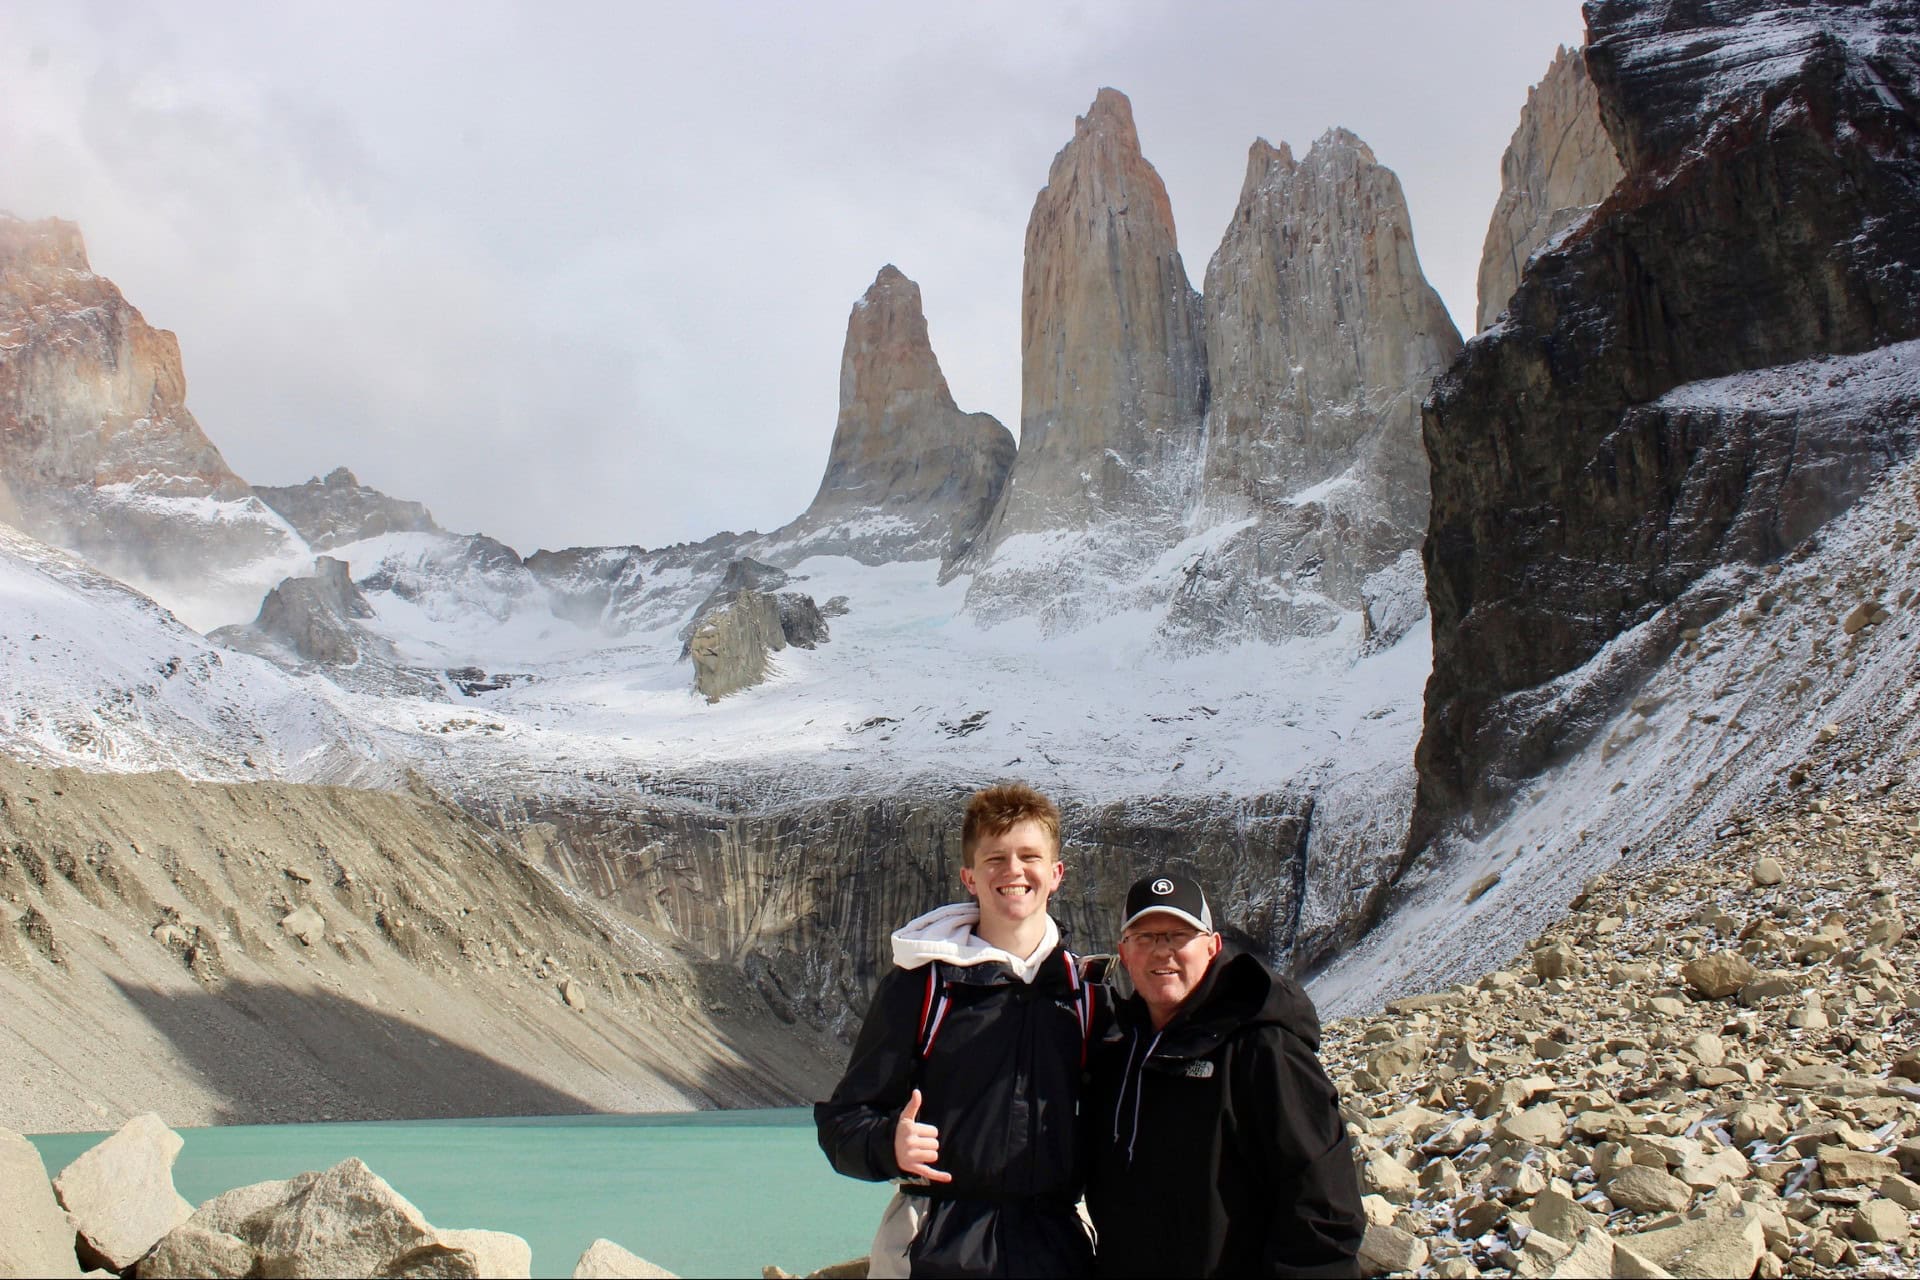
    Snow-capped Torres del Paine massif and glacial lake, Patagonian hiking viewpoint.
    Crampons become mandatory equipment at Level 3 of the six-level difficulty scale — Mount Rainier, Mount Hood, Mount Baker, Cotopaxi, Pico de Orizaba, and similar glaciated objectives. Below Level 3, crampons are typically not required. Above Level 3, they are essential equipment carried on every climb.

    Crampons 101 — Types and Anatomy

    Modern crampons consist of six main components arranged in a frame that flexes (or doesn’t) with the boot sole. Understanding the anatomy helps explain why crampons fit specific boots and not others, why some crampons work on technical terrain while others don’t, and how to evaluate damage during pre-climb inspection.

    The Six Components of a Crampon

    ComponentFunctionWhat to Check
    Front pointsThe 2 forward-facing points for vertical and overhead-step climbingSharpness, alignment, bent tips
    Secondary pointsThe 2-4 angled points behind the front points for moderate steep workWear pattern, alignment
    Downward pointsThe 6-8 vertical points for flat-foot French techniqueLength, sharpness, symmetry
    Center barAdjustable connection between front and rear sectionsLength setting, locking mechanism
    Toe bail / strapAttachment system at the front (varies by C-rating)Wire condition, strap wear
    Heel lever / strapAttachment system at the rear (varies by C-rating)Spring tension, lock engagement

    Crampon Point Counts — 10 vs 12 vs 14

    Crampons come in 10-point, 12-point, and 14-point configurations. The point count refers to total downward and forward-facing points combined:

    • 10-point crampons — lighter weight, simpler design, used for glacier travel and approach work. Suitable for Level 3 introductory glaciated objectives. Less effective on steep ice but lighter to carry.
    • 12-point crampons — the universal mountaineering standard. Handles everything from glacier walking to moderate ice climbing. The canonical choice for general mountaineering and the configuration most climbers should own. Front points enable steep snow and ice technique.
    • 14-point crampons — specialist ice climbing tool. Two extra secondary points provide additional steep ice traction at the cost of extra weight. Generally unnecessary for non-technical mountaineering objectives.

    Mono-Point vs Dual-Point Front Configurations

    Front points come in two configurations. Dual-point crampons have two parallel front points and dominate general mountaineering use — the dual configuration provides stability on snow and moderate ice. Mono-point crampons have a single central front point and dominate technical ice climbing — the mono configuration provides precision placement on small ice features but feels unstable on snow. For 95% of mountaineering objectives, dual-point is the correct choice.

    Boot-Crampon Compatibility — The C1/C2/C3 System

    The C1/C2/C3 rating system matches crampons to compatible boot stiffness levels. This is the single most important crampons concept beyond basic technique. Mismatched pairings are dangerous — crampons can detach from boots mid-climb, fail to provide adequate point engagement, or damage the boot welt over time.

    âš¡ The C1/C2/C3 System Explained

    Match boot rating (B1/B2/B3) to crampon rating (C1/C2/C3):

    B1 boots + C1 crampons — strap-on style, flexible boots, low-angle glacier travel and approach work.

    B2 boots + C2 crampons — hybrid (toe strap + heel lever), semi-rigid boots, general mountaineering.

    B3 boots + C3 crampons — full step-in (toe bail + heel lever), rigid mountaineering boots, technical ice and steep alpine.

    Upward compatibility: B3 boots accept all crampon ratings. B2 boots accept C1 or C2. B1 boots accept only C1.

    Boot RatingBoot StiffnessCompatible CramponsTypical Use
    B0Hiking boots (flexible)None — boots not crampon-compatibleTrail hiking only
    B1Light mountaineering (flexible)C1 strap-on onlyApproach, glacier walking, Level 2-3 peaks
    B2Semi-rigid mountaineeringC1 or C2General mountaineering, Level 3-4 peaks
    B3Fully rigid double bootsC1, C2, or C3Technical alpine, expedition mountaineering, Level 5-6 peaks
    âš  Critical — Why Mismatched Pairings Fail

    Putting C3 step-in crampons on B1 flexible boots is dangerous because the soft boot sole flexes during walking, which pries the toe bail away from the boot welt with each step. The crampon then becomes loose or detaches entirely. This failure mode kills climbers when it occurs on steep terrain where a detached crampon precedes a fall. Always verify boot rating before purchasing crampons. Both boots and crampons should display their rating in product specifications. If your boots don’t have a B-rating they are not mountaineering boots and crampons should not be attached.

    How to Fit Crampons to Your Boots

    Crampon fitting is a one-time setup that must be done before the climb. Adjusting crampons at the trailhead in cold conditions with bare hands is miserable and produces poor fits. Fit your crampons at home, in warm conditions, with the actual boots you’ll wear on the climb.

    Fitting Step 1

    Adjust the Center Bar Length

    The center bar connects the front and rear sections of the crampon. Most crampons have 4-6 length settings. Place your boot on the crampon and verify the toe bail (or strap) sits flush against the front welt of the boot. If there’s a gap, the crampon is too long. If the front section extends beyond the toe of the boot, the crampon is too short.

    Adjust the center bar until the crampon length matches your boot. The locking mechanism varies by manufacturer — typically a pin, screw, or quick-release lever. Lock the setting firmly.

    Fitting Step 2

    Verify Toe Engagement

    Place the boot on the crampon and engage the toe bail or strap. The bail should sit against the front welt with no visible gap. The strap (on C1 strap-on crampons) should pull the boot tight against the front of the crampon frame.

    If there’s any forward-backward play in the boot once the toe is engaged, the center bar is set too long. Shorten by one setting and re-test.

    Fitting Step 3

    Verify Heel Engagement

    With the toe engaged, push the heel of the boot down into the crampon and engage the heel lever (or strap). The lever should snap closed with firm hand pressure — neither loose nor requiring two hands.

    If the lever closes too easily, tighten the heel lever tension adjustment screw. If it won’t close at all, loosen the tension screw. Most crampons have a small screw or wheel on the heel lever for tension adjustment.

    Fitting Step 4

    Test the Fit

    Once toe and heel are engaged, lift the boot fully off the ground. The crampon should remain absolutely stable — no rotation, no shift, no movement of any kind. Wiggle the boot side-to-side and front-to-back. If you detect any movement, return to Step 1 and re-adjust.

    A correctly fitted crampon feels like an extension of the boot. A poorly fitted crampon feels like a separate object loosely attached to the boot.

    â—† Fitting Pro Tip — Mark Your Settings

    Once you’ve found the correct center bar setting for your boots, mark it with permanent marker or a small file scratch. Crampon settings can shift slightly during transport, and being able to verify the correct setting in 5 seconds before each climb prevents accidentally departing with a crampon set to the wrong length. If you have multiple boot pairs that fit different crampon settings, note which setting matches which boot. Some climbers tape a small card to the inside of their crampon storage bag with the correct settings written down.

    How to Put On Crampons

    Putting on crampons at the trailhead or on a glacier is a 60-90 second operation per foot once practiced. The sequence matters — doing it wrong wastes time, produces poor attachment, and sometimes causes falls. Most beginner crampon falls happen during the put-on process, not during walking.

    Step 1

    Sit Down on a Stable Surface

    Sit on a rock, a snow bench you’ve kicked out, or a pack — never attempt to put crampons on while standing on one foot. Standing balance attempts cause most beginner crampon falls. The few extra seconds to find a seat are worth far more than the time saved by standing.

    Step 2

    Clear Snow and Ice from Boot Soles

    Brush snow and ice from your boot sole using a gloved hand or the back of your ice axe. Any debris between the boot and the crampon creates an attachment failure waiting to happen. The crampon contact surface must be clean.

    Step 3

    Engage the Toe Bail First

    Place the toe bail (C2 or C3) or toe strap (C1) over the front welt of the boot. The bail or strap should engage with no gap between it and the boot. This is the foundation of the entire attachment — if the toe isn’t engaged correctly, nothing else matters.

    Step 4

    Engage the Heel Lever Second

    Push the heel of the boot firmly into the crampon and engage the heel lever. It should snap closed with firm but reasonable hand pressure. The boot should sit completely flat on the crampon frame with no rocking or gap.

    Step 5

    Secure the Safety Strap Third

    Wrap the safety strap around the back of the boot and tighten it. The strap is a backup attachment system — if the heel lever fails or the toe bail comes loose, the strap keeps the crampon from being lost in the snow. Don’t skip this step even if the heel lever feels secure.

    Step 6

    Verify by Lifting the Boot

    Lift the boot fully off the ground and check that the crampon remains absolutely stable. Wiggle the boot side-to-side. If the crampon shifts at all, something isn’t right — usually the heel lever didn’t fully engage. Re-check the attachment before walking anywhere.

    The Three Walking Techniques

    Three crampon walking techniques cover the full range of snow slope angles. Understanding which technique matches which slope angle is the difference between efficient climbing and exhausting yourself unnecessarily — or worse, falling on terrain you should have been able to handle.

    Slopes Under 30°

    The French Technique (Pied à Plat)

    Pied à plat means “flat foot” in French. The technique consists of placing the foot completely flat against the slope so all 10-12 downward-facing crampon points engage simultaneously. This provides maximum traction with minimum ankle and calf fatigue.

    How to execute: Bend the ankle laterally rather than rolling the foot. The foot stays flat to the slope surface even as the slope angles upward. Step deliberately — do not drag feet between steps. Wider stance than normal walking to keep crampon points from catching each other or your pants.

    When it works best: Approach walks across moderate snow. Glacier travel on consolidated snow. Long traverses where calf endurance matters. The French technique conserves energy more than any other crampons walking method, which matters on multi-hour climbs.

    When it fails: Above 30 degrees the ankle position becomes impossible to maintain. Hard ice that resists point penetration. Very soft snow where points don’t engage solidly.

    Slopes 30-45°

    The German Technique (Pied en Canard)

    Pied en canard means “duck foot” — and the technique looks like exactly what it sounds. The climber walks with feet splayed outward like a duck, keeping crampon points engaged while making the ankle angle manageable on steeper terrain.

    How to execute: Point toes outward 45-60 degrees from the direction of travel. Step diagonally up the slope rather than straight up. This converts a steep upward angle into a more moderate diagonal angle from the ankle’s perspective. The crampon points still engage flat into the slope.

    When it works best: Steeper snow where French technique becomes uncomfortable. Transitional terrain between low-angle approach and steep summit slopes. The German technique handles the awkward middle range where French is too flat-footed and American is too aggressive.

    When it fails: Above 45 degrees the duck angle still puts too much strain on the ankles. Hard ice where edging is required. The German technique is the most fatiguing of the three — efficient on shorter steep sections, exhausting on long ones.

    Slopes 45-60°+

    The American Technique (Hybrid)

    The American technique combines French and front-point techniques in a single step. One foot stays flat to the slope (French technique) while the other foot front-points directly into the slope. The combination handles steep terrain that’s too aggressive for German technique but not yet vertical.

    How to execute: The downhill foot stays flat to the slope using French technique. The uphill foot kicks straight into the slope using only the front 2 points. The body weight shifts between the two feet as you ascend. Switch which foot does which job as the slope direction changes.

    When it works best: Steep alpine climbing approaching vertical. The transition from snow slope to summit ridge. Variable terrain where the slope angle changes step-to-step. The American technique is the workhorse of intermediate technical mountaineering — Mount Hood, Mount Rainier upper sections, and similar Level 3-4 peaks demand it.

    When it fails: Sustained vertical ice (requires full front-point technique with two ice tools). Very soft snow where front points don’t bite. The American technique is the most versatile but requires practice to switch between sides smoothly.

    Snow-capped Chilean Patagonia mountains and prayer flags along a remote expedition route.
    The three techniques cover the full snow slope range. French technique under 30 degrees, German technique 30-45 degrees, American hybrid 45-60+ degrees. Switching between techniques as the slope angle changes is the core skill of competent crampons use. Practice on safe slopes before relying on the techniques in serious terrain.

    Self-Arrest with Crampons

    Self-arrest with crampons on is meaningfully different from self-arrest with only an ice axe and boots. Crampon points that drag against the snow during a fall can rotate the climber dangerously — flipping them head-down, causing the crampon to catch and tear ligaments, or shooting the climber off the slope. The modified technique handles this.

    âš  Critical — Lift Feet During Self-Arrest

    The single most important crampons self-arrest rule: lift your feet off the snow during the arrest. Do not drag crampon points into the slope as you would with boots alone. The ice axe pick driven into the snow is the primary stopping force. Keep feet held off the snow until the body comes to a complete stop, then carefully lower the feet to verify position before standing. Climbers who drag crampons during self-arrest accumulate disproportionate injury risk from caught points rotating the body unexpectedly.

    The Crampons Self-Arrest Sequence

    1. Drive the ice axe pick into the snow using full body weight pressed onto the head of the axe
    2. Bring knees up toward the chest to lift the crampons completely off the snow surface
    3. Keep the pick engaged with continuous downward pressure until the body slides to a complete stop
    4. Do not lower feet until the body has stopped moving
    5. Once stopped, carefully lower feet to test footing before standing up
    6. Stand up slowly while keeping the ice axe engaged as a third contact point

    Practice Self-Arrest Before Relying on It

    Practicing crampons self-arrest is uncomfortable — falling on snow with crampons attached feels deliberately dangerous. The discomfort is the point. Climbers who haven’t physically practiced the technique consistently freeze during real falls or revert to instinctive feet-down arrest that the crampons make worse.

    Find a safe practice slope: 20-25 degree snow with a flat runout below and no rocks, trees, or cliffs nearby. Practice the sequence repeatedly — sliding, lifting feet, engaging the pick — until the motion becomes instinctive. AMGA-certified guide schools include crampons self-arrest in standard avalanche and snow travel courses.

    Common Beginner Mistakes

    The same mistakes appear across beginner climbers regardless of which mountain or which year. Awareness of these patterns prevents most beginner crampon accidents.

    MistakeWhat Goes WrongThe Fix
    Catching crampons on pantsPoints snag fabric mid-step, causes fallWear gaiters or pants with reinforced cuffs; walk wider stance
    Catching one crampon on the otherPoints hook into the opposite boot, causes fallWider walking stance; deliberate foot placement
    Dragging feet between stepsPoints catch on snow surface, trips climberPick up each foot fully; place deliberately
    Walking on rock with cramponsPoints dull rapidly, lose self-arrest effectivenessTake them off as soon as terrain transitions
    Not checking attachmentLoose crampon detaches mid-climbCheck every 15-20 minutes; visible inspection plus boot lift test
    Self-arrest with crampons draggingPoints catch, rotate body dangerouslyLift feet during arrest; pick is the stopping force
    Putting on while standingBalance failure causes falls during put-onAlways sit down; kick out snow bench if needed
    Skipping safety strapHeel lever can pop open, crampon lost in snowAlways engage safety strap as third attachment
    Mismatched boot/crampon ratingCrampon detaches mid-climbVerify B-rating matches C-rating before purchase
    No anti-balling platesSnow accumulates, eliminates tractionInstall anti-balling plates; clear feet when snow builds up

    When to Take Them Off

    Knowing when to remove crampons matters as much as knowing when to put them on. Wearing crampons on inappropriate terrain destroys equipment and increases injury risk. Removing them too early creates falls.

    Take Crampons Off When Terrain Transitions To

    • Rock surfaces — destroys points faster than any other surface
    • Dirt or moraine sections — clogs and dulls points
    • Low-angle dry trails — unnecessary and tiring
    • Wet grass or vegetation — unnecessary; reduces effective walking speed
    • Ladder sections on glaciated routes — major safety hazard catching on rungs

    Keep Crampons On When

    • Any snow steeper than 20 degrees — even brief sections deserve crampons
    • Any glacier travel regardless of angle — crevasse hazard requires consistent technique
    • Hard packed snow even on moderate angles — refrozen surfaces become ice-like
    • Ice patches in mixed terrain — partial coverage still requires full crampons
    • Uncertain terrain where snow appears intermittently — better to wear than need them
    â—† The General Rule

    When in doubt, put them on early and take them off late. Falling because you removed crampons too soon is far more common than fatigue from wearing them too long. Climbers consistently underestimate how much consequence remains on the descent — the terrain that felt manageable without crampons in the morning becomes harder when fatigue accumulates and sun softens snow into slush over hard refreeze. Better to wear crampons through a stretch of mixed terrain than to remove them at the worst possible moment.

    Snow-capped mountain range under a bright blue sky, showcasing rugged terrain and alpine scenery, relevant to climbing and hiking guides.
    Proper crampons maintenance extends equipment lifespan to 10-20 years of regular use. Dry after each climb, inspect for wear, file dull points back to sharpness, replace damaged components, and store in a protective bag. Damaged or excessively worn crampons should be retired rather than risked on serious terrain.

    Maintenance and Storage

    Quality crampons properly maintained last 10-20 years of regular use. Poorly maintained crampons fail in 2-3 seasons. The difference is 10 minutes of care after each climb.

    After Each Climb

    • Dry completely — towel off all moisture to prevent rust on steel components
    • Inspect points — check for wear, bent tips, or impact damage
    • Check anti-balling plates — verify they remain attached and intact
    • Verify all rivets and connections — anything loose needs immediate attention
    • Test the heel lever spring — full snap closure with no sluggishness
    • Inspect straps — check for cuts, fraying, or buckle damage

    Once Per Season

    • File dull points — use a flat metal hand file (not powered grinder which destroys temper)
    • Replace bent points — many crampons have replaceable individual points
    • Replace damaged anti-balling plates — typically $20-40 per pair
    • Lubricate moving parts — heel lever pivots and adjustment mechanisms
    • Re-verify boot fit — boot welts wear over time, may require re-adjustment

    Storage

    Store crampons in a protective bag (purpose-made crampon bag, padded pouch, or wrapped fabric). Three reasons matter: protecting other gear in your pack from being punctured by crampon points; protecting the points themselves from impact damage during transport; and preventing accidents during gear handling.

    Climbers consistently underestimate how dangerous bare crampons are in a pack. Crampon points have caused punctures on packs, tents, sleeping bags, hands, and (in one documented AAC accident report) a femoral artery. Use a crampon bag.

    Frequently Asked Questions

    How do you put on crampons step by step?

    Sit down on a stable surface. Brush snow and ice off your boot soles. Place the toe bail of the crampon over the front welt of your boot first. Engage the heel lever second — it should snap with firm resistance. Secure the safety strap third. Verify by lifting the boot — the crampon should not shift or rotate. The whole process takes 60-90 seconds per foot once practiced. Always put crampons on while seated — standing on one foot to attach the other is the most common cause of beginner falls.

    What is the difference between C1, C2, and C3 crampons?

    The C1/C2/C3 system rates crampons by attachment method and intended use. C1 crampons are strap-on style for B1 flexible mountaineering boots — used for low-angle glacier travel and approach work. C2 crampons are hybrid with toe strap and heel clip for B2 semi-rigid boots — used for general mountaineering and moderate ice. C3 crampons are full step-in with toe bail and heel lever for B3 rigid mountaineering boots — used for technical ice climbing and steep alpine routes. Boot and crampon ratings must match: B1 pairs with C1, B2 pairs with C1 or C2, B3 pairs with all three. Mismatched pairings can detach mid-climb.

    What is the French technique for crampons?

    The French technique (pied à plat, “flat foot”) is the energy-efficient walking technique for crampons on low to moderate snow slopes up to about 30 degrees. The climber walks with feet flat to the slope so all crampon points engage simultaneously, bending the ankle laterally rather than rolling the foot. This technique conserves calf muscle energy on long approach climbs. The French technique works best on consolidated snow and consolidated firn. On steeper slopes 30-45 degrees the German technique (pied en canard, “duck walk”) becomes more practical. Above 45 degrees the American hybrid technique is most efficient.

    Can you walk on rock with crampons?

    Crampons can be walked on rock briefly during route transitions but should be removed as soon as practical. Rock destroys crampon points faster than any other surface — even a few hundred meters on rocky ground noticeably dulls steel points. Take crampons off at the bottom of glaciers when terrain becomes mixed. Take them off at the top of snow slopes when summit ridges turn rocky. Carry crampons in a protective bag during rocky sections to prevent damage to pack interiors and other gear. Worn crampon points lose self-arrest effectiveness and reduce traction on hard snow and ice.

    How do you self-arrest with crampons on?

    Self-arrest with crampons requires modified technique because crampon points can catch and rotate the climber dangerously during a slide. Lift feet off the snow during the arrest — do not drag crampons into the slope as you would with boots alone. Use the ice axe pick driven into the snow as the primary stopping force. Keep feet held off the snow surface until the body comes to a complete stop. Once stopped, carefully lower feet to verify position before standing. Practice self-arrest extensively on safe low-angle slopes before relying on the technique in serious terrain. Many alpine accidents involve climbers who knew self-arrest with an ice axe but had not practiced the modified crampons version.

    When should I take crampons off?

    Take crampons off when terrain transitions to: rock surfaces (destroys points), dirt or moraine sections (clogs and dulls points), low-angle dry trails (unnecessary and tiring), wet grass or vegetation, and ladder sections on glaciated routes (safety hazard). Keep crampons on for: any snow steeper than 20 degrees, any glacier travel regardless of angle, hard packed snow even on moderate angles, ice patches in mixed terrain, and any uncertain terrain where snow appears intermittently. The general rule is when in doubt put them on early and take them off late — falling because you removed crampons too soon is more common than fatigue from wearing them too long.

    How tight should crampons be?

    Crampons should be tight enough that they cannot rotate or shift on the boot but not so tight that they bend the crampon frame or damage the boot welt. Test the fit by lifting the boot fully off the ground — the crampon should remain absolutely stable with no movement. The heel lever should snap closed with firm but reasonable hand pressure. The toe bail should sit flush against the boot’s front welt with no visible gap. The safety strap should be snug but not constricting circulation. If you can rotate the crampon by hand it is too loose. If you cannot engage the heel lever without using two hands and significant force it is too tight.

    What are anti-balling plates and do I need them?

    Anti-balling plates are rubber or plastic pads attached to the underside of crampons that prevent snow from sticking and accumulating between the points. Snow balling is a major safety hazard because accumulated snow eliminates crampon point engagement — the climber may believe they have traction but the crampons are effectively walking on a smooth snowball. Anti-balling plates are highly recommended for all crampons and essential for spring snow conditions when wet snow sticks aggressively. Most modern crampons include anti-balling plates as standard equipment. If your crampons did not include them they can be purchased separately for $20-40 per pair. Snow balling is most dangerous on warming spring snow and during temperature swings around freezing.

    How do I maintain my crampons?

    After each use: dry crampons completely with a towel to prevent rust on steel components. Inspect points for wear, bend, or damage. Check anti-balling plates for cracks or detachment. Verify all rivets and connections remain tight. Once per season: file dull points back to sharpness using a flat metal file (not a powered grinder which can ruin temper). Replace bent points or damaged frames immediately. Replace anti-balling plates when worn. Store crampons in a protective bag with points covered to prevent damage to other gear and prevent accidents. Quality crampons properly maintained last 10-20 years of regular use. Damaged or excessively worn crampons should be retired rather than risked.

    Are crampons necessary for beginner mountaineering peaks?

    Crampons become necessary at Level 3 of the six-level difficulty scale — introductory glacier and alpine peaks including Mount Rainier, Mount Hood, Mount Baker, Cotopaxi, and Pico de Orizaba. Below Level 3, crampons are typically not required: Level 1 walk-up peaks like Mount Fuji rarely need crampons. Level 2 long non-technical peaks like Kilimanjaro do not require crampons on standard routes during normal season conditions. At Level 3 and above crampons are mandatory equipment. Climbers should complete a basic mountaineering course covering crampons technique before attempting their first Level 3 glaciated peak. Practicing crampons technique on safe low-angle slopes before relying on it in serious terrain is essential — most beginner crampons accidents involve climbers who had crampons but had never practiced walking in them.

    Methodology + Editorial Standards (E-E-A-T)

    How This Crampons Guide Was Researched

    Data Sources and Verification

    Crampons technique, boot compatibility, fitting procedures, and maintenance protocols cross-verified against five primary source categories: (1) First-hand editorial team experience — Travis Ludlow on Pico de Orizaba Jamapa Glacier route and Iztaccíhuatl glaciated upper slopes, Dawson Ludlow on Mount Hood South Side Hogsback Route May 2026 with Timberline Mountain Guides; (2) AAC (American Alpine Club) Accident Reports for crampons-related incident pattern analysis including beginner falls, mismatched boot-crampon pairings, and self-arrest technique failures; (3) AMGA (American Mountain Guides Association) Single Pitch and Alpine Guide curriculum standards for technique terminology and instructional sequencing; (4) UIAGM/IFMGA international mountain guide technique documentation for the canonical French/German/American walking technique definitions; (5) Manufacturer specifications from Petzl, Black Diamond, Grivel, and Camp for boot-crampon compatibility ratings, point configurations, and product-specific fitting procedures.

    Editorial Approach — MIXED-LEANING-FIRST-HAND

    This guide is research-based with substantial first-hand technique observation. The editorial team has used crampons on multiple glaciated mountaineering objectives but does not hold AMGA or IFMGA professional certification. Coverage of advanced technical ice climbing above 60 degrees (mono-point work, ice tool integration, multi-pitch vertical ice) is research-leaning rather than first-hand. Climbers progressing into that terrain should pursue formal AMGA Single Pitch Instructor or Alpine Guide course work rather than rely on web-published technique guides alone.

    Zero Paid Placement Policy

    This guide is updated annually with technique standards and equipment recommendations verified June 2026. This page may contain affiliate links. Editorial recommendations are independent of commission rates. See our affiliate disclosure for details. Manufacturer mentions reflect equipment we have personally used or that AMGA/IFMGA curricula reference as canonical examples. Last verified: June 23, 2026. v4.0 build June 23, 2026.

    Sources and References

    Primary Crampons Technique References

    1. American Alpine Club (AAC) — Accident Reports archive including crampons-related incident analysis from 2010-2025 published in Accidents in North American Mountaineering
    2. AMGA (American Mountain Guides Association) — Single Pitch Instructor and Alpine Guide curriculum standards for crampons technique terminology
    3. UIAGM/IFMGA International Federation of Mountain Guides Associations — international mountain guide technique documentation
    4. Petzl Foundation — technical documentation for Petzl crampons including Vasak, Sarken, and Lynx models with C-rating specifications
    5. Black Diamond Equipment — technical documentation for Sabretooth, Serac, and Stinger crampons
    6. Grivel — technical documentation for G12, Air Tech New-Matic, and Rambo crampons (Grivel established the original 12-point crampon design)
    7. Camp USA — technical documentation for Camp crampons including Stalker, XLC, and C12 models
    8. “Mountaineering: The Freedom of the Hills” (9th Edition, Mountaineers Books) — canonical mountaineering instruction text including crampons technique chapter
    9. Internal Global Summit Guide research — cross-referenced with Best Mountaineering Crampons Buyer’s Guide, Crampons Guide, How to Choose Crampons, Mountaineering Boots Guide, Ice Axe Guide, Glacier Travel Basics, and How to Train for Your First Glacier Climb

    About The Author (E-E-A-T)

    Travis Ludlow

    Editor, Global Summit Guide · Utah-based mountaineer · Pico de Orizaba 5,636m + Iztaccíhuatl 5,230m first-hand glaciated climbing experience

    Travis Ludlow is the editor of Global Summit Guide, a Utah-based mountaineering reference publication. For this crampons technique guide, Travis draws on first-hand crampons experience from Pico de Orizaba’s Jamapa Glacier route (Mexico’s highest peak, 5,636m, third-highest in North America) and Iztaccíhuatl’s glaciated upper slopes (5,230m). Both peaks share the dry-cold conditions and moderate-angle glaciated terrain where crampons technique gets tested most thoroughly.

    Editorial team contributions: Dawson Ludlow contributed first-hand crampons experience from the Mount Hood South Side Hogsback Route (May 2026 with Timberline Mountain Guides) — a Pacific Northwest classic with sustained 35-45 degree snow slopes that demand all three walking techniques in a single climb. Walker Ludlow contributed equipment testing observations.

    Editorial team credentials: Travis Ludlow (Pico de Orizaba 5,636m + Iztaccíhuatl 5,230m Mexican volcanoes first-hand, Utah-Wasatch alpine rock first-hand); Dawson Ludlow (Mount Kilimanjaro 5,895m Lemosho 7-day 2024 with African Walking Company first-hand, Mount Hood South Side Hogsback May 2026 with Timberline Mountain Guides first-hand, WFA certified); Walker Ludlow (gear reviewer); plus the Ludlow family Torres del Paine W Trek east-to-west January 2025 Patagonia regional experience.

    Ready to Practice Crampons Technique?

    The best way to learn crampons is to practice on safe low-angle slopes before relying on the technique in serious terrain. Start with the Mountain Difficulty Ratings Guide to identify a Level 3 peak that matches your current capability. Reference the Mountaineering Boots and Crampons Guides to ensure your equipment is properly matched. Then commit to a basic mountaineering course or guided climb on Mount Rainier, Mount Hood, or Pico de Orizaba to build the foundational glaciated technique that opens up the rest of the mountaineering world.

    Difficulty Scale Crampons Buyer’s Guide Glacier Travel Basics Mount Rainier Guide

    How to Use Crampons — Complete Step-by-Step Guide · v4.0 build · Last verified June 23, 2026 · Published by Global Summit Guide editorial team · Travis Ludlow Editor · MIXED-LEANING-FIRST-HAND framing — Travis Pico de Orizaba 5,636m + Iztaccíhuatl 5,230m + Dawson Mount Hood 2026 first-hand crampons experience · 4 schemas including HowTo · Internal funnel to Best Mountaineering Crampons Buyer’s Guide (complements 1,075 monthly impressions) + Crampons Guide + How to Choose Crampons + Mountaineering Boots Guide + Ice Axe Guide + Glacier Travel Basics + How to Train for First Glacier Climb · Targets canonical crampons technique keyword cluster

    Was this helpful?

    Yes
    No
    Thanks for your feedback!
  • How to use an ice axe: self-arrest, plunge step, and the 5 essential techniques

    Mountaineering Skills / Snow Travel

    How to use an ice axe: self-arrest, plunge step, and the 5 essential techniques

    5
    Essential techniques
    50-70 cm
    Typical axe length
    15-30°
    Practice slope angle
    Hours
    Practice time needed
    ★ Part of the mountaineering skills series This skills guide supports our ice axe master guide and our broader snow travel framework. Master guide →

    The ice axe is the single most important piece of mountaineering equipment most climbers will ever own. It is the difference between walking comfortably across a snow slope and sliding uncontrollably to the bottom of one. Yet most climbers buy an ice axe and never actually practice with it — they read about self-arrest, watch a YouTube video, and assume the technique will work when they need it. It usually doesn’t. Ice axe technique requires hands-on practice on safe slopes before it can save you in real conditions. This guide covers the five essential techniques every mountaineer must know, in the sequence climbers should learn them. For broader context see our mountaineering ice axe master guide.

    Ice axe anatomy know your tool before you use it

    Understanding the parts of an ice axe matters because each part has a specific function. Climbers who use the wrong part of the axe at the wrong moment lose effectiveness or create dangerous situations.

    ★ The five parts of an ice axe

    What each part does

    1. Pick (the spike at top)
    The pointed end of the head. Used for self-arrest, swinging into ice for traction, and anchor placement.
    2. Adze (the flat shovel)
    The flat end of the head opposite the pick. Used for chopping steps in snow and ice, and for clearing snow.
    3. Head (combined pick+adze)
    The top section combining pick and adze. The handhold for self-arrest and most technical positions.
    4. Shaft (the main pole)
    The straight or slightly curved main body. Held in the hand for cane position and self-belay.
    5. Spike (the bottom tip)
    The sharp point at the bottom of the shaft. Planted into the snow during cane position and self-belay.
    + Leash (optional)
    Attaches axe to wrist or harness to prevent dropping. Use varies by region and personal preference.

    The general mountaineering ice axe described here is different from a technical ice tool. Ice tools have strongly curved shafts and are designed for swinging into vertical ice during ice climbing. General ice axes are designed for snow slopes, self-arrest, and walking. The two are not interchangeable. The framework for choosing the right ice axe is in our mountaineering ice axe guide.

    The 5 essential ice axe techniques in the order to learn them

    Ice axe skills build on each other. Climbers who skip to self-arrest without first mastering grip and cane position never develop reliable arrest technique. Follow this sequence:

    1

    Cane Position

    Foundation technique · Used on 80% of mountaineering terrain
    Fundamental

    The cane position is the foundation ice axe technique and the position climbers will use most often. The axe is held by the head with the pick facing backward (away from the direction of travel) and the spike planted into the snow on the uphill side with each step. The technique provides balance, security, and a quick path to self-arrest if a slip occurs.

    1. Hold the head of the axe in your uphill hand.The thumb wraps around the adze; fingers curl around the head. The pick should point backward, away from your direction of travel.
    2. Walk uphill diagonally across the slope.Don’t walk straight up steep slopes – traverse diagonally with the axe planted on each step.
    3. Plant the spike with each step.The bottom spike goes into the snow on your uphill side, providing a stable third point of contact.
    4. Switch hands at each switchback.When you change direction, switch the axe to your new uphill hand. The axe is always on the uphill side.
    5. Keep your weight on your feet, not the axe.The axe is a stability aid, not a load-bearer. Crampons or boot edges carry your weight; the axe prevents slips.

    When to use: moderate snow slopes (15-30 degrees), most mountaineering approaches, glacier travel on flat or gently sloped terrain. Most of the climbing on Mont Blanc, Mexican volcanoes, Kilimanjaro snowfields, and approach hikes on serious peaks uses cane position.

    2

    Plunge Step (Descent)

    Descent technique · Efficient and energy-saving
    Essential

    The plunge step is the standard descent technique on snow slopes. Climbers face downhill, lean slightly forward, and walk straight down the slope plunging each foot heel-first into the snow. The technique is dramatically faster and less tiring than the slow side-stepping descent most beginners default to.

    1. Face directly downhill.Body weight slightly forward, knees slightly bent. The axe is held in the dominant hand in cane position – spike planted with each step.
    2. Step heel-first, hard.Each step lands heel-first with body weight driving the heel into the snow. The heel should compact the snow into a step platform.
    3. Keep your body forward over your feet.The instinct is to lean back for “safety” but this causes feet to slide. Stay forward over your boots.
    4. Plant the axe spike with each step.The axe stabilizes balance but doesn’t carry weight. The spike goes in the snow next to or slightly behind you on each plunge.
    5. Maintain rhythm.Plunge stepping works best at a steady rhythm. Hesitation makes the technique less effective.

    When to use: descending moderate to steep snow slopes (15-35 degrees) with firm but forgiving snow. Does not work well on ice (use crampons) or very soft snow (creates excessive postholing). The plunge step is one of the most underused techniques among intermediate climbers – mastering it dramatically improves mountain efficiency.

    3

    Self-Belay

    Steeper-terrain protection · Pre-arrest insurance
    Essential

    Self-belay is the technique used on steeper snow where a fall would have consequences. The axe shaft is driven deep into the snow as the climber moves, creating an anchor that catches a slip before a slide can develop. Self-belay differs from cane position by depth of placement and intent – cane position is a stability aid; self-belay is active protection.

    1. Hold the axe near the head with both hands optional.One hand on the head (uphill), the other can grip the shaft lower for additional control. The pick faces backward.
    2. Drive the shaft deep into the snow above you.The shaft penetrates the snow as deeply as possible (often the full shaft length on firm snow). This creates a temporary anchor.
    3. Climb up to the axe.With the shaft planted, kick steps with your feet and ascend until you’re level with or above the axe head.
    4. Replant the axe above and repeat.Remove the axe, advance, drive it back into the snow above you. The axe is always above and providing temporary anchor security.
    5. Switch hands smoothly.On long traverses or switchbacks, switch the axe to the new uphill hand at controlled moments.

    When to use: steeper snow slopes (30-45 degrees) where consequences of a fall would be serious. Self-belay is the technique that bridges between cane position (easy slopes) and roped climbing (technical terrain). Most of the steeper snow on Aconcagua’s upper mountain, the Mexican volcano summit ridges, and Cascade volcano approaches uses self-belay technique.

    4

    Self-Arrest

    Emergency stopping technique · Must be practiced
    Critical

    Self-arrest is the technique used to stop an uncontrolled slide on snow. It is the single most important emergency skill in snow mountaineering and the technique most commonly taught incorrectly. Self-arrest must be practiced repeatedly on safe slopes before it can be relied on in real conditions – the muscle memory takes time to develop and degrades without practice.

    1. If sliding head-first or on your back, roll into proper position.The arrest position has the climber on their stomach, head uphill, with the axe across the upper chest. Rolling into position takes 2-3 seconds and is often the difference between successful arrest and continued slide.
    2. Grip the head of the axe with both hands.One hand on the head over the pick; the other on the shaft near the spike. The pick faces down into the snow on the uphill side of your body.
    3. Drive the pick into the snow gradually.Apply increasing pressure rather than slamming the pick down. Slammed picks bounce away. Gradual pressure allows the pick to bite and hold.
    4. Lift your hips off the snow.Body weight transfers to the pick. The hips being raised concentrates pressure on the pick and increases arresting force.
    5. Spread your legs and dig in with your feet.If wearing boots only, kick your feet into the snow for additional braking. If wearing crampons, KEEP YOUR FEET OFF THE SNOW – kicking crampons into the slope while sliding can cause violent flips and broken ankles.
    The crampon warning

    The single most dangerous mistake in self-arrest with crampons is letting the crampon points catch the snow during the slide. The friction creates rotational force that flips the climber violently, often resulting in broken legs, lost axe control, or continued slide in an even worse position. When wearing crampons, lift your feet off the snow during self-arrest until your body is fully stopped. Use only the axe pick to arrest. Once stopped, then carefully reset your foot position.

    When to practice: on a snow slope with 15-30 degree angle, firm but forgiving snow, and a clean runout below (no rocks, cliffs, or hazards). Most mountaineering courses spend several hours teaching self-arrest from various starting positions (head-first on back, head-first on stomach, feet-first on back, feet-first on stomach). Each position requires slightly different recovery technique. Practice repeatedly until the response is automatic.

    The truth about self-arrest

    Self-arrest works reliably only when the technique has been practiced repeatedly. Most climbers who fail to self-arrest in real situations fail because they’ve never practiced – they read about it but don’t do the dozens of practice slides needed to develop muscle memory. The technique itself is straightforward; the execution under stress is what requires practice.

    5

    Anchor Position (Belay Setup)

    Roped climbing technique · Multi-person teams
    Advanced

    The anchor position uses the ice axe as a temporary anchor for belaying a partner across snow or ice terrain. This is the technique that bridges between solo self-belay and roped technical climbing. Used in rope team travel on glaciers and on steeper snow climbs where one climber must protect another’s movement.

    1. Plunge the shaft fully into firm snow.The shaft must be deep enough to provide reliable holding force – typically the full shaft length on firm snow.
    2. Test the anchor by leaning back on it.Apply body weight to the axe head. If the axe moves, the placement is not sufficient – replant it deeper or in better snow.
    3. Sit or stand braced behind the axe.The climber’s body position is also part of the anchor system – body weight braces the axe against pull-out.
    4. Manage the rope through the axe head.The rope can be passed over the axe head (Munter hitch style) or through additional gear to create the belay system.
    5. Be prepared to escape the belay.If a fall causes the axe to start pulling out, the climber must be ready to convert to a different anchor configuration.

    When to use: rope team glacier travel, protecting a partner on steeper snow, building snow anchors for crevasse rescue. This technique extends beyond basic ice axe use into roped mountaineering skill — usually learned through formal training rather than self-study. For climbers progressing beyond solo snow travel into technical alpine objectives, this is the next skill set to develop. The broader glacier travel framework is critical context — most climbers learn anchor position as part of a complete glacier travel course.

    Sizing and length getting the right axe

    The right ice axe length affects every technique. Wrong sizing makes proper technique difficult or impossible. The classic sizing rule:

    Your heightRecommended axe lengthBest for
    Under 5’4″ (162 cm)50-55 cmGeneral mountaineering, smaller climbers
    5’4″ to 5’8″ (162-173 cm)55-60 cmGeneral mountaineering, all-purpose
    5’8″ to 6’0″ (173-183 cm)60-65 cmGeneral mountaineering, most common range
    6’0″ to 6’4″ (183-193 cm)65-70 cmGeneral mountaineering, taller climbers
    Over 6’4″ (193 cm)70-75 cmGeneral mountaineering, very tall climbers
    Technical ice climbing50-55 cm regardless of heightSteep terrain, swing-into-ice technique
    Ski mountaineering50-55 cmPackable, lightweight, mostly carried

    The traditional test: hold the axe by the head at your side with the spike pointing down. The spike should reach your ankle bone. Too short and you’ll bend over uncomfortably in cane position; too long and the axe becomes unwieldy on steeper terrain. The full sizing framework is in our mountaineering ice axe guide.

    How to practice ice axe skills developing real competence

    Reading about ice axe technique is useful but does not develop the muscle memory required for reliable use. Climbers who only read about ice axe skills fail to self-arrest when needed because the response is not automatic. The practice progression:

    1. Find a safe practice slope. 15-30 degree angle, firm but forgiving snow, clean runout below (no rocks, cliffs, trees, or other hazards). Avoid slopes with summer or spring slush which behaves differently than winter snow.
    2. Practice basic positions first. Hold the axe in cane position for 30 minutes on flat or gentle slopes. Develop comfort with the grip and the spike-planting motion.
    3. Practice plunge step descents. Walk up the practice slope and plunge step down repeatedly. Build comfort with the heel-strike motion and weight-forward position.
    4. Practice self-arrest from controlled slides. Start by sliding feet-first on your back from a low starting point. Roll into arrest position and arrest. Repeat until automatic.
    5. Practice self-arrest from each fall position. Head-first on back, head-first on stomach, feet-first on back, feet-first on stomach. Each requires slightly different recovery technique. Practice all four.
    6. Practice with crampons separately. Once arrest is reliable with boots only, practice the same techniques with crampons – emphasizing keeping feet off the snow during arrest.
    7. Take a course if possible. Mountaineering courses through organizations like the American Alpine Institute, AMGA, or Petzl Foundation training programs accelerate skill development dramatically.
    The practice principle that matters

    Self-arrest skill needs regular reinforcement. Even climbers who learned arrest competently lose the muscle memory if they don’t practice for a few seasons. Many experienced mountaineers spend an hour or two on a snow practice slope at the start of each climbing season specifically to refresh self-arrest technique. This is the difference between climbers who reliably arrest under stress and those who don’t.

    Common ice axe mistakes that cause real injuries

    • Wrong hand for terrain. Holding the axe in the downhill hand makes self-arrest dramatically slower. Always uphill hand on traverses.
    • Slamming the pick during arrest. Slammed picks bounce away. Gradual pressure allows the pick to bite and hold.
    • Failure to roll into arrest position. Many failed arrests are because the climber tried to arrest from the position they ended up in rather than rolling onto their stomach first.
    • Crampons catching during slide. The single most common cause of broken ankles in mountaineering. Keep feet UP during slides with crampons.
    • Wrong axe size for technique. A 70cm axe is unwieldy for steep terrain. A 50cm axe is uncomfortable for cane position. Match the tool to your primary terrain.
    • Never practicing. The single biggest mistake. Self-arrest technique without practice is theoretical, not reliable.
    • Using an ice tool instead of an ice axe. Ice tools are designed for technical climbing, not self-arrest. Their curved shafts and aggressive picks make arrest harder.
    • Losing the axe. Dropping an ice axe during a slide makes recovery much harder. Use a leash on steep terrain, or be very deliberate with hand grip.
    • Ignoring snow conditions. Self-arrest works on soft to firm snow but is dramatically less effective on hard ice. Recognize when conditions exceed self-arrest capability and use rope team protection.

    When you actually need an ice axe match tool to terrain

    Terrain / objectiveIce axe needed?Notes
    Snowy hiking trailsNo (microspikes if icy)Use trekking poles for stability
    Mount Whitney summer routeSometimesYes if snowfields lingering
    Colorado 14ers (summer)SometimesYes in early summer with lingering snow
    Mount Hood / Mount AdamsYes (mandatory)Standard mountaineering equipment
    Mexican volcanoes (Pico de Orizaba)Yes (mandatory)Standard mountaineering equipment
    Mont BlancYes (mandatory)Standard mountaineering equipment
    AconcaguaYes (mandatory)Standard mountaineering equipment
    DenaliYes (mandatory)Plus second tool for steeper terrain
    Technical ice climbingNo – use ice tools insteadDifferent tool category entirely
    Ski mountaineeringYes (lightweight)Carried more than used most of the time

    The general rule: any mountaineering objective with sustained snow or ice travel requires an ice axe. The microspikes-vs-crampons distinction also applies to ice axe decisions — the full snow travel gear framework is in our microspikes vs crampons decision guide.

    ★ Ice Axe Master Guide

    The complete ice axe framework

    Detailed product recommendations, type comparisons, and the broader ice axe context for mountaineering.

    Master guide →

    The bottom line on ice axe technique

    Using an ice axe requires learning five essential techniques in sequence: cane position (the foundation), plunge step (for descent), self-belay (for steeper ascent), self-arrest (for emergencies), and anchor position (for roped travel). The techniques build on each other — climbers who skip to self-arrest without first mastering grip and cane position never develop reliable emergency response. Most mountaineering objectives use cane position 80% of the time, plunge step on descent, and self-belay on steeper sections; self-arrest is the emergency backup that must work when needed. The technique requires hands-on practice on safe slopes (15-30 degree angle, firm forgiving snow, clean runout) — reading about self-arrest without practicing does not build the muscle memory required for reliable execution under stress. The critical safety rule with crampons: keep your feet OFF the snow during self-arrest to prevent rotational ankle injuries. Sizing matters — choose an axe where the spike reaches your ankle bone when held at your side, typically 50-70cm for most climbers. Quality ice axes from Petzl, Black Diamond, Grivel, or Cassin cost $80-$200 and last decades with proper care. The full ice axe framework is in our mountaineering ice axe master guide, with related snow travel gear context in our microspikes vs crampons decision guide and crampons-specific framework in our how to choose mountaineering crampons guide.

    Frequently asked questions

    How do you use an ice axe?

    Using an ice axe requires learning five essential techniques in sequence: cane position for flat to moderate terrain, plunge step for descending firm snow, self-belay for ascending steeper snow, self-arrest for stopping a slide, and anchor/security position for belaying. Beginning climbers should focus first on grip and cane position, then learn self-arrest on a safe practice slope. The pick faces backward when used as a walking aid and forward during self-arrest. Most climbers learn ice axe technique through hands-on practice on a moderate snow slope where falls have no consequences, ideally with an experienced mentor or in a mountaineering course. Practicing the techniques only in real climbing situations is dangerous – dedicated practice on safe terrain is essential.

    How do you do an ice axe self-arrest?

    To perform an ice axe self-arrest, immediately roll onto your stomach with your head facing uphill if possible. Hold the head of the ice axe near your shoulder with the pick pointed down and into the snow. Drive the pick into the snow gradually – applying full force immediately can cause the axe to bounce away. Keep your hips lifted off the snow to put all your body weight on the pick. Spread your legs and dig in with your feet (or kick them away from the slope if wearing crampons to prevent catching). The full position has the climber pressed against the slope with the pick anchored, body weight pressing the axe in, and feet stabilizing position. Self-arrest must be practiced repeatedly on safe slopes before relying on it in real climbing situations.

    What is the plunge step technique?

    The plunge step is the technique used to descend moderate to steep snow slopes efficiently. The climber walks straight down the slope, plunging each foot heel-first into the snow with body weight forward. The ice axe is held in the cane position with the spike planted on the uphill side as a stabilizer. The plunge step works well on firm snow that compacts under the heel, providing a step platform. On harder ice it is less effective and crampons or technical techniques become necessary. On soft snow the plunge step can cause excessive postholing. Most descent of snow in mountaineering uses some form of plunge step or its variants. Mastering this technique meaningfully reduces descent times and energy expenditure on most snow slopes.

    Which hand should hold the ice axe?

    The ice axe is typically held in the uphill hand when traversing a slope so the axe can plant into the slope above. When ascending straight uphill, the axe is held in the dominant hand. When traversing, the climber switches hands at each switchback so the axe is always on the uphill side. This is critical for self-arrest preparation – if a fall occurs, the climber needs to be able to convert the cane position into an arrest position. Holding the axe in the downhill hand makes self-arrest much harder and slower. The general rule: ice axe goes in the uphill hand whenever there is a downhill direction to a fall.

    What is the difference between an ice axe and an ice tool?

    An ice axe (or general mountaineering ice axe) is straight or slightly curved, has a flat adze at one end of the head, and is designed for self-arrest, plunge steps, and general mountaineering. An ice tool (used for technical ice climbing) has a strongly curved shaft, no adze (or a hammer head), a more aggressive pick, and is designed for swinging into vertical ice while ice climbing. Ice axes are used for general mountaineering on snow slopes. Ice tools are used for technical ice climbing on vertical ice or mixed terrain. Most mountaineers carry an ice axe; only technical ice climbers carry ice tools. The two are not interchangeable – an ice axe is poorly suited for technical climbing and an ice tool is awkward for general mountaineering self-arrest.

    How long should an ice axe be?

    The right ice axe length depends on your height and intended use. For general mountaineering, the traditional sizing has the spike of the ice axe reach the ankle bone when held by your side. This produces 50-70cm axes for most climbers. Shorter people typically use 50-55cm axes; taller people use 65-70cm axes. For technical climbing on steeper terrain, shorter axes (50-55cm) are preferred regardless of height because the axe is used more like a tool than a walking aid. For ski mountaineering, axes around 55-60cm balance walking comfort with technical capability. Most first-time buyers choose 60-65cm axes which work well for a wide range of objectives and heights.

    Can you practice ice axe self-arrest?

    Yes, practicing ice axe self-arrest is essential before relying on the technique in real climbing. Practice is done on a safe snow slope with several characteristics: moderate angle (15-30 degrees), firm but forgiving snow (not ice), a clean runout below with no rocks or cliffs, and ideally with experienced supervision. Beginning climbers should practice falls from each position: head first downhill on back, head first downhill on stomach, feet first on back, feet first on stomach. Each position has slightly different recovery technique. Most mountaineering courses spend several hours teaching and practicing self-arrest on a designated practice slope before sending students to real climbing terrain. Solo practice without prior instruction is possible but slower to develop reliable technique.

    Was this helpful?

    Yes
    No
    Thanks for your feedback!
Language »