How to Use Crampons: Fit, Walk & Climb Safely
Learn when to use crampons, how to check boot compatibility, how to fit and wear them, and how flat-footing, hybrid footwork and front-pointing differ. This guide includes 10 illustrated steps, a ready-to-print checklist and verified gear examples.
The first rule: choose a compatible boot-crampon system and practice in low-consequence terrain before an exposed climb.
Last updated: November 7, 2026 | Technical guide and affiliate inventory reviewedSee 10 technique stepsChoose compatible gearPrint the checklist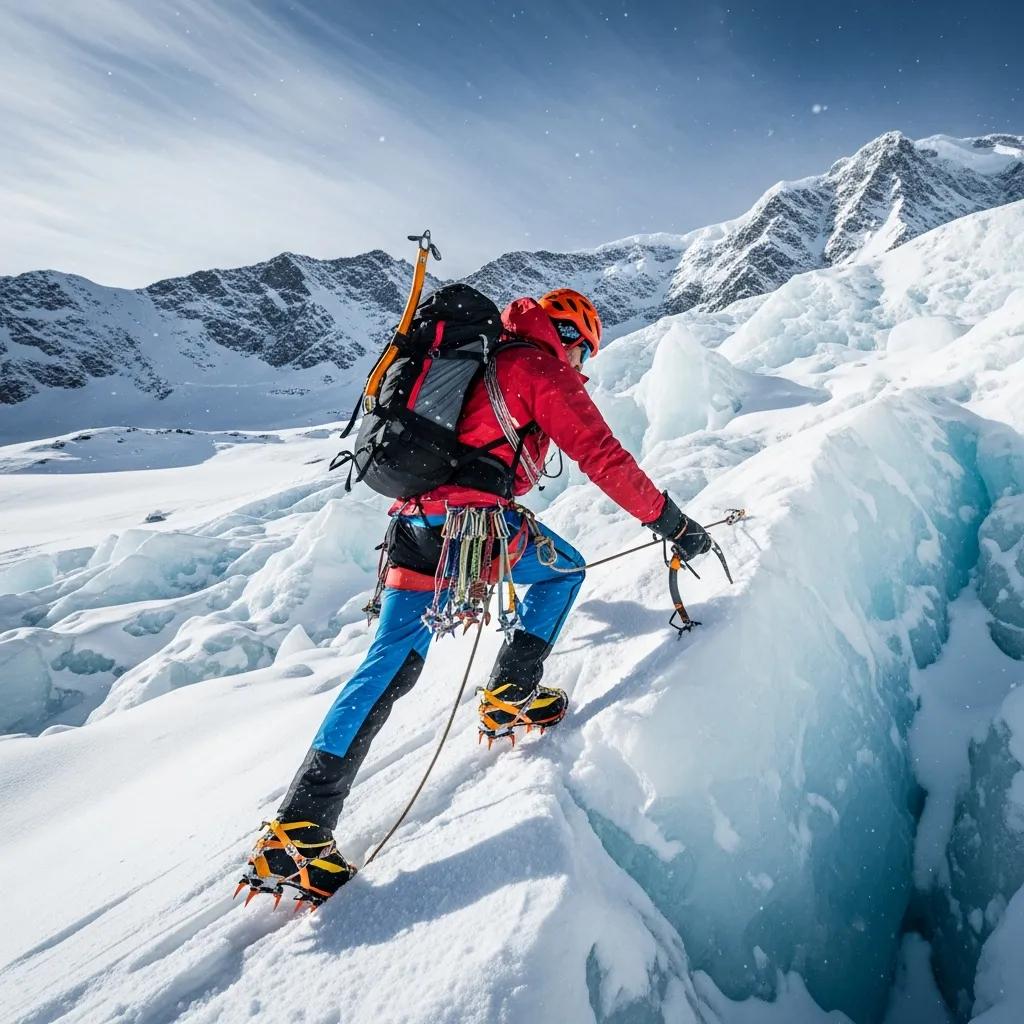
How do you use crampons correctly?
Put them on before the snow or ice becomes insecure, and only after matching the binding system to your exact boots. Secure the points and straps using the manufacturer’s instructions. Walk with a deliberate, slightly wider stance, engaging multiple downward points on suitable moderate terrain. Advanced front-point and hybrid techniques require qualified instruction.
From your first fit to confident footwork
Use these sections in order. The photographs show equipment and climbing situations; they are not a substitute for precise manufacturer adjustment diagrams or guided movement instruction.
How to fit, walk and descend in crampons
Each step includes a photograph and a deliberate safety checkpoint. Equipment images are illustrative, not detailed representations of each movement or binding adjustment.
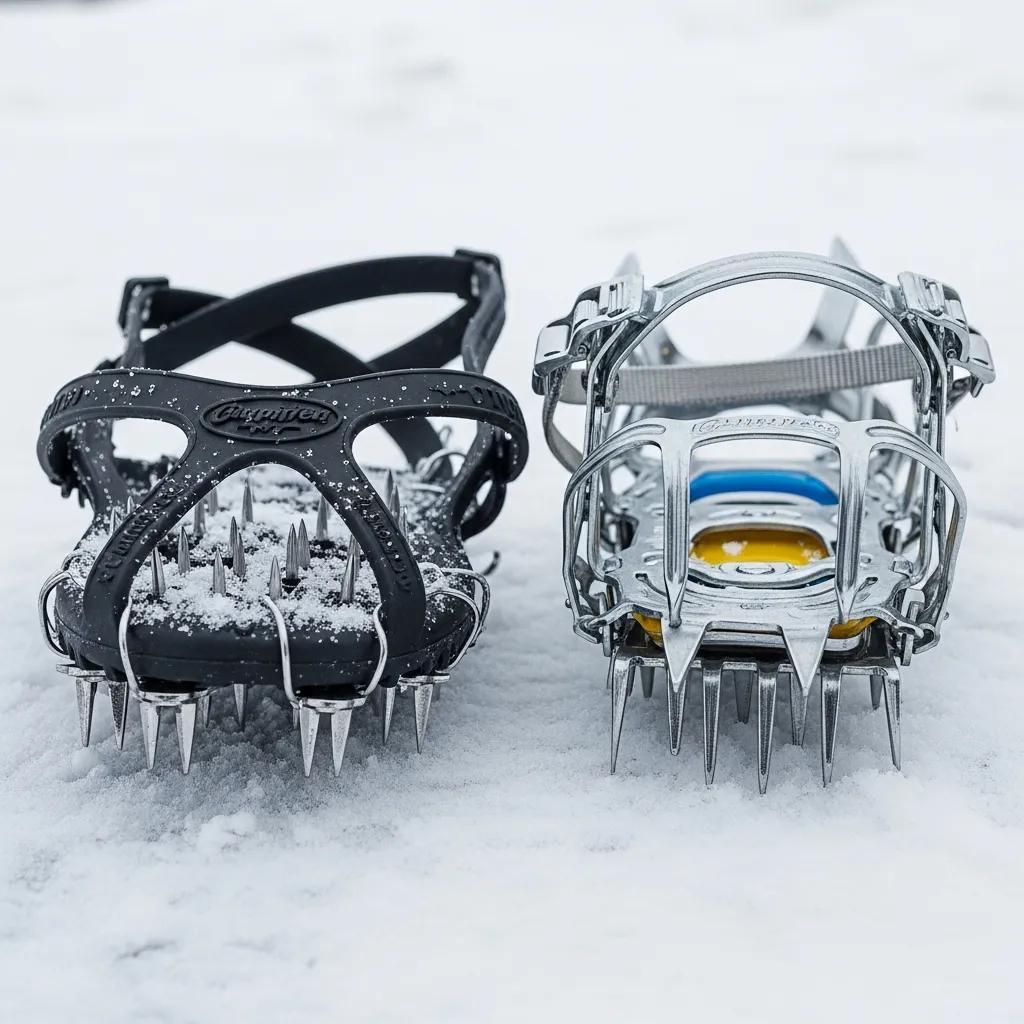
Choose the correct traction before the slope
Assess the surface, runout, and consequences of a slip. On low-angle icy trails microspikes may be useful; steep or consequential snow and ice require properly matched mountaineering equipment, skills, and often a team. Stop in a safe area before your boots lose reliable purchase.
Safety checkpoint: Check for dangerous runout, rocks, crevasses, or exposed traverses. There is no universal angle when crampons become mandatory.
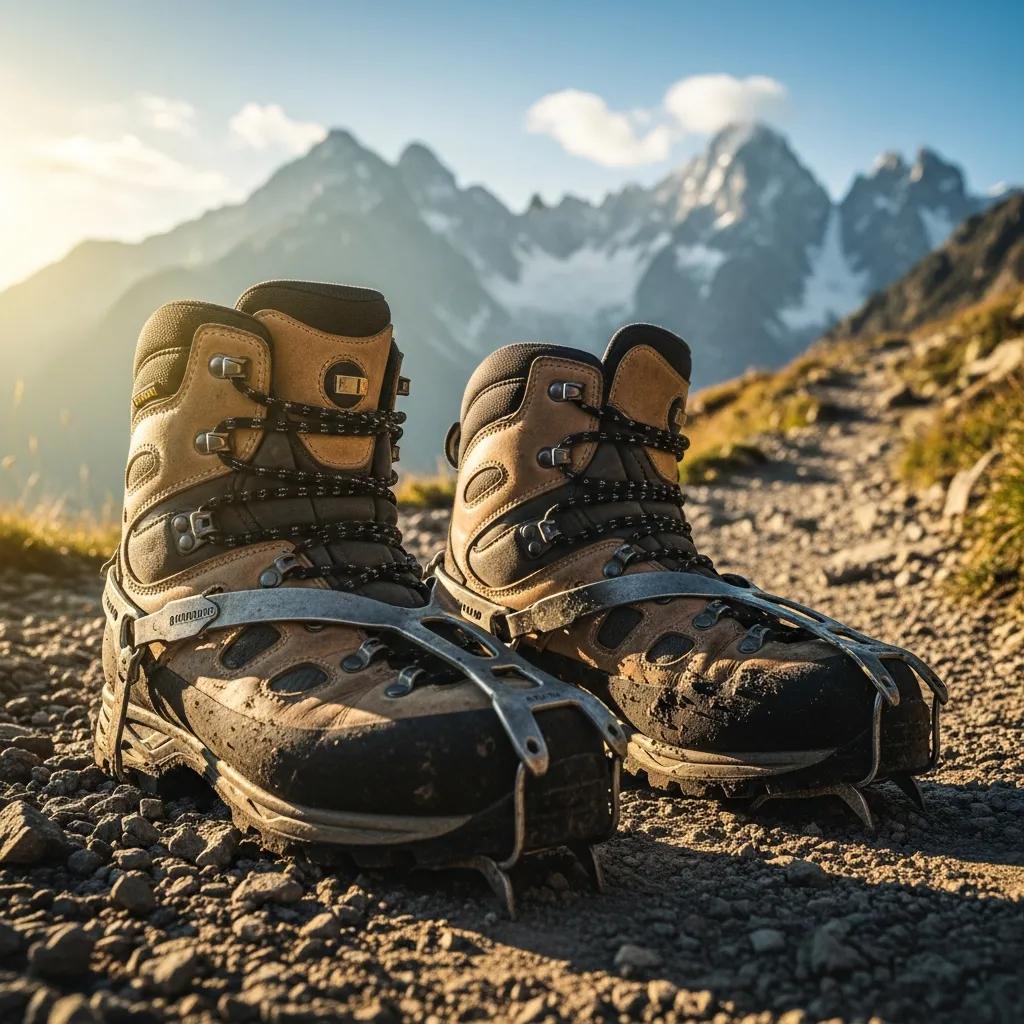
Match crampon bindings to the boots
Check the exact boot and crampon manufacturer compatibility. Strap/basket, hybrid heel-lever, and automatic step-in bindings require different sole stiffness and/or welt configurations. Some flexible footwear is not suited to conventional crampons.
Safety checkpoint: Test with the actual boots, including their toe and heel shapes. Do not force an automatic crampon onto unsuitable welts.
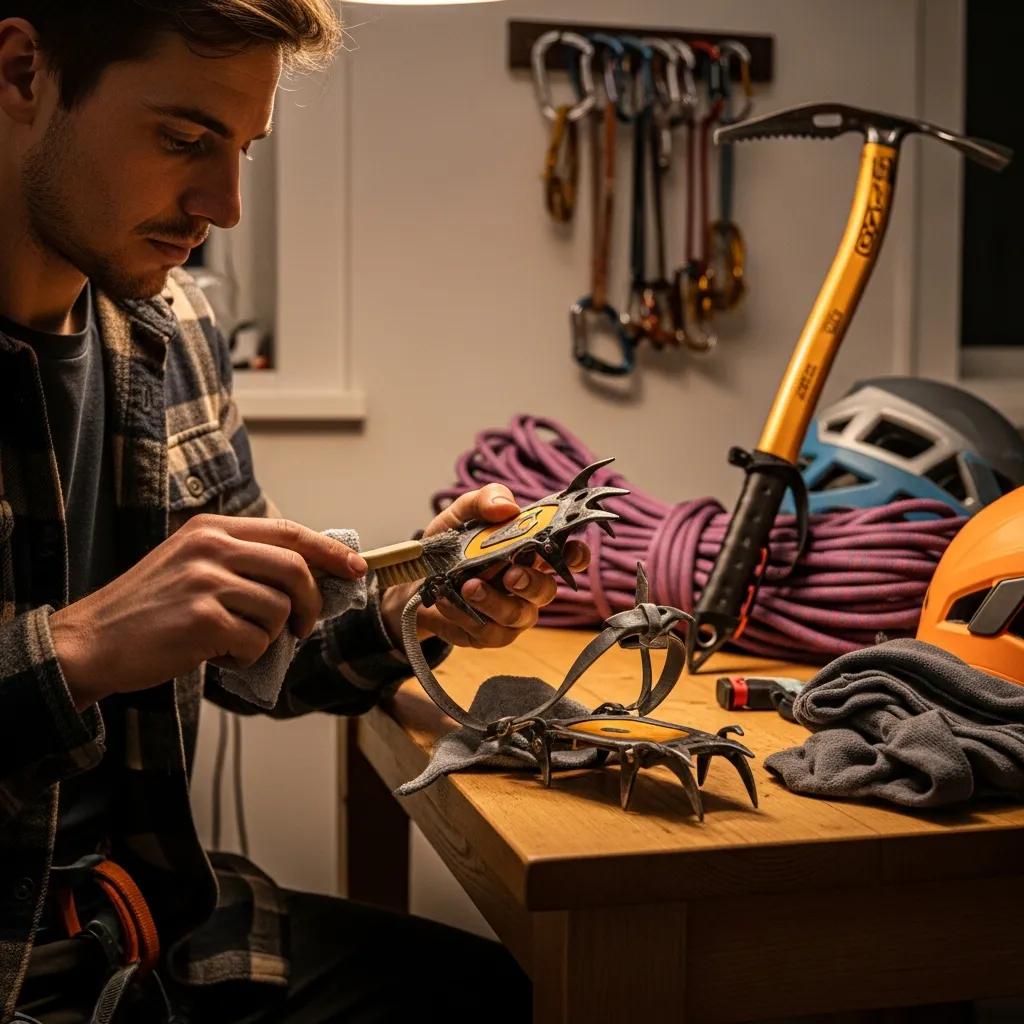
Inspect the complete crampon before fitting
Look for cracks, bent points, worn straps, damaged bails, loose linkage and missing anti-snow plates. Adjust the length system according to the model instructions and ensure both halves are properly seated.
Safety checkpoint: Use a shop or guide when fitting the exact model is uncertain. Replace damaged parts only with manufacturer-approved components.
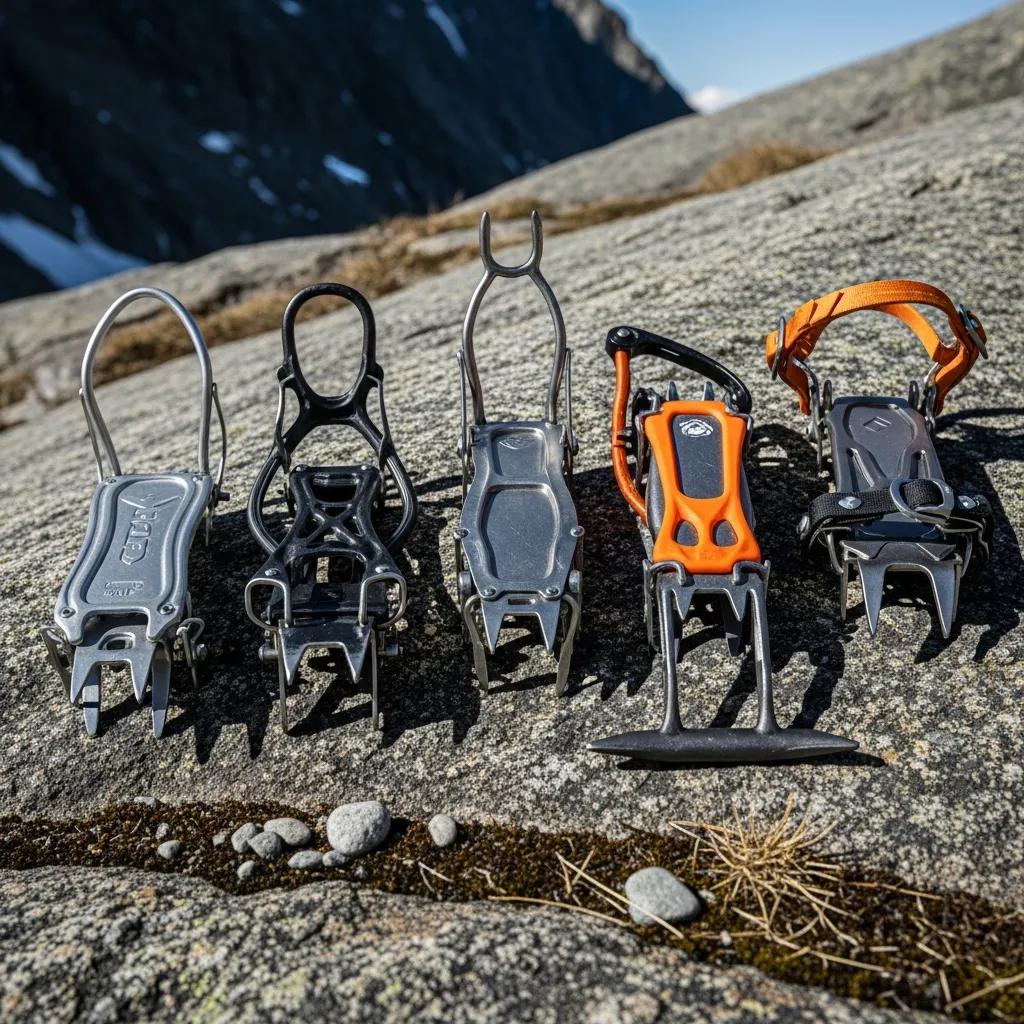
Put crampons on from a secure platform
Before exposed terrain, find level or sheltered ground. Remove snow from soles and welts, orient left and right, seat toe and heel in the specified order, tighten the binding and route excess straps out of the way.
Safety checkpoint: Recheck after walking briefly on safe ground: the frame must not twist or shift relative to the boot.

Walk with wider, deliberate steps
Lift each foot cleanly, keep a slightly wider stance, avoid crossing legs and prevent points from catching pants, gaiters, rope, or the other boot. Do not drag the points through snow or toward the opposite calf.
Safety checkpoint: Start on low-consequence terrain with an instructor. Look several steps ahead and keep your knees loose.
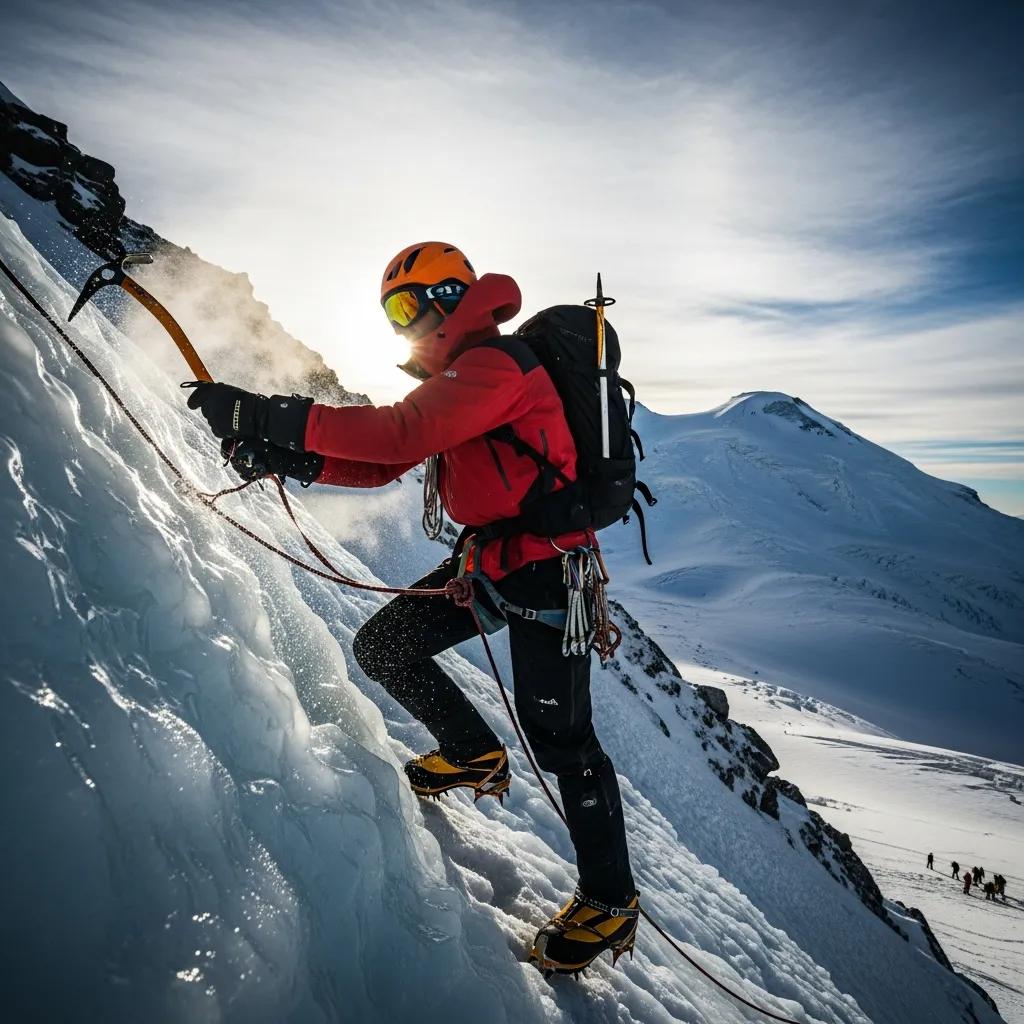
Flat-foot on moderate firm terrain
French technique aims to engage as many downward points as practicable. Articulate the ankle so the frame broadly follows the slope; adjust the foot angle or direction of travel instead of balancing on one uphill edge.
Safety checkpoint: Do not use a memorized slope-angle cutoff. Snow hardness and consequences change the appropriate technique.
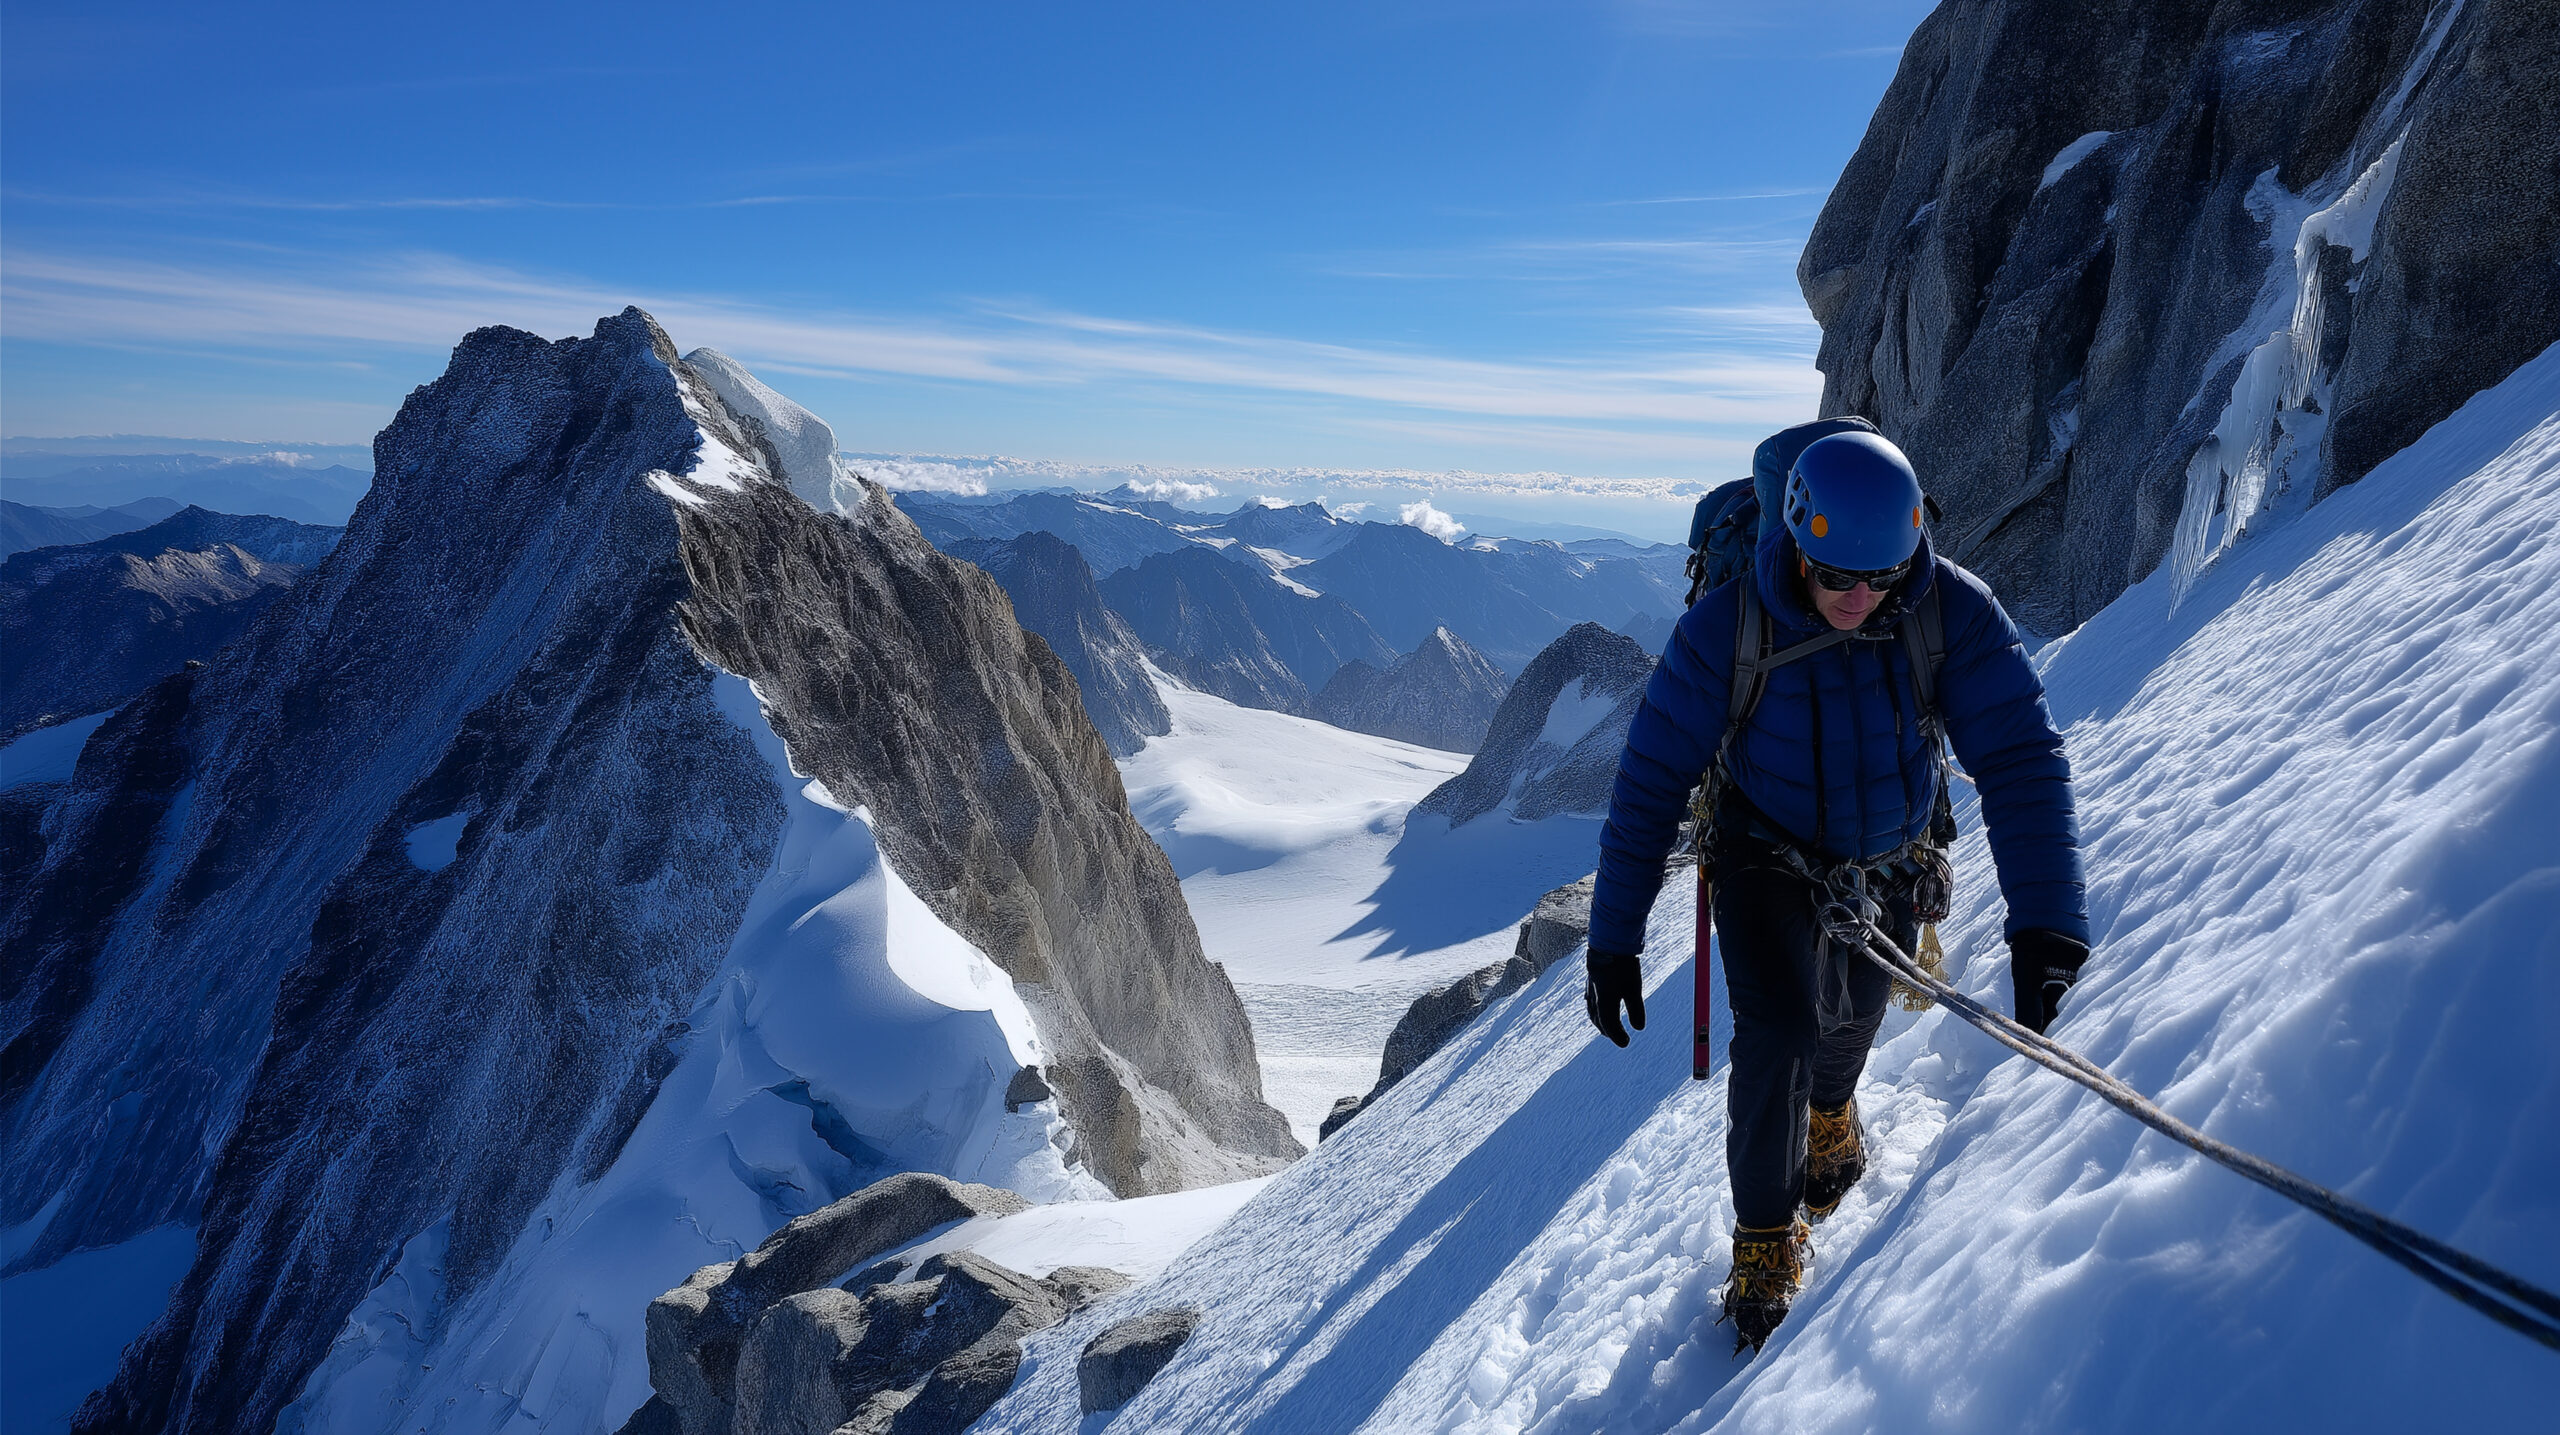
Transition carefully using hybrid footwork
On changing gradients, qualified climbers blend flat-footing and front-pointing: one foot may use downward points while the other begins to engage its front points. This transition needs secure hip position and deliberate weight transfer.
Safety checkpoint: Practice with a qualified instructor on protected terrain before relying on transitions above exposure.
Front-point only where it is appropriate
When the surface is too steep or hard for secure flat-footing, front points may become the primary contact. This requires compatible stiff boots, precise foot placements, tool/rope technique and considerable endurance.
Safety checkpoint: Steep ice and technical mixed routes are not appropriate places for first-time self-instruction.
Descend with the same discipline
Keep knees soft, avoid swinging or dragging the feet, watch points around pants and rope, and adapt between downward-point contact, traversing and other guided techniques according to the terrain.
Safety checkpoint: Fatigue and changing surface conditions often make the descent less forgiving than the ascent.

Remove, inspect, dry and store
At a safe stance, remove crampons when they are no longer useful, then protect points in a dedicated bag. Dry the steel and binding hardware after the trip; inspect for damage and follow manufacturer sharpening guidance.
Safety checkpoint: Never glissade with crampons on: points can catch during a slide and cause serious leg injury.
French vs American vs German crampon techniques
These terms describe a continuum of movement rather than fixed mandatory angles. Learn transitions in controlled conditions with an instructor.
| Technique | Contact pattern | Where it may be used | Common problem |
|---|---|---|---|
| French / Flat-foot | Multiple downward points engage | Moderate snow or ice where ankle mobility allows | Rolling onto an edge and losing traction |
| American / Hybrid | Blend downward-point and front-point contact | Changing gradient or traverses | Unstable weight transfers |
| German / Front-point | Front points take primary purchase | Steeper snow and ice with proper system | Calf fatigue and insecure kicks |
Why we do not prescribe one slope angle
A firm icy traverse with exposed runout may need more protection than a steeper soft-snow slope. Surface condition, exposure, boot stiffness, point geometry and skill all matter. Avoid a simplistic rule such as “always front-point above 45 degrees.”
For choosing microspikes versus crampons, focus on fall consequences and equipment suitability, not just trail classification.
See flat-footing, hybrid movement and front-pointing in action
The REI Expert Advice crampon lesson includes videos for the main techniques and discusses when to put crampons on, foot clearance and safety on changing terrain.
This page links to REI’s existing technique videos rather than embedding an unverified YouTube clip. Watch with a qualified instructor and then practice on low-consequence snow.
Watch REI crampon demonstrationsExternal instructional resource. Not a substitute for qualified personal instruction.
Choose crampons that actually fit your boots
Start with your boots and terrain, not a product ranking. A steel crampon that does not lock securely onto your specific boot is the wrong crampon, no matter how good its reviews are.
Look at your boot
Does it have a substantial sole? A rear heel welt? A front toe welt? Check the exact boot model and manufacturer guidance, not just a B1/B2/B3 label.
Choose the binding
Strap-on: no welt required on suitable boots. Hybrid: generally needs a heel welt. Automatic: needs compatible toe and heel welts.
Fit and test
Fit each crampon to the exact boot. Confirm manufacturer approval, adjustment range, anti-balling plates, strap routing and retention before an actual climb.
| Boot characteristics | Binding to investigate | Important limitation |
|---|---|---|
| Suitable stiff boot with no welts | Strap-on / universal | Not every flexible hiking boot is suitable for full mountaineering crampons. |
| Suitable boot with a heel welt | Hybrid / semi-automatic | Check heel-lever grip and toe-basket shape. |
| Suitable rigid boot with front and rear welts | Automatic / step-in | Both welts and the toe bail must match; welts alone do not guarantee fit. |
Four crampon systems to compare
These are examples of different binding choices, not universal recommendations. All four affiliate listings come from your approved inventory.
Black Diamond Serac Strap Crampon
For compatible stiff mountaineering boots without requiring a heel or toe welt.
Check before buying: Boot stiffness, strap security, exact fit and the intended slope.
Black Diamond Serac Clip Crampon
For appropriate mountaineering boots with a compatible heel welt; front basket retains the toe.
Check before buying: Heel-welt shape and lever engagement; never force a mismatched heel.
Black Diamond Sabretooth Pro Crampon
Technical step-in option for boots with suitable toe and heel welts.
Check before buying: Both welt interfaces, toe-bail fit and secure heel-lever operation.
CAMP USA Ascent Universal Crampon
Alternative universal-style binding for boots that meet the maker’s compatibility requirements.
Check before buying: The supplied binding configuration, boot rigidity and snow/ice suitability.
Lightweight alternatives and useful extras
A specialist lightweight crampon, an ice axe and protective storage solve different problems. They are not substitutes for correct crampon fit.
Blue Ice Harfang Tour Crampon
Lightweight alternative for appropriately matched boots and suitable snow terrain. Not a default replacement for steel crampons on mixed rock and ice.
Check before buying: Point material, manufacturer terrain limits and binding system.
Black Diamond Raven Ice Axe
A classic walking axe for appropriate snow-travel objectives; technique and sizing matter.
Check before buying: Route requirements, ice-axe length and self-arrest training.
Black Diamond Crampon Bag
Keeps sharp crampon points away from pack fabric and spare layers.
Check before buying: Bag size and space for dry gear.
CAMP USA Foldable Crampon Bag
Alternative protective storage for crampons when off your boots.
Check before buying: Compatibility with your actual crampon size.
Affiliate disclosure: GSG may earn a commission from qualifying purchases through these retailer links at no extra cost to you. These selections illustrate binding categories; they are not claims of hands-on comparative testing. Listed prices are November 2026 feed snapshots and may change. Read our affiliate disclosure.
For deeper comparisons, read the best mountaineering crampons buying guide, the crampon decision guide, and the boot compatibility guide.
Eight crampon mistakes to avoid
- Trying to make an incompatible boot fit by tightening harder.
- Putting crampons on too late, when a slip is already likely.
- Leaving a loose strap end where it can snag a point.
- Walking with feet too close and catching an opposite gaiter.
- Assuming points always grip when wet snow balls underneath them.
- Glissading while wearing crampons.
- Using advanced front-pointing without training and proper protection.
- Neglecting fit checks after changing boots or binding adjustments.
Printable crampon technique and safety checklist
Use this practical checklist when practicing with a guide or instructor. You can check items in the browser, or print this section with your browser’s Print / Save as PDF command.
Before leaving home
Before entering firm snow
Movement and route checks
After the route
Frequently asked questions about using crampons
How do you put crampons on correctly?
Use a safe flat stance, clear snow from the boot sole, confirm left and right, set the boot into the manufacturer-specified toe and heel bindings, secure the retention straps, control strap tails, and ground-test the fit before consequential terrain.
When should you put crampons on?
Before traction becomes unreliable on firm snow or ice, especially when a slip could have serious consequences. Choose a secure transition location rather than waiting until exposed terrain.
Can you use crampons with hiking boots?
Only where the exact boot and crampon are manufacturer-compatible; many flexible hiking boots are unsuitable for traditional mountaineering models.
What is French technique with crampons?
Flat-footing seeks to place multiple downward points in firm contact with snow or ice while keeping a stable stance. It is commonly used on moderate terrain where ankle flexibility allows.
What is American technique?
Hybrid technique blends downward-point and front-point placements while transitioning between slope angles or traversing. It should be learned in a controlled setting.
What is German technique?
Front-pointing uses the forward points for steeper or harder snow and ice when flat-footing is impractical, usually with a stiffer boot and additional technique.
Should I use crampons or microspikes?
Microspikes serve easier icy paths, while mountaineering crampons may be necessary on firm alpine terrain with severe runout. Neither traction choice substitutes for judgment, training or rope systems where required.
Can you self-arrest while wearing crampons?
A slide with crampons is especially hazardous because points may catch abruptly. Prevent falls and learn appropriate ice-axe and arrest skills with qualified supervision; never deliberately glissade with crampons on.
Do crampons need anti-balling plates?
Use the anti-snow plates supplied or recommended by the manufacturer. Snow packed beneath points can undermine traction.
How tight should crampons be?
The frame should remain secure on the boot without rotation or slippage, and bindings must operate as designed. Overtightening is not a remedy for incompatible footwear.
Can you walk on rock with crampons?
Short mixed rock sections may require them, but extended dry-rock travel dulls points and increases snag risk. Remove them only when a safe transition and route conditions allow.
How do you maintain crampons?
Inspect straps, frame, linking system and points, dry after use, and sharpen or replace components strictly according to the manufacturer technical notice.
How to decide whether your crampon setup is working
Before the first hard-snow crossing
Give yourself more space and time than you expect to need. Unclip your crampons from the pack, orient them, remove accumulated ice from the underside of your boots, and verify that the length setting has not shifted since the home fitting. Check that the manufacturer-required anti-snow plates are intact. If your boot has a welt, confirm that it is clean enough for the relevant bail or heel lever to seat properly.
With the crampon secured, make a few short movements on level, low-consequence terrain. Watch for a heel lifting away from the rear binding, a toe escaping its basket or bail, or the frame turning beneath the boot. Any independent movement is a reason to stop, remove the crampon, and revisit the fit. A binding that is painfully tight but still moving is not a safe fit.
When the terrain changes
Before crossing from soft snow to refrozen crust, assess whether normal walking still offers reliable traction. Look not only at what is immediately underfoot but also at what lies below you. A mild slope with a cliff or crevasse below it carries consequences unlike a similar slope with a safe runout. If the terrain requires rope protection, skilled ice-axe technique, or glacier travel procedures, crampons alone do not make the terrain manageable.
During the descent
Inspect your posture when tired. Very narrow steps, hurried shuffling, uncontrolled downhill momentum, and dragging points are warning signs. Practice deliberate placement and increase spacing so the inner points cannot catch fabric or the other leg. The correct orientation on a slope depends on steepness and surface; use a guide’s direction rather than forcing one descent method everywhere.
If snow starts packing beneath the crampon frame, stop in a secure stance and follow the manufacturer’s guidance for safely clearing it. Do not assume the anti-snow system prevents all buildup. If you are stepping onto a prolonged dry-rock trail, choose a safe platform where the crampons can be removed without losing control of balance.
After a fall or equipment impact
Do not assume the crampons are safe merely because both are still attached. Examine points, binding hardware, attachment straps and frame geometry for cracks, twisting, bent components or accidental loosening. If structural integrity is in doubt, retire the affected gear from consequential use and ask the manufacturer or a qualified shop for advice.
Why your crampons may not fit, even when the label seems right
| Symptom | Possible cause | Safer next action |
|---|---|---|
| Heel lifts out of the cradle | Length setting, heel geometry or binding mismatch | Stop, remove, and recheck the specific manufacturer instructions. Do not improvise straps. |
| Toe bail rests on rubber instead of an approved welt | Automatic-style binding is incompatible with boot | Do not use; obtain an approved binding and boot combination. |
| Frame turns under the sole | Incorrect length, poor toe/heel contact or inadequate stiffness | Refit on safe ground or have a qualified shop inspect both models. |
| Loose strap tails catch the other foot | Incorrect strap routing or unmanaged excess | Route and secure exactly as manufacturer specifies. |
| Hard snow packs underneath | Anti-snow system damaged or snow conditions causing balling | Check plates, clean in a stable stance and reassess the surface. |
| Calves become exhausted quickly | Staying on front points longer than necessary or poor movement technique | Retreat to less consequential ground and learn more efficient technique with an instructor. |
Traditional B0/B1/B2/B3 boot classifications and C1/C2/C3 crampon classifications can help begin a conversation, but they are not a manufacturer guarantee of fit. Modern binding systems also have model-specific adjustments and interfaces. Test and verify the actual combination, not just the labels or product category.
A realistic learning progression before technical climbs
Indoor fit, adjustment and safe storage
Learn the name and function of your heel lever or basket, toe basket or bail, linking system, points and anti-snow plates. Try fitting, removing and packing the system using the manufacturer notice. Practice with gloves on and ensure you can find every adjustment point.
Goal: Both crampons remain secure on the actual boots, with no loose tails and no uncertainty about how they attach.
Level snow or ice in a controlled environment
Under qualified instruction, practice lifting the feet deliberately, walking with adequate clearance, turning, stopping, and changing direction. Work on efficient balance and recognizing a foot placement that does not engage enough points.
Goal: Clean foot clearance, controlled posture and secure contact without repeatedly looking straight down at each boot.
Moderate slopes with low-consequence runout
Learn French technique and its variations with a guide. Pay attention to ankle movement, slope aspect, snow consistency and deliberate descent. Practice when to stop and adjust gear before climbing into riskier terrain.
Goal: Maintain stable downward-point contact without relying on a fixed slope-angle formula.
Advanced instruction and objective-specific systems
Learn hybrid movements, appropriate front-pointing, ice-axe work, self-arrest, and rope techniques in a structured course. A glacier climb also requires crevasse-rescue knowledge and route-specific protection. These skills involve substantial supervision and practice beyond a single lesson.
Goal: Make a realistic decision with a qualified leader about whether you are prepared for the next objective.
First-hand context from Global Summit Guide
The original GSG guide cites moderate-angle crampon experience on Pico de Orizaba and Iztaccihuatl in Mexico, and on Mount Hood’s South Side and Hogsback in Oregon. These are useful field contexts for careful fitting, changing snow conditions, fatigue, and the value of practicing before the main climb.
They do not establish first-hand product testing of each currently listed crampon or expertise in advanced waterfall ice climbing. Sections on advanced hybrid technique, front-pointing, mixed terrain and rescue should be read as manufacturer- and instructional-source-informed material, with in-person training still required.
In particular, a gear decision made for a snow volcano ascent cannot automatically be copied to an Alpine ridge or steep technical ice route. Different boots, point geometry, route protection, snow texture and weather conditions change the proper approach. We encourage readers to connect the gear choice to the actual objective and to local professional instruction.
Sources, technical boundaries and next steps
We use manufacturer fit requirements and established mountaineering instruction to distinguish basic snow walking from advanced technical climbing. Examples and prices are based on a retailer affiliate feed and do not imply independently measured performance or first-hand product testing.
- REI Expert Advice – How to Use Crampons (movement techniques and transitions)
- Petzl – Crampon product technical notices (manufacturer-specific fit and bindings)
- British Mountaineering Council (boots, crampons and winter skills)
- American Alpine Club (alpine accident learning and training)
Continue on Global Summit Guide
Page reviewed November 7, 2026. Photographs from the GSG WordPress media library show equipment and snowy mountain settings. These are illustrative, not proof that any specific instructional technique was performed as depicted.