<

Author: Travis Ludlow

  • Mountains in Utah: a climber’s guide to the Wasatch, Uintas, and Utah’s greatest peaks

    Mountains in Utah: A Climber’s Guide to the Wasatch, Uintas, and Utah’s Greatest Peaks | Global Summit Guide
    Regional Guides / Utah

    Mountains in Utah: a climber’s guide to the Wasatch, Uintas, and Utah’s greatest peaks

    13,528 ft
    Kings Peak (highest)
    7+
    Major ranges
    200+
    Named peaks 11K ft+
    Jul-Sep
    Best climbing season
    Part of the Utah mountains series This climber’s guide supports our best mountains in Utah master guide and connects to our Utah-specific peak content. Master guide →

    Utah is one of the most underrated mountain states in the US. The state has over 200 named peaks above 11,000 feet distributed across 7+ major ranges, the highest summit (Kings Peak) reaching 13,528 feet, and a combination of Wasatch alpine terrain, Uinta high country, and southern Utah desert peaks that no other state matches. Despite this, Utah’s mountains attract less national attention than Colorado’s 14ers or California’s Sierra Nevada — which is exactly what makes them appealing for climbers seeking fewer crowds and more variety. This guide covers the major Utah ranges, the most important peaks in each, and the order most climbers approach them. For broader context see our best mountains in Utah master guide.

    Utah’s mountain geography an overview

    Utah sits at the intersection of the Rocky Mountains, the Colorado Plateau, and the Great Basin, producing one of the most geologically diverse mountain landscapes in the United States. The state has three distinct mountain regions:

    • The Wasatch Front and Range: the north-south spine running from southern Idaho through Salt Lake City to central Utah. Contains the most-climbed peaks due to population proximity.
    • The Uinta Mountains: the unusual east-west range in northeastern Utah. Contains all of Utah’s highest peaks and the state’s only “13ers” (peaks above 13,000 feet).
    • The southern Utah ranges: the La Sal Mountains near Moab, the Henry Mountains, the Abajo Mountains, the Tushar Mountains, and others. Desert mountain character with dramatic views and lower visitor numbers.
    The mountains of Utah showing the Wasatch Range and Uinta Mountains landscape with high alpine terrain dramatic ridges and the diverse mountain geography that defines Utah climbing
    Utah’s diverse mountain landscape spans the Wasatch Front, the Uinta high country, and the southern desert ranges — over 200 named peaks above 11,000 feet across seven major mountain ranges.

    The diversity is what makes Utah unique. A climber based in Salt Lake City can spend the morning on a Wasatch Range scramble, drive 90 minutes east to backpack into the Uintas for a multi-day high peak, or drive 4 hours south to climb a desert mountain in the La Sals — all without leaving the state. No other state has this range of mountain experience packed so close together.

    Utah’s highest peaks the headline mountains

    1

    Kings Peak

    Uinta Mountains · Highest point in Utah · 28-mile backpack round trip · Class 2 scrambling at summit
    13,528 ft

    Kings Peak in the Uinta Mountains is the high point of Utah and one of the more unusual US state high points — it requires a 28-mile round-trip backpacking trip rather than a single-day hike. The peak sits deep in the High Uintas Wilderness with no road access closer than the Henrys Fork trailhead, 14 miles from the summit. Most climbers complete Kings Peak as a 3-day backpack, though strong parties can complete it in 2 days. The summit ridge involves class 2 scrambling on talus and is the highest peak in the entire Uinta Mountains range.

    2

    Mount Peale

    La Sal Mountains · Highest peak in southern Utah · Near Moab · Class 2 scramble
    12,726 ft

    Mount Peale in the La Sal Mountains is the highest peak in southern Utah and the second-highest peak in the state. The mountain sits in the La Sals range east of Moab, providing dramatic high alpine terrain rising from the surrounding red rock desert. Most climbers approach via the standard route from the La Sal Loop Road. The peak is class 2 with talus scrambling at the summit ridge and is meaningfully easier than Kings Peak due to a shorter approach and better trailhead access.

    3

    Mount Nebo

    Southern Wasatch Range · Highest peak in Wasatch · Multi-summit massif · Class 2 standard
    11,933 ft

    Mount Nebo is the highest peak in the Wasatch Range and the southernmost peak of the main Wasatch chain. The mountain is technically a three-summit massif with the south summit being the highest, though the north summit and middle summit are also recognized peaks. The standard route is class 2 with a long approach hike from the Wasatch foothills. Mount Nebo’s location makes it less visited than the Salt Lake City peaks but the dramatic three-summit profile and high elevation make it one of the iconic Utah objectives.

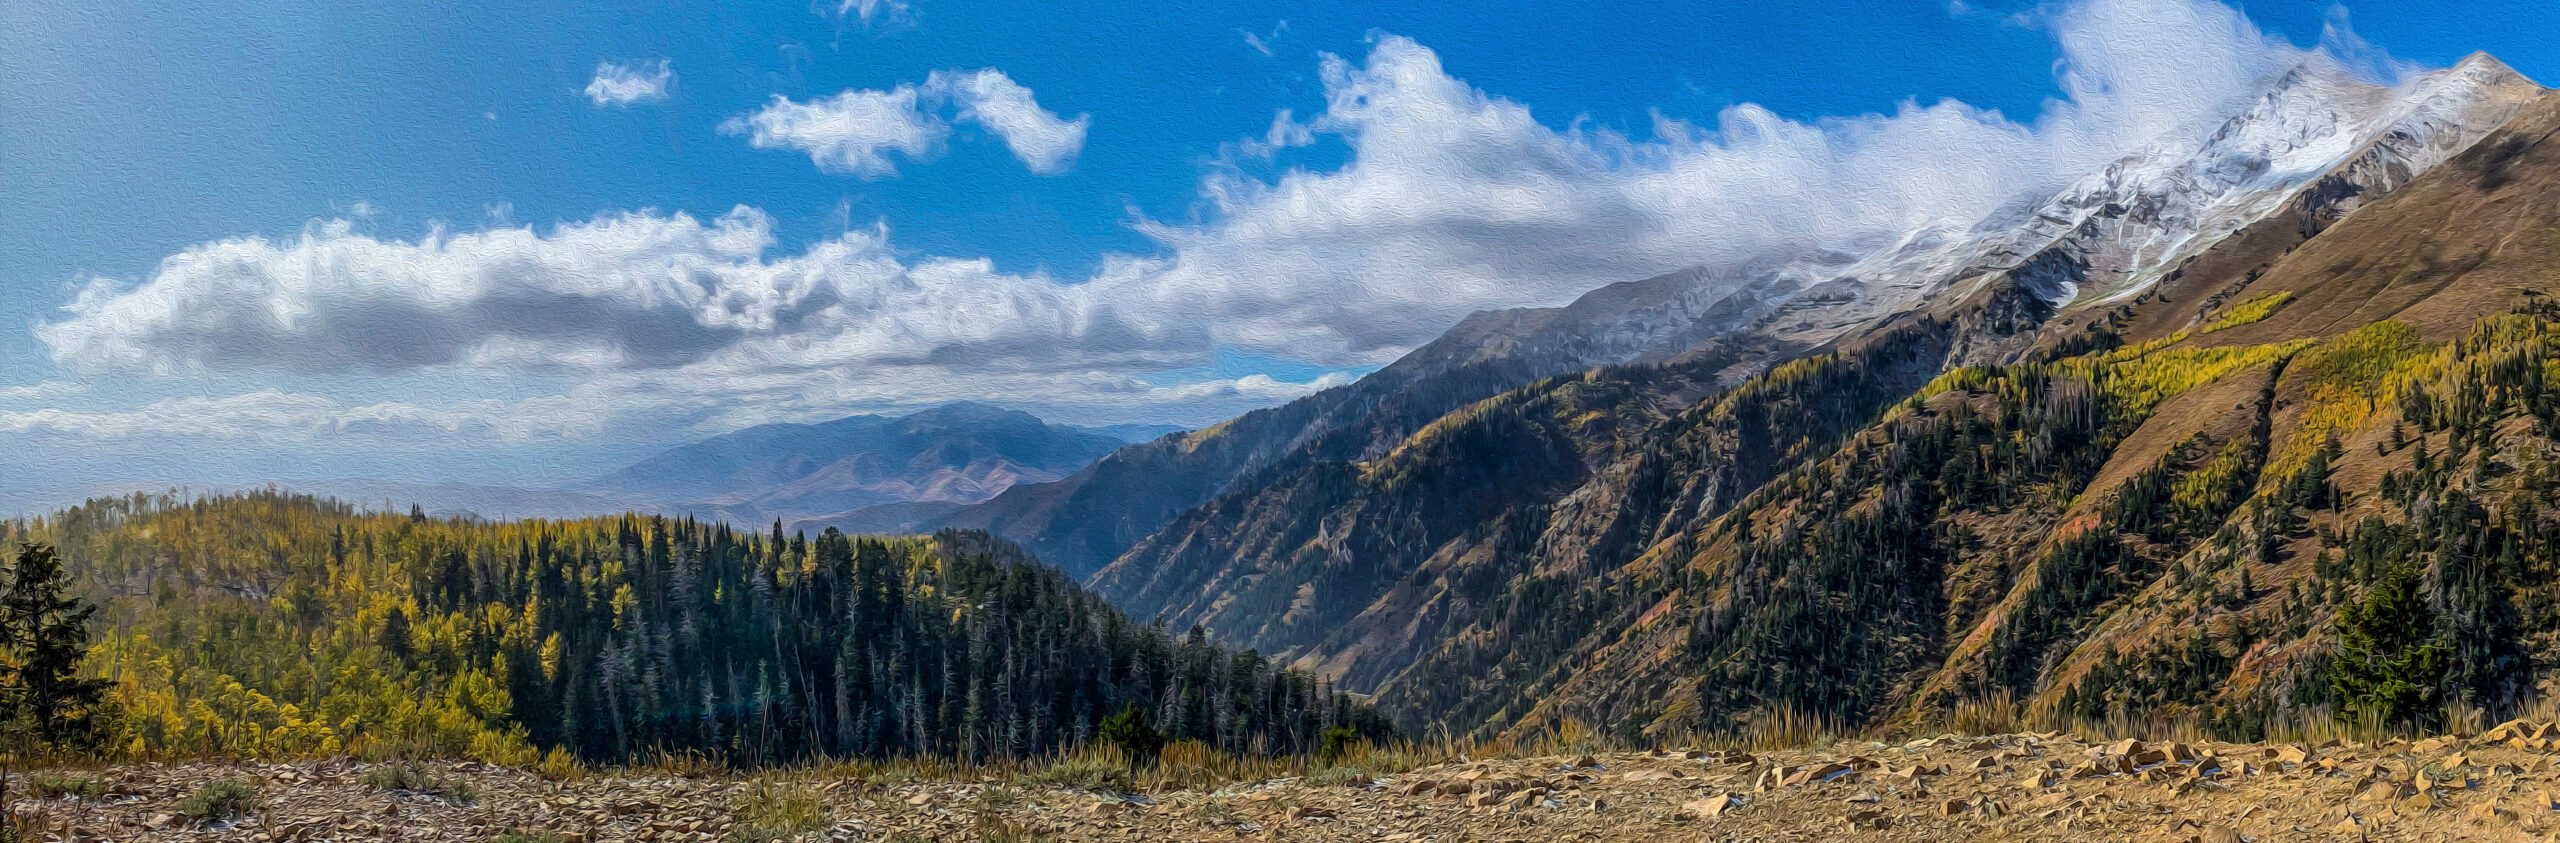
    The Wasatch Range the iconic peaks

    The Wasatch Range is Utah’s most visited mountain range, running north-south through northern Utah from the Idaho border to central Utah. The Wasatch Front (the western edge of the range visible from Salt Lake City and Provo) is one of the most populated mountain edges in the US. The peaks east of Salt Lake City — Mount Olympus, Twin Peaks, Lone Peak — are climbed by tens of thousands of locals each year.

    Mount Timpanogos is the most-climbed mountain in Utah, with over 100,000 attempts annually on the standard Aspen Grove and Timpooneke trails. The mountain dominates the skyline above Utah Valley and produces dramatic views from Provo, American Fork, and Lehi. The hike is a long day (14 miles round trip) with significant elevation gain but is class 2 throughout and accessible to fit hikers. The mountain has a small glacier (the “Timpanogos Glacier” — actually more accurately a permanent snowfield) near the summit.

    Mount Olympus is the most prominent peak in the Salt Lake Valley, rising directly above the city’s east bench. Despite being lower than many Utah peaks (9,026 ft), it is one of the steepest hikes in Utah — 4,100 feet of gain in just 4 miles round trip. The upper section includes class 3 scrambling on rock. Mount Olympus is the standard “test piece” for new Salt Lake hikers and the most-summited Wasatch peak by per-capita measure.

    Lone Peak is one of the most technically demanding Wasatch peaks accessible from Salt Lake. The standard hike to the summit involves a long approach through the granite cirque, with class 3-4 scrambling on the upper mountain. The cirque itself contains some of the best granite climbing in the Wasatch and is a popular technical climbing destination. The hike to the summit is widely considered one of the hardest day hikes in Utah.

    Twin Peaks (also called Broads Fork Twin Peaks) is one of the most dramatic-looking peaks visible from Salt Lake City. The standard route via Broads Fork involves a long approach hike with class 3 scrambling on the upper section. The summit views encompass the entire Salt Lake Valley to the west and the Cottonwood Canyons high country to the east.

    Utah mountain peaks in the Wasatch and Uinta ranges showing the alpine terrain dramatic ridgelines and high country that defines Utah's climbing landscape from Mount Timpanogos to Kings Peak
    From Mount Timpanogos in the Wasatch to Kings Peak in the Uintas, Utah’s peaks span dramatic alpine terrain accessible within driving distance of Salt Lake City and Provo.

    The Uinta Mountains Utah’s high country

    The Uinta Mountains are one of the most unusual major ranges in the contiguous United States — they run east-west rather than north-south, which is unique among major American ranges. The Uintas contain all of Utah’s 13ers (peaks above 13,000 feet), and the High Uintas Wilderness is one of the largest wilderness areas in the lower 48 states. Most Uinta peaks require multi-day backpacking trips due to limited road access into the range.

    1

    Kings Peak

    Henrys Fork trailhead · Utah’s state high point · 28-mile round trip backpack
    13,528 ft
    2

    South Kings Peak

    Adjacent to Kings Peak · Combined climbing day · Class 2
    13,512 ft
    3

    Gilbert Peak

    Western Uintas · Long approach · Class 2 scramble
    13,442 ft
    4

    Mount Emmons

    Central Uintas · Multi-day backpack · Class 2
    13,440 ft
    5

    Mount Lovenia

    Central Uintas · Remote · Class 2-3
    13,219 ft

    The Uintas have 17-19 named peaks above 13,000 feet depending on how subsidiary summits are counted. Climbing all of them is a multi-year project for serious Utah climbers — the remote access and limited windows of good weather make Uinta peak bagging a significantly different undertaking than Wasatch hiking. The full Kings Peak detail is in our existing Utah content.

    The Uintas character

    The High Uintas have a feel unlike anywhere else in Utah — broad alpine basins, hundreds of lakes, vast tundra plateaus, and peaks rising from already-high terrain. The trade-off is that the range is genuinely remote. You will not see another person for days in many parts of the High Uintas Wilderness, but you also cannot rely on rescue capability anywhere comparable to the Wasatch or Colorado 14ers.

    Southern Utah ranges desert mountain country

    The southern half of Utah contains several smaller but visually dramatic mountain ranges that contrast sharply with the surrounding red rock desert. These are the most photogenic mountains in Utah and produce some of the most striking landscapes anywhere in the American West.

    1

    Mount Peale

    La Sal Mountains, near Moab · Class 2 · High alpine terrain over red rock desert
    12,726 ft
    2

    Mount Mellenthin

    La Sal Mountains · Adjacent to Mount Peale · Combined climbing day · Class 2
    12,646 ft
    3

    Mount Tukuhnikivatz

    La Sal Mountains · Iconic Moab skyline peak · Class 2-3
    12,482 ft
    4

    Mount Ellen

    Henry Mountains · Most remote major peak in the lower 48 · Class 2
    11,522 ft
    5

    Delano Peak

    Tushar Mountains · South-central Utah · Class 1-2
    12,174 ft

    The Henry Mountains deserve special mention — they were the last named mountain range in the lower 48 United States, mapped only in the 1870s. Mount Ellen and the rest of the Henry Mountains are among the most remote major peaks in the country and offer climbers a meaningfully different experience than the more developed Wasatch and La Sals.

    Utah mountains compared to other Western states

    State Highest peak Named 14ers vs Utah character
    UtahKings Peak 13,528 ft0Diverse — Wasatch + Uintas + desert
    ColoradoMt Elbert 14,440 ft58Higher concentration of major peaks, but less variety
    CaliforniaMt Whitney 14,505 ft12Higher peaks, longer approaches, Sierra Nevada granite
    WyomingGannett Peak 13,810 ft0Wind River Range, more remote
    New MexicoWheeler Peak 13,167 ft0Sangre de Cristo southern terminus
    ArizonaHumphreys Peak 12,633 ft0Single major range (San Francisco Peaks)
    NevadaBoundary Peak 13,140 ft0Basin and Range character

    Utah does not have the highest peaks (Colorado, California, Wyoming all have higher summits) and does not have 14ers. But Utah’s combination of accessible Wasatch peaks, remote Uinta high country, and southern Utah desert mountains provides a variety of mountain experience that no other state matches. The full broader Western state context is in our best mountains in the USA guide.

    When to climb Utah mountains seasonal framework

    Season Wasatch peaks Uinta peaks Southern Utah ranges
    March-AprilSnow on high terrainClosed (deep snow)Approaching season
    MaySnow lingers above 9,000 ftStill closedExcellent (cool desert)
    JuneSnow patches retreatingSnow still extensiveHot in lower elevations
    JulyPrime seasonStandard season opensHot but accessible
    AugustPrime seasonPrime seasonBest for high La Sals/Henrys
    SeptemberExcellent — fewer crowdsExcellent — best windowExcellent
    OctoberFirst snow possibleSnow returnsCooler, excellent
    Nov-FebWinter mountaineeringClosedWinter desert climbing

    The single biggest seasonal factor in Utah is the Uintas — they have a meaningfully shorter climbing season than the Wasatch or southern ranges because of the higher base elevation and east-west orientation that holds snow longer. Late July through mid-September is the reliable window for Uinta high peaks. The Wasatch can be climbed earlier and later, and southern Utah peaks are often best in spring and fall when high-country routes are too snowy. The full Wasatch winter context is in our existing Kings Peak content.

    Who Utah mountains are good for honest fit assessment

    Utah is excellent for you if…

    • You live in or visit Salt Lake City, Provo, or the Wasatch Front and want frequent mountain access
    • You enjoy mountain variety — alpine, high country, desert peaks all within driving distance
    • You appreciate less crowded peaks than Colorado 14ers or California Sierras
    • You can backpack for multi-day Uinta objectives
    • You want to combine mountain trips with Utah’s national parks (Zion, Bryce, Arches, Canyonlands)
    • You are interested in winter mountaineering — the Wasatch has world-class backcountry skiing and ski mountaineering

    Utah might not fit if…

    • Your primary goal is 14ers — go to Colorado instead
    • You want technical alpine climbing — California Sierra granite or Cascade volcanoes are better matches
    • You strongly prefer single-day peak access without multi-day trips
    • You want lots of guided commercial expedition options — Utah’s guide service density is lower than Colorado or California

    A Utah mountain progression how climbers typically approach the state

    For climbers building toward Utah peak bagging or just exploring Utah’s mountains seriously, the typical progression looks like this:

    1. Year 1 — Wasatch Front intro: Mount Olympus, Mount Wire, Twin Peaks (the Pfeifferhorn variant). Build comfort with Wasatch-style steep hiking.
    2. Year 1-2 — Mount Timpanogos: the standard Utah peak. Test fitness on a long Wasatch day.
    3. Year 2 — Lone Peak and Mount Nebo: harder Wasatch objectives. Class 3-4 scrambling, longer days, real route-finding.
    4. Year 2-3 — First Uinta backpack: Kings Peak as the introduction to multi-day Uinta climbing. The state high point in 2-3 days.
    5. Year 3+ — Uinta 13er project: systematic Uinta high peaks. Most climbers complete this over 3-5 years of summer backpacking trips.
    6. Year 3+ — Southern Utah peaks: Mount Peale, Mount Mellenthin, Mount Ellen. Combine with national park trips.
    7. Winter mountaineering: Wasatch backcountry skiing and ski mountaineering as a winter complement to summer hiking.
    A note on Utah technical climbing

    Beyond hiking and peak bagging, Utah is one of the best technical climbing destinations in the world. Indian Creek splitter cracks, Zion big walls, Wasatch granite cirques, and the Castle Valley desert towers near Moab represent some of the best rock climbing anywhere. Climbers seriously building toward technical alpinism often spend time in Utah for the rock climbing as well as the peak bagging.

    Getting to Utah mountains practical access

    Destination Driving from Time
    Wasatch Front peaksSalt Lake City15-45 min
    Mount TimpanogosSalt Lake City1 hour
    Mount NeboSalt Lake City1.5 hours
    Uintas (Henrys Fork)Salt Lake City2.5-3 hours
    La Sal MountainsMoab30-45 min
    La Sals from Salt LakeSalt Lake City4 hours
    Henry MountainsSalt Lake City4.5 hours
    Tushar MountainsSalt Lake City3 hours

    Salt Lake City International Airport (SLC) is the standard arrival point for Utah climbing trips, with rental cars and direct access to the Wasatch Front. Many Utah peaks can be climbed as day trips from Salt Lake, though the Uintas and southern ranges typically require longer trips. The Utah Department of Transportation maintains good road access to most major trailheads year-round, though high-elevation roads close in winter.

    ★ Utah Mountains Master Guide

    The full Utah mountain framework

    Detailed peak profiles, route guides, and the complete framework for climbing in Utah.

    Master guide →

    The bottom line on Utah mountains

    Utah has over 200 named peaks above 11,000 feet distributed across seven major mountain ranges, including all 17-19 of the state’s “13ers” in the Uinta Mountains and the iconic Wasatch peaks accessible from Salt Lake City and Provo. Kings Peak at 13,528 feet is the state high point. Mount Timpanogos is the most-climbed peak. Mount Olympus is the most visible from population centers. The state combines Wasatch alpine terrain, Uinta high country, and southern Utah desert peaks in a way no other state matches. While Utah lacks 14ers and the absolute highest peaks belong to Colorado and California, the variety, accessibility, and lower visitor numbers make Utah one of the most rewarding mountain states for climbers who appreciate diverse mountain experience over pure altitude. The full peak-by-peak framework is in our best mountains in Utah master guide.

    Frequently asked questions

    What is the highest mountain in Utah?

    Kings Peak in the Uinta Mountains is the highest mountain in Utah at 13,528 feet (4,123 meters). Kings Peak is the high point of the entire Uinta Mountains range and one of only a handful of US state high points that requires a multi-day backpacking trip rather than a single-day hike. Mount Peale in the La Sal Mountains near Moab at 12,726 feet is the second-highest peak in Utah. The Uinta Mountains contain Utah’s highest peaks while the Wasatch Range contains the most-visited peaks due to proximity to Salt Lake City.

    What are the main mountain ranges in Utah?

    Utah has several major mountain ranges: the Wasatch Range (running north-south through northern Utah, containing peaks like Mount Timpanogos and Mount Nebo and the Salt Lake City area mountains), the Uinta Mountains (running east-west in northeastern Utah, containing Kings Peak), the La Sal Mountains (near Moab in southeast Utah), the Henry Mountains (south-central Utah), the Abajo Mountains (southeastern Utah), the Tushar Mountains (south-central Utah), and several smaller ranges. The Wasatch is the most populated and accessed, while the Uintas contain the highest peaks.

    What is the most famous mountain in Utah?

    Mount Timpanogos in the Wasatch Range at 11,752 feet is widely considered the most famous mountain in Utah, with over 100,000 hikers attempting it annually. The mountain is visible from much of Utah Valley and is the dominant peak in the Provo area. Mount Olympus near Salt Lake City is also extremely well known due to its prominence above the Salt Lake Valley. Kings Peak is famous as the state high point but is less visited due to its remote location. Mount Nebo at 11,933 feet is the highest peak in the Wasatch Range and a popular climbing objective.

    How many mountain peaks are in Utah?

    Utah has thousands of named mountain peaks across its various ranges. Counts depend on the inclusion criteria, but Utah has approximately 18 named peaks above 13,000 feet (all in the Uinta Mountains) and over 200 named peaks above 11,000 feet across the Wasatch, Uintas, and other ranges. The Wasatch Range alone contains over 50 named peaks above 10,000 feet. Mountain peak counts in Utah are dominated by the Uinta Mountains for highest elevation peaks and the Wasatch for total number of significant climbing objectives.

    Are there 14ers in Utah?

    No, Utah does not have any 14ers (peaks above 14,000 feet). The highest peak in Utah, Kings Peak in the Uinta Mountains, is 13,528 feet — just shy of the 14,000-foot threshold. Utah does have 13ers (peaks above 13,000 feet) — all of them located in the Uinta Mountains. The 14er distinction belongs primarily to Colorado (58 peaks), California (12 peaks), and Alaska. Utah’s high peaks are typically classified as 13ers and 12ers, with the Uintas containing all the 13ers and the Wasatch and southern ranges containing most of the 12ers.

    What is the best mountain to climb in Utah?

    The best mountain to climb in Utah depends on your goals. For most hikers, Mount Timpanogos in the Wasatch Range is the best Utah peak — accessible from Salt Lake City and Provo, dramatic terrain, and good views. For peak baggers, Kings Peak as the state high point is the iconic Utah objective. For a quick mountain day near Salt Lake City, Mount Olympus offers steep accessible hiking. For technical climbers, the granite walls of Lone Peak and the Cottonwood Canyons offer significant climbing. Each peak serves different climber profiles.

    When is the best time to climb mountains in Utah?

    The best time to climb most Utah mountains is July through early October. Snow lingers in the high country (Uintas, upper Wasatch) until late June or July in most years. The peak hiking season is July-August with stable weather and mostly dry conditions, though afternoon thunderstorms are common. September often produces the most stable weather and fewer crowds. Lower-elevation peaks in southern Utah (La Sals, Henry Mountains) have longer seasons. Winter mountaineering in Utah is significant, particularly in the Wasatch Range backcountry.

  • The greatest mountains in the Alps: a climber’s ranking of the 10 most iconic alpine peaks

    The Greatest Mountains in the Alps: A Climber’s Ranking of the 10 Most Iconic Alpine Peaks | Global Summit Guide
    Mountain Lists / Alps

    The greatest mountains in the Alps: a climber’s ranking of the 10 most iconic alpine peaks

    4,810 m
    Mont Blanc (highest)
    82
    Alps 4000ers
    8
    Countries
    1,200 km
    Range length
    Part of the Alps climbing series This ranking supports our Alps mountains compared master guide and our Alps classics collection. Master guide →

    The European Alps contain 82 named peaks above 4,000 meters, stretching 1,200 kilometers across eight countries from France through Italy, Switzerland, Austria, Germany, Liechtenstein, Slovenia, and Monaco. Picking the “greatest” Alps mountains is partly subjective — climbing history, cultural significance, technical difficulty, and visual drama all factor in. This ranking covers the 10 most iconic Alps peaks that consistently appear on climbers’ lifetime lists, with honest assessment of why each one matters and where it fits in the alpine progression. For the full Alps comparison framework see our greatest Alps mountains compared master guide and our Alps classics collection.

    How these peaks were ranked honest criteria

    “Greatest” is a contested word in mountaineering. A peak’s greatness depends on which axis you measure:

    • Highest: by pure elevation. Mont Blanc wins (4,810 m).
    • Most photographed: by cultural visibility. The Matterhorn wins by a large margin.
    • Most technically demanding: by standard-route difficulty. The Eiger North Face wins.
    • Most historically significant: by climbing history. Mont Blanc, Matterhorn, and Eiger all have major claims.
    • Most aesthetic: by visual drama. The Matterhorn, the Drus, and certain Bernese peaks dominate.
    • Most accessible: by climber numbers. Mont Blanc and Gran Paradiso are climbed by tens of thousands annually.

    The ranking below uses a composite of these factors — the peaks that consistently appear on serious climbers’ lifetime lists, with explanations of what makes each one matter. The order is approximately by overall cultural and climbing significance rather than strict elevation.

    The crown peaks the absolute icons

    1

    Mont Blanc

    France / Italy · Mont Blanc Massif · First climbed 1786 · Grade PD on Goûter route
    4,810 m

    Mont Blanc is the highest mountain in the Alps and the highest peak in Western Europe. The first ascent in 1786 by Jacques Balmat and Michel Paccard is widely considered the founding moment of modern mountaineering as a sport. The mountain straddles the France-Italy border and is the most-climbed major peak in the Alps with approximately 30,000+ attempts each year on the standard Goûter route.

    The standard Goûter route is technically rated PD (Peu Difficile) — moderate by alpine standards but physically demanding due to the distance, altitude, and exposure on the famous Goûter Couloir stonefall zone. The full route detail is in our Mont Blanc Gouter route expedition breakdown, with the alternative Three Monts route framework in our Gouter vs Three Monts comparison. Mont Blanc is also the standard “first major Alps 4000er” for nearly every climber building toward harder objectives — the broader progression is in our Mont Blanc vs Matterhorn comparison.

    2

    The Matterhorn

    Switzerland / Italy · Pennine Alps · First climbed 1865 · Grade AD on Hörnli Ridge
    4,478 m

    The Matterhorn is the most photographed mountain in the world and one of the most recognizable natural features anywhere on Earth. The pyramidal four-ridge shape rising 1,500 meters above the Zermatt valley produces an iconic profile that has defined “mountain” in popular imagination for over 150 years. The first ascent by Edward Whymper’s party in 1865 ended in tragedy when four of the seven climbers fell to their deaths on the descent.

    The standard Hörnli Ridge is graded AD (Assez Difficile) with sustained class 3-4 climbing on loose rock for over 1,200 meters of vertical. The route is significantly harder than Mont Blanc and demands real prior alpine experience. The full Matterhorn framework is in our Matterhorn training plan and our Matterhorn route comparison. The Matterhorn-vs-Mont-Blanc decision is one of the most-asked questions in alpine climbing — the framework for both peaks is in our Mont Blanc vs Matterhorn master guide.

    The iconic peaks historic and dramatic

    3

    The Eiger

    Switzerland · Bernese Alps · North Face first climbed 1938 · Grade ED2 (North Face)
    3,967 m

    The Eiger is famous less for its elevation (relatively modest at 3,967 m) and more for its terrifying north face — a 1,800-meter concave wall of rock and ice visible from Grindelwald village below. The north face was the great unclimbed problem of European alpinism in the 1930s, finally completed in 1938 by Heinrich Harrer’s German-Austrian team after multiple fatal attempts. The “Murder Wall” nickname earned during that era persists in mountaineering culture.

    The standard west flank route is class 2 walking and is climbed by many tourists. The North Face is in an entirely different category — graded ED2 with sustained mixed climbing, significant rockfall hazard, and severe psychological exposure. The Mittellegi Ridge offers a middle option (AD+) with technical ridge climbing. The Eiger’s combination of accessibility (the famous Eiger Nordwand is visible from a train) and difficulty (the north face is one of the hardest standard objectives in the Alps) makes it culturally unique.

    4

    Monte Rosa (Dufourspitze)

    Switzerland / Italy · Pennine Alps · First climbed 1855 · Grade PD on Normal Route
    4,634 m

    Monte Rosa is the second-highest peak in the Alps and the highest in Switzerland. The massif is technically a complex of multiple 4,000-meter summits, with the Dufourspitze at 4,634 m being the highest. The mountain straddles the Italy-Switzerland border south of Zermatt, with the impressive 2,400-meter East Face visible from the Italian side being one of the largest unbroken walls in the Alps.

    The standard route from Switzerland is graded PD and comparable in difficulty to Mont Blanc, making Monte Rosa the natural alternative for climbers who want a major 4,000-meter Alps objective without Mont Blanc’s crowding. The Monte Rosa hut (Capanna Regina Margherita at 4,554 m) is the highest mountain hut in Europe and a unique base for the climb. Monte Rosa is often combined with Mont Blanc in a “two crown peaks” Alps climbing project across multiple seasons.

    5

    Jungfrau

    Switzerland · Bernese Alps · First climbed 1811 · Grade PD on Standard Route
    4,158 m

    The Jungfrau (German for “young maiden”) completes the iconic Bernese Oberland trio with the Eiger and Mönch, all three visible together from Interlaken. The Jungfrau was first climbed in 1811 — surprisingly early — by Johann Rudolf and Hieronymus Meyer. The mountain is most famous today as the destination of the Jungfraujoch railway, which delivers tourists to a saddle below the summit at 3,463 m, making this one of the most-visited high alpine areas in the world.

    The standard climbing route is graded PD via the Rottal hut, climbing the south flank with moderate glacier travel and a final snow ridge to the summit. The mountain pairs well with the Mönch (also accessible from the Jungfraujoch) for climbers seeking multiple Bernese Alps summits in a single trip.

    The classic peaks technical alpine objectives

    6

    The Weisshorn

    Switzerland · Pennine Alps · First climbed 1861 · Grade AD+ on East Ridge
    4,506 m

    The Weisshorn is harder than the Matterhorn, less famous, and consistently rated by experienced alpinists as one of the most aesthetic 4,000-meter peaks in the Alps. The mountain’s three steep ridges and pyramidal summit profile rival the Matterhorn visually, but its less-developed access and harder climbing routes keep climber numbers low. The standard East Ridge is graded AD+ with sustained technical climbing on rock and ice at altitude.

    The Weisshorn sits in the Mattertal valley north of Zermatt, with the standard approach from Randa village. The Weisshorn hut at 2,932 m serves as base camp. The full Weisshorn framework is in our Weisshorn climbing guide. Climbers who have completed the Matterhorn often choose the Weisshorn as the natural next step in their Alps progression.

    7

    The Schreckhorn

    Switzerland · Bernese Alps · First climbed 1861 · Grade AD on Standard Route
    4,078 m

    The Schreckhorn (German for “Peak of Terror”) is the highest peak entirely within the Bernese Alps and one of the most committing standard objectives in the range. The mountain sits in remote glaciated terrain north of the Aar valley, with multi-day approach hikes through some of the most isolated alpine terrain in Switzerland. The standard route from the Schreckhorn hut is graded AD with sustained ridge climbing and significant exposure.

    The Schreckhorn pairs naturally with the Eiger in climbing imagination — both Bernese giants with serious technical character. The full mountain detail is in our Schreckhorn climbing guide. The peak appears less frequently on Alps lists than its difficulty would suggest, primarily because the remote approach excludes casual climbers.

    8

    Piz Badile

    Switzerland / Italy · Bregaglia Alps · First climbed 1867 · Grade D on North Edge
    3,308 m

    Piz Badile breaks the elevation rule of “greatest Alps mountains” at only 3,308 m, but earns its place through technical character. The northeast face is one of the most famous granite walls in the Alps, climbed by some of the greatest alpinists in history including Riccardo Cassin’s 1937 first ascent of the Cassin route. The mountain sits on the Switzerland-Italy border in the Bregaglia Alps east of Lake Como.

    Piz Badile represents a different tradition of Alps climbing — pure granite rock climbing rather than the snow-and-glacier dominated climbing of the high 4,000ers. The full route framework is in our Piz Badile climbing guide. The peak appears on serious climbers’ lifetime lists for the quality of its climbing rather than its altitude.

    Alpine entry peaks where climbers begin

    9

    Gran Paradiso

    Italy · Graian Alps · First climbed 1860 · Grade F+ on Normal Route
    4,061 m

    Gran Paradiso is the highest peak entirely within Italy and the easiest 4,000-meter peak in the Alps to climb. The standard route is graded F+ (Facile, the easiest of the alpine grades) with moderate glacier travel and a short snow ridge to the summit. Most fit hikers with basic crampon and rope-team skills can succeed on Gran Paradiso, making it the default “first 4000er” for climbers building toward harder Alps objectives.

    The mountain sits in Gran Paradiso National Park, Italy’s oldest national park, with the standard approach from Pont in the Valsavarenche valley. The climb typically takes 2 days with a night at the Vittorio Emanuele hut at 2,732 m. Gran Paradiso is the standard “test piece” before climbers attempt Mont Blanc — if you can complete Gran Paradiso comfortably, you have the foundation for the larger Alps objectives.

    10

    Breithorn

    Switzerland / Italy · Pennine Alps · First climbed 1813 · Grade F on Normal Route
    4,164 m

    The Breithorn is the easiest 4,000-meter peak in the Alps accessible by cable car. The Klein Matterhorn cable car from Zermatt delivers climbers to 3,883 m on the Italian side, leaving only 280 meters of vertical gain to the summit over relatively gentle glacier terrain. The total climbing time from the cable car top station to the summit is typically 2-3 hours.

    The Breithorn earns its place on greatest-Alps lists not for difficulty but for accessibility — it is the introductory 4,000-meter peak for thousands of climbers each year. The route teaches basic glacier travel, crampon technique, and rope team work in a low-consequence environment. The Breithorn is often the first 4,000-meter peak climbers complete before progressing to Gran Paradiso, Mont Blanc, and the harder Alps objectives.

    All 10 peaks at a glance

    Peak Elevation Country Grade Character
    Mont Blanc4,810 mFrance/ItalyPDThe crown peak, highest in Alps
    The Matterhorn4,478 mSwitzerland/ItalyADMost iconic, technical commitment
    The Eiger3,967 mSwitzerlandED2 (NF)The “Murder Wall” north face
    Monte Rosa4,634 mSwitzerland/ItalyPDSecond-highest, less crowded
    Jungfrau4,158 mSwitzerlandPDBernese Oberland icon
    The Weisshorn4,506 mSwitzerlandAD+Harder than Matterhorn, less famous
    The Schreckhorn4,078 mSwitzerlandADRemote Bernese committing climb
    Piz Badile3,308 mSwitzerland/ItalyDIconic granite rock climbing
    Gran Paradiso4,061 mItalyF+Easiest 4000er, intro peak
    The Breithorn4,164 mSwitzerland/ItalyFEasiest cable-car 4000er
    What makes a great Alps peak

    The pattern across these 10 peaks is that “greatness” requires a combination of factors: meaningful difficulty (most are at least PD), distinct visual character (the Matterhorn pyramid, the Eiger concave face, Mont Blanc’s massive dome), and a place in mountaineering history. Pure elevation alone does not make a peak great — there are 82 4,000ers in the Alps and most do not appear on lists like this. The peaks above earn their place through cultural and climbing significance, not just height.

    The natural climbing progression how climbers actually approach these peaks

    For climbers wanting to systematically work through the great Alps peaks, the typical progression spans 5-10 years and looks something like this:

    1. Year 1 — Entry 4000ers: Breithorn (F) and Gran Paradiso (F+). Build basic glacier travel and crampon skills on low-consequence terrain.
    2. Year 2 — First major 4000er: Mont Blanc via the Goûter route (PD). Step up to a multi-day expedition style climb with serious altitude.
    3. Year 3 — Build the 4000er portfolio: Monte Rosa, Jungfrau, Mönch. Multiple PD objectives building strength and route variety.
    4. Year 4 — Technical graduation peak: The Matterhorn via the Hörnli Ridge (AD). The classic Alps technical objective.
    5. Year 5 — Harder technical peaks: The Weisshorn (AD+), the Schreckhorn (AD), and the harder Mont Blanc routes.
    6. Beyond: The Eiger North Face (ED2), Piz Badile granite climbing, the Cassin Ridge variants, the technical north faces.

    This progression follows the natural skill-and-fitness curve from beginner alpine climber to experienced alpinist. Climbers who skip the progression and attempt harder peaks first often turn around or have less-safe experiences. The full Alps progression context is in our Alps classics collection.

    When to climb the Alps seasonal patterns

    Season Months Best for
    Spring ski mountaineeringMarch-MaySki ascents of Gran Paradiso, Mont Blanc, Monte Rosa
    Early summerJuneSnow still firm, fewer crowds. Some routes still under snow.
    High summerJuly-AugustStandard climbing season, most routes open, busy
    Late summerLate August – early SeptemberOften the best window — stable weather, fewer crowds
    AutumnSeptember-OctoberFirst snow returns. Some routes close.
    WinterNovember-FebruaryMajor peaks become serious winter alpinism objectives

    The peak climbing season for non-technical Alps 4000ers is July-August, with late August often producing the best conditions and slightly fewer crowds. Technical objectives like the Eiger North Face and Piz Badile north face have narrower windows — typically June-September for north faces, longer for south-facing routes. Winter alpinism on the major Alps peaks is a serious specialty that requires entirely different skills and equipment than summer climbing.

    The Alps vs other mountain ranges honest comparison

    Range Highest peak vs Alps
    HimalayaEverest 8,849 m4,000m higher, vastly harder access, multi-week expeditions
    KarakoramK2 8,611 mHigher and more remote, technical climbing throughout
    AndesAconcagua 6,961 mHigher but mostly non-technical, longer expeditions
    Rocky MountainsMount Elbert 4,401 mSimilar elevation but less technical, more accessible
    CaucasusMt Elbrus 5,642 mHigher highest peak but fewer technical objectives
    PyreneesAneto 3,404 mLower, less technical, less crowded
    DolomitesMarmolada 3,343 mTechnically a southern Alps subset, famous for via ferrata

    The Alps occupy a unique position in world mountaineering. Lower than the Himalaya but technically more demanding than the Rockies. More accessible than the Caucasus or Andes but with more concentrated 4,000-meter peaks than any other range outside Asia. The Alps are where modern mountaineering was invented in the 18th and 19th centuries, and they remain the benchmark for “alpine style” climbing worldwide. Climbers who progress through the major Alps peaks build the foundation for nearly any other mountaineering objective in the world.

    Why the Alps still matter

    You can climb higher peaks in the Himalaya, harder peaks in Patagonia, and more remote peaks in Alaska. But you cannot find anywhere else with the concentration of historically significant routes, well-developed mountain infrastructure, and continuous climbing tradition that the Alps offer. Every climber who builds skills toward bigger objectives benefits from time in the Alps — the techniques developed here transfer everywhere.

    Visiting and climbing the Alps practical access

    The Alps are the most accessible major mountain range in the world for international climbers. Practical considerations:

    • International access: major airports in Geneva (Swiss/French Alps), Zurich (eastern Switzerland), Milan (Italian Alps), Munich (Austrian/German Alps), Innsbruck (Austria), and Lyon (French Alps).
    • Mountain town bases: Chamonix (Mont Blanc, French Alps), Zermatt (Matterhorn, Pennine Alps), Grindelwald and Wengen (Eiger, Bernese Alps), Cortina d’Ampezzo (Dolomites), Courmayeur (Italian side Mont Blanc).
    • Mountain huts: the Alps have approximately 1,300 mountain huts (refuges, rifugios, Hütten) providing accommodation and food at high elevations. Most are operated by national alpine clubs. Reservations required during peak season.
    • Cable cars and lifts: the Alps’ uniquely developed lift infrastructure (Aiguille du Midi, Klein Matterhorn, Jungfraujoch) allows climbers to gain altitude quickly without long approach hikes.
    • Guides: certified IFMGA mountain guides operate throughout the Alps. Hiring a guide for technical objectives is standard practice and is often required by hut policies for harder routes.
    • Languages: English is widely spoken in mountain towns. French (western Alps), German (central/eastern Alps), and Italian (southern Alps) are the primary local languages.
    ★ Alps Master Resources

    The complete Alps comparison framework

    Detailed comparisons of Mont Blanc, the Matterhorn, the Eiger, and all the iconic Alps peaks.

    Master comparison →

    The bottom line on the greatest Alps mountains

    The European Alps contain 82 named peaks above 4,000 meters, but the 10 mountains that consistently appear on climbers’ lifetime lists are Mont Blanc (the highest), the Matterhorn (the most iconic), the Eiger (the most technically famous), Monte Rosa (the second-highest), the Jungfrau (the Bernese icon), the Weisshorn (the climber’s favorite), the Schreckhorn (the committing classic), Piz Badile (the granite icon), Gran Paradiso (the easiest 4000er), and the Breithorn (the cable-car peak). These 10 peaks span the full range of Alpine climbing from beginner-accessible F-grade glaciers to ED-grade north faces, providing a complete progression for climbers building toward serious mountaineering. The Alps are unique among the world’s mountain ranges for their combination of concentrated 4,000-meter peaks, exceptional accessibility, deep climbing history, and developed mountain infrastructure. The full peak-by-peak detail is in our greatest Alps mountains master guide, with the broader collection in our Alps classics collection.

    Frequently asked questions

    What is the highest mountain in the Alps?

    Mont Blanc is the highest mountain in the Alps at 4,810 meters (15,781 feet), located on the border between France and Italy in the western Alps. The mountain is the highest peak in Western Europe and the highest in the entire European Union. Despite being the tallest, Mont Blanc is not the hardest Alps mountain to climb – the standard Goûter route is technically rated PD (Peu Difficile), making it accessible to fit climbers with basic glacier travel skills. Monte Rosa at 4,634 meters is the second-highest peak in the Alps, also straddling the Italy-Switzerland border.

    How many 4000m peaks are in the Alps?

    The Alps contain 82 officially recognized peaks above 4,000 meters by the UIAA (International Climbing and Mountaineering Federation) standard, though counts vary slightly based on prominence criteria. The 82-peak list is the most widely accepted reference for the Alps 4000ers collection. Some climbers pursue the goal of climbing all 82 as a major Alps achievement, similar to the Colorado 14ers project in the United States. Most of the 4000ers are concentrated in three main groups: the Mont Blanc Massif on the French-Italian border, the Bernese Alps in Switzerland, and the Pennine Alps along the Swiss-Italian border.

    What are the most famous mountains in the Alps?

    The most famous mountains in the Alps are typically considered to be Mont Blanc (4,810 m, the highest), the Matterhorn (4,478 m, the most photographed), the Eiger (3,967 m, the most psychologically demanding), Jungfrau (4,158 m, part of the iconic Bernese Oberland), Monte Rosa (4,634 m, the second-highest), and the Dolomites (technically a subset of the southern Alps in Italy). These peaks define the cultural and climbing identity of the European Alps and are the most-photographed, most-climbed, and most-written-about peaks in the range.

    What is the most dangerous mountain in the Alps?

    The Eiger North Face is the most psychologically demanding mountain in the Alps and has a long history of fatal attempts since the 1930s. The face has killed approximately 70 climbers across its history. By raw total death count, Mont Blanc has killed the most climbers (6,000+ over two centuries) due to its enormous annual traffic, though its per-climber fatality rate is very low. The Matterhorn has killed approximately 500 climbers historically. K2 in Pakistan is dramatically more dangerous than any Alps peak by per-climber fatality rate, but is not in the Alps.

    Which Alps mountain is hardest to climb?

    The hardest Alps mountains to climb on standard routes are the Eiger North Face (grade ED2, sustained technical mixed climbing), the Matterhorn (grade AD on the standard Hörnli Ridge with sustained class 3-4), and the Weisshorn (grade AD+, technical ridge climbing at altitude). Beyond standard routes, the technical alpine routes on Mont Blanc, Aiguille du Dru, and the Grandes Jorasses represent some of the hardest mountaineering in the world. The “hardest” designation depends on whether you measure standard-route difficulty, technical alpine grade, or psychological commitment.

    What is the difference between the Alps and the Swiss Alps?

    The Alps are the entire mountain range stretching approximately 1,200 kilometers across eight European countries: France, Italy, Switzerland, Austria, Germany, Liechtenstein, Slovenia, and Monaco. The Swiss Alps are the portion of this range within Switzerland, including iconic peaks like the Matterhorn, Eiger, Jungfrau, Monte Rosa, and the Weisshorn. The Swiss Alps cover roughly 60% of Switzerland’s total area and contain a large concentration of the Alps’ most famous peaks. Other major sections include the French Alps (Mont Blanc area, Vanoise, Ecrins), the Italian Alps (Dolomites, parts of Mont Blanc Massif), and the Austrian Alps (Hohe Tauern range).

    How do the Alps compare to other mountain ranges?

    The Alps are significantly lower than the Himalaya and Karakoram (Mont Blanc at 4,810 m vs Everest at 8,849 m) but more developed for climbing access with extensive cable cars, mountain huts, and rescue infrastructure. The Alps are roughly comparable in elevation to the Rocky Mountains of North America, though the technical alpine character is different. The Alps have more concentrated 4000m peaks (82 total) than any other range outside Asia, making them the densest collection of major peaks accessible to climbers worldwide. The cultural depth of mountaineering history in the Alps is also unmatched – the sport effectively began here.

  • Everest South Col vs North Ridge: which route should you climb?

    Everest South Col vs North Ridge: Which Route Should You Climb? | Global Summit Guide
    Mountain Routes / Himalaya

    Everest South Col vs North Ridge: which route should you climb?

    8,849 m
    Everest summit
    Nepal
    South Col side
    Tibet
    North Ridge side
    ~$50K
    North side savings
    Part of the Everest route series This direct comparison supports our Everest route master comparison and our broader Everest route framework. Master comparison →

    Mount Everest has two standard commercial routes: the South Col from Nepal (the original first-ascent route used by Hillary and Tenzing in 1953) and the North Ridge from Tibet (first climbed by a Chinese expedition in 1960). The two routes converge near the summit but follow fundamentally different paths up the mountain — different base camps, different objective hazards, different infrastructure, and meaningfully different costs. This guide breaks down the head-to-head comparison: difficulty, success rates, costs, weather, and how to choose between them. For broader route context see our Everest South Col vs North Ridge master page and our Everest route comparison framework.

    The head-to-head at a glance

    South Col (Nepal)

    The Classic Route
    CountryNepal
    First ascent1953 (Hillary/Tenzing)
    Base camp5,364 m
    Approach12-day trek
    Crux hazardsKhumbu Icefall
    Camp 4 elevation7,920 m (South Col)
    Summit day routeSouth Col → SE Ridge
    Commercial cost$45K – $100K+
    Annual climbers~400-600
    Helicopter rescueExcellent (to ~7,000m)

    North Ridge (Tibet)

    The Alternative Route
    CountryChina (Tibet)
    First ascent1960 (Chinese expedition)
    Base camp5,150 m
    ApproachVehicle access
    Crux hazardsFirst/Second/Third Steps
    Camp 4 elevation8,300 m (high camp)
    Summit day routeNE Ridge via the Steps
    Commercial cost$35K – $60K
    Annual climbers~100-200
    Helicopter rescueLimited (Chinese restrictions)
    The 30-second answer

    South Col for infrastructure. North Ridge for cost savings and fewer crowds.

    The South Col is the dominant commercial route with more operators, better rescue infrastructure, and the famous Khumbu Icefall as both its primary hazard and its iconic image. The North Ridge offers meaningful cost savings (10-30% cheaper), vehicle access to base camp instead of a 12-day trek, fewer crowds at the high camps, but more technical climbing on the upper mountain and limited rescue capability. Most modern climbers choose the South Col.

    Why Everest has two routes a brief history

    For the first three decades of Everest attempts (1921-1953), Tibet was the only access. The early British expeditions including the famous 1924 attempt with George Mallory and Andrew Irvine all approached from the north via Tibet because Nepal was closed to foreign visitors. When Nepal opened in 1949 and Tibet was closed by China in 1950, the South Col route became the only practical option. The 1953 first ascent by Edmund Hillary and Tenzing Norgay used the South Col approach, establishing it as the standard route.

    The North Ridge was finally climbed in 1960 by a Chinese expedition (the ascent was disputed for decades but is now widely accepted) and re-opened to international climbing in the 1980s. Modern commercial Everest expeditions began offering both routes in the 1990s, with the South Col remaining dominant due to better-developed infrastructure in Nepal and easier permit access. The full historical context is in our Everest route comparison framework.

    The South Col route day by day character

    The South Col route is the iconic Everest experience. The journey starts with a flight to Lukla in Nepal, followed by a 10-12 day trek through Sherpa villages including Namche Bazaar, Tengboche Monastery, and Dingboche, reaching Everest Base Camp at 5,364 m. The trek itself is a meaningful acclimatization process and one of the most famous trekking routes in the world.

    Section Elevation Character
    Base Camp5,364 mTent city on the Khumbu Glacier
    Khumbu Icefall5,400-5,900 m~3-7 hour passage through serac field
    Camp 16,065 mAbove the icefall in the Western Cwm
    Western Cwm6,000-6,400 m“Valley of Silence” — flat glacial valley
    Camp 2 (Advanced BC)6,400 mMain acclimatization and staging camp
    Lhotse Face6,800-7,500 mSteep ice face with fixed ropes
    Camp 37,200 mMid-face camp on the Lhotse Face
    Yellow Band7,500-7,800 mLimestone band traverse
    Camp 4 (South Col)7,920 mHigh camp before summit push
    The Balcony8,400 mResting platform on summit day
    South Summit8,749 mFalse summit before the true peak
    Hillary Step~8,790 mFamous rock step (changed after 2015 earthquake)
    Summit8,849 mThe highest point on Earth

    The signature features of the South Col route are the Khumbu Icefall (the single most dangerous section), the Western Cwm with its dramatic Lhotse Face headwall, and the long summit ridge from the South Col through the Balcony, South Summit, and Hillary Step to the top. The total elapsed time from arriving at Base Camp to the summit is typically 6-8 weeks including multiple acclimatization rotations.

    What climbers remember about the South Col

    The Khumbu Icefall is the defining feature climbers describe — moving through it in pre-dawn darkness with seracs the size of houses above you and the glacier creaking under your feet. Most climbers traverse the icefall 6-8 times during a single expedition, each crossing a calculated bet that the ice will hold for the time it takes to pass through.

    The North Ridge route day by day character

    The North Ridge approach is dramatically different from the South Col. Climbers fly to Lhasa or Kathmandu (sometimes combining both), then drive across the Tibetan plateau to Base Camp at 5,150 m. There is no trek — vehicles drive directly to base camp. The acclimatization happens through several days at base camp and rotations up to Advanced Base Camp at 6,400 m.

    Section Elevation Character
    Base Camp5,150 mDrive-in tent camp on Rongbuk Glacier
    Interim Camp5,800 mAcclimatization stop
    Advanced Base Camp6,400 mMain staging camp
    North Col Wall6,400-7,020 mSteep glaciated face with fixed ropes
    Camp 1 (North Col)7,020 mSaddle between Everest and Changtse
    Camp 27,500 mOn the North Ridge proper
    Camp 37,900 mHigh camp before summit push
    Camp 4 (high camp)8,300 mFinal high camp for summit attempt
    First Step~8,564 mRock step on summit ridge
    Second Step~8,610 mThe famous step — ladder installed 1975
    Third Step~8,710 mFinal rock obstacle before summit pyramid
    Summit8,849 mThe highest point on Earth

    The signature features of the North Ridge route are the long summit-day traverse from the high camp through the three Steps, the more exposed terrain on the upper mountain, and the historically significant Mallory route that early British expeditions attempted. The Second Step has been equipped with a fixed Chinese ladder since 1975 — without this, the step would be a class 5.7+ rock climb at 8,610 m.

    The key differences side by side

    Dimension South Col (Nepal) North Ridge (Tibet)
    Approach10-12 day trek through KhumbuVehicle drive across Tibetan plateau
    Base camp altitude5,364 m5,150 m
    Number of high camps4 (BC, C1, C2, C3, C4)4 (BC, ABC, C1, C2, C3)
    Highest camp before summitSouth Col (7,920 m)High camp (8,300 m)
    Summit day elevation gain~930 m (7,920 → 8,849)~550 m (8,300 → 8,849)
    Primary objective hazardKhumbu Icefall serac fallCold + technical steps
    Technical climbing difficultyLimited (icefall + Lhotse Face)More sustained (Steps + ridge)
    Cold exposureModerate (Nepal weather)Severe (Tibetan plateau)
    Wind exposureModerateSevere (jet stream interaction)
    Commercial operators~30-40 active~10-15 active
    Crowding on summit dayOften very crowdedLess crowded
    Rescue infrastructureHelicopter to ~7,000 mLimited helicopter access
    Permit complexityStandard Nepal processComplex Chinese permits
    Political riskStablePeriodic closures by China
    Famous deaths / disasters1996, 2014, 2015 disasters1924 Mallory/Irvine, 1996 north side
    The single biggest structural difference

    The South Col concentrates objective hazards in the lower mountain (Khumbu Icefall) and shifts to relatively safer terrain higher up. The North Ridge has fewer objective hazards in the lower mountain but more sustained technical climbing and severe cold on the upper mountain. This produces different decision-making patterns: South Col deaths often happen during summit-day exhaustion on the descent, while North Ridge deaths often happen on the upper mountain Steps when climbers cannot complete the long summit-day traverse.

    Cost comparison honest numbers

    Cost category South Col (Nepal) North Ridge (Tibet)
    Climbing permit$11,000 (Nepal royalty)$8,000-12,000 (China)
    Operator fee (budget)$35,000-45,000$30,000-40,000
    Operator fee (mid-range)$50,000-70,000$40,000-50,000
    Operator fee (luxury)$80,000-130,000+$55,000-80,000
    Sherpa climber (1:1 ratio)$10,000-15,000 extraIncluded or $5,000-10,000
    Oxygen (bottles)Included in operator feeIncluded in operator fee
    Helicopter access (start)$2,000-5,000 (optional)N/A (drive-in)
    Gear (if needed)$8,000-15,000$8,000-15,000
    International flights$1,500-3,500$1,500-3,500
    Total typical cost$45,000-100,000+$35,000-60,000

    The North Ridge is meaningfully cheaper than the South Col, typically by 10-30%. The price difference reflects three main factors: lower commercial competition on the North side (fewer operators bidding against each other), simpler base camp logistics with vehicle access, and historically lower-cost Sherpa support on the Chinese side. The full Everest cost framework is in our cost to climb Everest guide.

    Success rates honest data

    Modern Everest success rates on both routes have improved dramatically from the historical baseline due to better forecasting, more reliable oxygen systems, and Sherpa-supported fixed-rope infrastructure. Current commercial expedition success rates:

    • South Col guided commercial expeditions: approximately 55-70% summit success rate in good weather seasons, 30-50% in difficult seasons. The 2019 traffic jam season produced notably lower rates due to summit-day crowding.
    • North Ridge guided commercial expeditions: approximately 50-65% summit success rate in good weather seasons. The lower numbers reflect harsher weather windows and the longer summit-day traverse rather than fundamentally lower commercial standards.
    • Both routes — bad weather seasons: can drop to 20-30% success when weather windows are limited or operators turn back groups for safety.

    The single biggest determinant of summit success on either route is the weather window, not the route choice. Climbers who arrive during a season with a multi-day stable window have dramatically higher success rates than climbers in a season with tight or broken windows. Operator quality (Sherpa team experience, fixed-rope reliability, decision-making) is the second biggest factor.

    Safety comparison empirical fatalities

    Both routes have killed many climbers

    Mount Everest has approximately 340 total deaths across all routes since 1921. The deaths are distributed across both standard routes roughly proportionally to climber numbers — both routes are extremely dangerous. The per-climber fatality rate on the modern commercial routes is approximately 1 percent, meaning roughly 1 in 100 climbers who attempts the summit dies on the mountain. The empirical death-rate framework is in our most dangerous mountains analysis.

    Where climbers die differs meaningfully between the routes:

    South Col primary fatality patterns

    • Khumbu Icefall: serac collapse and avalanche. The 2014 Khumbu Icefall avalanche killed 16 Sherpas in a single event.
    • Death Zone exhaustion: climbers running out of energy or oxygen on the long descent from the South Summit.
    • Summit-day storms: the 1996 disaster (8 deaths) involved climbers caught in an afternoon storm on the upper mountain.
    • Avalanche on the upper mountain: the 2015 earthquake-triggered avalanche killed 22 at Base Camp.

    North Ridge primary fatality patterns

    • Cold exposure: Tibetan plateau winds and severe cold cause frostbite and hypothermia at higher rates than the South side.
    • Long summit-day traverse: climbers running out of time or energy on the extended ridge traverse.
    • The Steps: exhaustion-related falls on the technical sections at extreme altitude.
    • Historical context: the 1924 Mallory/Irvine deaths, the 1996 disaster also affected the north side, and various smaller-scale incidents throughout history.

    Who should choose which route honest assessment

    Choose South Col if…

    The classic experience

    — You want the iconic Hillary/Tenzing route

    — You value the Khumbu trek as part of the experience

    — You want the broadest operator selection

    — You want maximum rescue infrastructure

    — You prefer better-developed commercial support

    — Budget is less of a constraint

    Choose North Ridge if…

    The cost-conscious alternative

    — Budget is a meaningful constraint

    — You want fewer crowds on summit day

    — You want vehicle access (no trek)

    — You have stronger technical climbing skills

    — You value the historical Mallory route

    — You accept limited rescue infrastructure

    Beyond the two standard routes briefly

    Everest has many additional routes beyond the two commercial standards, almost all of which are technical alpine objectives climbed by elite teams rather than commercial expeditions:

    • West Ridge — first climbed 1963 by an American expedition. Significantly harder than either standard route.
    • Northeast Ridge (Mallory route variant) — the route Mallory and Irvine attempted in 1924, completed later by various parties.
    • South Pillar — Polish-style technical route on the south face.
    • North Face direct lines — multiple variants climbed by Japanese, Swiss, and other expeditions.
    • Kangshung Face (East Face) — the most remote face, technically demanding and rarely attempted.

    For commercial climbers, the South Col and North Ridge remain the only practical options. Everything else is in the realm of elite alpine mountaineering. The broader context is in our Everest route comparison framework.

    Seasonal patterns when to climb

    Season Months South Col North Ridge
    Spring (primary)April-MayStandard seasonStandard season
    Pre-monsoonLate MayMost summit days happen hereMost summit days happen here
    MonsoonJune-SeptemberNot climbedNot climbed
    Autumn (secondary)September-OctoberRare attemptsRare attempts
    WinterDecember-FebruaryExtreme – rarely attemptedExtreme – rarely attempted

    Both routes use the same primary climbing season — spring/pre-monsoon (April-late May). The peak summit window is typically May 15 to May 30. Both sides receive jet stream interference outside this window, making summit attempts impossible. Some operators offer autumn (post-monsoon) attempts but success rates are much lower due to colder conditions and shorter windows.

    ★ Everest Master Resources

    The complete Everest climbing framework

    Route comparisons, costs, seasonal patterns, and the broader Everest expedition framework.

    Master comparison →

    The bottom line on South Col vs North Ridge

    The South Col from Nepal and the North Ridge from Tibet are the two standard commercial routes on Mount Everest, both of which converge near the summit but take fundamentally different paths up the mountain. The South Col is the dominant commercial route with better infrastructure, more operators, the iconic Khumbu Icefall, and the famous Hillary/Tenzing first-ascent legacy — but costs typically run $45,000-100,000+. The North Ridge offers meaningful cost savings (10-30% cheaper at $35,000-60,000), vehicle access to base camp, fewer crowds, and the historical Mallory route — but accepts more technical upper-mountain climbing, harsher cold, and limited rescue infrastructure. Success rates are similar between the two routes (55-70% on good seasons), and the per-climber fatality rate is approximately 1% on both. Most modern climbers choose the South Col for its commercial infrastructure; climbers with budget constraints or who value smaller crowds increasingly choose the North Ridge. The full framework is in our Everest South Col vs North Ridge master comparison, with broader route context in our Everest route framework.

    Frequently asked questions

    What is the difference between the South Col and North Ridge routes on Everest?

    The South Col route ascends Mount Everest from Nepal via the Khumbu Icefall, Western Cwm, Lhotse Face, and the South Col before the final summit ridge. The North Ridge route ascends from Tibet (China) via the East Rongbuk Glacier, the North Col, and the North Face before the summit ridge. The two routes converge near the summit but take fundamentally different paths up the mountain. The South Col is the original first-ascent route used by Hillary and Tenzing in 1953 and is the more commercially developed route. The North Ridge was first climbed in 1960 by a Chinese expedition and has historically seen lower climber numbers.

    Which Everest route is easier?

    The South Col route is generally considered slightly easier and is the more popular commercial route, primarily because of better-developed infrastructure, more guide services, and more rescue capability. However, both routes are extremely difficult and dangerous. The North Ridge has fewer objective hazards in the lower mountain (no Khumbu Icefall) but is longer, colder, and has more exposed terrain on the upper mountain including the famous First, Second, and Third Steps. Most modern Everest climbers choose the South Col for its more developed commercial support.

    What is the North Col on Everest?

    The North Col is a saddle at approximately 7,020 meters (23,031 feet) between Mount Everest and Changtse, a satellite peak on the Tibetan side. The North Col serves as the location for Camp 1 on the North Ridge route and is reached by climbing the steep North Col Wall from Advanced Base Camp at 6,400 m. The North Col was the gateway for early 20th century British Everest expeditions including the 1924 expedition with Mallory and Irvine. The col itself is heavily glaciated and requires fixed-rope ascent for most climbers.

    What is the Khumbu Icefall?

    The Khumbu Icefall is a section of the Khumbu Glacier between Base Camp at 5,364 meters and Camp 1 at 6,065 meters on the South Col route. The icefall is a chaotic field of seracs, crevasses, and ice towers that shifts daily as the glacier moves downhill. The Khumbu Icefall is the most dangerous section of the standard Everest route, having killed climbers including 16 Sherpas in the 2014 avalanche disaster. Ladders and fixed ropes are installed each season by Icefall Doctors to make passage possible, but the route remains hazardous throughout each climbing season.

    Which Everest route has a higher success rate?

    Both routes have similar overall success rates in the modern commercial era, typically 50 to 70 percent on a given season for guided climbers in good weather windows. The South Col has slightly higher success rates due to better infrastructure and more reliable weather windows. The North Ridge has lower numbers of attempts but proportionally similar success rates. Success rates are heavily influenced by weather, operator quality, individual climber fitness, and acclimatization rather than the route itself.

    Which Everest route is cheaper?

    The North Ridge route from Tibet is generally cheaper than the South Col route from Nepal by approximately 10 to 30 percent. Costs for the North Ridge typically range from 35,000 to 60,000 USD compared to 45,000 to 100,000+ USD for the South Col. The price difference primarily reflects lower commercial competition on the North side (fewer operators competing), simpler logistics with vehicle access to base camp rather than helicopter or trek, and historically lower permit costs from China. However, China has periodically restricted access to the North side which can disrupt expeditions.

    Which Everest route is more dangerous?

    Both routes are extremely dangerous. The South Col route concentrates most fatalities in the Khumbu Icefall (avalanche and serac collapse risk) and the Death Zone above the South Col on summit day. The North Ridge concentrates fatalities on the upper mountain steps, the long summit-day traverse, and exposure to severe cold on the more weather-exposed north face. The historical death rate is approximately 1 percent per climber on both routes in the modern era. Total deaths are higher on the South Col simply because more climbers attempt it, not because the per-climber risk is higher.

  • Microspikes vs crampons: when to use each on snow, ice, and mixed terrain

    Microspikes vs Crampons: When to Use Each on Snow, Ice, and Mixed Terrain | Global Summit Guide
    Gear Guides / Snow Travel

    Microspikes vs crampons: when to use each on snow, ice, and mixed terrain

    ~10 mm
    Microspike length
    ~30 mm
    Crampon length
    25°
    Slope threshold
    $60+ vs $200+
    Price difference
    Part of the snow travel gear series This decision framework supports our snow travel gear master guide and our crampons buyers guide. Master guide →

    Microspikes and crampons are the two snow-traction tools most winter hikers and mountaineers eventually own, but they solve different problems and using the wrong one can be dangerous. Microspikes give you surface traction on packed icy trails. Crampons give you secure penetration into steep hard snow and ice. The line between when one works and when you need the other comes down to slope angle, consequence of a fall, and surface hardness. This guide gives you the practical decision framework — when each works, when each fails, and how to choose between them. For the full snow-travel gear context see our snow travel gear master guide.

    The head-to-head at a glance

    Microspikes

    Surface traction tool
    Point length~10 mm
    Weight (pair)~12 oz / 350 g
    AttachmentElastic stretch
    Boot typeAny hiking boot
    Best terrainPacked icy trails
    Slope limit~20-25°
    Glacier capable?No
    Typical cost$60-80
    Setup time~30 seconds

    Crampons

    Mountaineering traction tool
    Point length25-38 mm
    Weight (pair)~32 oz / 900 g
    AttachmentBinding to boot
    Boot typeMountaineering boot
    Best terrainSteep snow, ice, glaciers
    Slope limitUnlimited
    Glacier capable?Yes
    Typical cost$150-350
    Setup time2-5 minutes
    The 30-second answer

    Microspikes for trails. Crampons for mountaineering.

    If the terrain is a hiking trail with ice or packed snow and the slope angle is moderate, microspikes are the right tool. If the terrain is steep snow, glacier, or true ice — or if a fall would have serious consequences — crampons are required. The line between them is roughly 25 degrees slope angle and the consequence of a fall.

    What each tool actually does the mechanics

    How microspikes work

    Microspikes consist of small metal points (typically 3/8 inch, or about 10mm) arranged in a chain pattern beneath your foot, held in place by an elastic harness that stretches over the boot. The points are short enough to feel comfortable while walking but long enough to bite into packed snow and ice on most trail conditions. Microspikes are designed for surface traction — they prevent slipping on icy or snow-packed terrain by adding mechanical grip, similar in concept to studded tires on a car.

    The dominant brand is Kahtoola MICROspikes, which essentially defined the category in 2008. Hillsound, Yaktrax, and STABILicers also produce comparable products at various price and quality tiers. Quality matters: cheap traction devices often have poor elastic that breaks, shorter points that don’t bite, or chain patterns that bunch under the foot.

    How crampons work

    Crampons are a fundamentally different category of equipment. They consist of 10-14 steel points (typically 1 to 1.5 inches long, or 25-38mm) mounted on a rigid or semi-rigid frame that binds firmly to a mountaineering boot. The longer points penetrate hard snow and ice rather than just providing surface friction. The binding system locks the crampon to the boot so the foot and crampon move as a single unit — essential for steep terrain where a loose crampon could be catastrophic.

    Modern crampons fall into three categories:

    • Aluminum crampons — lighter weight, designed for general mountaineering on snow. Examples: Black Diamond Neve, Petzl Leopard.
    • Steel general mountaineering crampons — versatile workhorses for most alpine objectives. Examples: Petzl Vasak, Grivel G12.
    • Technical steel crampons — for ice climbing and serious alpine routes. Examples: Petzl Dart, Black Diamond Cyborg.

    The full crampons framework is in our crampons buyers guide.

    The fundamental difference

    Microspikes prevent you from slipping on flat or moderate-angle ice. Crampons let you climb steep snow and ice without falling. Both deal with snow and ice, but they solve completely different problems.

    When to use microspikes the right scenarios

    Microspikes are the correct tool when you need surface traction on icy or snow-packed terrain without the depth-of-bite that crampons provide:

    Packed icy trails in winter

    Established hiking trails with consolidated snow and ice underfoot. Most winter day hikes fit this category — Colorado Front Range trails, New England winter peaks, the Pacific Northwest forest trails after a freeze-thaw cycle.

    Microspikes

    Trail running on snow and ice

    Microspikes work with trail running shoes for winter running. The lower weight and quick on/off make them practical for moving fast on mixed conditions.

    Microspikes

    Approach to climbing objectives

    The lower portions of mountaineering approaches where the terrain is moderate-angle packed snow. Many climbers wear microspikes from the trailhead to the start of technical terrain, then switch to crampons.

    Microspikes

    Daily winter walking in icy conditions

    Sidewalks, parking lots, and urban environments after freezing rain. Many people keep microspikes by the front door for everyday winter use when ice is a problem.

    Microspikes

    Shoulder-season alpine trails

    Spring and fall hikes when lingering snow and ice patches make terrain slippery but not steep enough to require crampons. Often paired with trekking poles for additional stability.

    Microspikes

    When to use crampons the required scenarios

    Crampons are required when the terrain demands actual ice penetration rather than just surface grip, or when a fall would have serious consequences:

    !

    Steep snow above ~25 degrees

    The threshold is approximate but consistent — snow slopes steeper than about 25 degrees require crampons for secure footing. Microspikes will slip on this angle, especially on hard snow conditions.

    Crampons
    !

    Glacier travel

    Any travel on glaciated terrain requires crampons. The combination of variable snow conditions, hidden crevasses, and the need for secure foot placement makes glacier travel a non-negotiable crampon requirement. The framework is in our glacier travel basics guide.

    Crampons
    !

    Ice climbing

    True water ice climbing requires technical crampons with vertical front points designed to penetrate ice. This is well outside microspike territory.

    Crampons
    !

    Hard snow with high fall consequence

    Any terrain where a slip would result in a serious fall — even if the slope angle is moderate. Cascade volcano descents, exposed ridges, terrain above cliffs. The rule is: if you would not want to fall here, do not rely on microspikes.

    Crampons
    !

    14ers in spring and early summer snow conditions

    Many Colorado 14ers in May-June still have snow on the upper sections that requires crampons. Climbers attempting these peaks before the snow melts need real mountaineering equipment, not just microspikes. The full 14er context is in our Colorado 14ers guide.

    Crampons

    The grey zone when neither is perfect

    Real conditions often fall between clean microspike and clean crampon scenarios. Honest assessment of the grey zone:

    ?

    Deep soft snow (no ice)

    Powder snow does not need traction devices — it needs flotation. The right tool is snowshoes, not microspikes or crampons. Microspikes do nothing in deep snow except make your feet heavier. Crampons can actually be hazardous in deep snow because they ball up with snow.

    Snowshoes
    ?

    Mixed conditions on a single hike

    Many spring and fall hikes have stretches of bare trail, then patches of ice, then steeper snow, then back to bare trail. Carrying both microspikes and trail boots (or microspikes plus crampons for serious objectives) is sometimes the practical answer. Many experienced winter hikers carry both.

    Carry both
    ?

    Hard ice on moderate slope

    Ice patches at 15-25 degrees can be challenging. Microspikes are technically capable but feel insecure. Crampons feel overkill but bite better. The honest answer depends on consequence: if a fall is just an inconvenience, microspikes work. If a fall could be serious, use crampons.

    Conditions-dependent

    Cost comparison honest numbers

    Item Microspikes price range Crampons price range
    Entry-level / budget$30-50 (Yaktrax, basic chains)$150-200 (aluminum)
    Standard / quality$60-80 (Kahtoola MICROspikes)$200-260 (Petzl Vasak, Grivel G12)
    Premium / technical$80-120 (Hillsound Trail Pro)$260-350 (Petzl Dart, BD Cyborg)
    Required compatible bootAny hiking boot ($100+)Mountaineering boot ($350-600+)
    System total cost$160-200 (microspikes + boots)$500-1,000 (crampons + boots)

    The cost difference is substantial. A complete microspikes-and-hiking-boots system runs $160-200. A complete crampons-and-mountaineering-boots system runs $500-1,000+. For most casual winter hikers, the microspikes route is the right starting point — you can always upgrade to crampons later if your objectives evolve toward true mountaineering. The full mountaineering boots context is in our crampons buyers guide.

    Common mistakes that cause injuries

    The mistake that produces most rescues

    Hikers attempting steep snow objectives with microspikes instead of crampons. This combination produces a consistent pattern of mid-hike rescues: the trail steepens, the microspikes slip, the hiker tries to descend without proper equipment, and a fall becomes serious. If you are heading into terrain where steep snow is possible, bring crampons even if you think you might not need them. The weight penalty is small; the consequence of not having them is large.

    The other common mistakes:

    • Microspikes on trail runners or thin shoes: the elastic harness can slip off, especially on technical terrain. Use microspikes with at least a sturdy hiking shoe.
    • Crampons on inappropriate boots: crampons require rigid or semi-rigid boots to bind properly. Strapping crampons to soft hiking boots is unsafe — the binding cannot remain secure under load.
    • Not removing crampons on rock: walking on rock or mixed terrain with crampons is hazardous. The points slip on rock and create awkward foot positions. Remove crampons for any extended rock travel.
    • Wearing microspikes in deep snow: they don’t help and they make your feet heavier. Use snowshoes instead.
    • Skipping practice: crampons require practice to use safely. The first time using crampons should not be on a serious objective. Most mountaineering courses spend time on crampon technique before sending students up real terrain.

    What experienced climbers actually carry practical kit

    For climbers building toward serious mountaineering, the typical gear progression looks like this:

    1. Year 1 — Winter hiker: Microspikes + trekking poles + winter hiking boots. Total system cost ~$250-350. Handles 80% of winter trail hiking scenarios.
    2. Year 2 — Aspiring mountaineer: Add aluminum crampons + mountaineering boots + ice axe. Total system cost ~$700-1,000. Handles non-technical glacier travel and easier 14ers.
    3. Year 3+ — Active mountaineer: Steel general mountaineering crampons + harder boots + ice axe tools. Total system cost varies but typically $1,200-1,800. Handles most general mountaineering.
    4. Technical climber: Multiple crampon pairs for different applications. Aluminum for general use, steel for harder objectives, technical crampons for ice. Total kit easily exceeds $2,000.

    The honest progression is that microspikes never go away even after you own crampons. Experienced mountaineers keep microspikes for trail approaches, daily winter walking, and shoulder-season conditions where crampons would be overkill. The two systems are complementary, not alternatives.

    Seasonal decision framework when to bring what

    Season / conditions Likely tool Backup option
    October-November (early snow)MicrospikesTrekking poles
    December-February (winter trails)MicrospikesSnowshoes if deep snow
    December-February (peak climbing)CramponsMicrospikes for approach
    March-April (variable)Both — conditions-dependentCheck trip reports
    May-June (lingering snow on peaks)CramponsMicrospikes for trail
    July-August (summer alpine)Crampons for high routesNone for low elevation
    September (early winter)Microspikes for shoulder seasonCrampons if snow has started

    The general rule for any specific trip: check recent trip reports for current conditions on your target. Microspikes-vs-crampons decisions are usually obvious once you know what other hikers found that week. Sites like AllTrails, the Mountaineers in Washington, the Colorado Mountain Club, and local backcountry conditions reports give specific gear recommendations for current conditions.

    Quality brands to consider honest assessment

    Microspikes

    • Kahtoola MICROspikes ($65-75) — the industry standard. Most experienced winter hikers own these. Excellent build quality, predictable performance.
    • Hillsound Trail Crampon ($65-80) — comparable to Kahtoola with slightly different chain pattern. Strong durability reports.
    • Hillsound Trail Crampon Pro ($90-100) — longer points for harder snow conditions, sometimes called “between microspikes and crampons.”
    • STABILicers ($50-65) — budget-friendly option, less aggressive bite but solid for casual use.

    Aluminum crampons (intro mountaineering)

    • Black Diamond Neve ($160-180) — lightweight aluminum for general mountaineering on snow.
    • Petzl Leopard FL ($180-200) — popular lightweight option with flexible binding.

    Steel general mountaineering crampons

    • Petzl Vasak ($200-220) — versatile workhorse, the most common general mountaineering crampon.
    • Grivel G12 ($220-260) — comparable to Vasak with slightly different geometry.
    • Black Diamond Sabretooth ($220-250) — solid alternative with good binding system.

    The full buyers framework is in our mountaineering crampons buyers guide.

    ★ Snow Travel Master Guide

    The complete snow travel gear framework

    Microspikes, crampons, trekking poles, gaiters, and the broader snow travel gear system — everything you need for winter hiking and mountaineering.

    Master guide →

    The bottom line on microspikes vs crampons

    Microspikes and crampons solve different problems and using the wrong tool can be dangerous. Microspikes provide surface traction on packed icy trails at moderate angles — perfect for winter day hiking, trail running, urban ice, and mountaineering approaches. Crampons provide secure penetration into steep snow and ice — required for slopes above approximately 25 degrees, glacier travel, ice climbing, and any terrain where a fall would have serious consequences. The honest framework: microspikes for trails, crampons for mountaineering, and accept that real conditions sometimes fall in the grey zone where the right answer is “bring both” or “check conditions first.” Most winter hikers should start with quality microspikes (Kahtoola or Hillsound, $60-80) and upgrade to crampons only when their objectives evolve toward true mountaineering. The full snow travel framework is in our snow travel gear guide, with the crampons-specific deep dive in our crampons buyers guide.

    Frequently asked questions

    What is the difference between microspikes and crampons?

    Microspikes are lightweight traction devices with small metal spikes (typically 3/8 inch or about 10mm) on a chain pattern that stretches over hiking boots or trail running shoes. They are designed for icy or snow-packed trails at moderate angles. Crampons are heavier mountaineering equipment with longer steel points (typically 1 to 1.5 inches or 25 to 38mm) attached to a rigid or semi-rigid frame that binds firmly to mountaineering boots. Crampons are designed for steep snow, glacier travel, and ice climbing. The fundamental distinction is depth of bite into the surface: microspikes provide surface traction, while crampons provide secure penetration into hard snow and ice.

    When should you use microspikes instead of crampons?

    Use microspikes on packed snow trails, icy paths, and moderate-angle terrain (typically below 20 degrees slope) where surface traction is needed but ice penetration is not. Microspikes work well for winter day hiking on established trails, walking on icy sidewalks or parking lots, light backcountry travel on consolidated snow, and approaches to climbing objectives where the technical terrain has not yet started. They are not appropriate for steep snow slopes above approximately 25 degrees, glacier travel with crevasse risk, or any terrain where a fall would be consequential.

    When are crampons required instead of microspikes?

    Crampons are required when the terrain involves steep snow slopes above approximately 25 to 30 degrees, hard ice that microspikes cannot penetrate, glacier travel where crevasse fall risk requires secure footing, ice climbing or mixed alpine routes, and any technical mountaineering terrain. The general rule is that if a fall would result in serious injury or death, crampons (not microspikes) are the appropriate gear. Crampons also become necessary on the descents of many summer peaks when snow conditions are firmly frozen in early morning hours.

    Can microspikes be used for mountaineering?

    Microspikes can be used on the approach portions of mountaineering objectives where the terrain is moderate-angle packed snow or icy trail, but they are not appropriate for the technical sections of mountaineering routes. Mountaineering generally involves steep snow, glaciers, or technical ice and mixed terrain — all conditions that require true crampons. Many mountaineers carry microspikes for the lower-elevation trail approach and switch to crampons at the start of technical terrain. Using microspikes alone on technical mountaineering routes is dangerous and not recommended.

    How much do microspikes and crampons cost?

    Microspikes cost approximately 60 to 80 USD for quality brands like Kahtoola MICROspikes, the industry standard. Crampons cost dramatically more: aluminum crampons for general mountaineering cost 150 to 250 USD, while technical steel crampons for ice climbing and serious alpine objectives cost 200 to 350 USD. Crampons also require compatible mountaineering boots with rigid or semi-rigid soles to bind properly, while microspikes work with virtually any hiking footwear. The total cost difference between the two systems can be significant when boots are factored in.

    What about snowshoes and trekking poles?

    Snowshoes serve a different purpose than microspikes or crampons. Snowshoes provide flotation on deep soft snow, preventing the hiker from postholing knee-deep into powder. They are used when snow depth is the problem, not surface ice or traction. Trekking poles provide stability and reduce knee impact on descents, and they pair well with microspikes for winter trail hiking. The ideal winter kit varies by conditions: snowshoes for deep snow, microspikes for packed icy trails, crampons for steep or technical terrain. Many winter hikers carry multiple options because conditions change throughout a single trip.

    Are microspikes good for ice?

    Microspikes work well on flat or moderate-angle ice such as frozen sidewalks, icy parking lots, and packed icy trails. They provide secure footing on most ice conditions a hiker encounters in everyday winter conditions. However, microspikes are not adequate for steep ice (anything above approximately 25 degrees), pure water ice climbing, or technical mountaineering ice. For these conditions, crampons are required. The practical test is the slope angle and consequence of a fall: gentle ice with low fall consequence is fine for microspikes; steep ice or high-consequence terrain requires crampons.

  • Mount Wilhelm in Papua New Guinea

    Mount Wilhelm in Papua New Guinea: The Complete Climbing Guide to Oceania’s Highest Mainland Peak | Global Summit Guide
    Mountain Climbing Guides / Oceania

    Mount Wilhelm in Papua New Guinea: the complete climbing guide to Oceania’s highest mainland peak

    4,509 m
    Summit elevation
    3-4 days
    Standard climb
    $3K-7K
    Total trip cost
    Apr-Sep
    Best season
    Part of the Oceania peaks series This climbing guide supports our Mount Wilhelm master page and our broader Oceania icons collection. Master guide →

    Mount Wilhelm is the highest mountain in Papua New Guinea at 4,509 meters (14,793 feet), the highest mainland peak in Oceania, and one of the more interesting Seven Summits debate peaks. Unlike Carstensz Pyramid in Indonesian-controlled New Guinea or Mount Kosciuszko in Australia, Mount Wilhelm rises from the Bismarck Range in central Papua New Guinea — a region that combines high-altitude alpine terrain with tropical equatorial weather and some of the most remote climbing logistics in the world. This guide covers the standard route, difficulty, day-by-day structure, costs, and how to organize an expedition. For broader context see our Mount Wilhelm master page and our Oceania icons collection.

    Why climb Mount Wilhelm and where it sits

    Mount Wilhelm matters in mountaineering for three distinct reasons. First, it is the high point of Papua New Guinea — a country of over 9 million people where the highest mountain is a significant national feature. Second, it is widely considered the highest mainland peak in Oceania (Carstensz Pyramid is on the Indonesian side of New Guinea island, which is geographically Asia/Oceania depending on the framework). Third, it appears on some alternative Seven Summits lists as the Oceania objective, though the more commonly-accepted lists use either Carstensz Pyramid (Messner list) or Mount Kosciuszko (Bass list).

    The climb itself sits in an unusual category: non-technical but logistically committed. The standard route involves no roped climbing, no glacier travel, no significant exposure. But the trip requires multi-day international travel to Papua New Guinea, in-country travel through the Highlands, coordination with local guides and lodges, and acceptance that the climbing infrastructure is dramatically less developed than peers like Kilimanjaro or Mount Kenya. Climbers who enjoy adventure travel and remote regions consistently rate Mount Wilhelm as one of the most rewarding mid-altitude climbs in the world. Climbers who prefer well-developed mountain infrastructure typically find the logistics frustrating.

    The mountain geography and character

    Mount Wilhelm sits in the Bismarck Range in central Papua New Guinea, on the border between Simbu Province and Madang Province. The summit area features dramatic rock spires, alpine grassland, and several lakes at around 3,600 m that serve as the standard base camp area. The peak itself is named after Otto von Bismarck’s son Wilhelm during the German colonial period in the late 19th century.

    Feature Detail
    Elevation4,509 m (14,793 ft)
    RangeBismarck Range, Central Highlands
    ProvinceSimbu / Madang border
    CountryPapua New Guinea
    Standard routeKeglsugl Village → Base Camp → Summit
    Technical gradeF+ (non-technical with class 2 scrambling)
    First ascent (recorded)1938, Leigh Vial and party
    Local indigenous nameEnduwa Kombuglu (Simbu language)

    The standard route starts in Keglsugl village (also spelled Kegelsugl) at approximately 2,800 m elevation. The route ascends through montane forest, then alpine grassland, then bare rocky terrain to the summit. Base camp typically sits near several glacial lakes at 3,600-3,800 m. The summit push covers roughly 800 m of vertical from base camp on summit day.

    The standard route day by day

    Most Mount Wilhelm expeditions follow a 3-4 day structure once climbers reach Keglsugl village. Some itineraries compress this to 2-3 days for fitter parties; longer versions add acclimatization days for climbers worried about altitude.

    1

    Keglsugl Village to Base Camp

    Distance: ~8 km · Elevation gain: ~800 m · Time: 4-6 hours · Terrain: Forest then alpine grassland

    Hike from Keglsugl (~2,800 m) to base camp at the lakes (~3,600 m). The trail starts in montane forest, transitions through alpine grassland with views of the summit ridge, and ends at the lakes area where most parties establish base camp. Local porters can be hired to carry gear. The trail is well-established but can be very muddy after rain.

    2

    Base Camp Acclimatization Day

    Optional but recommended · Walks to higher elevation · Rest day

    Most expeditions include an acclimatization day at base camp before the summit attempt. Optional activities include hikes to higher elevation viewpoints (4,000+ m), exploration of the lake areas, and rest. Climbers who fly into Papua New Guinea from sea level and travel directly to the mountain typically need this acclimatization day. Faster itineraries skip it but accept higher altitude sickness risk.

    3

    Summit Day — Base Camp to Summit and Return

    Distance: ~7 km round trip · Elevation gain: ~900 m · Time: 8-12 hours · Start: 1-3 AM headlamp

    Alpine start with headlamps between 1 AM and 3 AM. The route ascends through rocky terrain to a saddle below the summit ridge, then traverses across to the summit via class 2 scrambling on rocky terrain. Summit time is typically 5-8 hours from base camp. Most parties aim to summit at sunrise for views, then descend back to base camp by early afternoon to avoid afternoon weather. Bad weather days at high altitude can produce snow, hail, and reduced visibility — flexibility on summit day timing helps.

    4

    Base Camp to Keglsugl Descent

    Distance: ~8 km · Elevation loss: ~800 m · Time: 3-5 hours

    Descent on the same route back to Keglsugl village. Most parties continue to Mount Hagen or other Highlands towns the same afternoon. Some climbers add cultural visits in the Simbu region — the Highlands are home to vibrant traditional cultures and Mount Wilhelm is part of the broader Simbu cultural landscape.

    The pace decision

    The biggest variable in Mount Wilhelm itineraries is whether to include the acclimatization day. Fit climbers from high-altitude regions (Andean countries, US Rocky Mountains, European Alps) often skip it without issues. Sea-level climbers from coastal cities or tropical regions are advised to include it — the rapid elevation gain from sea level to 4,509 m within 3 days is a meaningful altitude stress.

    How difficult is Mount Wilhelm honest assessment

    Mount Wilhelm is consistently rated easier than it should be by online sources that compare it to Kilimanjaro. The honest comparison:

    Dimension Mount Wilhelm Kilimanjaro
    Summit elevation4,509 m5,895 m
    Climbing days3-4 days5-9 days
    Acclimatization profileAggressive (no acclim built in)Built into multi-day route
    Technical difficultyClass 2 scrambling near summitWalking trail throughout
    Route infrastructureBasic trail, local portersDeveloped system with huts
    Weather predictabilityEquatorial, changeableEquatorial, more predictable
    Logistics complexityVery high (remote PNG)Moderate (developed Tanzania)
    Altitude sickness riskModerate-high (fast ascent)Moderate (longer acclimatization)
    Summit success rate~60-75%~60-70%
    Overall difficultyModerate, logistics-heavyModerate, more established

    The key insight is that Mount Wilhelm’s lower elevation (1,386 m lower than Kilimanjaro) is offset by its compressed itinerary. Kilimanjaro climbers spend 5-9 days gradually acclimatizing on the mountain. Mount Wilhelm climbers spend 3-4 days with most of the elevation gained in 24-48 hours. The cumulative altitude stress on summit day can be comparable despite the lower peak.

    The conditioning factor most climbers underestimate

    Mount Wilhelm’s biggest physical demand is the long summit day combined with the equatorial heat-and-cold cycle. You leave base camp at 2 AM in cold conditions, climb in dark cold, summit in cold sunrise, and descend through rapidly warming alpine terrain back to humid montane forest by afternoon. Layering and pacing matter more than raw fitness.

    Costs and budgeting honest numbers

    Cost category Range (USD) Notes
    International flights to PNG$1,500 – $3,500Origin-dependent, often via Australia or Asia
    In-country flights (Port Moresby to Mount Hagen)$200 – $400Air Niugini standard fare
    Ground transport to Keglsugl$150 – $300Vehicle hire from Mount Hagen
    Local guide (per climb)$300 – $800Required, arrange in advance
    Porter fees$100 – $300Optional but commonly used
    Accommodation (Betty’s Lodge / Keglsugl)$50 – $150/nightPre and post climb nights
    Park / village fees$50 – $200Variable by route and current rules
    Food / supplies$100 – $300Self-supplied or arranged
    Mount Hagen hotel (pre/post)$150 – $400Recommended buffer nights
    Total estimated cost$3,000 – $7,000Highly dependent on origin and flight pricing

    Mount Wilhelm is meaningfully more expensive per climbing day than Kilimanjaro because Papua New Guinea has limited tourism infrastructure and most costs are absorbed in international and in-country travel rather than the climb itself. The actual climbing portion (4 days on the mountain with guide and porter) typically costs $500-1,500 — the rest is travel and logistics.

    When to climb seasonal patterns

    Months Conditions Recommendation
    December – MarchWet season, frequent rainAvoid if possible
    April – MayTransitional, drying outOK with weather flexibility
    June – AugustDry season, best conditionsOptimal — most climbers choose this
    September – OctoberLate dry season, still goodGood window, fewer climbers
    NovemberTransitional to wetPossible but increasing rain risk

    Papua New Guinea has a relatively muted wet-dry seasonal pattern because of its equatorial position, but the difference between June-August (drier, clearer, easier travel) and December-February (wet, frequent rain on the mountain) is significant. Most international climbing tour operators schedule Mount Wilhelm trips during June-September. The climb is possible year-round but success rates drop meaningfully during the wet season due to muddy trails, low visibility, and increased risk of weather-related route closures.

    How to organize an expedition practical logistics

    Mount Wilhelm logistics are unusual compared to mainstream mountaineering objectives. There are no large commercial operators offering scheduled departures with international clients. Most climbers organize trips through one of three pathways:

    Option 1: Self-organized with local guide

    The most cost-effective approach. Book flights independently, contact Betty’s Lodge or other Keglsugl-area accommodation to arrange local guides and porters, and manage the full logistics yourself. Total cost: typically $2,500-4,000 plus international flights. Requires comfort with PNG-specific logistics including potential language barriers, currency exchange, and limited internet outside major towns. Best for experienced adventure travelers.

    Option 2: PNG-based tour operator

    Several Papua New Guinea-based operators offer Mount Wilhelm packages including transport from Port Moresby or Mount Hagen, guides, porters, accommodation, and meals. PNG Trekking Adventures and similar operators specialize in this. Total cost: typically $3,500-5,500 plus international flights. Best for climbers who want logistics handled but accept that operators are smaller and less standardized than Kilimanjaro outfits.

    Option 3: International expedition operator

    A handful of international expedition operators offer scheduled Mount Wilhelm trips, typically as part of multi-peak Oceania expeditions or as standalone climbs. These trips are the most expensive ($5,500-9,000+ plus flights) but include international-standard support, English-speaking trip leaders, and pre-trip preparation. Best for climbers who want a fully managed experience. The operators framework for high-altitude expeditions is in our Aconcagua operators guide as a comparison reference.

    The Seven Summits debate where Mount Wilhelm fits

    Mount Wilhelm sits in the middle of one of mountaineering’s most persistent disagreements: which peak counts as the Oceania Seven Summits objective. The three serious contenders:

    Peak Elevation Country Seven Summits list
    Carstensz Pyramid (Puncak Jaya)4,884 mIndonesia (Papua)Messner list (most accepted)
    Mount Kosciuszko2,228 mAustraliaBass list (alternative)
    Mount Wilhelm4,509 mPapua New GuineaAlternative third list

    The dominant view in modern mountaineering is the Messner list with Carstensz Pyramid. This is the harder, more technical climb (involves rock climbing to class 5.5+ on the summit pyramid) and is the version completed by the majority of Seven Summits aspirants. The Bass list using Mount Kosciuszko makes the Seven Summits significantly easier — Kosciuszko is essentially a walk. Mount Wilhelm occupies a middle position: harder than Kosciuszko, easier than Carstensz, more remote than either. Some Seven Summits completionists climb all three peaks to satisfy any version of the list. The framework for the Seven Summits as a whole is in our Seven Summits collection.

    Safety considerations honest assessment

    Mount Wilhelm has a low rate of mountain-related fatalities — the technical climbing is straightforward and the route is well-established. The safety considerations that matter for the trip are not primarily about the climbing itself:

    • Travel safety in Papua New Guinea: PNG has historically had higher crime rates in urban areas like Port Moresby than most international destinations. Most trips minimize urban time and travel directly between airports and rural areas with arranged guides. Following standard travel advice (avoid walking alone, secure accommodation, current advisories) handles most of this risk.
    • Altitude sickness: the compressed itinerary creates real altitude risk. Build acclimatization days if possible. The framework is in our altitude sickness guide.
    • Medical evacuation: rural PNG has limited medical infrastructure. Travel insurance with evacuation coverage is essential. The insurance framework for high-altitude expeditions is in our mountaineering insurance comparison.
    • Weather: equatorial mountain weather changes quickly. Pack for cold, wet, and warm conditions in the same day. A solid shell, base layers, and warm layers are non-negotiable.
    • Communication: cell coverage is limited or absent on the mountain. Plan check-ins with people at home accordingly.

    Who should climb Mount Wilhelm honest fit assessment

    Mount Wilhelm makes sense for you if…

    • You want adventure travel combined with climbing, not just climbing.
    • You have experience with non-technical altitude objectives like Kilimanjaro or trekking peaks.
    • You are interested in Papua New Guinea as a destination beyond the mountain itself.
    • You are pursuing the Seven Summits and want to complete a meaningful Oceania peak.
    • You are comfortable with remote logistics and PNG-specific travel patterns.
    • You can carve out 10-14 days for a focused trip.

    Mount Wilhelm probably doesn’t fit you if…

    • You want the cheapest possible 4,500-meter climb — Kilimanjaro is more cost-effective per meter.
    • You prefer well-developed climbing infrastructure with established operators.
    • You are not interested in PNG specifically and just want a high mountain.
    • You have specific time constraints that don’t allow weather flexibility.
    • You are uncomfortable with travel in less-developed regions.
    ★ Oceania Climbing Resources

    The Oceania peaks framework

    Mount Wilhelm in context with Carstensz Pyramid, Mount Kosciuszko, and the broader Oceania climbing scene.

    Oceania icons collection →

    The bottom line on Mount Wilhelm

    Mount Wilhelm at 4,509 meters is the highest mountain in Papua New Guinea, the highest mainland peak in Oceania, and a meaningful but unconventional Seven Summits debate peak. The climb itself is non-technical class 2 scrambling on a 3-4 day itinerary from Keglsugl village. The challenges are logistical rather than technical — remote PNG travel, compressed altitude profile, equatorial mountain weather, and limited commercial infrastructure compared to mainstream peaks. Total trip cost runs $3,000-7,000 depending on origin and operator choice. Best season is June-September with the dry-season window producing the highest success rates. For climbers interested in remote-region adventure mountaineering, Mount Wilhelm consistently rates as one of the most rewarding mid-altitude climbs in the world. For climbers seeking efficient logistics, Kilimanjaro or Mount Kenya offer easier paths to similar altitude experience. The full Mount Wilhelm framework is in our Mount Wilhelm master page, with broader Oceania context in our Oceania icons collection.

    Frequently asked questions

    How high is Mount Wilhelm?

    Mount Wilhelm is 4,509 meters (14,793 feet) high, making it the highest mountain in Papua New Guinea and the highest mainland peak in Oceania. The mountain sits in the Bismarck Range in central Papua New Guinea, near the border between Simbu and Madang provinces. Although Carstensz Pyramid (Puncak Jaya) in the Indonesian half of New Guinea is higher at 4,884 meters, Mount Wilhelm is the highest point in the country of Papua New Guinea specifically and is climbed as an alternative Oceania Seven Summits objective.

    Is Mount Wilhelm one of the Seven Summits?

    Mount Wilhelm is not the standard Seven Summits peak for Oceania, but appears on some alternative versions of the list. The Messner list uses Carstensz Pyramid (4,884 m) for Oceania. The Bass list uses Mount Kosciuszko (2,228 m) in Australia. Mount Wilhelm is sometimes proposed as a third alternative because it is the highest mainland Oceania peak in an independent country, but it is rarely climbed as the formal Seven Summits objective. Most Seven Summits climbers complete Carstensz Pyramid or Kosciuszko, not Mount Wilhelm.

    How difficult is climbing Mount Wilhelm?

    Mount Wilhelm is technically a non-technical trek but is more challenging than commonly advertised. The standard route from Keglsugl village takes 3 to 4 days and involves moderate hiking with class 2 scrambling near the summit ridge. The primary difficulties are not technical but rather the remote logistics of Papua New Guinea, changeable equatorial mountain weather, the altitude (climbers go from low elevation to 4,509 m within days), and often muddy slippery trail conditions. The climb is comparable in difficulty to Mount Kilimanjaro but in a far more remote setting with significantly less infrastructure.

    How long does it take to climb Mount Wilhelm?

    A standard Mount Wilhelm climb takes 3 to 4 days from the trailhead at Keglsugl village. The typical structure is: Day 1 hike from Keglsugl to Base Camp at approximately 3,600 m. Day 2 acclimatization day at Base Camp with optional walks to nearby lakes. Day 3 alpine start at 1 to 2 AM for the summit push, returning to Base Camp by afternoon. Day 4 descent to Keglsugl. Adding international travel to Papua New Guinea, in-country travel to the Highlands, and buffer days brings the total trip duration to 10 to 14 days for most international climbers.

    How much does it cost to climb Mount Wilhelm?

    Mount Wilhelm climbs cost roughly 1,500 to 3,500 USD for the in-country portion (guide, transport from Mount Hagen, accommodation, permits, food) plus international flights to Papua New Guinea ranging from 1,500 to 3,500 USD depending on origin. Total trip costs range from approximately 3,000 to 7,000 USD for most international climbers. Local guides are required and can be arranged through Papua New Guinea-based operators or the Betty’s Lodge / Kegelsugl tourism office. Costs are significantly higher than Kilimanjaro or Mount Kenya due to remote logistics.

    What is the best time to climb Mount Wilhelm?

    The best time to climb Mount Wilhelm is during the drier season from April to September, with June through August being the most reliable months. Papua New Guinea sits very close to the equator and has high humidity year-round, but the southern hemisphere winter months produce slightly drier and clearer conditions. Even in the dry season, expect afternoon clouds and occasional rain on the mountain. The summit success rate is meaningfully higher during dry-season climbs because trail conditions are less muddy and visibility is better.

    Is Mount Wilhelm dangerous?

    Mount Wilhelm itself is not particularly dangerous as a climbing objective – the technical climbing is straightforward and the route is well-established with local guides. However, the trip involves several non-mountain risks worth understanding: travel safety in Papua New Guinea requires precautions and local guidance, altitude sickness is a real concern given the rapid ascent profile, the remote location means medical evacuation is difficult, and equatorial mountain weather can change quickly. Most climbers complete Mount Wilhelm without major incident, but the trip requires more pre-planning and risk management than comparable peaks in more developed regions.

  • How Many 14ers Are in Colorado? The Complete List with Heights and Difficulty

    How Many 14ers Are in Colorado? The Complete List with Heights and Difficulty | Global Summit Guide
    Mountain Lists / Colorado

    How many 14ers are in Colorado? the complete list with heights and difficulty

    58
    Total 14ers
    14,440 ft
    Mount Elbert (highest)
    14,005 ft
    Sunshine Peak (lowest)
    7
    Mountain ranges
    Part of the Colorado mountains series This complete list supports our Colorado 14ers master guide and our best mountains near Denver guide. Master guide →

    Colorado has more peaks above 14,000 feet than any other state — and the question “how many 14ers does Colorado have” has a slightly complicated answer because it depends on how you count. The widely-used number is 58 named peaks, distributed across seven mountain ranges from the Front Range west of Denver to the San Juan Mountains in the southwest corner of the state. The stricter prominence-based count comes to 53. This guide answers the count question definitively, then provides the complete enumerated list with heights, ranges, and difficulty class for all 58. For the full Colorado 14ers framework see our Colorado 14ers master guide and our best mountains near Denver guide.

    The short answer

    Colorado has 58 named peaks above 14,000 feet

    The most widely-used list (used by the Colorado Mountain Club, 14ers.com, and most climbing communities) recognizes 58 named 14ers. A stricter count using a 300-foot topographic prominence rule produces 53 peaks. The difference comes down to whether you count subsidiary summits with limited prominence above their parent peak. Most Colorado climbers use the 58-peak list.

    Why the count varies 53 vs 58

    The disagreement on how to count Colorado’s 14ers comes from a single technical question: what counts as an independent peak versus a subsidiary summit. The standard test is topographic prominence — how much a peak rises above the lowest pass connecting it to a higher peak. The two main conventions:

    • The 300-foot prominence rule (53 peaks) — only peaks with at least 300 feet of clean prominence above the connecting pass count. This is the stricter, more geographically pure definition.
    • The “commonly recognized” rule (58 peaks) — includes named subsidiary summits that climbers historically treat as separate objectives even when they have less than 300 feet of prominence. This is the convention used by the Colorado Mountain Club, 14ers.com, and most climbing communities.

    The five peaks that appear on the 58-peak list but not the 53-peak list are: North Maroon Peak, Conundrum Peak, Mount Cameron, El Diente Peak, and the Crestone Needle/Crestone Peak distinction. Each is a recognizable summit with its own climbing identity even though prominence purists argue it shouldn’t count as an independent peak.

    The convention most climbers use

    The 58-peak list is the canonical Colorado 14er list. When you read “complete the 58 14ers” or see online climbing logs, you’re seeing this list. The 53-peak count appears occasionally in academic mountaineering contexts but is rare in actual climbing community usage.

    The Colorado 14ers organized by mountain range

    Colorado’s 58 14ers are distributed across seven mountain ranges, with the Sawatch and San Juan ranges containing the largest concentrations:

    Mountain range 14ers Highest peak Character
    Sawatch Range15Mount Elbert (14,440 ft)Most 14ers, mostly class 1-2
    San Juan Mountains13Uncompahgre Peak (14,309 ft)Remote, varied difficulty
    Front Range9Grays Peak (14,278 ft)Closest to Denver
    Sangre de Cristo Range10Blanca Peak (14,351 ft)Long approaches, class 2-4
    Elk Mountains7Castle Peak (14,279 ft)Hardest range, class 3-4
    Mosquito Range3Mount Lincoln (14,293 ft)Short, accessible peaks
    Tenmile Range1Quandary Peak (14,265 ft)Single peak near Breckenridge
    Total58Mount Elbert (14,440 ft)Spread across 7 ranges

    The complete list all 58 Colorado 14ers

    Below is the complete enumerated list of all 58 Colorado 14ers, organized by mountain range. Each peak is listed with elevation and difficulty class (1 = walking trail, 2 = hiking with scrambling, 3 = scrambling with exposure, 4 = exposed scrambling near falls). Asterisks (*) mark the five peaks that appear on the 58-peak list but not the stricter 53-peak prominence list.

    Sawatch Range

    15 peaks · Highest concentration of 14ers
    #Peak NameClassElevation
    1Mount Elbert114,440 ft
    2Mount Massive214,428 ft
    3Mount Harvard214,421 ft
    4La Plata Peak214,343 ft
    5Mount Antero214,276 ft
    6Mount Shavano214,231 ft
    7Mount Belford214,203 ft
    8Mount Princeton214,204 ft
    9Mount Yale214,200 ft
    10Tabeguache Peak214,162 ft
    11Mount Oxford214,160 ft
    12Mount Columbia214,077 ft
    13Missouri Mountain214,074 ft
    14Huron Peak214,012 ft
    15Mount of the Holy Cross214,011 ft

    San Juan Mountains

    13 peaks · Remote and varied difficulty
    #Peak NameClassElevation
    16Uncompahgre Peak214,309 ft
    17Mount Wilson414,246 ft
    18El Diente Peak *314,159 ft
    19Mount Sneffels314,150 ft
    20Mount Eolus314,083 ft
    21Windom Peak214,082 ft
    22Sunlight Peak414,059 ft
    23Handies Peak114,048 ft
    24Redcloud Peak214,034 ft
    25Wilson Peak314,017 ft
    26Wetterhorn Peak314,015 ft
    27San Luis Peak114,014 ft
    28Sunshine Peak214,005 ft

    Sangre de Cristo Range

    10 peaks · Long approaches and dramatic ridges
    #Peak NameClassElevation
    29Blanca Peak214,351 ft
    30Crestone Peak314,300 ft
    31Crestone Needle314,203 ft
    32Kit Carson Peak314,171 ft
    33Challenger Point *214,087 ft
    34Humboldt Peak214,070 ft
    35Culebra Peak214,053 ft
    36Ellingwood Point214,047 ft
    37Mount Lindsey214,047 ft
    38Little Bear Peak414,041 ft

    Front Range

    9 peaks · Closest to Denver, most visited
    #Peak NameClassElevation
    39Grays Peak114,278 ft
    40Torreys Peak214,267 ft
    41Mount Evans / Mount Blue Sky114,265 ft
    42Longs Peak314,259 ft
    43Pikes Peak114,115 ft
    44Mount Bierstadt214,065 ft
    45Mount Cameron *214,238 ft
    46Mount Democrat214,148 ft
    47Mount Bross214,172 ft

    Elk Mountains

    7 peaks · Hardest range, technical class 3-4
    #Peak NameClassElevation
    48Castle Peak214,279 ft
    49Conundrum Peak *214,060 ft
    50Maroon Peak (South Maroon)314,163 ft
    51North Maroon Peak *414,019 ft
    52Capitol Peak414,130 ft
    53Snowmass Mountain314,099 ft
    54Pyramid Peak414,025 ft

    Mosquito Range

    3 peaks · Short, accessible, often combined
    #Peak NameClassElevation
    55Mount Lincoln214,293 ft
    56Mount Sherman114,043 ft
    57Mount Democrat (Mosquito side)214,148 ft

    Tenmile Range

    1 peak · Single peak near Breckenridge
    #Peak NameClassElevation
    58Quandary Peak114,265 ft
    A note on the class system

    The Yosemite Decimal System (YDS) classes used above are approximate and based on the standard route up each peak. Many 14ers have harder alternative routes — Longs Peak’s standard Keyhole Route is class 3, but its various technical routes range up to class 5.10+. Conditions also affect difficulty: a class 2 peak in dry summer can become class 4 with snow and ice. Always check current conditions before any 14er attempt.

    The Colorado 14er extremes highest, lowest, hardest, easiest

    Distinction Peak Why
    Highest peakMount Elbert (14,440 ft)Highest in Colorado and the entire Rocky Mountains
    Lowest peakSunshine Peak (14,005 ft)Just 5 feet above the 14,000 ft threshold
    Easiest peakMount Bierstadt (or Mount Sherman)Short, class 2, accessible trailhead
    Hardest peakCapitol PeakClass 4 Knife Edge ridge with severe exposure
    Closest to DenverMount Bierstadt~75 min drive from downtown Denver
    Furthest from DenverWilson Peak / Mount Wilson~6-7 hr drive in southwest Colorado
    Most climbedMount Bierstadt~20,000+ summits per year
    Least climbedCulebra PeakPrivate land, paid permit access only
    Highest range concentrationSawatch Range (15 peaks)Most 14ers in any single Colorado range

    14ers by difficulty class breakdown

    The 58 Colorado 14ers break down roughly this way by class:

    Class Approximate count Examples Skill level required
    Class 1~10 peaksMount Elbert, Pikes Peak, Mt Sherman, Grays Peak, Handies PeakStrong day hiker
    Class 2~30 peaksMount Massive, Mount Harvard, Quandary Peak, Mount BierstadtConfident scrambler
    Class 3~12 peaksLongs Peak, Crestone Peak, Mount Sneffels, Wilson PeakExperienced scrambler with route-finding
    Class 4~6 peaksCapitol Peak, Pyramid Peak, Little Bear, North Maroon, Sunlight, Mount WilsonConfident on exposed terrain, sometimes roped

    Most climbers attempting the 58 peaks build their progression from class 1 and class 2 peaks (Mount Bierstadt, Mount Sherman, Grays/Torreys, Quandary Peak as common starting points), through the class 3 peaks (Longs Peak is often the technical graduation peak for Front Range climbers), to the class 4 peaks last. Capitol Peak, Pyramid Peak, and the Maroon Bells are typically saved for the end because they require both technical confidence and accumulated experience reading mountain conditions. The full Front Range progression context is in our best mountains near Denver guide.

    How long it takes to climb them all

    Completing all 58 Colorado 14ers is a meaningful climbing achievement that most completers take between 5 and 20 years to finish. The realistic timeline distribution:

    • 3-5 years: aggressive completion timeline for fit hikers who climb most weekends throughout the climbing season and prioritize the 14ers as a focused project.
    • 5-10 years: the most common completion timeline for serious 14er climbers who balance the peaks with other life commitments.
    • 10-20+ years: the casual completer pace, climbing 3-5 peaks per year as opportunity permits.
    • Speed records: 14-20 days continuous for the fastest known times. These are not normal completion timelines.

    The reasons completion takes years rather than months:

    • Short climbing season: most 14ers are accessible only from June through September. Each season offers limited weekend windows.
    • Weather windows: afternoon thunderstorms during the standard summer season require climbers to be off summits by 1 PM, limiting attempts.
    • Drive times: the San Juan 14ers and Elk Mountain 14ers are 5-7 hours from Denver, requiring weekend or longer trips.
    • Skill progression: the class 3 and class 4 peaks require prior experience building from easier peaks.
    • Private access: Culebra Peak requires advance booking and paid access through private land.

    Most successful 14er completers follow a roughly similar progression that builds skill, fitness, and experience over time:

    1. First 14er: Mount Bierstadt or Mount Sherman as the gentle introduction to 14,000-foot terrain.
    2. Build the class 1-2 base: Grays + Torreys (combo day), Mount Elbert, Quandary Peak, Mount Massive, Mount Belford + Oxford.
    3. First class 3: Longs Peak via the Keyhole Route is the classic Front Range graduation peak. Crestone Peak in the Sangre de Cristo Range is the alternative.
    4. Build the class 3 portfolio: Crestone Needle, Mount Sneffels, Wilson Peak, Wetterhorn Peak.
    5. First class 4: Pyramid Peak or Little Bear Peak — both committing but accessible class 4 introductions.
    6. The hardest 14ers: Capitol Peak (the famous Knife Edge), North Maroon Peak, Mount Wilson, Sunlight Peak. Most climbers save these for the end.
    7. Logistical outliers: Culebra Peak (private permit), the far San Juan peaks (long drive), and any remaining isolated objectives.
    The peaks that intimidate completers

    Among 14er completers, the peaks most frequently cited as the “hardest” or “scariest” of the list are Capitol Peak’s Knife Edge, the Little Bear Hourglass, the Maroon Bells loose rock, and Sunlight Peak’s summit move. These class 4 peaks require not just technical skill but psychological commitment on exposed terrain where falls would be fatal.

    Why Colorado has so many 14ers vs other states

    Colorado has 58 14ers — more than any other state. The next closest is Alaska with about 21 peaks above 14,000 feet (mostly in the Alaska Range and Wrangell Mountains). California has 12, Washington has 2 (Mount Rainier and one subsidiary peak), and Wyoming has just Gannett Peak at 13,809 ft (not technically a 14er despite often being grouped with them). The geological reasons Colorado has so many 14ers:

    • The Colorado Rockies are a uniquely uplifted region: the Laramide orogeny that built the Rocky Mountains uplifted Colorado terrain to high average elevations — Colorado has the highest mean elevation of any state (6,800 ft average).
    • Multiple parallel ranges: seven distinct mountain ranges in Colorado each have their own 14ers rather than being concentrated in a single range.
    • Erosion patterns: the Colorado Rockies have eroded enough to create distinct peaks rather than continuous high plateaus, while preserving enough elevation to keep peaks above 14,000 ft.
    • Granite and metamorphic core: the bedrock geology produces durable peaks that resist erosion at high elevations.

    Colorado’s 14ers are also generally lower than Alaska’s or California’s highest peaks — Mount Elbert at 14,440 ft is well below Denali (20,310 ft) or Mount Whitney (14,505 ft) — but Colorado has the largest *number* of peaks in the 14,000-14,500 ft range of any state. The broader US peak context is in our best beginner mountains guide and our intermediate climbing guide.

    Colorado 14ers compared to other peak collections

    Collection Number of peaks Region Comparison to Colorado 14ers
    Colorado 14ers58 peaksColoradoThe standard reference
    California 14ers12 peaksSierra Nevada, White MountainsHigher peaks but fewer total
    SoCal Six Pack of Peaks6 peaksSouthern CaliforniaSub-14,000 ft challenge series
    14 Eight-Thousanders14 peaksHimalaya, KarakoramAsian 8,000+ meter peaks, dramatically harder
    Seven Summits7 peaksHighest peak on each continentGlobal high points, expedition climbs
    50 US State High Points50 peaksUSAIncludes 27 Colorado 14ers + others
    Alaska’s High Peaks~21 peaksAlaska Range, WrangellsHigher elevation, far more remote

    The Colorado 14ers are the most popular peak-bagging series in the United States, with active climbing communities, dedicated route-conditions reporting, and a 100+ year history of completion attempts. The framework for understanding how Colorado 14ers fit into broader peak progression is in our SoCal Six Pack training plan for the regional alternative, and our 14 eight-thousanders complete list for the global high-altitude comparison.

    How to start your Colorado 14er journey

    If you are considering starting the Colorado 14ers, the practical advice from completers:

    • Start with Mount Bierstadt or Mount Sherman. Both are class 1-2, short (7-10 miles round trip), and have accessible trailheads. They establish whether 14er climbing is for you.
    • Train for altitude. Climbing at 14,000 feet is physiologically demanding. Build cardiovascular fitness with regular hiking before attempting 14ers. The acclimatization framework is in our altitude acclimatization guide.
    • Start early. 4-6 AM trailhead departures are standard for 14ers. Summer afternoon thunderstorms make 1 PM the absolute latest time to be on summits.
    • Watch the weather. Mountain-Forecast.com and NOAA point forecasts for specific peaks. Check the day before and morning of.
    • Tell someone your plan. Leave detailed plan with someone who will alert authorities if you don’t check in.
    • Carry the gear. Layers, water, headlamp, first aid, navigation. Even on “easy” 14ers.
    • Build progression patience. Don’t attempt class 3-4 peaks until you have multiple class 1-2 peaks under your belt. The skills transfer but the consequence of error doesn’t.
    The honest safety reality

    Colorado 14ers kill several climbers every year, most commonly from lightning strikes on exposed ridges, falls on steep technical terrain, and hypothermia from unexpected weather. The 14ers feel approachable because so many people climb them — but they are real mountains with real consequences. Respect the weather windows. Turn around when needed. The mountain will be there next weekend.

    ★ Colorado 14ers Master Guide

    The full Colorado 14ers framework

    Detailed peak profiles, route guides, seasonal recommendations, and the complete climbing framework for Colorado’s 58 fourteeners.

    Read the master guide →

    The bottom line on Colorado 14ers

    Colorado has 58 named peaks above 14,000 feet, distributed across seven mountain ranges from the Front Range west of Denver to the San Juan Mountains in the southwest. The list uses the widely-accepted 58-peak convention; a stricter prominence-based count produces 53 peaks. The highest is Mount Elbert at 14,440 feet (also the highest peak in the entire Rocky Mountain range). The lowest is Sunshine Peak at 14,005 feet. Most climbers complete the 58 peaks across 5-20 years, building from class 1-2 Sawatch Range peaks through class 3 Sangre de Cristo objectives to the hardest class 4 peaks in the Elk Mountains. Colorado 14ers are the most popular peak-bagging series in the United States and a standard rite of passage for Colorado-based climbers. The full peak-by-peak framework is in our Colorado 14ers master guide, with the closer Front Range context in our best mountains near Denver guide.

    Frequently asked questions

    How many 14ers are in Colorado?

    Colorado has 58 named peaks above 14,000 feet using the most commonly accepted definition, though counts range from 53 to 58 depending on which prominence criterion is applied. The most widely-used list (used by the Colorado Mountain Club and 14ers.com) recognizes 58 peaks. A stricter prominence-based count produces 53 peaks. The 58 peaks are distributed across the Front Range, Sawatch, Mosquito, Tenmile, Sangre de Cristo, Elk, and San Juan ranges, with the Sawatch Range containing the most 14ers of any single range.

    What is the highest 14er in Colorado?

    Mount Elbert at 14,440 feet (or 14,433 ft depending on the survey used) is the highest peak in Colorado and the highest peak in the entire Rocky Mountains. Located in the Sawatch Range near Leadville, Mount Elbert is widely considered one of the easier major 14ers, with a class 1 standard route accessible to fit hikers. Mount Massive at 14,428 feet is the second-highest peak in Colorado, also in the Sawatch Range. Mount Harvard at 14,421 feet is third. The three highest peaks all sit in the Sawatch Range within roughly 30 miles of each other.

    What is the easiest 14er in Colorado?

    Mount Bierstadt at 14,065 feet is widely considered the easiest 14er in Colorado, with a 7-mile round trip class 2 standard route from Guanella Pass. Other commonly-cited easy 14ers include Mount Sherman (Mosquito Range, class 1-2), Quandary Peak East Ridge (Tenmile Range, class 1), Grays Peak and Torreys Peak (Front Range, class 1-2, often combined), and Mount Elbert (class 1 despite being the highest peak). The “easiest” designation depends on length, elevation gain, technical difficulty, and trailhead accessibility — Bierstadt scores well on most metrics for first-time 14er climbers.

    What is the hardest 14er in Colorado?

    Capitol Peak in the Elk Range at 14,130 feet is widely considered the hardest standard 14er in Colorado due to its committing class 4 climbing on the famous Knife Edge ridge. Other notoriously hard 14ers include Pyramid Peak (class 4, loose rock), Little Bear Peak (class 4, Hourglass section), Crestone Needle (class 3 with exposure), the Maroon Bells North and South Maroon (class 4 with rotten rock), and Sunlight Peak (class 4 summit move). Hardness depends on the metric used — pure technical difficulty, length, objective hazards like rockfall, or psychological exposure all produce different rankings.

    What are the Colorado 14ers by class?

    Colorado 14ers are rated using the Yosemite Decimal System for difficulty class. Class 1 (about 15-20 peaks) are walking trails like Mount Bierstadt and Mount Elbert. Class 2 (about 20 peaks) involve hiking with some scrambling, like Mount Sherman and Grays Peak. Class 3 (about 15 peaks) require non-technical scrambling with hands required for balance, like Longs Peak and Crestone Peak. Class 4 (about 5-10 peaks) involve exposed scrambling where falls would be serious, like Capitol Peak, Pyramid Peak, and Little Bear. The class system is approximate and varies somewhat between sources.

    How long does it take to climb all 58 Colorado 14ers?

    Most climbers who complete all 58 Colorado 14ers take between 5 and 20 years to do so. Aggressive hikers can complete the full list in 3 to 5 years with dedicated weekend trips throughout each climbing season. The fastest known speed records for the 58 peaks span just 14 to 20 days continuously, but those records are physically extraordinary and not the typical timeline. The average completer climbs 5 to 10 peaks per year, building up to harder peaks as fitness and experience accumulate. The class 4 peaks in the Elk Range typically come last because they require the most prior experience.

    What is the difference between 53 and 58 Colorado 14ers?

    The difference between the 53-peak and 58-peak Colorado 14er counts comes down to prominence — how much a peak rises above the lowest pass connecting it to a higher peak. The stricter 300-foot prominence rule produces a count of 53 peaks. The looser convention (used by the Colorado Mountain Club and 14ers.com) recognizes 58 peaks including some lower-prominence summits like North Maroon Peak, Conundrum Peak, Mount Cameron, El Diente, and the Crestone Needle/Crestone Peak distinction. The 58-peak list is more widely cited and is the convention used by most climbing communities.

  • The most dangerous mountains in the world: ranked by fatality rate, death toll, and difficulty

    The Most Dangerous Mountains in the World: Ranked by Fatality Rate, Death Toll, and Difficulty | Global Summit Guide
    Mountain Lists / Safety

    The most dangerous mountains in the world: ranked by fatality rate, death toll, and difficulty

    ~32%
    Annapurna fatality rate
    ~25%
    K2 fatality rate
    ~1%
    Everest fatality rate
    6,000+
    Mont Blanc deaths (total)
    Part of the dangerous mountains series This empirical ranking supports our 10 hardest mountains guide and our death rates by mountain analysis. 10 hardest mountains →

    When climbers ask “what is the most dangerous mountain in the world,” the honest answer depends on how you measure danger. By per-climber fatality rate, Annapurna I in Nepal has killed roughly 1 in 3 climbers who attempted to summit. By absolute death toll, Mont Blanc in the Alps has taken thousands of lives over the past two centuries due to its massive annual climbing volume. By technical difficulty combined with altitude exposure, K2 stands alone. This guide ranks the world’s most dangerous mountains using empirical fatality data — death rates, historical death tolls, and the structural reasons each peak is so lethal. The goal is not morbid spectacle but understanding why these peaks demand the respect climbers give them. For the full hardest-mountains framework see our 10 hardest mountains guide and our death rates by mountain analysis.

    How “dangerous” is actually measured

    The phrase “most dangerous mountain” hides at least four different definitions, and the answer changes depending on which one you use:

    • Per-climber fatality rate — what percentage of climbers attempting the mountain die on it. This is the most precise metric for risk-per-attempt. Annapurna and K2 lead this measure.
    • Total historical death toll — the absolute number of climbers who have died on the mountain since records began. Mont Blanc leads this by a wide margin due to enormous climbing volume.
    • Deaths per successful summit — the ratio of deaths to summits. This corrects for the fact that some mountains attract many attempts but few summits. K2 and Nanga Parbat score highest here.
    • Subjective difficulty — expert mountaineer assessments of technical and objective hazard. This is harder to quantify but produces consistent rankings of K2, Annapurna, and certain technical peaks like Latok I or Gasherbrum IV.
    A note on data sources

    Mountaineering fatality statistics come from the Himalayan Database (the authoritative source for Nepalese peaks), national alpine clubs, and aggregated climbing records. The numbers vary year to year, reflect different counting conventions (do you count Sherpas, helicopter pilots, climbers who died from descent illness?), and are not always perfectly comparable across mountains. The figures in this guide use widely-accepted long-term averages from reputable sources, with the understanding that specific decade-by-decade rates have shifted. The full methodology context is in our death rates by mountain analysis.

    Ranked by fatality rate the per-climber risk metric

    By the most precise risk metric — what percentage of climbers attempting the mountain die on it — these are the world’s most dangerous mountains:

    1

    Annapurna I — the deadliest per attempt

    8,091 m · Nepal · First climbed 1950 · Historical fatality rate ~32%
    ~32%
    Fatality rate

    Annapurna I was the first 8,000-meter peak ever climbed (in 1950 by Maurice Herzog and Louis Lachenal) and has remained the most dangerous of the eight-thousanders by fatality rate ever since. Approximately 1 in 3 climbers who attempts the summit dies on the mountain. The primary danger is avalanche-prone serac fall on the south face routes — massive hanging ice features that collapse unpredictably and produce avalanches that no climbing skill can prevent. The north face routes are less avalanche-exposed but involve sustained technical climbing at extreme altitude with serious objective hazards throughout.

    Why Annapurna is so deadly: the routes themselves carry inherent risk that cannot be fully mitigated by climber skill or judgment. Unlike K2 or Everest where deaths often happen during summit-day decisions, Annapurna deaths happen because climbers were in the wrong place at the wrong moment when a serac collapsed. The full eight-thousander context is in our 14 Eight-Thousanders collection.

    2

    K2 — the Savage Mountain

    8,611 m · Pakistan / China · First climbed 1954 · Historical fatality rate ~25%
    ~25%
    Fatality rate

    K2 is the second-highest mountain on Earth and the second-deadliest by per-climber fatality rate. Approximately 1 in 4 climbers who summits dies on the mountain (counting descent fatalities). The combination of sustained technical climbing on the standard Abruzzi Spur, the deadly Bottleneck serac at 8,200-8,400 m on summit day, variable Karakoram weather, and limited rescue infrastructure makes K2 the apex of high-altitude danger. The 2008 K2 disaster alone killed 11 climbers in a single day. The full route framework is in our K2 climb guide.

    What separates K2 from other dangerous mountains: every section requires expert technical climbing, and the dangers stack across the entire route rather than being concentrated in one hazardous zone. Even strong climbers with multiple prior 8,000-meter ascents face roughly 1-in-4 odds of not coming home.

    3

    Nanga Parbat — the Killer Mountain

    8,126 m · Pakistan · First climbed 1953 · Historical fatality rate ~20%
    ~20%
    Fatality rate

    Nanga Parbat earned its nickname “the Killer Mountain” during early 20th-century German expeditions when over 30 climbers died attempting the peak before the first successful ascent in 1953 by Hermann Buhl (solo from the high camp). The westernmost of the 8,000-meter peaks, Nanga Parbat features long, technical routes with severe objective hazards including avalanche, rockfall, and unpredictable Karakoram weather. The standard Diamir Face route, while less deadly than early Rupal Face attempts, remains one of the most committed of any 8,000-meter normal route. The full route detail is in our Nanga Parbat route comparison.

    4

    Kangchenjunga — the Five Treasures

    8,586 m · Nepal / India · First climbed 1955 · Historical fatality rate ~15%
    ~15%
    Fatality rate

    Kangchenjunga is the third-highest peak on Earth and the third-highest fatality rate among the major eight-thousanders. The mountain’s remoteness, technical complexity on all standard routes, and the long-traditional respect-the-deity custom of stopping just short of the true summit combine to produce a peak that has killed roughly 1 in 7 climbers historically. Most modern guided expeditions complete the summit, but the per-climber risk remains substantially higher than the more commercial peaks like Everest, Cho Oyu, or Manaslu.

    Ranked by absolute death toll total fatalities

    By raw number of climbers who have died over time, the rankings shift dramatically. Mountains with high traffic accumulate more deaths even when per-climber risk is low. This view shows where the “average” climbing fatality actually happens:

    1

    Mont Blanc — the deadliest by raw count

    4,810 m · France / Italy · First climbed 1786 · Estimated total deaths 6,000-8,000+
    6,000+
    Total deaths

    Mont Blanc has killed more climbers than any other mountain in the world, with estimated cumulative fatalities ranging from 6,000 to over 8,000 over the past two centuries. The high total reflects the mountain’s enormous annual climbing traffic — roughly 30,000 attempts per year on the standard Goûter route alone, with thousands more on adjacent routes. The per-climber fatality rate is very low (well under 0.1%), but the absolute numbers are enormous. The single most-cited hazard is the Goûter Couloir stonefall zone, which French authorities have considered restricting access to. The full route detail is in our Mont Blanc Gouter route expedition breakdown.

    Mont Blanc’s status as “deadliest by total deaths” highlights why per-climber fatality rate is the more useful metric for individual climbers — your personal risk on Mont Blanc is far lower than on Annapurna or K2, despite the higher absolute death count.

    2

    Mount Everest — high traffic, accumulated deaths

    8,849 m · Nepal / Tibet · First climbed 1953 · Total deaths ~340
    ~340
    Total deaths

    Mount Everest has accumulated approximately 340 total deaths since the first attempts in 1921. The per-climber rate is roughly 1 percent — far lower than K2 or Annapurna — but the volume of climbers (over 12,000 successful summits and many more attempts) drives the high absolute total. Most Everest deaths happen in the Death Zone above 8,000 m from altitude-related causes, exhaustion, weather, and the cumulative effects of multi-week expedition fatigue. The 1996 disaster (8 deaths), 2014 Khumbu Icefall avalanche (16 deaths), and 2015 earthquake avalanche (22 deaths) account for clustered high-fatality events. The Everest route framework is in our Everest route comparison.

    3

    The Matterhorn — Alps’ second deadliest

    4,478 m · Switzerland / Italy · First climbed 1865 · Total deaths ~500+
    ~500+
    Total deaths

    The Matterhorn has killed approximately 500 climbers since the first ascent in 1865 (which itself ended in tragedy with four of the seven first-ascensionists dying on the descent). Like Mont Blanc, the Matterhorn’s high absolute death count reflects substantial annual climbing traffic on the Hörnli Ridge — perhaps 3,000-4,000 attempts per year. The technical commitment of the Hörnli Ridge (sustained class 3-4 on loose rock) means falls are typically fatal, accounting for the meaningful per-climber risk on what is otherwise a relatively short single-day climb. The full Matterhorn framework is in our Matterhorn training plan.

    Ranked by technical difficulty the experts’ choice

    Beyond the headline eight-thousanders, several lower-altitude mountains are considered the most difficult climbing objectives in the world by experienced alpinists. These mountains are climbed by far fewer people but represent the absolute apex of mountaineering difficulty:

    1

    K2 — also the hardest by technical difficulty

    8,611 m · Pakistan / China · Combines sustained technical climbing with extreme altitude
    ED1+
    Standard grade

    K2 is unique in being both the most dangerous and the most technically difficult of the eight-thousanders. No other 8,000-meter peak combines sustained ED-grade technical climbing with the altitude and objective hazards K2 presents. The full route framework is in our K2 climbing routes explained guide.

    2

    Cerro Torre — the Patagonian needle

    3,128 m · Argentina · Granite spire with extreme storm exposure · Standard grade ED2
    ~6%
    Fatality rate

    Cerro Torre in Patagonia is one of the most technically demanding mountains in the world. The peak rises from the Patagonian icefields as a near-vertical granite spire, covered in rime ice that climbers must climb through, and exposed to the worst weather in the inhabited world. Despite being only 3,128 m tall — less than half the elevation of major Himalayan peaks — Cerro Torre requires elite technical climbing skills, exceptional weather windows, and acceptance that most attempts will be turned back by storms. The mountain has a roughly 6% per-climber fatality rate among serious attempts. The Patagonia context is in our Patagonia icons collection.

    3

    Gasherbrum IV — the most committed Karakoram climb

    7,925 m · Pakistan · Just below 8,000 m but harder than most 8000ers
    ~15%
    Fatality rate

    Gasherbrum IV is the dramatic granite peak adjacent to the four Gasherbrum eight-thousanders. At 7,925 m it falls just short of the 8,000-meter threshold but is widely considered harder than any of the standard eight-thousander routes. The mountain has been climbed only a handful of times since the first ascent in 1958, with most attempts turning back at the technical sections. The famous Walter Bonatti and Carlo Mauri first ascent has remained one of the great mountaineering achievements of the 20th century.

    4

    The Eiger North Face — the historic killer

    3,967 m · Switzerland · Famous concave north face · Grade ED2
    ~70+
    Total deaths

    The Eiger North Face has killed approximately 70 climbers since attempts began in the 1930s. The famous concave face — visible from Grindelwald village below — combines steep ice climbing, mixed climbing on loose rock, and severe rockfall exposure. The North Face was first climbed in 1938, and despite modern equipment and route knowledge, remains one of the most psychologically demanding climbs in the Alps. The “Murder Wall” nickname earned in the 1930s and 1940s persists in mountaineering culture. The Eiger context is in our greatest Alps mountains compared guide.

    Full comparison how the metrics shift

    Mountain Elevation Per-climber fatality rate Total deaths Why dangerous
    Annapurna I8,091 m~32%~75Avalanche-prone seracs
    K28,611 m~25%~96Technical + altitude + Bottleneck
    Nanga Parbat8,126 m~20%~85Long routes, severe weather
    Kangchenjunga8,586 m~15%~60Remote, technical, complex
    Dhaulagiri I8,167 m~13%~75Avalanche exposure
    Makalu8,485 m~7%~32Technical pyramid summit
    Manaslu8,163 m~6%~85Commercial volume + avalanches
    Cerro Torre3,128 m~6%~18Extreme technical + storms
    Cho Oyu8,188 m~3%~52Easiest 8000er, still serious
    Mount Everest8,849 m~1%~340Volume + Death Zone
    The Matterhorn4,478 m~0.5%~500+Falls on loose rock
    Mont Blanc4,810 m~0.04%6,000-8,000+Volume + Goûter Couloir
    The data inversion worth understanding

    The mountains with the highest per-climber risk (Annapurna, K2) have relatively modest total death counts because so few people attempt them. The mountains with the lowest per-climber risk (Mont Blanc, Matterhorn) have the highest total death counts because so many people attempt them. Neither view tells the whole story alone.

    Why these mountains are particularly dangerous

    The mountains on these lists share several recurring danger patterns that explain why they kill more climbers than other peaks of similar elevation:

    Objective hazards that cannot be avoided

    The most dangerous mountains feature hazards that climber skill cannot fully mitigate. K2’s Bottleneck serac, Annapurna’s south face hanging glaciers, Mont Blanc’s Goûter Couloir stonefall — these are all locations where being there at the wrong moment is fatal regardless of climbing ability. A perfectly skilled climber on Annapurna still faces the same serac collapse risk as a less-experienced one. This category of risk is fundamentally different from “merely difficult” climbing.

    Sustained technical climbing at altitude

    Several mountains combine extreme altitude (above 8,000 m, where climbers operate at 50% or less of sea-level oxygen) with sustained technical climbing throughout the route. K2’s Abruzzi Spur involves class 4-5 climbing for thousands of vertical meters at altitude. A single fall on this terrain is typically fatal. Compare this to Everest’s standard routes, which are mostly walking on snow with limited technical sections — climbers can survive most mistakes on Everest in ways they cannot on K2.

    Variable weather with limited forecasting

    The Karakoram and Patagonian peaks share unpredictable weather patterns that limit climbers’ ability to plan summit windows. K2 and Cerro Torre regularly produce sudden weather shifts that catch climbers high on the mountain with no safe retreat. The Himalayan peaks generally have more predictable weather windows because of better forecasting infrastructure and more consistent monsoon patterns.

    Limited rescue infrastructure

    Even when climbers can be reached, rescue capability varies enormously between mountains. Everest now has helicopter rescue capability to roughly 7,000 m. K2 has no helicopter rescue capability above the lower glaciers. Mont Blanc has world-class PGHM helicopter rescue with rapid response times. Annapurna has limited rescue infrastructure compared to Everest. Where rescue is impossible, an injury or illness that would be survivable elsewhere becomes fatal.

    Cumulative expedition fatigue

    The 8,000-meter peaks require 4-8 week expeditions during which climbers gradually deplete physical reserves. Most fatalities happen on summit day or descent when cumulative fatigue compounds decision-making errors. This is why “the second time up the mountain” (descents) is statistically more dangerous than the ascents on most major peaks.

    How fatality rates have changed over time

    Modern climbing fatality rates are generally lower than historical rates due to better equipment, weather forecasting, and route knowledge. The trends matter for understanding current vs historical risk:

    • Everest: historical rate of roughly 4-5% has dropped to about 1% in modern guided era due to improved oxygen systems, fixed ropes, and Sherpa-supported logistics.
    • K2: historical rate stayed near 25% for decades; modern era has reduced it modestly to around 20-22% but remains catastrophically high.
    • Annapurna: the fatality rate has actually decreased significantly in the modern era, though the avalanche risk that defines the mountain has not changed.
    • Mont Blanc: per-climber rate has been declining steadily but total deaths increase each year due to growing climbing volume.
    • Cerro Torre: modern rate is dramatically lower than 1960s-1980s rate, reflecting improved technical equipment and route knowledge.

    The data should be read carefully: modern fatality rates reflect modern climbing, which includes far more commercial expeditions with high-end logistics. The “average” climber on Everest today is using oxygen, climbing with multiple support staff, on fixed ropes installed by professional rope-fixing teams. The “average” climber on K2 has similar but less extensive support. These are not equivalent comparisons to historical alpine-style attempts. The full death-rate methodology is in our death rates by mountain analysis.

    Who climbs these mountains despite the risk

    An honest question worth addressing: why do climbers attempt mountains with 20-30% fatality rates? The answer is complex and varies by climber:

    • Self-assessment of risk: elite climbers often believe (sometimes correctly) that their skill reduces their per-climber risk below the historical average. A climber who has summited multiple 8,000-meter peaks without incident may have a personal risk closer to 5-10% rather than the population average.
    • The 14 eight-thousanders pursuit: climbers attempting to summit all 14 peaks above 8,000 m must climb Annapurna and K2 regardless of risk. The achievement requires accepting the mountains’ inherent danger.
    • Career-defining objectives: for professional climbers, the most dangerous mountains often produce the most career-defining achievements. The risk is calculated against a different reward structure than recreational climbers face.
    • Experience accumulation: each successful expedition builds judgment that incrementally reduces risk on subsequent climbs. Climbers don’t usually attempt Annapurna as their first 8,000-meter peak.
    A frame for thinking about mountaineering risk

    Most experienced mountaineers do not accept the population-average fatality rate when they climb. They assess their personal skill, experience, conditions, and decision-making against the historical baseline. The honest reality is that climbers do die at rates that would be unacceptable in most other activities, and the climbing community has produced ongoing discussion about whether the risk-to-reward ratio on the most dangerous peaks is justifiable. The framework for evaluating this risk individually sits in our mountaineering for beginners guide and the broader hardest-mountains context in our 10 hardest mountains guide.

    What this means for everyday climbers

    Most readers of this guide are not attempting K2 or Annapurna. The practical takeaways for climbers building toward their own objectives:

    • Per-climber risk drops dramatically as you move down the difficulty list. Mount Rainier (~0.04% fatality rate), Mont Blanc, the Matterhorn, and even Everest are all in a fundamentally different risk category than Annapurna or K2.
    • Acclimatization and altitude management drive most preventable deaths. The mountains kill far more climbers through altitude sickness, hypothermia, and exhaustion than through dramatic falls or avalanches. The altitude framework is in our altitude sickness guide.
    • The progression matters. Climbers who build skills on smaller peaks before attempting harder objectives have meaningfully lower fatality rates than climbers who skip the progression. Each tier of mountains teaches skills the next tier requires.
    • Conditions and timing are bigger drivers than skill. Many fatalities on every mountain reflect climbers in the wrong conditions at the wrong time. Building patience for good weather windows is one of the highest-impact safety habits any climber can develop.
    • Insurance and rescue planning are non-negotiable on the bigger peaks. The framework for high-altitude mountaineering insurance is in our mountaineering insurance comparison.
    ★ Hardest Mountains Master Resources

    The full hardest-mountains framework

    Technical difficulty rankings, climbing logistics, and the broader framework for understanding the world’s hardest mountain objectives.

    10 hardest mountains →

    The bottom line on dangerous mountains

    The most dangerous mountain in the world depends on how you measure danger. By per-climber fatality rate, Annapurna I leads at approximately 32% — nearly 1 in 3 climbers who attempts the summit dies on the mountain. K2 is second at approximately 25%. By absolute death toll, Mont Blanc leads with 6,000 to 8,000+ total fatalities accumulated over two centuries of massive climbing volume. The mountains differ not just in elevation and technical difficulty but in the type of risk they present — Annapurna’s avalanche-prone seracs, K2’s combination of technical climbing and the Bottleneck, Mont Blanc’s high-volume Goûter Couloir, the Eiger’s psychological exposure. Modern climbers have generally lower fatality rates than historical climbers due to improved equipment, forecasting, and rescue infrastructure, but Annapurna and K2 remain catastrophically dangerous regardless of era. The empirical death-rate framework is in our death rates by mountain analysis, with the full hardest-mountains context in our 10 hardest mountains guide.

    Frequently asked questions

    What is the most dangerous mountain in the world?

    Annapurna I in Nepal is widely considered the most dangerous major mountain in the world by fatality rate. Historically, approximately 1 in 3 climbers who attempt Annapurna I dies on the mountain, making it the most lethal of the 14 eight-thousanders. K2 in Pakistan is a close second with a historical death rate of approximately 1 in 4. Nanga Parbat earned the nickname “Killer Mountain” for its high historical fatality rate. The most dangerous mountain by absolute number of deaths is Mont Blanc, which has killed many more total climbers due to massive annual visitor numbers, even though its per-climber risk is far lower.

    What is the deadliest mountain by fatality rate?

    Annapurna I has the highest fatality rate of any major mountain, with roughly 32 percent of climbers who summit dying on the mountain (counting both ascent and descent deaths). K2 is second at approximately 25 percent. These rates are calculated by comparing total deaths to total successful summits. By contrast, Everest’s fatality rate is approximately 1 percent. The fatality rate has decreased over time on most major peaks as climbing technology, weather forecasting, and route knowledge have improved, but Annapurna and K2 remain dramatically more lethal than other 8000-meter peaks.

    How many people have died on Mount Everest?

    Approximately 340 climbers have died on Mount Everest since the first attempts in 1921, making it the mountain with the highest absolute death toll among major peaks. The deaths span over 100 years and roughly 12,000 successful summits, giving a per-climber fatality rate of approximately 1 percent (much lower than K2 or Annapurna). The largest single-day disasters were the 1996 disaster (8 deaths), the 2014 Khumbu Icefall avalanche (16 deaths), and the 2015 earthquake avalanche (22 deaths). Most Everest deaths happen in the Death Zone above 8,000 meters from altitude-related causes, exhaustion, and weather-related accidents.

    What is the hardest mountain to climb?

    K2 is widely considered the hardest of the major 8000-meter peaks to climb due to its combination of sustained technical climbing throughout the route, the deadly Bottleneck serac on the standard Abruzzi Spur, extreme weather in the Karakoram, and limited rescue infrastructure. Beyond the 8000-meter peaks, technical mountains like Cerro Torre in Patagonia, Gasherbrum IV, the Latok ridges, and the unclimbed direct lines on K2 represent the absolute hardest mountaineering objectives. The “hardest” designation depends on whether the metric is altitude, technical difficulty, fatality rate, or some combination.

    Why is Annapurna so dangerous?

    Annapurna I is dangerous primarily because of the avalanche-prone south face that hangs above the standard climbing routes. The mountain has very large hanging seracs that periodically collapse and trigger massive avalanches, with limited ability to predict or avoid them. The north face routes, while less avalanche-exposed, involve steep technical climbing at altitude with serious objective hazards. Unlike many other 8000-meter peaks where the standard route is reasonably safe with proper conditions and timing, Annapurna’s standard routes have inherent serac-fall risk that no climbing skill can fully mitigate.

    Why is K2 more dangerous than Everest?

    K2 is more dangerous than Everest for several reasons: K2 has sustained technical climbing throughout the standard Abruzzi Spur route while Everest’s standard routes are mostly snow travel with limited technical sections; K2 has the deadly Bottleneck serac that has no Everest equivalent; the Karakoram weather is more variable and less forecastable than the Himalaya; and rescue infrastructure on K2 is far less developed with no helicopter rescue capability above the lower glaciers. Per-climber fatality rate on K2 is roughly 25 percent versus 1 percent on Everest, despite both being above 8,000 meters.

    What is the deadliest mountain by total death toll?

    Mont Blanc in the Alps has the highest total death toll of any mountain in the world, with estimated cumulative fatalities ranging from 6,000 to over 8,000 climbers over the past two centuries. The high total reflects the mountain’s massive annual climbing traffic, which exceeds 30,000 attempts per year on the standard route. Mont Blanc’s per-climber fatality rate is very low compared to Himalayan peaks, but the absolute numbers are enormous. Everest is second by total deaths at approximately 340, with K2 having approximately 96 total deaths despite its much higher per-climber rate due to far lower total climber numbers.

  • K2 climbing routes explained: the Abruzzi Spur, North Ridge, and every major line

    K2 Climbing Routes Explained: The Abruzzi Spur, North Ridge, and Every Major Line | Global Summit Guide
    Mountain Routes / Karakoram

    K2 climbing routes explained: the Abruzzi Spur, North Ridge, and every major line

    8,611 m
    K2 summit
    Abruzzi
    Standard route
    ~12
    Documented routes
    ~1 in 4
    Historical death rate
    Part of the K2 series This route deep-dive supports our complete K2 climb guide and our K2 route comparison. K2 climb guide →

    K2 is the second-highest mountain on Earth at 8,611 meters and is widely considered the hardest of the 14 eight-thousanders. The mountain sits at the head of the Baltoro Glacier in the Karakoram range on the Pakistan-China border. Unlike Everest, K2 has no commercial trade route in any meaningful sense — even the standard Abruzzi Spur is graded TD (very difficult) and requires elite-level mountaineering. This guide breaks down every documented K2 climbing route: the Abruzzi Spur normal route, the Cesen alternative, the rarely-climbed North Ridge from China, and the technical lines that have seen only a handful of ascents in mountain history. For the full climbing logistics see our complete K2 climb guide and our K2 route comparison.

    Why K2 routes matter more than on most peaks

    On most mountains, the route choice is a stylistic preference — easier route for commercial expeditions, harder route for personal-style climbers. On K2, the route choice is closer to a life-or-death decision. The Abruzzi Spur, despite being called “the standard route,” is more technical and dangerous than almost any standard route on any other eight-thousander. The other K2 routes range from “even more dangerous” to “almost never attempted.” Understanding the routes is the first step in understanding why K2 has earned its reputation as the most dangerous of the 14 peaks above 8,000 meters.

    The K2 routes reality

    K2 has approximately 12 documented routes on its various faces and ridges. Of those, only two see regular ascent traffic (the Abruzzi Spur and the Cesen). Several have seen fewer than 5 ascents in the entire history of the mountain. K2 is not a mountain with a beginner route. Every line on K2 demands elite alpine skills, full 8,000-meter altitude experience, and acceptance of high objective risk. The full historical context is in our 14 eight-thousanders guide.

    The standard route: the Abruzzi Spur

    1

    Abruzzi Spur (Southeast Ridge)

    Pakistan side · First ascent 1954 · Compagnoni and Lacedelli · Grade: TD/ED1 · The standard normal route
    Grade TD

    The Abruzzi Spur is K2’s southeast ridge and the line followed by virtually all commercial expeditions to the mountain. The route was pioneered in 1909 by Luigi Amedeo, Duke of the Abruzzi (hence the name), and was the line of the first successful ascent by the 1954 Italian expedition led by Ardito Desio. The route ascends from base camp on the Godwin-Austen Glacier through a series of established high camps before the summit push through the deadly Bottleneck.

    Camp structure on the Abruzzi Spur:

    • Base camp: 5,150 m on the Godwin-Austen Glacier.
    • Camp 1: 6,050 m, on the lower ridge above the initial mixed climbing.
    • Camp 2: 6,700 m, just above House’s Chimney — the famous rock pitch climbed by William House on the 1938 American expedition.
    • Camp 3: 7,400 m, above the Black Pyramid mixed climbing section.
    • Camp 4 (the Shoulder): 7,800 m, where climbers stage the summit push.
    • The Bottleneck: 8,200-8,400 m, the deadly couloir below the summit serac.
    • The summit: 8,611 m, after the Bottleneck and the upper snowfield.

    The Abruzzi Spur is climbed using fixed ropes through the technical sections (House’s Chimney, the Black Pyramid, the Bottleneck), with most ascents now relying on rope-fixing teams that establish the route in the lower portions and dedicated guides who climb with summit clients. Despite the support infrastructure, the route is climbed only by climbers with prior 8,000-meter experience and elite-level skills.

    The Abruzzi Spur danger profile

    The technical climbing on the Abruzzi Spur — House’s Chimney, the Black Pyramid, the Bottleneck — would be challenging at any altitude. At 7,000-8,500 meters, with diminished oxygen and cumulative fatigue, every move on this route requires concentration that climbers struggle to maintain after multi-week expeditions. The Bottleneck alone has killed dozens of climbers from serac fall.

    The alternative route: the Cesen / South-Southeast Spur

    2

    Cesen Route (South-Southeast Spur / Basque Route)

    Pakistan side · First ascent 1986 · Tomo Česen (solo to ~8,000 m) · Completed by Basques 1994 · Grade: ED1
    Grade ED1

    The Cesen Route, also called the South-Southeast Spur or sometimes the Basque Route, is the secondary commonly-climbed line on K2. The route joins the Abruzzi Spur near the Shoulder camp at approximately 7,800 m, sharing the summit-day terrain through the Bottleneck. Below the join, the Cesen offers a different lower-route option that some climbers consider less dangerous than the Abruzzi due to lower exposure to rockfall in certain sections.

    The route’s history is unusual: it was pioneered as a partial line by Slovenian climber Tomo Česen in 1986, who soloed to approximately 8,000 m before retreating. The full route to the summit was completed by a Basque expedition in 1994. The Cesen has since become the secondary commercial route, with several modern expeditions choosing it over the Abruzzi when conditions favor that side of the mountain.

    From a practical climbing perspective:

    • The Cesen avoids House’s Chimney and the Black Pyramid sections of the Abruzzi, replacing them with a different technical line on the south-southeast face.
    • The route joins the Abruzzi at the Shoulder, which means everyone on K2 funnels into the same Bottleneck regardless of which lower route they used.
    • Modern commercial expeditions sometimes use the Cesen for ascent and Abruzzi for descent (or vice versa) depending on conditions and crowding.
    • The route is graded ED1 rather than TD because of sustained technical climbing on the lower spur, though many climbers consider it less serially dangerous than the Abruzzi.

    The north side route: the North Ridge from China

    3

    North Ridge (Chinese side)

    China / Tibet side · First ascent 1982 · Japanese expedition · Grade: TD+/ED1 · Rarely climbed
    Grade TD+

    The K2 North Ridge climbs the mountain from the Chinese side via the Shaksgam Valley. The route was first climbed in 1982 by a Japanese expedition. Despite being technically similar in difficulty to the Abruzzi Spur, the North Ridge has seen only a small fraction of total K2 ascents because of the more complex access logistics and the political situation around Chinese-side expeditions.

    The North Ridge approach requires:

    • Travel into the remote Shaksgam Valley in Xinjiang, China, north of the Karakoram main divide.
    • Significantly longer approach march — typically 7-10 days from the nearest road versus 4-7 days for the Pakistan-side Baltoro approach.
    • Chinese mountaineering permits, which are more complex and sometimes politically restricted compared to Pakistani permits.
    • Less commercial infrastructure — fewer guide services operate Chinese-side K2 expeditions.

    From a climbing perspective, the North Ridge avoids the Bottleneck entirely (a meaningful safety advantage), but introduces its own challenges including longer summit-day distances and exposure to north-side weather patterns that can be more variable. Modern North Ridge ascents are typically by alpine-style expeditions with significant prior K2 experience or by national-team-style expeditions from Asian countries. The Chinese-side context for Himalaya/Karakoram peaks generally is discussed in our Everest route comparison for the broader north-side access framework.

    The harder technical lines rarely climbed

    Beyond the Abruzzi, Cesen, and North Ridge, K2 has been climbed by approximately 9 other documented routes, most of which have seen fewer than 5 total ascents in the history of the mountain. These are not commercial objectives — they are climbed by elite alpine teams pursuing specific style or first-ascent goals. The major harder routes:

    4

    The Magic Line (South Pillar / South Face Direct)

    Pakistan side · First ascent 1986 · Polish-Slovak team (Piotr Konopka, Wojciech Wróż, Przemyslaw Piasecki) · Grade: ED3
    Grade ED3

    The Magic Line is K2’s direct south pillar, climbing straight up the south face of the mountain through the most prominent rib visible from base camp. The route was the dream of the 1986 climbing season — multiple expeditions attempted it that year as the great unclimbed problem of K2 — and was finally completed by a Polish-Slovak team in August 1986. The line has seen only a handful of ascents since. The Magic Line involves sustained technical rock and mixed climbing for over 2,000 meters of vertical at extreme altitude. It is considered one of the hardest climbs in the world.

    5

    The West Ridge

    Pakistan side · First ascent 1981 · Japanese expedition (Eiho Otani, Nazir Sabir) · Grade: ED1
    Grade ED1

    The K2 West Ridge ascends the mountain’s west side from the Savoia Glacier, climbing a long ridge feature that connects to the upper mountain near 8,000 m. The route was first climbed in 1981 by a Japanese expedition. The West Ridge sees occasional attempts but is not a regular commercial objective. Modern interest in the route has been mixed — some elite climbers view it as a logical alpine-style objective while others note its sustained technical demands at altitude make it impractical for non-elite teams.

    6

    The Polish Line (South Face)

    Pakistan side · First ascent attempt 1986 · No confirmed ascent · Grade: ED4
    Grade ED4

    The Polish Line is a direct south face line attempted multiple times but never confirmed as fully climbed. The route ascends the central south face of K2 directly to the summit, bypassing the south pillar (Magic Line) to the west. The 1986 Polish expedition that attempted the line lost climbers to avalanche and storm. The route remains essentially unclimbed and represents one of the great remaining problems on K2.

    7

    The Northwest Ridge

    China side · First ascent 1990 · Japanese expedition · Grade: TD+
    Grade TD+

    The Northwest Ridge ascends K2 from the Chinese side via the western flank of the North Ridge. The route was first climbed in 1990 by a Japanese expedition and has seen very few ascents since. Like the standard North Ridge, the route avoids the Bottleneck but adds significant technical climbing on the upper ridge.

    Route comparison at a glance

    Route Side First ascent Grade Status
    Abruzzi SpurPakistan (SE)1954TDStandard route, ~95% of ascents
    Cesen RoutePakistan (SSE)1994 (completion)ED1Secondary commercial route
    North RidgeChina (N)1982TD+/ED1Rare, complex access
    Magic Line (South Pillar)Pakistan (S)1986ED3Elite alpine, very rare
    West RidgePakistan (W)1981ED1Rarely attempted
    Northwest RidgeChina (NW)1990TD+Very rare
    Polish Line (South Face)Pakistan (S)UnclimbedED4Open problem
    Northeast RidgeChina (NE)1978ED1Rare
    Various other linesMultipleVariousED1-ED45 or fewer ascents each

    The Bottleneck: the crux that defines K2

    Why the Bottleneck dominates K2 conversation

    The Bottleneck is a narrow couloir at 8,200 to 8,400 m on the standard Abruzzi Spur route, directly beneath a hanging ice serac that periodically calves off and produces avalanches. The Bottleneck is the standard summit-day route from the Shoulder camp at 7,800 m. The serac above it has killed many climbers throughout K2’s history, including 11 climbers in the 2008 K2 disaster when a major collapse trapped a large summit-day group on the descent.

    The Bottleneck is the single most dangerous section on K2’s standard route. Climbers must traverse beneath the serac in both directions — ascending to the summit and descending after — typically spending 30 to 90 minutes total in the danger zone. The serac is impossible to predict; it can collapse on calm clear days or stay stable through major storms. Modern Abruzzi Spur expeditions accept the Bottleneck as the trade-off for K2 summit success — there is no way to avoid it on the standard route.

    The Bottleneck has driven significant exploration of alternative summit-day strategies:

    • Earliest possible departure from the Shoulder to minimize time in the danger zone — typically 10 PM to midnight starts.
    • Move quickly through the couloir — climbers train specifically for fast Bottleneck passage despite the altitude.
    • Alternative summit lines — some climbers have proposed bypassing the Bottleneck via traverses to the east, though these have not become standard.
    • North Ridge as the safer alternative — the route avoids the Bottleneck entirely, which is one reason it appeals to climbers who refuse the Abruzzi serac exposure.

    K2 routes vs Everest routes

    Climbers familiar with Everest often look for the K2 equivalent of the standard South Col or North Ridge commercial routes. The comparison helps frame why K2 is fundamentally different. The full Everest framework is in our Everest route comparison:

    Dimension Everest standard routes K2 Abruzzi Spur
    Technical gradePD/ADTD/ED1
    Sustained technical climbingLimited (Khumbu Icefall, Hillary Step)Throughout the route
    Fixed rope infrastructureExtensive, professionally maintainedPartial, less developed
    Commercial expedition supportMassive, multi-operatorLimited, fewer operators
    Rescue infrastructureHelicopter rescue to ~7,000 mLimited helicopter access
    Bottleneck-equivalent hazardNone comparableThe Bottleneck serac
    Annual successful ascents (standard route)500-80010-50
    Death rate (per climber on the mountain)~1%~25%
    Prerequisite experienceOther 8000m peak or extensive 7000mMultiple 8000m peaks, elite skills

    The single most important number in this comparison is the death rate. Everest is dangerous but climbed by hundreds annually with a ~1% per-climber fatality rate. K2 is fundamentally more dangerous with a ~25% per-climber fatality rate even on the standard route. This is not a small difference — it reflects K2’s combination of sustained technical climbing, the Bottleneck, the more variable Karakoram weather, and the more limited rescue infrastructure. The death-rate comparison framework is in our death rates by mountain analysis.

    When K2 routes are climbed

    K2’s climbing season is narrow and unpredictable. The window is essentially the summer monsoon transition period when weather windows open between Karakoram storm cycles:

    Month Conditions Activity
    MayApproach march beginsExpeditions arrive at base camp
    JuneAcclimatization rotationsCamps established to ~7,000 m
    Early JulyFirst summit attempts possibleWatch for stable windows
    Mid-July to early AugustPeak summit windowMost summits happen here
    Mid-AugustWindow typically closesExpeditions retreat
    SeptemberLate attempts rareMost years no further ascents
    WinterK2 winter climbingNepali team first winter ascent 2021

    The narrow summer window is one reason K2 has lower annual summit numbers than Everest — even strong expeditions sometimes go a full season without a viable summit window. Winter K2 was an unclimbed objective until 2021 when an all-Nepali team led by Nirmal Purja completed the first winter ascent. Winter K2 climbing remains extreme — the combination of jet-stream winds, Karakoram cold, and short daylight hours puts it in a different category from summer ascents.

    Where K2 routes fit in the broader progression

    Climbers attempting K2 routes have completed years of prior progression. The standard pathway:

    1. First eight-thousander: Cho Oyu, Manaslu, or Dhaulagiri as the introduction to 8000m peak logistics.
    2. Major Himalayan peaks: Everest, Kangchenjunga, or Makalu as the altitude proving ground.
    3. Karakoram introduction: Gasherbrum II, Broad Peak, or Gasherbrum I as the Karakoram-specific experience builder. Most K2 aspirants climb at least one of these first.
    4. K2 attempt: typically after 3-5 prior eight-thousanders, with at least one Karakoram peak among them.
    5. Beyond K2: the remaining 14 eight-thousanders, K2 winter, K2 alternative routes for elite climbers.

    The reason for this long progression is that K2 punishes any gap in alpine skill, altitude tolerance, or expedition experience. Climbers who attempt K2 without the Karakoram-specific preparation often turn around at the lower camps when the technical climbing reveals itself to be harder than they expected. The full eight-thousander progression context is in our 14 Eight-Thousanders collection.

    Cost by route honest numbers

    Route Typical guided cost Self-supported cost Notes
    Abruzzi Spur (commercial)$40,000 – $80,000$15,000 – $25,000Multiple operators available
    Cesen Route (commercial)$45,000 – $90,000$15,000 – $25,000Fewer operators
    North Ridge (Chinese side)$70,000 – $130,000$30,000 – $50,000Limited operators, complex permits
    Magic Line / South FaceNot commercially offered$25,000 – $50,000Elite expeditions only
    Permit fee (Pakistan, peak season)$7,500-12,000 per climber$7,500-12,000 per climberRoyalty plus base camp fees
    Permit fee (China, peak season)$15,000-25,000 per climber$15,000-25,000 per climberHigher than Pakistani side

    The total cost for a guided K2 attempt typically lands in the $50,000-$90,000 range, comparable to the higher end of Everest pricing. K2 commercial operators are fewer in number than Everest operators, with major names including Seven Summit Treks (Nepal), Madison Mountaineering, Furtenbach, and a small number of Pakistani-based operators. The economics of K2 climbing are challenging for operators — small client numbers, high failure rates, and high risk make K2 expeditions a niche business compared to the larger commercial Everest market.

    ★ K2 Master Resources

    The complete K2 climbing framework

    Route details, climbing logistics, expedition costs, and historical context — everything you need to understand K2 ascents.

    K2 climb guide →

    The bottom line on K2 climbing routes

    K2 has approximately a dozen documented climbing routes, but only the Abruzzi Spur and the Cesen Route see meaningful regular ascent traffic. The Abruzzi Spur is the standard normal route used by almost all commercial expeditions, graded TD with sustained technical climbing on rock, ice, and mixed terrain at extreme altitude. The Cesen Route offers an alternative lower-route line that joins the Abruzzi near the Shoulder camp. The North Ridge from China offers the only major non-Pakistan-side option but sees few ascents due to complex access. The harder lines — Magic Line, West Ridge, Polish Line — have seen fewer than 5 ascents each and remain elite alpine objectives rather than commercial routes. Every K2 route requires elite skills, full 8,000-meter experience, and acceptance of objectively dangerous conditions including the deadly Bottleneck serac on the standard route. There is no easy way up K2. The full climbing framework is in our K2 climb guide, with the side-by-side route detail in our K2 route comparison.

    Frequently asked questions

    How many routes are there on K2?

    K2 has approximately a dozen documented climbing routes, though only two are climbed with any regularity in modern commercial expeditions. The standard route is the Abruzzi Spur on the southeast ridge from the Pakistan side, which accounts for the overwhelming majority of all K2 ascents. The Cesen Route (also called the South-Southeast Spur or Basque Route) is the secondary commonly-climbed line. Other documented routes include the North Ridge from China, the Magic Line on the South Pillar, the West Ridge, the Polish Line on the South Face, and several rarely-attempted technical lines that have seen only a handful of ascents in the history of the mountain.

    What is the standard route on K2?

    The Abruzzi Spur is the standard normal route on K2 and the line followed by virtually all commercial expeditions. The route ascends the southeast ridge of the mountain from a base camp on the Godwin-Austen Glacier in Pakistan, passing through four established high camps before the summit push through the Bottleneck and across the dangerous serac traverse below the summit. The Abruzzi Spur is rated technically difficult (TD on the alpine grading scale) with sustained class 4 and class 5 climbing on rock, ice, and mixed terrain at extreme altitude. It is not an easy route in any sense — it is simply the easiest line on K2.

    What is the K2 Abruzzi route?

    The Abruzzi route, or Abruzzi Spur, is the southeast ridge of K2 and the standard climbing route. The line was pioneered by an Italian expedition led by Luigi Amedeo, Duke of the Abruzzi, in 1909 and was the line of the first ascent in 1954. The route ascends from base camp at 5,150 meters through House’s Chimney (a famous rock pitch around 6,700 m), the Black Pyramid (a technical mixed climbing section around 7,000 m), the Shoulder camp at approximately 7,800 m, and the Bottleneck below the summit serac at 8,300 m. The Bottleneck is widely considered the most dangerous section of the route due to constant serac fall risk.

    What is the K2 Bottleneck?

    The Bottleneck is a narrow couloir at approximately 8,200 to 8,400 meters on K2’s Abruzzi Spur route, directly beneath a hanging ice serac that periodically calves off and produces avalanches that have killed many climbers. The Bottleneck is the standard summit-day route from the Shoulder camp and is approximately 100 to 150 meters tall, climbed at a slope of 50 to 60 degrees on hard ice and snow. The 2008 K2 disaster killed 11 climbers when a serac collapse trapped a large summit-day group. The Bottleneck remains the single most dangerous section on K2’s standard route and is the leading cause of K2 fatalities.

    Can you climb K2 from the China side?

    Yes, K2 can be climbed from the China (Tibet) side via the North Ridge route, but it is rarely done in modern times. The Chinese side requires more complex permit logistics and a longer approach across the Shaksgam Valley, and the political situation has at times limited or closed access for foreign climbers. Historically only a small fraction of K2 ascents have come from the Chinese side. The standard commercial climbing of K2 happens from Pakistan via the Abruzzi Spur. Climbers wanting the China side typically need expedition-level commitment, advanced permits, and acceptance that the route sees almost no commercial support.

    What is the easiest route on K2?

    The Abruzzi Spur is the easiest route on K2 in relative terms, but this is misleading — there is no easy route on K2. Even the Abruzzi Spur is rated TD (very difficult) on the alpine grading scale, involves sustained technical climbing on rock and ice at extreme altitude, and traverses the deadly Bottleneck couloir below the summit serac. K2 has a historical death rate of approximately 1 in 4 climbers on the standard route. Any K2 ascent requires multi-week expedition logistics, full 8000-meter altitude experience, and elite-level mountaineering skills. The mountain is widely considered the hardest of the 14 eight-thousanders.

    How dangerous is K2 compared to Everest?

    K2 is dramatically more dangerous than Mount Everest by per-climber death rate. Approximately 1 in 4 climbers who summit K2 die on the mountain (counting deaths on the descent), while Everest’s death rate is closer to 1 in 100. Everest has more total deaths because of the much larger volume of climbers, but the per-climber risk is far higher on K2. The reasons include K2’s much steeper terrain, the deadly Bottleneck serac, more technical climbing throughout, less commercial support and fewer rescue resources, and more unpredictable Karakoram weather compared to the Himalaya. K2 is widely considered the most dangerous of the eight-thousanders.

  • Mountains near Denver: a hiker’s guide to the Front Range and closest peaks

    Mountains Near Denver: The Hiker’s Guide to the Front Range and Closest Peaks | Global Summit Guide
    Regional Guides / Colorado

    Mountains near Denver: a hiker’s guide to the Front Range and closest peaks

    14,265 ft
    Mount Evans / Blue Sky
    ~75 min
    Closest 14er drive
    200 mi
    Front Range length
    10+
    14ers within 2 hrs
    Part of the Colorado mountains series This Denver-area guide supports our best mountains near Denver master guide and our complete Colorado 14ers guide. Master guide →

    Denver sits at 5,280 feet, calls itself the Mile High City, and looks out on roughly 200 miles of Front Range mountains visible on most clear days. That kind of access is unusual — no other major US city has dozens of named peaks, multiple 14ers, and a national park all within a two-hour drive. This guide answers the questions Denver-area hikers and visitors actually ask: which mountains can you see from the city, what is the closest 14er, where do you start if you are new to Colorado peaks, and what are the best day-hike objectives within 2 hours of downtown. For the deeper deep-dive on individual peaks, see our best mountains near Denver master guide and our complete Colorado 14ers guide.

    What mountains can you see from Denver

    On any clear day, the western horizon from Denver shows a continuous wall of mountains stretching from north to south, technically the Front Range of the Rocky Mountains. From downtown you can identify roughly 30 named peaks if you know what you are looking for. The most prominent visible peaks, north to south:

    The best Denver-area viewpoints for seeing the mountains are Lookout Mountain in Golden (a 30-minute drive from downtown that puts you directly above the city looking west), Sloan Lake just northwest of downtown, Mount Falcon Park, and the upper floors of downtown buildings facing west. The clearest viewing days are typically after weather systems pass through and clear the air, particularly the morning after rain or snow when haze drops to near zero.

    The viewing reality from downtown

    The peaks visible from Denver are not as close as they look. Mount Evans appears to loom right over the city but is actually 35 miles west. Longs Peak is 50 miles northwest. The apparent closeness is an optical effect of the dry mountain air and the height of the peaks above the surrounding terrain. The mountains are real, they are accessible, but they take 1 to 2 hours of driving to actually reach.

    The closest mountains to Denver

    Different definitions of “closest” produce different answers. If you mean closest named mountain by drive time, Lookout Mountain wins. If you mean closest meaningful mountain experience, the foothills peaks west of Golden and Evergreen are 30-45 minutes from downtown. If you mean closest 14er (peak above 14,000 feet), Mount Bierstadt and Mount Evans tie at roughly 75 minutes. Here are the closest peaks in each category:

    1

    Lookout Mountain (Golden)

    The closest named mountain · Drive-up via Lariat Loop · Easy walking trails · Buffalo Bill Museum and grave site at summit
    7,377 ft
    ~30 minutes from downtown
    2

    Mount Falcon Park

    The closest hiking-only mountain · Multi-trail park · 3-7 mile loops · Castle ruins and Denver views
    7,851 ft
    ~35 minutes from downtown
    3

    Bergen Peak

    The closest substantial summit · 9.4 mile round trip · 1,900 ft gain · Real mountain feel close to the city
    9,708 ft
    ~45 minutes from downtown
    4

    Chief Mountain

    Short summit hike with big views · 3 mile round trip · 985 ft gain · Excellent intro to higher altitude
    11,709 ft
    ~1 hour from downtown
    5

    Mount Bierstadt

    The closest 14er · 7 mile round trip from Guanella Pass · 2,850 ft gain · The standard Denver-area first 14er
    14,065 ft
    ~75 minutes from downtown
    6

    Mount Evans / Mount Blue Sky

    Closest 14er by car · Drive-up to ~14,130 ft via Mount Evans Scenic Byway · Final 100 ft on foot · Seasonal road (May-September)
    14,265 ft
    ~75 minutes from downtown

    The 14ers closest to Denver

    Colorado has 58 named peaks above 14,000 feet (or 53 depending on which counting convention you use). Most are far from Denver — the highest concentrations are in the Sawatch Range to the southwest near Leadville (Mount Elbert, Mount Massive, and others) and in the San Juan Range to the southwest near Lake City and Silverton. But several 14ers are within 1.5 to 2 hours of Denver and are the natural targets for Denver-based hikers building toward bigger objectives. The complete framework is in our Colorado 14ers guide.

    14er Elevation Drive from Denver Difficulty Notes
    Mount Bierstadt14,065 ft~75 minClass 2 (easy)The classic Denver first 14er
    Mount Evans / Blue Sky14,265 ft~75 minClass 1 (drive-up)Drive to ~14,130 ft, walk last 100 ft
    Grays Peak14,278 ft~90 minClass 1 (easy)Often combined with Torreys
    Torreys Peak14,267 ft~90 minClass 2 (moderate)Combined Grays+Torreys = single day
    Longs Peak14,259 ft~1.5 hrClass 3 (hard)The Keyhole Route, technical
    Pikes Peak14,115 ft~1.5 hrClass 1 (drive/cog)Drive, cog railway, or 13 mi trail
    Quandary Peak14,265 ft~1.75 hrClass 1 (easy)Near Breckenridge
    Mount Sherman14,036 ft~2 hrClass 2 (easy)One of Colorado’s easiest 14ers
    The standard Denver 14er progression

    Most Denver-area hikers build a Colorado 14er progression in this order: Mount Bierstadt (easy, accessible, classic first 14er) → Grays + Torreys (combo hike, two 14ers in one day) → Quandary Peak (easy class 1, near Breckenridge) → Longs Peak (the technical graduation peak with class 3 scrambling). This sequence builds altitude tolerance, navigation skills, and confidence on increasingly committing terrain across a single hiking season.

    The best day hikes not requiring 14er commitment

    Not every Denver-area mountain experience needs to be a 14er. The Front Range has dozens of excellent day hikes that deliver real mountain experience without the altitude exposure, distance, or technical commitment of 14er routes. These work well for visitors with limited time, hikers building fitness, families, and anyone wanting a meaningful mountain day without the full 14er undertaking.

    1

    Bear Peak (Boulder)

    5.5 mile loop · 2,500 ft gain · One of Boulder’s iconic summits · 360-degree views of Front Range
    8,461 ft
    ~45 min from Denver
    2

    Royal Arch (Boulder Flatirons)

    3.4 mile round trip · 1,400 ft gain · Natural sandstone arch and iconic Flatirons views
    6,920 ft
    ~45 min from Denver
    3

    Devils Head Lookout

    2.8 mile round trip · 940 ft gain · Last manned fire lookout in Colorado · Views from 9,748 ft
    9,748 ft
    ~1 hour from Denver
    4

    Mount Sanitas (Boulder)

    3.1 mile loop · 1,300 ft gain · Boulder’s most popular workout hike · Mountain views without long drive
    6,863 ft
    ~45 min from Denver
    5

    Twin Sisters Peaks (RMNP)

    7.4 mile round trip · 2,500 ft gain · Spectacular views of Longs Peak · Best Longs Peak viewing summit
    11,428 ft
    ~1.75 hr from Denver
    6

    St. Mary’s Glacier

    2 mile round trip · 700 ft gain · Year-round small glacier · Photogenic alpine lake at the base
    10,800 ft
    ~1 hour from Denver

    When to hike mountains near Denver

    Colorado mountain hiking is genuinely four-season but with sharp seasonal patterns. Understanding the seasons saves you wasted trips and improves your odds of finding the conditions you want.

    Season Conditions What’s open What to watch
    March – AprilFoothills clear, high country snowyFoothills, lower trailsMud season, road closures above 9,000 ft
    MaySnow lingers high, foothills greenLower 14ers, foothillsPostholing on high trails, lingering ice
    JuneSnow recedes, wildflowers startMost 14ers accessible mid-monthLingering snow on north-facing
    JulyPeak seasonEverything openAfternoon thunderstorms (start early!)
    AugustPeak season continuesEverything openMonsoon thunderstorms, crowds
    SeptemberStable weather, aspens turnEverything open, fewer crowdsFirst storms typically late month
    OctoberFirst snow, transitionalFoothills, some 14ersRoad closures begin (Mount Evans road)
    November – FebruaryWinter, snow on high trailsFoothills snowshoeing, lower trailsAvalanche risk on high terrain

    The single most important seasonal pattern is the afternoon thunderstorm that builds almost daily during July and August. Front Range 14ers and high peaks routinely produce lightning storms starting around 1 PM through 4 PM. Standard protocol is to start summit attempts at 4-6 AM and be off the high terrain by noon. Climbers and hikers who ignore this pattern have been struck by lightning every season. The mountain weather framework is in our mountain weather guide.

    Getting to the mountains from Denver

    Destination Route Drive time Best for
    Golden / Lookout MountainUS-6 or I-70 W to Exit 256~30 minQuick scenic drive, families
    Idaho Springs / Mount Evans areaI-70 W to Exit 240~45 minMount Evans road access
    Georgetown / Guanella PassI-70 W to Exit 228~75 minMount Bierstadt, Grays, Torreys
    Estes Park / RMNPUS-36 NW via Lyons~90 minLongs Peak, RMNP, Twin Sisters
    Pikes Peak / Colorado SpringsI-25 S~90 minPikes Peak, Manitou Incline
    Boulder Flatirons / Bear PeakUS-36 N~45 minBoulder hiking
    Breckenridge / QuandaryI-70 W to Exit 203~1.75 hrQuandary, Tenmile Range
    Aspen / Maroon Bells (further)I-70 W to CO-82~3.5 hrIconic photos, weekend trips

    I-70 west is the primary mountain corridor and gets congested on weekend mornings during summer and ski season. The local saying is “leave Denver by 5 AM or stay home” for weekend 14er trips. Returning to Denver Sunday afternoon eastbound on I-70 routinely takes 2-3 times the normal drive time due to weekend traffic. Many Denver hikers do Friday afternoon or early Saturday morning trips to avoid the worst congestion.

    The altitude reality for visitors

    Denver altitude affects visitors more than people expect

    Denver sits at 5,280 feet, which is meaningfully above sea level. Visitors arriving from coastal cities may feel mild altitude effects in Denver itself — headache, fatigue, shortness of breath on stairs. The 14ers and high peaks above Denver are at 11,000 to 14,300 feet, which is genuinely high altitude where altitude sickness becomes a real concern. Visitors planning a 14er attempt within their first 2-3 days in Colorado are at meaningfully higher risk of altitude sickness than acclimated locals. The altitude framework is in our altitude sickness guide.

    Practical altitude planning for visitors:

    • Day 1-2 in Colorado: stay below 9,000 ft. Drink water aggressively, avoid alcohol, walk around Denver and adjust.
    • Day 3-4: try a moderate altitude hike (Chief Mountain at 11,709 ft, or Twin Sisters at 11,428 ft) to test how your body responds.
    • Day 5+: 14er attempts become reasonable if you have not experienced altitude symptoms at moderate altitude.
    • Critical: if you feel headache, nausea, fatigue, or dizziness at moderate altitude, descend. Going higher will make it worse, not better. The acclimatization framework is in our altitude acclimatization explainer.

    What to wear and bring on Front Range hikes

    Colorado mountain weather changes fast. A warm sunny morning at the trailhead can be snow, hail, and lightning at the summit two hours later. The standard 10 essentials apply, but a few items matter more in Colorado than in other ranges:

    • Layers, not bulk: a base layer, mid-layer (fleece or puffy), and waterproof shell handle nearly all Colorado mountain weather. Pack all three even on hot July mornings.
    • Sun protection: Colorado sun at altitude burns fast. SPF 30+ sunscreen, sunglasses, and a brimmed hat are not optional.
    • Water: dry air at altitude dehydrates you faster than you notice. Carry 2-3 liters for any 14er day, more for longer hikes.
    • Trekking poles: the descents from 14ers destroy knees. Poles take 20-30% of the impact load off your knees.
    • Microspikes or crampons (off-season): from October through June, snow and ice on north-facing slopes persists. The framework for which to use is in our snow travel gear guide.
    • Headlamp: for early starts and unexpected late descents. Even on summer day hikes.
    • First aid kit: small but real — Band-Aids, ibuprofen, electrolytes, blister treatment.

    Safety in the Colorado mountains honest assessment

    The Colorado Front Range is generally safe for prepared hikers but produces several mountain-related deaths every year. The most common causes:

    1. Lightning strikes on exposed ridges during afternoon thunderstorms (Longs Peak, Mount Evans, Bierstadt, Grays/Torreys).
    2. Falls on steep technical terrain (Longs Peak Keyhole Route, off-trail scrambling).
    3. Hypothermia from unexpected weather (summer climbers caught in snow storms).
    4. Getting lost after dark on descents when fatigue compounds navigation errors.
    5. Altitude sickness escalating to high-altitude pulmonary edema (HAPE) or cerebral edema (HACE) in extreme cases.

    The five rules that prevent most Colorado mountain incidents:

    1. Start early — 4-6 AM trailhead departures for 14ers, off summit by noon.
    2. Check weather — Mountain-Forecast.com and NOAA point forecasts for specific peaks.
    3. Tell someone your plan — leave detailed plan with someone who will alert authorities if you do not check in.
    4. Turn around when needed — the mountain will be there next weekend. Bad weather, sickness, or fatigue all mean turn around.
    5. Carry the gear — water, layers, headlamp, first aid. Even on “easy” hikes.

    Where Front Range hiking fits in the broader progression

    For climbers building toward bigger mountains, the Colorado Front Range serves a specific and valuable role. The 14ers between Denver and Colorado Springs are accessible enough to climb several in a single hiking season, varied enough to build different skill sets (class 1 walking on Mount Evans, class 2 trails on Bierstadt, class 3 scrambling on Longs Peak), and altitude-rich enough to build genuine acclimatization tolerance. The standard progression that includes Colorado 14ers as a step:

    1. Build base fitness: Front Range day hikes, foothill peaks, and shorter trail running.
    2. First 14er: Mount Bierstadt as the introduction to 14,000-foot terrain.
    3. Build the 14er portfolio: Grays + Torreys, Quandary, Mount Sherman as additional easier 14ers.
    4. Technical 14er graduation: Longs Peak via the Keyhole Route — the standard “hardest accessible” 14er from Denver.
    5. Beyond Colorado: Rainier as the introduction to true expedition climbing. Framework in our Rainier progression plan.
    6. Major peaks: Denali and Aconcagua as the next-step expedition mountains.

    This progression works because Colorado 14ers build the foundational skills nearly any North American mountaineer needs: altitude tolerance, navigation, weather decision-making, multi-hour endurance, and confidence on increasingly committing terrain. Climbers who complete several Colorado 14ers are well-positioned for the broader Cascade and Alaska Range progression. The full framework is in our best mountains near Denver master guide and the broader Colorado-specific detail is in our Colorado 14ers guide.

    ★ Master Denver Mountains Guide

    The full Front Range climbing framework

    Detailed peak profiles, route guides, seasonal recommendations, and the complete Colorado 14ers progression from beginner to expert.

    Read the master guide →

    The bottom line on mountains near Denver

    Denver sits at the eastern edge of one of the most accessible high-altitude mountain regions in the United States. The Front Range stretches 200 miles north to south along the city’s western horizon, with dozens of named peaks, multiple 14ers, and Rocky Mountain National Park all within 1 to 2 hours of downtown. The closest 14er is Mount Bierstadt at roughly 75 minutes drive. The most accessible drive-up 14er is Mount Evans / Mount Blue Sky via the seasonal scenic byway. The technical graduation peak is Longs Peak with its class 3 Keyhole Route. Most Denver-area hikers progress from foothill day hikes through easier 14ers to harder objectives across multiple hiking seasons, building the foundation for bigger climbing objectives outside Colorado. Whether you are a Denver local building your local hiking portfolio or a visitor wanting one great mountain day, the Front Range has the right peak for nearly any fitness level. The full peak-by-peak detail is in our best mountains near Denver master guide, with the complete Colorado 14ers framework in our Colorado 14ers guide.

    Frequently asked questions

    What mountains can you see from Denver?

    From Denver you can see roughly 200 miles of the Front Range of the Rocky Mountains stretching north to south along the western horizon. The most prominent visible peaks are Longs Peak (14,259 ft) to the northwest in Rocky Mountain National Park, Mount Evans (14,265 ft, recently renamed Mount Blue Sky) directly west, Pikes Peak (14,115 ft) to the south near Colorado Springs, and Mount Bierstadt (14,065 ft) adjacent to Mount Evans. On a clear day you can identify dozens of named peaks from downtown Denver, with the best viewpoints being elevated locations like Lookout Mountain in Golden or Sloan Lake.

    What is the closest mountain to Denver?

    Lookout Mountain in Golden is the closest named mountain to Denver, at roughly 7,377 feet elevation and only 30 minutes drive from downtown. For a more substantial mountain, Mount Falcon at 7,851 feet and Bergen Peak at 9,708 feet are both within 45 minutes of Denver. The closest 14er (peak above 14,000 feet) is Mount Bierstadt at roughly 1 hour and 15 minutes drive from Denver via I-70 to Guanella Pass. Mount Evans (Mount Blue Sky) is similar distance via the Mount Evans Scenic Byway when seasonally open.

    What is the closest 14er to Denver?

    Mount Bierstadt at 14,065 feet is the closest 14er to Denver by drive time, taking roughly 1 hour and 15 minutes via I-70 west to Georgetown and then south on Guanella Pass Road. Mount Evans (Mount Blue Sky) at 14,265 feet is similar distance via the Mount Evans Scenic Byway when seasonally open (typically late May through September). Both peaks have established hiking trails and are climbable in a day from Denver. Grays Peak and Torreys Peak (both 14,278 ft and 14,267 ft respectively) are about 1.5 hours from Denver and can be combined in a single hike.

    How far are the mountains from Denver?

    The foothills of the Front Range begin roughly 15 to 30 minutes drive west of Denver, with Lookout Mountain in Golden at 30 minutes from downtown. The first 14ers (peaks above 14,000 feet) are 1 to 1.5 hours drive west via I-70. Rocky Mountain National Park (Longs Peak) is approximately 1.5 hours drive northwest. Pikes Peak near Colorado Springs is about 1.5 hours south. Most of the named Front Range mountains visible from Denver are within a 1 to 2 hour drive, making Denver one of the most mountain-accessible major US cities.

    What are the best mountains to climb near Denver?

    The best mountains to climb near Denver depend on your fitness and experience. For beginners, Mount Falcon (7,851 ft), Bergen Peak (9,708 ft), and Chief Mountain (11,709 ft) offer accessible day hikes. For experienced hikers seeking 14er objectives, Mount Bierstadt (14,065 ft) is the most accessible 14er near Denver, followed by Mount Evans/Blue Sky (14,265 ft), Grays and Torreys Peaks (combined 14er day at 14,278 and 14,267 ft), and Longs Peak (14,259 ft, the hardest of the close-to-Denver 14ers with class 3 climbing on the Keyhole Route).

    Can you see the mountains from downtown Denver?

    Yes, you can clearly see the Front Range mountains from downtown Denver on most days. The mountains run north-south along the entire western horizon and are visible from elevated locations like the upper floors of downtown buildings, Sloan Lake just northwest of downtown, and any westward-facing street with clear sight lines. The best viewing days are after weather systems clear the air, typically the day after rain or snow. The mountains appear roughly 30 to 60 miles away depending on which peaks you are looking at, with Mount Evans/Blue Sky being the most prominent from downtown views.

    What is the Front Range of Colorado?

    The Front Range is the easternmost range of the Rocky Mountains in Colorado, running approximately 200 miles north-south along the eastern edge of the Rockies adjacent to the high plains. The range is named for being the first mountains travelers encounter coming from the east. The Front Range includes Rocky Mountain National Park in the north, the peaks west of Denver including Mount Evans and Bierstadt, the Mount Evans wilderness, and Pikes Peak to the south near Colorado Springs. Multiple 14ers (peaks above 14,000 feet) are located in the Front Range, all accessible within 2 hours of Denver.

  • Aconcagua vs Denali vs Rainier: the North American expedition progression compared

    Aconcagua vs Denali vs Rainier: The North American Expedition Progression Compared | Global Summit Guide
    Mountain Comparisons / Americas

    Aconcagua vs Denali vs Rainier: the North American expedition progression compared

    4,392 m
    Rainier (entry)
    6,190 m
    Denali
    6,961 m
    Aconcagua
    3 peaks
    2-5 year progression
    Part of the Americas progression series This three-way comparison consolidates our Aconcagua vs Denali and Rainier vs Denali deep dives, plus the broader Seven Summits framework. Aconcagua vs Denali →

    If you climb in North America and you are building toward big mountains, three peaks define the standard progression: Mount Rainier, Denali, and Aconcagua. Each represents a distinct step in expedition mountaineering — Rainier as the introduction to real glaciated expedition climbing, Denali as the cold-weather Alaska Range giant, Aconcagua as the high-altitude South American crown. This is the direct three-way comparison: difficulty, altitude, training, cost, and the natural order most climbers follow. For deeper single-comparison detail see our Aconcagua vs Denali and Rainier vs Denali guides.

    The three-way head-to-head at a glance

    Mount Rainier

    The Foundation Peak
    Elevation4,392 m
    LocationWashington, USA
    Standard routeDisappointment Cleaver
    Technical gradeF+ / PD-
    Trip duration2-3 days
    Primary challengeGlacier travel intro
    Cold exposureModerate
    Self-supported?No, day-trip style
    Guided cost$1,500-3,000
    Success rate~50%

    Denali

    The Expedition Peak
    Elevation6,190 m
    LocationAlaska, USA
    Standard routeWest Buttress
    Technical gradeAD-
    Trip duration17-21 days
    Primary challengeCold + logistics
    Cold exposureExtreme (-40°F)
    Self-supported?Yes, sled hauling
    Guided cost$8,000-13,000
    Success rate~50%

    Aconcagua

    The Altitude Peak
    Elevation6,961 m
    LocationArgentina
    Standard routeNormal Route
    Technical gradeF (non-technical)
    Trip duration18-21 days
    Primary challengeAltitude + wind
    Cold exposureModerate-high
    Self-supported?Mules to base camp
    Guided cost$5,000-9,000
    Success rate~40%
    The 30-second answer

    Rainier first, Denali or Aconcagua next, finish with whichever is left.

    Rainier is non-negotiable as the starting point — it builds the glacier and rope-team skills the other two require. Whether you climb Denali or Aconcagua second comes down to whether you prefer cold-weather expedition logistics (Denali) or pure high-altitude exposure (Aconcagua).

    The natural progression in three steps

    1

    Mount Rainier — the foundation

    4,392 m · 2-3 day trip · ~$2,000 guided · Year 1

    Rainier is where you learn whether expedition mountaineering is actually for you. The standard Disappointment Cleaver route teaches glacier travel, rope team work, crampon technique on steep snow, and the discipline of moving in the dark from a high camp. The summit day is short by expedition standards (8-12 hours round trip from Camp Muir), but the technical fundamentals you build here are the foundation everything else relies on. The full route framework is in our Rainier progression plan.

    2

    Denali (or Aconcagua) — the major expedition

    6,190 m · 17-21 days · ~$10,000 guided · Year 2-3

    Step two is your first true expedition. Most American climbers go to Denali next because the cold weather and self-supported expedition style build skills that translate directly to Himalayan objectives. Climbers who want pure altitude experience without the cold often choose Aconcagua second instead. Either order works. Denali teaches sled-hauling logistics, multi-week high-camp life, and cold-weather management. The full framework is in our Denali progression plan and our Denali route comparison.

    3

    Aconcagua — the altitude crown

    6,961 m · 18-21 days · ~$7,000 guided · Year 3-5

    Step three is the highest peak in the Americas and the standard 7 Summits South America objective. Aconcagua is non-technical (no ropes required on the Normal Route), but the altitude is the test. At 6,961 m, the summit day is performed in air with less than half the oxygen of sea level. The route is well-established but the weather window and altitude tolerance determine success. The full route framework is in our Aconcagua season guide and the cost framework is in our Aconcagua permits and cost guide.

    The honest order question

    The Denali-or-Aconcagua-second question depends on what you find harder. Climbers who do not handle cold well prefer Aconcagua second (warmer, simpler logistics). Climbers who do not handle altitude well prefer Denali second (lower, but extreme cold). There is no universal right answer — both orders produce successful 7 Summits aspirants.

    Aconcagua vs Denali head-to-head

    This is the comparison that drives most of the actual decision-making, since these two peaks fill the “biggest North/South American mountain” slot in most climbers’ plans. The full deep dive on this single comparison is in our Aconcagua vs Denali comparison — here is the summary:

    Dimension Aconcagua Denali Harder
    Elevation6,961 m6,190 mAconcagua
    Technical gradeF (non-technical)AD-Denali
    Cold exposure-10 to -20 °F summit-20 to -40 °F sustainedDenali
    Wind exposureSevere (Vientos Blancos)Severe (Arctic systems)Tie
    Self-support logisticsMules carry to base campYou carry everythingDenali
    Total weight carried~30 lbs after base camp~60-80 lbs in sled+packDenali
    Altitude oxygen~45% of sea level~50% of sea levelAconcagua
    Trip cost$5,000-9,000 guided$8,000-13,000 guidedDenali (more $)
    Permit cost$800-1,000$415Aconcagua (more $)
    Bush plane required?NoYes (Talkeetna to base)Denali logistics
    Death rate~0.1%~0.3%Denali
    Overall difficultyAltitude-drivenCold + logistics + altitudeDenali (most agree)

    Most experienced climbers rate Denali harder than Aconcagua despite Aconcagua’s higher elevation, primarily because Denali stacks more challenges: extreme cold, self-supported logistics, technical sections, AND altitude. Aconcagua is essentially a single challenge — altitude — without the cold or technical or logistics complexity. That said, Aconcagua’s higher absolute elevation (770 m higher) means the summit-day oxygen reality is meaningfully worse, and climbers who do not adapt well to altitude can find Aconcagua brutally hard regardless of its simpler logistics.

    Denali vs Rainier head-to-head

    This is the comparison that determines whether you are ready for expedition mountaineering. The full single-comparison detail is in our Rainier vs Denali guide:

    Dimension Rainier Denali Gap
    Elevation4,392 m6,190 m+1,798 m
    Technical gradeF+ / PD-AD-2 tiers harder
    Trip duration2-3 days17-21 days~7-10x longer
    Cold exposureModerate, +20 to 0 °FExtreme, -20 to -40 °F40-60 °F colder
    Self-support styleNone (day trip)Full expeditionCategorical shift
    Weight carried~30-40 lbs pack~60-80 lbs sled+pack~2x weight
    Glacier complexity1 major (Emmons/Ingraham)2 major (Kahiltna/Muldrow)More crevasse hazard
    Bush plane / logisticsDrive inBush plane to base campMajor logistics step
    Cost$1,500-3,000 guided$8,000-13,000 guided4-5x more
    Prior peaks requiredNone (entry level)Rainier or equivalentMajor skills jump
    Difficulty gapTraining peakMajor expeditionRoughly 2-3 tiers

    The gap between Rainier and Denali is the largest single jump in the standard North American progression. Climbers who attempt Denali without Rainier-level prior experience have meaningfully lower success rates and higher injury rates. Most Denali guide services either require or strongly recommend Rainier (or equivalent peaks like Mount Hood at full winter capability, Mount Baker via more difficult routes, or the Bolivian high peaks) as a prerequisite. Skipping Rainier is rarely worth the risk.

    Rainier vs Aconcagua head-to-head

    The third pair is less commonly discussed but matters when climbers consider the Rainier-to-Aconcagua jump that some choose over the Rainier-Denali-Aconcagua sequence:

    Dimension Rainier Aconcagua Gap
    Elevation4,392 m6,961 m+2,569 m
    Altitude categoryVery high (4,000-5,500 m)Extreme (5,500-8,000 m)Major altitude jump
    Technical gradeF+ / PD-F (non-technical)Aconcagua easier technically
    Trip duration2-3 days18-21 days~7x longer
    Cold exposureModerateModerate-high, very windyAconcagua colder + windier
    Logistics complexityDrive to trailheadInternational travel, permits, mulesAconcagua significantly more complex
    Cost$1,500-3,000$5,000-9,000~3x more
    Glacier travelYes, technical trainingLimited, mostly walkingAconcagua easier on snow
    Wind exposureModerateSevere (Vientos Blancos)Aconcagua much worse
    Overall comparisonTechnical trainingAltitude enduranceDifferent challenges entirely

    Rainier and Aconcagua test almost entirely different skills. Rainier is technical glacier climbing on a moderate-altitude peak. Aconcagua is non-technical walking-and-camping at extreme altitude. The jump from Rainier to Aconcagua skips the Denali expedition-style step, which means some skills (cold weather expedition logistics, sled hauling, multi-week camp life) get learned for the first time on Aconcagua rather than on Denali. Some climbers do make this jump successfully, but the expedition-experience gap shows.

    The full cost across all three

    Expense category Rainier Denali Aconcagua
    Permit / park fee$50 climbing fee$415 special use$800-1,000 peak season
    Guide service (typical)$1,500-2,500$8,000-13,000$5,000-9,000
    Guide ratio1:3 typical1:2 typical1:3 typical
    Transportation to peak$50 in gas$700 bush plane$1,200-2,000 flights to Argentina
    Pre-trip lodging$200$400$500-800
    Food (expedition)Included in guidedIncluded in guidedIncluded in guided
    Gear (if needed)$500-1,500$2,000-5,000 expedition kit$1,500-3,000
    Insurance$200$500-800$400-700
    Total all-in (guided)$2,500-5,000$12,000-20,000$8,500-14,500
    Total all-in (self-guided)$1,000-2,000$5,000-8,000$3,500-6,000

    Costs scale roughly with difficulty: Rainier is the cheapest by a wide margin, Aconcagua is mid-range, Denali is the most expensive. The Denali premium comes from the bush plane logistics, the longer expedition duration, the more elaborate gear requirements, and the higher guide ratios required for safety. Climbers building toward all three should budget roughly $25,000-40,000 for the full guided progression, or $10,000-15,000 self-guided with strong prior experience. The broader cost context for South American expeditions is in our Aconcagua cost guide.

    When to climb each peak

    Peak Primary season Peak window Avoid
    Mount RainierLate May – early SeptemberLate June – JulyLate September onward
    DenaliMid-May – early JulyLate May – mid JuneAugust onward (cold returns fast)
    AconcaguaDecember – FebruaryMid-December – early FebruaryMarch onward (winter returns)

    A useful detail for climbers planning all three: the seasons don’t overlap. Rainier and Denali are northern hemisphere summer peaks. Aconcagua is a southern hemisphere summer peak, which means December-February in the southern hemisphere. This means a climber can theoretically climb Rainier in June, fly to Alaska for Denali in late May (skipping the typical sequence to use one window), and then attempt Aconcagua the following December — all within a 6-month period. Most climbers do not move this fast, but the seasonal alignment makes it possible. The Cascade Volcanoes seasonal context is in our Cascade Volcanoes collection.

    Where these three fit in the Seven Summits

    Two of these three peaks are formal Seven Summits objectives. Aconcagua is the South American 7 Summits peak (highest in South America at 6,961 m). Denali is the North American 7 Summits peak (highest in North America at 6,190 m). Mount Rainier is not a Seven Summits peak — Mount Whitney at 4,418 m is technically slightly higher in the continental US, but neither makes the global 7 Summits list. Rainier earns its place in this comparison because it is the universally recognized training peak for the Americas expedition tier.

    For climbers pursuing the full Seven Summits, the typical sequence:

    1. Kilimanjaro (5,895 m) — Africa, the gateway high-altitude peak (non-technical, well-established commercial route).
    2. Aconcagua (6,961 m) — South America, the first major altitude test.
    3. Elbrus (5,642 m) — Europe, glaciated but moderate, often combined with Caucasus exposure. Framework in our Elbrus progression plan.
    4. Denali (6,190 m) — North America, the expedition skills test.
    5. Everest (8,849 m) — Asia, the altitude apex.
    6. Vinson (4,892 m) — Antarctica, cold and remote.
    7. Carstensz Pyramid or Kosciuszko (4,884 m / 2,228 m) — Oceania, depending on which list you follow.

    Aconcagua and Denali are typically attempted in years 2-4 of a Seven Summits campaign, after Kilimanjaro builds the altitude foundation and before Everest. Rainier sits earlier as the training peak that determines whether you should commit to the broader plan. The full framework is in our Seven Summits collection.

    Which to climb first honest decision framework

    If you can only climb one of these three this year

    Climb Rainier. No exceptions. Rainier teaches the skills you need for the others. Climbing Denali or Aconcagua without Rainier-equivalent prior experience is a meaningful step up in risk for the reward of skipping a single 2-3 day trip. The math does not work.

    If you have completed Rainier (or an equivalent peak — Hood, Baker, or Boliviano high peaks at full skill level), the second-peak decision comes down to a few honest self-assessments:

    Pick Denali second if you…

    • Want to build toward Himalayan expeditions where cold and self-supported logistics matter.
    • Have already done multi-week wilderness trips and are comfortable with that style of expedition.
    • Live in North America and prefer minimizing international travel costs.
    • Have shown you handle altitude reasonably well (no AMS issues on Rainier or other peaks at 4,000+ m).
    • Are physically very fit — Denali rewards strength and endurance more than Aconcagua does.

    Pick Aconcagua second if you…

    • Want the highest altitude experience available without going to the Himalaya.
    • Prefer single-challenge climbs (altitude) over multi-challenge climbs (cold + logistics + altitude).
    • Have a tighter budget — Aconcagua is meaningfully cheaper than Denali.
    • Have the southern hemisphere summer (December-February) window available.
    • Are uncertain about expedition skills and want pure altitude experience first.
    The order most climbers actually follow

    Looking at the population of climbers who complete all three, the most common order is Rainier → Aconcagua → Denali. Aconcagua second teaches altitude. Denali third uses the cold-weather expedition skills as the capstone before potential Himalayan objectives. The reverse order (Rainier → Denali → Aconcagua) is equally valid but less common.

    Where these three lead in the broader progression

    Climbers who complete the Rainier-Denali-Aconcagua progression have the foundation for nearly any non-Himalayan objective in the world and a real platform for considering Himalayan expedition climbing. The natural next steps after completing all three:

    • Mount Vinson (4,892 m, Antarctica) — the 7 Summits Antarctica peak, similar logistics to Denali but in a more extreme setting.
    • Cho Oyu (8,188 m, Tibet/Nepal) — the standard introductory 8,000-meter peak. Most accessible eight-thousander.
    • Manaslu (8,163 m, Nepal) — the alternative entry-level 8,000-meter peak.
    • Everest (8,849 m, Nepal/Tibet) — the altitude apex of the Seven Summits.
    • Technical Alaska Range peaks — Mt Hunter, Mt Foraker, the harder routes on Denali itself.

    The fitness and skills built across Rainier, Denali, and Aconcagua are foundational rather than complete preparation for the Himalayan eight-thousanders. Climbers progressing to 8,000-meter peaks typically add several intermediate altitude objectives (Bolivian high peaks, Andean 6,000-meter peaks, or Nepalese trekking peaks like Mera or Island Peak) between Aconcagua and Cho Oyu. The full 8,000-meter framework is in our 14 Eight-Thousanders collection.

    ★ Single-Comparison Deep Dives

    For the specific two-peak comparisons

    The full detail on each individual comparison — route specifics, training plans, and decision frameworks.

    Aconcagua vs Denali →

    The bottom line on the three-way progression

    Mount Rainier, Denali, and Aconcagua form the standard expedition mountaineering progression for North American climbers. Rainier is the technical foundation — non-negotiable as the entry point. Denali is the cold-weather expedition test. Aconcagua is the high-altitude endurance crown. Most climbers complete all three across 2-5 years, in the order Rainier → Aconcagua → Denali or Rainier → Denali → Aconcagua depending on personal preferences and trip windows. The total cost runs $25,000-40,000 guided or $10,000-15,000 self-guided for serious climbers with prior experience. Whichever order you choose, the progression builds the platform for nearly any non-Himalayan objective in the world. The single-comparison deep dives sit in our Aconcagua vs Denali guide and our Rainier vs Denali guide, with the broader framework in our Seven Summits collection.

    Frequently asked questions

    Is Aconcagua harder than Denali?

    Aconcagua and Denali are roughly comparable in difficulty but in different ways. Aconcagua is significantly higher (6,961 m vs 6,190 m) and the altitude is the primary challenge — the standard Normal Route is non-technical. Denali is lower but technically more demanding, involves expedition-style logistics (you carry and bury your own loads, no porters), and exposes climbers to extreme cold and weather in the Alaska Range. Most experienced climbers find Denali harder despite the lower elevation because the cold, weather, and self-supported expedition style add cumulative difficulty that the altitude on Aconcagua does not fully match.

    Is Denali harder than Rainier?

    Yes, Denali is significantly harder than Mount Rainier in every dimension that matters for expedition mountaineering. Denali is higher (6,190 m vs 4,392 m), colder (sustained -20 to -40 F at altitude), longer (17-21 day expedition vs 2-3 day climb), and requires self-supported logistics including hauling sleds and carrying multiple weeks of food and fuel. Rainier is the standard training peak for Denali aspirants — you should be able to climb Rainier confidently before attempting Denali. The difficulty gap is roughly 2-3 tiers.

    Should I climb Rainier before Denali?

    Yes, climbing Rainier before Denali is the standard expedition progression and is strongly recommended. Rainier teaches the foundational skills Denali requires: glacier travel in rope teams, crampon and ice axe technique on steep snow, multi-day high-camp logistics, cold weather management, and confidence on real glaciated terrain. Most Denali guide services either require or strongly recommend Rainier (or an equivalent peak) as a prerequisite. Climbing Denali without prior Rainier or equivalent experience dramatically increases your risk of failure or worse.

    What is the natural progression from Rainier to Denali to Aconcagua?

    The standard expedition mountaineering progression for North American climbers builds from Rainier (4,392 m) as the introduction to glaciated expedition climbing, to Denali (6,190 m) as the first major expedition with extreme cold and self-supported logistics, and finally to Aconcagua (6,961 m) as a high-altitude objective. Some climbers reverse the Denali and Aconcagua order, treating Aconcagua as the altitude introduction before Denali. Either order works but the Rainier-first step is essentially mandatory for serious aspirants of the higher peaks.

    Which is colder, Denali or Aconcagua?

    Denali is dramatically colder than Aconcagua. Denali’s high latitude (63 degrees north) and Alaska Range location produce sustained temperatures of minus 20 to minus 40 Fahrenheit at altitude, with wind chill commonly reaching minus 60 to minus 80. Aconcagua sits at 33 degrees south latitude in subtropical Argentina, with summit-day temperatures typically minus 10 to minus 20 Fahrenheit. The cold management on Denali is a primary expedition challenge in a way it is not on Aconcagua. Denali frostbite incidents are common; Aconcagua frostbite is less frequent.

    What is the cheapest way to climb all three?

    For self-guided strong climbers, the total cost ranges from approximately 15,000 to 25,000 USD for all three peaks combined (guide-free, gear amortized, basic logistics). For guided climbs, the total ranges from approximately 25,000 to 45,000 USD for all three. Rainier guided climbs cost 1,500 to 3,000 USD, Aconcagua 5,000 to 9,000 USD, and Denali 8,000 to 13,000 USD. The Aconcagua permit alone is 800 to 1,000 USD during peak season. Denali has lower permit fees but much higher logistics costs due to the bush plane flight to base camp and longer expedition duration.

    How long does it take to climb each mountain?

    Mount Rainier is typically climbed as a 2 to 3 day trip from the trailhead. Aconcagua expeditions run 18 to 21 days including acclimatization on the standard Normal Route. Denali expeditions run 17 to 21 days from Anchorage to summit and return. For a climber completing all three, expect 6 to 8 weeks of actual expedition time spread across several years, plus the travel time, training time, and gear preparation between each climb.

Language »